
Why use a hanging bird bath?
A hanging bird bath is the perfect way to attract songbirds to your your garden by providing them a safe, discrete area to get a drink or a quick bath.
Do birds like to use a hanging bird bath?
A hanging bird bath can quickly become a favourite go-to spot for weary songbirds looking for a quiet secluded place to bathe or get a drink.
The very nature of the hanging bird bath provides some immediate protection for birds. It’s usually mounted high off the ground a safer distance from predators like cats or even foxes and coyotes.
The trick is deciding the best location to hang the birdbath.
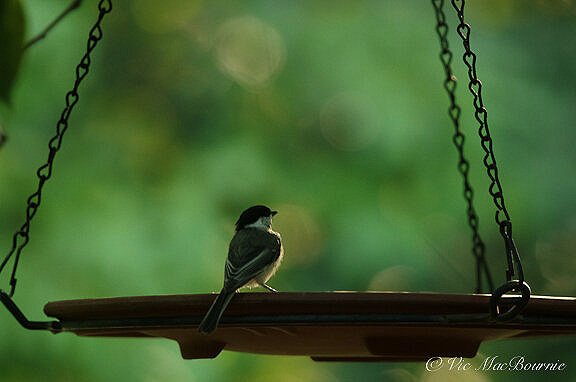
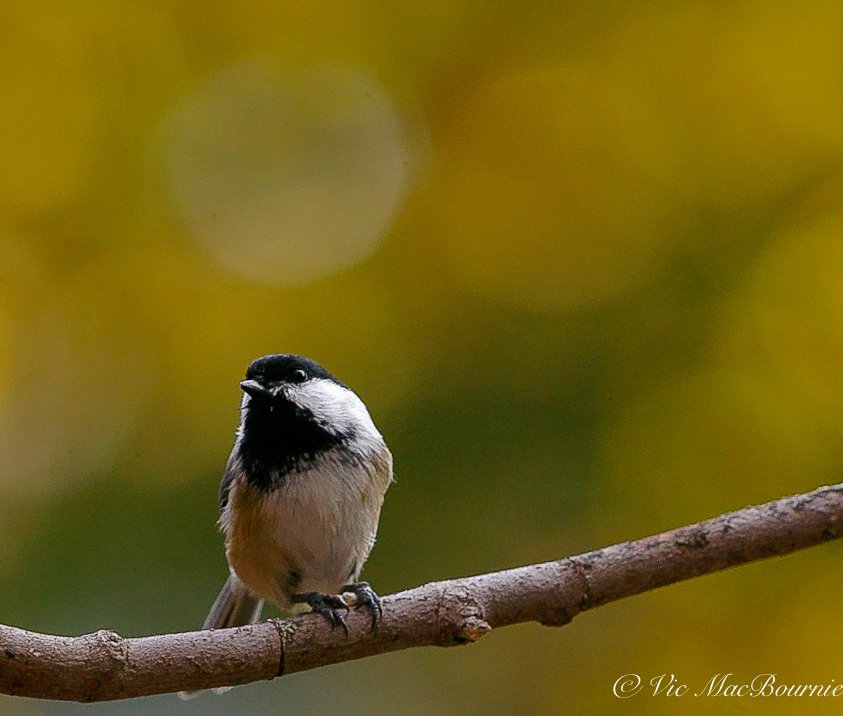
The chickadee was captured on the hanging bird bath just as the sun was rising creating a lovely rim light on the bird.
Where should you put a hanging bird bath?
Unlike a typical bird bath, hanging bird baths can be tucked away in the foliage of a favourite tree or large shrub where the birds feel more safe and are able to fly to a taller branch for a quick getaway from most predators.
A hanging bird bath in a tree can also help protect songbirds from aerial attacks from predators such as hawks or owls who don’t see them hidden in the thick foliage or are unable to easily navigate through the tangle of branches to strike the songbirds.
But, for me, the greatest asset to using hanging birdbaths in the garden is the magic they create when hung in a tree beside my favourite sitting place.
I love being able to watch the birds fly onto a branch, make their way to the birdbath and either steal a quick drink or a bath all the while tucked away among the tree’s foliage.
Cardinals, Chickadees, the Tufted Titmouse, and Nuthatches are all regulars to the hanging birdbath. Our resident chipmunks sometimes sneak a drink as well.
Imagine what the birds are thinking when they first discover a puddle of water floating in their favourite tree, tucked away maybe even hidden in the tree’s foliage. It’s almost like they have found their own secret little garden oasis.
I like to put a small, fly-through bird feeder nearby or even floating above the bird bath to complete the perfect secret hideout for the birds.
Our hanging bird bath is tucked away inside the open branches of our mature yellow magnolia tree that overlooks the patio and is in line with my view into the garden. The bird bath sits beside a rustic birdhouse mounted to the tree’s trunk and a small fly-through ceramic bird feeder where they can stop for a sunflower seed or two before making their way to the birdbath.
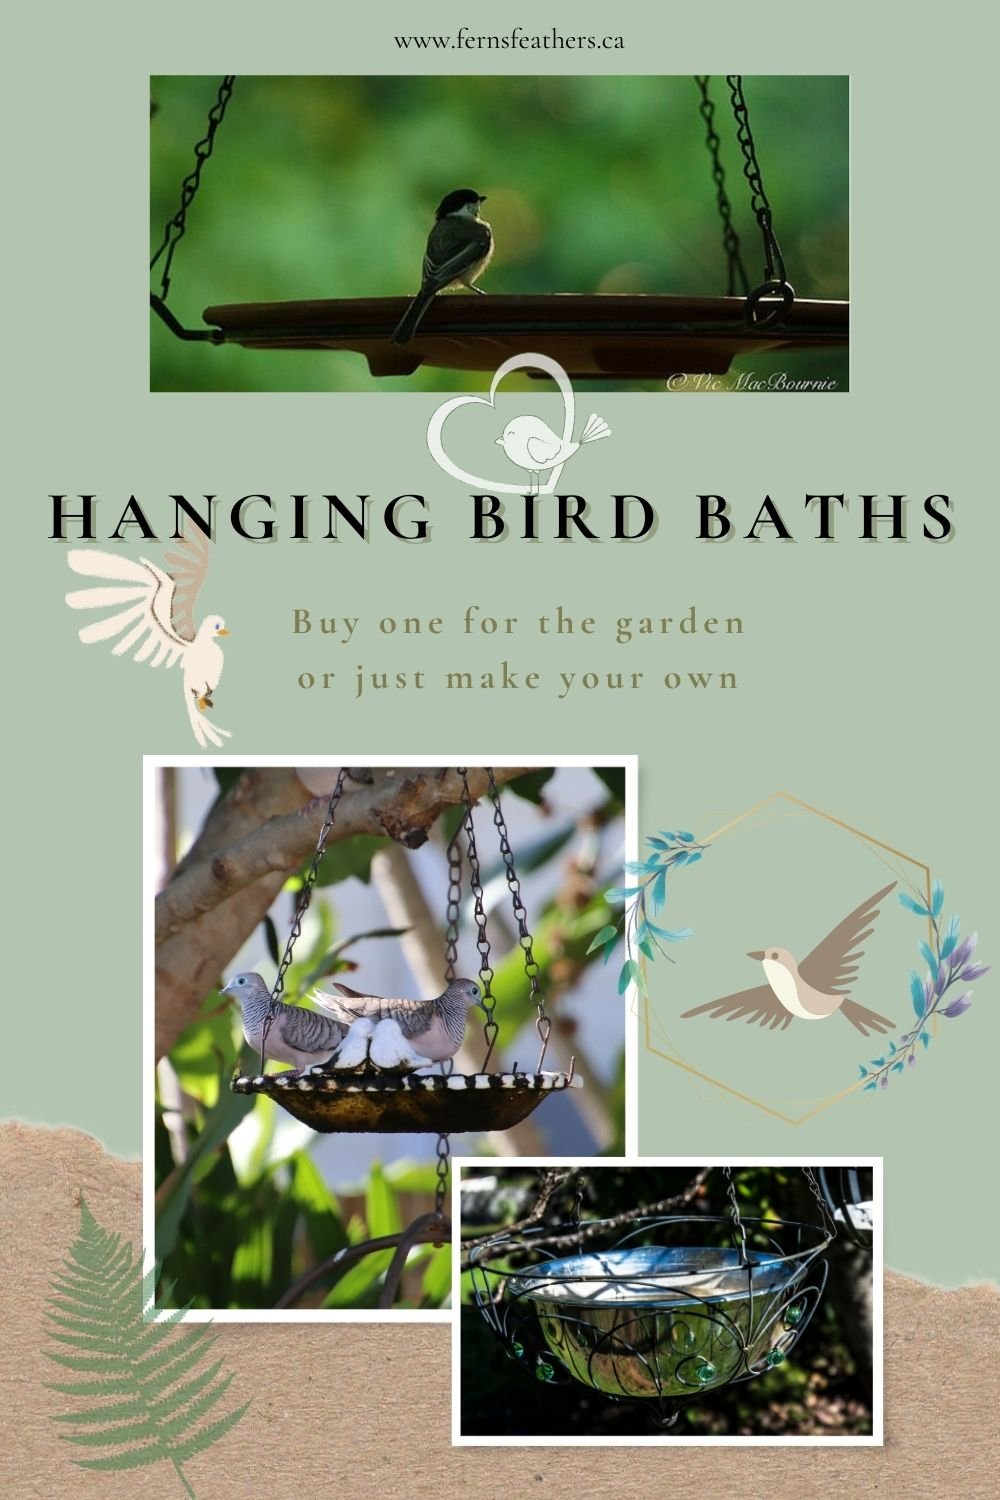
Adding a hanging bird bath to your backyard is a great way to bring birds in close. You can either buy one or take the challenge and create your own. Using an existing hanging basket is a great way to easily create a DIY bird bath.
In that small area is everything a songbird could ever want.
In fact, one of my fondest memories last year was watching a family of chickadees visiting the birdbath early in the morning as the sun rose behind them. The warm, rim light caught them perched on the edge of the birdbath taking turns drinking and bathing.
At the time, however, I did not have the camera by my side and missed the fleeting shot. The next morning I was ready with the camera and, sure enough, the chickadees returned for their morning baths providing me with a few minutes to capture them backlighted and celebrating a new day breaking in their secret garden.
Sitting and just observing the birds opens up a world of photographic possibilities. As the birds become accustomed to your presence, images like these become much easier and even predictable.
For more on adding bird baths to your yard, be sure to check out my other posts:
• Best bird bath for the garden
What are the best hanging birdbaths?
The best hanging bird baths are shallow enough to entice our smaller songbirds, with a rough enough surface to ensure they can get in and out easily and large enough to accommodate a couple of birds at a time.
Larger birds, such as Blue Jays, Mourning doves and Robins, tend to use the traditionally sized bird baths that are deeper, but will still come to hanging bird baths.
Also, larger birds tend to cause the hanging bird baths to swing more when they come in for a landing making them an uncomfortable spot for these birds when the more traditional bird baths are available. It’s always a good idea to have several different bird baths available to accommodate a variety of needs.
Our hanging bird bath is made from terracotta with a blue glazed ceramic bottom that prevents water from seeping through the terracotta base. The entire birdbath can be easily lifted off of the metal holder for quick cleaning. Three chains clip on to the metal holder and a large hook allows you to attach it to a branch or metal hanger.
The terracotta rim gives the birds a solid footing on landing, but the slippery glazed ceramic presents some challenges for birds who, I think, find the footing a little precarious at times. I like to put a small flat stone in the water to provide a comfortable spot for the birds to drink from.
Buy a hanging bird bath or make your own?
There are several commercial hanging bird baths to choose from. Look for ones that are easily tucked away in a tree or can be hung from a hook and would not break if battered around. This hammered copper hanging bird bath available at Amazon.com is an excellent choice. Besides looking great and aging beautifully, a copper bird bath has inherent anti-bacterial properties that helps to keep the water clean.
Other, less expensive examples include this simple terracotta coloured plastic tray also from Amazon. By adding a handful of pea gravel in the bottom smaller birds can feel safe.
This metal hanging bird bath is deep enough to double as a bird feeder say, during winter months.
If you are looking to add a beautiful piece of art to your yard, you might be interested in Evergreen’s beautiful Dragon fly motif glass handing bird bath. Evergreen on-line retailer of garden items, carries several different glass bird baths with various designs.

This Dragon fly, glass hanging bird bath that can double as a bird feeder, would make an elegant addition to any garden.
The dragonfly design features two light blue dragonflies making a whimsical statement against a green, yellow, and orange patterned background. This colorful hanging bowl, that can hold up to 3 cups of birdseed, can be used as either a birdbath or bird feeder. The bowl hangs from a metal chains that have a weather-resistant finish eliminating any worry about rust. The high-quality glass design, means it can be rinsed off for easy cleaning. Each bowl is approximately 14 inches in diameter and holds up to 32 ounces of liquid.
If you would prefer not to use glass in the garden, these elegant ceramic hanging bird baths from on-line retailer Vivaterra might interest you. Available in both Green and Blue, these unique ceramic hanging bird baths are embossed with a bird pattern giving it a charming detailed accent to your garden. The hanging baths provide the necessary depth for birds to bathe and relax comfortably.
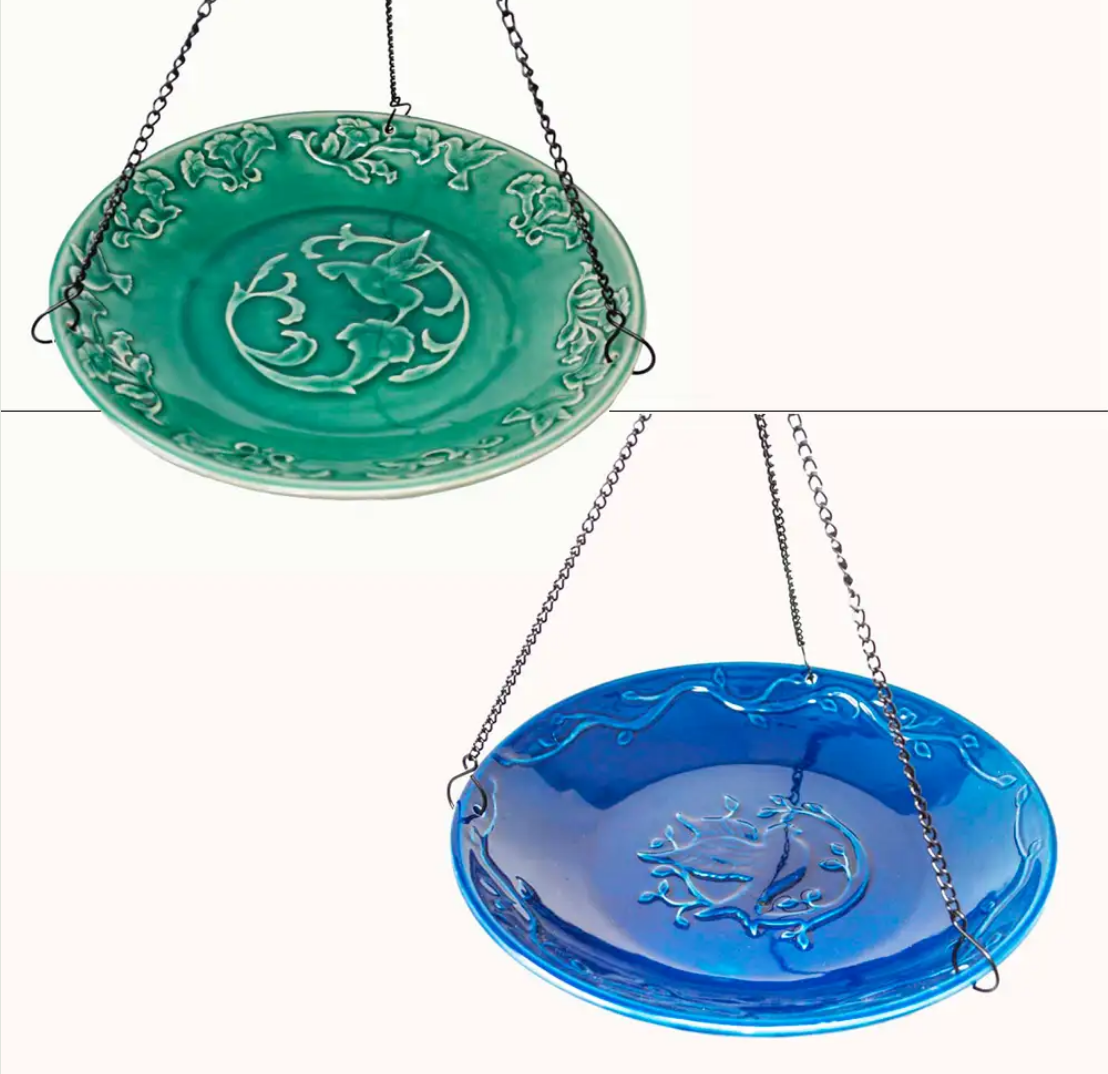
These ceramic bird baths will add an elegant touch to any garden.
Hanging bird bath is simple DIY project
Making your own is also not difficult. You can create a hanging bird bath as simple as drilling three holes into a plastic bowl and using copper wire and a hook to attach it to a branch, or tackle a more elaborate set up by creating a more natural bird bath decorated on the outside with branches and moss.
Another idea is to use an existing hanging basket. Plant up the edges of the hanging basket with lots of spillers, but leave the center open to insert a plastic bowl for the birds. The flowers should eventually hide the bowl from site. The combination is not only attractive, but it will create a potentially terrific outdoor photo studio where you can capture the birds bathing among the flowers and foliage.

Tulip Tree is good choice for fast growing native shade tree
Tulip trees are native to parts of North America including some areas in Canada. These fast-growing trees are useful to create a shade garden quickly.
If you are looking for a native tree that will provide fast growth, interesting spring flowers and help create shade and privacy in a hurry, the Tulip Tree might just be the perfect choice.
Shortly after purchasing our home 25 years ago, I took advantage of a local environmental group’s offering of two free native trees for interested homeowners. I chose a fast-growing Tulip Tree (Liriodendron tulipfera) for the back and a much slower single-stem serviceberry for the front of our home. (More on the Serviceberry in my earlier post.)
Both trees continue to impress 25 years later, but the varying growth rates really tell the story.
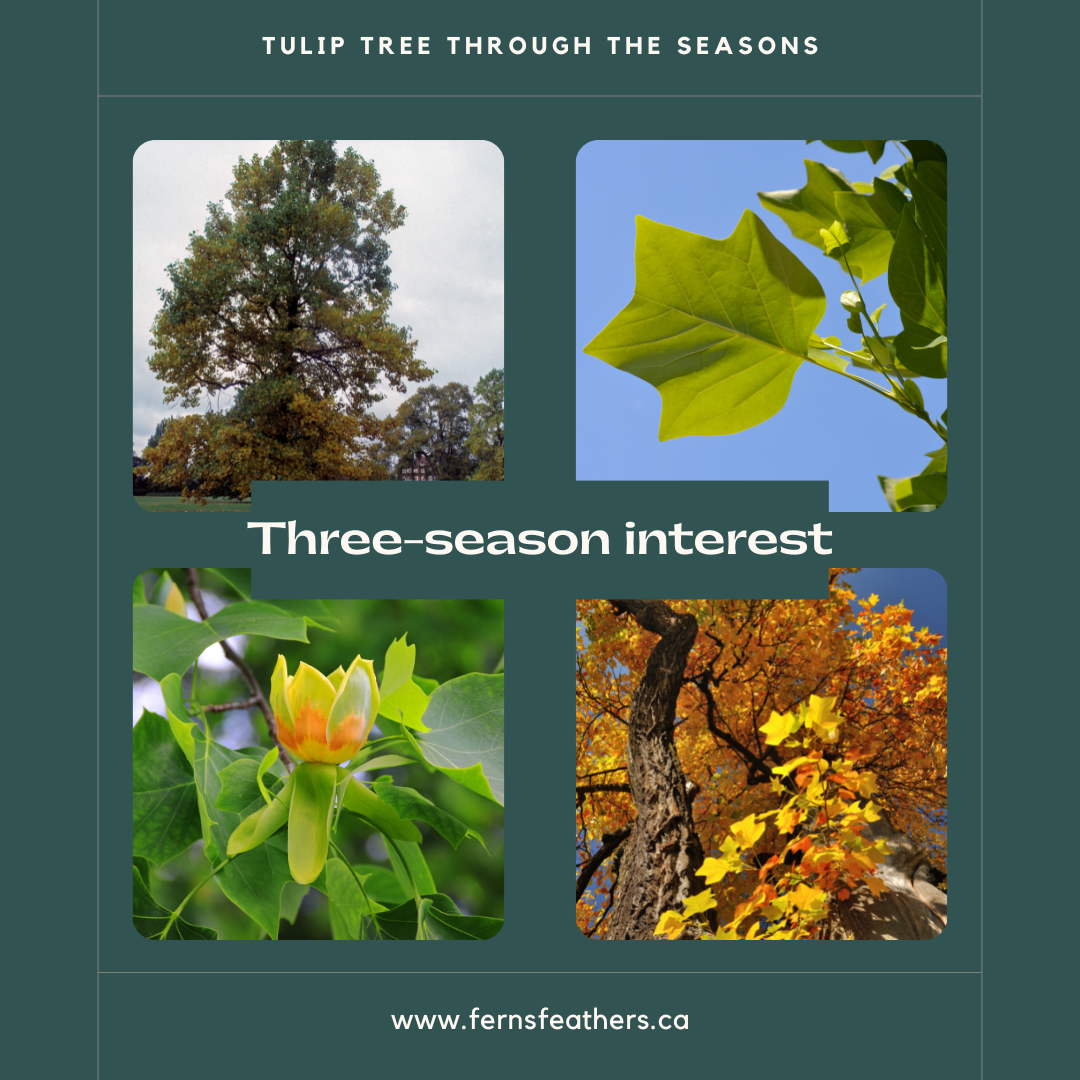
Graphic shows the native Tulip tree through the seasons including its vibrant yellow fall leaves and its impressive tulip-like flowers that bloom in May and June.
The Tulip tree is a rather large 4-5-storey shade tree that towers over even much older trees in the yard, while our serviceberry is still small by today’s standards barely reaching 1.5-storeys in height.
Although the Tulip tree is a fast grower, it generally does not suffer from many of the problems associated with fast-growing trees – not only behaving itself in its tidy oval growth habit, but surviving ice storms, snow and wind storms without shedding a single large branch.
They are native in zones 4-9 and can be found in northeastern United States, in the Carolinian zone into southern Ontario – on the south shore of Lake Huron, the north shore of Lake Erie and in the Niagara Peninsula. (For more on the trees and plants of the Carolinian zone, check out my earlier post here.

Tulip tree leaf among the spent ferns in B&W.
Tulip trees grow well in most conditions including acidic, loamy, moist, sandy well-drained and clay soils. Although they prefer sufficient moisture, they can can tolerate drought in more humid areas once established.
Their fast growth requires deep and wide-spread roots.
How fast do Tulip Trees grow?
Again, this is considered a fast growing tree, ideal for an empty yard looking for a quick shade tree. In saying this however, it is not considered a weed tree that will quickly take over your yard with fast, weak growth. A happy tree growing in the right conditions will experience annual increases in height of up to 24-inches (60.9 cms) or two feet a year.
These trees do best in full sun where they’ll reach mature heights of 70- to 90-feet (35 metres) with a 40-foot 12.19m spread. The trunk can reach up to 160 centimetres in diameter.
How did Tulip Trees get their names?
Tulip trees sport bright green leaves in summer that some might describe as resembling tulip flowers in profile. The leaves are 7 to 12 centimetres long with 4 lobes and the bark fo the tulip tree is smooth and dark green with the tree is young , turning brown and ridged with age.
In spring (usually May and June) tulip-like, greenish-yellow flowers with a splash of orange at the base bloom high in the tree canopy. The flowers have six petals and are about 1.5 to 2-inches in diameter (5 centimetres long). They are often difficult to see because they bloom so high in the tree. A pair of binoculars will go a long way to help identify them and provide you with a nice close up view of these lovely flowers.
Do tulip trees support wildlife?
Although tulip trees are native to areas of both the United States and Canada, they are not considered great trees to support native wildlife.
While the seeds of the tulip tree grow every year and are a source of food for both birds and mammals, Douglas Tallamy, in his excellent book Bringing Nature Home, How you can sustain wildlife with native plants, describes the tulip tree in the following way: “Unfortunately it is one of the least productive forest species in terms of its ability to support wildlife – insects and vertebrates alike.”
(Want more from Douglas Tallamy’s book Bringing Nature Home? Click on the link for my full review.)
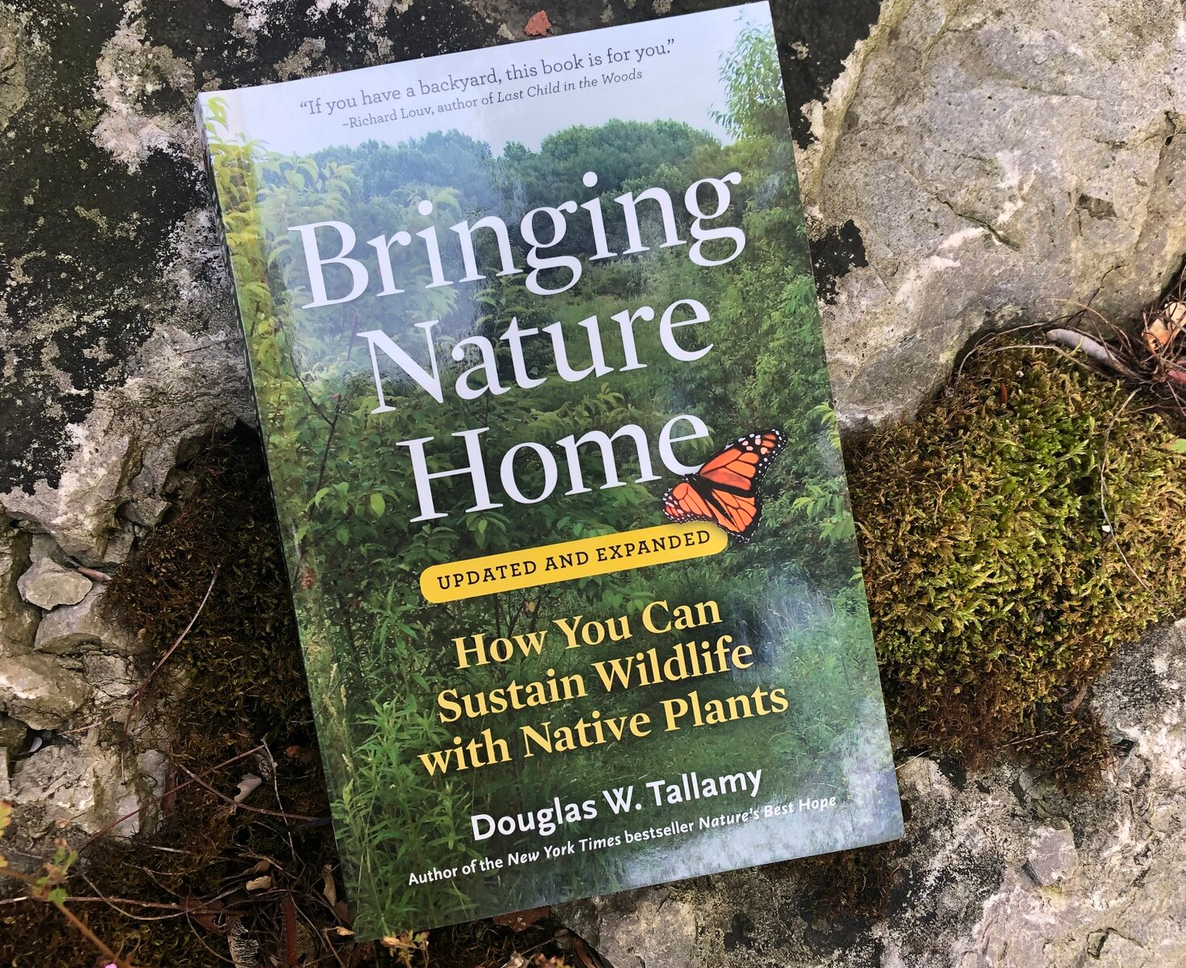
Douglas Tallamy’s excellent book Bringing Nature Home does not give the Tulip Tree high ratings as a native tree that attracts wildlife.
He goes on to say that if you want to attract Tiger Swallowtails to your yard, tulip trees are a source of food for their caterpillars (Lepidoptera).
Tallamy writes: “For those who become serious about increasing animal diversity in their gardens, it is important to recognize that all native plants are not equal when it comes to supporting insect herbivores and thus other forms of wildlife. For a variety of reasons, some plant species host many dozens of specialist herbivores, while others host only a few. For example, poison ivy, ferns, and tulip trees are among the plants that few extant insect species have the ability to eat, while oaks, willows and cherriesare at the other end of the spectrum , hosting 1,400 species among them.”
What does all this mean? It means that if you are looking for a tree with maximum benefit to wildlife, the tulip tree may not be the best choice. But, if you are looking for a tree that is not susceptible to a lot of insect and caterpillar damage, but still supports some bird and insect species, the tulip tree is a good choice.
I say, go ahead and plant one but don’t forget to plants a cherry, oak or willow tree too to provide maximum benefit to wildlife.
More features of Tulip Trees
• Seeds of the tulip tree grow every year and are a source of food for birds and small mammals.
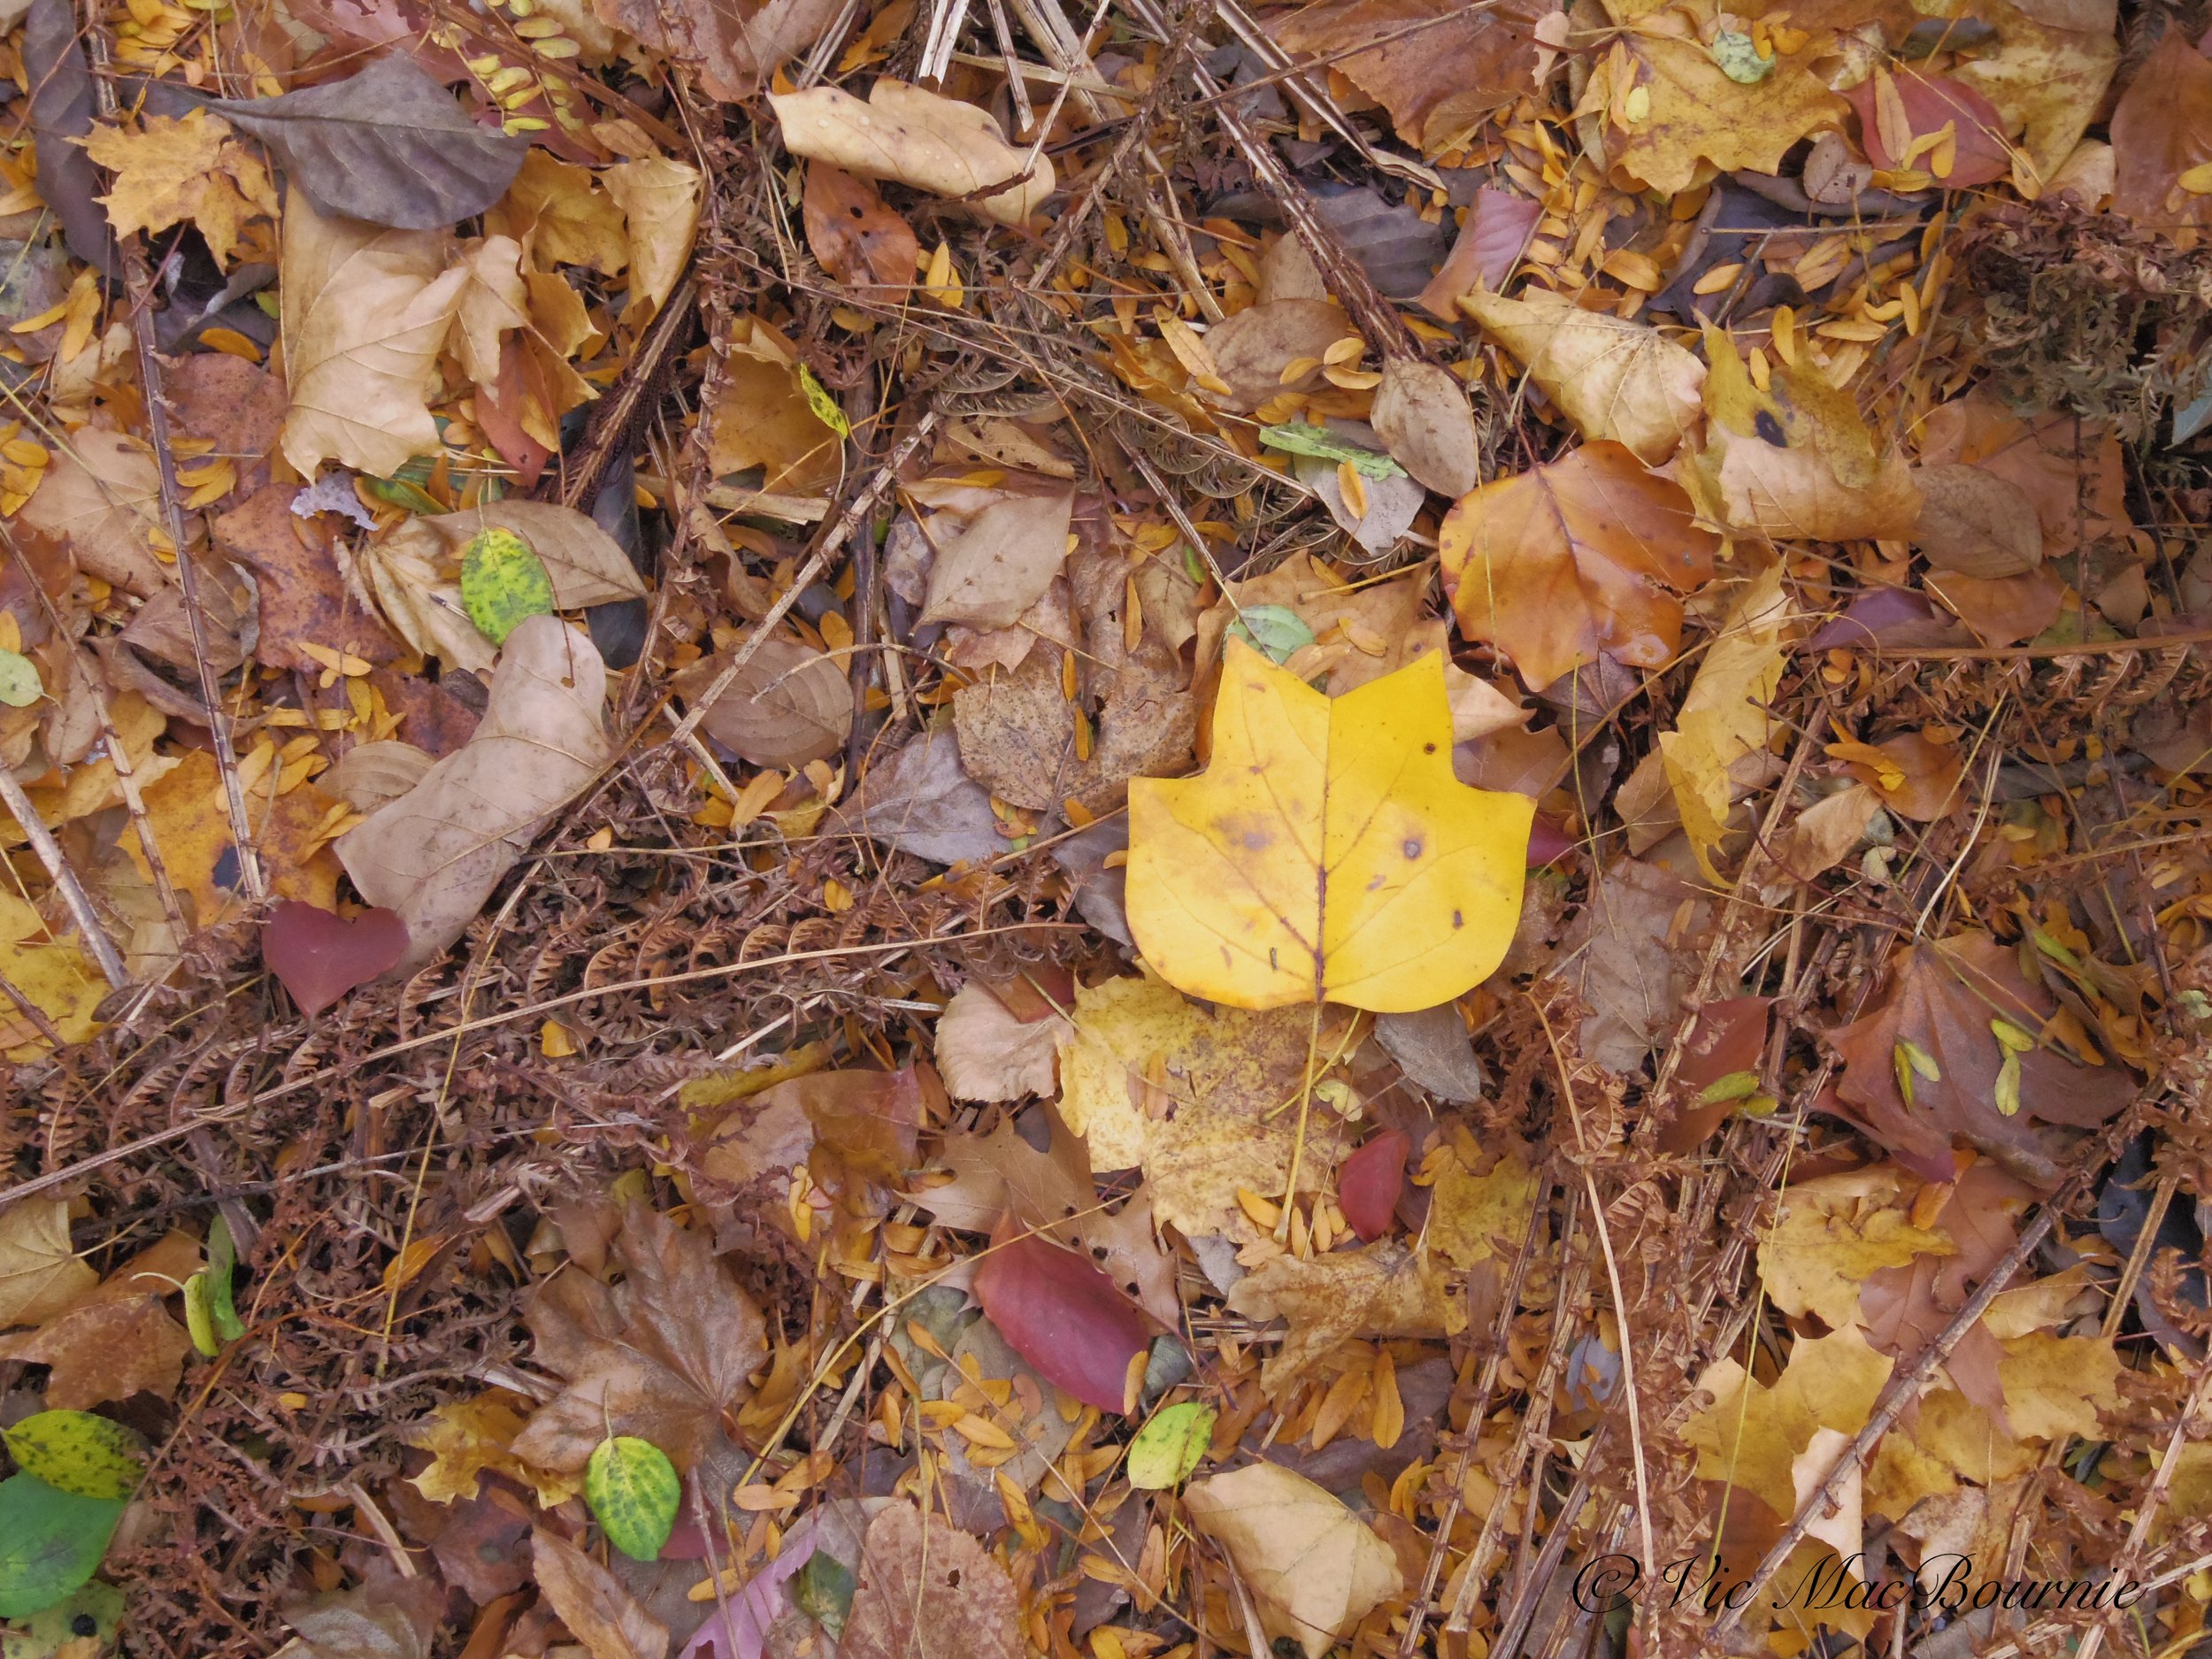
This image of a Tulip tree leaf in fall colours on the forest floor shows its vibrant yellow colour long after other leaves have faded.
• The trees are known to grow in a pleasing oval shape with a good spread but not one that would dominate a smaller backyard.
• The trees have aromatic stems that are pleaseant if broken off.
• Their fall colour is impressive as the leaves slowly turn a vibrant yellow and steal the show from many a tree in their vicinity.
• Colourful seeds cling to the tree in an upright position throughout the summer and into autumn
• At first glance the leaves may resemble a type of maple tree. On closer inspection, however, the alternating leaves that are 3-6 inches long with distinctive lobes, a flat base and two ear-like tips resemble a cat’s head with its two pointed ears.

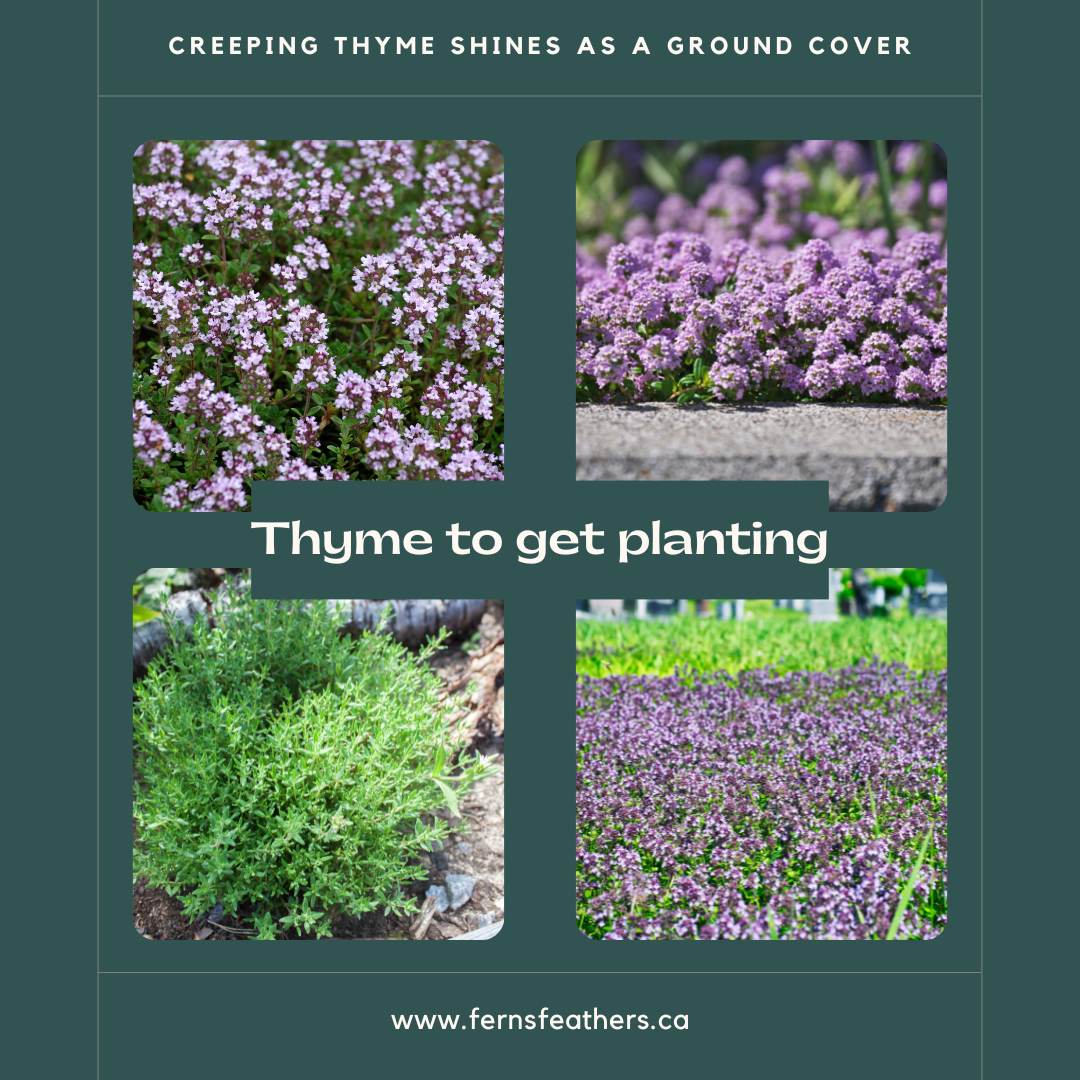
How to grow and care for creeping thyme ground cover
Thyme can be a very effective ground cover in a hot sunny dry area where you want to form a low growing dense cover that works like a living mulch.
Ground cover for hot, dry area and on a rock wall
Creeping thyme ground cover is one tough plant that not only withstands foot traffic but practically begs you to walk all over it.
Go ahead tramp on it. Put it between pavers and grow it over the edges of places you normally walk. Not only will you like the feel on your bare feet, chances are you’ll especially love the sweet perfume fragrance that the ground hugging plant gives off.
If you are in bare feet, however, watch those native bees that will be busy buzzing around on this non-native ground cover. Native to northwest Europe, you can expect creeping thyme (Thymus praecox) to grow into a dense mat of about four to six inches tall with the lavender flowers growing just above the foliage.
According to Wikipedia: Thymus praecox is a species of thyme. A common name is mother of thyme, but creeping thyme and wild thyme may be used where Thymus serpyllum, which also shares these names, is not found. It is native to central, southern, and western Europe.
This aromatic ground cover spreads at a very controlled rate of a couple inches a year up to about 24 inches, so if you are looking for a quick cover, plant individual plants 6-8 inches apart.
Use it to connect spaces in your garden. This evergreen ground cover works like a living mulch to shade your soil, suppress weeds and conserve water.
It works nicely as a low-growing border plant as well as in between pavers and in a rock wall. And, it can even be used as a lawn substitute, especially for smaller areas where getting out the lawnmower just doesn’t cut it.
It grows in full sun to partial shade in dry to moderate moisture soils in USDA hardiness zones 3 through nine.
I like to think this excellent ground cover is almost impossible to kill. Plant it in a sunny dry spot with average soil and you should be good to go. But, as noted above, it can take partial shade.
Every couple of years, pull some out and spread it around the garden to enhance another pathway. You can even steal some to pop in a container planting for a couple of months to work its magic in a patio container. In fall, just plug it into the ground in a spot you’ll want to grow it next year.
Our creeping thyme is actually one of the first plants that welcome visitors to our home. We have it growing in the front garden spilling over massive boulders that line the one side of the garden and work as a type of retaining wall.
I remember buying a flat from a local big box store a few years back and tucking it between the rock edges of our new massive boulders and the soil knowing that the warmth of the boulders in spring would give the thyme an early kick start.
And boy was I right.
The thyme has filled in nicely over the years, spilling on to the rock faces and softening their hard edges.
In spring, of course, the thyme is filled with purple flowers that attract the early pollinators and help welcome summer. In time, when the flowers begin to fade, the plants are happy to just sit back and take on an almost mossy look on the rock faces.
Spring or summer, it’s always a joy to take a few seconds to rub the thyme between my fingers and encourage the aroma to waft through the air. The fact that the thyme grows at or above knee height makes it easy to regularly reach down to bring out the scent of the thyme.
There are a variety of thymes to choose from. Some are particularly good as cooking herbs.
Other thymes that you may prefer: Woolly, lemon thyme, and hyssop thyme are examples of thyme varieties that can be used in the garden. Aromatic herbs, like the various thymes, work well with many garden plants in boosting othr plants’ defenses and increasing growth. Try experimenting with various thymes in diffent locations in the garden to see which ones work well.
Looking for more information on ground covers? Please check out my other posts on ground covers I use in the woodland garden.
• Bunchberry perfect ground cover for woodland garden
• Easiest ground covers to grow
• Three great ground covers for the woodland garden.
• Hardy Geraniums as a ground cover
• Snow in summer ideal for hot dry areas
• Moss and moss-like ground covers
Native alternatives to creeping thyme
It’s always better to choose a native plant rather than using a non-native species. While creeping thyme has proven useful in many ways both as a problem solver and a plant that attracts pollinators, there are good native alternatives you might want to consider.
• Wild Strawberry (Fragaria virginiana) like sun, part shade to shade conditions in both dry and moist soils. It is an excellent underused perennial that spreads quickly by runners in sun or shade. It is not considered overly aggressive and struggles to outcompete other plants in the garden. It has tiny white flowers in spring followed by fruit. The fruit is small but is a good food source for native birds and mammals. Wild strawberry attracts native bees, and is though to be a host of at least 75 Lepidoptera caterillars including the gray hairstreak butterfly and grizzled skipper.
• Green-and-gold (Chrysogonum virginianum) will not replace thyme in a hot dry area but it could be a good replacement in a dry shady or part shade area. Pretty yellow flowers bloom against a backdrop of green in the spring into summer. Green-and-gold spreads by rhizomes in optimum conditions which include well-drained soils.
• Eastern Hay-scented fern (Dennstaedtia punctilobula) is another alternative for a shady dry area but it grows tall in comparison to the ground hugging characteristics of creeping thyme.
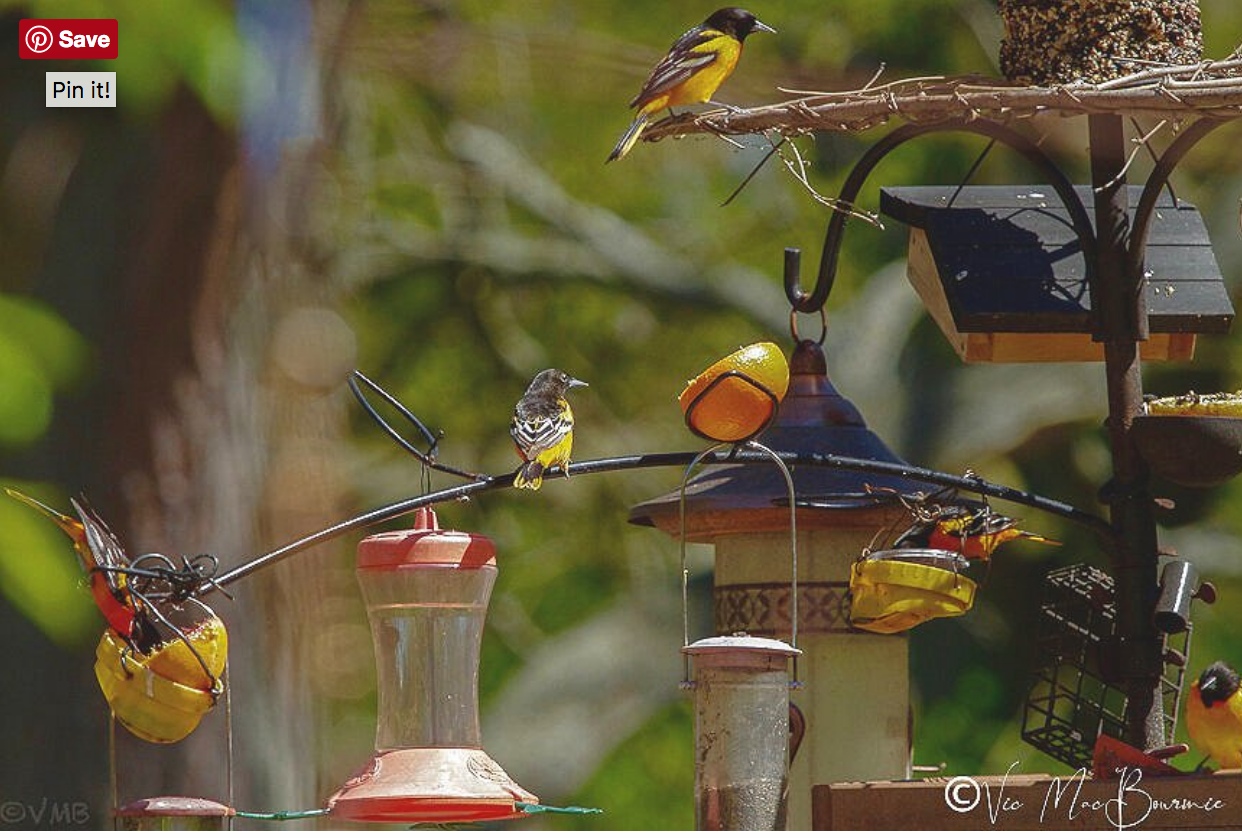
Best Oriole bird feeders
Attracting orioles to your yard starts with having a high quality feeder that includes the ability to feed nectar, oranges and grape jelly.
Look for a high quality all-in-one feeder
Attracting Orioles to your backyard starts with giving these colourful birds a proper feeder that provides them with a variety of their favourite foods, including oranges, grape jelly and, of course, sugar water or nectar.
The best feeders provide areas for all three food sources, but there may be reasons to provide feeders that focus on one or two of the food sources at different times of the year.

Oriole feeder with spikes to hold oranges and built-in containers for jelly as well as the reservoir for the home made nectar.
In our yard, I use a number of different feeders – ranging from a simple nectar feeder similar to a hummingbird feeder, to DIY Jelly feeders and orange-half holders, to commercially bought Oriole feeders that hold nectar and a half orange to one that holds all three.
If you are buying a new feeder, I would probably aim for a feeder that holds all three – nectar, oranges and grape jelly.
However, this page of Oriole feeders from Amazon is a clear indication of how many styles of feeders are available.
These oriole feeders from Etsy show how many varieties are available and how easy some styles are to create as a DIY project.
These Oriole feeders from Maine-based Gardener’s supply are good choices as are these high quality Oriole feeders from the Canadian and American based Wild Birds Unlimited.

Close-up details of the Oriole feeder complete with spikes to hold orange halves and built-in containers for grape jelly. This includes a dome to help keep squirrels away and the jelly from getting wet and spilling all over the feeder in a rain storm.
Where to locate oriole feeders
However, a feeder that provides all three of these foods might not necessarily prove to be very successful at attracting or encouraging the birds to return to the yard. Where the feeder is located in the yard, and how accessible it is to the birds can play an important role in the success of attracting orioles and keeping them coming back to your yard.
When you first put up the feeder, make sure that birds flying over head can see it. Tucking it away in a tree might seem like a great idea, but many of the migrating orioles will likely miss it and fly on by.
Hanging the feeder from a hook out in plain site is a good idea. You can hang it on your main bird feeding station, but Orioles generally prefer a quieter area, so finding a spot away from the busiest area of the garden is preferred.
More on attracting Orioles to your yard, on my earlier comprehensive post.

A group of five Baltimore Orioles feed on orange halves, nectar and jelly inside DIY containers at our busy bird feeding station. Notice the Oriole nectar feeder hanging off the steel branch feeder arm that is also ideal for stuffing orange halves into the stylized leaves. For more on the feeder arm go here.
Once the birds find the feeder(s) however, I have found that they feel comfortable feeding with other birds around them. At this point, I might put up a feeder or start feeding oranges on my main feeding station in addition to the original feeder location.
I have had as many as 12 Orioles see image above) on our main feeding station working oranges, and grape jelly among the seed-eating birds like Blue Jays and Cardinals. The stylized steel branch is the perfect spot to hang additional feeders and the wire leaves is a perfect spot to stuff orange halves into for the Orioles.
Keeping them around and where do Orioles nest?
Orioles can be a little picky when it comes to setting up their summer homes. Remember, these are nest-dwelling birds that do not use bird houses or tree cavities. They create hanging nests fairly high in trees where they are safe from most predators. We had a pair nesting in a mature maple in our front yard one year. If you do not have tall trees nearby, you might have some difficulties keeping the birds around all summer.
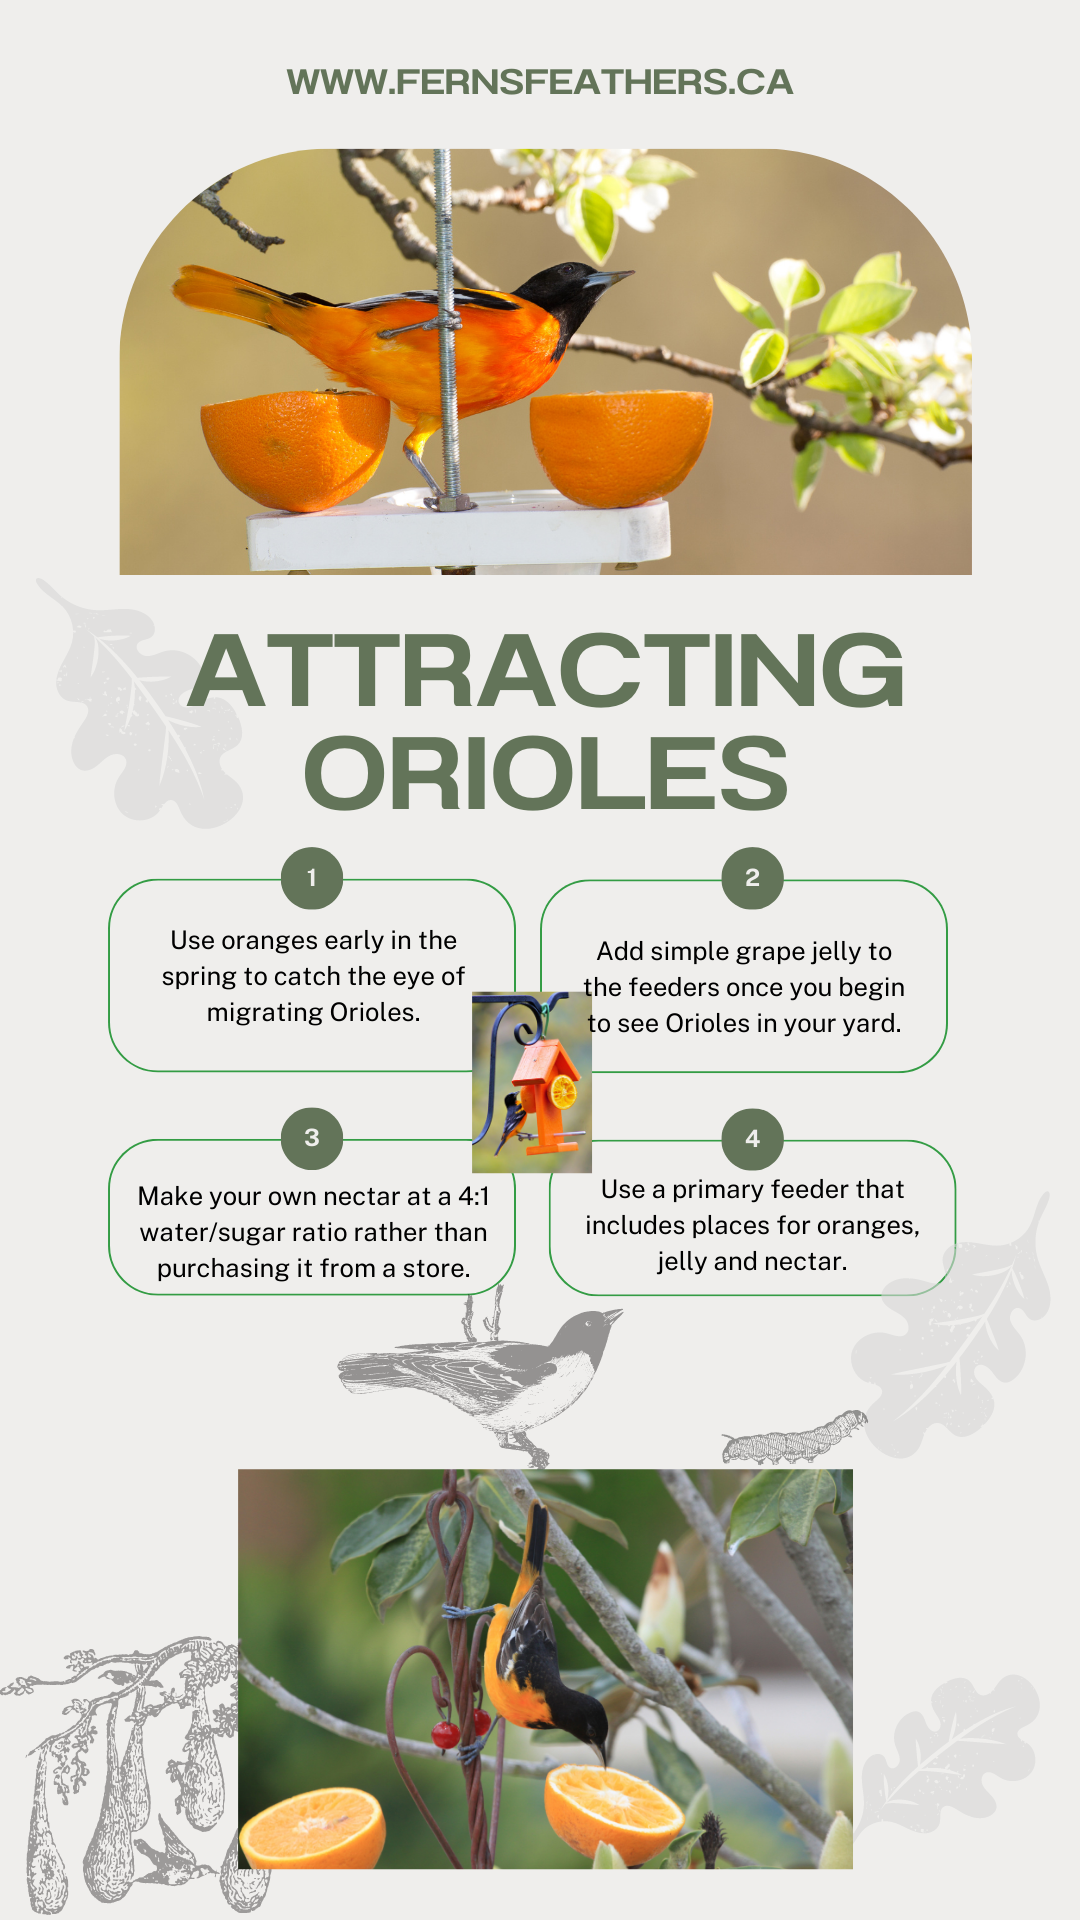
Attracting orioles to your backyard starts with using oranges to entice migrating orioles to your yard and then keeping them there with grape jelly, nectar and finally lots of insects for the Orioles to feed their young.
Insects are key to keeping Orioles all summer
It’s also important to remember that orioles are primarily insect-eating birds. They are attracted to your yard with the oranges and grape jelly as a quick energy hit after a long migration, but will only stick around if there is an abundance of insects to feed their young.
With that in mind, you might also want to set out a dish of meal worms near their feeder to attract them and keep them around longer.
Your best chance to attract Orioles is spring migration
But that’s not to say that you can’t attract them to your yard during spring migration with orange halves, nectar and jelly.
If the feeding stations fail to provide the Orioles with what they need, they will often simply stop off for a quick meal and move on. And that’s okay too. Having these bright colourful birds around for just a few days in spring is still a joy.
That stay could just be for a few minutes to an afternoon or even a couple of days, but many of the birds will eventually move on.
If they do move on, don’t take it personally. It may not mean your feeding setup was not to their liking, but that their nesting site is traditionally farther north in their annual migration.
The key is to make your yard so enticing, that first-time nesting pairs and others choose your yard to set up their homes.

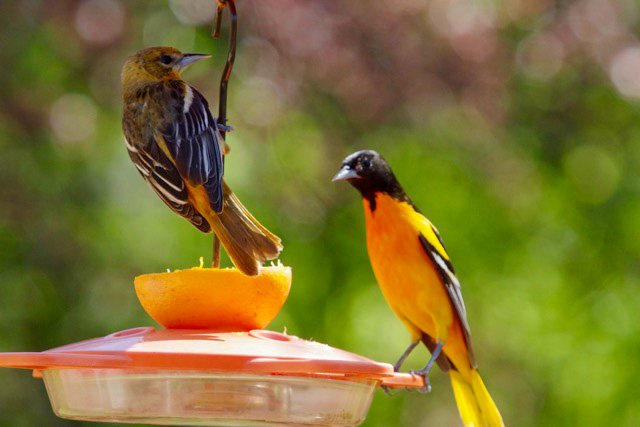
A male and female oriole work the orange halve and nectar at the commercial feeder.
Oranges are your first line of enticement
In my years of attracting Baltimore Orioles to our garden, I have found that oranges are the best first impression to provide the birds to encourage them to your yard. After spending the winter in Florida and other warm climates where oranges are common food sources, it’s understandable why Orioles would recognize the orange halves at our feeders.
My first feeder did not come with a specific holder for an orange half. Instead, I simply insert the orange half over the steel rod that the feeder hangs from. This allows the Orioles to grip the rod and feed at the same time. Changing the orange halves to keep a fresh supply is easily done.
Many of the new feeders have spikes where the orange halves can be positioned. If you are buying a new feeder, make sure it has a location to display either orange halves, or orange quarters.
Don’t forget to stock up on grape jelly
If oranges are what attracts the Orioles to your yard, it’s grape jelly that keeps them coming back.
Our Orioles just love their grape jelly mixed with a little water. Our newest feeder even has three small reservoirs that are perfect locations to add a spoonful of grape jelly.
In the past, I created my own DIY grape jelly containers out of orange plastic caps from a food container that I hung near the main nectar feeders.
I soon realized, however, that the spent orange halves were also good containers to fill with grape jelly once the Orioles had finished with the oranges. The pulp in the oranges however, does absorb the jelly water making the halves short lived as an ideal feeder.
A small glass dish filled with grape jelly mixed in a little water is a favourite for our Orioles and it is easy to clean an refill on a daily basis.
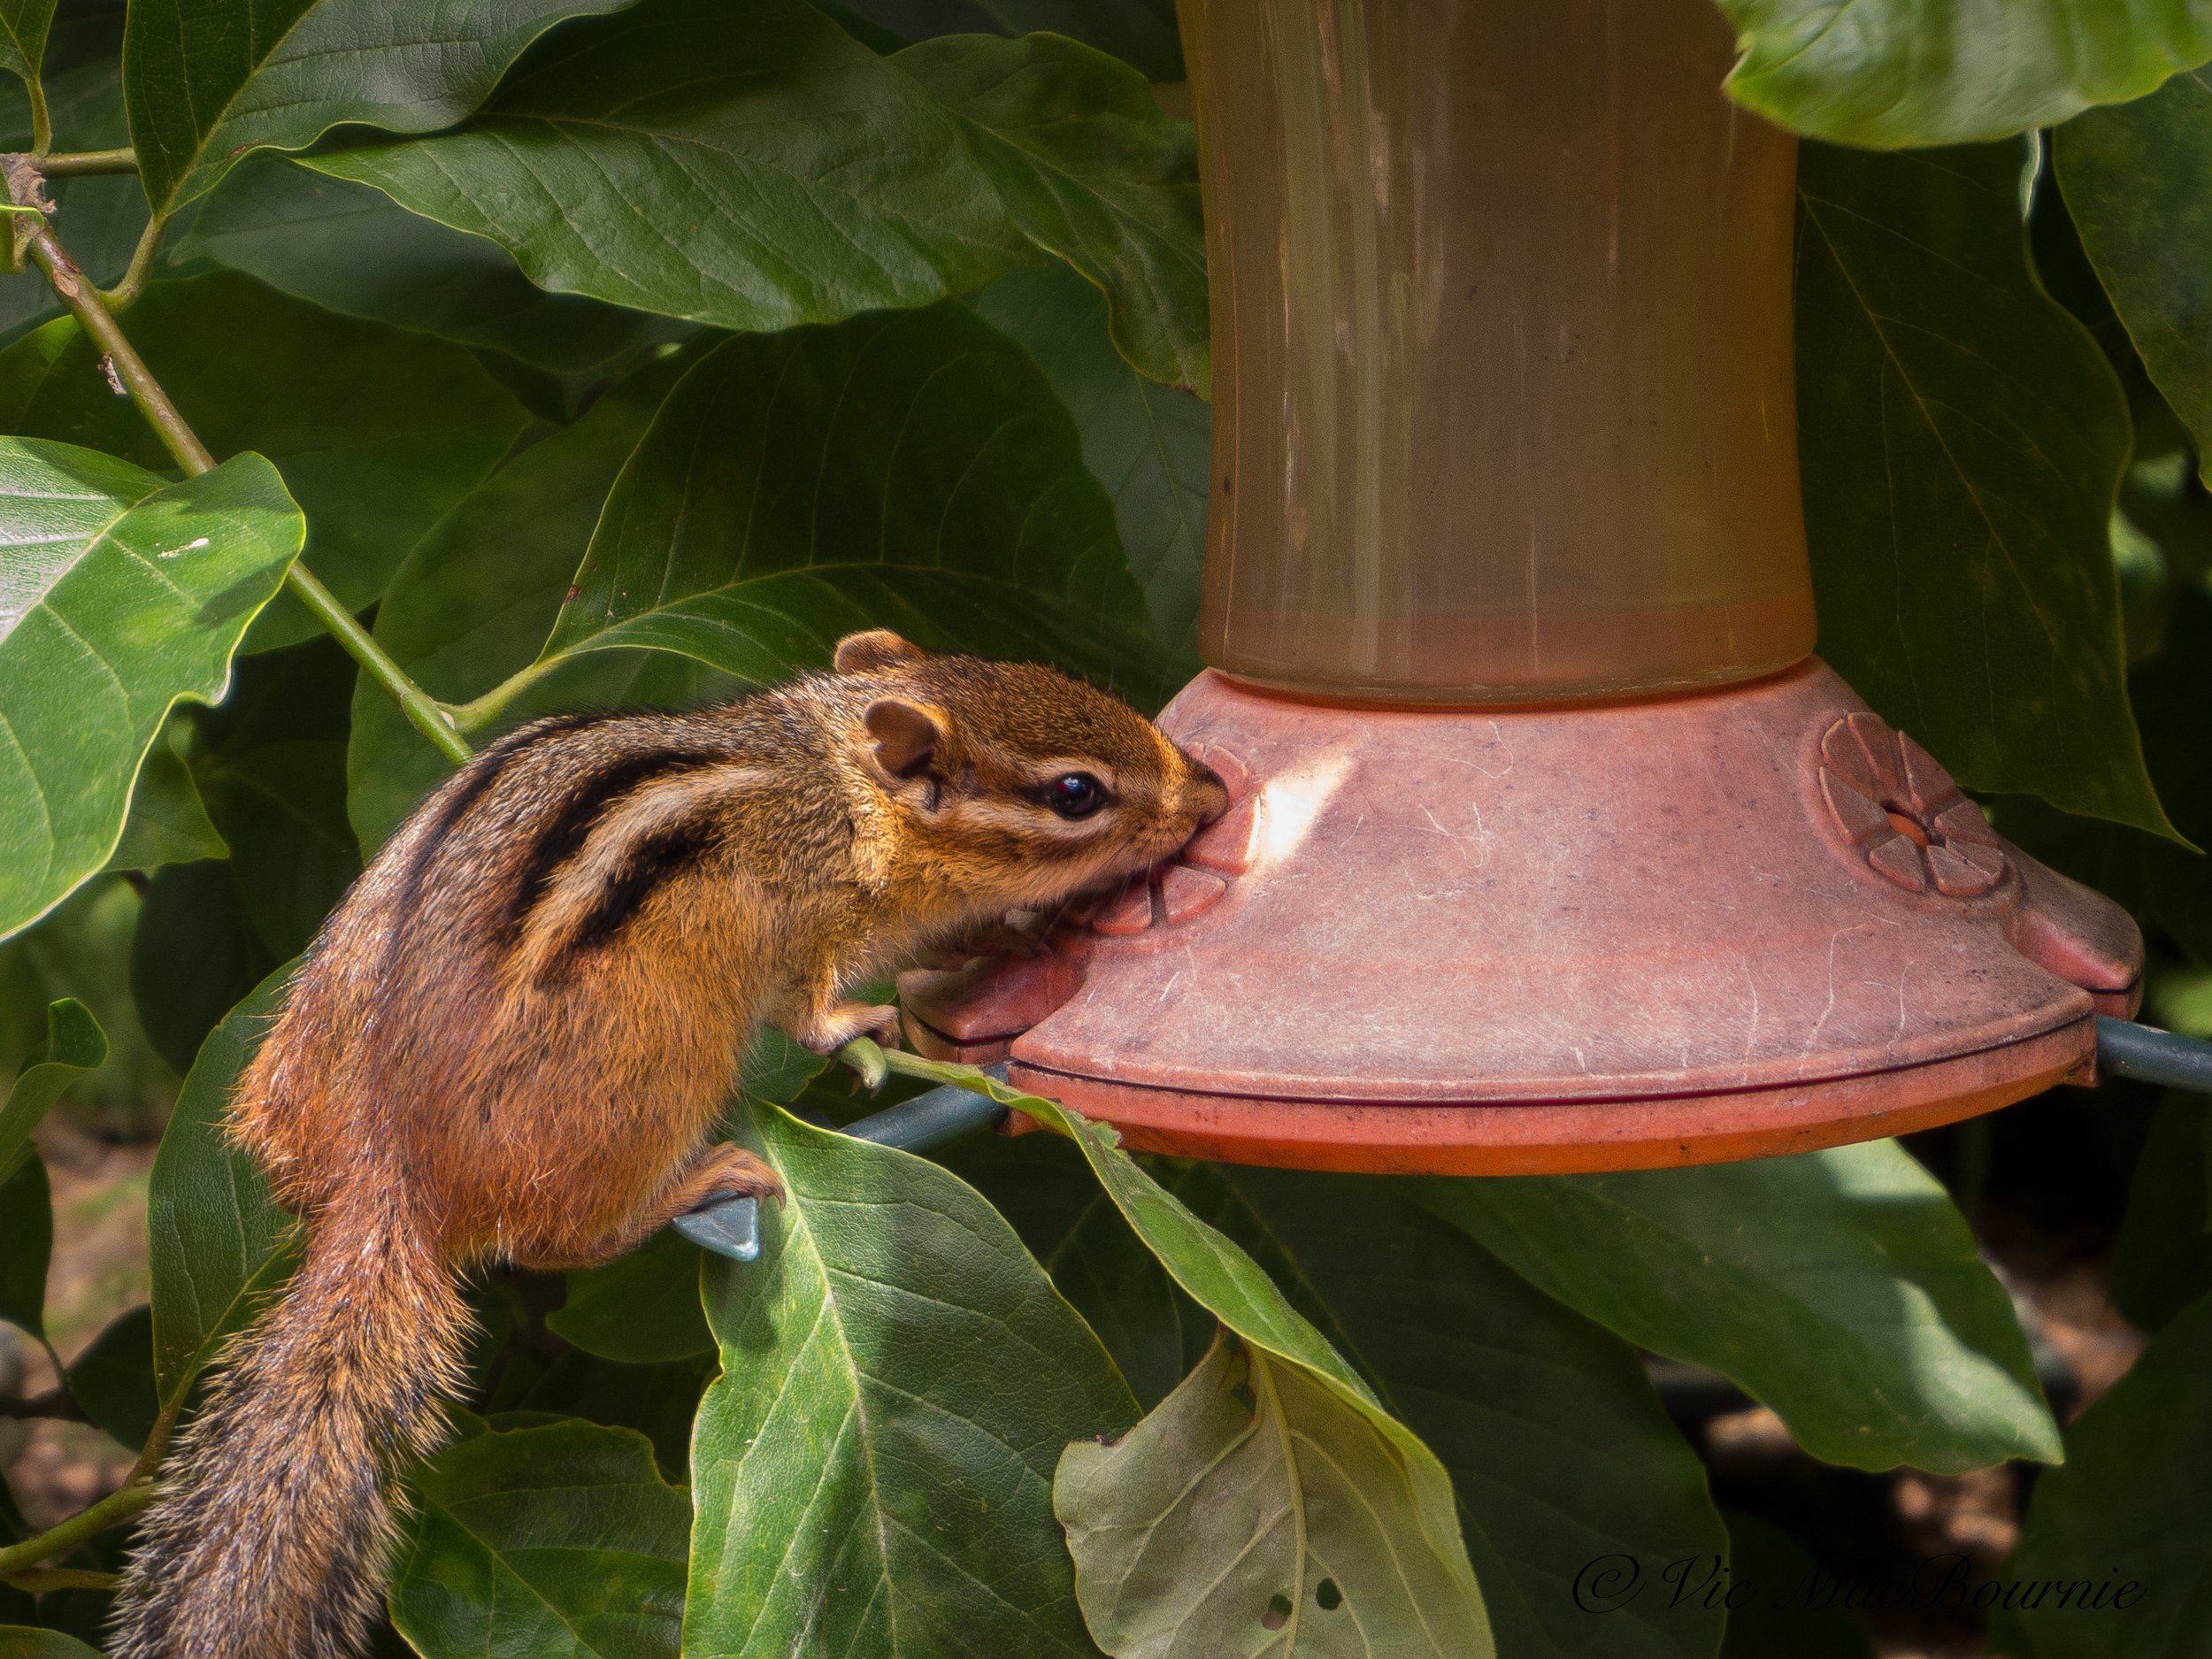
One of our resident chipmunks took a liking to the nectar in the Oriole feeder this past summer.
Nectar is good for a burst of high-energy
One of the first feeders I purchased was a nectar feeder that looked like an orange-coloured hummingbird feeder. It has never performed that well for us in attracting Orioles, but one of our resident chipmunks sure took a liking to it last year. Everyday, the chipmunk would come and get its hit of sugar water from the feeder.
It enjoyed the nectar so much that it wouldn’t stop drinking no matter how close I got to it to get a picture.
Oriole nectar should be mixed the same as hummingbird nectar. Do not buy the store-bought nectar packages with the orange food colouring. Just mix 1 part sugar with 4 parts of water to create the nectar. I like to boil the water before using it to clear out any impurities in the water. I also find it stays clear longer if it is boiled.
There are lots of high quality Oriole nectar feeders that are available. This plastic feeder from Home Hardware is an excellent choice. Don’t be surprised if it also attracts hummingbirds.
Best Oriole feeder conclusion
There are so many high quality Oriole feeders available today that it is difficult to recommend one brand or style. In fact, if you are like me you probably have Orioles visiting your hummingbird feeders more than your actual Oriole nectar feeders. I believe that this is because the Orioles are more accustomed to seeing the red hummingbird feeders and know there is a treat waiting for them inside.
The fact that Orioles are attracted to our DIY feeders as they are the commercial varieties also says a lot about how picky they are or are not when it comes to their favourite food.
But providing them with oranges, jelly and nectar in one convenient spot is your best chance at making a first impression with these wonderful birds. If a combination feeder can get their attention, you can use more dedicated style feeders to keep them coming back.
There are feeders that take an entire jar of grape jelly that some have reported are excellent magnets for the orioles. I can’t help but think these also attract their share of bees and wasps to the sugary jelly. They may even get moldy if the jelly is not eaten quickly enough.
I have also seen beautiful handmade Oriole feeders available on Etsy that would make a lovely addition to your garden. Most of these are excellent secondary feeders that could be added once you have success attracting and keeping the orioles around all summer.
One last thing to remember, Orioles enjoy a dependable source of water as well. Don’t forget to ensure water is available.
One of my favourite series of images I was able to capture was a female Oriole bringing her entire brood of babies down to our on-ground bird bath for most likely their first bath. That was a frenzy of excitement for both the birds and the photographer (image above) and a reminder of why it’s worth the effort to attract these beautiful birds to your yard.

Bird feeders for sale: Cashing in on Kijiji and other on-line sellers
These bird feeders from Wild Birds Unlimited are a good example of the new recycled resin feeders available at a number of locations.
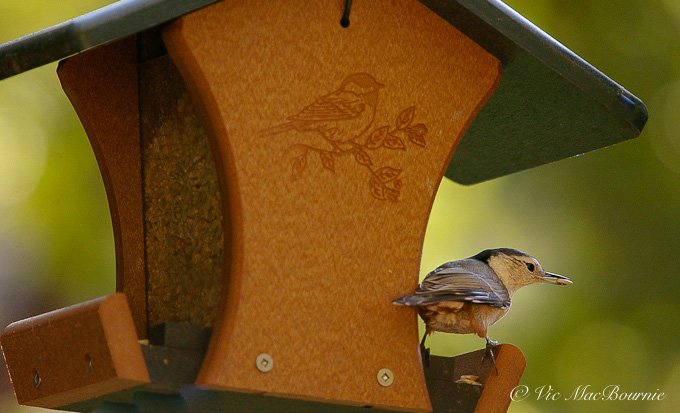
Nuthatch on Wild Birds Unlimited feeder.
When it comes to bird feeders for sale, my best deals have come courtesy of on-line purchases.
Sure, there are some good buys from on-line sellers like Amazon, Wayfair and Gardener’s Supply Co., but my best buys are local purchases courtesy of Kijiji, Craigslist, Facebook Marketplace and other local on-line garage sale type sites.
It may take a little more effort to find these items on places like Kijiji and Craigslist and arrange for pickup, but anyone who is starting out in backyard bird feeding and are looking to save a lot of money getting started, would benefit from spending time regularly checking for items on Kijiji, Craigslist, other on-line garage sales and even local thrift stores.
It’s not unlike creating a woodland garden, time and patience is key to your success.
(For more on creating a budget-friendly garden check out my story here.)
If you are looking to set up a bird-feeding station, be sure to check out Setting up a Bird Feeding Station.
My latest Kijiji purchases are two excellent bird feeders – one a top-of-the-line Wild Birds Unlimited recycled plastic hopper feeder in perfect condition and the other a brand new three-tube copper-look feeder still in its original box. Both set me back less than $35 Cdn. – $19 for the Wild Birds Unlimited hopper and $15 for the copper feeder.
New from nature stores or birding stores, these feeders are double and triple the costs you pay on these on-line sites. I’ve even seen entire bird feeding stations with poles, hooks and feeders sell on these on-line sites for pennies on the dollar. I suspect it’s the result of people who try feeding the birds only to find that they are not interested or that the seed on the ground is attracting unwanted critters.
But we know how to deal with that problem. Check out my post for more on keeping mice and rats away from your feeders.
If you are looking to add to your arsenal of bird feeders on a budget, be sure to check out sites like Kijiji and Craig’s List regularly. These on-line sites are to birders, what thrift stores are to home decorators.
The Wild Birds’ Feeder alone, which has a lifetime guarantee, is more than $120 Cdn. brand new and worth every penny.
These are just the latest of a wealth of bird feeders, bird houses and other bird related products available on sites like kijiji that discerning shoppers can purchase at a fraction of the cost of buying new.
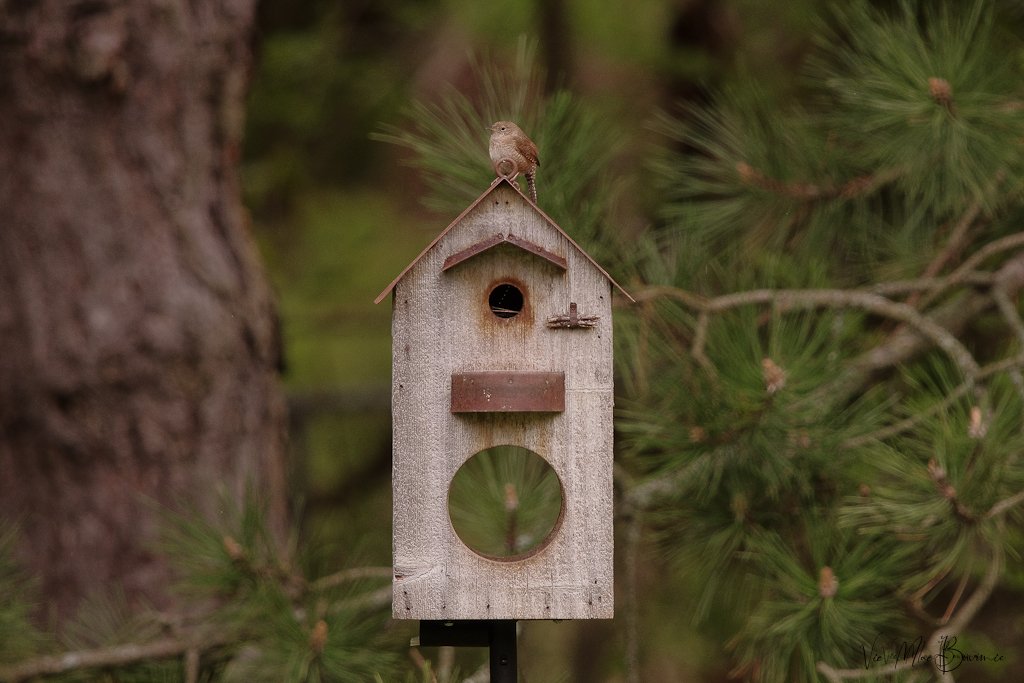
A Carolina wren on top of one of my favourite Kijiji purchases, a rustic bird house and feeder.
I strongly recommend purchasing the recycled resin bird feeders rather than wood ones. Take a moment to check out my full post on Why we should buy recycled resin feeders.
Kijiji, Facebook marketplace and Craigslist are really just on-line garage sales people use to sell items they no longer have a use for anymore. There are others as well. Many neighbourhoods have their own on-line marketplace where similar deals can be found. Local thrift stores are also good places to visit regularly to pick up garden and bird products on a budget.
These are perfect places to cash in on homeowners who, for some reason, have decided that feeding the birds is no longer something they are interested in continuing.
Maybe it’s the mess that bird feeding can create, the critters it may attract, or the expense of purchasing food that mostly goes to feed the local squirrel population that makes the sellers decide that this bird feeding hobby is not for them. Whatever it is, if you are willing to wait and check the listings regularly, there are often lots of choice available for those of us who have committed to feeding the birds.
In just the last year, I have purchased two bird feeders, two screech owl houses, a rustic bird house/feeder and three bird baths from sellers on Kijiji. I could have bought a lot more if I really wanted, but that’s a pretty impressive haul as it is.
In fact, these on-line garage sales are the first place I go whenever I’m looking to make a purchase. Although birding supplies seem to be in abundance, I have picked up everything from a large water pond container, and complete bubbling rock system (including the bubbling rock), to a nice little native White Pine tree from sellers.
Outside of gardening circles, other purchases include ipods, audio equipment, cameras, camera equipment, car parts and a truckload of square-cut blue flagstone that became an integral part of our garden structure.

A woodpecker at the Wild Birds Unlimited recycled plastic feeder.
A WBU classic hopper bird feeder for under $20
Back to my latest buy. If you are not familiar with Wild Birds Unlimited recycled plastic hopper feeders, you should definitely check them out. They are among the best feeders you can purchase and there were actually two of these feeders available on Kijiji recently when I looked.
These high-end feeders and similar ones are not impossible to find because of what I wrote earlier about new birding enthusiasts who lose their enthusiasm for one reason or another.
There are many reasons people decide to no longer feed birds. The couple I bought the feeder from told me they were moving and would not have a yard to feed birds any longer.
Without a doubt Wild Birds Unlimited products are among the best available. Products from nature and bird stores tend to be top notch but good buys are available on home made bird houses and bird feeders as well.
To make it even better, the heavy-duty, high-quality feeders made from recycled plastic are actually helping the environment by recycling plastic bottles.
In the words of Wild Birds Unlimited: “Imagine a wood-free bird feeder that actually looks like wood! Our EcoTough® Classic won’t crack, fade or rot and has a lifetime guarantee. The Classic has curved ends so you can see birds feeding on both sides at the same time. Perch drains allow seed to drop out of the feeder for ground-feeding birds to eat, and angled perches let empty seed hulls be blown away by the wind. The removable screen bottom is treated with EcoClean® Antimicrobial Product Protection, providing 24/7 product protection. EcoTough® feeders and houses are environmentally friendly, high quality products that are made from recycled plastic milk jugs. These feeders and houses prevent used milk jugs from making their way into our landfills.
To check out Wild Birds Unlimited feeders go to their website here.

Triple-tube feeder delivers for a variety of birds
Anyone who is a regular Costco shopper knows to grab the deal while you can because it will not likely be there on your next visit.
That’s exactly what happened to me when I passed on a beautiful triple feeder several years ago. On my next visit to Costco, I strolled through the doors – cash in hand and eager to buy – only to discover that model was sold out and replaced by a similar looking feeder, but one that sported only a large, single feeder tube. I bought that one and have used it for years. Unfortunately, it’s beginning to show its age and it’s almost time for a replacement.
So, when I saw the triple tube feeder, still in the original box for a fraction of the cost of the original, I snapped it up.
Who says you can never get a second chance?
The triple-tube feeder really delivers when it comes to attracting a variety of birds.
Unlike the single-tube feeder that can deliver only a single food source, the triple tube can provide, for example, a finch blend, a tube of highly desirable black-oil sunflower and maybe a general no-mess blend. The mix can change depending on the season and, of course, during migration when white prosso millet can be offered in one of the tubes to attract Indigo Buntings.
The result is a greater variety of backyard garden birds.
And isn’t that what it’s all about.
While I get great enjoyment from my bird feeding stations, providing natural food sources to our feathered friends is always the goal we should aspire to in our gardens. I have written a comprehensive post on feeding birds naturally. You can read about it here.
More gardening on a budget links
Ten money-saving tips for the weekend gardener
DIY Bark Butter feeder for Woodpeckers
DIY reflection pond for photography
Click & Grow is ideal for Native Plants from seed
Remove your turf and save money
Hiring students to get your garden in shape
• As an affiliate marketer with Amazon or other marketing companies, I earn money from qualifying purchases.

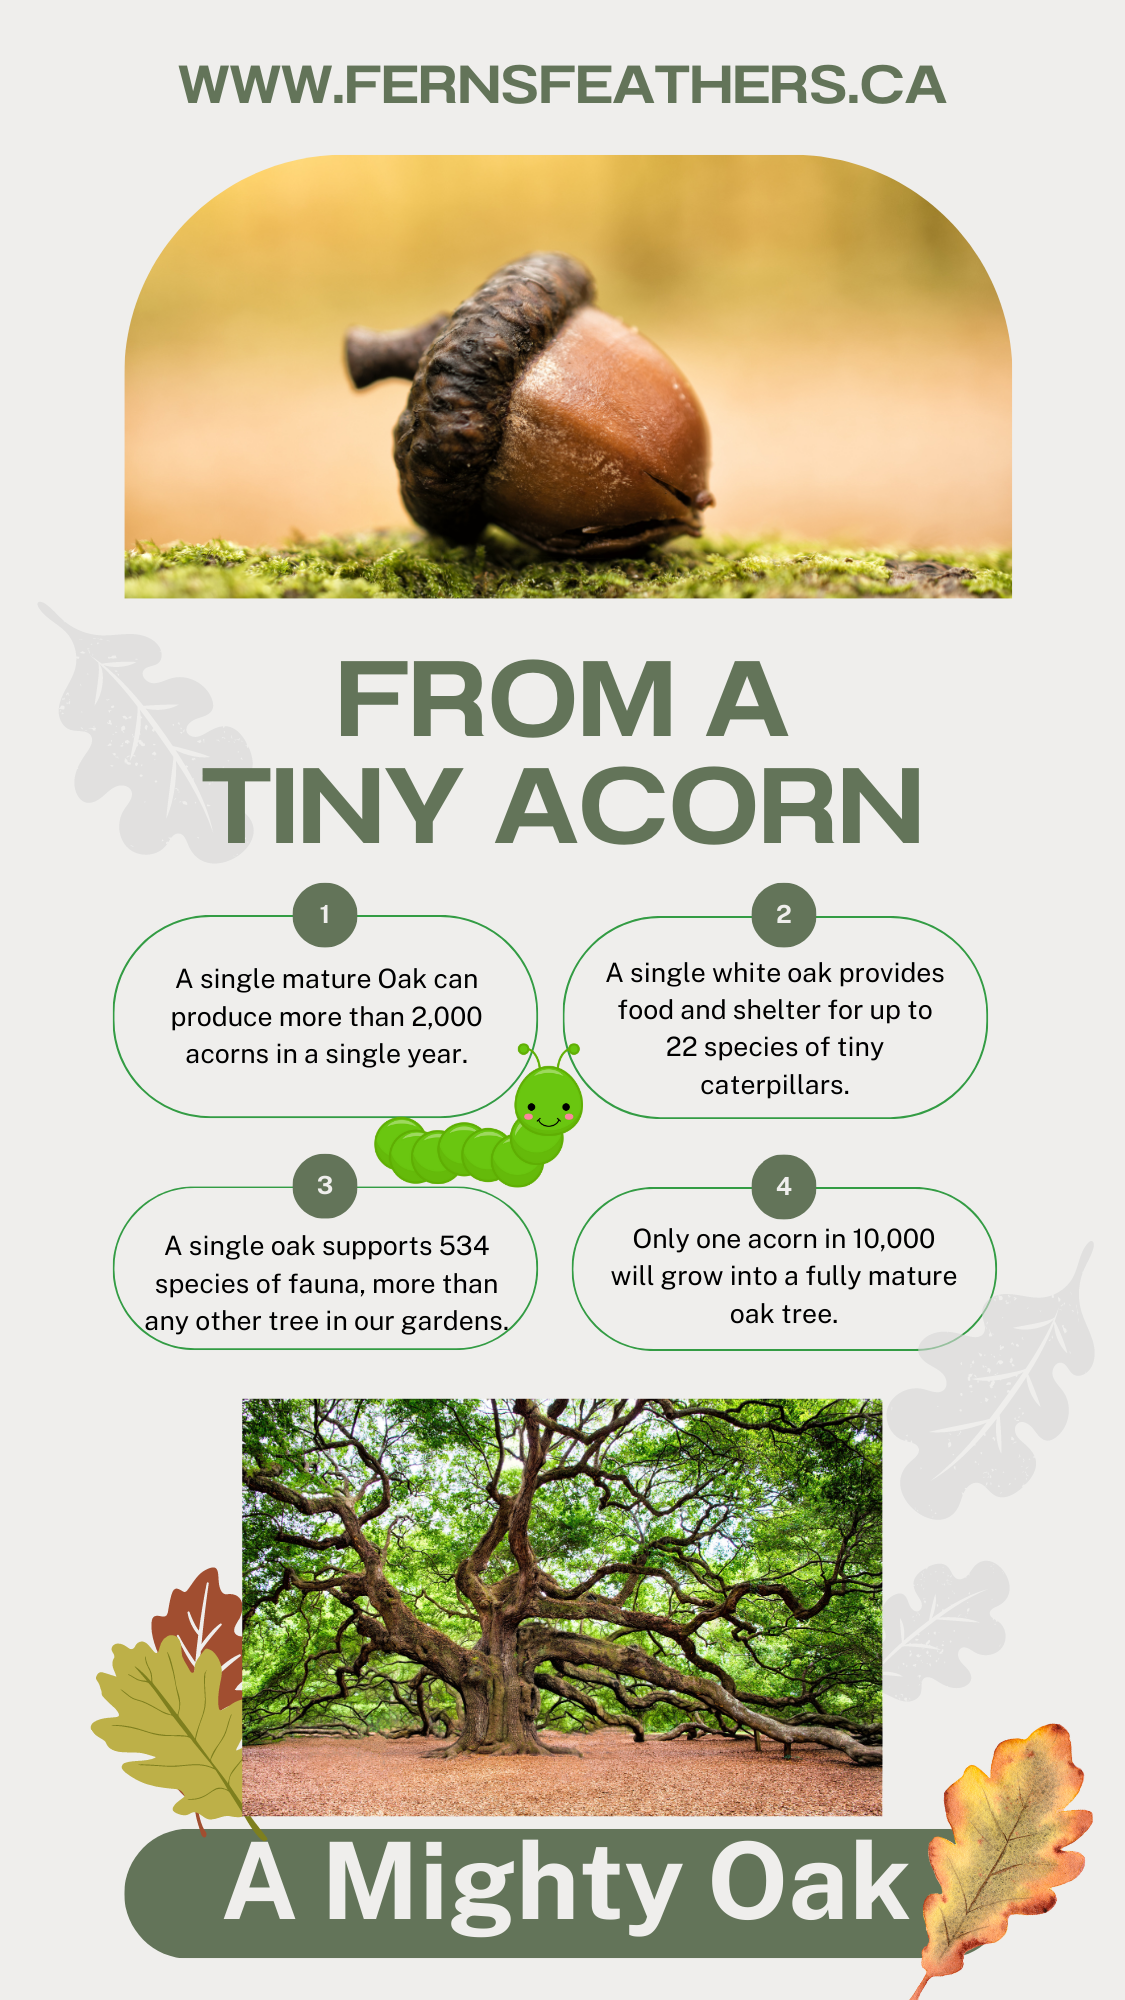
From a tiny acorn, a mighty Oak grows
From the tiny acorn grows the mighty oak is one of nature’s great miracles. The real miracle, however, is how a single oak tree can transform our landscapes in so many ways.
Our mighty oaks have humble roots
“Large streams from little fountains flow, Tall oaks from little acorns grow”
– D. Everett in The Columbian Orator, 1797
Our neighbour’s giant oak tree crashed to the ground several years ago. I guess it had lived its life to the fullest and was now offering itself up to the earth.
But, its work was not finished.
All around it, in our yard and, I imagine, many yards in the neighbourhood, this giant oak’s offspring had already begun their own lifelong journeys.
All from a little acorn that had fallen from the old oak tree and likely forgotten by a resident squirrel after it buried the acorn in the ground with the hope of using it for a meal in the cold of winter.
Just in case you were not aware, the seed of an oak tree, the “nut,” is called an acorn.
There is no tree more important in our yards than the oak tree. While some can grow massive, there are others that can work in today’s smaller yards.
It is believed that the average 100-year-old oak tree will produce as many as 2,200 acorns per year. That number will go up significantly during high production years that can occur every four to ten years.
I often find small oak saplings growing on our property. In spring, I move them to safer areas to grow in the back of the garden where they are safe and have a much better chance of growing to maturity. Often, during the move, remnants of the woody acorn shell remains on the small roots, a stark reminder of the the saplings’ origins.
If you are trying to decide whether or not to plant an Oak tree in your yard, The Nature of Oaks will certainly help you make that decision. This valuable book highlights the incredible benefits of these important trees.
For more on the importance of oak trees in our garden and natural landscapes take a few moments to check out my other posts on Oak trees:
It should not be forgotten that of the more than 2,000 acorns per year that fall from a mature oak, very few of those seeds grow into oak trees themselves. In fact, it is estimated that only one acorn in 10,000 will grow up to be an oak tree.
Some species of oaks bear acorns yearly, while others bear every two years.
The remainder provide food and even shelter for much of the wildlife in our yards.
It’s hard to believe how hard oaks work for the earth’s creatures.
How important are oaks to our wildlife?
In his highly acclaimed book Bringing Nature Home, How You Can Sustain Wildlife with Native Plants, Douglas Tallamy spells out clearly the vital role Oaks play in the natural environment and how important they are to include in our gardens.
He writes: In a study in Illinoise, John Nill and Robert Marquis (2003) found that a singe white oak tree can provide food and shelter for as many as 22 species of tiny leaf-tying and leaf-folding caterpillars, insects most people never notice on their walks in the woods.”
And that is just a tiny fraction of the fauna in your garden that depend on a single oak tree. In fact, the mighty oak supports 534 species of fauna, more than any other tree we can plant in our gardens.
It is followed by the willows, cherries and plums, in importance to fauna. All good choices when it comes to deciding what tree to plant in your garden.
If the Oak’s importance to wildlife is not enough, consider that of the 400 species of Oak, North America boasts 90 different species with 75-80 in the United States and 10 in Canada.
How long do Oaks usually live?
Oak trees traditionally live for hundreds of years. There’s a good chance your children will be watching the tree enter middle age long after you’re gone.
In Ontario and northeastern United States, that white oak you plant will grow more than 35 metres (that’s more than 114 feet) tall, can live for several hundred years and produce thousands of acorns every year to feed deer, squirrels (including flying, red and gray), chipmunks, wild turkeys, crows, rabbits, bears, mice, opossums, blue jays, quail, raccoons and even wood ducks just to name a few.
As Tallamy points out: “The value of oaks for supporting both vertebrate and invertebrate wildlife cannot be overstated.”
He explains that oaks along with hickories, walnuts and American beech, have stepped up to the plate following the demise of the American chestnut in supplying nut forage for various forms of fauna.
In addition, oaks – both living and dead – provide nesting cavities for our backyard birds ranging from chickadees, wrens, woodpeckers, owls and even bluebirds.
The tree species real genius, however, is what we alluded to earlier, and that is the astounding number of insect herbivores that oaks support in the forest ecosystem.
“From this perspective, oaks are the quintessential wildlife plants: no other plant genus supports more species of Lepidoptera, thus providing more types of bird food, than the mighty oak,” Tallamy writes.
(If you are wondering what a Lepidoptera is: They represent an order of about 180,000 species in 126 families and 46 superfamilies of insects that includes butterflies and moths. It is one of the most widespread and widely recognizable insect order in the world, and your average oak is full of them.)
And all from the tiny acorn.

Squirrel proof bird feeder strategies: Going for gold
Squirrel proof bird feeders are important to maintain a positive bird feeding experience. There are different ways to achieve that with varying degrees of success.
Best squirrel proof bird feeders: How to set up a feeding station and cages to keep them out
Our squirrels train everyday to beat us at our own game. Like the ultimate Olympian, they don’t seem to give up, don’t feel fear, and don’t seem to care about a little pain or even feel sorry for us when they win gold and walk away with a full belly of our finest bird food.
A cage helps, so do weight-sensitive feeders, but it takes more than just throwing them up in the nearest tree to guarantee successs.
So how do we keep squirrels out of our bird feeders?
They know what so many of us fail to accept – there are no squirrel proof bird feeders. There are feeders that work well most of the time and baffles that stop them in their tracks – for a time anyway – but there is nothing that can guarantee that squirrels aren’t getting fed on any given day.
We can try to keep squirrels at bay with a host of elaborate combinations baffles, cages and pressure sensitive feeders, but in the end there is always that one squirrel that accepts any challenge we throw at it with great gusto.
Baffles go a long way to keeping bird feeding station free of squirrels.
I have a name for these squirrels. I call them my Olympic calibre squirrels and right now we have one that comes in the form of a large grey male squirrel that, I swear, has no respect for me, my expensive bird feeders or the baffles meant to keep him on the ground.
My approach to keeping the squirrels off my feeders is a simple one and involves a single, centralized feeding station in an area where the squirrels are unable to access from above or from ground level.
He may not respect me, but I have the utmost respect for him.
I can live with one squirrel occasionally getting up on the feeder. The problem is when the entire neighbourhood has access to my expensive feed.
And, I can say with great certainty that there are very few yards with more squirrels than mine. Winter, spring, summer, fall, it doesn’t matter. There are always a handful of squirrels looking for a handout. Grey, black and red squirrels with a good mix of chipmunks thrown in just for fun.
Our resident red fox has taken care of some of them but the squirrels and chipmunks are always ready to restock with their kin whenever the numbers get manageable.
So it goes without saying that my vigilance is paramount at all times.

Harming squirrels is not the answer
First, let me say that I never harm our squirrels in any way. I don’t use the hot, spicy bird seed and I refuse to use the spinning feeders that just seem cruel to me. Maybe the squirrels like to go for a spinny ride once in a while, but I can’t help but think that the spinning feeders go just a little too far to protect a handful of bird seed.
My approach to keeping the squirrels off my feeders is a simple one and involves a single, centralized feeding station in an area where the squirrels are unable to access from above or from ground level. Although there are a lot of trees around the feeder, any limbs are kept cut back enough that even an Olympic calibre squirrel can’t score a medal with its best jump.
By using a bird feeding station rather than individual feeders, I am able to use a number of different, less expensive feeders and specialty feeders that the squirrels can’t get to. These include everything from simple hopper feeders to suet feeders and compressed seed cylinders.
The key is to keep the feeding station away from areas that allow the squirrels to jump up or down on the feeders.
I could give readers specific distances that the feeder station needs to be away from objects where the squirrels are capable of leaping from, but I think every situation is unique and needs a certain amount of individual experimentation. A good starting point, however is at least four feet off the ground and about ten feet from above for the daring aerial acrobats.
Our biggest weakness is usually an approach from ground level where, like a basketball player, a good vertical jumper can score almost every time.
The most success our squirrels have had is when I have left a feeder dangle too low to the ground.
Our most talented athletes manage to take a running leap off the large baffle flinging themselves into the air – often with an impressive twist or even what appears to be a salkow? – and then grasping the feeder with a toe hold any Olympic wrestler would be proud to have in their arsenal.
Squirrel and raccoon baffles are excellent deterrents
I use a combination of a large steel raccoon baffle as a first defence followed by a cap baffle (see image above) that sits on top of the raccoon baffle and provides the final defence. If they can jump past this combination, the bird seed is toast.
Once defeat is guaranteed, I’ve got one more deterrent that works well. Like any good defence, it involves bending but not breaking and works on the premise that all that work to get up on the feeders probably isn’t worth it.
I like to call it “the pantry is almost empty but go ahead and help yourself.”
It involves simply refraining from the urge to fill up your feeders to the point where it’s not really worthwhile for the squirrels to make the effort to get on the feeders. This won’t stop them for a second, but it will cut your losses if one or two manage to out jump your barriers and go for gold.
What if you can’t or don’t want to use a single pole bird feeding station?
There are lots of reasons to not want to use a centralized feeding station in your yard.
I love the look of beautiful bird feeders hanging in a tree being visited by cardinals, chickadees and a host of finches.
It’s an idyllic look in any woodland garden and one that we should all be able to enjoy without the annoyance of having squirrels swinging like monkeys from every bird feeder in the yard.
There are lots of options available. A quick search on Amazon provides a long list of squirrel proof feeders with some obviously more effective than others.
Squirrel deterrent feeders can be expensive
The answer involves the ability to dig into your pocket, pull out your wallet and hit the cashier at the high-end bird feeding store with your credit card without flinching.
It can get expensive.
Eliminator from WBU
A good feeder is not cheap, but there are reasons feeders designed to keep squirrels at bay without a series of baffles and bobbles can get very expensive.
First there is the feeder itself. If you are buying, pay what it takes to get a good one preferably one that shuts out squirrels and other critters depending on their weight.
Wild Birds Unlimited, for example, sells its “Eliminator” model that closes off access to the seed once the squirrel sits on the base of the feeder.
Wild Birds Unlimited describes how the feeder works: “When a squirrel touches the perches or perch ring, its weight closes the seed ports, foiling its seed-stealing plot. The Eliminator’s unique technology allows you to set the sensitivity level, so you can also exclude large birds such as pigeons or doves.”
Does it work? Absolutely. Can squirrels figure out a way around it? Absolutely. They will try their best to hang from a branch or even the top of the feeder so they do not add weight to the spring loaded seed dispenser.
By positioning the feeder in a location that makes it difficult for the squirrels to access it from a low hanging branch, the chances of keeping the squirrels at bay increases. Consider adding a half dome to make access from the top more difficult.
But even if the squirrels can’t extract seed, the raccoons will take their turn at it once the sun goes down. The result can be an expensive birdfeeder on the ground and susceptible to a hungry, snarling raccoon. I don’t like the feeder’s chances here.
Caged bird feeders are a good choice: Droll Yankee is top choice
Add a solid cage around the feeder and the problem of squirrels and even raccoons is more or less solved.
The best caged feeders work very well. There is a reason Droll Yankee feeders are a little expensive in comparison to other feeders. Their reputation as a company that builds solid feeders that work well is undeniable.

The Droll Yankees Domed Cage Sunflower Seed Bird Feeder is an example of a bird feeder, cage and dome built to keep the critters away while providing excellent access for he birds to high quality seed.
The six feeding ports on the feeder that takes 2.5 pounds of food provides plenty of choice for smaller birds to feed.
The cage allows our smaller songbirds to eat while keeping larger birds like blue jays and starlings away from the feeders. At the same time, squirrels and other undesirables can’t get to the feeders.
The plastic dome provides some shelter for the birds during inclement weather, but more importantly helps to keep the seed dry during rain or snow storms.
Of course the Droll Yankee feeders are not the only recommended caged feeders.
Fundamentals squirrel proof feeder.
The “Fundamentals Squirrel Proof Feeder” from Wild Birds Unlimited is anotheer effective caged feeder. They describe their Fundamentals feeder in the following way: “Our Fundamentals Squirrel Proof feeder is weight-sensitive, so when a squirrel gets on the feeder the feeding ports close, denying access to the seed. Birds can use the four perches or they can cling to the metal shroud to feed.
If it makes sense to add a dome over the entire feeder assembly, it can go a long way in keeping the bird seed dry, while at the same time helping to keep squirrels, chippmunks and raccoons off the feeder.
If raccoons are a problem, just try to remember to take the feeder in for the night or locked away in a safe spot outside away from the racoons but also in an area where mice and rats are not attracted to it. A large galvanized garbage can with a solid lid works for me.
What is the easiest ground cover to grow?
What’s the easiest ground cover to grow? Maybe the better question is, what’s the best native ground cover to grow in a given area.
Easiest may not always be the best choice
The very nature of ground covers is their eagerness to put on an abundance of quick growth to “cover” the ground as quickly as possible. So it goes without saying that pretty much all ground covers are easy to grow.
But the question we are trying to answer is: What is the easiest ground cover to grow?
I’m going to go out on a limb and say that the ground cover best suited for the conditions in your yard, is the easiest ground cover for you to grow.
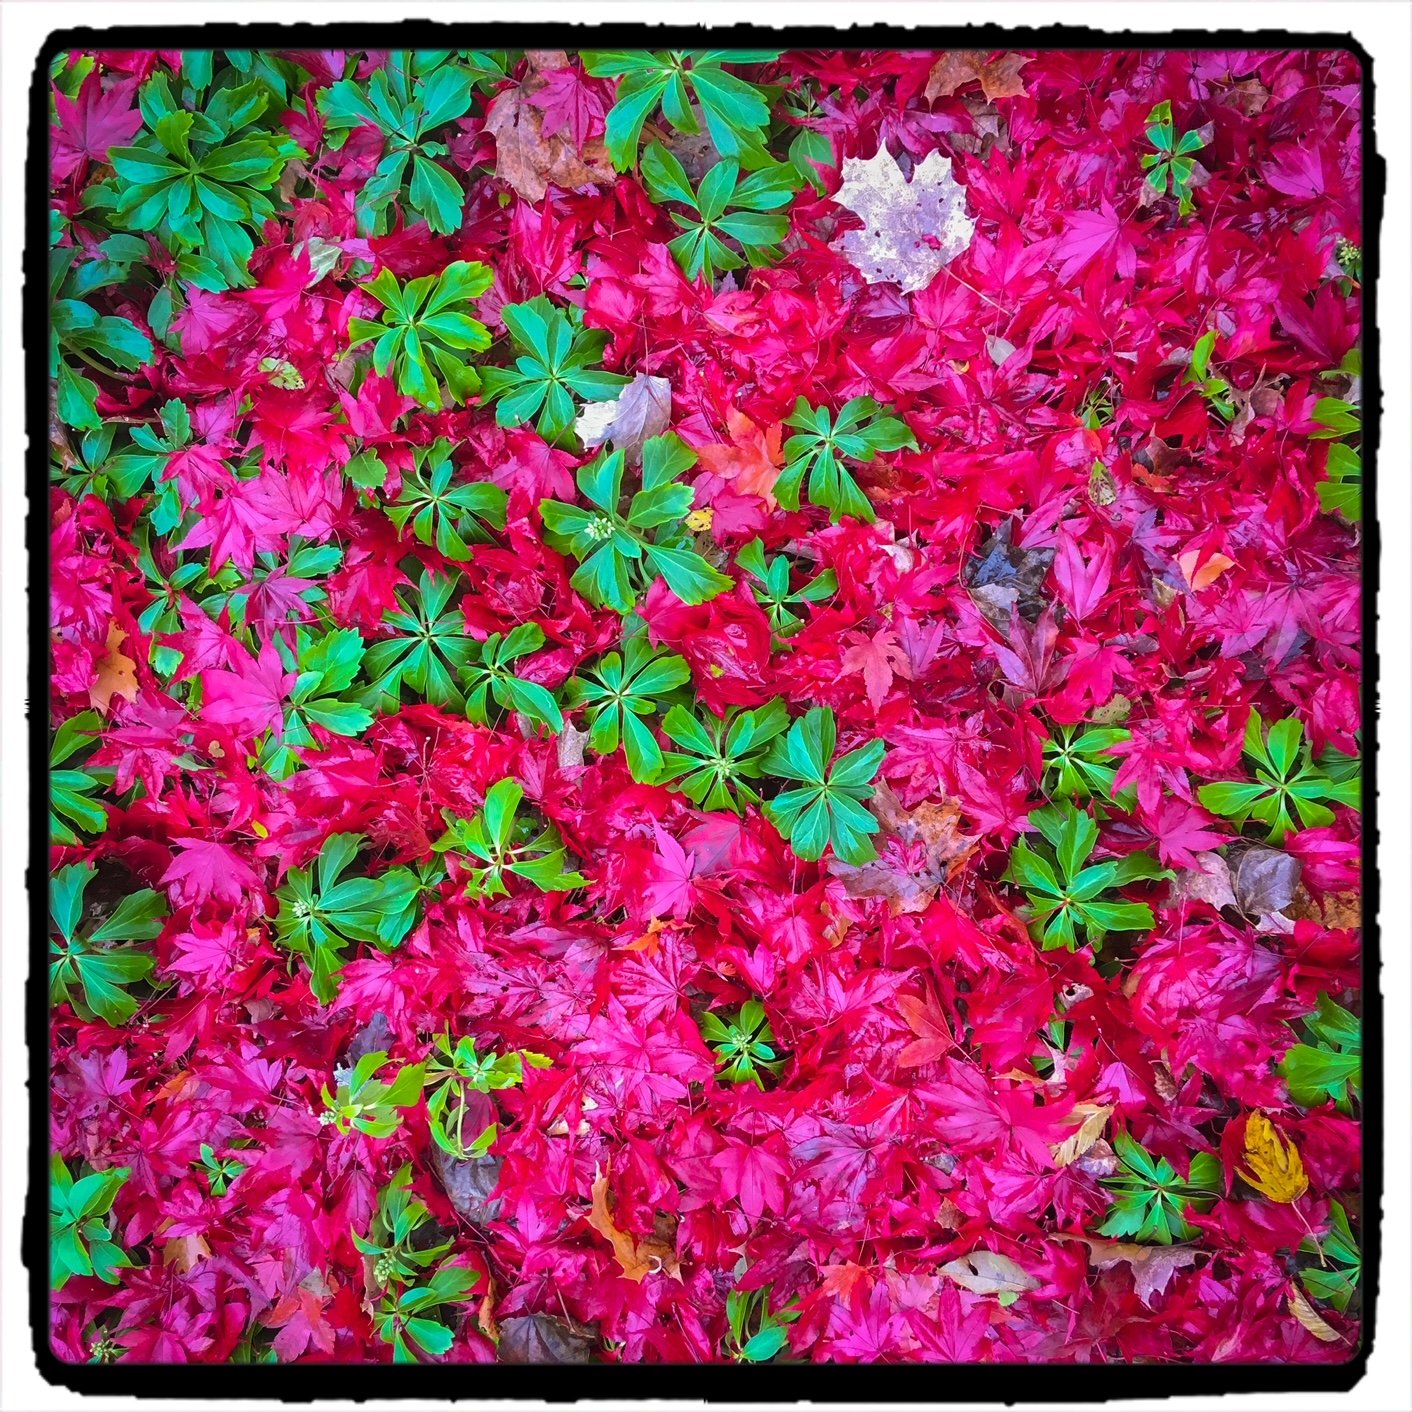
Our pachysandra ground cover poking up through the intense red leaves of our Japanese Maple in fall.
Soil conditions, the amount of light in the garden, drainage, the amount of foot traffic, how close you are to the street and salt spray, all play a role in how quickly the ground cover will take to its new home.
But that’s not what you came here for.
You want to know what is the easiest ground cover to grow in your garden to ensure the quickest success possible, right?
Let’s go out on that limb a little farther and say that you are gardening in a woodland garden or shade garden under the canopy of large deciduous trees and a smattering of understory trees and shrubs.
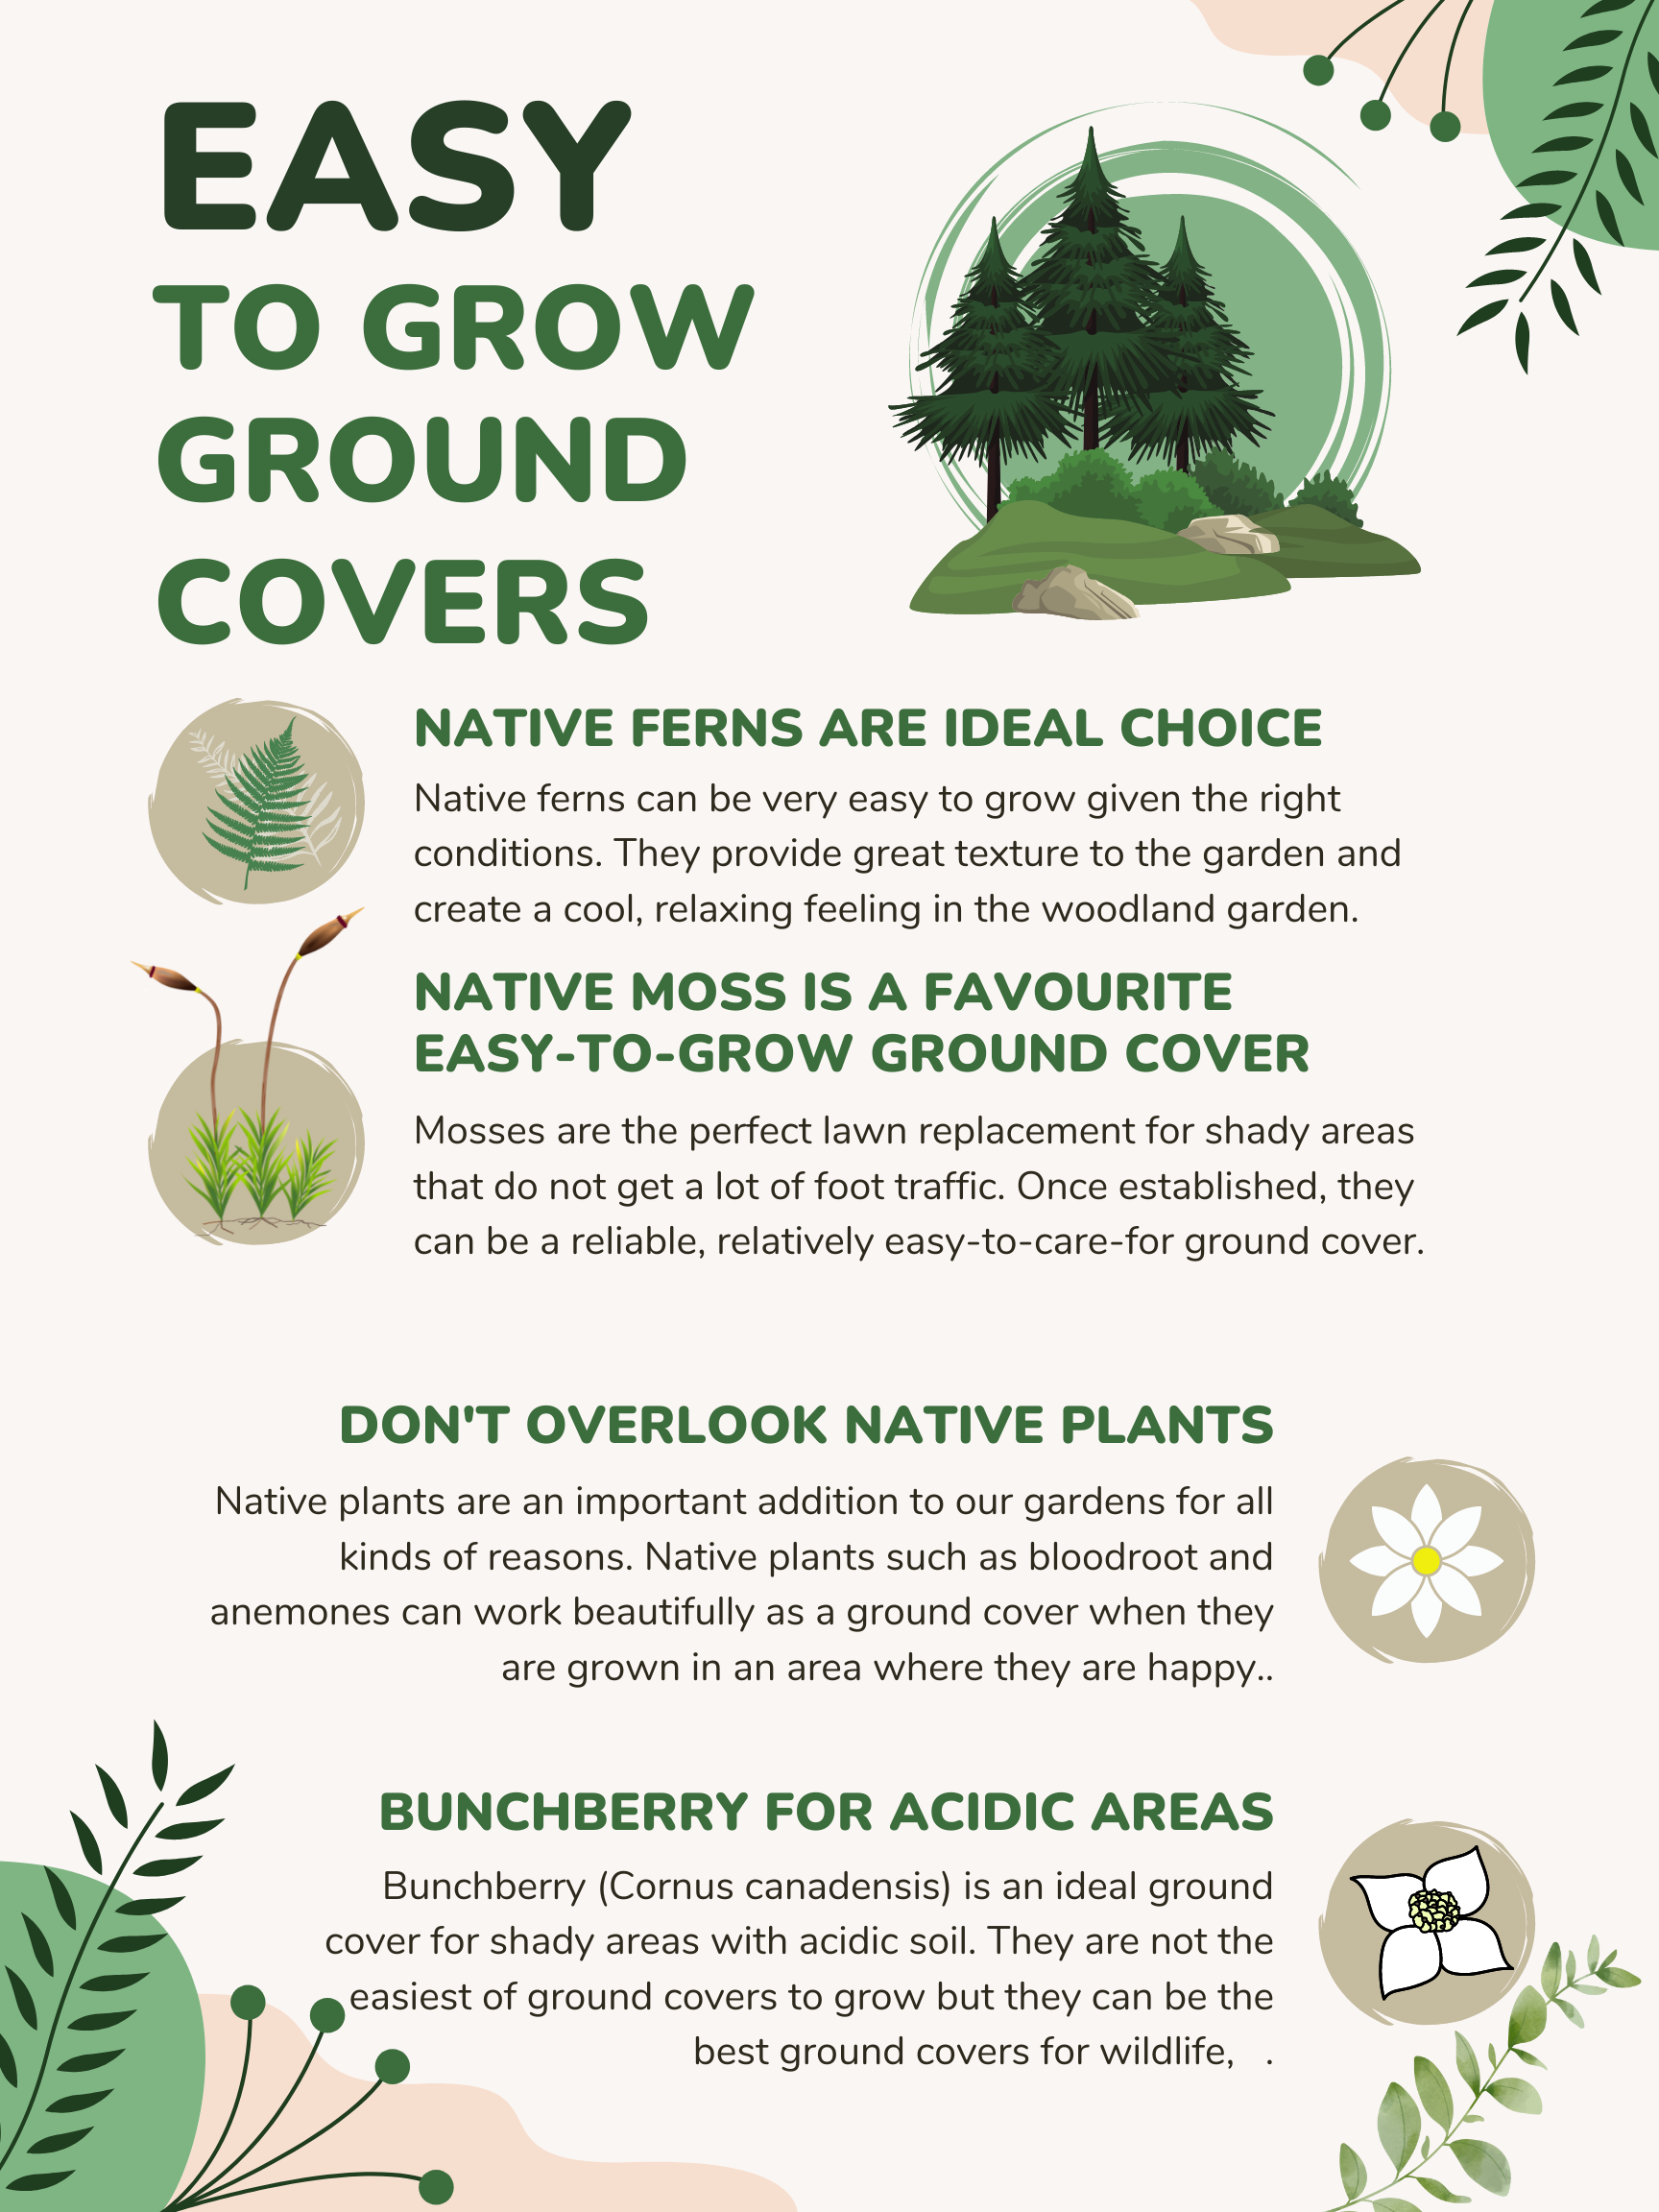
Info graphic showing some of the easiest to grow ground covers including native plants.
Pachysandra: Easiest ground cover to grow in our front shade garden
What is the easiest ground cover to grow under these conditions?
Again, let’s take another step out on that limb and say Pachysandra or Japanese spurge. That’s the easiest ground cover to grow in a shady garden with decent soil.
I have a large patch of pachysandra growing in our front garden that was grown basically from clippings and now covers a large area under our serviceberry, Japanese maples, a crimson maple and a sugar maple.
It grows thick and tidy, stays green all year and can take moderate foot traffic. It’s not so thick that I can’t grow plants up through the pachysandra and I certainly have a number of plants, including some that you can consider ground covers in themselves, that grow up through the pachysandra where they add texture and interest to the garden.
I would say pachysandra is the easiest to grow in my garden under these conditions.
But it’s not the best ground cover to grow. That’s another discussion all together.
I am confident in saying, however, that the best ground cover would be a ground cover that is native to your area and works hard to benefit the native wildlife from the smallest of insects to the largest of mammals.
Native Bunchberry (Cornus canadensis), wild strawberry (Frafaria virginiana), wild ginger (Asarum canadense), bloodroot (Sanguinaria canadensis) or Bearberry (Arctostaphylos uva-ursi) just to name a few are “better” choices than the non-native pachysandra.

The ground cover creeping phlox spills over rocks in the front garden.
Creeping phlox is the easiest in a sunny, dry area
In another area of the front garden close to the street that gets a lot of sun, the easiest ground cover to grow is creeping phlox. It’s a real winner in my books because of the incredible flower display it puts on in early spring before it turns into a lovely carpet of almost moss-like foliage.
In the sunny area of our front garden, creeping phlox is the easiest ground cover to grow.
Is it the best ground cover to grow, though?
Maybe native ground covers like Field Pussytoes (Antennaria neglecta) would be better, or Silverweed (Argentina anserina) or even creeping juniper (Juniperus horizontalis.)
Looking for more information on ground covers? Please check out my other posts on ground covers I use in the woodland garden.
• Bunchberry perfect ground cover for woodland garden
• Three great ground covers for the woodland garden.
• Hardy Geraniums as a ground cover

Understory trees grow up through the massive grouping of ostrich ferns that form the perfect ground cover for the woodland garden.
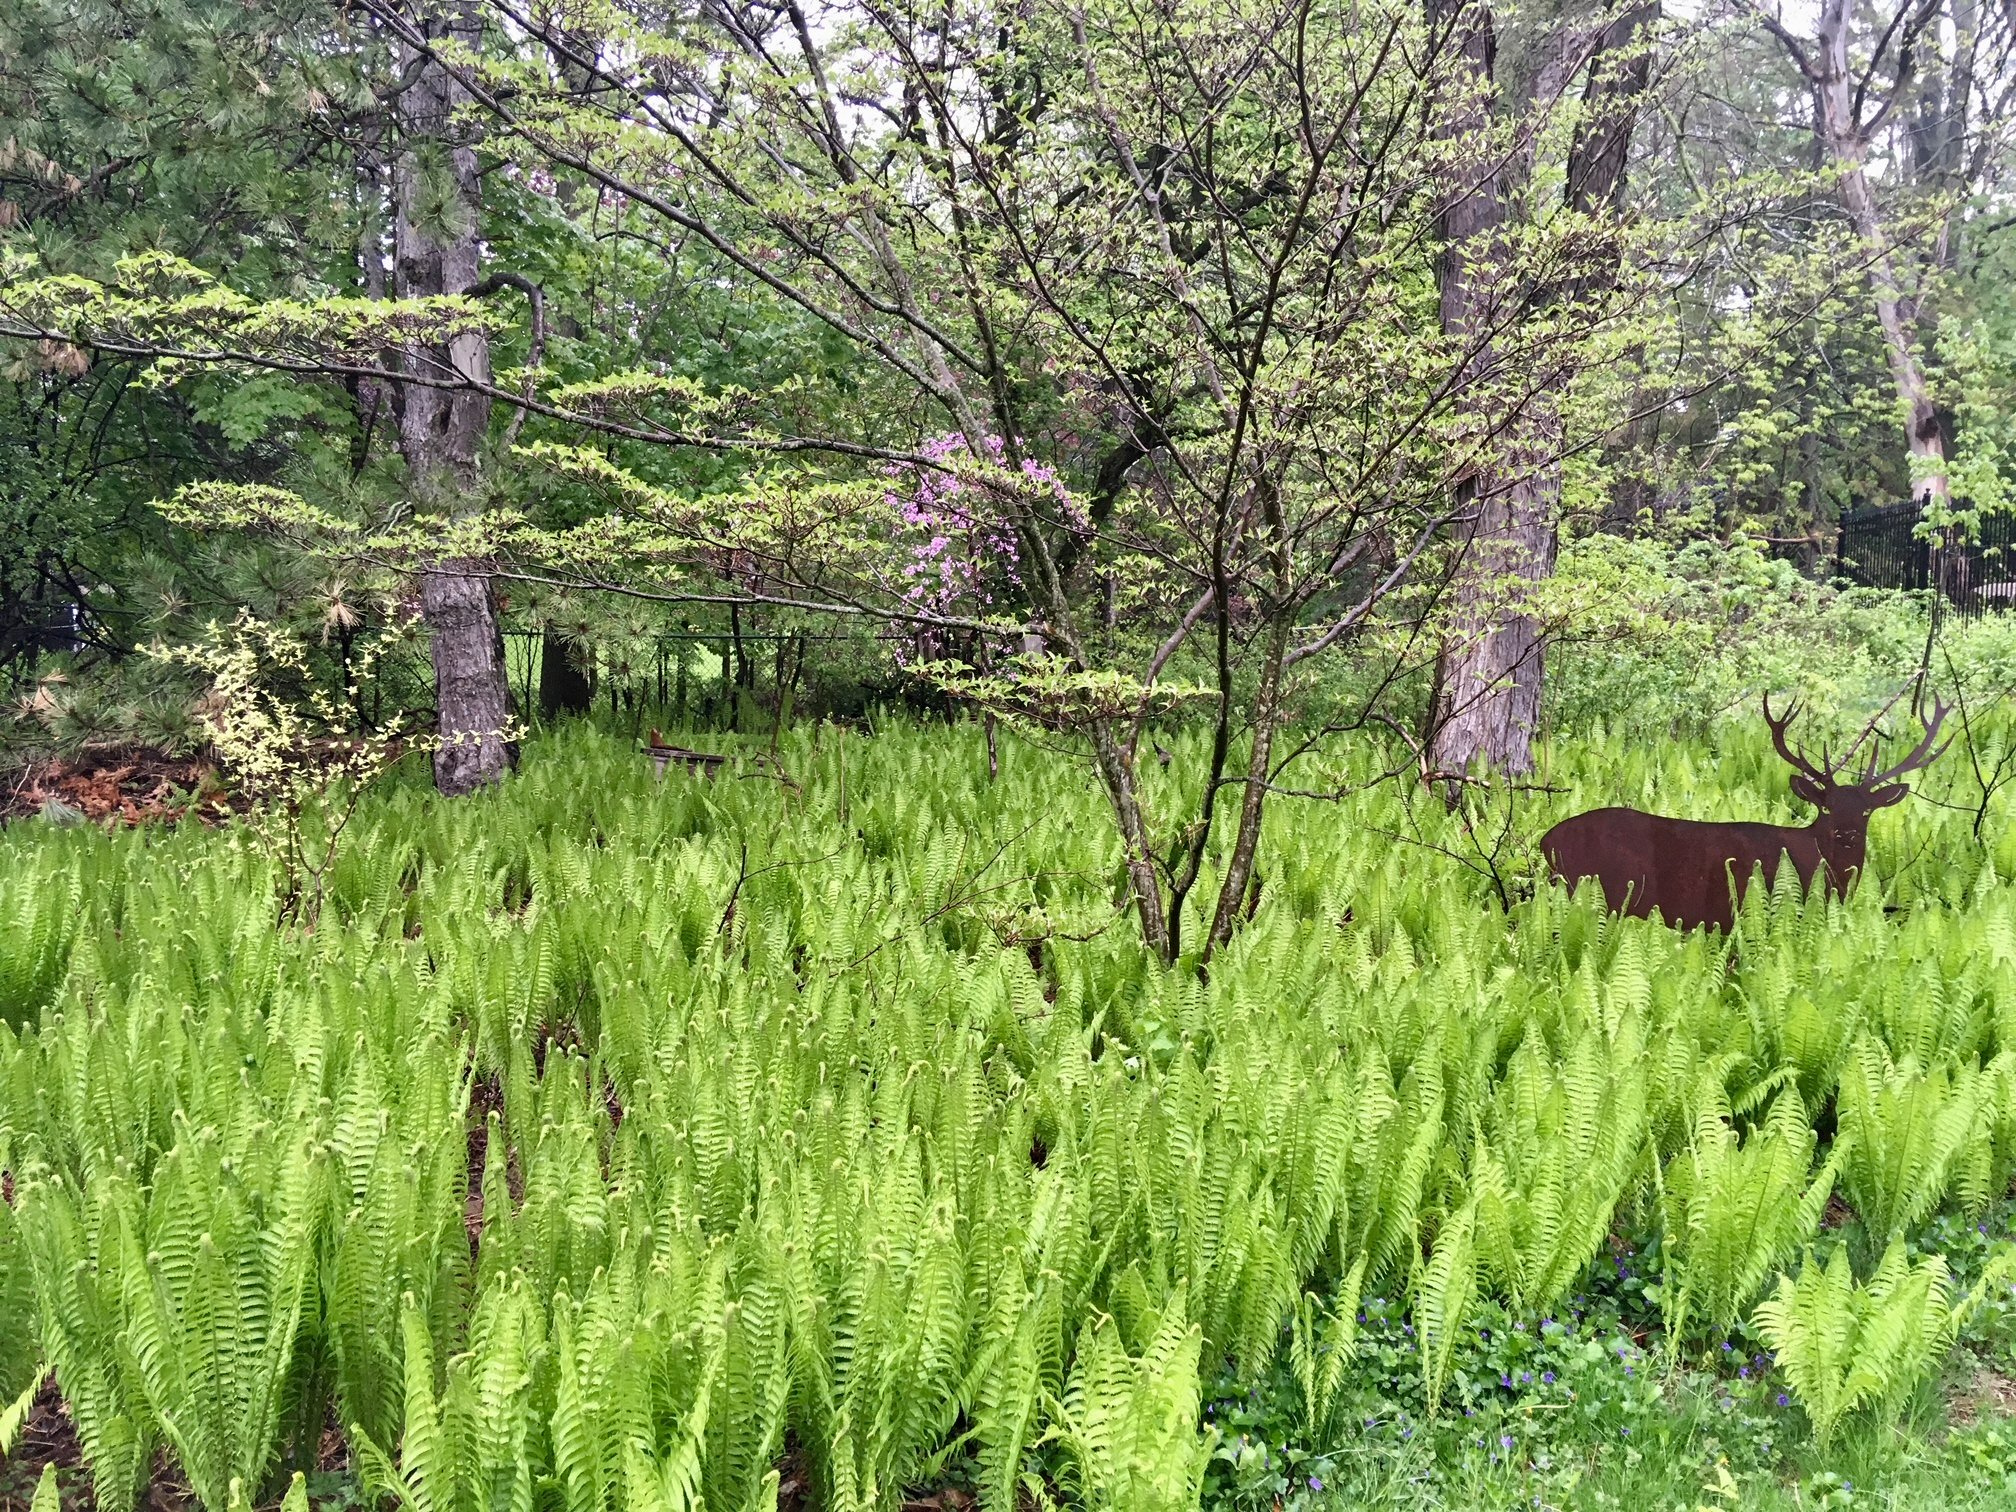
Ferns are the easiest ground cover for our shady back garden
Finally, in our backyard, under our mature locust tree is a large area that was originally a large expanse of turf grass that required weekly mowing and everything else that goes along with grass.
It gets a little more dappled sun than the front yard and the soil is more sandy and maybe not quite as good.
It gets literally no foot traffic or salt spray.
For more information on growing ferns, you may be interested in The Plant Lover’s Guide to Ferns, informative book.
One look at the massive ostrich fern (Matteuccia struthiopteris) garden that has easily out competed the grass and there is no question that ferns are the easiest ground cover for that area.
If I recall, I started with a handful of donated ostrich ferns from a coworker and those few ferns have grown and spread to hundreds maybe even thousands in number and cover a massive area with their cooling summer appearance.
For more on our massive fern garden check out the following post: Creating a fern garden in a small yard.
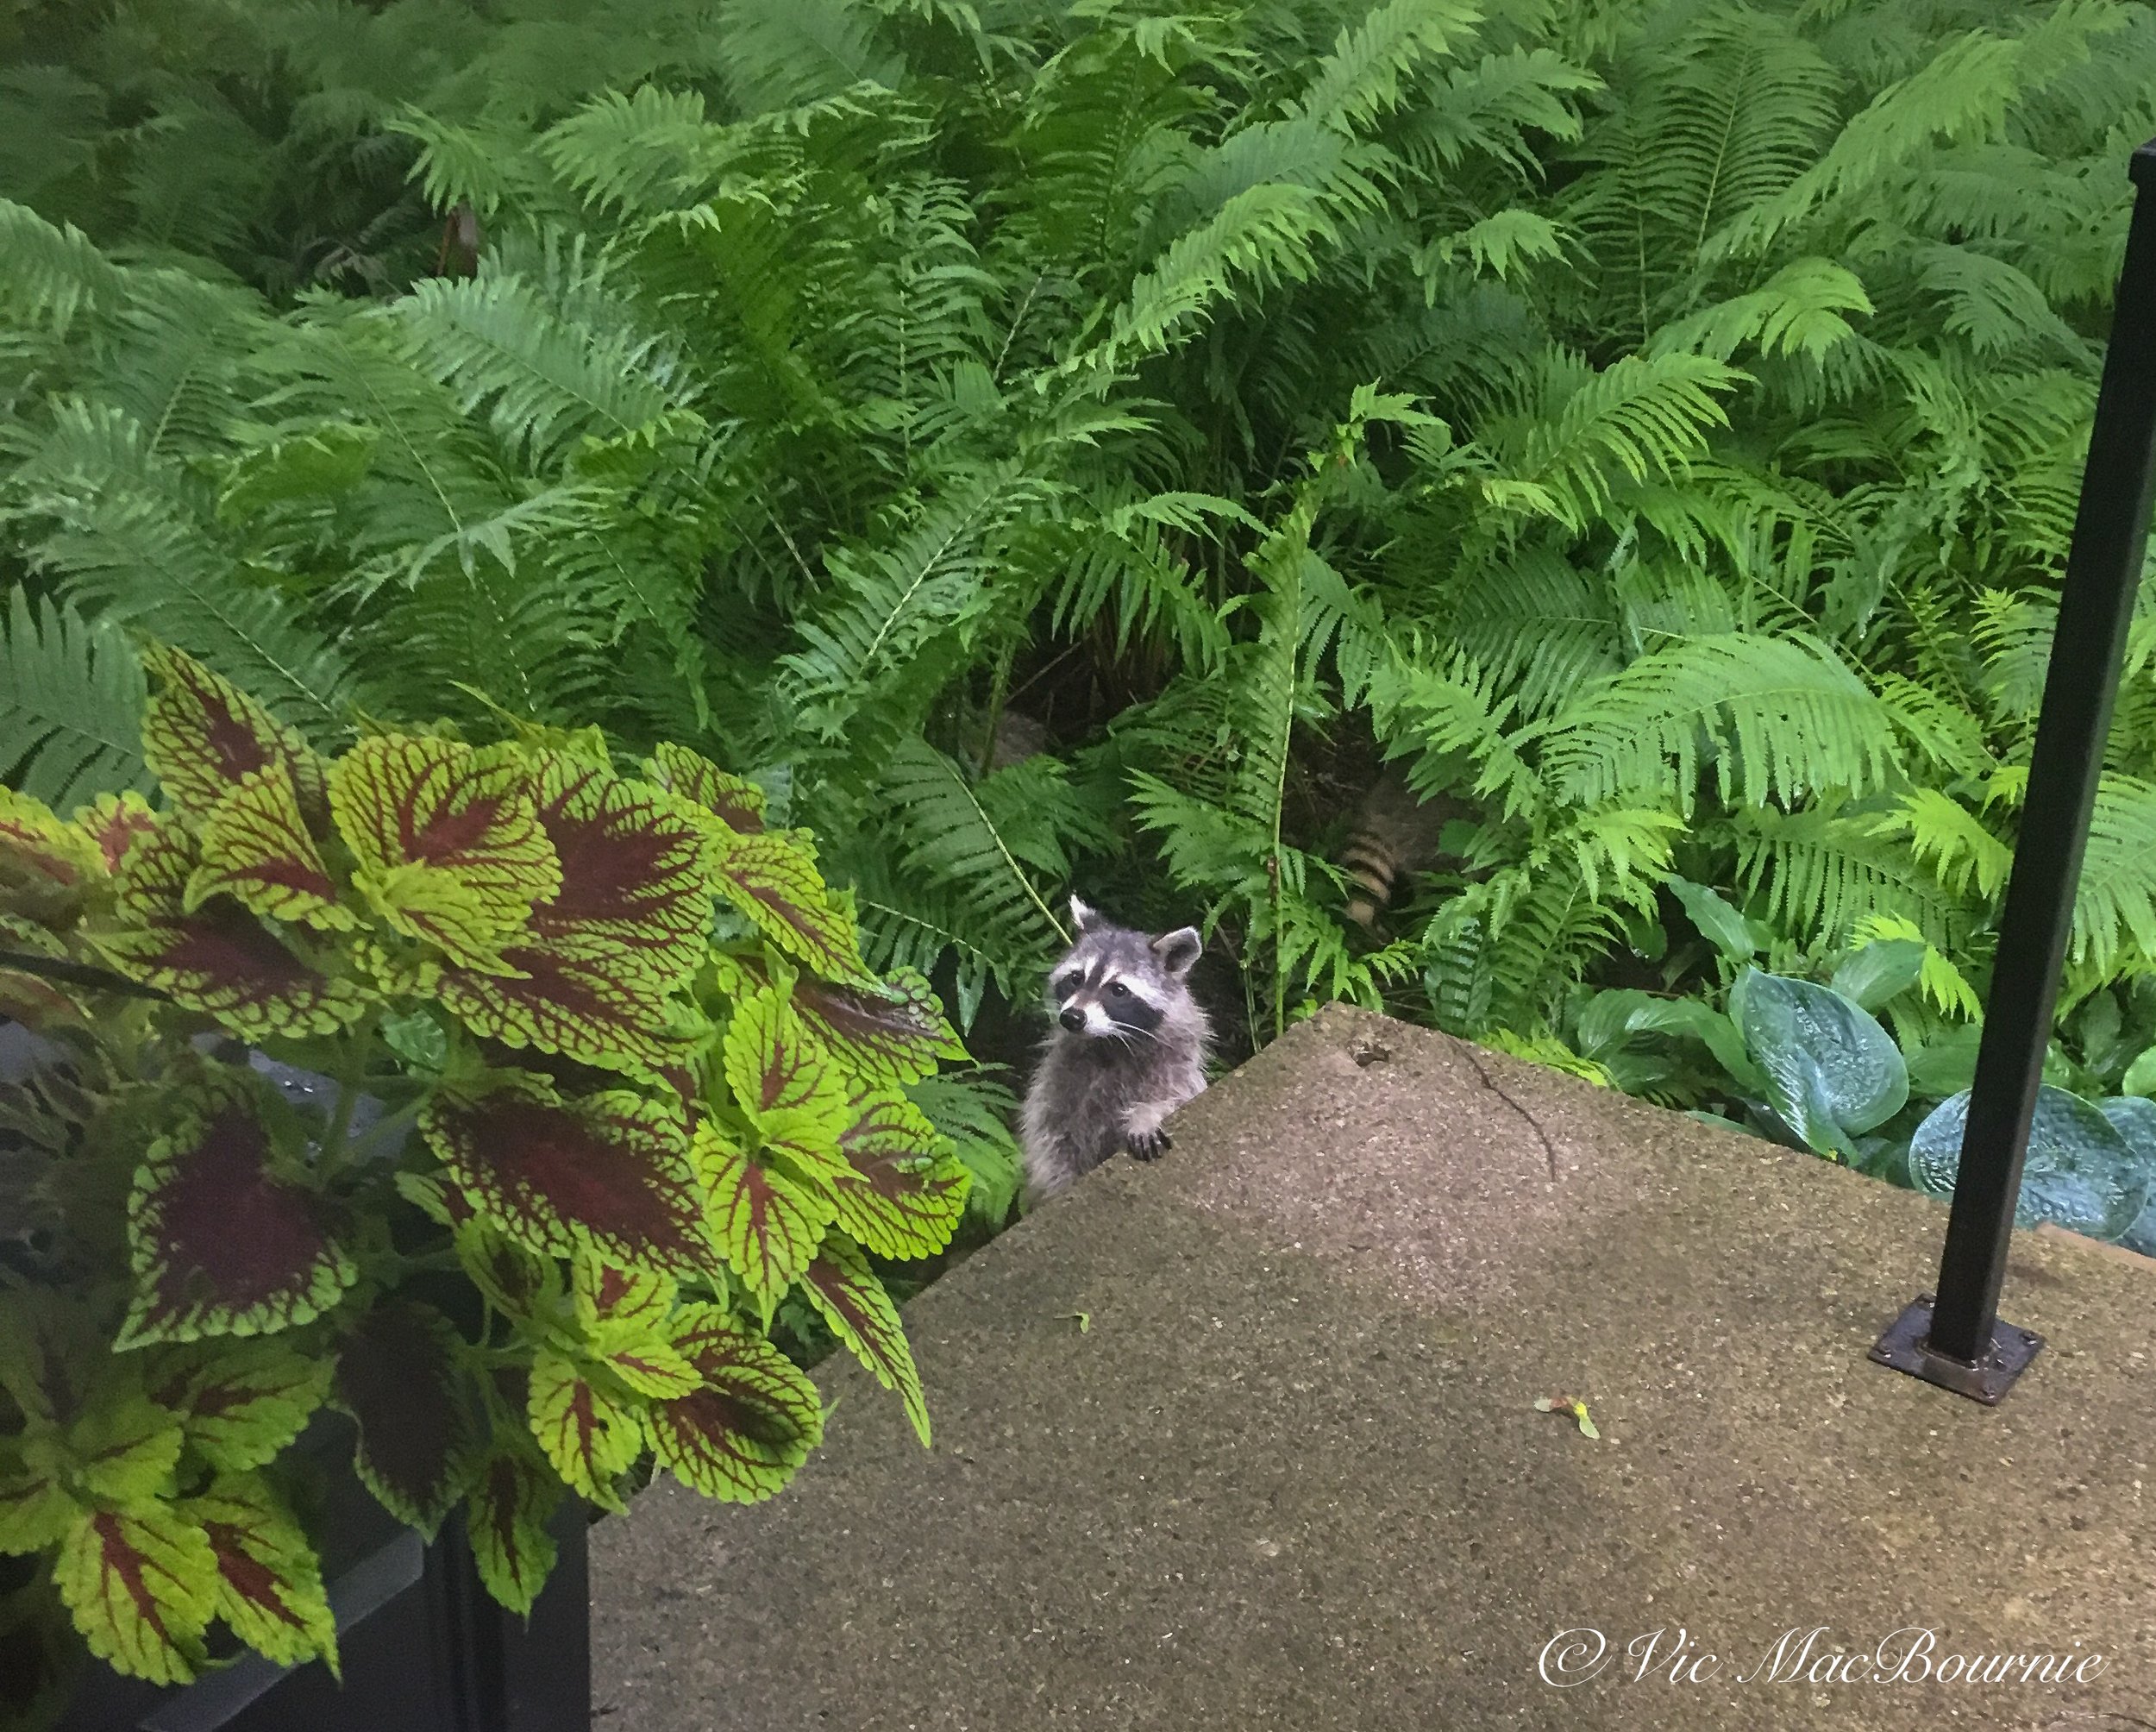
A baby raccoon uses the expanse of native ostrich ferns in a part of our front garden to move around safely under the cover of the large ferns.
If there was ever any doubt, one look as the fern glen and you’ll agree the ostrich ferns are the easiest ground cover to grow in that part of the garden.
The fact that ostrich ferns are native to our area is an additional bonus.
Again, like the other ground covers, I grow trees and shrubs up through the ferns to add texture and interest to an otherwise sea of 3-4-foot-high ferns where female deer often use the cover to hide their fawns in spring.
In this case, they are the easiest to grow and the best ground cover for that area.
But for many gardens, a huge expanse of massive ostrich ferns would be neither the easiest, nor the best ground cover choice. These ferns, when happy, spread like wildfire and would require a lot of thinning if you wanted to keep them contained to a small area.
In addition, the ferns are huge and would quickly over power a small garden.
The very traits that make them perfect for our yard, makes them the wrong choice for another yard.
Easiest ground cover depends on a number of factors
Like life, there are no simple answers to difficult problems when it comes to gardening. Trying to find the easiest ground cover for your garden may not even be the right question to ask yourself.
The better question is probably something like: What are the ground covers that suit the location, are native to my geographic area and will provide the most benefit to local wildlife.
Too often we choose the “easiest” solution that may not be the “best” solution because it is convenient at the time or we may not have taken the time to properly educate ourselves on what is truly “best” for our gardens.
Like way to many gardeners, I am certainly guilty of that. If I had to do it all again, I would change many of the decisions I made just a few years ago to replace non-native plants with native ones whenever possible.
If you are asking the question, what is the easiest ground cover to plant in my garden, please stop and ask the next question before proceeding.
And that is: what is the best native ground cover that will get the job done.

Bird feeder arms: A handy addition to any bird feeding station
Accessory bird feeder arms are excellent additions to any bird feeding station providing a variety of options from adding small specialized feeders, to orange halves for orioles and and dried grasses for nesting birds.
Perfect for holding accessory feeders, orange halves and nesting material
If you have set up your bird feeding station but still feel you need more options, a bird feeder arm might be exactly what you need.
I have two bird feeding arms that prove extremely helpful when it comes to adding small feeder accessories or additional places for feeding our feathered friends, including extra orange halves for the orioles.
Both of my feeder arms are sold as accessories for the Wild Birds Unlimited’s (WBU) Advanced Pole Yystem, but similar items are available with other systems and there is no reason you can’t add a WBU arm to an existing pole bird feeding system providing it fits on your pole.
Bird feeder arm showing the Wild Birds Unlimited’s Decorative Branch Perch being put to use with Oriole feeders and orange halves and DIY jelly containers. On the far right you can see the cylinder used to hold the natural branch bird feeder arm. At the time there was no branch being used in the holder.
Our main arm is called the Decorative Branch Perch and consists of a heavy gauge, curved, approximately three-foot steel rod with four decorative wire leaves that are perfect for holding everything from orange halves to nesting material, not to mention the ability to hang small, lightweight feeder accessories from.
Of course, the stylized branch that can be moved around the pole for best positioning, is meant primarily as a perch for birds waiting their turn at one of the feeders, but I like to put it to use whenever possible.
More tips on setting up a proper bird feeding station on my earlier post.
It is a favourite spot for mourning doves to rest and I’ve seen hummingbirds also taking a breather on the thin wire that forms the stylized leaves.
Wild Birds Unlimited describes the Decorative Branch as: “the perfect way to give your birds a little R and R between feedings. Some birds will take turns eating at a bird feeder. Typically, they will wait out of view in a nearby tree or bush. Our decorative perch allows birds to remain in sight while they wait to eat. It can also be used to hang additional lightweight feeders.”
I put it to use most in the spring to stuff last year’s ornamental grass cuttings into the open wire leaves for the songbirds to use as nesting material, as well as oranges for the Orioles. The solid perch allows the birds to sit comfortably on the heavier wire and pull out the nesting material or work the orange halves.
Most of the year it works as a perch for birds just waiting to get to the feeders.
It can also be used to hang small accessory feeders to hold fruit of even meal worms for Blue birds and the like.

This blue jay was photographed on a natural branch fixed to a bird feeding pole via an accessory bird feeding arm attachment.
Natural branch bird feeding arm is excellent addition
The other bird feeder arm I use on the pole system is really nothing but a cylinder that fits on the pole system and holds a single, mid-size tree branch.
This, of course, looks more natural and allows me to choose the type of branch to use as the arm. All that needs to be done is to find a branch with the right diameter to fit into the hole and then tighten the screw to secure the branch in place.
A chickadee sits on a natural branch fitted to an accessory on our bird feeding pole.
Although I use this primarily as a photographic tool to capture birds on an ever changing natural branch, it also comes in handy to hang small, lightweight feeders from. I can also spread bark butter (see my earlier post) on the natural branch to encourage woodpeckers, nuthatches, chickadees and other suet-loving birds to come to the branch to get their photographs taken.
The beauty of this bird feeder arm is that the branch can be easily changed to create a new look. Finding a branch with lichen already growing on it is ideal for photography. When that branch is finished, just add another.
The accessory can also be moved around the pole to put the bird in the best light or have it against a nice clean background.
I also find that backyard birds will readily go to the natural branch as a first choice for perching. The more textured surface provides them with a natural perch, and larger birds can get a better grip on the branch.
It also provides the perfect opportunity in the spring to cut a flowering branch from, say our crabapple tree or another flowering shrub, to use as a photographic perch for the songbirds.
But, even if you are not taking the birds’ photograph, the memory of a cardinal, indigo bunting or goldfinch perched on a flowering branch, is not one you’ll soon forget and the perfect welcome to spring birding season.
Other arms worth considering
There are several other bird feeder arms to consider that will work with whatever bird feeding system you are working with. Amazon, for example, lists several add-on arms that are designed to attach to a number of feeding poles. The Hang-IT multi-purpose add on arm for shepherds hook comes in several colours and is strong enough to handle full-size bird feeders. It claims to fit on any Shepherds hook and gets plenty of positive reviews from users.
There are so many different poles and arms that it’s impossible to list them all, but the yosager deck feeding station complete with bird feeding arms that resemble the Wild Birds Unlimited Decorative Branch Perch is a good choice for those who like to feed from their backyard decks.
It never hurts to get a helping hand feeding the birds
Whatever system you choose, it never hurts to get a helping hand feeding the birds. In this case it’s a helping arm, but you get the idea.
With a little ingenuity you could make your own bird feeding arms simply by attaching a sturdy branch to your pole system. A little wire and some duct tape or aheavy-duty clamp would certainly be enough to provide the birds in your yard with a safe, sturdy landing spot to wait their turn at the feeders.
Garden gift ideas you’ll love
Looking for gift ideas for the gardener in your life? Or, maybe it’s just time to reward yourself for all the work around the garden you have been doing. Let me help you find some unique gift ideas for your garden or a friend’s garden.
Gardening gifts For bird lovers, garden art collectors and just plain old gardeners
Gardeners ask for little more than sunshine, some warm weather and a little rain a few times a week.
That’s not to say we don’t like to receive gifts every once in a while, especially when they are garden or wildlife related.
Thankfully, there are a host of tools, trinkets and useful items most gardeners would be thrilled to receive.
Ferns & Feathers will strive to bring readers unique gift ideas from both large and small garden supply type outlets as well as home-made items from Canada, the United States, the United Kingdom and around the world.
I’ll try to update these items on a regular basis, so check back regularly for the latest items.
• Just a few items I’ve come across this month that may be of interest. This combination garden statue and bird bath would be perfect to tuck along a garden pathway or in a Japanese-style garden.
If you are looking for a little more colour in the garden, these stacking glass orbs will do the trick. Both the garden statuary bird bath and stacking orbs are from on-line home and garden retailer Vivaterra. If you have never checked out their on-line site, they offer a beautiful selection of higher-end home and garden items you will not easily find anywhere else.
• Gardening boots and shoes are a must, especially if you are in tick country. Muck Boot Company offers a huge range of gardening boots and shoes that will fit everyone’s needs. The women’s wide calf boot keeps both the dirt and ticks away, while the women’s stylish plaid boots are good for everyday use.
There are boots for kids as well as men in too many styles to mention.
Garret Wade, the fine American garden and woodworking store much like Lee Valley in Canada, offers high-end gardening tools and goodies like Grandpa’s Weeder, The ultimate green weeder that goes a long way in saving your back. It’s even currently on sale.
If you are looking for a real heavy duty bird feeder this giant 6-liter Bird Feeder from Garret Wade might be the perfect gift.
If you are like me, it’s getting harder to keep up with all the up-and-downs of gardening. This Portable Bench and Kneeler from Garret Wade can make a big difference. As described on the site: “Right-side up, it is a comfortable, extra-wide, portable seat. Flip it over, and it becomes a kneeler, particularly useful when you are doing gardening, yard work, or other jobs around the house, like painting baseboards. When used as a kneeler the handles offer support to make easy work of getting up from the ground. You can also take it along and be comfortable when watching fireworks or the kid’s soccer game. Use it as a camp stool or for tailgating.”

Could there be a more perfect gift for the woodland gardener than this Sherwood Fern Fairy Statuary with Bird Feeder. It’s time to Think Spring! at MyEvergreen on-line retailers for $165, regular $275. Evergreen is part of the Rakuten family of retailers. The beautiful bird feeder stands a full 2.5 feet tall and is made of durable, all-weather polystone to help give it a natural, carved wood look.
If you have never checked out the website Wind & Weather you owe it to yourself to wander over and take a look. They say they have a passion for the weather and it shows in many of the high-end weather instruments that are available at the California-based store. They also offer distinctive garden decor and artistic objects for the home. They are proud to say they “shop the globe” to provide customers with unique items.
• Still on the bird theme, another elegant addition to the garden is this polished Copper Hanging Birdbath measuring just over 12 inches in diameter. It can be purchased with a holder and chain that is made of black wrought iron. The whole thing is sure to age nicely in the garden. Although anything copper is obviously an expensive purchase, the inherent beauty of the metal and the fact it ages gracefully with the garden means it’s always a great investment. The wrought iron holder will rust and age the way wrought iron tends to do, so if this is not your style you may want to look at something different. Or, just purchase a copper bowl and use it as an on-ground water resource.
This on-ground bird bath is ideal for not only birds but other backyard critters that can’t jump or climb into a regular bird bath. A couple of these spread throughout the garden will give a hand to many wildlife species from toads, chipmunks, snakes and, of course, birds.
My post, Bringing water into the garden points out how important it is to have an on-ground water source in your garden for small mammals and reptiles as well as birds. This is an opportunity to add an on-ground feature that would make an elegant addition to any garden tucked into a low-growing ground cover, maybe thyme, moss or stone crop. We have our two on-ground water features tucked among the stone crop sedum that has grown around the water features and make them look like they have always been there.
Both bird baths are available through Amazon. A search on the Amazon site shows many hanging bird baths, some brightly coloured and at various price categories. Giving a bird lover or garden enthusiast a bird bath rather than a feeder requires them to do nothing but hang it up and add a little water every day or two.
This page contains affiliate links. If you purchase a product through one of them, I will receive a commission (at no additional cost to you) I try to only endorse products I have either used, have complete confidence in, or have experience with the manufacturer. Thank you for your support. This blog would not be possible without your continued support.

What flowers attract hummingbirds?
Hummingbirds are always a favourite in our garden. Here are tips to create hanging baskets and container planters to attract these entertaining little birds.
Create a hanging basket for hummingbirds and butterflies
What flowers are best to attract hummingbirds?
And, can we use the information on these plants to create a hanging basket or container planting specifically for hummingbirds and butterflies?
Choosing the best nectar-producing flowers is key, but there are other factors that will add to your success.
While most gardeners focus on using hanging baskets as well as containers to simply add colour and maybe experiment with different textures, creating a hanging basket or container specifically for hummingbirds and butterflies requires a slightly different approach.
A full, beautiful basket with the typical thriller, spiller and fillers combination is not the prime goal of our container or hanging basket for hummingbirds. We can work toward that goal but don’t get too carried away with trying to achieve that effect. We are not necessarily going for pretty here, our goal is to attract hummingbirds and butterflies.
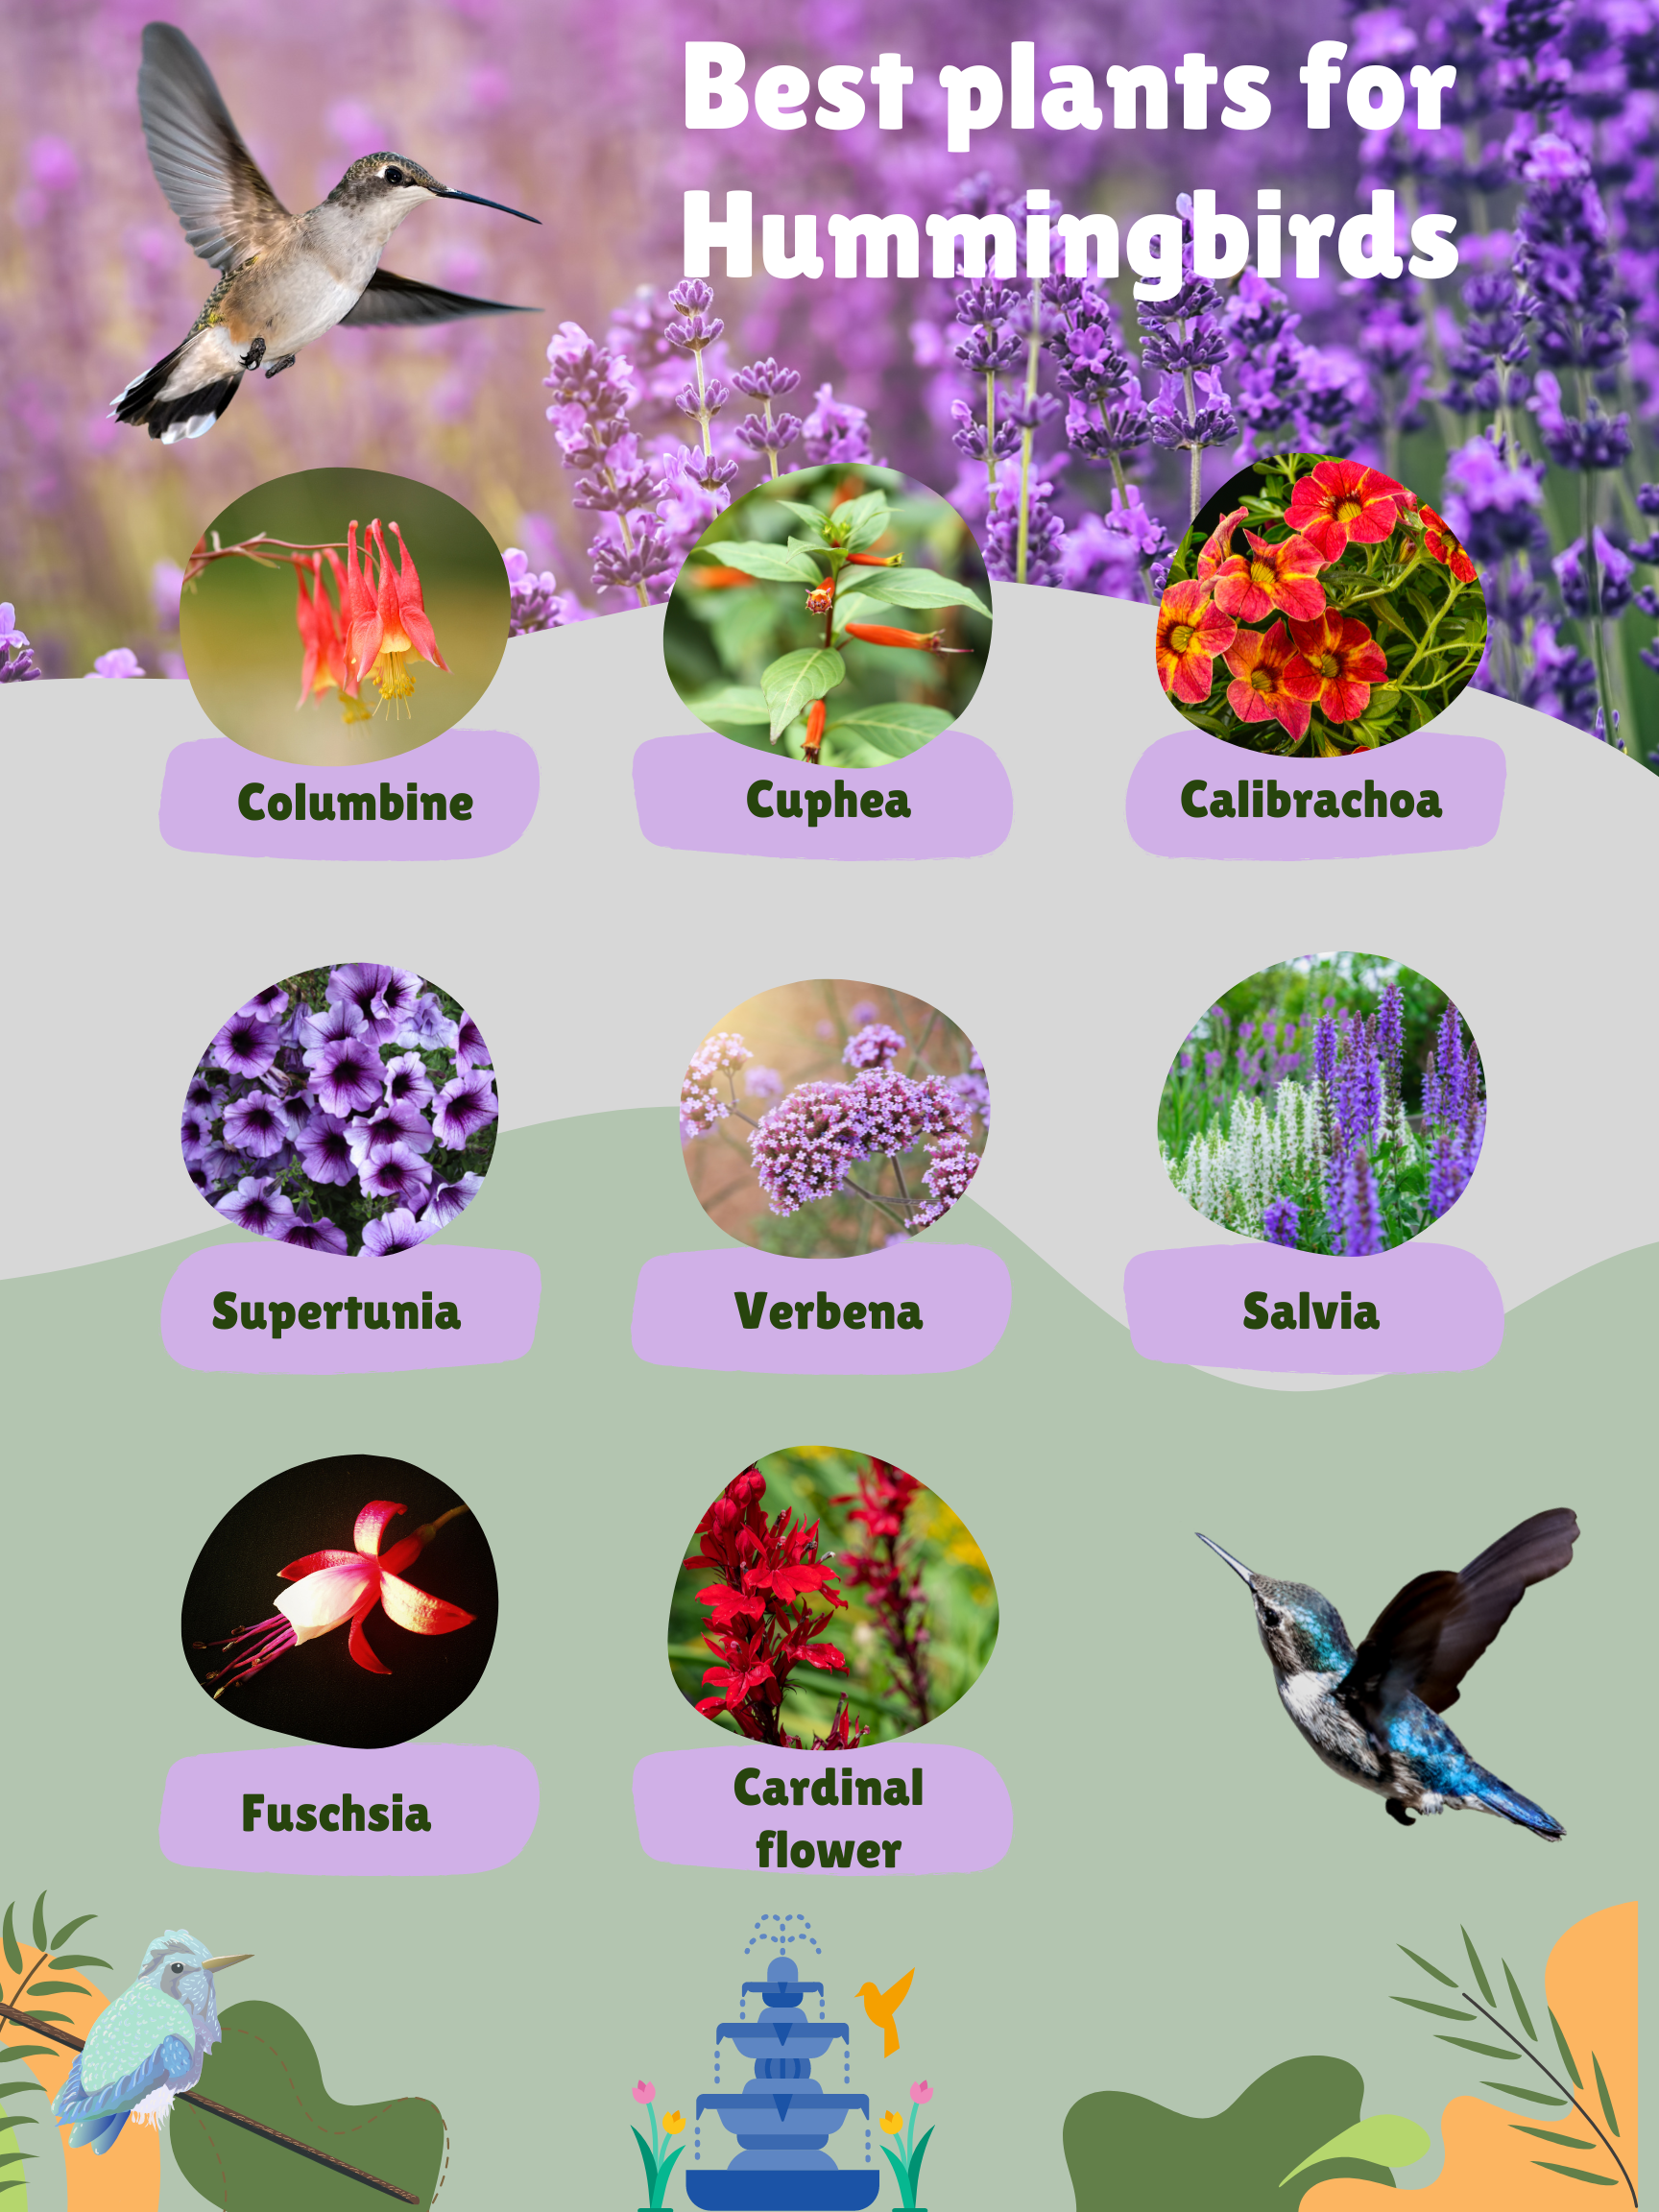
Graphic shows some of the best plants to attract hummingbirds.
First, consider red as your primary colour choice. We are going hot here with a spot of strategic, cooler blue flowers.
If you are looking for a pastel-coloured hanging basket, chances are this is not going to work for you. Hummingbirds are particularly attracted to red, tubular flowers.
Obviously we have to consider the amount of sun our basket will receive and adjust the plants accordingly. In addition, we need to use plants that require similar conditions including both the amount of light and the amount of water required.

Hummingbird on Proven Winners’ Rockin’ Deep Purple Salvia.
What hanging basket should I use for my hummingbird container?
First, let’s consider the importance of the hanging basket.
Forget those small store-bought white plastic baskets that you can purchase at any home improvement or garden centre. They can work if they happen to have some of the right hummingbird magnet plants included, but we want a hanging basket that maximizes our chances of attracting hummingbirds and butterflies while still looking good for the entire summer.
• For more Hummingbird images including digital images similar to the one below, click here.

This digital painting of a Hummingbird at cardinal flower was created from one of my photographs. For more hummingbird images including digital images, check out my post here.
Five great plants for Hummingbirds
Columbine native and hybrid forms
Cuphea or Vermillionaire
Calibrachoa
Supertunias
Verbena
A plastic container is good for holding water and maintaining a high moisture content. If you have a large one you want to use just make sure that you use enough “spillers” to quickly cover the unsightly plastic container.
Creating a beautiful, yet effective container is going to take a little work and a selection of some of the best flowers that are not usually included in the store-bought baskets.
A large wire basket with a coco mat tucked inside is an excellent starting point. Add a plastic liner that reaches 3/4 of the way up the inside of the container to hold the water and punch a couple of small holes in it, but just enough to allow the water to drain slowly.
If you want to add a little moss between the coco mat and wire frame, it will certainly enhance the look of your basket and help it hold moisture.
How many plants should we add?
For a 12- to 14-inch (diameter) basket you’ll want to have at least three to five plants, and for a 16- to 18-inch basket you’ll be adding at least five to seven plants. Don’t hesitate to add a few more to create a more full hanging basket but realize that you may have to water it more often and tidy it up later in the season.
Use a good quality potting soil in the baskets. You can add a handful of well-rotted compost to provide a little added natural nourishment. I recommend using a soil that includes slow release fertilizer and water retaining crystals in it, or be sure to add your own before you begin planting the containers up.
Plants that attract hummingbirds
Don’t be afraid to experiment with the flowers.
Consider planting up two different hanging baskets or, better still, a hanging basket and large container just for the hummingbirds.
Explore the use of native wildflowers to your area.
Hummingbirds and butterflies are already familiar with these plants and should come more readily to the baskets when they recognize the flowers in the container. Some of these native plants grow too large for planters but should work well in containers. You can also plant some of the larger ones, like Cardinal flower, below where you want to hang the baskets. By mid-summer the cardinal flowers will grow up high enough to blend in with the spillers and create a true hummingbird haven.
Remember, we are not aiming to win an award for the most beautiful containers and baskets, we are looking to create hummingbird magnets.
Complete list of plants that attract hummingbirds
Here is a list of plants that will attract hummingbirds and butterflies. Not all will be appropriate for hanging baskets but most would work in a large container.
Bee Balm (Monarda didyma) Unusual whorledd flowers in pink, red, white and red-purple. Fast spreader. Zones 4 to 10.
Catmint (Nepeta spp.) Loose mounding clumps of silvery leaves with abundant, small, lavender-blue flowers. Hardy in zones 3 to 10.
Columbines (Aquilegia spp.) Long-spurred flowers are held on bare stems above a rosette of pretty, lobed foliage. Most hardy in Zones 2 to 10.
Coral bells (Heuchera sanguinea) Rosettes of scalloped leaves bear many long-blooming stems of tiny red, pink or white blossoms. Remember red is ideal for hummingbirds. Zones 3 to 0.
Delphiniums (Delphinium) Beautiful spikes in all shades of blue, purple, and white rise above rosettes of foliage. Does best in cooler climates. Sones 3 to 10.
Hyssops (Agastache) Densely packed, narrow spikes of tiny flowers, often with fragrant foliage, are more familiar to herb gardens but beloved by hummingbirds. Zones 4 to 10.
Penstemons (Penstemon) Midheight perennials with abundant tubular flowers in blue, white and purple. Grows best in the West. They can be difficult to grow and are considered short-lived, but worthy of trying. Likes good drainage. Hardiness depends on species and varies from Zones 3 to 9.
Phlox (Phlox paniculata) Old-tiime garden favourite with often fragrant flowers in pink, red, white and lilac. Zones 3 to 9.
Pineapple sage (Salvia elegans) Large bush with fragrant foliage and late-blooming, bright red flowers. Zones 8 to 10. Can be grown as annual in cold regions.
Salvia (Salvia) Grows in Zone 8 but grown as annuals elsewhere. Has brilliant red flower. Cultivars are hummingbird magnets. Many are hardy in Zones 5 to 10, others only in the hottest Zones 9 to 10.
Annuals and tender perennials
Cleome (Cleome basslerama) Spidery whorls in pink, white and purple on 4-foot plants. Annual in all zones.
Four-o’clocks (Mirabilis jalapa) Bushy tuber forming tender perennials with flowers in red, yellow, white and pink – sometimes more than one colour on a single plant. Blooms in late afternoon. Gow as annual in most zones. Perennial in Zones 9 and 10.
Geraniums (Pelargonium x hortorum) Familiar container plants with pink, salmon, red, or white flowers. Anualls accept in Zones 9-10.
Geraniums, scented (Pelargonium) A wide asoortment of leaf shape and scent. Flowers are much less showy that common geraniums, but highly attractive to hummers. Annuals accept in Zones 9 to 10.
Impatiens (impatiens wallerana) Popular bedding annual with red, white, pink, lavender and mixed colours. Annuals in all but hottest Zones.
Nicotianas (Nicotiana) Sweet-smelling tobacco relatives with tubular blossoms. Avoid “Nikki” hybrids. Annuals accept in Zones 9 to 10.
Petunias (Petunia and hybrids) Popular annuals with sprawling plants and a variety of colourful flaring trumpet flowers. Annuals.
Tithonia (Tithonia rotundifolia) Huge, bushy but single-stemmed branching plant , to 8 feet high and 4 feet wide with a multitude of brilliant orange-red daisylike flowers in late summer. Also attracts variety of butterflies. Annual in all zone.
Thrilling possibilities with native plants
In a large container, consider using a native, red and yellow columbine as a thriller in the middle of the basket or container. Adding a good performing hybrid columbine such as this early blooming “early bird red and white columbine (Proven Winners) combined with the company’s Songbird Cardinal red and white columbine will help ensure a prolonged blooming period from early spring, when the hummers start appearing, to later in the summer.
The blue and yellow varieties will work as well and provide a little more colour to the basket. The columbines, both native and hybrids, will grow tall and form a solid thriller to attract hummingbirds.
In the fall, be sure to replant the native columbine in your garden to ensure it blooms again for future years.
Another favourite red-flowered plant to attract hummingbirds is the Cuphea Vermillionaire, (link to Proven Winners site) often referred to as the Firecracker Plant. This annual can be grown in a pot or in the ground and likes full sun. Keep it well watered and fertilized and it will send out its long cigar-like red flowers throughout the summer.
It can get quite large growing upwards to two feet high with a 12- to 24-inch spread, so it too might be best in a large container. But it can be kept in check in a larger hanging basket and used as a thriller or spiller (if planted horizontally in the basket). Keep it in check with a little pruning.
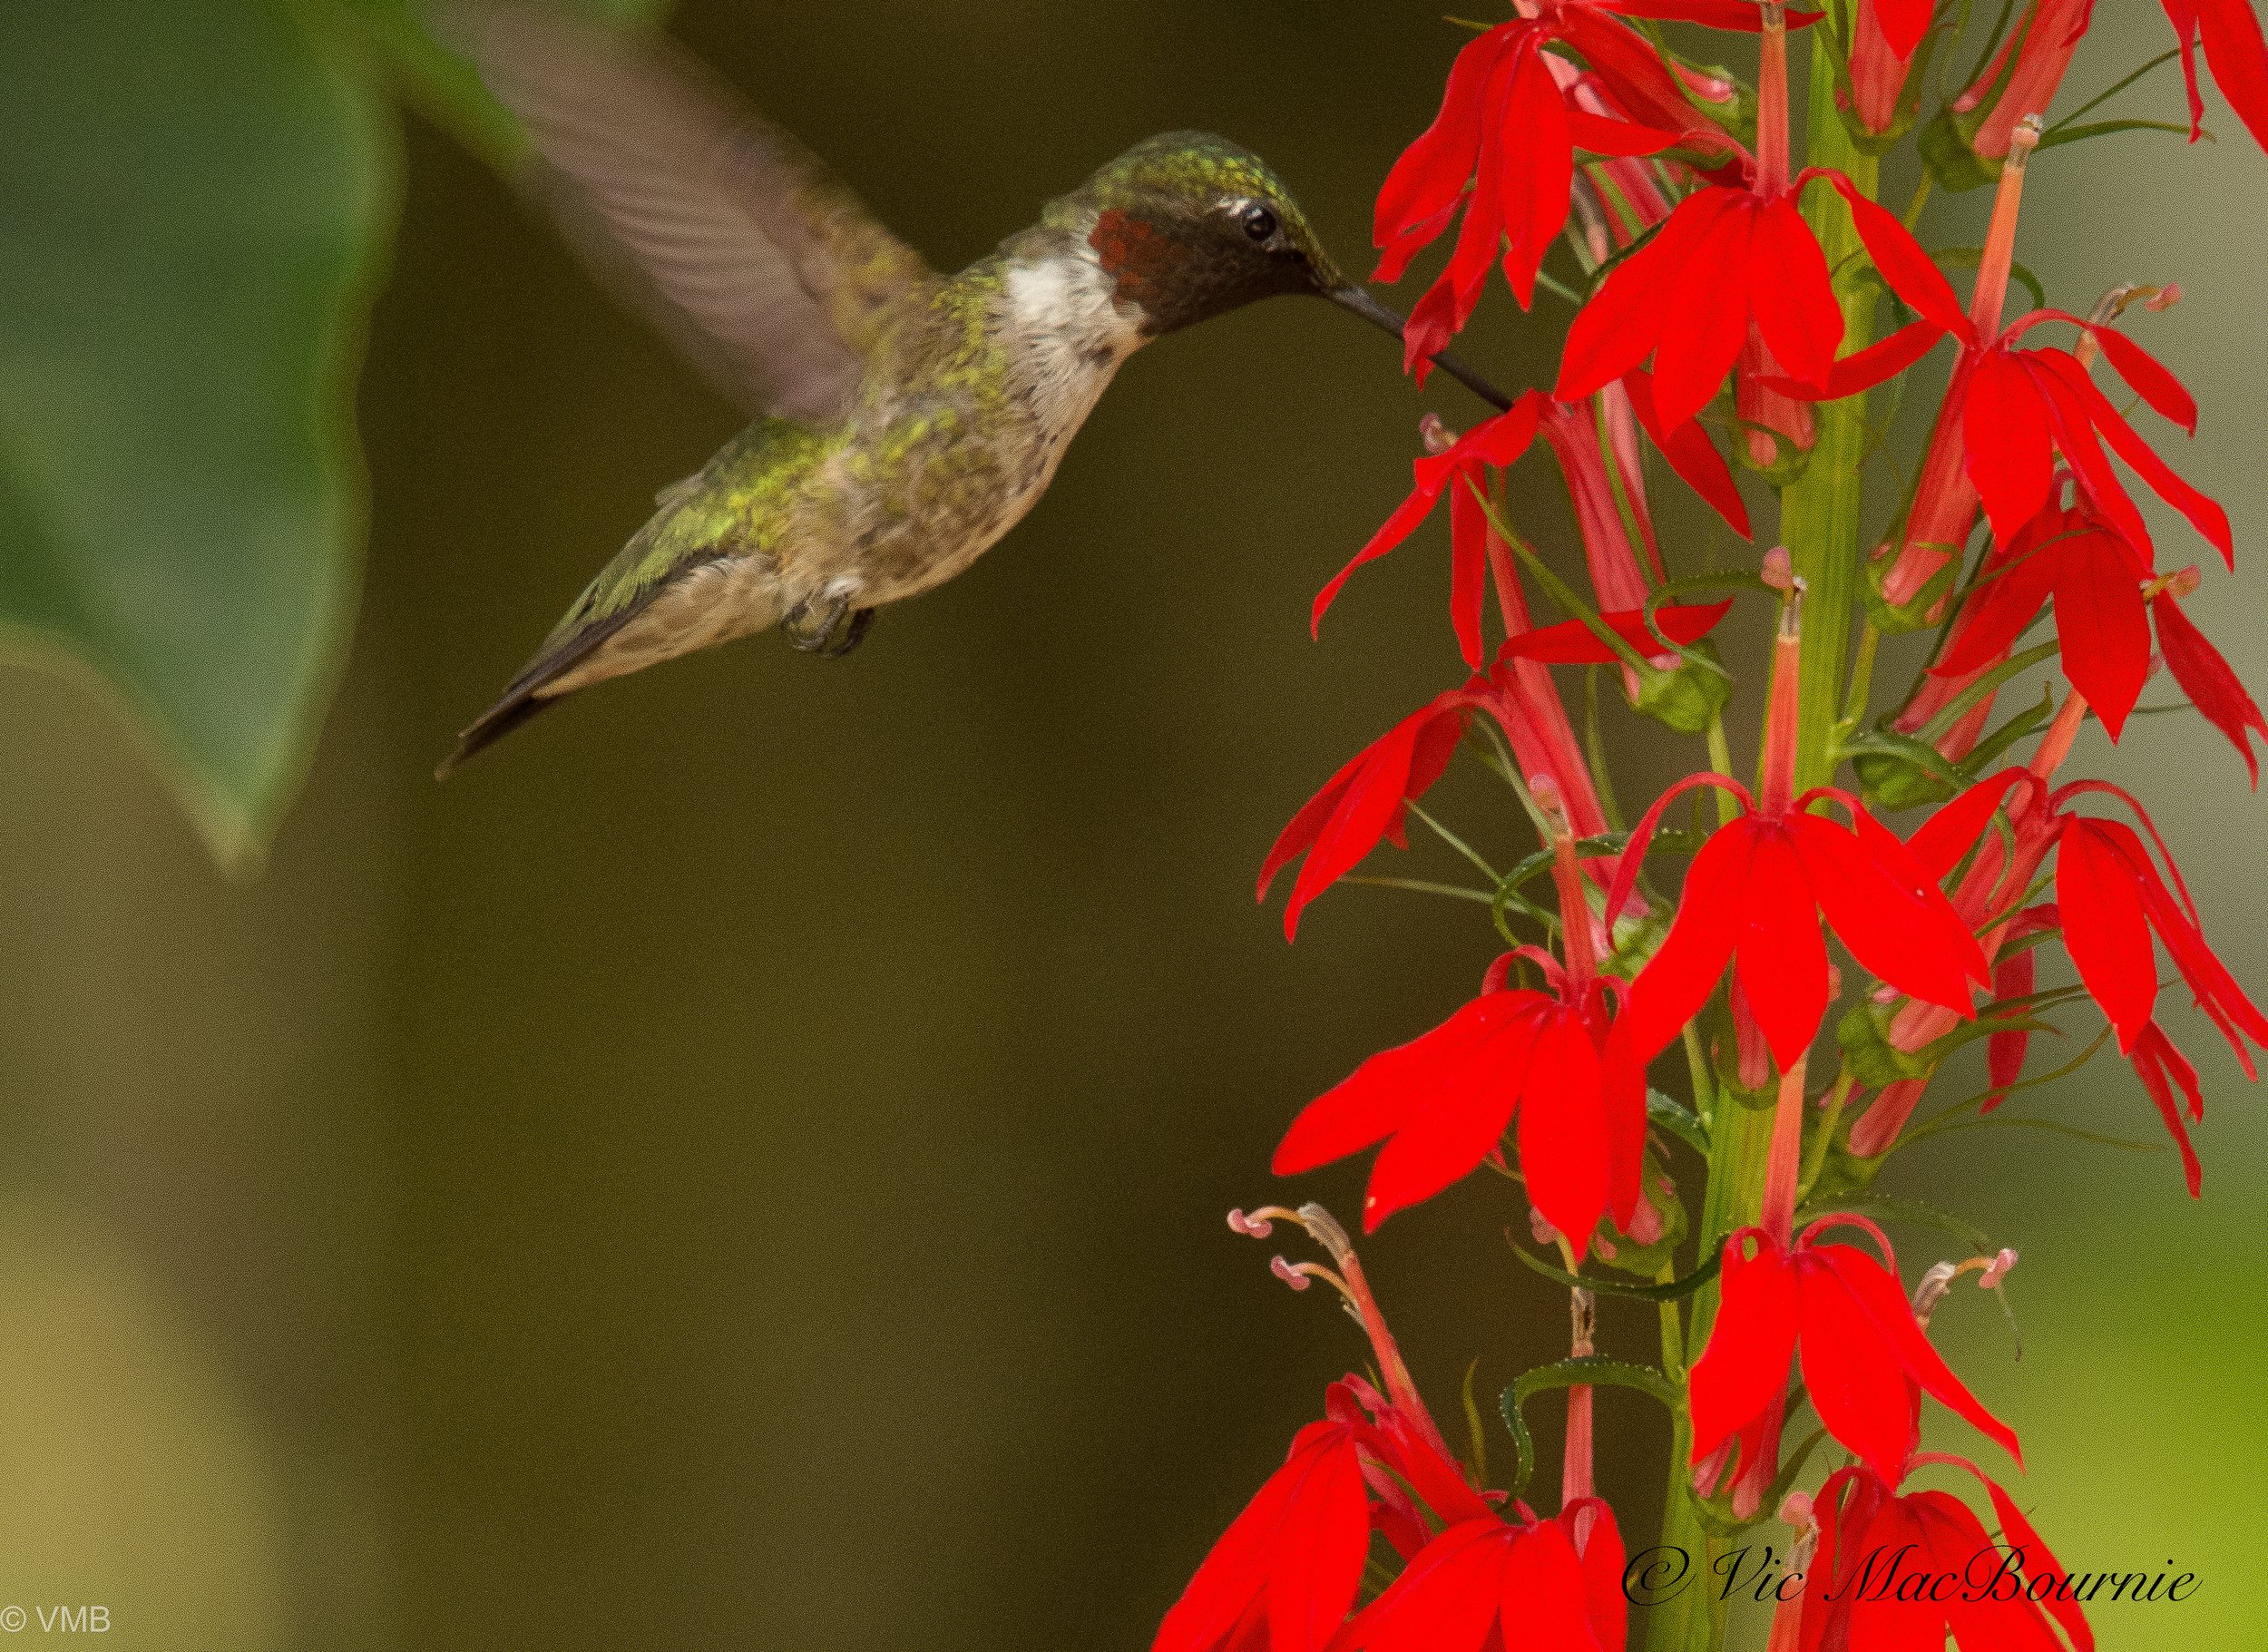
Cardinal flower is an excellent plant to attract hummingbirds but it’s too tall to use in a hanging basket. It could work in a large container as a tall thriller.
Other plants to consider for your Hummingbird hanging basket
Calibrachoa (Proven Winners) is an outstanding performer in a container or hanging basket. Proven Winners calls them “Superbells” and they offer several pages on their website. (see link) This annual likes sun to part sun and is often used all by itself in store-bought hanging baskets. It can look very impressive in the basket by itself but, remember, pretty is not the end goal here. They are available in a wide range of colours from hot reds and fuschias to cool blues and purples as well as combinations of yellow/pink, peach/purple… Stay away from double varieties and lean to the hot colours for best results.
Supertunias are Proven Winners’ improved version of the petunia and are available in a host of sizes colours and combinations. I have used the vista series for several years. Bubblegum is a pink variety that blooms continuously all summer and fills the basket quickly. Bordeaux is a smaller version (purple and white) that works nicely in hanging baskets and containers.
Verbena is another excellent choice to and a good one to use as a thriller. Varieties such as Meteor showers have a more compact growth habit for use in containers and baskets.
Salvias are top performers when it comes to attracting butterflies, hummingbirds and bees. I can personally attest to the effectiveness of Rockin’ Deep Purple in container plantings after using it last year and getting non-stop action.
Fuschsia, whether the regular hardy varieties seen in most nurseries or Cape Fuchsia with its more tubular flowers resembling Cupheas, are excellent choices for spillers in your baskets or containers. They do well in filtered light and are intollerant of high heat. Keep them well watered and out of full sun and they will perform admireably.
Native Lobelia (siphilitica) is another great addition to the garden and irresistible to hummingbirds and butterflies. This native hardy perennial would need to be planted out in the garden in fall to enjoy year after year.
Native lobelias would best be used as thrillers on account of how tall they grow. Their bright blue flowers will bloom in late summer and the plants are well-known for their ease of care and versatility. Unlike many of the annual lobelias commonly used in baskets as fillers, these lobelias can grow much larger – up to 4 feet. This is another plant I grew last year in our garden. Although it stayed around 2-feet high it can get quite large for a small basket. A large container might be a better solution, but it may work as a thriller in a large basket.
Add these accessories for even greater success
If you have not had much success attracting hummingbirds or a lot of butterflies, you might need a little help beyond the hanging baskets and containers.
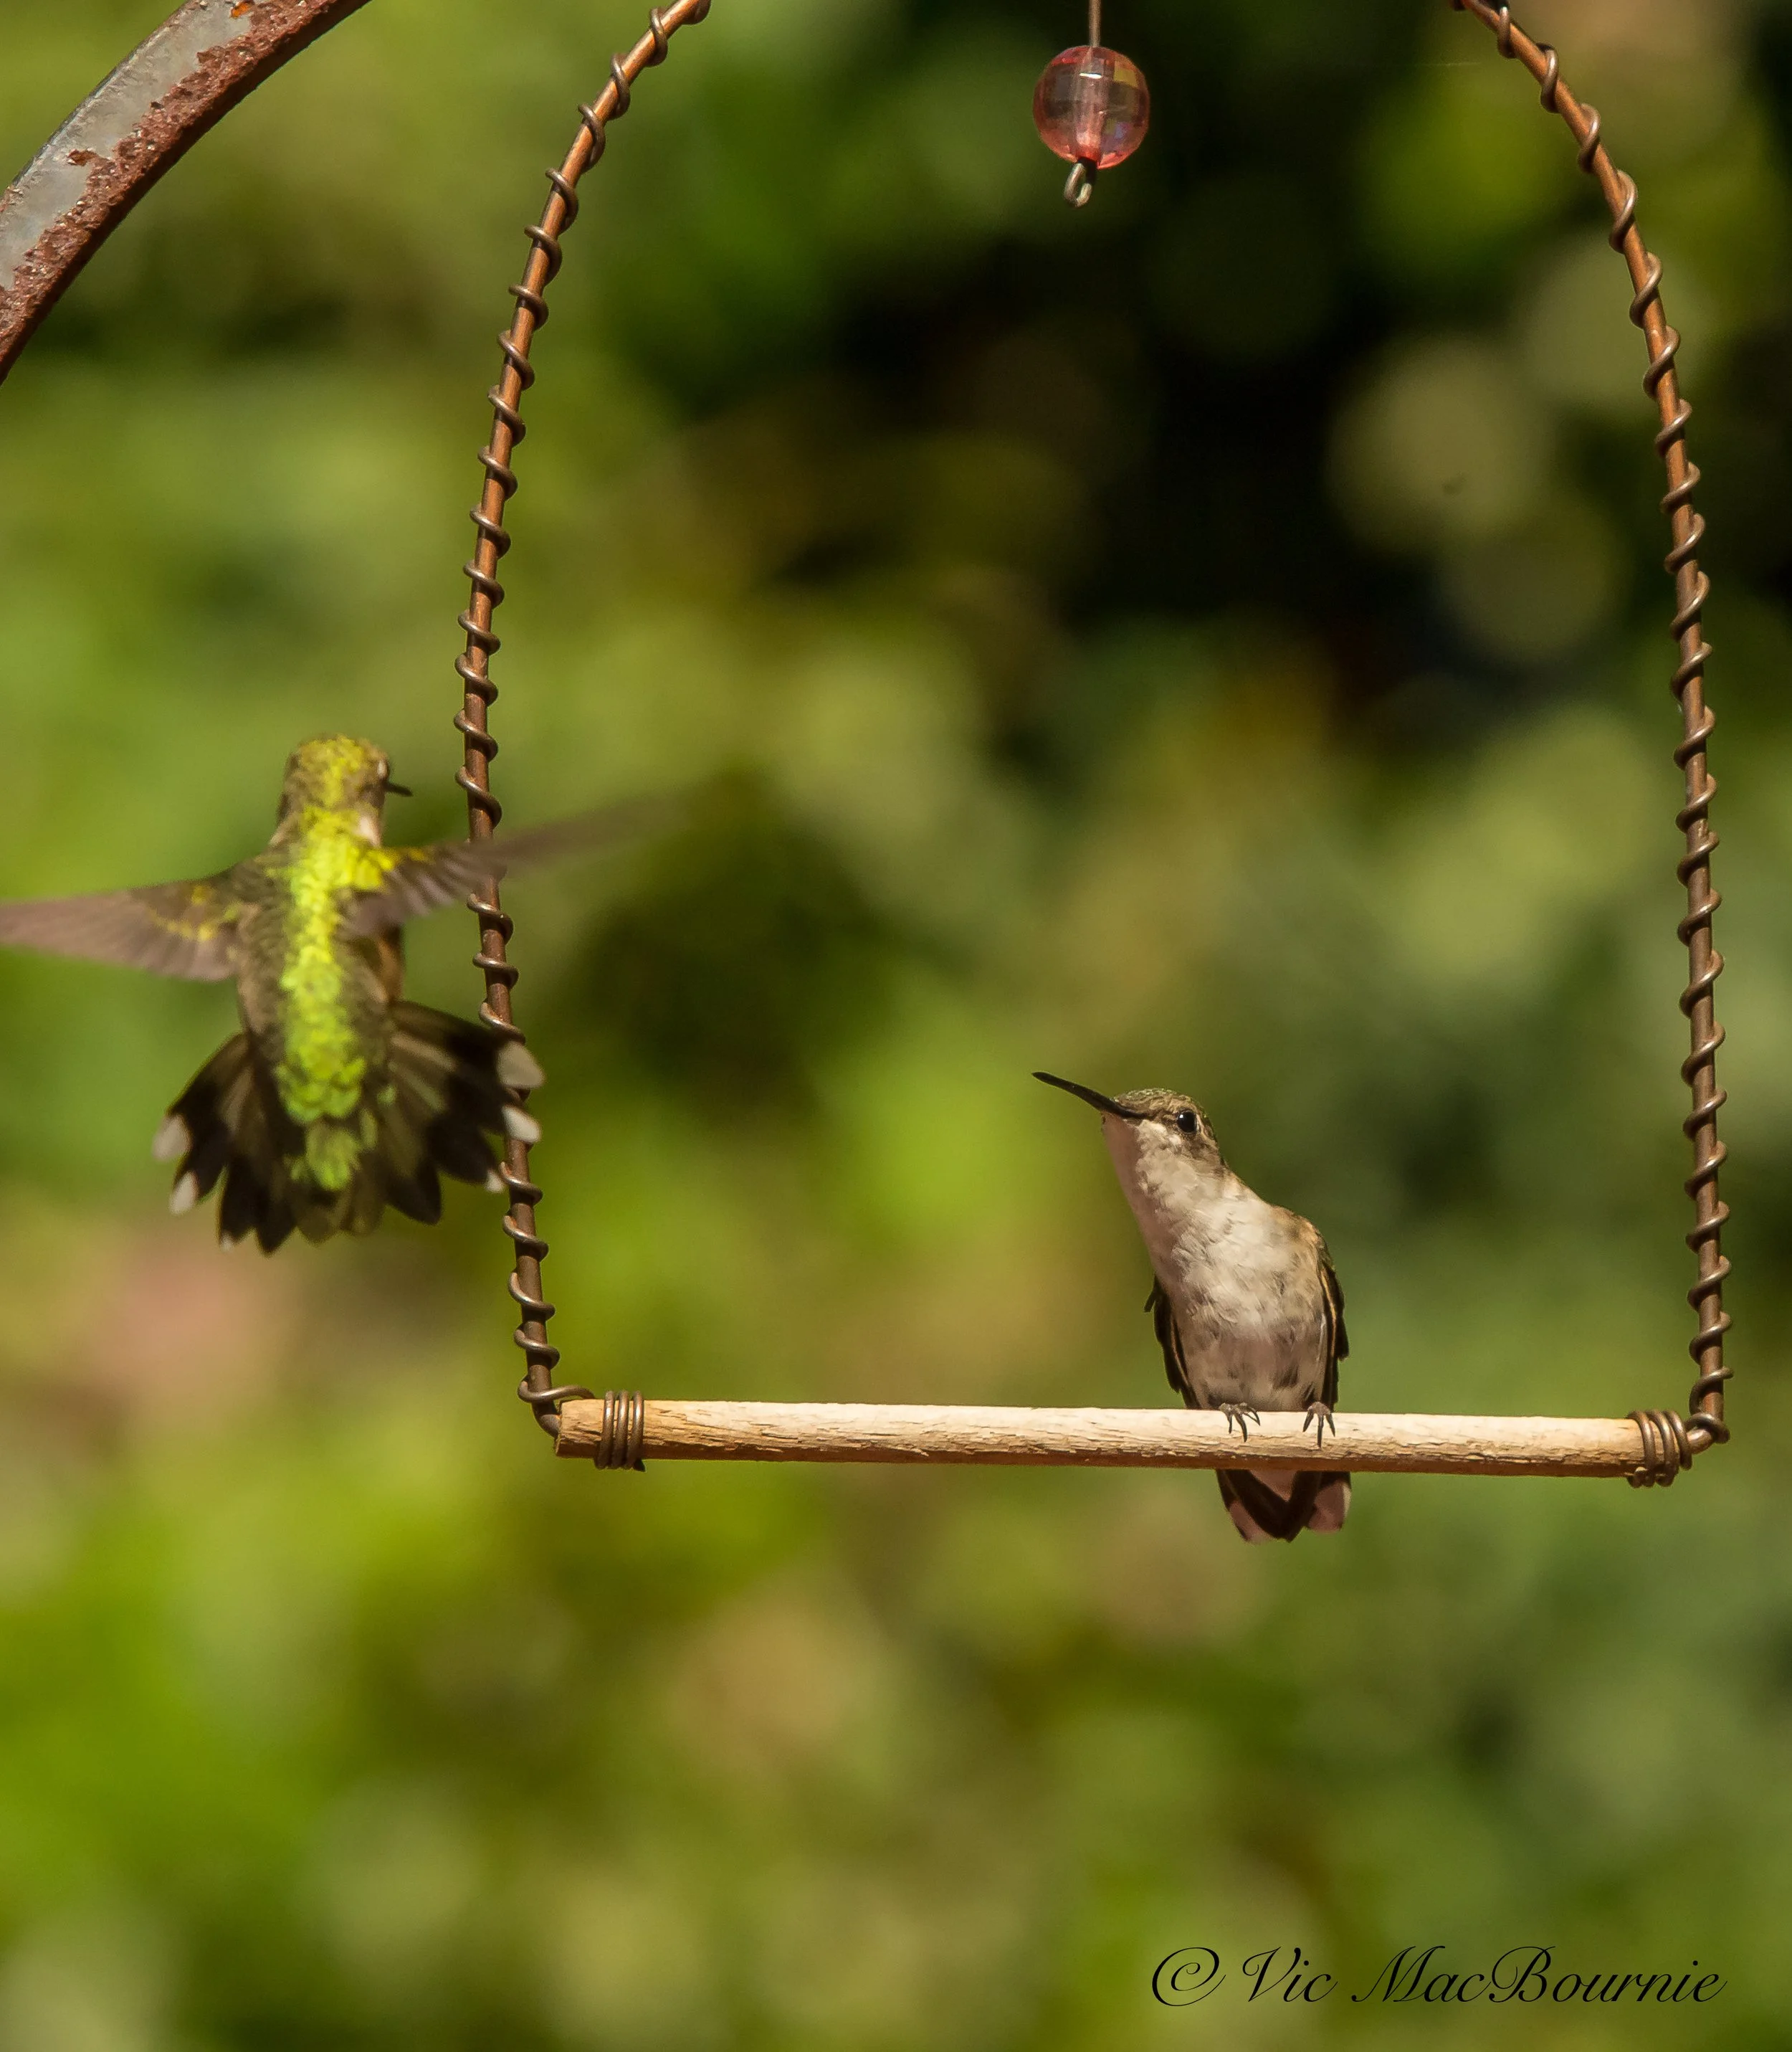
Hummingbirds fight for position over a perch that is located right beside a hanging planter in our garden.
Consider adding a perch or swing for your hummingbirds
Try hanging a small commercially available hummingbird perch or swing near the hanging basket/container. In fact, two perches is probably even better and will give the hummingbirds options to rest. Try placing one in the open and another tucked away in a nearby tree or shrub.
Go here for my complete story on using hummingbird swings.
I have used a swing for a number of years and once the hummers discover them, the perches quickly become a favourite spot for them to watch over their favourite feeding area.
Add a small hummingbird feeder
Small tubular hummingbird feeders are available with a wire stick that allows you to add them to your hanging planters and containers. These smaller versions of the larger hanging feeders can be tucked away in the planters where they almost become invisible to all but the hummingbirds who zero in on them.
A mister or shallow fountain will give them another reason to hang out
Hummingbirds, like all birds and wildlife, enjoy bathing but they need shallow water or, even better, a light mist to feel safe. Misters and shallow fountains are available at birding stores, Amazon and other commercial locations. You can also make your own with a shallow dish and a small solar pump with a fountain attachment.
Be sure to keep the water clean for these little guys and they will reward you with their antics all summer.
Native plants in the Pacific Northwest
Gardening with Native Plants of the Pacific Northwest should be a garden bible for anyone lucky enough to call this area home.
How to best use native plants in your garden
The native plants of Vancouver Island and the surrounding areas in the Pacific Northwest forever changed the way I see gardening today.
Two visits to the island and the mainland way back in the 1980s opened my eyes to the beauty of a truly natural landscape, and it was that lush landscape that has burned itself in my memory of what a garden should strive to attain.
Unfortunately, we gardeners in the northeast can only dream of the lush gardens possible in the Pacific Northwest. This thing called winter gets in the way of our dreams of lush, year-round gardens full of unusual native plants that attract four –count them four – species of hummingbirds: Anna’s, Black-chinned, Calliope, and Rufous. Of the four species, Anna’s Hummingbird is the only one found year round in the Puget Sound region of western Washington.

This outstanding edition of Gardening with Native Plants of the Pacific Northwest should be a bible for anyone lucky enough to garden in this region.
Four species of hummingbird is reason enough to want to call the Pacific Northwest home. But there’s so much more, not the least the abundance of native plants gardeners have access to in the creation of their gardens.
This is where the Gardening with Native Plants of the Pacific Northwest (Third Edition) comes into play.
Gardening with Native Plants of the Pacific Northwest’s more than 370 pages of pure native plant gold is a treasure trove of information, inspiration and motivation for any gardener lucky enough to call this area home. Packed with 948 full-colour images showing the native plants – many in their habitats – as well as in the garden, authors Arthur R. Kruckeberg and Linda Chalker-Scott deliver in almost every way.
Even the introduction answers many of the questions most gardeners new to native plants want answered.
“The key to garden success (using natives) is the compatibility of a plant to its place in the garden,” they write. “This means that natives can easily coexist with exotics in the garden as long as the requirements of the plant – and the desires of the creator of the plantings – are met.”
A garden entirely made up of native plants may be most appropriate in a woodland or semi-wild setting in suburbia, in rural areas, or at the vacation cabin by the sea or in the mountains. And there is often good reason to emphasize natives in such places,” they write, before going on to show examples of dunes in Oregon, a subalpine meadow on Mount Rainier, a seashore at Cape Flattery, in Washington state.
“Planting salal, oceanspray, madrone, and huckleberry in a westside scene that contains Douglas fir can restore the beauty of a natural woodland setting. Once established, the native garden becomes a nearly self-sustaining, low maintenance setting.”

Gardening with Native Plants of the Pacific Northwest is an excellent resource for any gardener lucky enough to garden in this area.
The book is published by the outstanding, garden-focused Canadian publishers Greystone Books. Visit their website at Greystonebooks.com for a complete selection of their books, including some of the most highly sought after gardening books.
Other Ferns & Feathers’ posts based from Greystone books include: The Hidden Life of Trees, The Heartbeat of Trees, The Hidden Kingdom of Fungi, Seed to Dust.
The book can often be purchased on the used market at Alibris Books on-line sellers. In this link there is a copy of the book for less than $4.00.
Still in the introduction to their book Gardening with Native Plants of the Pacific Northwest, the authors use Herbert Durand’s suggestions in his book Taming the Wildlings, to help readers understand where they can use natives. The result is, of course, almost anywhere but here’s the suggested list:
The small home garden: Perfect for defining boundaries, in borders and groups of shrubs. These natives need to be chosen with special care; matters of scale, quality of colour and texture, and habitat preference are particularly important in the small garden.
Suburban and rural places: Natives can restore “the original charm of neglected woodlands and develop the latent beauty of any forested area.”
The seashore, woodland, or mountain retreat: Natives are ideal for use in lands surrounding vacation homes in areas that were once wild. “The very purpose of a house in the wilds cries out for wildings.”
Parks, open spaces, and Estates: The authors call on more native plants in public gardens and large private estates as well as small parks.
Wildlife sanctuaries: Native plants have long been known to have a close relationship with wildlife and are vital for their future existence. “Plants from the surrounding wils for use in the re-created wildlife sanctuary should emphasize the attributes of shelter, nesting sites, and food. Most native trees and shrubs qualify without question; even though some might not have edible fruit or seed, they surely harbor insects and the like.”
Highway platings: the authors point out the success that has already been achieved with native plantings along highways and call out for more experimentation with different plants, trees and shrubs as well as a focus on rest areas that can be “best reclaimed by planting natives.”
Commercial, Industrial, and public sites: natives can be used not only to reclaim some of these areas but to screen their unsitely views.
Ecological restoration with natives: the authors point out that “Today, land management agencies and private landowners alike have turned ecological restoration into a thriving pursuit.” More ecological restoration using natives is needed in the future.
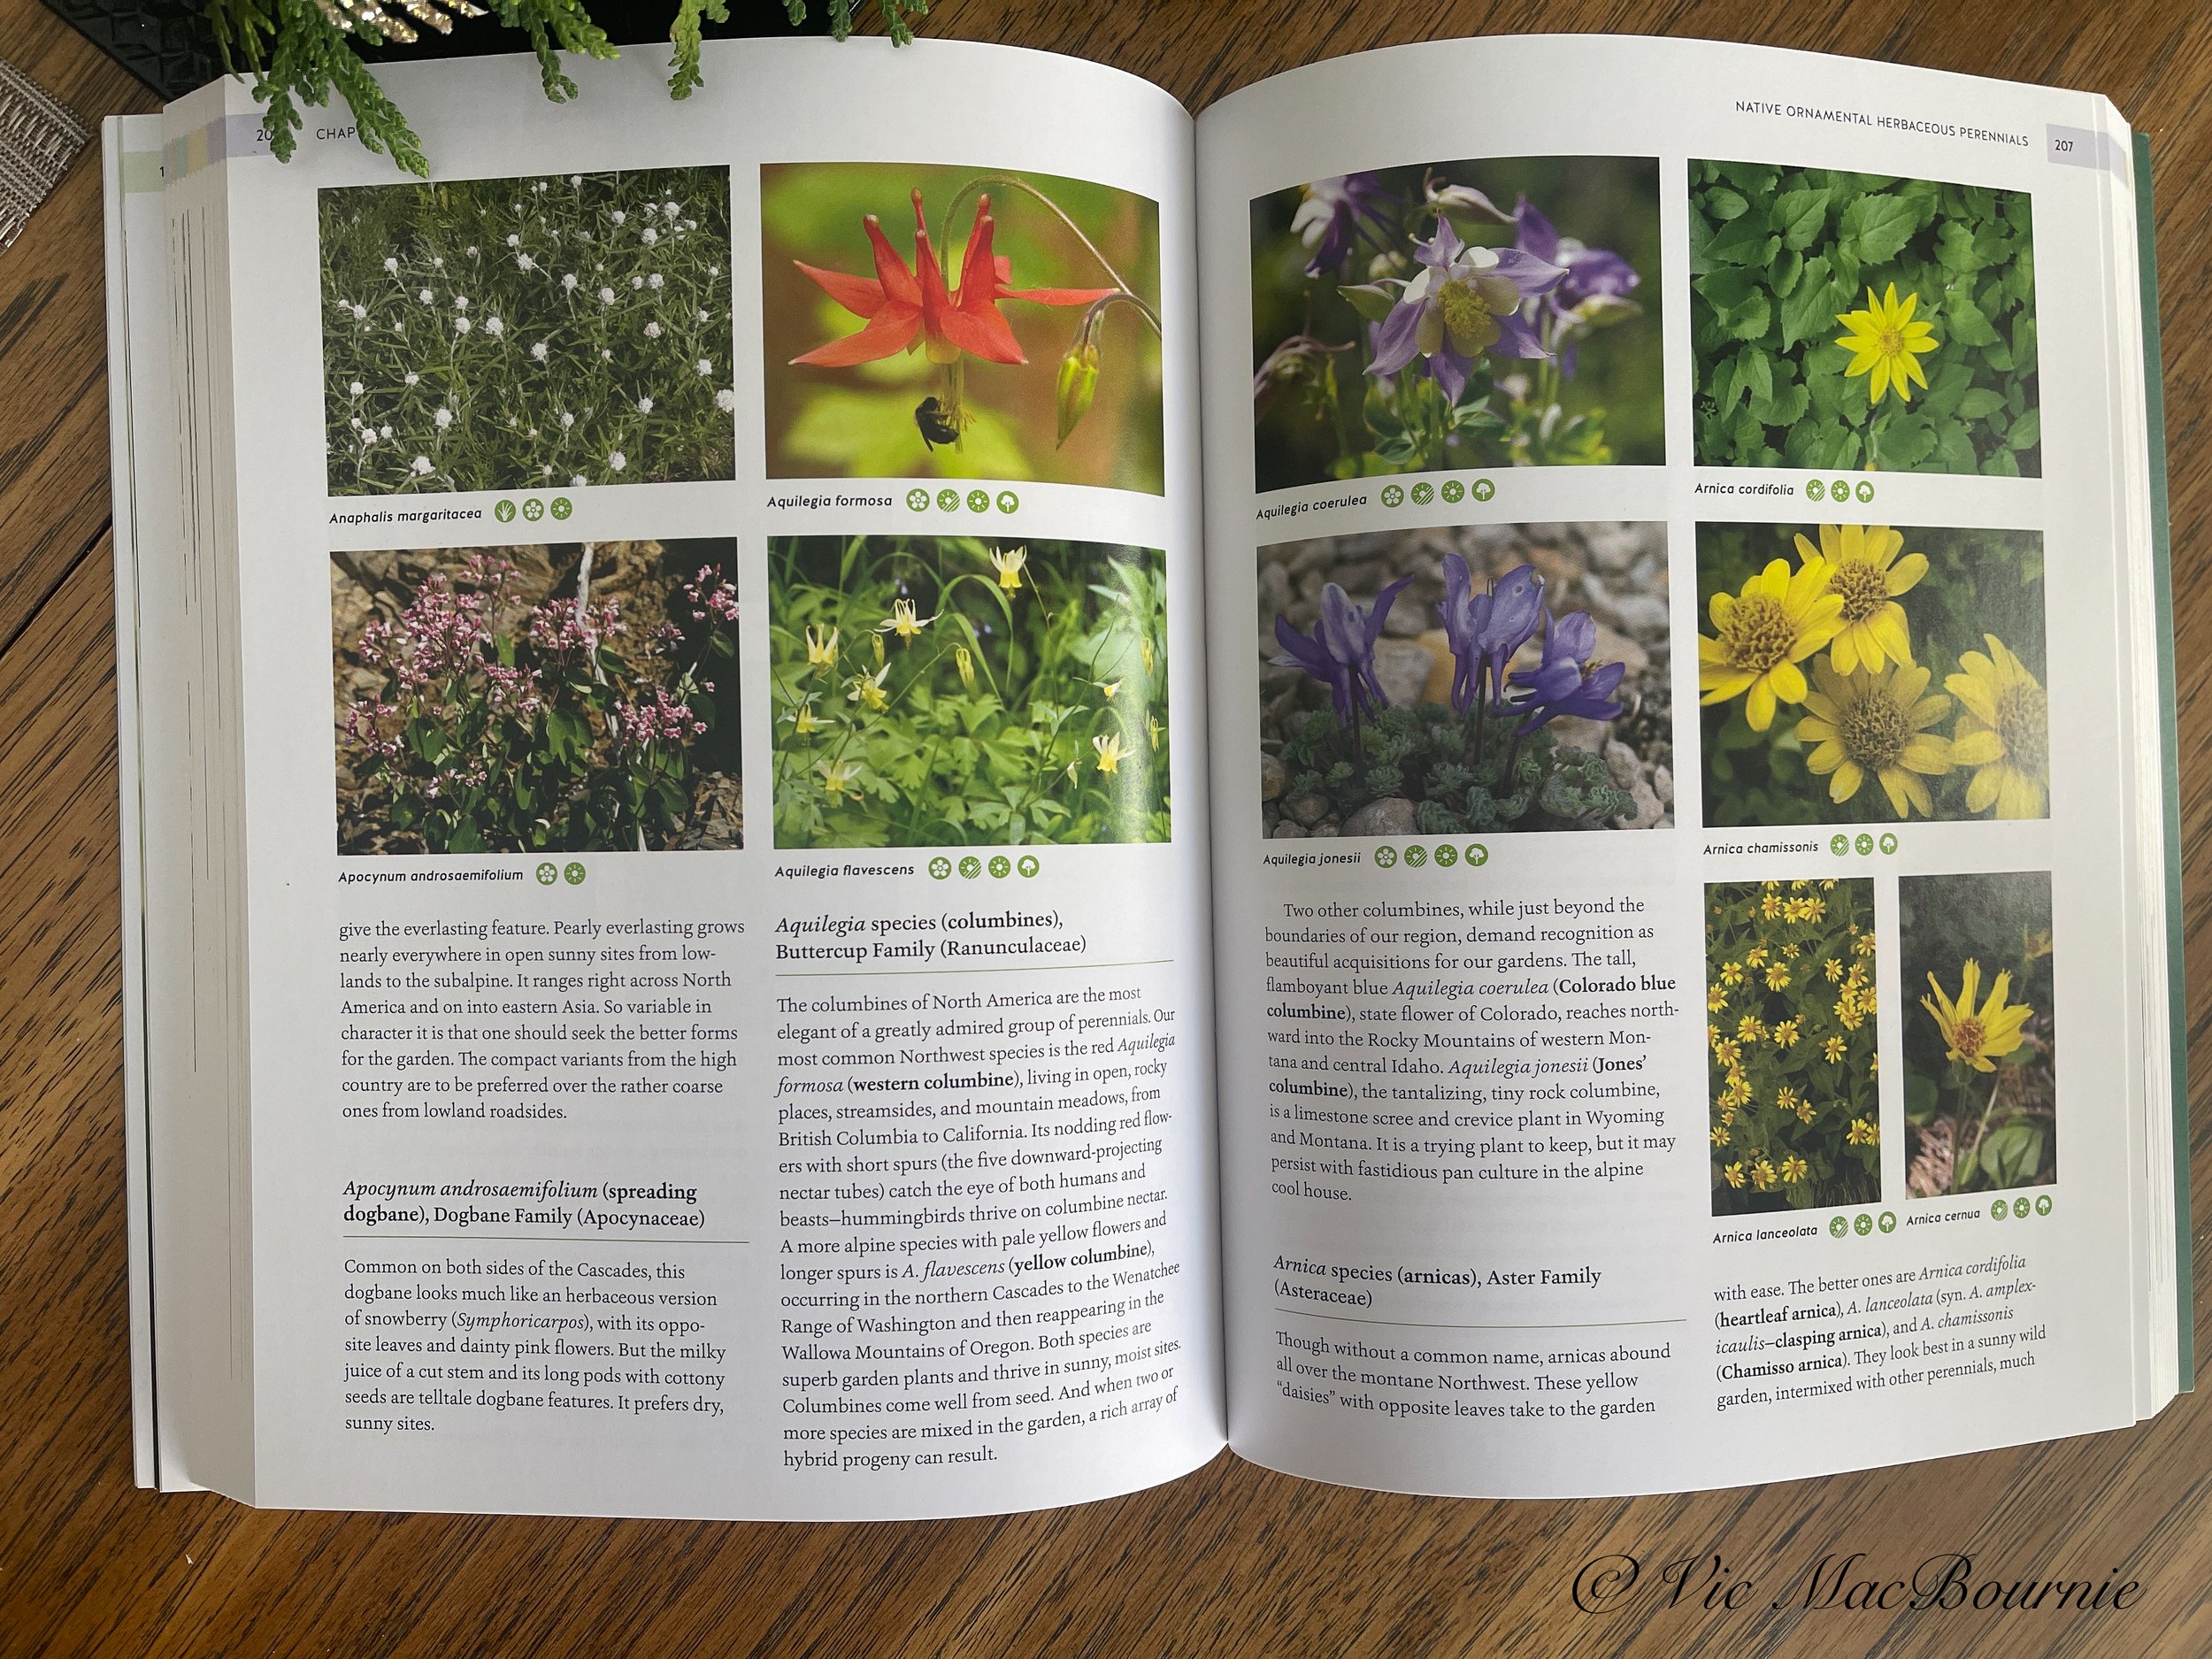
An example of the attention to detail in the book including the small green icons under the pictures that establishes the best locations to plant these individual plants.
Icons help readers identify planting locations
What else makes the book particularly useful? How about icons used for each plant that identifies where it should be planted – drylands, rock gardens, seashore, meadows and prairies, shade, sun, restoration, wetlans and, of course, woodlands – all have their own icons.
Chapter by chapter of excellent information for plant enthusiasts
The authors actually spell out in the introduction how they tackle the task ahead beginning with a dicussion of the science of gardening, starting with the ecology of native plants in their natural environments.
In chapter 2, they provide practical advice for choosing, planting, and maintaining native plants that are best suited for your particular environment. (What more can a beginner native plant gardener ask for?) There are also tips for managing garden invasives.
Chapter 3 tackles the enormous task of providing descriptions of native trees, shrubs, herbaceous perennials, grasses and even some annuals worth considering.
If you’re a gardener in the Pacific Northwest you will want to tap into the authors’ incredible native plant knowledge that is covered in this book.
For more Ferns & Feathers articles on Gardening in the Pacific Northwest, you will want to check out the following posts:
• Native plant plan for a front garden in Seattle
• Understory Gardens aims to bring more sustainable gardens to the west coast
Ferns & Feathers readers already know the importance of using native plants in our gardens. This book simply emphasizes that importance in a part of Canada and the United States that is already inherently blessed with a gardening lifestyle that begs us to protect and restore not only the native plants, but the wildlife that depends on it for survival.
Gardening with Native Plants of the Pacific Northwest is an essential resource for gardeners to explore how to best use the natural gifts they are provided on a daily basis.
• If you are considering creating a meadow in your front or backyard, be sure to check out The Making of a Meadow post for a landscape designer’s take on making a meadow in her own front yard.
If you are on the lookout for high quality, non-GMO seed for the Pacific North West consider West Coast Seeds. The company, based in Vancouver BC says that “part of our mission to help repair the world, we place a high priority on education and community outreach. Our intent is to encourage sustainable, organic growing practices through knowledge and support. We believe in the principles of eating locally produced food whenever possible, sharing gardening wisdom, and teaching people how to grow from seed.”
About the authors:
Arthur R Kruckeberg (1920-2016) was professor of botany at the University of Washington for nearly four decades. He cofounded the Washington Native Plant Society and authored The Natural History of Puget Sound Country and Geology and Plant Life, as well as prior editions of Gardening with Native Plants of the Pacific Northwest.
Linda Chalker-Scott is associate professor of horticulture and extension specialist at Washington State University . She cohosts the Garden Professors blog, and her books include The Informed Gardener, The Informed Gardener Blooms Again, and How Plants Work.
Richard G. Olmstead is prefessor of botany at the University of Washington and curator at the University of Washington Herbarium, Burke Museum.
The book is published by the outstanding, garden-focused Canadian publishers Greystone Books. Visit their website at Greystonebooks.com for a complete selection of their books, including some of the most highly sought after gardening books.

How to create a natural log planter
Creating an old log planter does not have to be difficult. The next time you get trees trimmed, consider keeping the larger branches and stumps to either build a wood pile or, even better, a planter.
One of the best additions to a woodland/wildlife garden is a simple rotting log.
Not unlike a forest, where large branches and entire trees are left to slowly decay on the ground, our gardens benefit from the same rotting logs on our forest floors. These logs can quickly become home to any number of small woodland creatures, many of which are often unseen unless we really go looking for them.
If it’s large enough, you should see toads, snakes, even salamanders move in to the log along with a myriad of insects and fungi that all work in unison to break down the wood and add nutrients back to the garden.
The process is slow and might even go more or less unnoticed if it wasn’t for the birds and animals that visit the log looking for a quick meal.

A natural log planter is the perfect addition to a woodland garden. Place it along a path so you can enjoy it on your walks through the garden.
Don’t remove those large branches after tree trimming
One of the best decisions I made several years ago was to tell our local tree service company not to cart off the large branches they took down from our upper canopy trees and, instead, leave them be on the ground.
One area where a lot of branches fell was our massive garden of ferns (link to fern garden post). It was the perfect place to just leave the large branches on the ground to break down naturally.
Our massive ferns grow up through the large branches and hide them throughout the summer months. During the early spring and fall and winter, I get to monitor the slow breakdown of the large branches spread over the ground.
In another area of the garden, I used the large branches that were removed from the tree to create a natural woodpile to provide shelter and habitat for the backyard critters that need places like this to escape predators. I’m sure some of them use it as shelter throughout the winter.
In fall, I throw on a layer or two of fallen leaves to provide even more shelter and create an even better environment for the large branches to break down over time.
Five tips to find deadwood
If you do not have dead trees or stumps on your property to attract wildlife, you can always go out on a scouting trip to find a handsome trunk or large branch to place artistically in your landscape. Here are a few places to look for deadwood to create your planter.
If there is a natural woods nearby; ask permission to collect a few good-size pieces of deadwood. It’s best to collect soon after a storm blows down the branches, before wildlife have a chance to move in.
Call a nearby tree service company. They are usually willing to let you have anything you can haul off, or you may be able to arrange delivery for a small fee.
Check with your local cable, electric or telephone company. Trimming branches and clearing trees are routine maintenance and they are more than likely happy to let you take them.
Your local parks department and the town or city road crew may be able to help as well. They maintain public trees and are often looking to get rid of large branches.
Keep an eye out for possibilities in your neighbourhood. Your neighbours will probably be pleased to let you cart off their branches. Explain to your neighbours why you want them and how you will be using them. It’s a good way to raise awareness about the value of deadwood.
Deadwood does not have to be left on the ground.
In her book, Natural Landscaping, Gardening with Nature to Create a Backyard Paradise, Sally Roth dedicates several pages to the benefits of using deadwood in the woodland garden.
It is almost as useful standing up as it is lying down, she explains. An interesting log or gnarly branch can add a very artistic touch to a shade garden or a final bit of realism to a woodland garden.
If you have a large, long branch that is manageable, consider creating your own “snag” by simply digging a deep hole and planting the deadwood vertically.
I have a 8- to 9-foot branch planted in the back of our yard near my outdoor photo setup that is a regular stop for woodpeckers, nuthatches, red squirrels and chipmunks.
These are particularly prized by woodpeckers, and they make an excellent foundation for a feeding area. I have drilled holes in the branch where I insert bark butter regularly. You can also wire suet to them or hang a feeder. The dead tree is also the perfect landing spot for birds approaching the feeding station. Keep it far enough away that squirrels can’t leap over to the feeders.
Create a simple log planter
Letting nature slowly break down the logs is certainly one way to help wildlife, but using the logs to create a path-side planter is an even better one.
How often have you been out for a walk and saw the local arbourist either cutting down or trimming up a large tree in the neighbourhood. That’s a great opportunity to ask if they would drop off a large branch or two at your home. If you have access to a truck, you could obviously just throw it in the back and take it home on your own.
Once you have it home, you can go to work carving out a portion of the log where you can pack in a rich forest soil loaded with compost, rotting leaves and bits of fungi that will quickly go to work breaking down the wood.
If you are comfortable using a chainsaw, you can create a large hollow in the log in no time. If a chainsaw is not something you want to get involved with, you can create the planter with simple tools like a hammer and chisel.
To speed up the process, consider using a power drill to first create holes in the area you want to hollow out. Once the holes have been drilled 5-6 inches deep, you can begin chiselling out the wood. Depending on the size of the log, you may have to drill and chisel out the wood a few times before you have the look and depth you want.
If it’s possible, use a longer drill bit to create drainage holes through the log. Drainage holes may not be necessary since the idea behind the project is to create a rotting log, and the wood in the log will absorb a lot of the moisture anyway, but drainage holes might be appropriate depending on what you are planning to grow in the fallen-log planter.
I have seen many of these natural planters with colourful bedding plants filling them up. That’s fine if you are looking to pretty up a corner of the yard, but a natural planter looks and feels much more appropriate.
Think wildflowers like hepatica, maidenhair ferns, mushrooms and small succulents. A natural path-side planter where you can control things like soil PH, is the perfect place to grow Bunchberry (cornus canadensis) or other acid loving plants.
In his book, Landscape with Nature, Using Natural Design to Plan Your Garden, Jeff Cox writes that “you can make a totally natural planter by hollowing out the centre 1 foot deep.” He suggests planting the old log planter with ferns, begonias, impatiens, or hens-and-chicks, but I prefer a more natural approach using native wild flowers including trilliums, dog-tooth violets and even wild ginger along with hepatica and spring beauty. It might also be the perfect spot to try some native orchids.
A log planter can also be a great place to grow a small bonsai-like shrub – suggesting the rebirth from a dead tree into new life. Again, try using a native shrub like a serviceberry, or one of the many small-shrubby native dogwoods, and viburnums preferably one with berries.
Commercial alternatives to a natural log planter
If carving up an old wooden log with a chainsaw or painstakingly chiselling one out is too much, there are much simpler ways to achieve the overall look without lifting a finger.
Commercial stumps are available that give you the look of an old, hollowed out tree stump without the work and the eventual complete break-down. High quality concrete planters can look remarkably real.
This example of an old wooden log planter from Wayfair.com is a good indication of what is available.
The concrete containers that are made to look like a real tree trunk are perfect for the woodland garden. You can purchase ones that stand up more or less vertically to give height, or planters that are more like fallen logs that lie on the ground horizontally.
These have the added benefit of being able to be easily moved around the garden.
Although not made to look like a fallen log, this exquisite planter from Vivaterra is a pefect vessel to show off your mosses, ferns or even a small native bonsai.
Of course, you will lose out on many of the insects and small animals that would readily move into the more natural pathside planter, but you will be gaining a woodland aesthetic that will surely bring a smile every time you pass it by.

DIY: Turn a birdbath into a succulent planter dish (step by step guide)
This DIY succulent hummingbird feeder is a fun gardening idea that is easy to build and beautiful to look at.
How to make a succulent dish garden (with a twist)
Here is a Do-it-yourself project that is both easy to create and results in a lovely succulent dish garden.
I’ve added a little twist by creating a mini photo studio with the addition of a small hummingbird feeder. All you need to complete the project is an old bird bath, some cactus soil, crushed clay stone and a small hummingbird feeder.
The project can be completed in less than an hour and will surely brighten up your backyard and add a great spot to photograph hummingbirds coming to your garden.
Succulents have certainly become popular recently. Here I have used a series of hens and chicks to make the project more hardy to stand up to our cold winters.
The popularity of succulents, however, is for good reason. Today’s succulents are outstanding. Large, small, colourful, tiny, easy to grow and even easier to maintain.
After all, the plants really don’t need a lot of care. Plant them in gritty, well-draining soil mixed with a little stone or pea gravel. Water them in extreme drought if necessary otherwise, just let them take care of themselves.
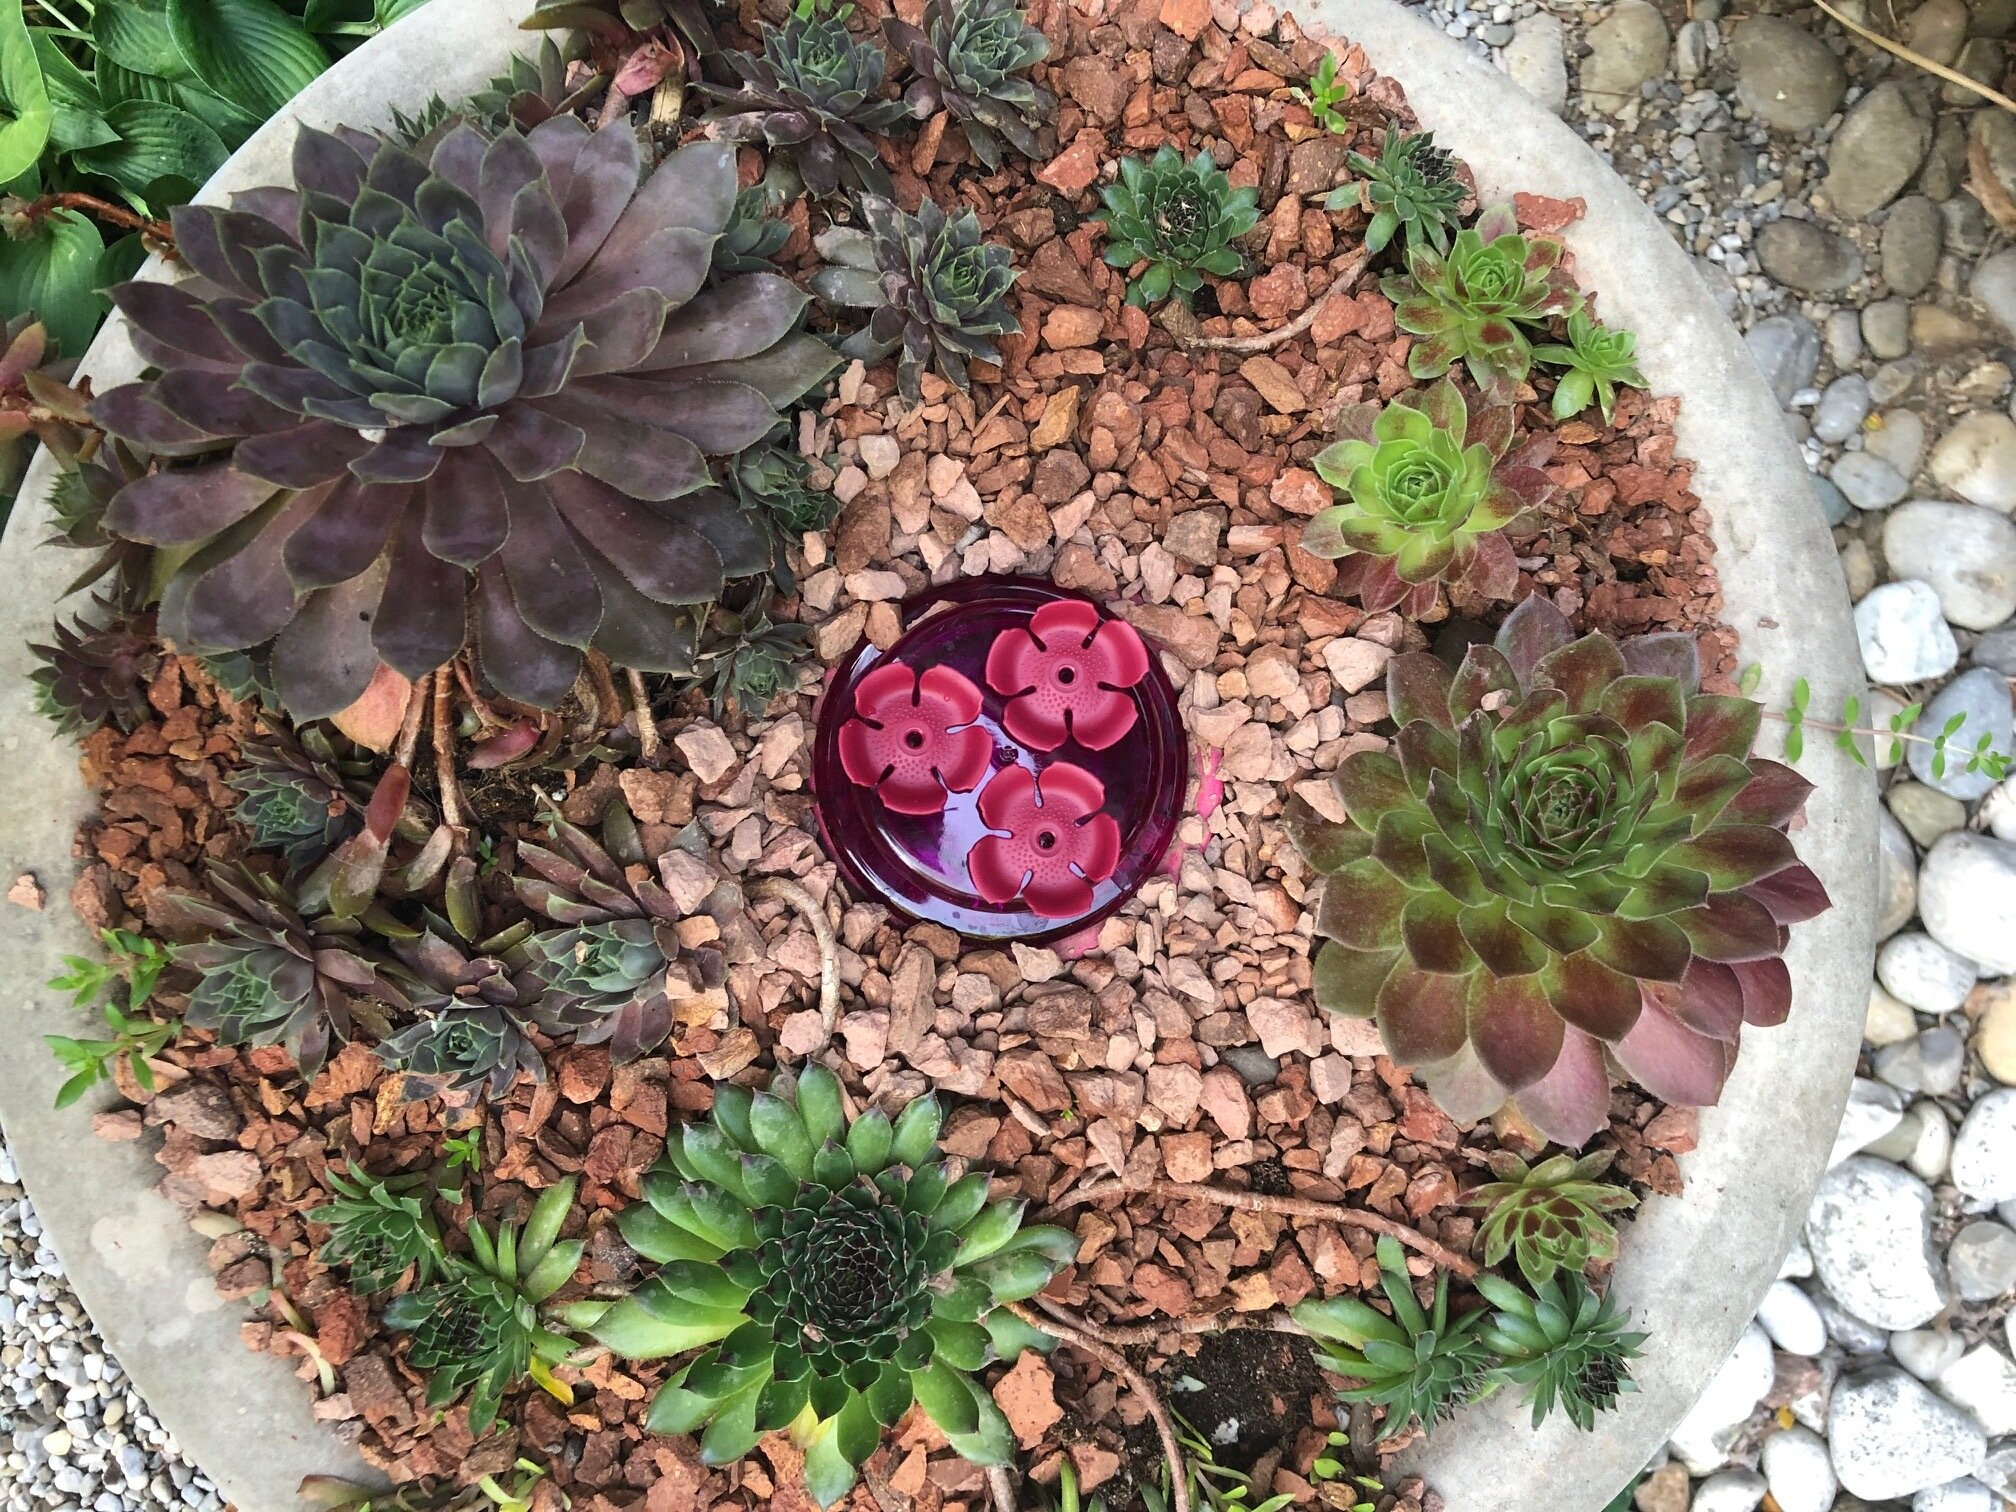
An old bird bath converted to a succulent planter with a twist – a Perky-Pet handhold/tabletop hummingbird feeder is buried in the stone. The set-up was designed as a potential stage for hummingbird photography.
So with all this in mind, and with an old leaky bird bath sitting empty in the yard, I figured it was a good time to create one of these popular planters.
We’ve had the planter for several years and, besides replacing some of the succulents last year after a brutally cold winter, it has become a focal point along our pathway. I can’t say that it has attracted many hummingbirds over its time, but I’ll keep experimenting with different hummingbird feeders to find one that keeps them coming back.
This small round hummingbird feeder fits the succulent dish perfectly.
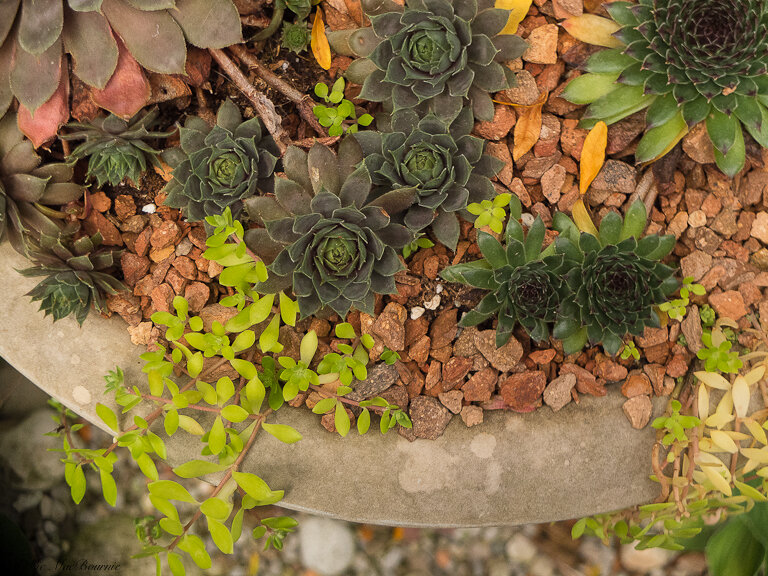
A more detailed shot shows the vibrant colours of the stone, succulents in the DIY birdbath conversion.
I happened to have the small hummingbird feeder designed to teach the tiny birds to eat out of your hand.
Converting birdbath into succulent planter
The project was simple and involved just a few items that I had around the house, and an electric drill.
1) First, I drilled about five holes through the bottom of the fibreglass bird bath to allow good drainage.
2) Then, add pea gravel in the middle area where the hummingbird feeder sits.
3) Next, surround the pea gravel with store-bought cactus soil and mix it with pea gravel to keep it loose and well draining.
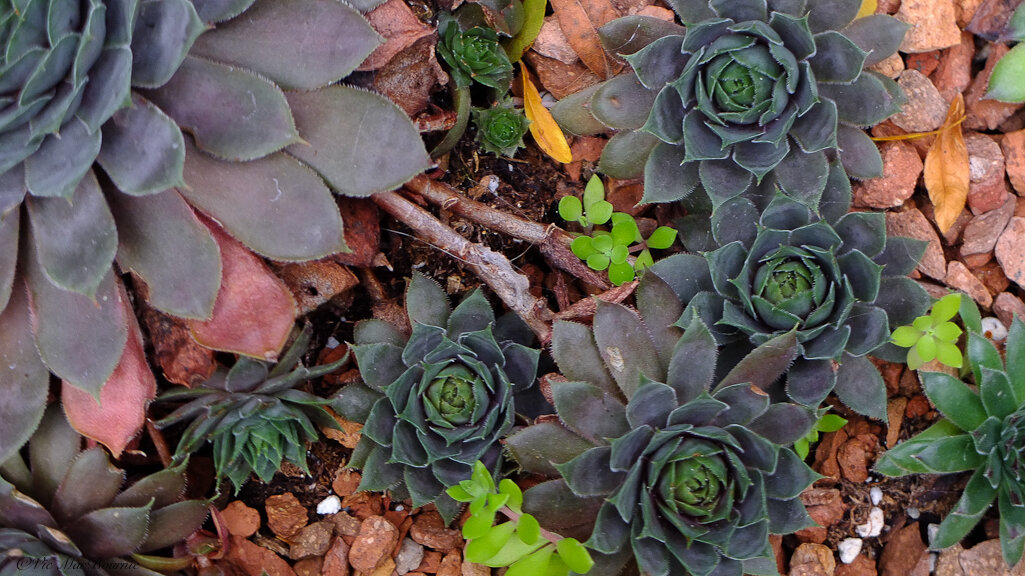
4) Now it’s time to plant the succulents around the edges of the bird bath, mixing large and small.
5) I added some sedum that was already growing in the garden
6) I also had a curved wire that looked perfect as a hummingbird resting stop, so that was placed in the container but far enough from the feeder not to interfere with any hummingbirds that might be feeding while in flight.
7) I filled the little hummingbird feeder and placed it in the middle of the succulent container.
8) Finally, red chipped clay stone was placed over the soil as a mulch and a nice clean backdrop for the succulents. The stones help to keep water from splashing up dirt onto the succulents and gives the whole container a more desert feel.

How to care for a succulent dish (birdbath) garden
Caring for a succulent dish – in this case a birdbath – is simple. Succulents do not need a lot of water. In fact, too much water would be the main reason for their demise.
Think desert landscape and you’ll know how much you’ll need to water your dish. I rarely water our succulent dish. Instead, allowing our summer rains to get the job done with the occasional watering works well.
Providing good drainage is probably the most important step you could do to ensure the survival of the plants.
Ours is planted is an area close to the house that gets mostly morning sun into early afternoon.
For more on gardening on a budget, check out my in-depth article here.
Gardening on a budget links
Ten money-saving tips for the weekend gardener
DIY Bark Butter feeder for Woodpeckers
DIY reflection pond for photography
Click & Grow is ideal for Native Plants from seed
Remove your turf and save money
Hiring students to get your garden in shape
If you are interested in backyard birds, please consider signing up for my backyard birds newsletter. The sign-up page is at the bottom of my homepage. Not only will the newsletter provide in-depth articles on attracting, feeding and photographing backyard birds, I am also working with local artisans to provide discounts on incredible bird-related feeders, houses and other goodies backyard birders will love. In addition there will be regular giveaways , including gardening books and birding items.
This page contains affiliate links. If you purchase a product through one of them, I will receive a commission (at no additional cost to you) I try to only endorse products I have either used, have complete confidence in, or have experience with the manufacturer.

Why leave ornamental grasses standing through winter?
Ornamental grasses have become popular additions to our gardens for summer and fall interest, but they really come into their own in winter where they add structure and even movement in the winter garden.
Grasses provide structure and habitat for the garden in winter
There are two reasons I leave our grasses standing all winter. First, wildlife – from insects to birds – benefit from the standing grasses and second, I just love the look of the wheat-coloured grasses providing structure in the garden from the fall through to the following spring.
There is another important reason to leave the grasses standing, but we’ll get to that in a minute.
During the winter months, when snow is covering the ground, our grasses provide amazing structure to the garden and are often the first element I focus on when looking for photographic subjects. The results can range from high-key images of the delicate wisps of wheat-coloured grasses against a pure white background, to an image of a bird tucked away in the grasses waiting out a heavy snowfall.
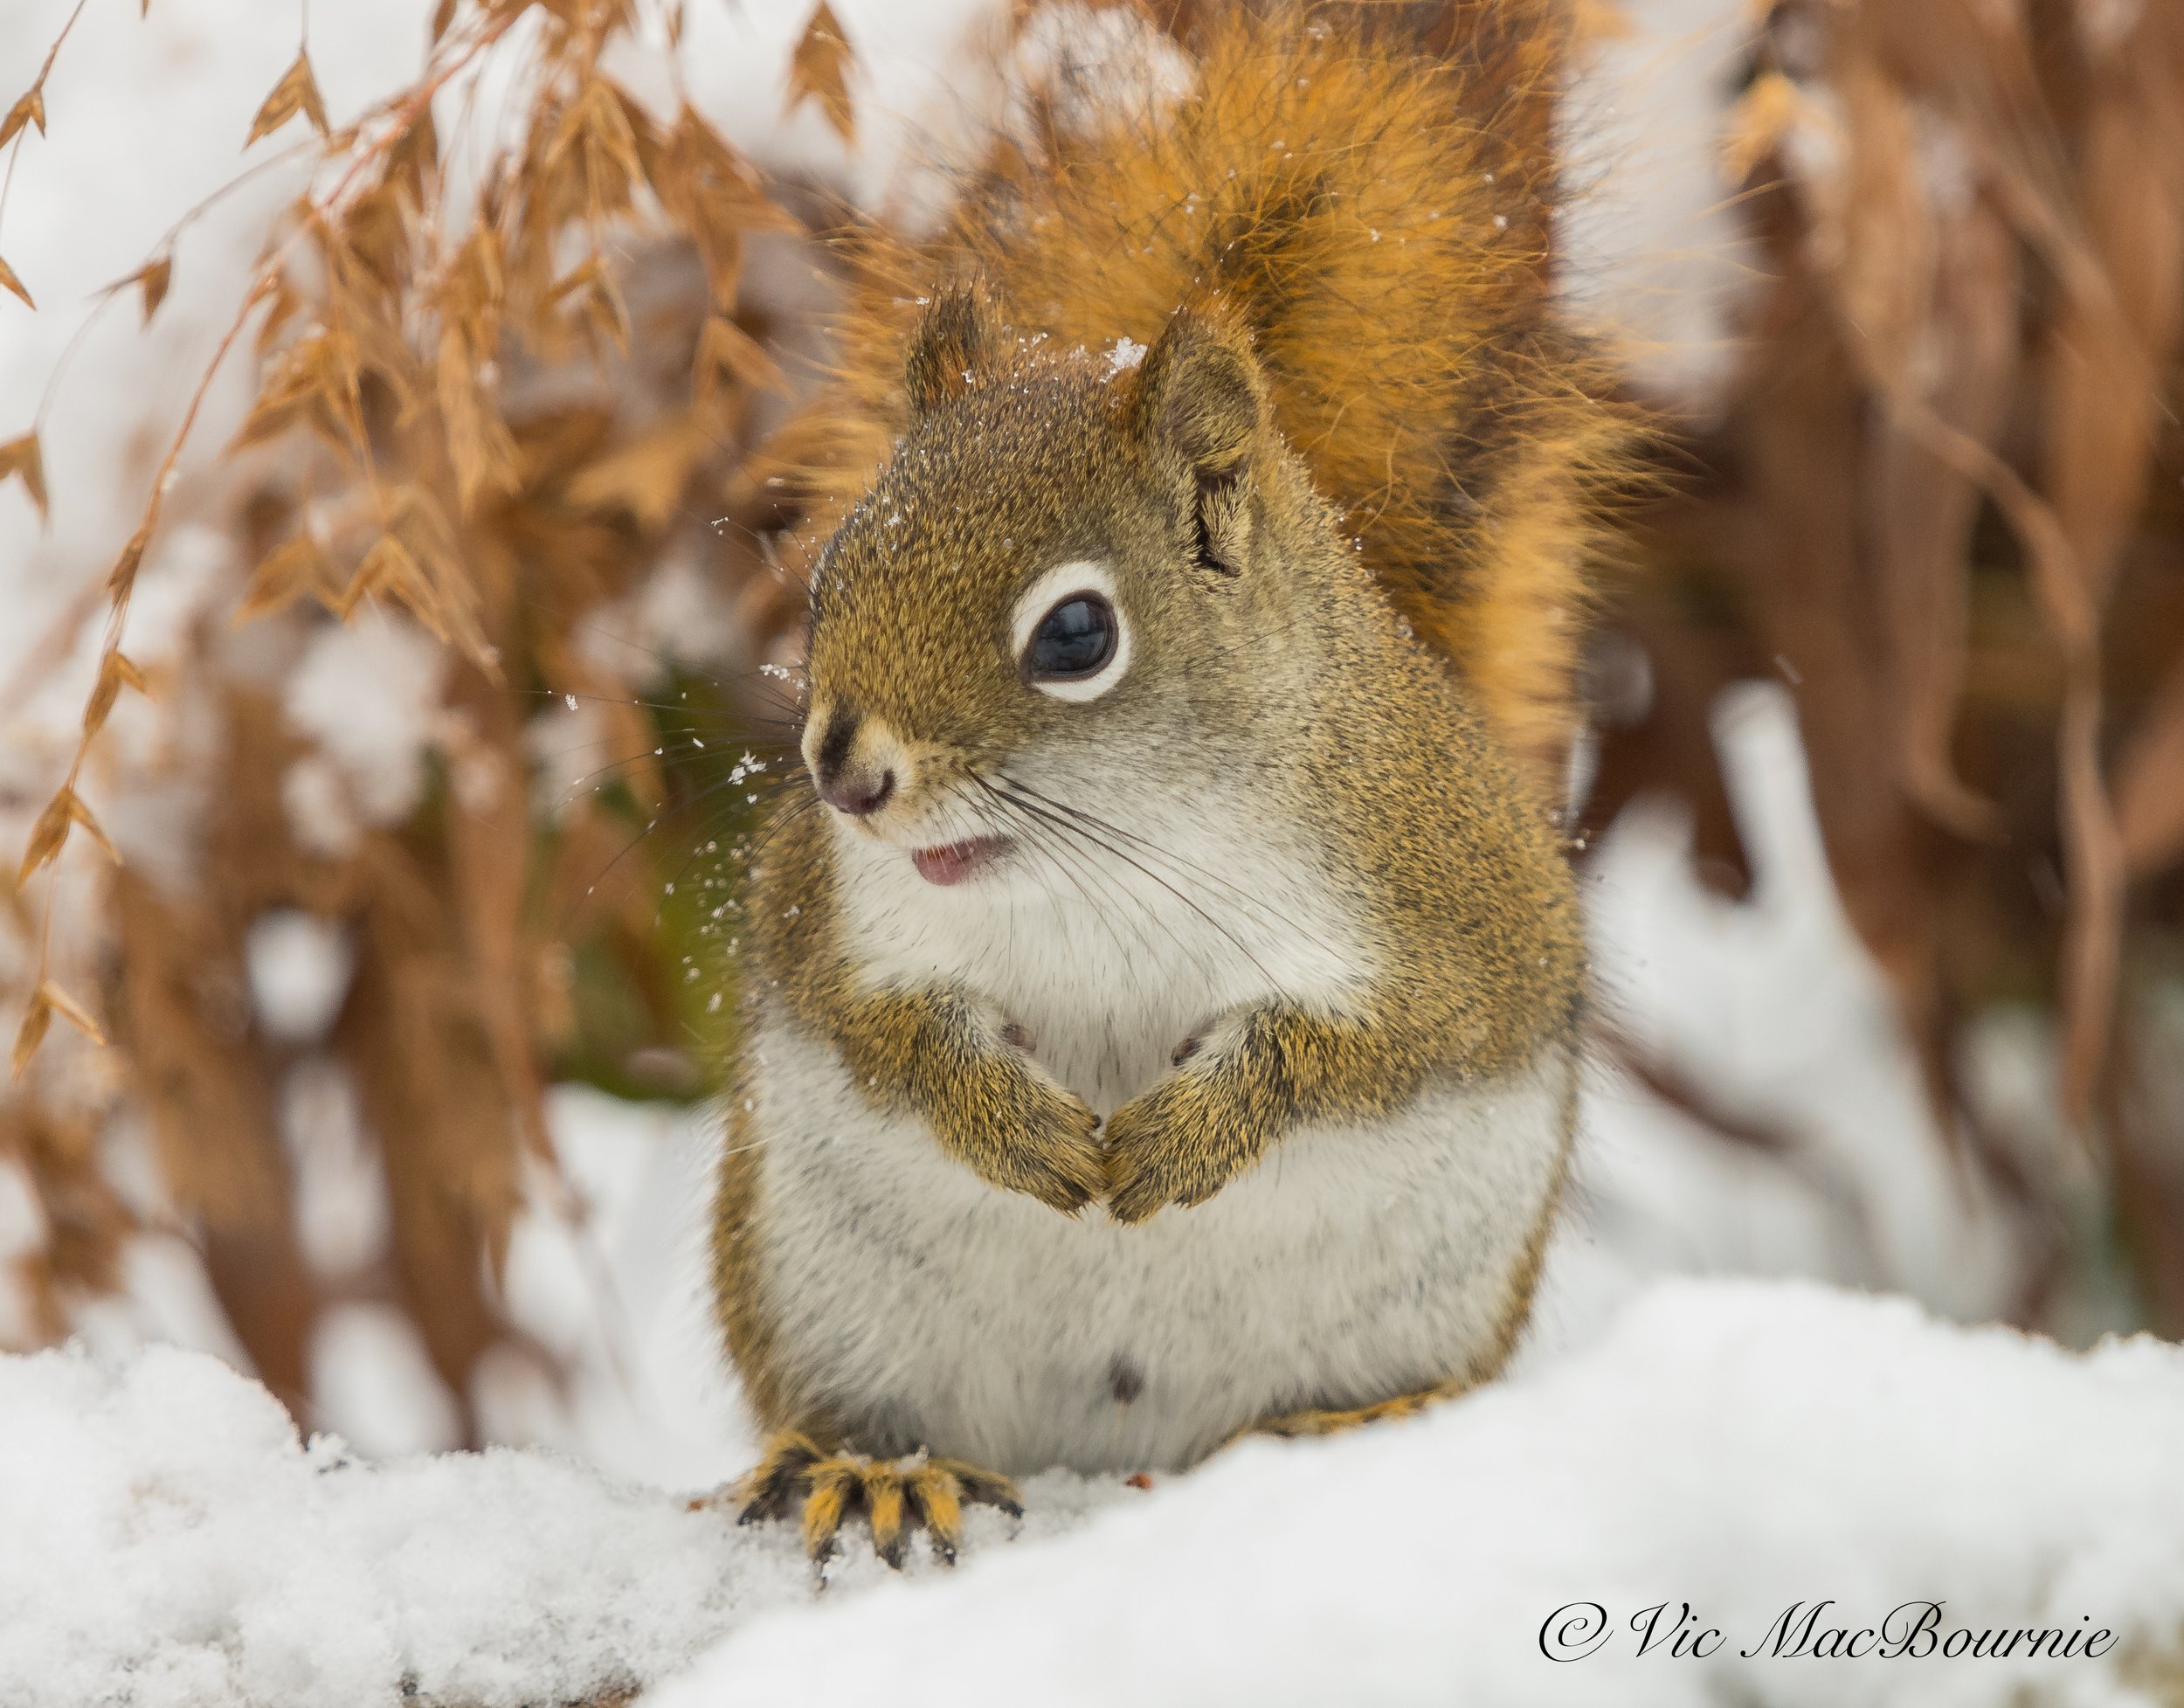
Red Squirrel among the Northern Sea Oats in winter.
In the early part of winter, capturing the seed heads poking out from the snow is a favourite subject, however, as winter draws on, the seeds heads are either eaten by the birds or dispersed from the cold winds.
Be sure to take advantage of the early part of winter to catch images of the seed heads in the snow.
It’s also a good time to capture the spent flower heads from the Black Eyed Susans with snow caps on before the goldfinches strip the seeds from the flower heads.
Are ornamental grasses perennial?
You may ask if ornamental grasses are annual or perennial? The answer is, of course, it depends. But it’s safe to say that most ornamental grasses you purchase are hardy perennials and will return year after year. Most ornamental grasses are very hardy but a few, including the large red- or purple-coloured fountain grass (Pennisetum setaceum) that is popular to use in containers, is a fast-growing – up to 4-feet – annual in most areas. It is actually hardy in tropical zone 9.
Because most ornamental grasses are perennial, they will require cutting down when they have expired. There is no problem leaving perennial or annual grasses up through the winter. Both will provide structure and beauty throughout the cold months.
Annual grasses, including the annual purple fountain grass, can simply be removed and discarded in the spring along with the cuttings of the perennial grasses.
I like to pile them on top of a natural compost heap to give the birds an opportunity to take the grass to build their nests. I also stuff handfulls of the dried grass in the suet holders in spring for the birds to take as nesting material.
More on Ornamental grasses:

Northern sea oats close up covered in snow.
Grasses help form the structure of a winter garden
Ornamental grasses might be the last thing you think of when looking for winter structure and interest in the garden. Typically, we look to evergreens to form the basic structure of a winter’s garden. Not everyone, however, has room to plant large evergreens such as spruce, pines or cedars.
That’s when ornamental grasses rise to the challenge.
Small enough to suit even the most compact gardens, these grasses can provide four-season interest with winter, arguably, being the time they shine the most. In many gardens, they are the only non-woody plant still standing, and their tan colour helps them stand out against a snowy or just drab winter background.
They can also add movement when the winds of winter blow, and their vase-like structure adds another dimension to our garden.
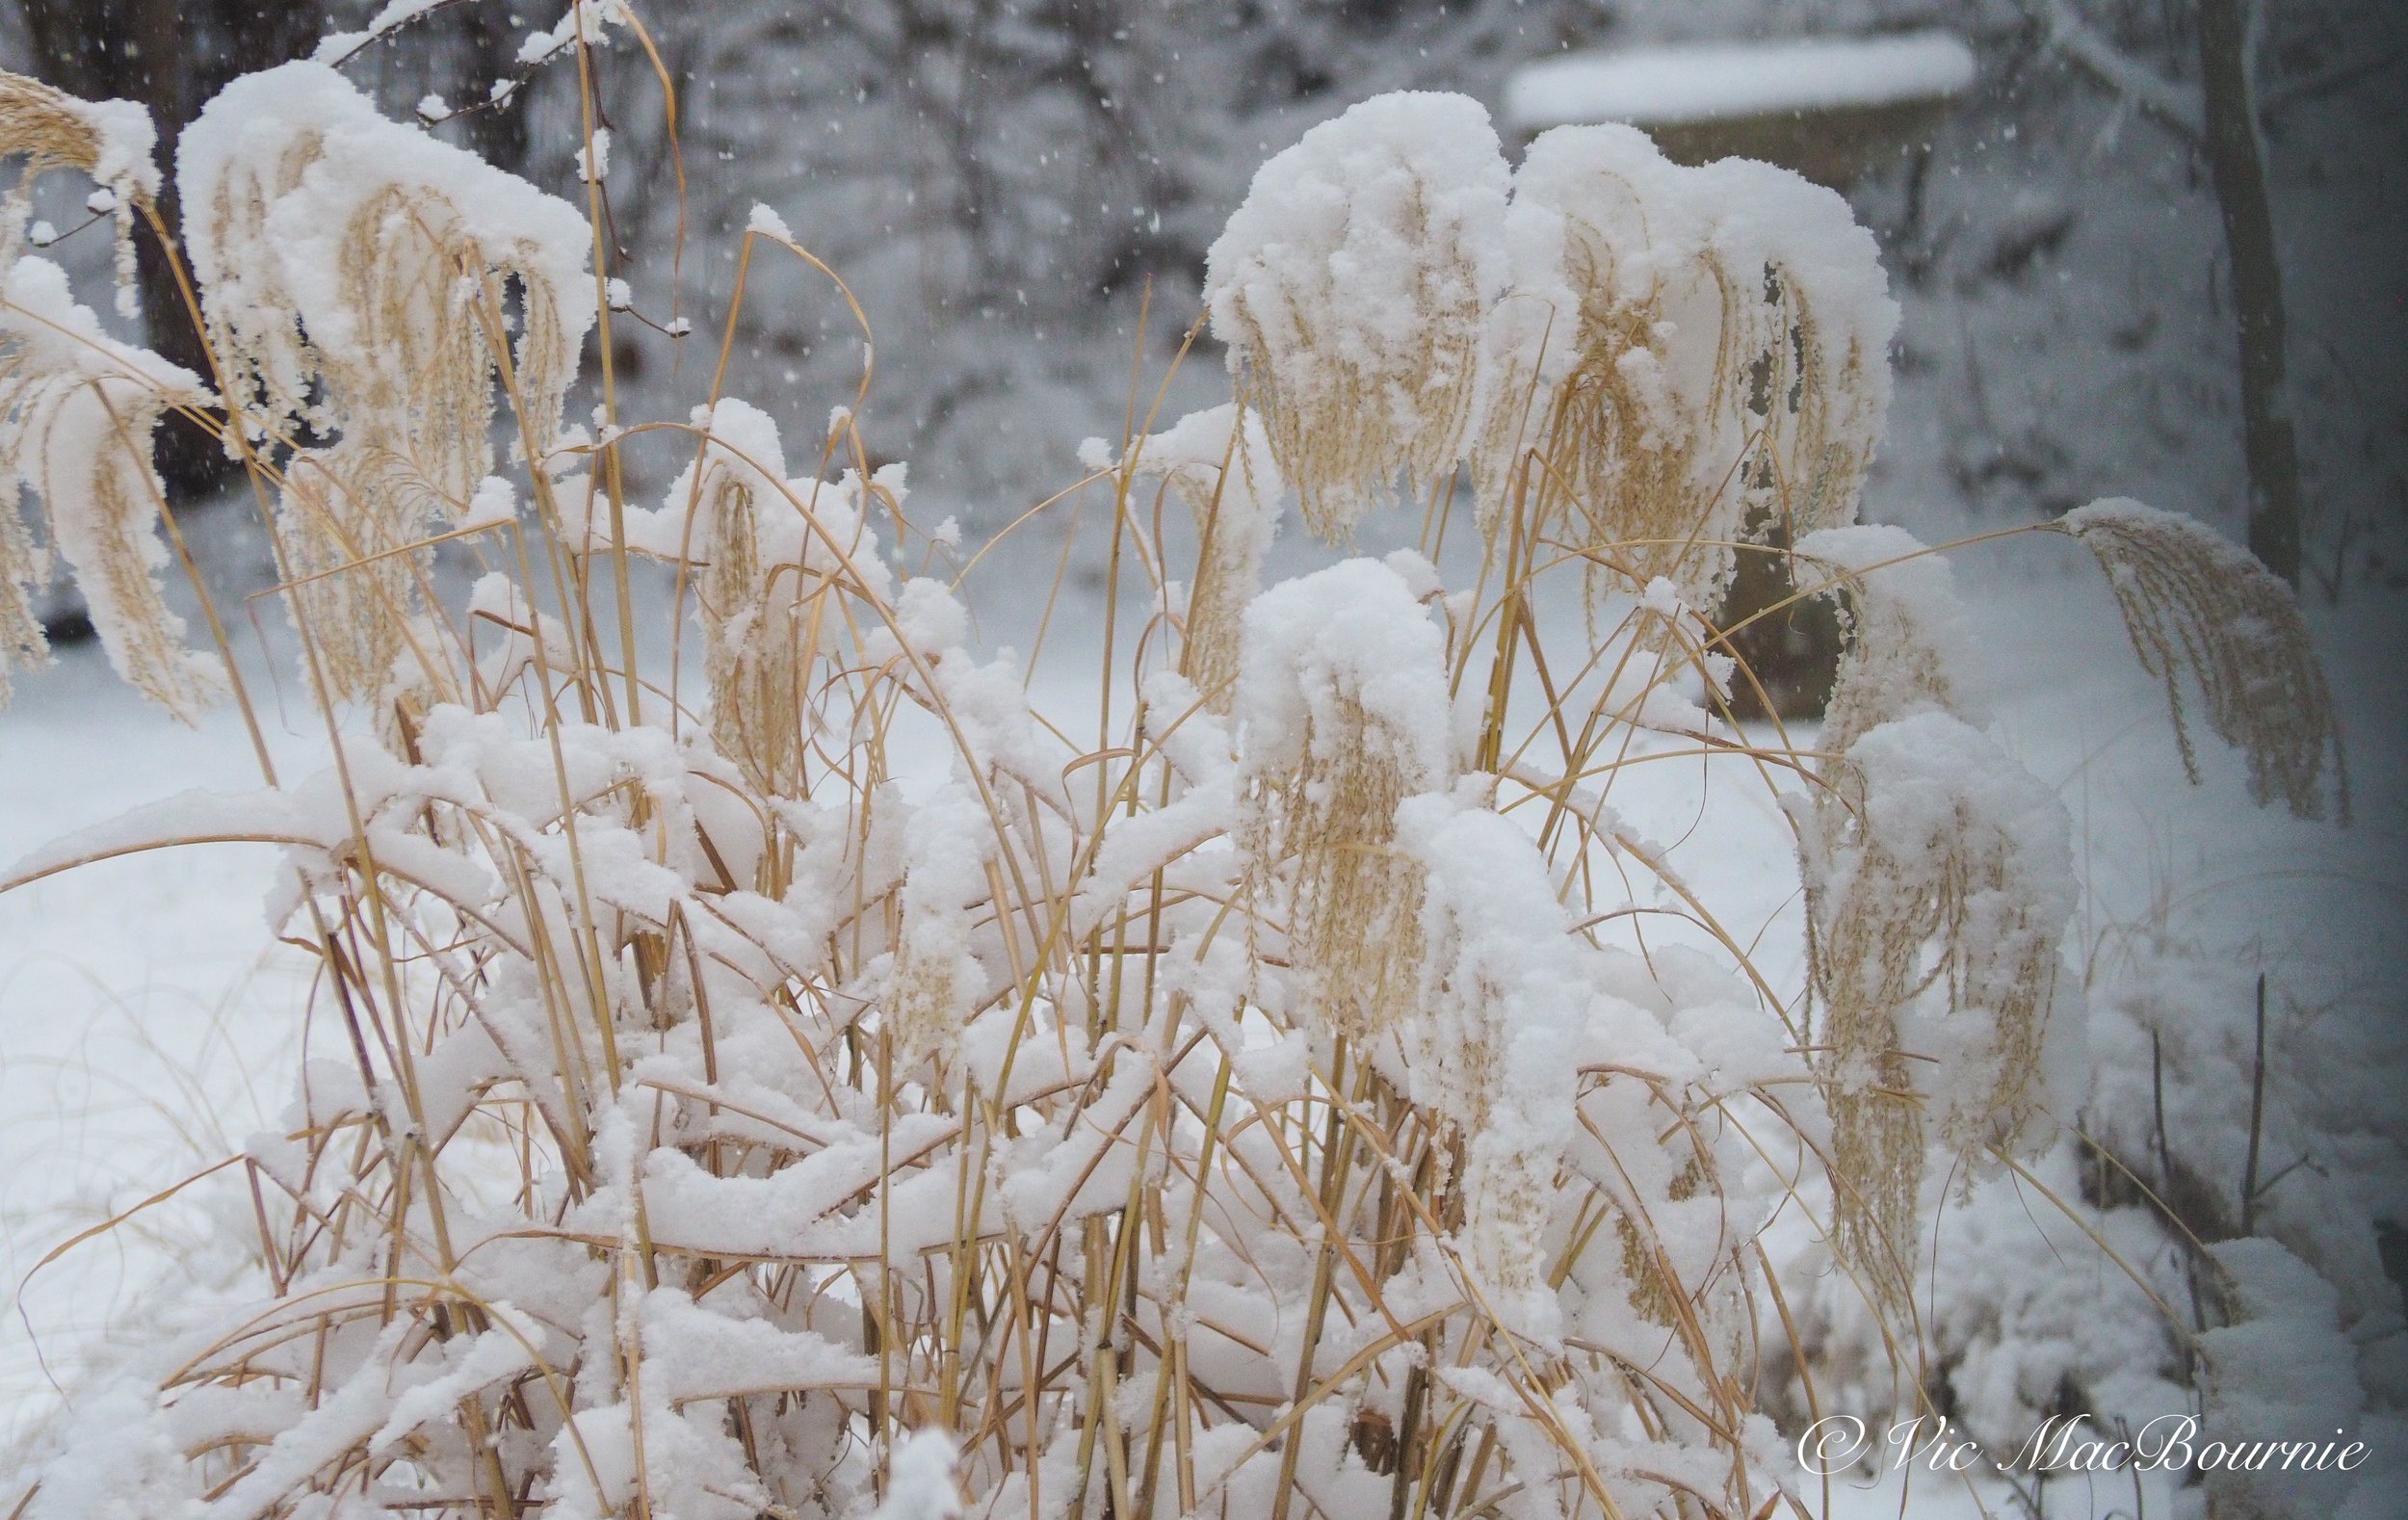
Miscanthus still standing tall after an early snowfall. Notice the “flower heads” are still intact. Later in the winter birds and strong winds will make them disappear.
A third reason to leave your ornamental grasses
There is another very important reason to leave grasses standing throughout the winter, and that is to protect the roots of the grasses from extreme temperatures, especially the constant freezing and thawing that is common over the course of our winters.
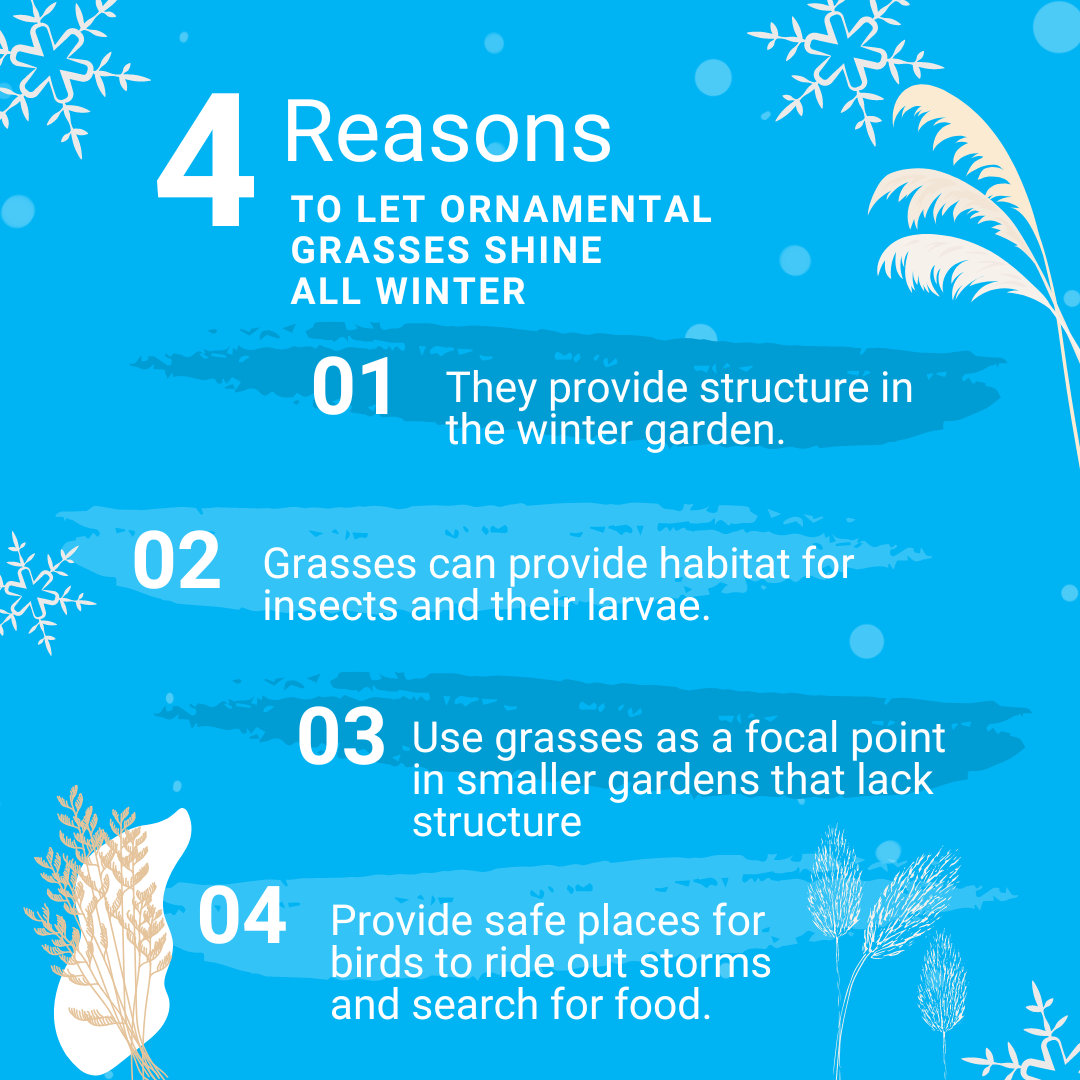
If you are like me and fall garden clean up amounts to putting away the hummingbird feeders, patio umbrellas and garden chairs, then you’ll benefit from a buildup of leaves around the plants which will form a nice layer of insulation around the roots of the grasses. The grasses will often fold in on themselves as well, providing additional “winter mulch” for the plants, wildlife and insects that count on the grasses for protection and habitat.

The Miscanthus grasses in the foreground help to give the garden structure and interest even if they are covered in heavy snow.
This insulation layer will help keep the roots from experiencing the freeze-thaw cycles that can uproot some plants, especially if they are newly planted and the roots have not yet set in completely. Or, if you recently planted a clump after dividing a larger clump of your ornamental grasses in the fall.
This is also the area around the roots where insects will burrow in to survive the winter or lay eggs for next spring.
It’s not uncommon to see Juncos and other insect-eating birds foraging around the leaves at the roots of our grasses looking for insects and larvae.
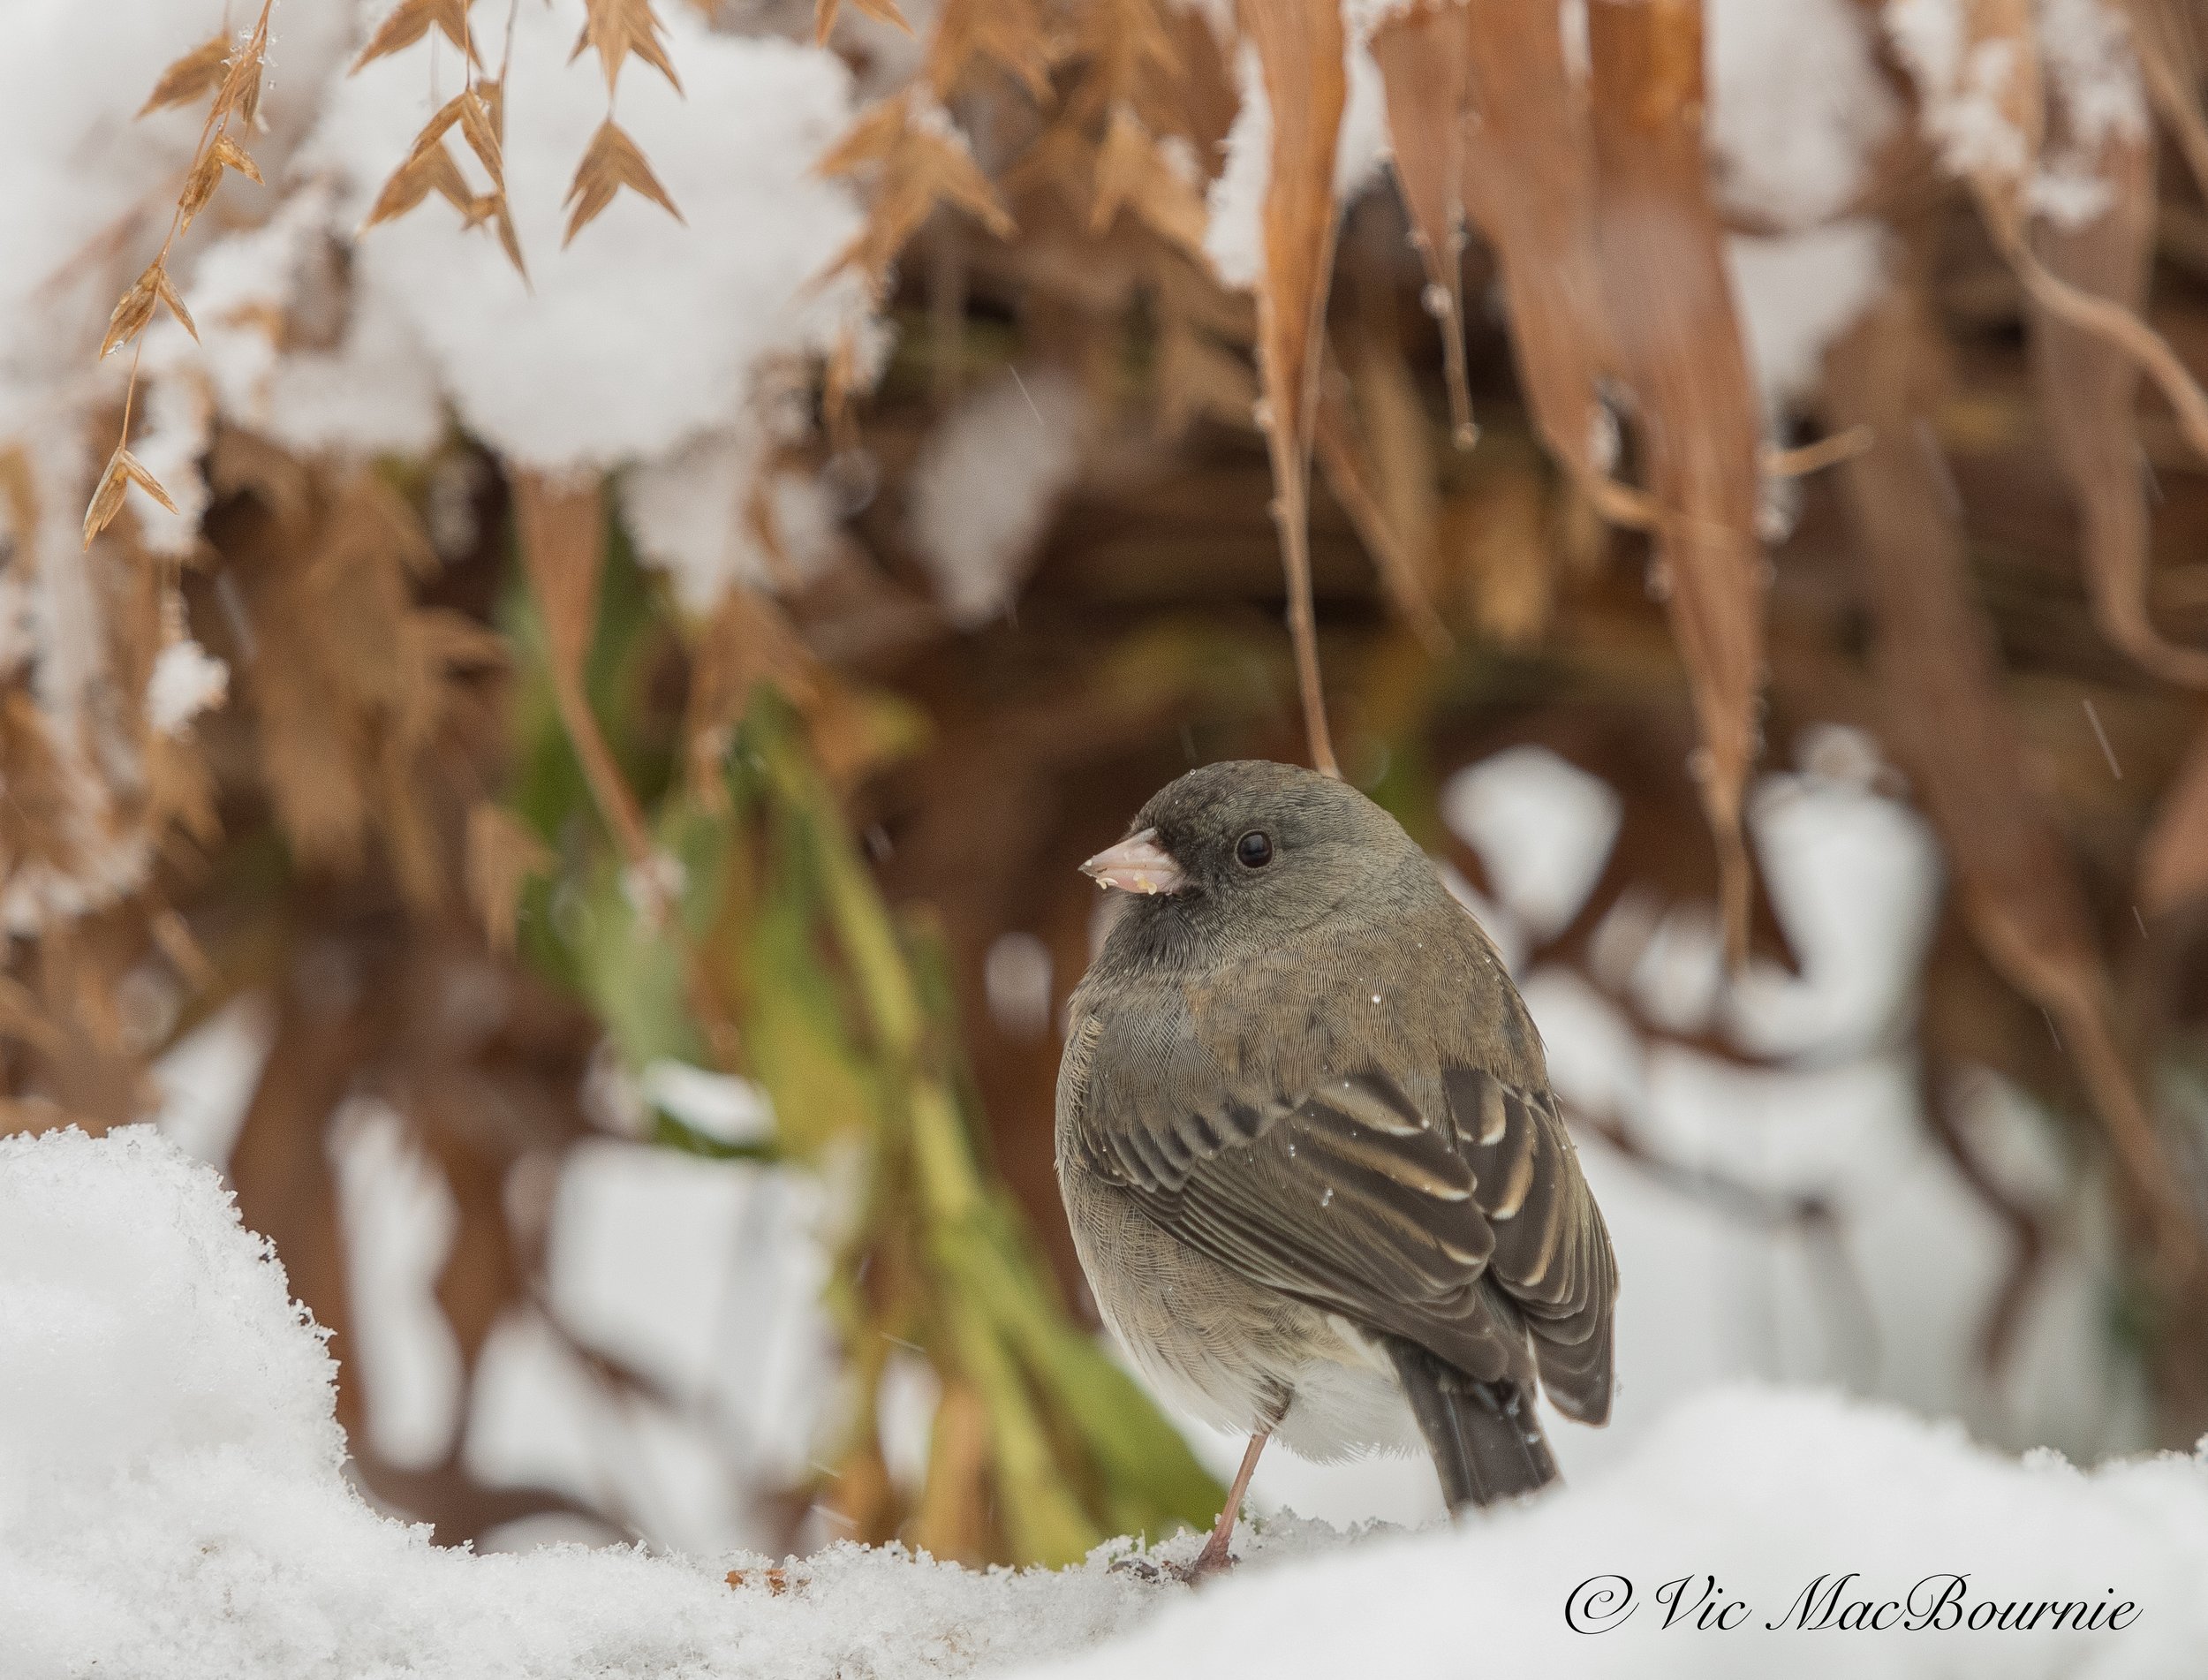
A Dark-eyed Junco among the Northern Sea Oats during an early snowfall.
Ornamental grasses can be a haven for birds in winter
The larger grasses that form sturdy upright branches can provide protection for birds in winter. I have seen birds go into the thick grasses during winter storms to escape the high winds and extreme cold. Some of the grasses get bent over and form a perfect perch for the birds.
Ornamental grasses would not be the first places the birds choose to ride out a winter storm, but if large evergreen trees are scarce in your neighbourhood, tall grasses would probably provide the next best natural shelter.

Snow laden grasses stand out against the stark background.
Best Ornamental grasses for winter interest
Some grasses are definitely better than others for winter interest. Some of the smaller grasses are covered early by snow and others are not vigorous enough to stand up to the harshness of our winters.
Look for native grasses whenever possible to provide the most benefits for wildlife and ensure you are not contributing to invasive non-native grasses spreading into natural areas.
The miscanthus grasses are particularly good for winter interest. They stand over six feet tall in summer with their feathery upright and very attractive pinkish seed heads. In winter, ours usually get knocked down to about four-feet high, allowing them to still stand above even the highest snow accumulations.
The stems turn a lovely beige-tan colour with the beautiful plumes lasting well into winter.
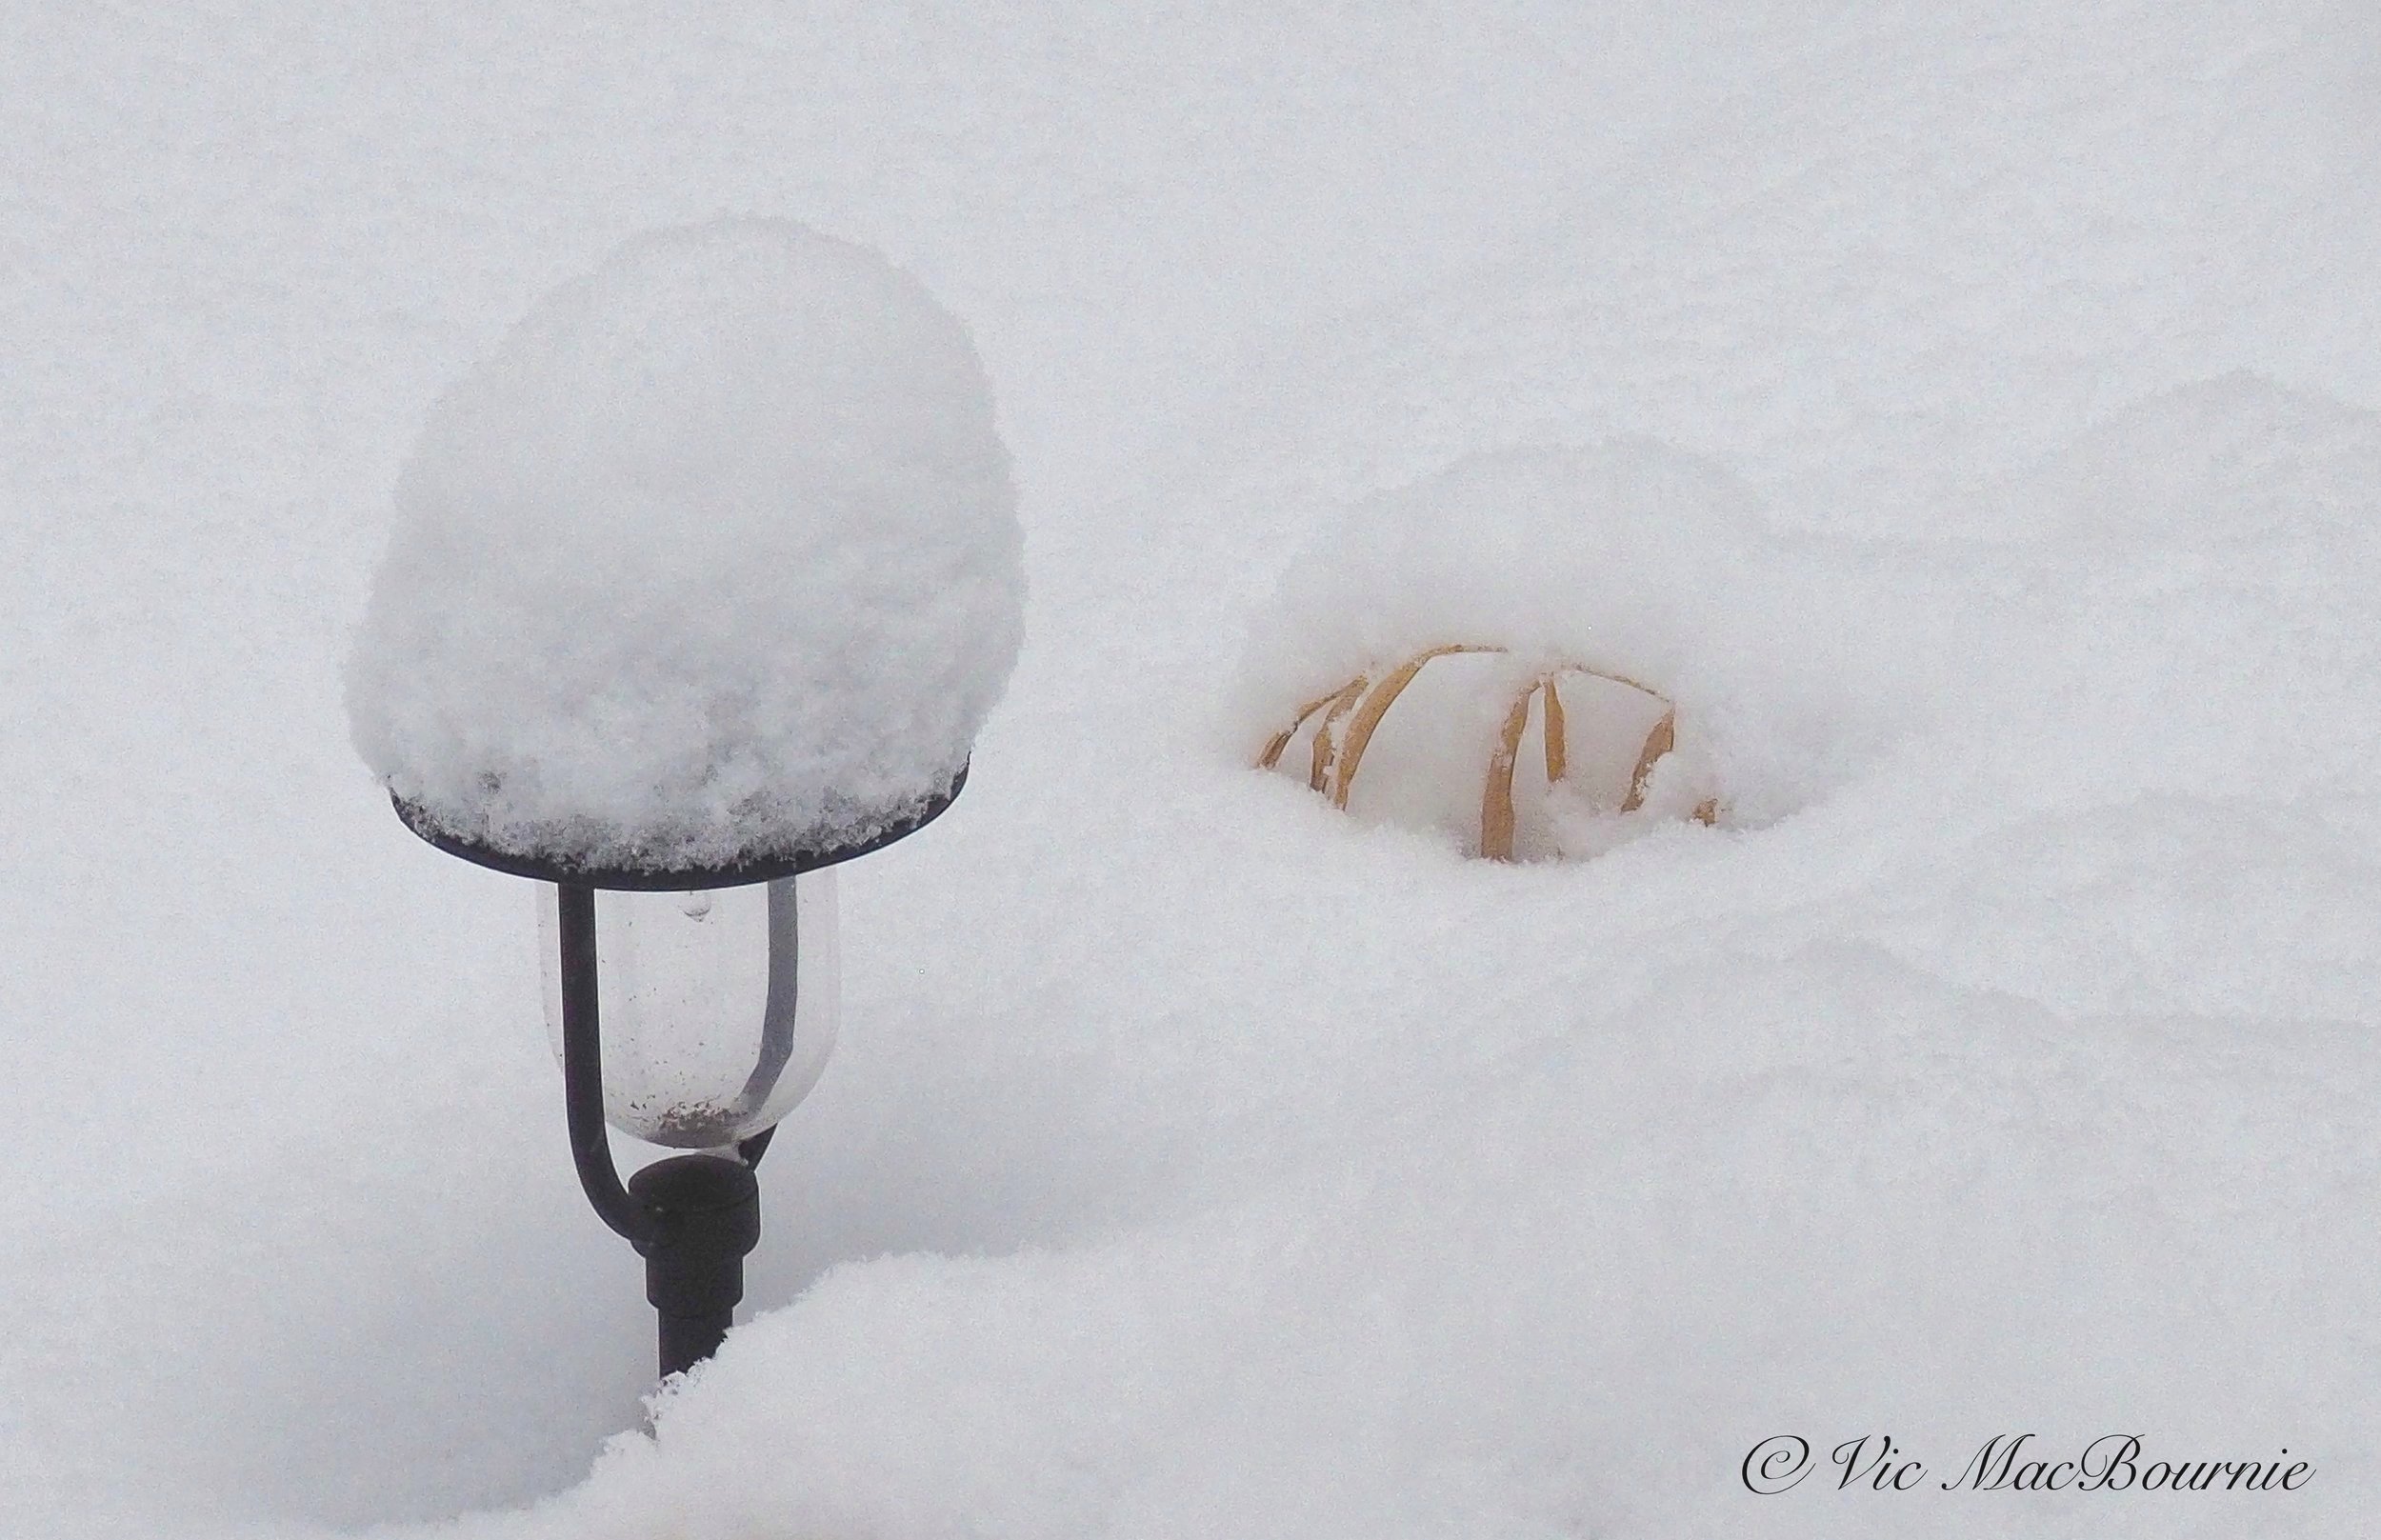
A combination of a garden light and a hint of Japanese Forest grass (Hakonechloa) makes for an interesting winter scene.
I also find our smaller fountain grasses to be excellent in the first half of the winter before the snow gets too high and buries the plants. But even a tiny bit of the grasses peaking up through the snow can result in a lovely, delicate photographic image. If you are searching for images, look for a single grass blade or grouping of three delicate beige grass blades forming an arc in the snow. If the seed head still remains, it’s a pure bonus.
The hybrid fountain grass Karly Rose is a larger fountain grass that carries lovely pink seed heads in late summer and can withstand more snow in winter before it is buried.
Panicum grasses are also a strong performer with great winter interest.
Calamagrotis Karl Foerster, a popular grass used in both commercial and residential landscaping is another grass that works well in the winter landscape. It’s upright habit and dense growth keeps it performing well into winter even in areas with high snowfall.

These grasses poking out of the snow work nicely with the white birch trees.
Photographing grasses in winter
Grasses, either covered in snow or mostly buried in winter’s ground cover, can be a rewarding photographic experience. But it’s usually not as simple as grabbing your camera and snapping a picture.
Successfully capturing the beauty of grasses in winter involves a number of factors that need to be considered.
The key to success is recognizing the amount of snow in the image. If you are photographing wisps of delicate grasses against a background of snow, it’s important to maintain the delicate look of the image. This would be an example of a high key image where the photograph has a clean white background with just a delicate hint of colour.
To create this image we want to “open up” our lens to allow more light into the scene.
What does this mean and how do you do it?
Shooting a snowy (or white sand beech) scene will trick the camera into thinking there is an incredible amount of light available. As a result, the camera will reduce the amount of light hitting the sensor (film) and give you snow that is very blue or, in the case of black and white photography, very grey. We’ve all seen the Instagram images of a lovely snow scene where the snow is blue and the real subject is too dark.
This is just the result of the camera doing what it does and using the metering system to create a “middle grey” image of the scene.
To compensate for this situation, and ensure the snow stays white, photographers say we have to “open up.” What they mean is we have to add back the light the camera wants to take away from the scene.
Today’s modern cameras are very good at recognizing various lighting conditions, but an abundance of snow is too much for most camera meters.
Below is an example of a typical underexposed snow scene. Compare it to the image below with the proper exposure.

An example of an underexposed snow scene where the snow turns grey or blue as opposed to holding its clean white look.

The same image shows a properly exposed scene where the white snow maintains its proper colour.
Escaping the blues: Simple solutions to photographing in the snow
The solutions to getting white snow are simple.
• If you are shooting in a program mode, (SP, AP or P mode) where the camera is automatically determining the proper exposure, try using the +1, +2 or even +3 compensation override to add the light back to the subject and make the snow white.
Be careful not to add too much compensation or you will (blow out) or take away the detail and texture in the snow. (If you are shooting a snow scene with a lot of blue sky, it’s unlikely any compensation would be necessary.)
• Possibly the easiest way to get the proper exposure is to go to the camera’s programmed shooting modes and look for the snow or sand/beach modes. Use these modes to photograph the snowy landscape. These modes automatically account for the brightness and make adjustments to keep the snow white. You may, however, have to use the camera’s compensation function (maybe +1) to tweak the scene depending how much snow is in the image.
In addition to the snow/sand modes, many of today’s compact cameras also include an “art mode” that allows the photographer to experiment with more artsy images. Set the camera to “high key” to create a delicate, ethereal look that might suit your image perfectly. This would work in a situation where you are moving in close on just a few strands of grass with a pure white background.
• Finally, if you are shooting in manual mode, get the camera’s suggested exposure and then use the +1, +2,+3 compensation to find an exposure that looks right. You can just check the back of the camera to get a feel for how the final image will look.
Bracket your snow scenes for best results
Getting properly exposed images in winter can be tricky, so it is probably a good idea to use bracketing whenever possible.
Bracketing is a process where you tell the camera to shoot a series of images at different settings – most often three images – where one image follows the camera’s suggested meter reading, another is a stop over and the final is a stop under. The result are three images where you have the opportunity to pick the one that works best for you.
I would suggest setting up the bracketing function before going outside so that you don’t have to fiddle with it in the cold.
Of course, some of these adjustments can be made in Lightroom or photoshop after you have taken the images, but it’s best to get it right in camera.
With a few simple adjustments to your approach, there is no reason to put the camera away during winter. Your garden takes on a completely different look in winter and its an opportunity to capture the delicate beauty of winter.
It’s also an opportunity to see the potential weaknesses in your garden’s structure. A picture never lies. Use your winter images to improve the garden structure come spring.
It’s just another good reason to buy more plants.
Use a camera with a viewfinder when shooting in the snow
It can be extremely difficult to see what you are photographing if you are using a camera without a viewfinder and being forced to use the camera’s LCD screen. If you are going out to shoot in the snow, either choose a camera with a built-in viewfinder or consider purchasing a separate viewfinder for the camera. The are usually a few you can choose from that would work with the camera.
There are also attachments available that can fit over the back of your camera to shade the LCD screen.

Forest Bathing: How to use nature to find peace, better health
Forest bathing has found its place in North America during the Covid pandemic, but it got its start in Japan in the 1980s. Come explore Forest bathing in your own backyard.
Let me bring you songs from the wood
To make you feel much better than you could know
Dust you down from tip to toe
Show you how the garden grows
Ian Anderson
Gardens can be the perfect starting point
Finding peace in the forest or woodland is nothing new. For centuries, people have sought the quiet solitude of these places to escape the stress of urban life.
Tapping into and recognizing the true healing power of the forest, woodlands and natural areas, however, is a fairly recent endeavour.
“It was the Japanese Ministry of Agriculture, Forestry, and Fisheries that established the practice of “shinrin-yoku” (literally translated to “forest bathing”) in the 1980s, as a response to a rising health crisis in their country,” explains Fru Molnar, a Certified Forest Therapy Guide (www.ForestBaths.earth).

Fru Molnar, a certified Forest Bathing guide from New York state.
She explains that: “Spending time in nature has been an accessible way to co-regulate the human nervous system for as long as we’ve been on this planet. And, with the evolution of humans, our consciousnesses, and our technologies, we have also developed multifaceted practices to connect with the natural world in order to heal ourselves.”
In the United States, Canada and Europe, the Covid pandemic helped turn woodlands and natural areas – including our gardens – into places of refuge where we could escape the stress and worries associated with big cities, crowded streets and the constant fear of contracting the disease.
Forest bathing for many, whether we realized it or not, became a lifesaver.
“In recent years, I would posit that forest bathing has been gaining traction throughout the pandemic in particular not only because it’s a tangible stress reliever, but also because it was one of the only activities that many folks could still enjoy during peak lockdown times, at least in the United States,” explains Fru, from her home in Peekskill, New York, a town on the Hudson River about an hour north of Manhattan
“When you’re truly engaged with your senses in the present moment in nature, that’s forest bathing to me.”
“Even in the height of the pandemic, people were able to discover that being outdoors in fresh air with plenty of distance between each other can be an avenue for self-care, play, socializing or community care, and recreation. It’s no coincidence, either, that forest bathing has been proven to boost the immune system – so the health and wellness benefits are obvious draws.”

Fru, a certified forest bathing guide, with her husband Evan exploring the mountains.
Forest bathing actually played a key role in helping Fru and her husband, Evan, find a more satisfying life away from the stress of the big city life.
Evan, a creative designer and digital artist created beautiful images to promote Fru’s Forest Bathing business. For my complete story on Evan’s outstanding work go here.
The couple escaped the big city life in Manhattan by taking a leap to a more rural area of New York state to create Fru’s dream of a more natural lifestyle as a Forest Bathing guide.
“Yes, absolutely. New York City will always have a huge piece of my heart, but I needed balance,” she explains.
“I learned that the concrete jungle isn’t always the most healthful environment for a sensitive person who longs to feel synced to the movements and energies of the natural world; I realized I needed to be living somewhere where I could actually touch the earth with my bare feet on a daily basis, where I could look out my windows and see more trees than buildings, where I could plant a garden and grow flowers for my friends, where I could hike up a mountain after work instead of hiking up endless subway steps.
“This experience was amazing. It took me days to speed back up again, and I don’t think I will ever feel like I have to move so fast again!”
For a few years, the couple combined the fast pace of Manhattan during the week with a slower pace of nature on weekends they hiked in the Hudson Valley.
Eventually, everything fell in place to “re-root here in Peekskill” she explains.
Peekskill is the basecamp for her forest therapy guide company.
To get to this stage she needed to become a certified forest therapy guide which she did via the Association of Nature and Forest Therapy Guides and Programs.
The program consists of a six-month online intensive training, followed by a four-day in-person immersion training, Fru explains. She also holds a certification in Wilderness First Aid Basics – an important addition in case of an emergency in the field.

Opening the door to nature
“Additionally, I’ve spent over a decade walking the trails and intimately getting to know the natural landscapes of the Lower Hudson Valley area as an avid hiking, camping, and outdoor adventure enthusiast,” Fru explains.
She is quick to point out that she – and others in her profession – are not therapists, but guides.
“In this practice, we allow the therapeutic work to be done by the natural setting itself. We hold the container for this unique relationship to form between each participant and the forest. A favorite motto among forest therapy guides is: “The forest is the therapist. The guide opens the doors.”
How to discover nature through the senses
“What forest bathing means to me is to be present in nature (any nature, it doesn’t actually have to be a literal forest). It’s really as simple as that. Coming into the present itself can be done through a variety of methods, and I find the most accessible is through the senses,” explains Fru.
“Nature offers such a gorgeously rich tapestry of sensory delights that make it almost impossible not to be present when touching the delicate petal of a flower, or listening to the birds singing, or watching water in a stream.
“When you’re truly engaged with your senses in the present moment in nature, that’s forest bathing to me.”
“That doesn’t mean you’re not having thoughts, of course, but the idea behind the practice is that it’s a restorative one – one where we get to step out of our minds a little bit, and step into our bodies, relax into nature, and enjoy the moment without expectations, without trying to “achieve” anything, just being open to receiving the gifts of Mother Earth. Try it – you might be surprised at how profound things can get when you start looking more closely at the mushrooms, or start actually listening to the trees."
““I had such a good time yesterday that I went out into the woods again later that day, just to do some writing on paper and be with the trees.””
What are the benefits to forest bathing?
There are so many physical, mental, and emotional benefits to the practice of forest bathing, some of which can be felt immediately, while others have more subtle effects.”
Three decades of scientific studies in Japan show the vast array of benefits that can be derived from spending mindful, structured time in nature, explains Fru.
These benefits range from the purely physical – boosting immunity, lowering cortisol and adrenaline levels, activating the parasympathetic nervous system, and lowered blood pressure, to the emotional and mental – enhanced mental clarity and cognition, increased access to certain types of creativity, improved mood, increased sense of vitality, and relief for chronic depression, anxiety, and other mental conditions.
“It’s truly incredible the breadth of ways in which simply being in the atmosphere of the forest can have a profound effect on us humans, both physiologically and psychologically,” says Fru, adding that “anyone who has spent a few hours in the woods knows how much better you feel afterward.”
Readers who are interested in diving deeper into the science behind any of these benefits, can find links to many of the studies on Fru’s website here.
“I had a pretty profound experience where I met my higher self and she told me that I’m worthy of love- it was a beautiful goddess version of me.”
What to expect during a forest bathing session
If you have never experienced an organized forest bathing session, you might be surprised.
It is not necessarily travelling deep into a forest and meditating for hours until the perfect Zen state is achieved. Of course, that can be part of an experience but most experiences are simpler and more accessible. For some, it could involve a slow movement through a natural area, for others, it may just involve sitting in a quiet place.
“This practice can be done while in motion, too – nature itself is always in motion, after all. So it’s not necessary to be seated or meditating while enjoying nature, but I do encourage slowness during movement. We want to let our bodies really feel relaxed and held, and for some this might mean moving around, and for others it may mean laying on the earth and watching the clouds float by. It’s all medicine.”
What’s a typical forest bathing session?
Fru explains: “Sessions range from 2-3 hours depending on the size of the group. We don’t walk the entire time, and there are usually several opportunities to take seated breaks along the way. Typically we cover no more than 1 mile in total distance.
“We gather at our meeting spot and I give a brief introduction. Then, I guide us in some gentle mindfulness practices to awaken our senses and ground us in the present moment.
“From there, we slowly wander and get to know our forest or natural setting. Along the way, I offer a few invitations designed to further connect us with our surroundings as we explore. I always build in chances for you to connect with the forest on your own terms, in your own authentic way. All elements of the session are completely optional and offered as invitations only.
“There are also opportunities to gather in a group and share with others. I really prefer guiding groups for this reason – when we share with others, and even more importantly, when we listen to and witness others’ experiences, our own experiences become all the more enriched for it. Someone sharing a story about a moment they had with a turtle might awaken something deep within another participant, or might prompt someone else to seek out their own kindred creature.”
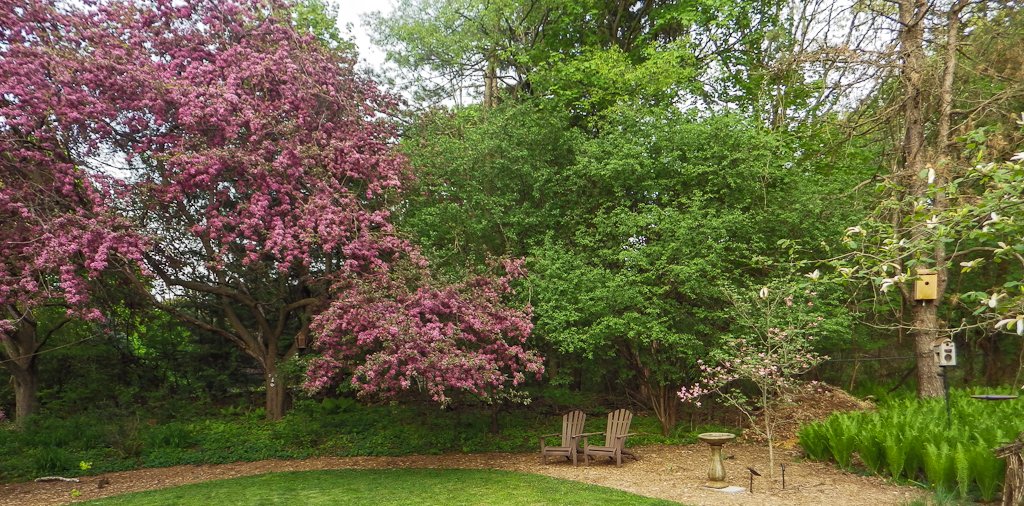
You don’t have to be out in the deep forest to practise Forest bathing. Pick a chair in your own garden and work to become one with nature. Fru will even work with far-away gardeners over zoom through their smartphones.
Can we practise forest bathing in our own natural garden?
The benefits of forest bathing can be achieved as much in your backyard as they can in the deepest forest. Afterall, it is as much a presence of mind as it is a physical place.
Our woodland gardens just might be the ideal place for us to experience the joys and peace forest bathing offers.
“Gardening is a perfect gateway to forest bathing! Caring for plants in a reciprocal relationship is a core value of forest therapy guides and gardeners alike,” explains Fru.
“I was surprised how much better I felt after and how deeply positively it affected me.”
She offers a simple technique: “I’d like to share a very simple but truly profound forest bathing invitation that gardeners can do every single day in their own backyards. It’s called “sit spot,” and it’s exactly what it sounds like — find a place in your garden where you can sit (or lie down) very comfortably for at least 15-20 minutes.
“Then, do just that — sit. And be. Allow yourself to do nothing. See what happens as you observe the world around you unfold. Notice with all of your senses. Cultivate patience.
Fru recommends people who have a peaceful garden to do this exercise every single day in the same spot, if possible. “It’s truly magical to notice how the landscape changes, and how it stays the same — and how we change and stay the same right alongside it.”
The good news is that Fru is available to hep guide gardeners either in person if you live nearby, virtually using a smart phone or through a zoom call.
Gardeners who would like to contact Fru can do so easily through email at her website at ([email protected]), or by filling out the booking form on her website.
“Walk was extremely calming and relaxing. I felt very supported to allow the invitations to flow easily, without judgment or control. Heart rate decreased, breathing felt more nourishing, filled with gratitude post-walk. Felt more connected with myself, my environment, and the walk group.”
Exploring a virtual forest bathing experience
Even if you don’t live anywhere near the Lower Hudson Valley (NY), Fru is available to guide virtually.
“On virtually-guided walks, you get to choose the location, and I’ll guide from my own location. So we won’t be physically present with each other, but we will be doing the practice simultaneously on our phones,” Fru explains. “These 1.5-hour journeys are a low-key, accessible way to get many of the benefits of an in-person forest therapy experience from your own backyard or favorite outdoor spot. All you need is a device with Wifi or cell connection, headphones, and someplace green that calls out to you. Wherever you participate from, the guided session includes sensory invitations and optional group sharing opportunities, and we’ll finish with a virtual tea circle!”
Exploring the virtual experience is just another way natural, woodland gardeners can explore the benefits of their hard work and become more aware and connected to their garden.
Gardeners who would like to contact Fru can do so easily through email at her website at ([email protected]), or by filling out the booking form on her website. You can visit her website at www.ForestBaths.earth
• Lastly, if readers want to find other ANFT-certified forest bathing guides near them, check out this comprehensive list of more than 500 certified forest bathers in the following directory and search by city or state or country, including forest bathers in Canada, the U.K. etc.
•A quick search in my area turned up Forestbathingwithbeth which is operated in Barrie just outside Toronto, Ont., Canada.
• For those in the west, or those readers looking for the ultimate Forest bathing experience in the Cdn. Rocky Mountains, contact Ronna at Forest Fix who operates in the Canmore/Banff area.

Olympus camera system in the garden, the woodlands and on vacation
The Olympus Micro Four Thirds OM-E-M10 camera and lenses are a joy to use and a true competitor for both full-size cameras as well as advanced point-and-shoot models.
Stunningly good: First impressions of the Olympus OM-E-M10 Micro Four Thirds system

This beautiful little Cape May Warbler was photographed with the Olympus E-M10 and the 40-150mm on the backyard birdbath.
If you are like me and put off purchasing a Micro Four Thirds camera for garden, wildlife and vacation images, it’s time to reconsider.
I picked up an Olympus E-M10 Micro Four Thirds camera with two kit lenses, and together with a converter and my existing high-quality, vintage 300mm F4.5* lens and a sweet 50mm macro f2.8 Pentax lens, I instantly have a compact photographic system with big potential.
When I say picked the camera and lenses up, I mean truly picked it up for the very first time.
Be sure to check out my Olympus Photo gallery.

Flowering dogwood shot with Olympus E-M10 using the soft focus setting.
I have been admiring Olympus cameras from afar for years – actually since a young female photojournalist I worked with more than 30 years ago used the Olympus OM1 compact 35mm system.
The E-M10 takes on a lot of the vintage vibe of that original OM1 system. Although I have the all-black version ( I love all-black cameras) there is also a silver and black version that gives off a terrific vintage vibe.
For more information on Olympus, check out my complete review of the Olympus PEN system.

Black swallowtail on Agapanthus shot with Olympus EM-10 and kit 40-150mm.
I can honestly say, however, that I have not held an Olympus camera in my hands since I admired the photojournalist’s impressive OM1 system.
In the hand, the E-M10 has the necessary heft to give it the feeling of a precision photographic tool that’ll put a smile on your face the moment you pick it up.
But that all changed recently when I received a box in the mail from an online seller who upgraded to a newer Olympus OM-D E-M10 Mark IV. He told me he loved his Olympus E-M10 so much that he bought the new, more expensive model.

Olympus OM-D E-M10 camera with two kit lenses.
The fact he upgraded to a newer model is always a good sign, especially for someone like me who had no real idea what to expect except from what I had seen on Youtube reviews and what other photo bloggers have written about the camera.
Let’s not kid ourselves, this is an older camera and Olympus has come a long way since they released the Olympus E-M10 in January 2014. That makes the camera almost ten years old already. But, in my book, it lacks very little of what I truly need to capture images in the garden, about town or on vacation.
The features offered in modern OM System cameras are truly outstanding and in many ways cutting edge in comparison to other camera manufacturers. The system is certainly one that should be considered if you are looking to purchase a new, modern camera.
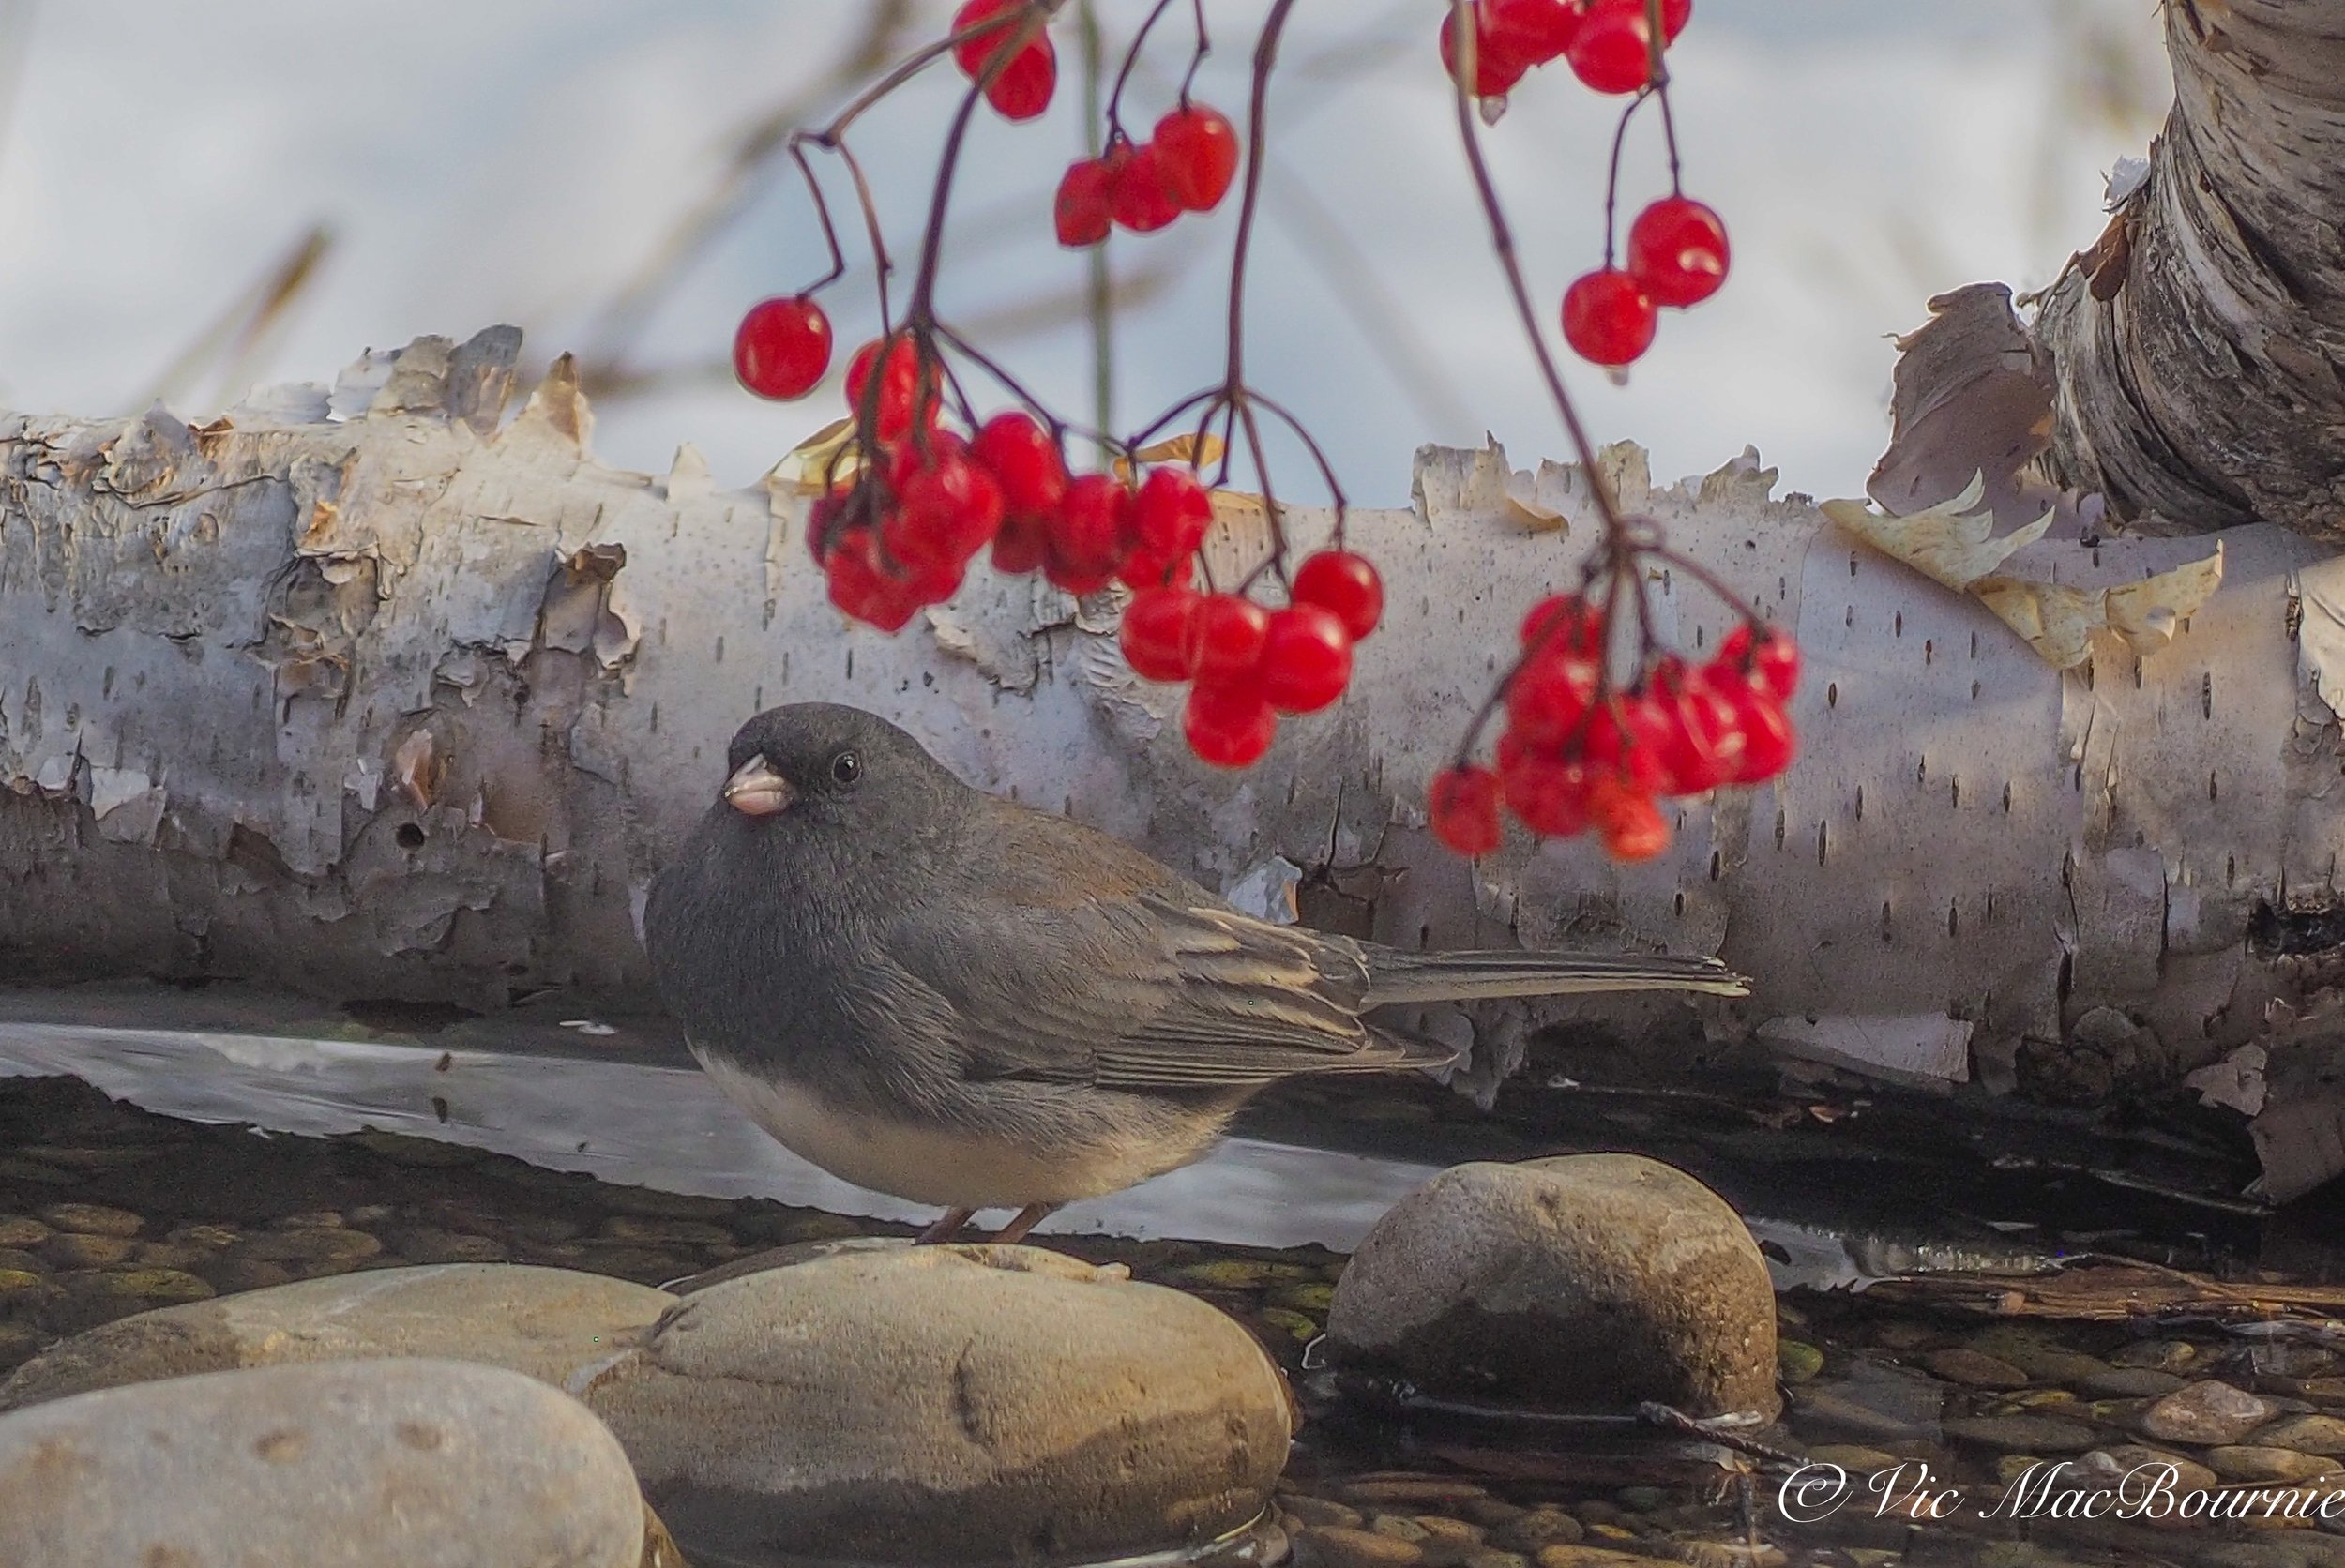
This Junco was photographed with the inexpensive 40-150 f4-5.6 lens.
I like the price of older cameras when I want to experiment with new systems and, unless you need the latest in technology, older versions of high-quality cameras are more than most of us really need to capture our garden, wildlife and other images such as our children, grandchildren, while on vacation and at special events.
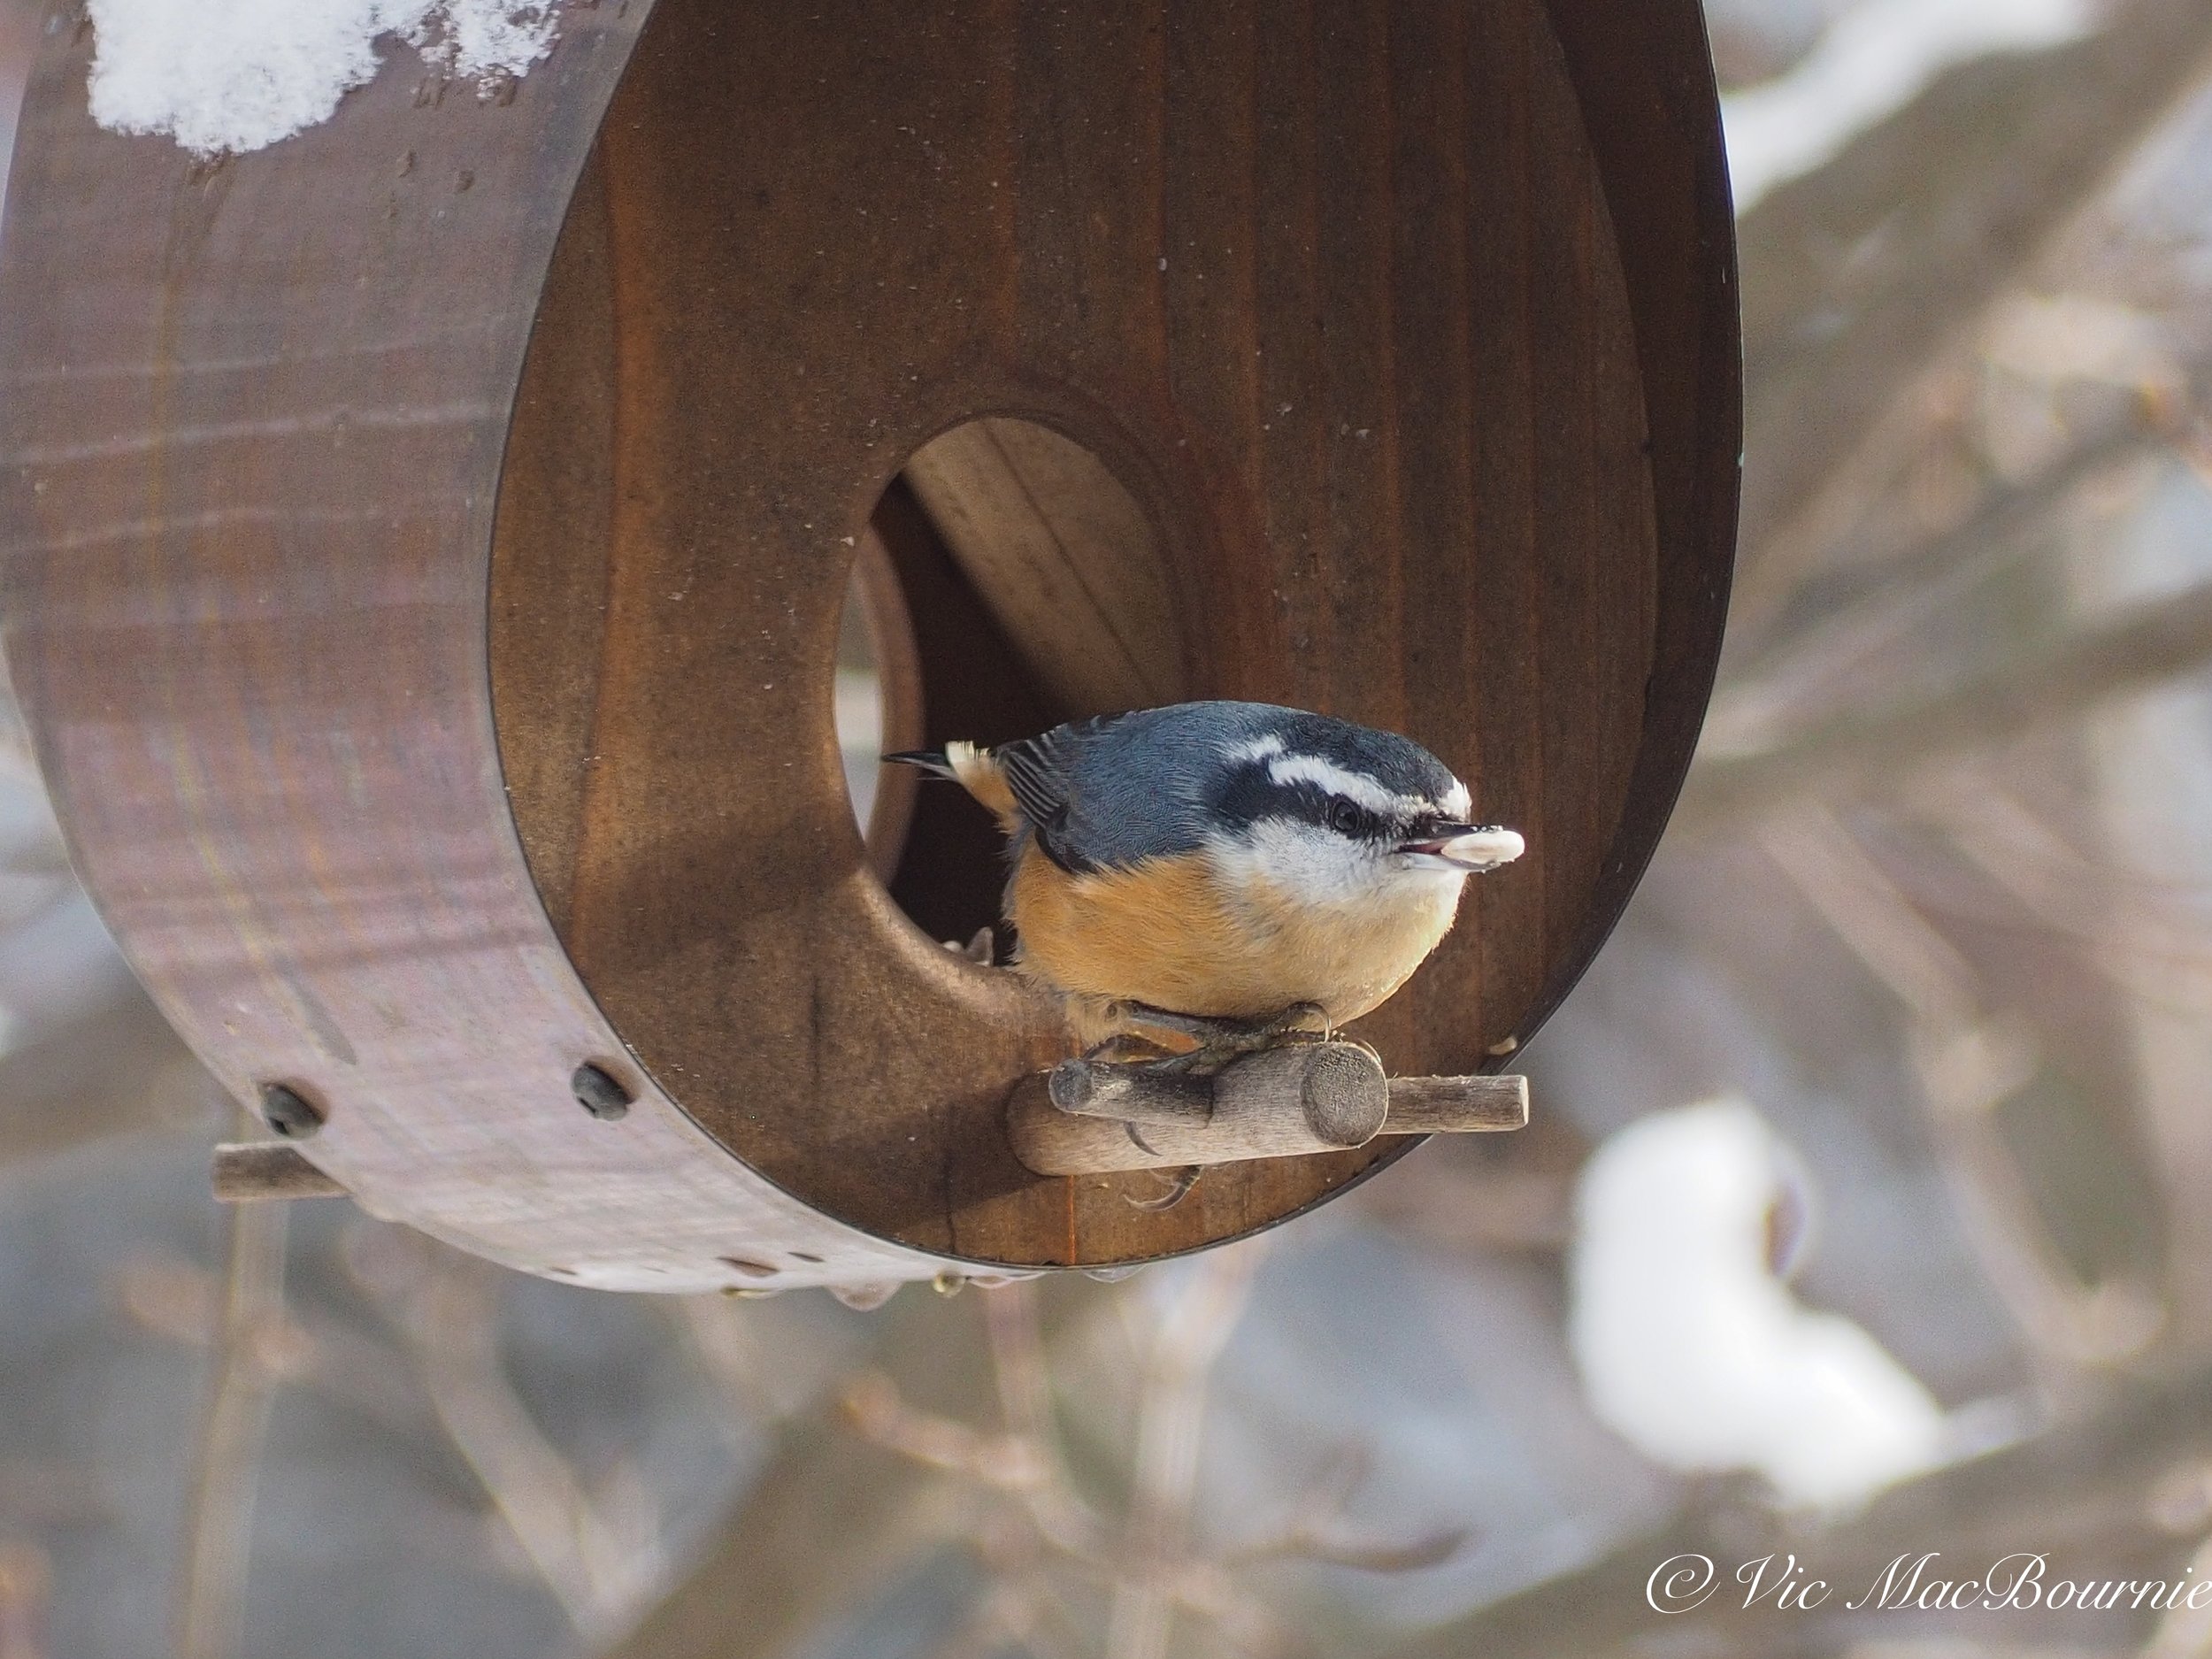
Red-breasted Nuthatch at Q&A bird feeder taken with the Olympus 40-150mm kit lens.
If you follow my website, you’ll know that I use Pentax as my main camera system, but that I also like to dabble in small, enthusiast point-and-shoot cameras as well – Fujifilm, Lumix and even the odd Canon point and shoot.
Pentax, not unlike Olympus, likes to forge its own path and appeal to the more discerning advanced amateur photographers. These photographers are generally as much concerned about the experience as they are about the size of their camera bodies and lenses.
To their credit, Olympus has created a cult following of believers with their outstanding camera lines, ranging from the OM-D line to the truly compact and elegant PEN systems. Even their TOUGH line of point-and-shoot cameras offer an impressive array of accessories that create a versatile photography system with waterproof lenses, protective cases, and an underwater housing.

Chipmunk photographed with the 40-150mm F4-5.6 kit lens.
If you are looking for a camera system, be sure to check out the Olympus Shop Featured Weekly Deals for great savings directly from Olympus.
But, let’s get back to my new (to me) toy – the E-M10.
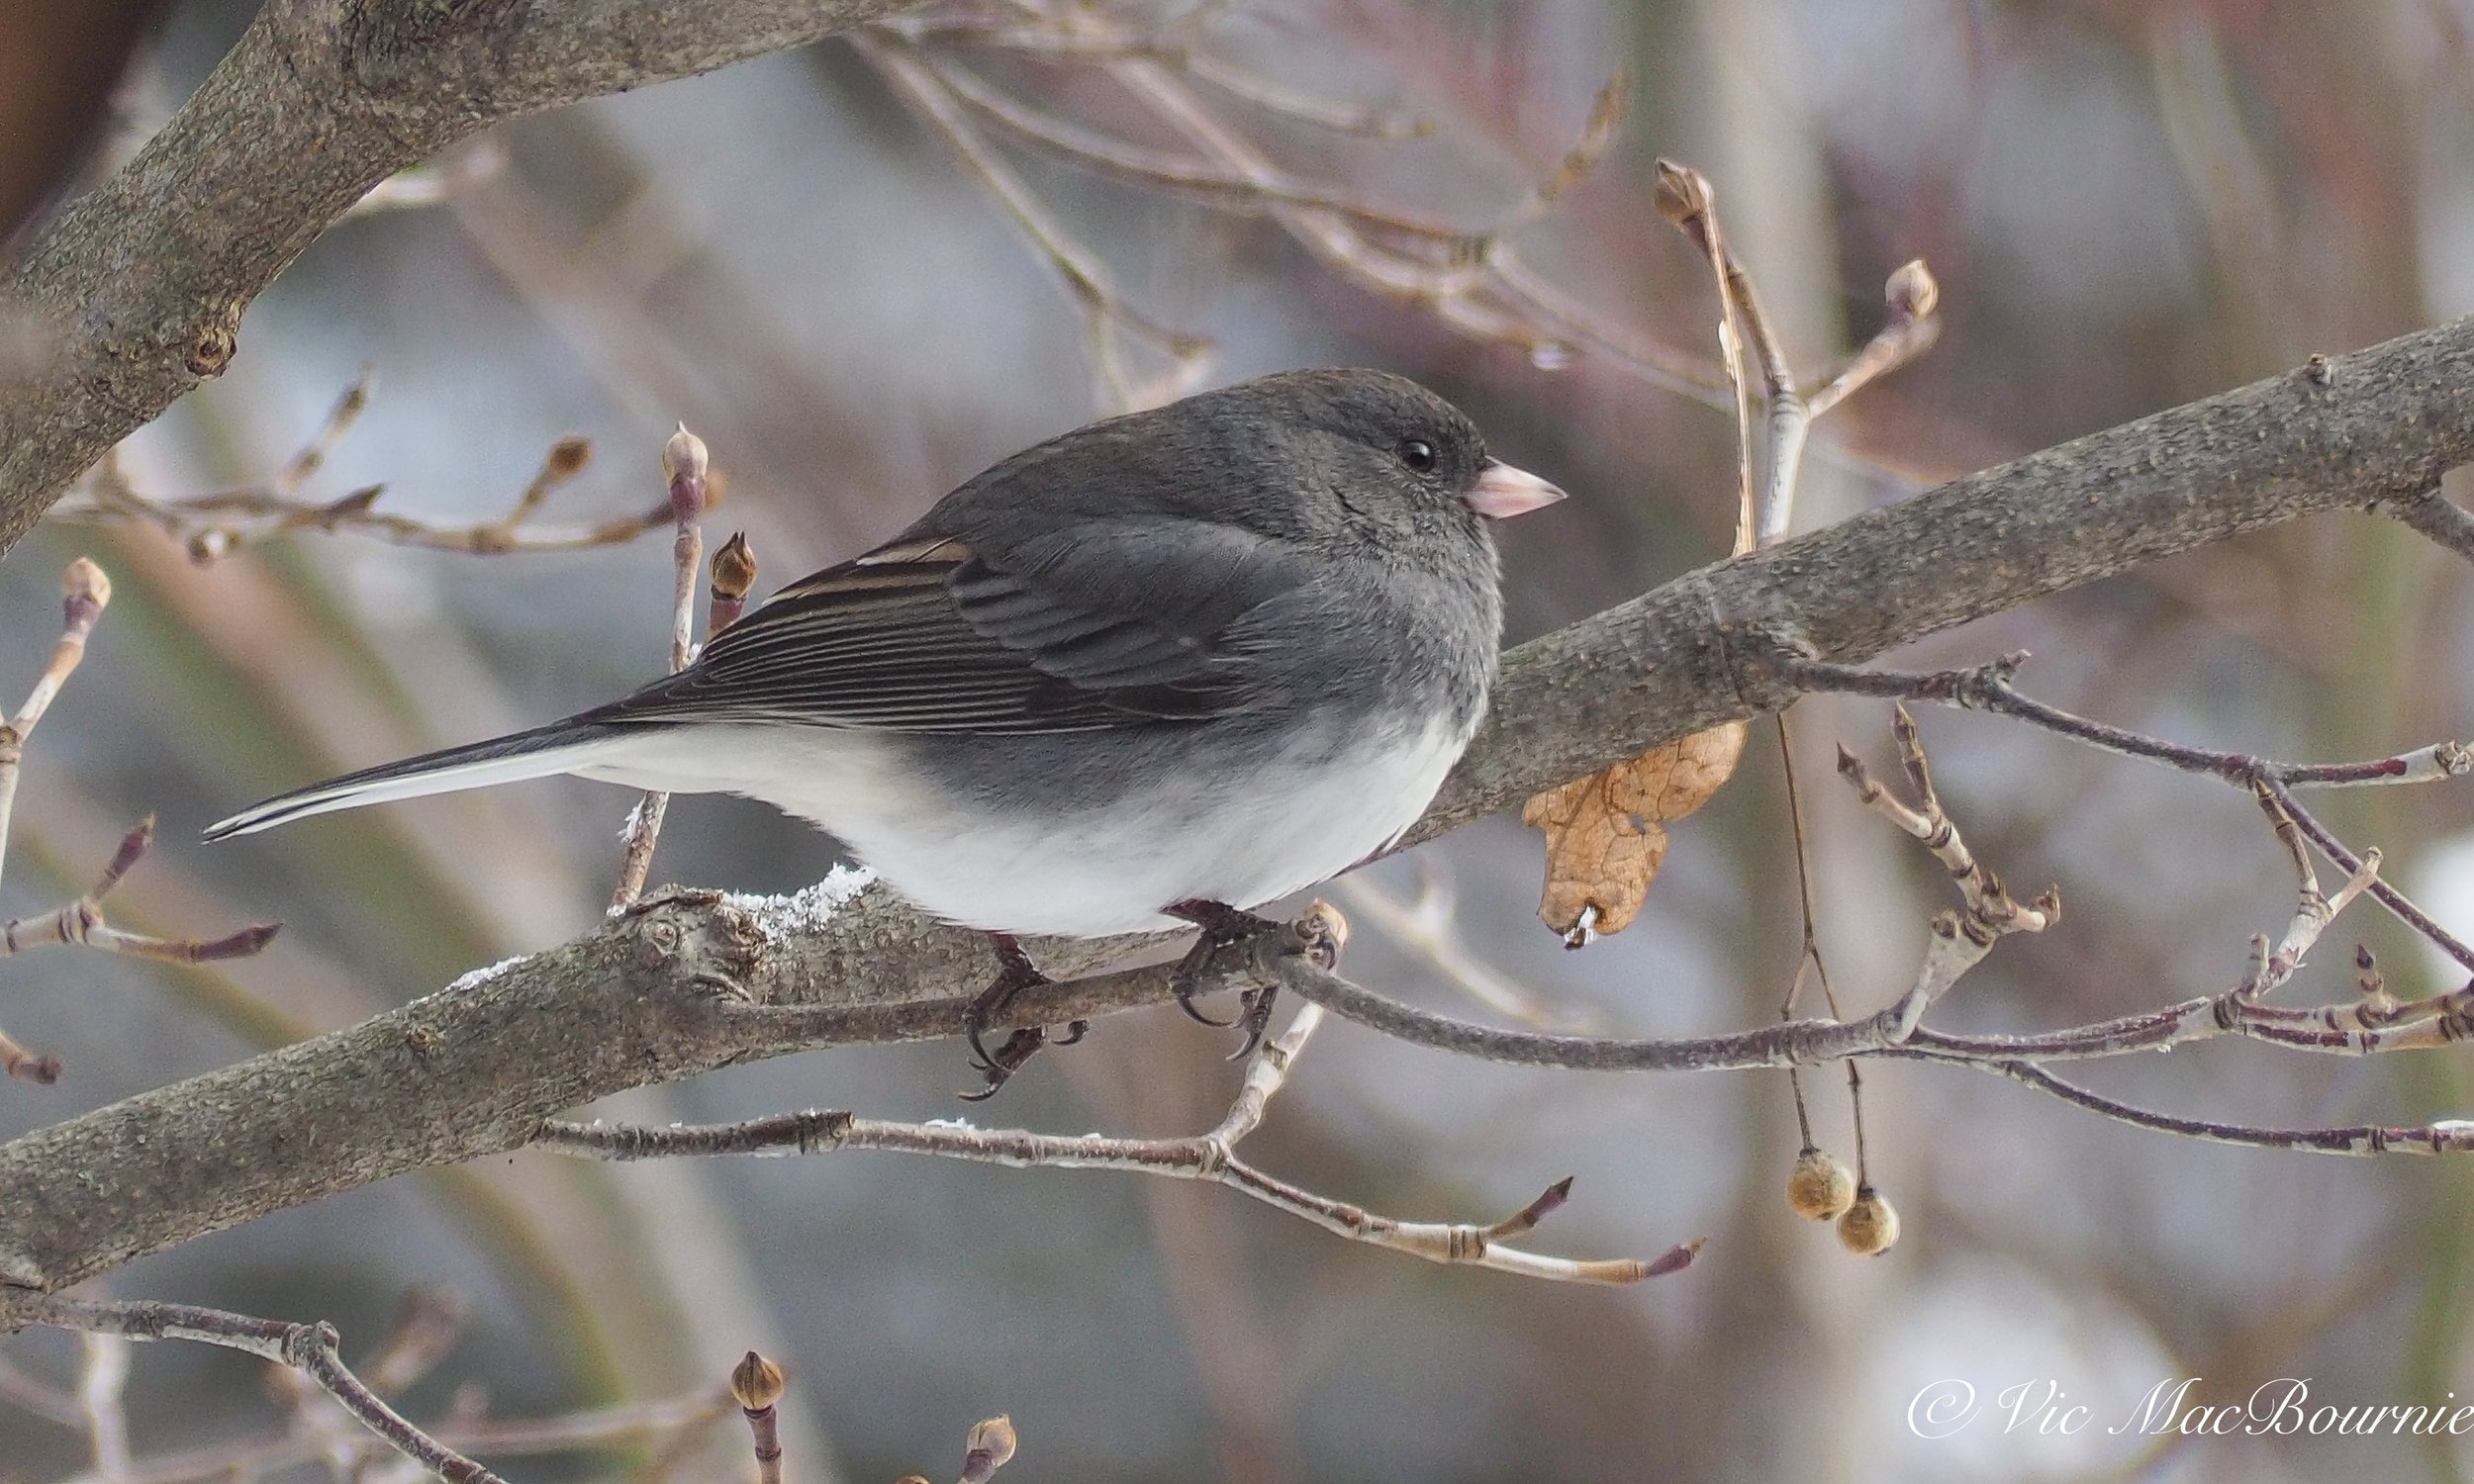
Dark eyed Junco on Cornus Kousa tree in winter.
The retro-looking E-M10 packs plenty of modern features
The Olympus OM-D E-M10 was released in January of 2014 packing 16 megapixels into its Micro Four Thirds sensor. It was actually the third model in the OM-D series of compact, mirrorless, interchangeable-lens cameras, and aimed at photographers looking for a less expensive solution to its predecessors.
The E-M10 may have been less expensive than its predecessors, but Olympus did not cut corners on quality or the photographic experience with this camera.
If you are looking to add a new Olympus camera, a lens or another brand of camera, be sure to check out the large, ever-changing selection from KEH Camera Exchange. Click here to check out there selection of used camera equipment.
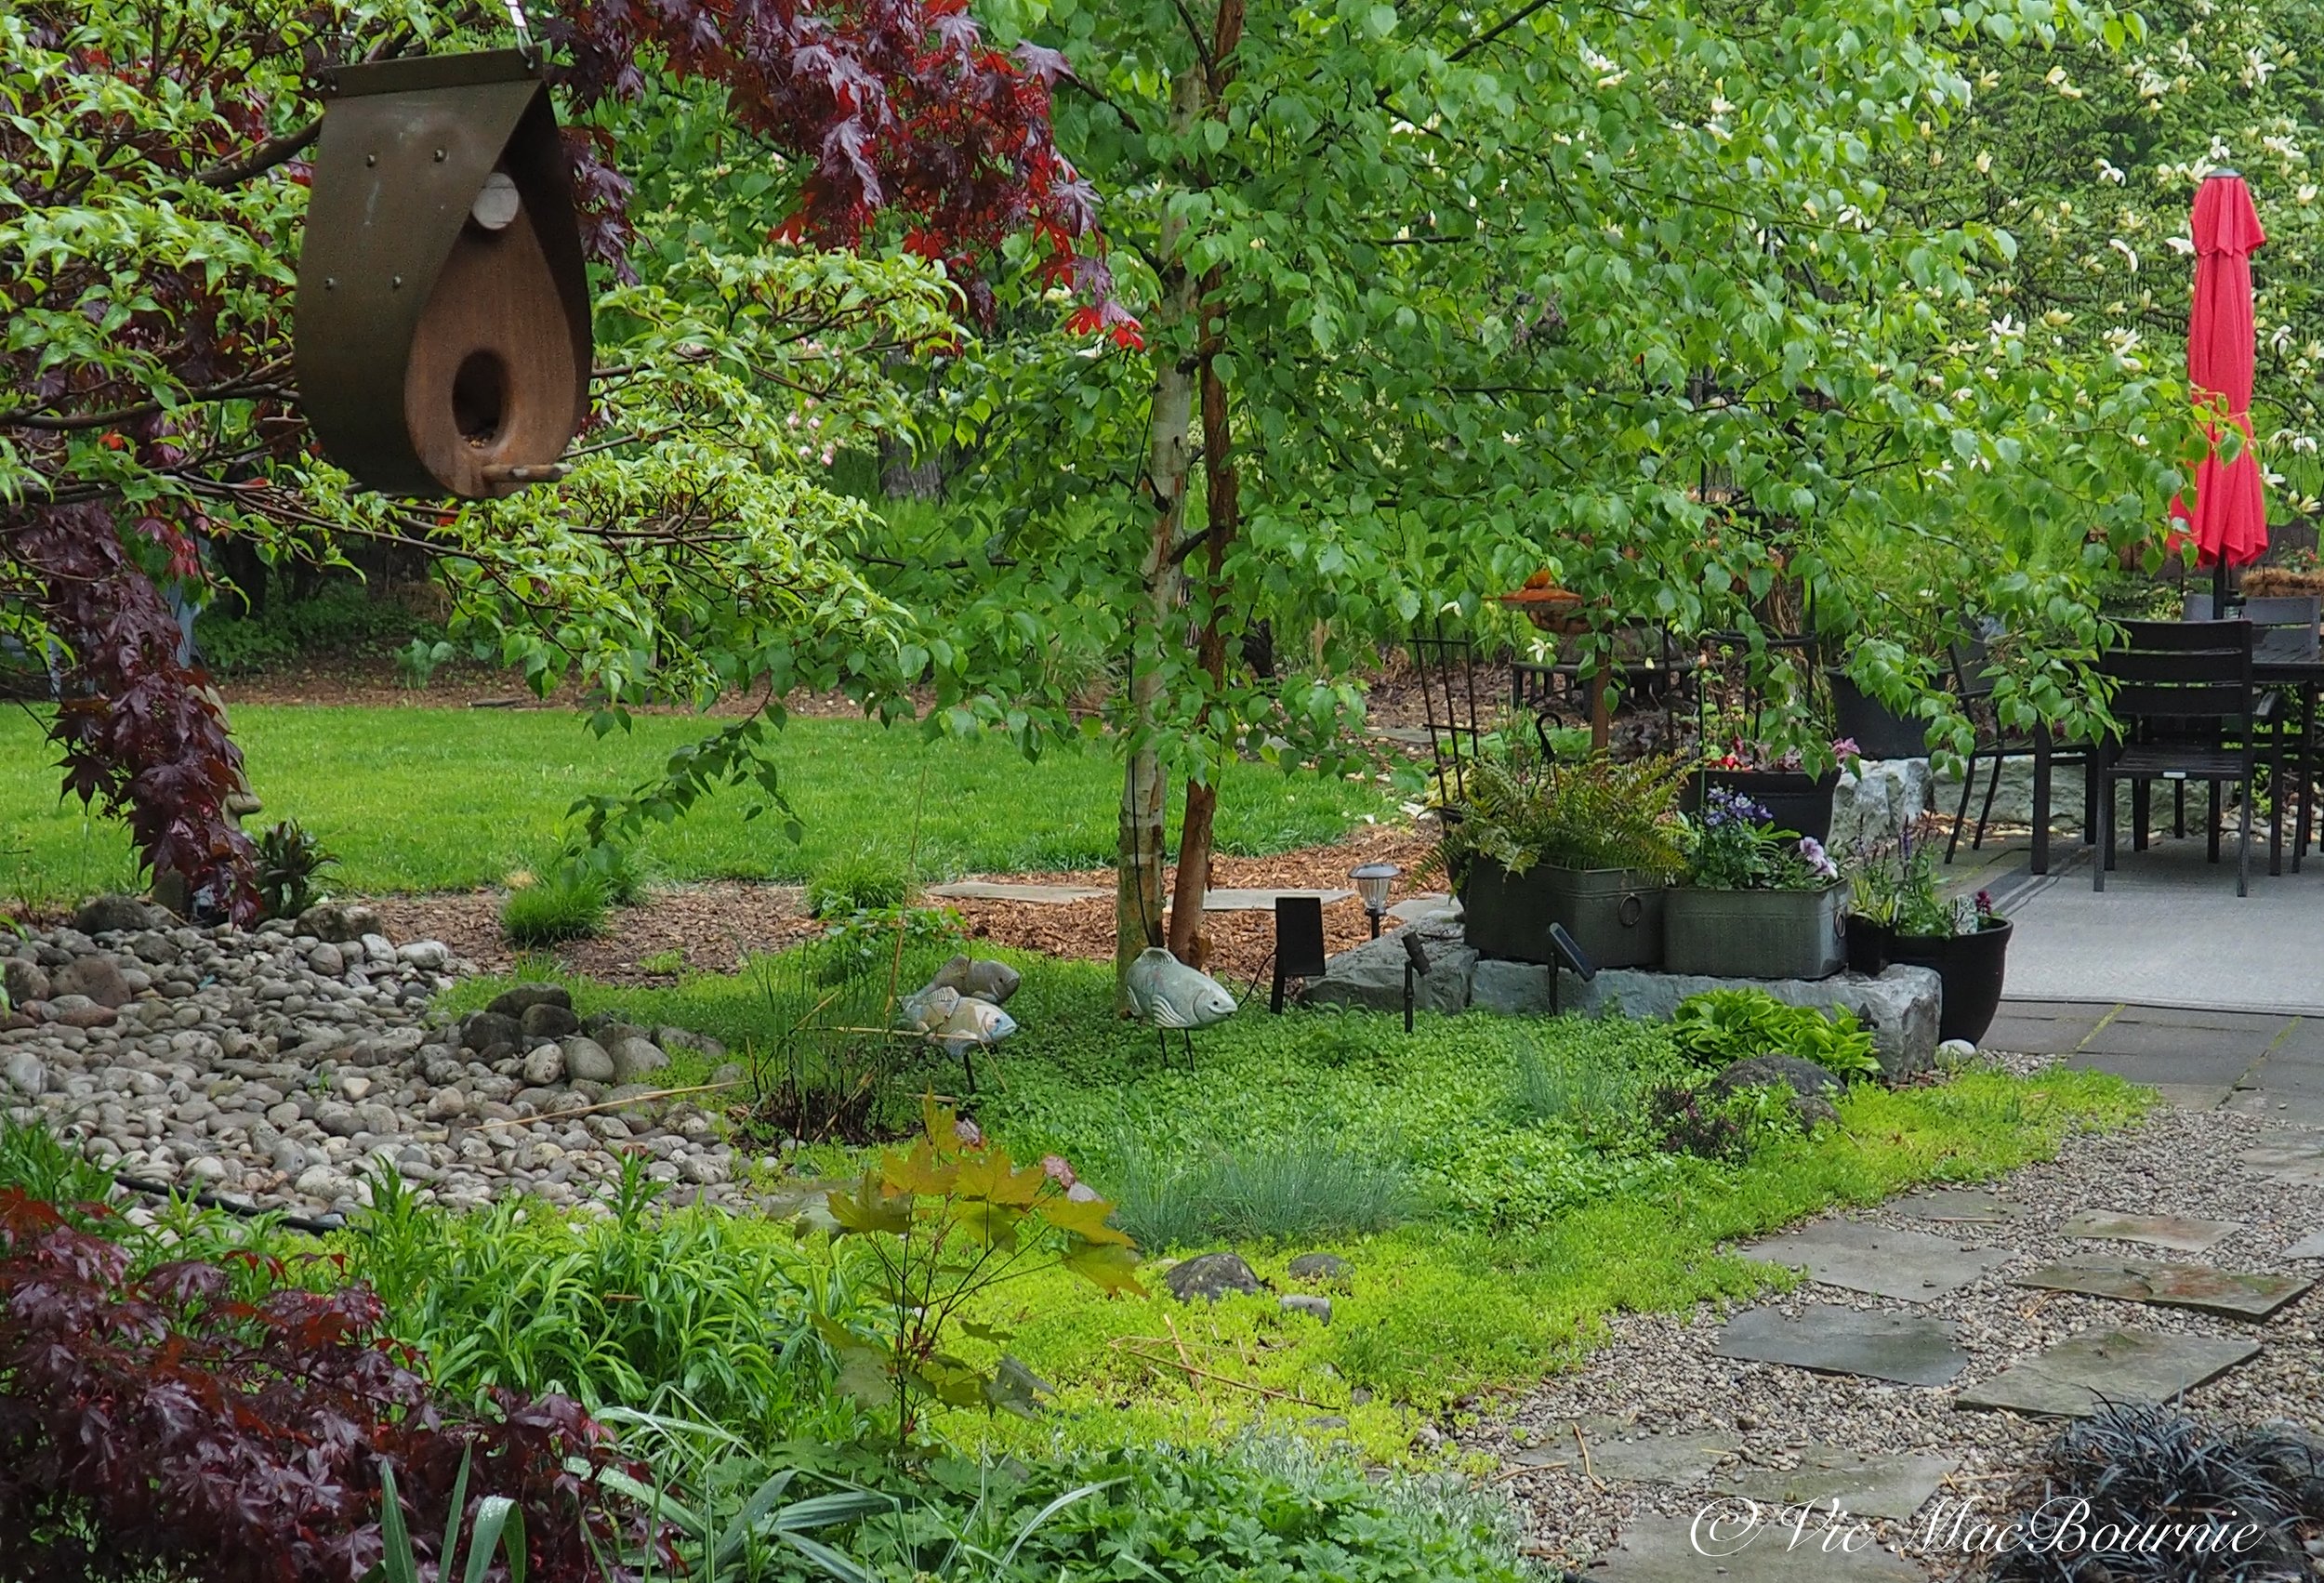
Our garden in spring photographed with the Olympus OM-D E-M10 and the kit lens 14-42mm.
OM-D E-M10 key features
16MP Four Thirds CMOS sensor
Twin control dials on the top of the camera
A solid, pop-up, built-in flash
Camera shoots 8 fps continuous shooting
The E-M10 has a handy tilting 1.04M dot LCD touchscreen
In addition to the LCD touchscreen, it boasts a 1.44m dot LCD viewfinder
Incorporates Wi-Fi for travellers allowing remote control and file transfer to smartphones
Focus peaking for those who want to use vintage lenses with an adapter
A full range of art filter modes and scene modes
The ability to shoot in Aperature, Shutter, Program and manual mode for more advanced photographers
'3-axis' image stabilization unlike other Olympus OM cameras with 5-axis
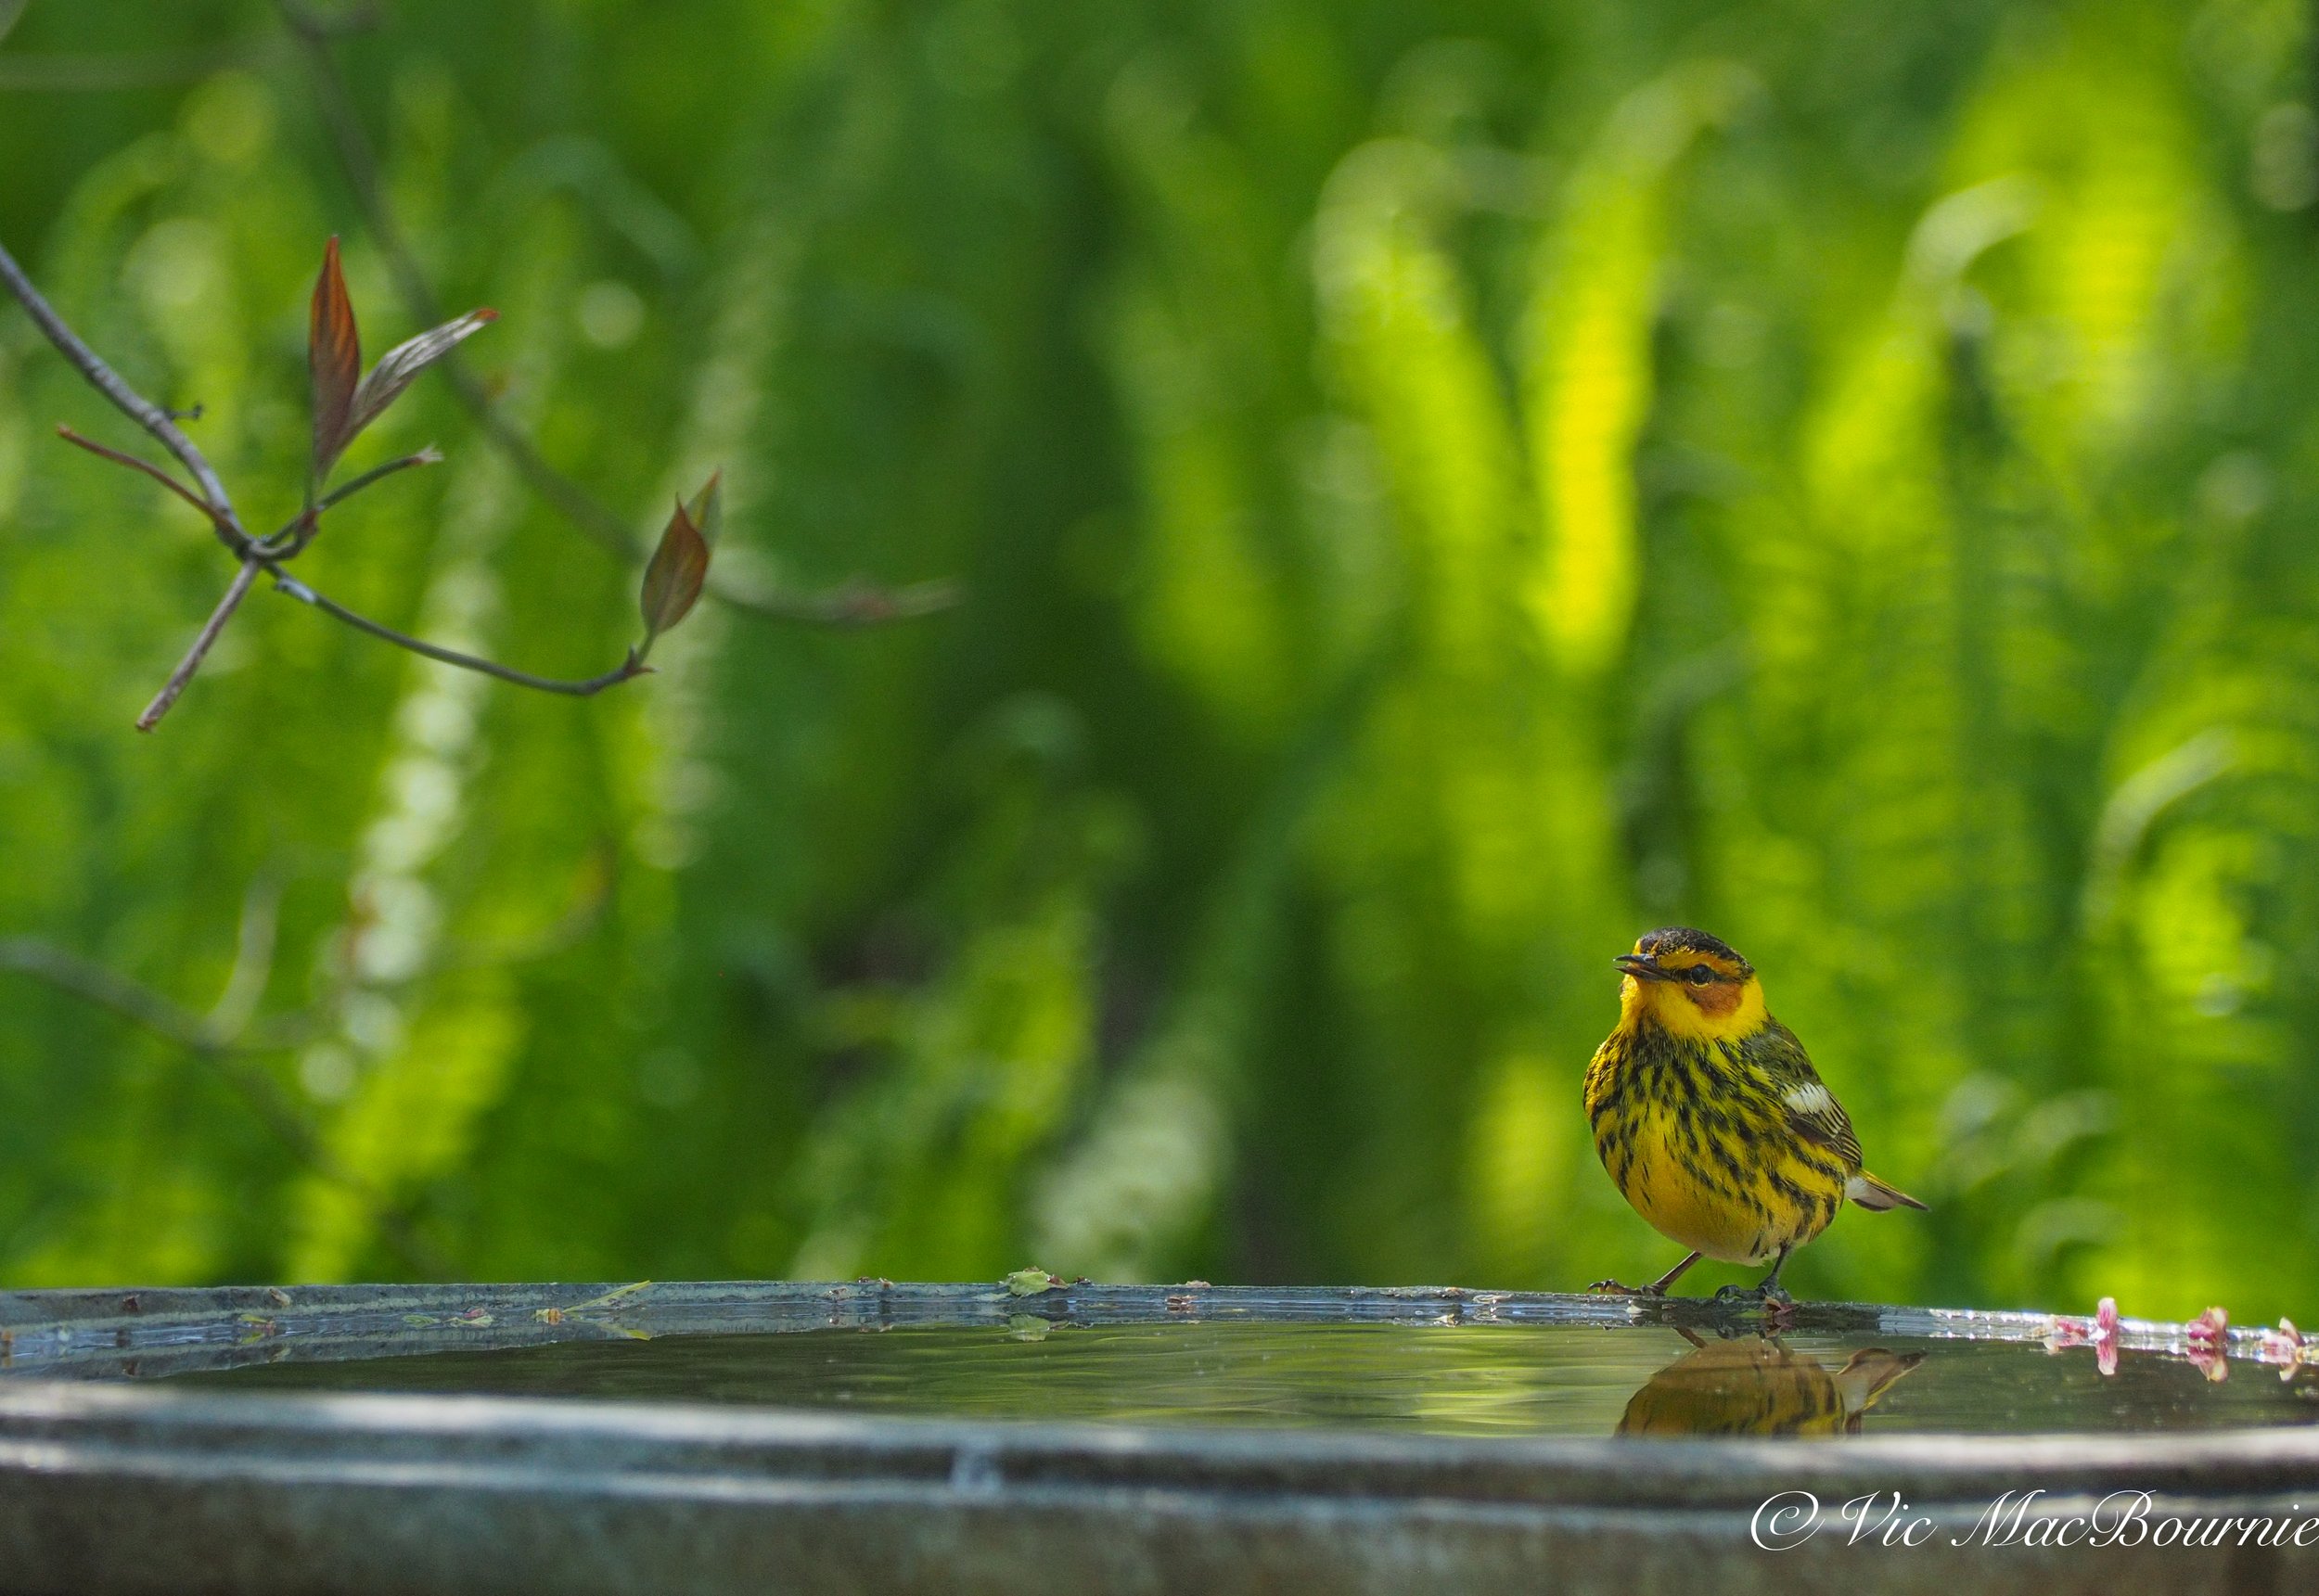
In the hand, the E-M10 has the necessary heft to give it the feeling of a precision photographic tool that’ll put a smile on your face the moment you pick it up.
Now, turn it on. You’ll notice there is an electronic viewfinder to look through if you so choose. Sure, there is also a very nice LCD screen to compose your image on as well, but if you are a little old school and still appreciate looking through a viewfinder to take a picture, you have a very capable digital viewfinder.
I was out recently taking images of ornamental grasses in the snow and without the digital viewfinder, the LCD screen would have been impossible to use. In fact, I was using the Olympus and a tiny Pentax Q camera system without a viewfinder and it was almost impossible to see the images on the Pentax Q system.
The Olympus viewfinder became almost indispensable. And the viewfinder is very usable.
If you are interested in exploring Olympus Micro Four Thirds cameras further, you can also check out the Olympus store at Amazon.com.
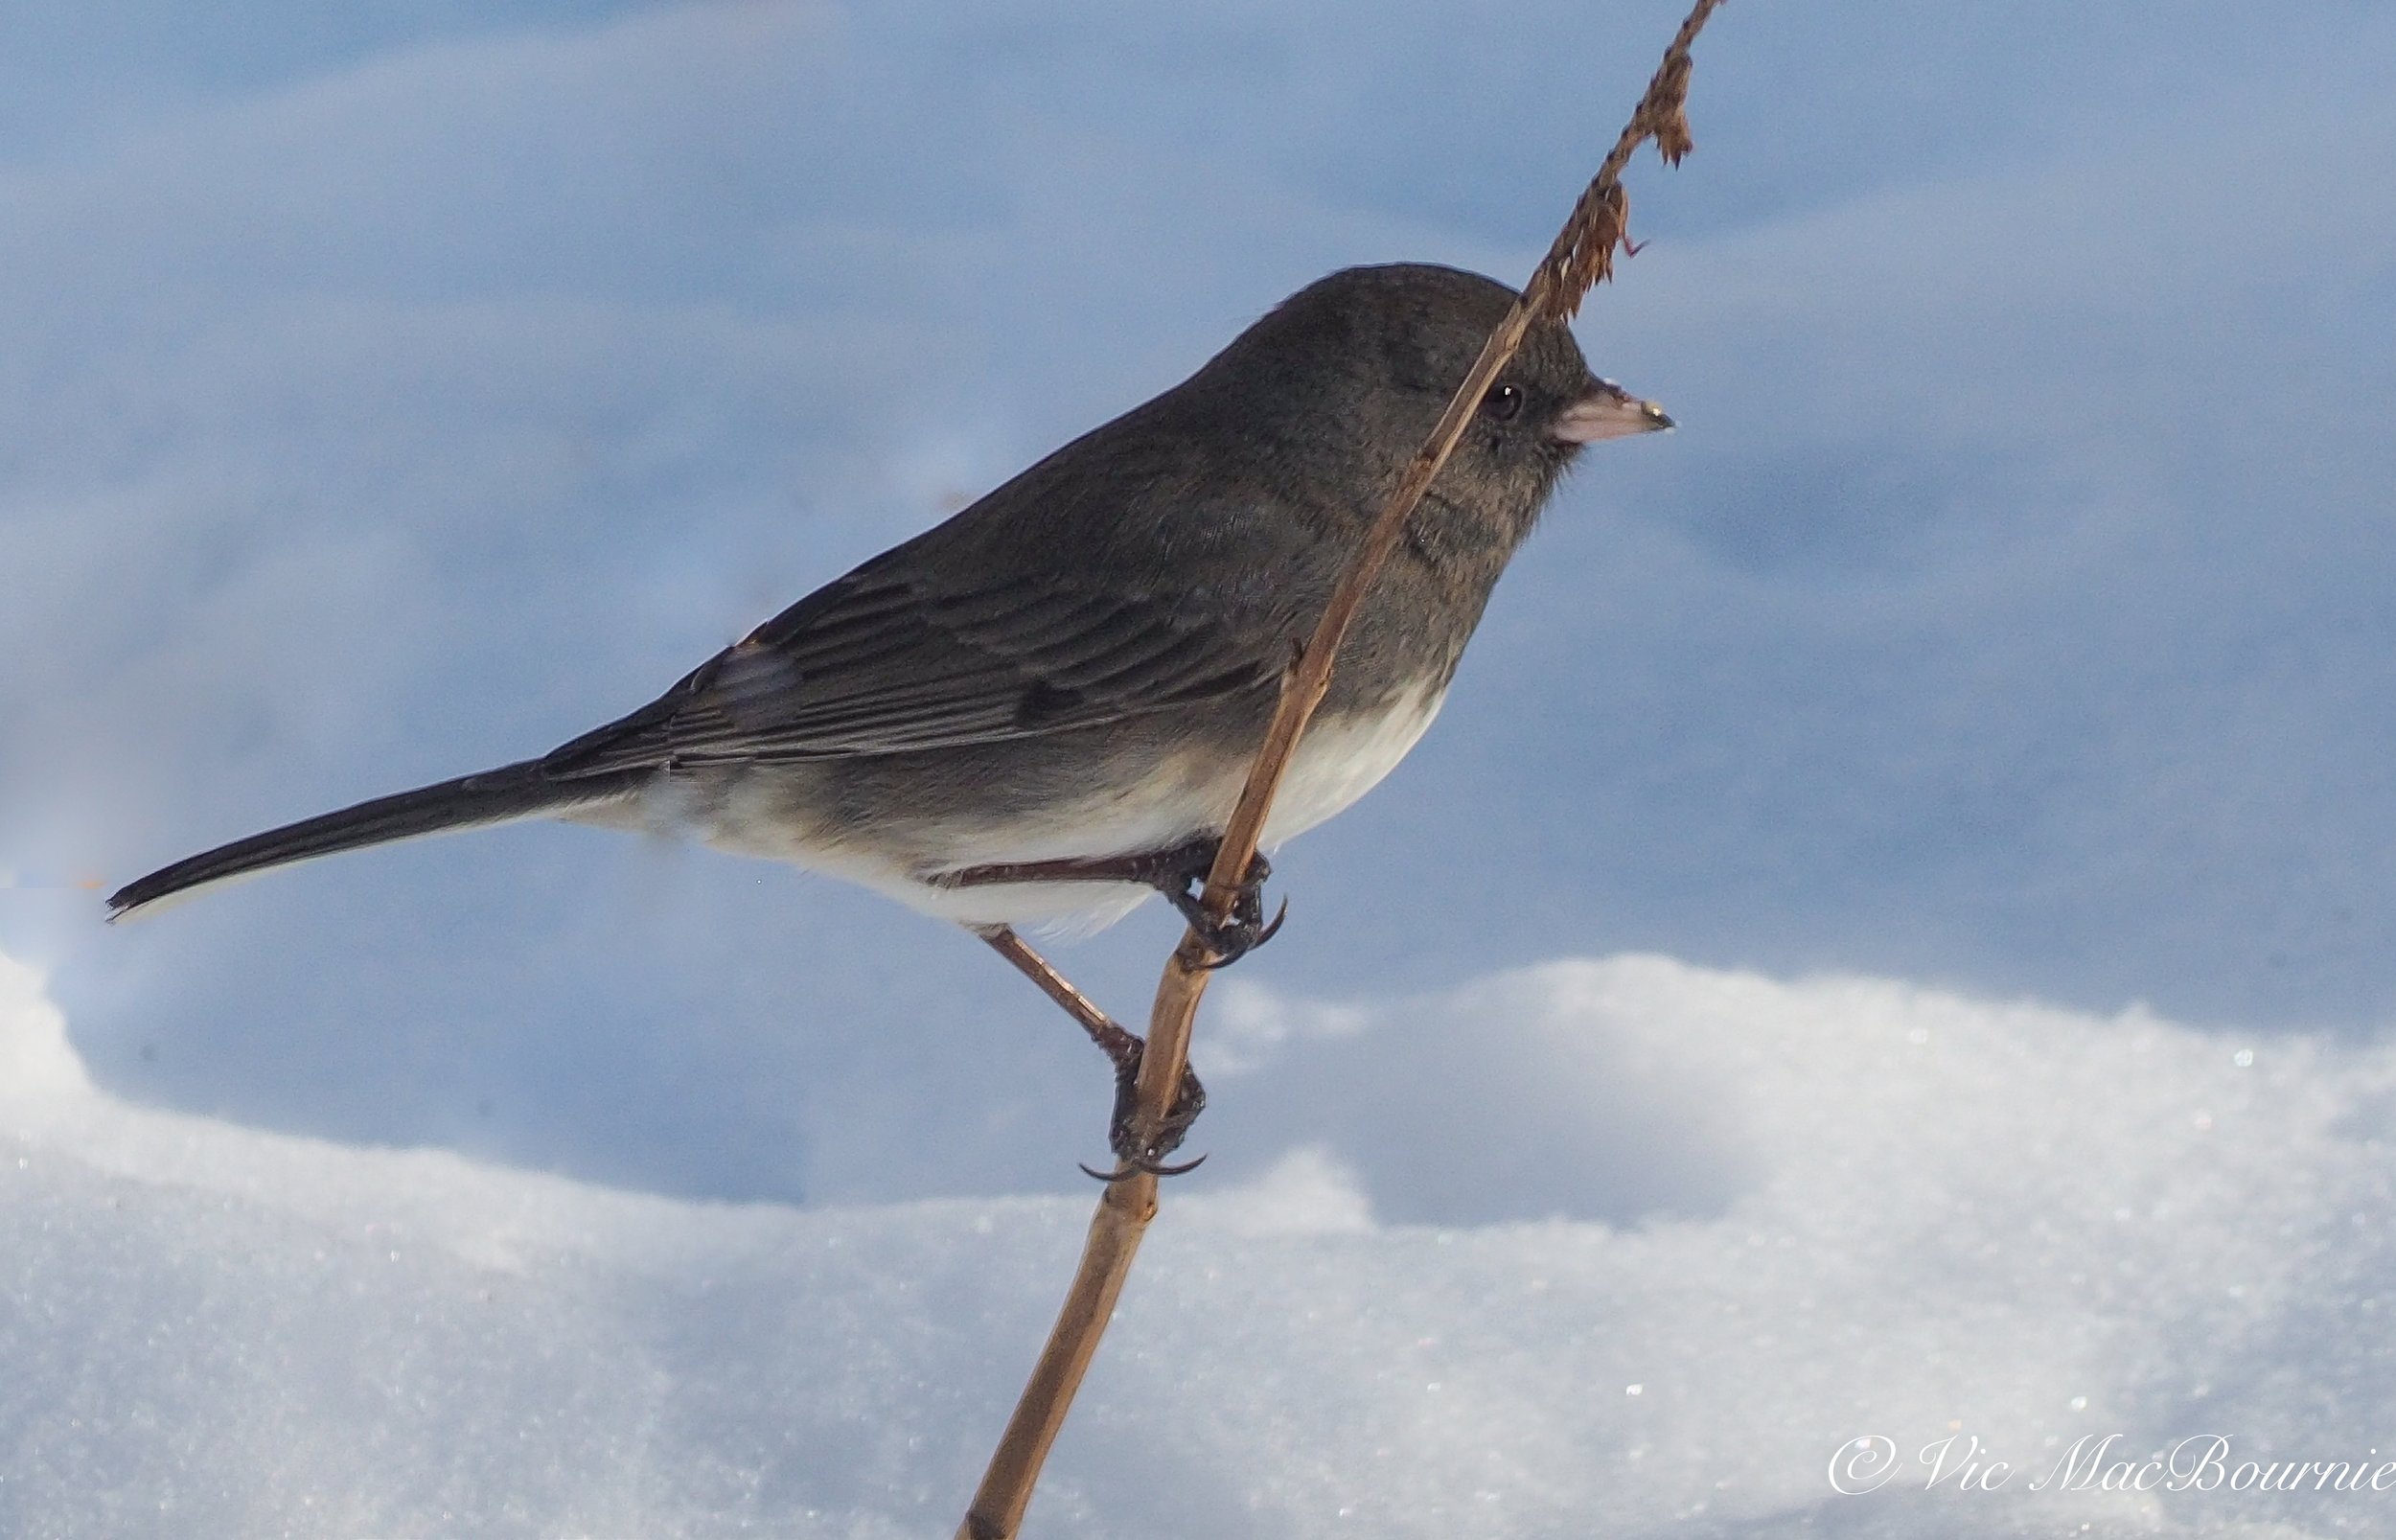
A dark-eyed Junco photographed with the 40-150mm Olympus kit lens.
I picked up the two kit lenses with the camera – 14-40mm and the 40-150mm – and I am very impressed. Both lenses have performed admirably in the extremely short time I have used them. In fact, I am so excited about the camera that I am writing this review after using the camera for just a few days.
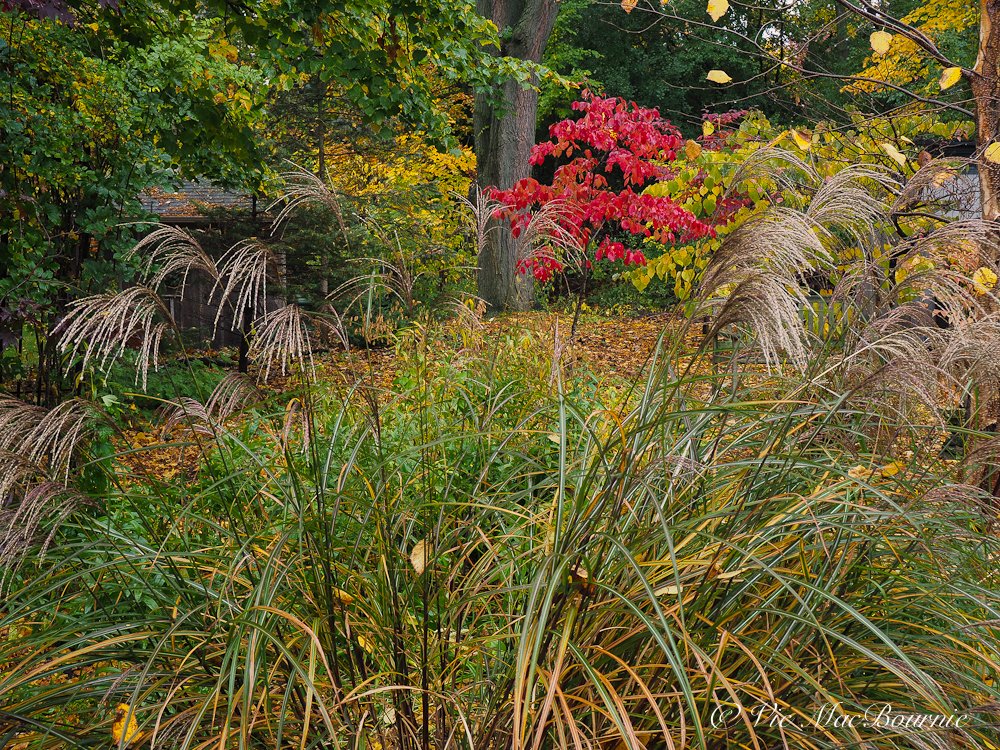
This fall shot was taken with the Olympus 14-40 kit lens.
The camera lenses focus quickly and are very sharp considering they are inexpensive kit lenses. I will say that I did experience some hunting with the 40-150mm at the long end when focusing on a bird close up, but for the most part the focusing has been exceptionally good.
I should add that the hunting for focus may have been caused by the fact that I was shooting through a back window at my DIY heated bird bath. Still the images came out exceptionally sharp with a little tweaking in Lightroom.
In addition, I didn’t realize at first that I had the digital zoom lens turned on. Although I appreciated the extra length of the lens in its digital zoom mode, it did soften the image to some degree.
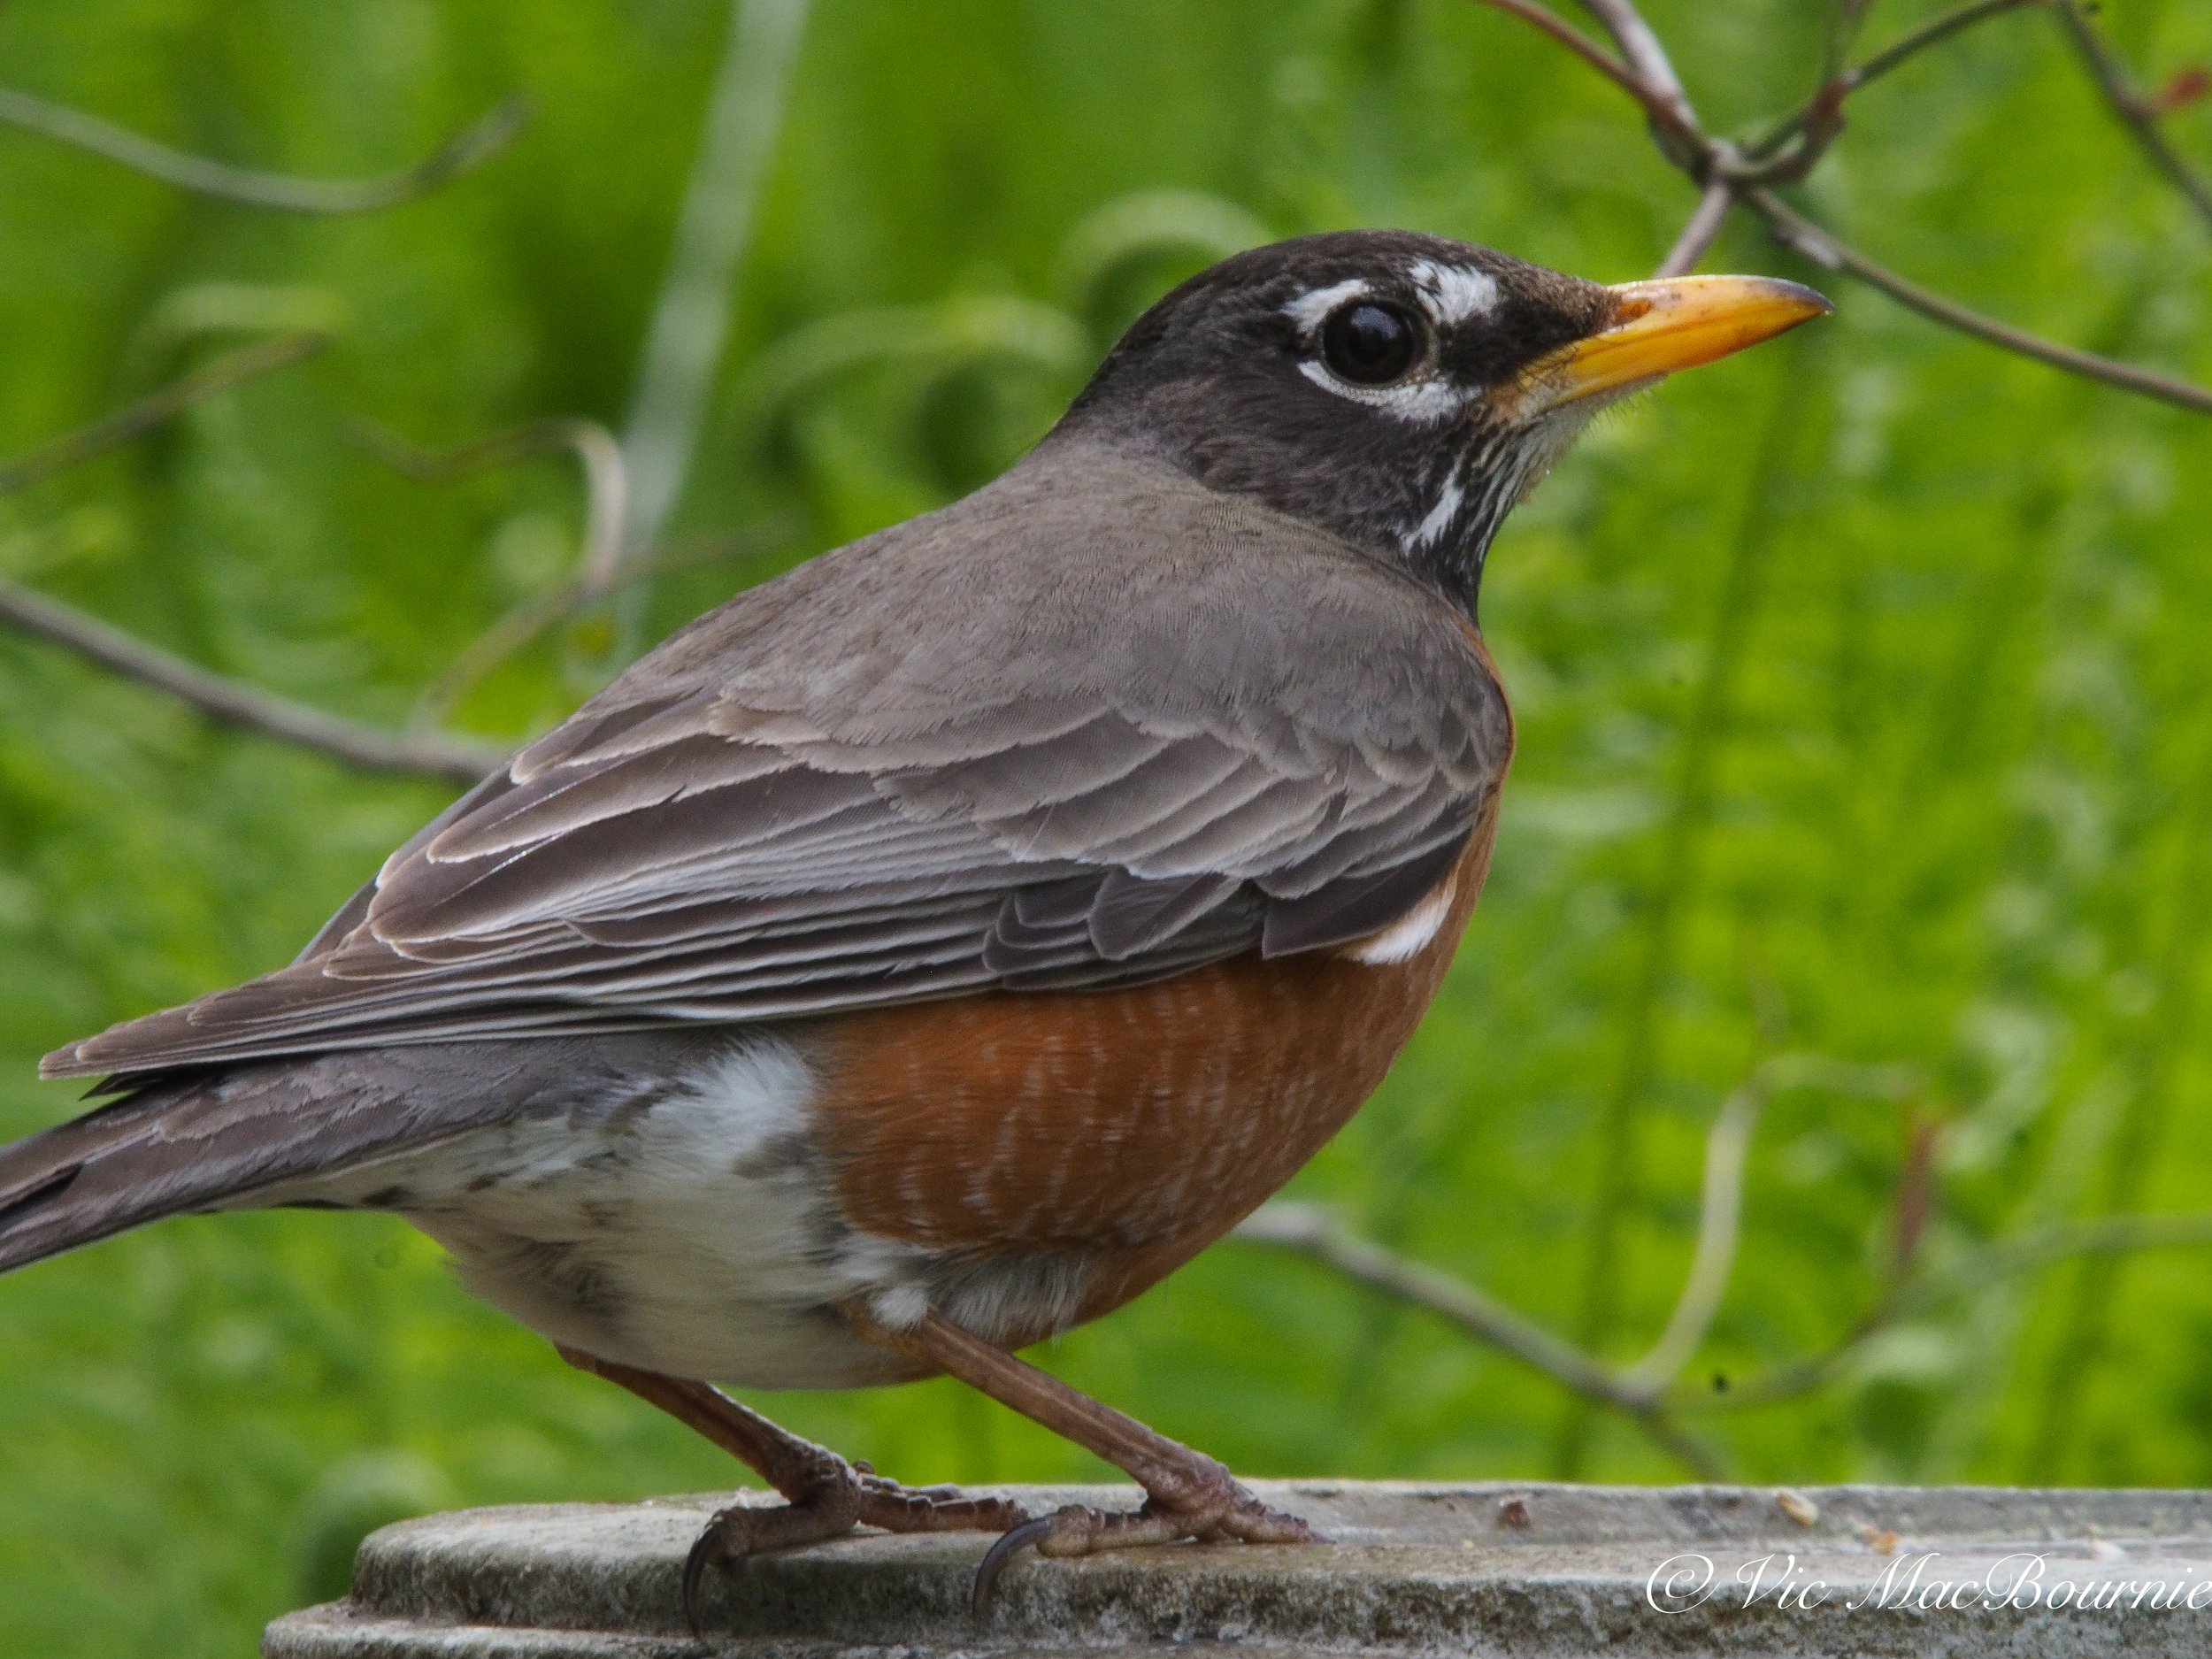
American Robin photographed with the Pentax 300mm f4.5* lens on the Olympus micro four thirds camera.
Adding my favourite Pentax 300mm F4.5 lens to my Olympus system
Mirrorless camera systems, like the Olympus OM-E-M10, allows photographers to dip into their more vintage lenses and use them on much more modern cameras. Although autofocus and other capabilities are lost when a converter is inserted between the camera’s lens mount, there are so many benefits that using these converters far outweigh their shortfalls.
I have a collection of older Pentax lenses – including my favourite 300mm F4.5* lens – that when used on the Olympus with the crop factor gives me a very useful 600mm F4.5 lens. I’ve only used the combination briefly but am impressed with the possibilities, especially when it comes to using the combination in my Tragopan photographic blind where the action is more predictable.
Manual focus is relatively easy using the LCD screen on the back of the camera. The Robin image (above) is a good illustration of what can be done in the right circumstances.
In addition to the 300mm, I will be using a Pentax 50mm f2.8 macro lens that becomes a 100mm macro lens.
Woodland Garden in winter photographed with the 14-40mm kit lens.
This short review does not pretend to go into the details of the camera and lenses. I wrote this as an introduction to the Olympus system and a “first impression” review of the camera and lenses. A longer, more informative review will follow after I have used the camera and lenses for an extensive period of time in the garden and the woodland area around my home.

Last words on the Olympus E-M10
After using the camera for a few days, I can honestly say that it is an impressive tool for anyone looking for a small, capable camera that supports interchangeable lenses.
With my two kit lenses, I can cover the 35mm equivalent of 28mm to 300mm in two very small, lightweight lenses, and still come away with excellent images that any gardener/birder/photographer would be happy to call their own.
The bird images above were all taken with an inexpensive kit lens, hand held and photographed through the window of our back patio door and they are still sharp.

Birch trees in winter with Northern Oat grass.
Unlike a high-end point and shoot camera with a fixed lens, the Olympus system leaves plenty of room for the gardener/photographer to grow.
While I have chosen to go with the inexpensive kit lenses to begin my Olympus journey, there is a whole array of impressive, more expensive, professional lenses and advanced amateur lenses that are certainly worth considering. Lenses are available from third-party manufacturers like Sigma as well as lenses made by Panasonic/Leica for its Micro Four Thirds cameras.
With inexpensive adapters, you can also use older vintage lenses with a two times magnification. For example, my Pentax 50mm F2.8 will become a 100mm F2.8 and my 100mm F2.8 Kiron K-mount lens becomes a 200mm F2.8 macro lens.
If you are in the market for either a new camera or camera system, definitely put a Micro Four Thirds system on your list. The convenience of the more compact system with the quality of a high-end, enthusiast camera makes these systems impossible to ignore.


The perfect ground cover for hot, sunny and dry areas in the garden
Snow-in-summer may not be every gardener’s dream, but if you like your ground covers and enjoy photographing beautiful, ethereal flowers in your garden, this white-flowering, silver foliage plant may be the ideal choice.
Elegant grey foliage, white flowers make snow in summer a great choice for sunny spots
If you are looking for a ground cover for a sunny, hot and dry area, look no further than the grey foliage and lovely white flower of Snow in Summer.
The ground cover affectionately named “snow-in-summer” is a favourite of mine. Its bloom is actually something I really look forward to each year. Snow-in-summer or Cerastium tomentosum is an herbaceous perennial that blooms alongside our wild geranium in early June.
It sits maybe 8-12 inches high and each plant quietly spreads out to form a dense mat of foliage to a width of 12 to 18 inches. Hardy in USDA plant hardiness zones from 3 to 7, this more or less well-behaved, delicate ground cover – a member of the carnation family – is valued for more than just its early summer bloom.

Snow-in-summer or Cerastium tomentosum is an excellent ground cover for sunny, hot and dry areas in the garden. It will bring a smile to any gardener and photographer with its delicate white flowers and silvery-grey foliage.
We have ours spilling out over our main garden pathway of pea gravel and blue flagstone where its silver-grey foliage is able to shine year-round. I would say it gets full sun where it is in our garden with some late afternoon shade.
It just loves the hot sun beating on it and reflecting up off the stone. The plants can take foot traffic and never really get out of hand in our garden.
Apparently, if it’s too happy where it is growing, it can become invasive. The combination of reseeding itself and sending out runners can make the plant a little bit of a problem in some areas.
If you are concerned about it running out of control, a 5- or 6-inch deep edge should keep it in check.
It is not particular about the soil it grows in and seems perfectly happy growing into our pea gravel where it is easy to remove and divide.
Here is an added bonus: it’s among the deer resistant family of plants woodland gardeners prize so dearly.
Looking for more information on ground covers? Please check out my other posts on ground covers I use in the woodland garden.
• Bunchberry perfect ground cover for woodland garden
• What is the easiest ground cover to grow?
• Three great ground covers for the woodland garden.
• Creeping thyme as a ground cover
• Moss and moss-like ground covers
Five more great ground covers for sunny areas
Lamb’s Ear (stachys byzantina)
Catmint (Nepeta)
Contoneaster (Contoneaster horizontalis)
Creeping Juniper (Juniperus horizontalis)
Silver Mound Artemisia (Artemisia schmidtiana)
The elegant clear white flowers and silvery-grey foliage gives the plant a mediterranean feel that works well in a rock garden location or along a pea-gravel path like it is seen here.
Although this is the only spot in our garden where this plant is growing, I’m noticing that it has jumped over, around or under, our wild geranium and has taken a second spot beneath one of our bird baths along the same pea-gravel path.
That’s fine with us, it can be easily trimmed back before it decides to continue its march elsewhere.
It’s best to divide these plants shortly after flowering, when you are cutting off the spent blooms and tidying it up.
Established plants may be propagated by division in the fall or by cuttings.

A 50mm macro lens with a profusion of flowers both in front of, and behind the in-focus flowers help to give these images an ethereal look often referred to as selective focus. More on photographing these plants below.
Space the snow in summer flower 12 to 24 inches apart to give plenty of room for spread. Mature plants grow to between 6 and 12 inches and have a spread of 12 to 18 inches.
Originally from Europe and western Asia, these plants can actually be pushed to grow in zones 8-10 as well, but growing in these zones they may be short-lived.
The plants silver-grey foliage gives away their overall toughness in the landscape being more or less heat tolerant. They do better in a dry, sunny heat situation rather than in humid conditions.
In fact, we are growing ours in more of a rock-garden style than as a border plant in a traditional garden, where it also excels.
These plants are said to be salt tolerant. If you are lucky enough to live by the sea, give them a try. They can be considered an invasive plant in some warmer climates so check with local authorities before planting.

Five sun-loving Ground covers.
Photographing these flowers in your garden
Snow in Summer is an excellent plant to experiment with photographically. It’s soft grey foliage and delicate white flowers makes it an ideal candidate to try “selective focus.” This creative style of photography uses a high-key, dreamy effect to create ethereal images.
Using fast, close-focusing lenses that are opened up to as much as f2.8 will create these effects.
Point-and-shoot tip: If you are using a point-and-shoot camera, consider using the “high-key” mode filter, which is usually built into theses cameras, to help you create the light and airy effect.
These “selective focus” images were made in full sunlight with a 50mm f2.8 Pentax macro lens. I used an older manual focus lens but newer auto focus lenses are available. Expect to spend a few dollars on these more specialty lenses.
Also available are 100mm macro lenses that enable photographers more control including a larger working distance to photograph insects and reptiles from farther back.
Many modern zoom lenses also offer a “macro” feature on them. These may work for some flowers, however their close-focusing abilities often fall just short of the mark and they are what we call “slow lenses”, meaning they only open up to f5.6 which is often not enough to give you the amount of out-of-focus effect you are looking for. In certain situations they would work, but if you are serious in pursuing this type of garden photography, consider splurging on a fast macro lens.
There are other ways to get close to flowers and insects in the garden that I’ll explore in later blogs, but trust me when I say true, fast macro lenses are the best way to go, if you want to explore this type of photography.
Macro lens is a good investment
I am lucky enough to own 3 macro lenses. All are older, manual focus lenses that still work on my digital cameras.
In these images, the camera’s settings had to be overridden about two f-stops to maintain the overall lightness of the image. If I had followed the camera meter, the image would have appeared muddy-grey rather than this delicate ethereal look.
Also, opening up the camera lens wide open to f2.8- f4, helps to keep the surrounding flowers completely out-of-focus with a nice dreamy look.
Shooting at f-8 or f16 would have created a sharper more documentary image of the flower, but that was not the look I was after.
Shooting the flowers with the lens wide open and in bright sunlight allowed me to shoot at a fast shutter speed without a tripod. Normally a small inexpensive tripod would be useful in an extreme closeup, but the shutter speed allowed me to shoot handheld.
Besides I don’t think my larger tripods would allow me to get this low to the ground. The situation forced me to lie on the ground and dig the camera into the pea gravel to get the best angles. (What we do to get the shot.)
For more on macro photography in the garden, check out my other posts including: Getting up close for flower and insect photography; Karen Hutton: Exploring the world of close-up photography.
Flowers that grow in profusion like this make for excellent “selective focus” subjects. Take advantage of these situations whenever possible.
Play with the camera settings a little until you get a feel for what works best. Using the camera’s overexposure compensation button is an easy way to change exposure in any camera mode.
These “selective focus” shots are difficult to do with a smart phone without the macro attachments I talked about in the previous blog and linked to here (macro lenses and other accessories.)
The photograph looking down at the plant from above, was taken with an iphone later in the day, after the area was in shade.
Taking this shot at mid-day would have created harsh shadows and likely made the image too contrasty and unuseable. If you must take a more documentary image in full sun, look for a way to shade the flower. White photo umbrellas would work wonderfully in this situation. They allow enough light to get through, yet remove the harsh shadows on the plant.
Once your subject is shaded, then consider using a reflector to bounce light back into the flowers. It could be as simple as a white card or a piece of tinfoil, but these 5 in 1 collapsible photo reflectors give you the flexibility to reflect light into your subjects at various levels and give you the option of reflecting warm, golden light if you are looking for an evening glow on your subject. They are easy to carry around and collapse into quite small, lightweight reflectors.
In my case, most of these accessories were not needed because the light grey pea gravel was able to bounce enough light back up into the flowers to keep that nice light airy feeling.
If the ground was soil or mulch, I would have used one of the collapsible reflectors to bounce the light back up into the plant. Probably the silver reflector would have brought the best results, but the white ones would have also worked well.
Photographing in our own gardens allows us to wait until the perfect times of day to get the best images possible. Keep an eye out for flowers or textures that are in their prime in your garden and try to capitalize on the proximity of your subject and the best light.
This page contains affiliate links. If you purchase a product through one of them, I will receive a commission (at no additional cost to you) I try to only endorse products I have either used, have complete confidence in, or have experience with the manufacturer. Thank you for your support. This blog would not be possible without your continued support.

Water Hyacinth is favourite in patio pond
The water hyacinth always has a place in our container pond where it flowers profusely and quickly spreads doing an excellent job keeping the water clear of algae.
Painterly image of a water hyacinth in bloom in our container pond.
Water hyacinth is banned in many parts of the world
Not a summer goes by when I don’t pick up a couple of water hyacinths (Pontederiaceae spp.) for our small container pond. Not only do these floating plants boast beautiful purple flowers that bloom regularly throughout the summer, their strong root mass helps to oxygenate the pond water and their thick, fibrous leaves shade the garden pond helping to control green algae growth.
It can provide great cover for fish and can be useful for spawning fish in a small pond.
Water hyacinth is a floating, aquatic plant in the pickerel-weed family that was imported into North America in 1884 for an exposition in New Orleans.
These floating plants have thick oval leaves and a bulbous stalk. It’s quick to multiply with the mother plants sending out multiple runners which then creates daughter plants. It reproduces through pollination by bees or through self cloning.

In our small garden container pond, the plants are more or less left alone by animals. Once or twice a year one of our neighbourhood raccoons or skunks decides to dig in the patio pond and remove a few of the hyacinth bulbs after taking a bite or two out of them. But, the plants just keep going.
For more on garden ponds, be sure to check out my post on garden ponds vs garden container ponds.

Patio container pond with water Hyacinth.
The fact the water hyacinths are quick to multiply means only a few are needed to quickly cover our patio container pond.
Water hyacinths are extremely invasive in temperate climates
Despite the positive attributes listed above, water hyacinth is not a plant you want to add to a large, natural pond, especially if you live in a warmer climate. They are among the fastest growing plants on earth and their fast growth can not only swallow up your pond, they can cause real damage to natural waterways in more temperate climates.
They have been known to clog up waterways, slow the movement of water and destroy much of the natural habitat.
The plant is considered invasive in many parts of the world.
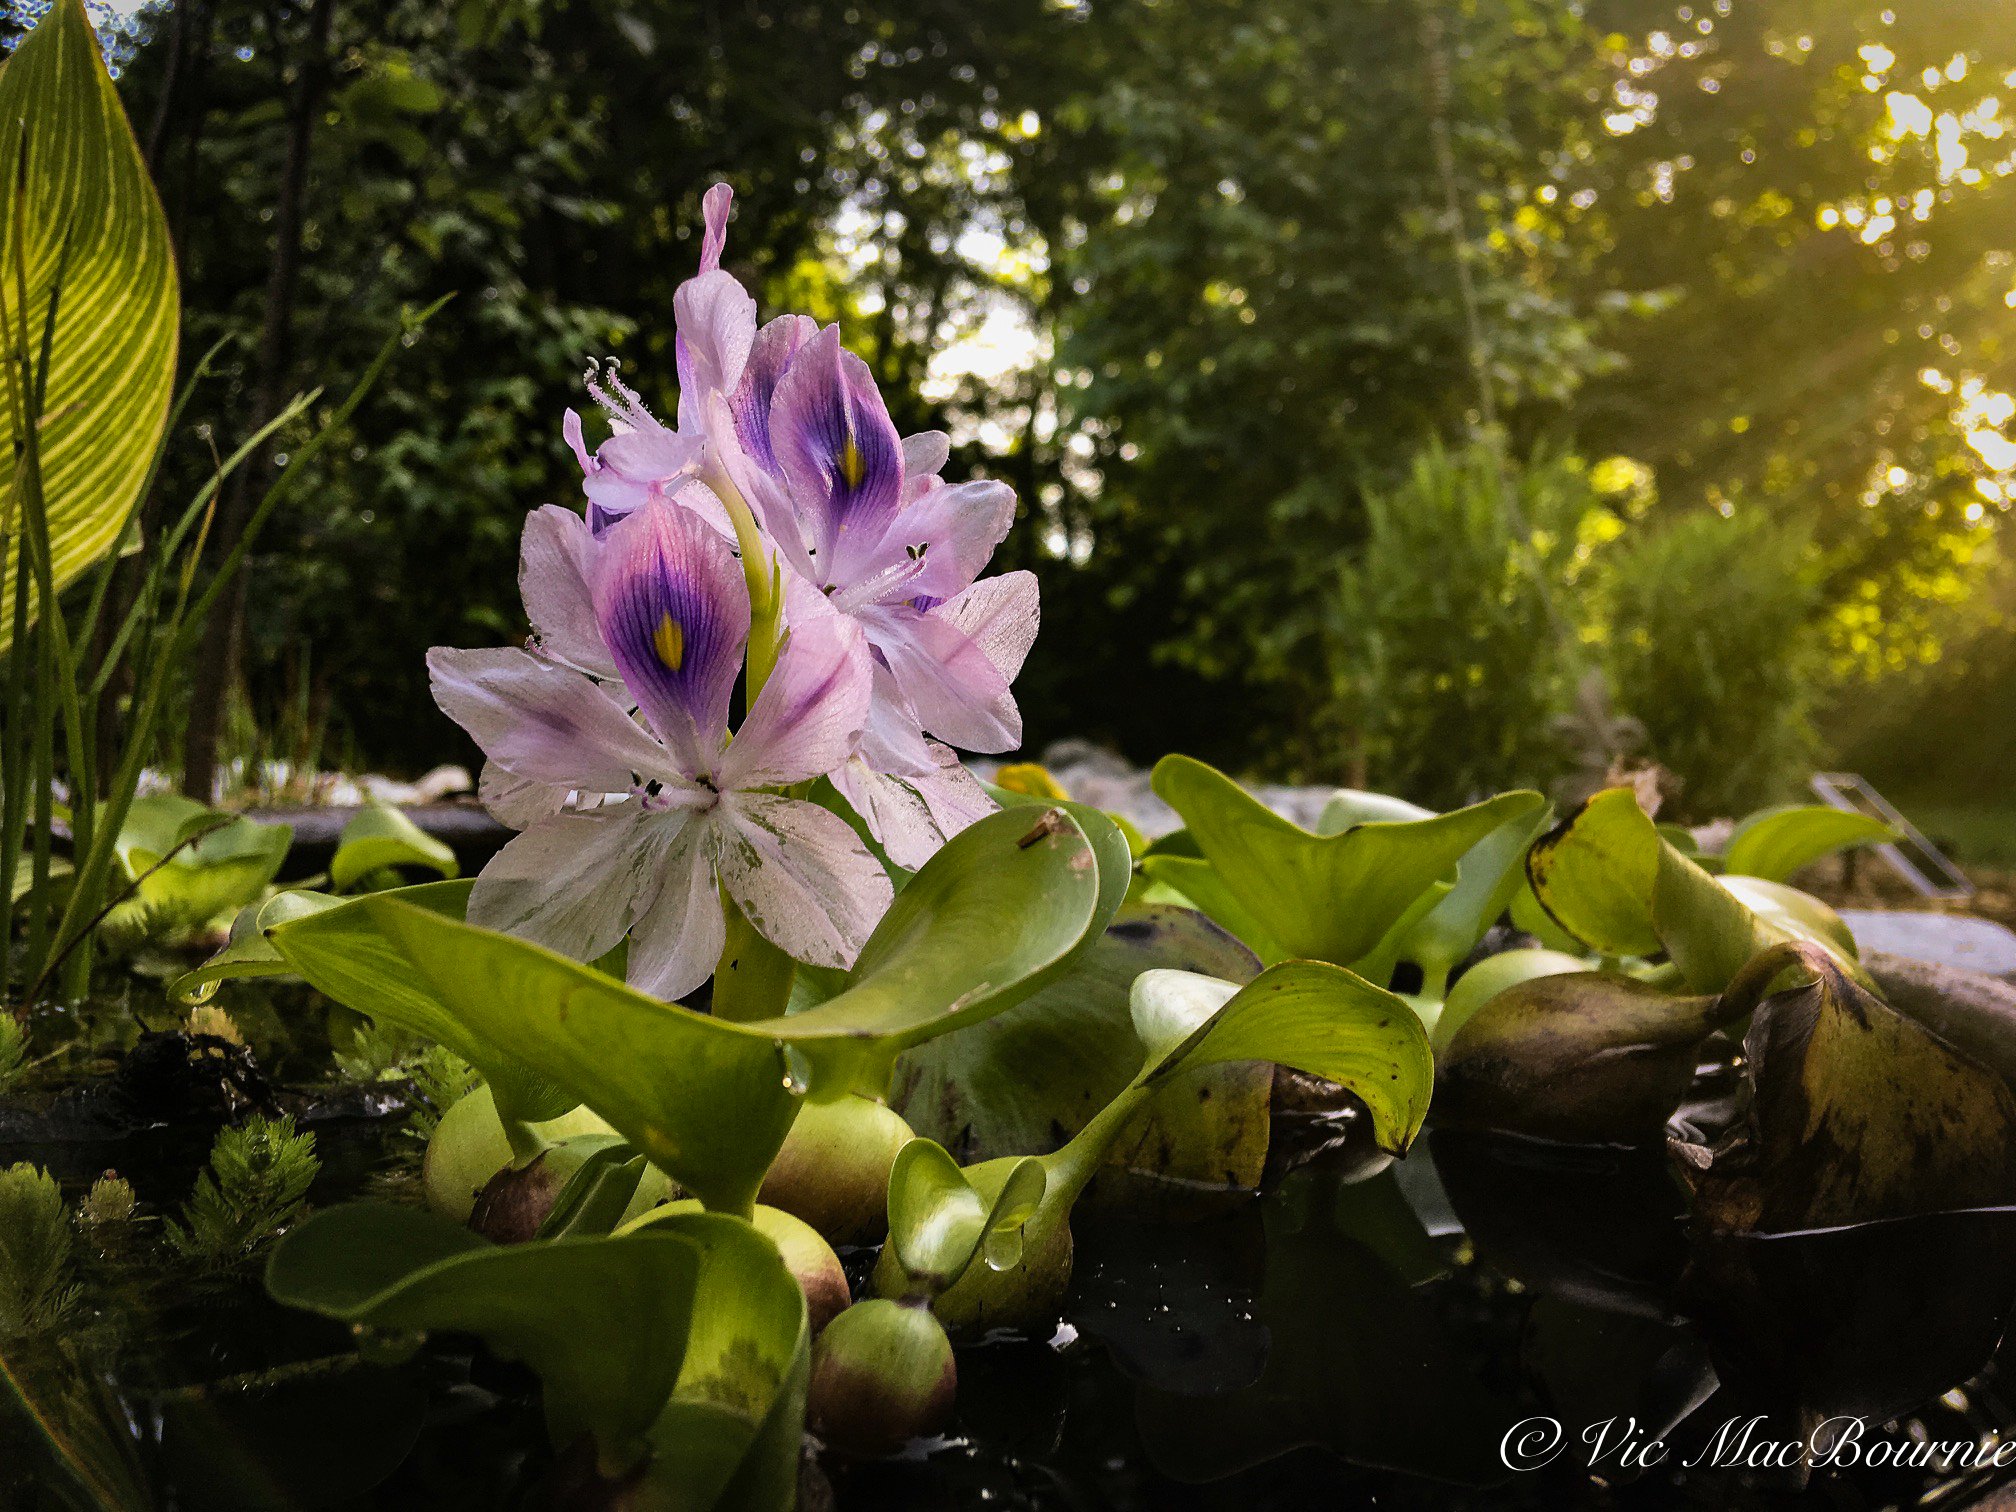
Hyacinth in bloom in early morning.
In parts of asia, experts have measured the plant growth of up to 15 feet a day. It’s particularly problematic for many waterways and is considered invasive in many parts of North America, Europe, Africa, Asia and Australia.
It is originally native to the waters of South America in the Amazon basin.
In some parts of the world it is used as a source of compost – which is where our plants go at the end of each summer. It can be a good source of nitrogen and phosphorous in the compost.
In parts of Africa, the fleshy part of the plant is used as an animal feed, while the roots are used in fertilizer.

Water fern combines with water hyacinth to cover the surface of the water.
It’s purple-pink bloom rises above the plant usually 5 to 7 inches.
Besides the flower, Water Hyacinths reproduce vegetatively by stolens running off the mother plant.
The plants are not hardy and will quickly die once the temperatures drop.
You can overwinter one or two of the plants by placing them in a fish tank or large bowl inside the house for use the following year.
The plant is actually used in wastewater treatment plants to remove nitrogen and potash. It can also remove many heavy metals and other toxins from contaminated water.
In parts of asia it is used heavily in cooking.
Water ferns and duckweed are good substitutes for water hyacinths
It’s important to use plants to cover much of the surface of the water of your pond to keep algae growth under control. A handful of water fern will have similar growth and cover the surface quickly, as will duckweed.
Duckweed is a tiny green plant that covers both natural and garden ponds quickly.

Focus on 2022 success stories in the garden and behind the lens
The year 2022 was a good one in the woodland garden both for plants and photographing birds and mammals.
Proven Winners’ Rockin’ Deep Purple salvia steal the show
The beginning of the new year is the perfect time to look back over the past year in your garden.
Focusing on your successes can be an eye-opening experience and go a long way to help you better understand the direction you may want to go in the future.
On that same note, if you had your share of losses, it’s a good opportunity to learn from them and possibly go in another direction.
Deep Purple Salvia stole the show in 2022
This year, for example, I had great success with Proven Winners’ Rocking Deep Purple Salvia.
Not only did it perform beautifully in our two containers – blooming profusely throughout the summer and lasting well into the fall – but more importantly it was a magnet for the native bumble bees and hummingbirds.
Every morning the containers would be buzzing with native bumble bees and they became my focus while I was out enjoying coffee with our dog, Holly.
It didn’t take long for the hummingbirds to include these containers with the Rockin’ Deep Purple Salvia on their daily rounds, adding to my morning coffee enjoyment.
It was a small step to simply grab a camera and photograph the bees and hummingbirds as part of my morning and afternoon routines.
The situation created an ideal opportunity to test out a number of older digicams and lenses to review for Ferns & Feathers readers. If you have not had a chance to check out any of the reviews, most focus on the cameras’ usability in garden and garden wildlife photography. A sampling of reviews are highlighted here: Pentax Q, Canon Powershot Elph 500, Lumix-DMC ZS8, Pentax 300mm F4.5 lens.
Being out in the yard regularly also made it easier to watch how the light moved across the patio and identify the best times to photograph the flowers and their many visitors.
The following are a few images taken using Rockin’ Deep Purple Salvia as the magnet for wildlife. Go to the 2022 Photo Gallery for more images.
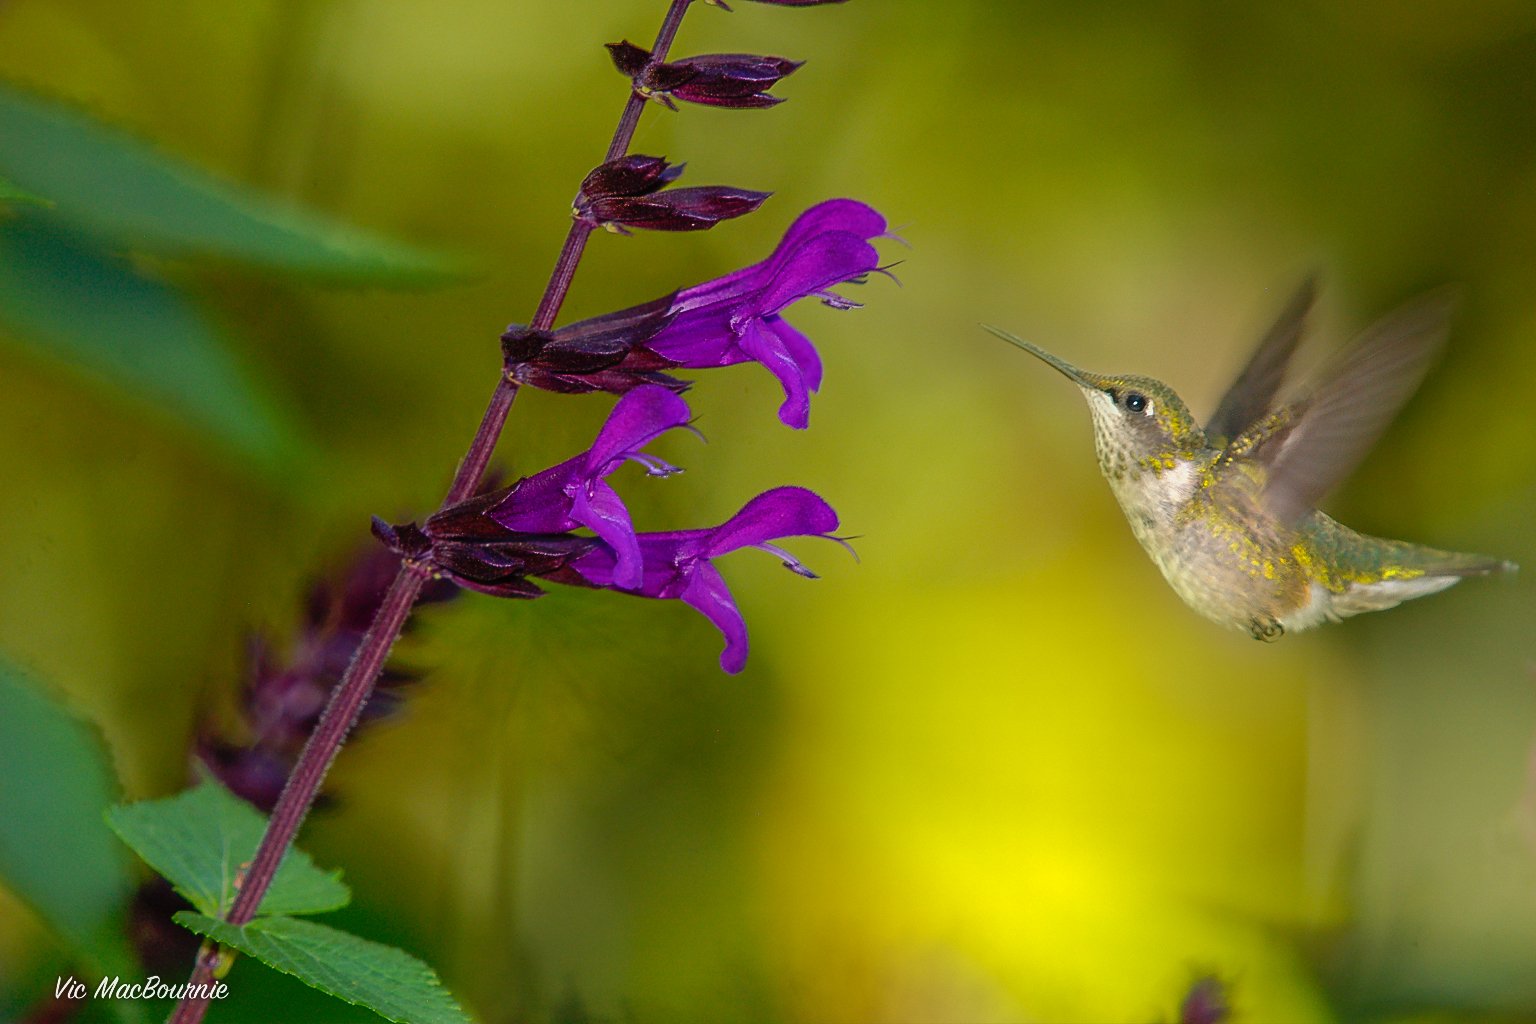
Rockin’ Deep Purple Salvia offers garden photographers a great opportunity to capture outstanding images of hummingbirds, bees and pollinators.
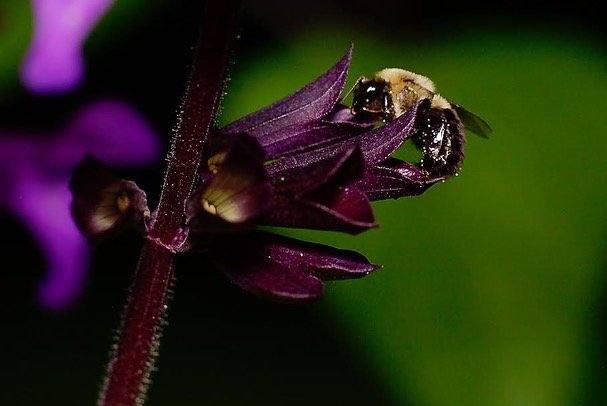
A macro shot of a bumble bee on a spent salvia flower.

An extreme macro image of a small fly feeding on a salvia flower.
Monarda proved to be another success in the garden
Another hit in 2022 was the performance of our Monarda, which I moved from the back of the yard to beside our patio where I could keep an eye on it more easily and photograph the hummingbirds as they moved back and forth between the Monarda and Cardinal flower.
(More reading here on the combination of the Monarda and Cardinal flower.)
Together, they are a splash of red that is just irresistible to hummingbirds and other pollinators.
Again, by watching how the light played on the Monarda, I was able to focus on capturing images primarily of hummingbirds.
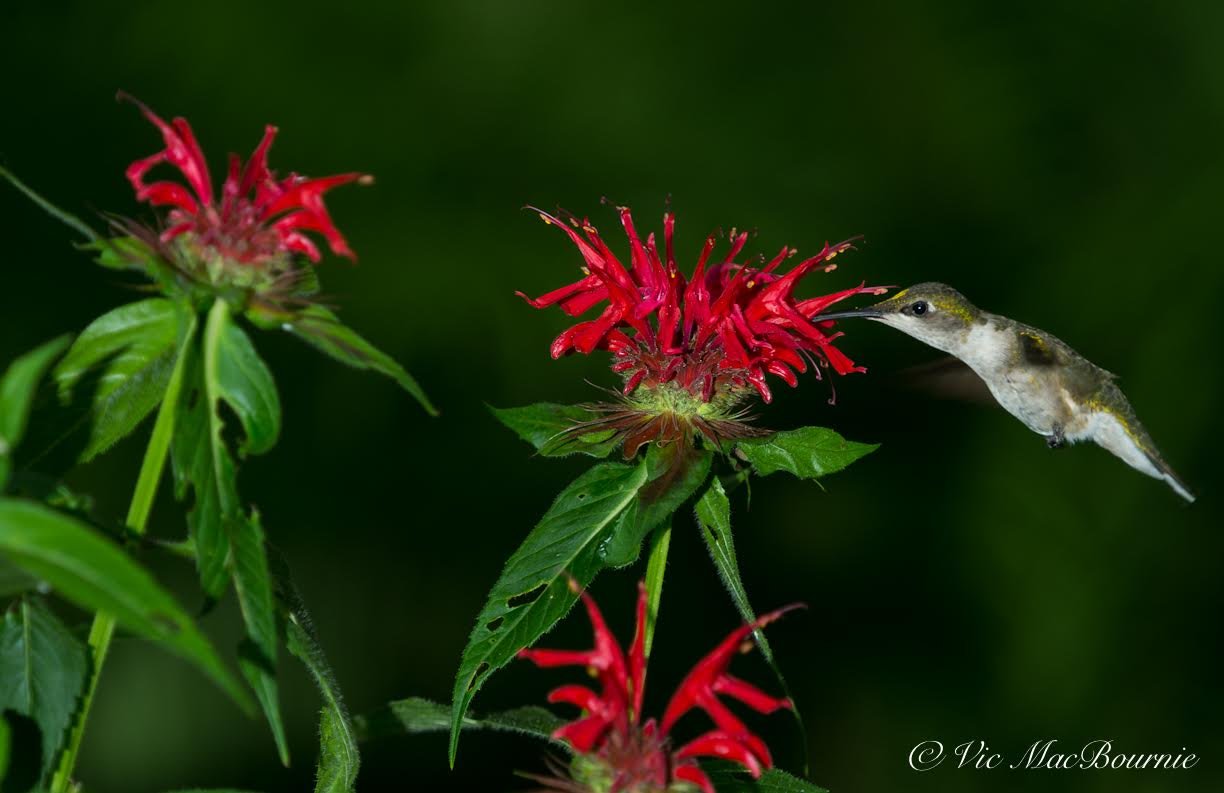
A hummingbird is captured here feeding on Monarda. Flash was used along with a diffuser to help stop the motion and provide a nice catchlight in the hummingbird’s eye.
Native Blue Lobelia is another winner in the woodland
Another combination that worked for me in 2022 was the native duo of Black Eyed Susans and blue lobelia.
The Black Eyed Susans had been growing in place for a few years, but adding the native blue lobelia into the mix created a combination that worked both visually and for local pollinators who visited the area regularly. I’m particularly looking forward to next year’s results after the lobelia has had a year to establish itself.
More reading: For the full story on the native wildflower Blue Lobelia.

A combination of black Eyed Susans and native blue lobelia.
Gardening lessons to take away from this year’s success
By planting the monarda, blue lobelia and salvias close to the patio, I was better able to enjoy not only the plants but the birds and the pollinators that visit them regularly.
It was also much easier to care for the plants rather than try to keep them properly watered when they were located at the far end of the yard.
Next year, I plan to add more plants around the patio including searching out more Proven Winners’ salvias from their Rockin’ series. There are four different salvias in their Rockin’ line including two blue salvias and a fuchsia. (Link to Proven Winners Rockin’ series.)
More reading: on Proven Winners free booklets here (2022) and here (2021).
Animals in the landscape
When it comes to visitors to the garden this year, I was fortunate enough to have several memorable moments.
The highlight this past garden season was capturing a number of photographs of our resident fox. The foxes have been around for the past few years, but capturing good images of them is not always easy.
Another benefit of being out in the garden trying to photograph the foxes, resulted in my best images of a skunk in early evening light light.
Both of these animals can be quite elusive if you are not prepared to photograph them and do your homework before hand.
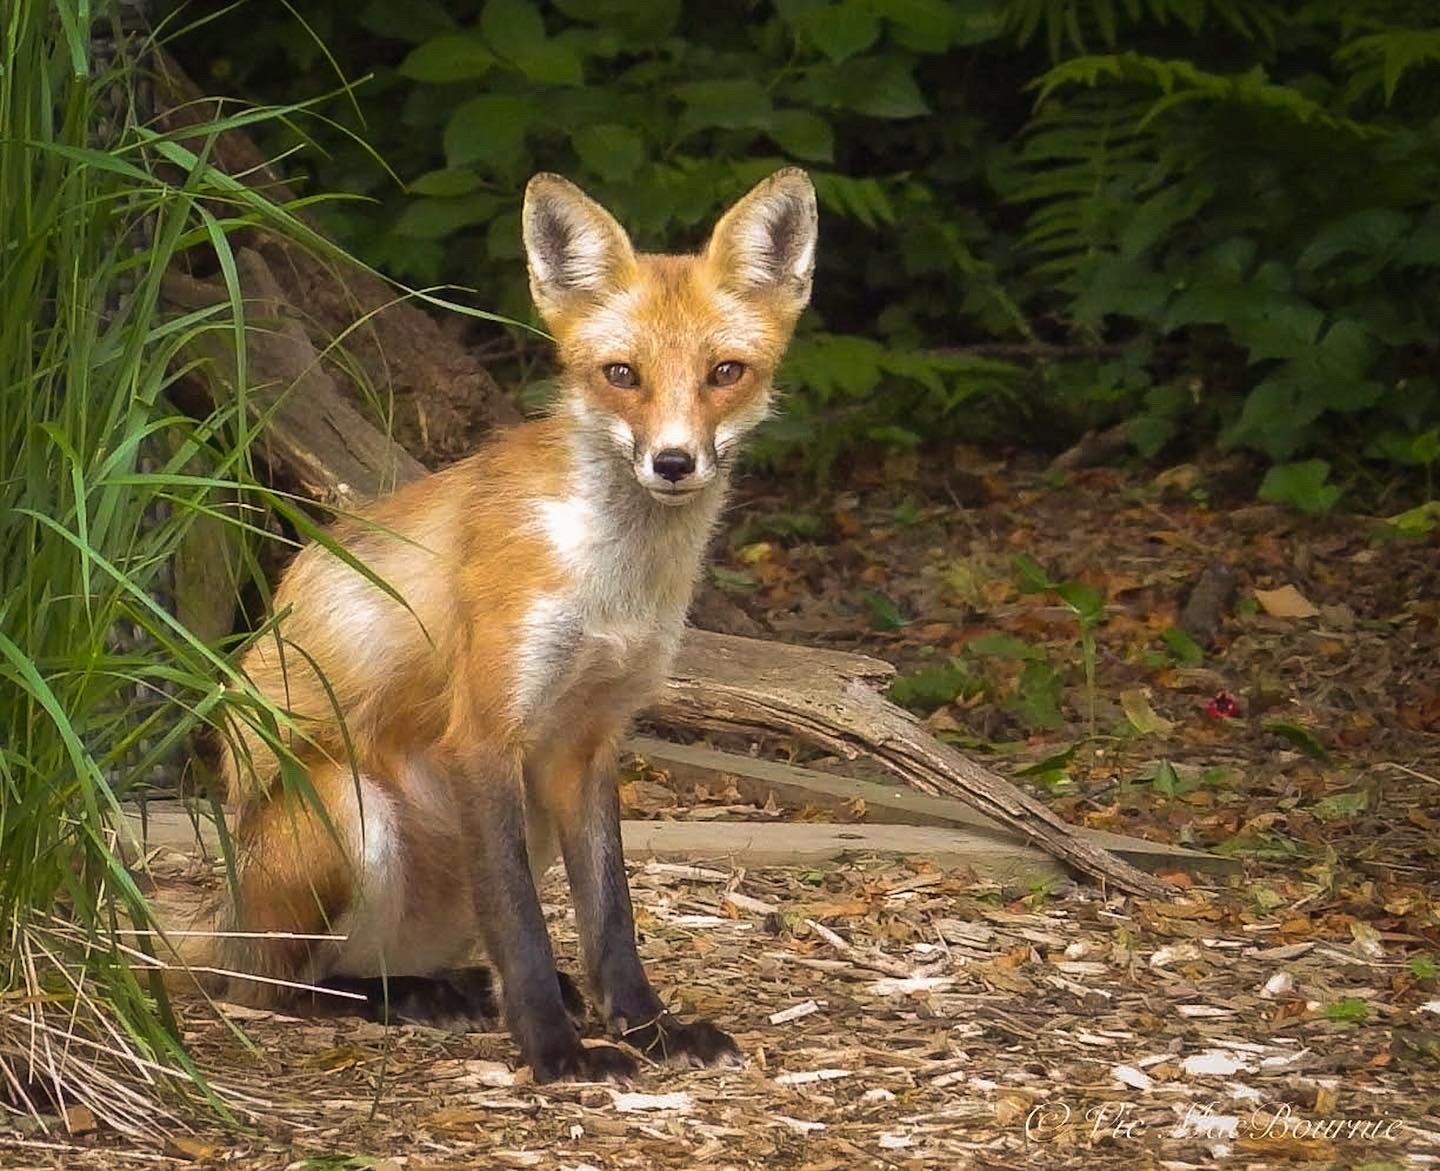
The neighbourhood fox was photographed in my Tragopan photographic blind with a 300mm F4.5 lens.
By using a trail camera in the backyard, I was able to establish that both the fox and the skunk regularly came to an area in the garden near our open compost. From there, it was as simple as setting up my Tragopan blind and waiting for the animals to come along.
More reading: For my post on using a trail camera in the backyard
More reading : For my post on using a Tragopan photo blind in the garden.
I knew the fox came in late afternoon on its regular rounds, but getting the skunk around the same time and in good light was a pure bonus.

A neighbourhood fox was photographed while it posed for a trail camera in the back garden. If you want to see the video of the fox from the Trail camera be sure to click the link above on using the trail camera in the backyard.
Being set up and prepared was, of course, the key to capturing more than just a grab shot of the animals as they made their way through the yard.
The Tragopan blind is important to help the animals feel unthreatened and act more naturally with a human in such close proximity.
While I used the blind for the fox, I did not need to use it for the skunk. Skunks don’t have good eyesight so, for the most part, it did not even know I was there. In fact, at one point it made a B-line across the yard right toward me until I gave it a hand signal that I was there. The hand signal was all it took for the little guy to head in a different direction.
I especially like the image of the fox (above) posing in front of the trail camera as it was capturing video and images of the fox.
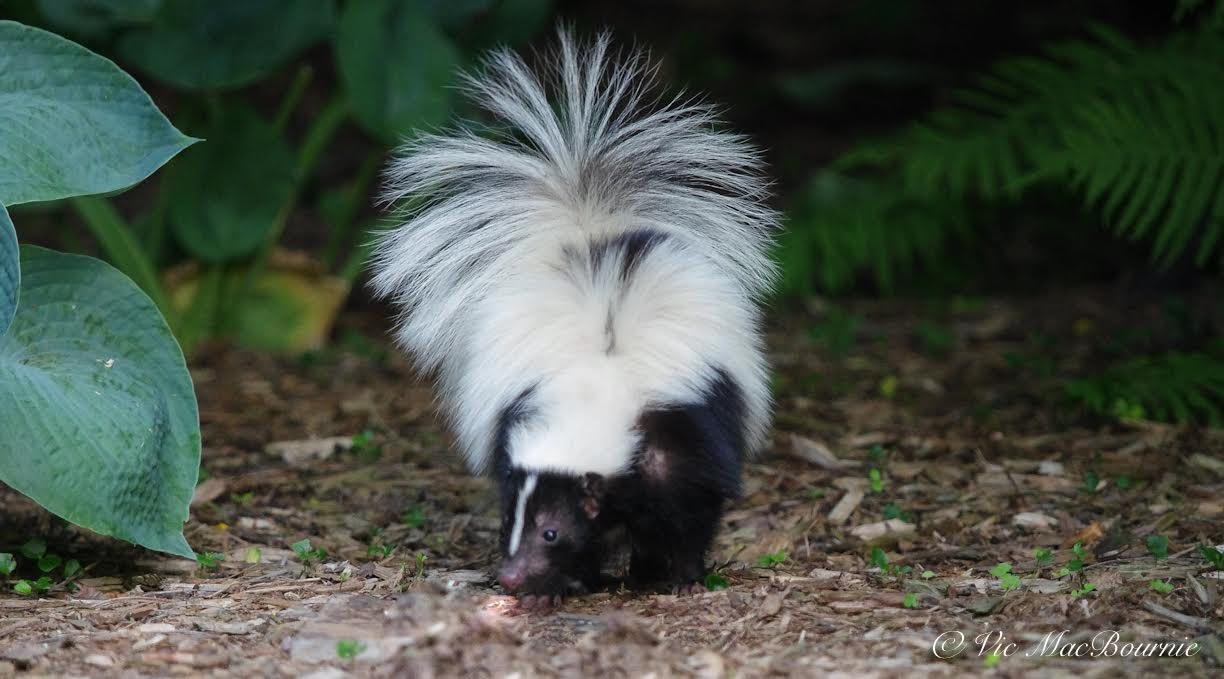
This image shows a beautiful skunk roaming through the garden.
The image of the cute little skunk involved a little luck. It came out of some tall grasses right beside me after I set up my camera in the garden. It walked over to a corner of the garden allowing for a more comfortable working distance.
Photographic lessons we can take away from a year in the garden
Observation is critical when you are trying to photograph birds, mammals and other backyard wildlife. Learning their habits and recognizing the times they are most likely to appear in the garden will greatly improve your chances.
There is nothing like spending more time in the garden and simply observing the goings on, but when that is difficult, the trail camera can do the job while you are away.
Most trail cameras will document any animals that come into your yard right down to the minute. If you notice a pattern, simply set up your camera and be prepared to capture images of your subject.
I’m planning to use the trail camera more over the coming winter through to spring and summer to help me capture more fox images this winter when the animals’ coats are in their prime.
Although the images from the trail camera are useable, it’s always better to capture the subjects with a real photographic camera to get the best results.
Looking forward to a new year
The coming year will present us with more challenges in the garden. But, by using our success stories from this past season and building on them, we can meet these challenges head on and come out a winner.
I had hoped to have real success with annual sunflowers (link to my post) this year and, although I did have some success with the native sunflowers, (link to my post) many of my seedlings and young plants were attacked by squirrels and other animals before they could mature and perform at their best. I did learn a few things, though, and next year my sunflower experiments will be much better.
Here’s to a new year.