

Bird seed: Complete guide to attracting favourite backyard birds
Choosing the best bird seed to attract specific birds to your garden starts with knowing what seed they like and using the proper feeder. Black oil sunflower seeds are a great start but other seeds will ensure you attract the greatest variety.
How to choose the best seed to attract a variety of birds
If you are looking to attract specific birds to your backyard, providing them with their favourite bird seed will go a long way toward your success.
First, it’s important to learn what seed your favourite birds prefer in your area and then find a good reliable source of fresh seed to provide them.
When in doubt, use straight black oil sunflower seed. It is by far the best overall seed to feed backyard birds. But you may miss out on some of the best birds if you stick to straight black oil sunflower seed.

Black oil sunflower seed is the best all round seed to use in your feeder.
Don’t make the mistake of using a general, inexpensive bird seed mix from your local department store – many of these blends are full of filler that birds will only spill to the ground.
Milo – a small, round whitish grain – is most often used as filler in inexpensive mixes.
There is nothing wrong with milo. It will not harm birds, but it is not their preferred choice and often ends up on the ground. If you either see a lot of milo in the seed mix, or it is listed as one of the primary additions in the mix, it’s probably best to avoid that seed mix.
The result of too much filler is, at best, a mess under the feeders, and, at worst, an invasion of mice and rats filling up on the discarded feed. (More on keeping mice and rats out of the garden.)

Woodpecker feeding on no-mess mixed bird seed at our recycled resin hopper feeder.
Millet is a good choice for ground foragers
Don’t mistake milo for millet. They look similar, but millet in small quantities is favoured by ground-foraging birds like Juncos, sparrows and mourning doves. It’s still probably best to leave it out of the feeders, but throwing a handful on the ground or in a platform feeder is a good idea.
By keeping the above tips in mind, there are blends at your local department stores that are good, but just recognize they come at a higher cost than the cheap mixes.
You are better off feeding the birds less with a high quality seed mix than filling the feeders with a low quality mix that results in problems and eventually stops you from getting the full enjoyment out of feeding your backyard birds.
It’s also important to realize that birds do not count on our seed to survive. They are quite capable of looking after themselves and their families.
Studies have shown, however, that birds – especially chickadees and other regular visitors to our feeders – do better if supplemental bird food is available.

The above graphic shows various bird seed and some of the birds that are attracted to those seed mixtures.
It is our responsibility to ensure that feeding the birds in our yards is not detrimental to their health. Keeping the feed fresh and the feeders clean should be a top priority.
More reading: Why recycled resin feeders are better than wood feeders.
Black oil sunflower: The best all-round choice
If in doubt, a good quality black oil sunflower seed is an excellent all-round choice that the majority of birds will readily eat.
Black oil sunflower is favoured by most birds because the seeds – in comparison to the common striped sunflower seeds – have a higher oil content, are easier for small birds to handle and are more nutritional for backyard birds. The black oil sunflower seed is extremely high in protein, as well as fiber, calcium, vitamin b-complex, vitamin e, potassium and iron.
They are favoured by our colourful Northern Cardinals, Evening grosbeaks, Blue Jays and House finches, in addition to chickadees, nuthatches, Tufted titmice, Mourning doves, grackles, Gray catbirds, Pine siskins and a host of others.
How to attract Cardinals to your feeders
Most birders enjoy seeing both male and female cardinals at our feeders.
If you are looking to attract these colourful but somewhat shy birds to your backyard, consider providing them with a large hopper feeder filled with a combination of safflower and black oil sunflower seed both in an out of the hull.
By leaning more heavily on the safflower seed, other birds will focus on a feeder filled with black oil sunflower and leave the safflower for the cardinals.
Safflower is a top seed choice for attracting cardinals. One of its other benefits is that it discourages squirrels, grackles and even sparrows from feeders because they dislike safflower seeds.
The small white thin-shelled seed is readily eaten by cardinals, nuthatches and chickadees.
A good mix will attract the greatest variety of birds
Feeding only the small black oil sunflower will limit the type of birds that are regulars at your feeders.
It’s important to offer a variety of seeds to attract the greatest variety of birds.
Compressed seed cylinders have always been a popular choice in our yard. They are available in a number of different mixes including ones that have meal worms compressed in with the seed mixture. Check out my full story on compressed seed cylinders.
Specialized bird or nature stores will even create specialized mixes for different times of the year (winter, summer, spring and fall), for different habitats (woodland, rural, urban, town and country.)
If done well, these mixes can be especially helpful to attract the birds that are in your area either year round or seasonally.
Wild Birds Unlimited, with stores across the United States and Canada, offer seven primary blends ranging from No-mess blends, to a deluxe blend, supreme blend, tree nut blend, finch and wildlife blends. Individual stores may offer further blends developed for birds in a particular geographic area.
Canada’s Urban Nature Store (link to store website) (Amazon.ca link) also offers a host of blends as well as straight seed.
The Kaytee brand of wild bird seed available at Amazon and elsewhere also offer a high quality seed and variety of quality mixes.
Nyjer or thistle seed is a favourite of Goldfinches
There is no question that Goldfinches are attracted to Nyjer or thistle seed, but only if it is fresh and of high quality. Nyjer/thistle seed that is past its prime, or worse, beginning to get mold growing on it, will be ignored by the birds.
But that may not be the only reason the birds are ignoring your thistle or nyjer seed.
Nyjer/thistle seed can be tricky. The seed actually comes from India and is part of their thistle plants. Before the seed can be imported into North America or parts of Europe, the seed must be cooked. Over cooking the seed removes the protein and makes them useless for birds.
If you notice that the finches are not eating your Nyjer seed, chances are it’s either well past its prime, going moldy or was over cooked in the factory prior to packaging.
If you notice the birds are not eating your Nyjer seed, don’t waste your time, purchase a new supply of Nyjer for your feeder.
You are much better off buying smaller amounts of nyjer seed and using it as quickly as possible rather than buying a large bag and storing it for prolonged periods of time.
It is important, therefore, to ensure you buy seed from a reputable seller that moves a lot of stock. Purchasing Nyjer at your local department store may not be the best idea. The seed may have been sitting on the shelves for months before you purchased it.
No-mess mixed seed is a solid choice
I have found that using a no-mess mix heavily weighted with shell-less sunflower seeds is the best choice as the primary food source for birds in the backyard.
It’s expensive, yes. But it has so many benefits that overpower any negative factors around price that it is my go-to seed choice for our recycled resin hopper feeders.
By using less food, and the fact that none is wasted and left on the ground, I feel it is the best value in the long run.
Consider adding in a couple handfuls of shelled black-oil sunflower to make the no-mess seed stretch further.
Birds will most likely store the shelled sunflower seeds in tree bark away from the feeder so it is unlikely to build up on the ground below feeders.
Final thoughts on best bird seed
First, let’s agree that feeding birds can be expensive. It gets even more expensive when most of that seed goes to feeding squirrels, raccoons, mice and rats.
Preventing animals from getting up to the feeders and the feed from getting down to the ground is critical to keeping costs down and deterring these animals.
Using a high quality food that birds will not waste or throw to the ground is an investment worth making. A no-mess mix is an excellent choice and by adding black oil sunflower seeds to your liking you can reduce the overall cost.
Most important, the high quality seed will attract the birds you are trying to bring into the garden and add to the joy and excitement you were hoping for in the first place.
Take the time to find a good source for seed and don’t over feed them to the point that the seed sits for long periods in the elements.
The best and most economical way to feed birds is the natural way through properly landscaping your yard using native flowers, shrubs and trees that include seed, berries, fruits and nuts.
If you are interested in moving in this direction, check out my comprehensive post on using native plants to feed birds.
Over time you can use bird feeders as nothing more than a supplemental feeding station to attract very specific birds.
Happy birding.
How to attract Red-bellied woodpeckers to your woodland garden
Red-bellied woodpeckers are woodland birds that have made their way into backyards across the south and into northeastern United States up into Canada.
Identifying Red-bellied woodpeckers can be tricky
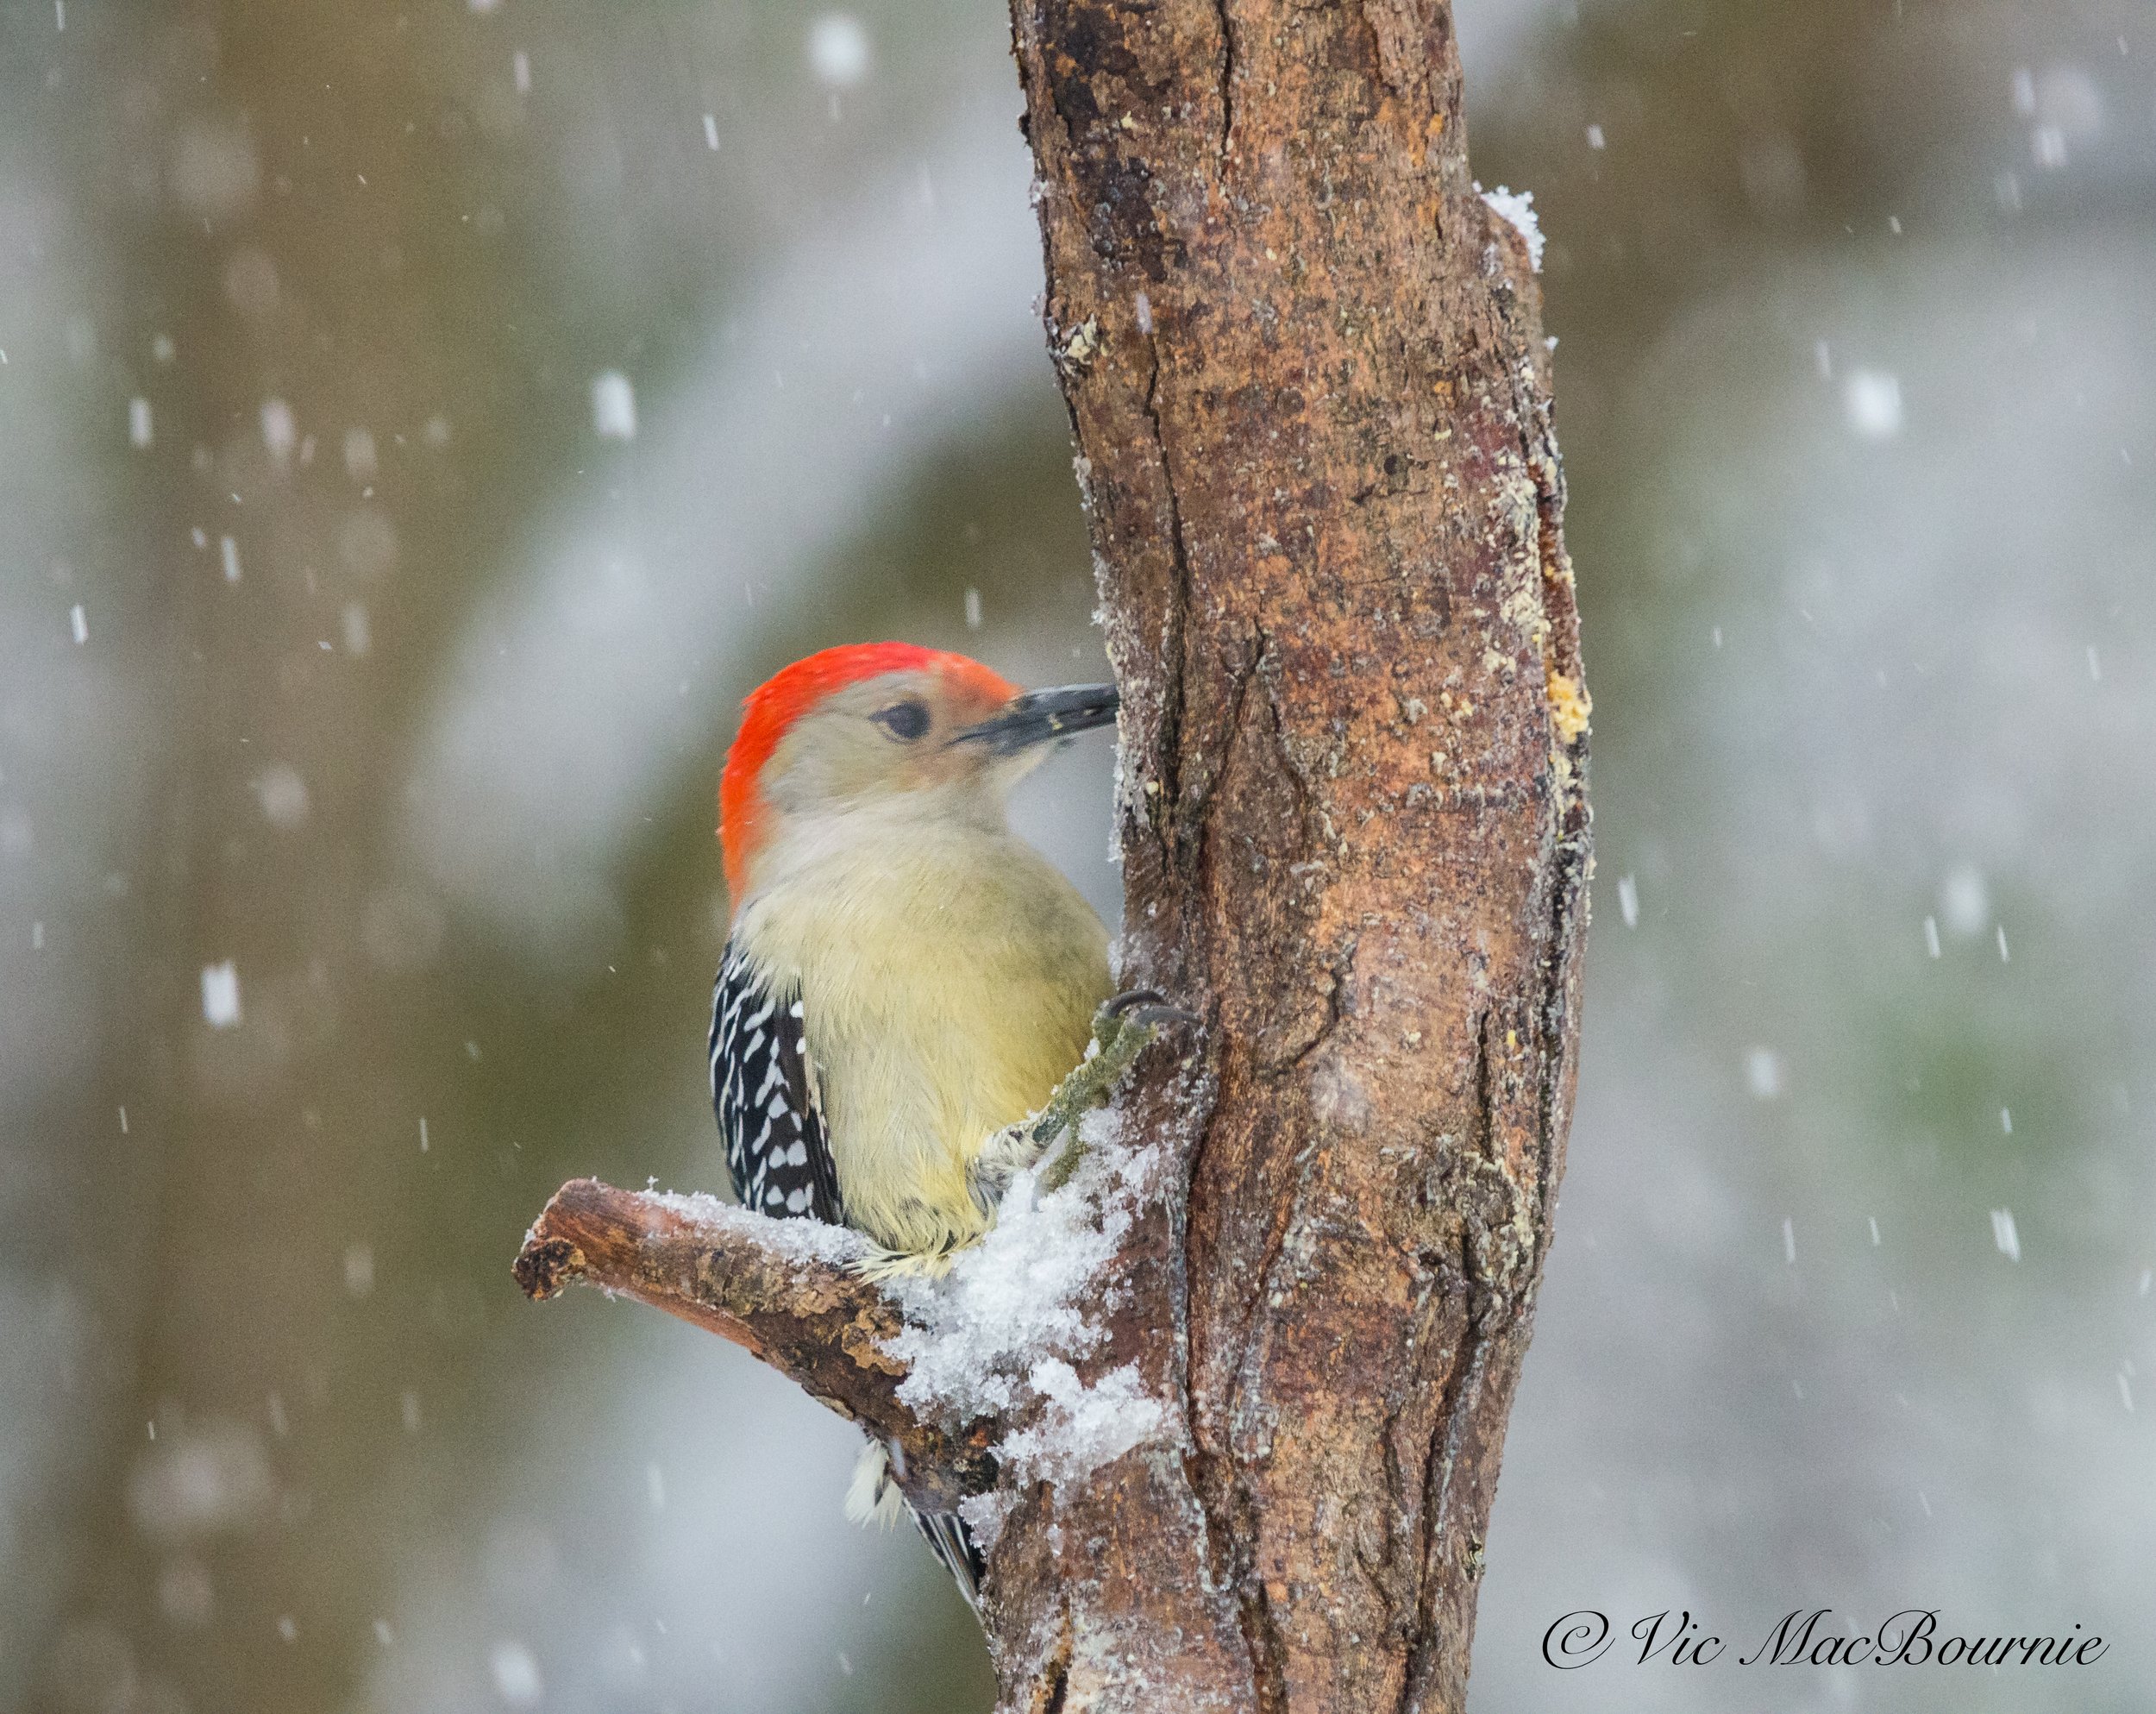
The Red-bellied woodpecker is a regular at our bird feeders thanks to one special food source and a delivery system that keeps it coming back throughout spring, summer, fall and, especially, winter.
This woodland species is an attractive, medium-sized, black-and-white barred woodpecker with a name that might suggest a bright red belly shining for all to see but, in reality, the red on the belly is a barely perceptible hint of reddish orange tucked closer to the bird’s rump than its belly.
Given that the splash of red on the birds’ belly is barely perceptible, you could be forgiven if you wonder how this bird even got its name.
This hidden patch of red on its belly is the primary reason the bird is often misidentified in the field by new birders expecting to see a big bright red belly similar to that of an American Robin.
Even trying to identify the males from the females is quite difficult.
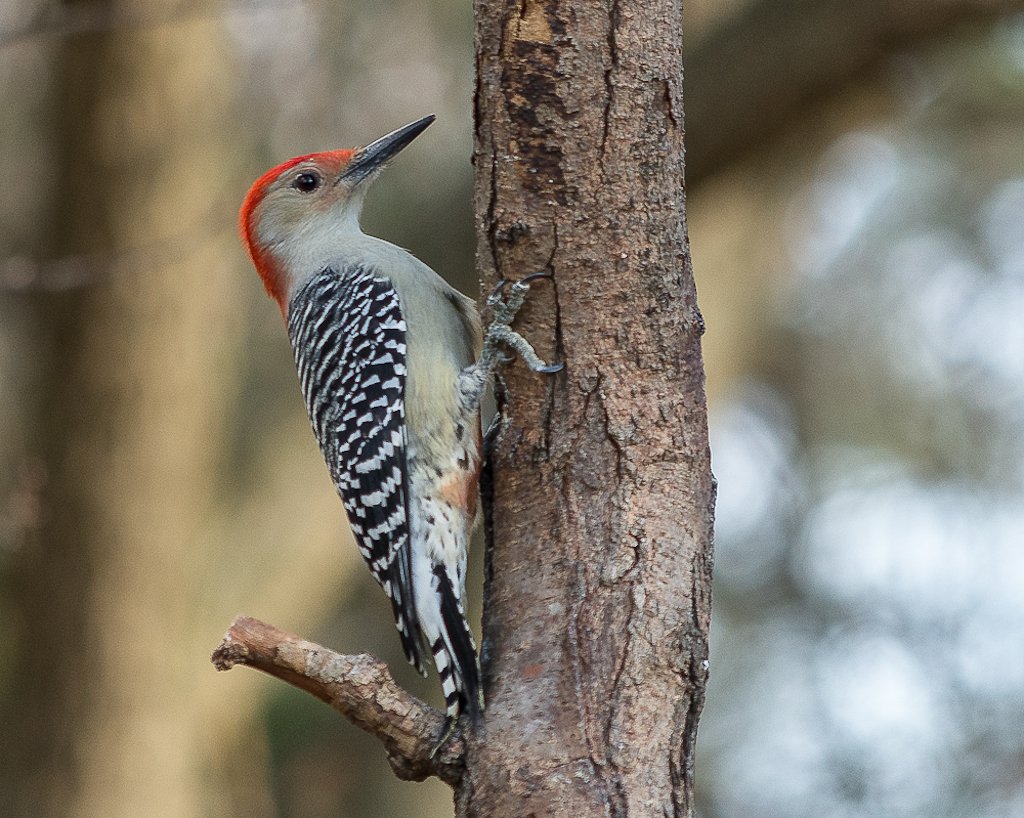
The main difference is that the males have a red crown and nape on their heads, while the females only have the red nape and lack the red crown. (In other words, only the males have the bright red head patch from their foreheads to the base of their neck. Females have red only on their neck. See images below to see the differences between both male and female Red-bellied woodpeckers.)
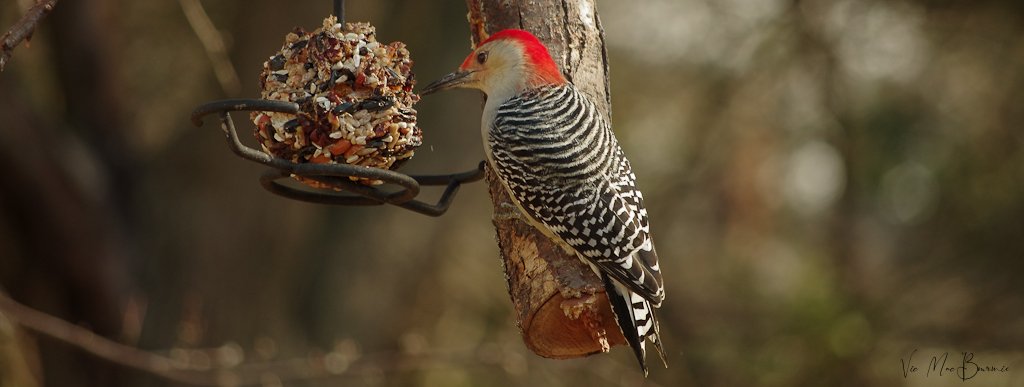
A male Red-bellied woodpecker grabs a treat from a small feeder on the bird-feeding station. Notice the full red cap on its head that extends from its forehead to its zebra-like black and white feathers on its back.
Red-headed vs Red-bellied woodpeckers
This flashy red on the Red-bellied woodpeckers’ rounded heads often leads to a further misidentification with the Red-headed woodpecker.
The vibrancy of the Red-bellied woodpecker’s head may have originally resulted in them taking the name “red-headed” if it was not already taken by its fellow, even more impressive, red-headed cousin.
The red-headed woodpecker is actually quite rare in comparison and sports a complete, almost blood-red head and solid black body with white tail feathers and a bright white breast.
The red-bellied woodpecker is also easily mistaken for a Hairy Woodpecker, which is about the same size.
For more on identifying different woodpeckers, check out my earlier post here.
How big is the Red-bellied woodpecker?
The Cornell Lab of Ornithology describe the Red-bellied woodpecker’s size as somewhere between an American robin and a common crow.
The Northern Flicker, which share some of the same characteristics but is more buff in colour, is slightly larger than the Red-bellied woodpecker.
Both the male and female red-bellied woodpecker measure about 9.5 inches (24 cm) long, and weigh in at between 2.0-3.2 oz (56-91 g). Their wingspan stretches out to between 13.0 and 16.5 inches (33-42 cm).
This image shows a part of the small marking on the bird's belly that earned it the name Red-bellied woodpecker. The red continues farther up the belly but does not extend to the bird’s breast, so it is easily overlooked.
Red-bellied woodpeckers are happy to feed from the common hopper-style feeders, but they much prefer the large seed cyclinders of compressed peanuts and sunflower seeds that sit on top of our bird-feeding station.
How to identify Red-bellied woodpeckers
When trying to identify these birds, it is probably better to focus on the banded, zebra-like pattern on their back, instead of looking for their faint reddish splash of colour on their bellies.
Both the male and female have sturdy, thick black bills that are excellent for drilling for food in the bark of hardwood trees. Their legs and feet are gray.

A male Red-bellied woodpecker working at a DIY suet feeder filled with bark butter.
What is the range of the Red-bellied woodpecker?
These birds may be common in the eastern woodlands but they are actually birds of the southeast regions stretching down as far south as Florida. According to studies, in the first half of the 20th century, this bird was declining in its more northern limits.
More recently, however, the Red-bellied woodpecker is actually expanding its numbers farther into the north reaching the southern limit of eastern Canada including Quebec and even Newfoundland, where they are more rare.
Backyard bird feeders are often cited as a main reason for this expansion northward.
Red-bellied woodpeckers numbers are reported as stable and in the range of about 10 million breeding birds.
These birds are more or less resident birds that do no not migrate any great distances. Reports show that some birds may move to a more northerly location in fall and remain through winter.
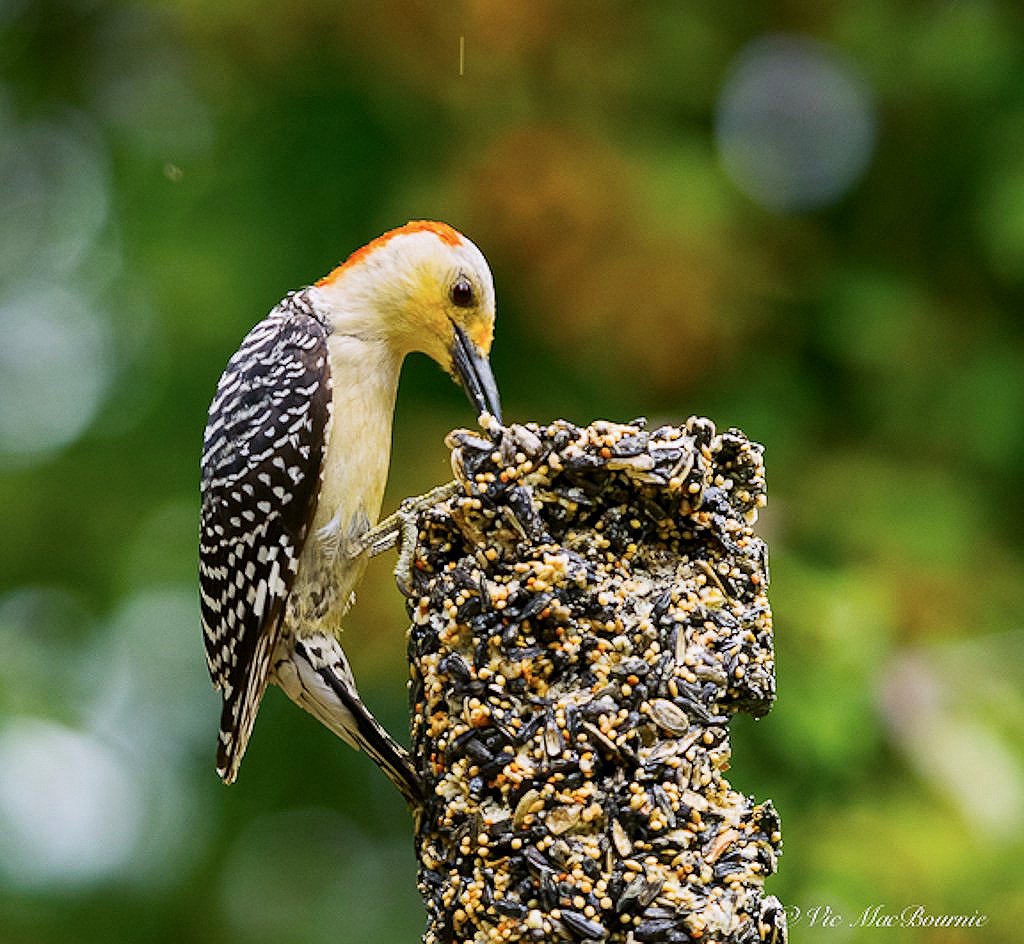
This female Red-bellied woodpecker works a seed cylinder. Notice the red cap does not extend down to the birds forehead, unlike the male.
What is the oldest Red-bellied woodpecker identified?
The oldest known woodpecker was a male found in Georgia where its band indicated it was more than 12 years old.
Most of the woodpeckers, however, do not live more than 11 years with a range of between 4-11 years depending on the type and their range.
Most of the Red-bellied diet consists of insects and spiders, but when insects are more rare, they are also happy to dine on other foods, including seeds, berries and fruit. In fact, during some seasons they eat up to 50 per cent seeds (including pine cones and acorns in the wild).
In the fall and winter they will also eat plenty of fruit such as wild grapes and other berries that remain on the trees and shrubs throughout the winter.
It’s always a good idea to include berry- and fruit-producing trees and shrubs to provide natural food for backyard wildlife.
(Be sure to check out my complete post on using native flowers, shrubs trees and vines to feed birds and other wildlife.)
What do Red-bellied woodpeckers eat in our backyards?
In our backyard, the Red-bellied woodpeckers are quick to come to the feeders to fill up on sunflower seeds and peanuts.
Red-bellied woodpeckers are happy to feed from the common hopper-style feeders, but they much prefer the large seed cyclinders of compressed peanuts and sunflower seeds that sit on top of our bird-feeding station.
I purchase the cylinder specifically labelled for woodpeckers and they seem to do the trick.
A dish of dried or live meal worms will certainly help get their attention and compressed seed cyclinders that include meal worms, berries, nuts and sunflower seeds are always welcomed by these noisey birds.
These large cylinders are by far their favourite, not only for their easy source of seeds, but for the ease that the birds can get at the food.
The cylinders provide a very natural perch for the woodpeckers to take advantage of their large beaks to extract the seeds.
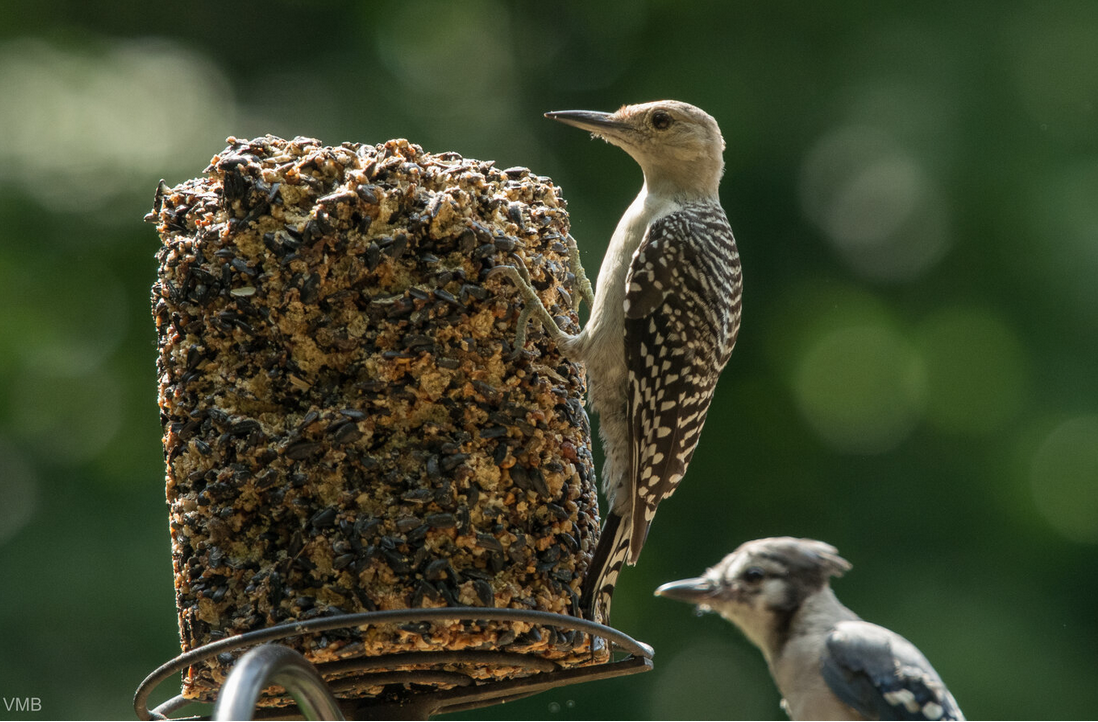
An immature woodpecker without head feathers and a blue jay work the compressed seed cylinder at the bird feeding station.
Sitting in my Tragopan photographic blind watching the woodpeckers working the seed cylinder is fascinating with bits of seed flying in all directions. The cylinders keep the birds at the location for a number of minutes, making viewing and photographing them a real joy.
(Be sure to check out my comprehensive post of Using seed cylinders in the garden. Not only are they a great food source for birds, but because they hold the seed better than hopper feeders, they help to deter mice and rats from eating seeds that are thrown to the ground by Jays and other picky birds.)
As winter progresses, I like to add more high-protein suet to their diet.
Suet bricks are popular and easy to add to the specially made cage feeders, but don’t overlook DIY suet logs that are easy to make from an old branch. Just drill some holes in it and pack the holes with suet for a more natural feeder that works particularly well if you are trying to photograph the birds in a more natural setting.
I like to use a product called bark butter to work into the holes. It is particularly attractive to a host of backyard birds.

Hopper-style feeders are great for small birds but can be awkward for larger birds like woodpeckers who prefer the compressed seed cylinder (above) and natural feeders log a suet log or the larger suet feeders with a tail prop.
(Check out my separate post on the benefit of Using bark butter to attract woodpeckers.)
Because they are quite large woodpeckers, the suet feeders with the tail prop work extremely well and are highly recommended. The recycled resin feeders, while they are more expensive, are easier to clean and will last a lifetime. This Songbird Essential suet feeder from Amazon combines the recycled plastic with a large tail prop for larger woodpeckers including The Pileated woodpeckers. Gardener’s Supply Company has their own take on the suet feeder with prop also in a recycled resin.

Here is a recycled plastic suet feeder complete with a tail prop for larger woodpeckers.
In addition, suet feeders that force the birds to hang upsidedown while they are feeding also work well and they are particularly good if squirrels regularly feed on your suet.
(Check out my post on why Modern resin bird feeders are a better choice than wood feeders.)
And, don’t be surprised to see a Red-bellied woodpecker on one of your hummingbird or a Baltimore Oriole feeders during the summer.
Not only will they help themselves to orange slices and the grape jelly set out for the Orioles, these woodpeckers have discovered the sweet nectar in the feeders and will help themselves to the instant source of energy. They may also be attracted to insects that are constantly around the feeders.
(Check out my earlier post on attracting Baltimore Orioles and another post on attracting hummingbirds to your garden.)

A snag or old dying tree creates an ideal habitat for woodpeckers and other tree-dwelling birds.
Dead trees (snags) are important habitat for Red-bellied woodpeckers
Woodpeckers are tree-cavity nesters, so it’s important to leave dead trees (snags) in your garden for them.
In a natural setting, these birds will typically nest in a dead tree or, in more suburban areas where dead trees are harder to come by, in a rotting fencepost or even in the side of a wood-sided home if given the opportunity.
They like to nest less than 50 feet above ground but have been known to nest more than 100 feet above ground.
They have also been known to use larger nest boxes in more urban settings and some specialty bird stores sell size-appropriate boxes.
The importance of leaving dead trees in the yard cannot be underestimated. Not only may you discover a pair nesting in the tree, but the dead tree offers hiding places for a host of insects the woodpeckers will feed on with their long, sticky, forked tongue that can actually protrude as much as 2 inches into crevices to pull out insects and beetle larvae hiding in the snags.
In addition, woodpeckers, along with other birds like Chickadees and Nuthatches, also store food in the crevices of tree bark and snags to snack on later when food is more scarce.
(Be sure to check out my comprehensive post on why we should leave dead trees in our yards.)
Do Red-bellied woodpeckers mate for life?
Unlike blue jays and other birds, Red-bellied woodpeckers do not mate for life, but they are monogamous during a mating season. They usually pair up in late winter and remain together during the nesting season. They will find a new mate the following year.
The Red-bellied woodpecker breeds once per year, usually in March or April, when the female lays an average of 4 eggs. About 12 days later the babies begin to emerge and have fledged the nest within about 27 days. They remain around their parents for between 2 and 10 weeks before going out on their own entirely.
Red-belly woodpecker wrap up
Attracting Red-belly woodpeckers is not really difficult if you are lucky enough to live in their range. It helps if you are also lucky enough to live near a forested area or have created a large woodland-style garden where these birds can feel at home.
Include large snags, berry and fruit trees and vines, a reliable source of water and good quality sunflower and nuts at your bird-feeding station. A large seed cylinder and suet placed into a resin feeder with a tail prop will go a long way to attract these very vocal and fun birds to your yard.
And, while they are setting up residence, don’t forget that their voracious appetites for insects and spiders will help to keep their numbers down.
American Robins: How to attract them to our yards
The American robin has always been a mainstay in our backyard whether they are eating crabapples or enjoying themselves in the bird bath.
More of these spring harbingers are remaining all winter
Most of us remember the first sign of spring involved an orange breasted bird and a worm.
Once we saw our first Robin pulling a worm out of the grass it was officially spring. Today, many of those same orange breasted birds are sticking around all winter living off berries, bugs, larvae and anything else they can scrounge to get them through our winters.
Milder winters resulting from climate change are certainly playing a role in more American Robins remaining in their northerly limits, but the threat of sudden and prolonged periods of freezing temperatures combined with heavy snow fall can certainly put the birds in severe danger.
It’s another good reason to ensure we do our best to supplement our bird feeders with more natural food for the birds – berries, fruit and even meal worms – especially during the winter.
Be sure to check out my comprehensive post on the best plants to feed birds naturally and save money.

An American Robin sits atop a rustic bird house in spring.
Robins are regulars in our backyard
Throughout most of the winter, I watch a small flock of American Robins feeding off of our two crabapple trees in the back of the yard. I suspect it is an important food source for the resident Robins, when other food supplies in the area are scarce.
The American Robin is probably one of the most familiar birds in North America. In fact, it is actually the state bird of three northeastern states – Connecticut, Michigan and Wisconsin.

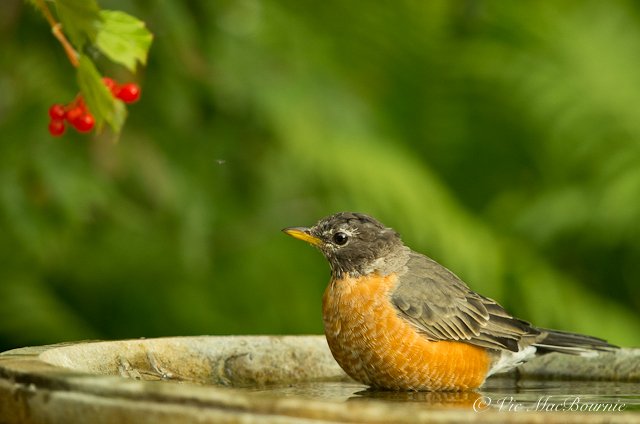
American Robins love their bird baths. Be sure to add a couple of large bird baths to keep the robins returning to your yard.
Where did the American Robin gets its name?
The American Robin got its name from European settlers who named it after the more diminutive and cheerful European Robin, which sports an equally impressive red breast and is often referred to as “Robin Redbreast.”
Although it is easy to see that the colouring of the two birds resulted in the identical names, the similarities more or less end there.
The American robin is actually a member of the thrush family and is much larger than its European namesake. Those who have studied the history, say that the two birds were given the same name as much for their character as their colourings. Both birds readily adapt to urban areas and are happy to live among humans, in fact, they eagerly stay close by to benefit from potential insects we sometimes stir up in the garden.
The water in this DIY bird bath is kept warm enough for the birds to use even in the coldest months of the year.
Whether you are in England digging a new garden bed or New York, chances are a robin is nearby watching your every move. And, don’t be surprised if they come right down to your feet to nab an unearthed worm or other insect.
It turns out the European settlers didn’t stop giving North American birds the Robin moniker after bestowing it upon the American Robin. Apparently, even our beloved bluebirds were tagged with the name robin. That’s understandable since the Eastern bluebird sports a lovely orange breast and reflects many of the traits of the European robin when it comes to size and characteristics.
But that didn’t end the Europeans obsession with naming our birds after their beloved robins. Towhees originally earned the name ground robin and Baltimore Orioles were called the Golden Robin.
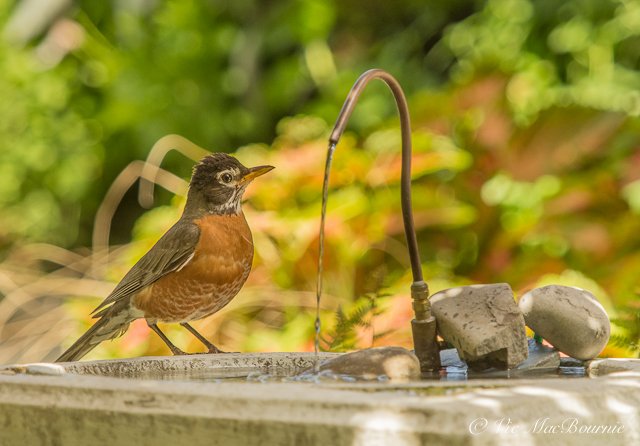
This American Robin was attracted by the sound of water spilling from the solar-powered dripper.
Obviously all four sport red-orange breasts that undoubtedly played a role in being compared to the friendly European robin, a mainstay in any British garden.
In fact, the American robin in all but colouring, is more related and shares more things in common to the Eurasian blackbird. Other than its colouring –which is all black – the blackbird is also in the thrush family and sports similarly to the American robin, a yellow beak and white around its eye.
Early Americans also called the bird the wandering thrush, which seems a more accurate description.
Robins love a good bath
If there is one thing in our garden that the robins love most, it’s our many bird baths sprinkled about. if you are looking to attract Robins to your yard, a couple of good, solid, large bird baths are essential. You will be amply rewarded, if you can keep a good reliable source of water for them throughout the winter.
Be sure to check out my article on creating a DIY heated bird bath for the winter.
American Robin is actually a woodland bird
Although the birds are a common sight in residential yards and parks, this wasn’t always the case. American Robins are actually woodland or forest dwelling birds that have learned to adapt to the abundance of food – primarily worms in grass – in surburban landscapes.
Many of our American Robins end up returning to woodlands and more “wild” areas in the winter,where they can more easily find food – in an abundance of berries and other fruit as well as overwintering insects and larvae.
Creating a more natural yard, by planting plenty of native berries as well as leaving leaf litter for overwintering insects and larvae, will help to attract these wonderful birds throughout the winter.
Creating this natural food source in your woodland/wildlife garden will also go a long way to ensure the survival of the American Robin in your neighbourhood.

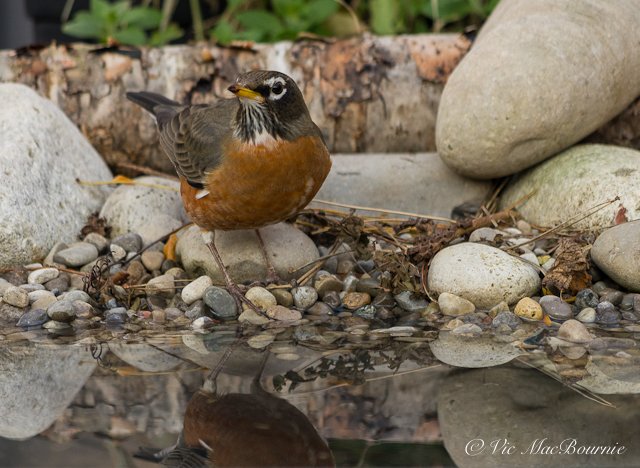
Robins love their bird baths. Be sure to ad a birdbath or small pond to attract these members of the Thrush family.
How do Robins survive winter?
During the winter, it is common to see the Robins travelling in large flocks where they work together to find natural food sources. Winter roosts can be huge with some estimates reaching more than two hundred thousand birds.
But, just because you see flocks of Robins in your area one year, does not mean they will necessarily return the following year.
Robins tend to be nomadic birds that don’t follow the typical north to south migration route. Individual Robins get around and may winter in completely different geographic areas from one winter to another. They have been known to travel long distances between states following the abundance of food in any given year.
Each spring, however, Robins return to their original nesting area and have even been known to use the previous year’s nest – with some modern improvements of course – if it proved successful the previous year.
A few facts about Robins
• In more northern regions of Ontario for example, Robins continue to be known as the harbingers of spring. They tend to show up around the end of March through early April as the warmer weather thaws the ground making worms and other insects more accessible.
• Worms only make up 15-20 per cent of the Robin’s summer diet. The rest is made up of other insects, fruits and berries.
•Robins tend to eat more earth worms in the early morning when they are more visible and closer to the surface, and turn to fruit later in the day.
• Robins belong to the Thrush family – family of birds known for their beautiful songs. Because Robins tend to hang out in neighbourhoods and around other human-dominated habitats, their spring songs are very familiar to most of us wheter we know it or not. Their rich, cheerful songs fill our neighbourhood each spring when they are particularly vocal announcing the arrival of spring and their readiness to mate and get on with building their families. Robins are known to sing their songs throughout the day and even will after sunset.
• Because Robins are comfortable in our gardens and around humans, it is not uncommon to have a pair nesting close to our homes and high-traffic areas such as on top of exterior lights, in hanging baskets on garden ornaments or just about anywhere the pair can find a good sturdy structure to build their nest. Last year, our neighbours had a pair nesting in a wreath near their front door, seemingly oblivious to all the comings and goings.
The birds’ ease around us often provides excellent opportunities to observe the family as they grow up in front of our eyes.
They can be the perfect opportunity for children to be exposed to the beauty of nature as they watch the parents on the nest, feeding the young and eventually watch as the fledglings leave the nest.
If you have children or grandchildren who express an interest in nature, be sure to check out my comprehensive post about why children need more nature in their lives.
Robins can nest up to three times in a breeding season, often using the same nest. However only about 40 per cent of the nests produce young and only about 25 per cent of those young Robins survive through fall to take on the winter. About half of the Robins that go into winter survive to mate the following spring.
Given those statistics, it’s not surprising that American Robins have an average lifespan of about 1.5 to two years, but they can live longer if given the right environment. For example, the longest lived American Robin recorded in the wild was almost 14 years old.
How to identify the American Robin
The American Robin is one of the easiest birds to identify with their rusty red belly against a greyish-black upper body, a bright yellow beak and white markings around their eyes.
These rather large birds measure around 25 centimeters long and weigh in at 77 grams, making them the largest thrush in North America.
The can be found right across North America from the farthest reaches of Alaska in the north, across to Canada’s Newfoundland and down south from Florida across to California.
Are American Robins threatened?
Robins face a hose of deadly foes around our residential gardens from the over use of insecticides especially on turf grass where they feed on worms and other insects, to the presence of unnatural predators such as cats, and collisions with windows.
Be sure to check out my two earlier posts on protecting birds from stray cats and how to protect birds from window strikes.
A more serious threat that has recently attacked American Robins is the mosquito-born virus West Nile that has killed a stunning number of both Robins and Blue Jays.
Be sure to check out this link for my comprehensive post on Blue Jays and West Nile.
Despite these challenges, the good news is that studies are showing that the American robin populations over the past 40 years have slowly increased. This increase is thought to be related to their ability to adapt their lifestyle to live comfortably in our suburban neighbourhoods.
The combination of a more readily accessible food source (worms), safe nesting places (unnatural as many of them are) and milder winters have no doubt combined to provide American robins with a fabourable environment despite the many threats they face in the suburban landscape.

Creating your own “Ark” landscape design has never been easier
Here is your opportunity to have Chelsey Gold Medal winning landscape designer Mary Reynolds create a garden of your dreams based around her concept of creating Arks. A natural landscape or woodland garden based on native plants for wildlife.
Mary Reynolds’ gift makes it all possible
Chelsea award-winning Irish landscape designer, Mary Reynolds, has given the world too many gifts to count, but her latest gift might just be her most inspiring.
Especially if you are the one either giving it, or, even better, on the beneficiary end.
Mary, both an accomplished author and landscaper designer, has been working hard over the past several years to help homeowners and especially gardeners develop a new appreciation for a more “wild landscape” – one that respects native plants and the wildlife that either calls it home or would love to make it their home.

Landscape designer Mary Reynolds is now offering readers in North America and elsewhere the opportunity to have her help create a landscape design for their properties.
She has developed an entire movement and website (We Are The Ark) around creating “Arks” in the suburban and rural landscapes. These Arks act as stepping stones across the landscape, where pollinators, birds and even mammals can find refuge and habitat they can call home.
“Every thread of the web we remove through human expansion, destruction and pollution, could be the last thread holding it all together and we just dont know when it is all going to fall apart. If you want to save the planet, start with your own patch of it. ”
Why is it so important for homeowners to develop their Ark?
Mary explains, over email, to Ferns & Feathers that it is increasingly important for homeowners to consider creating an Ark.
“Because the web of life is collapsing. We have lost 70 per cent of all our earth’s wild creatures since 1970 when the ‘green’ revolution kicked in and the population exploded. With the collapse in insect populations and the 75 per cent loss of our topsoil, we are looking at a catastrophic collapse of the earth’s ability to provide us with clean air, water, food and shelter,” Mary explains.
“Every thread of the web we remove through human expansion, destruction and pollution, could be the last thread holding it all together and we just don’t know when it is all going to fall apart.”
Mary urges homeowners to recognize their role in saving the planet, even if it is just a small patch in an urban environment.
“If you want to save the planet, start with your own patch of it. Set your land free and support it to become a native plant ecosystem, removing the non natives and importing as many locally sourced native plant layers as possible. These are the plant communities that have evolved alongside their local insects and mammals who cannot survive without them. We have to make a patchwork quilt of hope for nature, for the seeds of restoration to spring forth when the time comes.”
Her website already tracks the number of people who have created their own Arks and marked them on her arkivist world map.
To date, there are more than 1,000 documented Arks, including about 320 in the United States and Canada. Mary hopes her individual and more personalized assistance will help boost that number.
Now, Mary wants to offer her services to help even more homeowners turn their properties into “Arks.”
Landscape designer Mary Reynolds is offering to help howmowners in North America and elsewhere create their own Arks.
And, for homeowners in the United States and Canada, she will provide the service all on line.
She tells Ferns & Feathers that she is ready for the onslaught of requests undoubtedly coming her way.
“I have been doing online consultations for a couple of years now across the world, the complexities are not too hard, most places have similar problems, and simple, if often different solutions,” Mary explains.

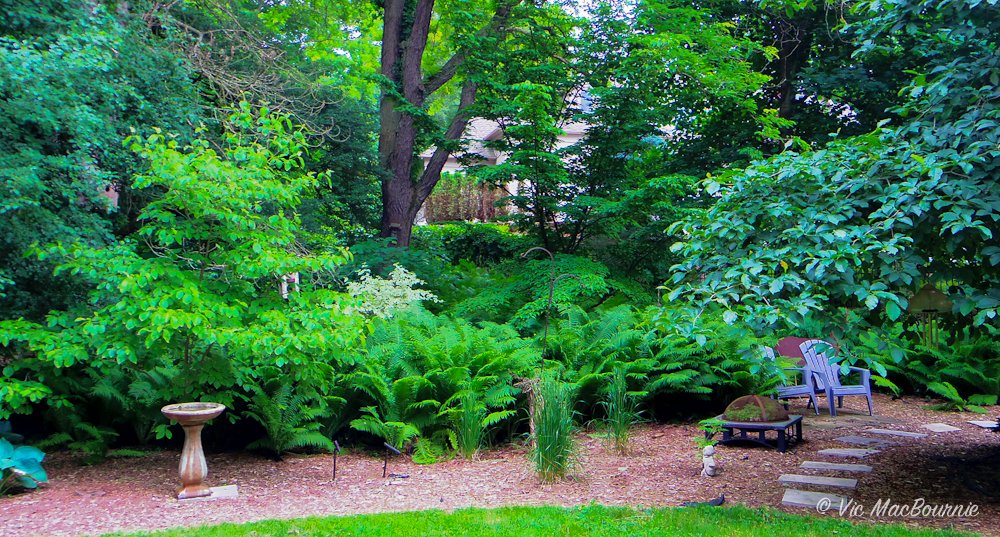
Giving wildlife a place to prosper in your garden is an important part of creating your own Ark.
Why do we need an Ark?
Mary points out on the website that the earth is “losing 150 to 200 species to extinction every single day. Each species lost is lost FOREVER.
Biodiversity is short for “Biological diversity”.
Biodiversity is “the variety of all living things, and the systems which connect them.” This includes all the planet’s different plants, animals and micro- organisms, plus the genetic information they contain and the ecosystems of which they are a part.”
An incredible opportunity to build your Ark
It’s an incredible opportunity to have a Chelsea Gold-Medal winning landscape designer dig into your landscape and help transform it into a woodland/wildlife refuge.
Mary, of course, is not limited to “woodland” designs, but given that this website is dedicated to woodland/wildlife design and Mary has gone on record saying that most land wants to revert back to a woodland style, the odds are good that the design will lean in that direction.
In the announcement, Mary said she “wants you to give any land under your care back to nature, to re-wild, to be Arked.”
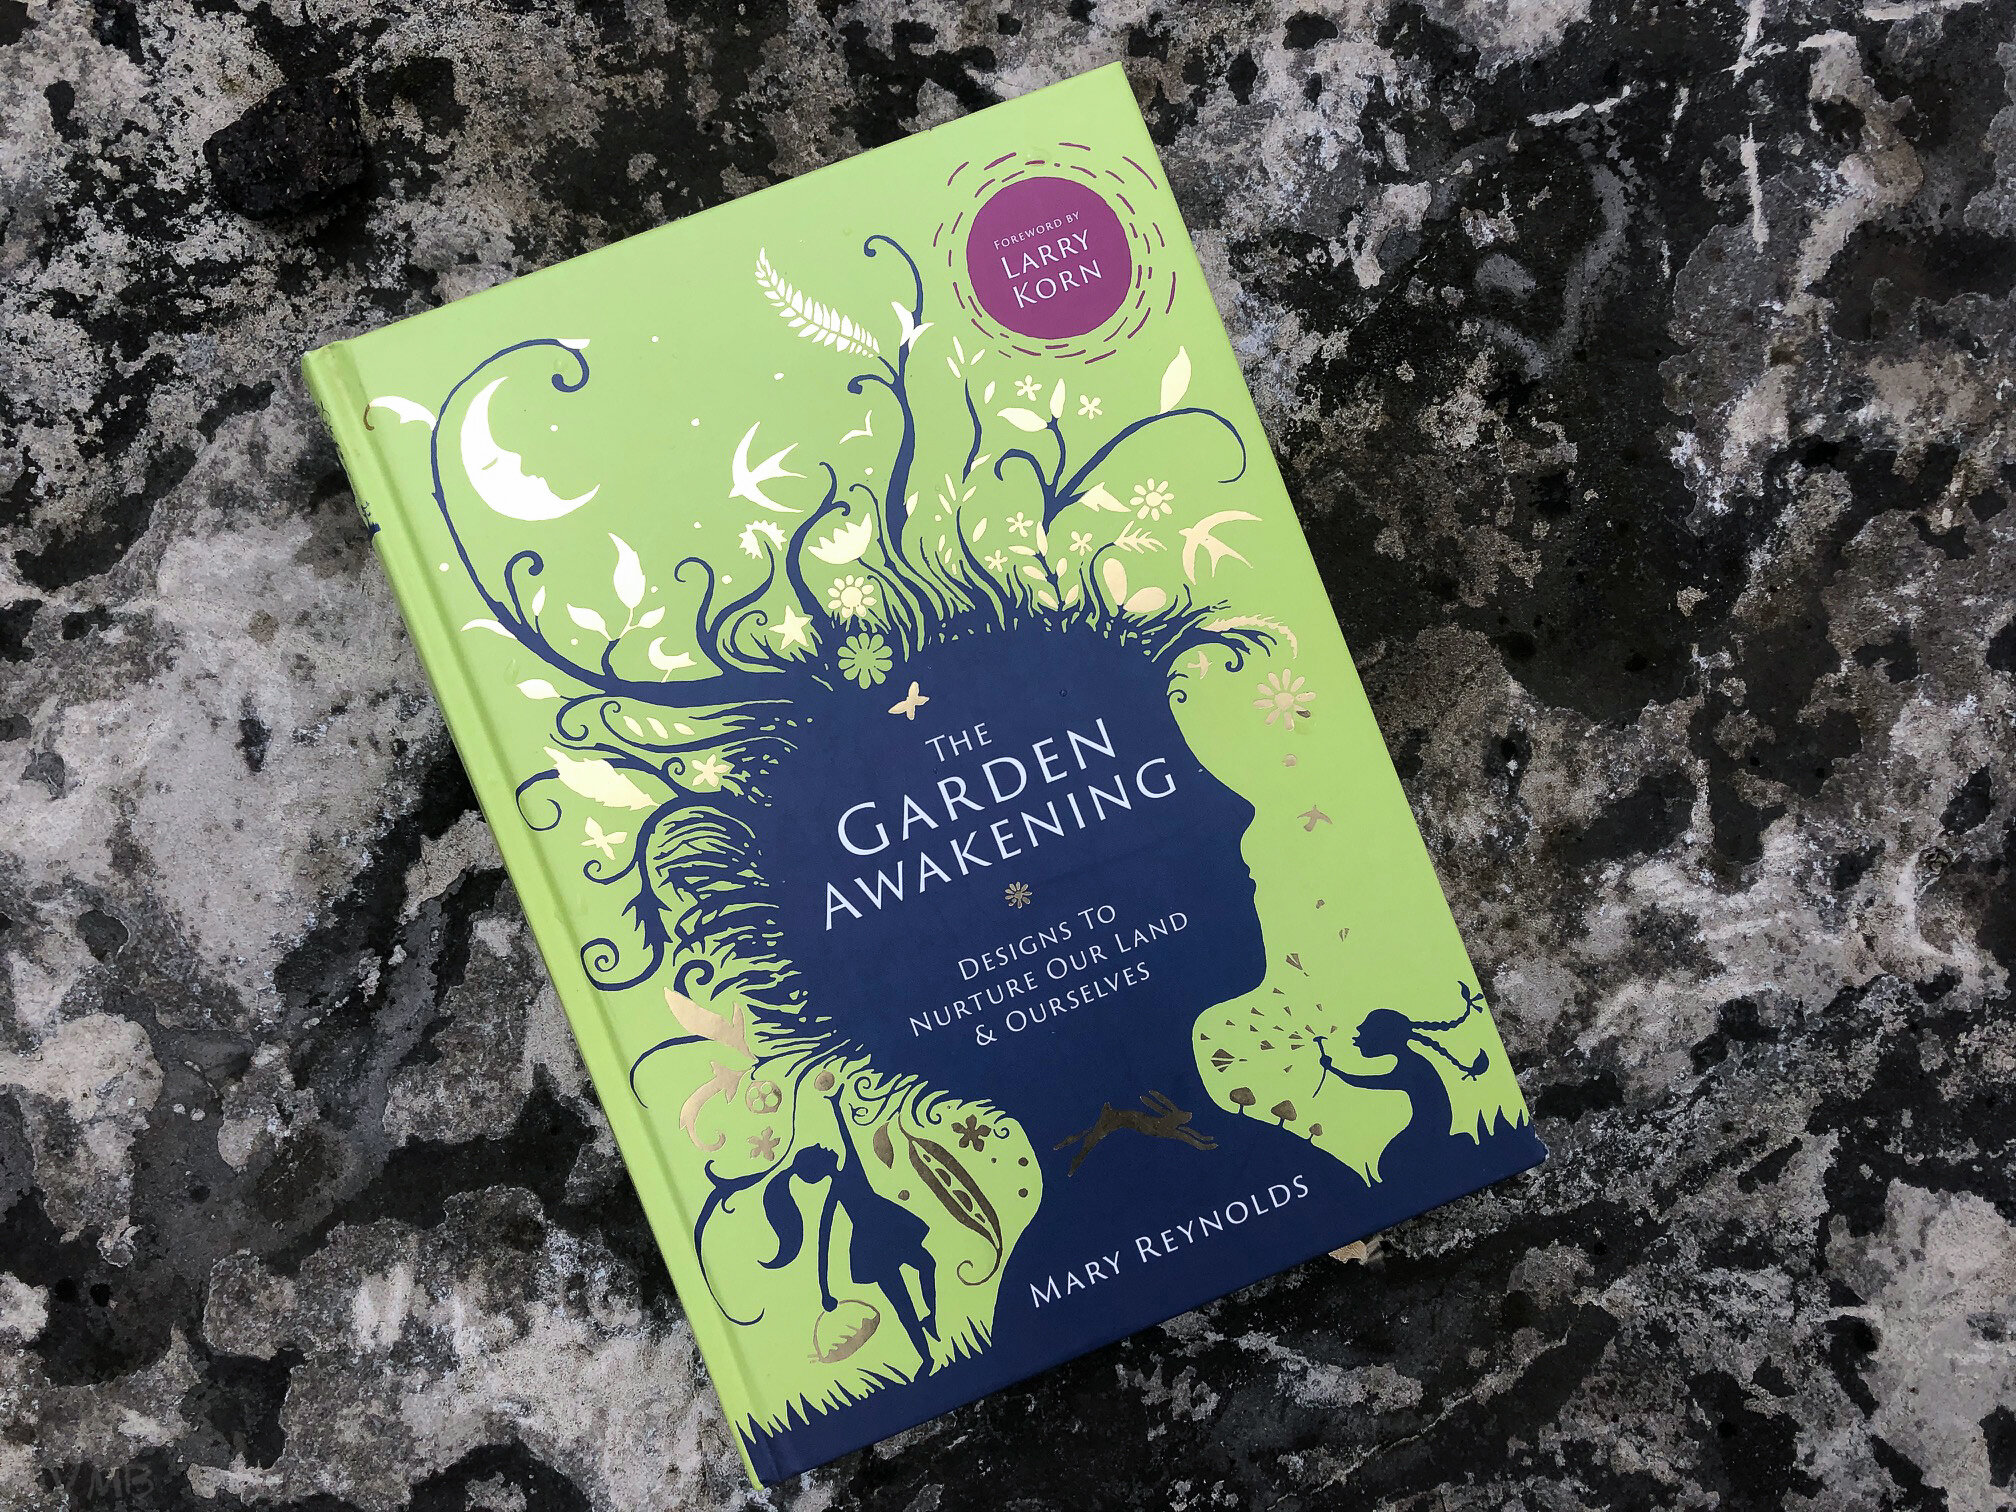
Mary Reynolds’ first book Garden Awakening, where she introduced the concept of creating Arks to the world of gardening.
“The hour consultation is a zoom call where I have been supplied with photos and short videos of their land. Then we talk through each area discussing how to increase the sanctuary there for the local wildlife in all its forms,” explains Mary.
“Also we work out how to weave the guardians’ own needs in with these ideas. The sketch designs are more detailed and are to scale, mapping out a concept design for you to work with on your own land, though I need a proper land survey for that option, with all of the existing trees, plants, paths etc,” Mary says, adding that the on-line services will be an ongoing service for homeowners and businesses.
Anywhere in the world, Mary can work online with you, from an hour long consultation to a full ARK design.
In particular, Mary “can help you design a space that allows for the maximum amount of edges and ecotones, the most diverse range of habitats you can fit into your land. A magical place for your family to enjoy and protect, which will be hopping with life and beauty. A sanctuary for all of the native creatures that need it, places to rest and recover and finally thrive.”
“She will guide you to understand how to step in and provide the ecosystem services required to maintain that diversity going forward, to replace the missing parts of the web of life that we have broken. To become the wolf, the deer, the beaver.
To be a Guardian, not a gardener.
To be an Arkevist.”
There are several approaches homeowners can take to have Mary design their gardens.
Mary is asking readers to email her with the property’s size, and some photos to receive a quote for the work.
All of the details are available at her website (link.) Below are excerpts from her website to give readers a better understanding how the process may work.
• An online advice hour over Skype or Zoom: Send a number of comprehensive photos of your land, a google maps pin so we can look at it from above and even some very short videos (less than 1 minute if possible). Once I have all the information, I can talk through ideas with you over zoom. Please note that this is not a gardening advice service. It is for Ark development and design. €184.50 (€150 plus VAT @ 23%) (approximately $230 US, or $310 Cdn. to be paid before the appointment.)
An on-site consultancy including a design: This involves me coming to visit you, at your home, where we sit down and I sketch a design out over a pre-prepared landscape survey of the site (which you will have provided from a surveyor), creating spaces within the land for spending time, growing food, building a magical connection between your land and yourself and supporting wildlife to share the land with you. I draw up a scaled master plan before I leave. However, there will be no detailed construction details or detailed drawings, but you will be able to work with a contractor using the master plan or use it yourself to develop your Ark.
If I am working out of the country, I would be asking you to consider an online design consultation as I do not want to travel unless absolutely necessary.
The process usually takes 3 – 4 hours on site (I will need a dry warm space with a large table to work on). In order to give you a definite price I need you to email me some photographs of the land so I can see how big it is, as size is everything in terms of the amount of design involved. But I usually manage most gardens in the one day, if the areas I am designing are not too complicated and under an acre in size.
Online Design Consultation: This is a good way to get the Mary design experience if you are a distance away.
“I will work on a survey pre-prepared and sent to me before the appointment date. I can get to talk to you by zoom in the morning to hear the design brief and feel into the situation. Then I will work on the design to get a good solution for both the client and the Ark’s requirements and call you back as required during the day, finally presenting it by zoom and scanning the drawings and emailing them to you day following completion.”
“You will end up with a good overall master plan to work towards yourself, or to use in conjunction with a contractor to manifest the design on the ground, or develop the Ark yourself.”
“However, there will be no detailed construction details or planting details. As I am not spending time travelling to the site, I get to spend more time at the design during the day and it is a good solution for people a distance away.”
In order to give you a definite price I would need you to send me photographs of the land so I can see how big it is, as size is everything in terms of the amount of design involved! But I usually manage most gardens in the one day, if the areas I am designing are not too complicated and under an acre in size.
However, there is also the cost of the survey, which needs to be emailed to me before I begin so that I can do some preparation drawings. The survey is a separate contract which doesn’t involve my input and best organized locally to your site.
The amount of information Mary will need will depend on how detailed a plan you are looking for her to design.

The Woodland comes to life in Evan Rosen’s exquisite artwork
It took the death of his father and a complete immersion into nature, the forest and woodlands to take Evan Rosens art from the darkness into the sunlight.
Hello darkness, my old friend
I've come to talk with you again
Because a vision softly creeping
Left its seeds while I was sleeping
And the vision that was planted in my brain
Still remains
Within the sound of silence
–Paul Simon
Darkness turns to light as the seeds of nature take root
The darkness in Evan Rosen’s art was clearly evident. It emerged from the skulls and knives, the snakes and the dark figures that are hard not to miss in his Instagram feed.
Today, that darkness has given way to light in the form of exquisite, woodland floral art.
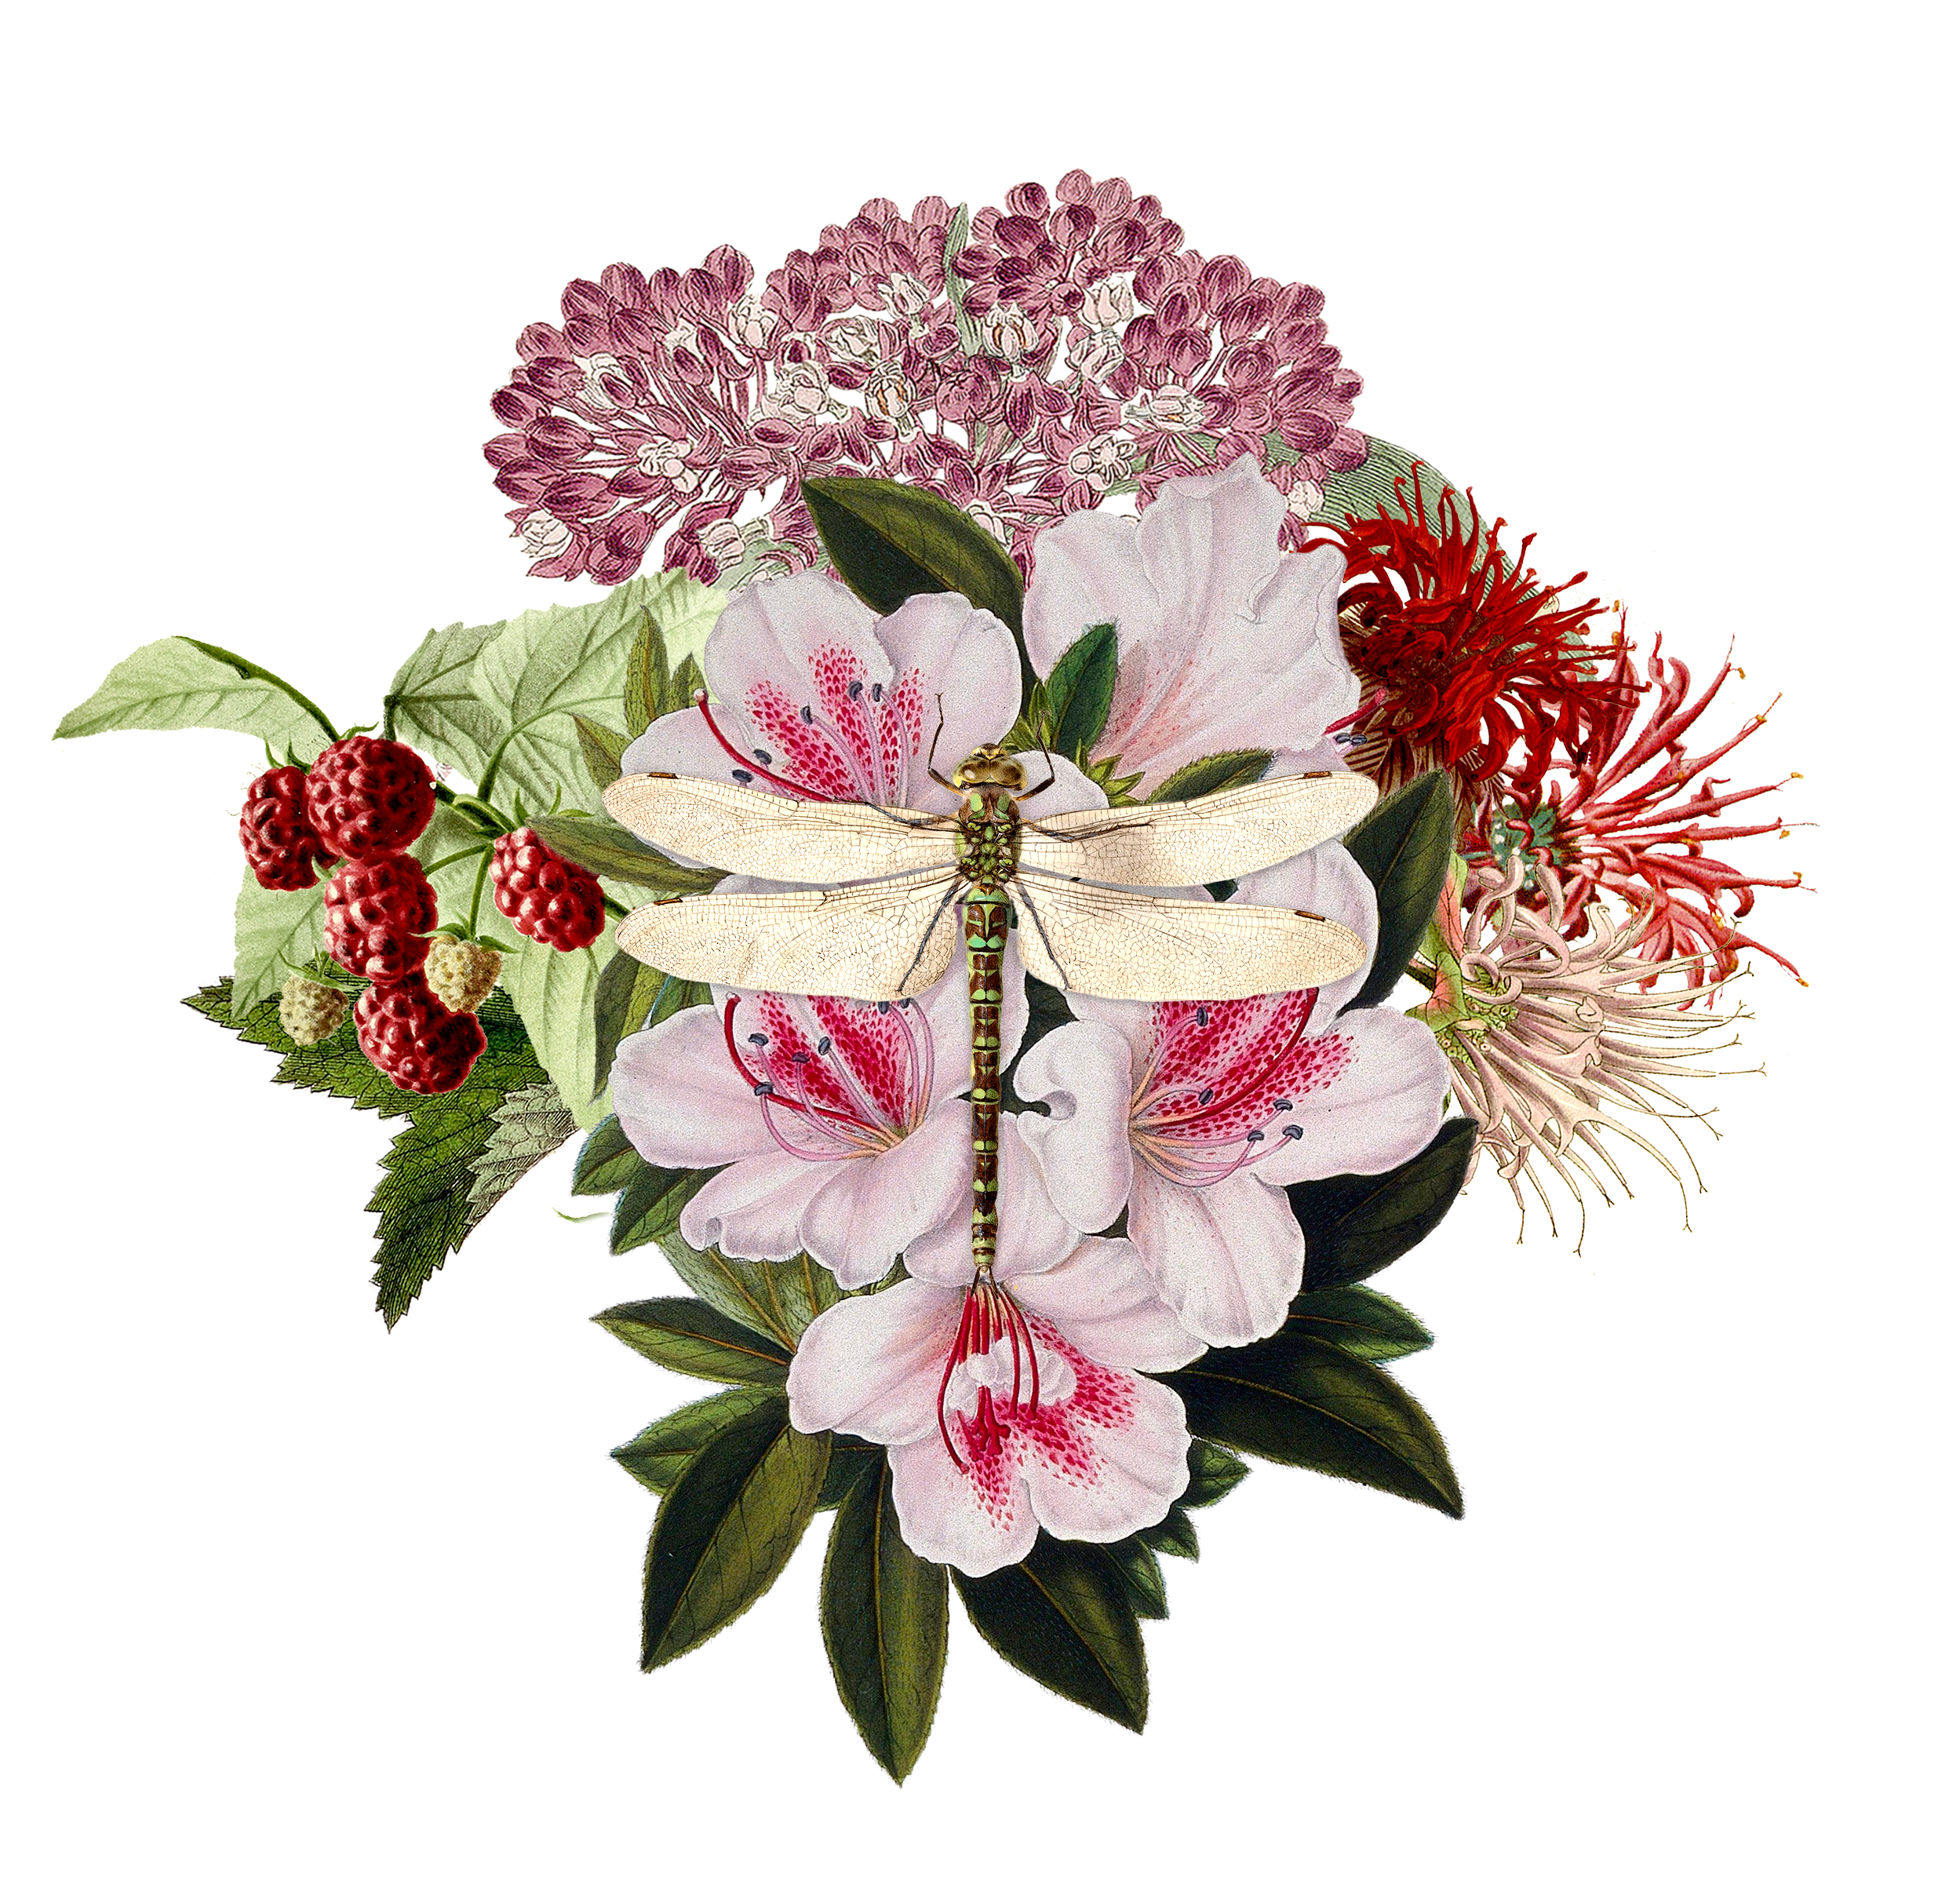
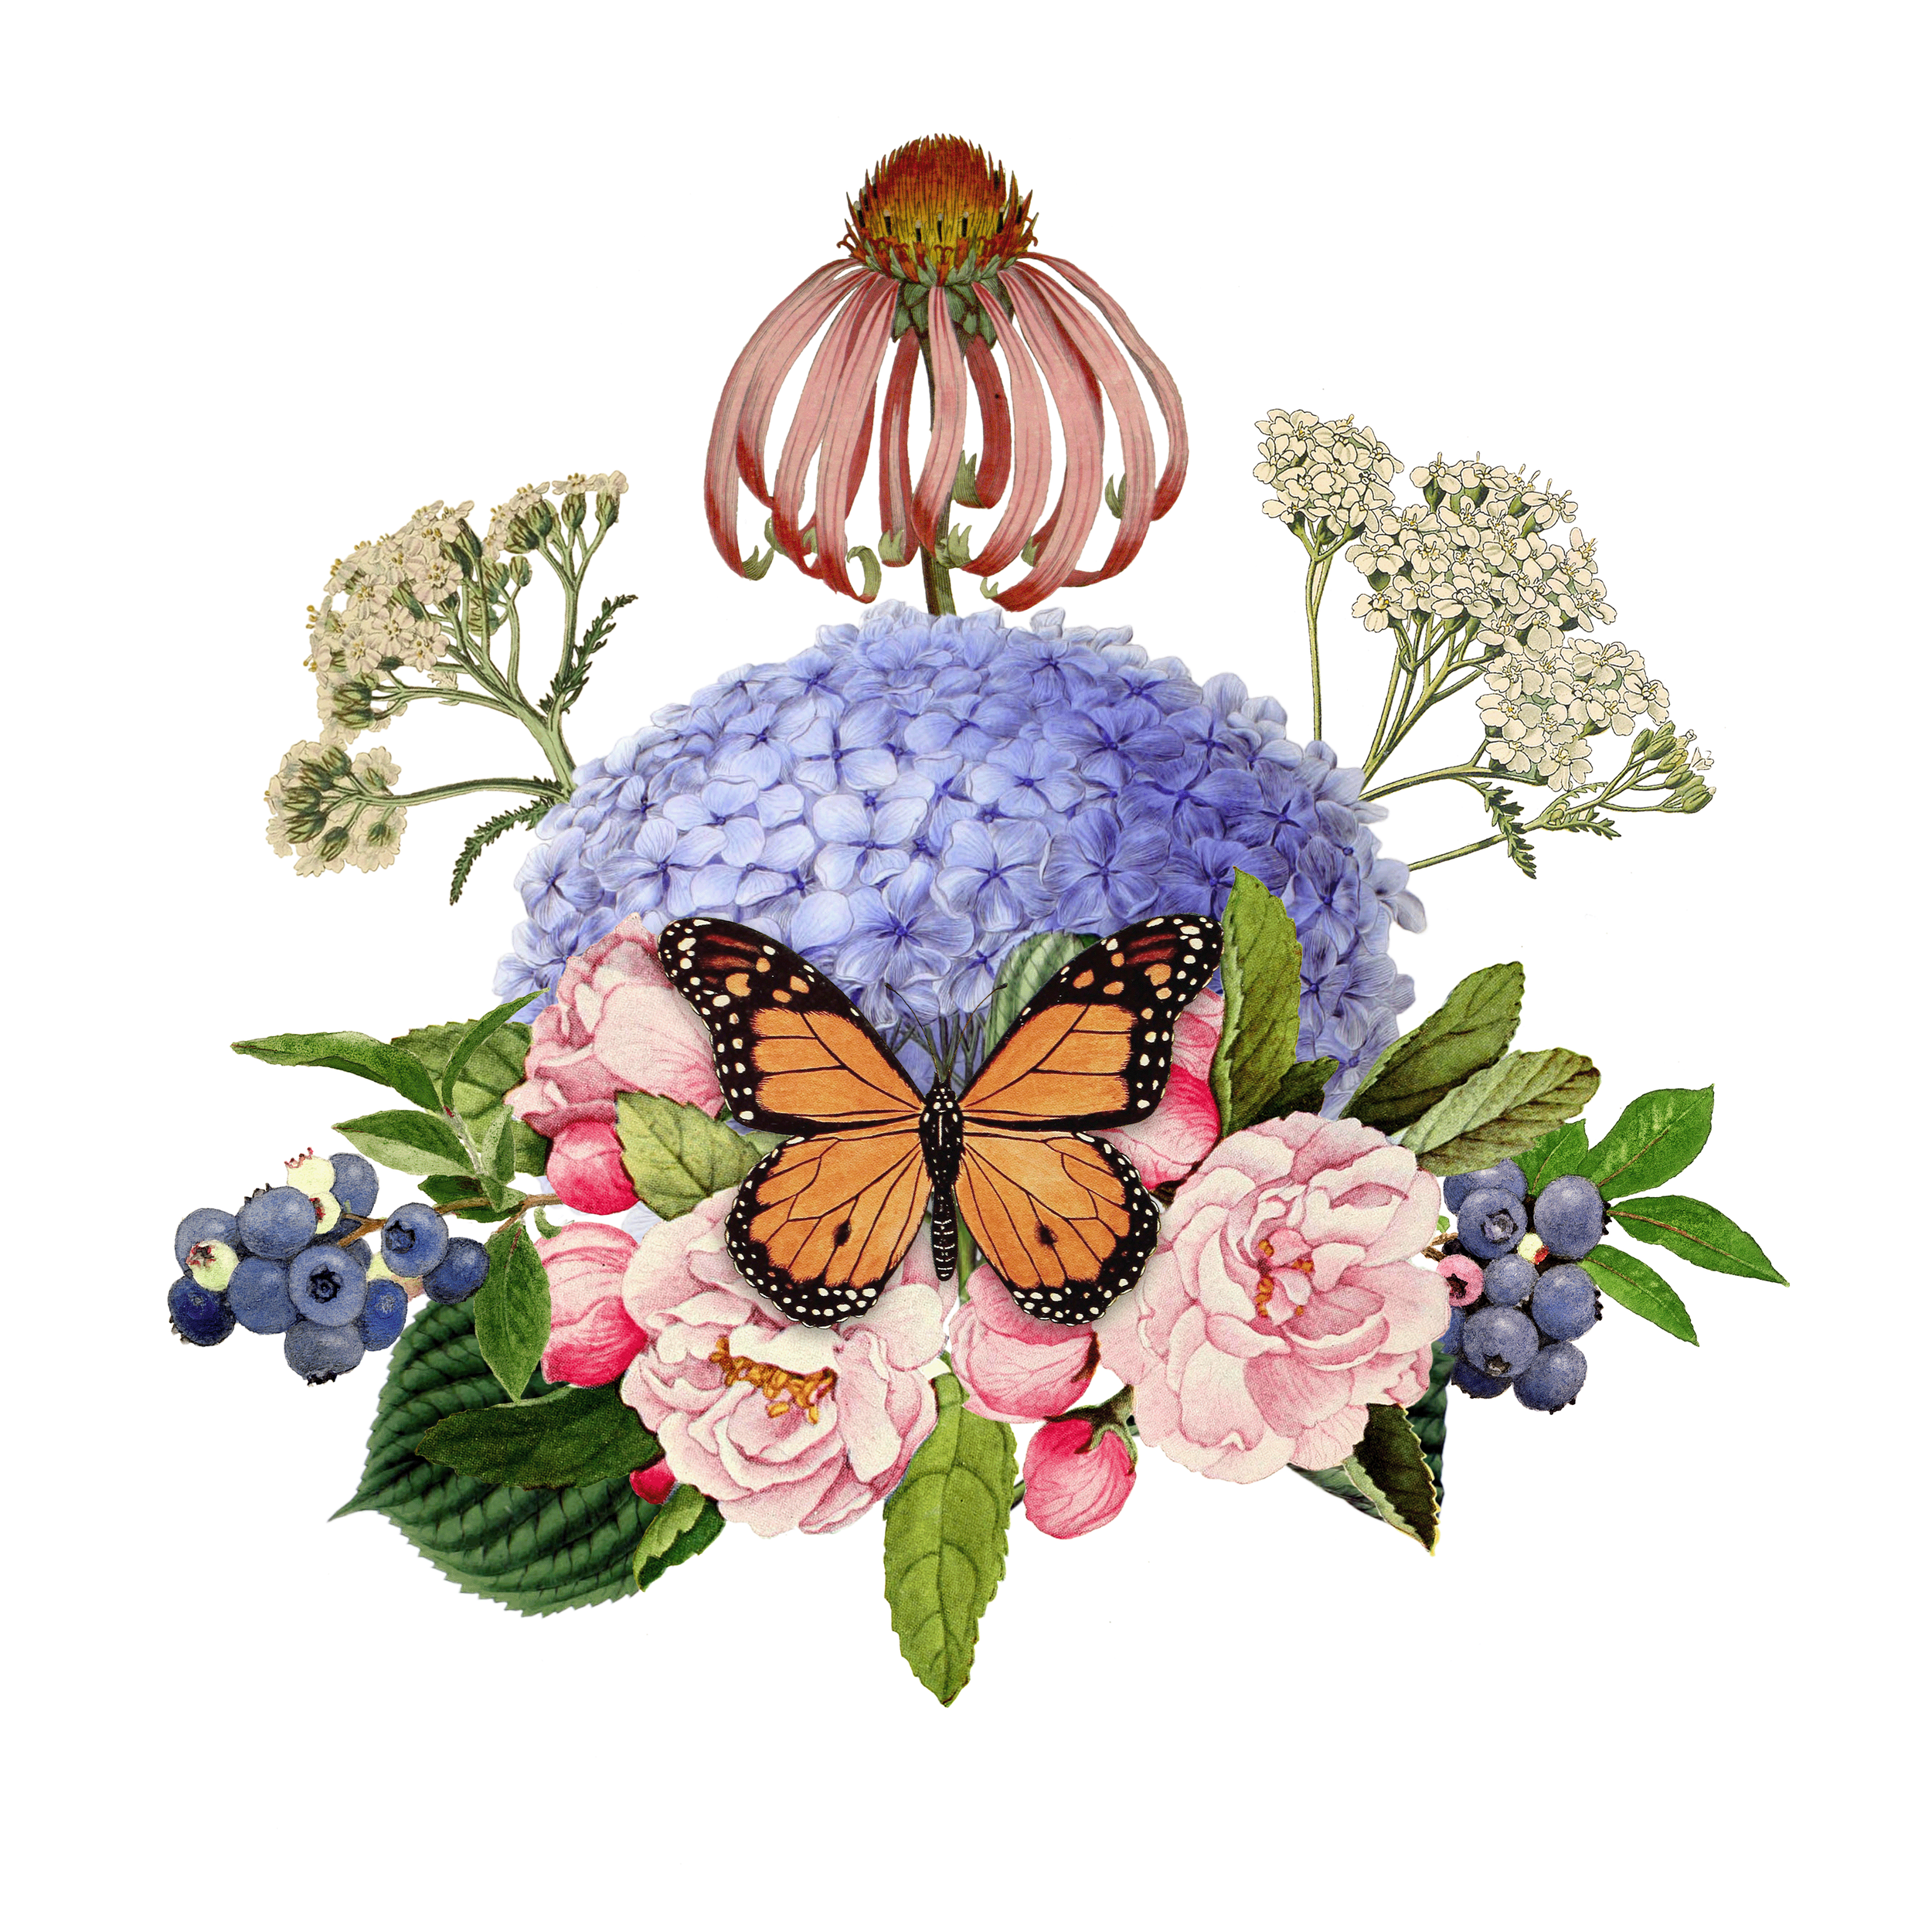
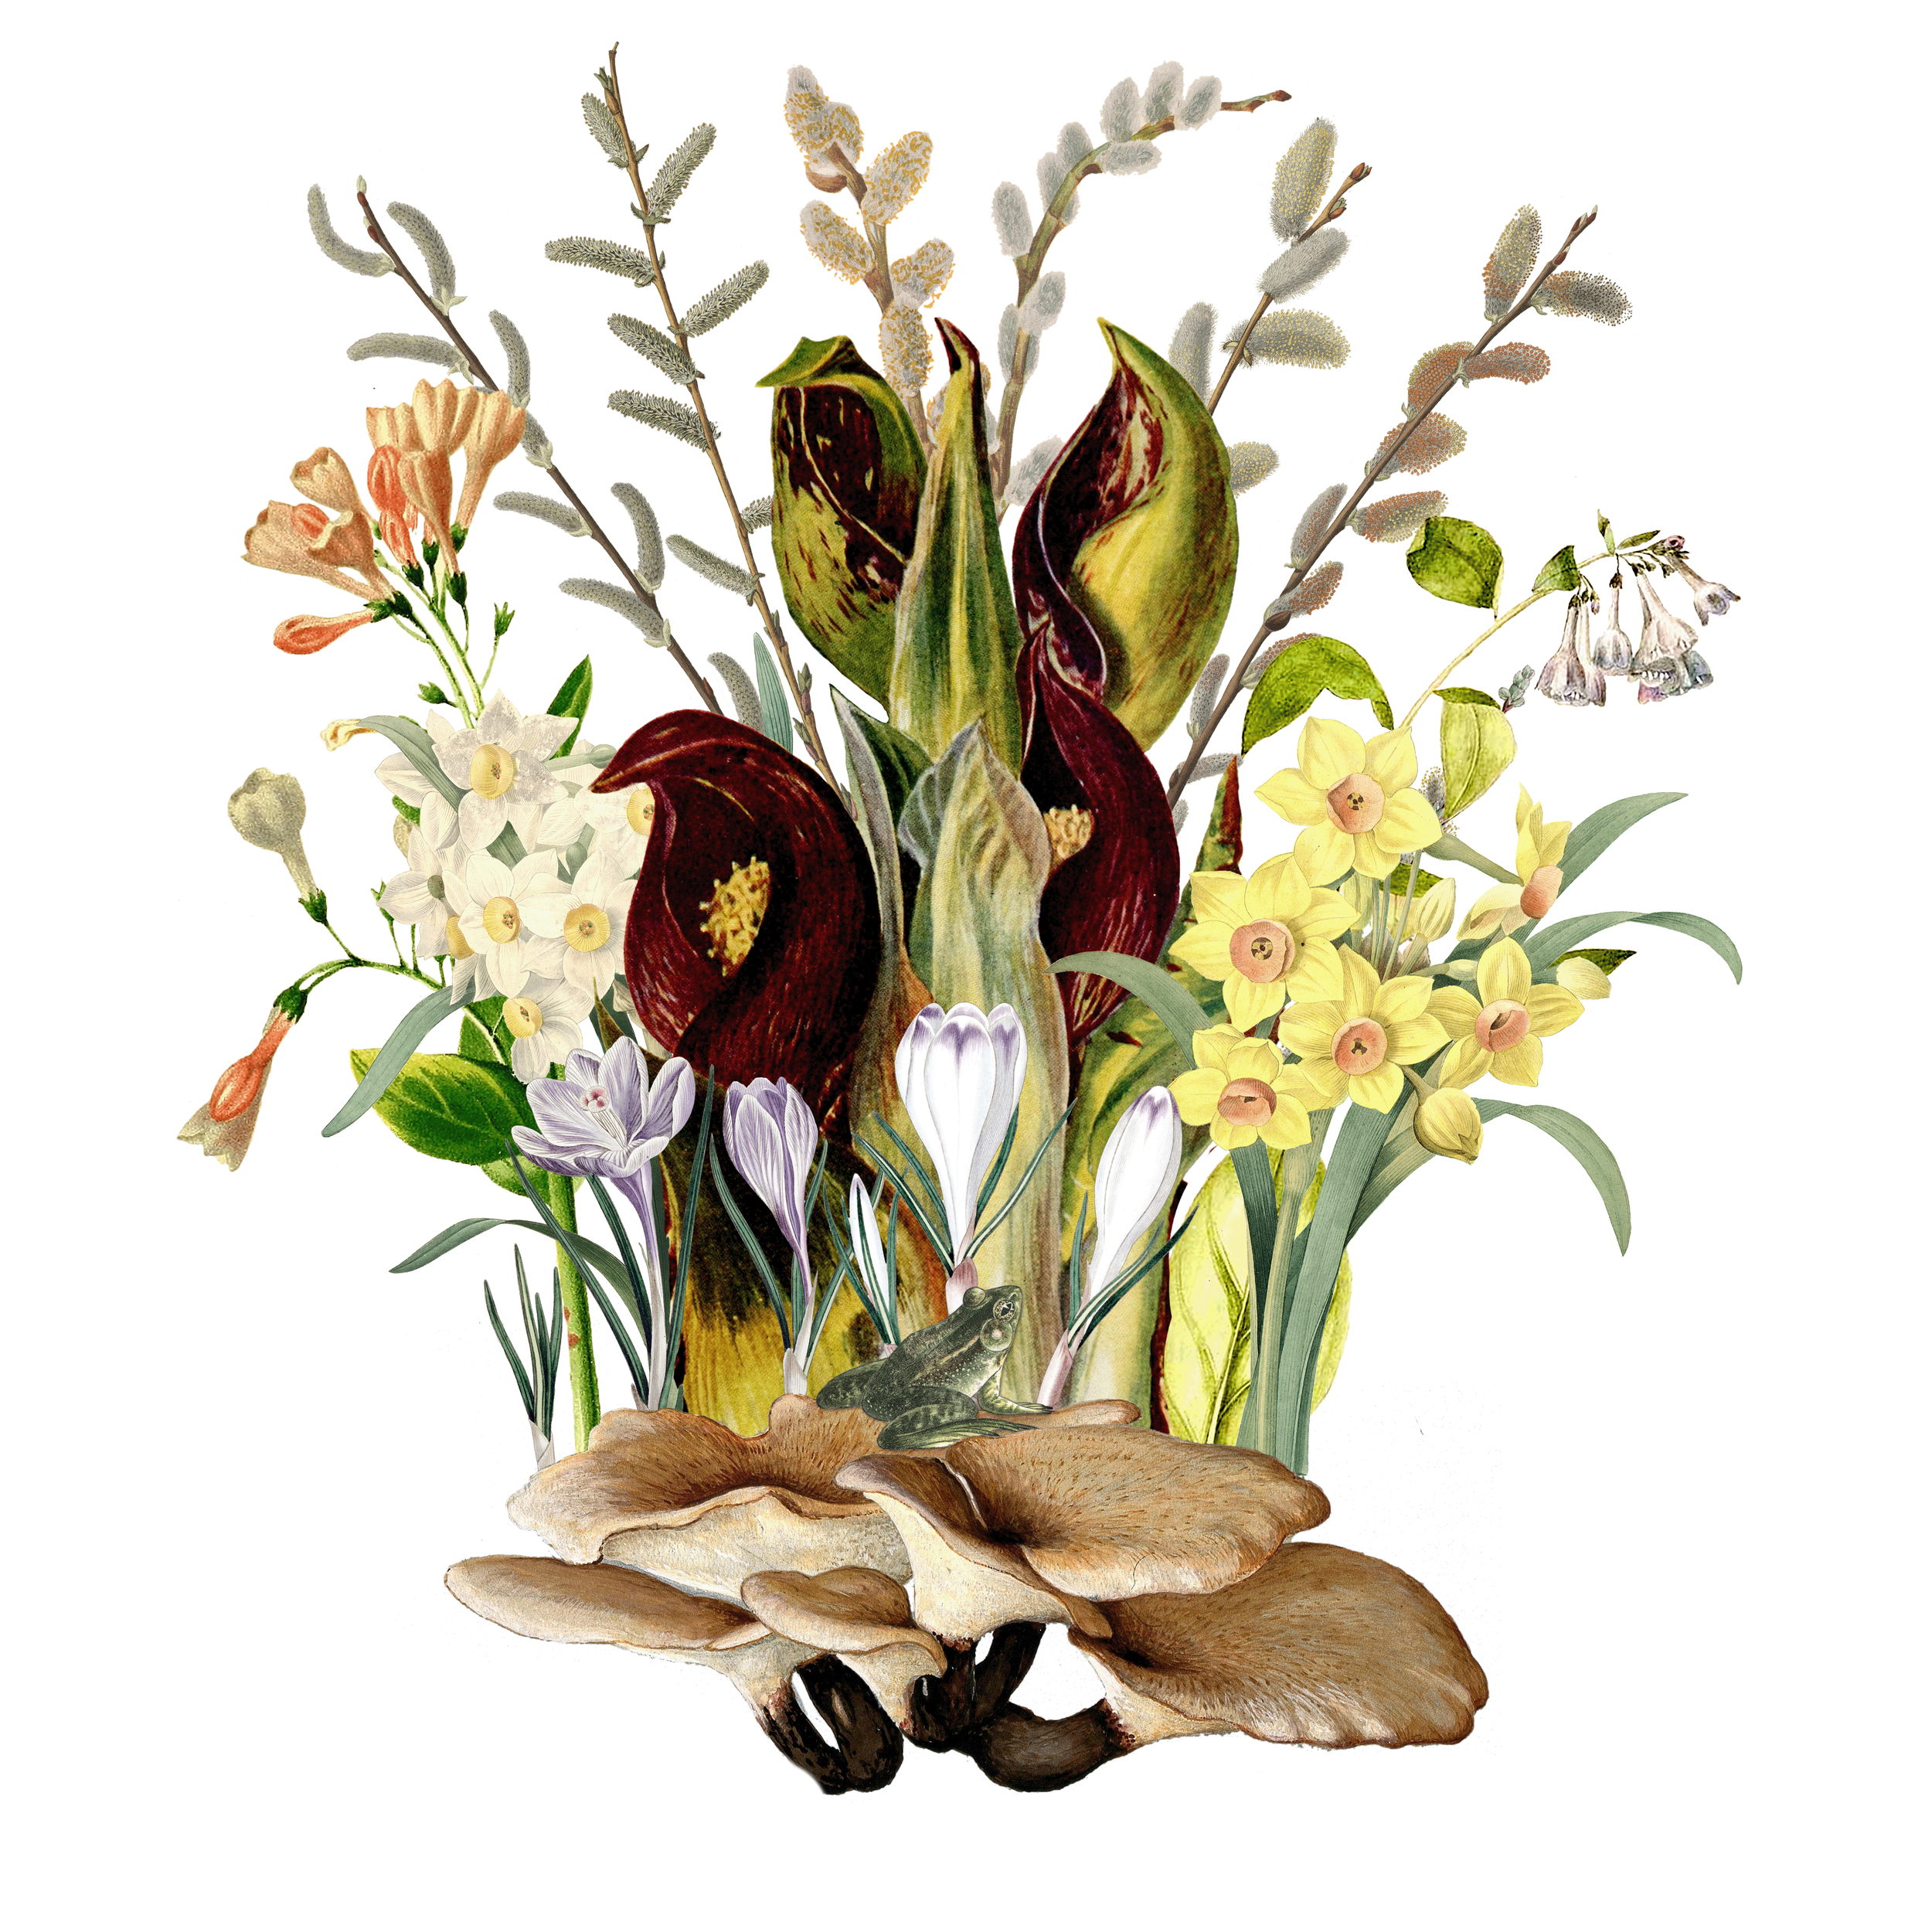
A series of flower bouquets combining woodland flowers, dogwood bracts, berries and even emerging skunk cabbage are evidence that his artistic path has taken a dramatic change.
But it took the death of his father and the work of his wife to bring about that change.

A spring woodland bouquet including trillium, dogwood, lilac, dog-tooth violet and, of course, our native bumble bee.
His wife’s life-changing decision to leave a hectic corporate job in New York and take on a new career in the quiet of nature’s woodland, that had a pronounced influence on Evan’s work.
A project to create a series of images of forest bouquets to promote his wife’s Forest Bathing venture was the catalyst behind his new artistic path.
“This project started as a way to market Forest Baths. I’d made the logo and we were both happy with it, but we needed something visually interesting for the newsletter and flyers. I can’t recall exactly how we came up with the first one, but I’m sure we were walking in the woods when it happened.”

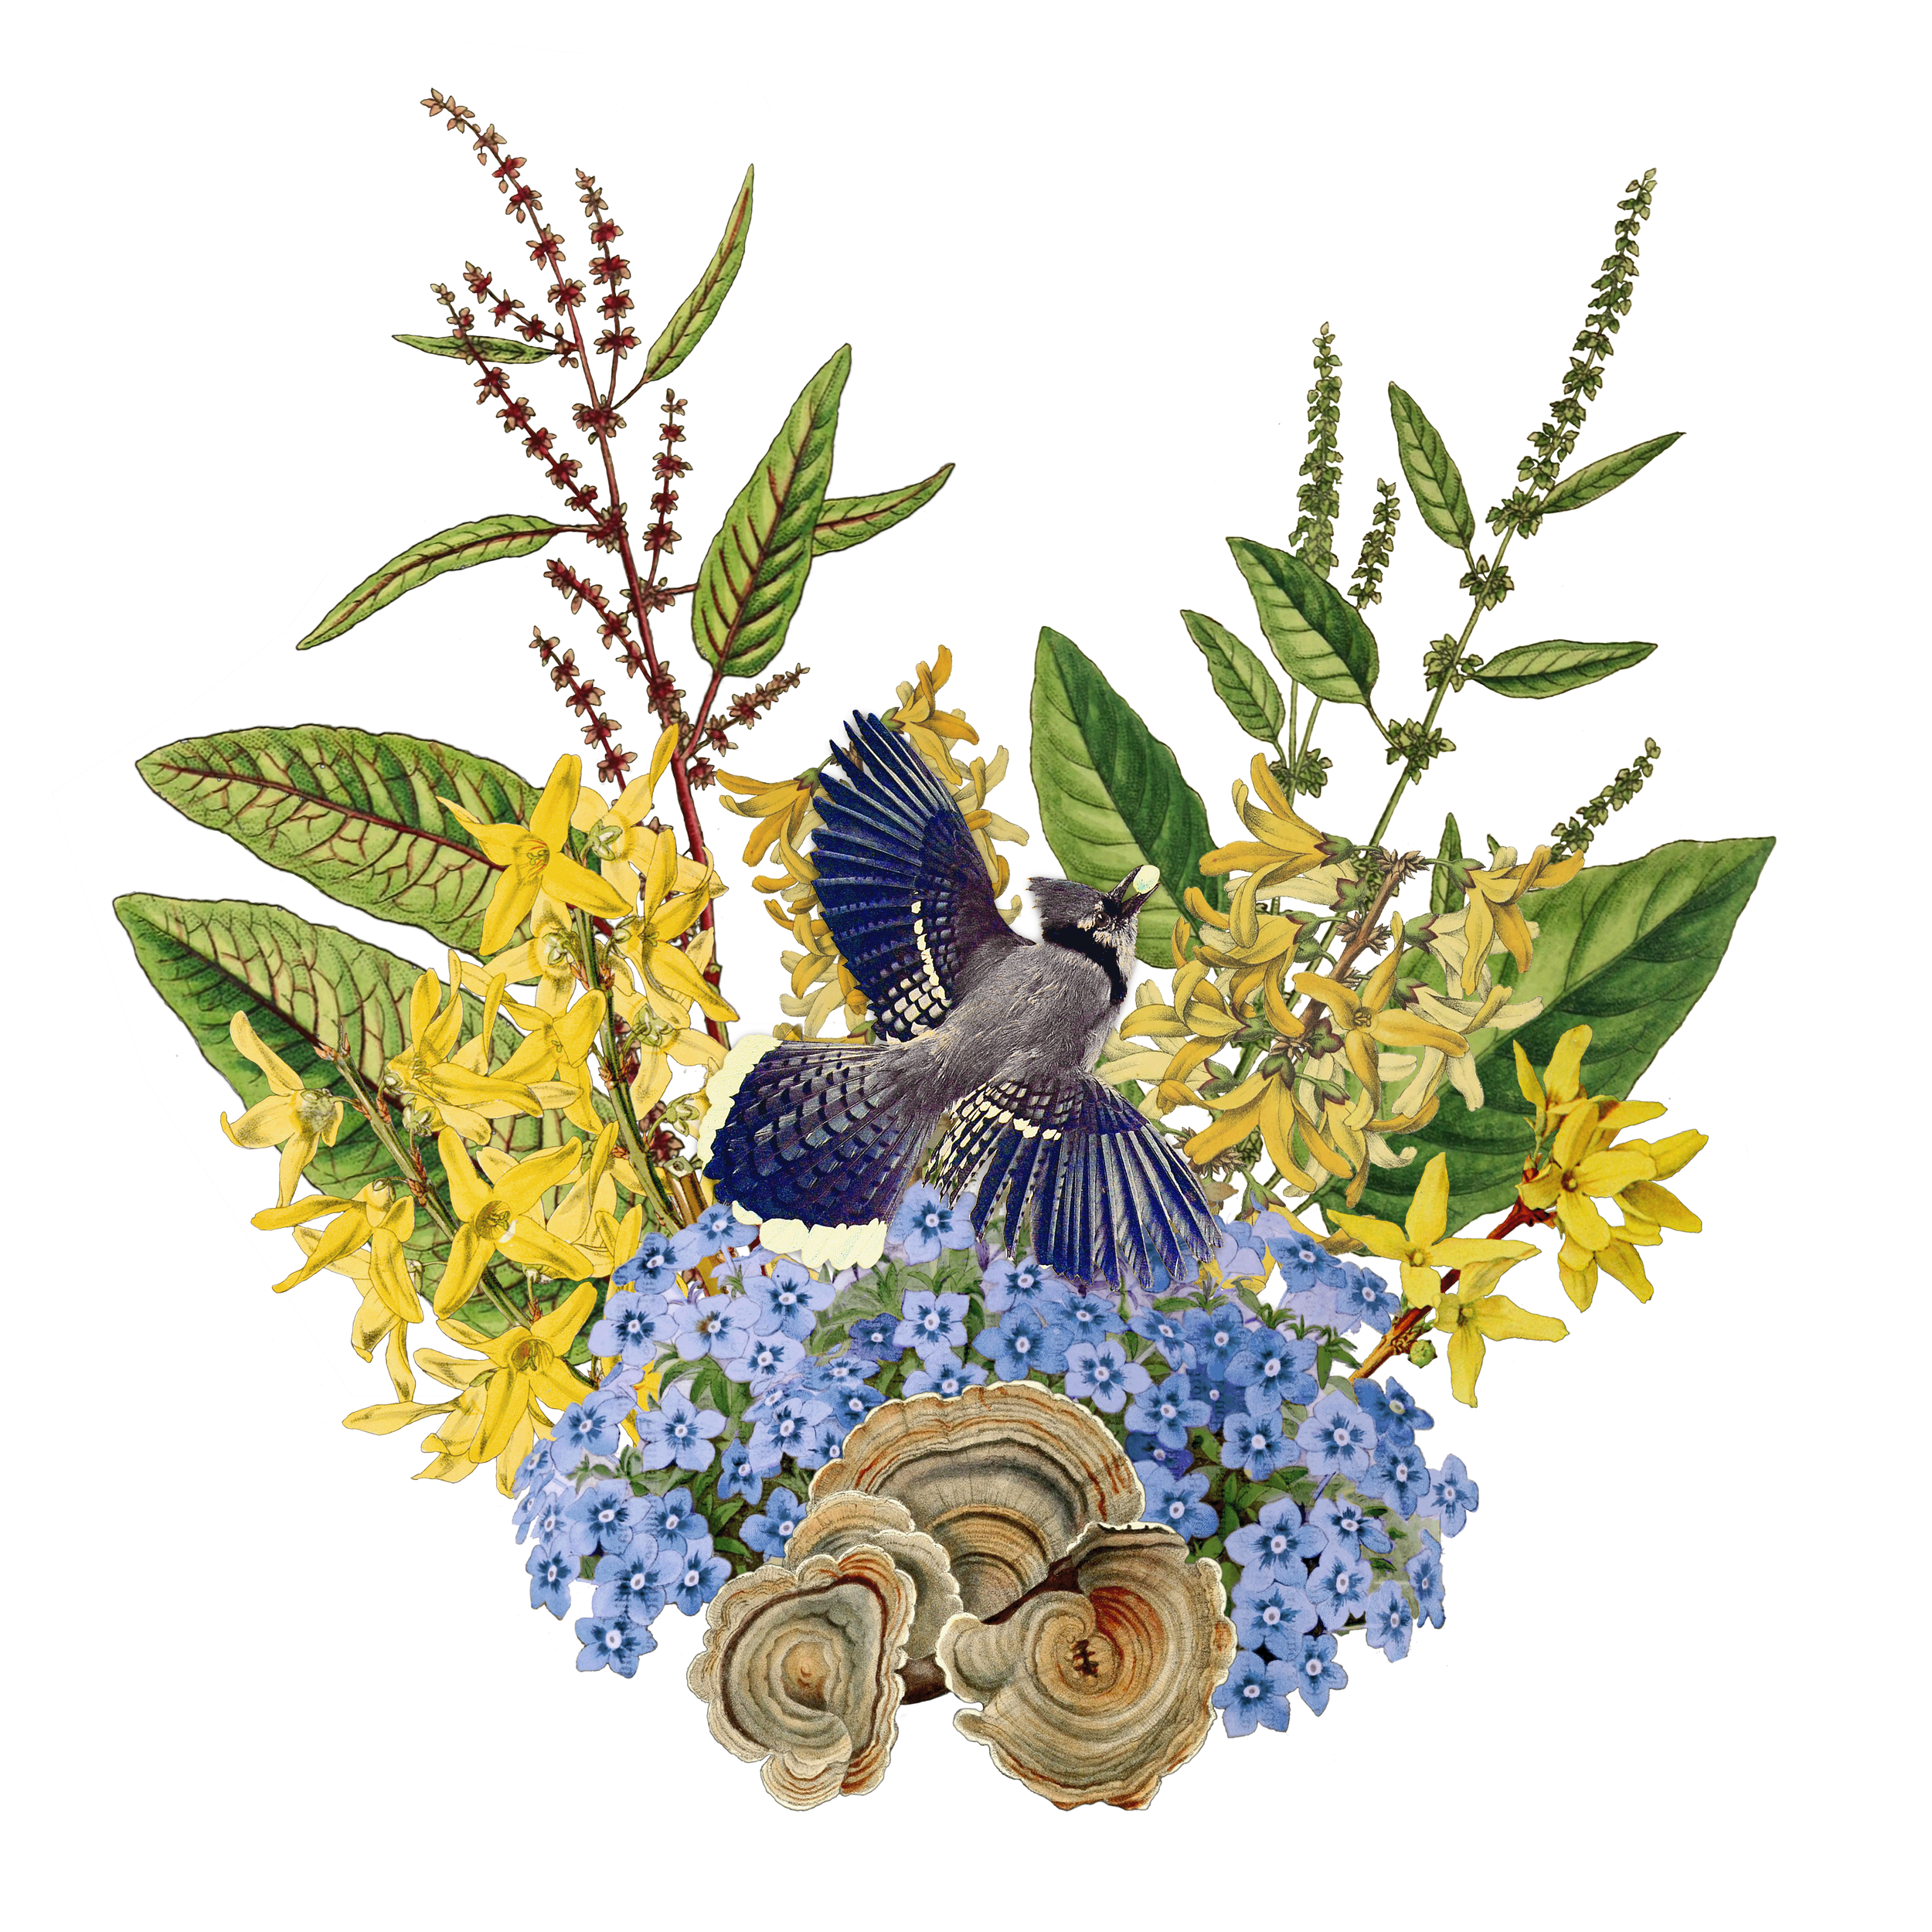
Evan Rosen’s woodland floral artwork captures the forest and its inhabitants in perfect detail.
Not only was the series of images for his wife’s work the original impetus for creating the floral work, but Evan is quick to add that it is also “because going forest bathing and hiking with his wife, Fru, was where we found much of the inspiration.”
If you want to learn more about Fru’s forest bathing business, you might enjoy my comprehensive story on Fru’s business, here.
Evan also attributes his change in focus to the loss of his dad to cancer in November of 2020. His death and the enormous influence of his mother, an award-winning gardener in her own right.
“My Mom is a flower maniac. She’s very talented at creating flower arrangements and our house was always full of them. She has grown an incredible variety of flowers (especially roses), and has a small mountain of prize ribbons from the local garden show. Which, shell have you know, she won without the use of fertilizers or pesticides, just compost!
My father’s death led to “a big tonal shift in my work,” he adds.
Evan created a collage portrait of his father which was eventually used as a poster for his memorial.
“He was an avid gardener of fruit trees, and an attorney who specialized in cannabis law. I wanted to create an image of him exalted and enthroned by the plants that he loved and cultivated. It’s the way I wanted to remember him, surrounded by life. I think it’s a critical bridge between my older work and my newer stuff.

A tribute Evan created for his father’s memorial.
“I think before I experienced loss, I was much more drawn toward dark imagery, skulls, etc. After spending a year grieving and experiencing actual darkness, flowers started to be really appealing! We also bought a house and I started growing flowers myself in addition to vegetable gardening.”


Evan’s path is quite extraordinary.
The self-taught artist grew up in California and attended University of California, Santa Cruz where he majored in Community Studies where he studied the theory and practice of activism. In high school and college he became interested in working on and designing web sites.


He eventually made his way to New York (Brooklyn in 2006) for a college internship, but he “liked it so much that I never went back to finish my degree. I continued doing freelance design and eventually transitioned to working desk jobs as a web, then UX (user experience) designer,” he explains.
In 2010 he met his wife through a dating website, and the rest was history.
But, let’s go back to the beginning again.
Evan traces the path back to 2014 in a small apartment in Brooklyn N.Y.


“I started making collage in earnest around 2014, while living in a small apartment in Brooklyn. I was exploring the medium in earnest, falling in love with the process, and didn’t have a particular statement I was trying to make. So a lot of the early things I made were derivative of, or direct homage, to the stuff I loved – weird scifi and dark fantasy, anime and comics and fiction.
Evan’s story certainly has a dark side, but it’s one he doesn’t mind sharing.
He remembers his artwork as a “reflection of my mental environment, which has not always been a friendly place. I was, for the first time, trying to treat my depression, anxiety and ADHD, with therapy, medication and meditation. This was not some program, I was just trying everything that seemed promising.


“It turns out making collage art was a key part of that healing process for me. By sifting through images and recombining them, I was able to let my subconscious process things that I wasn’t able to reckon with directly. So unsurprisingly, there are a lot of monsters,” he explains.
His outlook and creative vision continued to evolve and “in 2019 we left Brooklyn for Peekskill, NY, driven in large part by my wife’s passionate love of nature and my industry (web design) becoming increasingly friendly to remote-work. I started gardening and around the same time – the second half of 2019 – you start to see nature imagery creeping into my work.
That becomes clear in a series of biome environmental images he created that he calls the Islands series.
“I think it was also an expression of eco-anxiety – these tiny biomes floating in different voids symbolized a hopeful outcome for vanishing wild places,” Evan explains.

An example of one of Evan’s floating biodome pieces.
It was about that time that his wife needed artwork for her Forest Bathing business and Evan seemed like the logical choice to create it.
And the woodland floral bouquets were born.
But, it wasn’t quite that simple.
First, his outdoorsy wife, Fru, had to get this indoor recluse out in nature so he could experience what she was planning to dedicate her life doing.
“Well, I spend a LOT more time in the woods now. That’s always been a key part of our relationship, spending time in nature together. And for most of the time we’ve been together, she was always the one who would suggest we do outdoorsy things. And I’d half jokingly say ‘thanks for making sure I go outside sometimes.’ Because collage art is a pretty inherently indoor activity.”
Evan explains how getting outdoors changed his life.

Evan and his wife, Fru, enjoying the forest in New York State near their home.
“Learning the science has also been really eye opening. There are so many profound, and objectively measurable, health benefits to spending time in the woods. One of the most useful for me is the way it helps me regulate my nervous system. After I’ve been out in the woods for maybe 45 minutes or an hour, the sense of calm I feel in my body is tremendous, and lasts well past when we return to civilization.”
But, there was still the matter of creating these exquisite woodland bouquets. Again, that’s where his wife’s extensive knowledge of the woodland came to the rescue.
“I feel the bouquets are very much a collaboration, and never would have happened without her business as a client. They always start with a list of plants that we’re excited about seeing in the month ahead. Typically Fru would write most of that. So, she should get credit for a lot of the knowledge you’re seeing displayed!”
“From there, I’d learn the latin names and go find them on plantillustrations.org, an incredible archive of botanical imagery. Some species have hundreds of illustrations, while others might only have a few. But that site provides 90 per cent of my source material.
“Often I’ll combine elements from several different illustrations. The arranging itself is mostly my solo activity. But then I’ll always work with her to fine tune it, because she also has a great eye, especially for things like color balancing and getting the right mix of simple and complex.”
Evan also admits that it is his wife who does most of the planning.
“I do pretty well with my ADHD, but these take weeks to finish and if it were left up to me they’d all be two months late. She would make sure we start the process the month before which usually was enough time for me to finish a piece during the intended month.”
And so it was that the bouquets were born – one for each month of the year to promote Fru’s Forest Bathing business and, in turn, bring new life and focus to Evan’s art.
“I will definitely keep doing more floral arrangements,” he says. “I’d love to do commissions in this style, creating a custom piece based on the plants that are meaningful to someone.”
Where can you purchase Evan’s art?
Evan and his wife operate an Etsy shop where you can purchase his work as fine art prints, greeting cards and even a calendar displaying all the woodland images. Use this link to visit the Etsy site (or the one above.)
Evan has generously offered a 15 per cent discount to Ferns & Feathers readers by using the code “FERNSANDFLOWERS” at checkout. Evan points out that any order over $35 (which amounts to a calendar and two cards!) and there’s free shipping.
In addition, consider that 50 per cent of the Etsy shop profits are donated to an indigenous people’s arts and culture organization in New York.
“We donate 50 per cent of our profits to The Lenape Center, an arts and culture organization run by and for Lenape, the indigenous people of the Lower Hudson Valley,” explains Evan.
“As a white person, land acknowledgements are a good start, but pretty meaningless if they aren’t backed up with action, Evan explains. “So, we wanted to make sure that this project gave back to the land, by giving back to the people who have stewarded it.”
In their own words: “Since 2009, Lenape Center, based in Manhattan and led by Lenape elders, has created programs, exhibitions, workshops, performances, symposia, land acknowledgment, and ceremonies to continue our Lenape presence. We push back against our erasure and seed the ground with Lenape consciousness for the next generations.”

Flowering Crabapple trees: Spring flowers and berries for the birds
Crabapple trees are sometimes overlooked in the landscape because over the years they have become quite common. But they can be the perfect understory tree for both small and large yards.
Flowering crab is ideal for yards big and small
Flowering Crabapple trees have always been a popular under story tree providing homeowners with impressive spring flowers followed by an abundance of bird-loving berries later in the summer through fall.
Their popularity, however, has meant they are easily overlook when it’s time to consider purchasing a new tree for the front or back yard.
But that would be a mistake.

A male indigo Bunting stands out in a beautiful flowering crab in spring.
Crabapples are excellent understory trees that offer a full range of sizes, flower and leaf colour as well as an abundance of fruit for birds and other wildlife. They are long-lived trees that are hardy in zones 4-8. The leaves provide habitat and larval food for many species of moths and butterflies and the spring flowers provide food for early pollinators. As the trees age, it becomes home to lichens and fungi and the gnarly branches and trunks often have lots of cavities for nesting birds.
Crabapples have become a staple in urban landscapes and are used as dependable street trees and ornamental options. If allowed to grow to their natural shape, they have and irregular rounded shape with a wide spreading canopy.
Are crabapples good to eat?
Most crabapples are edible although their level of bitterness varies considerably and their level of acidity varies considerably. In the United States crabapples have had a place in culinary and beverage industries.
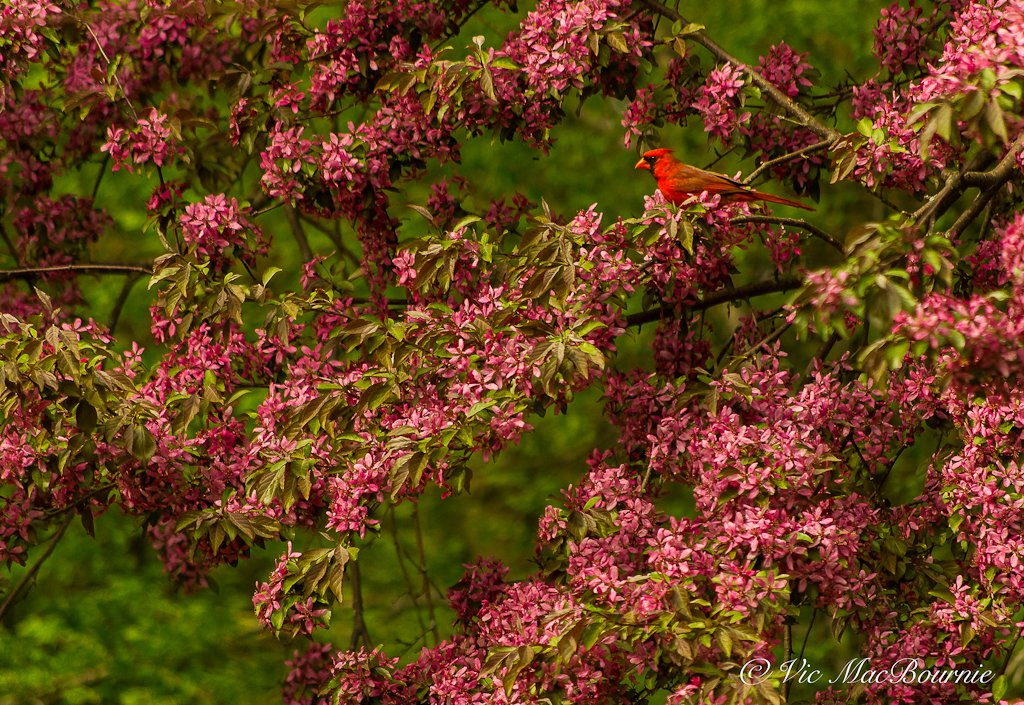
A beautiful male cardinal in a flowering crabapple at the peak of spring flowering.
Crabapples’ history is actually tied to the making of hard cider in the 1600s and 1700s. This tart little fruit can make a really interesting hard cider. They have also traditionally been grown commercially to make crabapple jellies.
Crabapples’ flower show is short lived
Although many homeowners purchase flowering crabapples for their outstanding spring show, gardeners should remember that the flowers only last 2-3 weeks.
It is, therefore, what the crabapple looks like for the rest of the year that makes a more lasting impression on the landscape. There are plenty of crabapples with green leaves, but there are also plenty with leaves that have a lot of red in them to help provide an accent in what would otherwise be a very green landscape during the summer.
There are large crabapples that can grow up to 30 feet tall, and dwarf varieties that stay in the five feet by five foot wide range.
Four great crabapples to consider in the woodland
Prairie Fire crabapple – is a hybrid that feature many of the traits of other great crabapple varieties. It blooms bright pink in the spring, sports dark green leaves with a purplish overcast throughout the summer, and dark purplish-red fruit in the fall that attract birds all winter. It’s hardy in zones 4 through 8 and has excellent disease resistance. One of its finest traits is that Prairie Fire happily tolerates clay soil. It stays on the small size into maturity and is an ideal urban landscape tree.
Purple Prince Crabapple – has a massive flower disply in spring along with its purple foliage following soon after. Hardy in zones 4-8, it is well known for its improved disease resistance and stands about 16-18 feet tall and 15-18 feet wide.
Sargent Crabapple – A perfect ornamental tree for small urban yards. Grows only 8-10 feet tall and 8-12 feet wide It buds are dark pink but blooms white attracting all the pollinators. The flowers are followed by bright red berries that birds can snack on all winter. Hardy to zones 4-8.
Royal Raindrops Crabapple – Blooms deep pink along upward spreading branches. The leaves flush out a reddish purple colour and stay dark green with a purple overcast throughout the sumer. Small purple berries stay on the tree all winter to feed birds and other backyard wildlife. It is happy to grow in zones 4-8.
Like many overly-hybridized flowers, trees and shrubs that do not have fruit, the Spring Snow crabapple may appeal to those who want a crabapple without any of the fruit. Fragrant wihite blooms in an upright form that grows to between15-25 feet tall and a similar similar width. I can’t recommend these overly hybridized trees that offer little to nothing for wildlife, but I recognize they may have a place in a garden close to a patio, deck or cement pathway.
If you do plant a sterile tree, try to ensure you plant plenty of native plants, shrubs and trees to help the wildlife that will get no benefit from the sterile tree.

A beautiful crabapple in full flower stands out in the landscape against the spring greenery of a Pagoda Dogwood in the front.
Two mature crabapples in our woodland, wildlife garden
Our two large crabapples are fully mature specimens that take centre stage in the garden at certain times of the year where they take up residence growing across the back of the property.
I’ve never really looked into exactly what variety we have, but they are most likely of the Royal Raindrop hybrid series with an abundance of deep pink flowers along its branches. The leaves of our crabapples flush out a reddish purple colour and stay dark green with a purple overcast throughout the summer. An abundance of small purple berries remain on the tree all winter and feed the resident and migratory birds.
Our neighbours planted smaller more upright crabapples (Harvest Gold) that sport larger fruit that has a distinctive yellow colour and remain on the branches well into the winter. These are a popular ornamental variety that really stand out in the winter landscape.
(here is an excellent Chart from Frank Schmidt and Son that illustrates the variety, shape, and flower colours of a host of crabapples.
Our crabapples have been pretty much ignored since we moved to the property more than 25 years ago. Besides thinning out some dead branches over the years, we have done little to the trees and prefer them to take on a natural rounded look.
Originally, the trees were surrounded by grass, but over the years, we have ignored the grass and planted native wildflowers around them allowing the area to become a mini meadow. I think the two crabapples are much happier growing in a more natural area and the wildlife that live off the tree are provided with a soft landing. (For more on the importance of providing a soft landing check out this link to the University of Minnesota Master Gardeners Extension.)
Besides cutting out a few dead branches, the trees have been more or less maintenance free while providing outstanding deep red spring colour followed by a small, hard, red berry that persists well into winter, just when birds are looking for a high quality food source.
I’ve noticed that more and more of our American Robins that are remaining in our snow-covered landscapes throughout winter, are using the crabapples as a food source throughout the winter. Waxwings also appear in large flocks to work the crabapples.
Why are crabapples so easily overlooked?
As a child growing up in the 1960s and '70s, I remember the abundance of crabapples in our suburban neighbourhood. My best friend’s family had a lovely crab apple that bloomed a soft pink in the spring and was covered with crab apples throughout the summer into fall. I don’t remember birds devouring the berries but I do remember some awesome crab apple fights among the neighbourhood kids (no eyes were lost.)
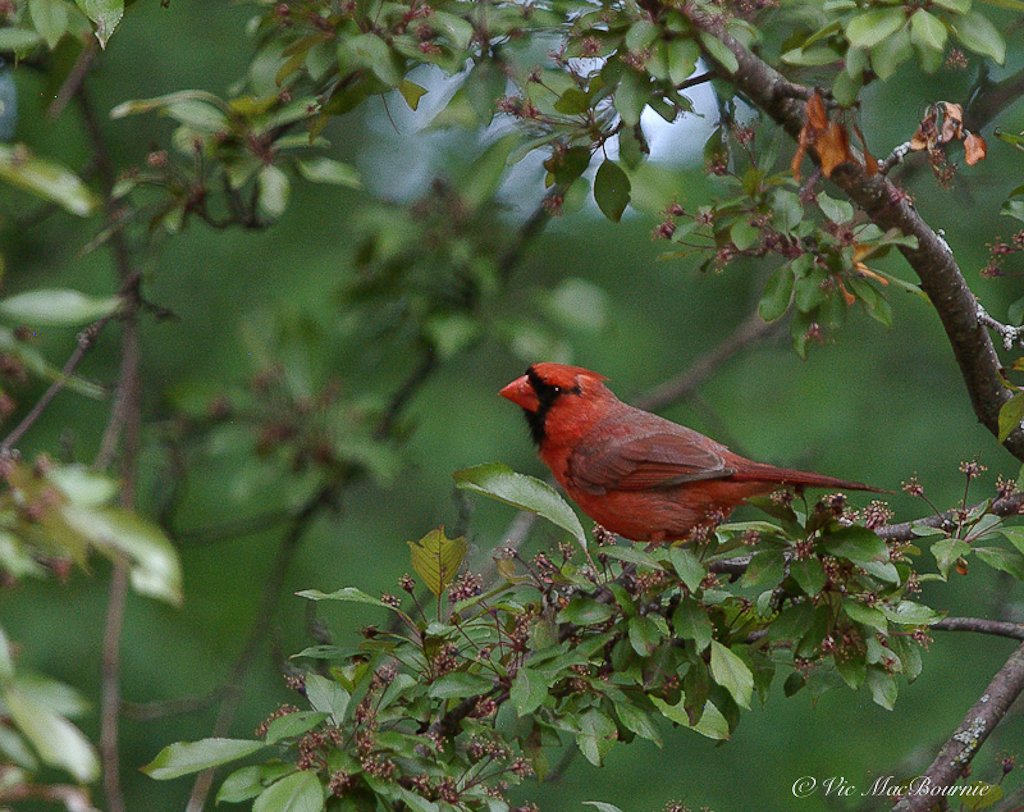
Image shows a male cardinal in a flowering crab just as the flowers have ended and the fruit is beginning to form on the tree.
I also remember annual fall cleanups of hundreds of thousands of crab apples in the grass, on the sidewalk and spilling out on the road.
The crab apples were smallish and hard and although there was an abundance of them, they were not particularly problematic.
I can’t say the same for my other buddy’s crab apple. That family’s crab apple tree produced large (almost miniature apples) that rotted quickly and became very messy. They were particularly attractive to wasps craving the sugar content after the crabapples were crushed all over the sidewalk and road. the crabapples were so numerous that they created a hazard almost like walking on marbles. Eventually, most years there were so many on the ground that they had to be cleaned up with brooms and shovels.
That was an example of the wrong tree for the area so close to the sidewalk. The same tree planted in a garden setting would create the perfect wildlife viewing and photography stage as all the neighbourhood birds and animals would flock to the area for the sweet food source.
It’s situations like this that probably convinced today’s gardeners that crab apples are messy trees that they don’t want in their landscapes. I can understand that thinking entirely.
Plant crab apples in the right area
In the right location, crab apples can be outstanding specimen trees in both large or small yards.

A blue jay among the flowers of a crab apple tree in spring.
Plant them in an area where the berries are free to fall to the ground as a source of food for birds and other backyard wildlife and let them clean up the ground under the tree. Of course, grass is never the best ground cover in a woodland setting, especially if you are striving for the perfect lawn.
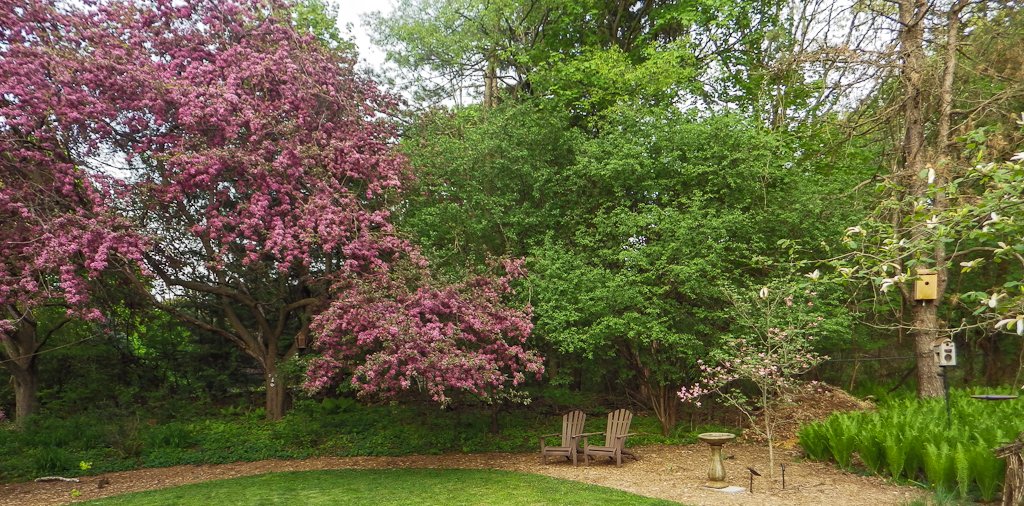
Image shows our mature crabapple in flower in the landscape.
A more natural ground cover where the berries can be left in place rather than “cleaned up” creates a much more sustainable situation in the garden.
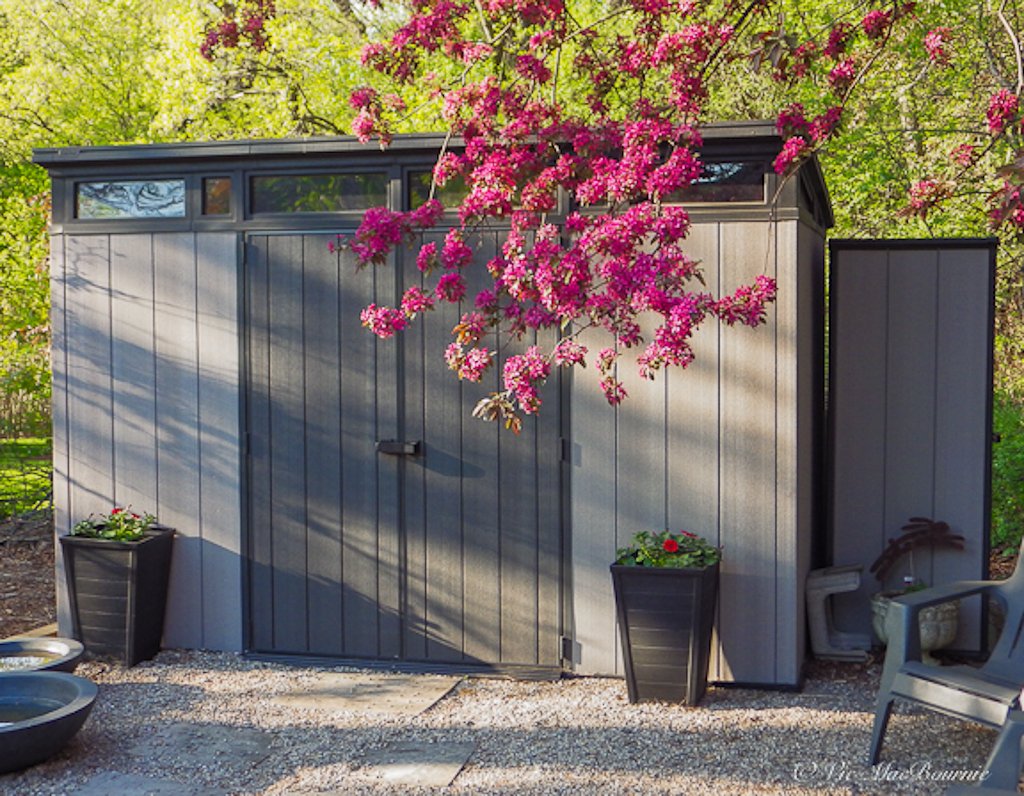
A Crabapple branch in full flower hangs in front of a grey Keter shed.helping to set off the dark pinks of the crabapple flowers.
Pruning crabapples: leave them natural
Please refrain from over pruning your crabapple trees into ridiculous balls or other unnatural shapes. I’ve seen too many crabapples that have been trimmed back to the extreme leaving only a trunk with a small ball of branches. I guess this is done to keep the tree small. Like most trees, it is best to leave them to grow into their natural shape, which in the case of a crabapple, usually mean a spread as wide as their height. Celebrate them and enjoy their natural beauty.
A front garden landscape design for the Pacific Northwest
Alexa DeBouef Brooks’ natural garden design complete with a plant list for this Seattle based front garden.
Acid-loving plants put to the test in small Seattle garden
This small Seattle front garden design plan by Alexa LeBouef Brooks puts native acid-loving plants to the test.
The Seattle area landscape designer first removed what was once a grass lawn and then had to deal with two very large and established cedar trees that were already on the property and had, over the years, turned the soil in the front garden acidic.
The design is installed in a neighborhood just outside of Seattle and very close to the University of Washington.
Alexa explains that the site is a small front lot with two very large and established cedar trees, one on either side of the garden.
Her goal was to create a natural, sustainable garden that both looks good year-round and is able to deal with changing environmental conditions associated with climate change in the future.
“You are limited in what you can plant underneath our Northwest conifers because they demand every drop of water available and make the soil very acidic.”

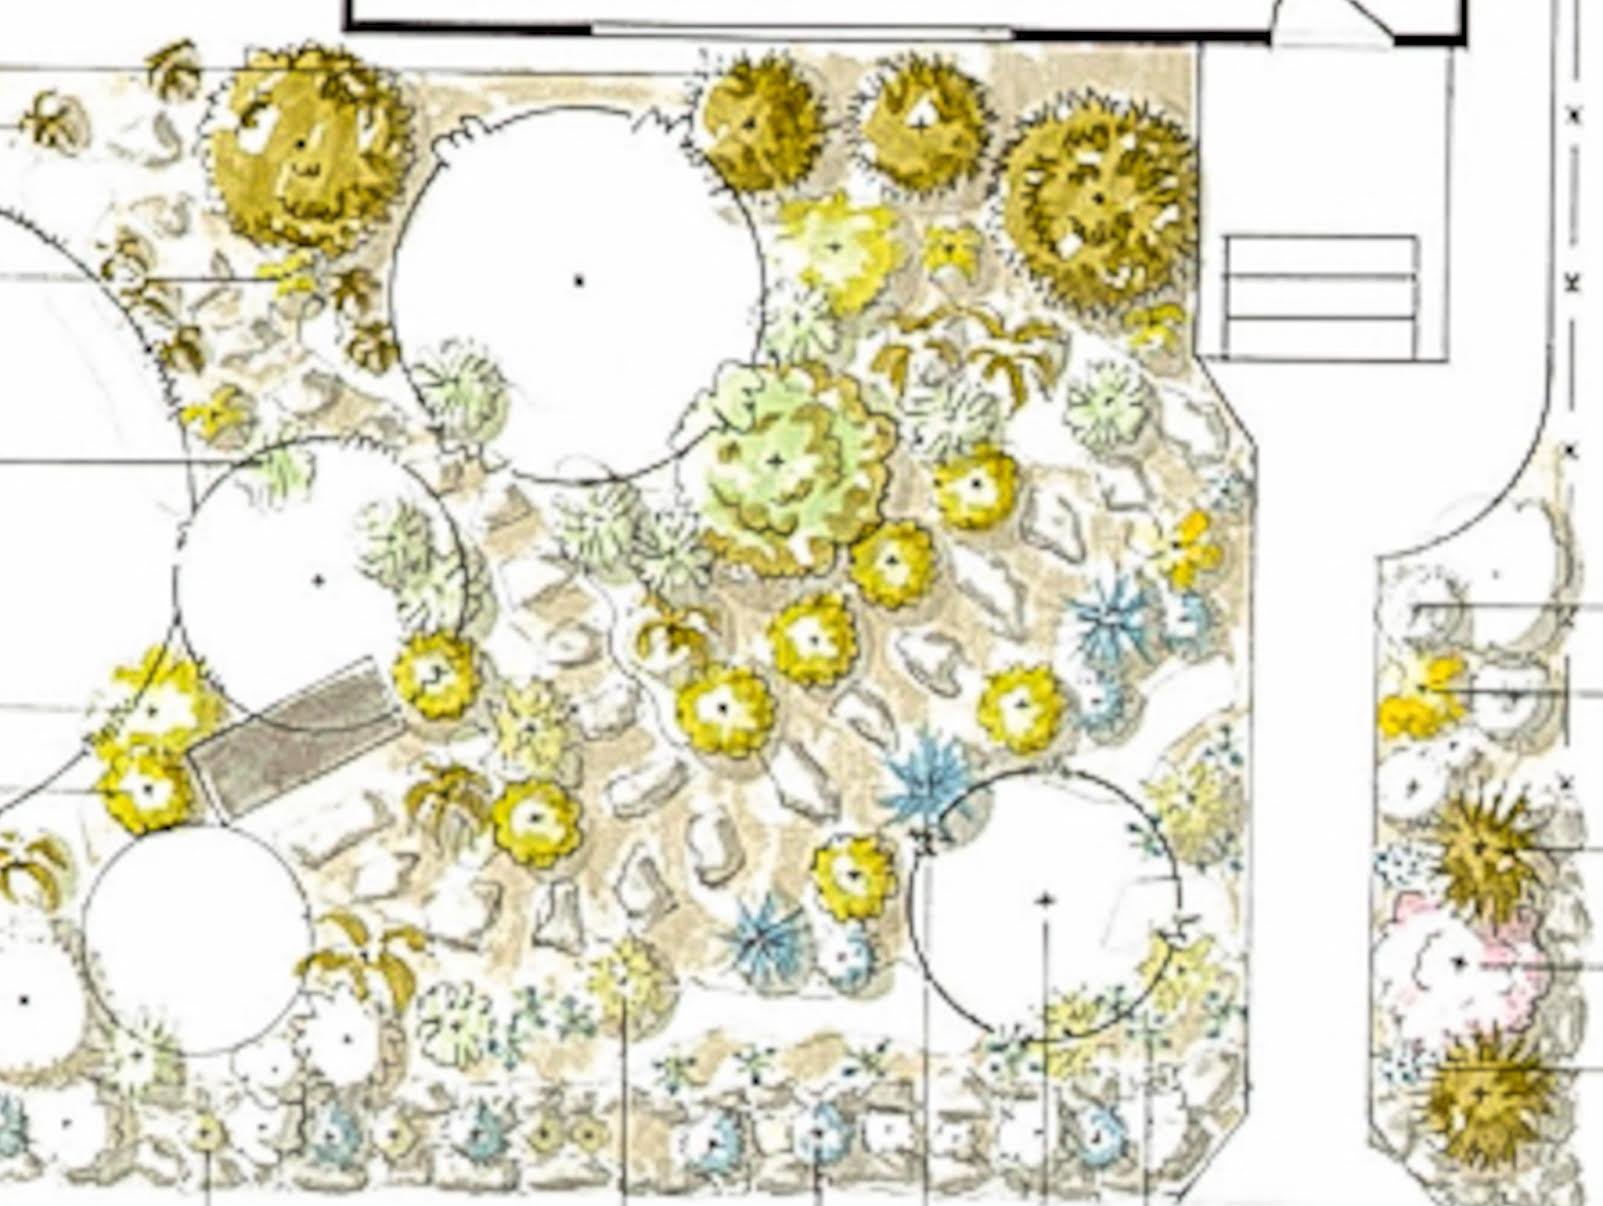
A front garden design plan of a Pacific Northwest garden in the Seattle area. Notice that there is no grass in this garden planted with native, acid-loving plants.
All the plants included in the design are acid loving plants and should establish well in the area. The House is East facing but gets adequate sunlight throughout the day.
The client wanted this garden to be an homage to a best friend who had recently died.
(Be sure to click on the link here for more on Alexa LeBouef Brooks and Understory Gardens.)
Also, if you are interested in native plants, be sure to check out my post on Gardening with Native Plants of the Pacific Northwest.
Alexa explains that for years the friends had planned on creating a native garden together.
“I feel honored to have been a part of this project, and help the clients vision come to life."
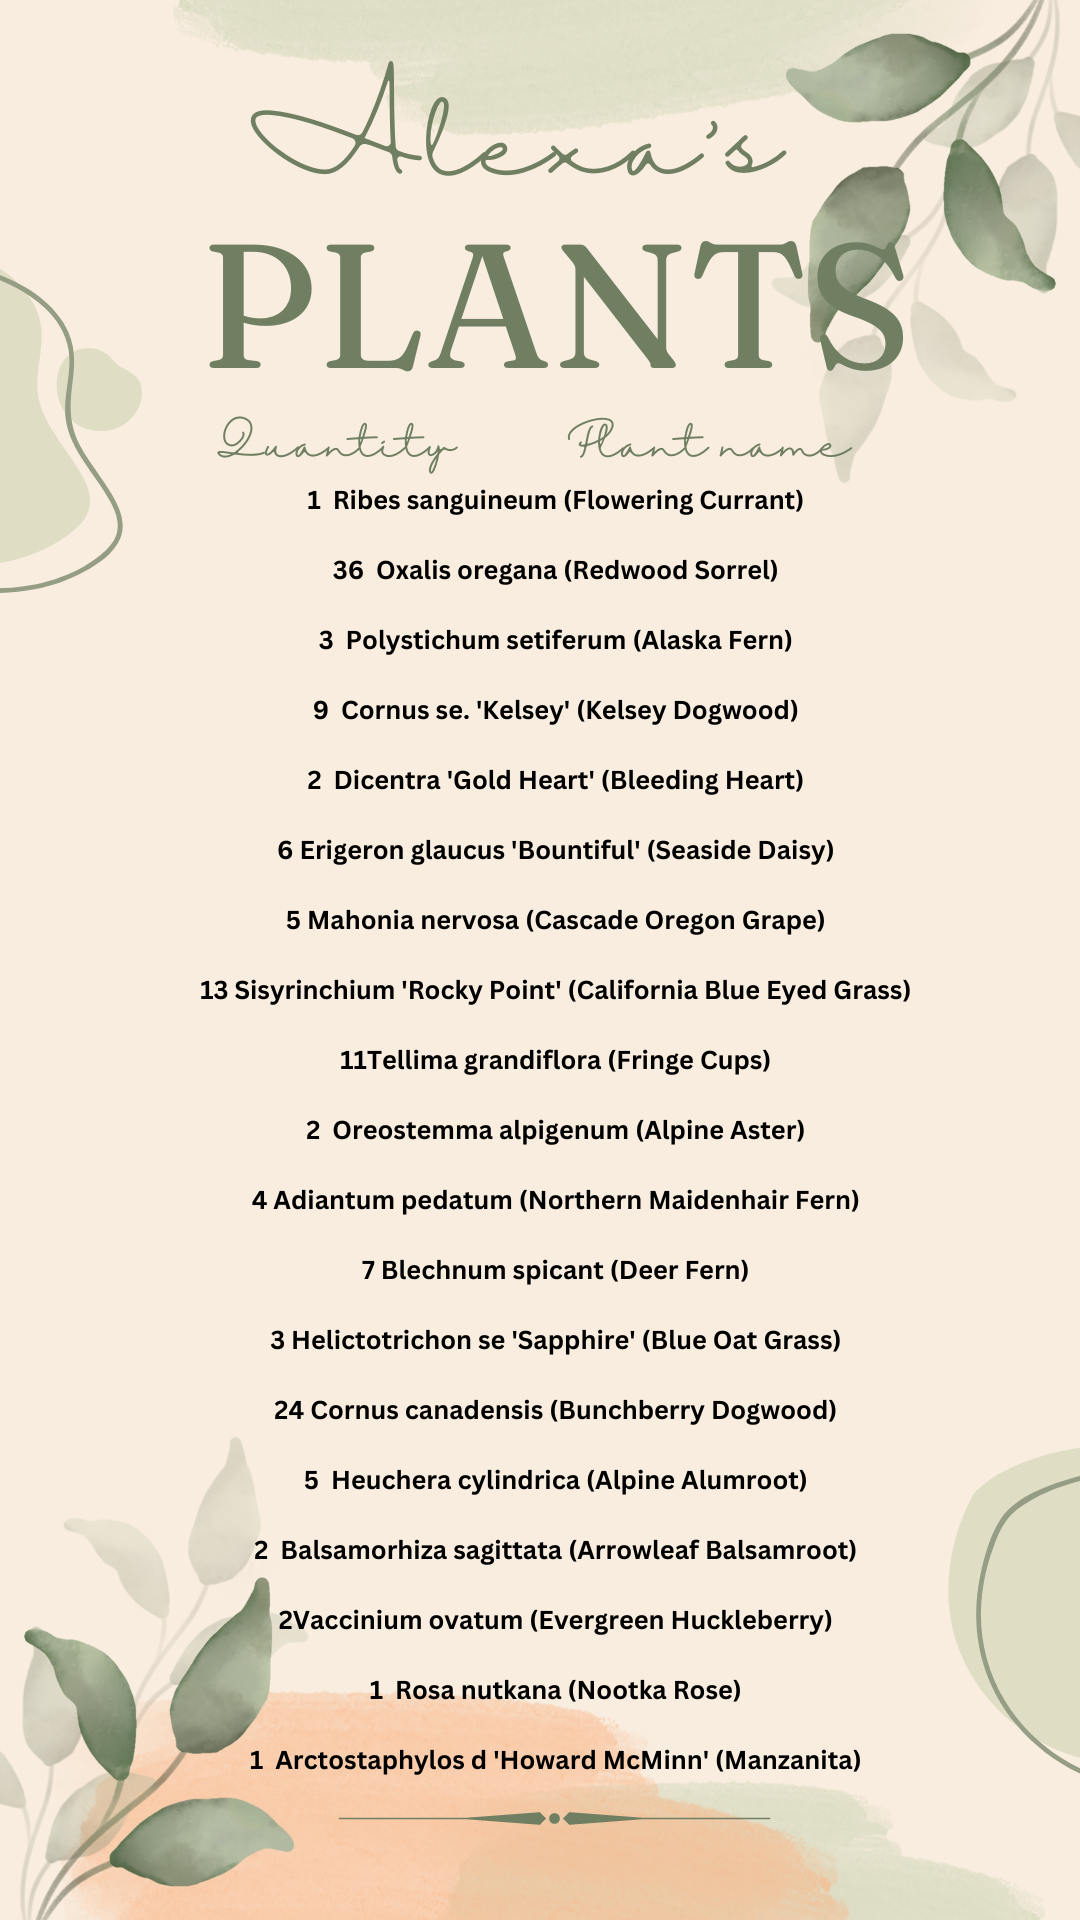
Below is a chart showing the plants Alexa used to create the garden. On the left are the number of plants and on the right is the name of the plants.
Above is a plant guide for the garden with the numbers listed to the left of the plant’s name.
Alexa LeBouef Brooks is a young landscape designer in the Seattle area who is using her passion for native plants along with her background in fine art to create exciting natural and woodland gardens.
She recently told Ferns & Feathers that the “development of my style of gardening grew from my desire to always be connected to the natural beauty I spent so much time in as a child. Although I embrace multiple garden aesthetics, the native and natural style of gardening keeps me rooted in the land I call home.”

Through the excellent work of the Seattle-based, non-profit organization called Plant Amnesty, many of Alexa’s clientele are already aware of the importance of protecting the ecology of the area.
The organization’s focus is to educate the greater Puget Sound area on proper pruning, responsible gardening and land preservation.
“I find that most clients who seek gardeners and designers through Plant Amnesty have a shared interest in maintaining the integrity of our delicate ecology and environment. Even outside of my Plant Amnesty clients, when a potential client sees my business name and website, they are anticipating a particular style of gardening from my work. Most are open to the suggestions I make when designing their gardens and plugging in additional plants to an existing design as well as garden maintenance methods,” Alexa explains.
Changing the way we garden is important to Alexa. Climate change is an ever increasing problem in the Pacific Northwest as well as elsewhere and Alexa is passionate about designing and installing gardens that will meet the future needs of her clients.
Issues around water conservation and installing plants that can not only deal with the increasingly hotter summers Seattle residents face, but the colder winters, are an important part of Alexa and Understory Gardens’ approach to the new challenges on gardening in the Pacific Northwest.
If you are on the lookout for high quality, non-GMO seed for the Pacific North West consider West Coast Seeds. The company, based in Vancouver BC says that “part of our mission to help repair the world, we place a high priority on education and community outreach. Our intent is to encourage sustainable, organic growing practices through knowledge and support. We believe in the principles of eating locally produced food whenever possible, sharing gardening wisdom, and teaching people how to grow from seed.”
Plant list for Seattle front garden design plan
Below is a list of the plants used in the garden in case the chart is difficult to read
1 Ribes sanguineum (Flowering Currant)36Oxalis oregana (Redwood Sorrel)
3 Polystichum setiferum (Alaska Fern)
9 Cornus se. 'Kelsey' (Kelsey Dogwood)
2 Dicentra 'Gold Heart' (Bleeding Heart)
6 Erigeron glaucus 'Bountiful' (Seaside Daisy)
5 Mahonia nervosa (Cascade Oregon Grape)
13 Sisyrinchium 'Rocky Point' (California Blue Eyed Grass)
11 Tellima grandiflora (Fringe Cups)
2 Oreostemma alpigenum (Alpine Aster)
4 Adiantum pedatum (Northern Maidenhair Fern)
7 Blechnum spicant (Deer Fern)
3 Helictotrichon se 'Sapphire' (Blue Oat Grass)
24 Cornus canadensis (Bunchberry Dogwood)
5 Heuchera cylindrica (Alpine Alumroot)
2 Balsamorhiza sagittata (Arrowleaf Balsamroot)
2 Vaccinium ovatum (Evergreen Huckleberry)
1 Rosa nutkana (Nootka Rose)1Arctostaphylos d 'Howard McMinn' (Manzanita)

Understory Gardens: Focus on sustainable west-coast landscapes
Alexa LeBouef Brooks is a west coast garden designer looking to convince people that we need a more sustainable approach to garden design in the face of climate change.
Garden designer’s favourite plants for the natural garden
Alexa LeBouef Brooks is changing the world around her, and she’s not alone.
Like so many other people her age working to protect the earth, Alexa recognizes that the environment is at a critical juncture – either something is done soon or we risk losing much of what we have in the not-too-distant future.
The 33-year-old landscape designer is fully aware of the environmental challenges that lay ahead for future generations and the precarious path humans could be facing in the future.
Alexa is part of a new breed of progressive landscape designers taking it upon themselves to reject traditional garden designs and embrace a new, more sustainable garden style – at least in the town she calls home. Her Pacific West-Coast designs specialize in developing a more sustainable, woodland or naturalized gardening approach – hence the name Understory Gardens.
(For more on West Coast garden designs and native plants, be sure to check out my post on Vancouver-Island-based Satinflower Nurseries, Native plants find a home on Vancouver Island.)
Also, if you are interested in native plants, be sure to check out my post on Gardening with Native Plants of the Pacific Northwest.

Seattle area landscape designer Alex LeBoeuf Brooks is one of many new progressive designers who is challenging old landscape approaches to create more sustainable landscapes for the future.
That love of woodland and natural garden designs has its roots in her childhood.
“Growing up in the Pacific Northwest my parents often brought me to the mountains or the river and seasides to go camping and exploring. From a young age I found myself in awe of our natural beauty,” Alexa explains.
“I think the development of my style of gardening grew from my desire to always be connected to the natural beauty I spent so much time in as a child. Although I embrace multiple garden aesthetics, the native and natural style of gardening keeps me rooted in the land I call home.”
Inspired by the work of Irish landscaper, author Mary Reynolds
Although her love for natural gardens has its roots in her childhood, Alexa owes much of her garden design approach to the work of famed Irish landscape designer and author Mary Reynolds who, rejected the traditional landscape design methods to focus mainly on restoring the land and habitats. She is founder of the environmental movement wearetheark.org, that encourages gardeners around the world to create more natural, sustainable gardens through the use of native plants.
If you are interested in getting more on the work of Mary Reynolds and her book Garden Awakening, you might be interested in my article Garden Awakening will change the way you garden.
Another landscape designer that has shaped Alexa’s work are the more classic designs of Miranda Brooks.

Although her passion is landscape design, Alexa’s real challenge is about combining beautiful, but ecologically sustainable landscapes for her clients.
Her long list of achievements has helped lead her to starting landscape design in 2018.
Vice chair and landscape designer for the Edmonds Architectural Design Board
Completed Edmonds Community College courses in specialty pruning and design
Member of the Plant Amnesty Gardener Referral List
9 years experience with organic Agriculture and animal husbandry
8 years experience with ornamental Horticulture
Plant Amnesty: Focus on maintaining ecology and environment
Through the excellent work of the Seattle-based, non-profit organization called Plant Amnesty, many of Alexa’s clientele are already aware of the importance of protecting the ecology of the area.
The organization’s focus is to educate the greater Puget Sound area on proper pruning, responsible gardening and land preservation.
“I find that most clients who seek gardeners and designers through Plant Amnesty have a shared interest in maintaining the integrity of our delicate ecology and environment. Even outside of my Plant Amnesty clients, when a potential client sees my business name and website, they are anticipating a particular style of gardening from my work. Most are open to the suggestions I make when designing their gardens and plugging in additional plants to an existing design as well as garden maintenance methods.

“The more I learn about the benefits of using strictly native plants, the more I turn to them,” Alexa LeBouef Brooks.
Designer is turning gardens into works of art
Alexa’s background in fine art certainly helped prepare her for the challenge
“In 2012 I received my bachelor’s degree of Fine Arts and Art History and pursued the art world in my twenties. I have always had my hands in the soil for as long as my memory serves me. I think that is why I enjoy art and art making so much, is because there is a tactile element that requires the use of hands and creativity, while getting a little messy along the way,” she explains.
“Somewhere along the journey I started getting interested in the design element of landscaping. I could use my creative skills on paper to transform beautiful outdoor living spaces. Landscape design has become the perfect marriage of all my interests in the art and landscaping world.”
Along the journey, she is playing a vital role in saving the natural environment and landscapes in her home town of Edmonds, Washington just outside Seattle, where she is the vice-chair for the Edmonds Architectural Design Board.
“I believe all homeowners should be stewards of their land, to preserve and maintain the diverse ecology of surrounding plants and species,” she explains.
Alexa is doing her part to help guide her clients along this path. Education plays an important role in her relationship both with her clients and the environment she creates for them.
“My design process includes an educational element in which I teach my clients about individual plant and seasonal needs. I like involving my clients in the design process because it inspires them to learn more about maintaining our natural environment, and their personal garden is the perfect tool to achieve this.”
I believe the natural landscape of the Pacific Northwest stirs inspiration in people of all ages to maintain its beauty.
She is quick to point out that, “responsible stewardship can also be achieved by creating designs for clients that integrate native and drought tolerant plants as well as plants that attract our resident pollinators.”
Alexa uses her extensive knowledge of the environment and use of native plants to guide her clients.
“I believe the natural landscape of the Pacific Northwest stirs inspiration in people of all ages to maintain its beauty,” she explains.
“It could be as simple as leaving most of the fallen leaves and using it as an attractive mulch for garden beds. Destructive methods include stripping the top layer of mulch and soil using powerful gas blowers and excessive raking. Not only does this negatively impact butterfly larvae populations as well as leave little nesting materials and berries for birds, but you are left with bare soil that does not retain moisture and nutrients for our increasing summer temperatures in the Pacific Northwest.”
Climate change: Awakening a new style of gardening
Alexa is the first to admit that climate change is awakening homeowners, who may have once dreamed for a certain style of garden, into realizing that a new, more sustainable approach to gardening is now needed.
“In the midst of our climate crisis and environmental destruction, Washington’s winters are bringing in more rain and colder temperatures while our summers are bringing in more drought and higher temperatures. What was a temperate climate is slowly becoming more extreme,” she explains.
“One of the biggest challenges we now face are forest and brush fires. Because of our increasing temperatures in the summer, many landscapers are implementing more California natives. The drawback is not all California natives thrive in our decreasing winter temperatures. So, instead of trying to control a shift in our plant hardiness zones, we must adapt and allow our plants to adapt. This, of course, comes with trial and often error. More and more clients are requesting drought tolerant plants in their gardens, and I am happy to oblige.”
(Be sure to check out the full story of Alexa’s Seattle-area garden design, including a list of native plants used in the design.)

An example of one of Alex’a garden design plans.
Alexa’s favourite Understory trees for Pacific Northwest gardens
Acer circinatum (native Vine Maple) for its spectacular fall color and interesting structure.
Cornus nuttallii (native Pacific Dogwood) for its cascading branching and delicate flowers.
Cornus controversa 'Variegata' (giant Dogwood or Wedding Cake tree) for its gorgeous cake-like layers of branches and delicate variegated color.
Cercidiphyllum japonicum (Katsura) for its fall color and fragrance of leaves that smell like burnt sugar.
Magnolia macrophylla (Bigleaf Magnolia) for its broad leaves that provide a tropical feel.
Alexa’s favourite ground covers for Pacific Northwest gardens
Cornus canadensis (native Bunchberry dogwood) for its seasonal interest from flowers, to berries, to multi color leaves. (For more information on our native bunchberry be sure to check out my story here.)
Frageria chiloensis (native Beach Strawberry) for its fruit, flowers and evergreen interest.
Ophiopogon 'Nana' (Dwarf Mondo) for its hardy evergreen blades that can withstand heavy traffic.
Erigeron glaucus (native Seaside Fleabane) for its spring through fall blooms.
Erigeron karvinskianus 'Profusion' (Fleabane) for its delicate white and pink flowers.
Alexa’s favourite Shrubs for Pacific Northwest gardens
Vaccinium ovatum (native Evergreen Huckleberry) for its edible berries and sculptural element.
Ribes sanguinium (native Flowering Currant) for its vibrant flowers.
Arctostaphylos 'Howard McMinn' (California native Manzanita) for its red bark, bell shaped flowers and silver leaves.
Picea abies 'Pusch' (Norway Spruce) for its hot pink cones and pin cushion shape.
Rosa nutkana (native Nootka Rose), for its rose hips and just to add a bonus, Corylopsis spicata (Winter Hazel) for its winter flowers.
Incorporating natives and non-natives in the landscape
While Alexa strives to incorporate more and more native plants in her landscapes, clients needs often dictate the use of non-natives. In many cases, non-natives are already well established in the gardens.
“My designs meet the clients where they are, and I incorporate many different aesthetics that cater to the clients needs and desires. That being said, I will always see myself as a student in anything I pursue. The more I learn about the benefits of using strictly native plants, the more I turn to them, explains Alexa.
(If you are looking for more information on the importance of using native plants in our gardens, check out my comprehensive post: Why we need native plants in our gardens.
“There is a list of plants that I strictly avoid in our area. These include invasive species that drive out beneficial pollinators, degrade habitat, cause disturbance in the food web, and even chemically alter soil biology. This doesn't even cover genetically engineered plants which is an increasing technology being utilized that has known and unknown consequences. The most important act we can do as gardeners and landscapers is educate our clients on what is appropriate for our area and be cognizant of our watershed, soils and precious species.”
Alexa gives much of her success and knowledge of plants to her friend Bre Moravec.
“My friend and fellow gardener Bre Moravec, owner of Gaia Gardens is the perfect example of this. She goes the extra mile to educate herself to educate others. Because of Bre’s passion she has mentored me and other gardeners, teaching specialty pruning methods and in depth plant species knowledge and identification.”
How Covid changed the way we garden
When asked how important she thought it is for homeowners’ physical and mental health to surround themselves in a landscape they love, and how rewarding it is for her when her clients fall in love with their new gardens, Alexa responded: “It has always been important, but ever since the Covid pandemic it is more important than ever.
“There have been studies that time spent outside, specifically in a more natural setting improves sleep, lowers overall inflammation, enhances blood flow, repairs cells and tissues, and improves electrical activity in the brain. How amazing would it be if we can access this from our backdoor! I love helping my clients transform what was once an uninviting space into a space in which they and their families can retreat to, where it is safe because they know chemicals aren't being used, and they can enjoy all the benefits and pleasures that our seasons bring.
(If you are looking for more information on the importance of being outdoors in nature and in our gardens, you will want to check out my post Why kids need more nature in their lives.
And what does Alexa love most about her job?
“My relationships with my clients and time outside bring me most joy. The most difficult hurdle about this job is probably Washington’s weather. We’re known to get a lot of rain here!
For more information, or to contact Alexa about landscaping, visit her website at Understory Gardens.
If you are looking for more inspiration, you may be interested in Gardens of the Pacific Northwest.
If you are on the lookout for high quality, non-GMO seed for the Pacific North West consider West Coast Seeds. The company, based in Vancouver BC says that “part of our mission to help repair the world, we place a high priority on education and community outreach. Our intent is to encourage sustainable, organic growing practices through knowledge and support. We believe in the principles of eating locally produced food whenever possible, sharing gardening wisdom, and teaching people how to grow from seed.”

White lights and window boxes: A warm holiday welcome
Combining white lights with window boxes creates a warm welcome during the holidays and throughout the year.
Simple Christmas decor is natural choice for front garden
There are no guarantees in life, but if it’s a White Christmas you’re dreaming of, adding the right lights will help bring the magic to your landscape during the holiday season and throughout the year.
Forget those bright LED red and green lights. And those new electric-blue LEDs, just don’t work in naturalized gardens.
If you are looking for tasteful lighting that welcomes guests during the holiday season, warm white lights work like a charm, especially in window boxes and other containers. An added bonus is that the window boxes with white lights look as good in the middle of summer as they do in winter.
In fact, we have solar-powered fairy lights on trellises in the back yard all summer. The inexpensive lights provide a romantic glow to the entrance of our back garden and welcome visitors.

Our Mayne window boxes decorated with Holiday decor complete with white lights add a warm welcome to the natural garden.
We use the warm white lights across the front of our home to add a festive yet classic look.
It starts with our two Mayne Fairfield window boxes decorated with white lights and holiday decor. The window boxes are plastic, self-watering and very well made. We added the decorative brackets as well. These solidly-built, Mayne boxes are available in several sizes in both black and white.
The look continues with our indoor tree (also in white lights) in our large picture window. Finally, the front door includes a lighted wreath flanked by two small, yet simple Christmas trees with white lights. All three are controlled by battery-operated timers making them a convenient option for the entire holiday season.
The only addition is a set of three “presents” decorated with red ribbon and white lights.
The understated decor works well in a naturalized woodland garden.
This look can begin on the exterior of the home and be easily carried into the interior with understated decor.

A Christmas tree adorned with white lights welcome visitors.
Cedar boughs covered in white fairy lights, like this example from McGee and Co., provide a perfect transition from outdoors to the interior. The greenery can be used around a doorway or on a interior or exterior railing.
By removing the obvious holiday decorations, the lights are subtle enough to leave out all winter. Certainly, they can stay out over the winter when a dusting of snow adds a magical quality to the light.
Inside the home, a natural style can be used well past the Holiday season. These contemporary wicker trees, for example, could be decorated with white lights for the holidays, and left natural for the remainder of the year.
And for the fall season, this fun rug from Anthropologie is the perfect way to greet visitors.

These Mayne window boxes add a festive mood and a warm welcome to the front garden.
Window boxes provide a classic Holiday look
One of my favourite combinations for Christmas – that lasts right through into spring – is our front Mayne Fairfield 3-ft window boxes filled with winter greens, holiday decorations and, of course, the small warm white lights.
A simple timer automatically turns the lights on and off after a chosen amount of time. The effect creates a classic holiday feeling both on the exterior of the home as well as inside the house looking out.
If window boxes are something you think you might be interested in, check out my earlier post on planting window boxes on a budget
A dusting of snow on the greenery turns the window boxes into magical wintery scenes.
Window boxes are a great addition to your home at any time of the year, but they really seem to come into their own around the holiday season where they can extend your Christmas decorating theme to a whole new level.

Small white lights in the Mayne Fairfield window boxes add a festive, but classic, look to the front garden.
We use the small twinkle lights in both window boxes, but technology has made the possibilities endless. You could place one or a group of flickering candles in the window boxes that turn on and off automatically. Tuck a grouping of lighted Christmas balls into the window boxes as an elegant thriller almost like a birdsnest.
Front door and landing offers more decorating possibilities
Our white-light theme is extended across the front of our ranch-style home and welcomes visitors with a battery-operated wreath on the front door flanked by two simple Christmas trees that are also on their own timers.
If you really want to add an interesting touch to your front decor, consider turning your porch lights into gas lanterns with these LED lights bulbs that create the illusion of soft, flickering, gas flames.
The effect is simple with an understated elegance.
Red ribbons add a touch of colour to all the greenery and simple decoration.

A window into your woodland
Our full-size Christmas tree, also adorned with white lights, sits in the large picture window over looking the front garden and completing the holiday look.
The simple aesthetics may not be for everyone, but keeping holiday decorating to soft, warm white light helps unify the look and creates a tasteful, yet warm welcome to the woodland garden.

Light pollution and wildlife
Although most wildlife is tucked away for the winter in underground burrows, we should always remember that too much light can create severe problems for some wildlife. Lighting up your landscape can cause some animals and birds to change their natural movements and their feeding habits. For some, the lights may attract prey making it easier for predators, but at the same time creating an unfavourable situation for prey animals.
Extremely bright lights, such as spotlights and other high intensity lights are simply unnecessary in a natural garden. Try to keep this in mind when designing your outdoor holiday decorating plan.

What are the best bird feeders: Wood or more modern plastic bird feeders?
The days of wood bird feeders are quickly giving way to Resin feeders made out of recycled plastic containers. These resin containers look great and are more importantly, easy to clean.
Avian flu outbreak is good reason to move to modern resin-based or plastic feeders
I love wood as much as the next guy, but when it comes to bird feeders, today’s more modern resin/plastic bird feeders are always the better choice.
The new plastic or resin-based feeders are easier to clean and keep clean and that helps to reduce the spread of disease among our songbirds.
This is especially important now with the emergence of Avian flu, which can be devastating to large flocks of birds that come in contact with the virus. It struck earlier this year in parts of the United States with primarily waterfowl and migrated north to northern states and into Canada. It was detected in Ontario in March of this year entering from migrating birds.
According to Cornell University’s All About Birds website: There is currently very low risk of an outbreak among wild songbirds, and no official recommendation to take down feeders unless you also keep domestic poultry, according to the National Wildlife Disease Program. We do always recommend that you clean bird feeders and birdbaths regularly as a way to keep many kinds of diseases at bay. We also always recommend that you follow any recommendations put out by your state government, such as the recent request to take down feeders in Illinois.”
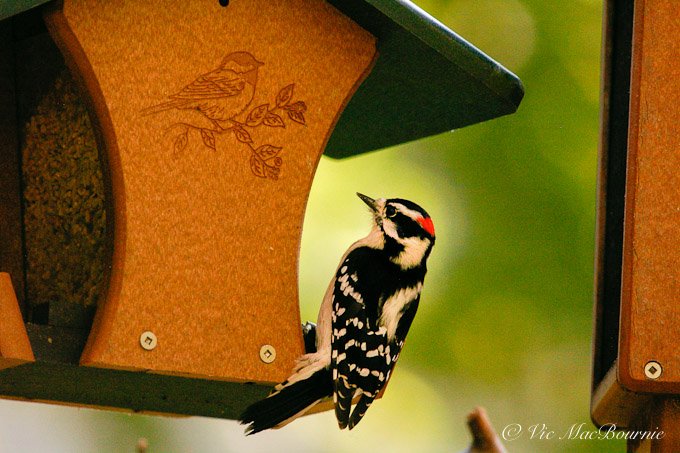
Woodpecker on Wild Birds Unlimited recycled plastic feeder.
Cornell reports that as of mid July, 2022, “they’ve detected the HPAI strain in 1,826 wild birds, with 41 detections in songbirds.
The website also reports that “Songbirds are much less likely than waterfowl to contract avian influenza and less likely to shed large amounts of virus, meaning they do not transmit the disease easily.”
The CDC reports the following: “Infected birds can shed avian influenza A viruses in their saliva, nasal secretions, and feces. Susceptible birds become infected when they have contact with the virus as it is shed by infected birds. They also can become infected through contact with surfaces that are contaminated with virus from infected birds.”

White breasted nuthatch on recycled plastic feeder.
What can we do to reduce the spread of Avian Flu?
I have seriously reduced the amount of feed I use this year, preferring to put out just a little of the no-mess blend on a daily basis. This eliminates seed build-up and keeps the number of birds at the feeding station down considerably.
For more on purchasing these bird feeders on a budget check out my best bird feeder finds.
Having plastic or resin bird feeders is no guarantee that your backyard birds will escape the deadly virus, but plastic feeders are easier to keep clean and should help keep the birds at your feeder safe. Regular cleaning of the resin feeders is quick and easy. A quick wipe with bleach gets the job done and this will not damage the resins.
In fact, a quick look at the Wild Birds Unlimited website shows 12 eco-friendly (resin) hopper bird feeders and only a single wood hopper feeder. I’m sure more are available in-store, but there is no question that the eco-friendly recycled plastic feeders are proving popular despite their high price tag.
Wild Birds Unlimited is not the only location where you can purchase high-quality, plastic feeders. If you are looking for a stylish addition to your garden, Look no further than Garret Wade’s impressive line of feeders. Their church-style-bird feeder is currently on clearance and would be a good choice as both a high quality bird feeder and piece of garden art.
Wild Birds Unlimited is a leader in the industry when it comes to backyard bird feeding. They describe their EcoTough Classic hopper-style feeder as a high quality feeder that “won’t crack, fade or rot. EcoTough® feeders are environmentally friendly, high quality products made from recycled plastic milk jugs. … Perch drains allow seed to drop out of the feeder for ground-feeding birds to eat, and angled perches let empty seed hulls be blown away by the wind. The removable screen bottom is treated with EcoClean® Product Protection, providing 24/7 product protection.”

Amish-made bird feeder is built to last and perform in your woodland garden
The Amish crafted large gazebo vinyl birdfeeder is the perfect addition to any backyard. Include it as a finishing touch topping feeder for your bird feeding pole, or use it as a stand alone feeder on a separate pole. If you use it as a stand alone feeder, be sure to include a squirrel baffle to keep squirrels and racoons of the feeder. This handmade and handcrafted feeder includes a clear plastic, built-in seed storage container that can hold up to four pounds of bird seed.
This makes it an ideal feeder to fill-and-forget for a week or two while, at the same time, protecting the seed from the elements and providing our feathered friends with a comfortable and sheltered place to feed. The fact that the feeder is made from high quality vinyl, plastic and cedar ensures it is a long-lasting, easy-to-clean and maintain feeder.
If you are looking to set up a bird-feeding station, be sure to check out my post on Setting Up a Bird Feeding Pole.
At our feeding station, plastic, or more appropriately resin, certainly takes centre stage. All wood products have been replaced with resin ones including two WBU hopper-style feeders, a catch tray that doubles as a platform feeder and a suet feeder for our woodpeckers.
The resin feeders, although expensive, are extremely well-built and will likely last a lifetime if treated and cared for properly. Using a jet of water from the hose or even a power washer is not likely to damage these sturdy feeders and will clean out any food that might have built up. Wooden feeders eventually break down and, for the most part, are unable to withstand many power washings.
Two of our Wild Birds Unlimited hopper feeders (a large one and a smaller one.) Cleaning is easy and the feeders stand up to both the weather and squirrels.
Any other feeders in our yard are either steel or a combination of steel and plastic.
The only feeder with wood is a small, stylish copper and cedar feeder that is kept separate from the main feeding area and is filled once a day with only a handful of safflower seeds.
In addition to the array of resin hopper feeders available at Wild Birds Unlimited, there are also resin bark butter feeders, and a series of rustic feeders.
Similar plastic feeders are available at other specialty bird stores as well as more affordable versions at Amazon with, for example, the Woodlink Premier Bird Feeder with suet cages and the Birds Choice Hopper Feeder in medium green.
These feeders are built to withstand everything our friendly squirrels can throw at them and keep performing at their best.
If you are thinking about creating a bird feeding station, investing in a single recycled plastic hopper feeder is an excellent choice. Over time, you can add additional feeders and build a high quality bird-feeding station that is easy to keep clean and will last a lifetime, while providing the birds with well thought out feeders that will help to keep them safe.

Are raccoons good for the garden?
Raccoons can be very beneficial in your woodland garden, but too many of these masked bandits are a recipe for problems.
Take steps to discourage over population of raccoons
A quick search on the internet and you would think Raccoons are the devil incarnate when, in fact, they can be welcome visitors to our gardens much like foxes, coyotes and other animals that share our garden spaces with us.
The problem is not raccoons, the problem – not unlike so many in our gardens – is too many raccoons. That’s especially true in smaller urban and inner-city backyards where they can quickly become overpopulated, get into trouble and too easily invade our living spaces.
If you’ve had a family of raccoons living in the attic or taking over your shed, you may not be quick to welcome them back.

My digital portrait of a young raccoon is evidence of just how cute these little masked bandits can be.
Can raccoons be beneficial in a garden?
But did you know that, despite the mischief they seem to get into regularly, these cute little critters are one link to ensuring healthy landscapes?
These masked bandits can play an important role in garden pest control as well as seed distribution throughout the garden.
(Read on for more details on how raccoons can be beneficial in the garden.)
While raccoons in small numbers can be good for a garden, they can pose dangers if they get into your home and live in the attic or chimney. (More details on the dangers of the raccoon at the end of the post.)
But first, back to the problem of when the numbers get out of hand and there are too many raccoons in a given area.
This ballooning population is often the result of either a lack of predators and/or too many resources that allow for a disproportionate number of raccoons to survive comfortably in a given area.
In the wild, raccoon density is usually about 5-10 per square kilometre. In urban areas that number can climb to as many as 100 raccoons per square kilometre. And, where the situation is particularly out of hand, those numbers can get up even higher.

Obviously, predators can play a major role in keeping the population down. The problem is that raccoons are fierce little mammals and have few predators in the wild let alone inner cities.
A raccon’s main predators include mountain lions, bobcats, coyotes, foxes, dogs, wolves, Great Horned Owls, and fishers. Besides coyotes, foxes, dogs and maybe Great Horned owls, few of these top predators are found in urban areas and even fewer are found in inner-city cores. Here, traffic easily accounts for the highest death rates in raccoons.
Even traffic, however, can’t stop these little critters. Studies have shown that in urban areas, part of a mother raccoon’s training for her babies is learning to cross the road quickly leading to a reduction in road kills.
In our woodland garden we benefit from the existence of foxes, coyotes and birds of prey including owls that I suspect keep raccoon numbers manageable.
In fact, I rarely see raccoons in our garden even at night. When I do see them, they are almost always under the bird feeder, which I ensure has very little if any feed remaining on the ground as evening approaches.
A high quality, no-mess bird food and a catch tray to keep seed off the ground goes a long way in keeping the ground around the feeders free of bird seed.
Despite problems with raccoons, there are good reasons to admire them and welcome them into your environment.
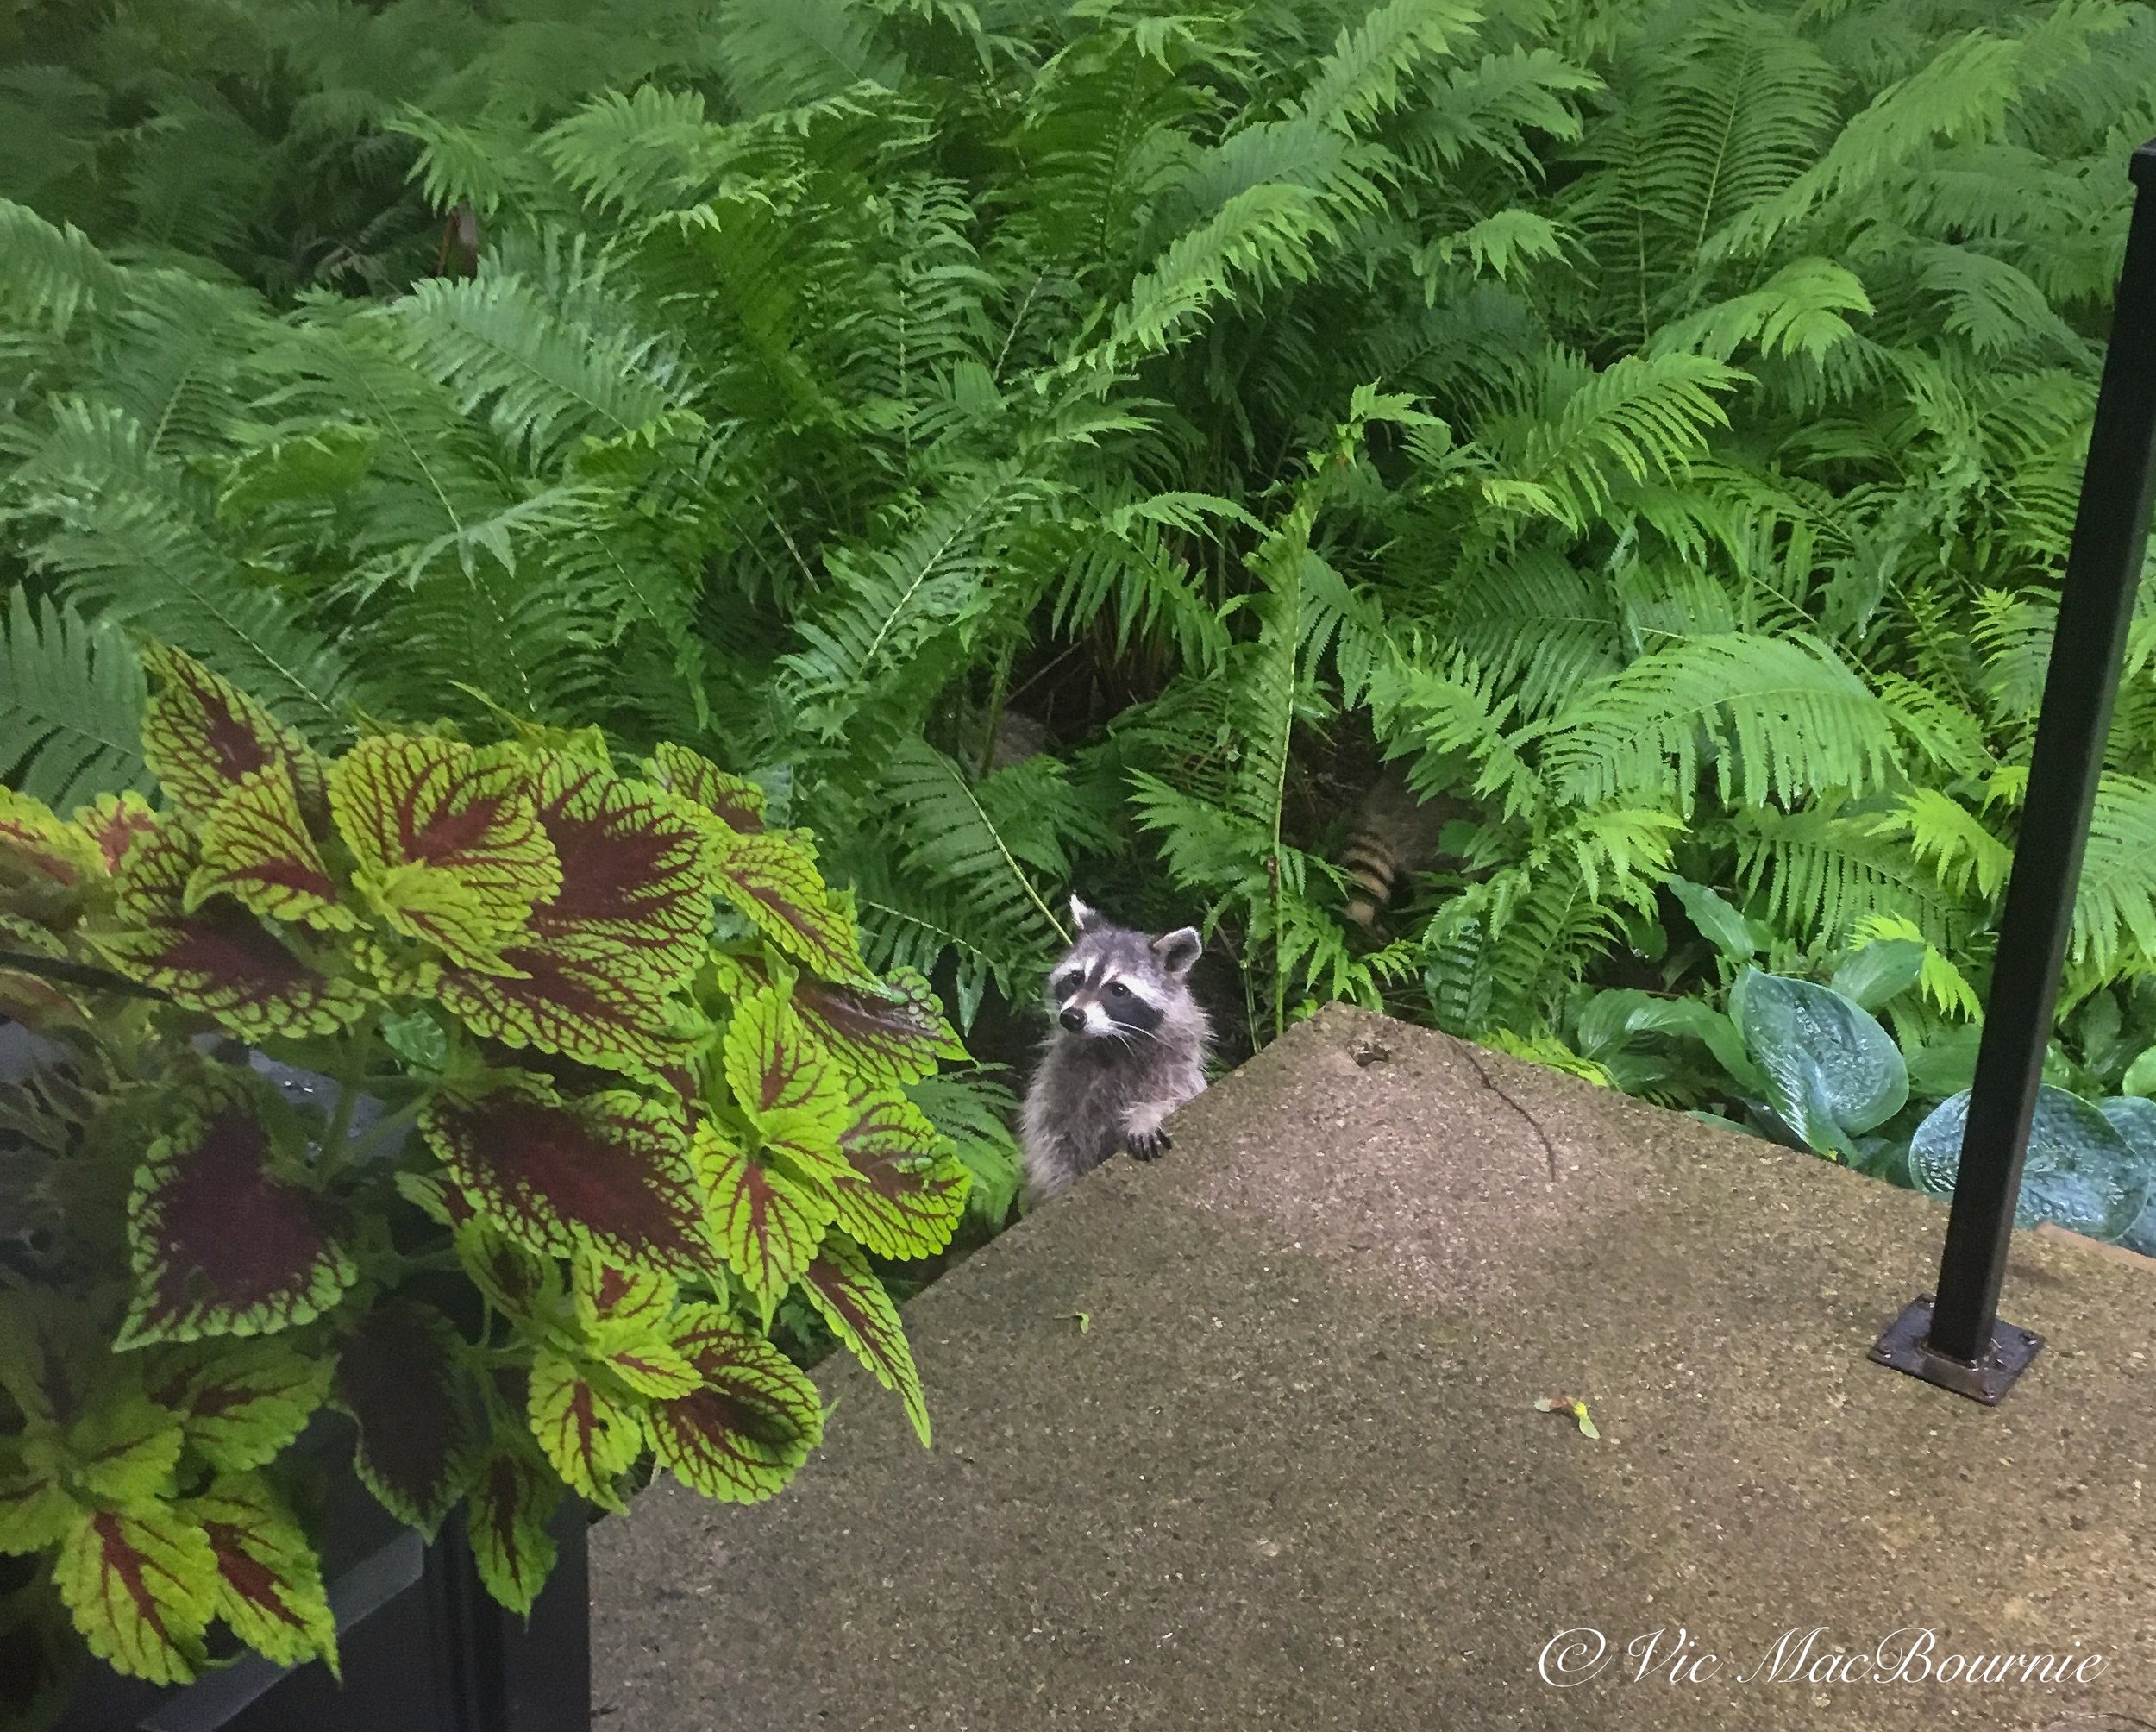
A young raccoon at home on our front porch among the ferns, coleus and hostas.
Do’s and don’ts to create a healthy environment for raccoons
Do not leave cat or dog food out at any time. Feed your domesticated animals inside your home. If you must feed them outside, be sure to bring in the dishes or ensure there is no food remaining at night.
Do leave old dead trees (snags) remaining in your garden. Cut off branches that might pose a threat to humans, but leave the main trunk (or at least part of it) for habitat. You might be surprised what you attract, including a family of owls.
Do not leave access points uncovered in your home or shed where raccoons could gain access to your attic or chimney.
Do leave a large brush pile in a corner of the yard where raccoons can forage for food or even possibly burrow in for the winter.
Do not use poisons in the yard to kill small mammals or insects that could be prey for raccoons.
Do grow a variety of berry, fruit and nut bearing shrubs and trees to provide raccoons and other wildlife with a natural food source.
Do not trap raccoons and move them far away into a forest or another part of town.
Do provide a water source for them. If there is one thing raccoons need, it is a source of water. Originally raccoons were found in the tropics where they could be found foraging along riverbanks. Today, a small pond or patio container of water is enough to satisfy their needs.
Do not allow bird seed to pile up under your feeders. Use a high quality seed and catch trays to keep the ground under feeders free of large quantities of seed.
Raccoons are excellent at pest control
Did you know that raccoons are excellent at pest control – both insects, small mammals and reptiles – not only eliminating problems but cleaning up any remains. For this reason, it’s important not to use pesticides in the garden for fear of poisoning the very animals that are tasked with the job of keeping the garden free of certain pests.

A raccoon forages for food in the grass.
What do raccoons eat in their natural environment?
Much of the success of raccoons is based on the fact they are omnivores – meaning they will eat, similar to humans, just about anything.
In fact, a typical diet of a raccoon in a natural environment is made up of about 40 per cent invertebrates (including everything from insects to crustaceans like crayfish that live in fresh-water streams), 30 per cent plant material, and another 30 per cent vertebrates (such as small mammals including mice, birds and reptiles.)
Young Raccoons (called kits or cubs) have a range of sounds
Young raccoons chitter to call their mom, or when they are interacting with one another
Raccoons also purr much like a cat when they feel happy and safe, often when they are in the den with their mother
They will bark and growl quite viciously when they feel they are in extreme danger
Young raccoons will actually scream if they feel extremely frightened
As they get older, they make more of a chattering sound to communicate with family members
Adult raccoons will snarl and growl loudly when they are protecting their young or a food source.

Raccoon on a partially fallen tree high in the tree canopy.
Where do raccoons live in natural environments?
Raccoons inhabit a wide range of environments including forests, shrublands and grasslands. They are even known to keep up to 20 denning areas at one time.
These masked bandits are sometimes categorized as “little bears” because they are closer to the bear family than the cat family.
Racoons are members of the Procyonidae family. Wikipedia classifies it as a “New World family of the order Carnivora.” This group includes our North and Central American-based raccoons. Just for a little perspective, members of the Procynonidae family also include ringtails, cacomistles, coatis, kinkajous, olingos, and olinguitos.
How did raccoons migrate so far north?
Raccoons are originally from warm climates but have used trains, and trucks to migrate north where they found barns and sheds to aid their northern migration and escape cold winters. Now, raccoons have been found as far north as Alaska.
I was able to photograph this baby raccoon in the backyard after it ventured out of its den in search of an adventure.
Why is Toronto called the raccoon capital of the world?
Racoons are common in the United States and most parts of Canada, especially in large cities like New York, Chicago and, in Canada, Toronto, which has become known as the raccoon capital of the world. Estimates show that there are 50 times more raccoons living in Toronto than in the adjacent countryside. This has helped to earn them the reputation as the raccoon capital of the world.
Raccoons are extremely adaptable animals thriving in natural, rural woodland areas as well as in heavily urban areas.
Are country and city raccoons different?
Studies have even shown that country and city raccoons have adapted into two very different creatures. There are the shy reclusive raccoons that make their homes in the country, and bold city raccoons that are right at home sharing backyards with human neighbours. Some studies have shown that they are quick learners and this enables them to be so successful in very urban areas.
Are raccoons smart?
Some would call raccoons the quintessential generalists that are able to live in a whole variety of habitats. Part of their success stems from the fact that they are smart animals able to adapt to a range of environments and habitats. They are also able to figure out basic puzzles and obstacles through persistence and brain power.
Raccoons see urban areas as opportunities rich in resources including both food and habitat. They are particularly successful in exploiting their surroundings and more than able to move into buildings where there are structural defects that allow easy access.
One of the important features that help these animals be so successful in an urban environment is the dexterity of their “fingers.” These long slender fingers are particularly sensitive to touch and allows raccoons to manipulate both food and complicated devices to the point where they can easily open garbage cans and doors (even those fitted with locking devices).
Do raccoons come out during the day?
They are primarily nocturnal, however, don’t be surprised to see them up and about during daylight hours especially in fall – much like bears – when they are looking to increase reserves in preparation for winter.

Although raccoons are rarely seen in winter, they do at times come out of their hibernation (more a torpor) to obtain food or water. Seen here is a young raccoon in the cold of winter.
Do raccoons hibernate during winter?
You might wonder why you rarely see raccoons during winter. Are they hibernating? Technically, raccoons are not true hibernators although, like bears, they store body fat throughout the summer and into fall so they can sleep through the coldest part of winters, especially in colder environments in the United States and into Canada.
Raccoons actually go into a state of torpor during winter where they sleep for extended periods to reduce the amount of energy needed, but at the same time are aware of changing conditions including threats from predators.
Where do raccoons live in nature?
In natural rural areas, raccoons set up dens primarily in hollow trees but have even been known to take over smaller animals’ underground burrows where they spend the winter tucked away with family members to stay warm. In urban environments, where hollow trees (or snags) are immediately removed by most homeowners, attics, sheds and chimneys are substituted for the comfort of hollow trees.
Since raccoons are less active during the winter, you may not even know they are living with you in the home’s attic until they begin moving around in spring.
Let’s get back to the benefits of these little masked bandits.
Besides pest management, what other benefits do raccoons have in our gardens?
Since raccoons are voracious eaters of seeds, berries and fruit, they play an important role in seed distribution both in the wild and in our gardens. Many seeds require a certain type of stratification which can be achieved by going through the digestive system of racoons and other mammals. One look at their feces in fall and you’ll see quite clearly that they are working hard at this important job.
Is raccoon poop/feces dangerous?
You may ask that besides a bite from a raccoon, what other dangers can a raccoon pose to humans?
Any animal feces can be dangerous in the garden, but it should be noted that a raccoon can carry a particularly dangerous strain of roundworm in their feces. It is particularly dangerous if ingested, but this is not uncommon if you have toddlers around or pets. The real danger are the eggs of roundworm that are in the feces. They can spread to the soil around the feces and survive for extended periods of time in the soil.
In addition to raccoon roundworm, raccoons can pose dangers to our pets including canine distemper, Leptospirosis, parvovirus, mange, fleas and rabies.
How dangerous is raccoon roundworm?
Raccoon roundworm should not be put in the same category as other roundworms because it is a much more serious problem for humans. Dogs can carry raccoon roundworms and be a spreader of the illnesses associated with it.
Roundworms come from eggs in raccoon feces and if left untreated in humans, these eggs can hatch and worms can spread to our brains resulting in serious neurological problems leading to loss of coordination, seizures, coma and eventually possible death. The worms can also travel into your eyes causing vision impairment and eventual blindness.
Roundworm contraction is most often found in children who play in soil or sand outside where raccoon feces is present. It can also be contracted by people in close contact with raccoon feces like if the animals are living in your attic and you try to extricate them on your own without experts.
If you think you or your children may have been exposed, contact your doctor immediately to obtain a deworming medication.

Try to leave snags like these in the garden to give raccoons safe places to raise their young.
Can you trap a raccoon and bring it out to a forest?
The answer, in most cases, is no you cannot live trap a raccoon and move it to the forest.
There are two reasons why this practise is unacceptable.
First, it is too easy to separate a mother from her kits when they are vulnerable and cannot survive on their own.
More importantly, however, is the potential to spread rabies and other diseases. Governments restrict the movement of wildlife through human intervention if there is a chance that the animals may have rabies. This practise helps to limit the spread of rabies.
How to get raccoons out of your attic
The more acceptable way to rid an attic of raccoons is to hire a wildlife company that will chase the adults out of the house and then screen off any access points back into the attic. Once that is completed, any raccoon kits that are left in the attic are removed and put into a special reunion box and left nearby for mom to find. The mother raccoon will quickly find her babies and relocate them to another den in the area.

A young raccoon foraging for food in the back garden.
Are raccoons aggressive?
Raccoons are not generally aggressive animals unless they feel threatened or are sick or injured. Absolutely raccoons can be aggressive if they feel threatened or are cornered. They come equipped with sharp teeth and know how to use them if necessary. But they are not dangerous in a normal garden setting where they do not feel threatened. Just make sure they know you are around and it is unlikely that they will stick around.
If a raccoon is aggressive, contact your local animal control because it could be injured or be carrying rabies.
Never corner a raccoon, say in a garage or shed. Instead, open the door and let them leave on their own. Better to make the environment they are in less attractive for them so they leave on their own.
For all kinds of reasons, keep your dogs and other pets away from raccoons if possible. It is however, not unheard of that raccoons can befriend family pets and live in harmony, but better not to encourage that behaviour.

What’s the best Blue Jay feeder?
Here are two bird feeders you will want to check out that are magnets for our noisy blue jays.
Two of the best feeders to attract Blue Jays
Attracting Blue Jays to your yard begins with having the right bird feeders to deliver their favourite food.
In our yard, there are two feeders that do an excellent job attracting our northern blue jays year round.
The best Blue Jay feeders are both simple and inexpensive, and deliver Blue Jays’ their favourite foods in a convenient way that allows them to perch comfortably while feeding. A seed cylinder spike, and a wreath-style whole peanut feeder are two of the best feeders for blue jays.
If you follow this website, you’ll know that my all-round favourite bird feeder is a simple attachment to the Wild Birds Unlimited Advanced Pole system. It involves nothing but a spike that sits on top of the pole and holds a variety of compressed seed cyclinders.
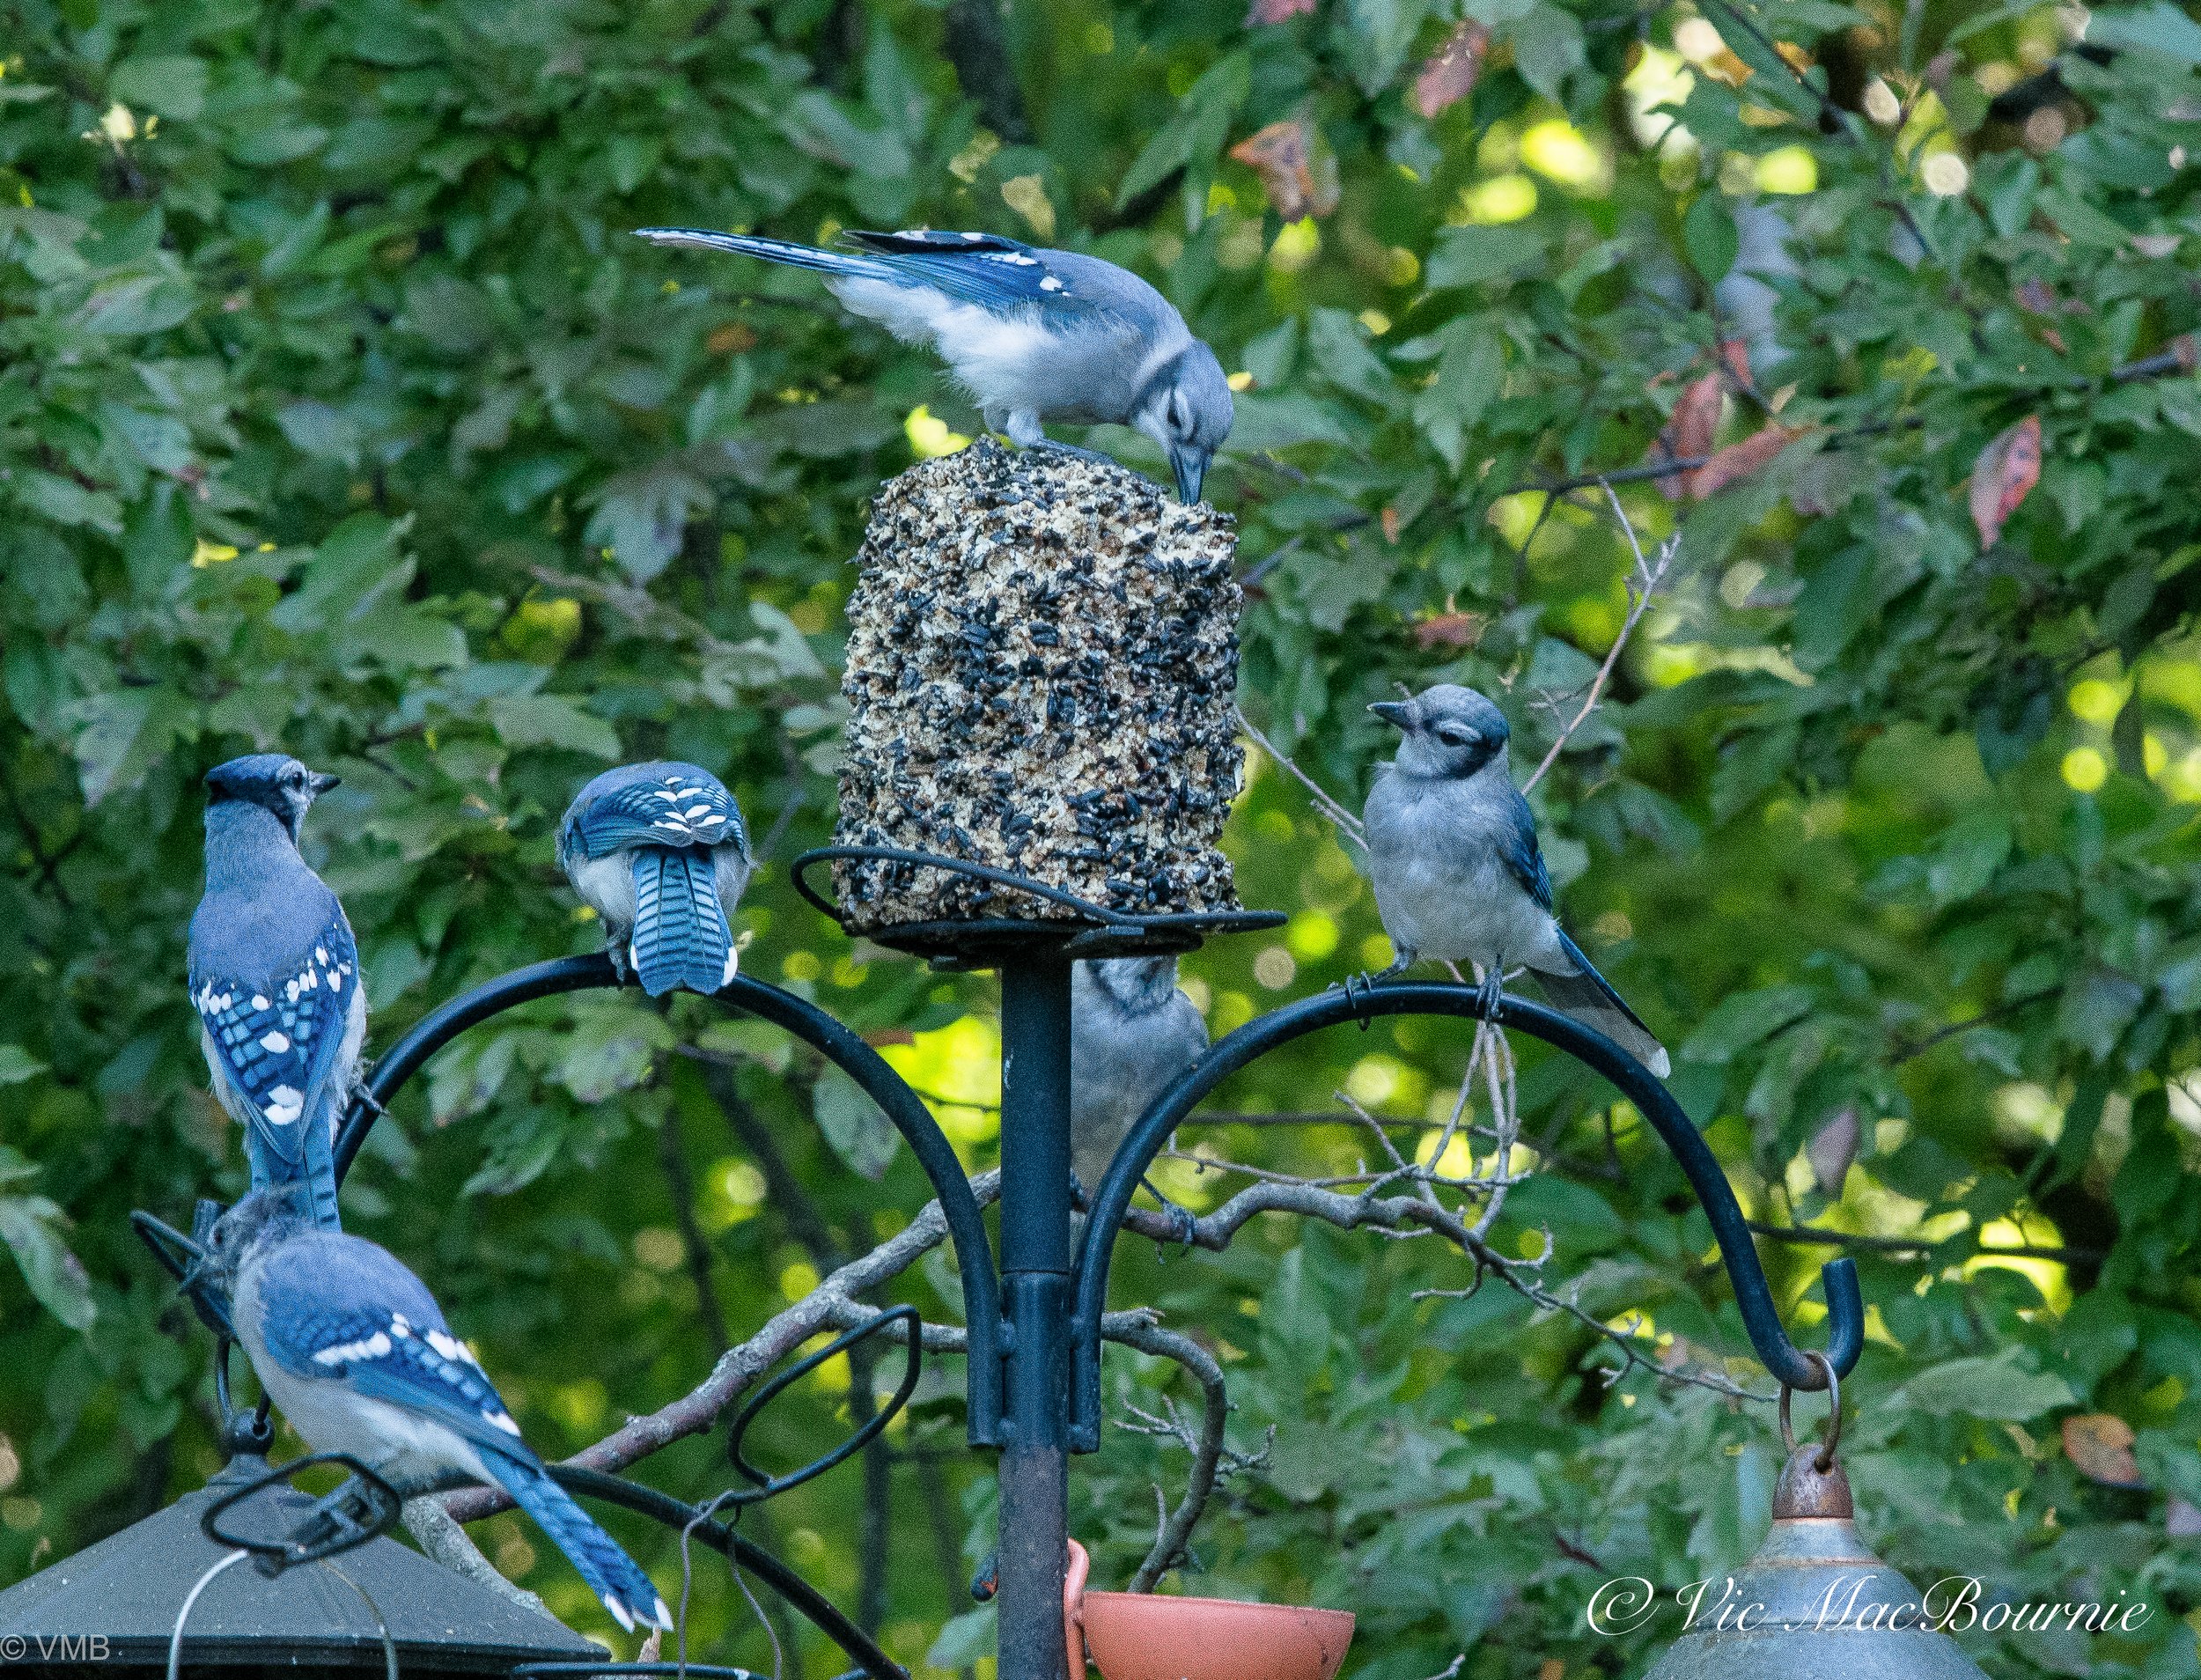
Blue jays flock to a compressed seed feeder at the backyard bird feeding station.
This is a very simple system that works for me and the birds. The one problem I have is that the seed cyclinder is directly open to the elements. This allows the Jays and other birds to have easy access to the sides as well as the top of the seed cyclinders, but it also allows water to eventually get into the seed and begin to break down the “glue” (it’s actually a gelatin that works like glue), leading to the enventual early demise of the seed cyclinder.

Peanuts as well as compressed seed cyclinders are among the favourite food sources of our blue jays.
There are seed cylinder feeders that include toppers to help protect the cyclinders from being totally exposed to the elements. I think they are certainly worth considering, especially if you live in a particularly rainy or snowy environment.
The spike is simply the delivery system for the seed cyclinders, so it’s paricularly important to provide the Blue Jays with their favourite foods in the cyclinders. Look for compressed seed cylinders high in their favourite foods – black oil sunflower seeds, regular sunflower seeds and unshelled peanuts.

A peanut wreath feeder and a compressed seed cylinder feeder is the idea combination to attract blue jays.
The round peanut feeder above and pictured below is a real favourite of Blue Jays giving them plenty of space to land. Their strong beaks enable them to easily pull the peanuts out from between the springy wire circles holding them.
One of the main reasons the cylinders are so attractive to blue jays and less attractive to some other backyard birds, is the fact that blue jays have very strong beaks that allow them to pound at the cyclinders to get the seeds they want. Our cyclinders are most visited by blue jays and woodpeckers. Other, smaller birds, are left to pick up the pieces of seed that fall off when the jays and woodpeckers attack the cylinders.
If you are interested in more information on attracting Blue Jays to your backyard, check out my post on Blue Jays and West Nile.
The spiked bird feeder that holds the compressed seed cyclinders doesn’t have to go on the top of a pole. Attachments are available to use a spike and seed cyclinder attachment as an accessory on other parts of either the WBU Advanced Pole System or other bird feeding station. Some spike-style accessories can be hung on feeders after inserting the seed cylinder, so there is no excuse for not adding one to your bird feeding station.
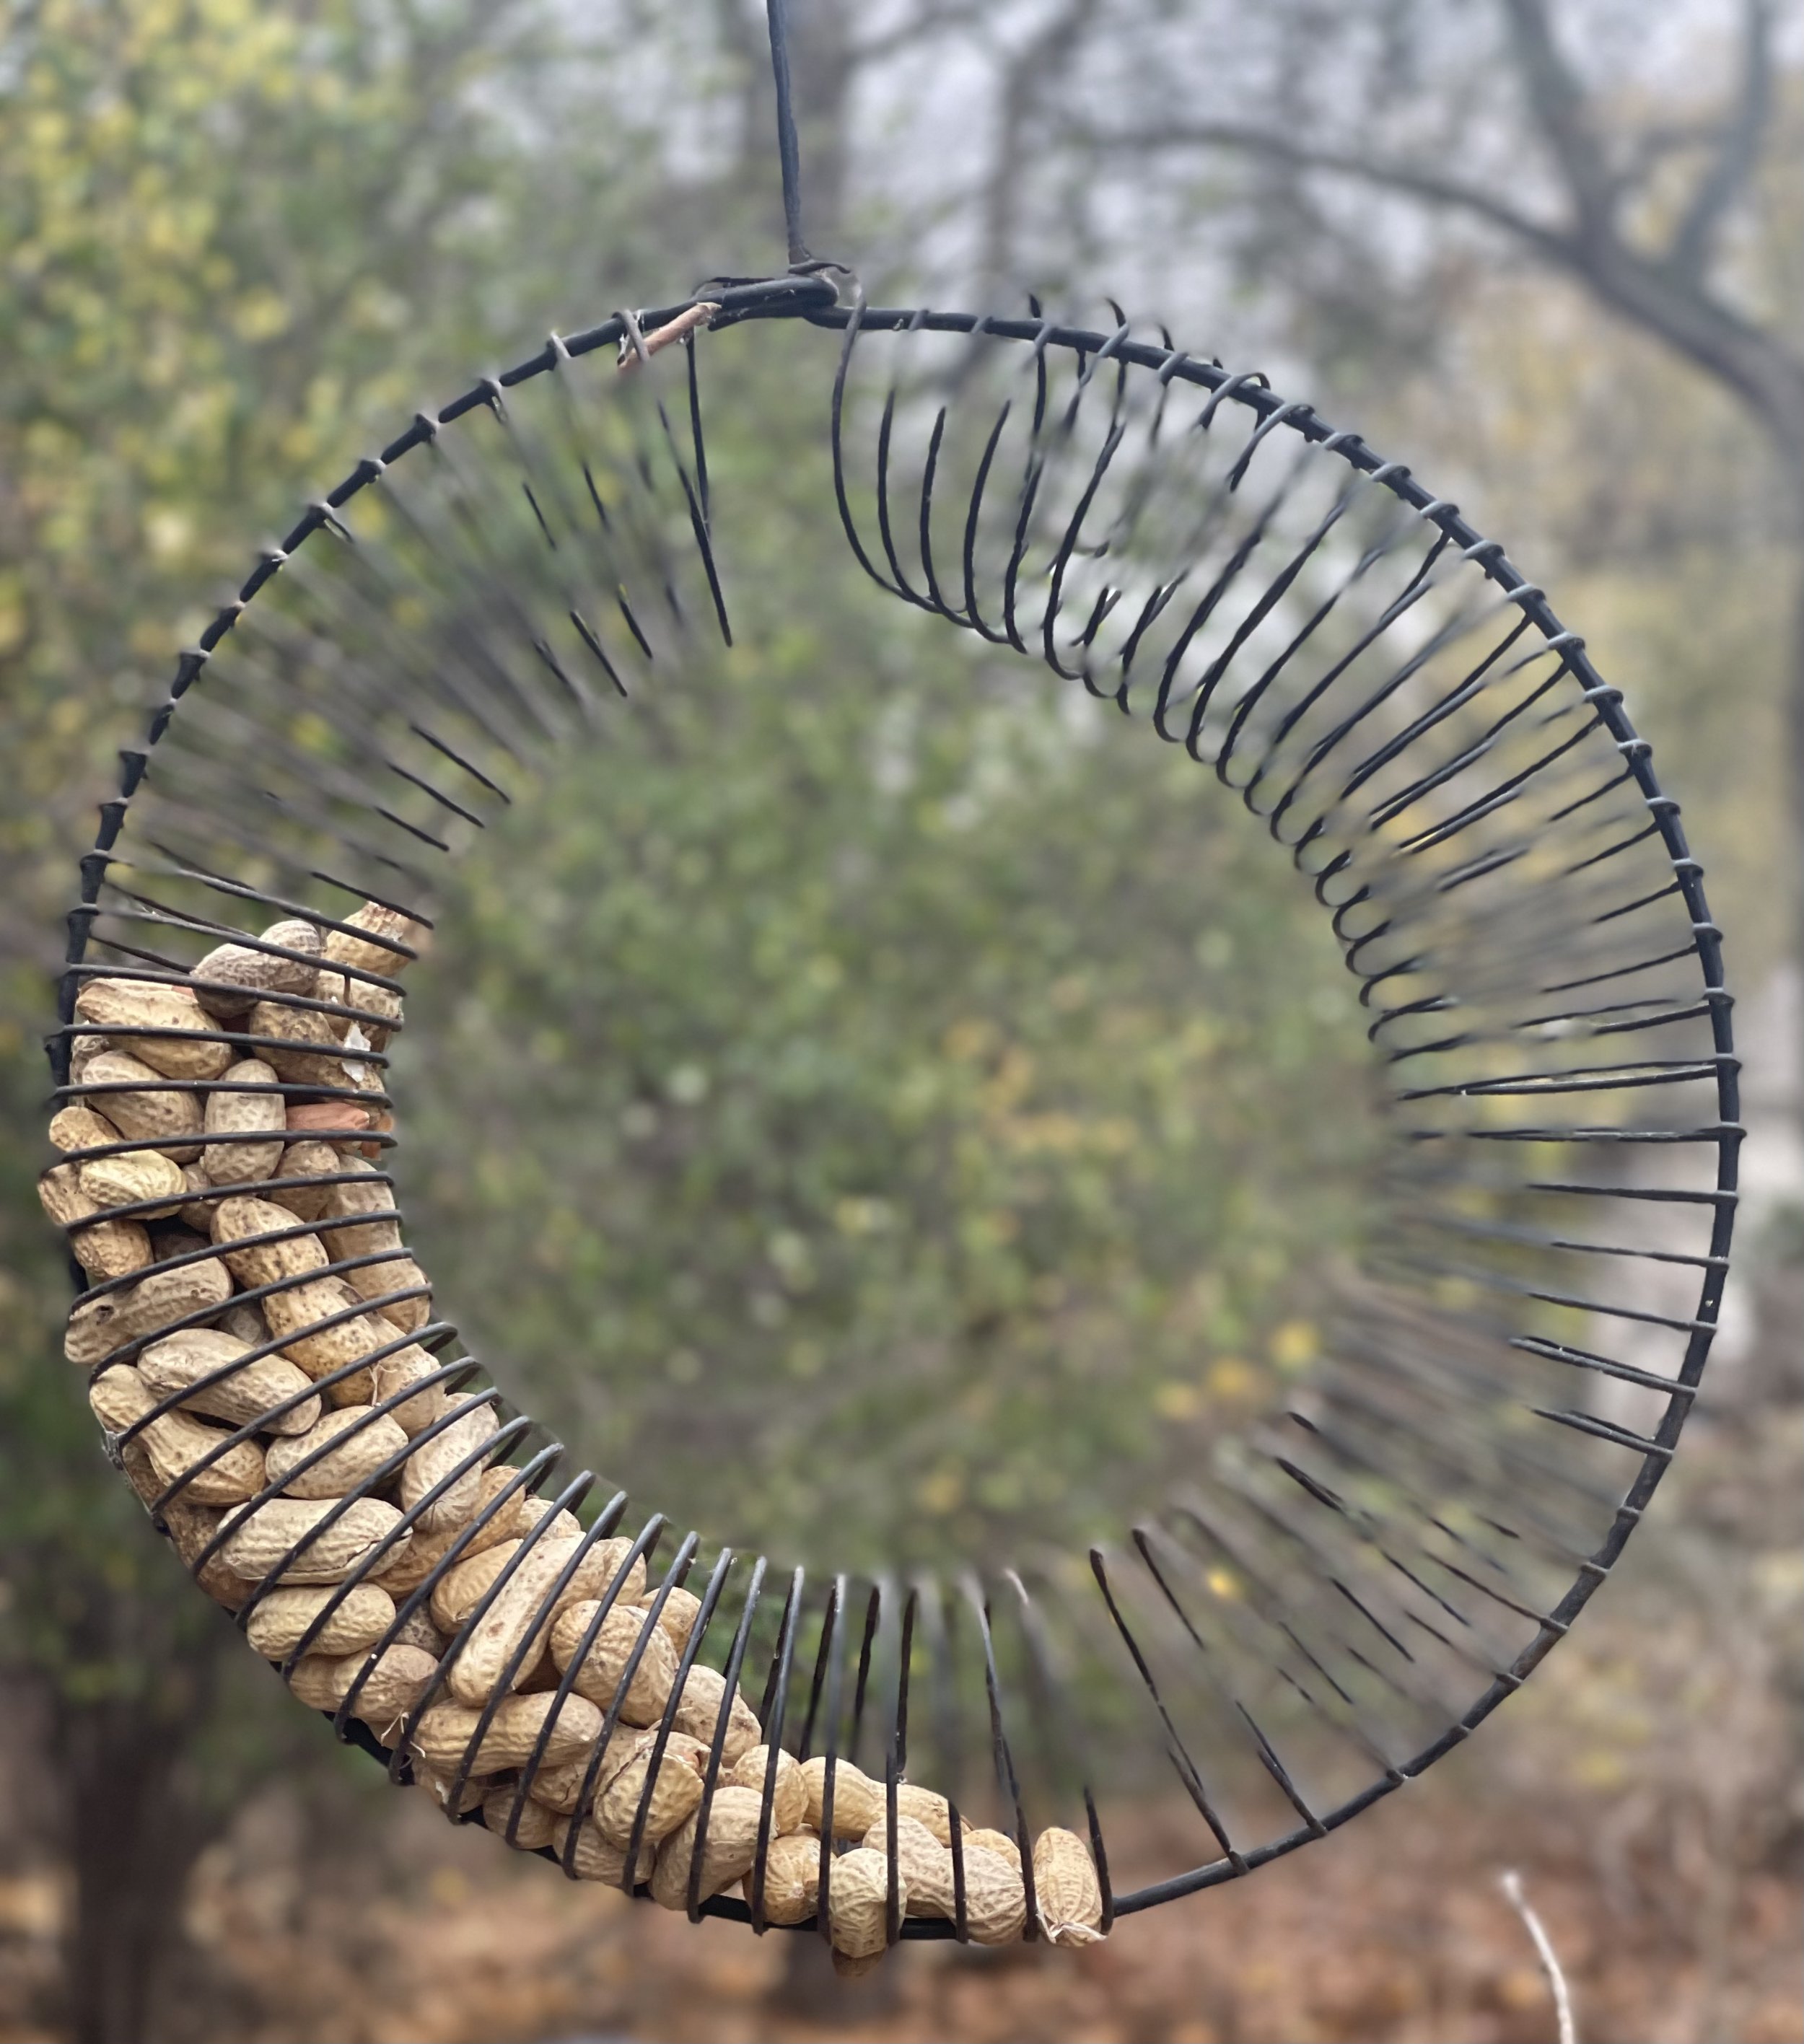
Blue jays love a wreath-style feeder that holds one of their favourite foods – unshelled peanuts.
Blue jays flock to the Wreath feeder for peanuts
While the seed cyclinder feeders are excellent for attracting blue jays to your yard, I think the wreath feeder filled with shelled peanuts is the best feeder to attract the birds.
The main reason for the success of the wreath feeder is what we will them with – shelled peanuts. I think shelled peanuts are blue jays’ favourite food. And, because the shells are difficult for smaller birds to penetrate, you can count on your blue jays to get most if not all of the peanuts. The wreath feeder can accommodate a number of blue jays at one time and provides them a good perch to remove the whole peanuts from the cyclinder.
Woodpeckers also enjoy whole peanuts in the wreath, but they primarily peck away at the peanuts rather than remove them to eat elsewhere like blue jays do.
The only problem I have with a wreath-style feeder is loading it with peanutes. While it’s not particularly difficult, I find loading them by hand can be a little bit tedious. I’m sure there are better ways to load peanuts into the feeder, but so far I have not discovered it.
The wreath feeders are a particularly effective way of delivering whole peanuts, but there are several other ways to deliver whole peanuts that can also work.
The Urban Nature Store in Canada actually groups their feeders according to what feeders are best for specific birds. Check out their list of best blue jay bird feeders just to get a feel for what feeders are best.
Check out your local bird store for other peanut feeders.

How to garden in the shade (Why shade gardening is important in 2022)
The Natural Shade Garden originally published in 1992 has inspired gardeners to embrace shade in this era of climate change.
What to plant in a shaded area of the garden
I don’t know why shade gardening developed a bad reputation in some circles, but times are changing and gardeners are beginning to recognize the benefits of gardening in the shade.
For woodland gardeners, learning to get the most out of the little sun our gardens receive has always been a key factor in the success of our shade gardens. And, learning how to deal with varying levels of shade in the garden – full shade, part shade, open shade – is a constant learning process.
Is shade in the garden a good thing?
Some gardeners may still ask: Is shade good for a garden?
The answer is a resounding yes, especially as many of our gardens are hit by the extremes of climate change. Shady areas not only allow us to grow plants we couldn’t in a sunny area, shade helps to cool our gardens the wildlife that live in it and the soil that our plants depend on for nutrients.
If the soil is too hot, it will dry out too quickly and lose its effectiveness as a growing median.
The Natural Shade Garden, written by garden writer extraordinaire Ken Druse in 1992, helped to introduce many gardeners to the benefits of gardening in the shade.
Since then, the combination of climate change – with its extreme heat and droughts – forced gardeners to rethink their approach, and the growing awareness of our role in rewilding urban landscapes, has slowly convinced many more gardeners to embrace the benefits of shade and woodland gardening.
A fern garden takes centre stage under the canopy of shade created by large and mid-size trees
In fact, Druse’s book, The New Shade Garden updates The Natural Shade Garden with information on dealing with the problems associated with climate change as well as providing a new generation of gardeners less concerned about visual beauty in the garden and more concerned about the garden’s ability to reduce carbon dioxide in the environment. Take a moment to check out my earlier review of The New Shade Garden.
In his book The Natural Shade Garden, Druse challenges readers to imagine an idyllic garden where shade plays a major role in the landscape.
Why we love a shade garden
The author opens by asking readers to imagine a walk in the woods where they might come across a sunny meadow, and a stream cutting through waist-high flowers.
“Follow its path and you’ll come to the edge of the woodland. This half-shade is the habitat of the evergreen and deciduous shrubs: mountain laurel, blueberry bushes and deciduous rhododendrons, for example.”
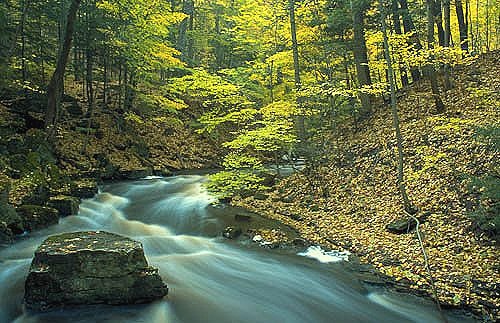
A stream running through a woodland provides inspiration for the creation of the New Shade Garden.
Even if we have never taken this “walk in the woods” there is a certain familiarity with his description of the experience. Maybe it reminds us of a favourite garden or, maybe, it’s the garden of our dreams and one we long to experience.
The Natural Shade Garden is a roadmap to help us get there.
In the book’s opening, the author goes on to explain that the “small trees that line the forest – dogwoods, redbud, and shadblow (serviceberry) – mingle with the spreading shrubs. Pass into the darkness and you’ll find more woody plants of the under story blooming in turn: witch hazel, Fothergilla, and oakleaf hydrangeas…. Spring in the deciduous forest explodes with masses of flowers that bloom and fade before the emerging leaves veil the light from above.”
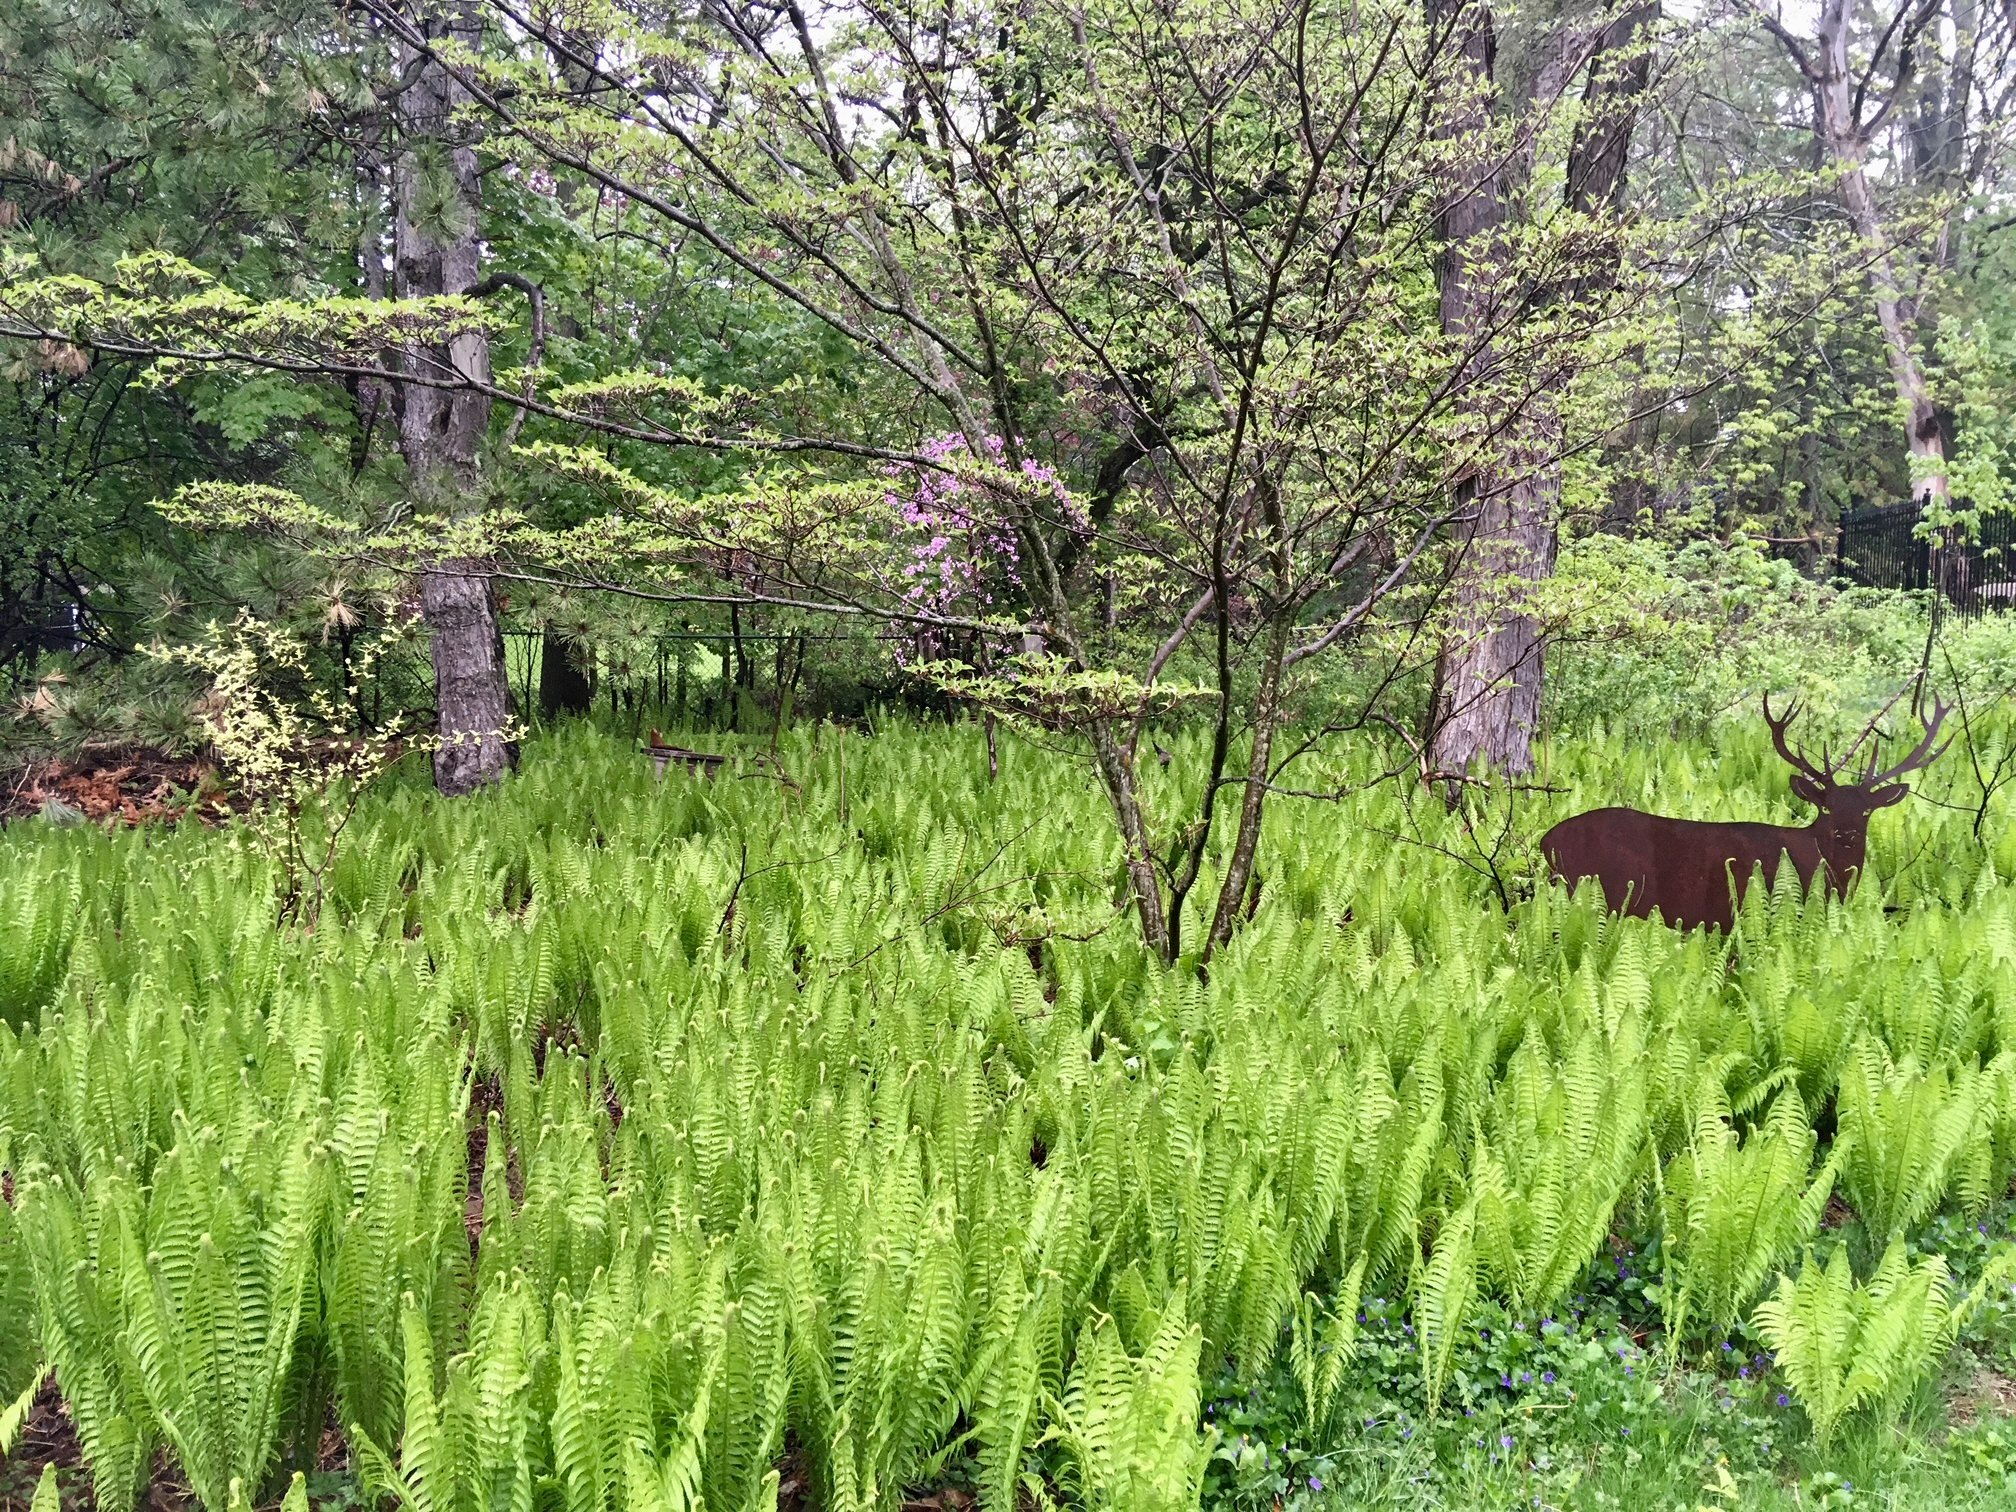
A mature Cornus Kousa dogwood (centre), a smaller variegated Cornus mas (left) and a Redbud (pink flowers in back) grow up through the fern garden in the woodland shade garden.
Shade gardens focus on texture rather than raw colour
To some – those who worship colourful garden beds – Druse’s idyllic garden might sound rather dull.
But to the more experienced gardener – those who recognize the importance of a tranquil garden that celebrates leaf texture, shape and architectural interest over the use of gaudy colour – the shade garden represents a new awakening, free of daily chores including the constant upkeep associated with deadheading, fertilizing and heavy watering.
It’s where ferns can take centre stage in the heat of summer. Where hostas are at home growing through the native ground cover of wild ginger and where birds build their homes in the many tree and shrub layers that are the source of much of the shade in the garden.
Throughout the book, Druse takes us on a journey through shade gardens pointing out the ingredients to success.
Let’s explore some of the plants and shrubs that Druse suggests gardeners use to create the successful shade garden.
What plants grows best in the shade
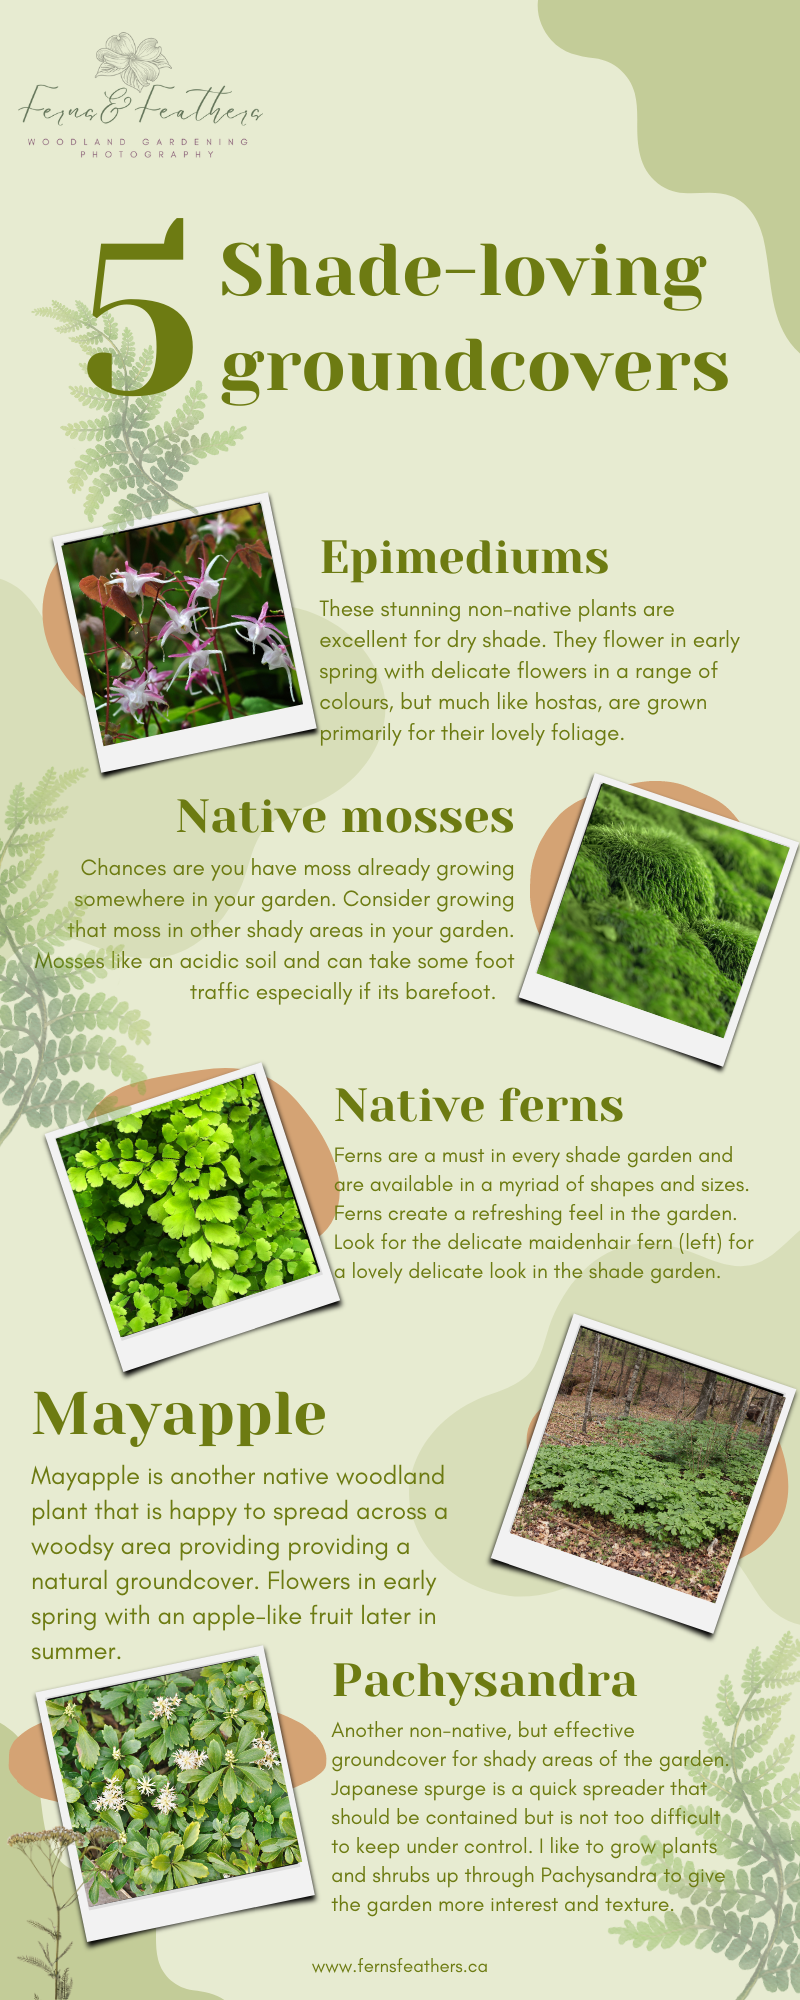
Info graphic shows 5 great shade plants for the woodland garden.
Best ground covers for a natural shade garden
Any plant that spreads to cloak the soil can be used as a ground cover. That includes low-growing shrubs, herbaceous perennials, vines and grasses. Druse explains that even “a good-sized hosta, can be used as a ground cover…. A mass planting of evergreen azaleas might be considered a ground cover.”
Druse doesn’t leave out the “most famous ground cover of them all: grass lawn.”
“No other living plant can stand so much foot traffic. But there are problems with lawn (My post on eliminating lawn). Besides the fact that it has to be mowed often, fertilized endlessly, watered, weeded, and mowed again, it doesn’t like shade very much.” Druse explains that lawns are a “gross-feeder” that “perishes not only from lack of light, but also from insufficient nutrition.”
So what are the alternatives?

Natural moss and epimediums form the ground cover in the Japanese-inspired shade garden.
Moss: If you are blessed with moss already, enjoy it, explains Druse. “I’ve met one gardener,” Druse writes, “who gave up trying to keep a lawn in the shade and let his soil go to moss. He was very surprised to find that it kept up quite well, even under teenagers and touch football.”
Today, moss as a lawn substitute is not rare. In Japan and more humid areas where moss grows naturally, it has become a more common ground cover.
Moss is best used for smaller areas where it can be kept clear of garden debris and kept moist year round.
Moss may not need mowing, but it does require some upkeep to ensure it thrives and looks its best.
Back in 1992, when The Natural Shade Garden was written, moss was not as available as it is today. Now, sheets of moss can even be purchased to create large areas of beautiful, soft mosses. If you have mosses growing in your garden, take note of the conditions and experiment with it in other areas of your garden with similar growing conditions.

Wild columbine, maidenhair ferns, epimediums and pachysandra form the ground cover in this part of the shade garden in our front yard.
Other grass alternatives include:
(Be sure to check out my post on best ground covers.)
• Irish and Scotch mosses: are actually sun-loving perennials that look and act much like traditional moss. (Click here for my post on moss-like ground covers)
• Ajuga, vinca, moss pink and moneywort all can take some light foot traffic.
Dry shade tolerant ground covers include:
• Japanese pachysandra
• Vinca
• Epimediums (Be sure to check out my post on Epimediums)
• Galium
American barrenwort (Vancouveria hexandra) (hardy to zone 5) “is a light and airy alternative to so many of the leatherleaf subshrubs,” explains Druse.

A sumac pruned beautifully to give the look of a cut-leaf Japanese Maple.
Berry-producing ground covers include:
• Bunchberry is the smallest dogwood that sports the same white dogwood flower bracts that its larger siblings the flowering dogwoods have. Bright red flowers follow in fall. (Be sure to check out my separate post on Bunchberry here.)
• Contoneasters: Both evergreen and deciduous varieties.
• Cowberries: A native cranberry
• Creeping snowberry also called wintergreen
• Oregon Grape
• Mock strawberry
These are just a sampling of the ground covers that Druse lists in great detail.
Some of the best shrubs and deciduous perennials for shade
The Natural Shade Garden turns the spotlight on the middle layer of the woodland garden stating: “A garden makes its strongest impression in the middle layer – between the gound covers and the trees. It’s where the eye naturally comes to rest. So, it’s an area that requires special consideration. This is home ground to the herbaceous perennials and the flowering shrubs.”
It’s these plants that will form the framework of the landscape, Druse explains.
“Choosing plants from the woodlands and the edges of the forest, and carefully selecting and preparing their new home, will be your mission.”
Favourite shrubs and perennials for the Natural Shade Garden
Early bloomers to add colour:
• Baneberries
• Cimicifugas
• Goatsbeard
• Astilbes
• Meadowsweet Filipendula purpurea
• Meadow rue
• Columbines
• Corydalis
• Dutchman’s-breeches
• Hellebores
• Solomons seal
• Foxgloves
•Cardinal flowers
• Sedums
• Hostas are essential for the natural shade garden.
Shrubby plants for the New Shade Garden
• Azaleas
• Rhododendron
• Oak Leaf Hyrangea
• Rough leaved Hydrangea
• Annabelle Tree Hydrangea
• Star magnolia
• Viburnums (Check out my story on 7 viburnums for the woodland garden)
• Red-twig dogwood
• Rose of Sharon
• Winter hazel
• Mountain laurel

Iphone camera captures Woodland garden in stunning fall colours
The iphone 12 pro max features a 12MP camera and three lenses that give the photographer an opportunity to experiment with a range of techniques. The results are impressive for a smartphone.
Take advantage of ideal conditions to capture your front and back gardens
Can modern cameras on the iphone or other smart phones capture the subtle details of fall colours in the garden?
If a recent morning outing in the garden with nothing but my iphone is any indication of the performance of the three camera lenses on the apple iphone, I think the answer is a resounding yes. The images captured on the apple iphone 12 pro max turned out beautifully on an early morning with a lovely fog hanging in the air and wet leaves either still clinging to the trees or turning the ground into a magnificent carpet of colour.
The colours produced by the apple iphone are subtle and delicate where they cut through the fog and vibrant when the camera was turned on the crimson red of the fallen Japanese Maple leaves. Little to no post processing was needed to get these results.
Quite frankly, I was astonished just how good the images came out with little to no effort on my part. Thanks to the shake resistance capabilities built into the iphone camera, I was able to take all of these images handheld without the need of a tripod. If there is any criticism, it would be that the images are too sharp and take on a digital look, especially if the images are cropped.

This image of the woodland garden in fall was taken with the iphone 12 pro max.
Would a real camera (either a DSLR or high-end compact point and shoot) have captured better images? Maybe – well, probably yes – but I had my new iphone handy and it comes with three lenses – an extreme wide angle, a standard, and a portrait lens – so I was confident I could capture everything I needed with the iphone. Besides, I decided I needed to put the smartphone camera to the test to know that I could trust it if I ever really needed it to capture an important image. From what I had already seen, I was confident it could get the job done.
And boy, was I right.

This Japanese Maple was photographed with the iphone 12 pro max.
Maybe it was the outstanding conditions with the early morning fog and wet leaves that helped bring out the beauty in the scenes, but the ease and convenience of using the lenses on the iphone meant I could move quickly to capture the scenes before the light changed.
For more images taken on the apple iphone 12 pro max, go to my Gallery of Images and click on the image at the bottom.

These Cornus Kousa leaves taking on their fall cloakes show the impressive colour and details the iphone 12 pro max is capable of producing.
With a press of the icon on the phone I could easily go from extreme wide angle to normal. And, by tapping into the normal lens’s zoom range, it was simple to move in closer when necessary.

This Paperbark Maple is just beginning to show its fall colour in the woodland garden.
Five tips to get the most out of your iphone camera and lenses
Experiment. Don’t be afraid to use all three lenses to get different views of the same or similiar scenes. You can always edit them later and pick your favourites to put up on social media.
Move in close to flowers, insects or colourful leaves to tell a more complete story about your garden at that moment. The iphone’s close focusing capabilities are excellent and the optical shake reduction system will help you get sharphand held images.
Try different angles. Holding the iphone up above your subject and shooting down on it, or getting low and shooting up will give you different perspective of similar scenes. Try to hold the camera straight (not pointing at odd angles) to keep the proper perspective in the images.
In portrait mode there are a number of different lighting effects that you could try to add more drama to your images whether they are an actual portrait or a garden scene.
The iphone is a very smart piece of technology that uses artificial intelligence to create the type of images it thinks will look best. Experiment with the tools, especially the touch screen focusing and exposure adjustments that are available. Focus specifically in an area you want the camera to focus on by touching the screen. A square will appear to tell you that is where the camera is focused. At that time you can also adjust the exposure by moving the small sun icon up for a lighter image and down to darken it.

The leaves of the Japanese Maple Bloodgood provide an elegant but vibrant groundcover in this Japanese-inspired garden.
iphone 12 pro max camera specifications
I would prefer not get into the fine details of the iphone’s specifications, since there are a number of technical sites that focus on such details. However, some basic information might help readers better understand the camera’s capabilities.
The iphone pro max has three lenses on the back of phone. While looking at the phone, the user sees three settings – 0.5 (representative of a 13mm f/2.4 lens in 35mm lingo), 1X (26mm f/1.6 in 35mm equivalency) and 2.5X (65mm f/2.2 equivalent in 35mm). The iPhone Pro Max features a 5x optical zoom range and a much larger digital zoom up to 12x. Using the digital zoom at its extreme will likely leave you with images that will be unsatisfactory in most instances.
For more on the apple iphone line including comparisons between the various models’ camera features, go to the apple iphone site.

What’s left of the fern garden with a Cornus Kousa still in leaf. The texture of the spent ferns in the woodland garden actually creates a lovely scene in itself.
Although at the time of writing this post, the iphone 12 pro max is by no means the latest iteration of Apple’s iphone line – that would be the iphone 14 Pro. That iphone comes with the latest Pro camera system sporting a 48MP camera sensor with ultra wide and telephoto lenses, something they call a Photonic Engine for incredible detail and True Depth colour. The iphone14 is a step up from the dual-camera 12MP camera system in the iphone 13, but not that much of a leap from the iphone 12 pro max that I am now using.

The back of the iphoto 12 pro max includes from the left the 2.5X telephoto lens, the flash (white lens on right), 0.5X lens (directly below flash), 1X lens (lower left) and LIDAR bottom right. The LIDAR is used for Face ID and depth mapping.
Both the iphone 14 and the 12 pro max offer the three camera lens system but the 14 boasts a massive 48MP sensor while the 12 pro max comes in with a 12MP sensor. The 14 has a 6X optical zoom range, while the older iphone 12 model has a 5X optical zoom range. Both have 6.7-inch Super Retina XDR display screens.

So, unless you are planning to create poster-size images of your photographs, or need to seriously crop your images to get in closer to your subjects, there really is not a huge difference between the latest iphone and my trusty iphone 12 pro max. The larger sensor would also improve noise in the image, especially in the evening when the light is low.
In garden photography, there would be little need to want to upgrade to the newer iphone and camera unless you are using it to photograph birds or small mammals. Images taken from afar with the iphone 14 could take a much more severe crop to get in close to the subject (a bird for instance) than the smaller sensor on the iphone 12 would allow. In that case, however, it’s probably wise to use a dedicated camera and telephoto lens.
A slight mist or fog is the ideal time for garden photography
There is no question that the soft fog and misty conditions created the ideal atmosphere to show off the capabilities of the iphone 12 pro max. In bright sunny conditions, the images would not have anywhere near the impact that the right atmospheric conditions can bring to a scene.
Using these opportunities to get out in the garden can make a huge difference to your photographic success. The annoying backgrounds are either softened or disappear completely in the fog. The colours are muted and the tree trunks take on the look of dark skeletons against the white background of the sky. The lighting is even and even the darkest areas of the garden benefit from the soft light in the scenes.
When the fog rolls in, it can be a magical time.
Even if you are busy or need to get out the door to get to work, try to take a moment to grab a camera, or your cell phone, and capture your garden in its best light. You won’t get many of these special opportunities – especially in fall when the colours are at their peak – so don’t miss the opportunity.
For more on the apple iphone line including comparisons between the various models’ camera features, go to the apple iphone site.

Paperbark Maple: Understory tree with year-round interest
The paperbark maple (acer griseum) is a mid-size understory that fits both small gardens as well as larger woodland-style gardens.
Paperbark Maple ideal for late fall colour in small urban yards
Paperbark Maples are as useful in the winter landscape with their exquisite, peeling cinnamon-coloured bark, as they are in summer when they perform as a beautiful, mid-size understory tree.
But don’t underestimate the Paperbark Maple’s outstanding performance in late fall when they light up the landscape long after most of the other deciduous trees are left naked.
Where to plant the Paperbark Maple for best results
Be sure to plant Paperbark Maple (acer griseum) in an area of your garden where you can appreciate it in every season.

Paperbark Maples are the ideal tree for a small garden or as an understory tree in a larger woodland garden.
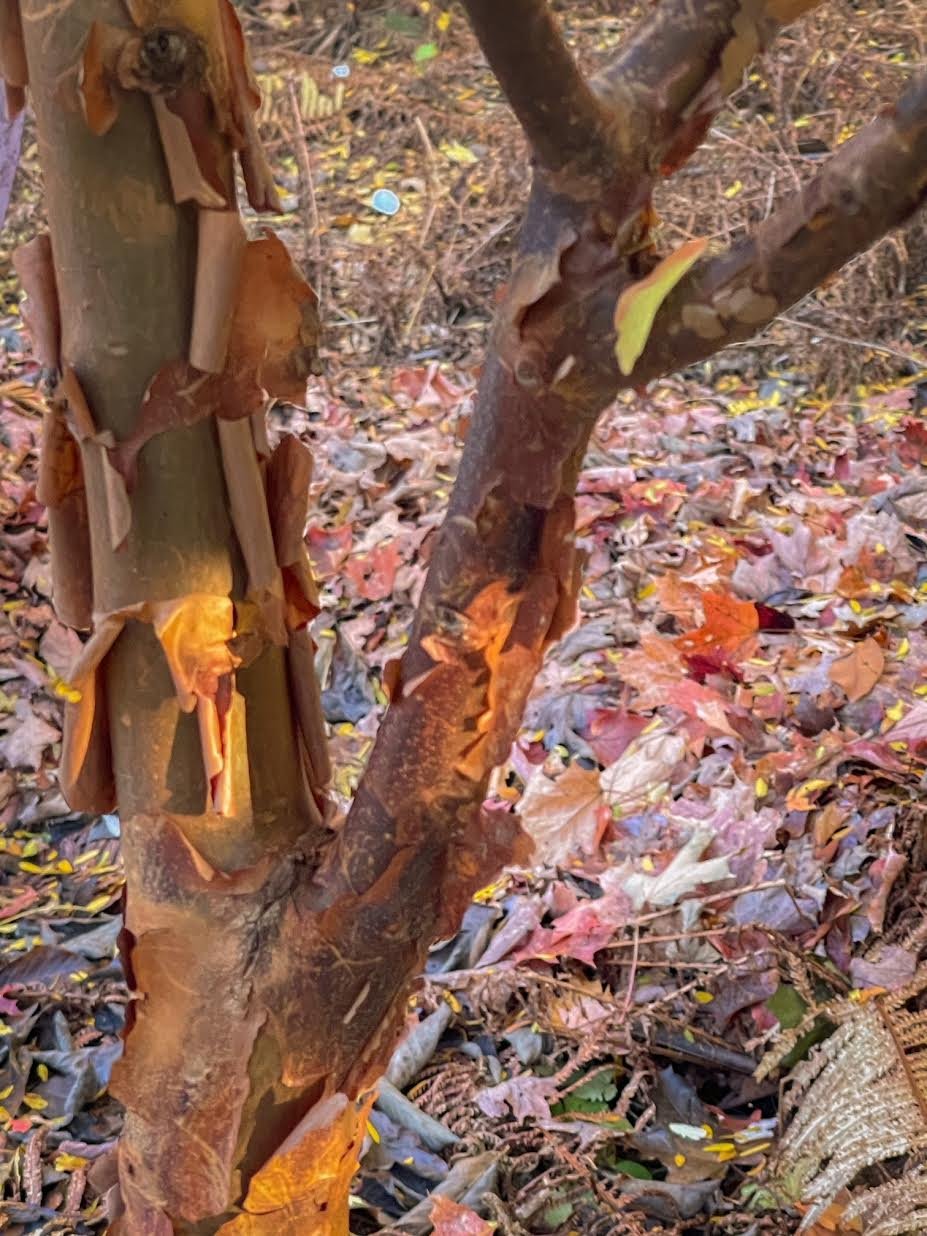
The paper thin bark of the paperbark maple does not begin until the tree is about seven years old.
Our Paperbark Maple is just steps away from our patio where we spend most of our time. It takes centre stage in late fall when its leaves just begin turning colour long after all the other deciduous trees have dropped their colourful leaves.

This Paperbark Maple is just beginning to take on its fall colours.
The Paperbark Maple is a lovely oval to rounded small tree with an open habit and upright branching. In fall, the dainty, three-lobed soft-green maple leaves turn a rich, rusty red.
How long does it take to reach maturity?
Acer griseum are a slow growing tree that will eventually reach about 25 ft. tall and between 15-20 ft. wide.
But unless you are buying a mature specimen, don’t expect the tree to reach those heights any time soon. Paperbark maples grow 6 to 12 inches a year depending on growing conditions.

The leaves of the paperbark maple beginning to take on their fall colour.
Exfoliating papery bark is the show stopper year round
While the tree’s fall colour is often overlooked, the tree’s exfoliating papery sheets of bark that peel to reveal cinnamon-brown new bark is rarely overlooked in the landscape. It’s the bark, not unlike that of the river or white birch trees that makes acer griseum a special tree in a landscape.
How long before the bark on a paperbark maple begins to peel off?
If you have planted a young tree, don’t be surprised if you do not see any exfoliating bark for a few years. This can take up to seven years and is more evident on mature trees.
Do paperbark maples have pest problems?
Remarkably free of serious pest problems, the trees tolerate a wide range of conditions from sun to shade and wind.
They can also be attractive as a place to nest for birds, but are not known to be particularly effective in attracting either birds or other wildlife. The trees put out small yellow flowers in spring which can attract pollinators followed by two winged seeds about 1 cm long with a 3 cm wing, which can be a food source for backyard wildlife.
How to grow and use Paperbark Maples in the landscape
They like to grow in soil that is kept consistently moist, but not soggy, and are best grown in zones 5-8 in filtered sun, full sun or partial shade.
They are effective as an understory tree in a woodland or shade garden but because they like some sun, paperbark maples can be used as a specimen tree in a more open garden.
The compound leaves have a 2-4 cm petiole with three 3-10 cm long dark green leaflets.
What companion plants look good with Paperbark maples?
Good companion plants are various sedges, hostas and, of course a range of native spring wildflowers from trilliums, bloodroot and anemones, to bluebells. Keep the plants around the base of the tree on the shorter side so you can appreciate the full effect of the peeling bark.
These deciduous trees are at home in foundation beds in both front or back yards as an accent plant to greet visitors with its impressive bark. They can also work well in more wild, woodland settings, and in wetland conditions as transitions between the more formal garden and open spaces.

Paperbark Maple (acer griseum) entering into the final stages of fall colour. The hints of green still clinging to the leaves gives it a delicate presence in the autumn landscape.
These trees are not native to North America. The Acer griseum originates from central China and was introduced to the U.K. in 1901. It came to North America a few years later. Cultivars include the columnar Copper Rocket.
What are good alternatives for the paperbark maple?
While the paperbark maple is an impressive, four-season tree that is at home in both the shade garden as an understory tree or as a specimen in a more sunny location, it may not be the best choice if you are looking for more native and wildlife-friendly trees in your landscape.
Other options to consider over the paperbark maples are, of course our native dogwoods ranging from the pagoda dogwood (cornus alternifolia), flowering dogwood (cornus florida), Redbud (cercis canadensis), Paw Paw (Asimina triloba) and the serviceberry (Amelanchier canadensis).
Our native serviceberry is an excellent choice maintaining similar growth habits, beautiful white flowers in spring followed by red berries in fall that are a favourite food source for birds and other wildlife. It’s fall colours (oranges and reds) are also similar to the paperbark maple.
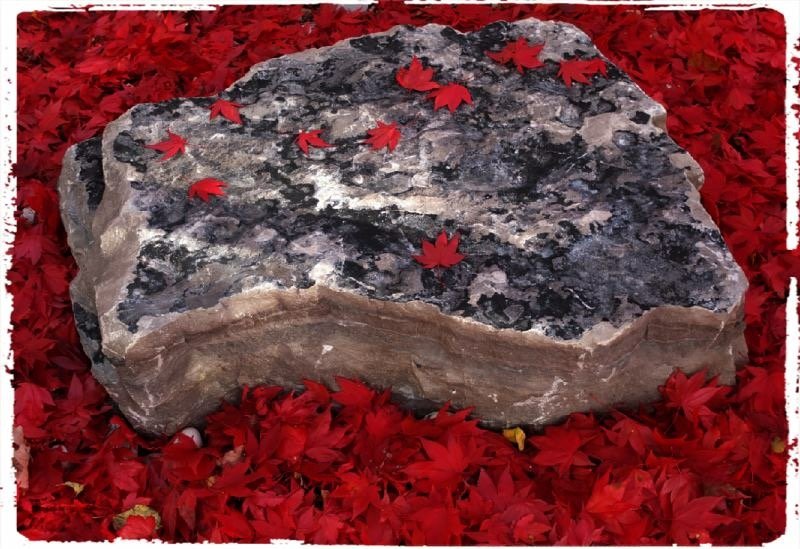
How to use Japanese Maples in the landscape
Japanese Maples are not native to North America but they are becoming more and more common understory trees, used primarily for their stunning beauty in the landscape.
The Japanese Maple is a popular small- to mid-size tree that fits into any landscape, but is especially at home in today’s more compact urban properties.
The enormous selection of varieties available – from the weeping, cutleaf trees that can be tucked into the smallest of spots and are at home in containers, to the full-size acers that add architectural interest and hits of colour to the understory of larger woodland gardens – makes Japanese Maples a staple in today’s landscapes.
There is an incredible variety of Japanese Maples (genus Acer), some that have red/purple leaves, others that feature green leaves and still others that boast a more golden foliage. Some varieties even have a variegated leaf. Many Japanese Maples have a palmatum leaf structure, but some have more lacy, cutleaf foliage that range from mildly serrated to more extreme forms. Some Japanese Maples grow tall (up to 20-25 feet), others are more upright, ideal for narrow areas.
Even the bark of the Japanese Maples vary widely in both colour and textures.
There is definitely a Japanese Maple to fit any and all landscapes.
Japanese maples are generally pest free. Although deer may check them out, they generally leave them alone. I have never experienced a problem with deer in our garden. Male deer, however, have been known to use the smaller trees either to remove antler velvet, or as a sparring partner during mating season. That’s never a good thing for maintaining the shape of your maples.
For more on Japanese Maples and Japanese-inspired gardens, be sure to check out my post on Five tips to create a Japanese-inspired Gardens. For more on the majesty of a mature Japanese Maple and how to care for them in the garden. The weeping Japanese Maple: ideal for yards big and small.

A few examples of the Japanese maples in their fall colours.
Japanese Maples are relatively slow-growing trees that can easily take 20-25 years to mature into beautiful specimens. The upright varieties can put on maybe a foot of growth a year once they are established, while the smaller weeping varieties might only put on six inches or less.
With this in mind, if you want a large specimen, you might have to invest in a larger (more expensive) specimen from a good nursery.
Don’t be surprised if it takes three or even four years after planting a large specimen to begin showing signs of real growth again. For the first few years after planting, the tree’s roots will be working to settle into their new environment and will put on very little top growth.
If you want to see what your Japanese Maple can become, just take a look at the spectacular Japanese Maple that makes its home in the Portland Japanese garden. (Link to outstanding photos of the tree) Photographers are actually known to make annual pilgrimages to the tree each year in fall just to try and capture its magnificence.

A stunning red-leaved Bloodgood Japanese maple graces this front garden surrounded by other maples.
While they are not native to North America, Japanese Maple trees can be an important addition to a woodland garden adding year-round interest to the understory, while providing nesting spots and other benefits for birds and other wildlife.
These stunning trees that grow in zones 5-8, are native to Japan where they have developed many different cultivars, each with their own growing styles. Some golden varieties of Japanese Maples do not do well in the colder zones. If you are looking to add one of these stunning trees, ensure it has extra protection from extreme cold and winds during the winter months.
Used effectively as an understory tree, the larger Japanese Maples can work in landscape plans to form the perfect transition from the height of say, a two-storey home, to the garden’s ground level.
Japanese Maples can be used in containers in the warmer zones (7-8-9) where the containers do not freeze completely.
Do not put prized Japanese Maples in containers in zones 5 and 6a without providing significant winter protection. (I made that mistake and lost two trees during a particularly cold winter.) Consider moving them into a greenhouse if you want to grow Japanese Maples in a container in these colder zones.
The smaller threadleaf weeping varieties of Japanese Maples work beautifully as specimen trees in rock gardens or as part of a water feature reflecting the flowing nature of a waterfalls.
Most of us are familiar with the classic “Bloodgood” variety. These are the larger, hardy red-leaved Japanese Maples that are quite common in neighbourhoods where they have been growing for decades.

A cutleaf weeping Japanese Maple is backed by grasses and helps to ground a large boulder that is part of a Japanese-style garden.
How to use Japanese Maples effectively in the landscape
Used effectively as an understory tree, the larger Japanese Maples can work in landscape plans to form the perfect transition from the height of say, a two-storey home, to the garden’s ground level. The building forms a backdrop to show the delicate architecture of the tree. A stucco or light-coloured building, for example, can work beautifully to show off the structure of the tree in all seasons.
The smaller threadleaf weeping varieties of Japanese Maples work beautifully as specimen trees in rock gardens or as part of a water feature reflecting the flowing nature of a waterfalls.
Elsewhere, the mid-size trees are perfect to place a small bench beneath the long horizontal branches to create a focal point in the garden.
The red/purple leaf varieties act as a break from the sea of green in the summer landscape. Consider planting Japanese Forest grass below them for a natural look. All gold Japanese Forest grass works nicely with the Bloodgood maples. In our front garden, I have planted Japanese Forest grass under the large Bloodgood to form a loose groundcover. (You can actually see it in the image below.)

Japanese Forest Grass surrounds the Bloodgood maple in our front yard.
What native trees are good alternatives to Japanese Maple
The traditional Japanese Maple is an elegant, mid-size tree with a horizontal branching habit with interest in all seasons.
That sounds a lot like our native dogwoods, including both the Pagoda Dogwood (cornus alternifolia) and the Flowering Dogwood (cornus florida). Both are excellent native alternatives to the Japanese Maple. For more on Dogwoods, be sure to check out my post on Six of the Best Dogwoods.
Below, is an example of how a smaller sumach tree can be the perfect native alternative to a Japanese Maple. The fall colour on this sumach is absolutely stunning.

This exquisite well-shaped sumach tree is the perfect alternative to a Japanese Maple in the front garden.
Another good alternative is the Mountain maple (Acer glabrum) is a small understory tree that grows between 10-12 feet tall with pink flowers in spring. Its leaves turn bright red in fall not unlike Japanese Maples.
Redbuds, both western redbud (cercis occidentalis) and Eastern redbud (Cercis canadensis) are perfect alternatives to Japanese Maples. Redbuds grow to between 15-30 feet and sports pink flowers in early spring. Check out my post for more on our native redbuds.
Four tips to growing Japanese Maples
Japanese Maples are not difficult to grow but there are steps you can take to ensure their success. They are not an inexpensive tree to plant so anything we can do to give them a good start is a good idea.
When choosing a location, ensure your tree is planted in an area with good drainage. Japanese maples do not like wet feet and their roots could eventually develop root rot and succumb to being planted in a very wet area. The soil should be allowed to dry out between watering. If you must plant a tree in what you think is a wet area, amend the soil as much as possible with sand and grit to promote drainage. Dig a large hole and fill the bottom with stone to keep the roots above water. When you are planting the tree, make sure you plant it an inch or two higher than the soil level to ensure it does not sink into a water-logged bowl.
Do not plant Japanese Maples too deep whether you are planting in a wet area or not. Japanese Maples, like all trees, need oxygen to the roots of the plant. When planting the tree, consider planting it higher than the soil level in the pot it was growing in, especially if you are planting it into a clay-based soil. Create a berm around it so that as it settles into the ground it does not sink below its original soil line. Planting the tree too deep will force the tree to put out feeder roots where the trunk is below ground. Instead of putting on top growth, all its energy will go into putting out root growth where there should not be any. This will slow the tree’s growth and possibly kill it over time. It’s especially important with grafted Japanese Maples. The graft should never be planted below the soil level. It goes without saying that the trees benefit from mulching around the roots but not directly around the trunk of the trees. We’ve all seen the volcano of death style of mulching that almost always leads to a weakened tree and eventual death.
The final set of tips is actually aimed at homeowners trying too hard to create the perfect landscape. I am a strong believer that turf grass should never (or rarely) be grown right up to the trunk of the tree. There are several reasons for this, but among the most critical is the tendency for homeowners, or worse lawn care companies, to injure the tree’s trunk by either hitting it regularly with a lawnmower, or even worse, girdling the trunk with a weedeater. Once the bark around a tree’s trunk is damaged severely, the tree is unable to get food and water up to the main body of the tree leading to eventual weakening and death. This can happen over several years of abuse by the lawnmower or weedeater.

Over fertilization, especially later in the season (June and beyond), can threaten the health of the tree by forcing it to put out too much growth just before the tree goes into hibernation. Extreme cold will then kill off this new growth prior to spring. Japanese Maples are slow growing trees. Have patience. Fertilizing is probably not necessary, but if you do feel you want to add a slow release fertilizer, apply it in early May and keep the nitrogen level low (no more than 15)
Below are two images of a Japanese Maple known as Full Moon Maple (Acer shirasawanum 'Aureum') that never gets large. Fertilizing it will only injure the tree rather than encourage more growth. This link shows a more mature specimen.

This full moon maple (Acer shirasawanum 'Aureum') seen here in early fall is a golden-coloured tree that stays small even in maturity.

This full moon maple (Acer shirasawanum 'Aureum') is a golden-coloured tree that stays small even in maturity.
Japanese Maples in our woodland garden
In our garden, Japanese Maples take centre stage in both the front and back yards. In the front, three Japanese Maples combine with two full-size maples and a serviceberry to create the upper and lower canopies so important for a woodland style garden. The main Japanese Maple (acer Bloodgood) was the first tree planted in our landscape 25 years ago and welcomes visitors to the pathway leading to the front door.
It has come a long way from the tiny tree I originally planted to a graceful acer that has spread to form a lovely canopy over the walkway. I’ve had to raise the canopy of the tree several times over the years, but I still like to keep it low enough that I’m forced to bend a little to walk beneath its branches.

Japanese Maple leafs fill a bird bath creating a colourful highlight in the garden.
A second Acer palmatum, (Beni Schichihenge) was added later as a large specimen Japanese Maple that adds a touch of elegance to the landscape and is especially striking in its autumn clothing with its delicate pinkish-orange leaves.
A weeping cutleaf variety adds colour to the Japanese-inspired garden where it softens the hard-edge of the large boulders that grounds the one side of the garden.
Together, they form a triangle in the front landscape that helps to bring a cohesion to the front garden adding colour to the spring, summer and fall landscapes.
There is no denying that Japanese Maples steal the show in fall when their vibrant colours shine through for a number of weeks before they shed their colourful leaves, sometimes all at once following a frosty morning.
On those days, the leaves from our main Japanese Maple form an incredible carpet of crimson red leaves making for the most perfect groundcover for a number of days before they begin to dry out and curl up.
How to grow Japanese Maples
It’s important to remember that Japanese Maples are understory trees, meaning that they do not like to receive full sun for the greater part of the day. Doing so will likely cause the leaves to burn as the summer heat is turned up.
In colder zones such as zones 5-6, Japanese Maples may be able to take more direct sun, but in the hotter zones it is imperative to grow the trees in partial shade and keep them away from mid-day and afternoon sun.
Some direct light results in better colour for many of the varieties.
Japanese Maples can handle heat, it’s the sun that will burn the leaves. New foliage is especially susceptible to burning. Depending on where you are, a couple hours of morning sun is fine but going beyond 1 pm in full sun will likely begin to do damage to the health of these trees.
Make sure they are protected later in the day when the sun is at its strongest. This is especially true in very hot locations.
Salt can also cause the Japanese Maple leaves to burn, whether the salt is in the air near oceans or if your area has hard water. By adding a little gypsum to the soil at planting, the minerals in the water will be leached out. Top dressing the soil around the roots with a little gypsum can also help.
Japanese Maples, like most maples, benefit from deep watering, especially in hot climates or in the heat of summer. While they would not be considered a deep-rooted tree, they are not shallow rooted either.
Deep watering also helps flush out salts that build in the soils.
For more on deep watering, check out my post Why is the Tree in my Front Garden Dying.
When to prune Japanese Maples
It’s best to prune Japanese Maples in either winter or summer. Pruning them in the spring will remove the beautiful new growth that make these trees stunning in early spring and summer.
Winter is an ideal time because you can see the shape of the tree best and work with the branch structure to enhance its architectural interest.
Japanese Maples should never be sheered or shaped into a ball. They are meant to be elegant trees with long horizontal branches that lend a delicate look to them. Their growth pattern is not unlike many of our native dogwoods that like to spread out horizontally.
If you are unsure about how best to prune Japanese maples to enhance their inherent beauty, consider hiring a trained arborist who understands how to properly prune these trees to enhance their inherent qualities.
A typical tree service, known more for cutting down trees, might not be the best to use for pruning your Japanese Maples.

Can you grow Japanese Maples from cuttings?
Take cuttings from spring growth when it is still flexible and not quite what you would called woody.
Put them in a glass of water immediately, before putting them into potting soil with plenty of perlite and a little rooting hormone if possible.
Strip off a number of leaves to create nodes. This is where the roots will eventually emerge.
Keep the cuttings well watered and misted throughout the spring and you could be blessed with new trees perfect for creating bonsai specimens.
Planting a Japanese Maple
One of the keys to getting the perfect Japanese Maple is to pay particular attention to the shape of the tree before setting it into the ground.
Japanese Maples like neutral to slightly acidic soils so start with a good draining soil mix and consider adding a little acidifier to the soil – a good azalea or rhododendron mix would work well. If you have hard water in your area, a little gypsum in the planting hole will help remove some of the minerals in the water. Add just a small amount, maybe 2-3 per cent.
Backfill the soil about halfway and then water in the tree to ensure it gets a good start. At this point you could add a couple handfulls of a mild fertilizer in a 5-3-1 ratio.
Continue backfilling around the tree until the soil is an inch or two below where the soil level was in the pot. Give it another good watering and then add mulch to lock in the moisture in the soil and protect it from direct sun.

Pentax Q review: Why you need one in 2024
Just how small is the Pentax Q? This image of the camera being dwarfed by a chipmunk is a good indication of the size of the camera.
Fun camera for garden and wildlife photography
The Pentax Q might be tiny, but it takes a back seat to no camera in its class.
This full-featured miniature camera, first released in 2011, boasts a very nice interchangeable lens system ranging from a fisheye all the way up to the 35mm equivalent of a 70-200 f2.8 telephoto zoom lens. Even the 70-200 fits in the palm of your hand, but has the telephoto pull to capture wildlife in the garden.

This sunset image was taken with the Pentax Q7 and hard-to-get 08 wide angle lens.
The entire system fits into a tiny package. And when I say tiny, i mean tiny.
If that’s not enough, these cameras come complete with a set of features, filters and shooting modes any full-sized DSLR or mirrorless camera would be proud to boast about. Add surprisingly good ergonomics for a miniature camera that was originally advertised as looking completely at home on the end of a keychain.
Sounds weird right? Maybe, but keep reading to find out how this camera went from a weird distraction in 2011 to one of the coolest camera in the years that followed.
For more images taken with the Pentax Q, check out my Pentax Q photo gallery.

Image shows how small the Pentax Q is beside this tiny chipmunk.
What more can you ask for with the Pentax Q?
How about a system so small that you can fit two Q camera bodies, at least three lenses ranging from wide angle to a 70-250 f2.8 telephoto, filters and even a Fuji X10 and Lumix point-and shoot camera in a Lowepro camera bag meant to handle a single DSLR camera body and a small wide angle zoom.
Forget the camera bag, a Pentax Q complete with the 70-250mm f2.8 lens equivalent will slip into a coat pocket or a woman’s purse. Heck, throw in the 50mm equivalent fast F1.7 prime and a miniature wide angle or fisheye lens into the purse or coat pocket too – there’s still plenty of room.
• If you are looking for a Pentax Q, or the many lenses in the system, or any other piece of hard-to-find photographic gear, be sure to check out KEH Photographic for an outstanding selection of used equipment at great prices.

The Pentax Q combined with the exquisite TTArtisan optical viewfinder is the perfect combination. For more on the TTArtisan viewfinder, check out my full story here
TTArtisan optical finder is the perfect accessory
If the lack of viewfinder on the Pentax Q is a little annoying, the TTArtisan optical viewfinder is an exquisite accessory that not only adds utility to the camera system but also makes the setup look awesome taking it to a whole new coolness factor. For my complete review of the TTArtisan 28mm finder, check out my comprehensive review here.
Click on the link for my comparison post between the two viewfinders pictured below.

Two external optonal viewfinders on the Pentax Qs. The viewfinder on the left is the TTArtisan 28mm finder and the one on the right is the tiny Lichifit 28mm finder. Both have their place on the Pentax Q line of cameras. Click here for my post comparing the two viewfinders.
And what about the photographic results?
Well, I think the results here speak for them self. I took the Pentax Q and three lenses out for an afternoon of fall photography and came away with more than a few keepers.
Image taken with the Pentax Q of an old home set among the fall colours.
Fall colours in a wetlands taken with the Pentax Q.

Fall leaves ablaze in vibrant colour.
Are these fall images of high enough quality that you would want to supersize into posters or murals, or use for professional work with a client? Probably not.
But, for everyday use with the end result of making prints in the 4X6 to 11X14-inch range, or – more likely these days – posting on social media accounts or on web sites – these images can stand up to the scrutiny. They are sharp, contrasty with great colour even at moderately higher ISO settings.
Maybe it’s the fine Pentax lenses or the fact that Pentax took the bold decision to remove the anti-aliasing filter from in front of the sensor that resulted in this sharpness, but whether you are viewing jpegs right out of the camera or Pentax’s RAW images, after a little post-processing, there’s no short changing the results here.
A view from Hamilton Mountain over the city during fall with the Pentax Q.
But let’s not kid ourselves. The sensors on these cameras are tiny.
Tiny sensors but great results
In fact, the original Q’s sensor was a back-illuminated CMOS, 1/2.3” (6.17 x 4.55 mm). The Q7, introduced later in June 2013, uses a larger 1/1.7” type sensor (7.44 x 5.58 mm). Both fell into the point-and-shoot-sized sensor and many critics in those days simply wrote the camera off as nothing but a toy.
Heck, even some of the lenses were called “toy” lenses. Probably not a great marketing decision by Pentax at the time.

The colour extraction filter (set to purple) helps to isolate this salvia flower petal against the grey leaves. The Pentax Q allows you to choose from a host of colours to isolate in your image. You can even choose to isolate two separate colours.
Pentax Q boasts big features in a tiny package
There isn’t time to get into all the features packed into these tiny cameras. Besides, I’m not really big on all the gimmicks camera manufacturers pack into their cameras to convince buyers they have to buy the camera. But, there is no denying that the features in this camera would be welcome in some of the more expensive DSLRs offered at the time.
It sports a 12.3mp sensor, it’s own dust removal system, ISO settings from 125 - 6400 and a sensor shift shake reduction system to help users get sharp images even in low light. Some of the lenses even have built-in neutral density filters.

This is an extreme crop of at least 50 per cent with the Q 06 lens. I think the image stands up well despite the crop on the small sensor.
How about HDR, a built-in intervalometer, creative “bokeh” blur settings, single and multiple colour extraction filters, and highly adjustable B&W capabilities to name just a few. It shoots RAW, has fully manual settings and for Pentax lovers the green button will bring you back to normal exposure no matter how far off you may have wandered.

Another image taken with the Pentax Q and the 06 lens with a minimal crop.
Are you thinking these cameras might make for a nice street photography package? I took the Pentax Q with the 01 Prime lens (47mm equivalent) to an emergency animal hospital, while I waited for my dog, Holly, to get her new pacemaker checked by the cardiologist. (Yes you read that right).
• Here is a gallery of results of that one-hour wait at the Emergency Animal Hospital shot with the 01 prime (50mm) in a photojournalistic style with the camera’s B&W mode.
• For my full story on The Pentax Q as a lomography camera with the 07 Mount Shield Lens go here.
• For my full story on the Pentax Q and 110 vintage lens.
This thumb grip link works nicely on the Pentax Q and makes the camera even more ergonomic. The one linked to does not block the dial and your thumb clears the LCD so it does not block your view.

Five reasons to buy a Pentax Q today
Even today it remains among the smallest and most competent mirrorless cameras with interchangeable lenses.
They are now very inexpensive on the used market. If possible, buy an entire package including several lenses to get the best bang for your money.
You are already sitting on some great Pentax or other manufacturer’s (Olympus, Canon, Nikon) vintage 35mm lenses and all you would need to use them on the Q is an inexpensive adapter.
You love small, exquisitely built cameras and lenses and don’t care about mega sensors.
You love the idea of turning your 50mm macro into a 250mm macro or the 100mm f2.8 portrait lens into a 500mm super zoom for about $35.
You have a set of the exquisite Pentax Auto 110 lenses and are itching to use them on a modern digital camera. See my full review of using Auto 110 lenses on the Pentax Q

New England Asters taken with the Pentax Q's blur mode that allows you to control bokeh in the images.
Even the pop-up flash is cute, cool and quite useful.
Lot’s of fun, creative and artistic stuff here to keep even the most bored photographers, inspired.
Did I mention the fully customizeable creative wheel thingy in the front of the camera to control favourite creative settings fast and conveniently. Yea, there’s that too.
(I’ll put a link at the bottom of this post from Pentax Forums for anyone who wants to get into the fine details of the camera system.)
This image of native New England asters and grasses shows the detail that the Pentax Q is able to achieve.
How long was the Pentax Q manufactured?
Over the years this miniature camera system, that had a relatively short life span ranging from the original Q’s introduction in 2011 to after the release of the Q-S1 in 2014, gained a cult-like following.
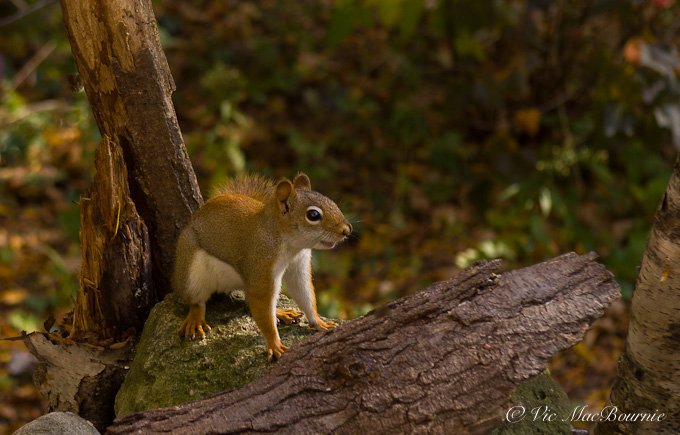
This Red Squirrel was photographed with the Pentax Q and the 06 telephoto lens wide open at F2.8. The lens can deliver soft backgrounds if the subject is far enough away from the background.
Eight Pentax Q lenses deliver top quality results
Pentax introduced a total of 8 miniaturized lenses beginning with the excellent 01 standard Prime with a focal length of 8.5 mm (47mm equivalent for the Q, Q10, and 39mm for the Q7, Q-S1 with the larger sensors.) More lenses followed: 02 standard zoom (27-80 range equivalency, 23-69mm), 03 Fisheye (17.5mm, 16.5mm), 04 Toy wide angle lens ( 35mm, 33mm), 05 Toy lens (100mm, 94mm), 06 Telephoto zoom (83-249mm, 69-207mm), 07 Shield mount lens (63mm, 53mm) and finally the 08 Wide Zoom (21-32mm, 17.5-27mm).
The final lens, the 08 wide angle, is a quality-built lens but extremely expensive. It still remains a highly sought after lens with a big price tag even on the used market, if you can find one. I have just recently acquired this lens and can confirm that it is an outstanding lens both in its photographic qualities as well as its build qualities. (See image below.)

Moss on rocks in woodland taken with Q07 and 08 wide angle zoom lens.
I should not forget another group of lenses that were made for the Q years before Pentax engineers even knew digital cameras were ever going to be a thing, and that’s the Pentax Auto 110 line of lenses. With a simple adapter, these tiny lenses look like they were made for the Pentax Q. For my complete story on using these lenses on the Pentax Q, be sure to check out my story here.

Blue Jay photographed with the Pentax Q and the 06 telephoto zoom, which is approximately 70-250mm in 35mm equivalence.
What happened to the Pentax Q cameras and lenses?
Was the Pentax Q system made of simply inferior products meant for the trash heap almost from the day it was announced?
Far from it.
In true Pentax style, these cameras were not only ahead of their time, but engineered to the finest Japanese craftmanship. The result was a hefty price tag (about $700 plus with a basic lens), one that most serious amateur photographers – who they were originally aimed at – just weren’t ready to spend for such a small-sensored camera. That initial cost would rise as you add other lenses to make the system more complete.
In those days, not unlike today, the size of the sensor meant everything. This was before social media took off so photographers were more focused on obtaining the highest resolution images possible.
Fast forward to today when 95 per cent of all digital images never get past Instagram, Facebook and Vero, where the size of the original image plays only a small part in the camera-buying decision.
Our cell phones are just one example of how the size of sensors mean less and less to the end user. Convenience and the coolness factor are far superior to size these days.

The Pentax Q colour extraction filter can pull out colours out of an otherwise B&W image. Here, I pulled out red and purple.
Where can you buy the Pentax Q?
One quick look on Ebay.com and you’ll find your share of Pentax Q cameras and lenses. Most are from Japan where the Pentax Q has always been a very popular camera. The difference is that on today’s used market, you can pick up the camera and a couple of lenses for a fraction of what you would have paid back when they were available in stores.
In fact, when I purchased my Fujifilm X10 back in 2011, the Pentax Q had just been released. The owner of the camera store urged me to get the Pentax over the Fuji. I loved the little Pentax camera but could not justify the cost of the system. The Pentax Q cost as much as the Fuji but the X10 came complete with the excellent 28-112mm equivalent built-in lens. By the time you added a few of the Pentax Q lenses, you were into a large financial investment and one I was not willing to make at the time.
I suspect, I wasn’t alone.
Today that close to $1,000 investment can be had for maybe $200 for a camera and a couple of lenses. I was able to purchase an Original Pentax Q and standard O2 lens on Kijiji for $60 Cdn. – a real sweet deal. And Ebay is full of great deals – maybe not quite that good but still very reasonable.
But that is just the beginning.

The Pentax Q shown here with the Q to Pantax K adapter and a 50mm f2,8 macro lens which becomes a 250mm macro lens with the 5.6 crop factor of the Q's tiny sensor.
Adapters make the Pentax Q useful in 2024
A lot has changed since Pentax first introduced their miniaturized mirrorless little gem.
If it was great then, new, inexpensive adapters have turned the Pentax Q into one of the coolest little mirrorless cameras on the market.
In 2012 Pentax announced the Adapter Q for K-mount lenses with a 5.6X crop factor. This little device changed everything, but it took time for other manufacturers like Fotodiox and K&F (amazon link to list of adapters) to follow and change the world of Pentax Q owners.

The 50mm f2.8 macro lens on the Pentax Q making it a 250mm with the crop factor.
The small sensors and the fact it is a mirrorless camera makes adapting vintage – even ancient lenses – to the camera simple and inexpensive.
There are adapters to mount classic Pentax, Olympus, Nikon and Canon 35mm lenses to the Pentax Q. But it doesn’t stop there. There is an inexpensive adapter for Pentax’s venerable classic 110 camera with its interchangeable lenses. These sweet little miniature lenses will fit the Pentax Q now too.

This image shows how much magnification the 50mm macro can achieve on the Pentax Q. And, just look at that lovely background. Not bad for a tiny-sensored camera.
Oh, and did I mention those ancient miniature D-mount lenses from your dad’s or grandfather’s 8mm cinema camera. Yep, they have an adapter too. Cost me $3 for the adapter and I have four d-mount lenses I found attached to old 8mm cameras I had been using as paperweights that I can now attach to the the Q and explore the world around me.
I will be doing separate posts looking at these lenses as well as breakdowns of some of the Q-mount lenses.
And, if you are looking for cinematic quality in your images, what better than a lens from the 1930s-40s to create the mood.
Oh, and did I mention C-mount cinema lenses…
You get the idea.
A $30 adapter and a couple of my classic Pentax K and Ka lenses together with the Pentax Q turns the system into one that we could only dream of a few years ago.
The crop factor is about 5.5X which means normal lenses become telephoto equivalents and telephoto lenses become super telephotos.
Let’s do some quick math.
My older 50mm f2.8 macro becomes a 250mm f2.8 macro lens. My 100mm F4 becomes the equivalent of a 500mm macro. My 40mm pancake becomes a 200mm pancake lens. My 300mm F4.5 A* becomes a 1500mm F4.5 telephoto. My old 75-150mm zoom becomes a 375mm to 750mm zoom.
Just imagine the possibilities.
I remember always wanting the A* 200mm macro lens in its day, but it was the price of a small used car. Today, I can mount a 50mm F2.8 A manual focus macro lens on the Q and get a 250mm macro F2.8 equivalent lens. It’s like I’ve died and gone to heaven.
I’ve included a few example images above of of the Pentax 5omm in action just to get readers thinking about the possibilities. Notice the beautiful soft background the lens was able to achieve even on a point-and-shoot-sized sensor.
Stay tuned for future posts on the Pentax Q where I’ll provide more specific insight and examples of what can be done with these ancient lenses.
If you are into fine details (and after you finished reading this complete post, of course) check out this post at Pentax Forums. It’s all here in fine detail.)

Hummingbird and salvia shot with Pentax Q and 06 telephoto zoom.
Is the Pentax Q worth buying in 2024 and beyond: Pros and Cons
Is the Q worth it in 2024?
Absolutely.
Is it the only camera you should pack in your arsenal?
Probably not.
Is it capable of getting great images for social media like Instagram, Vero, Facebook etc?
Absolutely.
Hello, World!
But the Pentax Q is far from perfect. It’s certainly beginning to show its age when it comes to focusing and where it lacks the latest technology. Trying to see the back LCD screen in bright light is near impossible and, although using the classic 35mm-style lenses with at adapter is super fun and cool, don’t be surprised if you struggle nailing the focus.
Yes, the Q has focus peaking and magnification factors to help with focus, but if you struggle to be able to even see the back LCD, you are not going to have an easy time focusing.
There is no built-in LVF (fiewfinder) to help frame the image. Well, I should not say there is no viewfinder. There is an optional viewfinder that works with the 01 Prime lens, but it’s expensive and not really all that great, according to users. It does look cool on the camera, however, giving it a real rangefinder look.
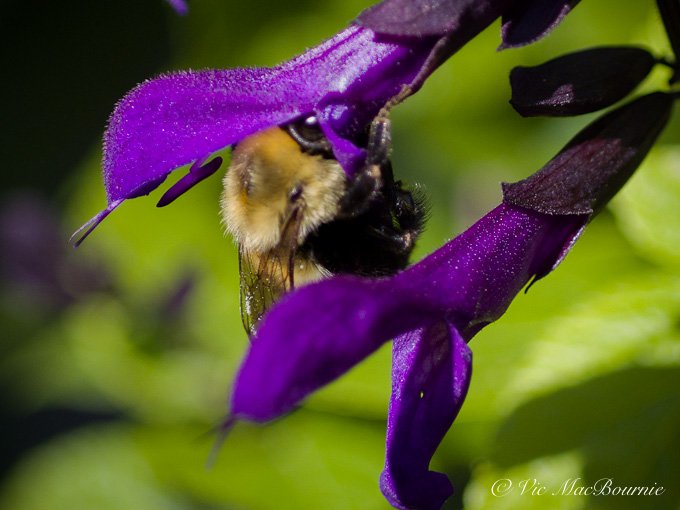
Bee on salvia taken with Pentax Q and vintage 50mm macro.
There are more issues with the camera and lens system that some users may think are worth noting, but with the price of these sweet, miniature cameras coming down as much as they have, it’s too easy to overlook the minor problems and just enjoy the camera and all it has to offer.
For a fraction of the price of a new smartphone, you can walk into a party with your Q and turn some heads.
At the same time, take it out on the street and you can virtually go unnoticed with this tiny camera.
Slip it in your purse or pocket and you’re ready to go anywhere. Even out in the garden for a morning of shooting. Heck, these Pentax Qs even have a macro feature on them for capturing our favourite flowers, bees and butterflies.

Author Profile: Vic MacBournie is a former journalist and author/owner of the award-winning website Ferns & Feathers. He writes about his woodland wildlife garden that he has created over the past 25 years and enjoys sharing his garden photography with readers.

Columnar Oak: Keystone plant perfect for today’s small yards
Columnar Oaks are the ideal compromise for today’s smaller front and backyards that might be overwhelmed by massive, native Red and White oaks.
Oak trees are critical to the survival of insects, birds and other fauna
It’s no secret how important Oak trees are for a healthy, natural environment, but not everyone has space in their yard to dedicate to such massive trees.
That’s where the columnar oaks (Quercus robur ‘Fastigiata’) come into their own. These trees are smaller, more narrow and able to fit into the smallest of yards, but still pack many of the benefits that our full-size, native oaks provide.
Columnar oaks or English Oak is an Asian and European native tree. It prefers average well-drained soils in full sun, but adapts to a wide range of soil types and conditions.
These oaks can take 20-30 years before they can bear acorns – an important food source for many mammals. In the wild, it is found in northern USA and Canada.
Five reasons to plant a columnar oak tree
They are a perfect tree for small, narrow spaces in both front and backyards.
They can be used to screen out views, even on second storeys, when ground space is limited. Their branches grow low to the ground providing screening from the ground up.
Oaks are attractive to wildlife and considered a vital food source for birds as well as insects and caterpillars.
Columnar oaks are low-maintenance, trees that can withstand drought, salt and other urban issues that can stress out other, less vigorous trees.
Columnar oaks actually boast four season interest from the dark green leaves of summer, to the rusty/brown leaves of fall and beige leaves that cling to the branches throughout winter.
‘Fastigiata’ or Upright English Oak is an upright, columnar, deciduous tree that matures into a dense elongated oval shape with a short trunk. They can work as a landscape specimen or in a group to form a very tall privacy hedge.

Oak leaves from a columnar oak looking beautiful as they transition to its fall colours.
If you are trying to decide whether or not to plant an Oak tree in your yard, The Nature of Oaks will certainly help you make that decision. This valuable book highlights the incredible benefits of these important trees.
They do best planted in full sun in well-drained acidic or slightly alkaline soil. If you live near the ocean or plant it in an area that is heavily salted in winter, these trees can continue to perform well. As an added bonus, especially during these times of climate change, the columnar oaks are also drought tolerant and can survive in more severe urban conditions. (For more on problems faced by urban trees see my articles on The Internet of Nature or How Trees Communicate.)
For more on the importance of oak trees in our garden and natural landscapes take a few moments to check out my other posts on Oak trees:
Propagation for the Columnar Oak is from seed, but don’t be surprised if the seed doesn’t always grow true.
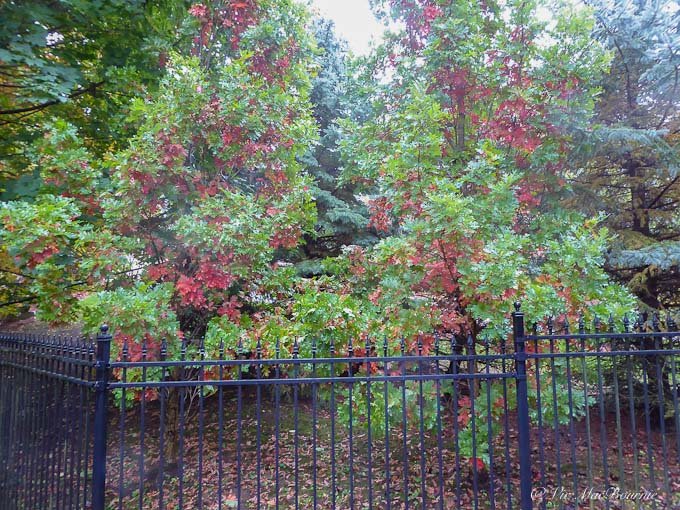
These columnar oaks have been used as an effective privacy screen teamed up with blue spruce. The combination of trees provide effective habitat for backyard birds and other wildlife.
What are the benefits of oak trees?
Doug Tallamy, renowned entomologist, advocate for native gardening and author of the book Bringing Nature Home, and the Nature of Oaks as well as a number of other highly acclaimed books on the subject, calls oak trees a “keystone plant” in our environment. This rating goes only to a select few native plants that provide food and habitat for an enormous number of insects, caterpillars and fauna that, in turn, are critical as a food source for birds and other wildlife.

These gorgeous colours show how beautiful the leaves look in fall. They eventually turn a lovely beige colour as winter progresses and remain on the tree to provide shelter for birds and other animals.
In fact, oaks top the list of Tallamy’s “keystone plants.”
Tallamy cites a 2003 study that found a “single white oak tree can provide food and shelter for as many as 22 species of tiny leaf-tying and leaf folding caterpillars.” And that is just a tiny fraction of the fauna that depend on a single oak tree. In fact, the mighty oak supports 534 species of fauna, more than any other tree we can plant in our gardens.
There are about 400 species of Oak worldwide. North America boasts 90 different species with 75-80 in the United States and 10 in Canada.
Unfortunately, the emergence of smaller and smaller lots in today’s subdivisions makes planting a full-size white or red oak tree difficult for most homeowners. Although the trees are relatively slow growers and beautiful specimens in the landscape, they eventually grow to become massive trees that, if not planted with plenty of room to grow around them, might have to be removed or, at the very least, severely pruned as they mature.

These Columnar oaks along the driveway present a formal entrance to the home but also provide some privacy.
How to use Columnar oaks in the landscape
This is where the columnar oak comes into its own. These trees grow tall (up to about 60 feet (18 m), but the spread is only about 15 feet (4.5m) making them the perfect tree to tuck into a narrow space say along a driveway or in a corner of the yard to provide privacy.
Our neighbour actually uses a trio of columnar oaks grouped together anchoring two blue spruce trees to provide privacy. In this instance, these trees perform more like a dense, high hedge. The combination can be stunning at different times of the year, but especially in fall when the oak leaves begin to turn a rusty brownish/red while the remaining leaves hold on to their dark green leaves into the late fall and even into winter. In the dead of winter, many of the leaves remain on the plant, not falling off until the new spring growth pushes them to the ground.

Columnar oaks form a narrow privacy hedge.
In a perfect example of a shared landscape, we benefit from the trees’ architectural interest and, most importantly, their environmental benefits as a food source for so many woodland and backyard birds. The grouping of trees provide the perfect safe habitat for a variety of song birds looking for dense cover among the deciduous oaks and the evergreen branches of the blue spruce.
Can columnar oaks be used as a privacy hedge?
Another neighbour on the street has used three of the trees down the edge of their driveway to form a narrow, but very tall and effective screen. Again, the result is a dense, natural screen that is attractive to birds throughout the summer, including winter where the remaining leaves provide a safe escape out of the cold wind and an effective roosting spot.
These columnar trees may not provide all of the benefits of our native oaks, but they are far superior to many other non-native trees that offer little to no benefits to birds and other wildlife.
If you are interested in planting one of these trees, there are a number hybridized columnar oaks available for homeowners. A search on a high-end plant nursery near me shows a total of seven varieties available.
These hybridized columnar oaks include the following: Green Pillar Pin Oak (Quercus Palustris Pringreen), Crimson Spire English Oak (Quercus Robur Crimschmidt), Pyramidal English Oak (Quercus Robur Fastigiata), Skyrocket English Oak, Kindrid Spirit Oak, Chimney Rire Hybrid Oak, Regal Prince Pyramidal Oak.
You can check out these columnar oaks, including access to detailed information on growth habits, by going to Connon Nurseries’ informative website or a website of a nursery in your location.

Rick Sammon: How to photograph backyard birds
Rick Sammon, often referred to as the “Godfather of Photography,” puts both his photography skills and love for teaching together at KelbyOne with his course on photographing Birds in the backyard and beyond.
KelbyOne course: Tips to turn anyone into a backyard bird photographer
Rick Sammon knows photography and he’s looking to share what he knows – especially when it comes to Backyard bird photography.
Whether it’s capturing a colourful cardinal, documenting his latest travel adventure, or nailing a backyard bird in flight, Rick is more than willing to share his expertise and practical how-to advice after more than 40 years of photography.
That includes, at last count, more than 50 books on photography, regular monthly articles in Outdoor Photography and an envious portfolio of more than 25 instructional courses on KelbyOne, The Ultimate Source for Photography Education. In fact, Photographing Backyard Birds is his 25th course offered on KelbyOne.
For more on photographing backyard birds, check out my many articles on this website, including: Using props to photograph backyard birds; Beginners Guide to backyard bird photography; Building a backyard reflection pond and using the Tragopan blind to get up close to birds. If you are setting up feeders, check out my post on why we should be using recycle resin feeders.
The award-winning photographer is a Canon Explorer of Light and an inspirational image-maker that is known in photographic circles as “The Godfather of Photography.”
Click on the link if you want more on KelbyOne on-line photographic courses.
Along with Rick’s books and how-to videos, throw in his blog, iPhone and iPad apps, a podcast and an expanding following on social media. He has accumulated nearly 800,000 Google+ followers, and he has been recognized as one of the top photographers to follow on Google+.

Screen shot of Rick Sammon in his studio during KelbyOne photo course.
Rick doesn’t hesitate for a minute to impart his knowledge to other photographers. Each year, between photo assignments, Rick gives more than a dozen photography workshops (including private workshops) and presentations around the world.
Rick admits that he does not want to fit into any one style of photography. “I’m an A-to-Z type of photographer. I do it all – and I enjoy the freedom of not specializing,” he told Canon in an interview.
“When you are through changing, you are through,” he adds.
But, we are here to focus on Rick’s KelbyOne presentation of Backyard Bird Photography and Beyond.

This screen shot of a Rick Sammon image shows a cardinal with movement in the wings while the eye is tack sharp, illustrates the importance of choosing the right shutter speed.
A review of Photographing Backyard Birds on-line course
I was lucky enough to take Rick’s one-hour course and am happy to give readers a taste of what they can expect after signing up.
The one-hour course features a total of 250 slides to help illustrate his talks and keep viewers focused on capturing great photographs. Many of the images include tips on post processing in both Lightroom and Photoshop, including examples of images that many of us would discard. Rick shows how most can be saved through post processing.
Click on the link if you want more on KelbyOne on-line photographic courses.
Rick starts with the basics and progresses through photographing around garden ponds and lakes. He offers tips on ISO settings, anticipating action, creating controlled backyard sessions, and tips to learn from your mistakes.
He kicks off the video with 11 tips every bird photographer needs to know. The tips provide an ideal starting point for viewers.
Rick starts with probably the most important tip – the need for patience. When it comes to capturing images of birds, there is no denying the need for patience, whether it’s sitting in a blind beside your feeders, tracking more elusive warblers, or capturing waterfowl on a backyard pond.

Rick Sammon is quick to share the lenses he uses to capture his backyard bird shots.
Rick doesn’t hesitate to share information on the lenses he uses expounding on the benefits of long zoom lenses and the use of teleconverters.
Along the way he talks about dealing with different lighting conditions, the importance of catch lights in the eye, and using fast shutter speeds to stop motion and keep the subjects sharp.
Rick combines the necessary technical information along with practical information about attracting and feeding birds. He even touches on the best feeders and bird feed to use to get the results you are after.
For someone just starting out in backyard bird photography, the tips alone would provide enough valuable information to make the course worthwhile, but Rick is just getting started.
In the remaining episodes, rick explores bird and wildlife photography around garden ponds and larger bodies of water as well as travelling to nearby wildlife parks where photographers can capture birds of prey that would be almost impossible to get in the wild. Rick shows how backgrounds, lighting and manipulating the image in post processing is as important for captive subjects as it is for wild ones in a natural setting.

This screen capture is an example of the information Rick Sammon shares in his KelbyOne course.
Who should take this backyard bird photography course?
I recognize not everyone is as excited about sitting in a blind in a forest for several hours to capture a single image of a common woodpecker. Not everyone is interested or capable of investing in expensive lenses and travelling to the world’s birding hot spots to capture images.
But capturing bird images in the comfort of your backyard is another thing all together. It takes minimal effort to set up a feeder and put out an interesting perch for them to land on while you enjoy your morning coffee.
Rick’s course is a gateway into the world of backyard bird photography and is aimed at those of us who are happy to create an environment to bring birds to us rather than go to them. For beginner bird photographers, it will provide you with the building blocks to success. For more advanced photographers it should help take your work to a higher level and provide ideas that you may not have considered in the past.
Even if you are familiar with most of the tips Rick provides, seeing them put together in a focused, professional presentation complete with powerful illustrations will inspire you to get out in the garden at all times of the year and capture images of our feathered friends.
For those of us who enjoy improving the images on the computer in Lightroom and Photoshop, Rick’s course will inspire you to revisit many of the images you might have given up on in the past and revive them.
Photographing Birds in the Backyard and Beyond is simple enough for the beginner, but detailed enough to keep experienced bird photographers interested. It’s also inspiring enough to encourage non-birders to give the art of bird photography a try. Afterall, they are waiting for you just outside your back door.
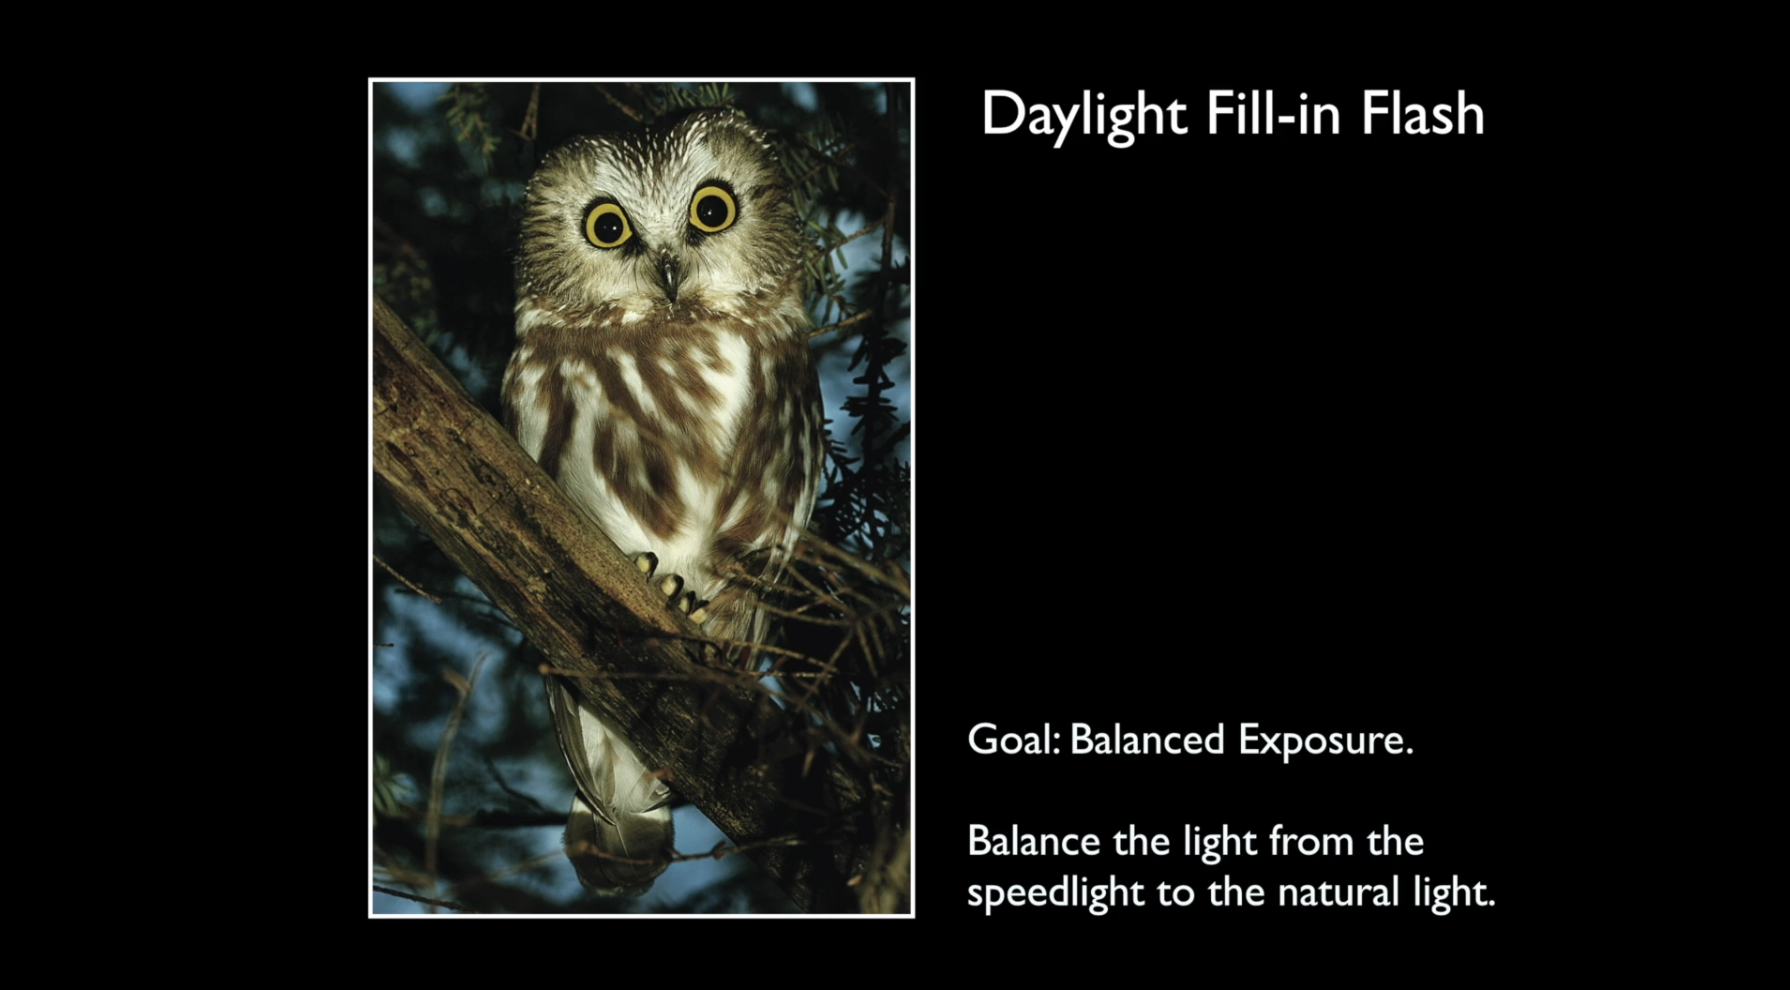
Rick Sammon shares how he uses fill flash to bring out the best image of this backyard owl.
What is the KelbyOne on-line photography program?
Before I explain the KelbyOne on-line photography program, let’s take a look at the founder of the program, Scott Kelby. I was introduced to his work many years ago when I purchased one of his incredibly informative Photoshop books from my local Costco. Since then, he has gone on to write a plethora of books and articles on everything from Lightroom and Photoshop to getting the most out of your iphone camera.
Scott is the brains behind KelbyOne, the extensive on-line photography educational program boasting more than 100 of the world’s best and most entertaining photographers sharing their knowledge and expertise with the photographic community and anyone looking to expand their knowledge about their hobby or their chosen profession. It’s all online and can be accessed from your computer, tablet or even from your phone. There is no need to leave the comfort of your home to gain a wealth of knowledge.
Courses on everything from travel photography, to portraiture, to creative landscapes and Black & White photography are just a few of the more than 900 on-line courses available.
Students can purchase courses individually for as low as $9.95 or by monthly subscriptions for less than $20.00. There is also a yearly membership for those looking for the ultimate learning experience. The courses offer something for everyone whether your are a beginner, hobby photographer, or a seasoned professional.
“Our goal here is to make learning something that you look forward to. This way you, our community of photographers, can move past the hurdles and bring to life the images that are stuck inside of you. We feel like the content has to be fun, cinematic, and inspiring, and taught by the most personable and experienced photographers in the industry,” states the KelbyOne site.

Karen Hutton: Exploring the world of macro/close-up photography
Karen Hutton’s creative approach to macro photography takes out the technical details that turn many new photographers away from exploring close-up photography. Her approach is perfect for garden photographers looking to create beautiful images.

Karen Hutton likes to use macro and close-up photography to tell a story.
KelbyOne course takes creative approach to macro photography
It doesn’t take long to see that Karen Hutton’s high-energy personality is contagious.
Her YouTube videos are a dead giveaway of her energetic approach to photography and life. And, it’s this high-energy approach to travel and landscape photography that has made her a popular speaker, educator and voice for photography.
She is a Professional Fujifilm-X Photographer, living in California where she spreads her love for her chosen profession to anyone who will listen.
• Click on the link if you want more on KelbyOne on-line photographic courses.

Lady bugs and aphids on Milkweed plants.
“I believe in discernment, truth, wisdom, strong artistic choices, love and the power of uplifting others,” she writes on her impressive website. “I believe that art is love made visible.”
Karen also believes in simplicity. When asked by Ferns & Feathers how her course would benefit someone who is inexperienced in the world of macro, she is quick to explain that her goal is to take the complexity out of macro photography. “It’s creative and meditative” she explains adding that
“It approaches macro in a less technical way, and more as: A way of seeing + thinking,” she explains. It’s “a way of telling stories; a way of being and of well-being; a way to understand beyond ourselves. Thus, (the course is) more an exploration that anyone can enjoy.” Karen explains.
“The course breaks down the stages of storytelling (like a filmmaker does) in a simple way that any photographer can use to shape their images in a more meaningful way. As a for instance, by finding relationships, then using the light to paint, bathe and wash your characters with it in interesting ways to create an emotional impact, you tell an interesting story with your images.”
Readers who don’t have an expensive camera and maybe count on their cell phone or a simple point-and-shoot compact camera are not left out from enjoying the macro experience.
“The course is built for anyone, regardless of the type of camera they have. It’s about a way of sensing, thinking and seeing… which is a different kind of approach and welcomes any kind of gear,” Karen explains, when asked about gardeners who like to take pictures with their smartphones or compact cameras.
Karen emphasizes the importance of telling the story of the hidden beauty of our gardens.
We how the beauty of our gardens by “telling (showing) the great stories found within the garden. Stories about what you love, how the various elements interact with one another – and finding meaning in all of it.”
If you want to experience some of Karen’s macro photography, take 5 minutes to watch her video in collaboration with Fujifilm on the Great American Road Trip. In this video she uses the road trip to explore the details found along the route.

Karen Hutton
It’s not hard to fall in love with her approach and her work. Whether it’s capturing the spirit of the Sierra Nevada mountains of her California home, intimate details of her travels to France and Italy, or capturing beautiful light of St. Thomas on the Hill in the Upper Sava Valley of Slovenia.
“A lifetime of chasing – and creating with – light began when I was 8 or 9,” she writes. “I had a vision about the transformational power of light, which ignited a sense of purpose that leads me to this day.”
Her outstanding images, humour and genuinely positive outlook, are inspirational to those looking to discover their artistic voices in photography.
If you are looking to upgrade your camera equipment and maybe purchase that macro lens you always wanted, be sure to check out the used camera equipment at KEH Camera Exchange. You can also trade in your old equipment to help defray the costs of your new, used equipment.
Macro photography in our gardens can be extremely rewarding. For more on shooting close-up images in our gardens, be sure to check out my comprehensive post on macro/close-up photography. I have also done a separate post here on flower photography.
But how does all this high energy translate into macro photography?
After all, The world of close-up photography demands the maker slow down, study the world in minute detail and find intimate compositions that can be almost invisible to the naked eye.
• Click on the link if you want more on KelbyOne on-line photographic courses.
In one of her many videos, Karen talks about the importance of discovering the natural world and the smaller details that are so easily overlooked.
“There is so much beauty that fills our world.” Karen explains. “And it comes at every shape and scale and texture. I am awestruck by amazing vistas and cityscapes, but as a citizen of the earth, I want to look, I want to appreciate the smallest components as well as the grand design.”

Karen Hutton’s on-line course turns the focus on creative macro photography.
Review: Karen Hutton’s hour-long macro/close-up photography course
I was fortunate enough to have taken Karen’s one-hour photography course on macro and close-up photography.
After viewing the on-line course on my laptop in the comfort of my home, I can say without a doubt that this course is aimed at people looking to experience the world of close-up photography in a creative rather than a highly technical approach.
It is not aimed at a master of macro photography. That’s not to say there is nothing for the experienced macro photographer to take away from the on-line course, Karen incorporates plenty of excellent tips and approaches to macro and close-up photography for even the most experienced photographers.
The course is, however, aimed at photographers looking to expand their creative horizons and experiment in a world they may never have explored to any great degree in the past.Technical explanations are kept to a minimum, there are no complex descriptions of using flash, and even discussions around lenses are kept to a minimum.
For those of us who are more gardeners than photographers, I think this course is the perfect introduction to macro and close-up photography.
It will challenge you to look at, and approach, your garden and photography in a new more creative way. Karen’s whole approach is to see macro photography as one part of a larger story that begins with seeing the subject in a wider context before moving in on the more intimate details.
It’s the ideal vision for our woodland/wildlife garden approach. Although the single flower is beautiful in itself, it is really just one part of the larger concept that makes up our woodland gardens. The native trilliums in our gardens, for example, depend on the tree canopy for their survival. The tree canopy, therefore, is part of the the trilliums’ and other spring ephemerals larger story and should be included in our story as we explore the details of our trilliums.
It’s an approach that tells a more creative and complete story, as we move in closer and closer to our subjects.

It’s storytelling in a very intimate way.
She refuses to get hung-up on the true definition of macro and, instead, shows how “close-up” photography can be captured with everything from a point-and-shoot camera, to a telephoto lens or a simple zoom lens with a macro feature. Most of us have at least one of these tools in our camera bag.
Karen begins the course by showing students how they can tell a story by moving from a distant view of their subjects through to the middle, medium and finally the more intimate macro or close-up views.
Along the way she uses images to illustrate her story-telling approach to close-up photography.
She touches on the importance of light, explaining the varying emotions that different light can evoke in an image.
She talks about exploring macro at home using everything from kitchen utensils and garden produce to backyard flowers.
Finally, she explores design and movement in close-up images, and wraps it up with the importance of capturing natural patterns in nature.

Macro on-line course is both inspirational as well as informative
In conclusion, Karen’s creative approach to teaching macro photography makes it more accessible to all of us. It inspires us to think about why we are trying to capture an image; why we even want to capture the image, and how we can best illustrate the intimacy of that moment.
Karen’s approach of using macro photography as a means to tell the complete story of our gardens is an approach that inspires us to look deep into what makes our gardens special.
“The course breaks down the stages of storytelling (like a filmmaker does) in a simple way that any photographer can use to shape their images in a more meaningful way. As a for instance, by finding relationships, then using the light to paint, bathe and wash your characters with it in interesting ways to create an emotional impact, you tell an interesting story with your images.”
If you are looking for technical expertise on lenses, lighting and how to obtain 1:1 images of your favourite flower, I suggest you may want to look elsewhere. But if you are looking to be inspired to take your close-up and macro photography to another level, Karen’s course might be the spark that ignites a whole new world of photography.
Karen’s courses are available at KelbyOne, The Ultimate source for Photography Education on the web.

What is the KelbyOne on-line photography program?
Before I explain the KelbyOne on-line photography program, let’s take a look at the founder of the program, Scott Kelby. I was introduced to his work many years ago when I purchased one of his incredibly informative Photoshop books from my local Costco. Since then, he has gone on to write a plethora of books and articles on everything from Lightroom and Photoshop to getting the most out of your iphone camera.
Scott is the brains behind KelbyOne, the extensive on-line photography educational program boasting more than 100 of the world’s best and most entertaining photographers sharing their knowledge and expertise with the photographic community and anyone looking to expand their knowledge about their hobby or their chosen profession. It’s all online and can be accessed from your computer, tablet or even from your phone. There is no need to leave the comfort of your home to gain a wealth of knowledge.
Courses on everything from travel photography, to portraiture, to creative landscapes and Black & White photography are just a few of the more than 900 on-line courses available.
Students can purchase courses individually for as low as $9.95 or by monthly subscriptions for less than $20.00. There is also a yearly membership for those looking for the ultimate learning experience. The courses offer something for everyone whether your are a beginner, hobby photographer, or a seasoned professional.
“Our goal here is to make learning something that you look forward to. This way you, our community of photographers, can move past the hurdles and bring to life the images that are stuck inside of you. We feel like the content has to be fun, cinematic, and inspiring, and taught by the most personable and experienced photographers in the industry,” states the KelbyOne site.