

How to cut down ornamental grasses
Hedge trimmers have taken the work out of cutting back Ornamental grasses. Every garden benefits from ornamental grasses, but learning to cut back these beautiful additions to the garden makes these elegant, four-season plants an even greater joy in our gardens.
What’s the best tool to cut down large ornamental grasses?
Ornamental grasses have grown in popularity over the past several years primarily because they are easy to grow and create four seasons of interest in the garden. The problem for many of us comes when it’s time to cut the larger grasses down in the spring or fall.
The larger clumping grasses, like varieties of Pampas grass (Cortaderia) and my favourite, Maiden grass (Miscanthus), are delicate when first planted, but over the years the clumps grow, the grass stems thicken up and cutting them down can become very difficult work. Even the smaller grasses in my garden, fountain grass (Pennisetum), little bluestem (Andropogon gerardii), and Northern Sea Oat grasses (Chasmanthium latifolium) are a chore to cut back in the spring.
Be sure to check out my posts on the Three best grasses for a shade or woodland garden and the Best Ornamental grasses for sun and shade. You might also be interested in my post on why we should leave our grasses up all winter.
For years, I used simple secateurs to cut down the dried grasses one stem at a time each spring. The job took hours and, although I wore gloves, I was usually left with scratched knuckles and very sore hands.
The job became such a burden that I put it off as long as possible often resulting in having to cut the stems higher than I wanted because the new grasses were already beginning to put on growth.
I am getting older, and cutting back the grasses is getting more difficult each year. It was time to look for an alternative.

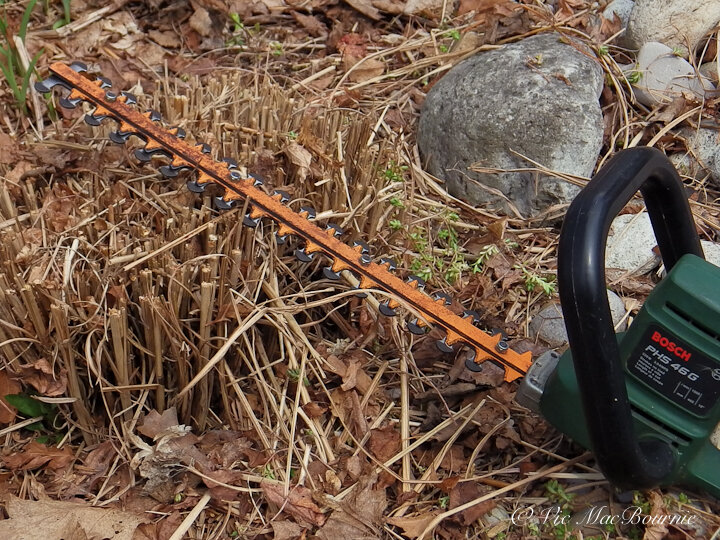
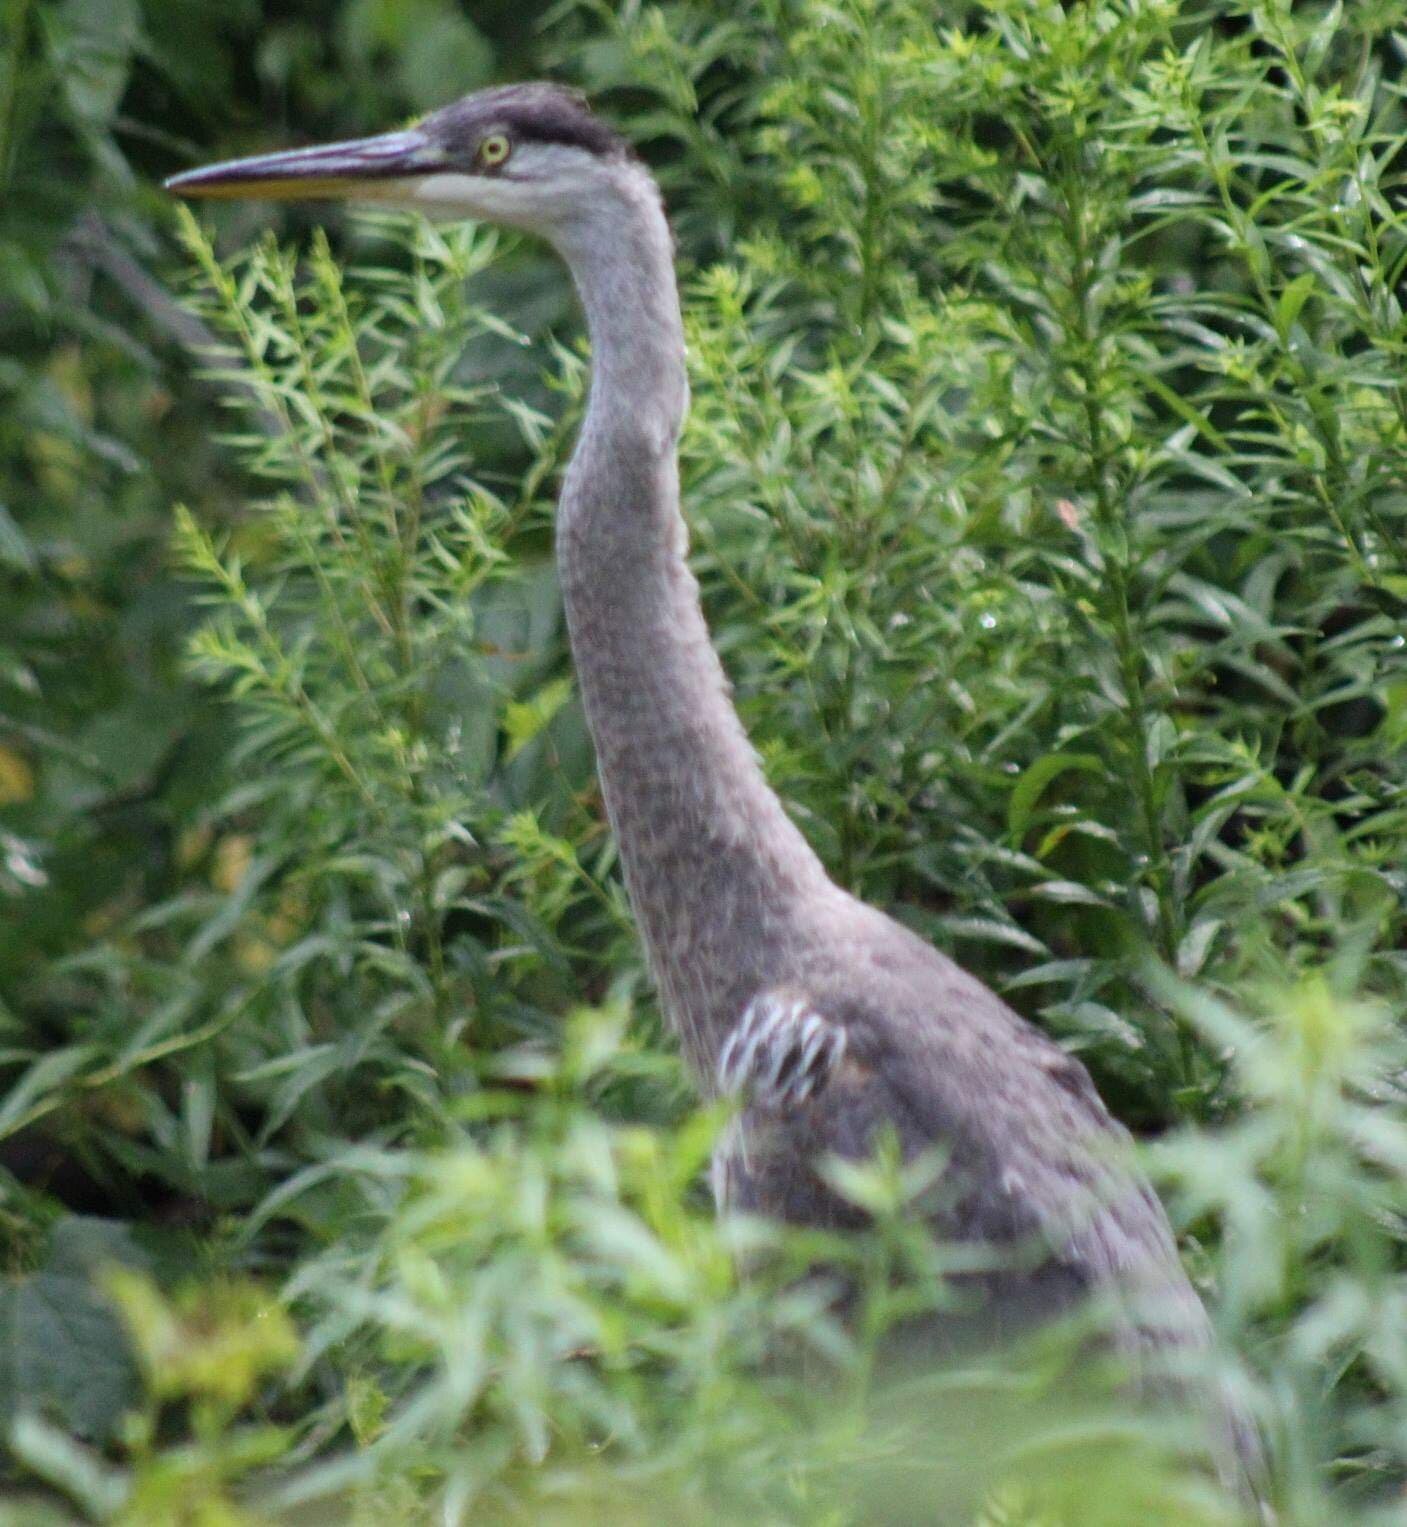
This Miscanthus Sinensis is a real winner in the fall with it’s elegant seed heads. Cutting it down in early spring, however, can be difficult without the right tools. An electric headge trimmer (pictured below) made short work of the dried stems this fall.
Last year we used a combination of the secateurs and a weed eater with a string to cut through the grasses. Although we eventually got the job done, it wasn’t easy or quick. A weed eater with a blade is often suggested rather than a string, but I prefer not to work with a spinning blade whirling around my toes. The grasses are replaceable, my toes are not.
This spring cutting back our grasses took a giant leap forward. The solution: I decided it was time to get smart and use an electric hedge trimmer to do the heavy work for me. This cordless model from Gardener’s Supply Company will make the job a whole lot easier.


This spring, the electric hedge trimmer not only cut the grasses down with great ease, it enabled me to cut the stems shorter, giving the garden a cleaner look and opening up the clumps to more sunshine leading to better early-spring growth. It handled the tough, thick stems as well as the smaller more dense grass stems with ease. An added bonus to my spring clean up was that the hedge trimmer was powerful enough to cut down a number of unwanted shrub and sucker growth saplings that were slowly taking over an area of the garden.
I like to cut my grasses down in the spring to benefit from the look of their lovely dried stems all winter and, more importantly, to give insects a safe place to spend the winter. Birds too benefit from the grasses giving them an opportunity to feed on the seeds and any insects or insect eggs they can find hiding in the dried grass stems.
The dried stems can also be cut down in fall, but you would miss out on the delicate snow-covered branches and deprive insects and birds of habitat and potential feeding locations.
This spring, the task of cutting down the grasses was so easy that I can’t ever imagine cutting the grasses with any other tool after using the electric hedge trimmers.
Not only did it make taking down the larger stems a joy, but it cleaned up my smaller ornamental fountain grasses, northern sea oats and little bluestems in mere seconds.
In total, my wife and I cut down about 15 ornamental grasses in less than an hour. The same task using garden secateurs would have taken about three hours and left me with sore, cut-up hands from the sharp, dried, dead stems, as well as a very sore back.
Before you actually cut the grasses down – especially large clumps – it’s a good idea to tie them off with string. Then, when you cut the dead stems off, they are contained nicely in a tight compact form by the string and are easy to carry to the back compost area.
I like to pile them into my large gardening bag or Gorilla Cart (link to my story) to carry several clumps to the back compost area.
Once cut down, it’s a good idea to put the stems in a back corner to allow any insects to complete their spring emergence. It’s always a good idea not to throw out the stems for recycling. We like to carry them to the back of the yard where they are placed on top of an open brush pile. This gives any insects that may be hibernating in the stems an opportunity to emerge from the grasses into a safe and favourable environment.
In addition, I like to take the softer grasses (most often from the dwarf fountain grasses) and place them near bird-feeding stations where the birds can take them to use for nest-building.
Modern hedge trimmers get the job done
The hedge trimmer we used was an older, high quality plug-in electric unit made by Bosch, but there are many units available that can tackle the job including newer, battery operated models that allow you to go anywhere in the garden without having to be tied to an electrical cord.
If you are looking to purchase a hedge trimmer, there are many issues to consider: electric vs. gas, blade type, blade length, blade gap, and much more. These feature become more or less important depending on how you plan to use it in the garden. If your main use is simply to cut down grasses, any of the better trimmers will get the job done.
For a full review of the best trimmers check out this article from Best Reviews. The Amazon products featured on this page are among the most favourable recommendations from Best Reviews.
We actually borrowed the hedge trimmer from my neighbour, who also uses it to cut down his ornamental grasses. The trimmer was originally purchased to cut back a massive hedge between our properties, but that hedge was removed last year and replaced with much nicer and wildlife-friends cedars.
Today, there is little use for the trimmer, so it has been given a new purpose primarily as an ornamental grass trimmer.
If you are a gardener on a budget looking for hedge trimmers, consider checking out thrift stores or Kijiji and other on-line buy- and sell-sites. The trimmers are fairly common sale items on these sites as a growing number of homeowners remove formal hedging and sell off their trimmers.
Since they are required only a few times a year and for a relatively short time, sharing a hedge trimmer with a neighbour is also a great way to cut costs.
If you are looking to purchase your own hedge trimmer, many of today’s models offer excellent ease-of-use whether you purchase and electric version or a battery-operated unit.
When to cut down ornamental grasses
There are generally three classifications of ornamental grasses: cool season, warm season, and evergreen grasses. The rules that govern the cutting, planting and dividing of these grasses vary slightly depending on the type. Proven Winners offers this explanation of the three types:
Cool-season grasses put on most of their growth in spring before temperatures begin exceeding 75 degrees Fahrenheit and in the fall when temperatures cool down. They generally maintain good colour through the summer but won’t grow much when it is hot. It is recommended to trim about 2/3 of the plant for cool-season grasses. Cool-season grasses tend to look good even as the weather cools. Leave their foliage in place until spring and then as soon as the snow is gone cut them back. Trimming cool-season grasses too harshly can irreparably harm the plant.These plants include:
Calamagrostic acutiflora. Commonly called Karl Foerster Feather Reed grass. This 4- to 6-foot tall cool-season ornamental grows in zones 4-9 . Its flumes turn feathery as fall approaches making it a perfect addition for the late season and winter garden.
Deschampsia. These cool-season grasses grow in most soil types in zones 4 through 9. D. cespitosa, or Blue Mohawk Soft Rush, forms a clump of thin dark green blades. The graceful plant gives way to numerous flower stems in summer with gold, silver and green tints. Northern Lights Tufted Hairgrass adds a colourful and natural look to any garden, with variegated leaves rising nearly 3 feet high.
Fescue, or Festuca. Blue fescue are cool-season grasses that grow as clumps of icy-blue leaves and can thrive in sun or light shade. They have deep roots that help them tolerate drought. The compact and cold-hardy perennial can add winter color to edgings or mass plantings.
Helictotrichon. Also called Blue Oat Grass, H. sempervirens is a European clump grass that achieves its bluest color in drier soils.
Warm-season grasses won’t start growing until mid to late spring or even early summer. Their major growth and flowering happens when the weather is hot. They will usually turn shades of brown for the winter. These grasses include:
Acorus. Also called Golden Variegated Sweet Flag, Acorus gramineous 'Ogon' has rich golden leaves that is semi-evergreen. It grows in zones 5 through 11 to a height of about 10 inches.
Arundo (Arundo donax). Commonly called Giant Reed grass, Arundo is a warm-season ornamental that blooms in fall with purple stems.
Andropogon. This warm-season ornamental grass also is called Big Bluestem. I have grown it close to the street for several years and it performs magnificently each year despite the harsh conditions it faces. It grows in zones 4 through 9 and the thin grass blades can reach 4 to 6 feet high. The grass turns from blue-green to reddish in fall.
Calamagrostis. Also called reed grass, C. brachytricha is a clump-forming warm-season grass that grows to nearly 4 feet high, displaying pinkish-tinted flumes in late summer or early fall.
Carex. More commonly called sedge, several pretty warm-season Carex grasses can work in a landscape. They rarely need to be cut back and are semi-evergreen in many areas.
Chasmanthium. This native (Chasmanthium latifolium) has common names like oat grass or wild oats. It grows 2 to 4 feet high and is a warm-season, low-maintenance grass. It sends up blue-green leaves followed by graceful ivory seed heads.
Hakonechloa. H. macra, also called Hakone grass or Japanese forest grass, is a full-sun loving warm-season grass. ‘All Gold’ Japanese Forest grass has pure gold blades that cascade from the centre, reaching only about 14 inches high. Aureola Golden Variegated Japanese Forest Grass grows a little taller and adds stunning, cascading texture with its thick gold and green leaves.
Miscanthus. Usually called Maiden Grass, Miscanthus varieties have blue-green foliage that grows in a vase-like shape. Miscanthus Sinensis (pictured above) is a favourite of mine, especially in fall with its silver-colored seed heads late in the season.
Panicum. Switch grass (P. virgatum) grows well in zones 5 through 9. It can handle poor soil and drought and attracts birds to its flowering heads.
Pennisetum. Commonly known as Fountain Grass, these grasses are actually from tropical areas. Probably the best known variety is Purple Fountain Grass, a colourful warm-season grass, that sports 2- to 4-foot high green and maroon glades all summer. Dwarf Fountain Grass can grow to 3 feet tall in a bright green mound with copper-colored seed heads in fall.
Schizachyrium. This tough and hardy grass, more commonly known as Little Bluestem is a native to North America and features narrow blue-green leaves.
Evergreen grasses are usually plants that look like grasses but aren't actually classified as grasses. Plants like the sedges and carex (see above) are grass-like but not grasses.
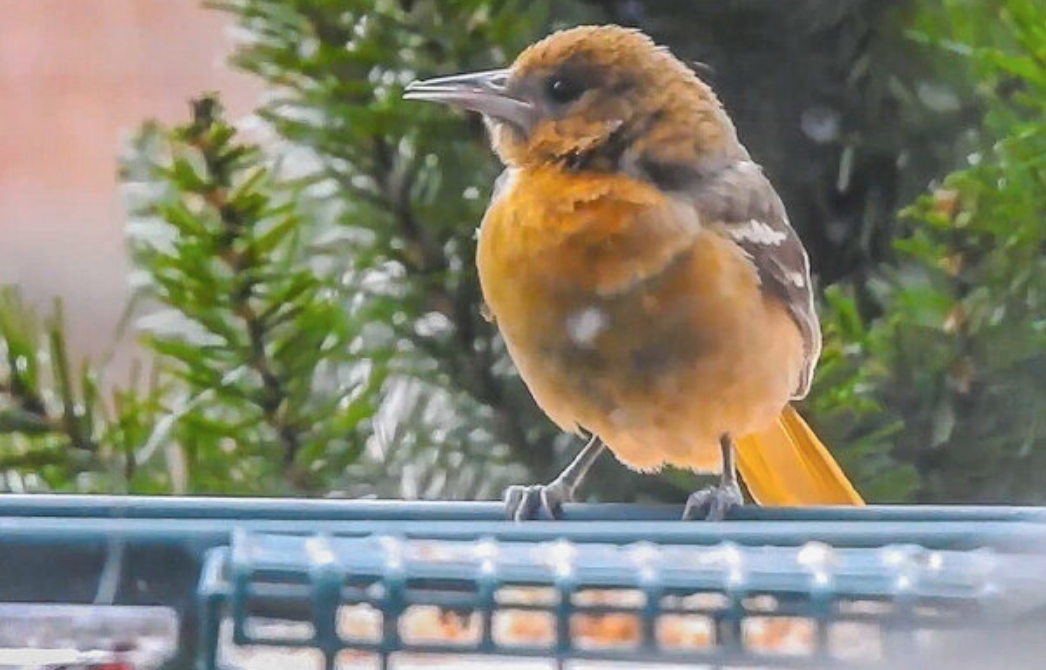
Toronto couple team up to save oriole the “snow bird”
A Baltimore Oriole that overwintered in Toronto had a couple of friends to help her. Two Toronto University professors went to great lengths to provide food and warmth to the young oriole during a long cold winter. Violet, as they aptly named her, survived the winter and is ready to celebrate spring.
Young Baltimore Oriole survives Canadian winter with a little help from her friends
Toronto’s little orphan oriole has made it through a brutal Canadian winter thanks to her adoptive parents Stella and Gord.
It took lots of love, caring and work but Violet – the name the couple have given their little “snow bird” – not only survived winter, but seems to have come out the other end in good health. After all, the young Baltimore Oriole dined on an assortment of Stella’s finest, homemade “almond bites” in her fully heated, big-city Pied-a-Terre where the couple worked vigilantly to provide everything the oriole needed to survive the frigid Toronto temperatures.
The specialized, homemade roosting box included a heated floor to help the oriole escape the most frigid temperatures, and even a small, heated birdbath that she used more as a source of water than a place to bathe.
The female Baltimore Oriole, who chose to remain in her favourite Canadian city throughout the winter, probably owes her life to the Toronto couple – both Toronto university professors – who noticed the oriole hanging around late last fall and realized that it was not going to fly south with its family for the winter. That’s when they stepped in to ensure the bird was not going to succumb to a Toronto winter.
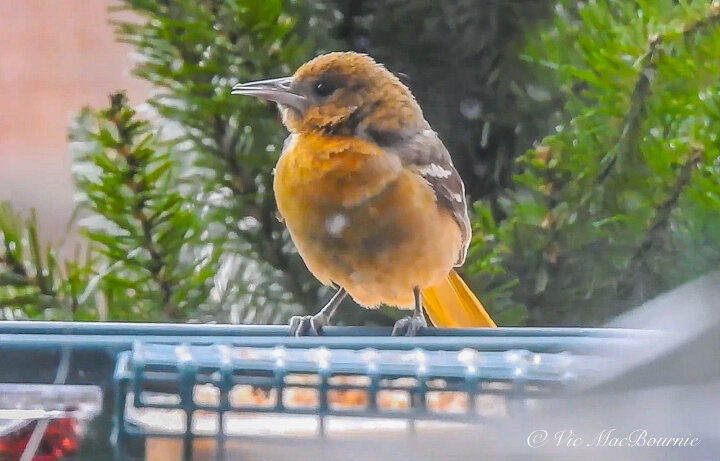
Violet, the little Oriole who survived a difficult Canadian winter with the help of two Toronto professors who went to great lengths to help the little Oriole survive.
Several biologists and birder friends suggested that the Oriole was probably born in the summer of 2020. The couple are now hoping that the young bird continues to fly solo until the other Orioles return in the spring so she can reconnect with her own.
"Maybe she'll even have a family,” Stella told Toronto Blog earlier this winter when they were trying to find ways to help the Oriole. “We realize she may not stick around our ‘hood’ once the warmer weather arrives. This is par for the course. We have not done anything to encourage her to let her guard down around humans; we keep a distance. She needs to be her natural Oriole self, with a good healthy caution around people, their cats, and other mammals,” explained Stella.
Her adventure began in late fall after a summer of feeding the birds in her Toronto west backyard, including groups of local orioles. That’s when she noticed something unusual.
“I started putting suet out in November and one day around November 15 I happened to notice this young little female clinging to the suet cage, and I knew it was likely she wouldn’t migrate. After that I started keeping an eye out for her, and the little food experiments started,” Stella explained to Ferns and Feathers in an email communication.
For more on Orioles, check out my posts on attracting orioles with oranges and jelly and the best oriole feeders.
“There were several female Baltimore Orioles in New York state that were documented all winter, and a couple of males in that same state which were not regularly documented/updated.”
Earlier this winter, Stella told Toronto Blog that her husband Gord “is super handy with wood, and we spent days sketching out designs for several feeders that would discourage Starlings and House Sparrows and still allow other species to feed.” She explains that after “some trial and error, lots of observing and moving things around, (Violet) started frequenting a certain feeder that was free of the invasive mobs.”
But Stella and Gord didn’t stop there. Drawing on their educational backgrounds, the couple set up a camera to keep a close eye on Violet while she was inside the roosting box and use that information to focus in on her favourite foods and how they could keep her safe from the more aggressive birds.
“We have set up a Blink security camera system, and we put a few cameras around the Oriole’s platform," she explained in an email to Ferns and Feathers.
“It has a motion sensor feature, so whenever she visits (or when other birds/squirrels visit), I get a notification on my phone,” Stella explains.
Violet enters her custom roosting box complete with heated floor and assortment of food. Video provided by Stella Bastone.
“The system records up to 30 seconds of footage at a time. This has been instrumental in helping me come up with tweaks to the feeding stations and foods for her! Every time I make a little change, I watch the short footage clips carefully to gauge whether I should make more adjustments. (For example, I make what I call “almond bites” for her – consisting of a base of ground almonds and pure lard – and there are a variety of natural additives. With careful observation and some research I’ve come up with 4 “flavours” that she likes. One set is “Red” – with powdered strawberry and raspberry. One is “Green” – with powdered hemp hearts, ground pumpkin seeds. One is “Orange” – powdered orange, chopped dried apricot. One is “Purple” – chopped dried blueberries, powdered berries. I can also see what she eats first, what’s her least favourite, how she’s able to eat foods of various densities and sizes, etc.”
Online community also lends a hand
Stella and Gord were never alone in their quest to help the oriole. The very active online birding community followed along with Violet’s journey and the couple were able to hook up with others in Canada and the United States who were caring for their own orioles that chose not to fly south to Mexico and Central America for the winter.
“There were several female Baltimore Orioles in New York state that were documented all winter, and a couple of males in that same state which were not regularly documented/updated,” explained Stella.
“There is a male Baltimore Oriole who has survived all winter in Haliburton Ontario, and is still doing well. And at least several others in states south of NY. On a less positive note, there was a very well-document female Baltimore Oriole north of Barrie who disappeared in January, as did a Summer Tanager who was wintering near there,” she added.
“A wonderful woman named Marlene was the one looking after the female near Barrie, Ontario. She and I connected regularly to compare notes. Like the others helping out wintering Orioles, she was offering grape jelly and oranges (neither of which my local Oriole cared for), and she also mentioned she was offering live mealworms – that’s where I got the live mealworm idea,” explains Stella.

Video of Violet getting a drink in a heated bird bath during a snowstorm. Video provided by Stella Bastone.
The live meal worms which she was able to get from a local branch of Wild Birds Unlimited proved to be a favourite for Violet providing much-needed protein to keep the bird’s fat content high.
Earlier this winter, Stella told Toronto blog that strangers have been “so eager to reach out to us: ‘thank you for being good humans’, they say. We are amazed. In recent weeks I’ve connected with several others who are also caring for wintering Orioles, or even Tanagers, in Canada and northern States. We are sharing our observations and notes on our efforts.” she says.
Drawing on their education background, the couple designed learning exercises for Violet. The goal was to teach the bird to use the shelter for quick food pickups. Violet seemed eager to learn, not only finding the shelter quickly but learning to quickly fly in and out of the shelter for quick bites.
Oriole proves to be a quick learner
Other, more aggressive, non-native birds discovered the roosting box and more action was necessary to ensure Violet’s survival.
Stella explains that just recently they have had to “set up a few additional feeding spaces since there were all kinds of “breaches” happening in her shelter – squirrels and Starlings started entering.”
“Since I anticipated something like this, I had already started leaving orange ribbons next the feeder bowls inside the shelter, so that our smart little Oriole would associate her food with the orange ribbon and be drawn to orange ribbons elsewhere. So, after the breaches, I set up another semi-enclosed area nearby, with the food bowls mostly out of sight, but with orange ribbon visible, and sure enough the Oriole discovered it right away. Then I did this again with a third little feeder enclosure slightly farther away, and she discovered that quickly too. Eventually I will have to dismantle her raised platform (which is up against our dining room window) so I am glad she knows about the third enclosed area – this will soon have tall ferns growing all around and concealing it, but with any luck the Oriole will continue to flourish and will know to go to that feeder for her mealworms and almond bites. Of course we’re also bracing for the possibility she will stop returning to our yard someday!”
As spring settles in around her Toronto neighbourhood, Stella awaits the return of the Orioles and other birds that she has been feeding in her approximately 40X75-foot backyard.
She explains her yard is larger than a typical Toronto yard “especially the newer ones “where developers are making huge houses with very little green space, after applying for exemptions to the rules – absolutely tragic. Many of our neighbours have similar sized back yards (except for the ones in newly-built developer houses), and since this was historically a European neighbourhood, there are very many fruit trees around here,” she explains.
“I have planted several native berry shrubs: serviceberry, winterberry, chokeberry, dogwoods. I also planted a few very narrow “nativars” called Weeping White Spruce and Louie White Pine, which are better suited for our urban space than the species evergreens.”
Her commitment to native plants may help to explain her success in attracting birds to her big-city garden.
“I started seriously getting into bird feeding maybe 5 years ago. (Before that I just sprinkled seed on the ground now and then.) I have maybe 25 feeders now, but they’re never all out at once. It depends on the time of year, the types of birds that are around,” Stella explains.
“Since my aim is to support local native species whose resources are dwindling, I really don’t want to encourage larger populations of non-native species like House Sparrows and Starlings, so I try to exclude them. There’s not really a 100% effective way to exclude them while feeding all local species, but I have found some partial solutions. For example, I have quite a few caged feeders – these keep Starlings out, and to discourage House Sparrows from those same feeders, I attach thin wire filaments which seem to spook House Sparrows for reasons that are not well understood. I also have almost all of the feeders in the Brome Squirrel Buster line of feeders, which are 100% effective at keeping squirrels at bay. I use a hopper feeder for whole peanuts, which draws Blue Jays all winter (and all of the blackbirds starting in spring). On my tube feeders, I have a "Magic Halo" dangling overhead to discourage House Sparrows. Click here for link to magic halo website.
With the Orioles preparing to invade her Toronto area neighbourhood again this spring, she says she will be ready with her Orange halves and grape jelly to welcome them back to town.
Across Ontario, and northern United States birders will be anxiously awaiting their return along with other migrants, including hummingbirds and warblers, many who decide to make our yards their home for the summer.
Some, like many of the warblers, will continue their journey farther north where insects and other reliable food sources may be more abundant.
In Toronto, Stella and Gord will be watching their little Violet with great anticipation that her long winter will end in a reunion with her family and friends and maybe even lead to her whole family. In fact, their latest Youtube video shows Violet is busy collecting material to build weave her intricate nest.
While we struggled in our own ways over the winter to survive a difficult, sometimes lonely pandemic period, we can all appreciate the struggle Violet endured trying to survive a cold winter without her family and friends by her side.
She did have Stella and Gord – two of the best friends a bird could hope for – watching over her and ensuring that she survived to sing another day.
Why birds choose not to migrate
It’s commonly believed that birds migrate because of the cold temperatures in fall and winter, but, in fact, birds are more driven to migrate in search of food. Birds that depend on insects and berries must move south as cold temperatures either kill off insects or force them into hiding under fallen leaves and in tiny crevices where they wait out the winter in relative safety from the cold and birds.
Many birds, including Orioles, travel as far south as parts of Central or South America in search of an abundance of both insects and fruit, while some cut their journey short and decide to remain in Mexico or the southern United States.
(If you are interested in the migration and annual cycle of the Baltimore and Bullock’s Orioles, Check out this comprehensive, month by month breakdown.)
Young birds, like Violet, injured birds or sick and malnourished birds often decide not to make the long journey south and, instead, try to survive the winter on their own. Many eventually begin to depend on the food we provide in our feeders to get them through the winter. Bug-filled suet cakes, meal worms and fruit are excellent sources of food for these birds and are often a key ingredient to get them through the most difficult of times.
Specialty bird feeding stores like Wild Birds Unlimited are good sources for these products or you can be like Stella and make your own to help them through the winter.
While I get great enjoyment from my bird feeding stations, providing natural food sources to our feathered friends is always the goal we should aspire to in our gardens. I have written a comprehensive post on feeding birds naturally. You can read about it here.
This page contains affiliate links. If you purchase a product through one of them, I will receive a commission (at no additional cost to you) I try to only endorse products I have either used, have complete confidence in, or have experience with the manufacturer.
Three spring wildflowers for the woodland garden
Spring is a magical time of year and nothing says spring more than the ephemeral wildflowers that emerge early and then disappear only to return the following spring. Here are three of my favourite.
Cultivating a love for Ephemerals
Spring ephemerals are often the first thing we think about when it comes to a woodland garden.
You know, those flowers that suddenly appear in early spring and quietly disappear almost as quickly as they appeared until re-emerging the following spring. In the meantime, they provide an essential early source of nectar for many of our pollinators and kick off the official woodland gardening season.
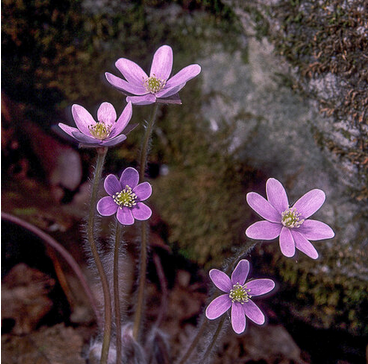
The diminutive Hepatica, the well-loved Trillium, and the aptly-named Bloodroot are three easy-to-grow spring wildflowers to plant in your woodland garden. All three will give you an early bloom, with the Hepatica adding lovely little hits of colour combined with its hairy stems and purple flowers.
Let’s take a closer look at all three of these woodland wonders.
(For my article on the importance of native plants, trees and shrubs, go here.)

The delicate nature of this Bloodroot flower and other spring ephemerals light up the woodland garden in early spring before they quietly disappear only to return the following spring.
Hepatica (Hepatica nobilis)
I remember going out into the woods around our home looking for the perfect Hepatica to photograph. My photo friends and I would crawl around the wet forest floor examining the delicate flowers (actually members of the buttercup family) trying to find the perfect specimen. They would emerge in early spring before the trees leafed out and when the ground was still wet from the melting winter snow. They opened only on sunny days and we would have to bring along a small mister to dampen the surrounding leaves and darken them for the photograph.
That just gives you an idea of how early you can expect these wildflowers to bloom.
Although Hepatica are native to Europe, Asia and eastern North America, our hunting grounds were the hardwood forests of southern Ontario. Theses small evergreen plants appeared, often tucked among the limestone rocks and fallen tree trunks in shades of pink, purple, blue or white sepals sitting atop the three green bracts on very hairy stems. In the United States, they are often found growing in rich woodlands from Minnesota to Maine and even as far south as Northern Florida and west to Alabama.
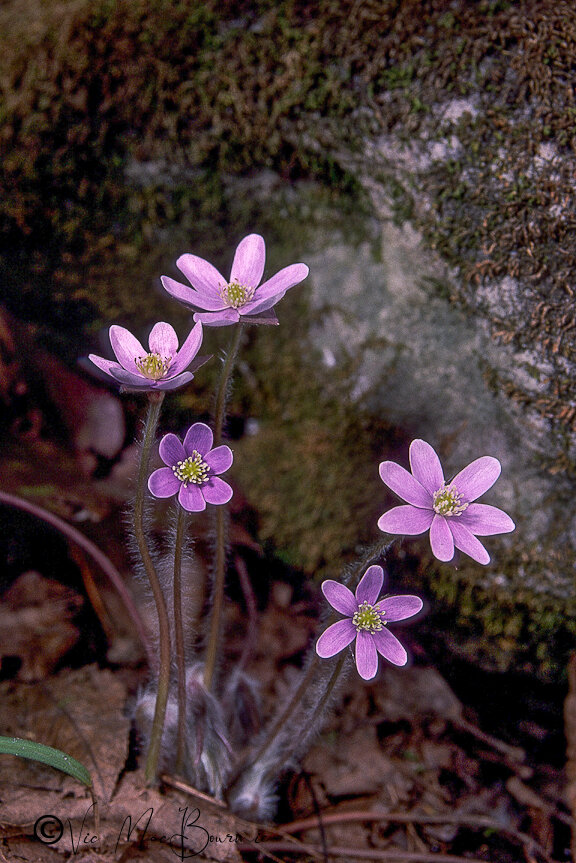
Spring in the woodland. Hepatica clump growing up against moss-covered limestone rock.
Hepatica nobilis is the plant found in Eastern North America, Europe and Japan, but other varieties, namely obtusa and var. acuta can also be found in North America.
There is nothing like a macro shot of a delicate, blue Hepatica with the sun streaming in from behind the flower and lighting up the delicate hairs along the stems of the plant. To get these shots we had to get low, very low. These flowers rise up only a couple of inches from the ground at best and don’t really flower unless they are getting at least some sun. Great specimens were not easy to find. Adding to the difficulty was the fact that we were capturing these images in the days of Kodachrome or Fuji Velvia with ASAs of 25 and 50.
Those days are done. Modern digital cameras open up the possibilities of capturing these wildflowers in very creative ways. And there is no real need to go into the forest to find these flowers when you can just go into your own backyard to experience them.
Hepatica hybrids have been cultivated in Japan going back to the 18th century. There are Youtube videos exploring the Japanese fascination with these flowers. This obsession is not hard to understand considering the delicate nature of the plants and how well they fit in to a Japanese-style garden. The Japanese have long perfected the hybrids with doubled petals in a range of colour patterns.
Although the hybrids can work in a woodland garden if you want a little more showiness, I always try to get the native wildflower or species plant (Hepatica nobilis)
Remember those Hepatica I photographed years ago? They were growing in alkaline limestone-derived soil. These flowers are not overly particular about where exactly they grow and can be found in a range of conditions, from the deep shade of a woodland to a grassland in full sun. They are most happy in a shaded location with rich organic soil and will live for many years. Once established, they will form colourful clumps of flowers that will bloom early in spring alongside even your crocuses. They are happy in both sandy and a clay-rich soil. What Hepatica really need for success is a covering of snow in winter and an evenly moist soil throughout the year.
Gardeners on a budget can grow Hepatica from seed, however be prepared to wait several years for the plant to bloom. Divided plants will also take a few years to recover and thicken up.
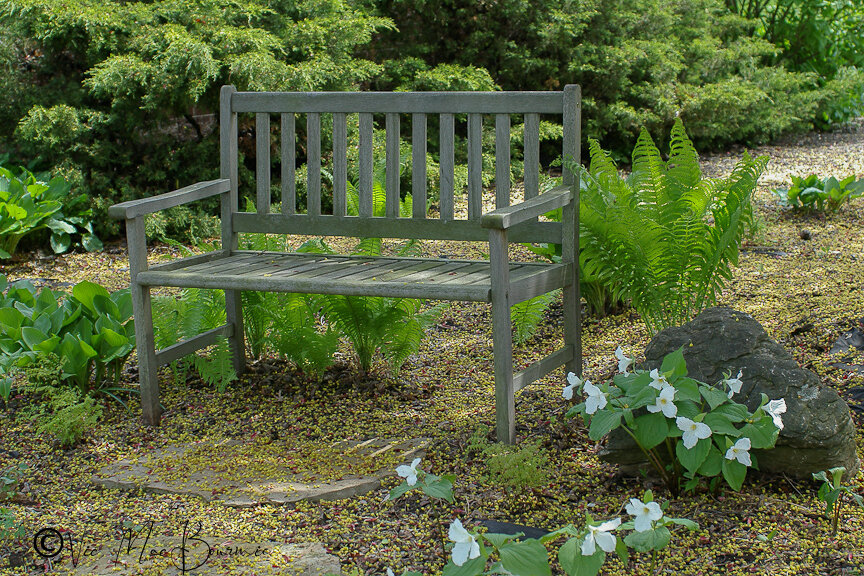
The perfect place to sit and enjoy the spring Trilliums in our front garden.
Trilliums (T. grandiflorum)
It’s hard to imagine a woodland without Trilliums. Easily recognized by their three petalled white flowers surrounded by a whorl of three green leaves, these early spring bloomers have long been a favourite of gardeners looking to celebrate spring.
Although there are more than 40 trillium species, with varying colours ranging from white to yellow, maroon and approaching nearly purple, most are familiar with the white trillium (T. grandiflorum).

Trilliums nestled in around a fallen birch branch in this natural woodland scene.
During those same photographic outings with my buddies we would often stop by the “Trillium Trail” at a local provincial park that was literally covered with thousands of Trilliums in all shapes, sizes and interesting variations. It was always an impressive site but in some ways overwhelming to photograph. So many Trilliums, so little time.
If given proper growing conditions, Trilliums are relatively easy to grow and are long-lived in our woodland gardens. Provide them with an organic-rich soil that is well drained but kept moist all summer. The flowers will bloom early before the trees are all leafed out, and become dormant by midsummer.
Trilliums do not transplant well if they are dug up from the forest floor, so always purchase Trilliums from a reputable nursery.
Gardeners on a budget can propagate Trilliums from seed, but expect to wait up to five years before you begin to see blooms. Seeds sown in the garden will not even germinate until the second year. Propagating trilliums by rhizome cuttings or, even better, division when the plant is dormant is probably an easier way to go.

A bloodroot flower tries to emerge from its leaf that wraps around it like a glove in the early spring garden.
Bloodroot (Sanguinaria canadensis)
Every spring I watch for the Bloodroot to emerge in our front woodland garden beneath the Serviceberry tree and one of our Japanese Maples. They are growing beside a large limestone boulder tucked in and among ground covers that hide the emerging plant until just before they bloom. I’m often surprised to suddenly see the lovely white blooms with the sunny yellow center.
My sudden encounters every spring is not a surprise since the Bloodroot flower emerges from the ground on a single stem wrapped up in their own single, large leaf. The white multi-petaled blossom may even begin opening before the leaf has completely unwrapped. The bloom, which can stretch upwards of 12-14 inches high, manages to rise just slightly above the leaf before opening. On a sunny day the white flower with its blood-red stem and roots, opens to reveal its stunning flower only to close up again at night.

A selective focus image of a Bloodroot flower emerging in the spring garden.
Our native bloodroots are members of the poppy family. Like other ephemerals they are only in flower for a fleeting time in spring before they disappear again only to rise up again the following spring.
Bloodroots spread rapidly and can make an excellent ground cover. And here is an interesting fact, seed dispersal is primarily done by ants.
You can expect to find them growing wild in moist woodlands throughout the U.S. and Canada from Eastern Quebec to Manitoba and south to Florida, Alabama and Texas.
For gardeners on a budget, the best method of propagation is by seed. It is best to plant the seeds immediately after you collect them, usually in early to mid-June. It’s also important to ensure the seeds do not dry out. This is a good reason to harvest your own seed rather than using commercially available stock.
More links to my articles on native plants
Why picking native wildflowers is wrong
Serviceberry the perfect native tree for the garden
The Mayapple: Native plant worth exploring
Three spring native wildflowers for the garden
A western source for native plants
Native plants source in Ontario
The Eastern columbine native plant for spring
Three native understory trees for Carolinian zone gardeners
Ecological gardening and native plants
Eastern White Pine is for the birds
Native viburnums are ideal to attract birds
The Carolinian Zone in Canada and the United States
Dogwoods for the woodland wildlife garden
Bringing Nature Home by Douglas Tellamy
A little Love for the Black-Eyed Susan
Native moss in our gardens
This page contains affiliate links. If you purchase a product through one of them, I will receive a commission (at no additional cost to you) I try to only endorse products I have either used, have complete confidence in, or have experience with the manufacturer. Thank you for your support.

Native plants help rewild his woodland garden ark
The coyote making itself at home on his back deck on his facebook page caught my eye, but the fact that Vince Fiorito brought in 50 tons of boulders and rocks into his backyard caught my attention. This guy is serious about rewilding his backyard.
Boulders build foundation for woodland garden
I thought the coyote making itself at home on Vince Fiorito’s back deck was a sign of his commitment to rewilding his backyard, but when he told me about the 40 tons of granite boulders and rocks that he squeezed into his backyard in Burlington Ont., I knew this guy was serious.
Not only is he rewilding the typical suburban-sized backyard, he is extending his efforts into the ravine behind his home and transforming it from a garbage-dumping area that is infested with invasive, non-native vegetation, into an impressive woodland ark filled with native plants and shrubs that are encouraging more fauna to set up homes in and around the area.
(Here is a link to my article on the importance of using native plants in the garden.
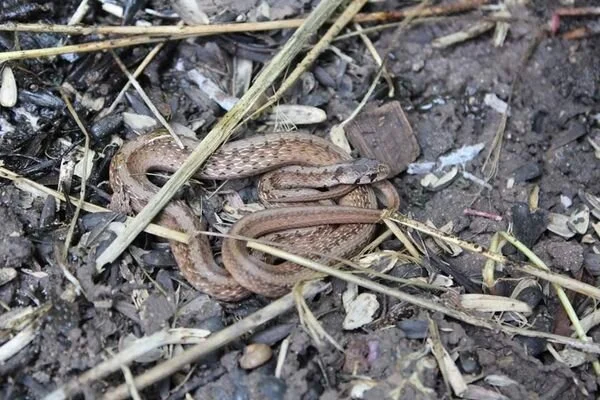
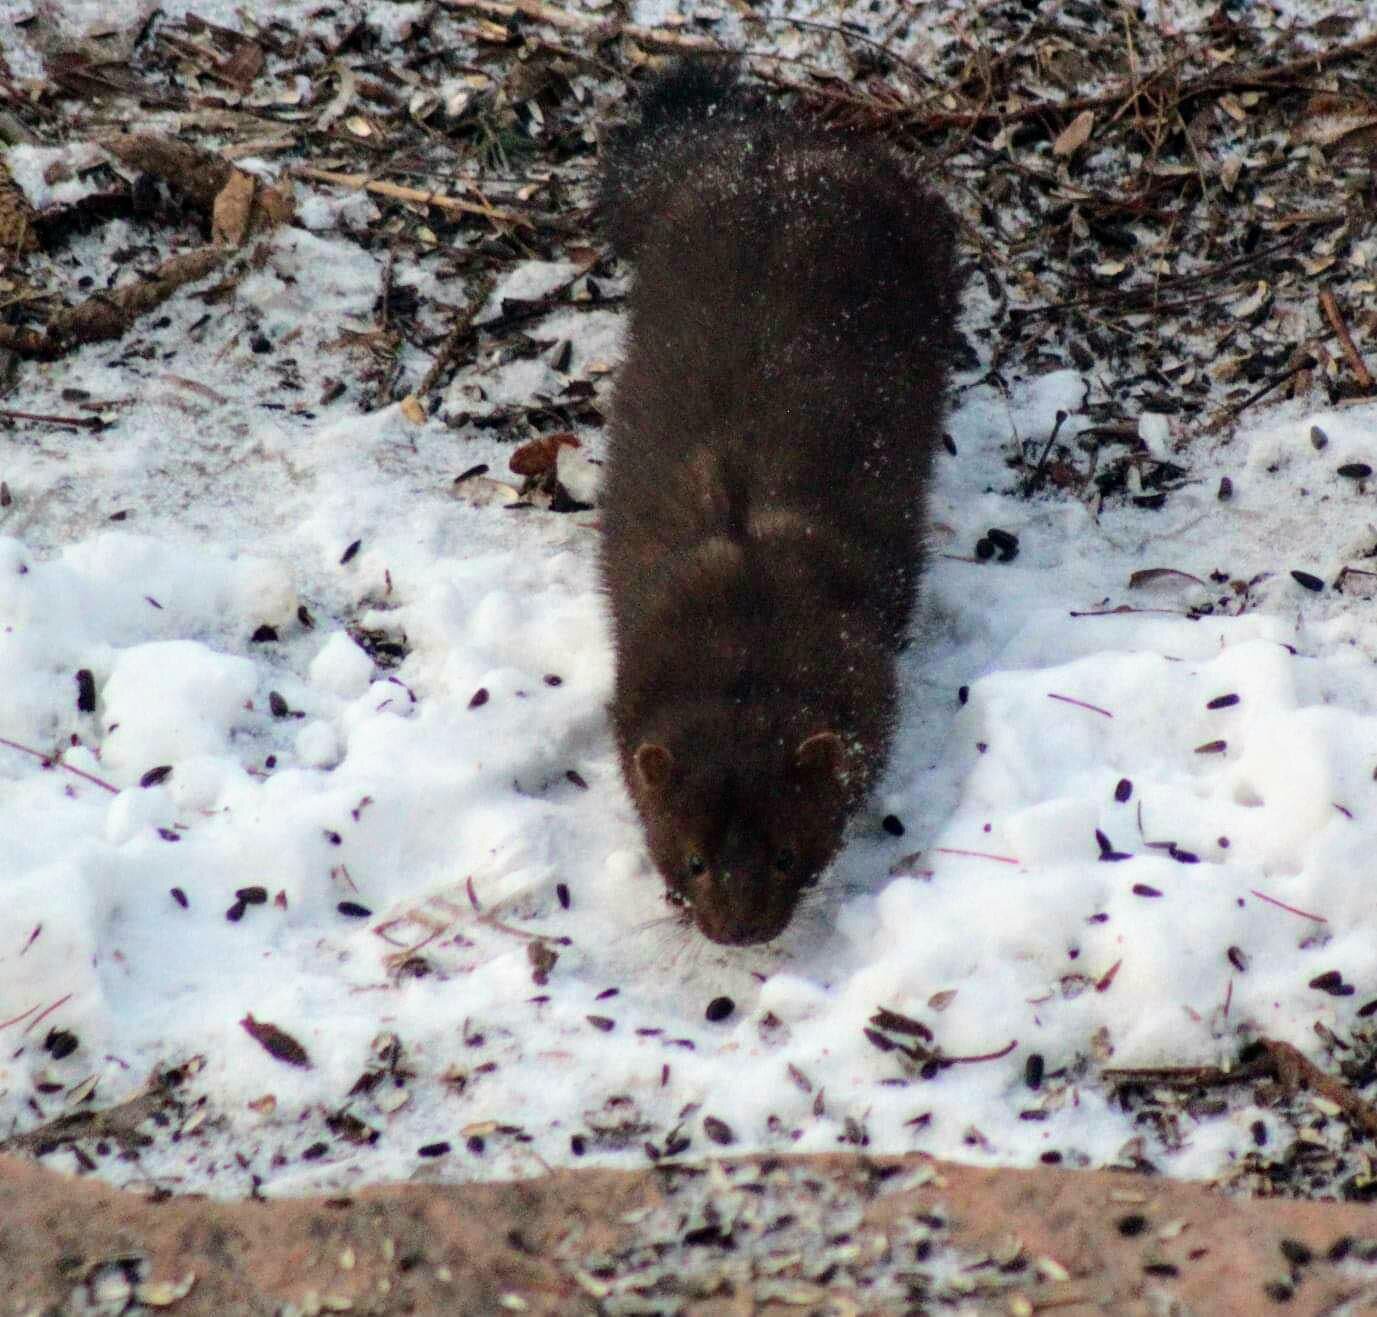
Maybe that explains the coyote that couldn’t help checking out his backyard and wandered up on his back deck, or the minks that came hunting squirrels in his yard this winter. Maybe it helps to explain the many small DeKay Brown snakes that call his backyard home. (See a Youtube video of his yard here.)
All you have to do is talk to Vince for a few minutes to realize this guy is serious about rewilding his yard, the ravine behind it, and the entire City of Burlington if given the chance.
Vince has even been recognized by the Hamilton/Halton Conservation Authority for his work on the Sheldon Creek watershed.

Vince Fiorito’s property backs on to a wooded area that he has worked to not only clean up, but transform with native plants into a naturalized woodland where coyotes, mink and a host of reptiles and birds call home.
It’s not the first time he has taken on the challenge. Before moving to Burlington, Vince transformed a former property in much the same way he has at his Burlington home.
More than 20 years ago in Cornwall Ont. Vince decided he could no longer live with the “McHappy” gardens that overwhelmed subdivisions all over his small town, let alone most of North America. It was then, after helping out with a school field trip to rescue trilliums and other spring ephemerals from a future gravel pit to a school yard natural habitat restoration project, that he decided it was time to take action and start cultivating native plants, with a focus on rare local species that were quickly disappearing.
“That is when I became convinced that the lawn and garden industry had created perceptions of problems where none existed (dandelions) so they could sell us solutions which are really problems,” he added.


Twenty steps to rewild your backyard
Remove all or as much grass as possible.
Stop using chemicals on your property to kill flora and fauna. Try instead to deal with problems naturally.
Replace non-native plants and trees with natives whenever and wherever possible.
Create safe habitat for animals, insects and reptiles of all kinds. This can include natural habitat from leaving snags (dead trees) to planting cedars and other evergreens that provide year-round protection. Supplement natural habitats with commercial or man-made structures such as bird houses and roosting boxes.
Consider providing natural nesting habitat for our native solitary bees as well as high-quality homes that allow for easy cleaning and removal of larvae. See my earlier article on the WeeBeeHouse.
Stop picking up leaves in the fall. Countless insects, reptiles and small mammals depend on leaf litter for winter survival. If you must, pile them into a corner or corners of your yard and let nature take care of them naturally.
Provide natural, native food sources for animals and birds from berries and nuts to flower seeds.
Ensure a safe and regular nectar supply in the yard for hummingbirds, pollinators, butterflies and bees.
Provide several sources of water in the garden, from small ponds, to on-ground bird baths that could include some form of moving water from a small solar fountain.
Consider the value of going vertical with more flowering and fruiting vines. These can also provide nesting areas for birds.
Forget a tidy garden. Nature isn’t tidy. Those spent flower stalks you are cutting down and sending to the curb, are home to insect larvae. Leave them be until late spring or early summer when the insects have had time to re-emerge.
Refrain from using gas-powered blowers on your property when a simple light raking will get the job done.
Build brush piles on your property. Even a small brush pile of sticks can be surprisingly productive. If you are having trees trimmed, ask the tree service to leave the cut branches in a pile in a corner of your property. You will save money and create invaluable habitat and hunting ground for birds and other backyard visitors.
Consider creating a hibernaculum as an overwintering area for snakes, insects, small mammals and other reptiles.
Create an open compost pile which will not only provide you with black gold, but will encourage insects and other fauna to use it as food and habitat.
Consider taking the necessary steps to become a certified backyard habitat to inspire neighbours to take action in their own yards.
Join your local garden and native plants organizations and spread the word about the value of rewilding their yards and neighbourhoods.
Always be on the watch for injured or sick animals and take the time to learn who to contact and what to do if you notice an injured animal on the property.
Put up decals, streamers or some other deterrent to keep birds from striking your windows.
Do no harm. It goes without saying that as gardeners we have a responsibility to do no harm to the fauna that share our backyards. Before taking any action in the yard, consider that possible harm that could result. The next time you are severely pruning a shrub or tree, for example, be sure to first check to ensure a family of birds are not depending on that shrub to hide and protect their nestlings. If so, put the pruning off until fall.
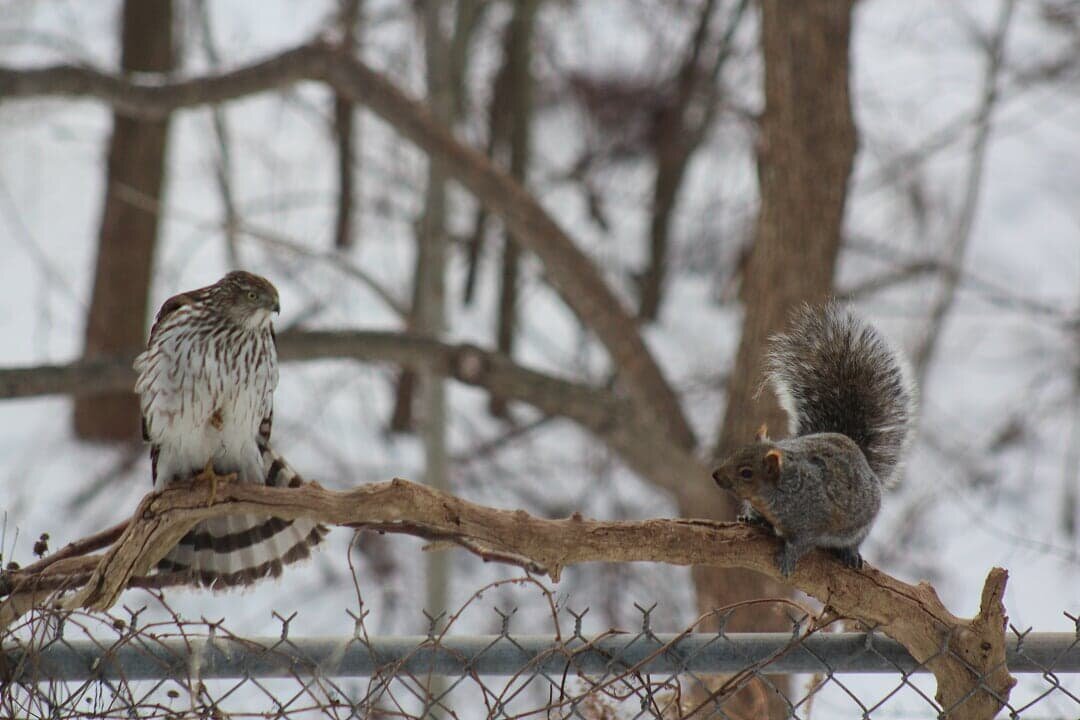
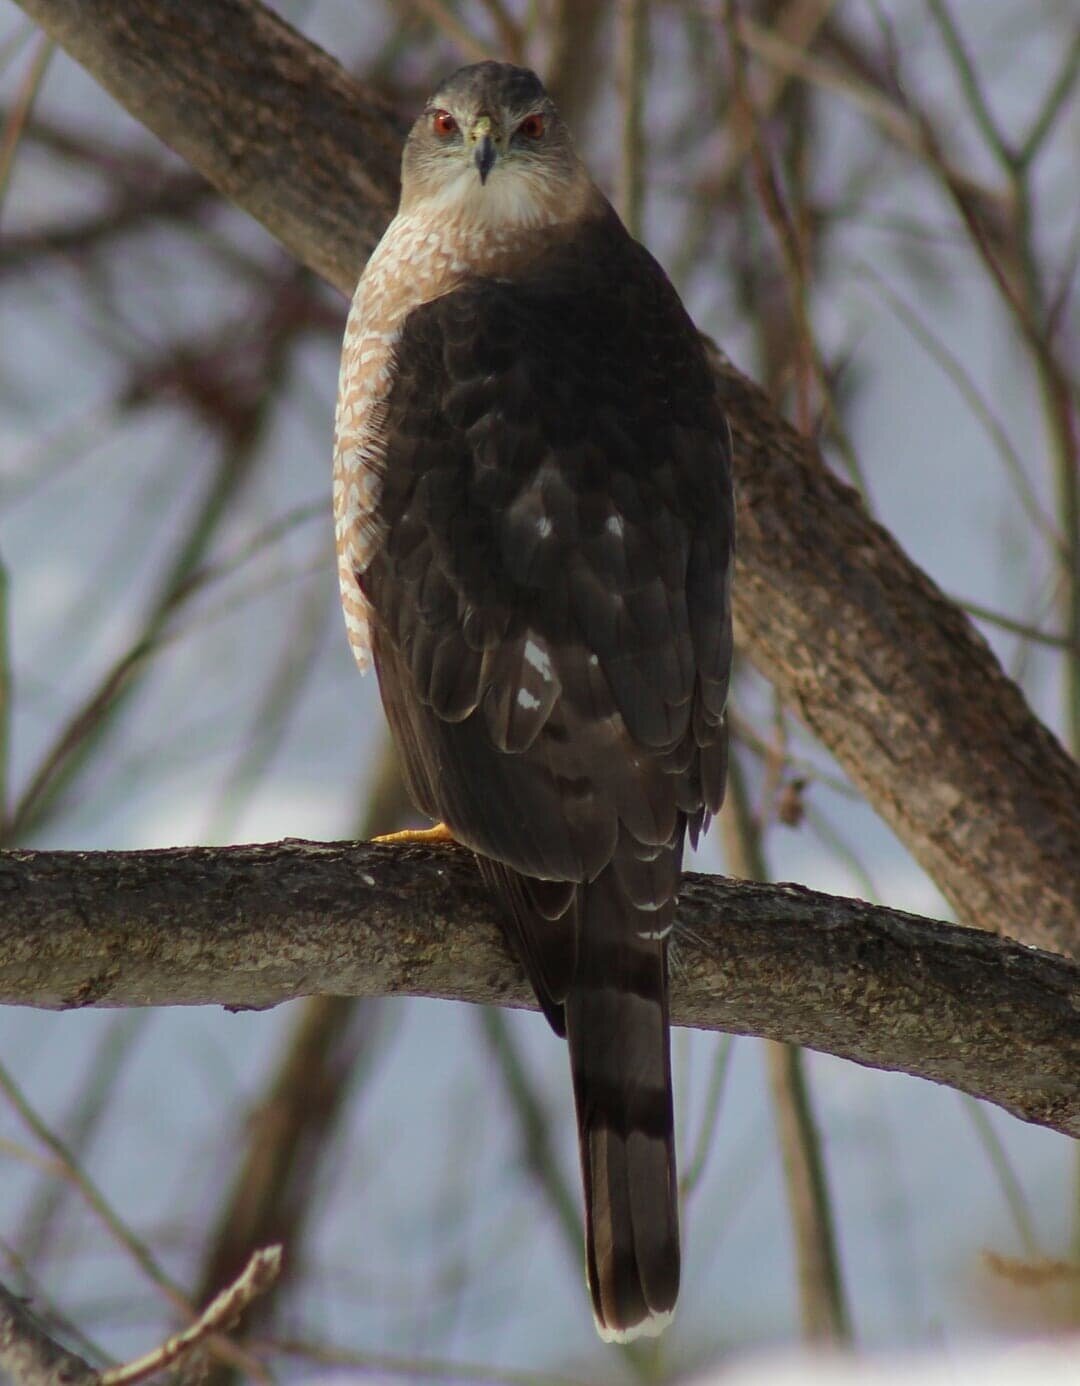
Vince’s outstanding photograph of the standoff between the hawk and a grey squirrel at the border of his garden and the ravine is the perfect illustration of wild nature and our suburban wildlife.
Vince’s journey to rewilding success
Vince explains how he originally became interested in the natural world.
“The biodiversity crisis set me on this path. I grew up hearing stories about the passenger pigeon and other species extinctions during my childhood,” he says adding that he also grew up watching the Nature of Things every week since even before Dr. Suzuki hosted the show.
More recently, he joined the Canadian Wildflower Society (the precursor to the North American Native Plants Society) and went to work teaching himself everything he could about native wildflowers. He soon discovered the informative and expert writings of native plant guru and author extraordinaire Lorraine Johnson.
It all added up to an acquired knowledge that he continues to search for and is quick to recommend the expertise of groups like the Ontario Invasive Plant Council and its program Grow Me Instead guide that is currently in its 3rd Edition. and available online. (This release marks the most extensive update of the guide, first released in 2010. The newest update includes nearly 40 new “invasives” and “alternatives.” In addition to the guides, Grow Me Instead also offers seed packets and other resources for Ontario gardeners interested in pursuing native plant gardens.)
Similar groups are available throughout North America. Gardeners are encouraged to look up their local native wildflower associations for specific information on their regions.)
In an article Vince wrote for the North American Native Plant Society newsletter, he describes some of the work he embarked on at his Cornwall property, which he describes as a typical ‘90s subdivision lot.
“I purchased plants and ordered prairie seed mixes from reputable local nurseries that specialized in native plants. I rototilled most of my lawn and smothered the remnants with newsprint and leaf litter. Then I added two tandem truckloads of furniture-size granite rocks and another 7.6 cubic metres (10 cubic yards) of black earth. I rescued deciduous forest floor plants from a nearby quarry site.”
And the conversion had begun.
Several years later, the turfgrass and non-native volunteers were eliminated and his front yard had become a cornucopia of native plants growing between granite boulders. Black-eyed Susans brightened the late summer months with their sunny dispositions, while asters, goldenrods, prairie grasses such a Little bluestem filled out the curb appeal in the front yard.
In the back, Vince planted taller native grasses including switch grass, bottlebrush grass and big bluestem. trilliums, foamflower, blue cohosh and Jack-in-the-pulpits and bloodroot made up just a few of the more than 100 native plant species – including some endangered species such as goldenseal (Hydrastis canadensis) spread throughout the garden.
“To save threatened species from extinction, we must deliberately create habitats for them in urban areas around our homes and businesses. We need to know about local species at risk, the conditions they need to thrive and deliberately recreate these conditions they need to thrive and deliberately recreate these conditions wherever we influence the landscape.”
The price of being ahead of his time
One big problem. Vince was well ahead of his time and at least one neighbour didn’t agree with his non-traditional landscaping style and complained endlessly to anyone who would listen.
It turns out this neighbour wasn’t the only “McHappy” homeowner who thought a chemical-filled lawn and a couple foundation plantings was the way create a beautiful, healthy neighbourhood.
A job offer in Mississauga was too much for Vince to turn down, and so, the home and garden he had worked so hard to transform had to be put up for sale.
And that’s where it sat for months.
Cornwall home buyers were just not ready to take on what they saw as a high-maintenance, non-traditional garden. Eventually, Vince and his family were forced to take a serious cut in the home’s value to help pay for the new owners to bring in bulldozers to remove all the low-maintenance native plantings and boulders, only to replace it with with high-maintenance, non-native turf and a couple of foundation plantings that could, if they played their cards right, eventually grow too large and cover the view out their front windows. (sarcasm intended)
Many of the native plants went to the school where Vince was first inspired on his journey to rewild his Cornwall home.
The family moved to Mississauga for a short time before settling in Burlington, close to the Oakville border and purchased a home that Vince knew would be home to his next backyard rescue. Only this time, his small GTA-sized backyard stretched out as far as he could see and beyond. His backyard might have been small, but it backed on to Sheldon Creek, a stream that emptied into Lake Ontario a few kilometres downstream. A chain link fence was all that separated his property from the surrounding forest and natural area that was just crying out for Vince’s acquired expertise in restoring nature with love and care and, of course, wheelbarrows of native plants.
“Who needs to drive up North. I have Muskoka right in my own backyard.”
A new city a new challenge
And so, in 2013 Vince accepted the challenge of a lifetime to rewild not only his new backyard but to restore what was once a beautiful, natural ravine back to its former glory.
There was one ultimatum he couldn’t ignore, however. It came from his wife, and there was no arguing about it. The front of the home – the curb appeal part – would remain more or less traditional. The trade off seemed a good one and Vince got busy. Very busy.
“Who needs to drive up North,” Vince says describing Ontario’s rugged northern cottage country. “I have Muskoka right in my own backyard,” he adds proudly.
It wasn’t always that way. When Vince moved into his current home the awkward, 75-foot by a mere 30-foot backyard sloped steeply down toward the ravine, and didn’t have a lot going for it accept plenty of non-native plants including an abundance of Burning Bush.
He installed a large cedar deck to flatten out the slope right next to the house and give him the perfect view of his garden, the ravine the birds and the wildlife passing through the ravine.
Then Vince called in reinforcements in the form of 40 tons of rock and stone, and two guys – one wielding a forklift and the other, a small backhoe.
“People joke that I have Stonehenge in my backyard,” he explains.
That’s a lot of stone for such a small yard but there was rhyme and reason for his madness. After pricing out limestone boulders for his yard, he realized that if he went to the source of the rock (a large quarry) he could get a lot better price. One problem however, he had to fill the flatbed truck with rock to get the deal. “That was about four times more rock than I needed,” he explains.
So he filled the truck, hired some manpower and machinery and the rest is history.
Today, native Redbud trees light up the yard in early spring and native plants from milkweed to black-eyed Susans fill in around the rocks, flagstone and boulders.
In the newsletter article for the North American Native Plant Society, he notes: Since moving to Burlington, I have recreated my ark garden concept. I use rocks and organic material to create overwintering habitat for reptiles and many other creatures. I grow endangered hoptrees, (the host plant for the giant swallowtail), which has appeared in my garden for the past three years. I have planted milkweeds, host plants for monarch butterflies larvae, which I saw for the first time last summer, and New Jersey tea (Ceanothus americanus) host plant for the mottled duskywing butterfly.”
Vince is particularly proud of the giant hibernaculum he created in his backyard just with with the introduction of the massive boulders and stone that now make up the foundation of his backyard.
The small DeKay snakes that call his yard home are just an example of the success he has had in attracting and providing safe areas in his garden for surrounding wildlife. These small snakes, which are capable of putting on quite a show when they are scared, live off of insects and slugs and are, therefore, highly prized by knowing gardeners. (A hibernaculum is a location where creatures can seek refuge during winters, often diving beneath the frost zone in a safe, dry environment. They are most often used by snakes, toads, lizards, insects, and rodents.)
But it’s not hard to see Vince’s compassion for the wildlife around his home and throughout the city he now calls home.
Building an “ark” for his forest friends
He refers to his property as an “ark” the same term Mary Reynolds talks about in her book the Garden Awakening. Ms. Reynolds, an acclaimed Irish landscape designer, is calling on gardeners around the world to create “arks” in their yards in the hope that these “arks” can eventually be joined to create wild corridors for native fauna and flora to once again flourish across the urban areas.
In his newsletter article, Vince points out that scientists have concluded that the earth is in the middle of its sixth great mass extinction.
“Species may be going extinct 1,000 times faster than historical background rates and accelerating,” he writes. “Most species are in decline, degrading the biosphpere’s ability to provide the environmental services that clean the air, purify water and rejuvenate soil. If current trends continue, flora and fauna homogenization, invasive organisms, novel pathogens, overexploitation, habitat loss, pollution/toxification and climate disruption may become so severe that within half a century nature may require three to five million years to recover lost biodiversity and ecosystem functionality.”
the statement could not be more clear as we try to recover from a pandemic gripping the world, killing hundreds of thousands of people and forcing the remainder to seek refuge in their homes far from the ravages of the dreaded Covid-19 virus.
“We must seek coexistence with other species on land directly influenced by human activity,” he writes. “To save threatened species from extinction, we must deliberately create habitats for them in urban areas around our homes and businesses. We need to know about local species at risk, the conditions they need to thrive and deliberately recreate these conditions they need to thrive and deliberately recreate these conditions wherever we influence the landscape. To change common perceptions, we must communicate complex stewardship concepts with easily understood words and imagery.
“We need to build ark gardens.”
All true. And, I will add that the world needs more committed naturalists and gardeners like Vince Fiorito.
More links to my articles on native plants
Serviceberry the perfect native tree for the garden
The Mayapple: Native plant worth exploring
Three spring native wildflowers for the garden
A western source for native plants
Native plants source in Ontario
The Eastern columbine native plant for spring
Three native understory trees for Carolinian zone gardeners
Ecological gardening and native plants
Eastern White Pine is for the birds
Native viburnums are ideal to attract birds
The Carolinian Zone in Canada and the United States
Dogwoods for the woodland wildlife garden
Bringing Nature Home by Douglas Tellamy
A little Love for the Black-Eyed Susan
This page contains affiliate links. If you purchase a product through one of them, I will receive a commission (at no additional cost to you) I try to only endorse products I have either used, have complete confidence in, or have experience with the manufacturer. Thank you for your support.

Ten Money-saving tips for the weekend gardener
Ten tips to create your dream backyard on a budget with both a long- and short-term approach. One of the keys is to create a garden landscape design that can be both built and maintained in small increments on weekends.
Weekend Gardener: Take a long- and short-term approach to saving money
Let’s face it, this hobby of ours can get expensive unless we are constantly looking for ways to save money. Rather than spending our weekends at the nursery buying more and more plants, consider staying home creating more plants through division and seed planting, and finishing that landscaping project that has been staring you in the face for so long.
Becoming a weekend warrior is the answer for so many of us with full-time jobs. It’s certainly one of the keys to long- and short-term saving when it comes to building our dream gardens over time. Set aside a few weekends in the spring, during the cooler months to tackle the bigger landscape-related jobs, and then take advantage of the remaining weekends to continue to get smaller jobs done. Before you know it, your garden design will take shape, you’ll be gathering more and more confidence in the garden, and you will be using the weekends to save money rather than spend it.
For more money-saving tips, be sure to check out my in-depth article on creating a buget-friendly garden.
The good news is that gardening in itself can be a money-saving venture, especially if you add plenty of veggies, fruits and nuts to your landscape plans.

The above picture shows the result of hard work and the benefit of time. I hired a local student to help with a lot of the heavy lifting. The photo below was the beginning of the project that involved installing a solar powered bubbling rock and a dry river bed, surrounded by three clump birch trees that creates the feeling of a forest glade.
But to really cash in, we need to make long- and short-term approaches to saving money a top priority. Saving money in the short term, means we can have more of what we want in the long term, and get us to our desired goal faster and for less money.
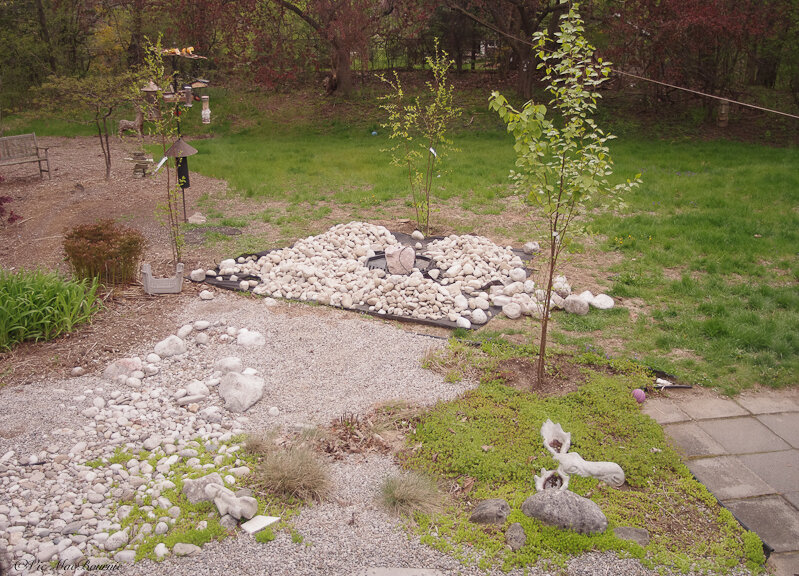
The beginnings of a design that finally pulled this rather unkept area together with the installation of a dry river bed below a birch grove. The main picture above shows how a few years of growth has transformed this area into a positive rather than a negative.

Several years later the small birch trees have grown to more mature trees and their upper storeys are beginning to form a ceiling over the bubbling rock.
Short-term saving, including starting plants from seed, dividing perennials, taking advantage of spring and fall sales and buying products used on line, can add up quickly to big savings.
Long-term savings requires a plan to complete major landscape projects with a view of saving money through the use of our own hard work and learned skills and the value of time. That’s where working the weekends really begins to shine.
Let’s take a look at how a short-term savings plan can work with a real-world example.
If I plan a garden bed with three drifts of three perennials, I can get to that end in several ways.
Start the plants from seeds (definitely the most frugal method.)
Purchase one plant of each variety leaving lots of room in the garden bed to add the remaining plants as the original plants are divided.
Purchase all nine plants for immediate impact. (certainly the most expensive option.)
If growing plants from seeds appeals to you, this is by far the best short-term saving choice potentially costing you almost nothing.
My choice would be to purchase one plant of each with the expectation of future divisions. By purchasing one perennial of each variety and knowing that we can divide them in a year into two or three plants, we can reach our goal in a couple of years. In the end, we save 2/3 in the short term to achieve the same result in the long term.
So, in the short term we save money by using time and smart gardening techniques to get to our desired result. By taking this approach over and over again with smaller projects we create substantial long-term savings.
“Be realistic about what you attempt to accomplish each season. If you are overly ambitious and attempt to renovate your entire property all at once, as we unwisely began to do at our present house, you’ll probably never get anything completed.”
Don’t overlook time as one of the biggest factors in the creation of long-term value in our landscapes.
Consider the potential savings acquired over time just by staying home to enjoy and work on our gardens rather than paying for expensive holiday resorts that offer little more than what could exist in our own backyards over time.
If being a weekend warrior pays high dividends, using a week or two worth of vacation to tackle a large problem is like winning the pot of gold and the end of the rainbow.
A staycation used to be a bad thing. Today, it’s a term used to describe those lucky enough to have a backyard they enjoy. I’m sure the pandemic has had a lot to do with it, but more and more of us are happy to stay home and enjoy the fruits of our labour.
If you love your garden, I’m guessing, you will much rather stay home with a good glass of wine in the backyard watching the birds than spend thousands of dollars to go to a resort to sip pricey drinks around a noisy pool.
Call my wife and I cheap, but our favourite vacation spot is our backyard.
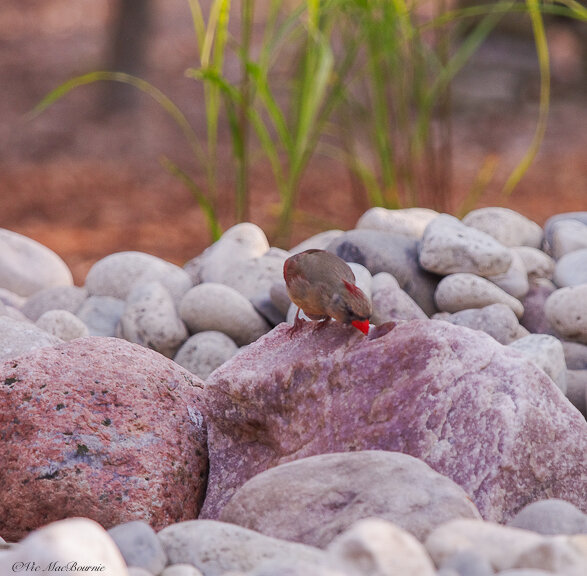
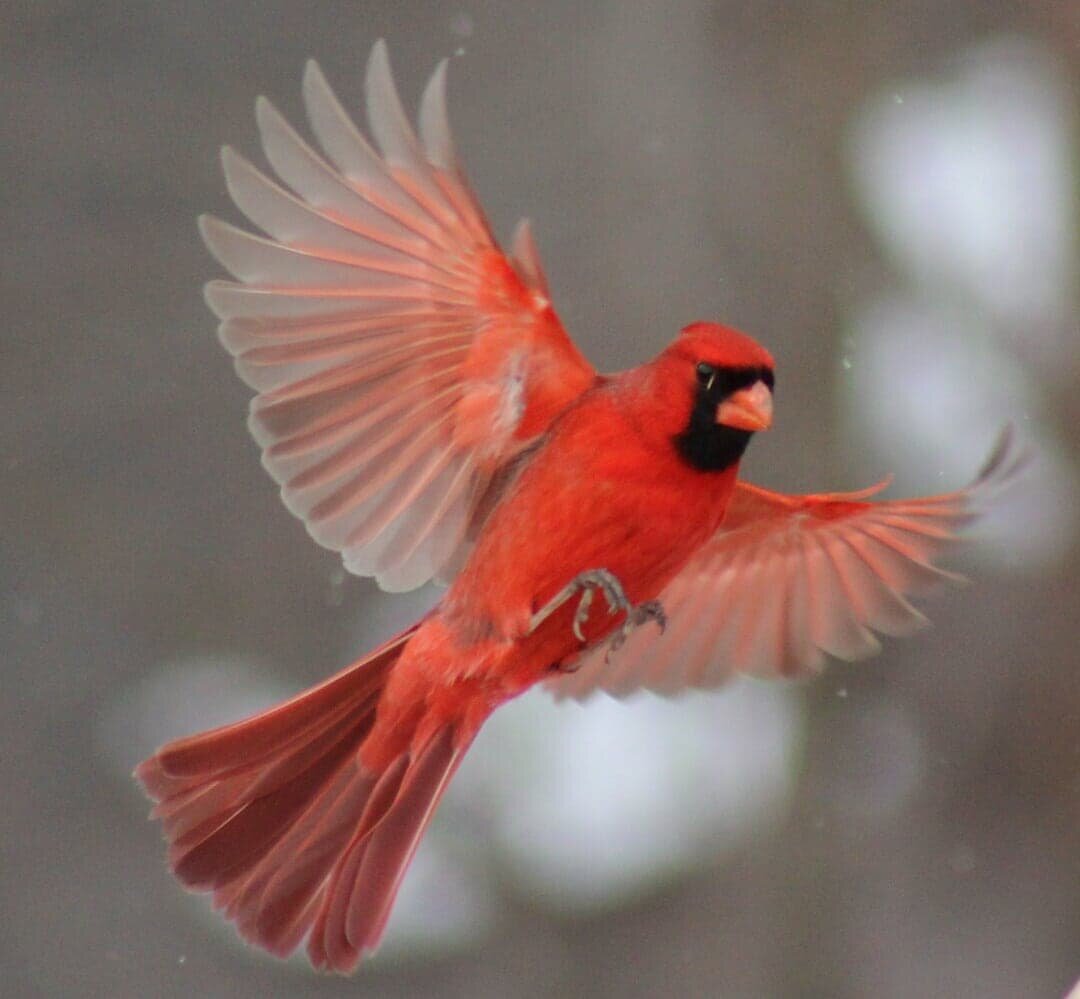
A cardinal takes advantage of the cool water from the solar-powered bubbling rock. The bubbling rock setup was another Kijiji find that helped me to keep the costs of the project on a tight budget.
These long-term goals are made possible by taking advantage of short-term money-saving tips that make it possible to create the very best backyard experience possible at a price we can afford.
Five long-term money saving tips for gardeners
Buy your trees and shrubs as immature specimens and use time to let them mature into large, highly-valued investments. If you are young, and time is on your side, consider planting bare root specimens for mere pennies. Whips of many trees can be purchased for peanuts. Not all trees need to be planted as immature specimens. Key trees in your landscape can be purchased as larger specimens, while understory trees and those on the edge of your woodland can be grown from bare root and whips.
Learn to do your own landscaping whenever possible. Use the winter months to read books, blogs and magazines not only to get ideas but to learn how other gardeners create your favourite spaces. One of the biggest mistakes homeowners make is to think they need to hire professionals to install huge concrete patios or large decks. The sheer size of these projects is enough to scare off the most ambitious DIY gardeners. It is usually much better, and quite frankly aesthetically more pleasing, to create smaller, more intimate settings that are more manageable and certainly easier to create on a budget. Replace the thought of installing a bright white concrete patio with a much more sophisticated rough-cut flagstone patio set in screenings and surrounded by a couple of large rocks for seating. Unlike the concrete that will not age well, eventually begin to crack and have to be replaced in time, the flagstone patio will take on a beautiful patina, moss may begin growing in the cracks between the pavers and any shifting over time can be easily corrected in spring. And, most important, you can do this yourself.
Consider hiring a student, a young family member or a neighbourhood teenager to help you with a lot of the heavy lifting. When we were young, my wife and I did all of the work ourselves. Today, hiring a student allows me to use the skills I have developed, after completing so many of my own projects, to guide them in more simple tasks. (See earlier article about hiring students)
Break down your landscaping into weekend projects. Many years ago I picked up a book by Susan A. Roth called The Weekend Garden Guide, Work-saving ways to a Beautiful Backyard. In the book she explores ways to design easier yards and lawns, creating low-maintenance flower gardens and the creation of easy-care natural landscapes like woodland and wildflower gardens in such a way that most of the work including maintenance can be completed over one or two weekends. If her book did nothing, it pointed me in the direction of learning to downsize major tasks and attempt to break them down into weekend DIY projects. “Homemade versions of grassy meadows and fields of flowers, woodland wildflower walks, gurgling streams, and rough-and-tumble- mountain peaks fall within the reach of the imaginative gardener,” she explains in the book. “Many of these naturalistic landscapes or gardens, especially woodland and meadow gardens, turn out to be ideal for weekend gardeners, because the sites require little maintenance. After all, whoever heard of a tidy woodland? Mother Nature doesn’t sweep up, so why should you?”
Create your own long- and short-term landscape plan or hire a landscape designer to do it for you. If you have a genuine interest in creating the garden of your dreams, then it is likely that creating a plan (or several smaller plans) is entirely within your capabilities of completing over time. It’s possible that your backyard can be divided into several smaller zones or rooms that can be tackled one at a time. Remember to look at your yard as a long series of weekend projects over many years.
For many of us, however, this process is overwhelming or the project is just too large to tackle on our own. In these cases it can be money well spent to find a professional who truly understands your vision and can put it down on paper to help you create the garden over time.
If you are dealing with a highly complex site, or your dreams are so grandiose, then it is probably a wise investment to hire an expert to help you solve these problems.
If, for example, your dream is to have a natural stream winding down into a massive pond, this might be something you need to hire an expert to design and create. That does not mean that you cannot design the rest of the property on your own and leave this area until you are able to tackle it in the future. By following a budget-friendly approach in the years leading up to this expensive installation, the money saved will enable you to hire a company to create the pond, stream, waterfall of your dreams.
Take it Slow
As Ms Roth explains in her book The Weekend Garden Guide: “Don’t attempt too much at once. Renovate your yard slowly. That’s the most valuable, cautionary word of advice you can follow, and it comes from someone who ought to know (me). Be realistic about what you attempt to accomplish each season. If you are overly ambitious and attempt to renovate your entire property all at once, as we unwisely began to do at our present house, you’ll probably never get anything completed. Make a long-range plan and space out your projects over several years, if necessary. The work will wait – it (unfortunately) won’t go away!”
“Many of these naturalistic landscapes or gardens, especially woodland and meadow gardens, turn out to be ideal for weekend gardeners, because the sites require little maintenance.”
Five short-term budget friendly tips for gardeners
If you are just starting out, consider investing in high quality tools, especially the ones you know will be used extensively during your weekend projects. Shovels, picks, a wheelbarrow (or even better and garden cart see my earlier story here) will be in regular use.
Search in places like Kijiji and other used outlets for good-quality landscaping tools. There is no need to spend hard-earned money on brand new expensive shovels, axes, and gardening utensils. Not only are many of these items available on the used market, but many are older, higher quality products that should last you a lifetime.
Check with parents, friends or relatives and ask if they have any good garden tools they are no longer using. Chances are their sheds are full of rakes and shovels they are not using. Electric or gas-powered garden tools are also available on many on-line outlets. Try to always buy high quality because there is a good chance these tools will last a lifetime and save you money over the long term. Take care of the tools, keep them sharp and rust-free for best performance.
Plan now to get rid of as much, if not all your grass, as soon as possible. There is no better way to throw away money than to begin to obsess over a non-native monoculture groundcover that is estimated to suck up $500-$600 a year just on water alone. Add in hundreds of dollars a year more for fertilizer and whatever killers lawn worshippers feel they need to spread over their properties.
Then there are the lawn mowers, rollers, aerators, lawn replacements, lawn companies…. It never ends. Trust me, eliminate what you can and save yourself a lot of money over the long term. (Check out my full story here.) Consider planting native ground covers in place of the grass. They will require less care, less chemicals and help local wildlife that have evolved with these plants to survive in our gardens.
Grow your perennials and annuals from seed if possible. You don’t need to invest in all the lighting and other accoutrements if it’s not something you are really interested in doing. There are many seeds you can sow directly into the ground. Some perennials and annuals are self-seeding which can make the whole process even easier. Learn to recognize the seedlings as they emerge and transfer them to other parts of the garden once they are large enough to be moved.
Pay attention to what other gardeners are growing in the area and, if any plants strike your fancy, tell them you would be interested in any divisions or seeds they would be willing to share. Free plants are always good. Neighbours, friends and relatives can get together for plant swaps, or you can keep an eye out for your local garden club’s annual spring sale. For the past several years, that’s been one of my go-to places for inexpensive trees, shrubs and plants. Many of them are expensive or rare plants that would cost considerably more at your local nursery.
Whenever possible, plant native plants rather than expensive hybrids. There are many positive reasons to move in this direction in your garden. Not only are they of enormous benefit to local wildlife, from insects, to butterflies birds and even larger predators like fox, they create a natural habitat in our yards that usually requires less upkeep and costs. That’s not to say they require no maintenance, but, if planted in the right location and soil requirements, they will grow, reproduce and survive in our gardens with minimal care. In the end you should be left with a garden that requires less care and money while enticing native fauna to your yards and gardens that, in turn, help to control invasive species of plants and insects that can harm the natural ecosystem.
Consider installing a high-end, off-grid solar power system
If you are like me and don’t have electricity in your garden, or at least don’t have it in the far reaches of the garden, consider installing a complete off-grid solar-powered electrical system like the American-based Shop Solar Kit company.
Maybe you have a pergola in the back of the garden, or even a she-shed that you would like to have full power running a small refrigerator, sound system or full-size lamps and lighting. If you need to run pumps and lighting to a garden pond, you can do it with one of these highly capable systems that, once installed, operate at no cost to you at all.
There are complete DIY kits available for approximately $1,500 and up.
Gardening on a budget links
Ten money-saving tips for the weekend gardener
DIY Bark Butter feeder for Woodpeckers
DIY reflection pond for photography
Click & Grow is ideal for Native Plants from seed

Window boxes on a budget: 5 money-saving tips
Few garden elements create curb appeal more than colourful window boxes and containers. They can be built and planted on a budget and offer a low cost way to increase the value of your front landscape. Here are five tips to plant them on a budget.
Cutting your cost on curb appeal
Window boxes are an important element to creating stunning curb appeal, and they don’t have to be expensive. In fact, with a little creativity, good planning and patience, creating window boxes that make a real statement can cost pennies rather than taking a major chunk out of our pay cheques.
The two self-watering window boxes on the front of our home have quickly become the focal point of our home’s curb appeal over all four seasons.
In spring window boxes can be packed with bulbs. In summer they are loaded with fillers, thrillers and spillers and at their prime. By fall and winter window boxes provide the opportunity to create themed boxes featuring pumkins, ghords, dried leaves and grasses. In winter, evergreen boughs spill out between colourful Christmas balls. Just add some white twinkle lights and you’re set.
So if you haven’t given much thought to installing window boxes, now just might be a good time to consider them. There are a number of models available on the market.
For more on building your gardening on a budget, check out my in-depth article here.
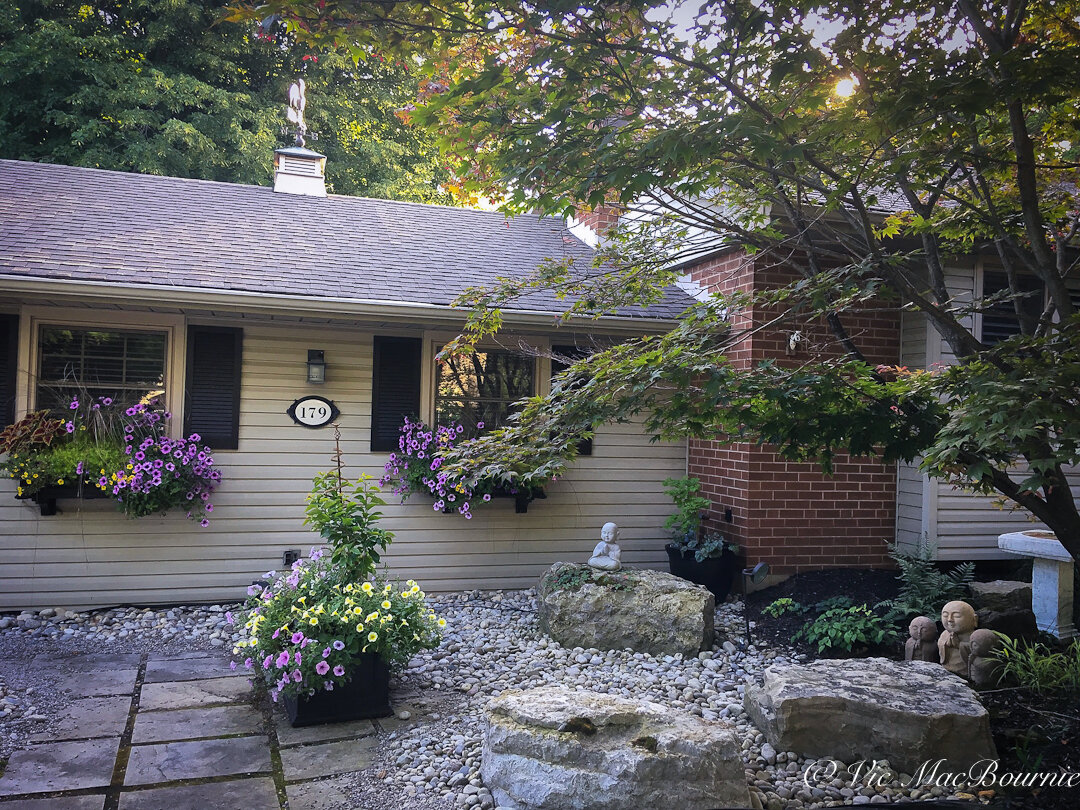
This image show the front of the home with window boxes and matching container withing a Japanese-style garden
Mayne window boxes provide lots of options
We chose to go with the Mayne Fairfield 4-ft self-watering black window box mostly because they offered the self-watering feature, were black and came in the exact size we wanted.
For more suggestions and some of my favourite garden things, be sure to check out my Favourite Things post.

Don’t be afraid to snap pictures of window boxes you admire on your travels. These window boxes were on a beautiful building in Old Quebec City and I could not resist grabbing a shot. The symmetry is perfect as is the colour selections. Grasses as the thriller works perfectly.
Buying or building window boxes on a budget
The Mayne window boxes are a New England style window box made from 100 per cent high-grade polyethylene with a double wall construction that creates the water reservoir and helps to insulate the plants from temperature extremes.
They can hold approximately 4 gallons of water with a soil capacity of 9.5 gallons. We purchased the optional decorative wall mount brackets in the same powder coated finish. The brackets, although they are mostly decorative, make the window boxes look more authentic and substantial.

An example of one of our window boxes with Toffee Twist Carex as the thriller with supertunias, coleus and other annuals adding colour and texture to the grouping.
If you are a little handy and looking to save even more money, there are lots of plans on the internet that will take you through simple steps to build your own out of wood.
Extra precautions would be needed to protect the wood against rotting from constant watering and the weight of the units after filling them with soil, water and plants.
But this post is not about building window boxes on a budget. I’ll leave that for the handy guys.
This is about planting them up on a budget-friendly approach so that we can use any remaining funds to get our containers planted up as well.
One of the surprising benefits of installing our window boxes is that they create an opportunity to add a little fun, whimsy, colour and seasonal interest to the front of our home on a small scale, but in a very budget-friendly manner.
A quick stroll through Pinterest or google will reveal some spectacular examples of beautiful window boxes packed with thrillers, fillers and, of course, spillers. It doesn’t take long, however, to see that more than a few pennies were spent creating these wonderful window boxes.
Tips to planting boxes on a budget
Our goal is to find ways to cut costs and still get outstanding results.
An example of using artificial flowers in early spring to add a punch of colour. the plants can be used to fill out the boxes before the plants have filled out.
Budget-friendly Tip #1: Go to your nearest Dollar Store and go on a buying binge: fake flowers, fake ferns, fake greenery even fake fall leaves – anything that might be appropriate for your seasonal window box designs.
The artificial flowers are, of course, the best. They come in handy in early spring to create spectacularly colourful looking window boxes entirely of fake flowers and greenery.
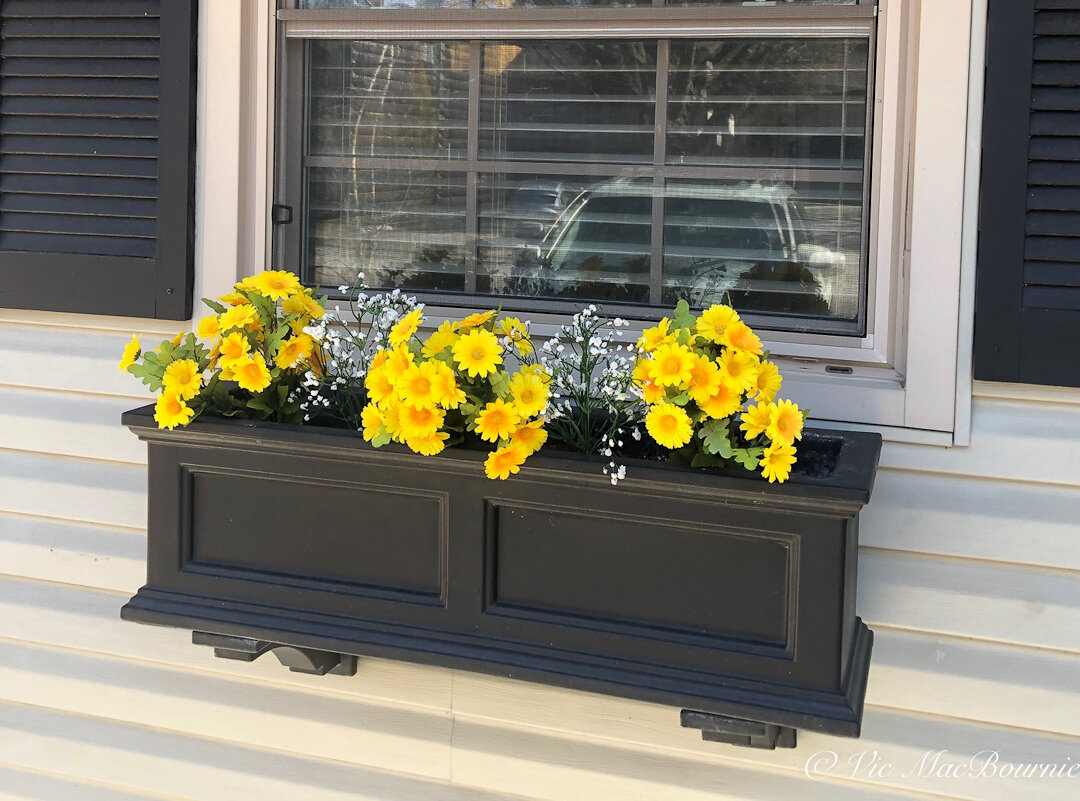
They are a great way to get you into the garden spirit when the snow is on the ground and the mornings are too frosty to have anything growing. It’s mid March in our area of Canada and our window boxes are filled with yellow daisy-like flowers surrounded by Pearly Everlastings.
The Dollar Store finds can by used year after year for a punch of spring color but don’t stop there. They are also vital to create that full look in the window boxes before your live plants have taken hold.
The fake flowers are the perfect placeholders well into the summer as you await the full impact of the live plants. You can even combine real flowers and fake flowers right through the summer to keep your window boxes in flower and looking full.
The artificial plants tend to disappear as the real ones begin to take over the boxes.
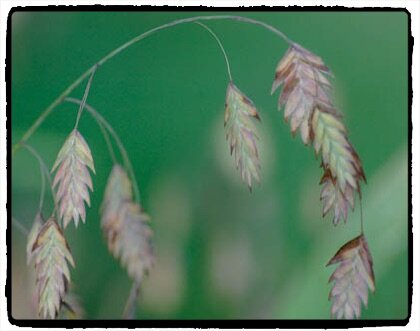
The perennial Northern Sea Oats can be used in window boxes for a year or two before making its way back into the garden.
Budget-friendly Tip #2: Consider growing your container plants from seed in the months leading up to spring. Many of these container plants are ideal to grow from seed. You likely won’t need too many plants to fill your containers, so even if you don’t have the room or equipment to grow plants on a large scale, you could grow a handful of container plants from seeds at a kitchen window. I use the Click and Grow system which makes growing seeds super simple. In fact, two of the plants, a magenta petunia and a black viola that we used in this year’s boxes are grown from seeds in our Click and Grow. More on the Click and Grow on this earlier blog post.
A few container plants your can easily grow from seed:
• Sweet Alyssum is are quick to germinate and should be started indoors several weeks prior to the last frost. It likes full sun to partial shade, is available primarily in white or purple and makes for a nice filler. Some of the newer varieties are more full and will spill out of the boxes more readily.
• Nasturtium is super easy to grow from seed. It is available in yellow, orange and red blooms, that are eatable with a peppery flavour, and are quick to germinate once they have gone through a stratification period for 24 hours. These trailing or semi-trailing plants are happy in sun but also do well in part shade. Varieties are available with handsome foliage including some that are variegated. Collect the seeds for more flowers net season.
•Zinnias can be a showstopper in your window box with their bright colours. Their mounding growth habit makes them ideal as a colourful filler and their height and abundance of flowers throughout the summer (in the range of 9 to 12 inches) makes them a thriller candidate.
• Dusty Miller brightens up a window box with its soft, grey foliage and contrasting colour and texture. It can be grown form seed sown early indoors 4-6 weeks before the last heavy frost and moved to the window box after the last frost. These are tough, drought-resistant plants.
More tips for your containers
Budget-friendly tip #3: Use perennials that are already growing in your garden. There are so many perrennials to choose from. The best part is that you can leave them in the window box rather than replanting them every year.
Using your existing perennials just might be the best advice I can give to save money planting your window boxes. Spring is the ideal time to divide your perennials. What to do with all the extra plants? You can spread the divisions around the garden and still have some left over to experiment with them in your window boxes. Some of the best plants to consider are small to medium grasses that can really look great spilling out of the window boxes. In fact, this year we are using two grasses in our window boxes that were taken this spring as divisions from the perennial gardens: Northern Sea Oat grasses are being used as the Thriller (see image above), and Little Bluestems are being used as filler both in our window boxes and in a large container in the backyard.
I’m looking forward to seeing how the bobbing flat seedheads on the Northern Sea Oats that start out green but eventually turn from buff-coloured to a deep bronze will look through the summer and into the fall. If I like them enough, I can leave them to use again the following year.
And, since the seed heads are attractive with a dusting of snow, they could be left in the boxes and used as decorative elements until the spring when they can be popped out and planted back in the garden.
A few years years ago, we used Proven Winner’s Toffee Twist Carex as the thriller in the boxes. PW describes the unique grass as slender, with iridescent leaves that offers an elegant sweeping, trailing habit. Some may describe the 18-25-inch tall plant as looking dead with its bronzy brown appearance, but it works well in a container. Considered an annual where I live, it can be overwintered in zones 7 through 10.
Small fountain grasses, and Sedges such as Carex buchananil, comans, elata, flagellifera, and testacea are easy to grow, low maintence and tough. (check here for images of many of these Sedges)
For more bold statements, consider using smaller hostas as filler plants. The more upright, taller hostas, especially those with variegated or blue varieties can even be used as thrillers for a season before they return to the garden to continue growing.
Other perennials in your garden you might want to consider are Heucheras. Since they are primarily foliage plants and available in a variety of colours and leaf styles, they make excellent fillers and some can even work as spillers.
Don’t forget ferns (especially Japanese Painted ferns), Snow in Summer (grey foliage with a profusion of white flowers), Sedums, Creeping Thyme and Forget-Me-Nots just to name a few.
Budget-friendly tip #4: Much like the previous tip – using perennials from your garden – purchasing perennials for use in your window box with the express purpose of eventually moving them into the garden can be a very budget-friendly approach to gardening. By purchasing perennials when they are smaller plants, and using them as a filler plant for the first year or two while they fill out in size before planting them out in the garden, you can get double the production out of them.
I have used Japanese Forest grass (Hakonechloa) All Gold in the window boxes for a year before pulling them out in the fall and planting them out in the garden. After a season of growth, it’s even possible to split the grasses into two before planting in the garden.
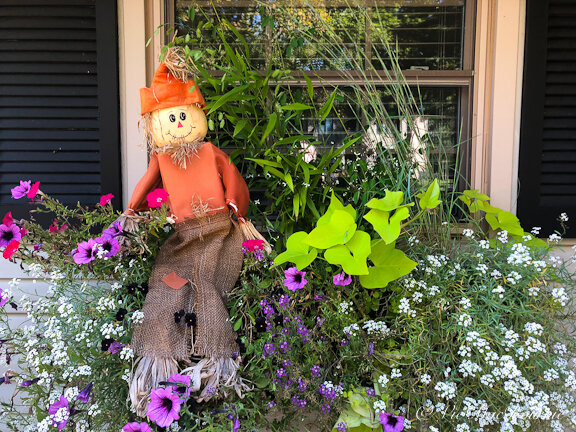
Window box in fall decor just to add a little whimsy as the garden season draws to an end.
Budget-friendly tip #5: Be creative when putting together your window box. You might want to use it as an opportunity to grow fresh herbs, or even vegetables. Cherry tomato plants are being bred to be grown in containers and can be used both as thrillers (if they are staked) or spillers cascading out of the window boxes surrounded by flowers. The herbs and tomatoes can all be grown from seed to save costs and they will more than pay for themselves at dinner time.
In addition, Don’t be afraid to use indoor plants in creative ways. the variegated ivy that is so popular with indoor plant enthusiasts is a great addition to outdoor window boxes and containers.
Also, plants like the polka dot plant, another popular houseplant, works very well in a window box. In fact, I am in the process of growing one in my Click and Grow device that is slated for my window boxes once summer rolls around. My plan is to continue to grow the plant until I can take a couple of snippets. Those snippets will be grown in water until I get roots. Those snippets will be my house plants, while the original seed-grown plants will be outdoor plants until fall threatens. That will give me 3-5 plants from a couple of seed-grown pods grown in a small device in our kitchen. Now that’s frugal at its best.
Gardening on a budget links
Ten money-saving tips for the weekend gardener
DIY Bark Butter feeder for Woodpeckers
DIY reflection pond for photography
Click & Grow is ideal for Native Plants from seed
Remove your turf and save money
Hiring students to get your garden in shape
This page contains affiliate links. If you purchase a product through one of them, I will receive a commission (at no additional cost to you) I try to only endorse products I have either used, have complete confidence in, or have experience with the manufacturer. Thank you for your support.

What’s better the Kamado or the Kettle BBQ
Choosing between a Kamado-style charcoal barbecue and the traditional Kettle-style is a debate that continues to rage between traditional grillers both young and old. There are no easy answers to which is best but price might help us settle the argument. Especially when you consider my previous blog post on building a garden before filling your yard with high-end BBQs, fire tables and hot tubs.
Kamado-style grilling vs the Kettle
So, what’s better a Kamado or a Kettle? Trying to choose between a Kamado-style grill or a more traditional Kettle charcoal BBQ really comes down to price. There is no question that the Kamado style grill, whether it’s a Big Green Egg, Kamado Joe or Louisianna Grill, is more adaptable to most grilling styles than the Kettle. The problem is that you will pay dearly for that convenience.
Both get the job done. If you are like many busy people, however, and don’t want to spend hours behind the BBQ preparing a meal for your family, you should probably look into a natural gas or propane unit.
But retirement certainly has its benefits.
Somehow, spending two-three hours cooking chicken wings on a charcoal BBQ is a luxury I can afford these days rather than an inconvenience. Nursing the little guys with a low and slow smoke over our new Louisiana Kamado-style Grill can be an enjoyable way to spend an afternoon. I must admit, however, that I never felt that way working full time. It was off to the local pub for a basket of chicken wings and a pitcher of beer.
The chicken wings were hit and miss but the beer was always good.
Besides, trying to cook chicken wings on our old rusty propane BBQ would have been an exercise in futility. It might have been easier to just cook them over an open flame.
So it was time.
For more suggestions and some of my favourite garden things, be sure to check out my Favourite Things post.

This image, from the Louisianna Grills website, shows our Kamado-style grid in action out on the road. The portability of the unit makes it perfect for camping or tailgating.
A search on YouTube led me to the popular Kamado-style grills and smokers dominated mostly by the popular Big Green Egg and the Kamado Joes. They looked cooler than the BBQs I remember growing up, but they came with hefty price tags for what my wife and I needed. Besides, I wasn’t even sure if I wanted a charcoal BBQ after living most of my adult life with propane.
A quick search on-line turned up the Louisiana Grills’ Kamado mini for a good price. Sold.
It was advertised as being able to handle 10 hamburgs at a time, but when it arrived I quickly realized that 10-burger claim must have been a typo. As one on-line review suggested, more like room for 10 meatballs. Oh well, it was still perfect for the two of us and even big enough to handle cooking for three or four with a little ingenuity.
Our mini Kamado has a 10-inch grill surface and lacks the accessories the larger Big Green Egg and Kamado Joes offer. So far, though, I’ve really enjoyed barbecuing with it and have not really felt restricted by the lack of accessories or the very small grilling area. No doubt one of the the reasons is that we teamed it up with a propane BBQ. More on that in a later post.
Our Kamado-style grill is small but mighty handling everything I have thrown at it so far. It is a mini grill, ideal for taking with you to the cottage or a tailgating party.
If you are buying into the whole Kamado experience, Big Green Egg, Kamado Joe and Louisiana Grills pretty much have you covered as far as ceramic bodies are concerned. There are other top-notch manufacturers of Kamado-style grills that are definitely worth checking out. including all-steel models by a number of prestigious manufacturers. The 22-inch stainless steel Caliber Pro Kamado, for example, will set you back about $1,900 U.S. but weighs in at a mere 75 pounds, making it a real alternative. And it comes in several colours including turquoise.
The market, however, is definitely dominated by the two big boys. Big Green Egg, for example, offers the Mini, MiniMax, Small, Medium, Large, XLarge and 2XL. Kamado Joe offers a similar line up of grills and an impressive array of accessories.
The mini Egg is the closest to the Louisiana Grill we purchased with a grid diameter of 10 inches or 25 cm. and a weight of just under 40 pounds or 18 kgs. Both are advertised as the perfect solution for picnics and tailgating, but they would also work well on apartment balconies and camping when you don’t want (or can’t) use propane canisters.
We were looking for something small and stylish, and were intrigued by what we had seen on Burlington Ont. resident Smoking Dad BBQ’s YouTube channel. The guy takes Kamado-style BBQing to an art form and I wanted to get in on the action – at least in a small way.

Firing up our Kamado grill for the initial burn in knowing it will never again be this clean.
In comparison to our 10-inch diameter, the Xlarge Big Green Egg has a grid diameter of 24 inches or 61 cm and weighs in at a hefty 219 pounds. Keep in mind that the grill size can easily expand with accessories that let you vertically more than double up on grill size. The Eggspander kit is on the Big Green Egg site at $265 U.S. and more than $400 Cdn on Amazon. There is not a Big Green Egg accessory you can think of that is probably not available for either the Big Green Egg and Kamado Joes, but be aware that it can get very expensive with each new gadget. The pizza accessory for the Kamado Joe, known as “DOJOE”, will set you back in the neighbourhood of $300 Cdn on Amazon. An excellent alternative to buying a separate, wood-fired pizza oven, but still not cheap considering the original cost of the BBQ.
So why choose a Kamado-style grill over, say the traditional Kettle grill, such as the popular Weber Kettle? Proponents of Kamados will tell you the secret is in the ceramic housings that retain both heat and moisture resulting in a finished product that is more tender and juicier than it would be on a regular charcoal grill. I am going to refer readers to this excellent and informative article to help further explain the benefits of the Kamado grills.
And, as champion Pit Master Chris Lilly once said about Kamado grills: “Ask your children what colour they want, because they will inherit it.”
With all that said: what about the more traditional charcoal grillers such as the extremely popular Webber Kettle. There is a reason these things have been around since they were invented by Weber’s founder George Stephen in 1952 and has since developed a cult following around the world. The Kettle’s are also available in various sizes, have an easy cleaning setup, a huge number of accessories and continue the long tradition of charcoal grilling while offering regular modern updates.
And, have we talked about the price. The basic Weber Original 18-inch black Charcoal Kettle will set Canadians back a mere $119. Upgrade to the Premium 22-inch model and you are at $229 Canadian. Add $10 for a coloured version (crimson, copper or green. A premium 26-inch Kettle will set you back a mere $469 Cdn.
Whether it’s a Weber or Kamado Joe you are cooking on, cast iron cookware is almost indispensible. For my post on using, seasoning and why you need a cast iron skillet, check out Cast Iron Cookware.
In a previous blog post, I talked about the importance of creating the bones of your garden before you go out and purchase the latest and greatest BBQ. Getting that garden foundation established as early as possible will pay off in the long run. Even if that means only buying a single tree to begin your woodland garden.
This is where the Weber Kettle or a similar BBQ steps to the forefront. It’s a simple, inexpensive BBQ that will go a long way to give you a foundation in BBQ techniques at a very reasonable cost. Weber’s website even offers excellent posts to teach you how to master the art of cooking with charcoal. If you are just starting out in the world of charcoal barbecuing and looking to create your ideal woodland garden, the Weber Kettle is an excellent choice to get you on your way.
If your garden is much further along and you are ready to take barbecuing to the next level, consider a more expensive Kamado-style BBQ.
Either way you can’t lose.
I also have a propane BBQ which gets plenty of use. Our Vermont Castings Vanguard BBQ is an excellent choice for those looking for a propane or gas style BBQ.
Check out this link for my article on our Vermont Castings Vanguard propane BBQ.
And this article for information on using cast iron cookware on the BBQ.
This page contains affiliate links. If you purchase a product through one of them, I will receive a commission (at no additional cost to you) I try to only endorse products I have either used, have complete confidence in, or have experience with the manufacturer. Thank you for your support. This blog would not be possible without your continued support.

How to help Hummingbirds during migration
Twice a year our little hummingbirds perform a minor miracle during their migration to and from Mexico and Central America. Along the way they could really use our help. Find out how you can help them survive their arduous journey by providing nectar and insects along their route and then welcoming them back home.
How far do hummingbirds migrate
It’s hard to imagine our tiny hummingbirds embarking on a two-week journey all by themselves covering between 3,500 - 4,000 kms from southern Mexico to the Great Lakes area and returning to the same backyard feeder they left seven months earlier.
But for many of our little Ruby-throated hummingbirds, that is the miracle they perform twice a year. Some, who spend our winter in Central America, can travel even farther. If that wasn’t enough, every year thousands of hummingbirds make the dangerous journey over the open water of the Gulf of Mexico flying non-stop for up to 500 miles to reach the safe shores of the United States. That solitary flight alone can take up to 22 hours.
So when do hummingbirds do most of their flying?
Experts believe that hummingbirds begin their migration because of the changing level and angle of the sunlight. They then use the daylight hours during migration to do most of their flying. This way they can take advantage of the nectar sources along the route. Years of migration have taught them what flowers to watch for along the way and by flying low, the birds can actually see food sources and make regular pit stops to stock up on energy along the way.
How can we help Hummingbirds survive their journey?
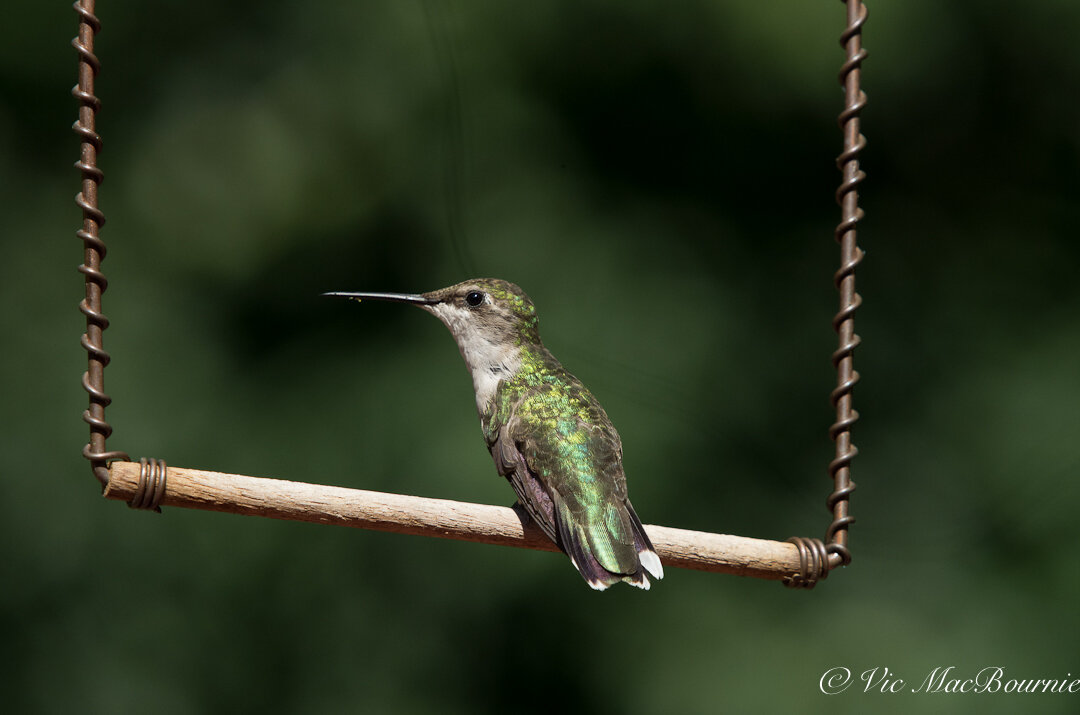
Providing perches for Hummingbirds to rest near a food source is a great way to give them a needed rest as well as an opportunity to photograph them.
5 Tips to help Hummingbirds during migration
Ensure your commercial feeders are cleaned, and up a few weeks earlier than you would expect them to normally arrive. Keep them filled with a 4:1 mixture of 1 part regular white sugar and 4 parts of water. It’s best to boil the water first and dissolve all the sugar in the boiling water. place it in the refrigerator until cooled and then fill the feeders and hang them out in the garden. I have found that the feeder hanging off our home’s eavestrough attracts the most hummingbirds, but spread your feeders throughout the garden to give the hummers the best chance of seeing them as they pass through.
Put out fruit, say on a shallow birdbath, to attract fruit flies – a great source of protein for the migrating birds.
Refrain from using any insecticides in the garden to encourage as many small insects and spiders as possible. We should never be using insecticides but especially in the spring when the birds depend on insects for their survival and, if nesting, for their young.
Plant flowers to provide natural nectar for the migrating hummingbirds. If you do not have any early-flowering varieties, consider going to the nursery and picking up some flowering annuals that provide the birds with an early nectar source.
Provide a shallow birdbath or one with a gentle fountain for the birds. Hummingbirds need to keep their feathers in top shape and will flutter in and out of a gentle spray cleaning their feathers and/or taking a small drink. Hummingbirds do get most of their water needs met through the nectar they consume.

Native plants are best food source
Using native plants in the garden is the ideal way to give our hummingbirds the necessary food to survive the long migratory journey.
Experts say that the little birds have learned to take advantage of tail winds to help them travel more efficiently and burn less calories. Ruby-throated hummingbirds have been know to eat one to three times their weight every day.
For some, their journey is close to complete at that stage, but most keep going bringing them as far west as Texas and North Dakota and as far north as parts of central and eastern Canada. Many settle in and around the Great Lakes where gardeners in Toronto, Hamilton, Cleveland, Buffalo and Niagara Falls welcome them with open arms and a host of hummingbird feeders, cleaned and topped with fresh home-made nectar.
Still others, continue their journey farther north.
To better understand the extent of the journey the Cornell Lab of Ornithology estimates that the 3,900-mile migration from Alaska to Mexico is the equivalent of 78,470,000 body lengths to the 3-inch hummer. The Arctic Tern’s migration of about 11,185 miles is only 51,430,000 body lengths. That’s a mighty difference for such a tiny bird.
Getting to their final destination involves a perilous journey. Storms, cold snaps and injury all play a major role in whether they are able to finish this journey. So too does the availability of food along the way.
Another interesting fact is that along the migration, if a hummingbird gets caught in a cold spell, it will shut down and enter a sleep-like state called torpor. The hummingbird can be seen hanging upside down and looks to be dead, but in fact, it has dropped its body temperature and heart rate to conserve energy. It even goes so far as to make its breathing intermittent. Once temperatures rise, the hummingbirds will continue its journey.
Prior to setting off on their journey, whether it is the Fall migration south, or the spring migration north, a hummingbird will typically gain 25-40 per cent of their body weight this will help to sustain them in the first part of the journey but food sources along the way are critical for their survival.
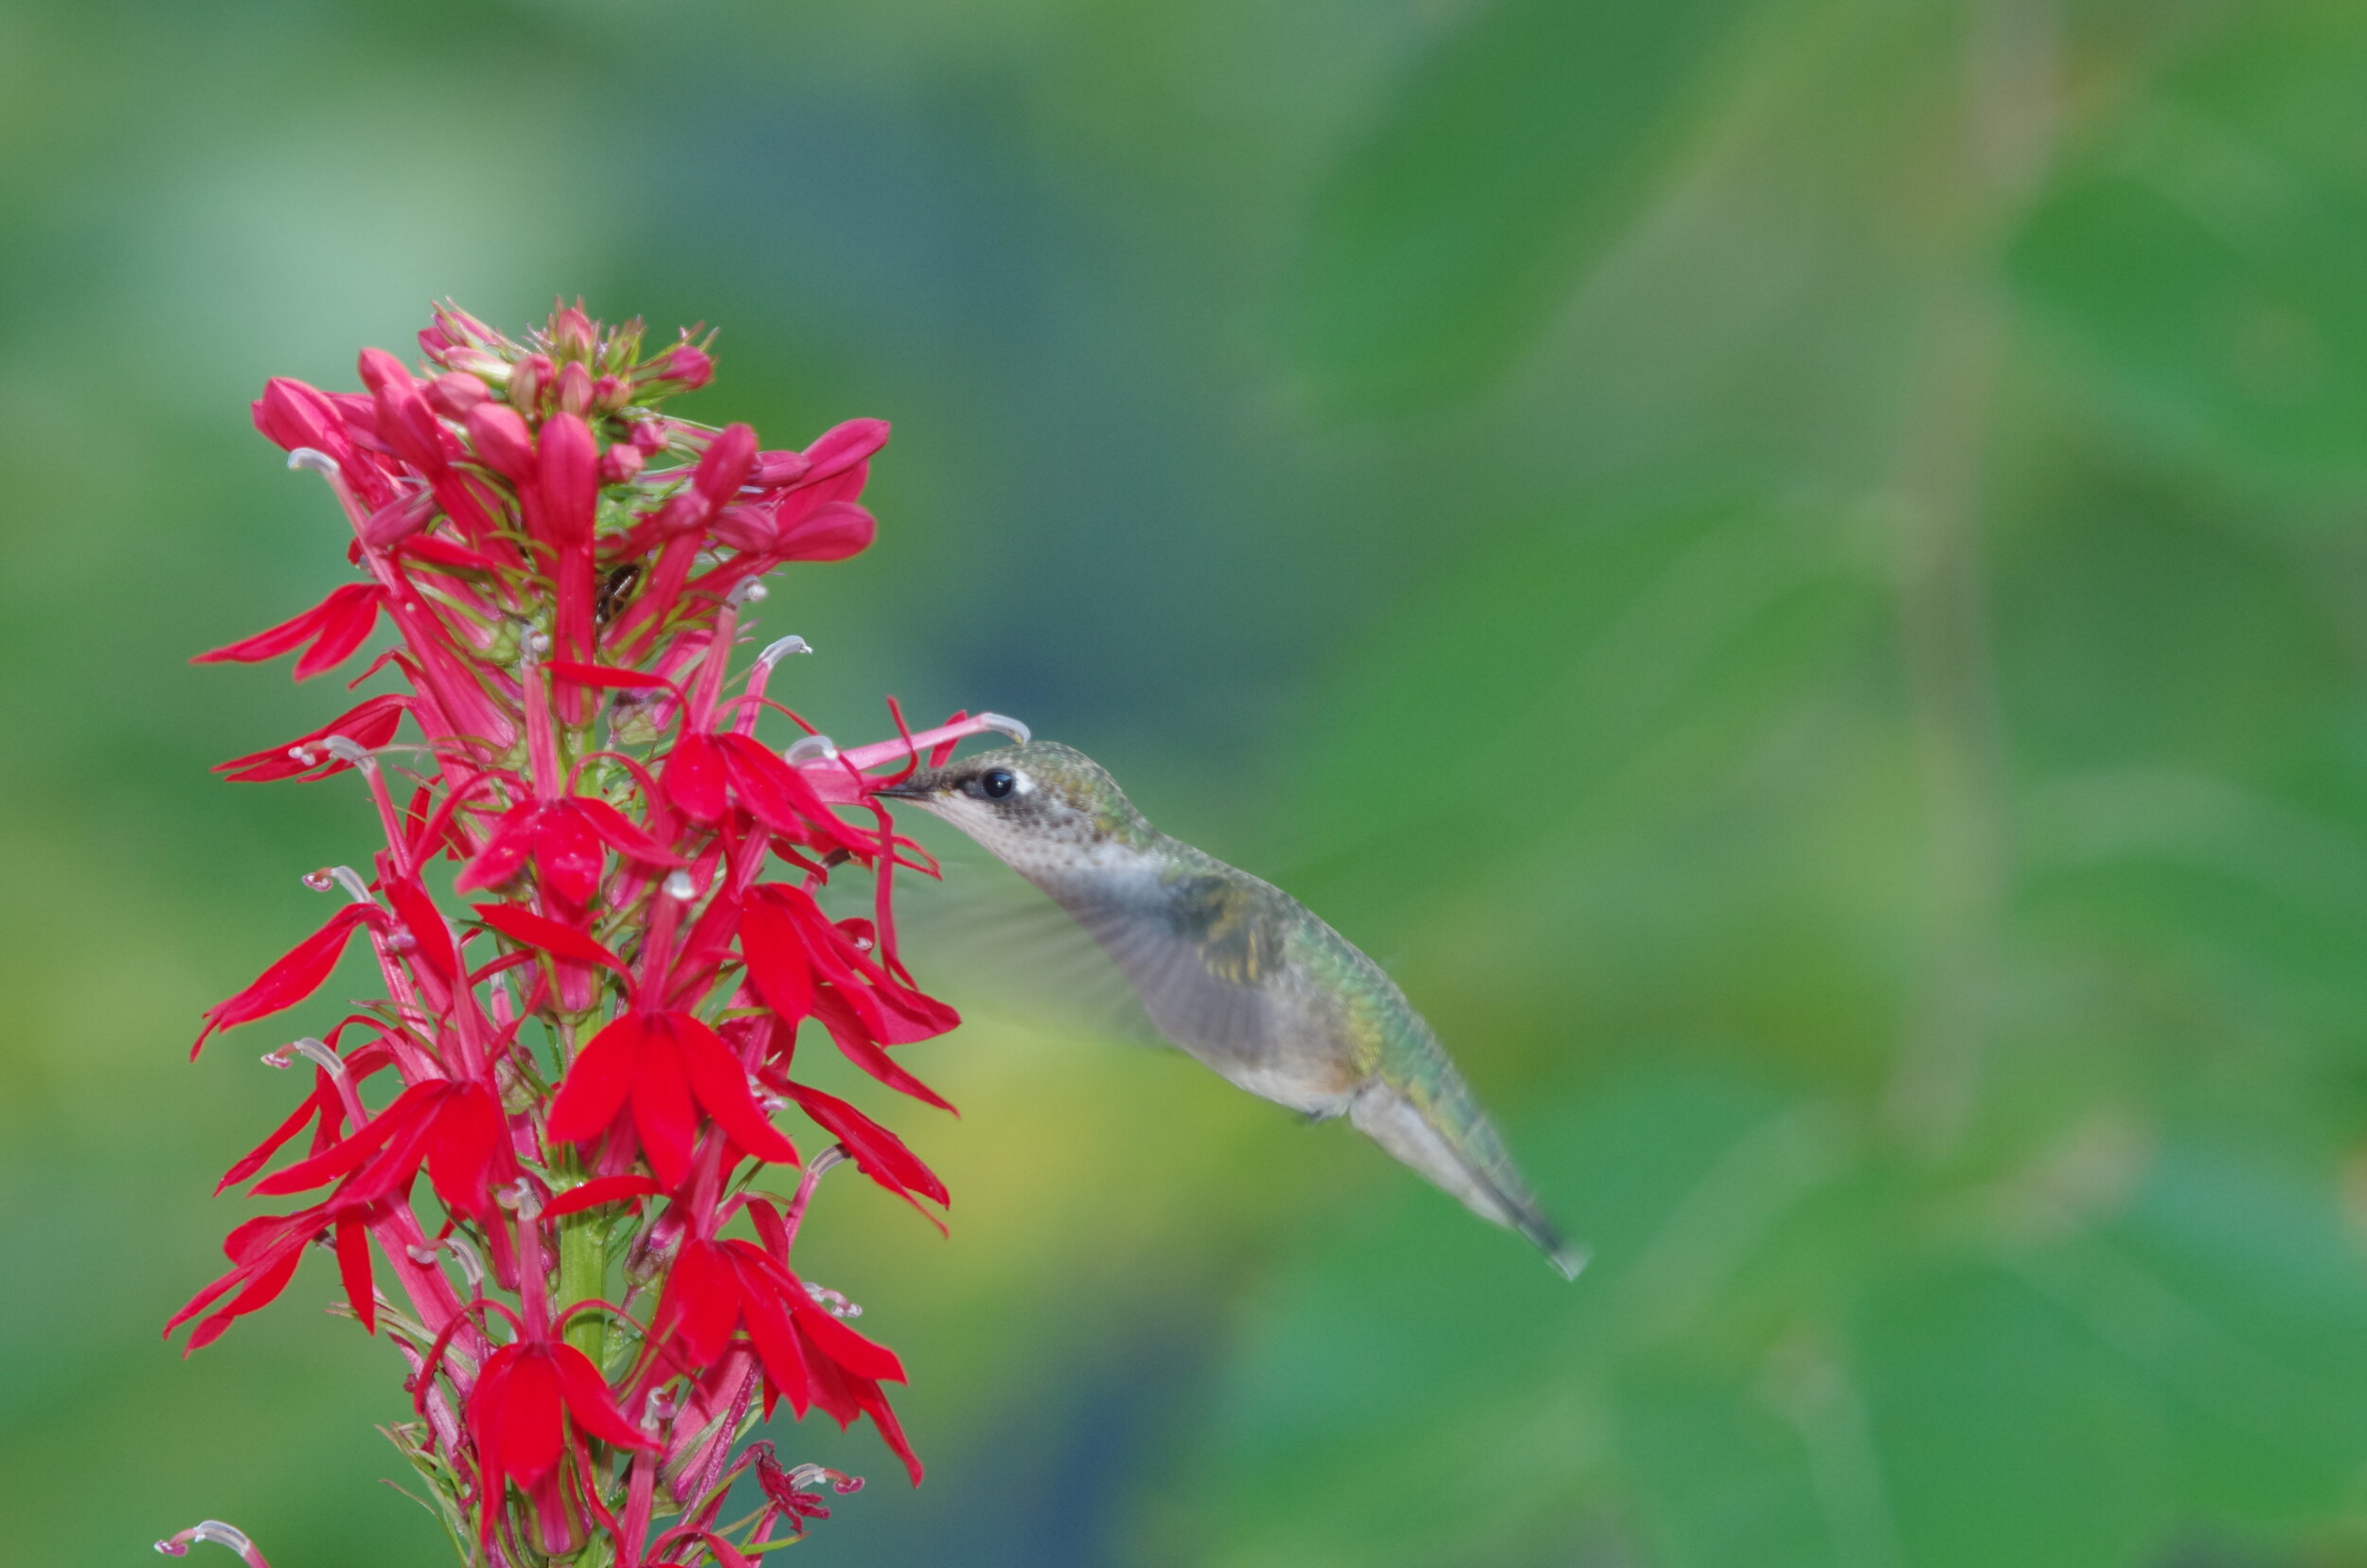
A hummingbird feeds at a Cardinal flower, an excellent source of food that flowers later in the season providing nectar for the fall migration.
Natural food sources are always the best for migrating birds and that includes an abundance of small insects that provide them with the necessary protein they will need to continue the journey. Gardeners in the southern states and along the migration route up to and including through parts of Canada need to ensure they are not only putting out commercial feeders and growing native, early blooming shrubs and flowers to help the hummingbirds along their way, they also need to put away any urge to reduce insects and spiders through the use of insecticides in their gardens and natural areas. These insecticides will limit the availability of insects at such a crucial time in the migration.
In fact, by putting out ripened fruit in spring, we can help give the hummingbirds a fresh supply of fruit flies during their migration. The fruit flies are an excellent source of protein and easy for the hummingbirds to eat in large quantities.
Gardeners are also urged to put commercial feeders, like this beautiful copper feeder from Gardener’s Supply, near natural nectar sources, most often red or orange tubular-shaped flowers. Consider columbine, honeysuckle and penstemon just to name a few. Lupines, foxgloves and hollyhocks are also favourite flowers for hummingbirds, although they bloom later in the season.
While I get great enjoyment from my bird feeding stations, providing natural food sources to our feathered friends is always the goal we should aspire to in our gardens. I have written a comprehensive post on feeding birds naturally. You can read about it here.
During that migration, where these tiny birds can travel up to 23 miles and day, they consume more than their weight in nectar and insects every single day. Hummingbirds have an average of 53 wing beats per second (ranging from as low as 15 to as high as 80) and a heart rate of 1,260 beats per minute, so you can imagine how much food they need just to keep up with the incredible amount of energy they expend on the journey.
To say their journey is complicated is an understatement. If they travel too fast they will run the risk of outrunning the early blooming times of the native flowers along the route. Too slow, and they might not get to their destination in time to recover and begin the process of reproduction.
The other factor that is growing in importance and potentially threatening hummingbirds is climate change. Most gardeners are aware of the changing agricultural zones that climate change has brought on many of our own gardens. That same change is having some impact on the availability of flowering plants that the hummers depend on during their journey. Already, experts are saying that 10 per cent of all hummingbird species worldwide are threatened with extinction. The introduction of more commercial hummingbird feeders are likely to become an increasingly important source of nectar for the birds as they migrate through the United States and up into Canada.
At the time of writing this post On Thursday March 11, the hummingbirds were gathering in the southern states with reports of Ruby-throated hummingbirds in Riverside, Alabama, Jackson Mississippi, Georgia and North Carolina. Many of these may have simply chosen to spend the winter in these warmer climates, but there is no doubt the migration is beginning to pick up steam.
If you want to follow the spring migration as it works its way through the United States from Central America and Mexico into Canada, sign up for my free newsletter which will be tracking the migration and reporting back to subscribers throughout the spring. Sign up for the free newsletter at the bottom of my home page here.
As an affiliate marketer with Amazon or other marketing companies, I earn money from qualifying purchases.

Keter Artisan shed review: Contemporary flair and top quality build
The days of your dad’s old garden shed kits made of tin with flimsy doors that keep falling off, are long gone. Today, homeowners can choose garden shed kits constructed of wood, resin and steel that all have a place in our yards. Why did choose a contemporary resin design over a traditional wood shed? There are several key reasons that may surprise you.
Why I chose prefab resin garden shed kit over a wooden shed
The search for a stylish, well-priced garden shed kit for our Woodland garden sent me down many paths, but it all came to an abrupt end when I stumbled across Keter’s Artisan contemporary design.
So what makes the Keter Artisan shed a great product? The shed is available in different sizes, but we went with the largest 11X7-foot design with double door entry and a series of small windows across the front and down the sides to let in plenty of light during daylight hours. Its sophisticated and stylish look allows it to fit into any garden style. It’s easy to build yourself, offers double-door entry and is a quality, steel reinforced product that can stand up to tough Canadian winters.
We also added a Keter High-Store Shed on one side of the Artisan shed for additional storage (seen in the photo above on the right side). Together, the two stylish sheds blend together and have a sophisticated appearance with their beautifully weathered cedar-look finish in that highly sought after silvery grey colour. They combine to give the appearance of one large shed with a bump-out not unlike those you may see on a mobile home or trailer. The amount of storage these two sheds provide is astonishing.
You can also add the matching impressive Keter Denali box for extra storage. It has the same grey weathered cedar look to match the other products.
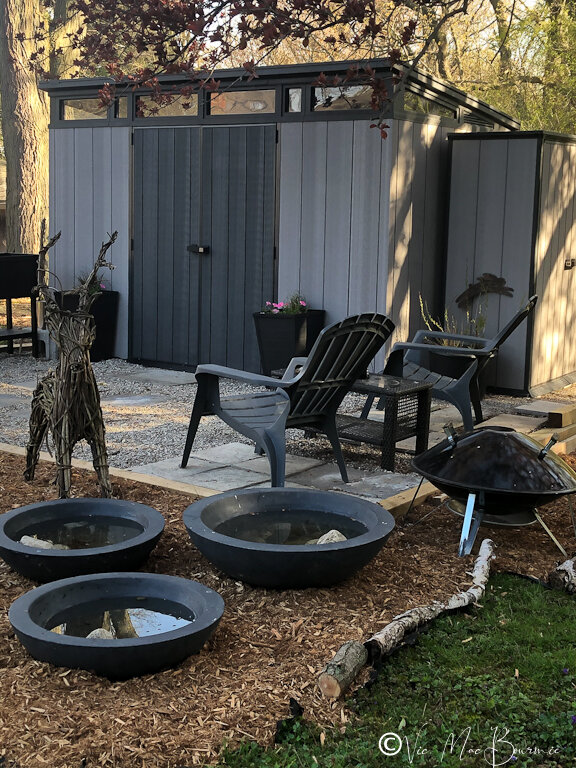
Keter’s Artisan shed together with the High Store shed on the side provide an elegant, sophisticated contemporary look together with the three water bowls.
So why did I choose a prefab contemporary vinyl shed over a more traditional wooden one?
The answer to that question is difficult. In short, however, the Keter shed provided extremely high quality at a reasonable price with a sophisticated look that really would have been difficult to match in a wood product. The silvery-grey finish would have taken years to occur naturally, if ever.
An unstained wood shed in the dampness of a woodland garden would most likely have taken on a dark grey mold rather than the silvery look of sun-bleached cedar. At the very best, a wooden shed would need regular maintenance including regular cleaning and staining to keep that natural silvery-grey look.
In addition, the texture and quality of the exterior hard-wearing durable resin makes it difficult to distinguish whether the siding is actually a wood product or vinyl/resin. In many ways, the vinyl siding looks and feels more like rough cut cedar than the real thing.
In fact, nothing really comes close to the look and feel of Keter’s innovative DUOTECH siding that offers a real wood texture with the durability and all-weather resistance of resin. It’s also easy to clean, requires zero maintenance and is fade free. But more on that later.
Five reasons I chose a resin shed
Contemporary design with a sophisticated look that works well in our Woodland garden.
Maintenance-free exterior and interior with easy-to-clean washable Duotech panels.
Steel reinforced framing for durability and a roof that can handle heavy snow loads.
Easy assembly with basic tools making it a DIY job if you are up to a little hard work.
Plenty of storage space, and because of the design, lots of headroom. The floor panels are an added bonus that keeps everything clean and dry.
To be fair, I must have looked at hundreds of wooden shed designs prior to purchasing the Keter shed. My plan was certainly to eventually buy a wooden shed and have the company construct it for me either on a deck or concrete slab. They were all well-built and quite nice. Most had a rustic look to them and all involved some kind of construction either by myself or by a crew who would come in and put up the shed in a day or two.
The real nice ones were a little expensive for my taste and the ones I felt I could afford were, quite frankly, kind of boring and predictable.
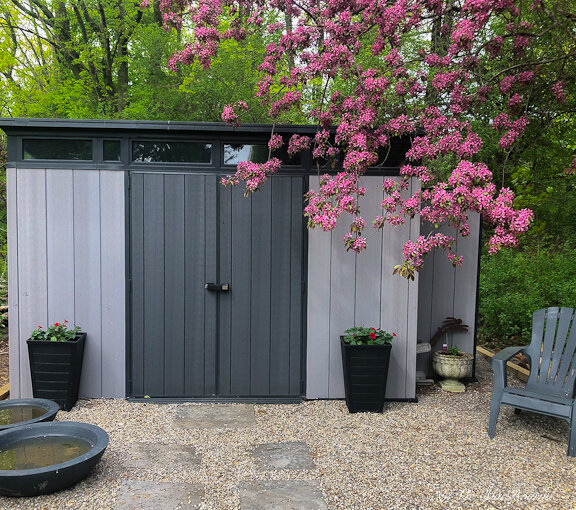
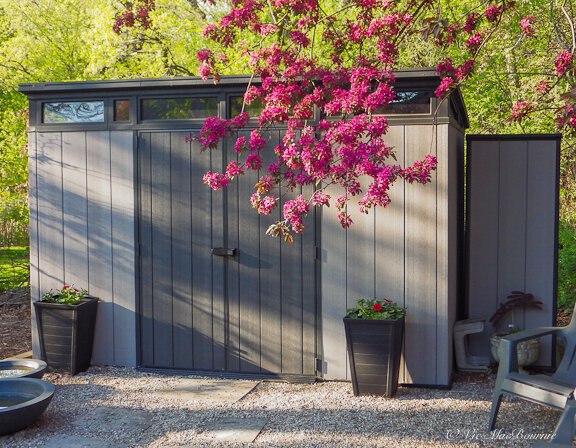
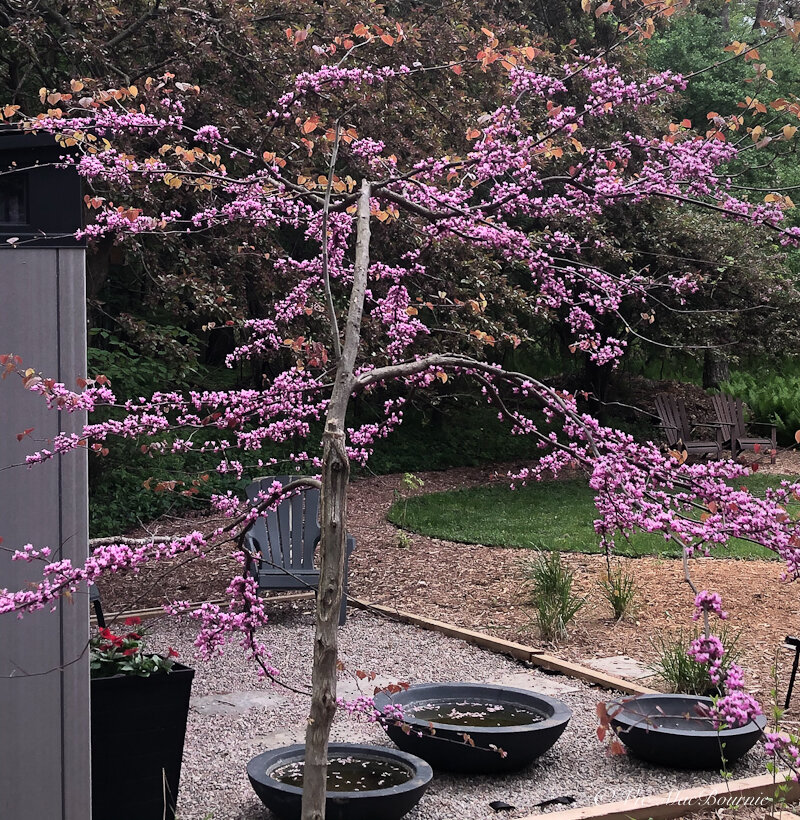
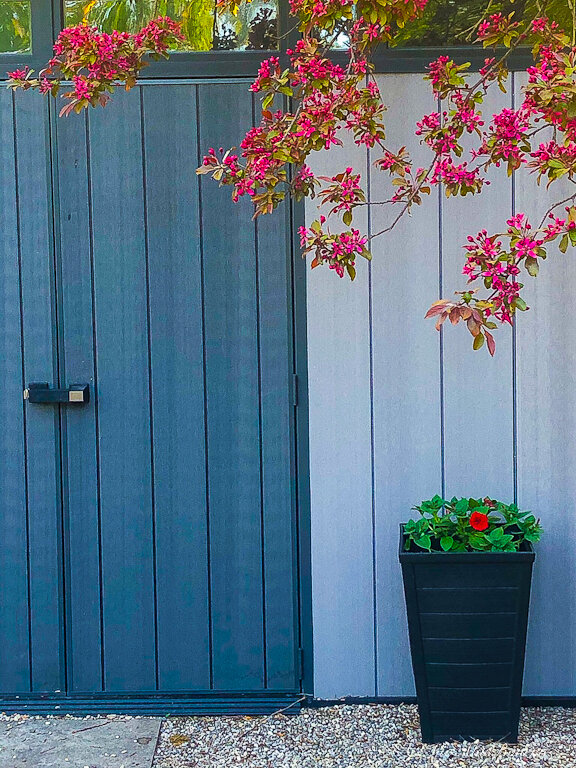

While a rustic shed in a woodland setting seems totally appropriate, I could not help but be drawn to the more contemporary sheds that I often came across while looking at pictures on Pinterest and other sources. Their simplicity was attractive to my aesthetic and I knew I could landscape around it to make it fit in to the woodland experience.
I was also interested in creating the feeling of a separate garden room where I could view the woodland from a different perspective than it is usually viewed from. Part of that involved incorporating three large, black water bowls into the landscape design in front of the shed and I knew the three water bowls would create a contemporary feel to the design not completely in keeping with the rustic aesthetic of the wooden sheds I had seen.
And then I came across the Keter Artisan shed. Instantly, I liked the look. The silvery-grey colour reminded me of the elegant and sophisticated wooden structures I had seen years earlier during vacations to Canada’s western provinces, especially Vancouver and the Victoria area. I knew it would work perfectly with the water bowls and other design features I had planned for the area.
I had already purchased other Keter products and was impressed with how easily they went together and how sturdy they were once completed. Think, the highest quality Ikea products, but for the garden.
We were so impressed with their products that we eventually added two black Keter raised planters on the left side and two Keter planters on each side of the double doors. (See photo at bottom of article.)
The Keter Artisan shed was large, much easier to construct than wood products, and the double doors made it easy enough to pack away many substantial garden products from lawn mowers to BBQs if necessary.
My plan was always to save money and build the shed on my own. We ordered both sheds, but because the Artisan model was on back order, we received the High Store shed weeks earlier. I was impressed with it from the beginning. It went together quickly and easily in an afternoon and the Duotech finish was exquisite.
Then came the big boy. It came in several large boxes on a couple of skids in a large truck. It even needed to be unloaded with a fork lift. It was around that time that I began to wonder what I had gotten myself into. I didn’t expect it to be so large and heavy.
The first task was to create a platform for the shed. My plan was to use a base of screening to level off the uneven ground in an area of the garden. It was more difficult than expected for an old guy lacking the skills necessary to get the job done in a timely manner without having a heart attack. In the end, I hired a local handyman to help with the construction of the both the base and the shed.
In just one full exhausting day we were able to build the platform, spread the screenings and have the shed 90 per cent built. All that was left for me to finish on day two was the construction and installation of the two front doors.
We are now preparing for the second full summer with the two sheds, and I could not be happier with the results.
They have performed admirably all year. There have been no problems and the sheds continue to look as good as new.
What makes the Keter Artisan so special?
Let’s take a quick look at why this shed has proven to be a winner.
The Keter web site lists only two sizes the 7X7-foot and the 9X7-foot, but the larger one still appears to be available. It is certainly still listed on Amazon.com.
The shed’s positives attributes begin with the contemporary architectural design that makes the sheds stand out from the crowd. The silver-grey Duotech walls were the selling point for me. But the steel-reinforced double-wall construction and an extra-strong roof that can withstand serious snow loads ranging from up to 200-150 Kg/sqm is an important selling factor – especially in Canada where snow is a guarantee.
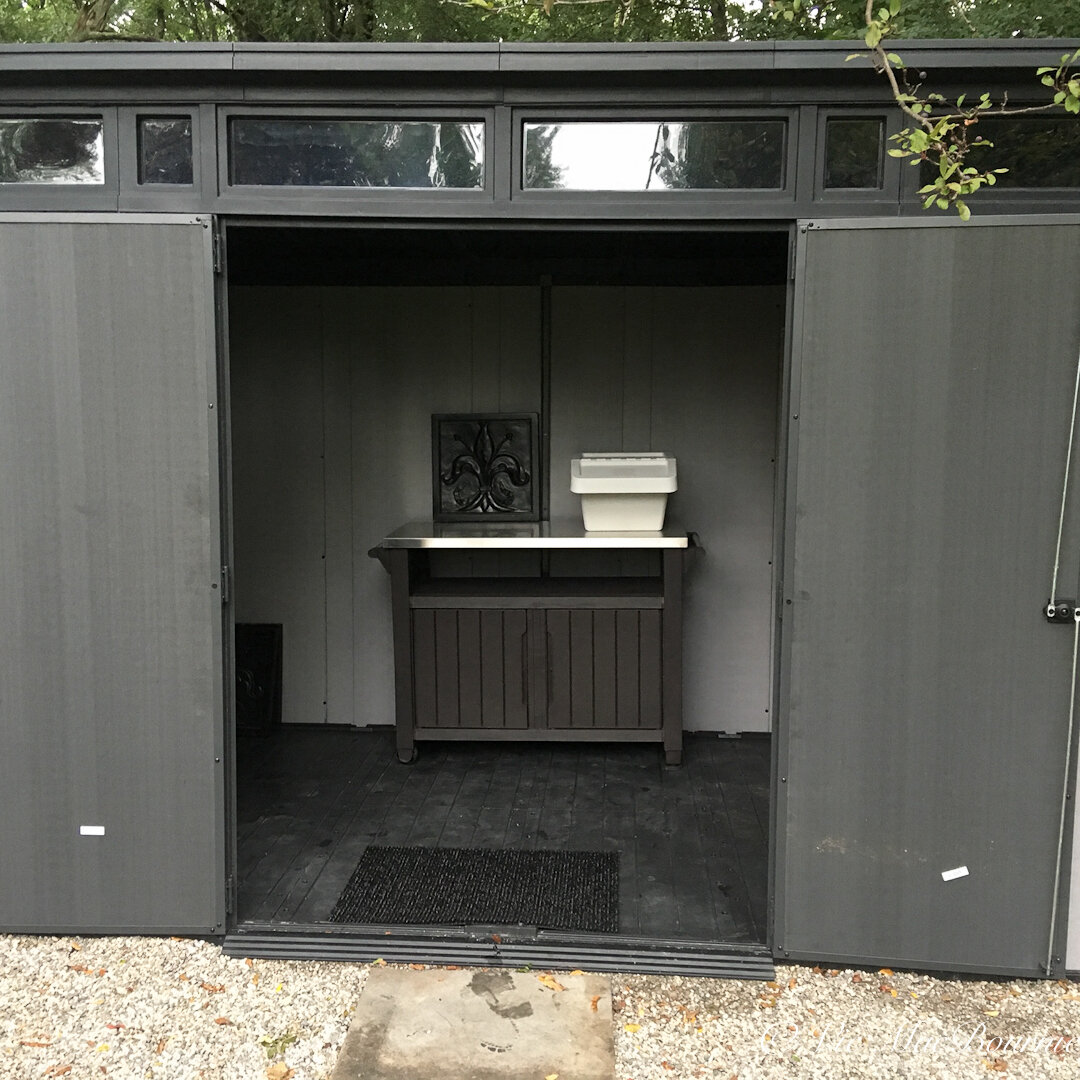
The Keter XL Utility Entertainment Storage Unit and cart was one of the first things we put inside the shed. Although it’s advertised as a BBQ cart, it can work nicely as a potter’s table.
In case you were wondering, it also features heavy-duty floor panels that keep out critters and protects the interior from a muddy floor and rainwater seeping in from underneath. The easy access double doors, clear windows and a lock on the door for added security are just additional bonuses.
The Duotech walls are as elegant on the interior of the shed as they are on the exterior. But if the silver-grey colour does not appeal to you, the interior and exterior walls are paintable any funky colour your heart desires.
The paintability of the walls make the Artisan sheds perfect for the creation of a she/he shed complete with funky interior wall colours.
The walls are also drillable, (although I would recommend using the special wall hangars provided by Keter) making hanging anything from pictures on the wall to tool organizers a simple task.
I could go on singing the praises of Keter but one more key factor that is always important are warranties. Keter advertise that their sheds come with warranties from 5 years to lifetime guarantees.
In fear of sounding like a commercial, we have purchased several Keter garden products before and after buying the two sheds. All the products, from the raised planters (earlier post I wrote about them), the large container planters that now flank the doors of the Artisan shed, a large deck box and two small balcony boxes, have proven themselves time and time again.
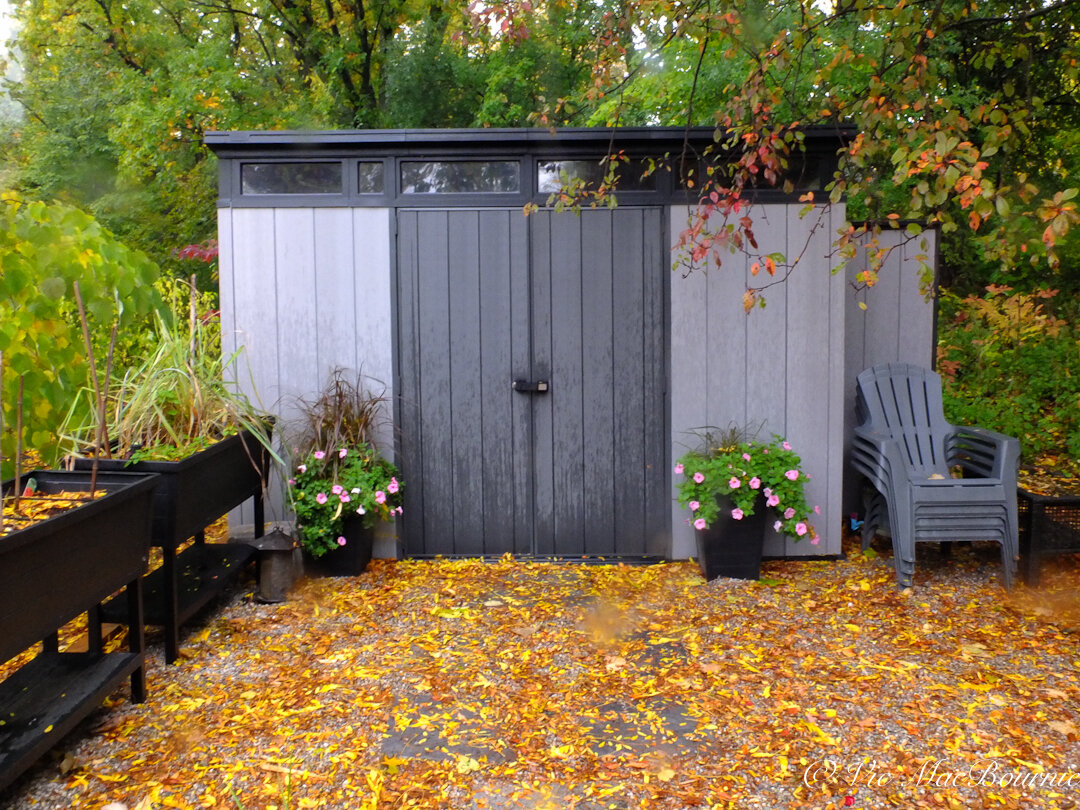
Our Keter sheds, raised planters and containers flanking the doors all work together to create unified look in the garden.
A potter’s table to match
One final Keter product that I can recommend wholeheartedly is the Utility XL Entertainment Storage Unit. Keter describes the Unity XL Entertainment Storage Unit as an all-in-one solution. It’s made out of a strong, weather-resistant resin with an appealing wood-like texture and has a durable steel top for cooking, serving and other hosting duties.
That might all be true, but gardeners might want to know that this storage unit is actually an ideal little potter’s table with its stainless steel top and under-cabinet storage. Right now it lives inside the shed (see above photo) but because it’s on wheels, it can be easily wheeled out whenever there is a need.
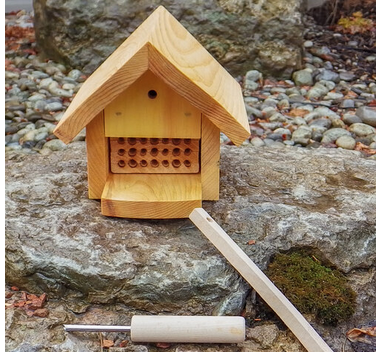
WeeBeeHouse and tips to attract native solitary bees
Native, solitary bees have a friend in Joe Prytula. His Weebeehouses have been making their lives a whole lot better and beautifying backyard gardens at the same time. Joe decided to use his outstanding carpentry skills to create extremely well-built, high performing and safe homes for our native bees.
Solitary bees have a friend in Joe and his WeeBeeHouse designs
Don’t get Joe Prytula talking about bees, particularly those solitary ones. They’ve literally changed his life and there is nothing he wants to talk about more than his bees, unless of course, it’s his WeeBeeHouse designs.
What makes his bee houses so special?
WeeBeeHouse designs serve as breeding space and sanctuaries for solitary orchard mason bees and leafcutter bees. The high quality, well-made wooden homes are built specifically with the bees’ well being in mind. Unlike most commercial products, these homes can be easily taken apart to be cleaned out and prepared for more bees year after year. There are even cleaning tools and detailed instructions supplied with the house to ensure success.
In fact, it took only about a week before bees found my WeeBeeHouse in our garden and began using filling it with offspring.
Afterall, these artisan, solitary bee houses that have taken up so much of his time since he retired in 2014 after 34 years as a tool and die maker at a Hamilton Ontario area manufacturing facility.
He’s the first to admit “it’s been a labour of love” toiling away in his home workshop, where he’s built hundreds of the custom bee houses for gardeners and nature lovers interested in saving the native bees that prefer to live alone rather than the massive hives associated with honey bees.

Joe Prytula looks over one of his WeeBeeHouse designs in his workshop.
“Most native bees are cavity nesting, looking for existing holes in trees or deteriorating stems of ground plants,” Joe explains.
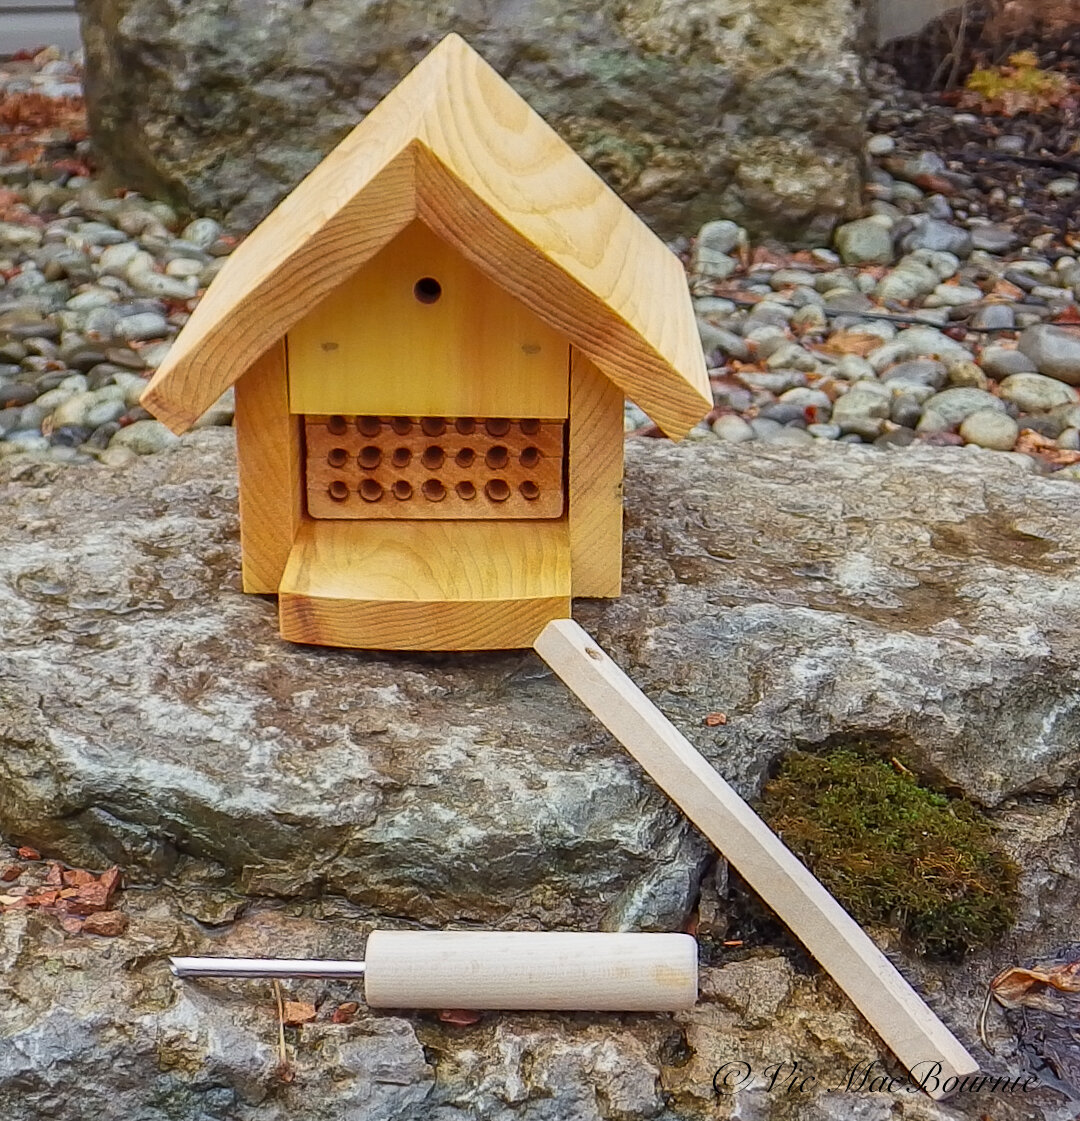
WeeBeeHouse with cleaning tools that are provided with the purchase of a bee house along with extensive instructions.
“Mason and Leaf cutter bees were original pollinators in North America before honeybees were brought over from Europe,” he explains. “These bees collect pollen only and are three times more efficient at pollinating than honeybees. Their method of pollination results in greater yield per acre. As well some plants can only be pollinated by native bees, tomatoes by bumblebees and apples by mason bees,” says Joe.
The mason bees focus their prolific pollinating skills primarily on fruit and nut trees as well as vegetables in the spring. Leafcutter bees pollinate many of our summer garden vegetables, says Joe.
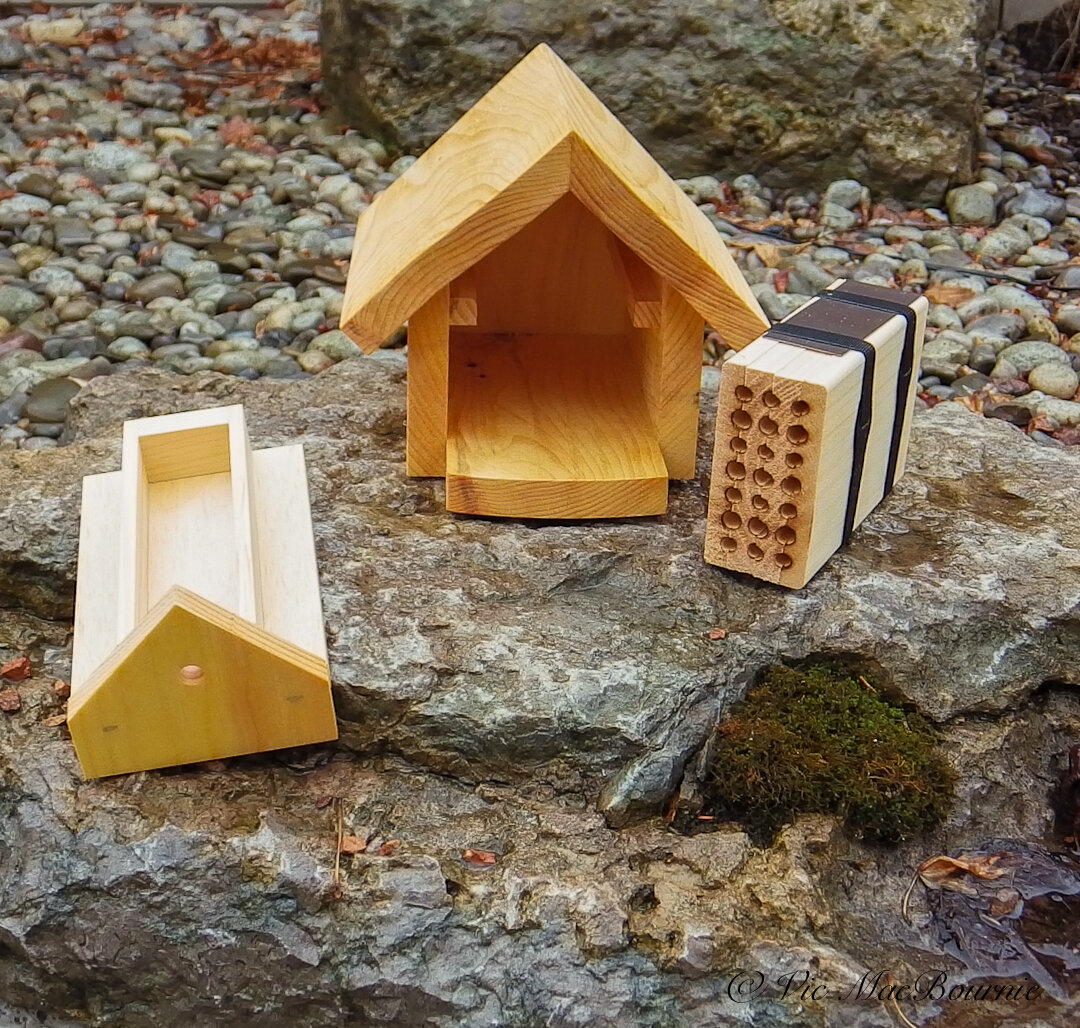
An exploded view of the WeeBeeHouse showing the bee tunnels where the eggs are planted by the bees as well as the chamber where the beekeeper stores the bee pupae in winter before they fly off.
Woodland gardeners may have noticed perfect circles cut out of the leaves of, say, their native Redbud trees. The culprits would be our leafcutter bees who use the leaf pieces to seal off their nesting cavity.
Joe’s bee houses are designed to serve as breeding space and sanctuaries for solitary orchard mason bees and leafcutter bees. The good news is that these native bees are non-stinging, so they are perfect for gardens with children and pets.
These solitary bees do not make honey and you don’t need the protective gear used to handle traditional honey bees, because these bee species don’t sting. They are simply driven by their need for pollen and nectar to support reproduction through the laying of eggs.
Joe’s Mason and Leafcutter Bee Care Sheets
The public is not only aware but also incredibly concerned over the decimation of our bee populations. We have all heard about neonicotinoids and the damage they are causing to our environment. Whether nicotinoids such as; imidacloprid (the most widely used insecticide in the world) are the problem or not, the fewer insecticides being used, the better. These gentle bees are amazing pollinators for spring fruit, nut trees, berries and blooming plants. These bees do not produce honey
What are Orchard Mason Bees?
The Orchard Mason Bee is the common name of a native bee (Osmia lignaria ssp.) that pollinates our spring fruit and nut trees, flowers and vegetables. It’s estimated a single mason bee may visit approximately 2,000 blossoms a day. The mason bee’s name comes from using mud to seal the egg chambers within a nesting hole. A female mason bee will collect a pollen ball (as a food source for the larva), lay an egg and seal the chamber with mud, usually laying six eggs to a chamber. They are the first bee to hatch in the season usually in late March to early April.
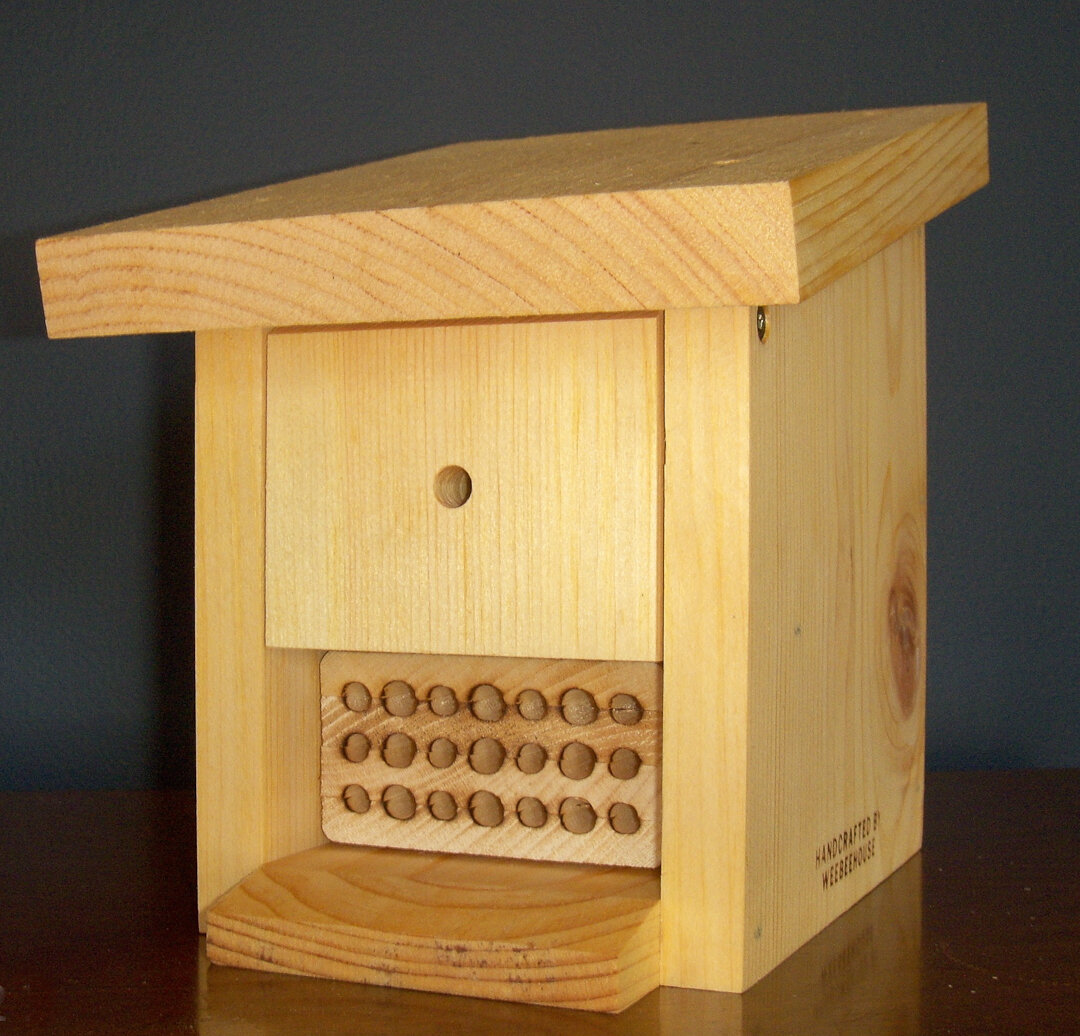
These bees wake to the warmth of the early morning sun, and will pollinate until day’s end. This bee is non-social which means it does not live in a hive. In the wild, mason bees nest in hollow stems, woodpecker drillings and insect holes found in trees or wood. You will find mason bees active in your yard until early summer at which time they have laid a new bee for the following season.
Mason bees are known as gentle bees and can be observed at close range. They rarely sting (the males have no stinger) and when they do it is similar to a mosquito bite.
What do they pollinate?
These bees are perfect for spring fruit and nut trees, blueberries, and virtually all flowers in your yard needing pollination.
What are Leafcutter Bees?
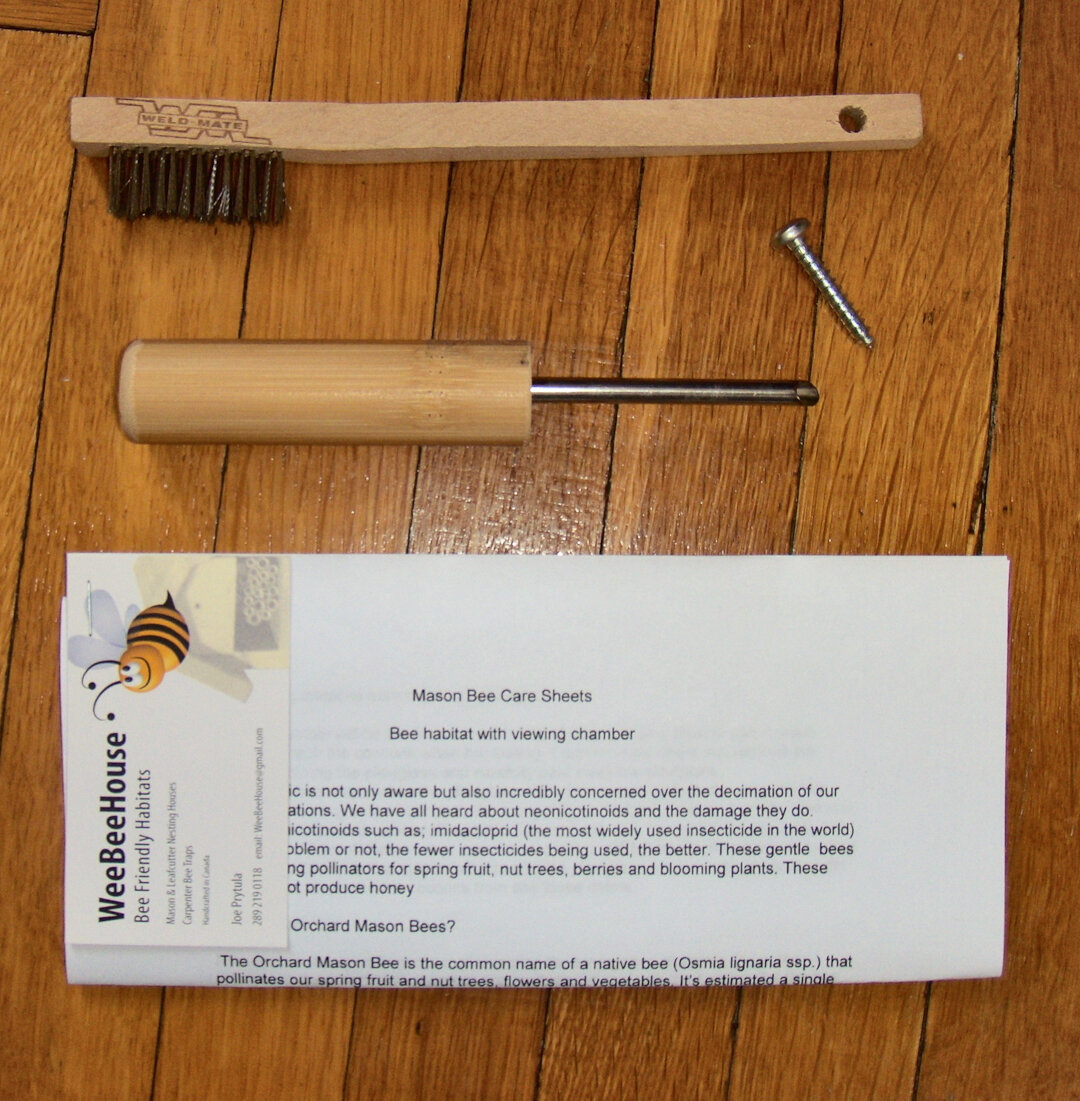
Complete instructions and cleaning tools are included with all of Joe’s Weebeehouses.
The leafcutter bees are a useful friend to gardeners as they provide valuable and efficient pollination for plants such as your summer vegetable gardens.
The leafcutter bee is a smaller bee than the mason bee but just as gentle and as hard working.
They tend to hatch out of their cocoons in mid to late July, being cued to do so by heat and daylight hours.
The leafcutter bee is a cavity dwelling bee, so she lays her eggs in existing holes. She does not create holes or damage structures to make holes.
Leafcutter bees stay close to home, foraging for pollen and nectar within 100m of the nest. Like mason bees, these bees are cavity nesting and need ready-made nests such as soft rotting wood, pithy plants stems like roses or man-made tubes.
Once a suitable home is found, the leafcutter bee will build its nest using a piece of leaf for lining, which they will use to make a cylindrical cavity that looks like a cigar. Leafcutter bees will cause crescent or almost circular shaped hole in a leaf. This damage does not harm the plant. Like mason bees, these bees are gentle and observed without the fear of being stung.
Native bee life cycle
The life cycle of native bees begins with the male and female emerging from their nests and mating. Soon after, the male dies and the female is left to find a suitable nest. She gets busy collecting pollen and nectar to make a specialized “bee bread” that will be eventually used to feed her young. The female deposits one egg on the bee bread, seals the chamber and repeats the process until she runs out of eggs. After laying the eggs, she dies. Her offspring will remain in the nest for about eleven months, where they pass through the egg, larva and pupa stages before emerging as adults.
A Redbud leaf with parts of it cut out by a solitary leafcutter bee.
“These bees collect pollen only and are three times more efficient at pollinating than honeybees. Their method of pollination results in greater yield per acre.”
How to attract native bees
• Grow a variety of pollinator-friendly native wildflowers throughout spring, summer and fall to provide plenty of nectar and pollen the bees need to feed their young.
• Ensure access to nesting materials such as moist soil for mason bees and leafy plants such as Redbud trees, roses and lilacs for leafcutter bees.
• Do not remove dead flower or woody stems that the bees use for hibernation and egg laying.
• Install a WeeBeeHouse
It should come as no surprise that the honeybee population in North America is being decimated from chemicals, making the protection of native bees important to ensure pollination continues. The vast percentage of food we eat, explains Joe, depends on pollination directly or indirectly.
In fact, Joe explains, pollination is essential for humans to exist. “If we lose bees, we’ll die.”
Joe hasn’t always been the bee house guy.
He and his wife, Linda, own an 1875 Italianate style home in the historic section of Thorold (near St. Catharines and not far from Niagara Falls) surrounded by many Century Homes. He honed his outstanding woodworking skills through their loving restoration of the home.
It just so happens that the couple also share a love for gardening and the introduction to native bees has changed their way of thinking when it comes to planning their gardens.
However, the path from fine woodworking skills to WeeBeeHouses wasn’t a direct one. He actually started by trying to save our feathered friends, namely bluebirds and wrens.
The decision to use his woodworking skills to create products for gardeners and bird lovers came as a result of a failed business relationship with a local garden supply business in 2014 to build and supply Wren and Bluebird houses as well as Bluebird feeders.
The volume proved too low to make the project profitable, however, the building of nesting habitat for native bees showed promise.
“I was given parameters to design around and came up with two designs,” he explains. “To my surprise orders took off with about 225 units sold between January and April, 2015. The second season saw a similar amount sold,” he says.
But it was around this time that he began feeling too much pressure to supply under tight timelines, explains Joe. Afterall, he was officially retired and wasn’t looking for a full-time job. Asking for more lead time proved fruitless so he was left with the decision to end that relationship. Before long, he was on his own and working local craft shows.
And WeeBeeHouses was born.
He currently offers four different designs. He likes to make them in batches of 40. Many of the parts are interchangeable fixtures to make the various components of the houses, which helps him construct them more efficiently. He estimates 40 WeeBeeHouses requires him to work four to five hours a day for about two weeks.
Perfect for a retired guy to give he and his wife some alone time to pursue their other loves.
The pandemic has pretty well killed sales, says Joe, who relied heavily on selling at outdoor events and events aimed at eco-friendly consumers.
He ships the units through Canada Post pretty much anywhere in the world people want them. He has shipped several units more recently to the United States where the threat to native bees has become an important issue confronting agricultural activities.
So what makes his houses so special?
Commercially available units usually have reeds or cardboard tubes which should be replaced after each season, he explains. “This information is not shared with the buyer, nor are replacement tubes available to purchase,” says Joe. The result can mean death for the young bees in the chambers.
“The lack of maintenance information (from commercial units) is another concern” says Joe. These bees are being asked to live in an environment that is similar to living in an apartment building. In the wild they are scattered and rarely use the same nesting cavity,”
Although the solitary bees have predators, they are able to survive quite well on their own. However, in a bee house that uses tubes or reeds, pollen mites brought back to the nesting site will thrive in this type of environment, explains Joe.
“They will feed on the pollen left for the eggs. Eventually the nesting site will become a Death Chamber,” he says.
After much research, Joe began to use stackable nesting trays which can be easily cleaned each season to ensure an ongoing healthy environment for his bees.
He is also careful to provide detailed instruction procedure sheets for harvesting and cleaning his bee houses.
Joe is always tweaking his designs to perfect his houses both for the bees and to improve construction of the impressive houses.
In fact he is just completing a prototype that will be tested this season. So far, the new style is only on paper right now. The nesting cavity diameters will range in size from 1/8"-3/8" and the goal is to attract a more diverse population of other cavity nesting pollinators.
The four styles he currently offers are : Observation Style, Barn, Villa, Starter.
If you are interested in purchasing one of Joe’s WeebeeHouses, you can either contact him through his instagram account @weebeehouse or by email at [email protected] Be sure to use the code Fernsfeathers10 to receive a 10 per cent discount.
This page contains affiliate links. If you purchase a product through one of them, I will receive a commission (at no additional cost to you) I try to only endorse products I have either used, have complete confidence in, or have experience with the manufacturer. Thank you for your support.

The Humane Gardener: Nurturing a Backyard Habitat For Wildlife
Nancy Lawson’s love affair with the natural world and all its inhabitants big and small, is on display in The Humane Gardener: Nurturing a Backyard Habitat For Wildlife. It’s a book every gardener needs to have in their library and a message of respect and compassion the entire world needs to hear.
A simple plea for respect and compassion
Even Nancy Lawson’s note paper is testament to her love affair.
It was tucked into the book she sent me along with a lovely note. In the bottom right corner of the note is a green garden beetle. Not a cute little rabbit, chipmunk or even a fawn. It’s a beetle. Probably one of those many gardeners pick off their plants and drop into a bucket of soapy water.
Nancy’s proclaimed love has nothing to do with looks. Cute and cuddly is not in her vocabulary. Her relationship with the garden and the many critters that call it home is rooted in compassion.
Nancy Lawson’s book, The Humane Gardener, (Amazon link) is a plea for respect and compassion toward all species. It’s a message gardeners need to hear and describes why and how we should welcome all wildlife to our backyards. It’s as much a gift to gardeners as it is to the birds, beetles, bugs and creepy crawlies that are so vital to the success of our woodland gardens.
If you like The Humane Gardener, you might want to check out Nancy’s latest book Wildscape.
Her love and compassion for wildlife comes from a lifetime of helping animals. As a gardener and editor with the Humane Society for many years, her extensive knowledge of the relationship between fauna and plants in the garden comes honestly.
For more from Nancy Lawson, be sure to check out my post on her newest book Wildscape: Trilling Chipmunks, Beckoning Blooms, Salty Butterflies and other Sensory Wonders of Nature.
If you are looking to purchase the Humane Gardener or any other book for that matter, be sure to check out the outstanding selections and prices (used and new) at alibris books. (see ad below).
“Plants are the solution to everything,” she writes on her website humanegardener.com. “Whether you’re trying to resolve conflicts with wildlife or immersed in efforts to save local fauna, you’ll be more successful if you let plants lead the way.”
Plants and Animals: Making the connection
The intricate connection between animals and plants came to her about 20 years ago thanks to a poop problem. Specifically, mass groupings of Canada geese creating land mines all around lakeside communities.

Nancy Lawson’s, The Humane Gardener, is a plea for respect and compassion toward all species.
In an attempt to find an alternative to mass killings, harassment or oiling eggs to prevent hatching, she read about a solution while working on a Humane Society magazine about resolving conflicts with geese humanely. The solution: Plant native grasses and wildflowers around the banks of the ponds, proved to be the most humane and effective. Removing the delicious turf around the ponds, giving predators easier access to the goslings and making access more difficult for the geese, encouraged them to go elsewhere.
“It was something I read about, and then as the years went by, research continued to confirm what an effective strategy the plant buffers are. I’ve done a lot of my other planting strategies to resolve conflicts since then – such as with deer, rabbits and other mammals,” she explains.
“I often tell this story toward the beginning of my presentations – because at the time, it sort of coalesced so many things for me. I’d long thought lawns were wasteful, and as a relatively new gardener, I was just learning that some plants had much more value for wildlife than others. And so the geese coexistence solutions made me think about how plants can both draw wildlife and resolve conflicts with them,” she explains.
These native plants proved much more beneficial than simply providing a visual barrier to the geese. These same natural barriers also created habitat for butterflies, birds, turtles and frogs. They helped filter pollutants and “played multiple roles in healing the local environment, just as plants do everywhere,” Nancy explains.
“Creating vegetative buffers to mitigate conflicts was still a novel idea in 1999. But in the two decades since I first reported on the issue, some progressive waterside communities have embraced the practise.” (For more see my article on the work of Reyna Matties at Ontario Native Plants)

The Humane Gardener
“There were many rules to follow but not much heart behind them. I learned how to start seeds but not why I should leave their progeny – the seed heads – in place as a food source for birds.”
Nancy speaks out on her own garden transformation
Nancy’s extensive knowledge comes from more than 20 years of gardening on her own two-acre property that she transformed from barren turfgrass to a natural, wildlife garden. Much of her garden is started from seeds way back in the year 2000 when she began to welcome rabbits, deer and small mammals into her garden. As the native plants took off, so did the rare butterflies, native bees and birds.
“All were welcome,” she says on her website. “None were turned away.”
“Common or not, each one of these animals is precious here, with a role to play in our mini-ecosystem: As squirrels helped plant more hickory trees, rabbits created habitat for bumblebees who reuse their old nests. Deer pruned dogwoods and sumacs, inviting cavity-nesting bee moms to lay their eggs in the sawed-off tops. We’ve left as many plants as we can for the animals and in turn the animals contribute in ways we can’t always predict.”
So, she speaks with authority and The Humane Gardener spells it out in such an entertaining, informative and knowledgeable way that it’s hard to put down once you pick it up.
“Common or not, each one of these animals is precious here, with a role to play in our mini-ecosystem: As squirrels helped plant more hickory trees, rabbits created habitat for bumblebees who reuse their old nests. Deer pruned dogwoods and sumacs, inviting cavity-nesting bee moms to lay their eggs in the sawed-off tops. We’ve left as many plants as we can for the animals and in turn the animals contribute in ways we can’t always predict.”
Nancy’s easy writing style, no doubt the result of her journalism background, adds to the enjoyment, but also explains one of the most enjoyable aspects of the more than 200-page hardcover book: The human-interest vignettes throughout the book that profile the work of home gardeners across the United States and Canada.
She breaks up the regular chapters of the book with a 10-15 page profile on gardeners, illustrated with photos of their gardens and the insects, butterflies and birds that call their garden home.
There is the story of Dennis Mudd, who gardens on his two-acre suburban site adjacent to 5-acres of canyon property he purchased in California where he has transformed a typical turfed property into a plant lovers dream where he shares it with everything from raccoons, rabbits and moles to hawks, Great Horned Owls and dusky-footed woodrats. And, of course there are the rattlesnakes that he has to keep an eye out for in the garden.
And there is the story of Jennifer Howard, a wildlife rescuer and activist who gardens in a small backyard sanctuary in Innisfil, Ontario, Canada. In her garden near Lake Simcoe, Jennifer works to protect the wildlife being threatened by the suburban creep that is threatening important wetlands. Jennifer has added ponds in her backyard to create more habitat and lobbied local government for turtle crossing signs.
She’s just one of many examples of how gardeners are recognizing the importance of many of the fauna that has traditionally been ignored or, even worse, eliminated because they did not meet the gardeners vision on what their garden should become.
The Humane Gardener is not the first book to encourage a new, more thoughtful approach to gardening, but it is certainly a groundbreaking one that brings together ideas and practises with vignettes of gardeners who are putting these approaches into action everyday in their gardens.
Book offers a New Kind of Dream Home
The book opens with a chapter entitled: A New Kind of Dream Home where she urges gardeners to adopt a new planting style that eschews turfgrass and calls for a landscape of native plants. But she doesn’t pretend for a moment that she was not caught in the same trap most gardeners find themselves in at the beginning of their journey.
“Though my husband teased me about my addiction to ‘flower porn,’ I also read these publication for the articles, learning about everything from proper spacing… to the best time to trim back dead perennial stalks. But inspiration eventually turned into frustration, and it became clear that Will (her husband) had a point about the emptiness of the endeavor.”
“There were many rules to follow but not much heart behind them. I learned how to start seeds but not why I should leave their progeny – the seed heads – in place as a food source for birds,” she writes.
And so begans her quest for what real beauty meant to her.
“I developed an almost innate sense of how to keep voluptuous cottage garden flowers thriving but had little knowledge of trees, shrubs and other plants critical to wildlife. Most wasteful of all, I looked beyond my borders for beauty, rather than taking the time to understand the potential already there in my own backyard.”
In the remaining chapters, Nancy talks about “letting go” by letting nature guide your garden along its path. This approach leads to a chapter on creating a family-friendly backyard, not necessarily for the humans that use it, but for birds and mammals that depend on it to raise their own families.
There are chapters on how to share the fruits of the garden with birds and forest creatures like deer, ensuring our gardens are safe for wildlife and rejoicing in death and decay in the garden for the life that rises out of it. This chapter focuses on the importance of leaving dead and dying trees in the yard for woodpeckers, bluebirds and nuthatches to create homes. She talks about the importance of decaying logs left in the garden and the insect life they attract. The salamanders, snakes and birds that then move in to feast on the insects.
Nancy’s approach is not to preach, not to judge, but to simply point out how we as gardeners can change the way we approach our land, our challenges and our vision to include, and maybe even prioritize, the birds, bees, butterflies, rats, snakes and bugs in our gardens. To make nurturing a fledgling as important as raising a favourite flower.
Nancy informs me that she is working on a new book. “It’s kind of an extension of the ideas in the first book, but I’m looking in more detail at how the animals and plants perceive the environment around us through their senses – and how some of our practices in gardening/landscaping get in the way of their ability to sense their world and each other.”
If her new book is anything like The Humane Gardener and reflects the same dedication, knowledge and commitment to excellence, the new book will only add another chapter to the outstanding work she has already accomplished and the influence she has had on so many gardeners looking for more than just a beautiful lush garden to call paradise.
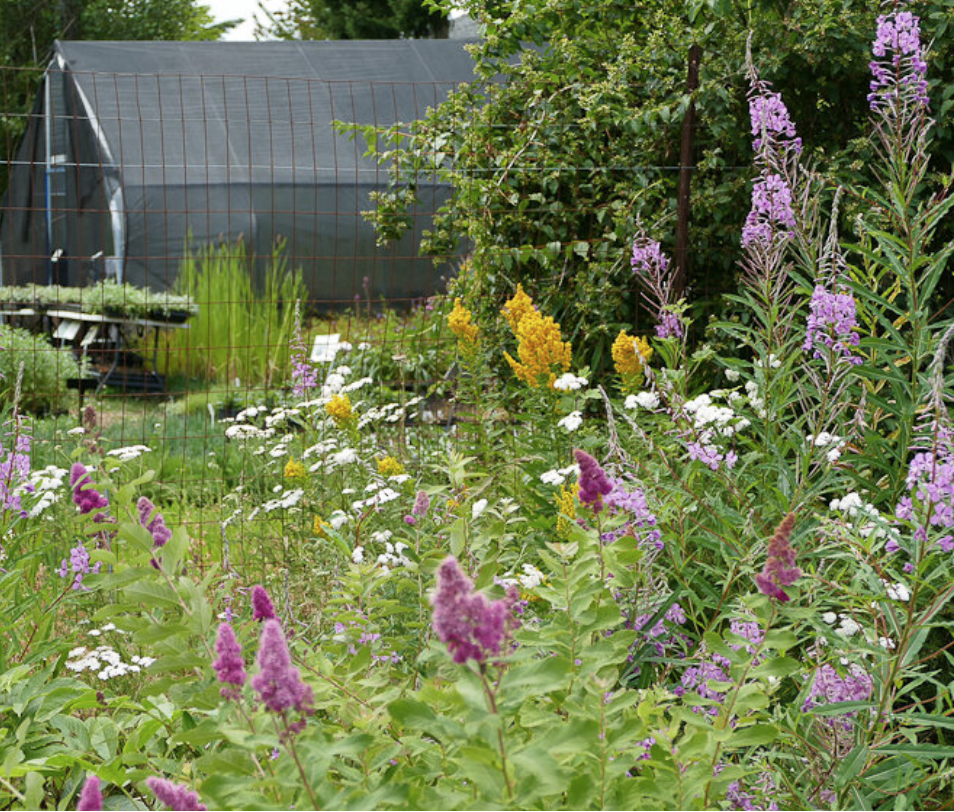
Native Plants find a home on Vancouver Island
Satinflower Nurseries Native Plants owners Kristen and James Miskelly are reshaping and rewilding the gardens and natural areas around Canada’s beautiful city of Victoria on Vancouver Island. The couple is bringing their expertise of native plants to gardeners, and large commericial clients and restoring the natural habitat of the Saanich area.
Satinflower Nurseries Native Plants working to rewild Canada’s gardening paradise
Kristen Miskelly has travelled a long way to find her new home near Victoria B.C.
In fact, it would be harder to find a location in Canada much farther from her Toronto-area roots than her current home on the Saanich Peninsula northeast of Victoria, British Columbia.
But there’s no doubt in her mind that Vancouver Island – undoubtedly one of the finest area in Canada to garden – is her new home.
It’s also the home of Satinflower Nurseries Native Plants, seeds & Consulting (formerly Saanich Native Plants), the business Kristen and her husband, James, have grown from a seed of an idea into a highly successful native plant nursery and consulting firm.
Satinflower Nurseries Native Plants, seeds & Consulting offers a robust retail side to their business, but much of the nursery’s work involves consulting and installation of much larger properties in and around the Victoria area ranging from private lands restoration to commercial and government. The native plant nursery is helping to rewild the land around Victoria B.C.
(For more information on West Coast native plants and garden design, be sure to check out my comprehensive post on Seattle landscape designer Alexa LeBouef Brooks. Also, Check out Alexa’s Pacific Northwest front garden design plan complete with plant list.)
Also, if you are interested in native plants, be sure to check out my post on Gardening with Native Plants of the Pacific Northwest.
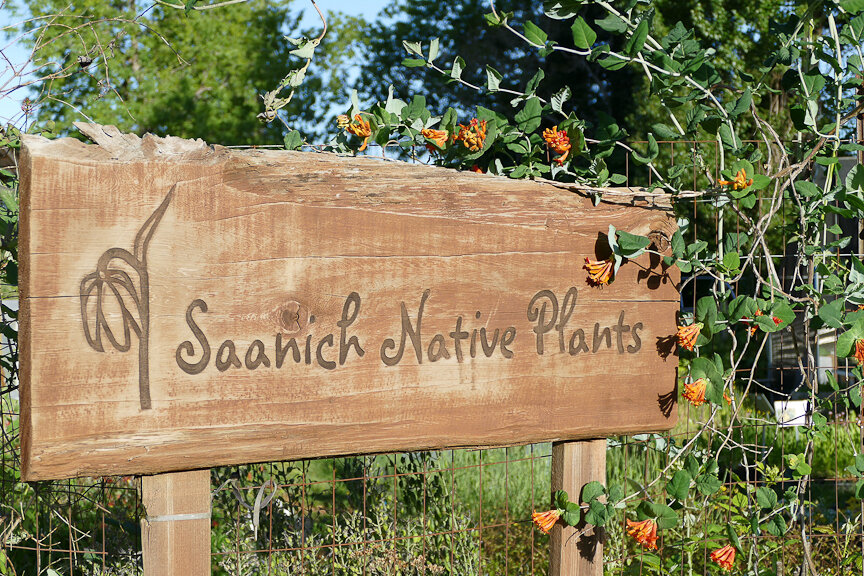
Satinflower Nurseries Native Plants (formerly Saanich Native Plants) is an excellent source of native wildflowers, shrubs and trees for westerly residents especially in the Victoria-area.
For my article on the the importance of using native plants in our garden, go here.
“I absolutely love the Victoria area,” she says. “It’s an absolutely beautiful place.”
It’s not surprising that Kristen, who was born in Welland Ontario but from grade 4 to 12 lived in Aurora just north of Toronto, is in love with the stunningly beautiful landscapes and moderate weather that makes Vancouver Island such a special place. The Saanich Peninsula, once a farming region, is surrounded by water on all sides and continues to feature pastures and an abundance of rolling hills. It’s hard to imagine a more perfect place for a couple with a great love for gardening and native plants.
“We’ve built our business on the core principle of valuing nature. We try to continually work with integrity and excellence and value collaboration greatly.”
It’s the ideal canvas to begin the work of rewilding with native plants, with the goal of helping to bring back much of the rich variety of plants, trees, insects and animals to the area.
Their work has not gone unnoticed. In fact, Satinflower Nurseries Native Plants, seeds & Consulting (Saanich Native Plants) was the recipient of the area’s 2016 environmental award in business achievement.
“I love growing indigenous plants and there is no part of the year we can’t work on them here at our nursery,” she explains on a cold, snowy, mid-February day in Ontario. “We are just planting up some grasses here today.” she adds.
Kristen knew she was home when she left Ontario to begin her studies at the University of Victoria, where she completed both her undergraduate work and a Master of Science in Biology. Her undergraduate work focused on grass taxonomy and her Masters research used palynology – the study of pollen grains – to learn more about the ancient vegetation of southern Vancouver Island.
Her husband, James, has similar expertise. The co-founder of Satinflower Nurseries Native Plants is a biologist with expertise in Garry Oak ecosystems, plants, insects, and restoration. He has a Master of Science in Biology, also from the University of Victoria.
So, it’s no surprise that upon graduation the couple went to work establishing the roots of what soon would become their prosperous native plant business.
“James and I made a decision that when I finished my Masters degree we would begin working more intensively with native plants.” Afterall, she admits, they “were both obsessed with native plants.”
• If you are considering creating a meadow in your front or backyard, be sure to check out The Making of a Meadow post for a landscape designer’s take on making a meadow in her own front yard.
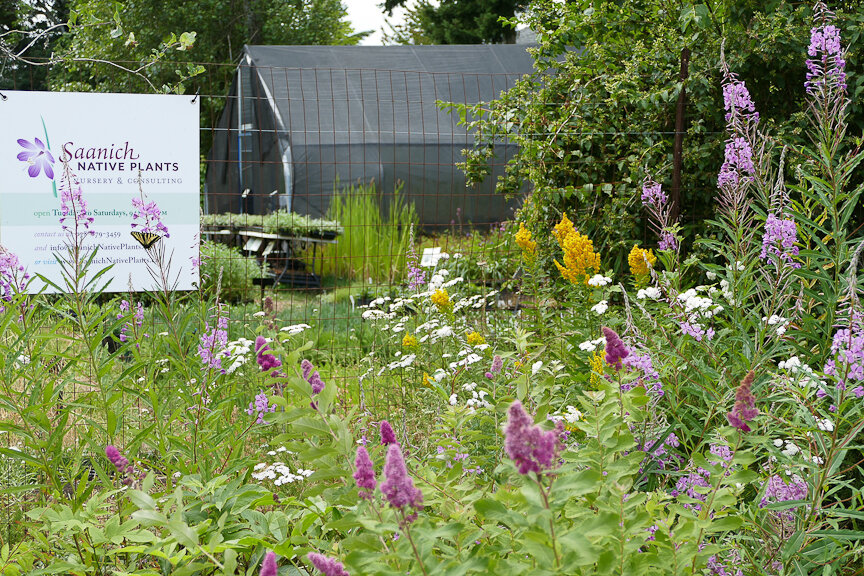
Meadow plants put on a show at one of the Nursery’s locations.
Their nursery took root in 2013 at Haliburton Community Organic Farm, where they had been working as volunteers to coordinate the restoration of a native meadow and wetland. They used a small front lawn of the farm house as their retail outlet for what would become the Saanich Native Plants Nursery & Consulting business (now known as Satinflower Nurseries Native Plants and seeds.) In 2015, they leased an additional half acre at Haliburton Farm for plant propagation and native seed production and in 2018 expanded their native seed fields further to Fairfield Farm just outside of the Victoria core. Kristen emphasizes how grateful both her and James are for the opportunities that the non-profit Society who runs the farm has provided to them and the broader community.
Growing popularity of native plants
From those simple roots rose a successful small business that now employs up to 10 employees over the course of the year and features more than 200 native plants, a large, ever-growing native seed catalogue, several planting fields and soon, a new home for the growing business.
The couple have recently purchased a property in Metchosin near Victoria and plan to use it as a base for their growing business. The new 2-acre property will be staged as growing fields for both plants and seed production. The nursery grows most of its own plants from seed and offers a large selection of seeds at both the commercial and retail level.
Although Satinflower Nurseries Native Plants offers a robust retail side to their business, much of the work involves consulting and installation of much larger properties in and around the Victoria area ranging from private lands restoration to commercial and government.
The new, larger location may be illustrative of the growing popularity of native plants not just on Vancouver Island but across Canada, the United States and Europe.
Kristen says it’s difficult to tell if the expansion of Satinflower Nurseries Native Plants and Seeds is a natural progression of the business or the result of a surge in the interest of using native plants in the gardens of both homeowners and in large scale commercial settings and government projects. But, she is quick to add that with the emergence of social media groups such as Facebook, native plant groups and on-line discussion groups represent “a change in education outreach in society.”
“There is a genuine interest in restoration and conserving nature,” Kristen explains. People are seeing “more habitat destruction every day and they are trying to find something proactive to do to counter that devastation.”
“Sometimes,” she adds, “just planting a few native wildflowers in your garden exposes you to the joys and benefits of using native plants and from there, the enthusiasm just grows.”
Satinflower Nurseries Native Plants and Seeds is certainly playing a role in conserving nature and helping to educate gardeners in their area about the importance of using native plants.
Besides teaching a range of courses and workshops related to plant identification, botany, restoration, and propagation, Kristen currently teaches Ecosystem Design through Propagation of Native Plants and Urban Restoration and Sustainable Agricultural Systems at the University of Victoria.
Their website states that the company’s aim is to inspire and empower people to restore and conserve nature by providing native plants, seeds, education, and expertise.
Education and outreach make up the foundation of the nursery. Here Beangka Elliot, Tsartlip First Nation, co-hosts one of the nursery’s regular educational workshops.
Expertise at the root of Nursery’s success
When it comes to expertise, it would be difficult to find a more knowledgeable staff than the folks at Saanich Native Plants. You already know about Kristen’s expertise, her husband, James, has his own expertise in Garry Oak ecosystems. His Master of Science focused on butterflies and their habitat needs. Besides his work in various capacities in rare plants and animals, he is a research associate at the Royal BC Museum in entomology with a focus on Canadian Orthoptera (crickets, grasshoppers and katydids.) For his day job, James works with Natural Resources Canada, where he helps to conserve and restore habitats and rare species of Federal Department of National Defence (DND) lands.
At the nursery, James plays a role in the consulting aspects of the nursery that often works on larger government projects. In addition, he manages the native seed fields and develops specialized seed mixes for nursery customers.
But that really is just the beginning of the expertise the nursery offers customers. Julia Daly, with a BSc in Geography from the University of Victoria and a diploma in Applied Coastal Ecology from Northwest Community College, puts her knowledge of plant identification, species-at-risk management, ecological restoration, and native plant gardening to work at the nursery.
Andrea Simmonds brings new perspectives to native plant garden installations with her artistic background and her patient and kind demeanor is always welcome when working with a range of clientele.
Josh Aitken brings extensive experience from working on farms growing up in rural Australia and Paige Erickson-McGee brings a passion for conservation and knowledge of native plants along with her BSc Geography from UVic and an Environmental Technologist diploma from a local College.
Sasha Kubicek brings an extensive knowledge of local orchids and protecting orchid habitats. He and his wife, Robin, oversee the seed saving part of Sea Bluff Farm – a 10 acre certified organic vegetable farm with a 600-foot section set aside as a native pollinator hedge row. They are also actively rehabilitating the farm’s Garry Oak grove.
Daniela Toriola-Lafuente moved to Victoria in 2012 from France after obtaining her BSc in natural sciences at the University of Lausanne and PhD in tropical forest ecology at the University of Paris. One of her passions is propagating native plants and taking great pleasure that her work is having a positive ecological impact.
Other consultants and partners bring a diversity of expertise and perspectives. Beangka Elliott from the Tsartlip First Nation of WSÁNEĆ (Saanich) Territory has a background in sharing traditional knowledges of Indigenous foods and medicines through workshop-based learning. Beangka started working at Saanich Native Plants in 2018 in propagation as well as providing workshops on a variety of topics. Beangka, no longer a regular employee, leads a suite of regular workshops at the nursery with a focus on consent-based practices and Indigenous foods and food systems.
Kristen points out that although many of the people who make up the nursery team have impressive credentials, nothing replaces a “passion for native plants. When we hire we are looking for that authentic passion – everything else can be learned.”
“Expertise is important when you are selling indigenous plants,” explains Kristen. Many of the plants are not well known to the general population so Kristen and her staff consider it vital to be able to pass on their knowledge on the care of the plants and educating clients to know what they are planting and how the plants will perform in various growing conditions.
She also emphasizes that land stewardship by Indigenous Peoples, past and present, continues to play a critical role in the awareness of the importance of native plants and natural areas in the Victoria area.
We’ve built our business on the core principle of valuing nature. We try to continually work with integrity and excellence and value collaboration greatly,” states the introduction on their website.
The nursery grows plants and produce seeds native to a variety of habitats in the Victoria area, including meadows, woodlands, forests, wetlands and beaches. The company also specializes in the restoration and ecology of Garry Oak ecosystems (Prairie-Oak ecosystems in Ontario and the southeast United States) and meadowscaping.
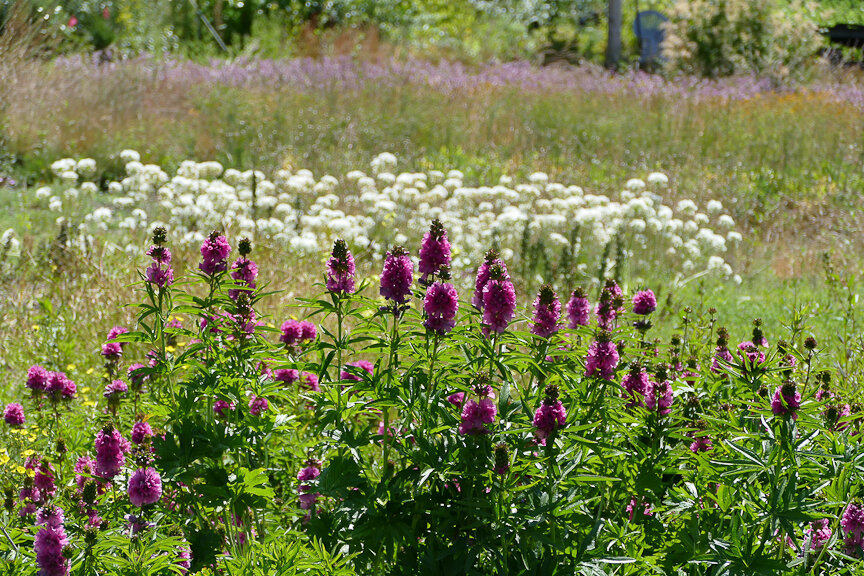
The native plant seed rows at Satinflower Nurseries Native Plants, seeds & Consulting provide a stunning visual display as well as habitat for wildlife.
Their commitment to the environment is evident in the fact that no herbicides or pesticides (including neonicotinoids) or chemical fertilizers are used in their business.
Although it would be easy to think that everything grows perfectly on Vancouver Island, that would be a false presumption. Kristen explains that annual precipitation across the Island varies greatly, ranging from rainforest on the westcoast to Mediterranean-like to the southeast
In Saanich, where the Nursery is located, it is in the “rainshadow of the Olympic Mountains resulting in extremely droughty summers,” explains Kristen. In fact, the location has the lowest average summer precipitation anywhere in Canada. “Even Vancouver gets two times the rainfall we do,” she explains. “Just a couple hours from where we are is rainforest.”
All this means that the native plants they grow are very focused to a specific geographical area. Kristen explains that their growing zone is part of a broader ecoregion that extends into Washington and Oregon.
Kristen and James love returning to Kristen’s roots in Ontario to experience the diverse range of flora and fauna of the Carolinian zone in Southern Ontario. She points out that her former home in Ontario is very biodiverse, having a wider variety of both flora and fauna than they enjoy on the Saanich Peninsula.
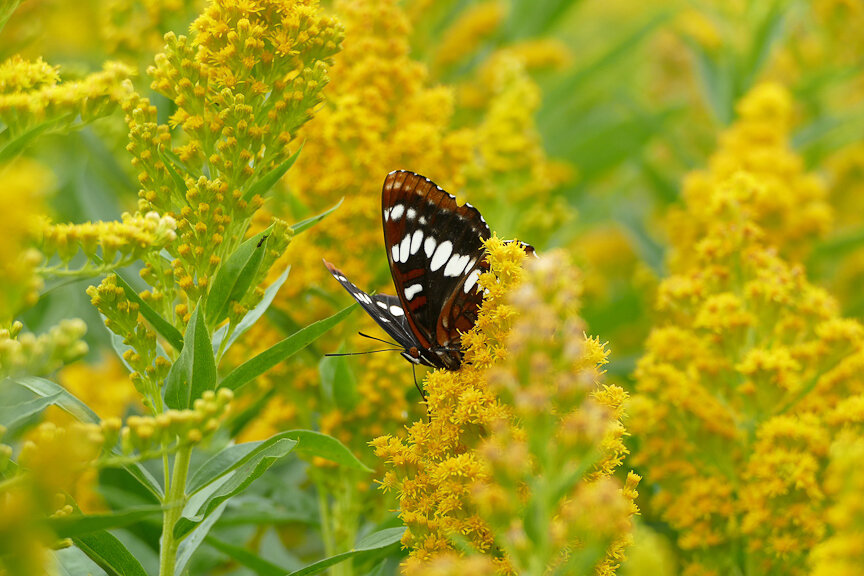
Bringing in the butterflies
Sometimes a single plant in a homeowners garden can inspire them to explore more native plants, explains Kristen. Every time we see wildlife using the native plants, it serves as endless inspiration to keep doing the work that we are doing.
The social activism and access to nature that many BC residents enjoy has resulted in an engagement with nature that she also hopes is being felt in Ontario as well. Kristen notes that “The gardeners, conservationists, and environmentalists in Ontario who have been working to educate others on the importance of native plants serve as inspiration for others”.
On an earlier visit to Ontario, the couple were particlarly impressed with the massive growing facilities at St. Williams Nursery & Ecology Centre in Norfolk County in the heart of southwestern Ontario’s Carolinian Life Zone. The largest native plant nursery in Ontario, stretches some 6 acres of greenhouses and more that 250 acres of production fields, is a wholesale conservation nursery and ecological restoration provider. Its team of restoration scientists and practitioners, nursery growers, and technical experts support and supply a variety of conservation initiatives across the province of Ontario.
Kristen and James have also spent time with Ontario Naturalists Mary Gartshore and Peter Carson who started Pterophylla in old South Walsingham. Peter and Mary worked to restore a 60-acre Tobacco farm back to black oak savanna and forest. Kristen notes that the “Pterophylla restoration project continues to be a tremendous example of what conservation impacts hands-on restoration by individuals can have”.
It’s always exciting to see how others operate their nurseries and get new ideas, she says. Places like St. Williams have greatly inspired us.
What’s the future hold for Satinflower Nurseries Native Plants, seeds & Consulting? The couple are busy preparing their new nursery location in Metchosin with everything from installing irrigation to re-planting their native seed fields. The Nursery is also re-doing their website in an effort to provide more online educational resources for the public. The new website will also feature a digital newsletter and online store to make native plants and seeds more easily available to everyone in their area. If you haven’t already, be sure to check out the impressive new Ontario Native Plants’ website.
Readers in Canada’s west who are looking for homegrown native plants need to check out Saanich Native Plants.
More links to my articles on native plants
Why picking native wildflowers is wrong
Serviceberry the perfect native tree for the garden
The Mayapple: Native plant worth exploring
Three spring native wildflowers for the garden
A western source for native plants
Native plants source in Ontario
The Eastern columbine native plant for spring
Three native understory trees for Carolinian zone gardeners
Ecological gardening and native plants
Eastern White Pine is for the birds
Native viburnums are ideal to attract birds
The Carolinian Zone in Canada and the United States
Dogwoods for the woodland wildlife garden
Bringing Nature Home by Douglas Tellamy
A little Love for the Black-Eyed Susan
Native moss in our gardens
As an affiliate marketer with Amazon or other marketing companies, I earn money from qualifying purchases.
Japanese inspired garden: Six elements to success
Japanese-inspired gardens are meant to look simple but are, in fact, highly designed, nature-inspired landscapes. Stone, water and plants form the structure of a Japanese garden with Japanese Maples, small evergreens and moss adding life to the design.
Finding serenity in a Japanese inspired woodland
I’ve always loved the peacefulness a Japanese garden evokes.
They seem so simple, yet, in reality, are highly thought-out designs that reflect the natural world. This appearance of simplicity hides what often is the meticulous placement of elements in the garden.
The main purpose of the Japanese Garden is to create a feeling of serenity and nature. A well designed Japanese garden strives to remind us of a natural landscape, but, in fact, is a carefully controlled landscape highly designed and maintained. They are nature-inspired, but it’s unlikely you will ever find them growing naturally. But that doesn’t mean they don’t evoke feelings of some of your greatest memories of wandering through the woodlands and coming across a beautiful moss-covered grove with large boulders protruding from the ground.
For more suggestions and some of my favourite garden things, be sure to check out my Favourite Things post.
Three elements make up the Japanese garden: Stone forms the structure of the landscape; water which gives it a life-giving force; and plants that provide what little color and changes the gardens provide throughout the seasons.
With all this in mind, I embarked on my Japanese-inspired garden.
If you love Japanese gardens and want more information, be sure to check out my post on Using Japanese Maples in the landscape. For more on the majesty of a mature Japanese Maple. Weeping Japanese Maples for landscapes big and small.

The Japanese-inspired garden in late spring with the blue Fish In The Garden moving through the plants.
The plan was to create a garden that would hide the fact that our home’s garage was long ago converted into a family room. Up until the garden was installed, the driveway’s blacktop came right up to our family room where the garage doors were once located. It never looked right to me and emphasized the garage conversion. So, by reducing the length of the driveway by adding large boulders, pea gravel and square cut gray flagstone, we were able to not only create the Japanese-inspired garden, but hide the fact that the family room was once a garage.
Three Japanese maples, the large boulders surrounded by pea gravel, a fern, moss and a bird bath combine to create an area that allows the primarily woodland garden to showcase a separate japanese-inspired garden area.
Key Components of a Japanese Garden

Adding Japanese garden art helps to create the mood of the garden.
1) A single large boulder or several large boulders (depending on the size of the garden) form the basic structure of a Japanese Zen Garden. Stone in a Japanese garden represents longevity and the forces of the nature. They anchor the garden to the ground and give it its specific personality. They should always be buried in the ground to look like they are emerging from the sand or stone they are on. Stones are laid out depending on their shapes and sizes. Their placement is key to creating a cohesive look. Look for boulders that are different in size and shape. A bonus is if you are able to grow moss on the boulders to give them a lovely aged look.
2) Pea gravel or sand surrounding the boulder(s) is another structural element. In zen gardens, it represents water, or, like the white space found in Japanese paintings, emptiness and distance. They are perfect places for meditation. In Zen gardens, the pea gravel is meticulously raked to create the illusion of waves surrounding an island of stone.
3) Incorporating evergreens (often pine trees) not only gives the garden year-round interest but they add a sense of permanence. Preferably, the evergreens should be smaller, slow-growing specimens that can be trimmed and either given a bonsai look or kept on the small side. The large boulders are the perfect place to display bonsai specimens either growing in pots or in pockets carved out of the boulders.
4) A water source is another important garden feature. It is said to represent renewal, calm, wonder and continuity in the garden. Everything from a small on-ground stone pool to an electric fountain or a bird bath can be used. There are many alternatives available which can either be created or bought commercially. Every effort should be made to keep and commercial products in keeping with the Japanese theme.
5) A beautiful Japanese Maple (or several) can either become a focal point or used as smaller trees in the landscape. Their natural form complements the garden style and they can be used as bonsai.
6) Statuary really helps to bring the Japanese theme into the landscape. Sculptured in stone, the Yukimi-gata lantern, sometimes called the snow lantern, was originally intended to guide visitors during evening events. Its light was also considered the light of knowledge clearing away the clouds of ignorance. Praying Jinzu statues positioned in strategic areas will delight garden visitors.
The Japanese-inspired Garden includes large boulders that provide a strong foundation and a mature Japanese Maple planted more than 20 years ago.
Keep garden proportions in check
Keep garden structures such as pathways and plantings in proper size relative to a human body.
Feel free to use a variety of plant sizes to keep the eye moving around the space.
Balance large trees with gradually smaller trees and shrubs to bring them into scale.
My Japanese-inspired garden plan was given a major boost when a neighbour over estimated the number of boulders needed for a large landscape project and I was able to nab 11 massive limestone boulders. Four of the boulders formed the structure of the Japanese-inspired garden. The rest were used as a retaining wall for the driveway. But they all worked together to provide the foundation of the Japanese garden.
Adding to the basic structure was a large Japanese Maple I planted the year we moved into the house twenty-plus years ago. Back then, Japanese Maples were just beginning to gain in popularity in this area of Southern Ontario. Time has turned the sapling into a beautiful, full-size multi-stem specimen.
With the basic structure in place, we placed square-cut, blue flagstone through the space and moved yards of river rock and pea gravel into place around them. The flagstones provide a path from the front of the home to the backyard.
A small cutleaf weeping form of Japanese maple backed by large grasses took it’s place on the opposite side of the larger mature specimen.
Under the mature Japanese Maple, I’ve planted variegated Japanese Forest grass, a clump of epimedium, a ghost fern and a couple of very small blue hosta. The connected garden that stretches across the front works as a transition from the Japanese-inspired garden to the Woodland garden that dominates the rest of the property. The front garden contains several small fountain grasses, a large clump of Japanese Forest grass to complement the clumps around the mature Japanese Maple and a large horizontal blue spruce ( picea pungens Dietz) all on a black mulch backdrop.
Where the stone meets the garden, just beside a square birdbath water feature, we’ve added three small Jinzu praying on a bed of moss. The three statues represent our small family – me, my wife and our daughter.
It’s also important to include evergreens into the design. We have two – the horizontal blue spruce and a serbian spruce growing in a container on the square-cut flagstone pathway.
Low-voltage lighting allows us to enjoy the garden both day and night.
This page contains affiliate links. If you purchase a product through one of them, I will receive a commission (at no additional cost to you) I try to only endorse products I have either used, have complete confidence in, or have experience with the manufacturer. Thank you for your support. This blog would not be possible without your continued support.
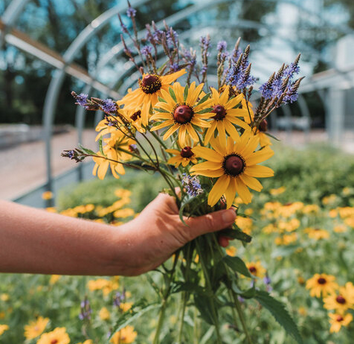
Ontario Native Plants: Taking back nature one garden at a time
Reyna Matties and Ontario Native Plants is saving our natural environment one garden at a time. The Hamilton-based native plant on-line store offers more than 100 plants, shrubs and trees native to Ontario and the Carolinian Canada forest zone to shoppers on their informative on-line catalogue.
McMaster grad brings native plants to Ontario
Reyna Matties knows her native plants, and she knows how important they are in urban revitalization, restoration and sustainability.
The 30-year-old manager of Ontario Native Plants (onplants.ca) is using that wealth of knowledge in her mission to bring back native plants to Ontario one garden at a time.
For my article on why native plants are important in the garden, go here.
What is Ontario Native Plants?
Ontario Native Plants (onplants.ca) is a Southern-Ontario mail order company, based out of Hamilton, that specializes in providing an impressive selection of native plants, shrubs and trees to Ontario residents. They offer more than 100 varieties of native plants. To ensure clients get only the hardiest plants native to their agricultural zone, Ontario Native Plants only delivers to Ontario residents.
It all started for Matties at McMaster University in Hamilton, Ontario where she earned a bachelors of Science (Environmental Science) and a Masters of Science (Biology). But it wasn’t until she embarked on her Masters thesis project that her love of native plants took root.
Her thesis focused on analyzing the success of a new parking lot restoration project on the McMaster campus. Part of the restoration involved the extension of a riparian buffer to protect a creek habitat from water runoff of a large campus parking lot.
“Being able to provide habitat and a food source for the local wildlife that visit your yard is such a beautiful and important motivation.”
The creation of the buffer called for the extensive seeding with a mixture of hardy prairie native plants (rye, bergamot, rudbeckia, etc.). Plant and soil studies were done to assess the success of the restoration (i.e. proportion of native to non-native plants).

Reyna Matties with a selection of native wildflowers from the ONP greenhouses.
The research created an impressive native-plant knowledge base and she landed the manager’s position for the small upstart company in 2019. Ontario Native Plants actually started in 2017, the same year Reyna graduated from McMaster. The job seemed too perfect to be true, combining her education with a desire to make a significant environmental impact.
The McMaster project, Reyna explains, “grew an interest of mine in urban planting and green infrastructure in cities. More specifically, I became interested in how people perceive restoration work and planting native in general.”
“I wanted to work at a plant nursery or business that helped with ecological restoration, or connecting home owners to native plants. The ONP manager job ticked all my boxes of what type of work I wanted to be involved in, and also provided a diversity of roles to learn from in a new small business.”

A bouquet of wildflowers from ONP.
Needless to say, the business literally took off after Reyna came on board in the spring of 2019. Today, the on-line mail order business is enjoying great success with a strong on-line social media presence and word-of-mouth advertising.
In 2019, ONP had a crew of about four people during the busy period between May and June. For 2020 that number almost doubled to about seven people and Reyna says that number is expected to grow again in 2021.
“The last two years (2019 and 2020) have been very important for our growth as a business,” Reyna explains.
She has great praise for the staff that have played a key role in ensuring the success of the business.
“The crews have all been such amazing individuals that enjoy working with plants, and bring so much energy to each day,” she explains.
Part of that success is the result of a growing awareness of the environment and the loss of habitat being experienced worldwide. “The interest for planting native is growing,” she explains. “Being able to provide habitat and a food source for the local wildlife that visit your yard is such a beautiful and important motivation.”
The Covid pandemic is also creating more awareness of gardening and the environmental affects of planting native flowers, trees and shrubs.
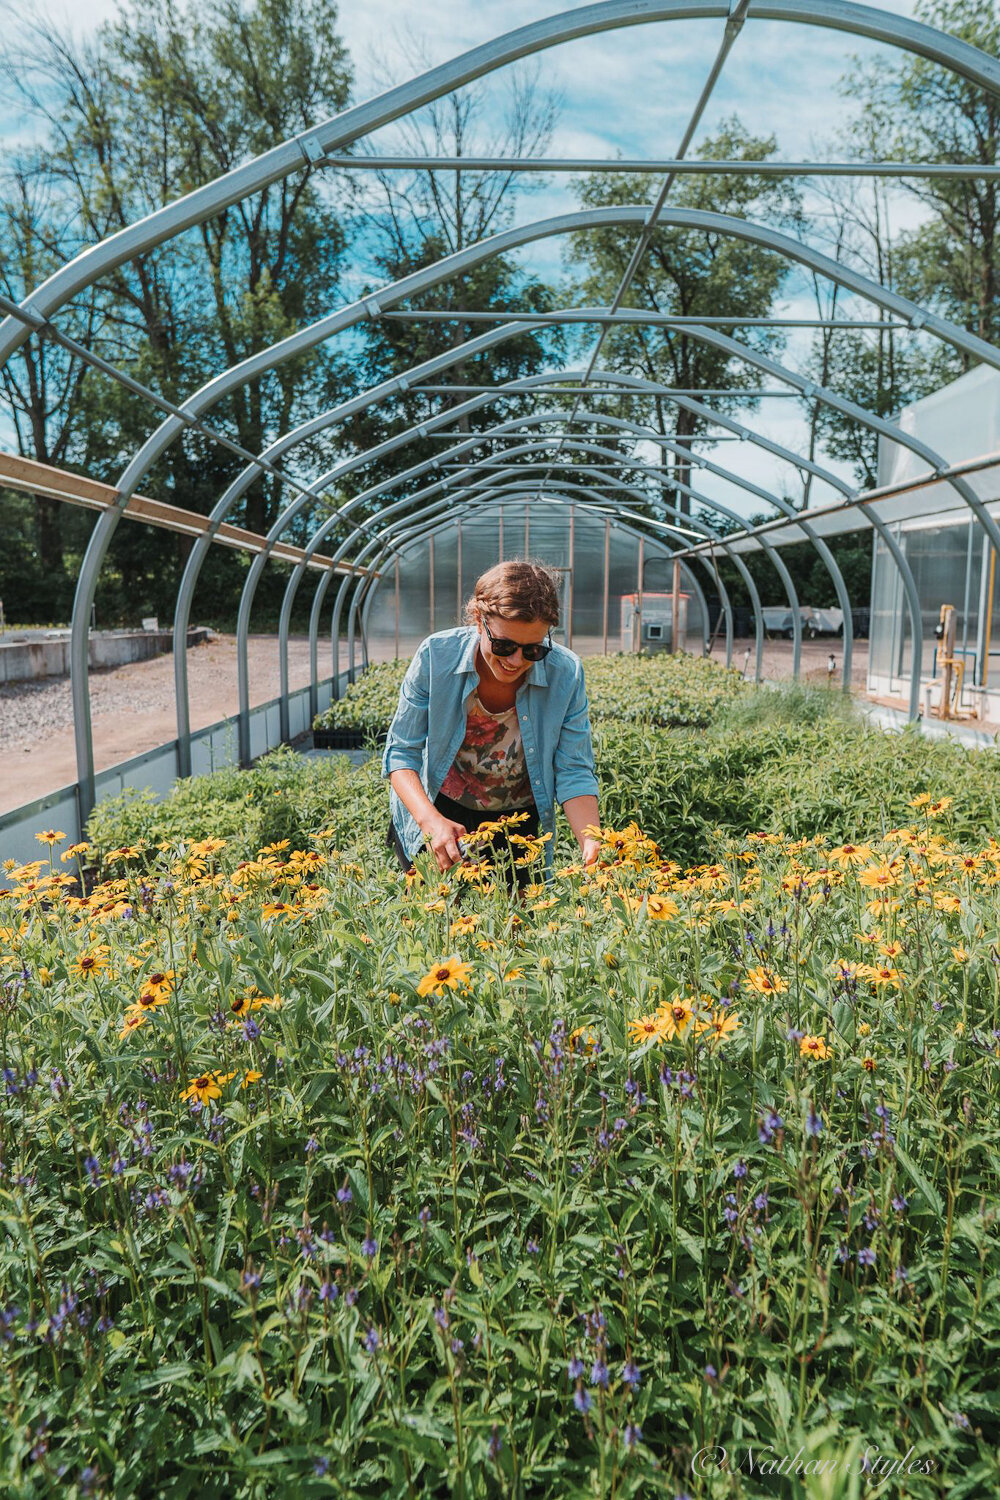
Reyna looks over some of the many wildflowers in one of the ONP greenhouses.
“With people staying home more in 2020, there was another natural surge in gardening with homeowners having more time and interest in gardening,” Reyna explains. “The physical and mental benefits are mentioned frequently by our customers.”
“With our store being completely online and contactless, we have been able to provide a very efficient way for people to purchase plants for their gardens. We are excited for 2021 and are busy updating our website and getting organized for our opening on March 1, 2021.”
But taking an upstart, online native plants nursery to new heights takes more than good timing and a growing interest in using native plants in the typical backyard garden. It takes both a knowledge of plants and first-rate service.
Ontario Native Plants seems to have found the perfect combination.
I can attest to this after a work colleague and I placed an order with the company last year. Not only were the plants shipped in a timely and obviously caring manner, the product was vigorous and extremely healthy. It transplanted well and produced in its first year. The cardinal flowers I planted proved to be a simply outstanding addition to our garden and helped to draw in a number of hummingbirds and hummingbird moths that worked the flowers from early to late summer providing me with endless chances to capture excellent photographic images in a natural setting.
“Since we are only an online store, we have been able to focus on creating a very streamlined ordering process. Customers can simply create an account, and then add different plants to their cart. The check-out is also very simple, and payment is processed by credit card or Paypal. (Website: onplants.ca)
By delivering only to Ontario, clients can by assured they will receive only the hardiest plants native to their agricultural zone.
“We only ship within Ontario as our business model is to keep the plants in their native range. We also only grow our plants from Ontario sourced seed, so you can be assured that the plants will be well adapted, and also genetically unique. We provide information on each plant’s hardiness zone for you to determine whether it can grow succesfully in the zone you live.”
Success certainly breeds more success, much to the benefit of their clients.
“We have also been able to add a handful of new species each year and, in 2021, we are offering more than 100 species of flowers, grasses, trees, shrubs, and ferns. Pretty exciting stuff!”
An important part of the ongoing success of the business is a growing awareness of the importance of using native plants in typical urban and suburban gardens rather than more showy hybridized versions of the same plants.
“We work to provide as much information in the plant descriptions about the benefits of each plant to the local wildlife, often an important nectar or food source for a variety of butterflies, caterpillars, moths, etc. We also share articles or information on Facebook and Instagram that highlights the importance of native plants,” Reyna explains.
Three reasons to use native plants
What does Reyna consider the three main reasons for using native plants in our gardens?
1. Food source/habitat for local wildlife. From the nectar from a Blue Lobelia flower, to the acorn of an Oak tree, native plants provide a diverse buffet for local wildlife in your garden. Especially in urban areas where green space is limited, bringing native plants into your yard provides “food along the road” for migrating insects, birds, and other small mammals.
2. Ecological connectivity – pockets of native plants in homeowner gardens help weave back together ecosystems that have been removed. This once again could benefit wildlife with corridors for movement or food, habitat, etc. Native plants also contributes to climate resiliency by cooling urban areas with connected patches of trees, shrubs, flowers, etc.
3. Mental and Physical benefits for the gardener – Digging in the soil and taking time to observe the beauty around you. Noticing the small insects that feed on your plants. Moving compost all day and the satisfaction of the physical labour. There are so many ways to enjoy your garden, and then, in turn, benefit from that enjoyment.
This season ONP is adding 19 new plants to its on-line catalogue of more than 100 plants, shrubs and trees. The on-line catalogue lists 59 perennial species, 48 tree and shrub species (For this year’s new plants, look for the ones listed in bold).
A quick look at the website shows perennial flowers ranging from Wild Columbine (see my earlier article here), Wild Ginger, three types of Milkweed, two types of Joe Pye, Asters, Wild Strawberry, Bottle Gentian, Woodland Sunflower, Rose Mallow, False Solomon’s seal, two types of Beebalm, Yellow Coneflower and Black-eyed Susan.
Grasses listed include Big and Little Bluestem, Switchgrass, Bottlebrush Grass and Indian Grass. Carexes include Bebb’s sedge and Fox sedge. Four ferns are listed including Lady Fern, Marginal Wood Fern and Sensitive Fern.
ONP has an impressive list of 23 trees listed for sale, including Alternative Leaved dogwood, Tulip tree, Eastern Red Cedar, Paper Birch, Paw Paw (see my article here), Eastern redbud (see my article here), Eastern Hemlock, Tamarack, White Cedar and Bur Oak.
There are 25 Shrubs listed including Serviceberry, Black Chokeberry, Flowering Dogwood, two types of Sumac, Elderberry, Lowbush Blueberry and Nannyberry.
Besides individual plants, shrubs, trees and grasses, the catalogue also offers gardeners “plants packs,” perfect for gardeners planning to plant a larger area with more specialized needs. For fern lovers, there are a number of packs offering assorted ferns, or packs of four specific fern types such as lady fern, sensitive fern or wood fern.
In addition, there is a plant pack focused on rain gardens.
The catalogue is organized to provide plenty of assistance to seasoned gardeners as well as novice native gardeners. Not only are the plants broken down according to light requirements (partial shade to shade, full sun, sun to partial shade…) it is also broken down according to moisture requirements and soil type.

Reyna works in one of the greenhouses at ONP headquarters in Southern Ontario.
New gardeners or gardeners new to ordering through ONP should be aware that many of the plants sell out over the course of the spring and summer, so they may want to get their orders in early.
Last season Lowbush blueberry, Elderberry, Pawpaw Tree, Butterfly milkweed and Wild lupine sold out.
In addition to native plants ONP also sells trees and shrubs. In Spring they offer 1-year-old plants, and then by late summer start selling a 4-month-old crop from that year. So trees and shrubs don't sell out as quickly throughout the year.
“With perennials (Flowers, grasses, ferns) there is only one crop seeded either in the prior fall or Spring, so we are able to order more as quantities permit, but those are more in demand. This is why we emphasize ordering as soon as you can to ensure you get the variety you were hoping for in Spring.”
How to place an order
ONP start taking orders on March 1st. Then, begin to ship orders with ONLY trees and shrubs in mid April. All other orders begin to ship in early May. It is essentially a queue so the earlier you order, the earlier your plants will likely be shipped in May.
Ontario Native Plants offers an updates page (https://onplants.ca/updates/) where they post information on what order numbers are shipping and good tips on making up your order.
Western Canada readers should check out Saanich Native Plants
Ferns & Feathers readers in Western Canada, specifically British Columbia, should check out Saanich Native Plants. They grow plants and produce seeds native to a variety of habitats in the Victoria area, including meadows, woodlands, forests, wetlands, beaches and more.
Their impressive website states they aim to inspire and empower people to restore and conserve nature by providing native plants, seeds, education and expertise.
“We’ve built our business on the core principle of valuing nature. We try to continually work with integrity and excellence and value collaboration greatly.”
More links to my articles on native plants
Why picking native wildflowers is wrong
Serviceberry the perfect native tree for the garden
The Mayapple: Native plant worth exploring
Three spring native wildflowers for the garden
A western source for native plants
The Eastern columbine native plant for spring
Three native understory trees for Carolinian zone gardeners
Ecological gardening and native plants
Eastern White Pine is for the birds
Native viburnums are ideal to attract birds
The Carolinian Zone in Canada and the United States
Dogwoods for the woodland wildlife garden
Bringing Nature Home by Douglas Tellamy
A little Love for the Black-Eyed Susan
Native moss in our gardens
As an affiliate marketer with Amazon or other marketing companies, I earn money from qualifying purchases.
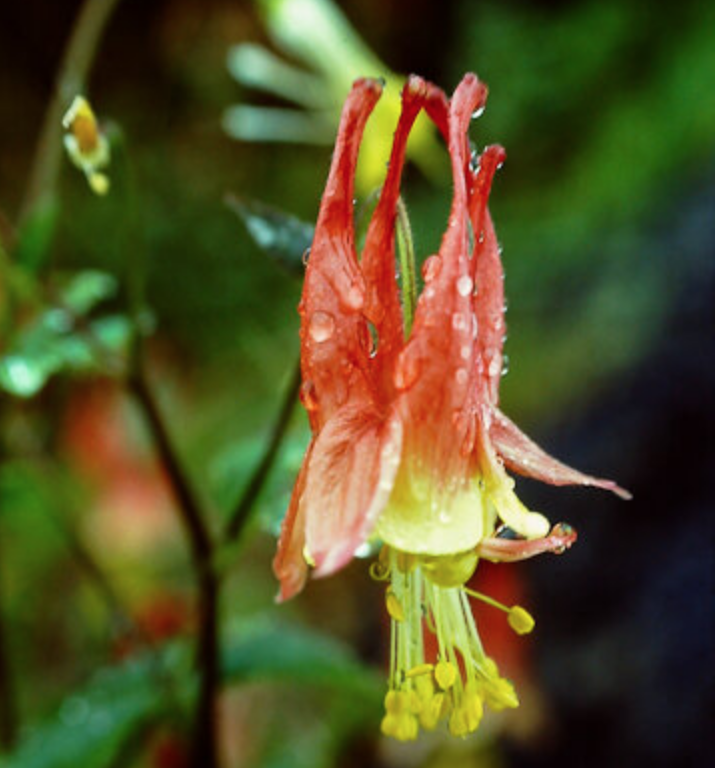
Native Eastern columbine: Growing tips for a woodland, wildlife garden
The Native Eastern Columbine is an early blooming red and yellow wildflower that is an important food source for returning hummingbirds and other pollinators. Grow them in your woodland wildlife gardens in average to poor soils in rock gardens, woodland edges or garden borders.
First columbine encounter on Niagara Escarpment
I’ll never forget my first sighting of wild native columbine.
I was hiking along the Niagara Escarpment with my camera and stumbled upon two beautiful clumps of the native plant, columbine, in their prime and growing on the edge of an overhanging, steep cliff.
I had to get a shot of them. So, being young and not too bright, I moved way too close to the cliff’s edge to get the images.
Needless to say I got the shots and survived to tell you about it.
Not the best shots maybe, but ones I’ll never forget.
These wildflowers made such an impression on me that day that native columbines were the first wildflowers I planted in our front woodland wildlife garden more than ten years later.
(For my article on why native plants are vital in our gardens, go here.)
Although the Eastern Columbine may look delicate, the plants are actually quite hardy, living for many years, often in quite harsh environments. When I say my first sight of them was growing on a cliff, I wasn’t kidding. These delicate-looking flowers appeared to be growing right out of a crack in the granite cliffs.
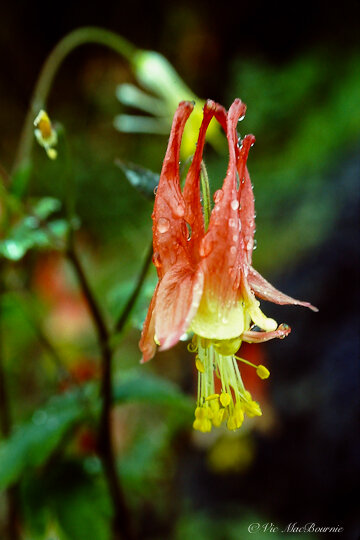
Not only did I plant them in my front garden, I also recreated in my garden – at least as best I could – that same image of the columbines growing on the limestone edge of the escarpment.
Our native columbines grow out of, and next to, a large limestone boulder surrounded by clumps of maidenhair ferns. I originally tucked the plant right up beside the edge of the boulder so that it could draw heat from the rock in early spring. It wasn’t long, however, before a plant emerged from a thin pocket of soil along a crack in the rock. These little guys will find a spot to grow anywhere they can. This plant stays more compact than the one growing in the soil beside the rock, but together they create much the same feeling I experienced so many years ago overhanging the cliff.
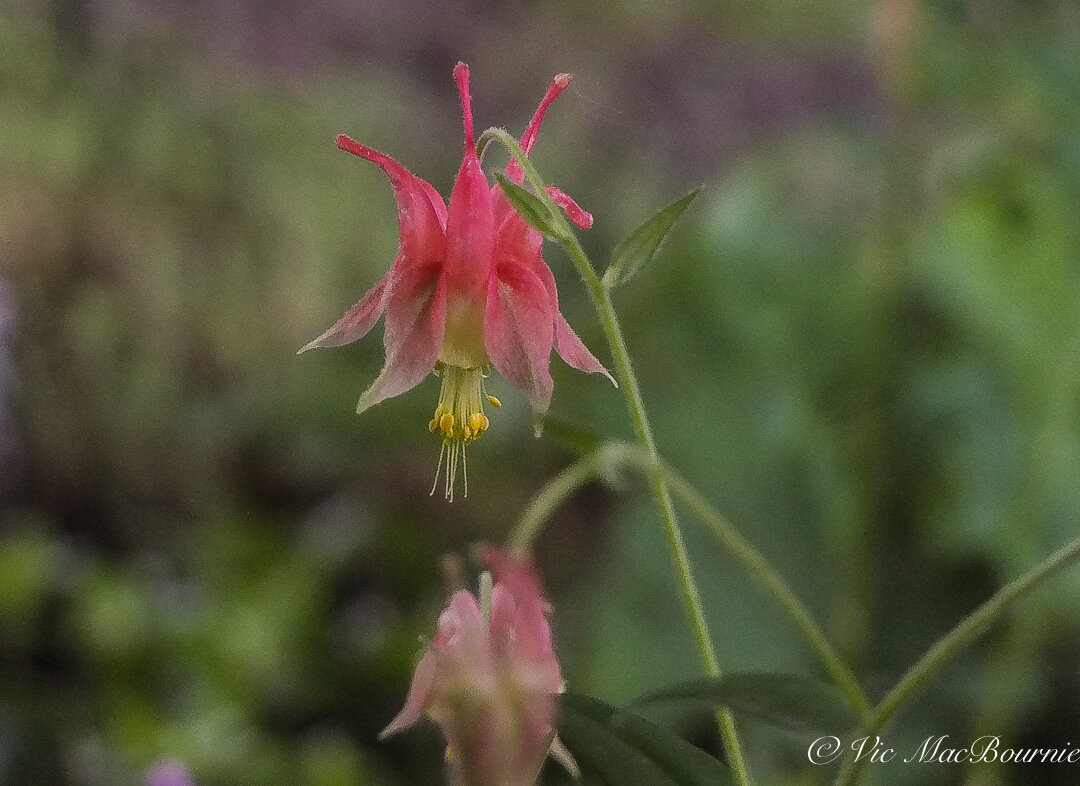
Don’t mistake the native Eastern columbine for a delicate wildflower. These early spring bloomers can be found growing in some harsh areas, even out of granite boulders in my front yard or on cliff edges.
Native wildflowers that combine well with columbines
The Eastern columbines looks right at home growing alongside other native woodland plants. Besides the maindenhair ferns, mine also share space with Solomon’s seals, foamflowers and bloodroot where they make an attractive early-spring combination with other woodland natives.
Our native Columbines can also look stunning growing in large swaths all on their own or in large garden borders as a middle-height plant where the flowers growing atop the plants provide an almost ethereal feeling.
The columbines and maidenhair ferns both like moist, well-drained sandy, limestone-based soil. If the columbines are planted in too rich garden soil, don’t be surprised if they put on excessive vegetative growth with weak stems. Instead, plants in sandy-type soils will prosper and grow in a more tight, compact form, surviving for many years. They prefer partly-shaded woodland habitat with calcareous soils that are not too rich. A single plant, while in bloom, can put out a large number of flowers. Columbines will naturalize under the right growing conditions and in a woodland or native plant garden.
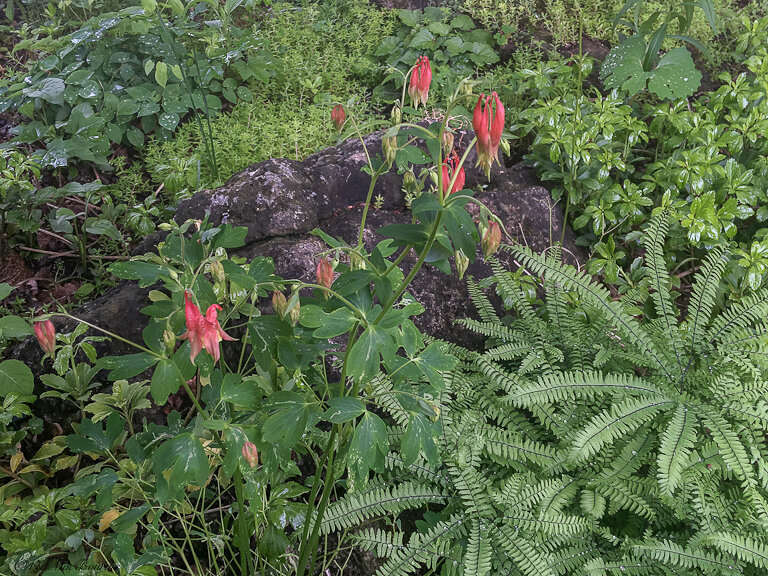
Native Eastern Columbine in the garden mixed with ferns, epimediums and sedum.
The Eastern red Columbines, also knows as the wild red columbine, or Canadian columbine, is a relatively low maintenance plant that is actually in the buttercup family (Ranunculaceae). Spent flower stalks can be clipped off to tidy up the plant, but don’t cut the plant back to the ground in case it is being used by host larvae.
Columbines can be attacked by leaf miners that leave serpentine trails in the leaves. They are generally harmless to the native plants.
In the wild, native columbines can be found in open woodlands and rocky areas throughout North America. In Canada they stretch from Nova Scotia to Saskatchewan in zones 2-9. It can also be found through much of the eastern United States.
Because these perennial plants, which grow 20 to 30 inches high, are self propagating, my original planting years ago continues to self seed in the same general vicinity where they were originally planted. More native columbines, were planted last year in a shaded area of our back wildflower garden.
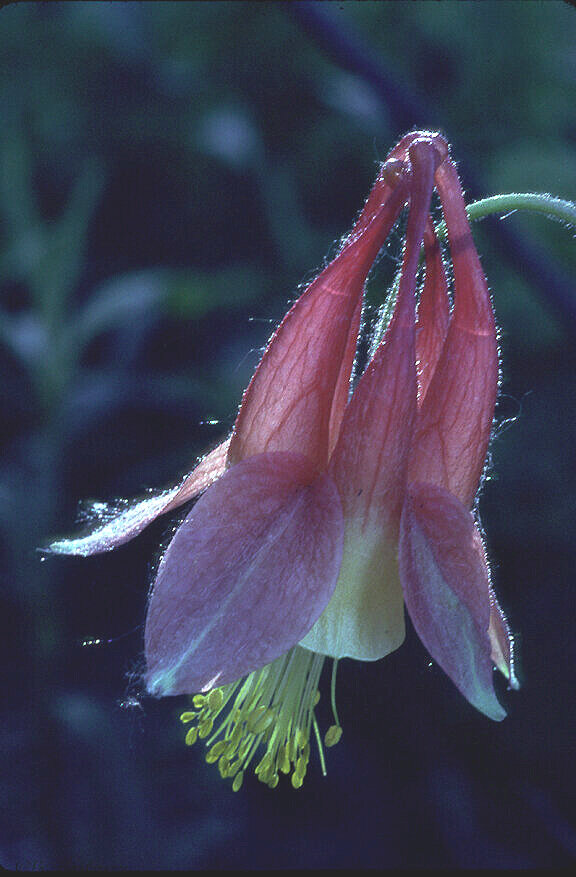
Backlit columbine in spring.
Native columbines, know as the Eastern Red Columbine (Aquilega canadensis L.), bloom from April to July in rocky open woods and slopes, and provide an early nectar source for hummingbirds. The flowers are actually a critical food source for returning ruby-throated hummingbirds in spring where they tend to bloom for about a month beginning in May or June depending on weather conditions.
The Eastern Columbine can grow up to 4 ft. tall but don’t be surprised if yours stay much more compact. You can expect the plants to be more in the 6-12 inch zone if grown in shady woodland consditions in average soil.
The showy, nodding red and yellow flowers have five hollow spurs that point upward and contain nectar that is particularly attractive to hummingbirds and other long-tongued insects. Because the flowers point downward, hummingbirds and insects including bees, butterflies and hawk moths have to come up from below the flowers to obtain the nectar.
Finches and buntings are known to consume the small, shiny black seeds that are contained in five pod-shaped follicles after the bloom period.
The columbine is larval host to the Columbine Duskywing skipper found in Southern Ontario and throughout the Eastern United States. The female skipper deposits eggs under the leaves of the native columbine where tiny caterpillars feed on them until they emerge as the small dark brown, nondescript skippers.
I have found that both the deer and rabbits leave these native plants alone in our zone 6-7 garden. In warmer areas, where the plants are considered evergreen, this may not hold true.
The light green to blue-green leaves of the Columbine are divided and subdivided into threes. The foliage is attractive even when not in bloom and turns yellow in fall.
Our native wildflower can be described as an attractive, old-fashioned plant, but it’s not without its accolades. This erect, open herbaceous perennnial plant has received the Royal Horticultural Society’s Award of Garden Merit.
That makes it a worthy consideration for a spot in your garden. I grow mine both in the front and backyard.
Don’t mistake the very showy European Columbine (A. vulgaris), with their blue, pink, violet and white short-spurred flowers, with our native variety.
The Canadian Wildlife Federation website also lists the following native columbines for consideration depending on the growing zones where you live.
Sitka columbine (A. formosa)
Native to: southern Yukon, B.C. and swAlta.
Habitat: moist to dry open areas such as streamsides, rocky slopes, woods and meadows at subalpine elevations (moist alpine meadows and mountain meadows)
Appearance: up to about one metre (three feet) tall, nodding red flowers and short spurs
Yellow columbine(A. flavescens)
Native to: B.C. and swAlta.
Habitat: moist meadows, screes/slopes and acid rocky ledges at moderate to high elevations (up to just above timberline and higher than A. formosa)
Appearance: a pale yellow flowering columbine with long spurs, sometimes with a pinkish tinge, blooming from late June to early August. Nodding flowers.
Jones’ columbine(A. jonesii)
Native to: swAlta.
Habitat: subalpine limestone screes and crevices
Appearance: a low-growing plant that reaches five to 12 centimetres tall, with leathery, hairy leaves that bunch together to resemble coral. It has only one or two short-stalked flowers that are a blue and typically face upwards.
Blue columbine (A. brevistyla)
Native to: the Yukon, B.C., Alta., Sask., Man. and central Ont.
Habitat: This boreal forest species of columbine grows in rock crevices, meadows and open woods.
Appearance: blue and white flowers, nodding/upright with short spurs
More links to my articles on native plants
Why picking native wildflowers is wrong
Serviceberry the perfect native tree for the garden
The Mayapple: Native plant worth exploring
Three spring native wildflowers for the garden
A western source for native plants
Native plants source in Ontario
The Eastern columbine native plant for spring
Three native understory trees for Carolinian zone gardeners
Ecological gardening and native plants
Eastern White Pine is for the birds
Native viburnums are ideal to attract birds
The Carolinian Zone in Canada and the United States
Dogwoods for the woodland wildlife garden

The Garden Bench as art, tips to placing them in the landscape
Garden art takes many forms, but nothing can have a bigger impact than a well-placed, beautifully aged garden bench. Whether it’s a traditional wooden bench or a small concrete one in the corner of the yard, they almost always form a focal point enticing visitors to explore the distant areas in the garden.
Help Mother Nature bring her patina of moss and lichen
I can probably count the number of times I’ve sat on our garden benches.
They’ve grown old along with our garden and have taken on a lovely patina that has transformed them into the perfect wildlife garden accessory art form, rather than the utilitarian pieces their creators originally had in mind for them.
I can think of no better piece of garden art than a beautifully moss- and lichen-covered ancient garden bench tucked beneath the branches of a spring flowering dogwood or serviceberry.
Imagine the vignette. At the foot, a lovely aged piece of natural flagstone with bits of lichen and moss echoing the patina of the bench that now offers birds and woodland wildlife a resting place. Beside the bench, an aging copper or concrete birdbath.
On one side of the bench, annual flowers spill out of a small group of terracotta pots where chipmunks chase one another in what seems like an endless game of tag.
The summer rains bring both nourishment for the annual flowers as well as another opportunity for the grey, weathered bench to transform into a patchwork of blue-green mosses and lichens.
This is not the time to clean these works of art, or worse, paint them some gaudy colour looking for a focal point in the garden. This is a time to let Mother Nature work her magic and create garden art that only time can buy.
If you do want to add colour to your benches or garden sitting area, let me suggest taking a look at designers like Annie Selke who has a great selection of colourful outdoor accessories like rugs, cushions and drapes.
There was a time, shortly after we purchased our two wooden benches, that they offered up a comfortable place to rest and relax in the garden.
They provided a place to sit quietly, explore the many senses of the garden; the sounds of birds, the sweet smell of honeysuckle or the earthiness after a summer rain.
After the mosses and lichens started to take over, however, the thought of sitting on them and crushing these delicate, miniature works of art was replaced with how I could best capture Mother Nature’s creations through the lens of the camera. Several attempts, in different weather and under a variety of lighting conditions have given me a deeper appreciation for the incredible beauty that time creates.
Situate a garden bench near an arbour covered in roses or native vines and enjoy not only the view but the privacy and shade the arbour throws. More on the garden arbour here.

This old garden bench covered in mosses and lichen provides the perfect landing spot for this male cardinal. Even if the bench is old and no longer useful as a place to sit, it can be used as art in the garden. I often place a container full of colourful flowers on the seat or on the ground below to draw attention to the bench.
How to create a mossy, aged patina
A quick search on the internet provides several alternatives to creating an aged look for new garden objects. Although most focus on aging concrete, the same process will also work on wood product. Mother nature and time does most of the work naturally, but some simple steps help to hurry it along. What might take mother nature years to create, can be done in a few weeks or months by following these steps.
• Start by mixing a weak solution of water and black acrylic or water-based paint and apply it to the cement statuary. Let dry and apply a second or third coat. The effect is simply to give the statuary a ‘dirty’ look rather than the stark white one it often has when it is new.
• Mix yogurt or buttermilk in a bucket with equal amounts of water, compost or soil and even some manure. You can add in some crushed moss at this stage as well. The result should be a thick spreadable paste.
• Paint on the mixture to the cement statuary or container ensuring you cover all areas especially creases where moss would naturally take hold.
• Take a handful of moss and rub the surface of the concrete to spread the moss spores into the concrete.

This small garden bench is located just outside our patio doors and is part of a vignette that includes a birdbath, flowers and groundcovers beneath a Cornus Kousa dogwood. We often place a container filled with annuals on it to add a pop of colour to the vignette.
“I often lay on that bench looking up into the tree, past the trunk and up into the branches. It was particularly fine at night with the stars above the tree.”
A close up of the Lichen and moss that combine to create a beautiful patina on the garden bench.
A history of the Garden Bench
The garden bench has a long history that can be traced back to the Roman age when very uncomfortable stone benches and seats were popular in hedged gardens and orchards where they fit in quite nicely with the abundance of long rows of Roman and Greek columns. In fact, the oldest surviving examples of garden furniture can be traced back to the ancient gardens of Pompeii.
Turf benches became popular in the Middle Ages.
By the 19th century, parks and gardens became more commonplace and along with it came the need for more seating. Cast iron methods of construction ramped up production and cemented the park and garden bench into the hearts and minds of gardeners.
It wasn’t until the early 18th century that wooden chairs and benches became more commonplace in gardens. In fact, the Windsor chair, so common in many of today’s homes, actually got its start in English gardens where it was known as the Forest Chair.
In North America, it is said that the oldest known surviving piece of garden furniture is a wooden bench from the late 18th century. The Almodington bench was created for the Plantation house in Somerset County, Maryland. Replicas of the large, highly detailed bench circa 1750 continue to be available. For those interested in the history of the bench or even to purchase one click here to take you to this informative Aileen Minor Garden Antiques website.
Over the years poets have praised the simple garden bench and all that it encompasses. Thomas Hardy had this to say about the garden bench.

A garden bench in a public garden situated perfectly for selfies with the colourful Iris in the background.
The Garden Seat
Its former green is blue and thin,
And its once firm legs sink in and in;
Soon it will break down unaware,
Soon it will break down unaware.
At night when reddest flowers are black
Those who once sat thereon come back;
Quite a row of them sitting there,
Quite a row of them sitting there.
With them the seat does not break down,
Nor winter freeze them, nor floods drown,
For they are as light as upper air,
They are as light as upper air!
Thomas Hardy

An old garden bench tucked away in some ferns beneath a dogwood tree makes for a perfect composition in the woodland garden.
Placing your garden bench in your backyard
Of course, garden benches don’t have to be covered in moss and lichen to be works of art. Almost any garden bench becomes a work of art if it is carefully placed in a garden. Finding the perfect spot isn’t always easy and it might take moving the bench to several spots before you find the perfect placement. Even then, most garden benches are light enough to move around the garden and experiment with placement. The ideal place in the spring, might not be the best place in the summer, fall or winter.
We have a number of garden benches, but I consider only two of them to be real “artsy” garden benches. The others include a small decorative concrete bench that is just beginning to take on the aged look with a little moss and lichen. It is placed just outside our single French/patio door where we can see it from our family room couch. Beside the bench is a copper bird bath. At its feet is a carpet of snow-in-summer ground cover and a combination of pea gravel and grey square-cut flagstone. It sits under a Cornus Kousa dogwood that is just maturing enough to put on a show involving hundreds of late spring, early summer creamy-coloured flowers.
The other is a homemade cedar bench that originally came from a hot tub enclosure. It sits beneath our large pine and is hidden for most of the year. It sits in an extremely shady location providing me an opportunity to grow shade-loving plants in a large container, or just leave it as a natural bench garden visitors may stumble upon. The squirrels regularly take advantage of its raised perspective to survey that part of the garden and work on a nut they’ve gathered or a prize they’ve discovered in the nearby compost/brush pile.
“No king has a throne more beautiful than a bench covered with the autumn leaves!”
Here are just a few more ideas for placing your garden benches.

An example of an elegant park bench in a commercial garden setting hilighted by the colourful tulips.
• Consider building or purchasing a small garden arbour as a focal point to draw visitors to your bench. Surround it with a sweet-smelling vine like honeysuckle that is particularly attractive to hummingbirds. A favourite clematis can provide a delicate and very easy-to-control vine with exquisite flowers. Or, consider a berry producing vine like Virginia Creeper for the birds and great fall colour. Better yet, combine a selection of vines to provide interest, food and nectar for the entire growing season.
•If you have a relatively small yard, placing a bench at the end of a pathway that leads you through the garden is a great way to create a destination in the garden. It can also provide you with a new seating area – one that allows you to look back at your home and garden rather than always looking out to the same view. In this instance, a colourful bench might be just the thing to add a hit of colour. If the bench leads to a wooden fence, consider using a backdrop of three to five cedars to provide a natural background and a place for birds to nest. Add planters with colourful annuals spilling onto the pathway. A small birdbath allows you to sit quietly while birds enjoy a drink or quick bath. This is a great way to, over time, get the birds used to your presence and provide you with some great photographic opportunities.
• If you have a larger garden consider placing your garden bench in an area that affords the best view in the garden. It may be overlooking a body of water, sweeping fields or an open area where deer, rabbits and other garden wildlife often wander. Walk around the garden and find areas that you don’t often visit and then imagine quietly sitting there in the morning or evening, a cup of coffee in hand or maybe even a glass of fine wine. It may not have the perfect backdrop at the moment, but some strategically placed cedars, Eastern White Pine or even well-placed large shrubs can provide privacy for you and the wildlife that will also enjoy the open view that this area of the garden provides. Don’t forget the birdbath and maybe a birdhouse to welcome your garden friends to what will become your favourite spot in the garden.
A spot you might not yet realize even exists in your garden.
There is nothing like a garden bench to bring beauty and, at the same time, experience it, in your woodland wildlife refuge.
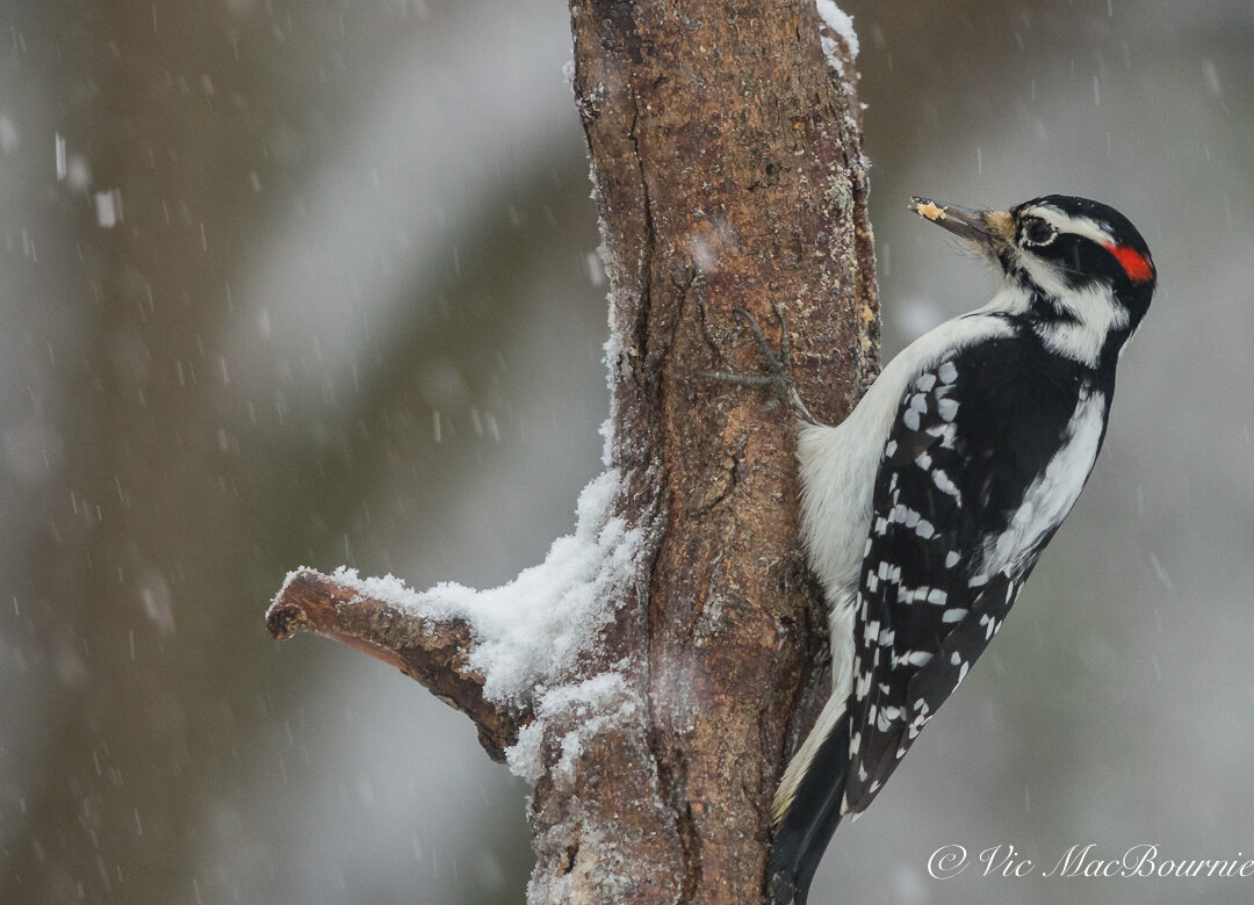
Bark butter and DIY bird feeders
The combination of a DIY feeder and WBU’s Bark Butter is an irresistible draw for more than 150 species of birds. If attracting woodpeckers, nuthatches and chickadees along with warblers sounds good, check out this simple and easy to make feeder and food combination.
Natural feeder is irresistible to 152 species of birds
Combining Bark Butter with a DIY bird feeder has become my favourite combination for attracting woodpeckers, nuthatches and chickadees to my wildlife, woodland garden.
It has also quickly become my favourite feeder combo to photograph birds in a natural setting.
So if you are like me and love either photographing backyard birds, or simply watching woodpeckers, nuthatches and other suet-loving garden visitors as they peck away gathering food for the winter, then you will love the simplicity of creating this DIY branch feeder. The feeders are so easy to make and appreciated by out feathered friends that I’ve already made two and plan on making many more in the near future.
But before digging in on how to make the DIY feeder let’s talk a little about Wild Birds Unlimited Bark Butter.
There are other spreadable-suet products available that might suit your needs. I just can’t speak to them. I do plan to order some of these products from Amazon and will report back.
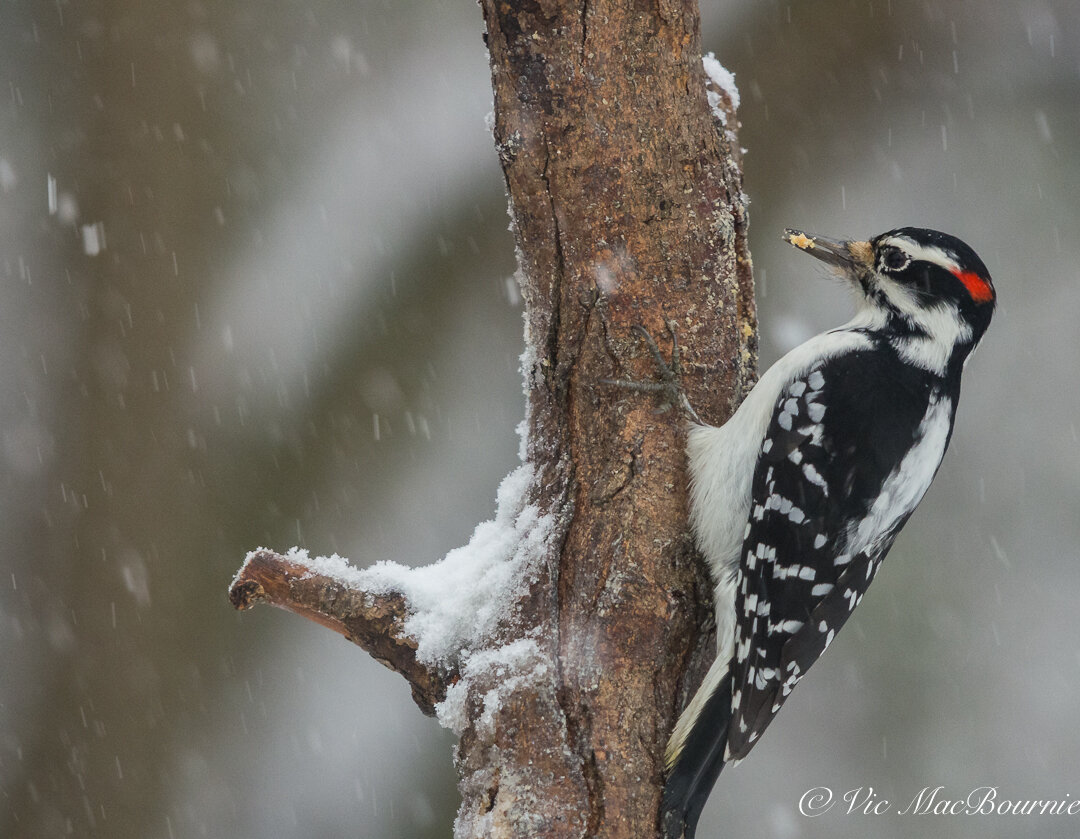
A woodpecker removes a piece of Bark Butter from the DIY branch feeder.
What’s Bark Butter?
Bark Butter is a spreadable suet-peanut butter and corn blend that can be easily spread on a rough surface like tree bark or stuffed into holes or small crevices that are easily accessible to many birds. It is especially accessible to those birds with long beaks that can reach into cracks and areas where squirrels may have difficulty reaching. It is sold, in many different forms, through Wild Birds Unlimited stores and on line throughout Canada and the United States. The formula for Jim’s Birdacious Bark Butter is said to be created by Jim Carpenter, founder of Wild Birds Unlimited. It is advertised as a food source that attracts a greater variety of birds than any other food source including regular suet.
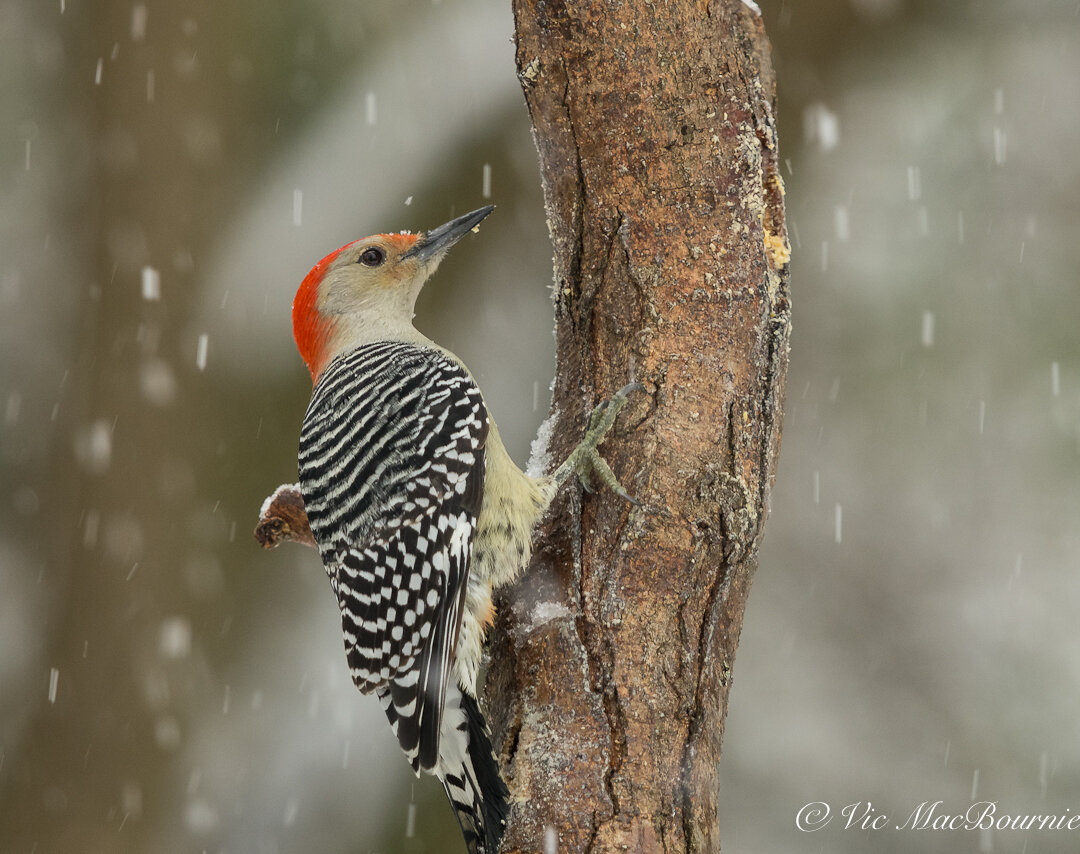
This Flicker is working one of the many Bark Butter pockets in the DIY branch feeder.
I can’t verify the claims that it attracts more than 152 species of birds, but I can verify that this stuff is a joy to use. Its peanut butter base makes handling it enjoyable. In fact, I mostly just scoop it out of its plastic container using my hands and stuff it into the holes I’ve drilled into the DIY feeder tree branch. Any access bark butter that gets on my hand is simply rubbed into the crevices of the branch’s bark.
Getting back to those 152 different species that Bark Butter is said to attract. I have no doubts that the claims are true that Bark Butter attracts everything from woodpeckers like Flickers, Downies, Hairy and red-breasted woodpeckers, to Brown Creepers, Chickadees, Jays and even warblers. As many know, attracting warblers to our gardens is not always easy. Anything that brings warblers into the yard is a good thing and, since Warblers are big insect eaters, the bark bits with insects would be a good choice to attract them.
Bark Butter is not inexpensive so care should be taken to use it wisely and do everything possible to keep squirrels and other mammals from feasting on it.
Although it is recommended to be spread on tree bark, if squirrels discover it before the birds, there’s a good chance they’ll devour most of it before the birds get to it.
The DIY feeder helps solve this problem. Because it can be hung from a feeding station complete with squirrel baffles and placed is an area of your garden that makes access difficult for raccoons, squirrels and other garden critters, it’s easy to maximize the benefits of the butter.
As an experiment, I have created two of these feeders. One is hanging off the feeding station and therefore protected from squirrels. The other feeder is part of a large tree branch that has been dug into the ground and allows easy access to red and grey squirrels among other backyard wildlife critters who discover it.
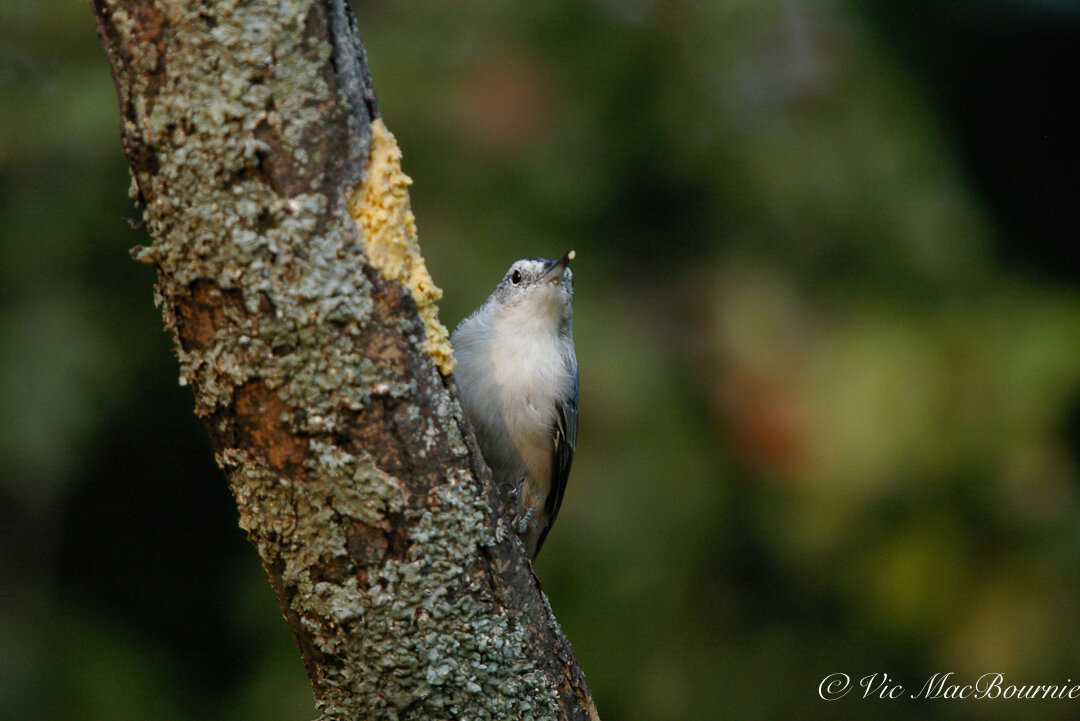
A Nuthatch feasts on Bark Butter at the lichen-covered DIY branch feeder.
As a result of the experiment, I can attest to squirrels’ love of Bark Butter and the importance of making access difficult for them. Once loaded up, the Bark Butter feeder on the feeding station remains available to the birds for several days, while the branch feeder is more or less devoured in a day or two. I suppose using the hot pepper mix is appropriate in this circumstance to keep squirrels away, but after my fair share of hot wings, I’m not a fan of teaching the squirrels a hard-earned lesson.
In the end, I like both feeders. If saving money is important to you, however, it’s probably wise to make it difficult for squirrels to get access to your DIY feeders.
The bark butter is available in plastic tubs in both regular and a hot pepper blend that helps detract squirrels from feasting on the rather expensive feed. It’s also available in a Bugs and Bits blend, which incorporates small pellets of bark butter together with insect parts including meal worms. The same pellet-shaped Bark Butter Bits are available without the insects and with hot pepper. There is also Bark Butter quickbites and a large no-melt suet cyclinder. Both are available in regular and hot pepper.
Be aware that some Wild Birds Unlimited locations choose not to sell the hot pepper Bark Butter.
For more on Building your Garden on a Budget go here.
While I get great enjoyment from my bird feeding stations, providing natural food sources to our feathered friends is always the goal we should aspire to in our gardens. I have written a comprehensive post on feeding birds naturally. You can read about it here.
Simple, easy-to-create DIY feeders
There are many different ways to use Bark Butter. One of the simplest ways is to gather pine cones from the garden and smother them with the bark butter. These can be hung from tree branches throughout the garden especially during or just before a snowfall.
But my favourite method is to use a one- or two-foot branch cut from or left over from a tree pruning, either from your own tree or a neighbours’. My feeders are a little thicker than a man’s wrist, but larger, heavier branches can be used for larger woodpeckers like the Pileated woodpecker.
These feeders are so simple to make that the process is almost not worth describing. But here is a simple description of the process.
• Drill a hole through the branch maybe an inch or two down from an end to insert string or preferably wire, which will be used to hang the feeder.
• Then, using a larger drill bit, start drilling several pockets or holes in the branch at regular intervals.
• If there is a side branch, leave some of it to act as a small perch for the birds. Then drill a hole above the perch to act as a convenient location for birds to get easy access to the Bark Butter.
• I use a combination of drilled pockets that go half way into the branch, full holes drilled right through the branch to provide birds with different length beaks access to the butter.
• Once the wire is attached and the Bark Butter applied, you can hang the feeder. Leave room around the feeder to give visitors access from all sides.
• Refilling the tree branch with suet is just a matter of taking a clump of the Bark Butter and stuffing it into the holes. I do it with my hands but you could use an old spoon. Wild Birds Unlimited says to use a fork for the final application because the rungs leave a criss-cross pattern in the butter that birds can easily pick off and eat.
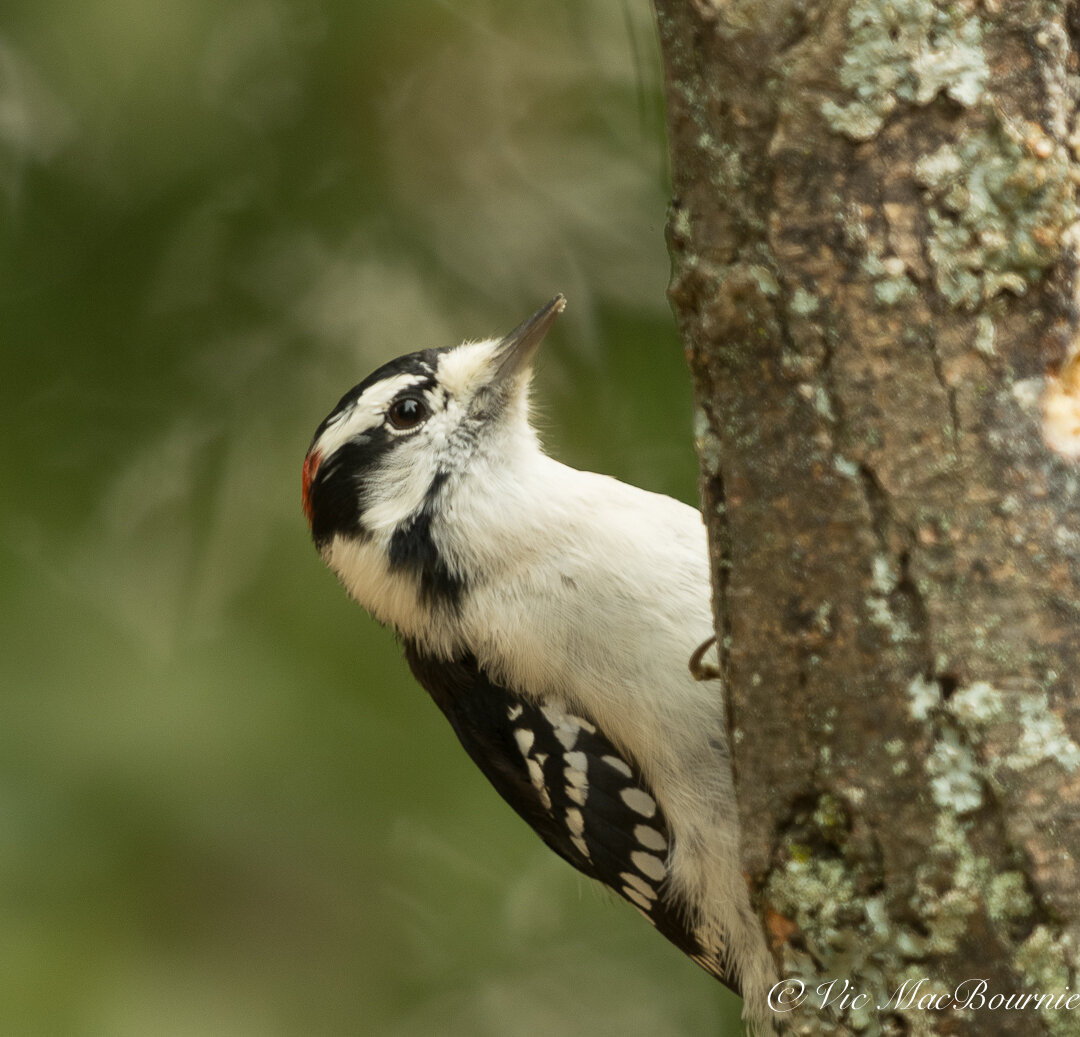
Create a free-standing feeder for all garden visitors
• Our other Bark Butter feeder is nothing but a larger 8- to 9-foot branch partially buried into the ground a couple of feet.
• Once stabilized in the ground, drill several holes and pockets in the branch at various heights to provide birds with several feeding areas up and down the branch.
• Smaller holes can be drilled into the branch to insert perches for birds or long screws to hang smaller feeders from. This is an ideal spot to add Bark Butter-infused pine cones.
• I like to fill this bird feeder an hour or two before going out to photograph the birds to give me another potential photo location.
Branch feeders are ideal photographic stages
This larger branch has become a favourite location for birds and squirrels who enjoy taking up a position on top to scan the garden. It has only been up for about eight months and I’m sill waiting for a large hawk or owl to discover it and use it as a hunting perch.
But I’m confident that time will come and I hope to be there in my Tragopan V6 photo blind ready to capture the image.
In the meantime, I’ll enjoy the large variety of backyard birds providing me with endless photographic opportunities on my two natural feeders.
The lure of the DIY branch feeder and Bark Butter is irresistible to so many birds. This makes it ideal for photographers to capture natural images (much like the ones featured in this article) of the many varieties that visit. The DIY feeder combined with a photographic blind like the Tragopan V6 one-person blind, makes it easy to get up close to some of your favourite species. The feeders and the blind are also portable enough to move them around the garden to obtain the background of your choosing.
If photographing birds is one of your primary goals behind creating the branch feeders, be careful to drill your holes strategically to hide as many as possible from the camera lens. By keeping the suet pockets on one side and shooting from an angle that keeps the suet more or less hidden, the resulting photos can look very natural.
I like to look for branches from older trees that already have lichen and moss growing on them. A chainsaw makes creating several lengths of feeders easy and quick work.
Gardening on a budget links
Ten money-saving tips for the weekend gardener
DIY Bark Butter feeder for Woodpeckers
DIY reflection pond for photography
Click & Grow is ideal for Native Plants from seed
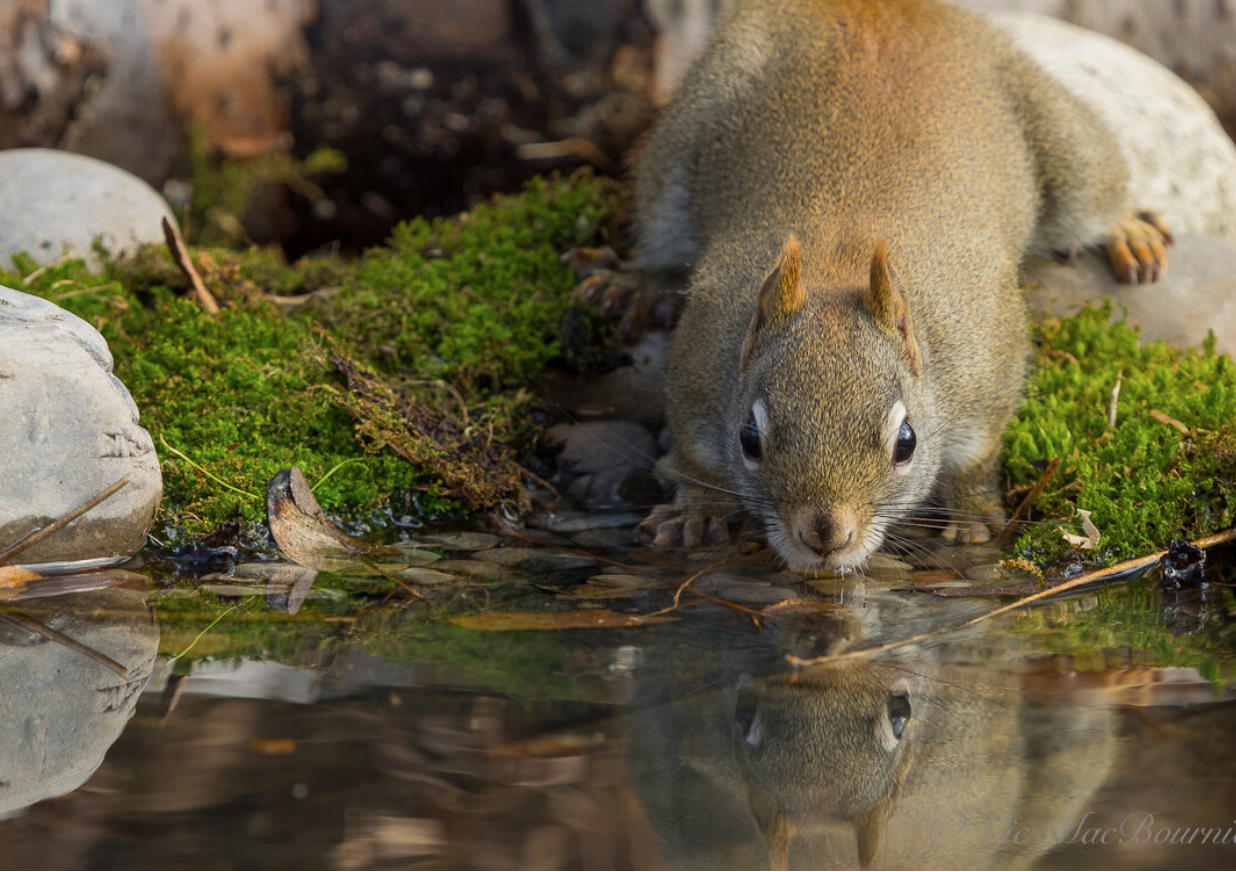
Garden photography: Build a portable DIY reflection pond in three simple steps
How to create a reflection pond in three simple steps. It begins with purchasing a rubberized boot tray. Then add some natural materials such as moss, river rock, pea gravel, pine needles and, in the fall, colourful leaves. The last step, add a little water and you are ready to start capturing professional looking reflection images of birds and mammals.
Create professional looking wildlife photographs
Ever wonder how photographers get those beautiful reflection shots of birds or animals?
It should come as no secret that many of those images are made with a well thought out reflection pond and a photographic blind.
In this post I am going to show you how to create a reflection pond in three simple steps and about ten minutes of your time.
I've always admired the incredible image of a lion drinking by the water hole in the evening – Its pink tongue and focused stare perfectly reflected in the water.
Without the mirror-like reflection, the image is just another impressive safari shot.
Our woodland and wildlife gardens can’t compete with an African watering hole, but that doesn’t mean we can’t create exciting reflection images in our own backyards. I know the red squirrel in the picture above isn’t quite a lion, but with a little work we can all imagine the possibilities.
Many of us have seen elaborate reflection ponds created to photograph birds and mammals. Some reflection ponds in Europe are so popular that photographers are willing to pay to use them to obtain outstanding photographic images of birds and mammals.
But here’s an epic hack of a readily available commercial product that makes creating a reflection pond as simple as possible and for under $50 Canadian. It’s so simple that, provided you have a few materials at hand, building it should take less than ten minutes.
(If saving money is your thing, check out my in-depth article on Building Your Garden on a Budget.)
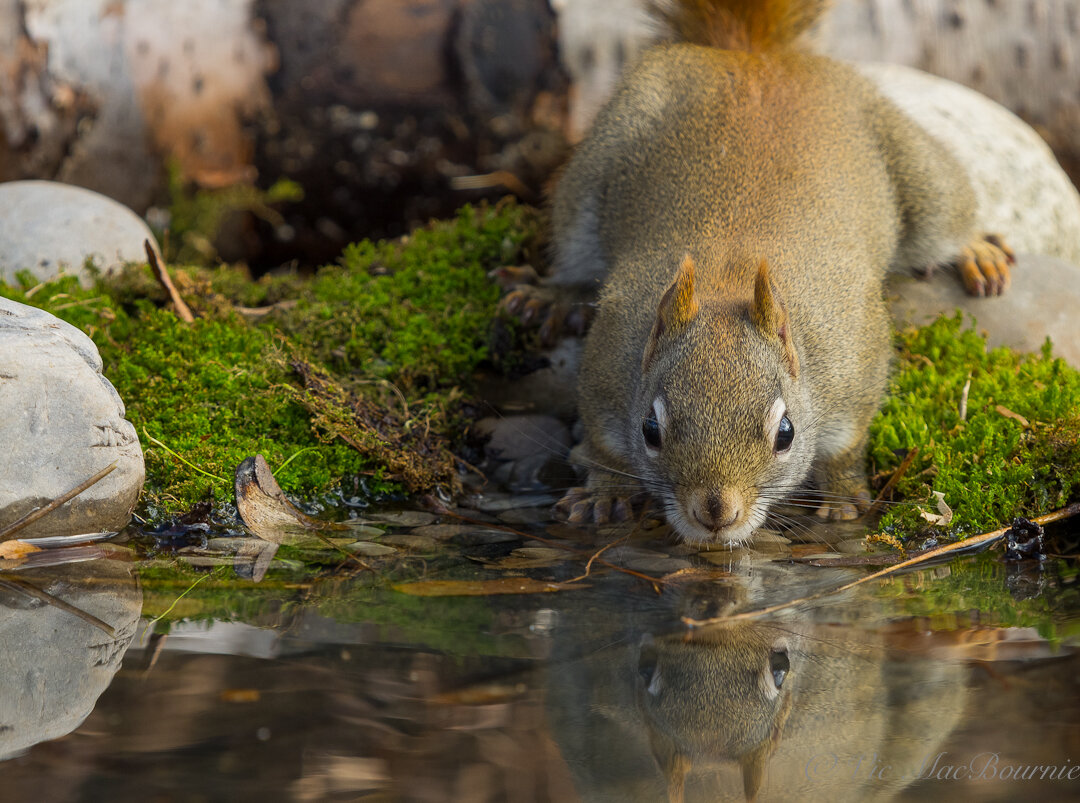
This reflection of a red squirrel at the pond is made to look natural with the addition of moss, pine needles, river rock and submerged pea gravel. This DIY reflection pond is extremely simple and inexpensive to create.
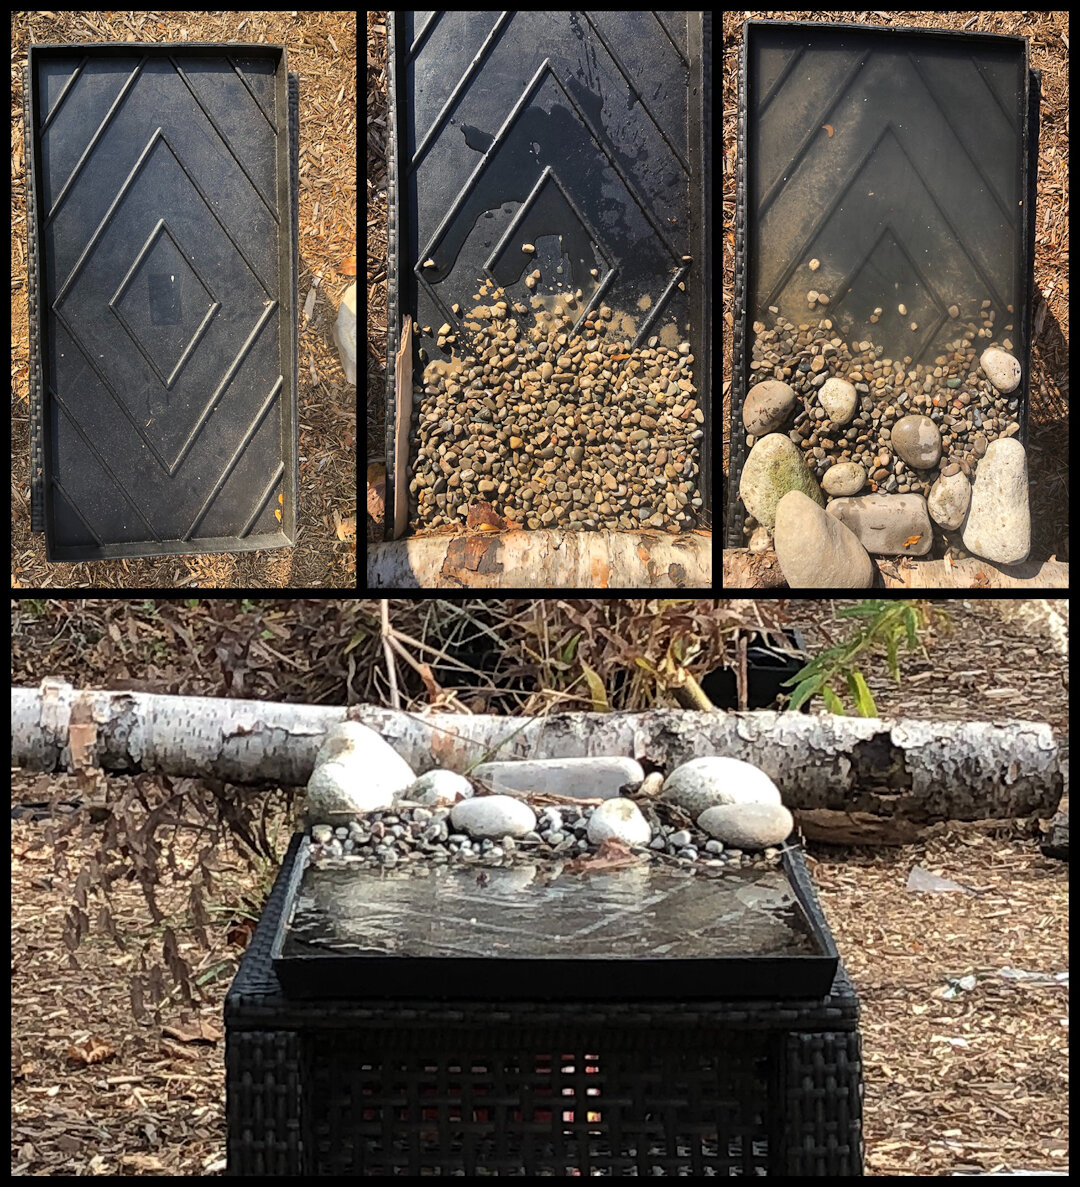
A step by step visual illustration of the creation of the reflection pond made from a rubberized boot tray.
Three simple steps to creating a reflection pond
1) Purchase a black rubberized boot tray. Mine was purchased from Lee Valley Tools outlet here in Canada and place it on a small table.
2) Add a few large river rocks, a couple of handfulls of pea gravel, maybe a birch log and moss, pine needles etc to your taste.
3) Add a couple pitchers of water to fill the tray and voila.
The reflected image of the red squirrel is just one example of what can be done with this simple, backyard reflection pond.
A little planning goes a long way in the creation of memorable backyard bird and mammal images. With that in mind, I went to work creating an outdoor studio to provide the inspiration to create my own “lion image.”
It's not uncommon for photographers to set up a few branches near a feeder as perches to guide birds to the best photographic locations.
My plan was to take that a step farther with the creation of a small reflecting pond to entice birds during the winter, when a reliable water source is a priority.
It all started with with the purchase of a 32-inch by 16-inch by 1.25-inch deep black rubber boot tray. It’s the perfect ready-made base to use as a reflection pond.
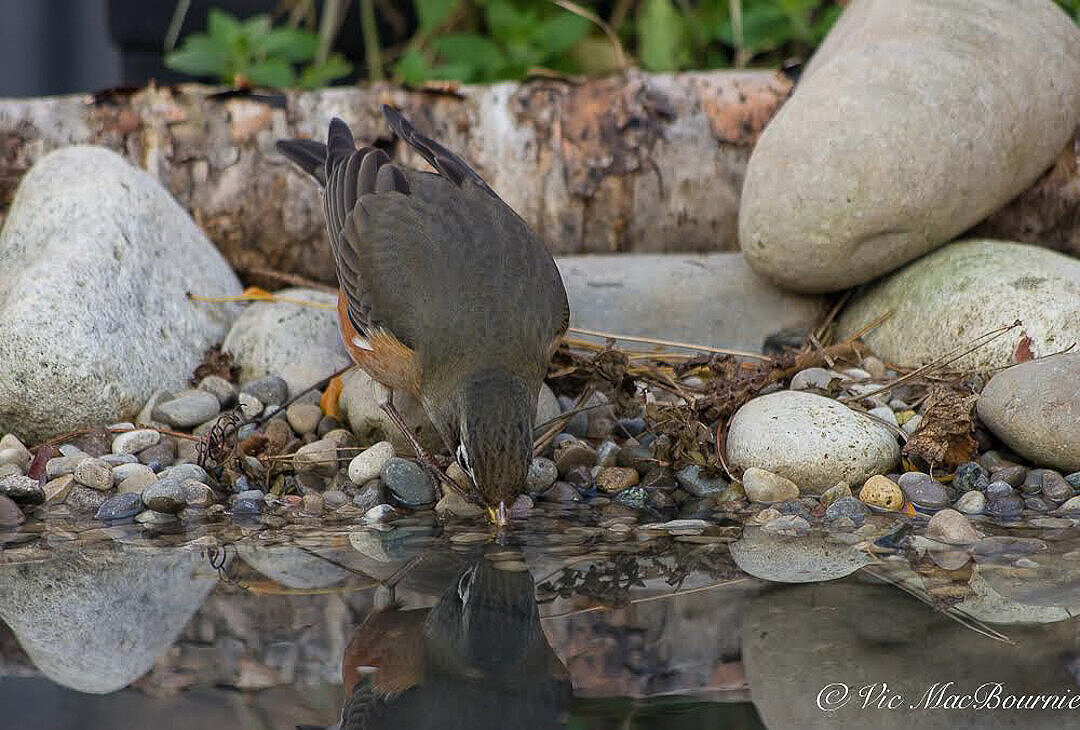
A robin stops by the reflection pond to steal a drink.
This boot tray, in case you are not familiar with it, is no cheap plastic flimsy tray that will crack in the cold. It’s made from a virtually indestructible rubber compound that is also non-skid and heavy enough to stay put even in high winds.
Placed on a similarly rectangular patio table that sits about two feet high, it's at the perfect height to capture reflections of the birds and mammals from my Tragopan V6 photographic blind or, if I put it close to a window in my home, from the comfort of my home.
Once I had the boot tray, the next step was to simply add some pea gravel, a couple of medium-sized and larger river rocks, maybe some pine needles, moss and a birch branch to give the outdoor photo studio a more natural look from behind the camera lens.
These natural materials will form the backdrop for the images and can be changed or manipulated to create different looks from one season to another. In summer, for example, moss and small wildflowers could be added. In fall, fallen leaves, pinecones, even an acorn or two.
Once the natural materials are in place, add a few pitchers of water to fill the tray to the top. Once the water is added, ensure that the tray is level by placing small stones or pieces of wood under the table’s legs.
Now, you are ready to begin photographing. It's really as simple as that. The birds will need time to get comfortable with the reflection pond.
During warmer months, you could slip a small mirror into the water to get a perfect reflection, but I don’t find that necessary. The fact the boot tray is black, will result in good to excellent reflection qualities provided your camera is set at the right angle to the water. A little experimentation here will help you get the results you want.
For the winter, set it up outside a back door on your deck or near a full-length window, so you can capture images in the comfort of your home.
With the Tragopan photography blind placed 7-10 feet from the reflection pond, I am able to use a very basic, inexpensive lens to capture the images.
By creating these types of lures to bring birds and mammals in close to either a photographic blind or a window in your home, you are much more likely to get outstanding images without having to purchase expensive photographic lenses.
It's important to note that to get a proper reflection, the camera should be at the same level or just above the height of the reflection pond. Some trial and error is necessary to get the best results.
I'll admit that the rubber boot tray falls a little short. It’s not perfect. If it were a little larger it would capture more of the reflection of larger birds or mammals, but it works beautifully for smaller- and mid-sized birds and mammals.
The fact it is black not only helps to create the perfect reflection, it also absorbs the light and works as a natural solar heater during the colder months. It will not keep it ice free in the coldest months, but it will help warm the water on sunny days.
My cost for the entire setup was about $40 Cdn, which was the cost of the boot tray.
In addition to the rectangular reflection pond, I also created a similar, smaller round version using a plastic planter tray purchased from a local nursery for about $11. That smaller pond is deeper so it allows me to use an electric birdbath heater to keep the small “pond” from freezing over.
For the winter, I have put both reflection ponds side by side in an area of the garden near a full-length glass door which allows me to photograph the birds and animals all winter from inside my home.
(I have taken the reflection pond to new heights by combining it with a natural backyard food table. Click on the link for the complete story about building a DIY feeding table/reflection pond photo studio.)
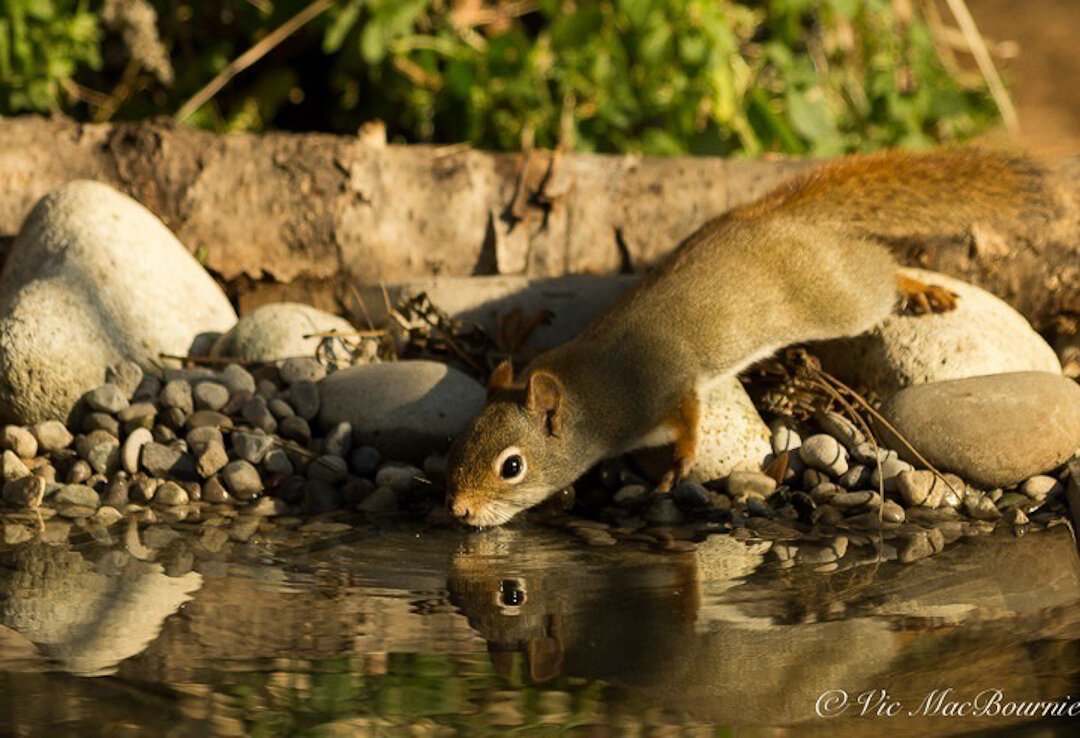
Another image of the red squirrel getting a sip of water from the reflection pond.
Tragopan Photographic blind is ideal companion to reflection pond
A note on using the one-man Tragopan V6 blind with this project. Besides working so well to hide my movements inside the blind, the viewing holes are set at the perfect height to photograph the best reflections.
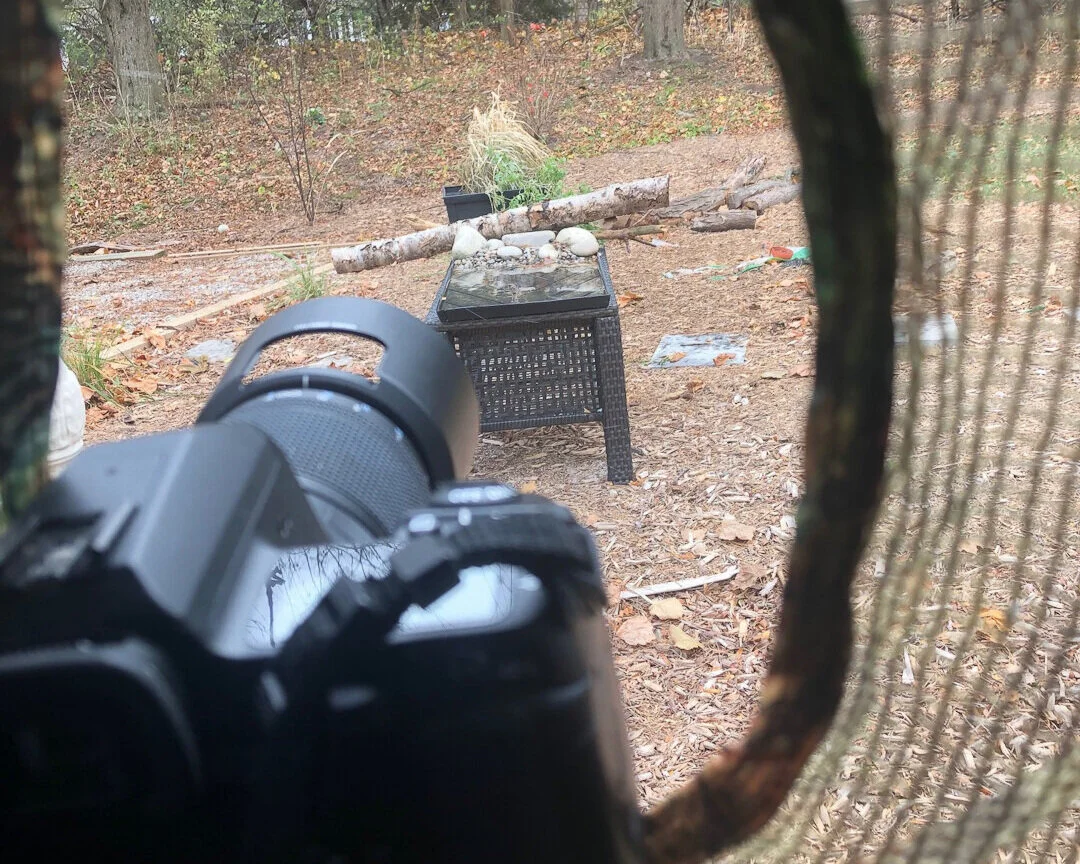
The reflection pond from inside the Tragopan V6 photographic blind.
In addition, both the blind and the reflection pond are extremely easy to move around the garden. By moving the blind around the garden, it’s possible to change backgrounds and even the reflections. For example, in the fall, move the reflection pond around the garden to capture the most intense fall colours. In the spring, do the same to capture spring flowering trees and shrubs.
I have used the blind extensively over the past several months and have grown to really appreciate the convenience of using it to capture images I would never have been able to get without it.
An added bonus to the blind is that as the weather turns cooler, the photo blind, that comes with a thermal lining built into it, will not only help cut the chilling winds and hold what little heat my body generates inside the blind.
The blind makes photographing during the cooler temperatures of late fall and early winter very comfortable for long periods of time.
Gardening on a budget links
Ten money-saving tips for the weekend gardener
DIY Bark Butter feeder for Woodpeckers
DIY reflection pond for photography
Click & Grow is ideal for Native Plants from seed

Three of the best Carolinian under story trees (perfect for small yards)
If you are lucky enough to live in the Carolinian forest zone in Ontario or the United States you are able to grow some of the finest understory trees. Here are three of the best understory trees, Redbud, dogwood and Pawpaw. They are small trees perfect for today’s smaller backyards.
Native trees need to be in our gardens
If you are lucky enough to live in the Carolinian zone your garden can be home to a host of exceptional native trees unavailable to many gardeners in colder regions of Canada and the United States.
The Carolinian Canada zone in southern Ontario is characterized by the predominance of deciduous trees and actually stretches well into the United States from the Carolinas, through the Virginias, Kentucky, Tennessee, Maryland, Delaware, Pennsylvania, parts of Ohio and New York state to name just a few.
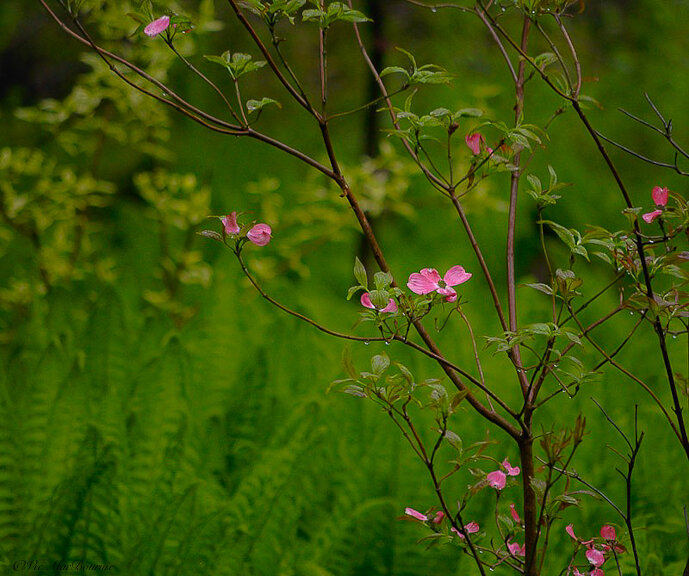
Dogwood among the ferns in the back woodland garden.
In Canada it includes gardening zones 6-7 and shares many of the same animals, trees, flowers and shrubs.
Trees in the Carolinian zone include upper story trees such as oak, hickory, tulip tree and walnut.
But what are the best native understory trees in the Carolinian zone? Carolinian forest understory trees are among the finest and most showy of the available smaller trees, and most would consider the dogwood and redbud to be the showiest. I’m suggesting the Paw Paw to round out the top three for its outstanding fruit production.
(For more on the importance of native plants, trees and shrubs in our gardens, go here.)
These understory trees are ideal for smaller backyards that are common in many of today’s urban and suburban yards.
Let’s take a look at three of the best.

This image illustrates the work of our native carpenter bees who use the Redbud leaves of the Forest Pansy cultivar for their nests. The leaves are just beginning to turn colour for their autumn show.
Redbud (Cercis Canadensis)
The Eastern Redbud, is a hardy understory tree that grows in zones 4-9. It is native to Southern Ontario and is found throughout most of the United States from Florida through to California.
It grows to about 30 feet high with a spread of 35 feet and is available both as a single-stem tree or a multi-stem tree. It has a rounded canopy and tolerates clay soil and the presence of Black Walnut.
My experience is that deer primarily leave the tree alone and outside information seems to back up my findings. So if you are in deer country, put this tree on your list. It’s always a good idea, however, to buy them large enough that deer cannot reach the upper part of the tree.
Redbuds are easily grown in average, medium moisture, in well-drained soils in full sun to part shade.
It is prized for its spectacular early spring bloom of a profusion of tiny pink flowers that lasts for weeks covering the branches prior to the heart-shaped leaves emerge. The result is a stunning early spring display that is really unmatched by any other tree accept maybe the native Florida dogwood which pairs perfectly with the native Redbuds.

One of our Redbuds in full bloom. This is the Forest Pansy that grows beside our shed and provides beautiful magenta/pink blooms against the grey walls of the shed in early spring.
Once the flowers fade the heart-shaped, dark green leaves emerge and remain throughout the summer. The leaves, a favourite for carpenter bees, will eventually put on an impressive fall show of bright, harvest-yellow leaves before falling to the ground. Small, purplish seed pods remain on the tree for a while providing winter interest.
The tree blooms on the previous year’s growth, so it’s best to prune the tree in early spring, after the blooms fade and before it sets bud for next year.
In the wild, the tree is found in woodlands and along creek beds and rivers where it grows as an understory tree in the shade of taller hardwoods and conifers.
In your garden, it can be grown as a specimen or in small groups and woodland margins in a naturalized setting. It is the perfect small tree to grow near a patio or deck.
There are a number of cultivars available including “Appalachian Red” a smaller red flowered variety (zones 4-9), “Ace of Hearts” a more compact form with a dense, domed shaped canopy growing to 12 feet with a 15-foot wide canopy, “Silver cloud” a variegated form of soft green leaves blotched with white that are slightly smaller than the species plants, “Covey” is a small weeping cultivar with a dense umbrella-shaped crown with contorted stems and arching to pendulous branches. Covey is particularly good for small yards or beside patios and decks.
“Forest Pansy” is a purple leaved cultivar. It is one of the most popular cultivars both for its spring show of flowers and its fall show where leaves turn shades of reddish-purple and orange. In cooler climates, the trees foliage retains its rusty/burgundy colour throughout the summer. You can read one of my earlier posts on the Forest Pansy cultivar here.
Dogwood (Cornus Florida)

Often considered the queen of flowering native deciduous trees, there is no arguing that the flowering dogwood (Cornus Florida) deserves a royal welcome in any garden big or small, urban or suburban.
Growing 20-40 feet in height with a delicate horizontal habit of its spreading crown and long-lasting, showy white and pink spring blooms. The 3-inch flower, which are actually primarily large showy bracts, bloom prior to the leaves unfurling giving the tree its spectacular show. Once the spring flowering is complete, the tree’s graceful, horizontal tiered branching habit give way to red fruits that last only as long as birds will allow.
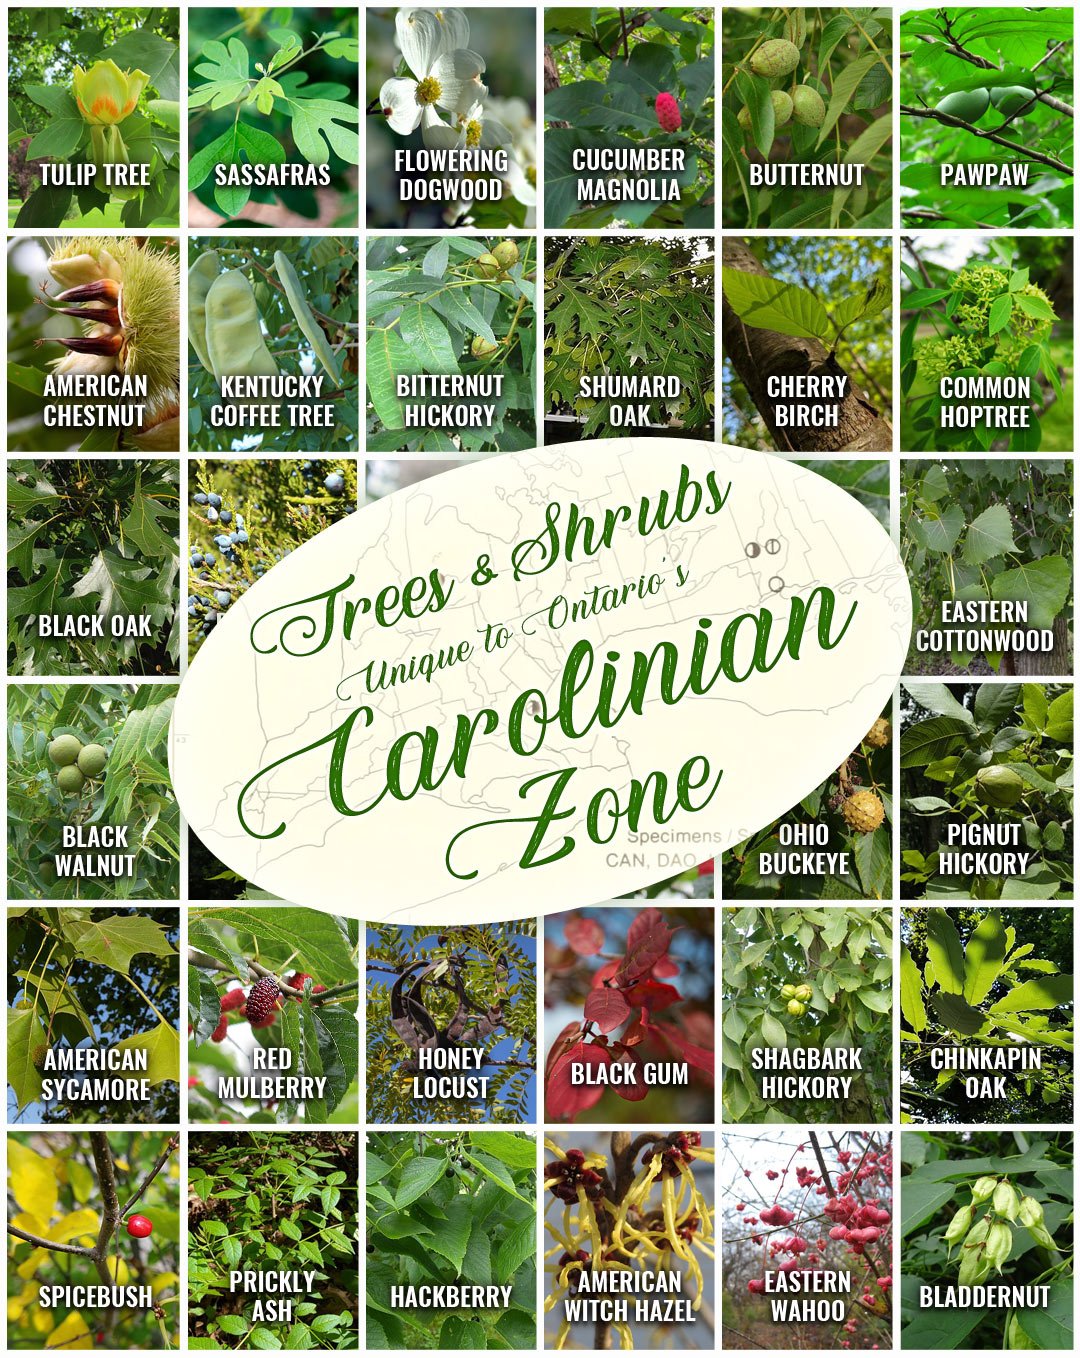
This Carolinian Zone poster was created by Justin Lewis. It is best viewed on a tablet or desktop.
The show does not end after the spring bloom and showy fruit of summer. The scarlet autumn foliage provides the perfect backdrop to the vibrant reds and oranges that often dominate the fall landscape.
In the wild you will find the tree growing near streams, on river banks, in thickets, shaded woods and woodland edges. in shade or part shade. It prefers Rich, well-drained, acidic soil. It can grow in sandy, sandy loam and medium loam that is acid based.
In your garden use it as a specimen but give it room to spread its horizontal, tiered branches as it matures. Its fruit will attract a variety of birds as well as mammals throughout the summer. It will attract a host of butterflies, moths and insects, but is known as the host plant for the Spring Azure caterpillar. The spring azure butterfly is an attractive butterfly with blue undersides marked with black and gray spots.
It is also considered to be especially attractive to native bee species.
It is best pruned in early spring after blooming and efforts should be made to prevent complete drying of soil by mulching the area around the tree. They prefer not to grow in a lawn or surrounded by grass.
Anthracnose disease is an invasive disease, first confirmed in Ontario in 1998 (earlier in the United States) that is threatening the native dogwoods. It is a foliar disease caused by a fungus that can lead to damage and eventual mortality of the tree. It attacks both the Cornus Florida and Pacific dogwood (Cornus nuttalli). At present, there is no cure for the disease.
The emergence of Anthracnose has resulted in many gardeners planting Cornus Kousa varieties which are also beautiful and have many of the same benefits but are not native to the Carolinian zone and flower after the leaves have emerged rather than before.
Don’t let Anthracnose stop you from planting the native tree. They are too beautiful not to have in your garden.
Pawpaw (Asimina triloba)
Imagine going out in your backyard and picking a large piece of fruit (larger than a pear) that tastes as sweet as any mango you’ve tasted.
You might think you’re in some exotic spot, not in southern Ontario or parts of Eastern United States. But you would be wrong.
The Pawpaw tree is not common any longer but it’s making a real resurgence as ecological and food forest gardeners discover the incredible benefits of growing this native tree with its massive, exotic-tasting fruit.
The understory tree reaches about 20 metres tall, with large 30-centimetre long leaves that hang down adding to the tree’s tropical look. Showy red flowers appear before the leaves emerge followed by the yellow-green fruit that matures in the fall where, if left unpicked, will fall to the ground and provide local wildlife with a feast of delicate-flavoured fruit often described to taste very much like a mango.
Pawpaws prefer moist to wet soils in part to full shade in rich, loam soils.
One of the reasons the Pawpaw may have fell out of favour is it’s unusual flower that has been described as having the smell of rotting meat. In fact, the flowers are actually pollinated by beetles and flies rather than bees.
For this reason, it might be better to plants these trees in a back corner of your yard where you can still enjoy the fruit but not the stench of the spring flowers.
Important links for Carolinian zone information
Carolinian Canada operates an impressive educational website that is a must for anyone looking to gather more information on Carolinian Canada. Click here to visit their site.
In The Zone is an organization aimed at protecting and promoting the Carolinian Forest to gardeners. Click here to visit their site.
Carolinian Forest Wikipedia offers a host of links and information on the Carolinian forest. Click here to check out the site.
Redbud tree many images and a host of information can be found here.
Pawpaw tree images and information can be found here.
More links to my articles on native plants
Why picking native wildflowers is wrong
Serviceberry the perfect native tree for the garden
The Mayapple: Native plant worth exploring
Three spring native wildflowers for the garden
A western source for native plants
Native plants source in Ontario
The Eastern columbine native plant for spring
Three native understory trees for Carolinian zone gardeners
Ecological gardening and native plants
Eastern White Pine is for the birds
Native viburnums are ideal to attract birds
The Carolinian Zone in Canada and the United States
Dogwoods for the woodland wildlife garden
Bringing Nature Home by Douglas Tellamy
A little Love for the Black-Eyed Susan
Native moss in our gardens
This page contains affiliate links. I try to only endorse products I have either used, have complete confidence in, or have experience with the manufacturer. Thank you for your support.
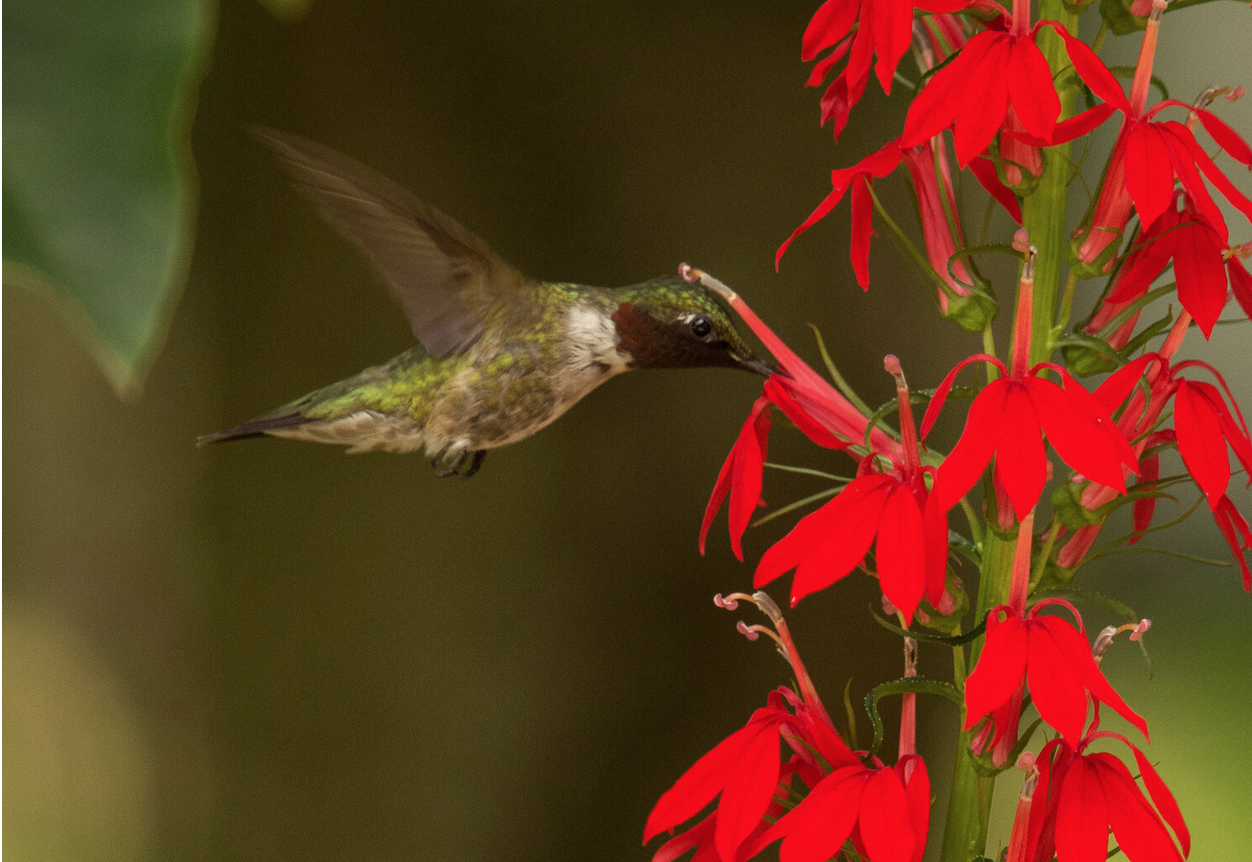
Garden photography: Tips to photographing hummingbirds in flight
Backyard bird photography involves planning, patience and the right equipment. Months of planning, hours of waiting and about five seconds of shooting resulted in this photograph of the hummingbird at a native cardinal flower.
Planning, patience: Key to capturing garden bird photographs
Garden photography isn’t always easy. In fact, I figure the photo took about six hours of patience and five seconds of shooting.
The result, pretty close to what I hoped for photographing with natural light in the shade of a magnolia tree. An electronic flash would certainly have punched it up both in colour and sharpness, but I decided to go with natural light.
The flash photo can wait for now.
Was luck involved? There is always a certain amount of luck in any good image, but to me luck would have meant getting the photograph in the first half hour, not the sixth.
Photographers looking to do more backyard bird photography might find it helpful to delve a little deeper into the creation of this image.
If I could have only one lens for wildlife and birds in the garden, it would be my F* 300mm F4.5. Check out my full story on the lens by clicking the link.
Much like most bird photography, good planning, lots of patience, and the right equipment went a long way in capturing the image.

Hummingbird feeds from a cardinal flower in the garden.
Planning: The planning started when I ordered the native plant from Onplants.ca back in the spring. I knew hummingbirds loved Cardinal flowers so I ordered three and planted them in an area where they would prosper. Then, I planted it where I would have easy access to them for photography. Beside the patio and a couple of feet from where I normally sit is the ideal location. And, so, that’s where the plants found a home. Nearby, there are three hummingbird feeders that encourage the birds to the general vicinity to where the plant is located.
Patience: Six hours speaks to the patience it took to get the shot. That length of time can be extremely long if you are out in the field, but sitting in a comfortable chair in the backyard makes the wait much easier. It’s one of the big benefits of practising backyard bird photography. Have a coffee, a beer or maybe a glass of wine and take your best shots. Couldn’t be easier.
In most cases a photography blind is not needed when shooting hummingbirds providing you take the time to acclimatize the birds to your presence.
(If you are interested in exploring garden photography at a higher level, be sure to check out my comprehensive post on the Best camera and lens for Garden Photography.)
Looking to upgrade your camera or lenses? Check out the excellent used cameras and lenses at KEH Camera Exchange.
Even if you’re not taking pictures, sitting out in the same chair and moving slowly will eventually cause the birds to recognize you as nonthreatening and allow them to go about their day as if you are not really even there.
This will not work with all birds, but many, especially Hummingbirds will eventually simply ignore you if you are always around their feeders.
Equipment: Bird photography has always been a specialty field involving high-powered cameras, motordrives and long, fast, expensive lenses. A visit to Point Pelee during spring migration, or any other of the birding hot spots around the globe, will certainly convince you that admission into serious bird photography requires more than an iphone or a point-and-shoot camera.
That’s not to say that with very careful planning you can’t get some good shots with these cameras. It’s just that it would be hard to do it consistently and the effort put forward might not be worth the results.
The small size of the hummingbird makes it even more difficult to get good results with these cameras.
So, with that in mind, I took the hummingbird challenge armed with a 35mm SLR camera with built-in motordrive and a 300mm F4.5 close-focusing telephoto lens (with a focal lens of around 450mm on the cropped sensor).
If I could have only one lens for wildlife and birds in the garden, it would be my F* 300mm F4.5. Check out my full story on the lens by clicking the link.
But this was not really the secret behind getting the photograph. They are merely the tools that helped make it possible.
The secret was a tripod, an electronic shutter release, and a camera set on backfocus.
With the camera locked into place on the tripod, and the electronic release ready to trip the shutter without moving the camera, the plan was almost complete.
If you are considering a new camera or lens to capture your best garden photography, travel photography or maybe just your kids and grandchildren, consider checking out the exceptional used camera equipment at KEH Camera Exchange. It’s a U.S. based camera and lens reseller. click on this link to check out their daily offerings.
However, one big problem remained. Normally, when you press the shutter halfway down, the camera refocuses, often going into search mode to find something to focus on. Trying to focus blindly with the hummingbird moving about makes it close to impossible.
That’s where back focus came into play.
What’s back focus you may ask?
On the back of most higher-quality 35mm SLRs is a button that enables the photographer to focus separately from the shutter control button. By using the back focus button, I was able to prefocus on the flowers and then release the shutter without it refocusing when the hummingbird reached the area where I expected it would be in-focus.
Focusing on the flower and then putting the camera into manual focus mode would also have worked.
In the end, the combination of planning, patience and equipment came together to create a pleasing shot. Months in the planning, hours of waiting for the plan to come together and a few seconds of actual shooting made it all happen.
A lucky shot if I ever saw one.

A female ruby-throated hummingbird feeds from a cardinal flower on a sunny afternoon.
Later in the season, I set up a similar situation where the Cardinal flower was primarily in the sun.
The higher shutter speed that the additional light provided helped to get the frenetic little bird in focus and brightened the colours in its feathers. I’m not sure I like the photos any more than the earlier images taken in a shadier part of the garden, but taking it was certainly a simpler process.
Again, patience was the key. The process was similar. Camera on a tripod focused on the flower (again using the back focus button) and a remote release attached to the camera. Every time the hummingbird came to feed, I took several photographs hoping that enough of them would be in focus and sharp.
As I said earlier, photographing the bird in a sunny location brought out the colours, provided a highlight in the bird’s eye and allowed me to shoot at a higher f-stop which helped to capture more of the bird in focus.
This page contains affiliate links. If you purchase a product through one of them, I will receive a commission (at no additional cost to you) I try to only endorse products I have either used, have complete confidence in, or have experience with the manufacturer. Thank you for your support. This blog would not be possible without your continued support.