

Shinryoku: Capturing the subtle, fleeting beauty of spring
The Japanese culture has its own way to describe and experience the joy of spring greens. We too can learn from their enlightened perception of the woodland.

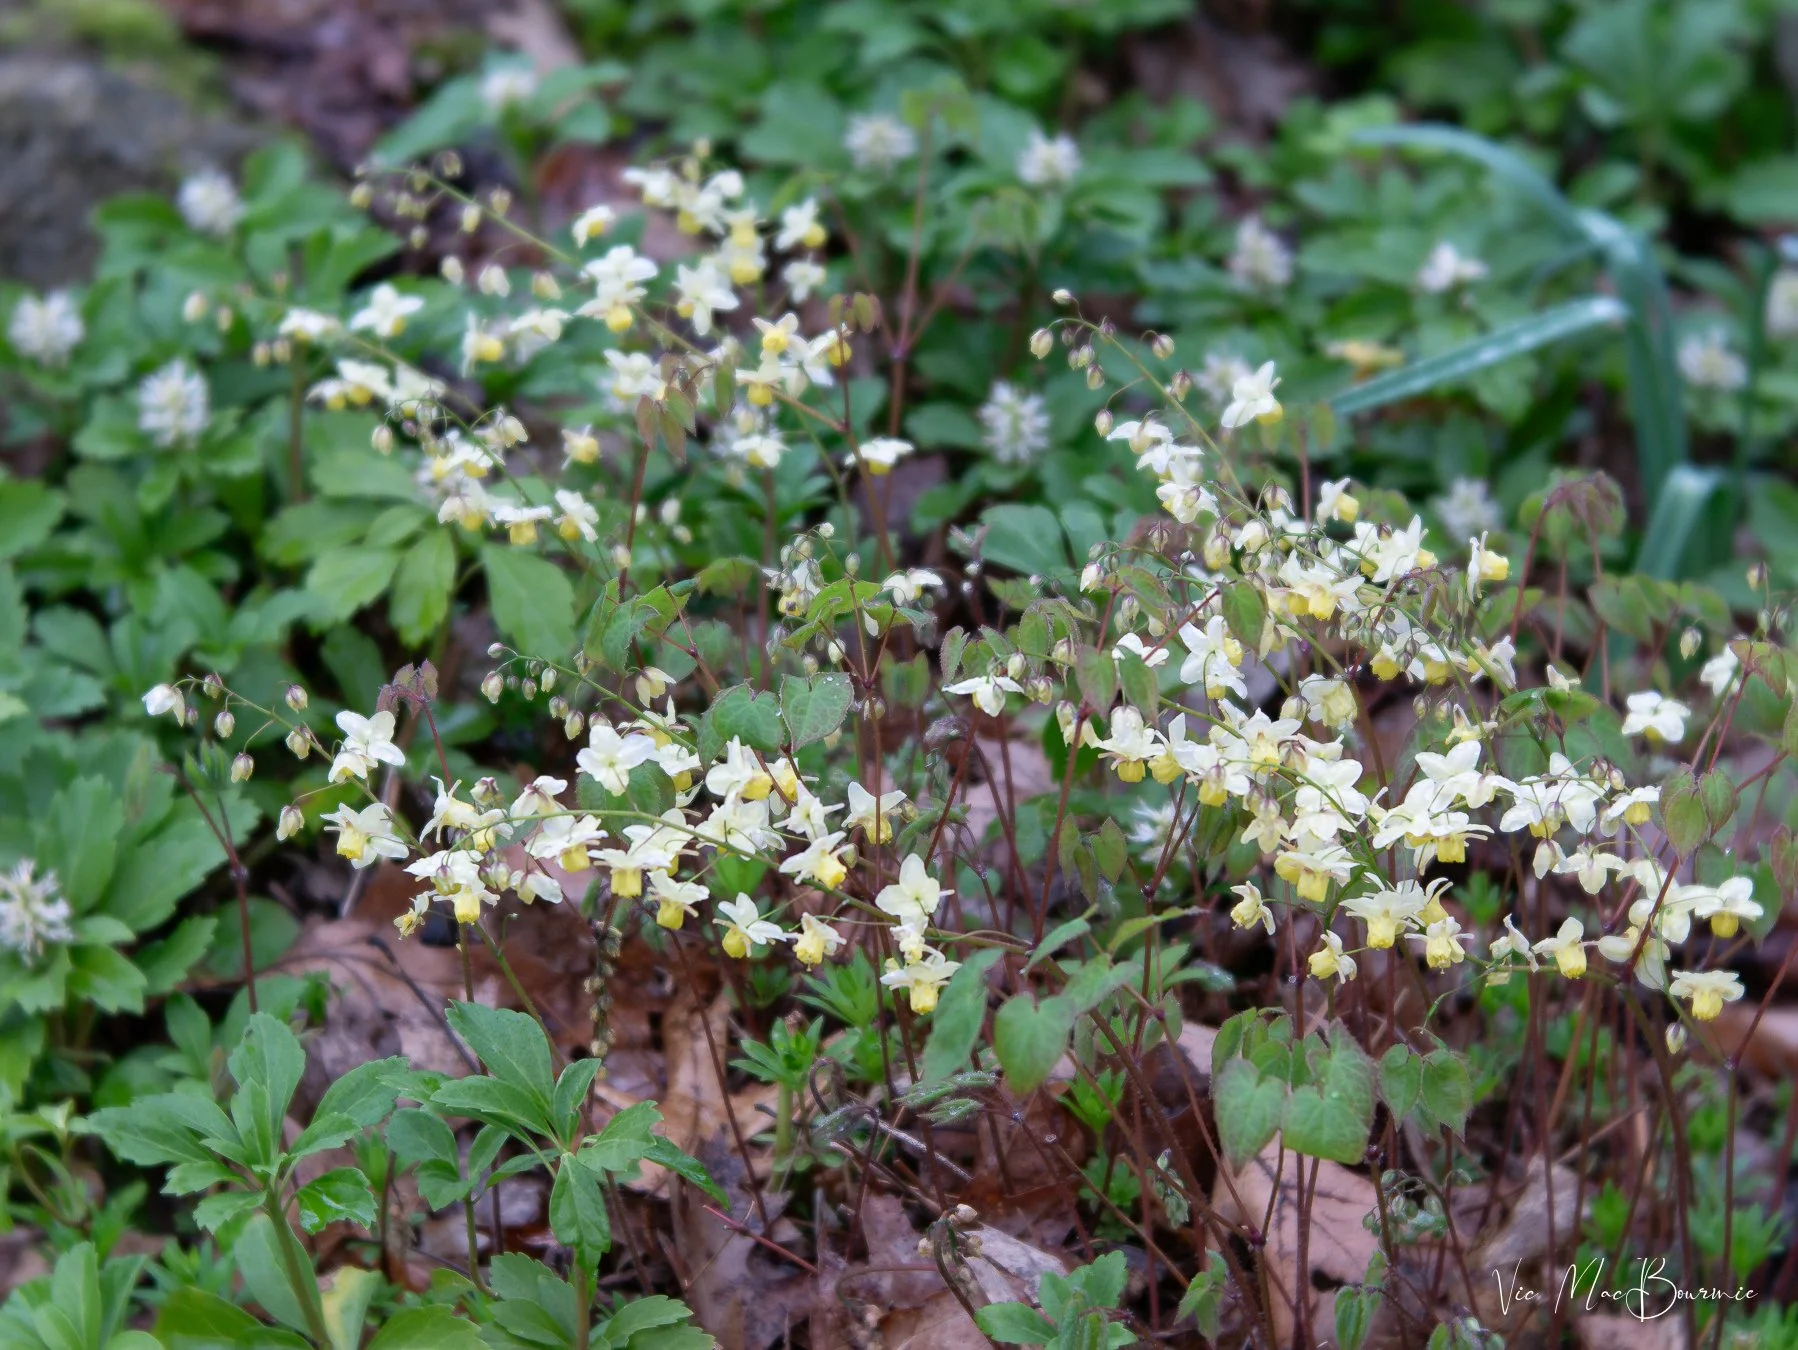
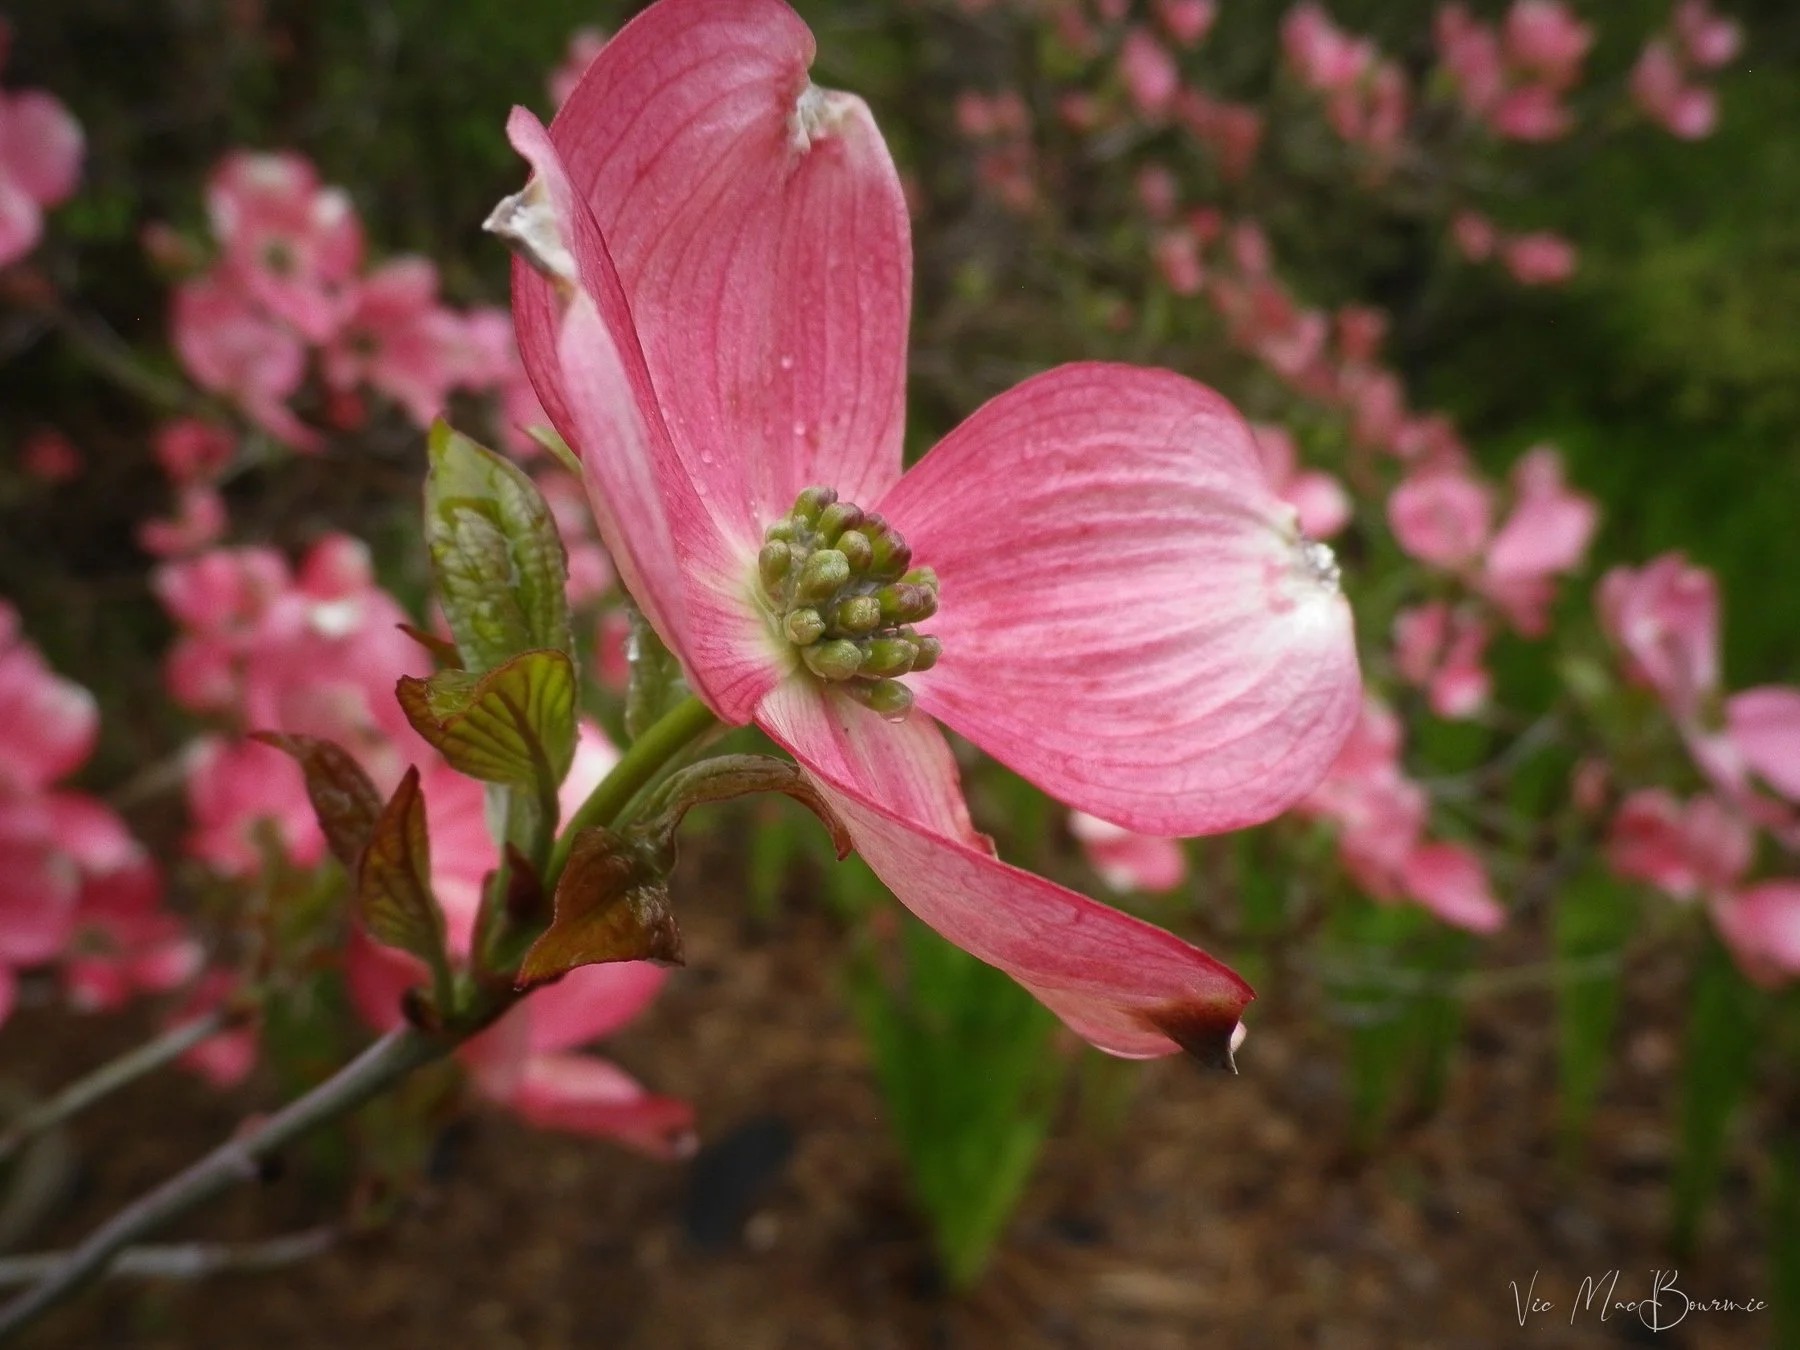
Early spring greens emerge in the delicate flowers of Solomon’s Seal dripping off of an arching stem.
Celebrating spring greens Japanese style
Learning has always been a passion of mine. Unfortunately, this thirst for knowledge rarely involves text books. These days, it takes the form of the hundreds of YouTubers that I follow, from gardeners to photographers and everything in between.
One that combines both gardening and photography is a channel based out of Japan called “Shizan style” that focuses on learning to see and experience nature through the eyes and soul of the Japanese culture.
Fine art photographer Joshua 'Gensetsu' Smith, PhD, describes his channel in the following way: “it focuses on Japanese aesthetics, photography, creativity, Japanese gardens and culture. A Shizen Style is about designing a Japan-inspired creative lifestyle infused with nature.
You can check out the channel here if this approach to gardening, living and photography interests you.
I have found many of his videos inspirational in so many ways. They inspire viewers to slow down and experience the finer elements of the garden that are often easily overlooked in the hustle and bustle of everyday life. Whether you choose to capture your experience photographically is really a less significant focus of the channel, but I fully appreciate his approach to documenting the journey.
Looking up to experience the translucent flowers of the yellow magnolia against the brilliant blue sky. The experience is as much about seeing the translucent flowers as it is about the space between the flowers.
Spring greens in the woodland garden
His recent video exploring how the Japanese experience “spring greens” fascinated and inspired me enough to share some of the concepts with readers so we can all, hopefully, experience spring in a deeper, more meaningful way.
At the root of the video is how the Japanese describe the term “spring greens.”
While the rest of the world either uses those simple two words, or don’t even acknowledge the incredible new greens of spring, the Japanese have many ways and words to describe the emerging greens.
Discovering the intricacies of Shinryoku: A moment in time
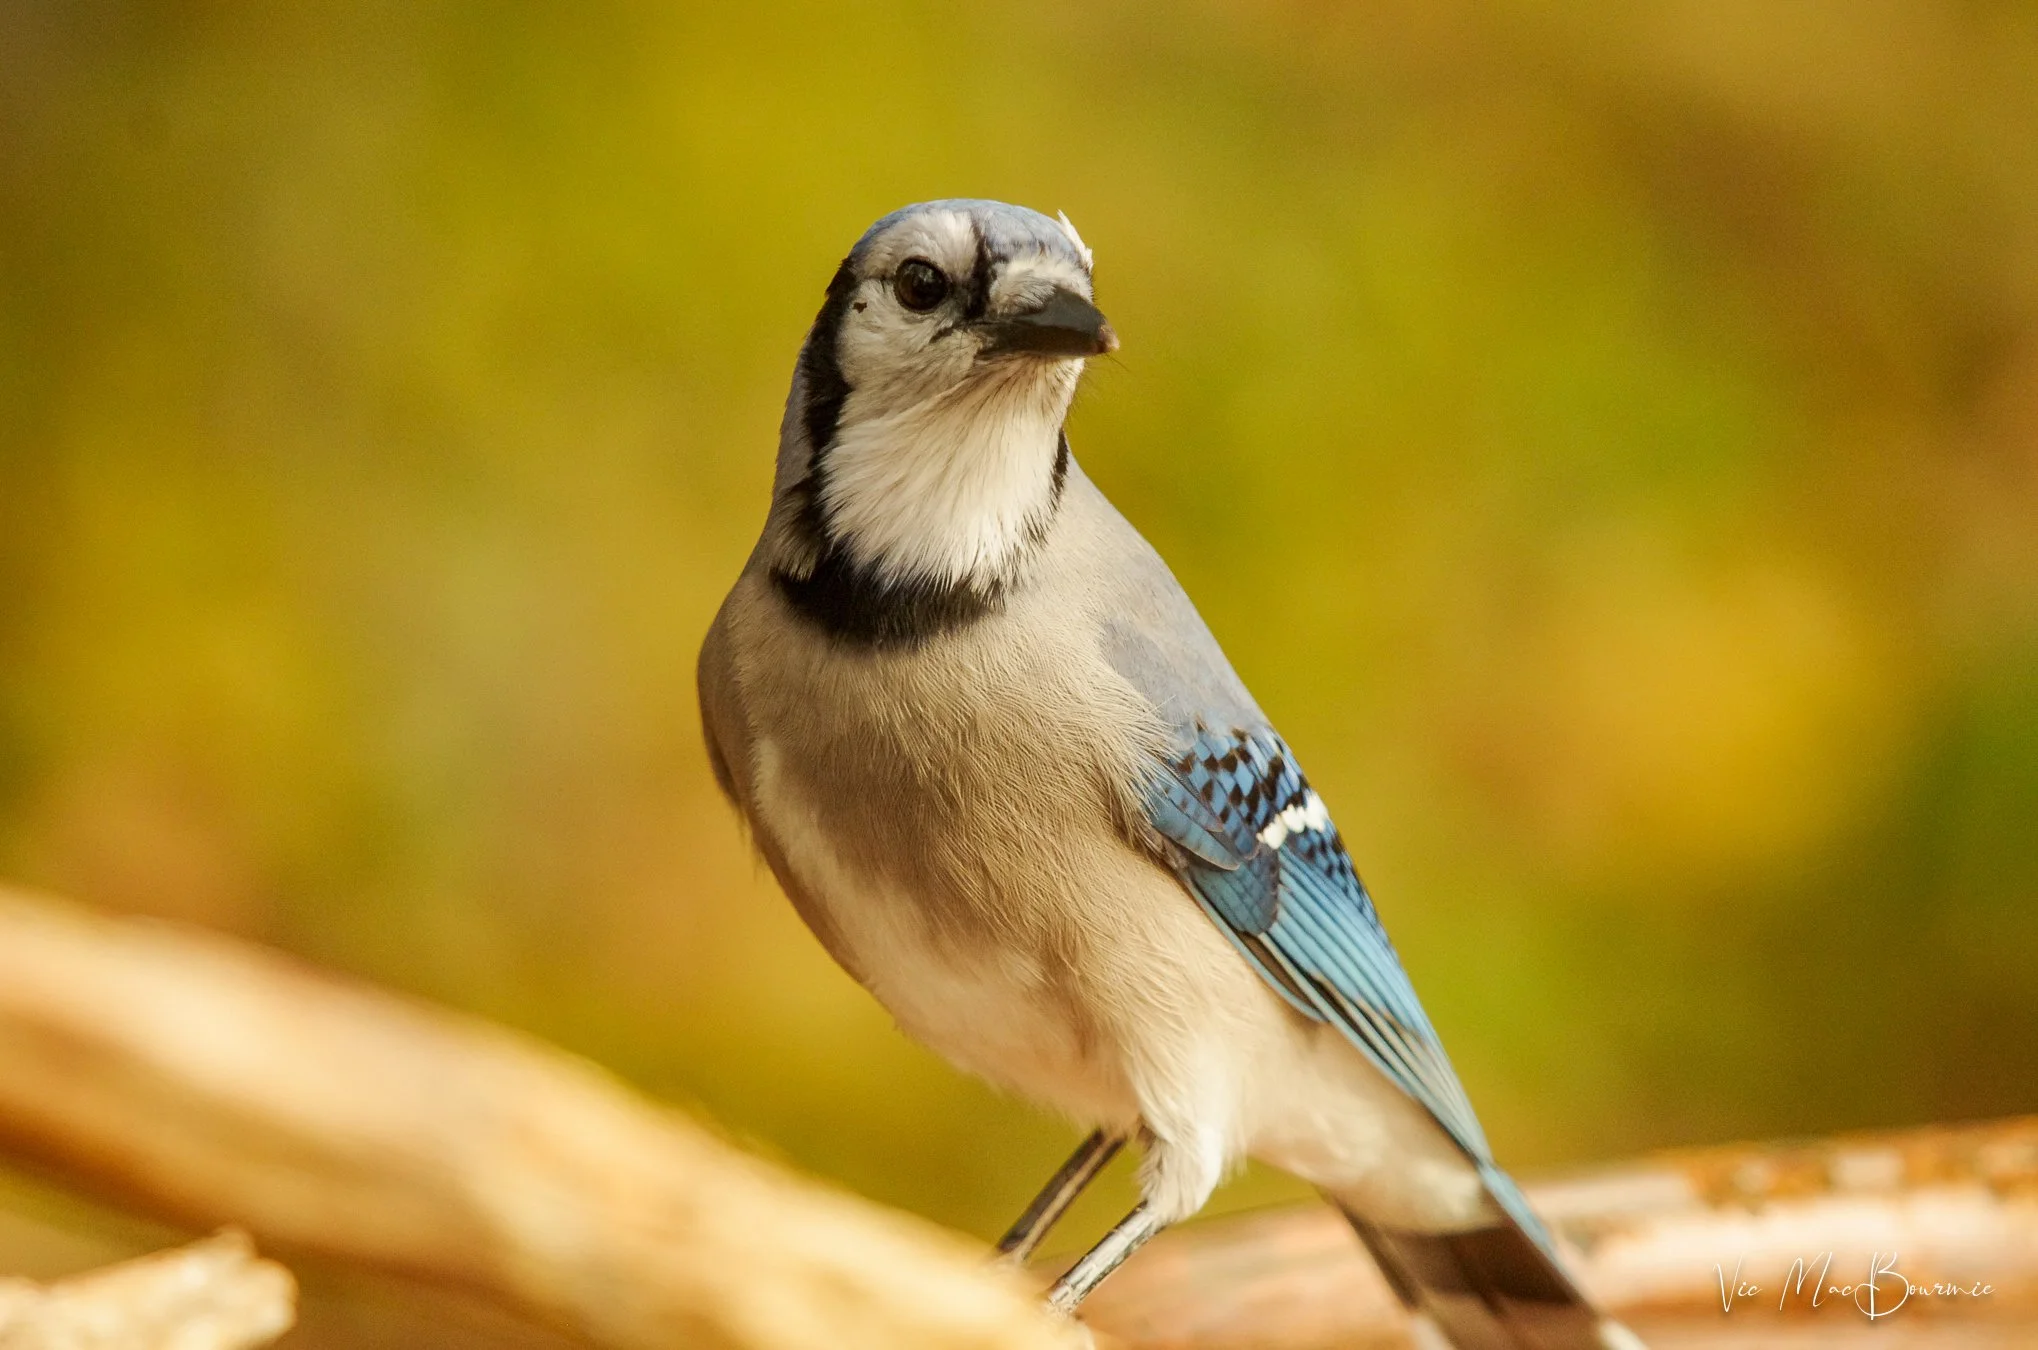
Josh explains in the video that the greens of mid may are described as Shinryoku. The word describes that brilliant new green emerging in the woodland and gardens. It describes the leaves that have just opened and represent not just a colour but, even more importantly, a “moment in time.”
Shinryoku describes the particular green of leaves that have just opened –”tender, bright, almost shy.”
In Japan, it represents that time at the end of the cherry blossom season, but before summer heat sets in and turns the focus on the beginnings of new life emerging.

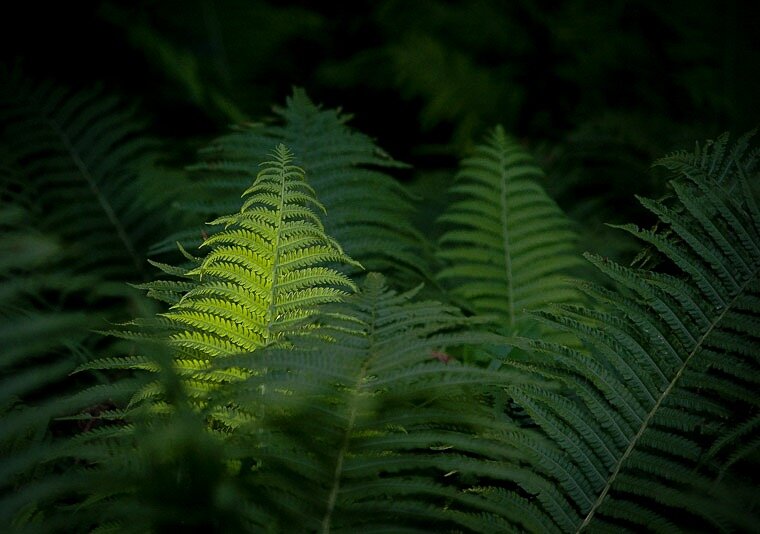
Try moving in close on back lit leaves to show the veining structure of the emerging leaves.
It’s a time many of us are experiencing at this very moment in our spring gardens.
However, so many of us are so overwhelmed with trying to get our gardens into shape, that we fail to appreciate the emergence that is ocurring before our eyes.
Shinryoku, or the feeling it brings, is important to experience and capture, whether it is just a memory and feeling we store in our minds or an image we capture with our cameras.
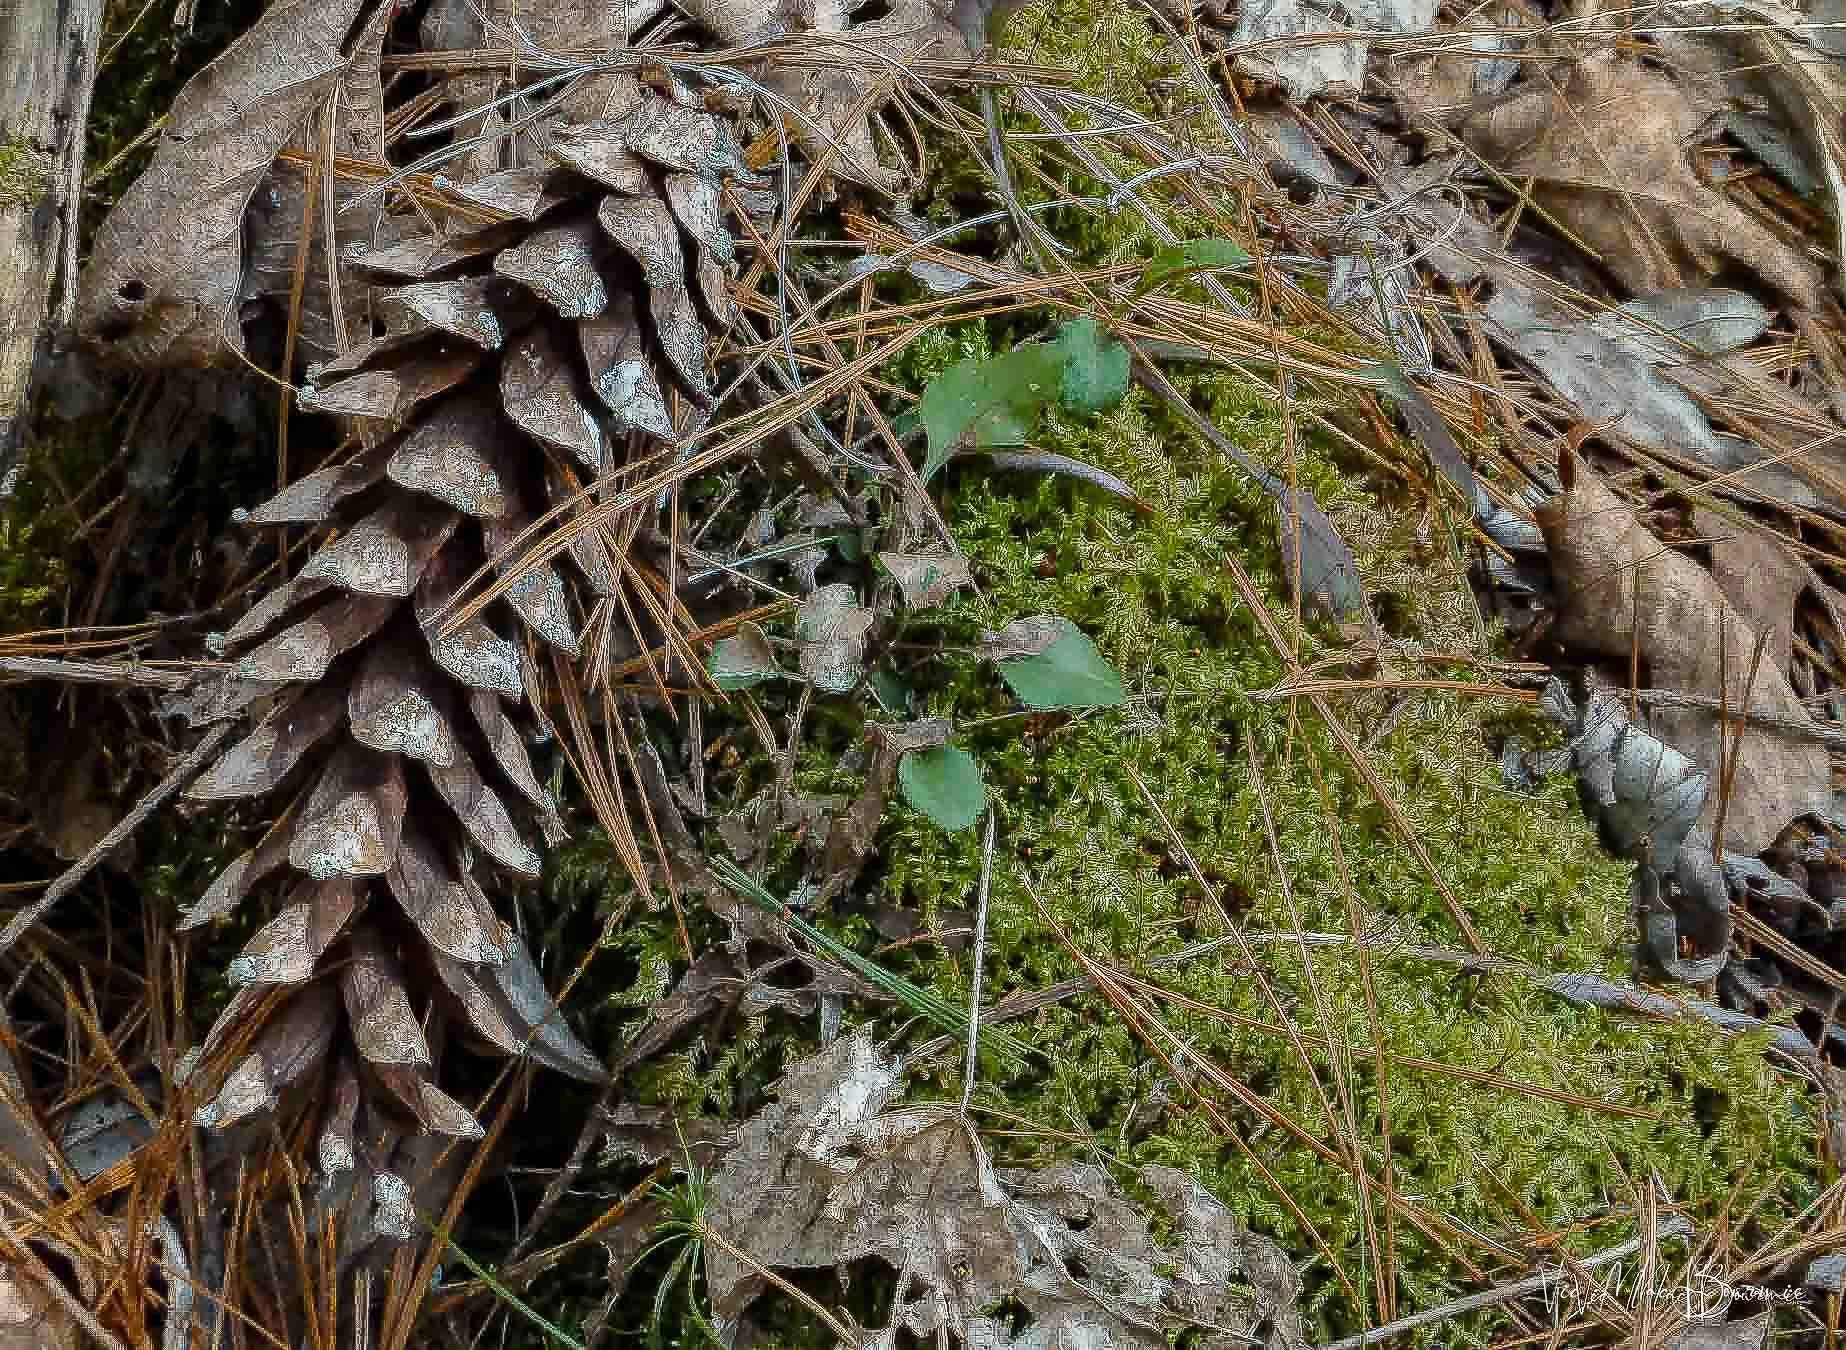
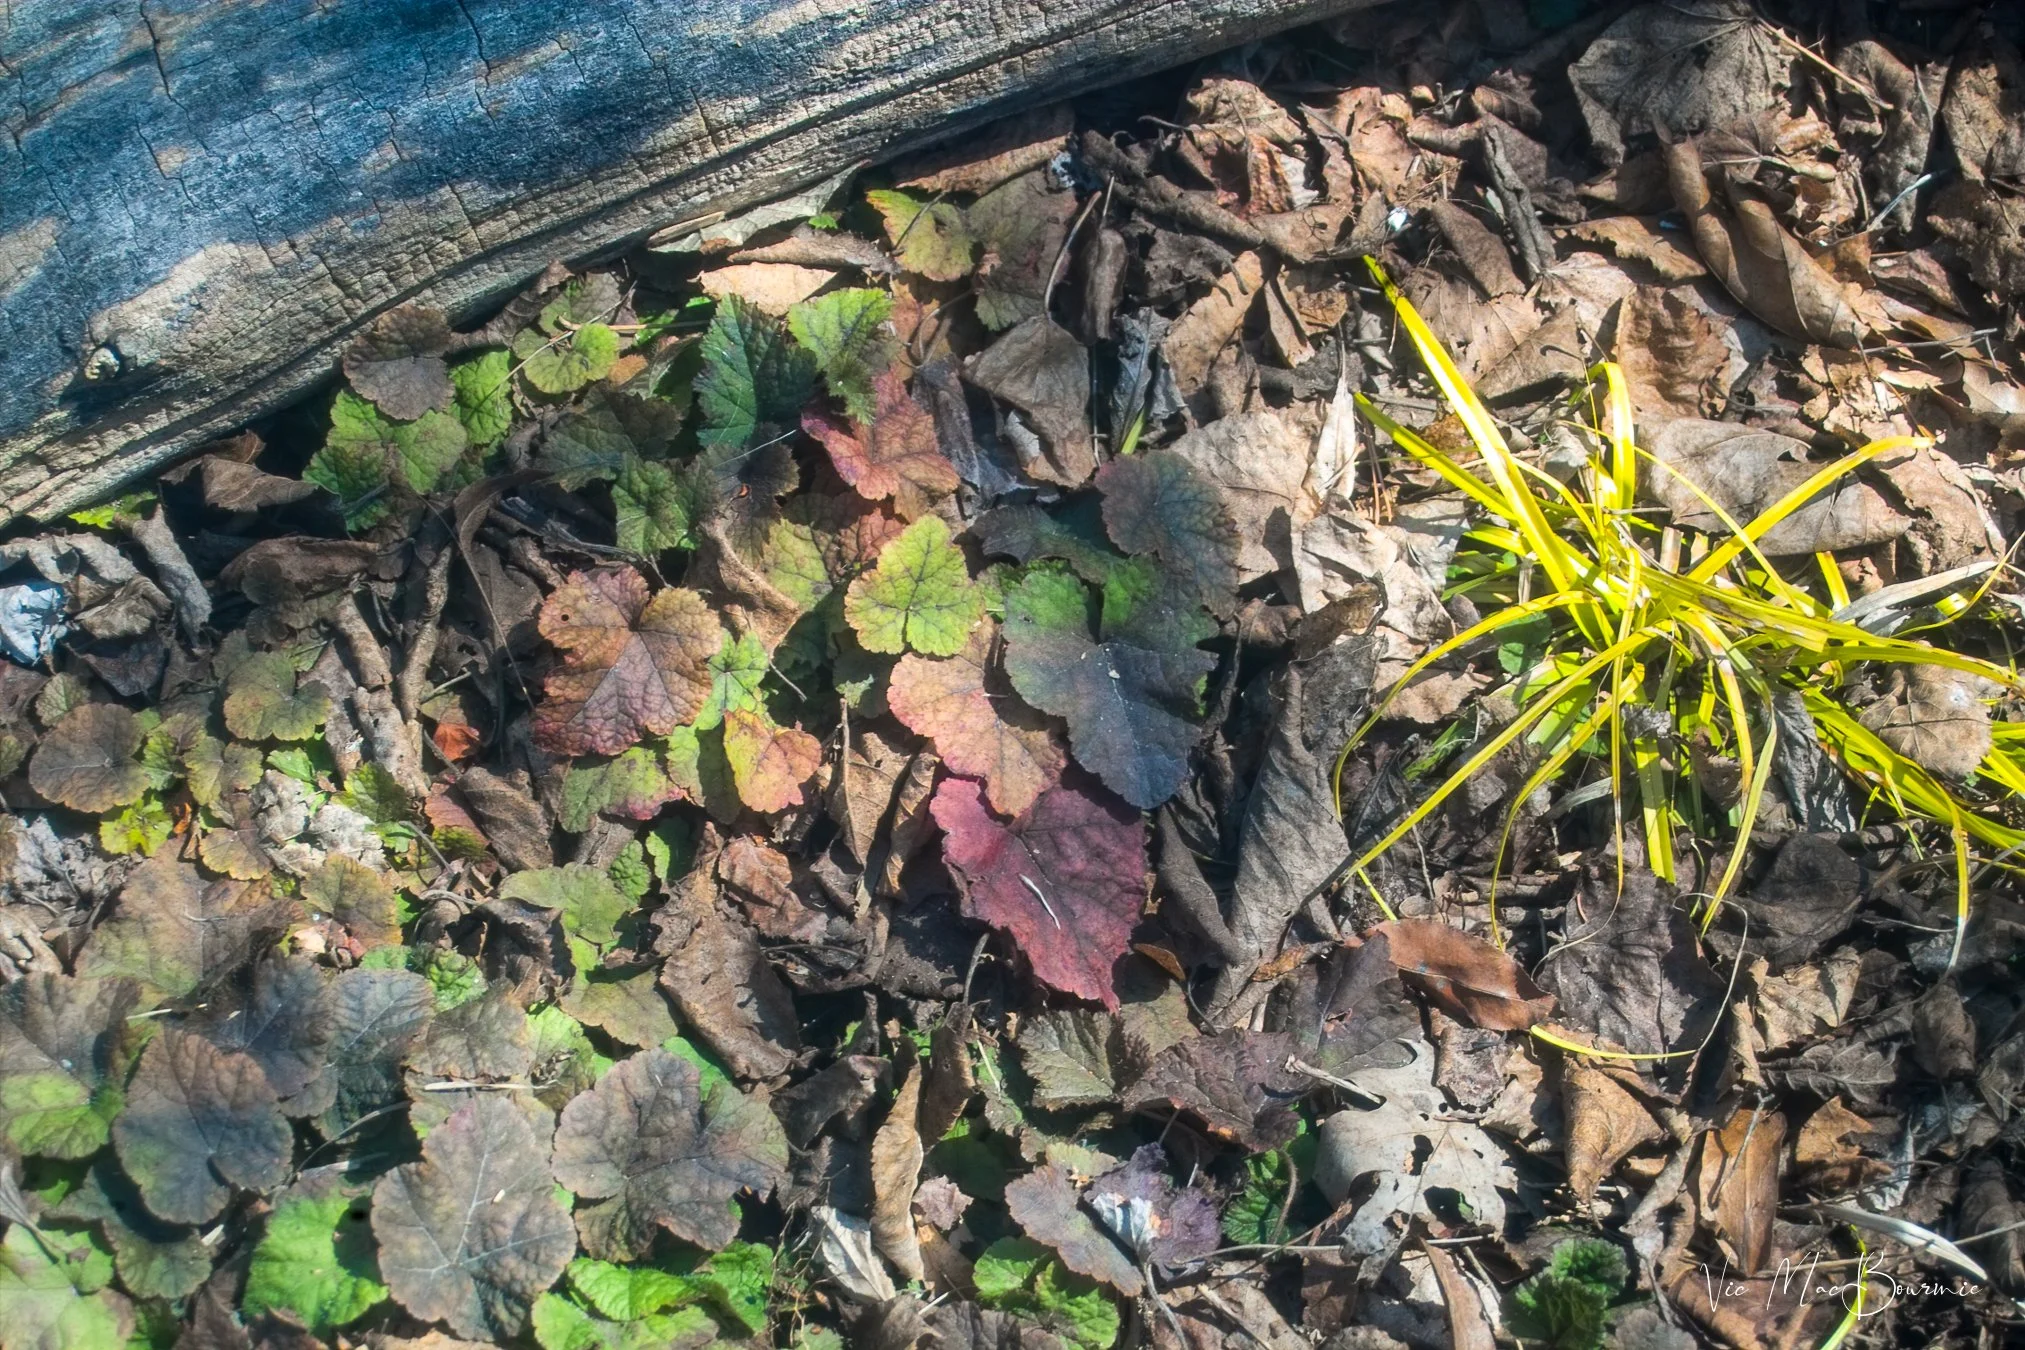
Finding beauty in the simplest things requires you to really look at your surroundings. Here, spring unveils a new beginning – the dead leaves and pine cones give way to fresh spring moss and small seedlings that are just beginning their new life on the forest floor.
Capturing early spring in the woodland garden
Josh’s video explores the many approaches to documenting Shinryoku. Here I’ll just touch on a few and if you are interested in exploring further you can watch his video.
The first involves moving in close to exerience the translucency of the emerging leaves. Capturing the small details in the leaves as sunlight that filters through the leaves and flowers brings out the delicate veining.
To quote Josh: It is an important time when we get to capture the “beginning of something that will spend the rest of the year becoming.”
This is the time to either use a macro (close focussing lens) or a telephoto lens to move in close and use backlighting to capture the translucency of the leaves and flowers, like I tried to do in some of the images above.
This is the time, as Josh explains, that we: Capture the “beginning of something that will spend the rest of the year becoming.”
It’s an opportunity to photograph a “thing that is not yet what it will be. “
Shinrin-yoku: Looking up and Forest bathing
The Japanese concept of Shinrin-yoku or forest bathing finds its success because it encourages the eyes to look outward and upward.
The second approach is to simply look up through the leaves and the sunlight filtering through them. It works so well because, in spring, leaves are still transparent.
Josh suggests to: Find a tree. Lie down point your camera straight up. Capture the leaves’ transparency. Contrast and geometry. Dark branches against that luminous green. … the negative space betweeen them when the sky comes through.
“You can’t look up to a canopy like that and hang on to a to do list,” he says in the video.
In our backyard in spring, I often look up through the branches and flowers of our yellow magnolia. The mellow yellow flowers light up against the backlit sky. (See second image in post.)
Later, when the massive bright yellow locust tree leaves begin to emerge, the results can be spectacular.
It’s best to underexpose the scene to capture the bright yellows and greens against a dark blue sky. A polarizing filter will further deepen the sky and help remove the bright highlights off of the waxy leaves.

Although this is not in my garden (thank goodness) I think It represents the perfect combination of old and new and shows how, over time, new growth slowly covers last years newness. I like to compare this to fallen leaves and how so many people are obsessed about clearing out every last leaf on their properties in fall and early spring. If new growth can eventually cover this old car, imagine how quickly it can hide last year’s decaying leaves. Lesson learned: Relax and let nature do its work.
Wabi Sabi: Finding beauty in combining the old and the new
In my mind, the most successful gardens are a blend of old and new. It's one of the reasons I am drawn to the aesthetic of European gardens where plants find a home inside an ancient stone urn or vines climb the walls of historic castles. Documenting this in our own gardens is not always easy, but if we look hard enough we may be able to find a moss-covered urn or rock. An ancient boulder or tree covered in mosses and lichens.

The beautiful early greens of spring are punctuated by the emerging purple alliums.
Now look to capture new growth up against the old tree, branch or moss-covered container. Maybe an old garden gate with a new vine growing on it. …
Josh so eloquently describes the core of Wabi Sabi in his video: “Beauty lives in the relationship between aging and renewal. Not in one or the other. The green is more alive when it is next to something that has been here much longer. The rough stone is more beautiful when something young grows through it
This is actually how Japanese gardens work. Every element is in conversation with every other element. You don’t place a stone alone, you place it in relationship.
Apply that thinking to your photography. You are not dicumenting just the leaf, you are documenting a relationship.
Time and now permanence and impermanence. More interesting than a simple photograph it’s a conversation. It’s an about it’s not a picture of something it’s about something.”
This is the perfect time for us to get out in the garden and experience, maybe even capture photographically, what the Japanese refer to as Shinryoku.

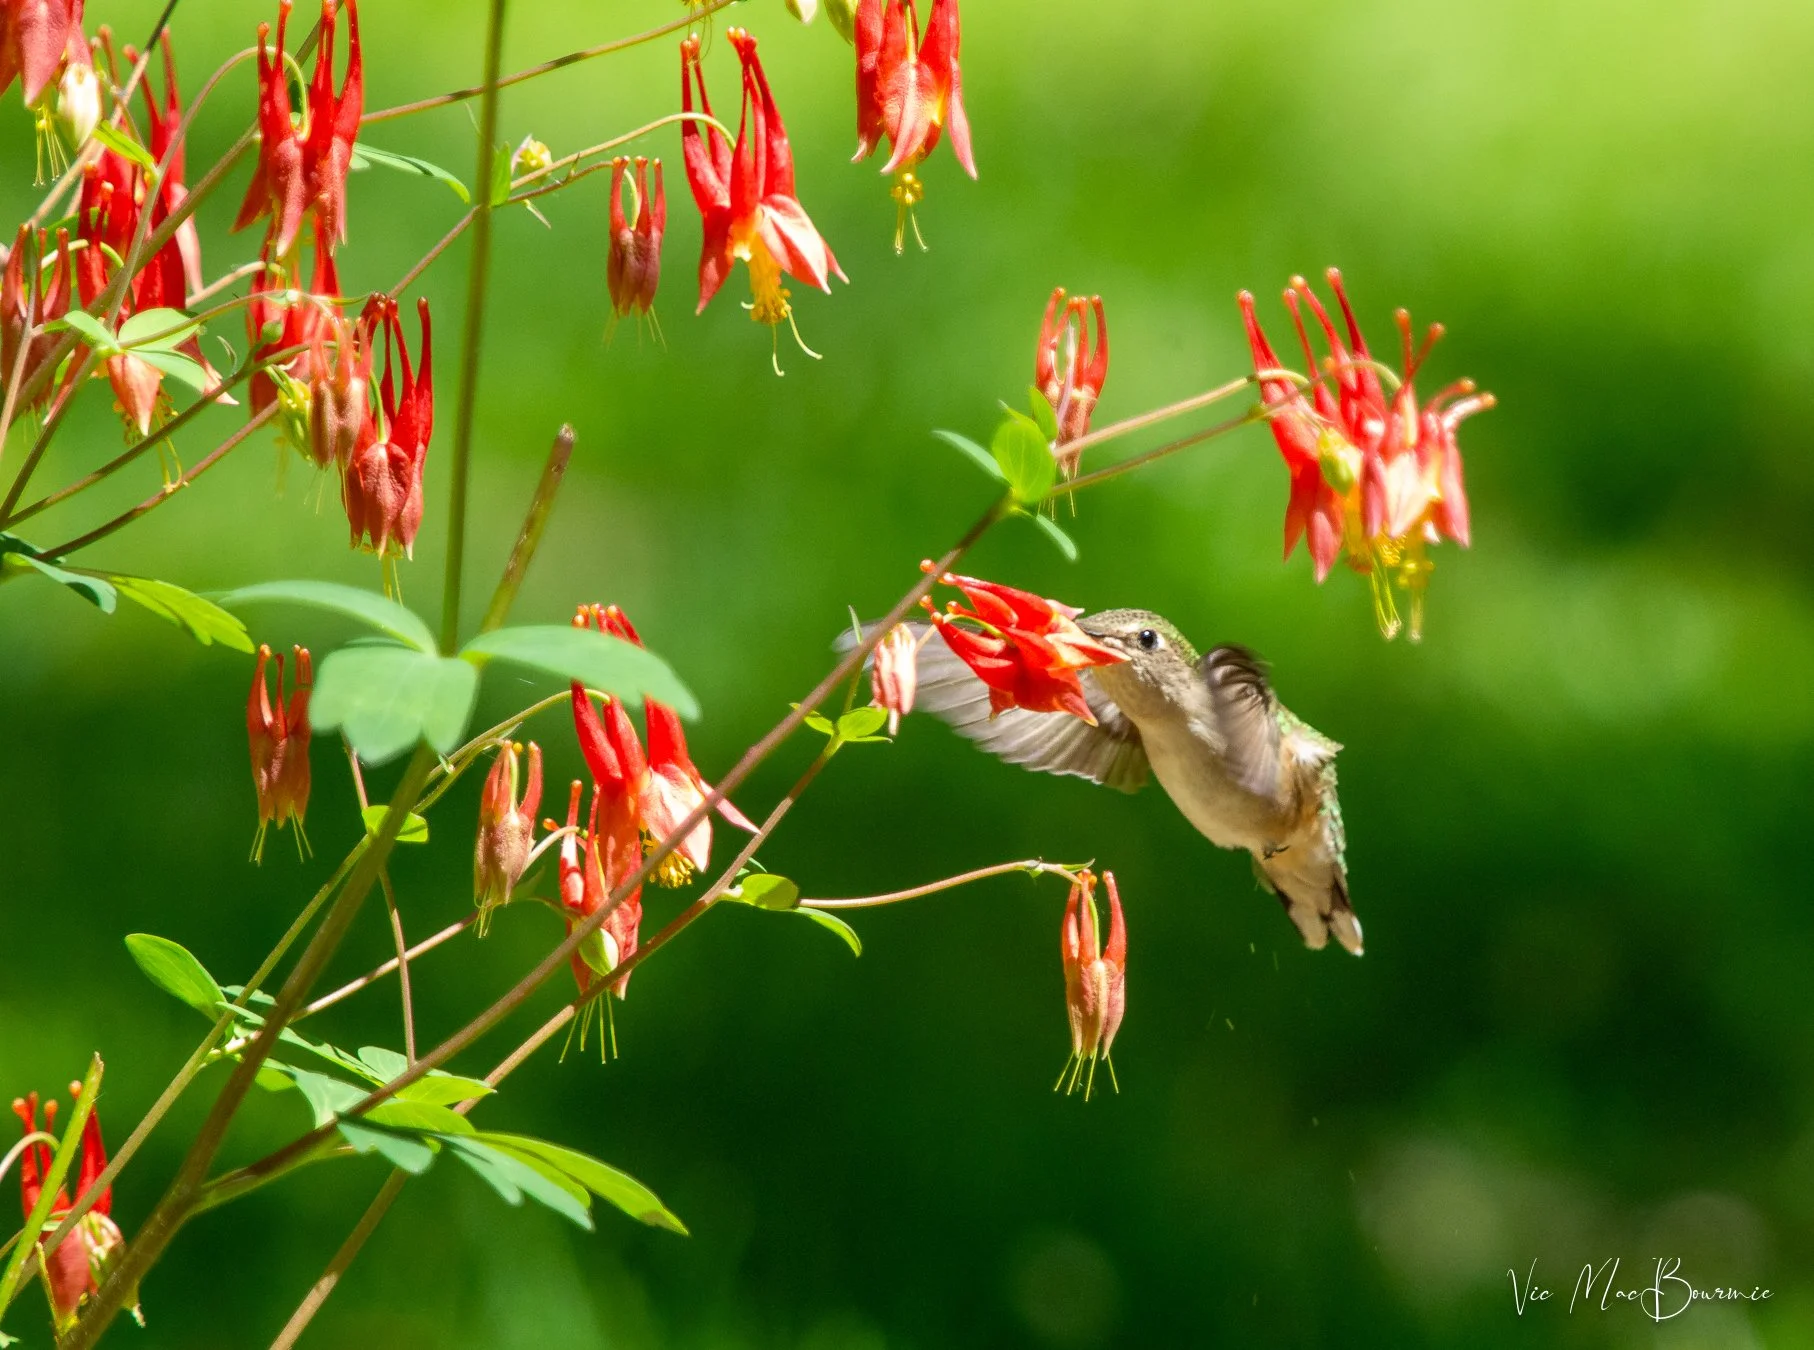
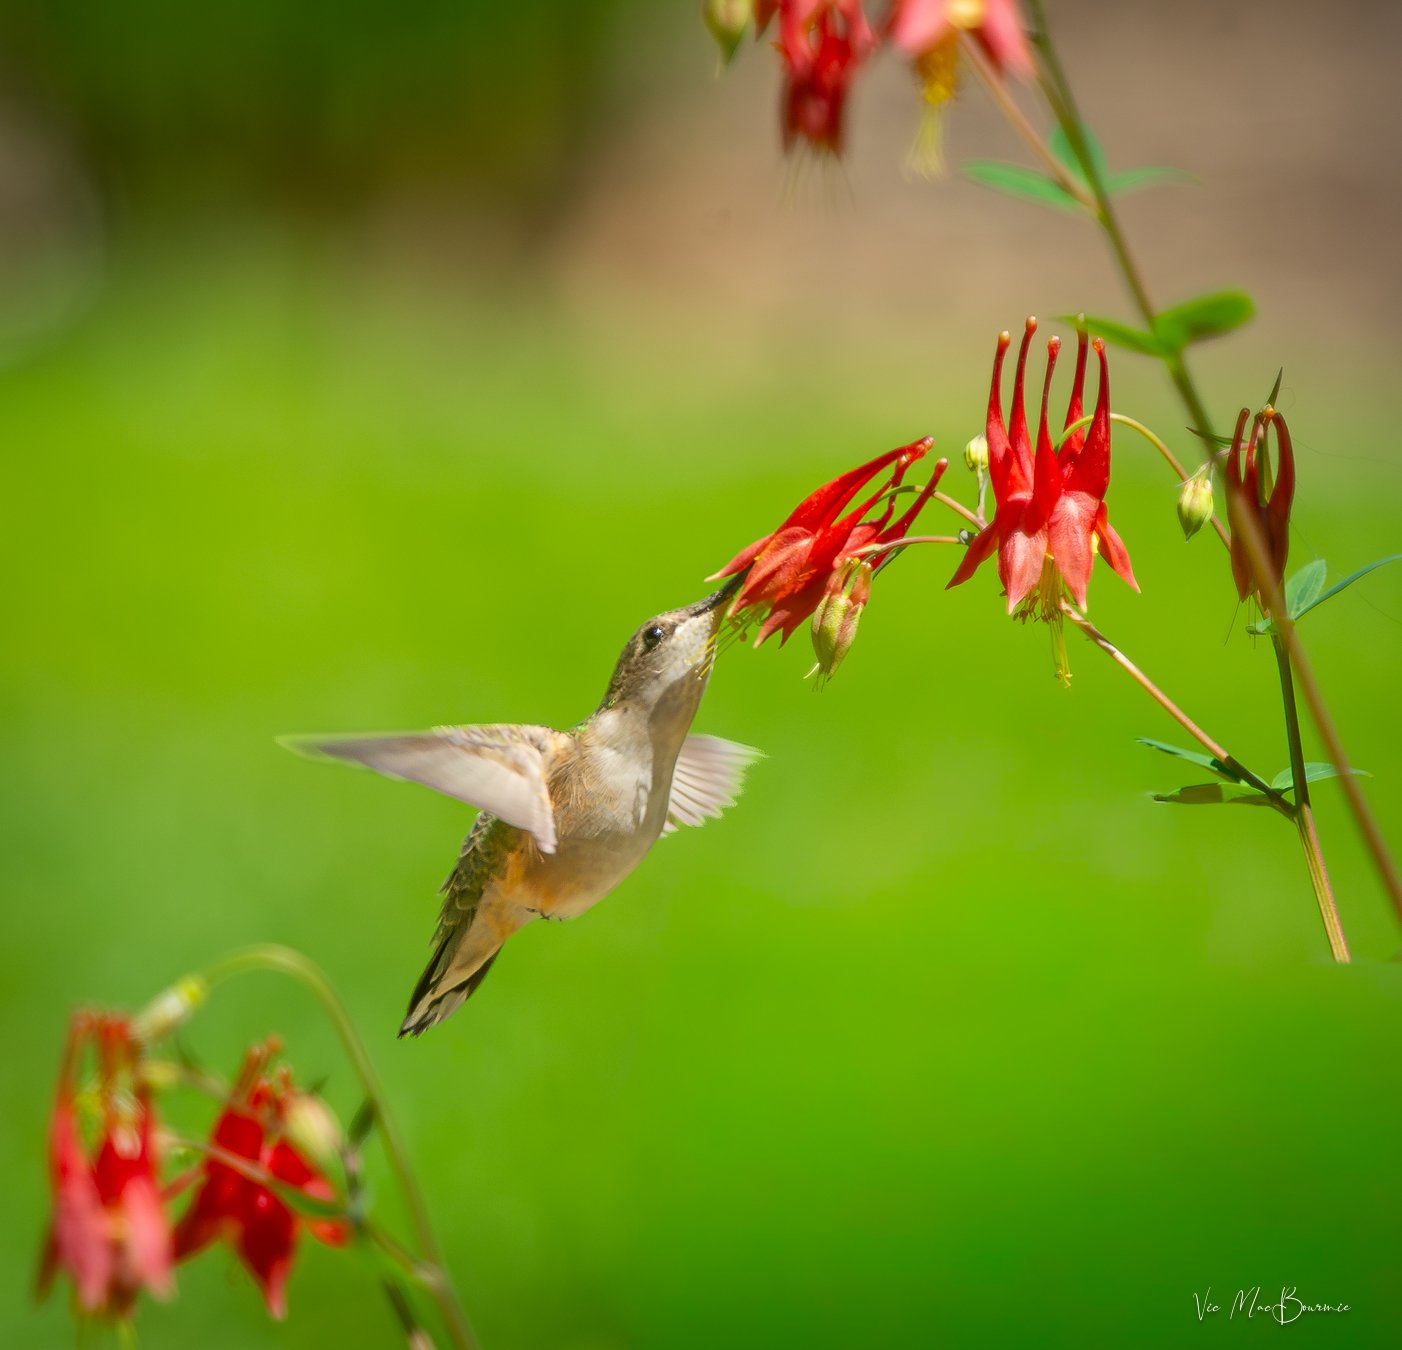
The Columbine and the hummingbird
Native plants, especially native columbines, are an important early spring food source for migrating hummingbirds.

A hummingbird works on native Columbine in the woodland garden in early spring.
Spring in the woodland garden: Importance of native plants
One look at a native columbine and you know they were “made” for hummingbirds.
The colours – a vibrant red and yellow. The shape – long tubular flower petals perfect for our hummingbirds’ long beaks and even longer tongues. The way the entire flower hangs off the stem.
It’s the perfect match for the hummingbird.
This week in the garden watching hummingbirds work the columbines was all I needed to be reminded of the important relationship between our native columbine and hummingbirds. In fact, it proved to be even more verification of how important native plants are to our local wildlife.
I don’t think it’s a coincidence that our ruby-throated hummingbirds arrived to our garden just as the columbines were preparing to open.

Columbines, along with Solomon’s seal and a handful of other natives and non-native plants, are just a few of the key plants that provide a food source for migrating hummingbirds. Flowering trees such as crabapples, serviceberries and a host of other shrubs also play a major role in helping migrating birds, such as hummingbirds.
For more on columbines, check out my earlier posts here.
For my post on helping migrating birds, see my earlier post here.
Commercial feeders are no replacement for native plants
One look at all the activity around our commercial feeders (Amazon link) and it’s easy to forget that these tiny birds that have just made their way from as far away as Central America to our backyards in the northeastern United States, Ontario and more northerly parts of Canada, are more dependent on native plants than our feeders.
In other parts of the world, including the southwestern U.S., into western Canada, a similar dependency exists with the beautiful Rocky Mountain columbines and other native plants that feed the migrating hummingbirds along their journey.
Hummingbird feeders have certainly become an important, readily available, high-energy food source that is available to migrants as they make their way to their summer breeding ground. But, it is plants like columbines that ensure hummingbirds’ survival over long stretches of uninhabited areas where feeders are not as readily available.
Columbines can be an important food source for migrating hummingbirds in early spring.
Not only are native plants, including columbines, important as an early food source for hummingbirds, they also feed smaller insects which can be a source of protein for hummingbirds.
Many of us might not realize that insects actually make up a huge part of the hummingbirds’ diet. In fact, leaving pieces of fruit out near a feeder to attract fruit flies can also be beneficial for hummingbirds. When it comes to feeding their babies on the nest, it’s small insects and spiders that make up the diet of both the tiny babies and their parents.
The Rocky Mountain columbines – non-native in my location – as well as the more hybridized varieties may not be as beneficial to hummingbirds in our area, but more than likely offer some of the same benefits as our native plants.
It’s always good to include at least some native varieties in your naturalized garden.
If you don’t have native columbines in your garden, be sure to put them on your list for next season. If you can still find plants are your local nursery, pick up a few and get them in the ground for the hummers. If you can’t find any plants, you can probably purchase some seed which you can try to sew directly in the garden or grow in pots.
For more on native plants and their importance in the landscape, check out my earlier posts here.
This image shows how the hummingbirds flies low and then up to feed on the low hanging columbines. They are able to lift the flowers as they feed.
How I photographed the hummingbirds
Anyone who has tried to photograph these tiny, extremely fast and skittish little birds knows how difficult it can be.
Using an electronic flash helps to stop movement, throws a catchlight in the eye and adds a fill light to darker areas in the image, but I prefer to keep it simple when it comes to capturing images of hummingbirds.
I used a digital SLR (Pentax K5) combined with a Pentax 300mm f4.5* lens teamed with a 1.4 converter that gave me the equivalent of about a 720mm lens on the cropped sensor. I bumped up the ISO to 1600, which added even more noise to the images.
I’m lucky that I planted the Columbines right near where I like to sit with my coffee and look out over the garden. So, I grabbed my monopod and waited… and waited.
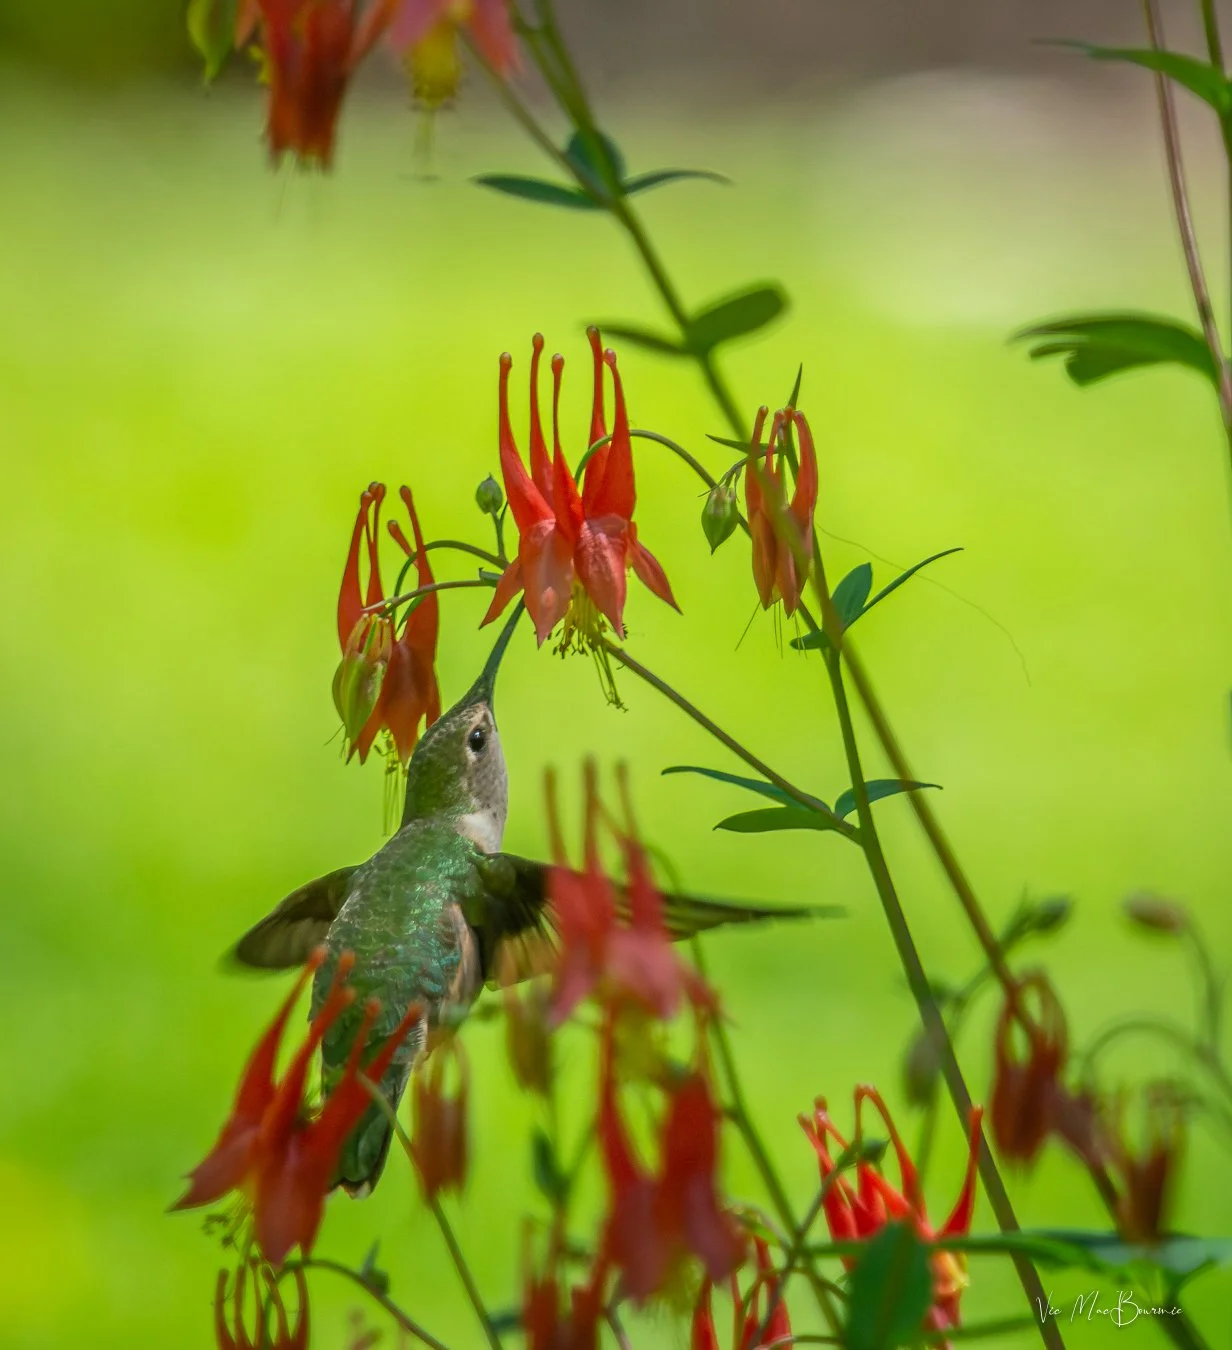
A hummingbird flying almost vertically to feed on the columbines.
The hummingbirds visited the many feeders I had put up around the patio but took their time to check out the columbines.
It was late morning and the flowers were in the shade while the background was well lit, so I knew it wasn’t ideal lighting. I knew I could save the RAW images in post processing with a combination of Lightroom and Luminar Neo, but wasn’t under any great expectations that the results would be anything more than acceptable.
As a result of the bright background, most of the images of the birds were underexposed. Bringing the exposure up only added to the noise in the high-ISO images.
The birds visited a few times giving me lots of opportunities to get a variety of images. I shot in continuous mode but the K5 and lens combination wasn’t ideal to capture these fast-moving subjects.
Several hours later and I could see the shade moving away and the flowers beginning to get lit up. All I could do was hope the hummingbirds would return with the better lighting. And they did.

This image shows the hummingbird’s beak moving into the long Columbine flower petals to feed.
The results with the sun on the plants and the birds proved to be much better with a natural catchlight in the eye and a faster shutter speed to better freeze the motion of the bird. In addtion, the better lighting allowed me to stop down the lens for a little added depth of field.
The results of the photo shoot was a mixed bag of good and bad. I was happy just to capture the hummingbirds at the columbines, but unhappy about the quality of images and the amount of post processing needed to make them acceptable for publication.
A lot of work was needed to get the most out of the images, including a heavy amount of sharpening in both Lightroom and Luminar Neo.
Speaking of Luminar Neo, I used its “light depth” module on many of the images to create nicer light on the hummingbirds. I also used Luminar Neo’s AI sharpening tool in a few of the images.

This image shows the hummingbird flying almost vertically to feed on the columbines. During post processing, I darkened the background edges to focus on the hummingbird. Warm sun rays were added and the entire image was warmed up. The result is a more creative approach to a natural image.
Finally, I decided to push Luminar Neo’s creative capabilities to see what was possible. (See image above.)
After using the light depth module to lighten the hummingbird against the surroundings, I tapped into the sunrays module to add warm beams of light on the subject.
And the result: As a creative image I think I really like the results.
Some may argue that it is too contrived, and that’s okay. I see photography as a creative expression and have no problem taking an image to its creative limits.
I enjoy nothing more on a rainy day, than sitting in front of the computer and playing with the creative aspects modern post processing programs provide photographers.
For my post on creative approaches to photography, check out my earlier post here.
What do you think? Is it too much or are you open to creative expression in nature photography?


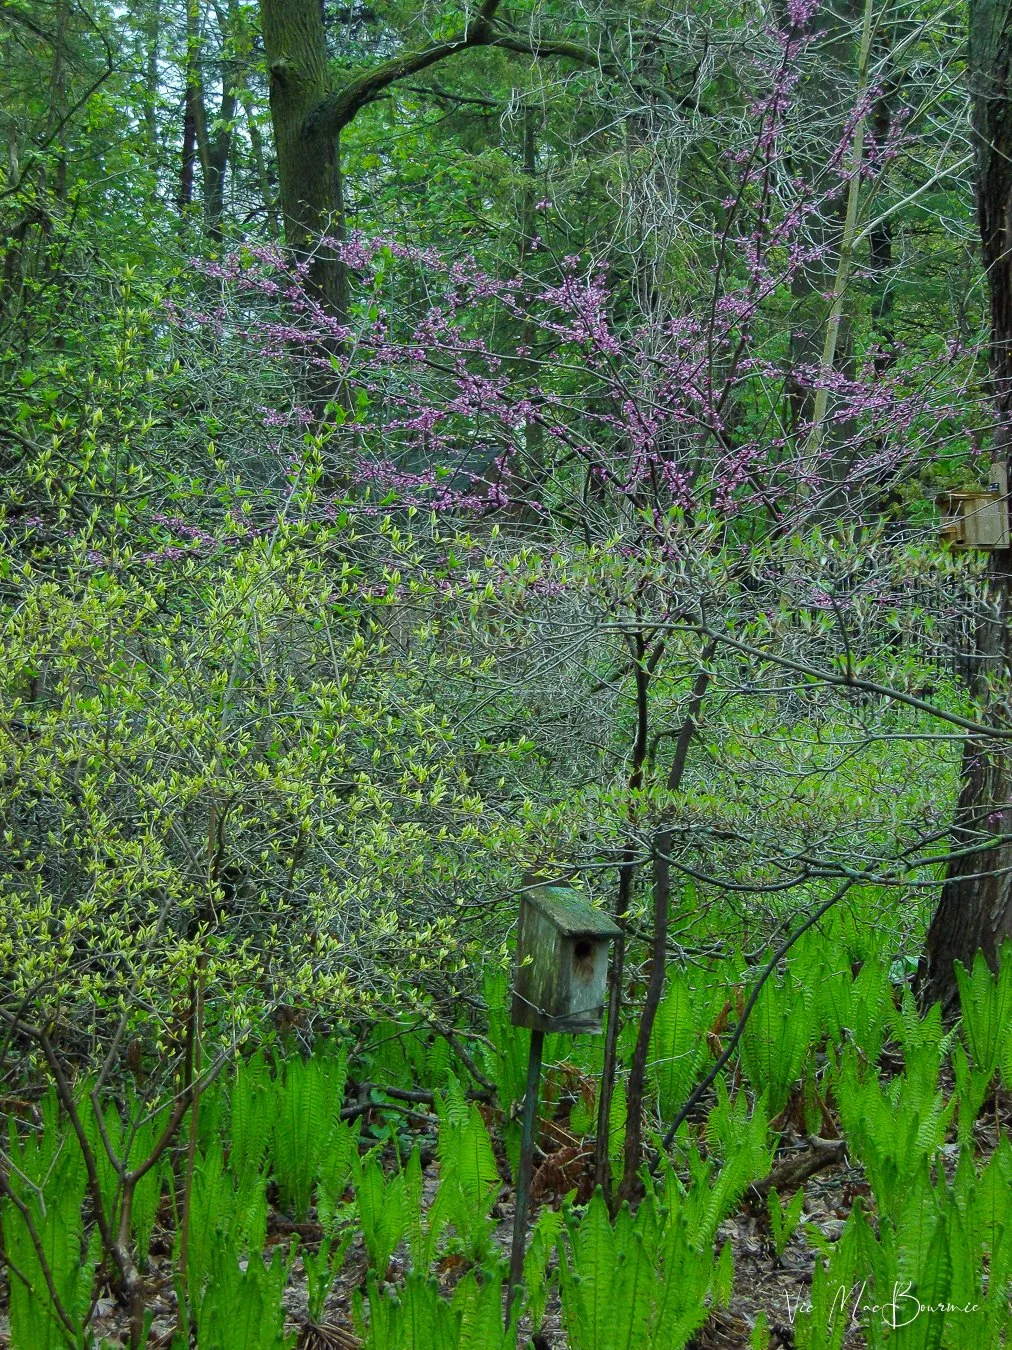
Woodland Garden: Mid May brings lots of little surprises
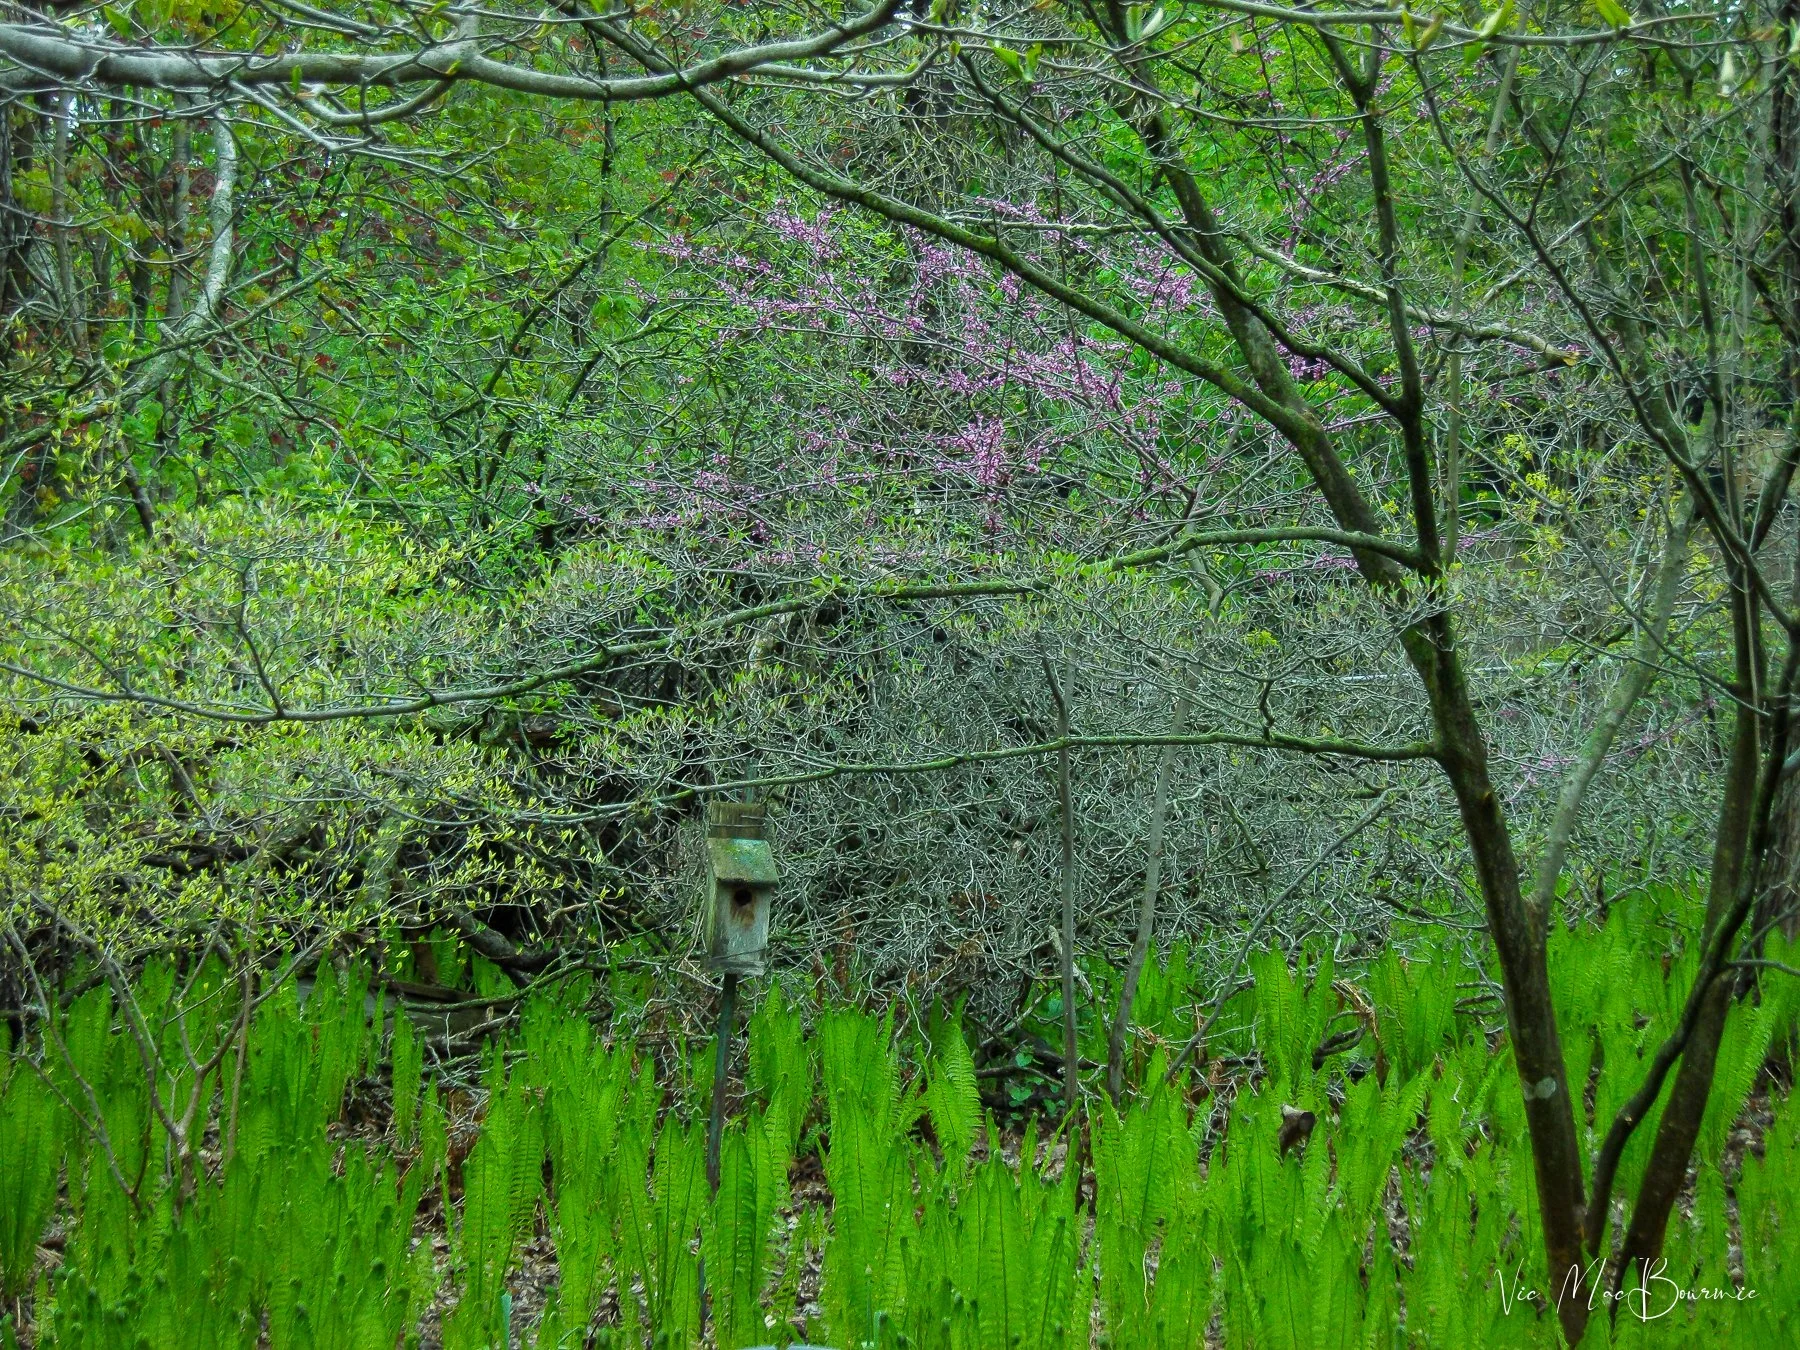
Mid May is an exciting time in the woodland garden when spots of colour break the beauty of the spring greens.

Native wild geranium (cranesbill) front, join Mayapple and Forget-Me-Nots for an early spring show in the woodland garden.
Native plants sparkle in spring
It’s the middle of May but it’s cold, really cold. In fact, earlier this week, if you can believe it, there were overnight frost warnings here.
Frost warnings and cold days, however, are not slowing down our hardy native plantings from moving forward and actually performing very well, thank you.
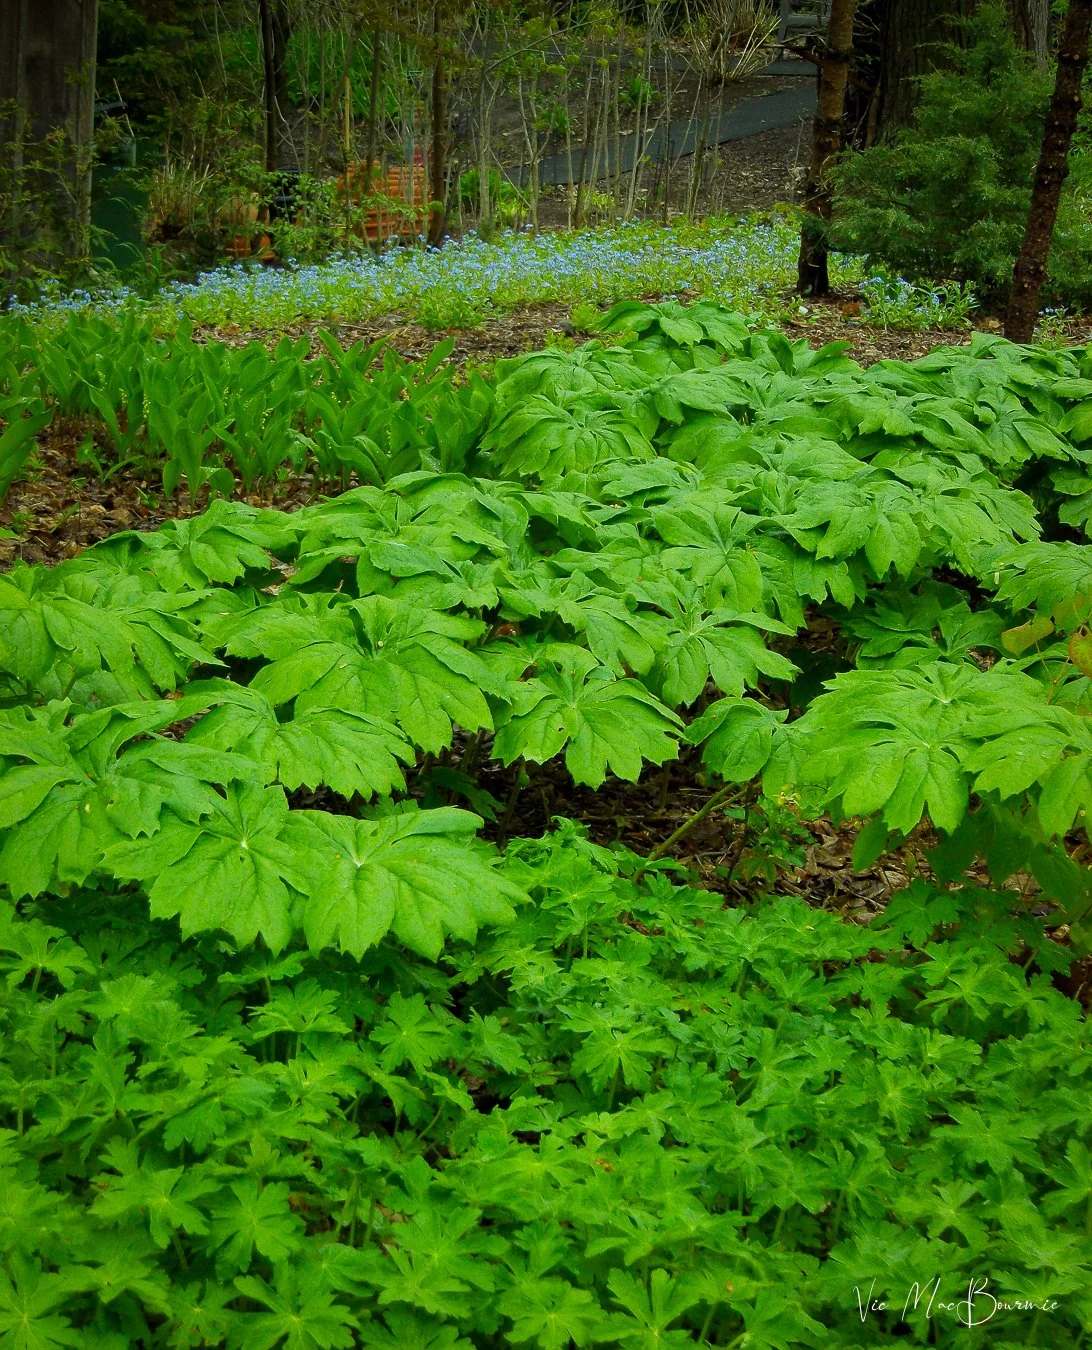
Leading the way are the Mayapples that are fully stretched out and creating a lovely green carpet in the main area of our garden that they are slowly taking over. They are also blooming in a distant corner of the woodland where I can see them, but rarely wander over to that “wilder” part of the yard.
But don’t count out the lovely arching stems of Solomon’s Seal that are reaching out for the sun with their delicate little green flowers hanging down below the leaves.
Solomon’s Seal, whether it’s the straight native or the variegated variety, is a good addition to any woodland garden adding a needed sense of verticality in the spring garden and lasting throughout the summer well into fall. Not unlike Mayapple, its tattered, beigey fall look is almost as nice as it is dressed in its spring greens.
The Forget-Me-Nots are also putting on their subtle spring show with their soft, mist-like haze of blue forming a perfect backdrop to the Mayapple and geranium ground covers. These lovely, dainty little flowers are an important early source of nectar for early emerging insects and butterflies.
In the woodlands surrounding our home, massive waves of Forget-Me-Nots fill sunny spots on the woodland floor spilling over the deer paths that zig zag through the forest.
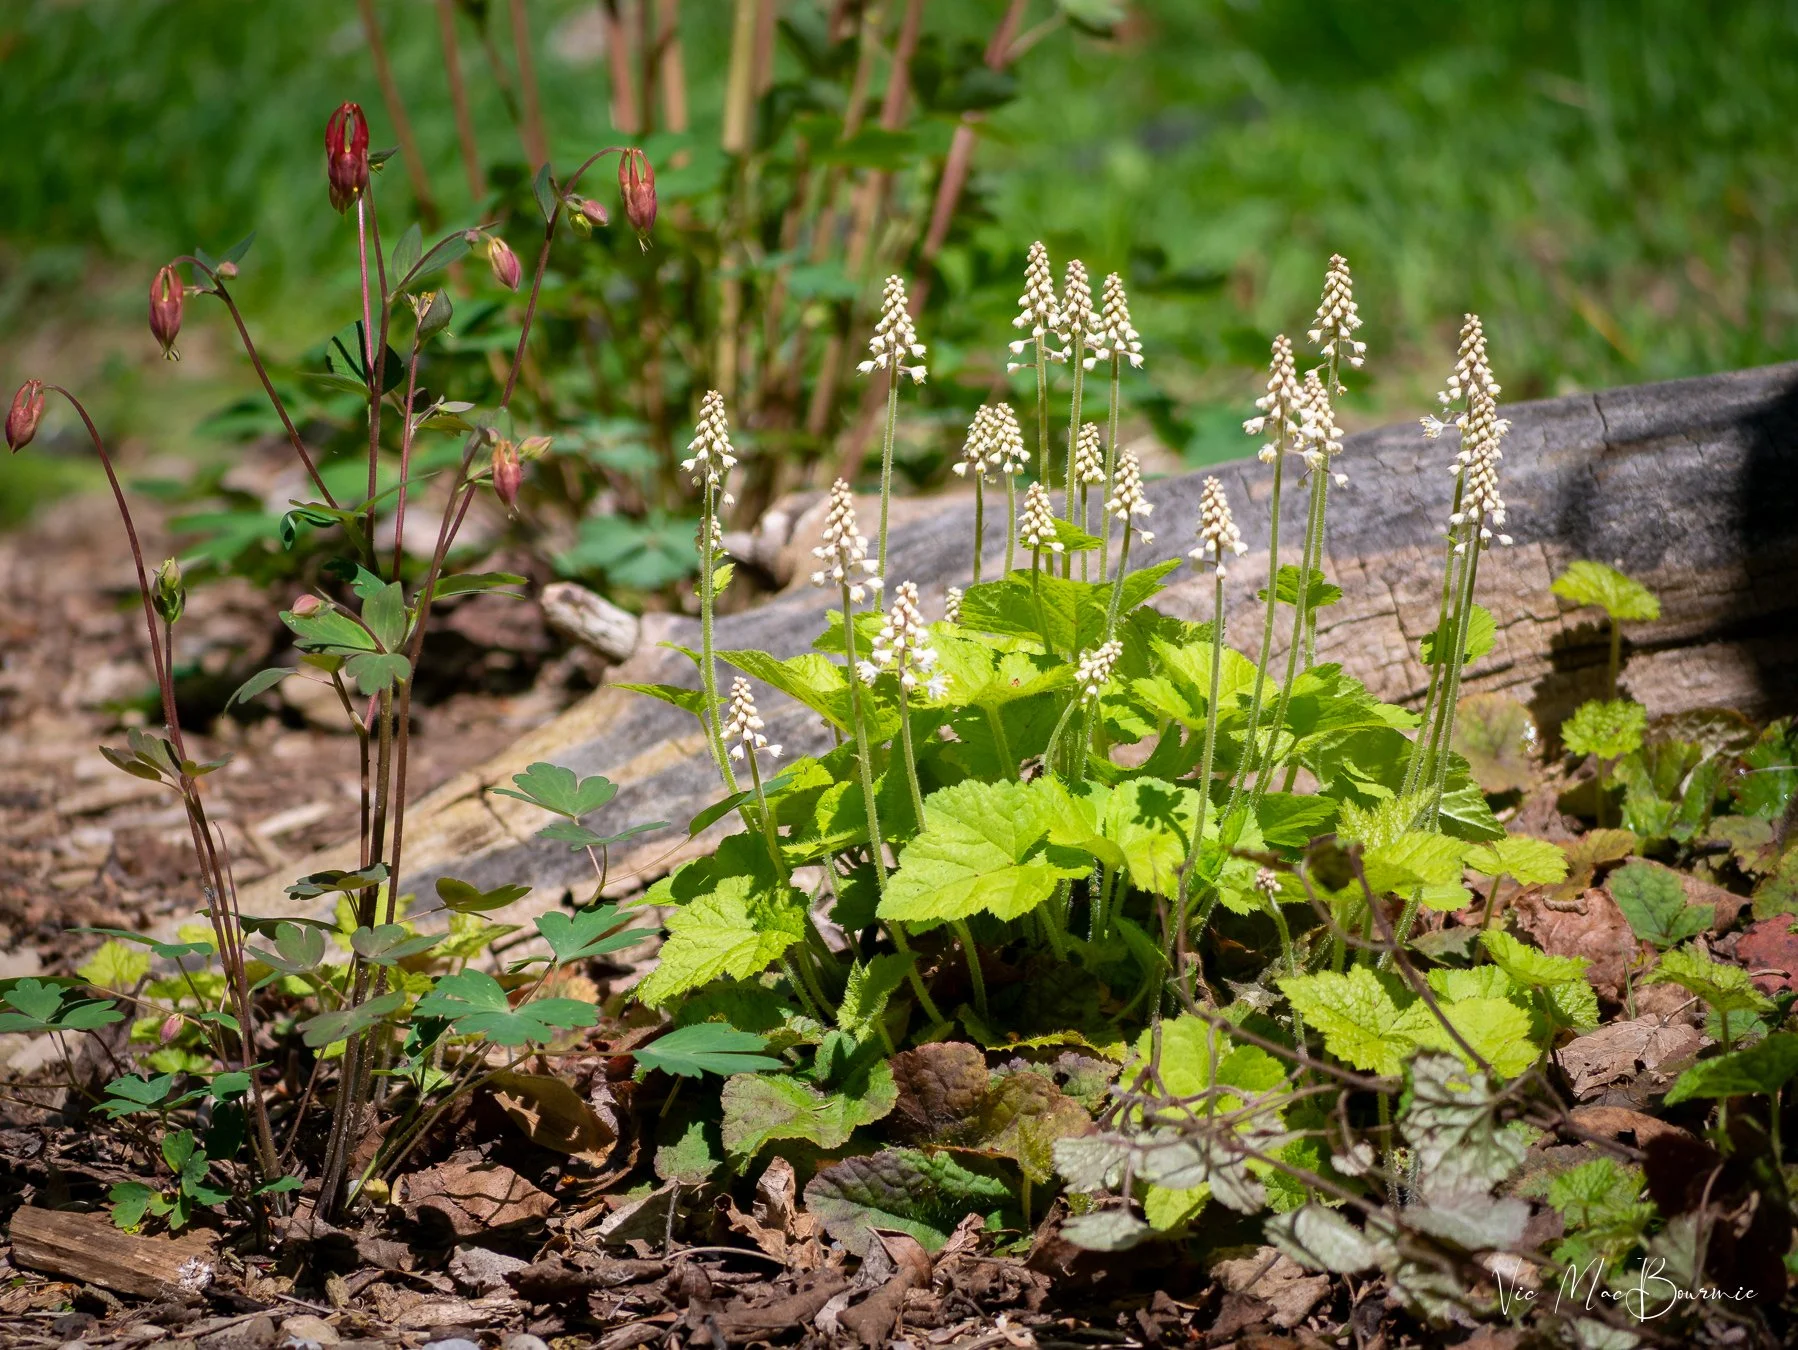
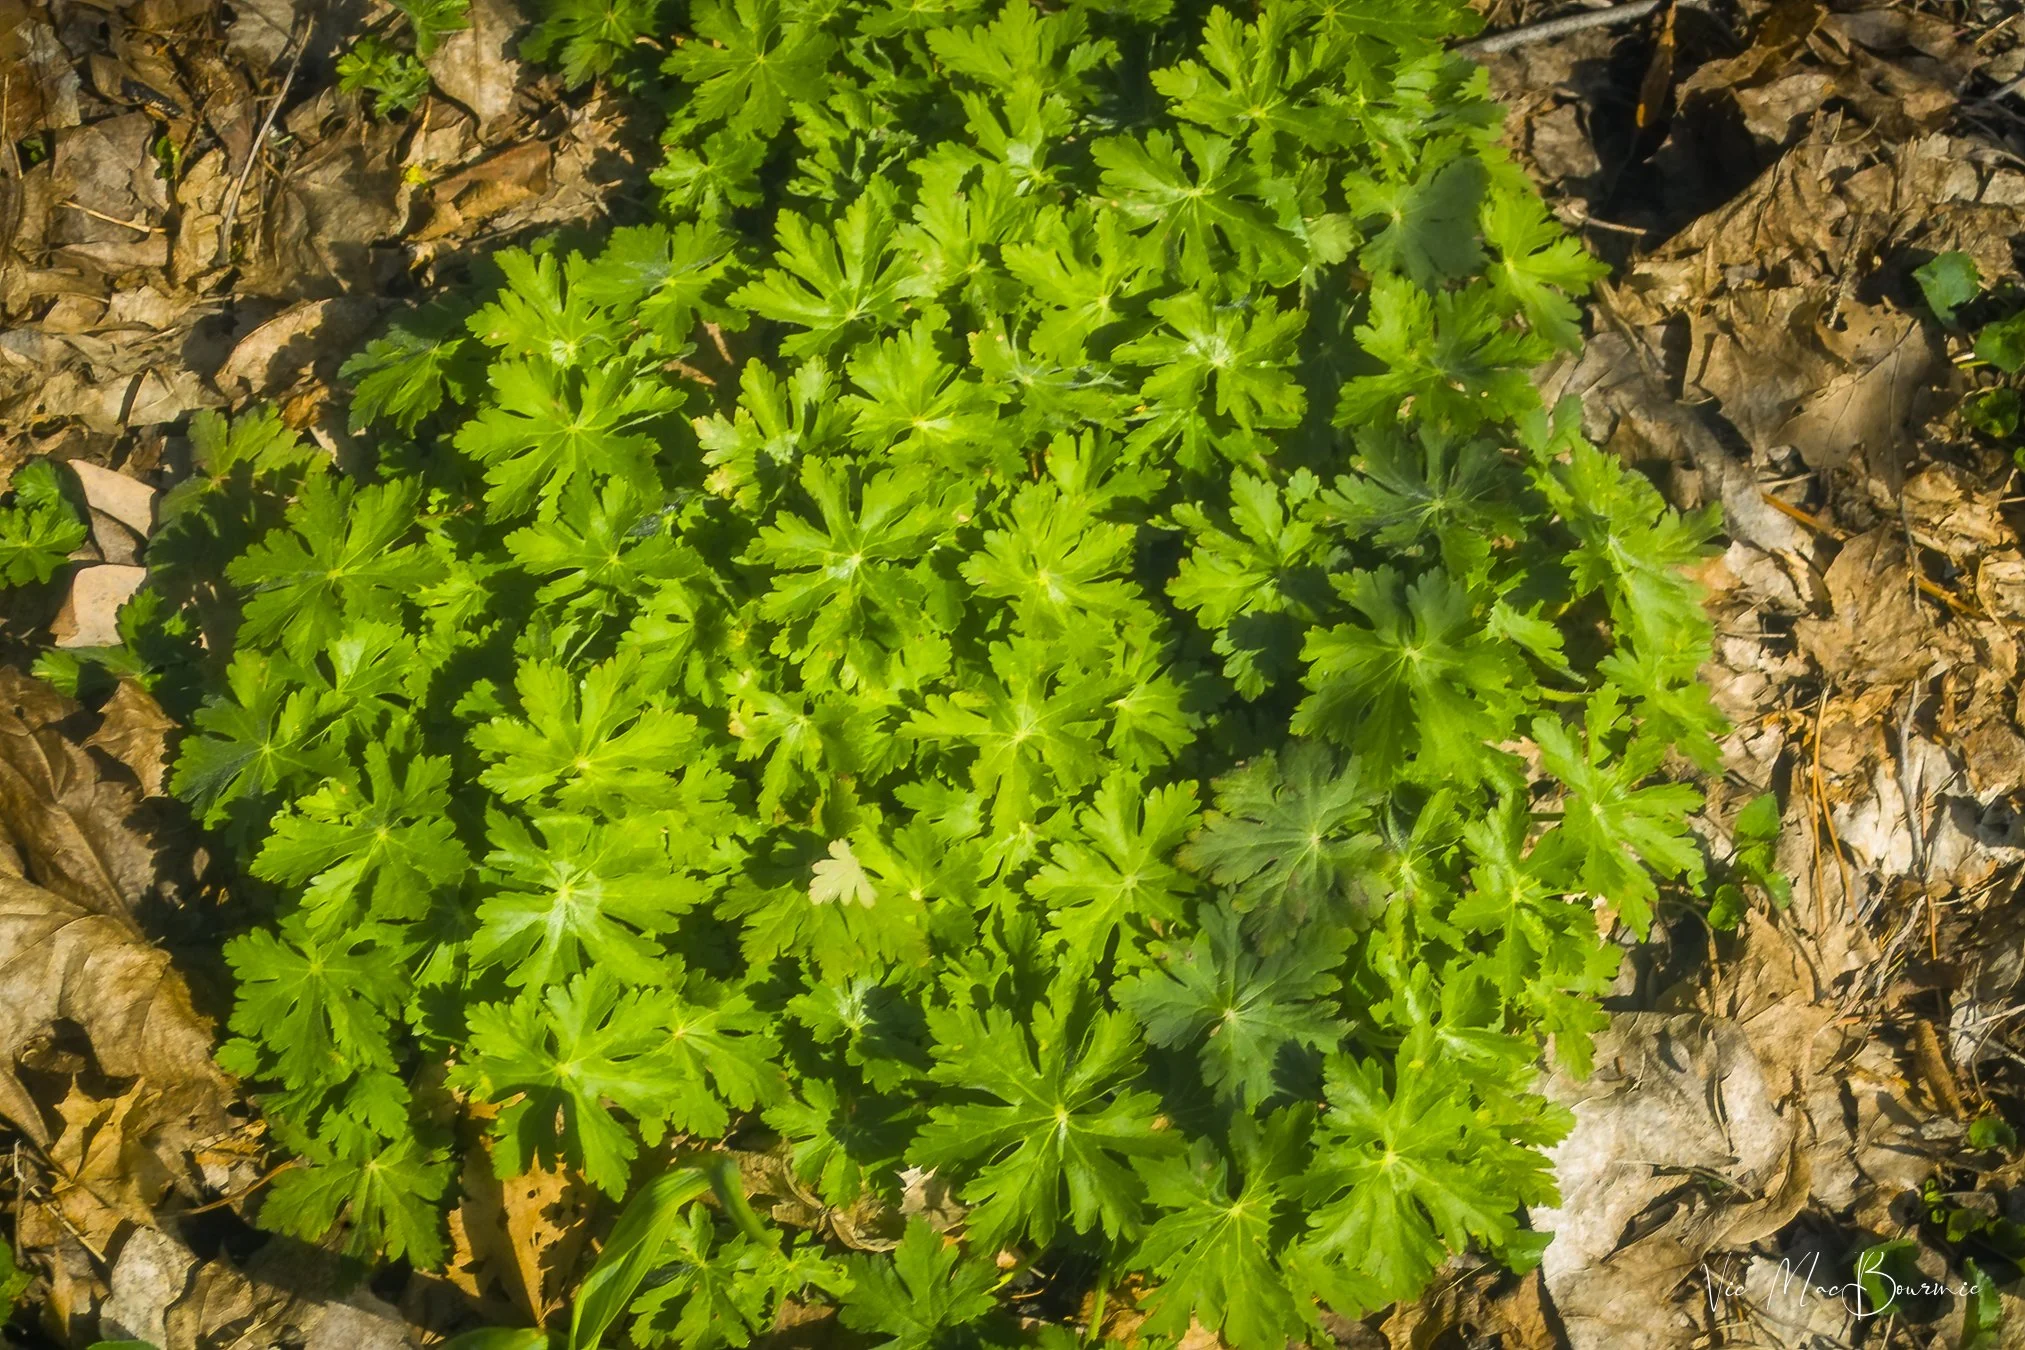
Delicate native columbines and foamflower prepare to put on their spring display. The vibrant spring greens of the foamflower are hard to miss.
And, while spring greens are always a joy in the woodland garden, let’s not overlook the hints of colour that are already poking through the greens.
Just in time for our hummingbirds’ arrival, our native columbine are about to explode in red-and-yellow flower. A favourite early source of nectar for migrating hummingbirds, Columbine are another early spring favourite that needs to be in everyone’s woodland garden.
In the image above, Foamflower (Tiarella cordifolia) grows happily alongside a Columbine as part of one of our many newly created little woodland vignettes from last year. These were created from cut branches pruned from our larger trees and, rather than disposing of them, we “planted” them in the ground and planted woodland plants around them. Over time they will break down and add nutrients – various fungi – to the soil. For more on our woodland vignettes (log planter), check out my post previous here.
Joining our Columbine, of course, are the always popular bleeding hearts. Our clumps are already blooming in the back garden where they get maybe six hours of sun while the leaf cover is still sparse.

The leaves of native bloodroot form a nice clump alongside a grape hyacinth. It’s all part of our front garden’s ground cover along with non-native pachysandra and epimediums along with black-eyed Susans and other summer-blooming plants.
Both the Columbine and bleeding hearts are a photographer’s delight so make sure to get out and document them before they past their prime.
Right beside the Columbine, our foamflower (Tiarella cordifolia) is preparing to put on a show. It’s the first year with foamflower, so I’m looking forward to experiencing it in the garden and photographing it at its prime.

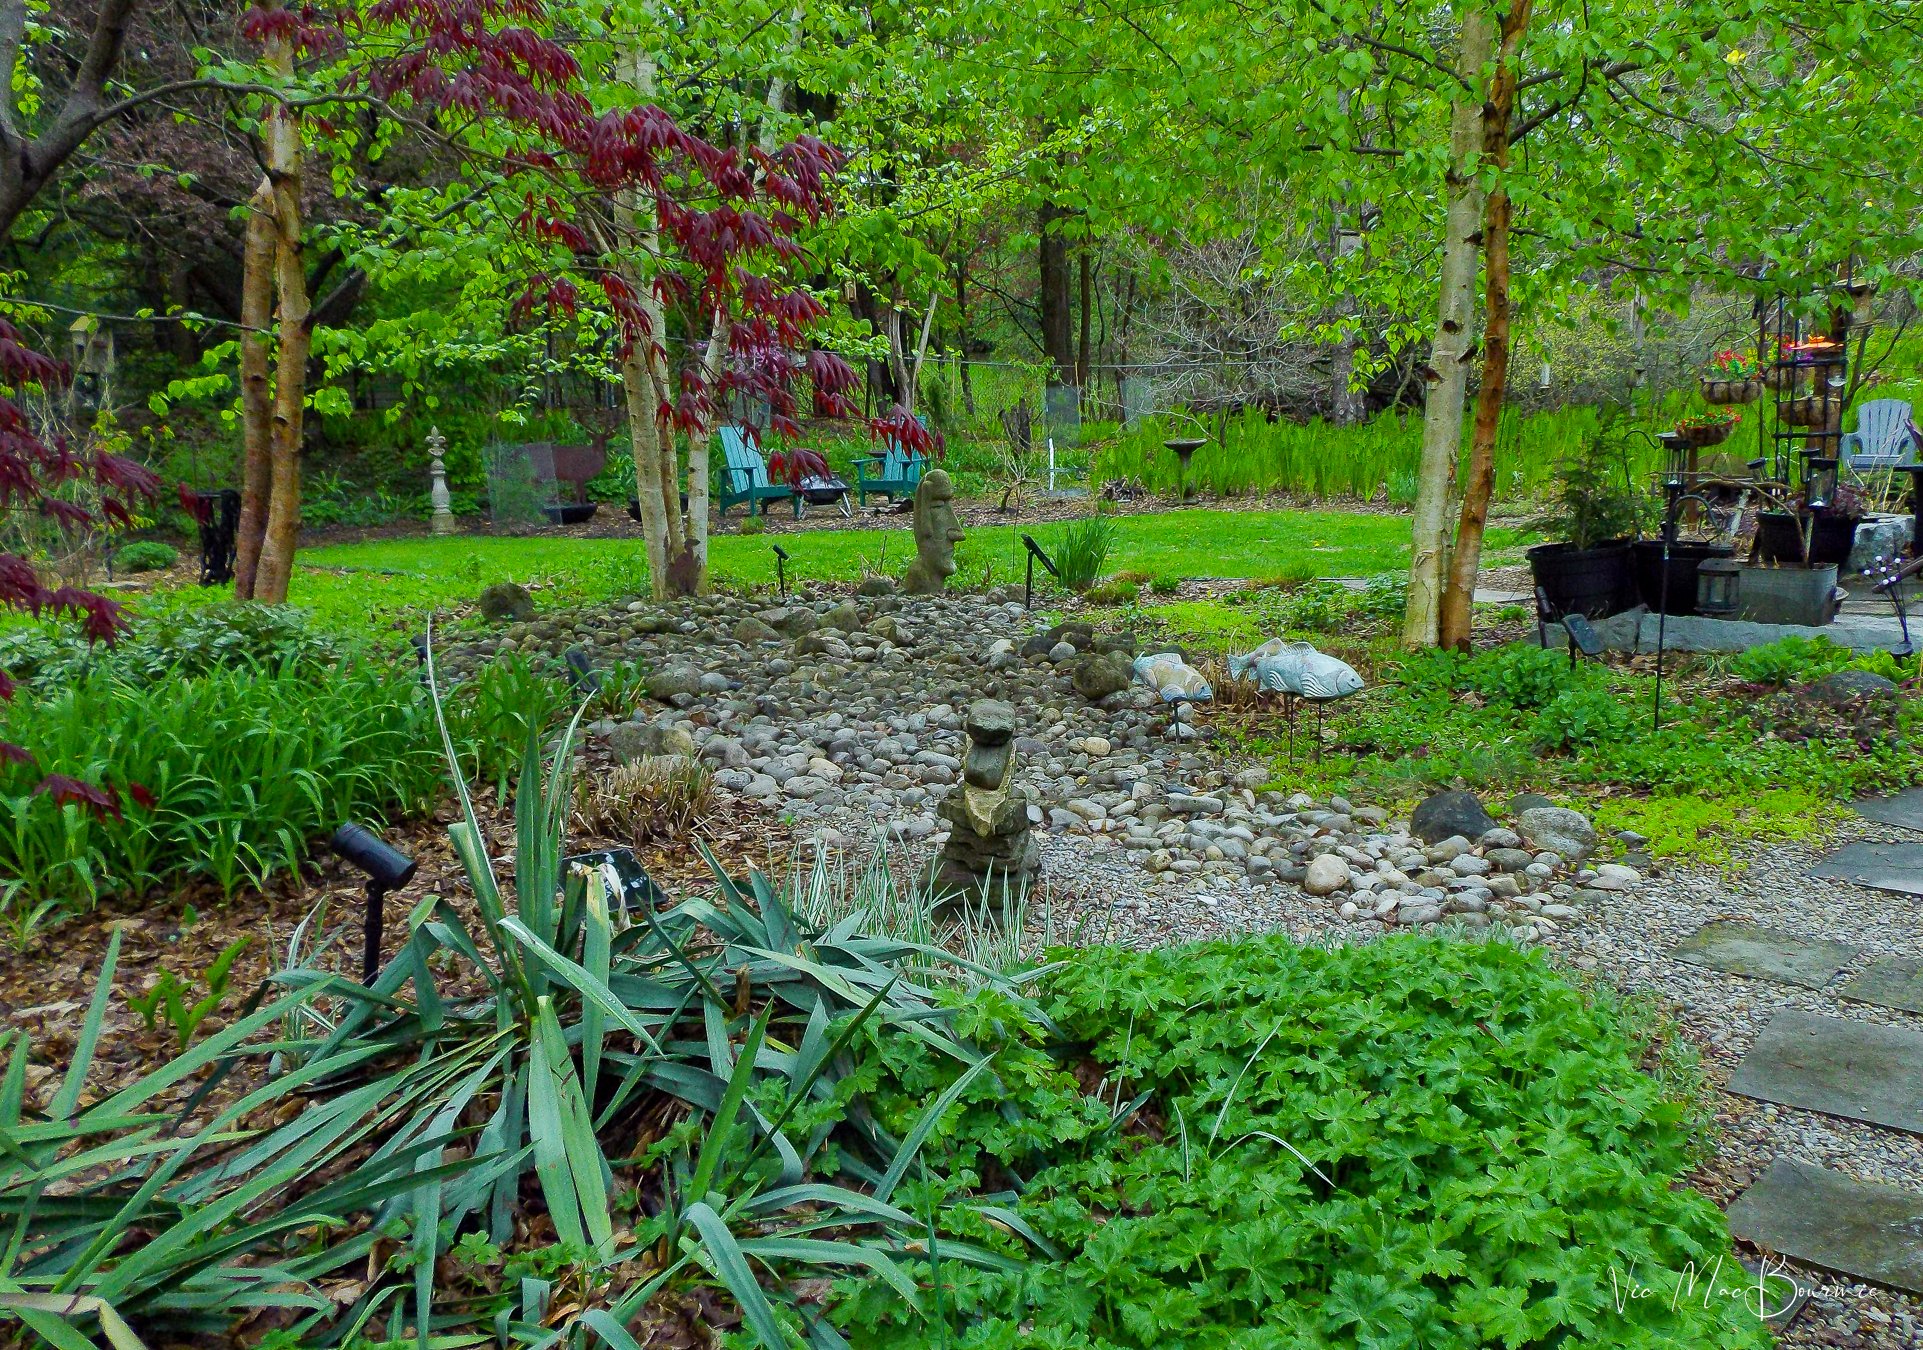
A bigger look of the spring garden shows the mini birch grove forming a canopy over the bubbling rock and dry-river bed that leads to the stepping stones of the pathway. Japanese maples and low-growing ground covers with larger ornamental grasses fill out the area as spring turns to summer.
Throughout the garden, ferns are unfurling, the eastern redbuds are beginning to put on their magnificent show and the Flowering dogwoods are hinting at what’s still to come.
I’ll let the following pictures tell the rest of the story.
A multi-stem Eastern Redbud blooms alongside a Cornus Mas Dogwood in the fern garden.
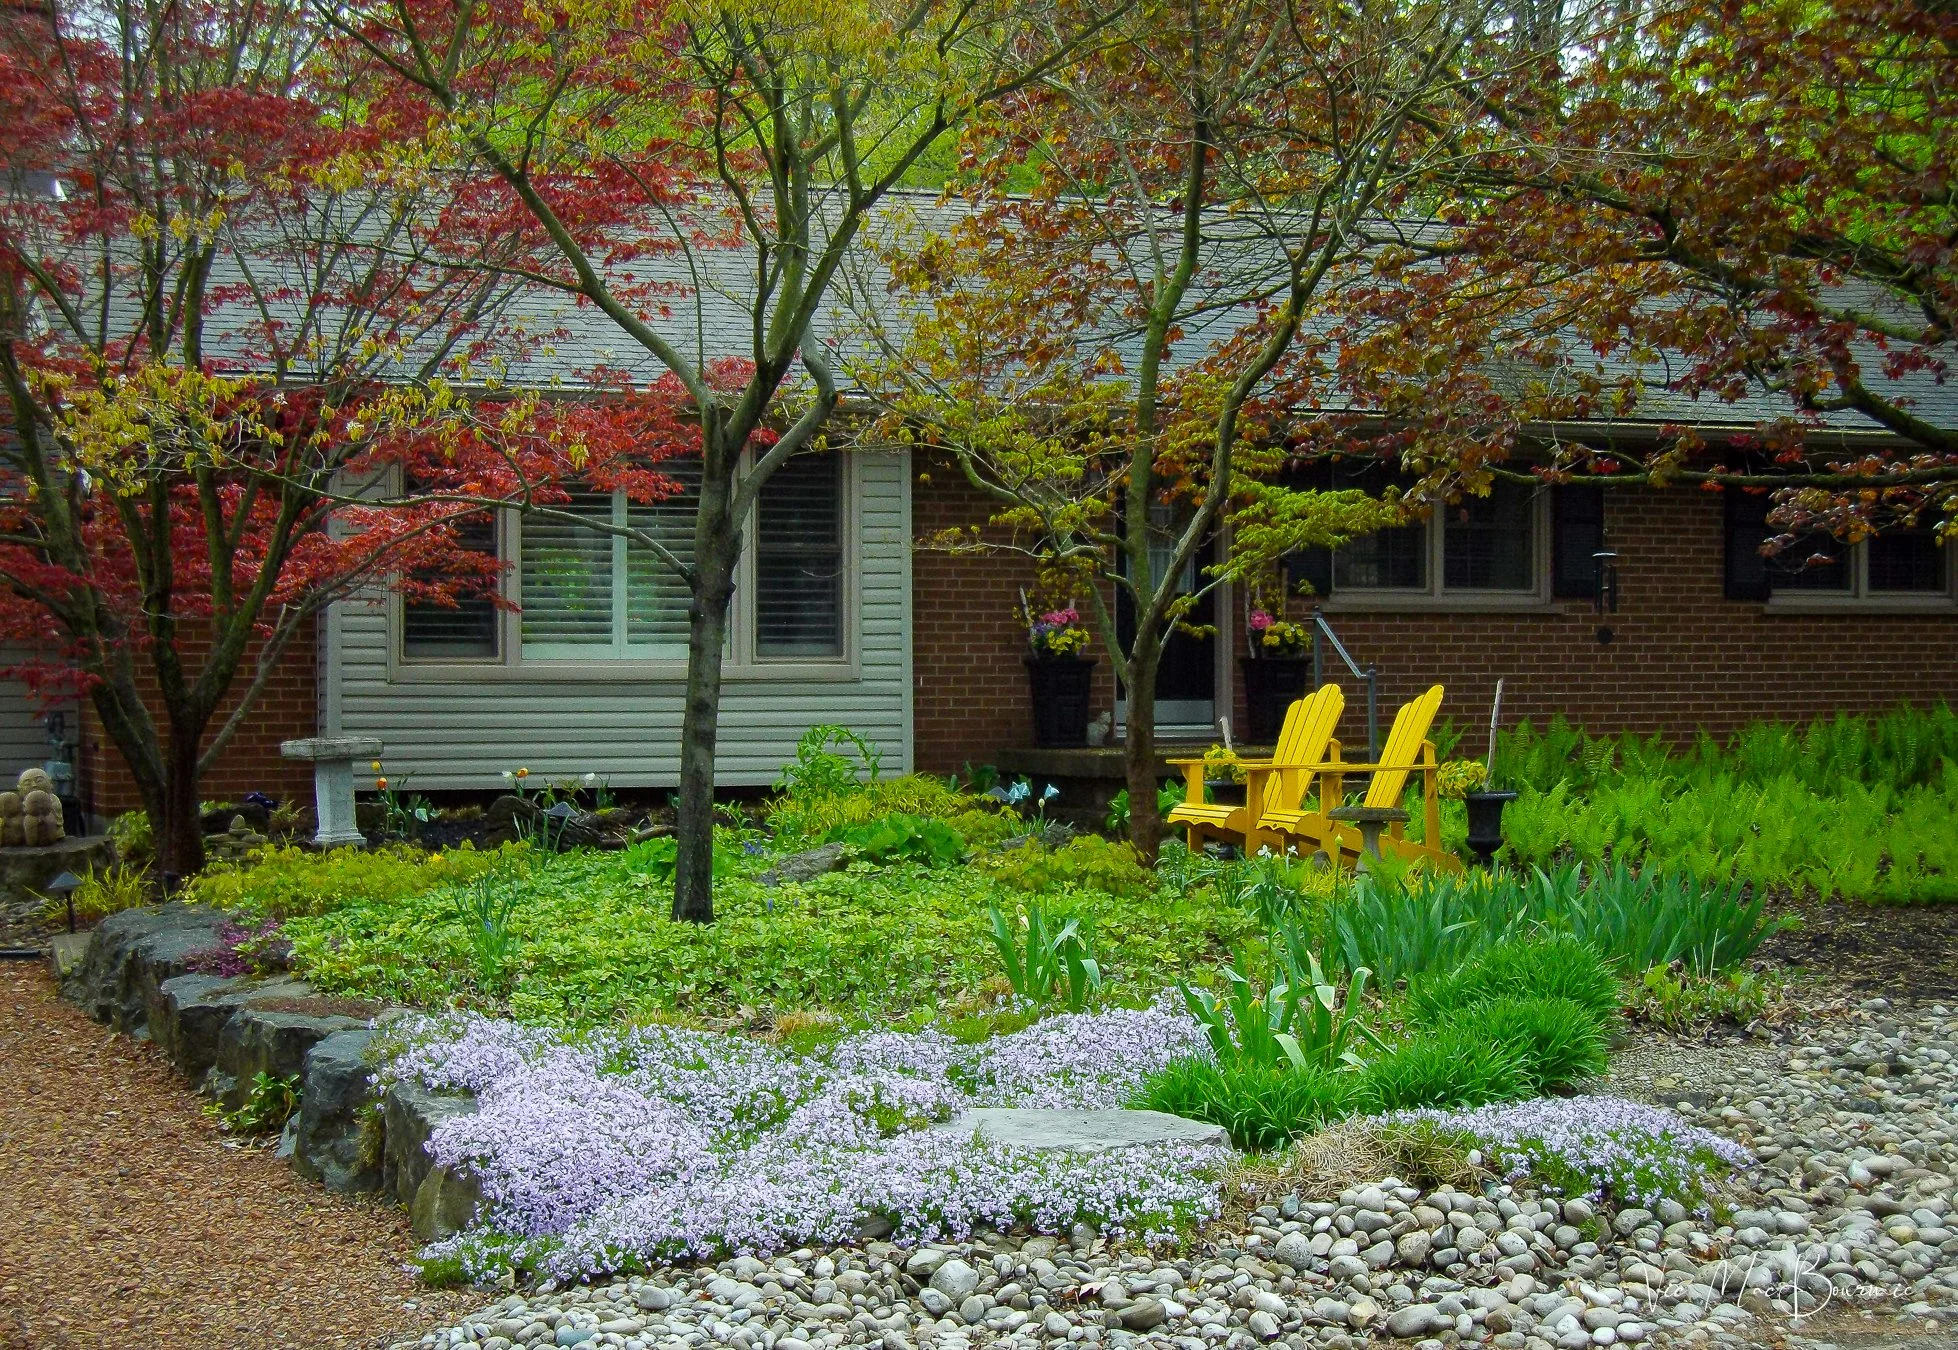
The front woodland garden showing the creeping phlox, Japanese Maples and serviceberry tree.

Bleeding heart is always a fan favourite in any garden.


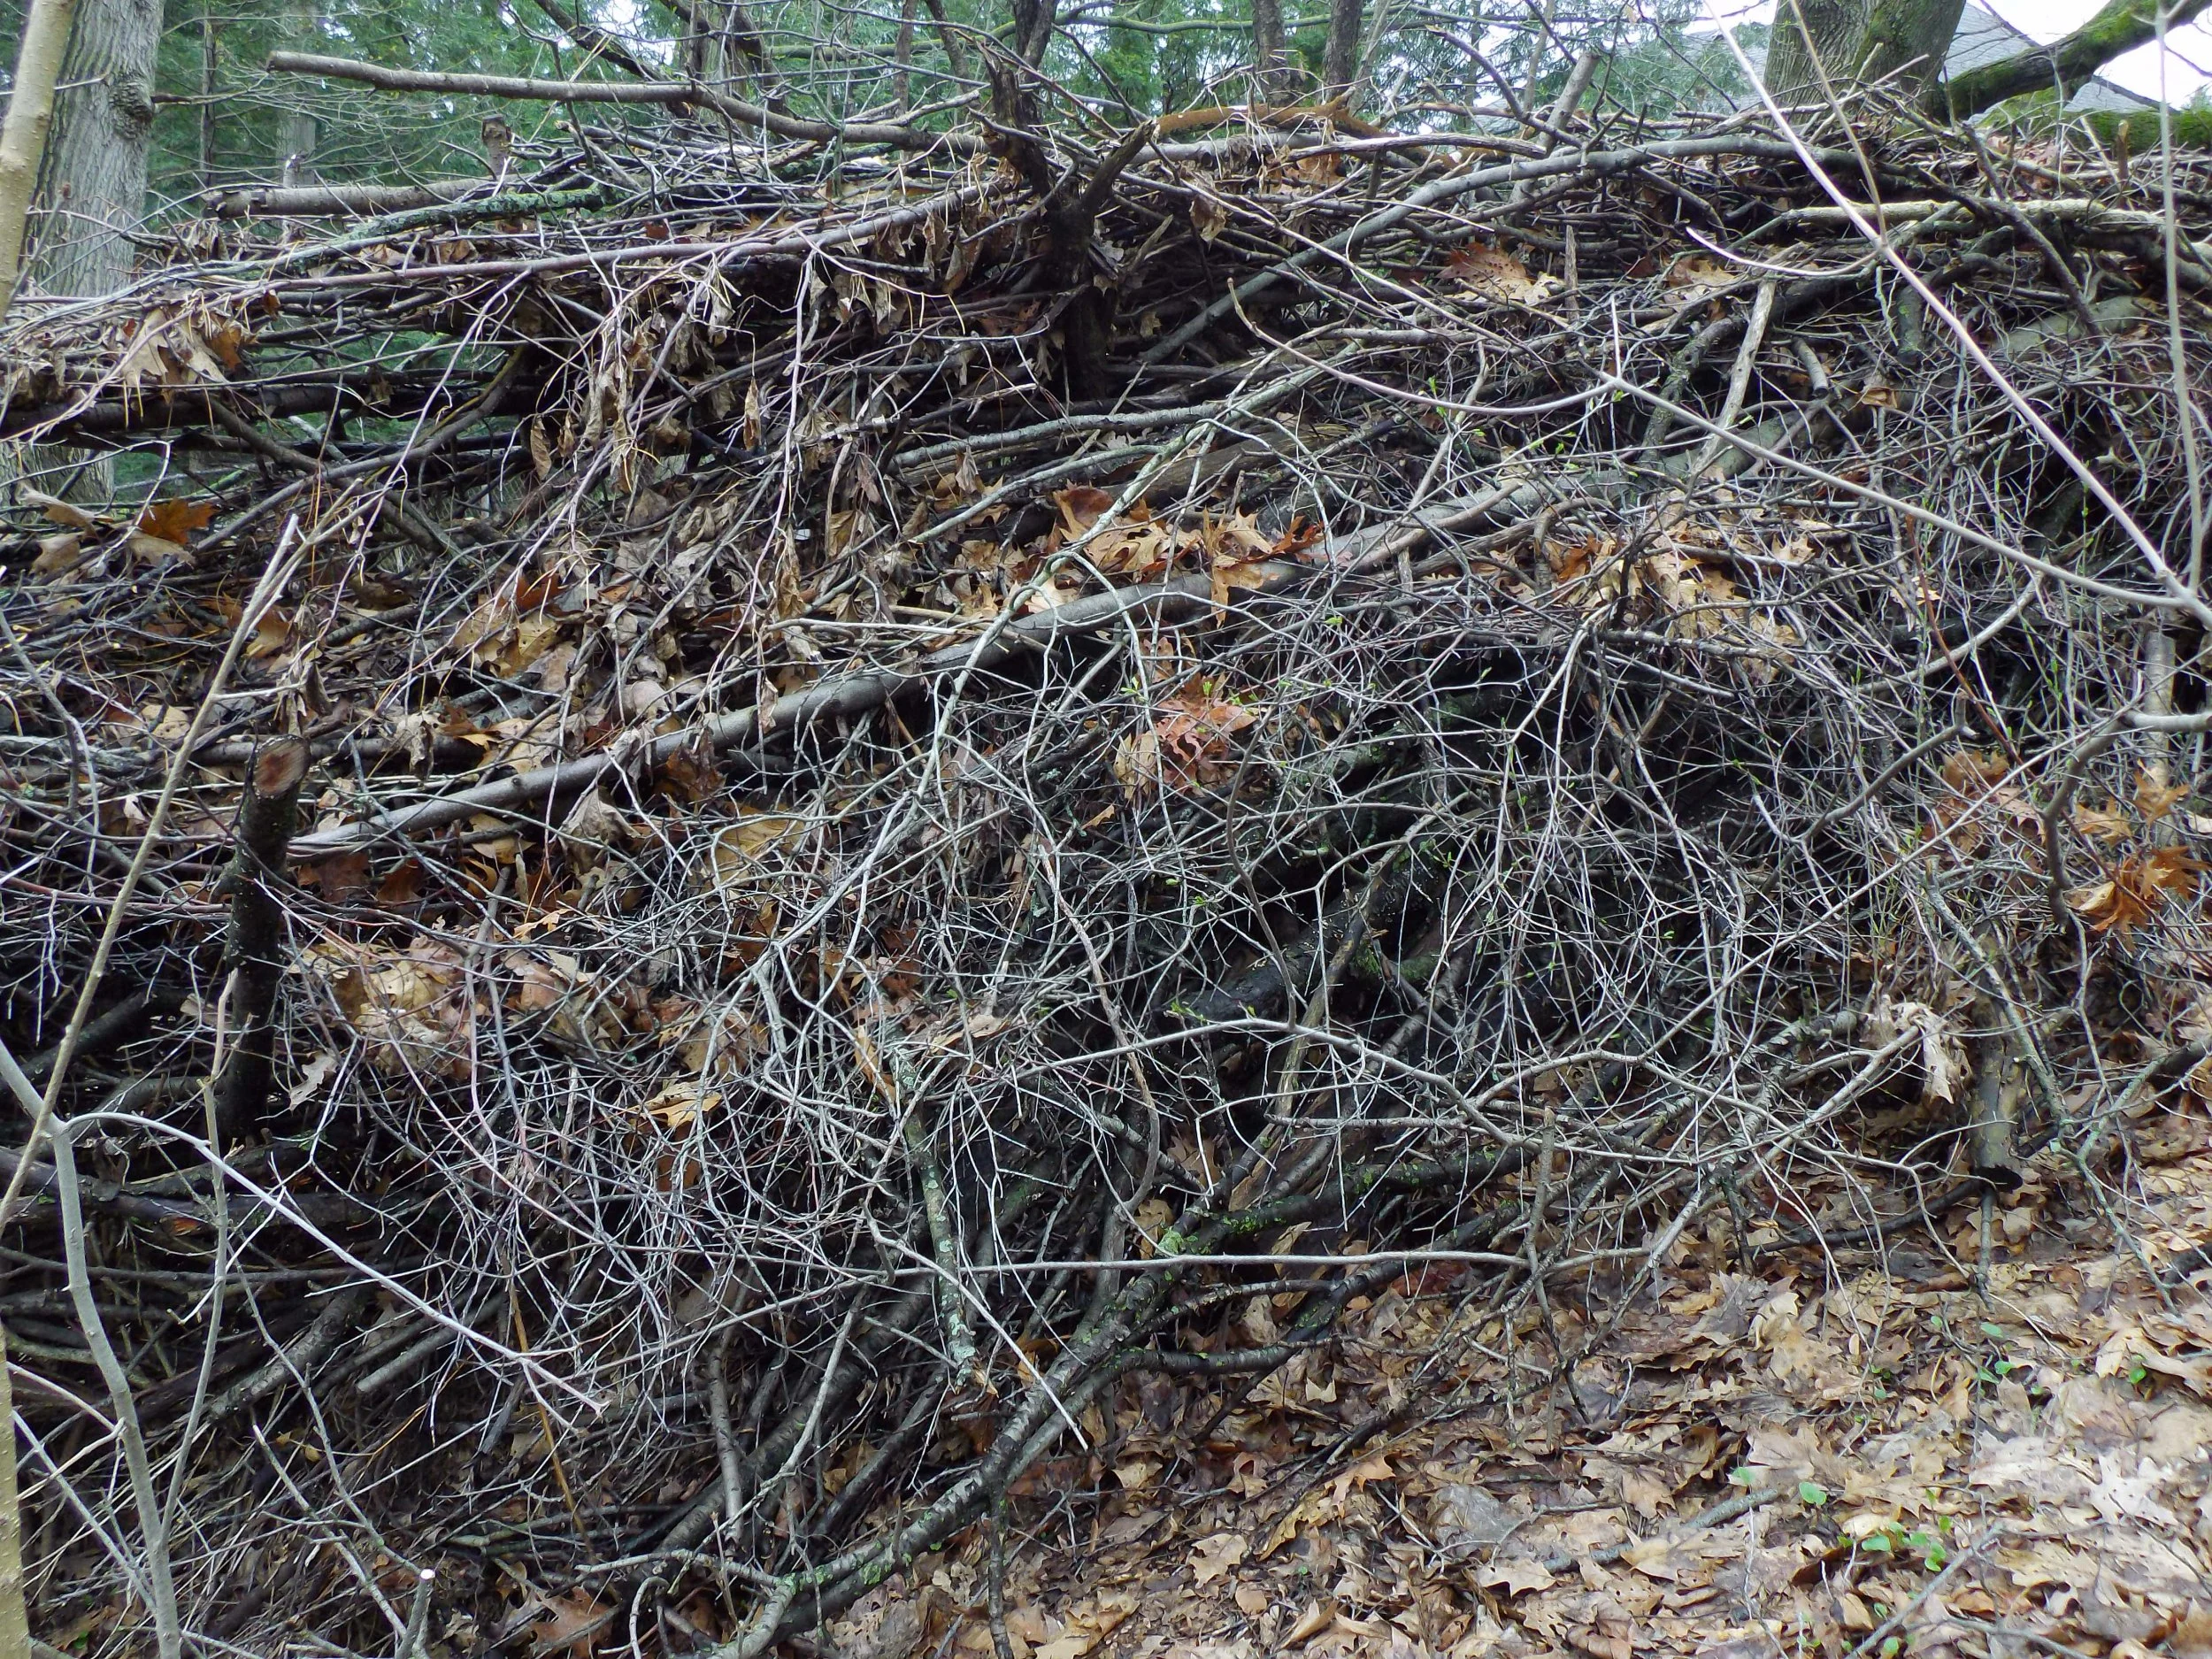
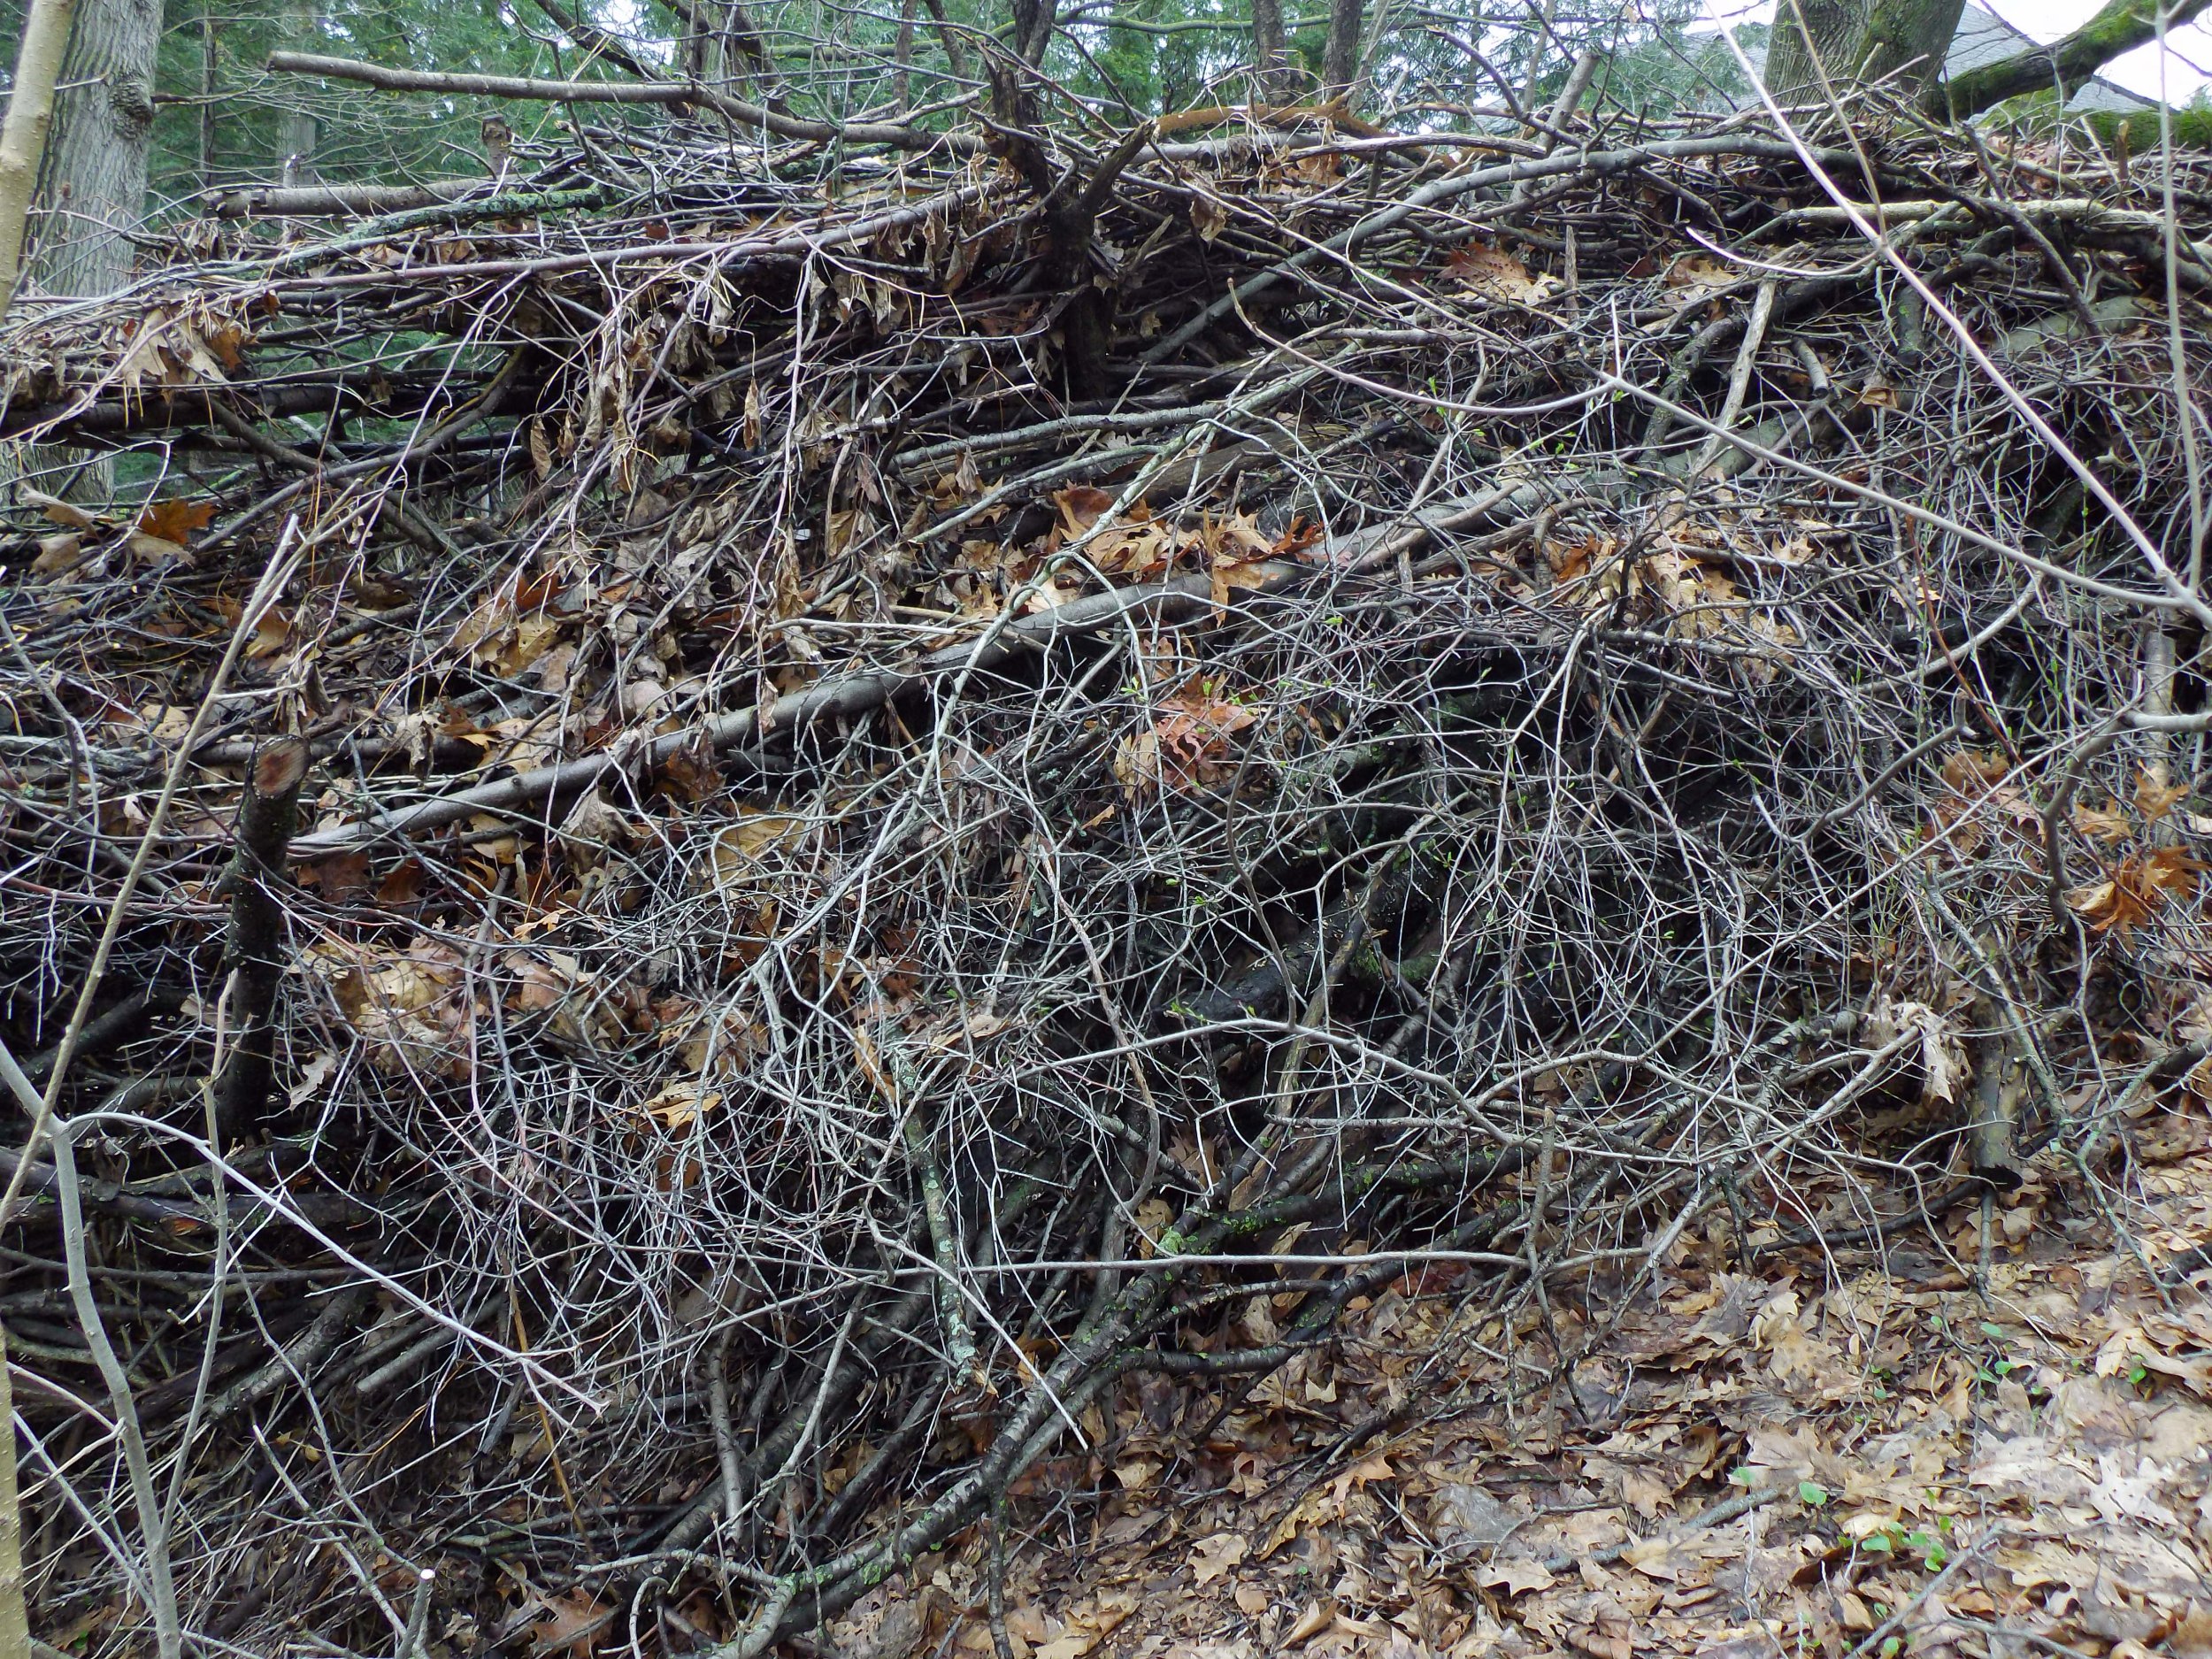
The “dead hedge” is coming to life
A dead hedge or brush pile just might be the solution to blocking an eyesore and/or creating much needed vertical wildlife habitat in your backyard.
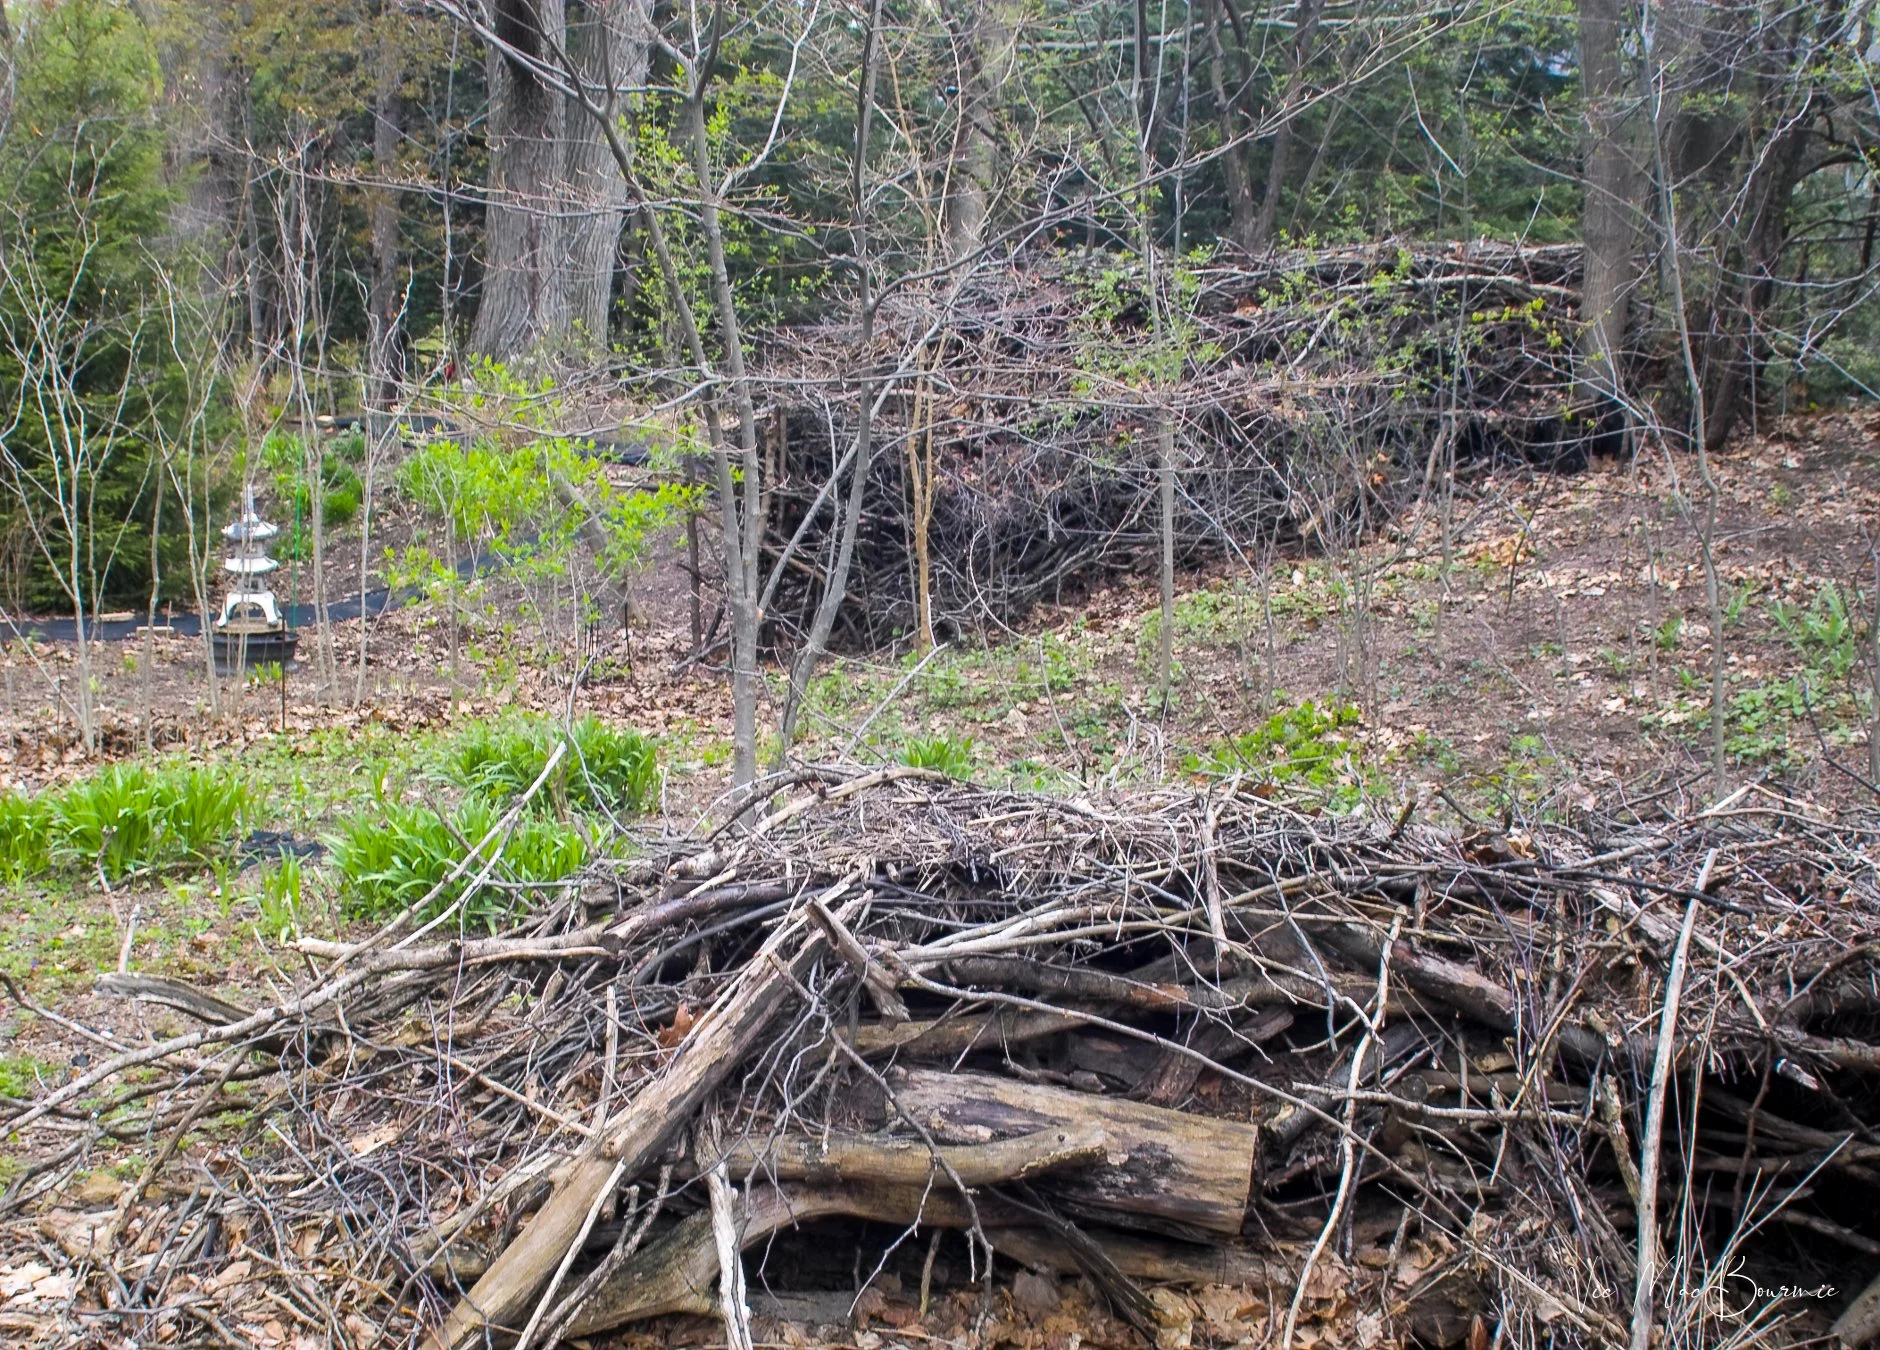
This image shows my brush pile in the foreground with my neighbour’s dead hedge in the background. Although they look similar, the brush pile in the foreground has been built up over years and is much wider covering more ground, while the dead hedge has been built in just the past year and is taller than it is wide.
Dead hedge vs brush pile: Both can create excellent habitat
What do you do with hundreds of non-native trees and shrubs that need to be removed and disposed?
Well, you could do a lot worse than using them as building blocks for what is known as a “dead hedge.”
That’s exactly what my neighbour, Peter, has done with a grove of buckthorn that quickly spread across the back of our properties.
While I yanked mine out and threw them on the top of our massive brush pile, Peter used the larger ones as fenceposts while the smaller trees and branches became the horizontal “filler” for the hedge.
It’s made by stacking branches and garden waste between the posts, which don’t have to be dead trees. You could just as easily use store-bought wooden or even steel posts for the vertical support.
Think of it like a very vertical brush pile, but with a more utilitarian role to play in the landscape.
Using a dead hedge like a fence doesn’t just block views, it creates safe shelter for birds, small mammals, and beneficial insects as well as hangouts for snakes, toads etc.
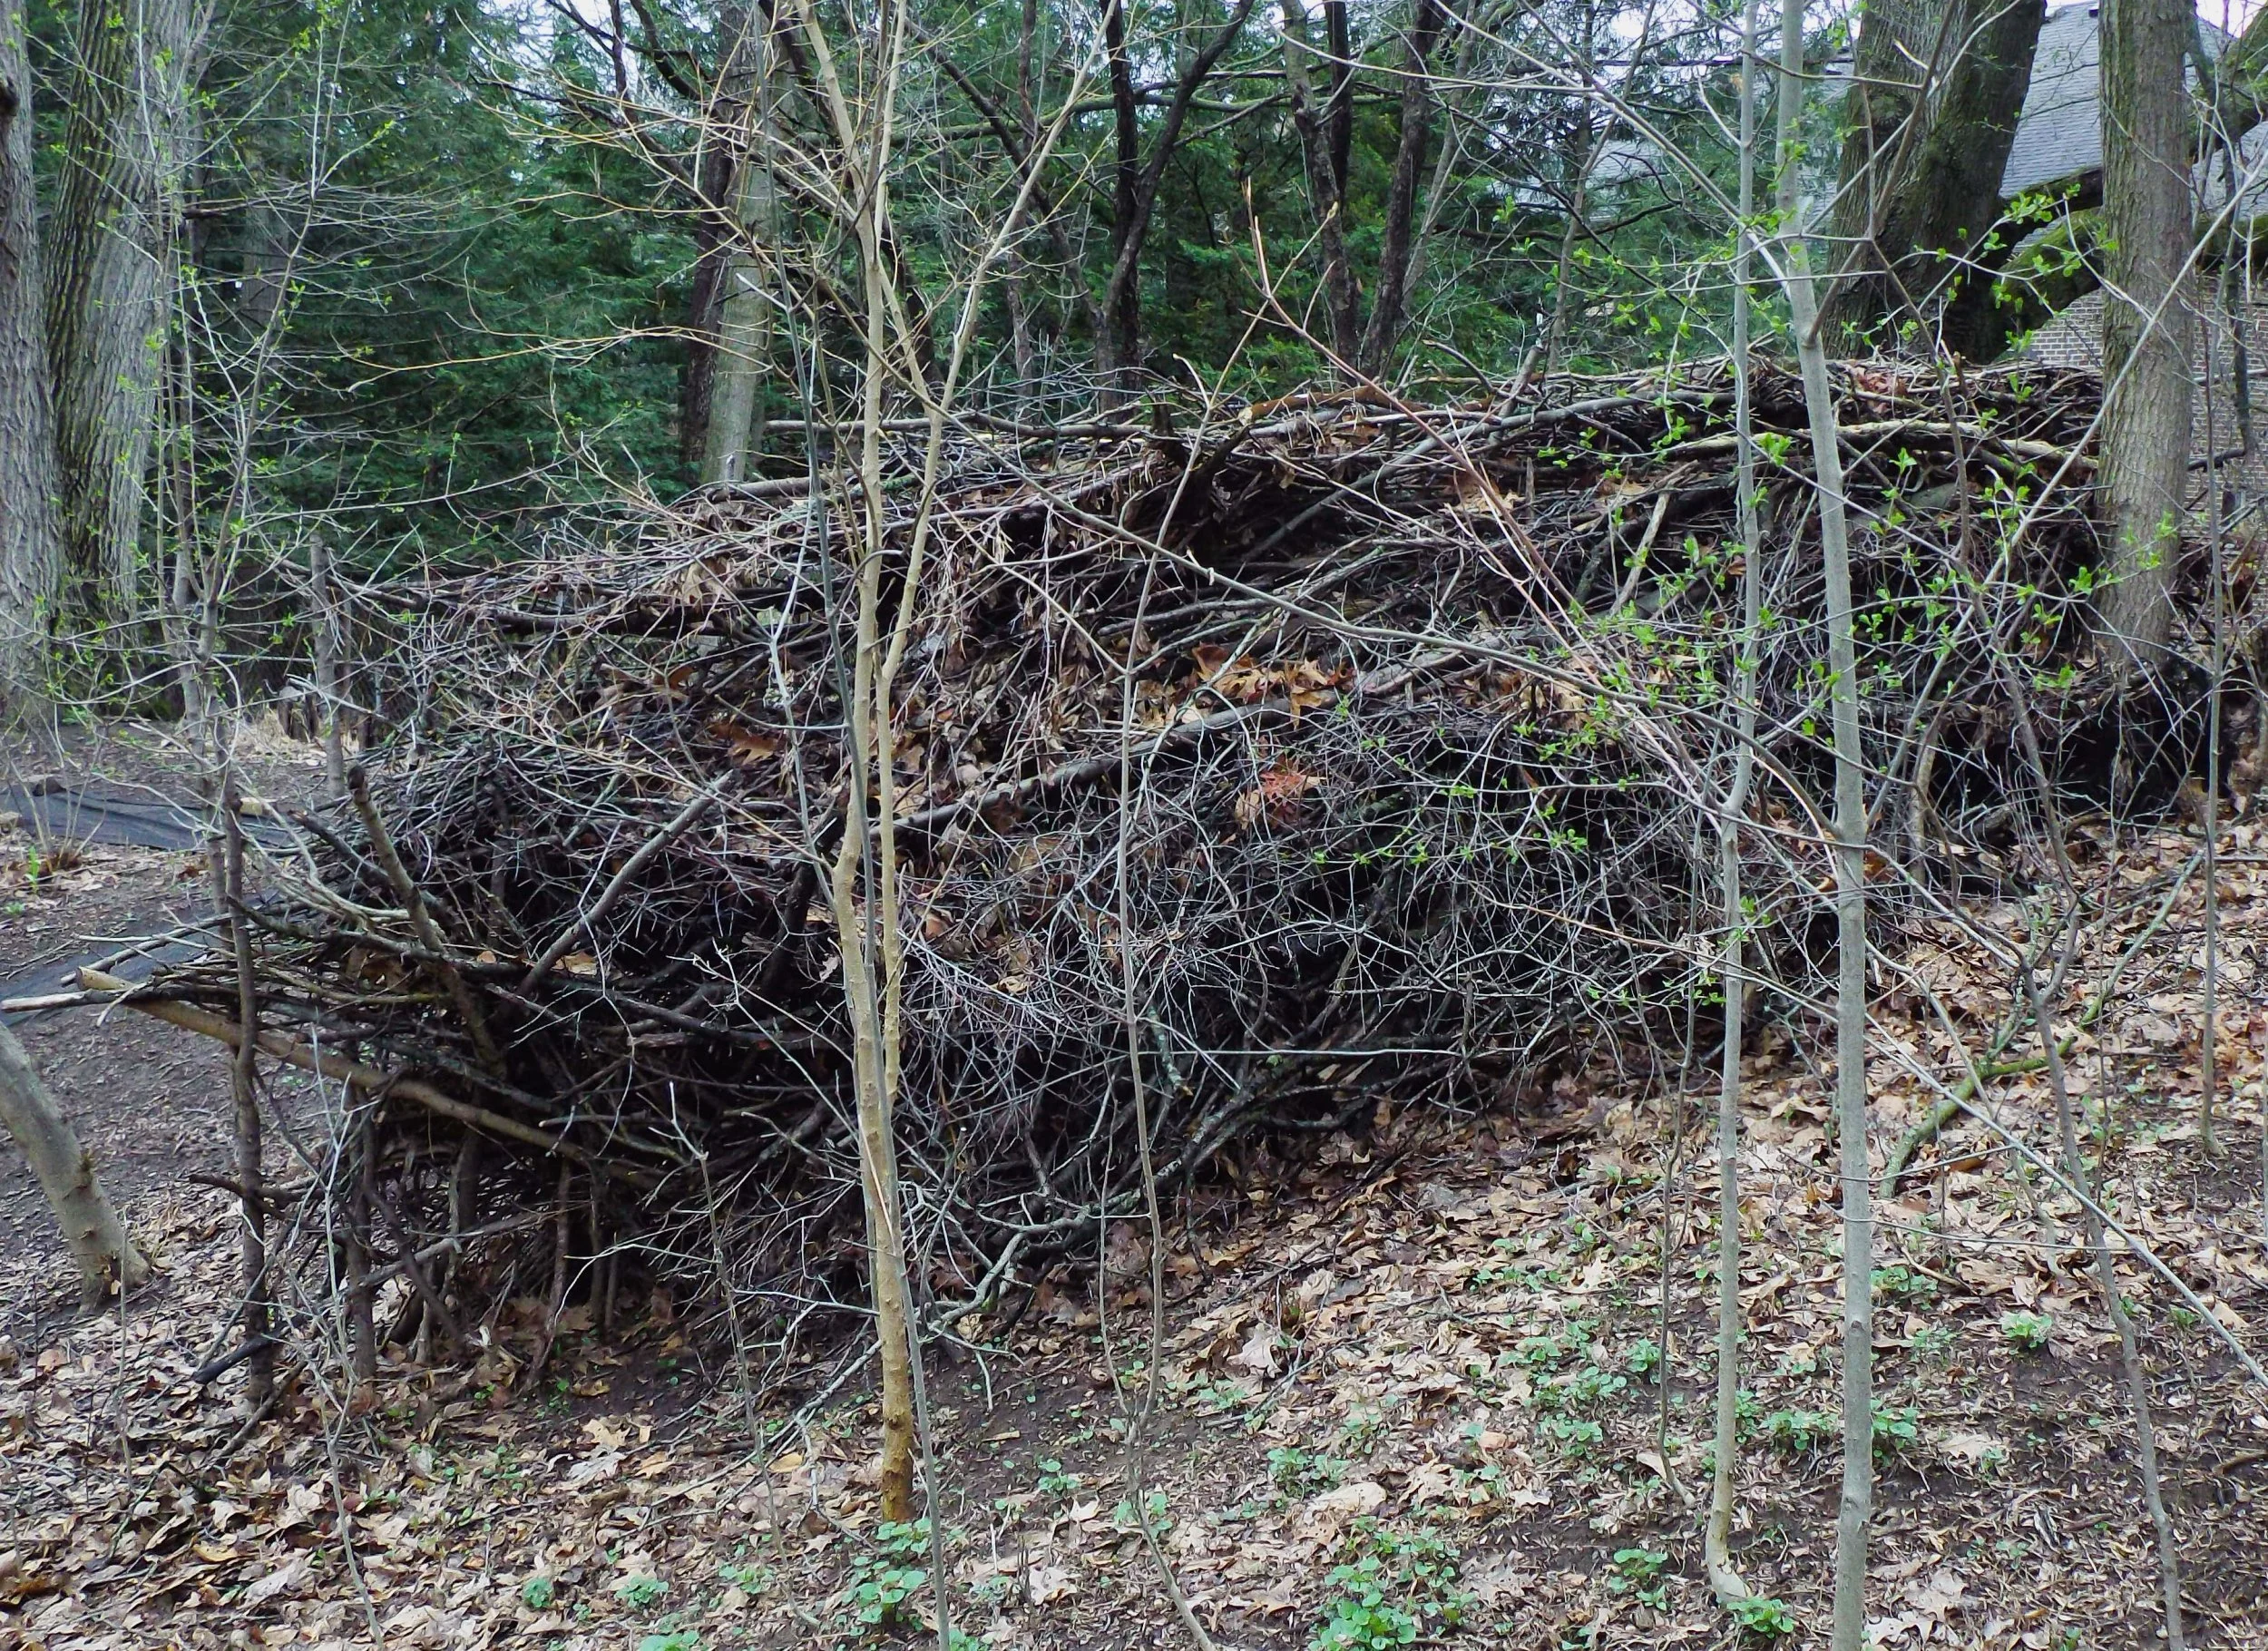
The dead hedge my neighbour built to get rid of piles of non-native buckthorn and other clippings. Rather than put them out in the recycling, he smartly used small trees that were removed as vertical posts and then began piling branches and twigs between them to build a 15-20-foot dead hedge where birds and other small animals and insects can escape to or even build nests in the spring.
The dead hedge fence can turn even the smallest yard into a living habitat and act, not just as a boundary wall like a traditional fence would do, but as n inexpensive way to block a distracting view or eyesore. Now, some would say that the dead hedge in itself an eyesore – and I can understand that argument – but read on for ideas on how we can turn the dead hedge into a living one.
As the dead hedge slowly breaks down – replaced by newer garden material – it feeds the soil and supports fungi and microorganisms in the soil.
The result is another new home and safe place for birds, chipmunks, squirrels and any other living critters that can make use of the structure. Native bees, too, can also take advantage of the dead wood to lay their offspring, especially if you take the time to drill holes in some of the larger branches.
It probably wouldn’t provide the same potential habitat that a large brush pile provides, but its vertical space and dense branch structure provides safety for birds and small mammals looking to escape predators.
Set up a bird bath or bird feeder nearby and you will likely get lots of action.

Adding secret passageways in the brush pile in the form of plastic tubing gives smaller animals quick escape passageways for predators such as foxes.
Turn the dead hedge into a living one
I’m thinking the dead hedge would be the perfect place to grow flowering annual and perennial vines to hide the woody brown mass and create a colourful vertical spot for local wildlife to hang out. Vines that attract hummingbirds would be a great choice. In a shady area, consider flowering hydrangea or, even better, Virginia Creeper that offers fruit and lovely fall foliage.

This little red squirrel is comfortable among the many branches of either the woodpile or dead hedge.
Over time, the dead hedge can be built out so that it stretches across a larger area in the yard creating a natural source of privacy, a sound wall that fills with bird song, or a natural wall to create a shady wind break area and the perfect spot to grow woodland flowers.
Although the dead hedge looks a little messy in spring, my plan is to allow a number of flowering vines to grow up and over the hedge and create a lovely, living hedge with lots of nooks and crannies for birds and other wildlife.
Safe spot from predators
I’ve added a hanging bird/wildlife water source and a bird feeder nearby to introduce a greater variety of birds and other wildlife to the dead hedge, which gives our feathered friends and other wildlife a quick and safe escape from potential predators.
While the dead hedge may act like a barrier of sorts for larger mammals such as deer, it allows smaller animals to pass through it with relative ease – everything from red and grey squirrels and chipmunks, to possums, weasels and mice.
Jays, woodpeckers, warblers and lots of other birds can take advantage of the potential habitat and food source that the dead hedge or brush pile affords them.
Adding to the beauty and usefulness of the dead hedge, is the fact it is free to anyone who wants to take the time to put it together.
Another benefit of the dead hedge/fence is that it does not need to go together in one season –although if you had enough material it certainly could be built in a single season. It’s probably better to think of a dead hedge as a long-term project that can be added to on a yearly basis both vertically and horizontally until you get the hedge to a point where you are satisfied. From that point, simply add to it with your annual pruned branches or garden waste.
Your backyard wildlife will thank you.


Exploring the woodland garden: Creeping phlox explodes with colour
Early May in the woodland garden brings with it a rush of new birds from warblers to orioles and hummingbirds. In addition creeping phlox is beginning to put on its spring show in our front garden.

The Baltimore Orioles arrived this week in great numbers. at one point we had five males and one female working our feeders. As soon as I saw them appear, I brought out the orange slices and grape jelly. I’m hoping some of the them stick around and raise a family or two. This one came quite close and allowed me to capture it just before it flew down to a feeder.
It’s May 5th and the Orioles and hummingbirds are back in town
Every spring I look forward to the explosion of colour our creeping phlox provides in our front garden.
In fact, it is the introduction to our garden – the first plant you come across as you approach from the street. I like to let it go wild and weave in an out of the river rocks and boulders across the front. It even cascades over the side of the boulders along our driveway and creates a colourful vignette for a week or two.
This is a native plant that deserves a place in every garden. It’s an early source of food for pollinators and welcomes spring like no other groundcover can. It’s best to treat it like a ground cover and let it run through the garden, around plants, rocks and tree stumps.
It’s well behaved, yet can fill out a space in a relatively short period of time – a couple of seasons and your small patch has doubled or tripled in size.

The early stages of creeping phlox in the front garden. Within a few days it will me a mass of purple flowers and remain like that for a few weeks before becoming a green mat of low-growing highly textured foliage.
In my opinion, trying to grow it in a small clump like many traditional perennials just doesn’t do it the justice it deserves. This beautiful plant commands attention in the spring while in flower, but lays back in summer to form a lovely moss-like low growing, highly textured ground cover that makes the perfect backdrop for your summer-flowering plants.
• For a more detailed post on creeping phlox and other great substitutes for moss in the woodland garden, be sure to check out my earlier post here.

Many years ago I removed all the grass in the front of our home and replaced it with a number of ground covers from ornamental grasses (see Japanese forest grass top left) natives like Bloodroot, trilliums, Solomon’s seal and a variety of ferns as well as non-natives including pachysandra and epimediums that can be seen in the foreground. Large hosta plants also grow close to the house but are often eaten by the local deer population.
Of course, the creeping phlox isn’t the only plant making an appearance as April gives way to May.
Our woodland understory trees – serviceberries, Eastern Redbuds and pin cherries – are just starting to bud out, and with them have come the birds. I’m looking out the window and seeing five Baltimore Orioles working the feeders stocked with oranges and jelly. The hummingbirds have returned and my Merlin app tells me a variety of warblers are working their way through the upper tree story. They are joining our regulars – juncos, cardinals, chickadees, blue jays, woodpeckers, nuthatches, various sparrows, goldfinches and wrens.
• For my full post on serviceberries click here.
• For my earlier post on three of the best Carolinian forest trees including the Eastern Redbud click here.

Visitors to our back gardenThe entrance into our back are greeted by this friendly little Jinsu who sits among a combination of ground covers including hosta, ferns Solomon’s seal, trilliums and wild geranium just to name a few. An alternate dogwood (Pagoda Dogwood) is just beginning to wake up from it’s winter sleep.
if you look closely in different parts of the yard, you’ll see the native columbines just getting ready to offer their lovely little blooms to the hummingbirds and other insects.
The bleeding hearts too – a photographers’ dream plant – are just starting to bloom alongside trilliums, Solomon’s seal and the May Apple.
Of course, the various hosta and ferns are a few weeks away from putting on a show. Each day they reveal just a little more of what’s to come.
Tick problems and remedies
Unfortunately, all this excitement brings with it a dose of reality in the form of an epidemic of ticks.
These things appear to be everywhere this year.
They are in their nymph stage and are extremely difficult to see. Our dog, Colby, has to be kept on the patio to keep the ticks off him and we are having to take extra precaution every time we wander into the garden.
We have never experienced a tick infestation like we have this year. Earlier this week, I spread 12 Thermacell Tick Control Tubes (Amazon link) throughout the property, but apparently they take continued use over a full season or two to really knock back the tick population.
I’m sure they will have an immediate affect, but it may not be enough to knock back the numbers sufficiently this year to make a huge difference.
Ticks, as most people know, can be dangerous and are capable of transmitting diseases like Lyme disease. Here is a link from the Lyme disease organization on repellents to keep ticks off your body when hiking or working in areas where ticks are found.
The concept of the Tick Control Tubes is actually fascinating as they target ticks through a host carrier like mice and chipmunks.

Controlling ticks
I don’t expect the Thermacell Tick Control Tubes to work miracles, I’m just hoping they can reduce the number of ticks to more manageable numbers. Reading comments from users suggest that they can have immediate results but are best used over a number of years. This is the first year I will be using them but will report back in the future on the results.
The general concept is that the mice and chipmunks take the cotton out of the tubes to use as bedding. When the ticks are carried down to their lairs, they are killed by the active ingredient Permethrin actually extracted from chrysanthemums.
So far this spring, we have had to remove three ticks that have latched on to us. We used a special tick removal tool to take them off, and several more were discovered before they had a chance to dig in. For more information on Tick Removal Tools check out this Amazon link. I highly recommend having one of these tools available even if you do not have a tick problem. These inexpensive devices are vital if and when you discover a tick has burrowed into your skin. Without these tools, the ticks can be tricky to remove.
Please take a moment to check out my earlier post on dealing with ticks in the woodland garden. I have updated the original post to include more information.


Exploring the woodland garden: The week of epimediums
Week two at the end of April in the spring woodland garden introduces the world of epimediums, trilliums, ferns and more.

A delicate grouping of yellow epimedium growing in our front garden against a large boulder.
Week Two
Barrenwort/Epimedium takes centre stage
It’s the end of April and Epimediums are stealing the spotlight in the woodland garden.
I know – not native – but they are a great source of nectar for wildlife, and boy are they a lovely addition to the early spring woodland garden. I have two varieties (there are hundreds). Their lovely yellow and rose blooms standing on thin stems and dancing in the wind give the early spring woodland garden an ethereal feel.
We have clumps planted both in the back and front gardens where they are spreading nicely.
For my complete post on Epimediums click here.
These early spring bloomers are great for dry-shade and splitting the clumps is the perfect way to spread their joy around the garden. Although the flowers are a welcome addition in spring, it’s their foliage that makes these plants so desirable. Not unlike hostas, the lovely foliage provides the real interest throughout the gardening season. Spring, however, is the time to enjoy the flowers.
The delicate blossoms of epimedium rubrum (barrenwort) along with the spring green foliage is a welcoming sight after a long winter.

This clump of rubrum epimedium stand out against this mossy rock in the front Japanese-style garden. Notice the lovely moss and lichen growing on the rock. Moss is an important part of our woodland garden and grows happily on rocks, paving stones, on the soil and anywhere else it can get a grip.
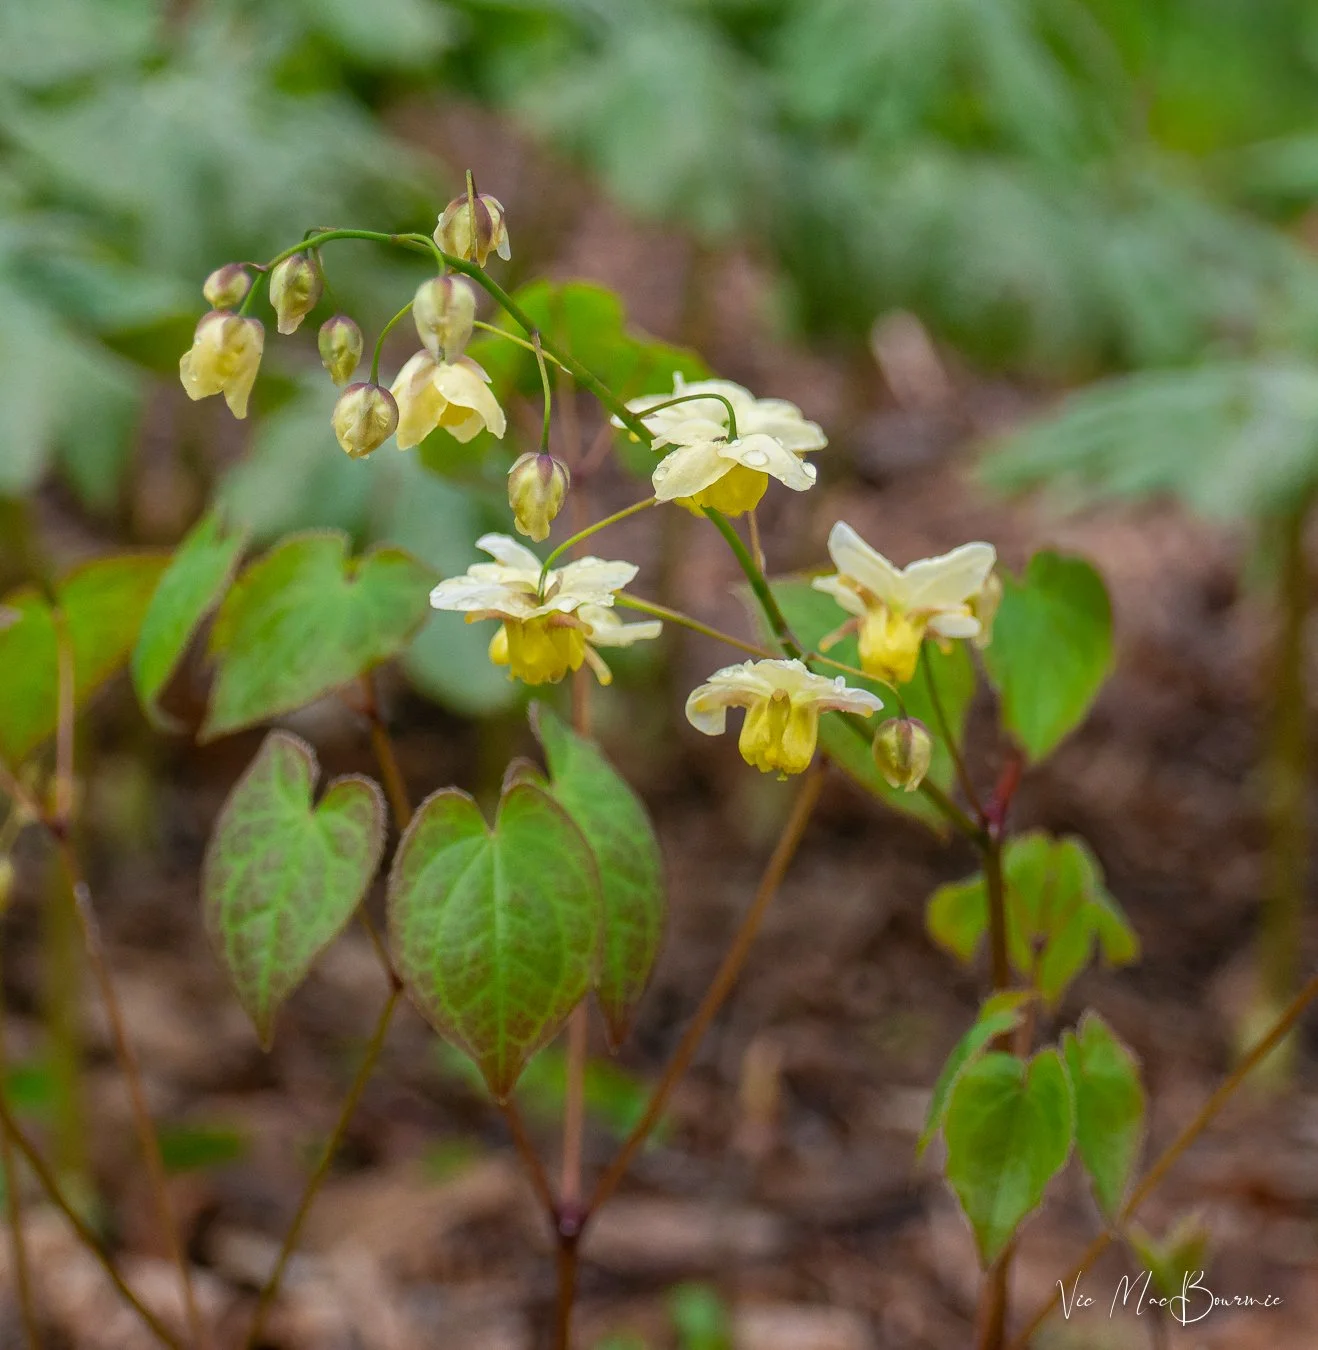
Joining the Epimediums at this time in the woodland garden are native trilliums that bloomed this week, and the sudden emergence of Solomon’s Seal stems just waiting to unfurl.
Moss and moss-like ground covers should be an important part of any woodland garden. For more on growing moss and moss-like ground covers, check out my earlier post here.
In other parts of the garden, ostrich ferns have begun to unfurl their soon-to-be massive fronds, while the more delicate maidenhairs reveal themselves in much more subtle ways. violets are everywhere and forget-me-nots are beginning to make their presence known not by their flowers but certainly by their foliage.
Everywhere, the spring greens are lighting up the woodland and nothing is a more welcome sight than our trio of clump birch trees that I like to refer to as my mini-birch grove. They bring a lovely view outside our main window in the kitchen and allow me to look out into a sea of green interrupted only by the birds that flitter about in search of insects. Click here for my earlier post on the mini birch grove.
The full impact of spring is yet to be felt here, but just a few more warm and sunny days and it will burst in all its glory.
Even the birds are brimming with excitement. The Merlin app is telling me there are a huge variety of birds in the yard, including warblers which I have yet to spot while out with the camera. Hopefully, they’s get lower in the trees and allow me to capture their elusive beauty.
Interested in exploring epimediums further, be sure to check out my post here.
The foliage of epimedium, as seen in this image, is what makes the plant desirable throughout the growing season. The veined green leaves rimmed in a delicate red adds year-round interest to the plant replacing the ubiquitous host in many cases.
Still waiting for the hummingbirds and orioles but I am seeing reports of them all around us and our feeders are out a ready to welcome them.
Speaking of birds, I have decided to finally give up our main central bird feeding station in the yard. Actually, our friendly and overweight racoon made the decision easy for me by literally breaking our main pole that holds a variety of feeders.

Colby after running into a concrete planter in pursuit of a chipmunk. We are working hard to teach him not to chase any of the wildlife but there are times where he just can’t help himself. No chipmunks were injured, just Colby.
The pole was probably pushing 25 years old, so the decision to let it go wasn’t difficult. Instead of the single pole, I’ll be moving to individual feeders around the yard. I’m hoping if I use tough feeders, I’ll be able to keep the critters off them for the most part.
Time will tell.
In other excitement in the garden this week, Colby, our very large flat-footed retriever, almost lost his eye after deciding to ignore my strict warnings not to chase the chipmunks. I guess he figured that it was worth the risk to go on the chase of the little chipmunk hanging out at the downed feeding pole. Colby not only missed the chipmunk, but ran into a concrete planter, knocked it over and taking out a chunk of skin and fur under his eye.
Turns out, he is perfectly fine, but it’ll take a couple of weeks to get the fur back. In the meantime he looks like he lost a round with one tough boxer.
Colby is a real handful in the garden and I think the whole wildlife thing is very new to the big guy. For the most part, he Is being very good around the squirrels and chipmunks, just watching them from afar. However, If they get too close to him, I’m thinking he might be a real handful.
It’s important for him to get used to having lots of wildlife around, from rabbits, to deer and everything in between. His prey drive is high, so I’m fearing he will have to stay on a leash with us anytime we are in the back yard.
Here are a few more images of the garden at the end of April.
Native solomon’s seal sprouts prepare to unfurl in the front garden alongside the epimedium and pachysandra groundcovers.
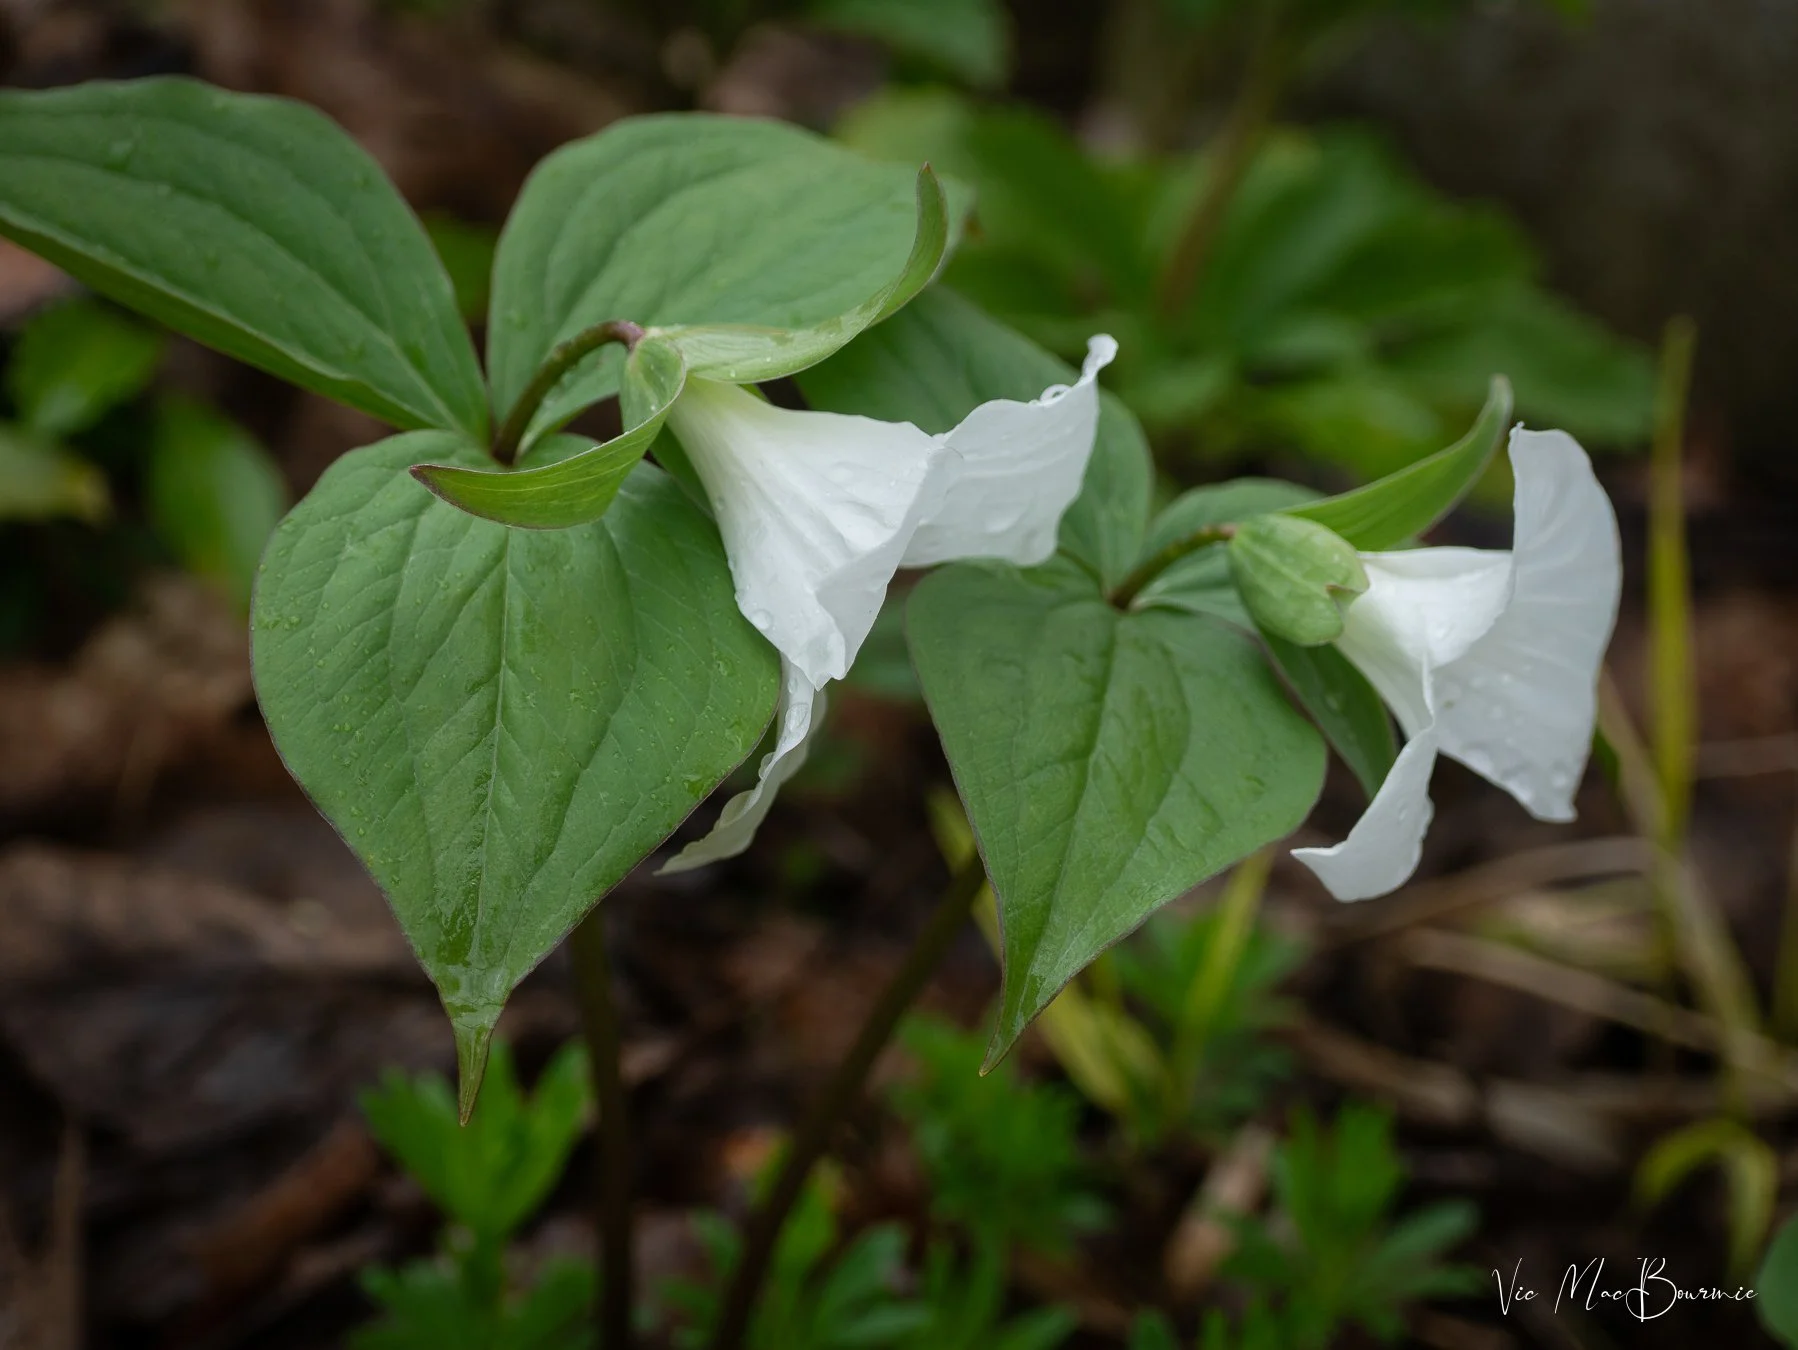
A pair of native white trilliums in bloom in the front garden. Hoping the wildlife give these a chance to bloom before nipping off the flowers.

A native wild ginger plant prepares to bloom in the back woodland garden. I planted this last year as part of a woodland vignette, inspired by last year’s “A walk in the woods” series of articles. with any luck, this plant will spring into a lovely clump.

Heather grows along a rock wall of boulders providing an early-spring nectar source to a host of insects. Notice the leaves th at have been left on the garden. It’s important not to clean up you leaves to make the garden look pristine. In a short time, all the leaves with be buried by plants and literally disappear over the summer. Any leaves that we do clean up are moved to the backyard.


Exploring the backyard spring woodland/wildlife garden
Exploring the early spring woodland wildlife garden with the aim of really seeing the surprises that await us.

Mayapples just beginning to poke out of last year’s fallen leaves. This native ground cover is among the first to emerge and begin shading the forest floor. Eventually they form a large umbrella hiding a small green “apple” that eventually becomes the seeds for future plants. This is a wonderful ground cover that, when happy, will spread prolifically.
Learn to see the small treasures our gardens provide
Part one of a series
In our woodland garden, early spring is certainly not the most picturesque time.
Without the foliage from the ground on up to the heavens, it’s not much more than a vast space of brown leaves and unappealing bare stems. And to make matters worse, it’s open for all to see more or less in it entirety.
It’s a good time to look around and recognize the areas that could use a little help. Maybe an evergreen in that corner to block an ugly view or a small privacy fence to break up the view of your neighbour’s BBQ. Other than that, it’s easy to look aside and yearn for the summer when everything is dense, green and in full bloom.
Anyway, at this time of year, most of us are too busy bringing out chair cushions, garden statues and other garden accoutrements from the shed to really look at the early spring garden.
But, it’s worth a look –and a close one at that.

The very early emergence of our native Hepatica offer a wonderful little surprise when you think nothing is blooming. I planted these last year as part of several small woodland garden vignettes inspired by my woodland walks. The hepatica are tucked in beside a sort of mini-stump garden were I recycled a large downed tree branches as a focal point for native plants.
Listening and observing the music of the garden
I often ask my friends if they still listen to music. When I ask that question, I don’t mean have the music on in the background while they are surfing the net or getting household chores done. I mean really listen like we did as kids when we got home with a new piece of vinyl or the latest CD. Remember when we would darken the room, close our eyes, drop the needle, clear our minds and really listen to the music.
Those days are slowly disappearing. Most of us are too busy to devote that kind of time to a single album let alone a song or two.
Seeing – and I mean really seeing – is also slowly disappearing from our daily routines.
It would be easy to walk by this little vignette and see it primarily as old dead leaves, but the subtle colour of the emerging native foam flower together with the yellow sedge is a reminder of what awaits us later in spring.
So many of us are too busy cleaning up the garden to actually take the time to actually see it. The result is often not only a missed opportunity, but a growing inability to appreciate the smaller things in the garden – the emerging rosettes of our favourite native plants, the tiny leaves of the columbines before they get large enough to flower, the slow unfurling of our ferns.
I am as much at fault as anyone. Like you, I’m always anxiously awaiting the flower to emerge, while overlooking the beauty of the foliage. (For a greater understanding of the role foliage plays in our gardens, check out my posts here and here.)
The serated leaves of a clump of wild geranium or cranesbill greets early spring visitors. soon the lovely mauve flowers will emerge providing early nectar to native bees. This relatively low-grown ground cover spreads nicely in the garden and is well behaved. Lifting clumps and spreading them in other parts of the garden is a worthwhile spring chore.
Canadian photographer Freeman Patterson, as well as many others, have devoted entire books on learning to see. Seeing requires us to do more than simply opening our eyes to what our gardens offer. I think it requires a more active role on our part. Getting down on our knees, not just to clean an area around our plants, but to appreciate the tiny little worlds and truly experience the garden.
Get up close and personal, take in the earthy smell, listen to the natural sounds – the wind blowing through the trees, the birds, the spring peepers, the bees even those pesky mosquitos.
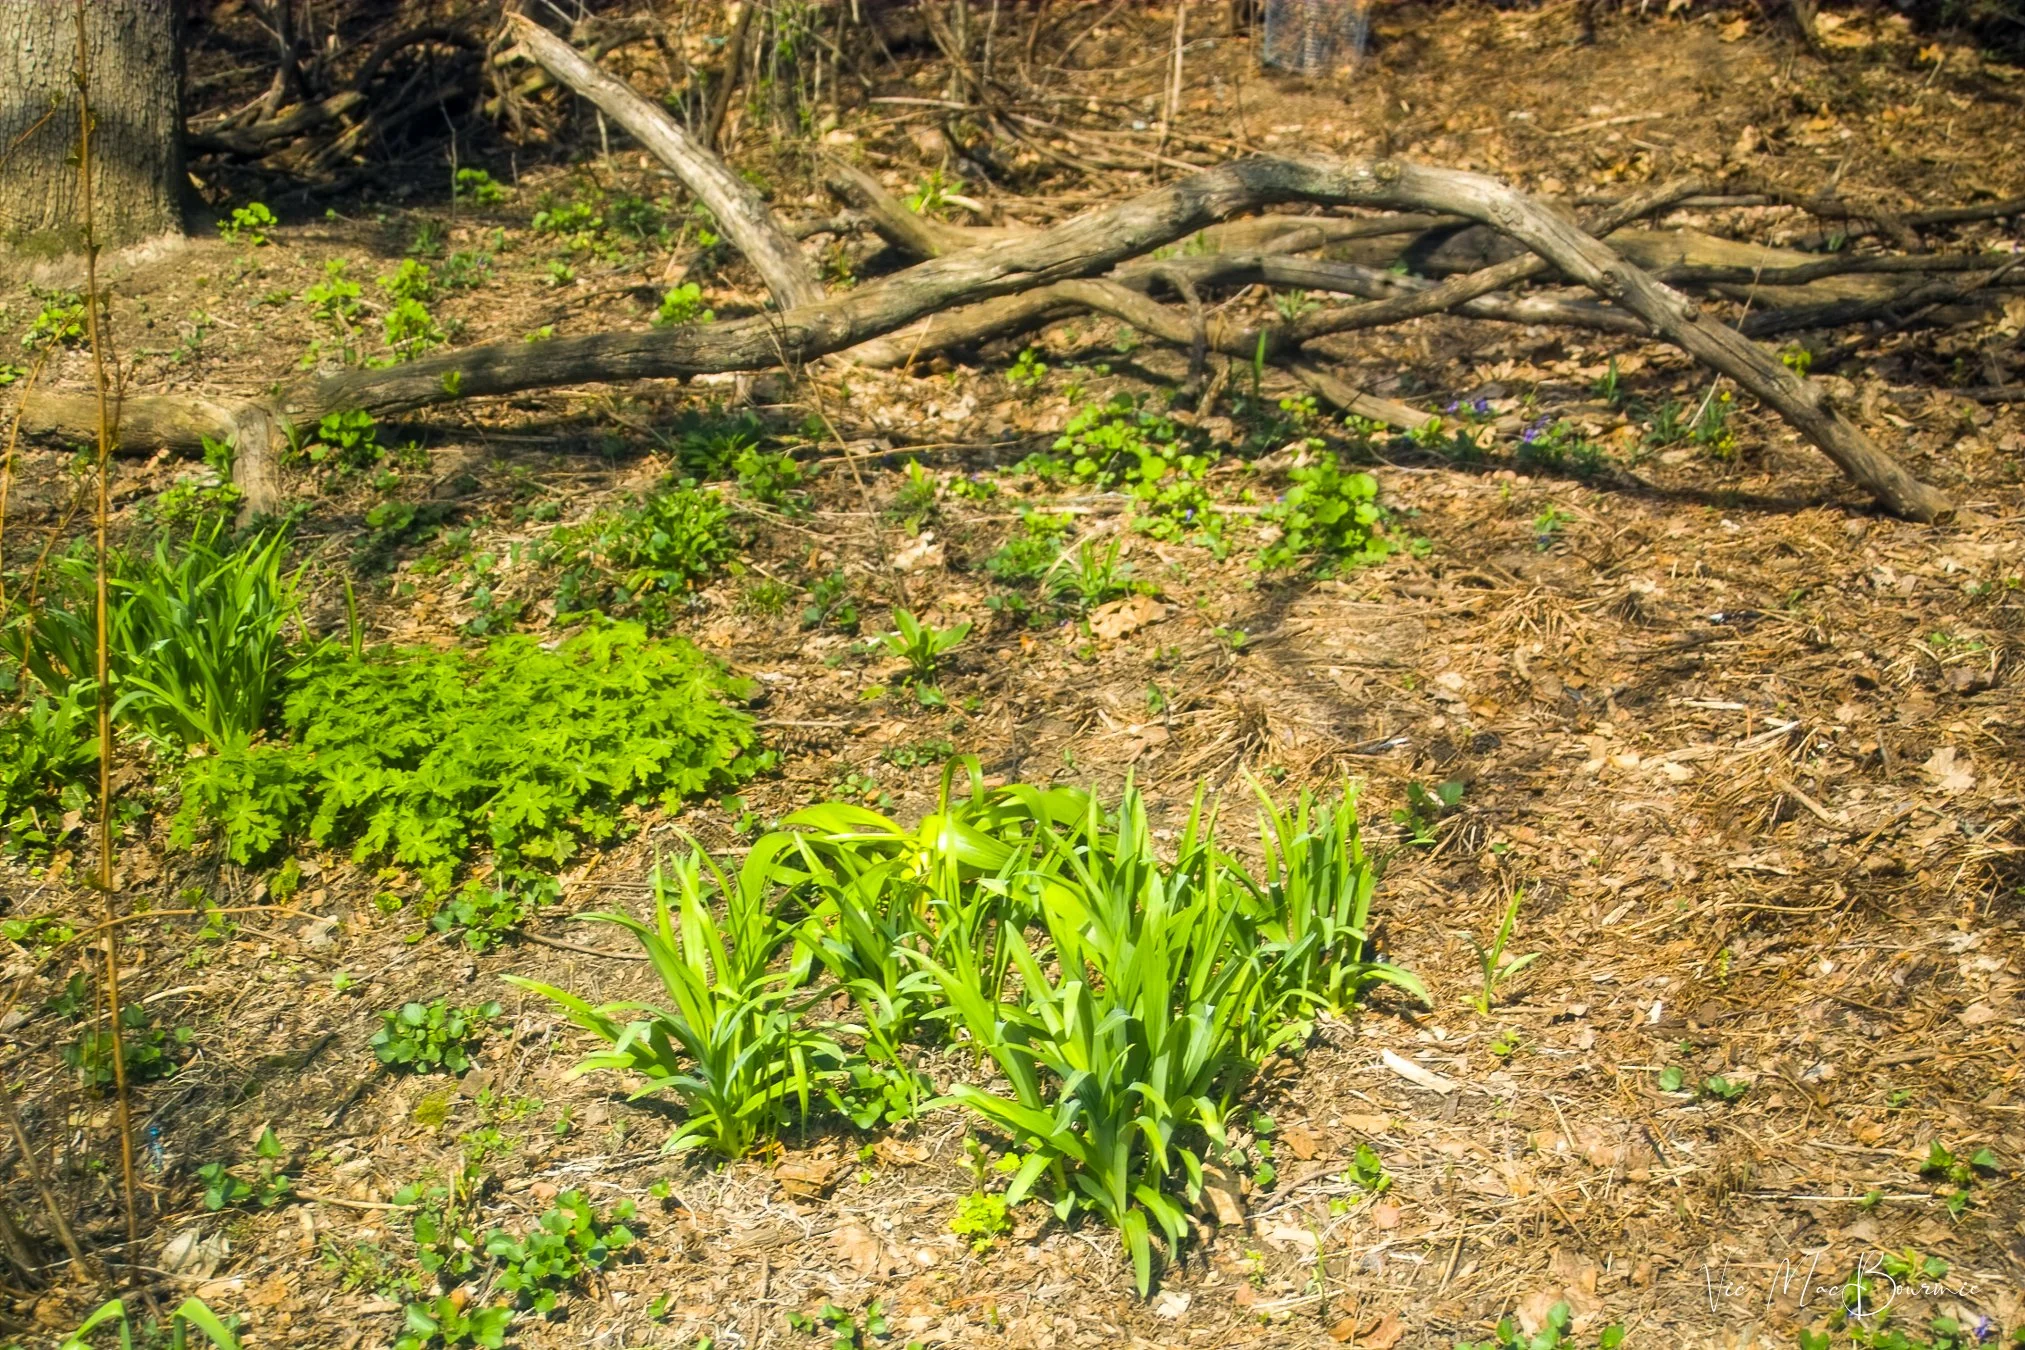
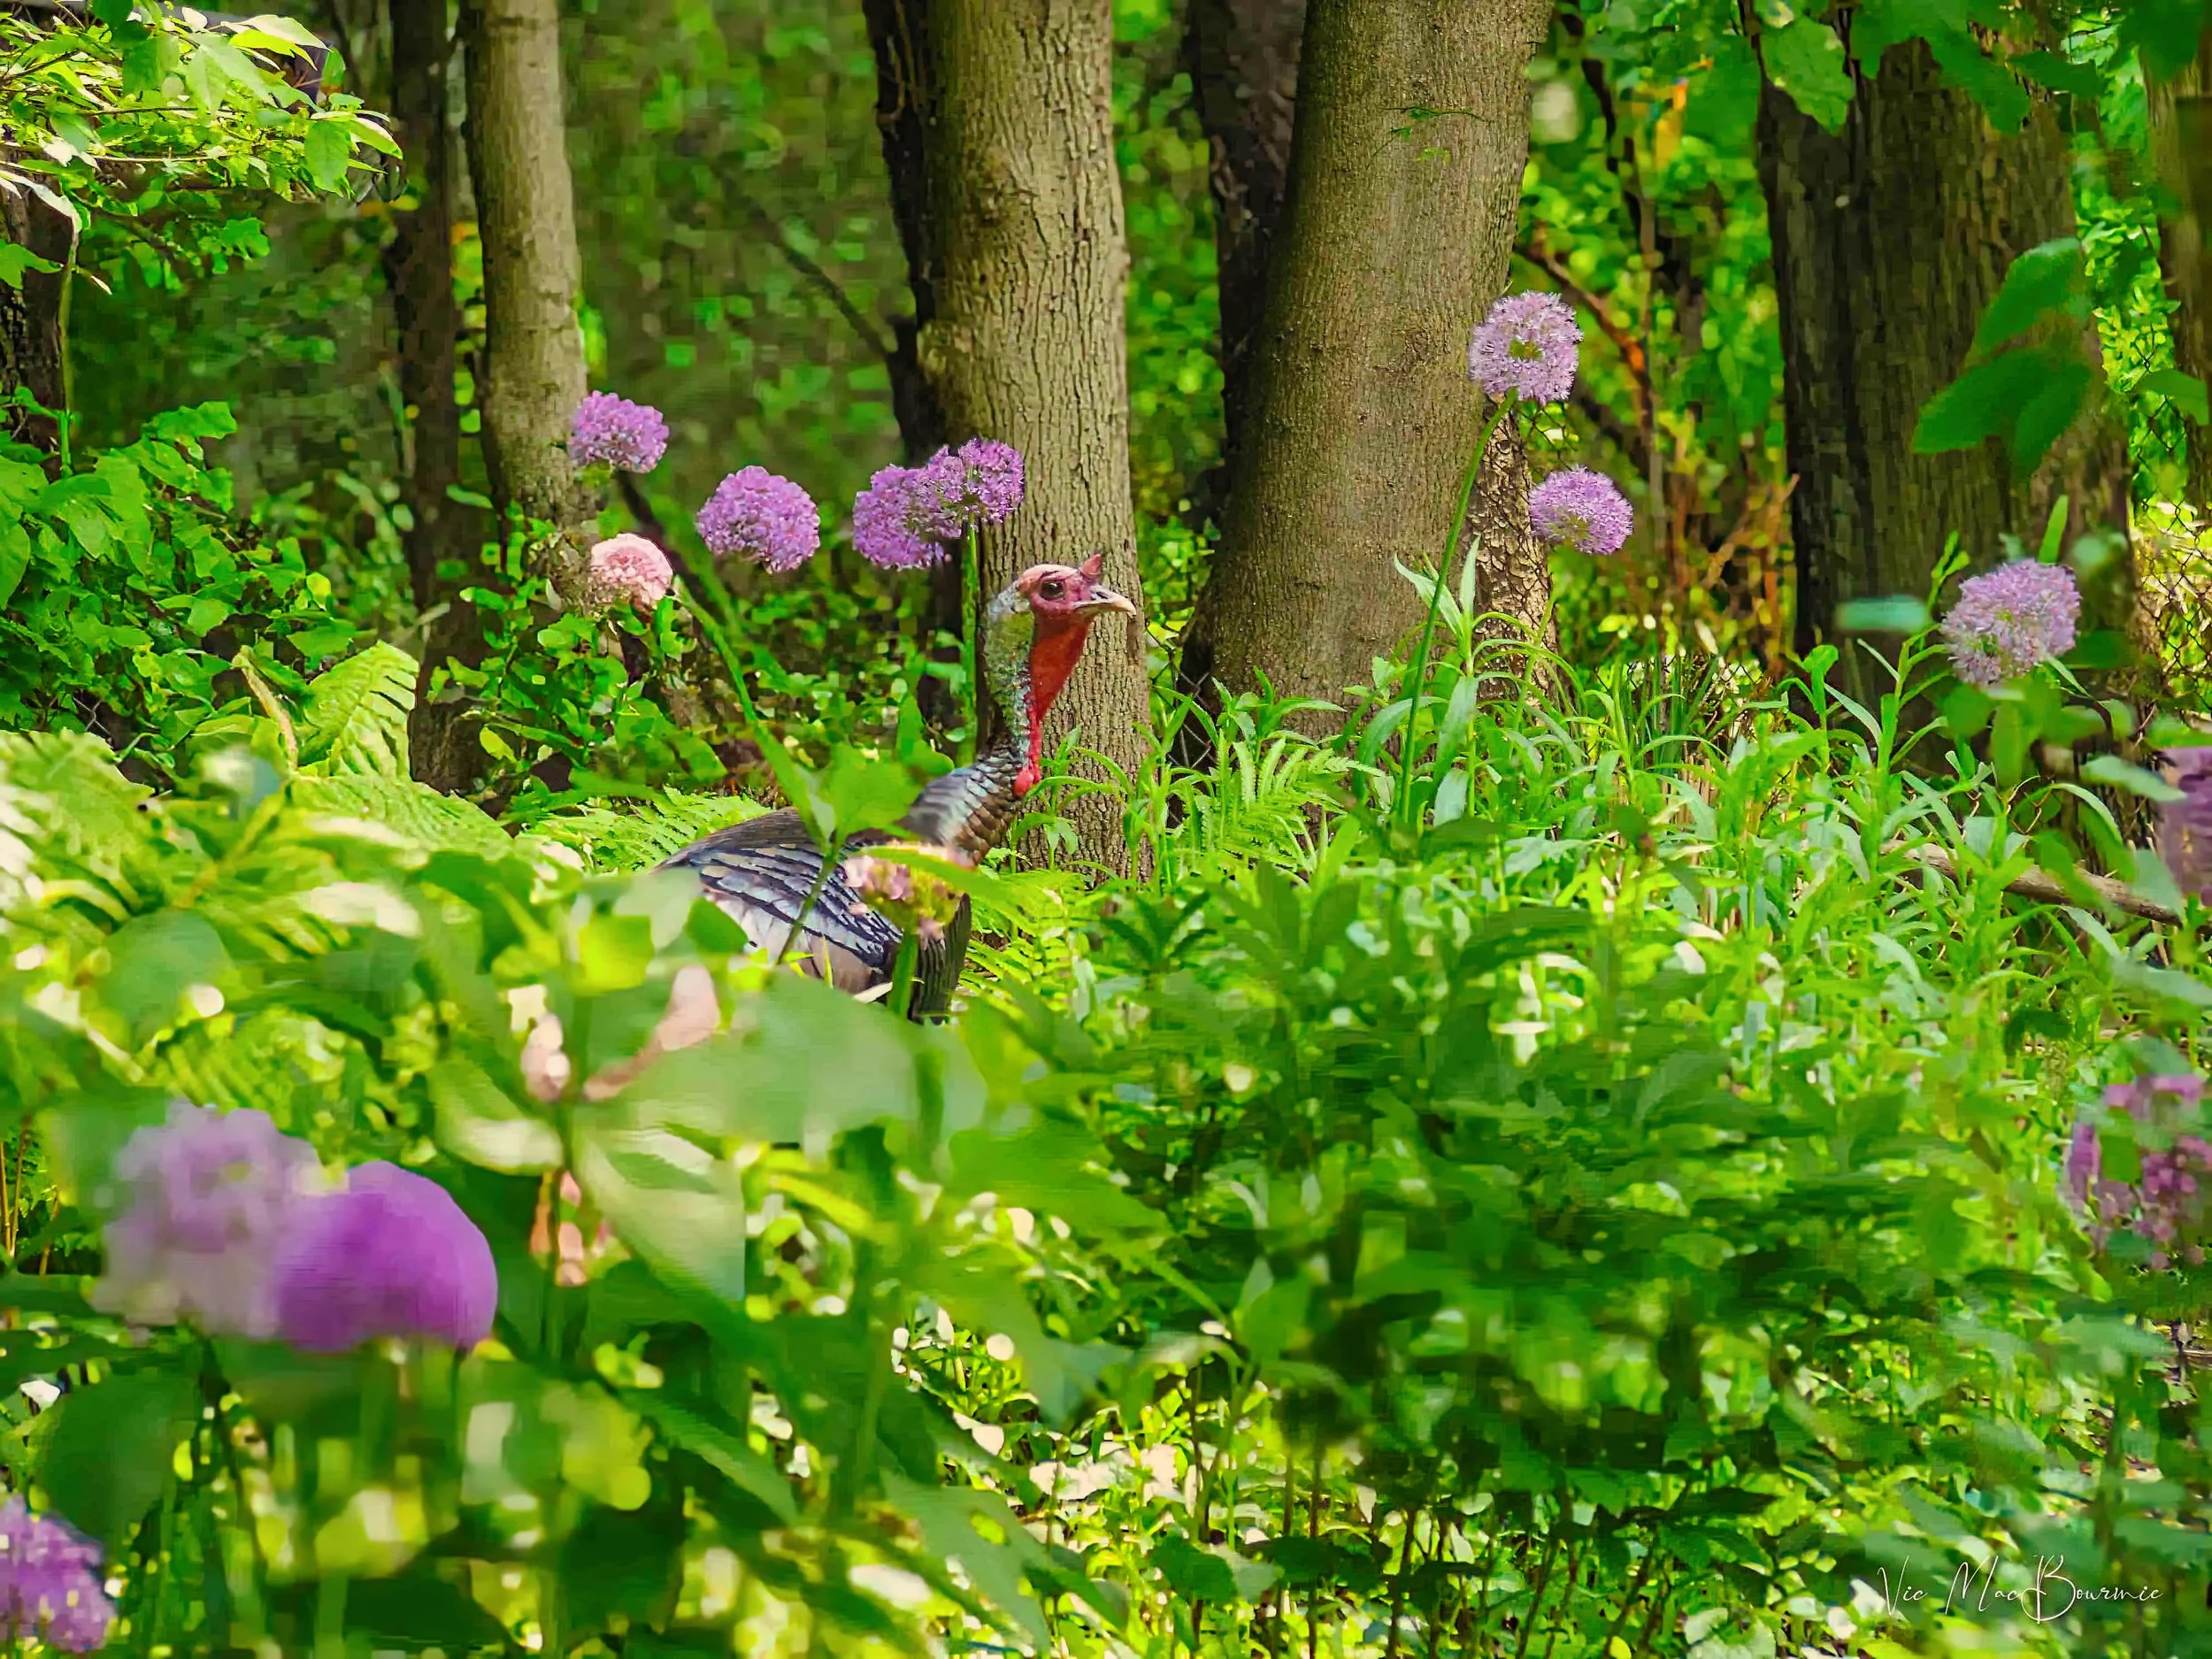
Exposed brown earth, dried up leaves with pockets of emerging greenery are what most of us see at this time of year. But on closer inspection, and a little imagination you might be inspired by the careful placement of the arched branch that serves as a mini highway for chipmunks and red squirrels. Or, the arch of the branch might bring back memories of wild turkeys rooting around the garden like in the picture below. The emerging alliums don’t look very appealing now, but imagine them in full bloom with birds (big and small) flitting about them. Maybe you remember the wild geranium in bloom and covered with native bees.
Seeing – I mean really seeing – can involve all our senses.
Last year, I decided to fully explore the spring woodlands (see: A walk in the woods) around our home. It was an incredibly enjoyable and educational experience wandering through the spring woodlands and watching it emerge over the course of weeks… months. I learned to see the natural woodland in a new way and was inspired to take what I learned and bring vignettes back into our woodland garden.

That same arched branch in the previous image, becomes an interesting piece of woodland garden art as spring rolls into summer. So many times I’ve looked out to the garden and seen birds or chipmunks perched on the curved arch taking in the surroundings. Here, a wild turkey roots around in the back garden.
This year, I plan to experience spring in our own woodland where I’ll explore the art of seeing in the comfort of my own backyard woodland.
If your garden is more traditional, it doesn’t mean you can’t experience many of the same enjoyments and be inspired by the emergence of your garden plants, trees and shrubs.
That ugly piece of back garden (see image above) is transformed later in spring and summer with purple alliums as well as some large backyard birds.
Just make the commitment that this is the year you are going to really begin trying to “see” and fully experience the garden, starting from the ugly brown phase through to summer with its explosion of colour, wildlife and visual fireworks.
Come and join me on this journey in the spring woodland where each week I’ll unveil new surprises both visually and through my, hopefully, inspiring and descriptive accounts of my experiences.
Our backyard birds are getting busy
We start this exploration in late April just as many of the plants emerge. At this time neither the hummingbirds, nor the orioles or warblers have invaded the area but they are very close. Our hummingbird and oriole feeders are out and ready for visitors.
Although many of the migrants are still on their way, our backyard feeders are bursting with birds from goldfinches to blue jays, cardinals, house finches, juncos, chickadees, a host of woodpeckers, sparrows and even a colony of crows that visit the backyard on a regular basis.
The following are just a few images of the birds that are hanging out in the yard at this time of the year.
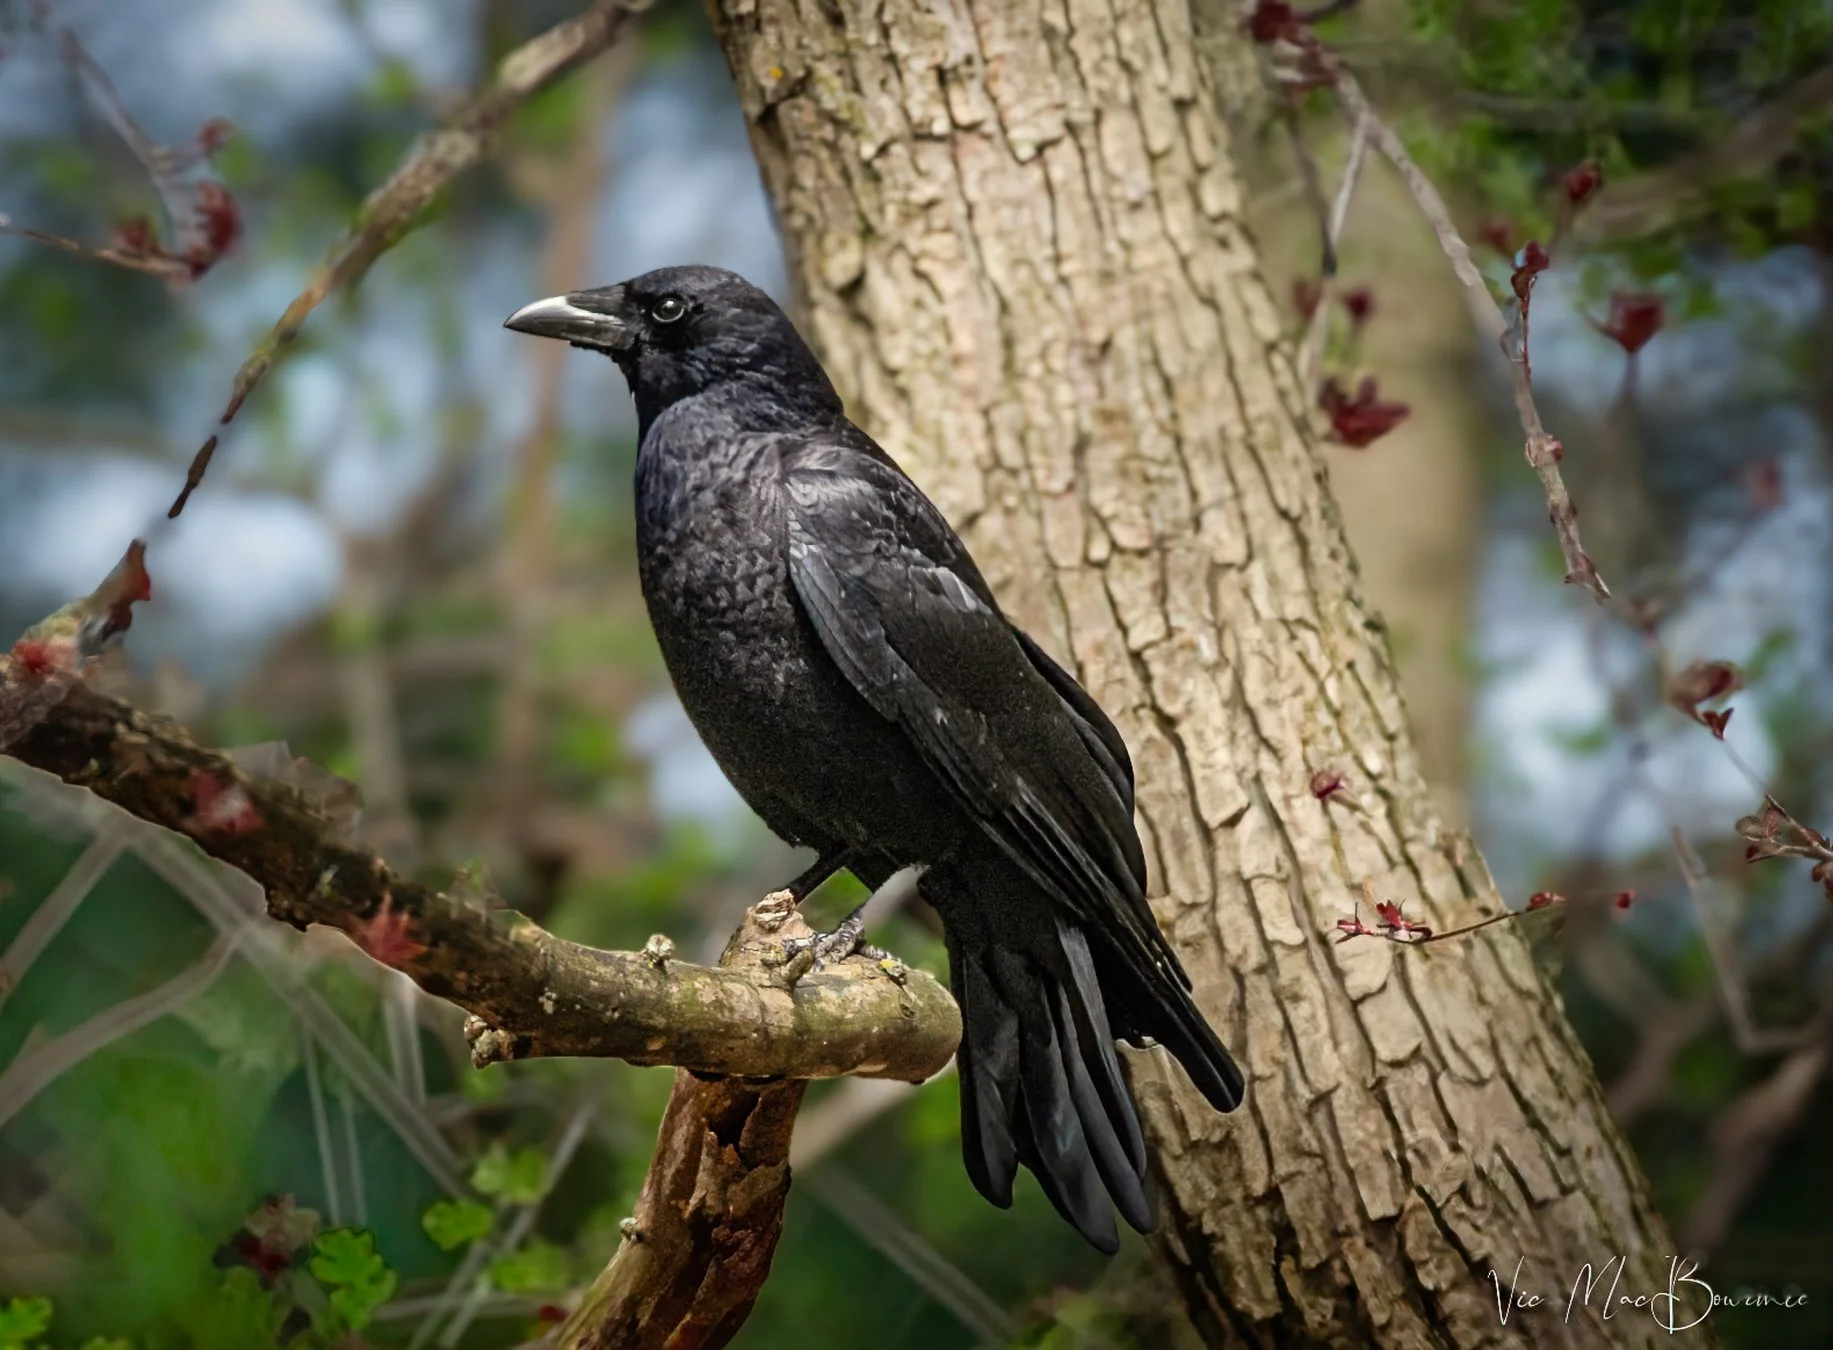
I say it every year that this is the year I am going to befriend our family of crows. This big guy seems like a good place to start.
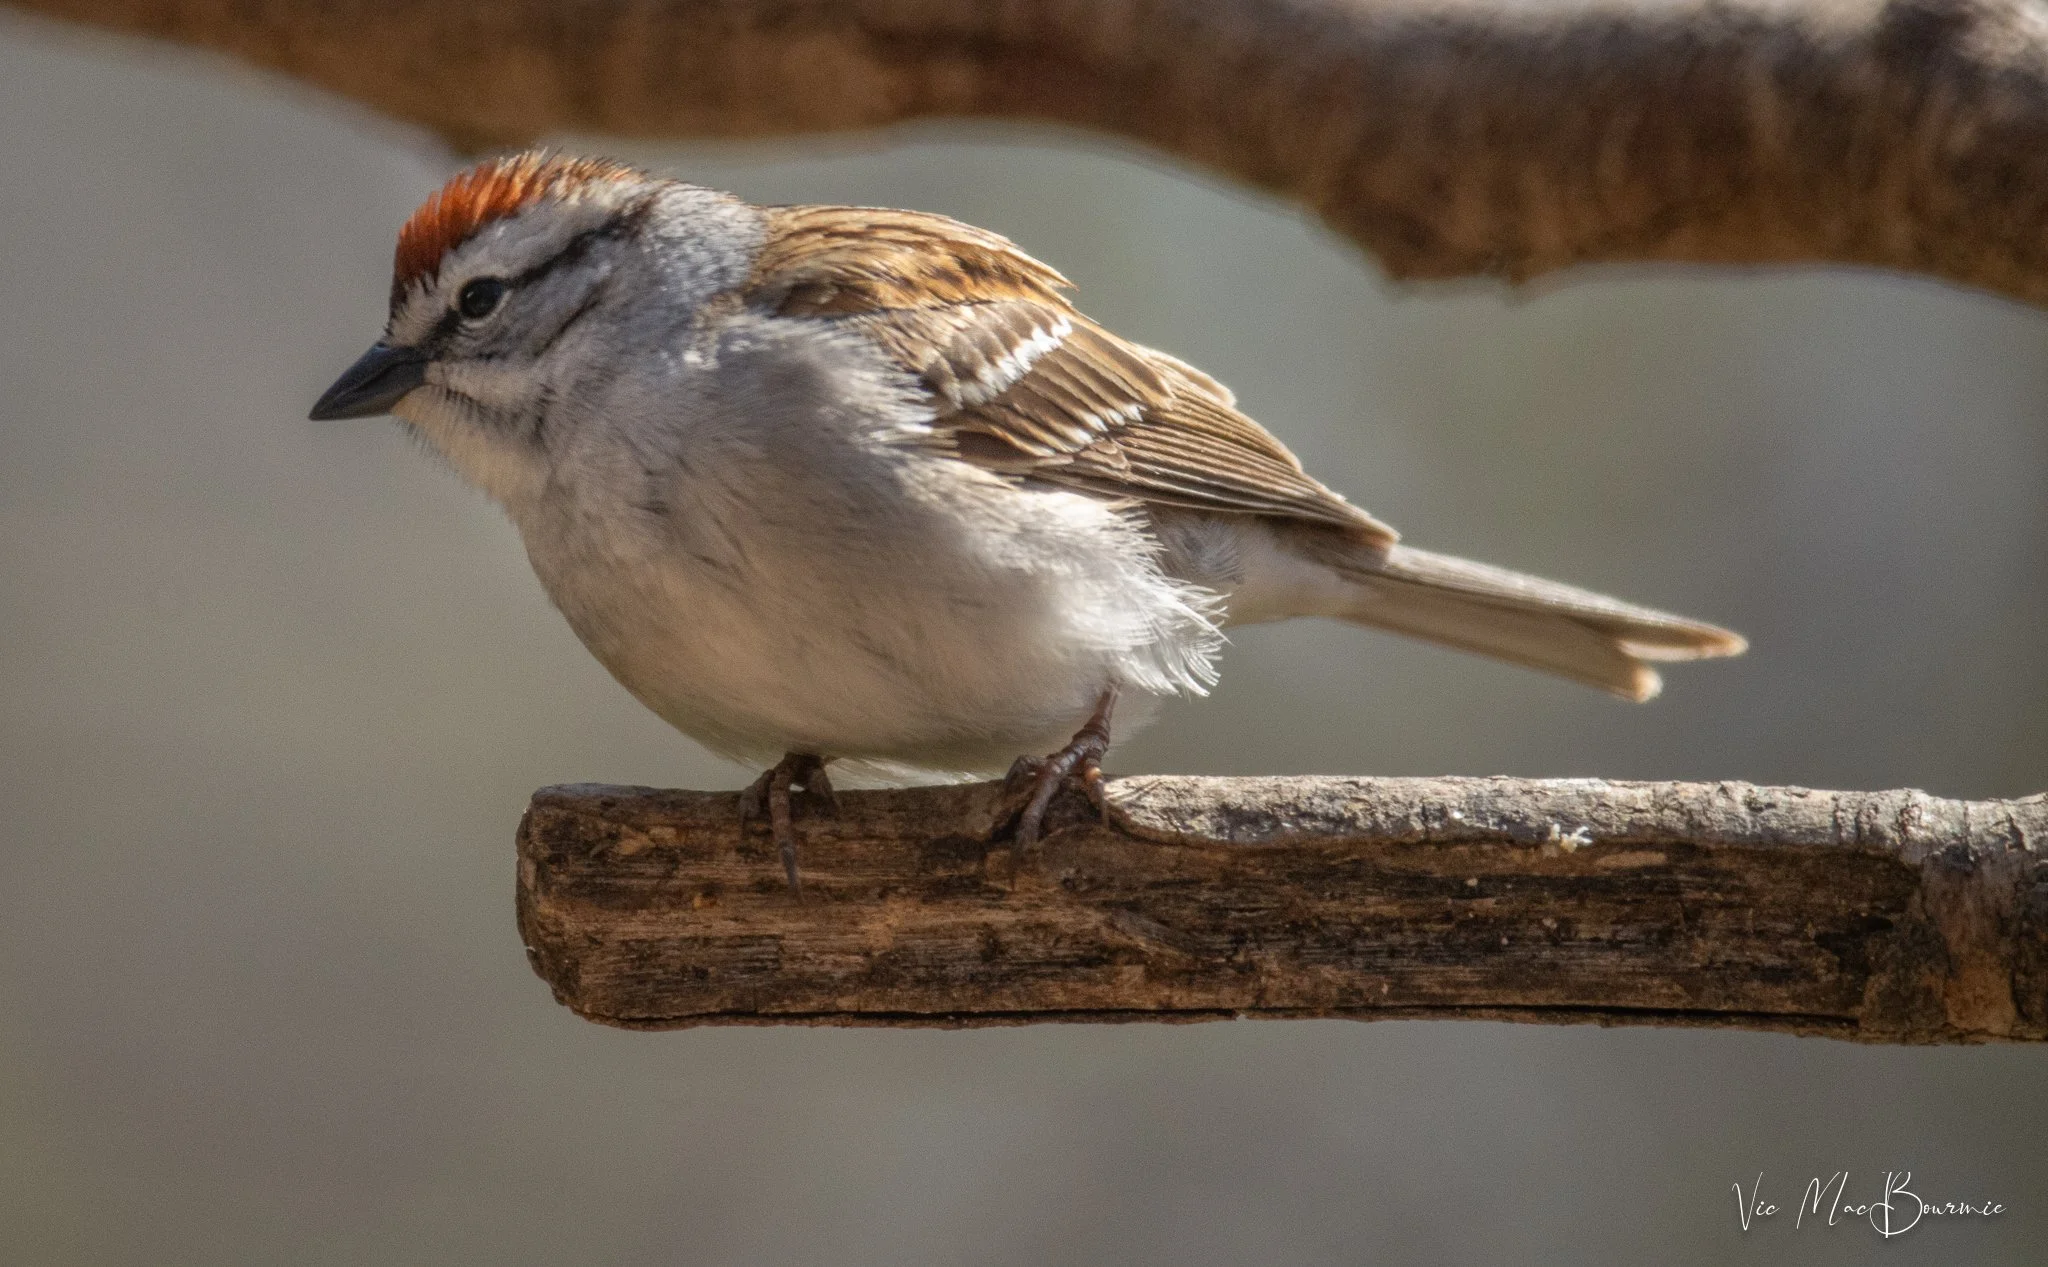
A chipping sparrow hanging out near the bird feeder is always a welcoming site.
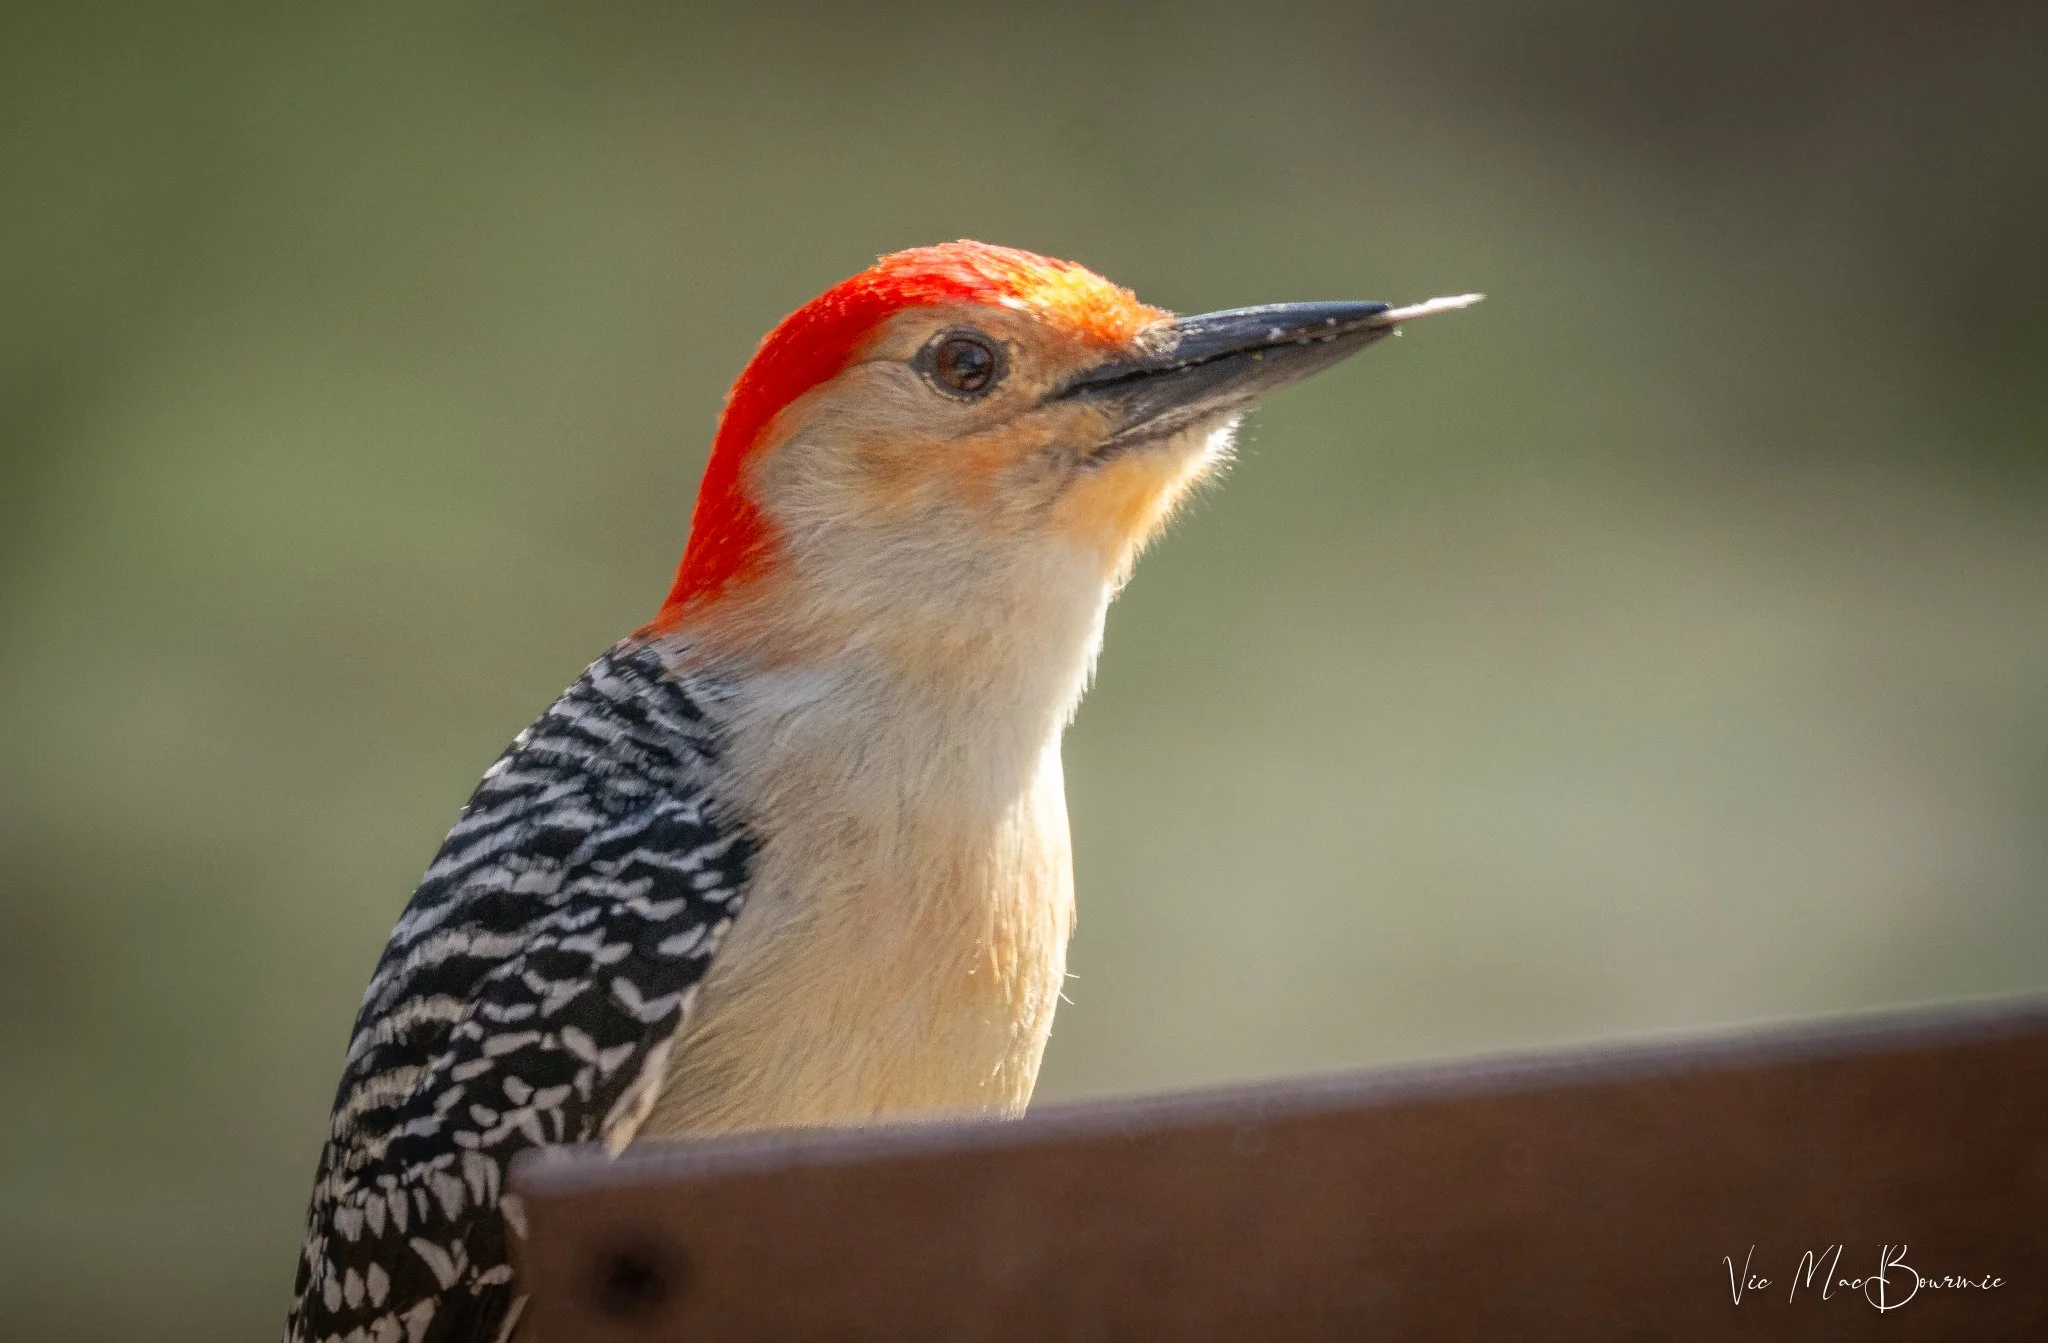
Woodpeckers stick around all winter but are particularly active in spring.
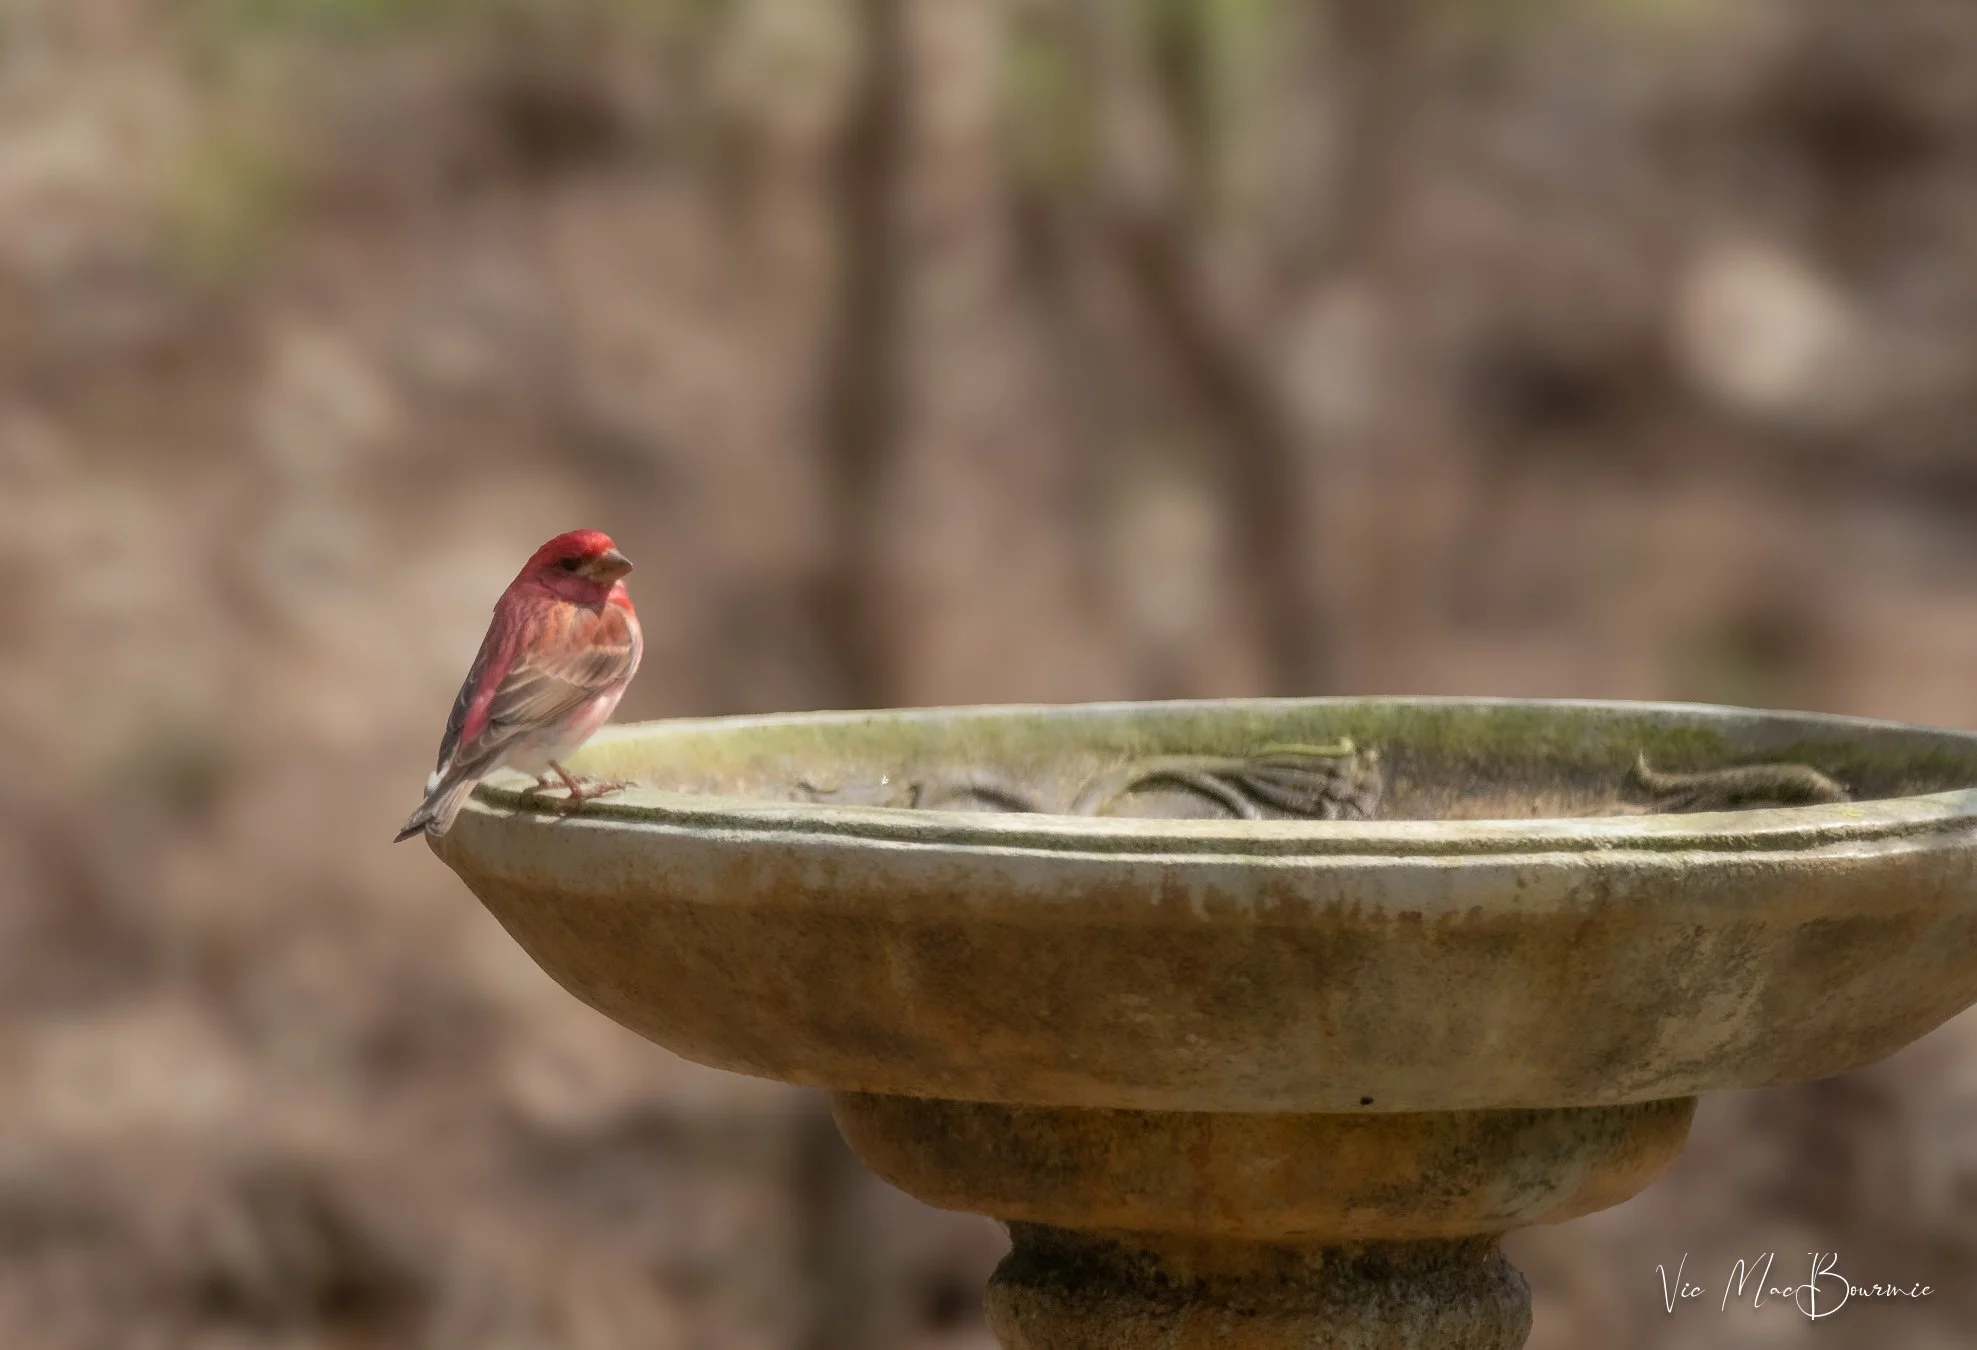
The bird bath is a favourite place for backyard birds in early spring including this lovely purple finch.
Seeing the garden – I mean really seeing the spring garden – can often be expressed not literally but in abstract form. In this ICM (intentional camera movement) photograph, I was able to focus on the white birch trunks without the distractions of green leaves. Later in spring, this image would not be possible because of the foliage that would block the lovely white trunks.
Learning to see different areas of the garden in a more abstract form can be a rewarding artistic experience that forces you to try new ways to use your camera.
If spring in the garden means nothing more to you than the time you have to spend hours in the garden working to get it ready for the “big show,” take a moment to relax, and really see it, experience its hidden beauty, and consider capturing that beauty in a photograph.
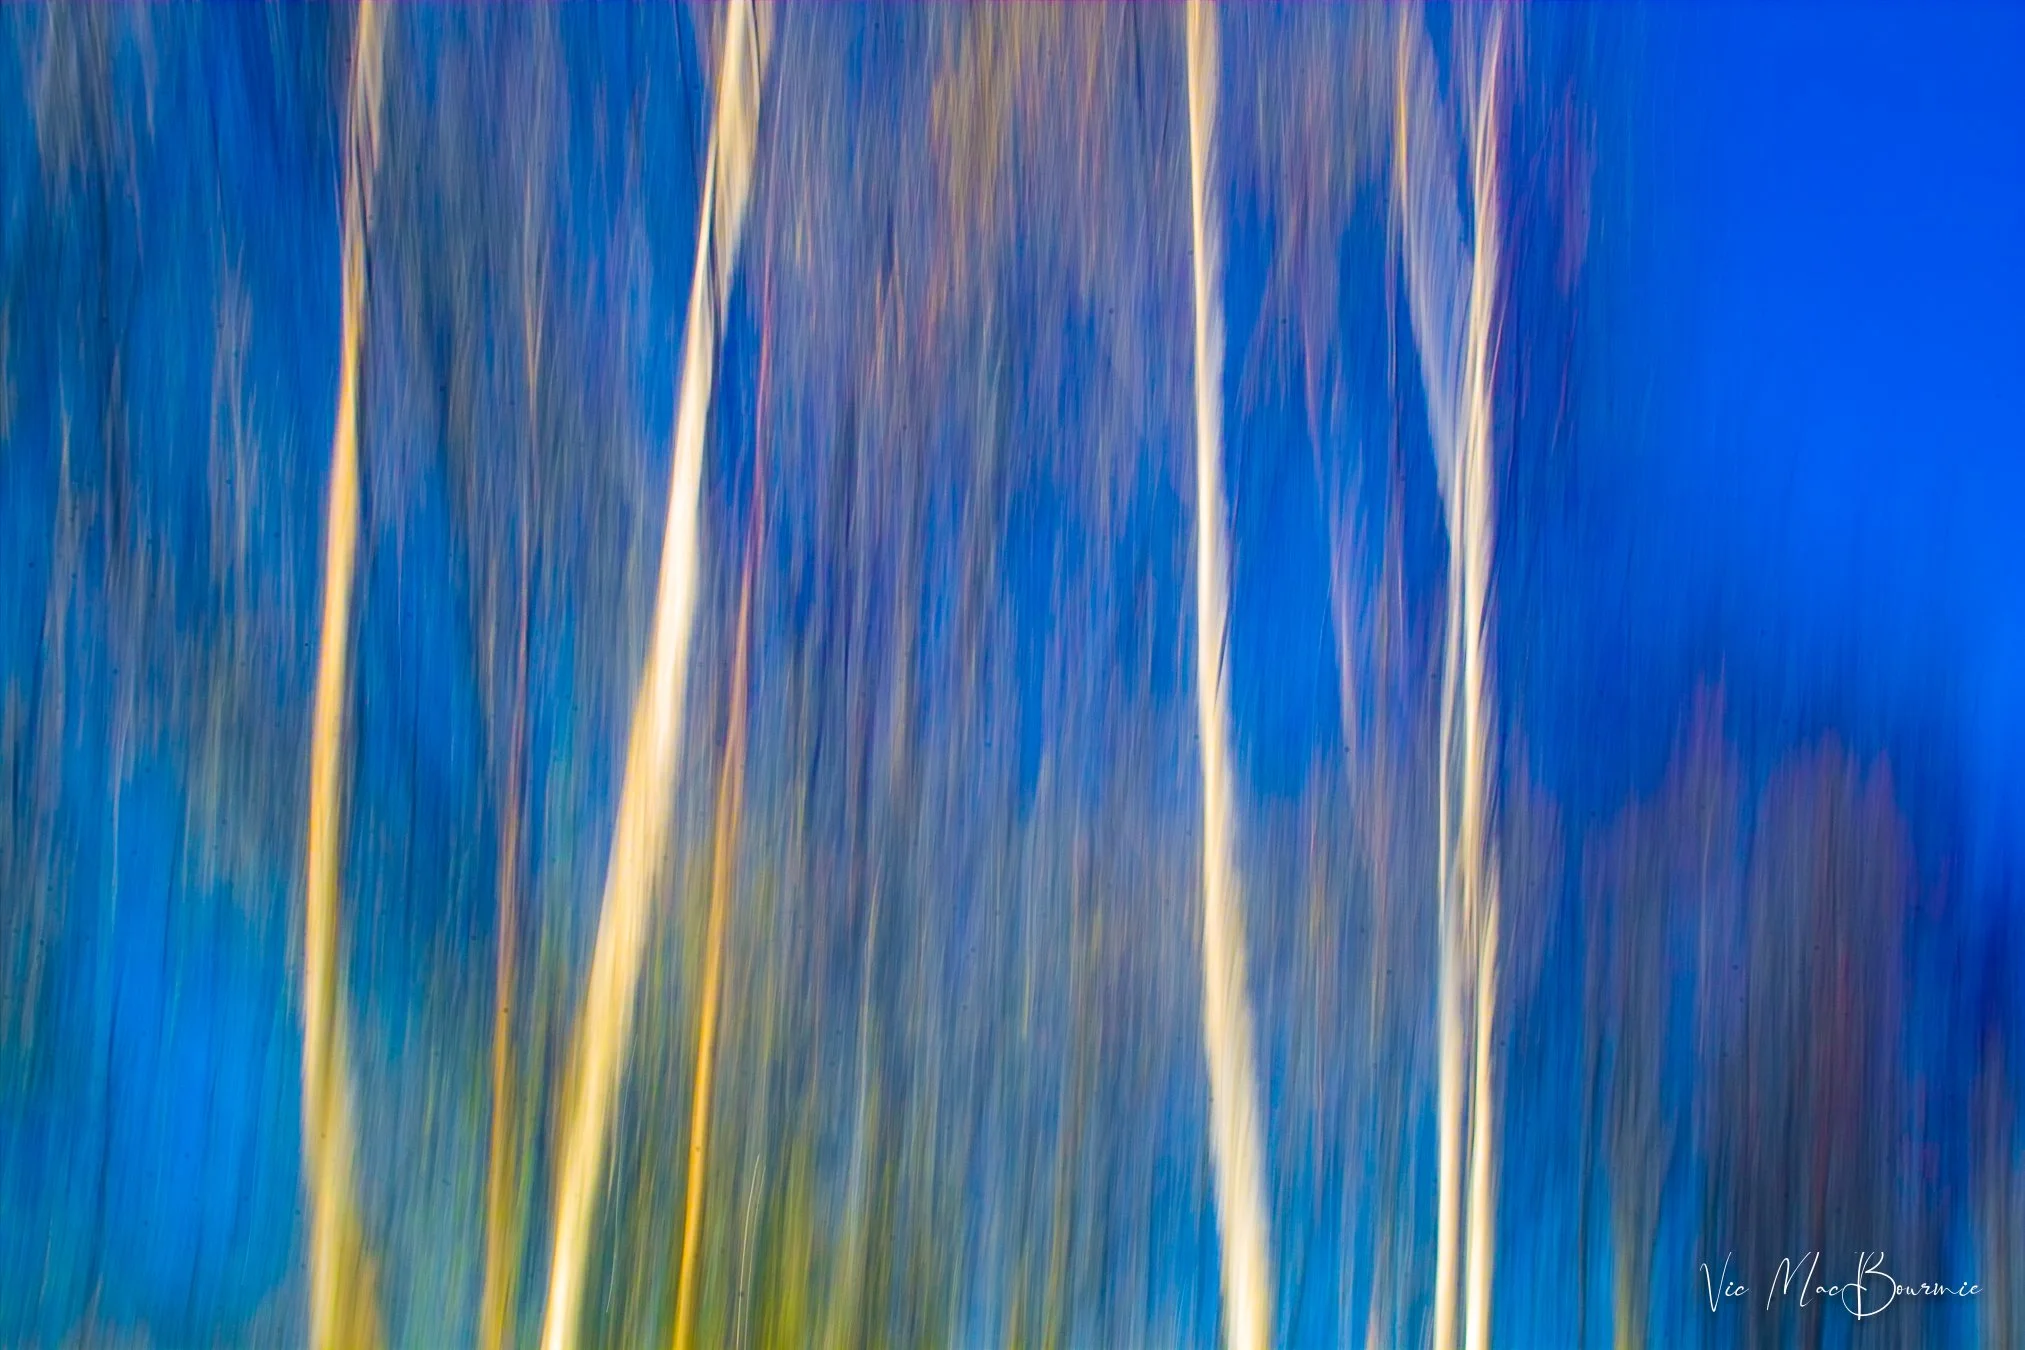
Finally, learning to see in the emerging spring garden can be a visually creative experience. Before the trees green out with leaves, opportunities exist to throw out your preconceived ideas of the garden and truly experience it. This ICM (intentional creative movement) image of our birch tree clumps is an example of what can happen when you let go of traditional ways of seeing.
Luminar Neo turns the focus on beautiful bokeh
Looking to take your garden and wildlife images, even your family portraits to new heights but don’t want to buy expensive equipment? This post is for.

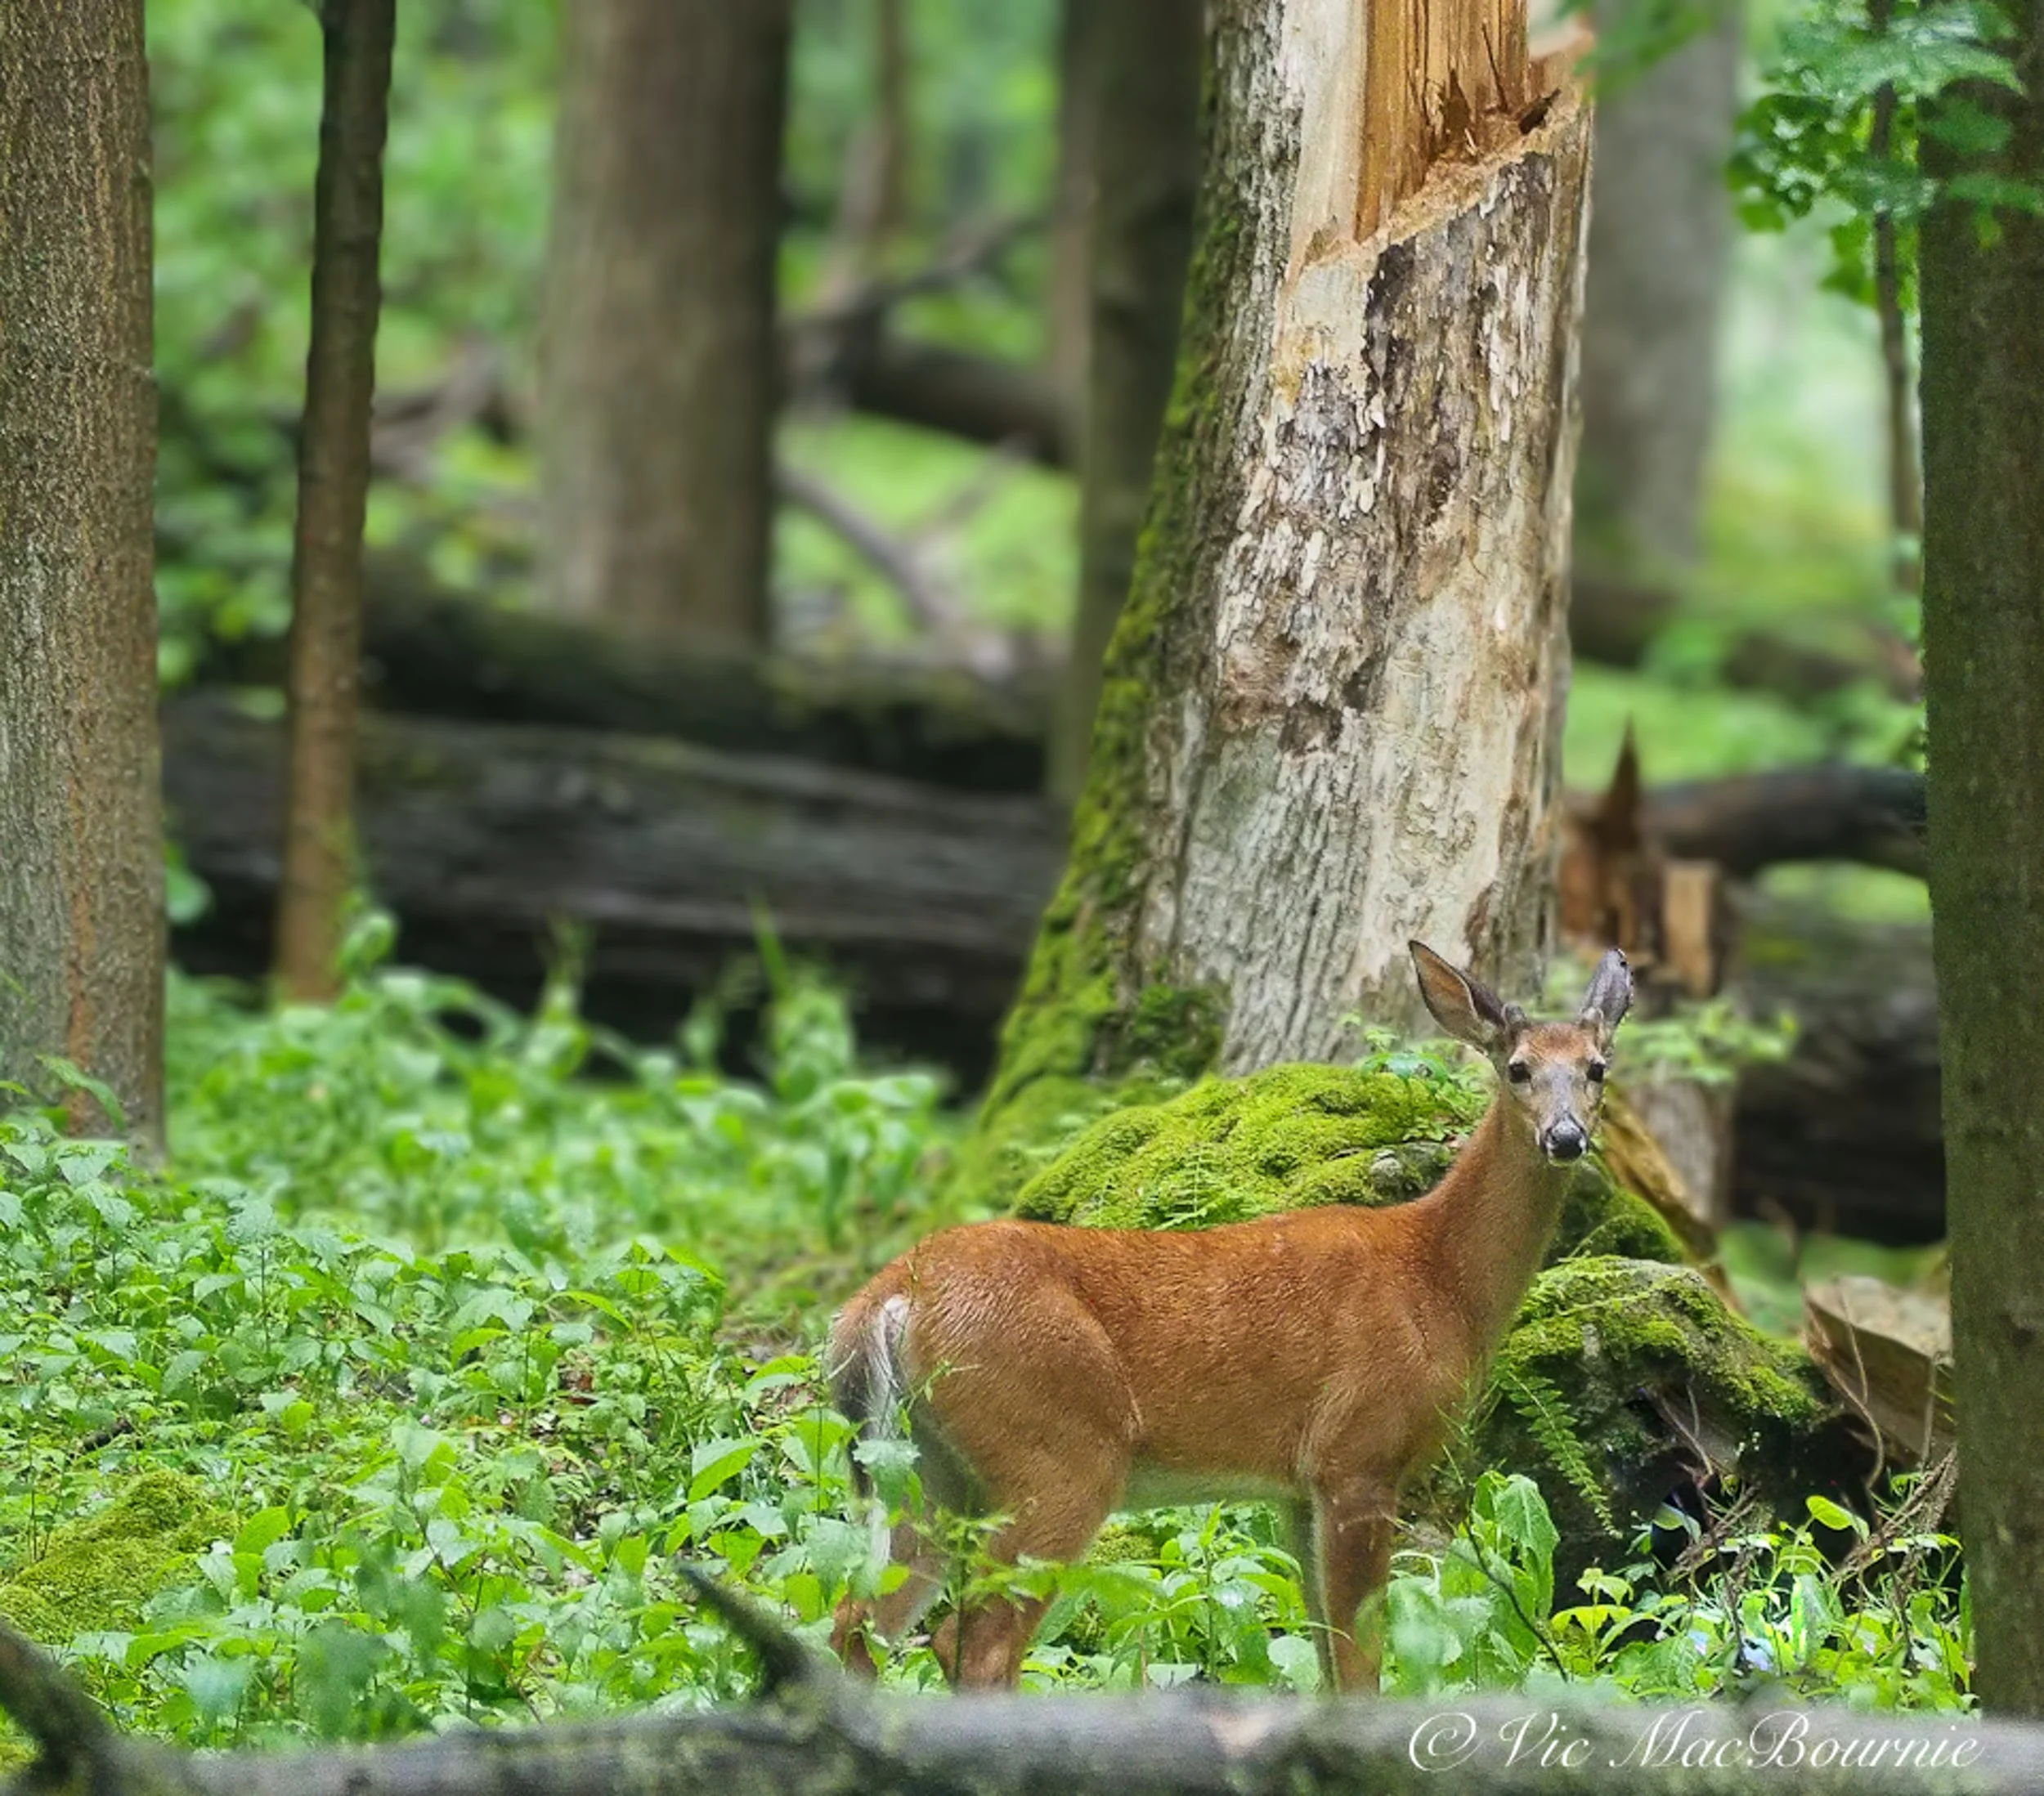
This image of a doe in the woodland was always a nice image, but by softening the background, I was able to draw attention to the deer. By creating a narrow band of focus, the viewers eye is drawn to the deer. A relatively inexpensive Olympus 100-300mm lens was used to capture the image but the narrow depth of field suggests a very fast and expensive f2.8 lens was used.
Celebrate spring with these outstanding new features from Luminar Neo
The difference between a very expensive lens and the inexpensive consumer version often comes down to which lens can render a softer, more pleasing out-of-focus background.
Fast, expensive lenses deliver on both sharpness when it comes to the subject as well as the ability to soften the background translating into what most photographers describe as beautiful bokeh.
Those smart phone images that have become so common on social media often lack any real bokeh. Instead, everything is sharp from front to back. The same can be true for most point-and-shoot camera results. That can work in many cases, but if you have always wondered why more experienced photographers’ images always have a beautiful look to them, chances are the bokeh of their lenses plays a significant role.
(If you are interested in checking out or purchasing Luminar Neo, please consider using my discount code here.)

In this image both the “Bokeh” module and the “Light depth” module were combined to create depth both with a soft out-of-focus background as well as warm lighting focussed on the main ornamental grasses in the front.
In this “before” image you can clearly see how the background is sharp and a little distracting. In addition, the foreground grasses lighting is rather dull compared to the grasses in the above image that were warmed and lightened in the light depth module in Luminar Neo.
In the past, not having access to fast and often expensive lenses, means those beautiful, soft-background images were unattainable.
Luminar Neo’s new spring feature package has changed all this.
From portraits to landscapes, beautiful bokeh can change everything
Now, Luminar Neo can turn your smartphone and inexpensive kit-zoom photos into images with a beautifully soft creamy bokeh. Even better, you have complete control over the bokeh effect in your images.
Originally released as part of its “Portrait tools”, Luminar Neo’s Bokeh module fits just as easily in a nature, wildlife and flower photographer’s tool box.
I remember when Lightroom first introduced a similar feature and it changed the way I saw many of my older photographs. I spent weeks going back over images with distracting backgrounds and seeing how the software could improve the images by softening the background.
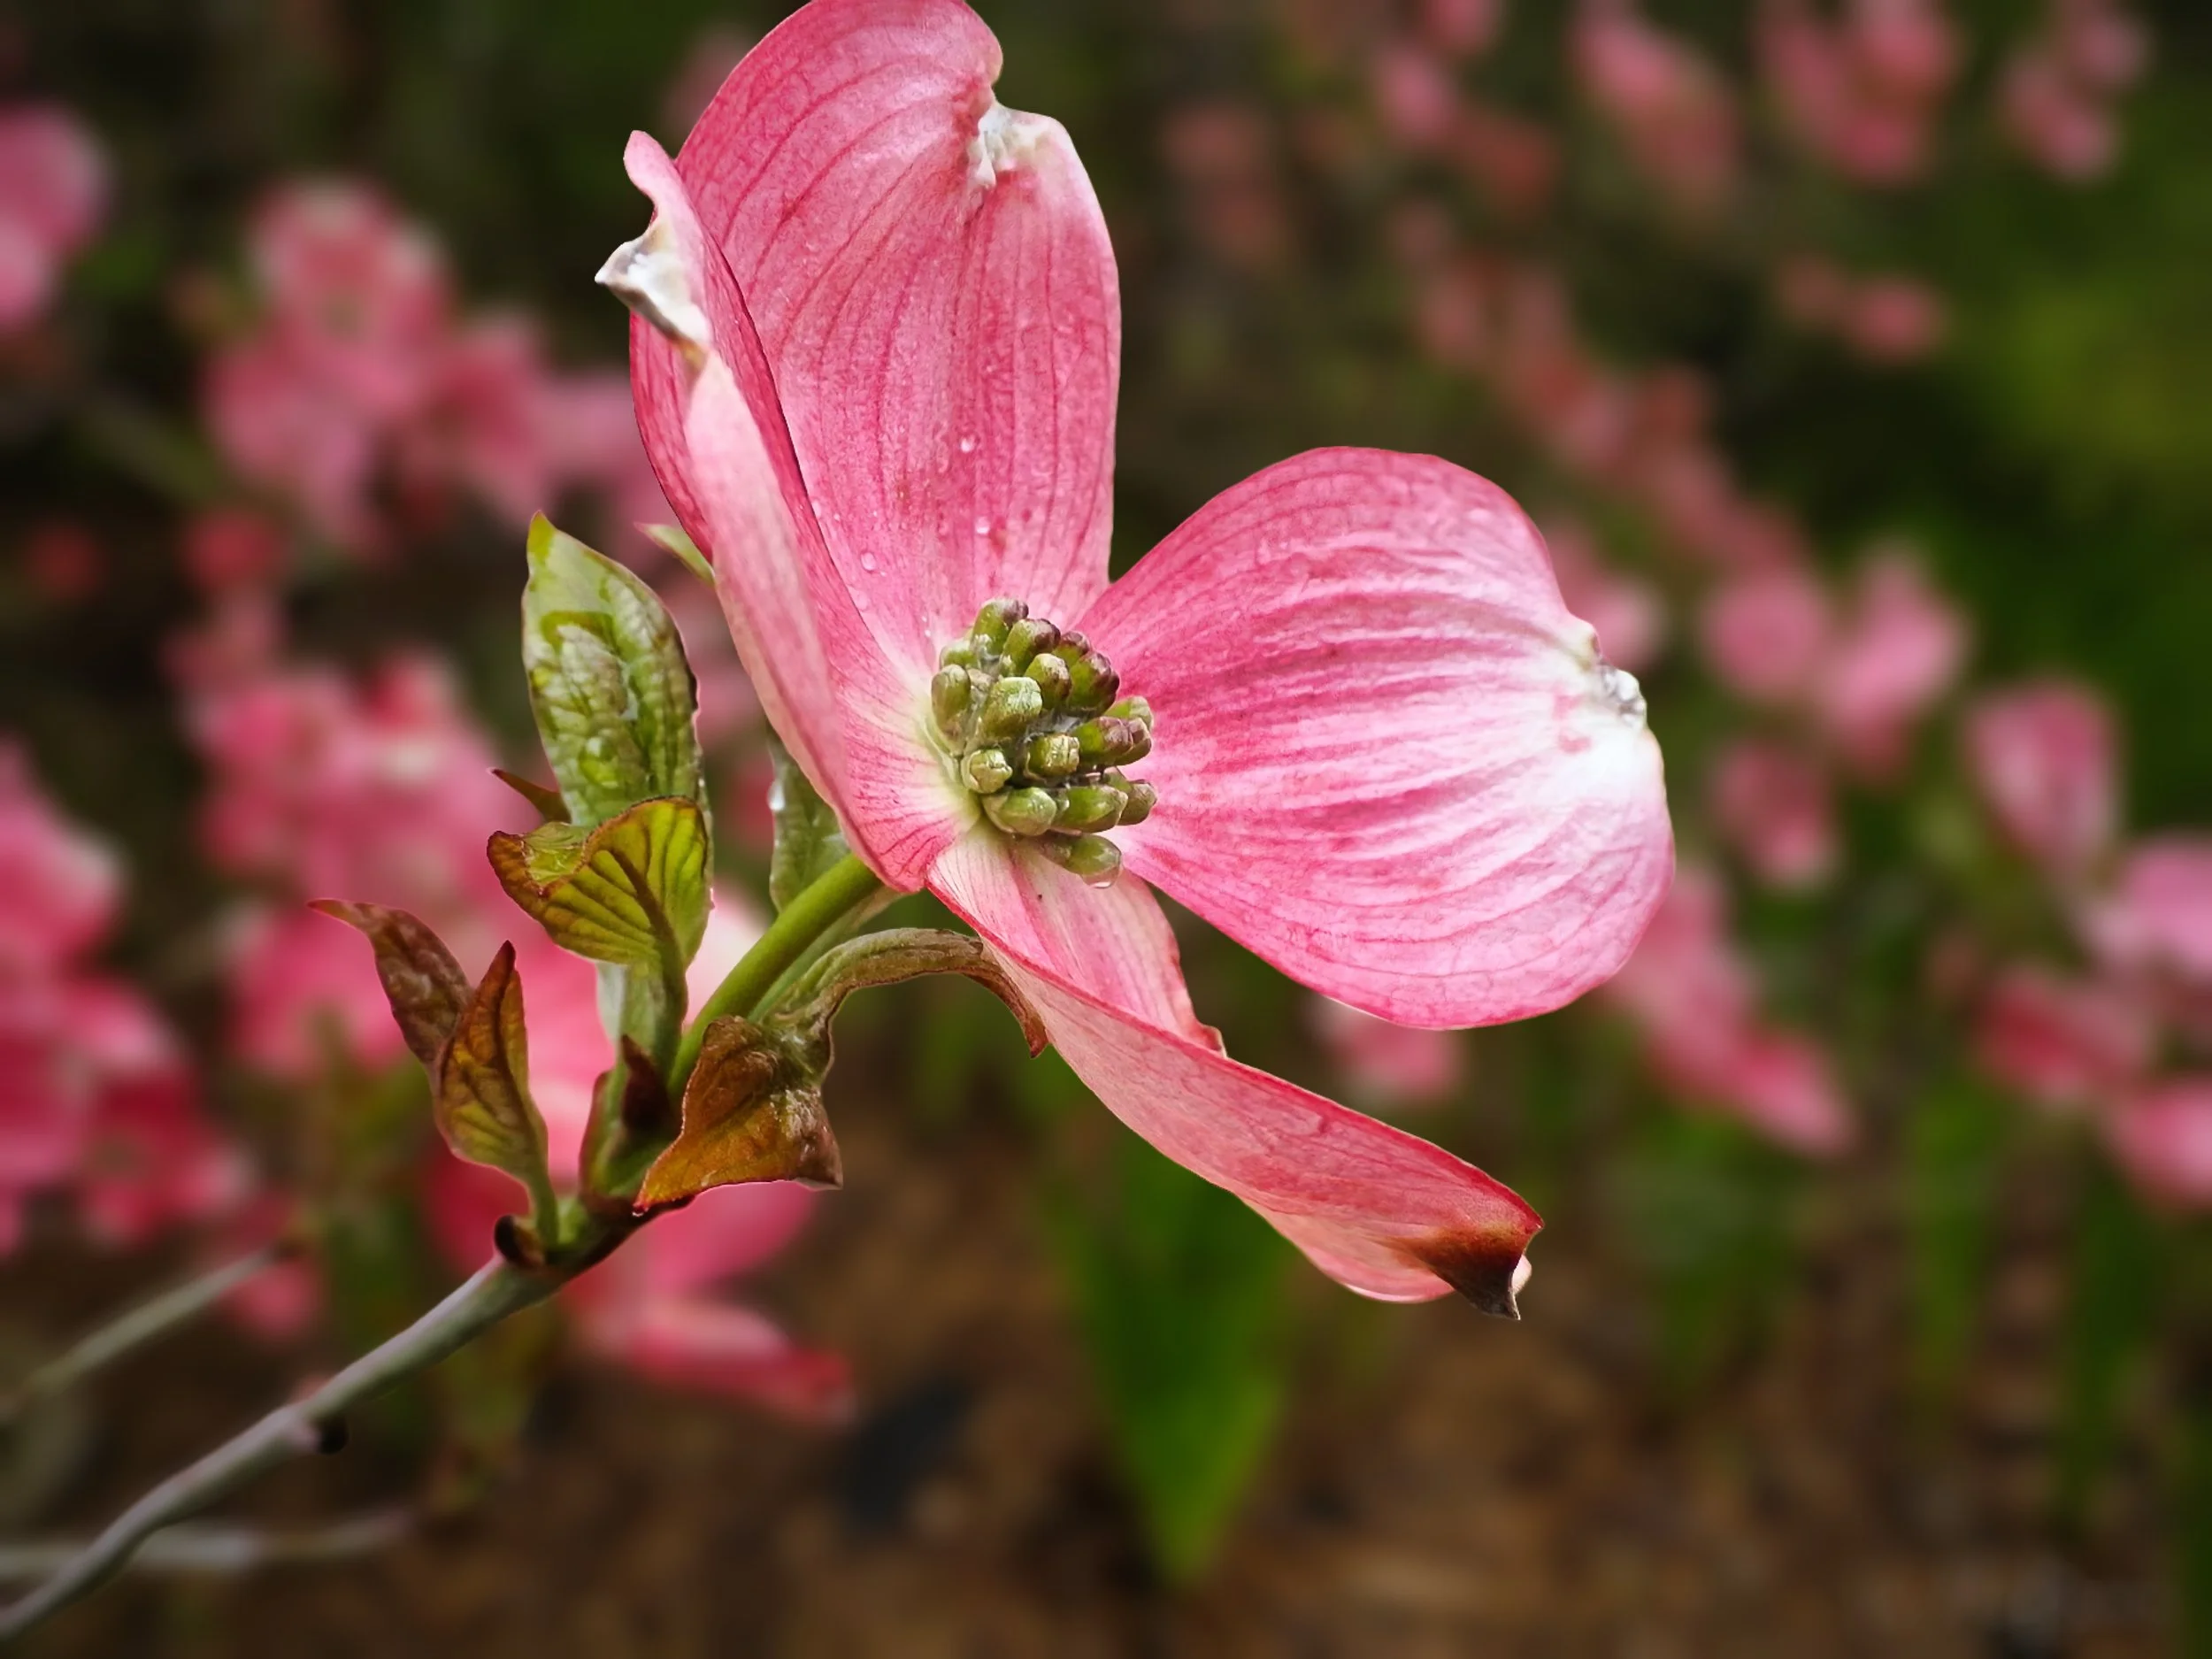
The lovely dogwood bract stands out nicely from the softened background with the help of Luminar Neo’s Bokeh tool. The tool allows subtle changes if just a little is all you need.
The original image, while still lovely, is improved with warm light and a softer background. Sliders built in to the Luminar Neo tools give the photographer complete control how soft they want the background to look. Improved masking capabilities creates smoother transitions to keep the image from looking over processed.
Now I can do the same in Luminar Neo for a fraction of the price. And, I have to say that Luminar Neo’s new bokeh module is better and works in the same three-dimensional way as Luminar Neo’s outstanding Light Depth module works.
The bokeh module and the light depth module combination can literally transform your photography from boring to spectacular without the purchase of expensive cameras and lenses.
If you have not read my post on Luminar Neo’s light depth module, you can check it out here.
I think the following before-and-after pictures best tell the story.

Softening the background helped this young fox stand out from distracting foliage seen in the before image below.
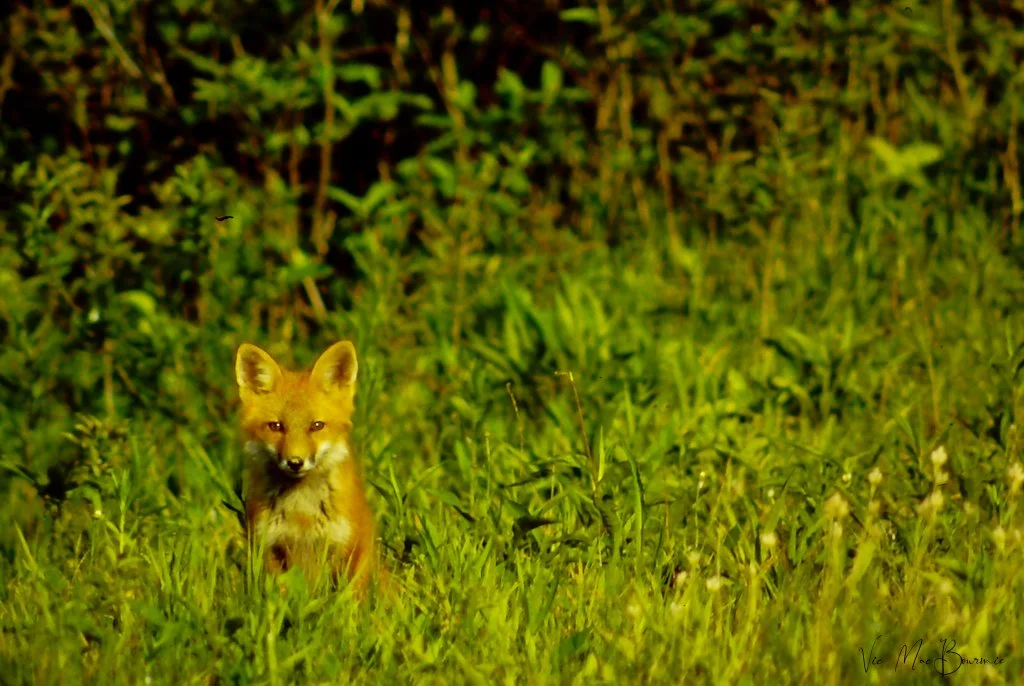
The background is quite distracting in this image and gives the overall image the look of more of a snapshot. Softening the background (see image above) improves the image and helps focus the viewer on the main subject.

This young fox was a regular in our woodland/wildlife garden for a period of time. This before picture represents a good documentary photo of the little guy but includes many distracting elements and the lighting is a little bland. Luminar Neo’s powerful post processing tools offer significant improvements to the original image. In the image below, a softer background and warmer, direct light on the fox improves the image immensely, in my opinion.

The image after post processing with Luminar Neo’s light and bokeh modules. Notice the out-of-focus background as well as the warmer light on the fox.

This After picture of blue jays at the feeder is improved by softening the background bokeh helping the birds stand out better from the background. (see image below)
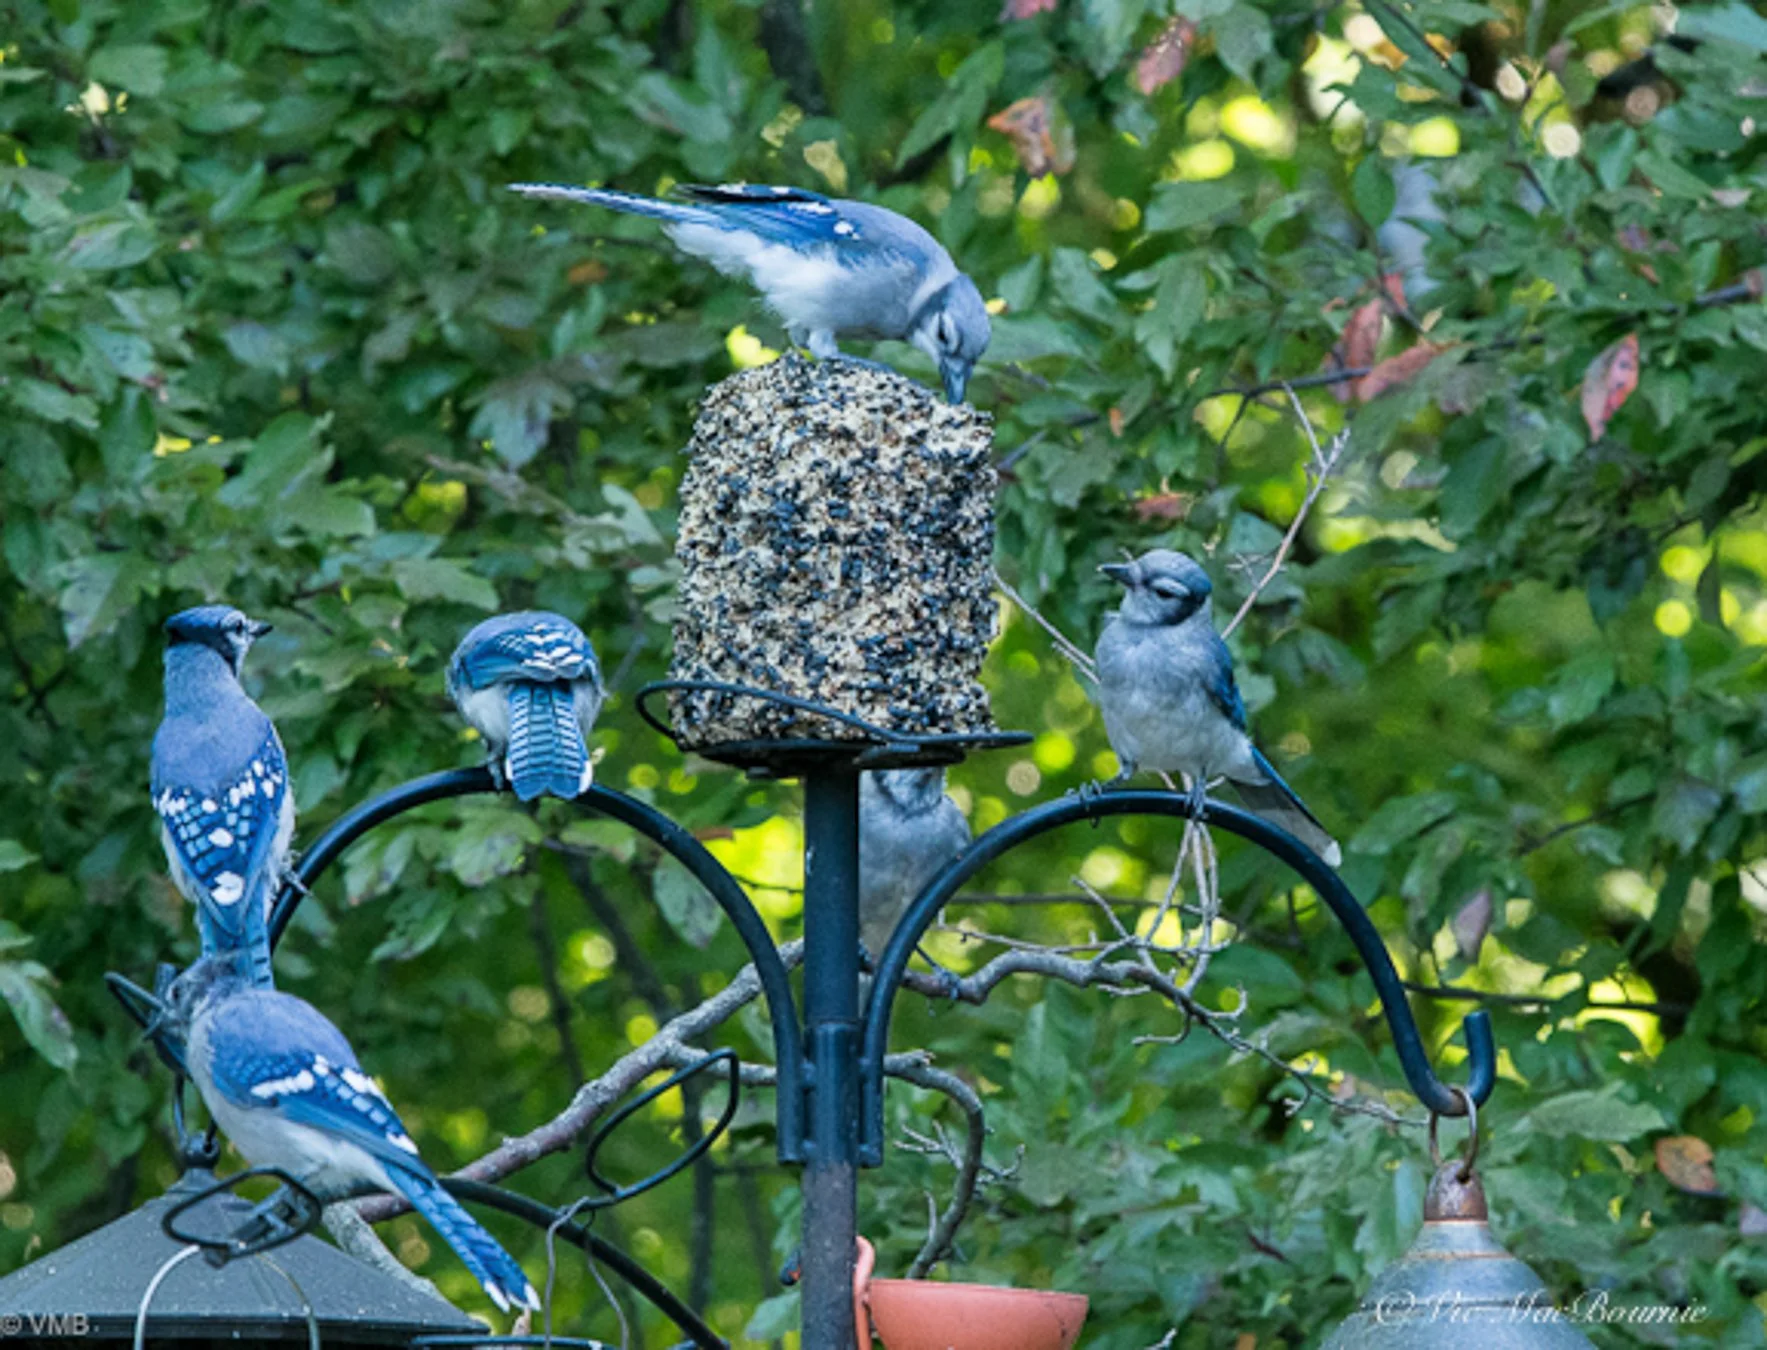
Although the differences in the two images may not seem obvious, the background in the image above creates a much more pleasing image and one that looks like it was photographed with a much longer and much more expensive (faster) lens.
The above images illustrate how Luminar Neo’s new bokeh module can improve nature images by creating much more pleasing backgrounds that allow the main subjects to stand out. These are important features in nature, flower and wildlife images, but they are also critical in other forms of photography from street photographs to travel and especially portrait images.
In fact, Luminar Neo chose to locate their bokeh module in their portrait tools where they thought it would be most useful. So, for those looking to improve their people pictures – whether that is professional work or just shots of your kids or family on vacation – Luminar Neos new bokeh module is certainly worth further investigation.
For people shooters (not my specialty) Luminar Neo has actually unveiled many new interesting modules to enhance your portraits.
Earlier this month Luminar Neo rolled out its new upgrade focused on portrait photography on both desktop and mobile. The mobile update inclues the Bokeh AI module discussed above along with new Face AI features such as Face Light and Face Slim. In addition, Blemish Removal has been significantly enhanced.
Desktop updates include Bokeh AI discussed above for nature and garden images, In addition, with Face AI users can control Dark Circles under eyes with an improved tool that is simple to use, as well as expanded capabilities for Face Skin smoothing, Body Smoothing and Shine Removal and a brand new Blemish Removal tool.
The is also a new Mask Feather feature that softens mask edges for smoother blending.
If you are interested in purchasing Luminar Neo (which offers a one-time purchase model rather than paying monthly) please consider using my discount code here.


Taking on Ticks in the woodland garden
Ticks can be both a real nuisance as well as dangerous. Here are some steps you can use to control and deter them in your garden.

One of the signs that greets visitors to the nearby woodlands around our home. Note that not all ticks transmit Lyme disease. In this area, the Blacklegged Tick is the one that can transmit Lyme disease. Thank goodness it is the American dog Tick that is most prevalent in our area. It doesn’t mean, however, that you want these little critters biting you and remaining attached for any period of time. Removing them can be a problem. We use a special little tool that makes removing them a little easier.
Steps to discourage ticks in the garden
There was a time as a young boy and teenager growing up in Southern Ontario when ticks were not a thing. In fact, I remember only a single location where ticks were present in Southern Ontario – Longpoint Provincial Park.
It just so happened that Longpoint on the Lake Erie coast was my favourite summer hangout. The beaches were the best around and on good days we could ride the waves.
And, although I spent a lot of time at Longpoint Provincial Park, still, I never encountered a single tick. In fact, during my entire childhood, through my crazy teen years and right through my 20s, 30s, 40s, 50s …, I never even really thought about ticks.
Those care-free days are gone.
It wasn’t until more recently that ticks have become an issue in our neck of the woods.
And have they ever.
Today, as I write this post, ticks have become a serious problem not only in this area but in our own backyard.
Last year, I needed precautionary Lyme disease medication after discovering an engorged tick on my leg (see image below). It had to have been attached for at least 24 hours. This year, after a little garden cleanup, my wife has already had two ticks attached and we have pulled a number both dead and alive off our dog. More recently, I have had to remove a tick off my back and have found several of the tiny sesame-sized ticks crawling on my hand and foot after going into the garden.
Not all the ticks may have been picked up in our yard, but I’m guessing most originated in the dry ornamental grasses and fallen leaves in the yard.
Of course, having a massive black dog is certainly a tick magnet, but even without Colby to bring ticks into the yard and eventually into the home, transitory animals and birds spread these little critters from property to property.
Ticks are one of the reasons I welcome Opposums on to the property whenever I see them. They are known to devour ticks by the hundreds even thousands.
Last year, after taking our dog into the nearby woodland, we discovered he was covered with ticks and, as a result, seemed to have an allergic reaction to being bitten in and around his face.
Now that was not a whole lot of fun.
Thankfully, he was on his regular tick medicine from the vet and the situation cleared itself up over a short time.
Bringing a boat load of ticks into your living space via your dog, however, is not something most of us want to do.
For more information check out this post about using Permethrin on your clothing https://www.nytimes.com/wirecutter/reviews/sawyer-permethrin-premium-insect-repellent-review/

This tick decided it was a good idea to crawl up my leg during a photo shoot in the fern garden. A knee brace stopped its forward progress and marked the spot to dig in and start drawing my blood. You can see how engorged he is compared to the image above of the various ticks. I’m not proud to say that I can report back that it was indeed its last meal.
Reasons for the rise in ticks
I’m no expert, but I can’t help but think the rise in our local tick population is the direct result of climate change. In past years, our bitterly cold winters killed any chance of ticks migrating north from our southern neighbours. But, as our winters warmed, new animals appeared along with plants and, of course, ticks – lots and lots of ticks.
Once established in the area, they are impossible to exterminate and, because they can potentially spread Lyme disease, they are not something to be taken lightly.
I had hoped this year’s severe winter would diminish the local tick population in the area. Instead, the deep snow cover, like a nice warm blanket, actually helped the ticks survive winter and left us with even more of the critters this spring.

Ornamental grasses such as these low-growing fountain grasses are perfect places for ticks to lie in wait for an animal – either wild or domestic to pass by and provide a free meal. Humans too provide a free meal for these annoying little insects that are incredibly small and easily go unnoticed until they have had their fill of blood.
The very nature of a woodland/wildlife garden almost guarantees you are going to have ticks if you live in an area where ticks are a problem.
In the entrances to the woodlands surrounding our home, large signs (See top image) warn that there are ticks in the area and to take precautions both for your own well being and for your pets - primarily dogs but also cats.
In fact, in hindsight, I’m thinking we may have lost one of our cats from a tick bite. Cats can get a number of diseases from tick bites.
According to Petmeds: Cats can contract several dangerous illnesses from tick bites, most notably Cytauxzoononosis (bobcat fever), Hemobartoneliosis (feline infectious anemia), Lyme disease, Ehrlichiosis and Anaplasmosis. Severe anemia, high fever, lethargy, and loss of appetite are symptoms. Regular, year-round tick prevention is the best protection.

Even in the fall and early spring, ornamental grasses provide the perfect spot for ticks. If possible, I like to burn the grasses in spring to reduce the possibility of ticks that survived winter.
Tips to deal with ticks in the garden
So how do we deal with them?
First off, it’s important not to use general insecticides to control ticks. Doing so will only eliminate other important insects that call your garden home.
Take the following steps before resorting to the use of any harsh insecticides.
Take a multi-faceted approach to controlling ticks
I think keeping ticks at bay is probably best accomplished through a series of actions meant to deter them from areas of the garden where you and your pets like to hang out.
A first layer of defence can be the plants we choose to place near the areas we most frequently visit – near the patio or deck or other sitting areas and pathways around the garden.
Ticks are known to hang out in ornamental grasses or any long grass so it’s probably wise to keep long grasses in areas of the garden where you won’t brush up against them on a regular basis. But, it’s not just ornamental grasses where these tiny insects can hide. Any foliage could be home to these little critters.
Use plants as a first defence
With this in mind, there are plants we can grow that are said to actually help repel ticks. Don’t expect miracles from these plants, but if they help even a little they are definitely worth adding to your garden, especially in heavy traffic areas.
The following is a list of six suggested plants that help deter ticks in your yard.
Lavender,
Mint
Marigolds
Catmint
Rosemary
Chives
Tick removal tool is critical addition to your kit
If you or your dog get bit by a tick and it is still attached, it helps to have a tool to remove it as quickly and painlessly as possible.. This premium tick remover (Amazon Link) will get the job done. It’s always a good idea to have one of these tools available even if you have never had to remove a tick.
Sprays to keep ticks at bay
The next line of defence I like to use is a spray – Mosquito Barrier – that is said to keep mosquitoes, ticks and fleas from attacking you and your pets. It’s important to note that this is not an insecticide and only acts as a deterrence.
Its primary use is to form a barrier against mosquitoes, but it’s listed to be effective against fleas and ticks as well.
These larger grasses are ideal spots for ticks to hang out and latching on to an animal –whether its your dog, a deer, racoon or even a person.

Mosquito Barrier is a premium quality product that, although a little pricey, uses industrial-grade garlic to deter mosquitos, and ticks. It is concentrated so it needs to be mixed with water before using. As a result, for most people, a single bottle should last several years.
Mosquito Barrier (company web site) comes in concentrated form so although it may appear expensive, a single bottle can last several years. Its main ingredient is industrial-grade garlic which gives off a powerful odour on application but eventually mellows out to a pleasant garlic smell – and who doesn’t like a little garlic.
In a small yard, you can spray generously around the perimeter of the property on plants, fences, trees and walls. In larger yards, it is probably better to just create a boundary around the areas you and your pets tend to hang out.
We like to give the area a spray about once a week and top it off after a rainfall.
So far, we have found it helps keep the mosquitoes aways so I’m sure it’s having some effect with ticks and fleas. I plan to use the spray much more this year directly on plants around the patio. The spray is available through Amazon, (link to Mosquito Barrier) but we purchased our bottle at our local RAW dog food store.

Tick Attack and other similar herbal-based products can be sprayed directly on our pets or our own clothing to keep ticks at bay. There are even recipes on line to create your own essential oil sprays.
Safe botanical/herbal sprays specifically for use on dogs and clothing
The next line of defence is a botanical-based spray used directly on both our pets and our own clothing to repel ticks. Again, it’s important to note that these are not insecticides they are a repellent. The main ingredients are essential oils that repel ticks and fleas safely.
If you don’t want to spray your dog directly, consider spraying a cloth and rubbing the cloth over the dog’s legs, chest and head being careful to keep it away from their eyes.
I have just added these Tick Control Tubes from Thermacell throughout the garden in the hope of knocking back the number of ticks. Most reviews suggest that it takes at lest a year of use to see a significant reduction in backyard ticks, but some report an immediate result.
Using mice to control ticks
Tick control tubes made by Thermacell are another defence that you may be interested in. Although these DO use an insecticide and are more aggressive than botanicals and other deterents, some users swear by them. They work in an interesting very targeted way by using garden mice to kill the ticks.
The concept is that mice take the cotton stuffed in the tubes laced with a natural insecticide and use it for bedding in their lairs. When ticks attach themselves to the mice and are taken back to the lair the insecticide kill the ticks without injuring the mice and their offspring.
I’m a little Leary about this approach but plan to try it this year to see how well it works.

These Tick Control Tubes are an interesting way to control ticks in your yard. They depend on mice and other critters to take the cotton balls back to their dens. When ticks go on the mice they are eventually killed by the plant-based insecticide.

Medication is a good solution for tick control, especially when you are in an area where there is a lot of tick activity. We are using Spimparica Trio, but there are alternatives. Getting your dog to eat the large pill monthly is not always easy.
Using harsh medicines to control ticks
Finally, using a focused medicine to protect your dog and cat from ticks is often a necessity, if you live in an area where ticks are abundant. If you live in an area where ticks are not a problem, you could probably skip this final defence method.
Not all dogs and cats react positively to taking these drugs or putting the medicine on them. The decision to go ahead and use these medicines should be made after discussing the possible cons with your veteranarian.
It’s important to note that the medicines do not kill the ticks until they actually bite the dog or cat. At that point the ticks die. Even while on the medication, it’s not uncommon to see a tick crawling on the dog. If you see one, just pick it off and dispose of it.
For more ideas on how to control ticks, you might want to check out this Amazon page of potential solutions.

Is a knee wall in your landscaping plans?
The popularity of knee walls in the landscape creates an opportunity for gardeners to add interest to their front landscaping.

This simple stone knee wall with room for address numbers is highlighted beautifully by these warm Karl Forrester grasses and stunning hydrangeas. Low horizontal evergreens in front of the knee wall and Japanese Forest grasses to the left soften the edge transition from lawn to the garden.
Add visual appeal, utility and interest to your front landscape
If walking the neighbourhood with our dog has taught me anything, it’s that knee walls are quickly becoming a trend in front-yard landscape design.
It’s easy to understand their appeal. Not only do they successfully add an element of interest away from the front of the home closer to the street, they also provide a convenient spot to display address numbers and anything else that might strike your fancy – a favourite garden quote, a lovely hummingbird feeder or sophisticated bird house maybe.
Add an electric or solar spotlight to highlight the house numbers or a favourite plant and the knee wall looks as good in the evening as it does throughout the day.

This elegant stone knee wall picks up on the home’s brick colour with two bands of brick highlighting the house numbers. The large boulders, river stone and low-growing evergreen ground cover gives the entire landscape a simple, but natural, feel.
More importantly for gardeners, these knee walls offer the perfect opportunity to create a lovely little garden to give a visual boost for that all-important street appeal we all crave.
In our neighbourhood, the knee walls are primarily made of stone, brick or concrete, but I have seen simpler DIY designs made from wood.
For a more natural approach, a large boulder or rock slab with house numbers attached, can also provide a similar look and feel as the more traditional knee wall.

This small garden knee wall sits comfortably in this garden island bed surrounded by grasses. The homeowners wisely created a large island around the mature evergreen and incorporated the knee wall. The entire garden island is in scale with the landscape and breaks up a large expanse of grass creating more visual interest.
If you are considering adding a traditional brick, stone or cement knee wall, be aware that they can be expensive to install.
The larger, heavier units will need a concrete foundation to ensure the wall does not lean and/or eventually fall over. Without the support of other walls giving the knee wall support, a solid foundation is a necessity.
In addition, adding electricity to the knee wall would likely require hiring an electrician and running conduit from the home’s main electrical outlet to the knee wall. Tapping into today’s high-quality solar lighting can save you money and allow you to easily move the light(s) around to highlight various accents such as favourite in-season flowers, shrubs or even garden art.
If you are a little handy or know someone who is, a smaller DIY knee wall like this one can solve several problems. In this case it serves both to bring the house numbers down closer to the street as well as provide a place for the rural mailbox. Made simply of two posts placed in the ground (preferably in concrete) with wood slats running horizontally. I have seen similar ones that are painted black rather than stained. Either way, they can be an inexpensive addition to your front landscape. Large grasses and hydrangeas are used beautifully here to soften the landscape around the knee wall.
Building a DIY knee wall out of wood can be a great cost-saving approach, but it needs to be visually appealing and carry the proper weight for the size and style of home and landscape design. Painting the wood slats black creates a contemporary feel and adds a nice dark background to best display your house numbers.

This more contemporary approach to a knee wall is proof that simplicity can be very effective in the right situation. At night, soft uplighting adds an elegant touch and creates a little drama for passersby. The lighted address numbers also helps guests or delivery vehicles find the home rather than have to search the home for the house numbers.
The following are just a sample of knee walls I come across on my daily walks in the neighbourhood. Unfortunately, most of these images have been taken in the early spring before the flowers have bloomed, and the shrubs and the grasses have fully emerged. I’ll be looking for more examples as summer approaches and be sure to add them to this post, so you can see them in their prime.

A large boulder with address numbers can take the place of a traditional knee wall in a more natural/rustic landscape. Notice the light in front of the boulder to create a highlight at night. Again, the homeowner wisely chose to include the boulder in a large island garden bed where low-growing plants can provide a natural backdrop for the boulder.

This more architecturally-inspired knee wall is a reflection of the home’s design and picks up on the brick above the window as well as the architecture.

This knee wall uses the street name in a large, but simple contemporary font to create interest.

This small stone knee wall sits among a larger garden island with low growing evergreen ground covers surrounded by mature evergreen trees
Pentax VS20: A CCD-sensored travel camera ahead of its time
Pentax was ahead of its time when it unveiled its Optio VS20 portrait centric digital camera with separate shutter releases for the portrait and landscape modes. Did they foresee the future of social media platforms like instagram.
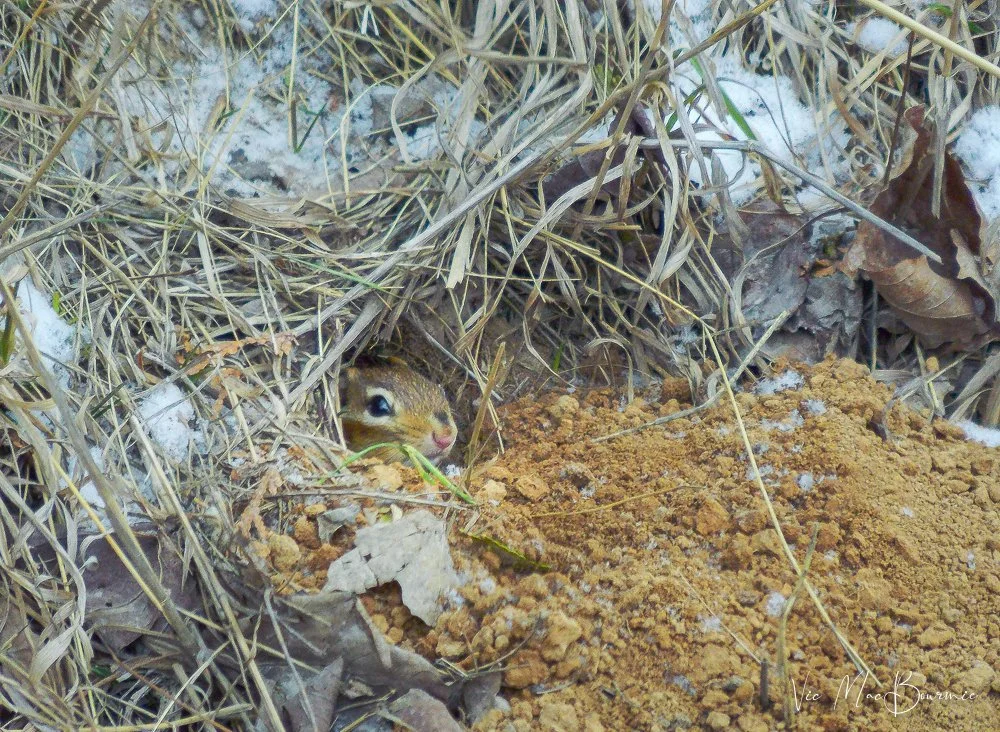
The Pentax VS20 is capable of capturing everything from garden landscapes with its expansive wide angle lens to the little critters that take up residence in the garden. The telephoto zoom was used to capture this little chipmunk in late winter when hints of snow remained on the ground.
Was the Pentax VS20 a digital precursor to modern-day Pentax 17 half-frame camera?
Say what you will about Pentax cameras, but this venerable Japanese company is not afraid to take risks. Unfortunately, not all of the risks prove successful.
The recent Pentax 17 half-frame camera might be a case in point. Although it did meet with initial success as one of the first film cameras to be released in recent times, with the exception of an avid hipster fan base, collectors and film enthusiasts – which, mind you make up a sizeable number of photographers – I’m not sure the camera attracted sufficient users to call it an overwhelming success. Add that to their even more recent Monochrome DSLR experiment, which has proven moderately successful to a narrow group of BW digital enthusiasts.
No one is saying these cameras are not great, only that their narrow base might not be enough to take the cameras over the top in regards to overwhelming success.

Never a huge fan of Pentax’s Optio series of cameras, the VS20 is certainly an exception, with both its good looks and very high build quality.
The concept behind the vertical shooting “Pentax 17” was twofold: first double the number of pictures out of a roll of 35mm film to save costs, and second; provide users with instagram-ready images already in the vertical/portrait format to perfectly fit the smartphone aesthetic on social media. All this wrapped up in a nicely built, pocketable camera that looks as good in your hand as it does on the table of your favourite trendy coffee shop.

A second separate shutter release and zooming mechanism on the top of the camera makes taking portrait-style images extremely convenient.
Bravo to Pentax engineers and designers for throwing caution to the wind and producing cameras no other mainstream camera company dared create.
Pentax’s forgotten digital social-media gem
To be honest, Pentax already had experience creating a camera that specialized in vertical images. In fact, it could be argued that their first attempt made a whole lot more sense than their latest film-based endeavour.
Wild geranium, Mayapple and Forget-Me-Nots take centre stage in the woodland garden wit the Pentax Optio VS20 capturing the scene in vivid greens.

The Pentax VS20 camera includes a Pano feature that stitches as many as three images together in the panoramic mode. Here, two images were stitched together (in-camera) to create this garden panorama.
Head-to-head with the smartphone
The problem, like many of Pentax’s adventures, was their first attempt was just too far ahead of its time.
The Pentax Optio VS20 was officially announced by Pentax/Ricoh on January 25, 2012 – just as 14-million or so smartphones with their built-in cameras saturated the market. Pentax’s answer was a pocketable camera with a 20x optical zoom and separate portrait and landscape shutter releases complete with zooming mechanisms and separate tripod sockets. For more information, check out the Pentax/Ricoh official site.
Now, you would be hard-pressed to name a smartphone that packed that much of a punch.

The Pentax Optio VS20 captures the early spring greens of ferns ad a Eastern Redbud.
For many camera enthusiasts and reviewers, the Pentax VS20 digital camera with its dual shutter releases – a traditional release and a separate vertical/ portrait release – was nothing more than an unnecessary gimmick to sell their latest travel camera in a large field of new digital camera releases.
One highly respected on-line review put it succinctly: “While ideally each new camera should have a special, unique feature that sells it on its own terms and distinguishes it from the pack, depressingly most don’t. But, in the case of the Optio VS20 from Pentax we don’t quite know whether to rejoice in or ridicule its points of difference.”

This highly cropped image shows the quality of the files even after extensive (50 Percent) crop. I think it also shows the classical film-like look provided by the CCD 16mp sensor.
Whether photographers of the day ridiculed or admired the camera, it’s almost as if the Pentax designers knew that the world would eventually be obsessed with vertical/portrait images in the never-ending search for as many social-media “likes” as possible.
Today, smartphones dominate that market, but there was a time when the very nicely built, easily pocketable little VS20 travel camera may have competed with that same market.
If the VS20 included modern-day bluetooth capibilties to quickly and easily transfer images from the camera to your smartphone, it may well have become the darling of social media.
Instead, it faded into the history books along with so many other excellent point-and-shoot cameras.
But back to why this camera might be worth considering again today.
For one thing, the new film-based Pentax 17 will set you back $400 or so dollars, while the digital equivalent can be purchased for a fraction of that. I got a mint condition never used version – for a mere $35 Canadian, quite possibly the best deal ever for the camera – but typical used versions go for about $100.

Portrait mode made easy
The Pentax/Ricoh VS20’s portrait mode makes capturing social-media-ready images easier than ever.
Feature-packed camera
Not only was the camera already designed to shoot vertical images, it sported a highly sought after 16 megapixel CCD sensor and an Intelligent Zoom function that extended the core 20x optical range (22.-580mm in 35mm terms) by 144x to provide a lens reach of a ridiculous 4032mm in terms of a 35mm film camera. You might not want to push it that far, but in case of a once-in-a-lifetime picture, it’s nice to know the possibility is there for the taking.
Oh, and have I mentioned that it even sported two tripod socket mounts for more serious photographers who were either looking to achieve the ultimate in sharpness, or just wanted to be included in the picture. (It’s also wise to use a tripod when you are extending the camera’s lens to these extremes.)
Again, you’re not going to get that type of reach on your average smartphone.

Portrait mode made easy
Pentax’s convenient portrait mode shutter release and zoom ring turns the camera into the ultimate social media darling.
Add a CCD-based sensor
And, yes, you read that right the camera was equipped with a 16mp CCD sensor. If that means nothing to you, a little research will quickly unveil the cult following for CCD-sensor-equipped cameras that are said to be able to obtain a more film-like image quality.
I can’t say the results a film-like, but I can verify that the jpeg images coming out this camera are very natural with excellent colour and depth. Unfortunately, it does not shoot in RAW.
Hipsters everywhere must be losing their minds to have missed such a great little CCD-based social media darling camera.
But, it’s not only hipsters. Any photographer looking for an everyday carry might want to take the time to track down this sweet little travel camera from 2012 that sports a host of goodies under its hood.
Features galore
Let’s take a Quick Look at what this camera offers.
I’ve never really been a fan of the Optio series of Pentax cameras because they lack many of the ultimate control more advanced photographers look for in a serious camera.
The VS20 is no different – lacking the ability to put the camera in shutter or aperture priority let alone in fully manual. That aside, the camera’s multiple modes are enough to satisfy most photographers’ wants and needs.

This image of a church shows the nice colour, sharpness and depth possible with the CCD-sensored camera.
The trick is, like many point-and-shoot style cameras to learn how to get the most out of these cameras’ shooting modes.
And, like most cameras in Pentax’s Optio line, the VS20 sports a plethora of modes – 20 to be exact –, presented across two screens and tabbed through using the multi directional pad.
The intelligent Auto Picture mode and Program Auto join with natural skin tone portrait mode, handheld night snap, night scene portrait, night scene, digital panorama, plus the self-explanatory landscape, blue sky, sunset, flower and digital shake reduction options. The second screen and second dozen options cover kids, pets, generic portraits, food (enhances saturation and contrast), fireworks, surf and snow, sport, plus the digital effects filters which comprise fish eye, sketch and miniature, along with text mode and frame composite mode – adding a border to your image but fixing the pixel count at 3MP at the same time.
These colourful chairs in an old barn were too good to pass by. Despite the relatively low light, the camera was able to capture the scene nicely.
More serious photographers will choose the “program Mode” where we can narrow or enlarge the focus area, as well as activate AF tracking. Exposure can also be tweaked between +/- 2EV, the camera’s dynamic range can be adjusted for highlight correction, shadow correction or both, plus the likes of shake reduction, face detection, blink detection and the digital zoom implemented if desired.
That’s just a taste of what this highly useable, should I say '“enjoyable” camera offers users.
Of course whether you are on vacation, out for a walk with your dog or just capturing your garden images, this very pocketable camera can be a daily carry to capture memorable images.
There is a standard (for its era) 3-inch, square-ish 4:3 aspect ratio LCD with anti reflective coating to compose and review stills and 1280x720 pixels video clips. The screen still holds up as a higher resolution than one would expect of an entry-level snapper of this era at 460k dots.
The black faceplate on the back adds a little sophistication to the camera’s aesthetic – with white being an alternative choice on some cameras.. There’s also a gentle curve to one end by way of a hand grip, plus a rubber pad at the opposite end for those preferring the two-handed approach when lacking a tripod.
The camera also features an extremely good macro feature that allows the photographer to get extremely close-up images. Perfect for flower and insect photography.
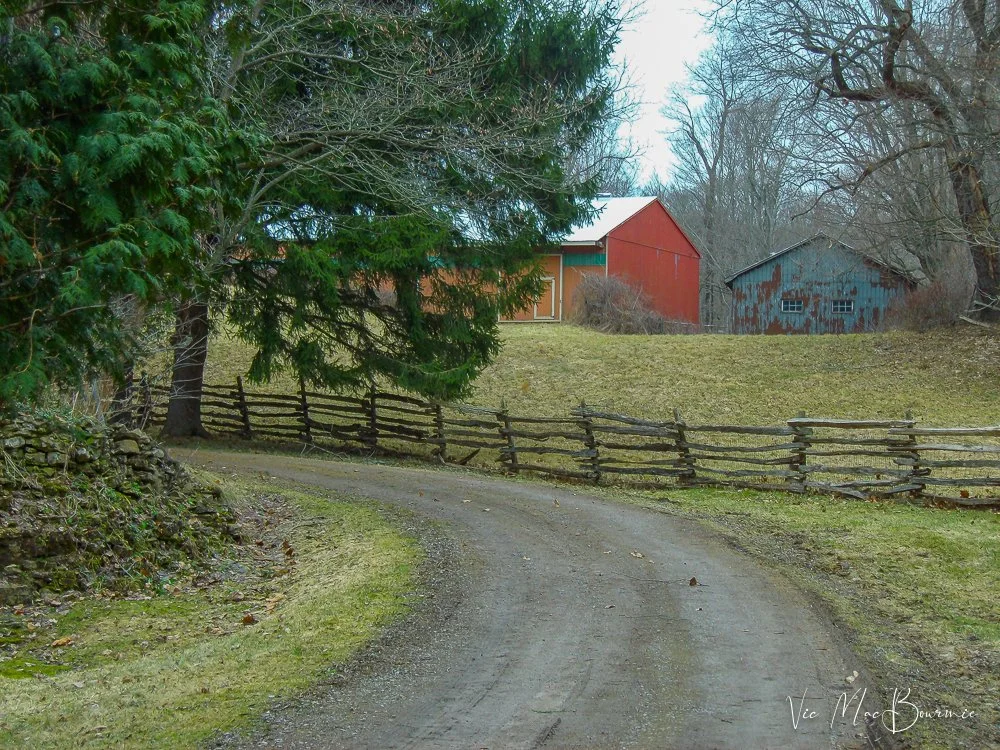
The camera’s 16mp CCD sensor is more than enough to capture beautiful landscape images. The wide-range zoom has the ability to crop the image in-camera to get the ideal composition.
Image quality
All of the images in this review were taken using the 16 megapixel “best” JPEG setting, which gives an average image size of around 4.5Mb.
Is this camera capable of matching what you would get out of your mirrorless camera or DSLR? Of course not. Is it capable of capturing your garden in full bloom, the critters that share it with you as well as your pets, children, grandchildren and even your next vacation – absolutely.
Not only is it more than capable, you might find using the camera is actually fun. It is certainly small ebough to fit into your pocket so you have it with you wherever you go.
That’s not to say it’s the perfect camera.
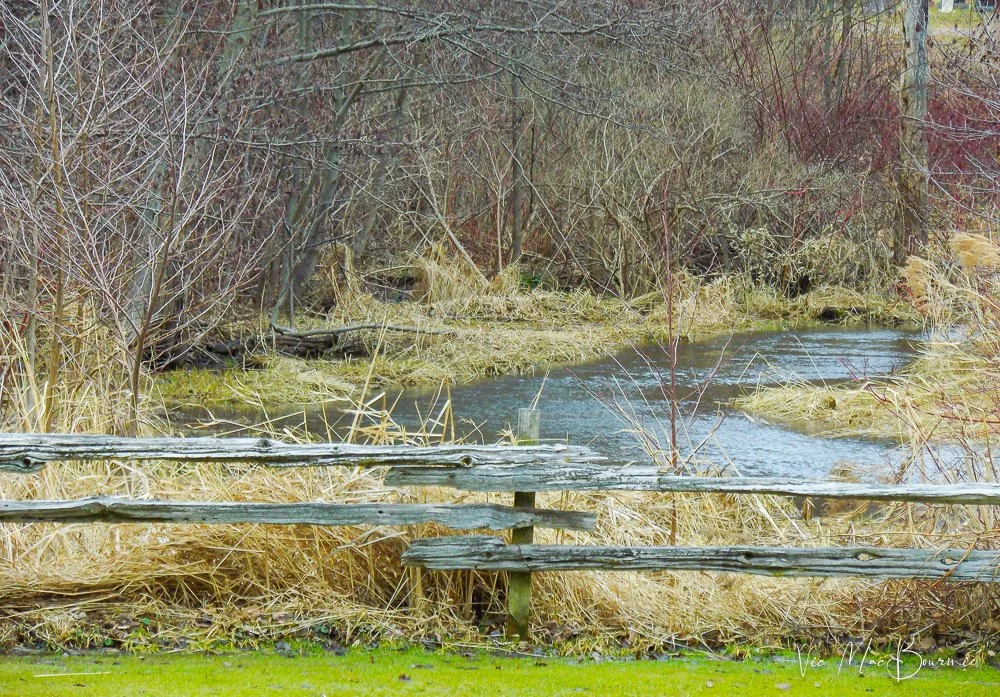
Pentax’s VS20 was never considered an “expensive” camera with an original retail price at about £199.99 / $249.95 new. Today’s prices on the used market make it an absolute steal if you can find one in good shape. (I got mine for under $50 Canadian virtually brand new and never used.) Ebay.com has them listed anywhere from around $60 to almost $200 U.S..
That said, the focus is slow. As a result you may find some of the images are not sharp - it’s a little hit-or-miss at times if you are snapping pictures quickly. It’s important to give the camera time to get focus before clicking the shutter. You might want to turn the “beep” up so you get an audible assurance before clicking the shutter. Also, because you don’t have complete control of the shudder speed, don’t be afraid to use the built-in flash or a tripod to ensure sharp images.

Many modern digital cameras offer an “extract colour” feature that takes an image and converts it to black and white but pulls out a single colour of your choosing. The VS20 allows for blue, red and green to be extracted after the original image has been taken. In this case, I chose to extract red.
Images maintained detail into the corners for the most part at maximum wideangle, with minimal if any barrel distortion too. Brighter conditions can result in over exposed highlight detail plus there can be some pixel fringing between areas of high contrast, but the latter only becomes an issue on close inspection.
In terms of low light performance, the camera can be used up to ISO800 with acceptable results. Higher ISOs begin to degrade the images more than you would want, unless it is a critical shot. If you have access to high quality post processing software, these high-ISO problems become less important.
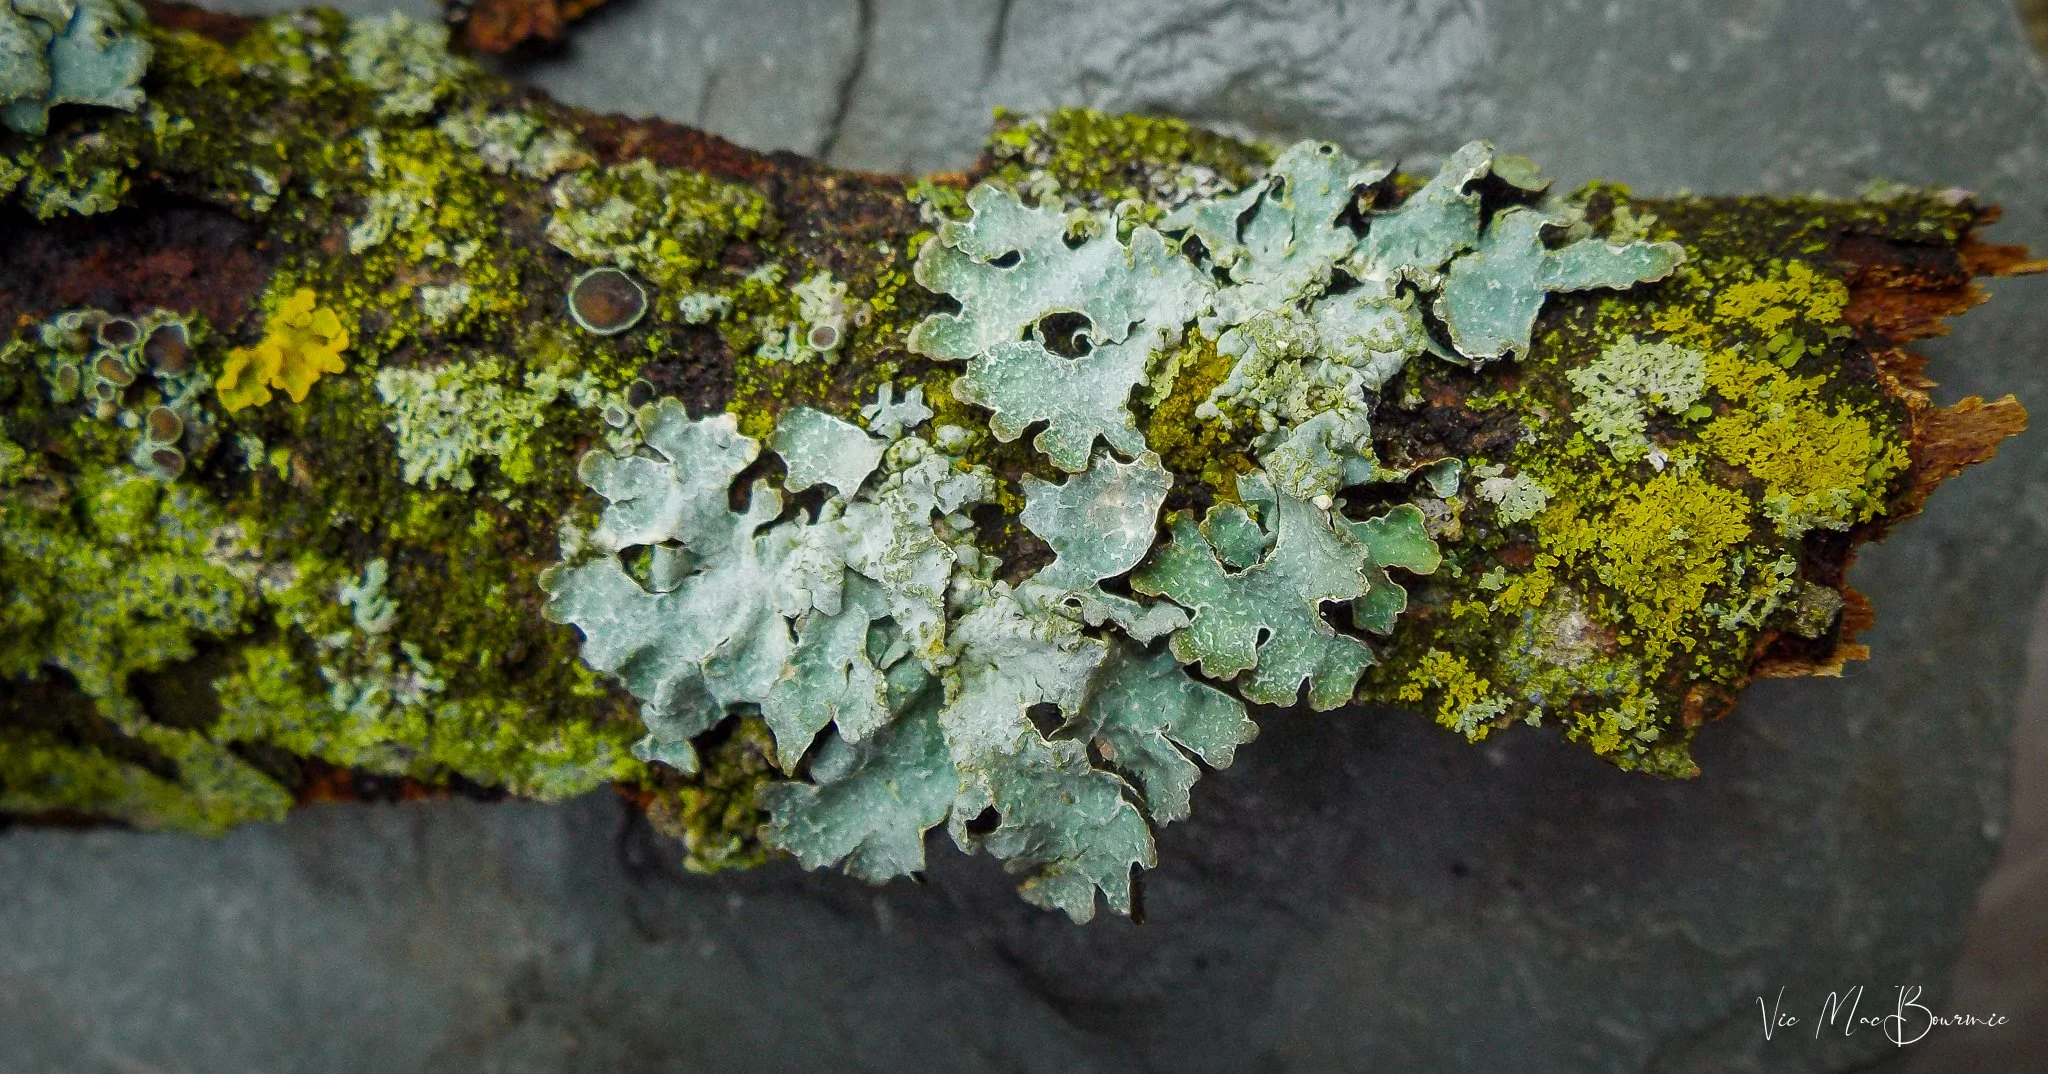
The Pentax Optio’s close-focus capibiities are also very impressive. This hand held image was taken from just a few centimetres away. The lichen and mosses are tiny.
Having said that, the camera has a night scene mode and, as long as you have a steady surface at your disposal, it’s possible to achieve really quite acceptable results in low light situations.
One last annoying problem I have discovered. The four-way button is easily pushed with your thumb which, in my case, sends the camera into a 10-second timer mode causing me to miss a couple of shots of birds and other wildlife. Not a big deal if you are aware of it, but it did cause me to miss a couple of potentially good shots.

It’ not hard to see how the camera’s CCD sensor was able to capture the fine details and colour of this old barn door.
Specifications
Camera Type: Super Zoom Compact CameraSensorTypeCCDSize1/2.33’’ CCDTotal Pixelsapprox. 16.00 megapixelsEffective Pixels
16.56 MP
Still16M (4608x3456), 12M [1:1] (3456x3456), 12M [16:9] (4608x2592), 7M (3072x2304), 2M [16:9] (1920x1080), 640 (640x480)Movie
Compatibility AVI (Motion JPEG)
Resolution :
HD: 1280(1280 x 720): approx. 30/15 fps.
VGA: (640 x 480): approx. 30/15 fps.
320:(?320 x 240): approx. 30/15 fps.
SensitivityAuto ISO, manual (80 ? 6400 ISO)
Shake ReductionCCD-shift Shake Reduction
LensFocal Length 5-100mm, equ. to 28-560mm in 35mm, aperture : F/3,1 - 4,8
Digital Zoom
Optical Zoom:20X
Digital Zoom: Approx. 7.2 X
Smart Zoom Approx. 30x at 7M, approx. 144X at 640 (including optical zoom)
Construction11 elements in 8 groups (1 aspherical elements )
Focusing SystemTypeTTL autofocus with contrast détention
FunctionsManual Focus, Infinity-landscape
Focus Range (automatic)
AF points
Standard
1.6m - infinity (at tele setting)
3-point AF, Spot AF, Auto tracking AF (anticipating moving subject), 0.4m - infinity (at wide setting)
Macro
0.1m - 0.5m (at wide setting)
Super Macro
0.01m - 0.2m (middle zoom position)
ScreenType3’’ LCD Colour screen
Resolutionapprox.460K points
ShutterTypeElectronical shutter with sheduled automatic exposition
Speed1/2500 - 1/4 sec. 4 sec max. (Night Scene mode setting)
Exposure systemMeteringMulti-segment metering
Exposure Modes Auto Picture, Program, Natural Skin Tone, Handheld Night Snap, Night Scene Portrait, Night Scene, Digital Panorama, Landscape, Blue Sky, Sunset, Flower, Digital SR, Kids, Pet, Portrait, Food, Fireworks, Surf & Snow, Sport, Fish-eye, Sketch, Miniature Filter, Text, Frame composite, Movie, Green.
Compensation+/-2EV (1/3 EV steps)
FlashType Integrated auto flash control
Automatic activation in low light conditions.
ModesFlash-on and Flash-off modes "Red-eye" reduction function
Effective Range
Flash range Wide: approx. 0.2 ? 5.1m (ISO Auto) Tele: approx. 1.6 ? 3.3m (ISO Auto)
Exposure ParametersModes Mode: Standard, self timer,burst shooting, high speed burst (L,M,H****), Remote control DRE: "Dynamic Range Enlargement", shades compensation: high lights
Face Recognition Face recognition AF&AE is available for all modes up to 32 faces, Smile Capture, Blink Detection, animal recognition
White BalanceAuto, Daylight, Shade, Tungsten, Fluorescent, Manual setting
Digital Filter B&W/Sepia, Toy Camera, Retro, Color, Extract Color, Starburst, Soft, Fish-eye, Brightness, Miniature, Natural Skin Tone, Sketch
MovieRecording
Sound : Yes
Movie : Shake reduction Mode (SR)
Duration : Depends on memory card capacity
Resolution :
VGA (640x480), approx 30/15 fps
QVGA (320x240), approx 30/15 fps
HD 1280 (1280 x 720p), approx 30:15 fps
EditingRecord as pictures, spilt movies.
PlaybackDigital Filter
B&W/Sepia, Toy Camera, Retro, Color, Extract Color, Starburst, Soft, Fish-eye, Brightness, Miniature, Natural Skin Tone, Sketch
Options
Slideshow, Image Rotation, Stretch Filter, Small Face Filter, Digital Filter (B&W/Sepia, Toy Camera, Retro, Color, Extract Color, Starburst, Soft, Fish-eye, Brightness, Miniature, Natural Skin Tone, Sketch), Frame Composite, Movie Editing, Red-eye Compensation, Resize, Cropping, Image Copy, Protect, DPOF, Startup Screen
StorageInternalApprox. 16MB
ExternalCompatible with SD, SDHC, SDXC memory cards
File Format
Photo format : JPEG (Exif 2.3), DCF 2.0, DPOF, PRINT Image Matching III
Video format : AVI (Motion JPEG), with sound
Special FeaturesFeatures
Text size: Standard, large
World time : 75 cities, 28 time zones
?Language
English, French, German, Spanish, Portuguese, Italian, Dutch, Japanese, Danish, Swedish, Finnish, Polish, Czech, Hungarian, Turkish, Greek, Russian, Thai, Korean, Simplified Chinese, Traditional Chinese
PrintingFormatInterfaceInterfaceUSB2.0 (Hi-Speed), PC/AV terminal (NTSC/PAL, mono)
PowerSource
Battery : Rechargeable D-LI122 Luthium-ion battery
Optional AC adapter also available
PerformanceRecording capacity approx. 200 shots and 180 min in play mode.
DimensionsHeight60mm
Width108mm
Depth34mm
Weight191g (charged with battery) Approx. 170g (body only)
CompatibilityPCWindows XP SP3, (SP3), VistaTM and 7MacOS X 10.3.9 or aboveAccessoriesIncluded SoftwareSoftware: (CD-ROM) S-SW121
Kit ContentUSB cable I-USB7, AV-IAVC7 video cable, rechargeable battery Li-ion D-DLI92, battery charger D-BC92, O-ST104 strap and software.
OptionalOptional AC adapter
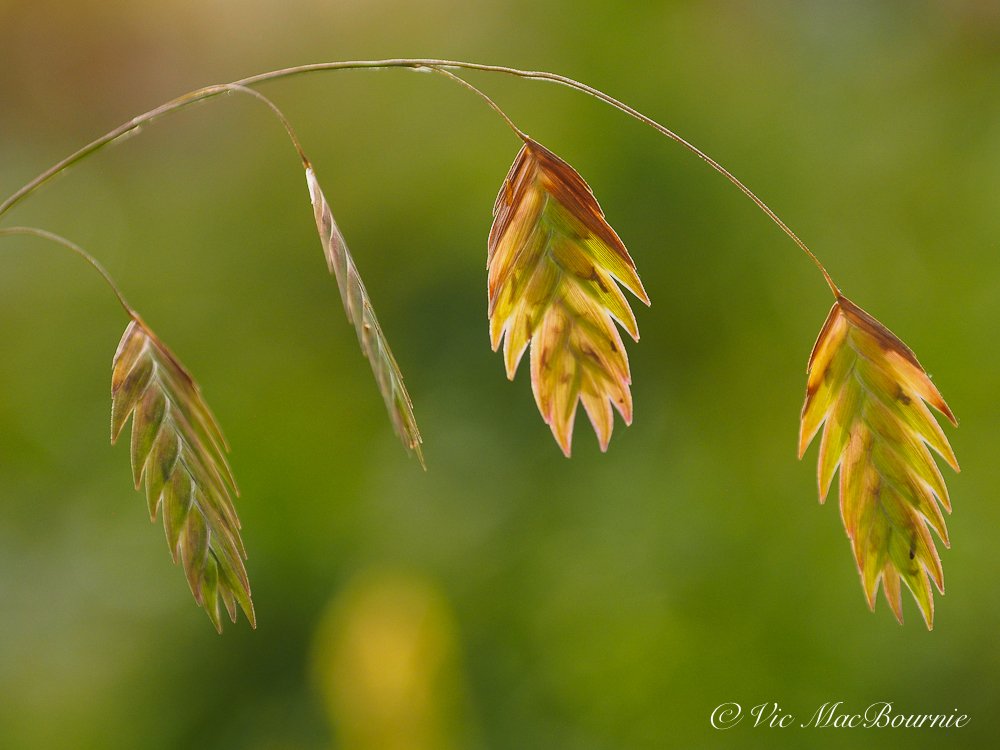


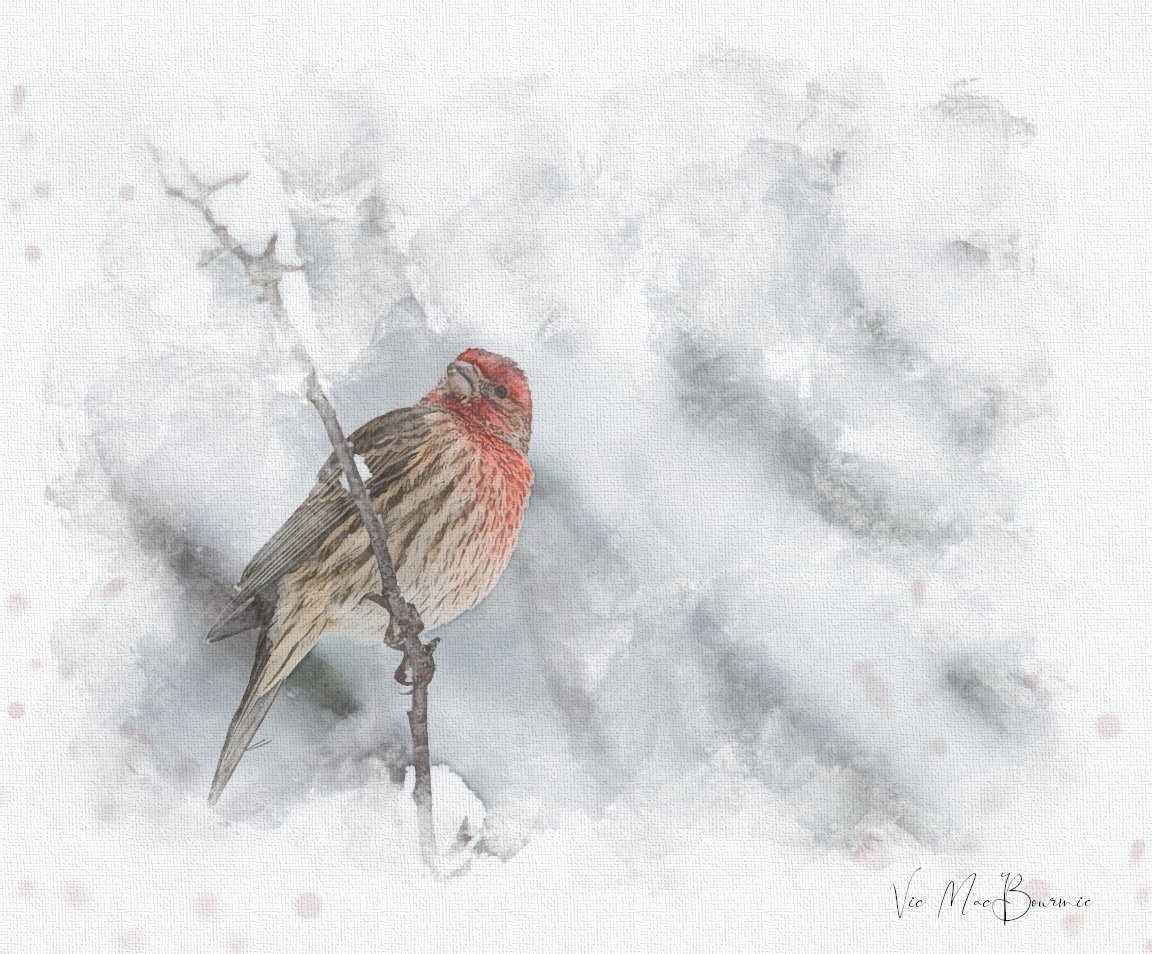


Fujifilm’s powerful, fun travel cameras pass the test
Fujifilm’s travel cameras are capable of impressive results whether you are travelling the world or just wandering into your garden for a day of flower or wildlife photography.

The harbour in Lausanne's Ouchy/Olympic district in Switzerland.
Fujifilm F660EXR: From thrift-store find to priceless European vacation images
It takes a special camera to find a spot in your travel pack just weeks after picking it up at a local thrift shop for less than a couple of fancy Swiss espressos.
That’s exactly what happened recently when my wife and I flew to Switzerland to board a once-in-a-lifetime Rhine River cruise. I had been trying to decide what cameras would be small enough to take everywhere I went in Europe, but also could provide the quality I wanted to ensure I would not regret the choice when I returned home with hundreds maybe even thousands of images.

Sunset over Amsterdam from the deck of our ship taken with Fujifilm F660EXR travel camera.
The choice was the Fujifilm F660EXR travel camera from 2012 that boasts a 15X compact superzoom with a 35mm equivalent lens ranging from a very wide 24mm to a more than adequate 360mm.
This combination meant there was nothing standing in the way of capturing the incredible vistas of the Rhine River valley complete with its magnificent castles, or the details of same castles from the comfort of our deck chairs. All this capability packaged with Fuji’s EXR technology and a 1/2"-inch, 16MP CMOS sensor with a generous 3.0-inch 460,000 dot LCD viewing panel.

The Fujifilm F660EXR quick startup helped to catch this image of a woman in red walking beneath an impressive Swiss flag in the city of Lausanne.
For the beginner photographer who cares little about such details, these specs simply translate into a very capable camera.
But the impressive stats were not the only reason I chose to pack this camera rather than a host of other more capable possibilities filing my camera case.

The Fujifilm F660EXR’s zoom range was able to frame this image of a church while cruising the Rhine River.
What really convinced me was the camera’s superb performance discovered in the few weeks prior to the cruise. After running the camera through its paces, I gained complete confidence that it would deliver. That, and the fun factor of using this little gem to capture the spring woodlands around our home made the decision easy.
Now, to be fair, a big part of the decision revolved around the camera’s pocketability and, once again, the Fujifilm F660EXR proved too good to be true. Fuji made this thing so streamlined that there wasn’t a pocket it didn’t like.

A day cruise of the beautiful Lake Geneva in Switzerland taken with the Fujifilm F660EXR.
I confess that Fuji’s magnificent little travel camera was not the only camera in my pack. The other travel companion was the miniaturized Pentax Q complete with a couple of its tiny lenses. Both cameras gave me everything I needed to capture the beauty of Switzerland and the Rhine River.
Fujifilm F660EXR
In this post, however, I am going to focus on the Fujifilm. For my separate post on the Pentax Q, click here. For my post on shooting street photography while on vacation, click here. And, for my post on capturing window box images in Europe click here.
As travel cameras go, the Fujifilm EXR F-series pack a real punch including their almost cult-like film-simulation settings including Velvia for vivid colours, Provia for a more natural look, Astia for a softer effect (excellent for portraits and people pictures) and, of couse, B&W and sepia settings.
Add to the film simulations a huge selection of picture modes for special effects or difficult exposure situations. A particularly useful addition is Fujifilm’s impressive pro-focus selection that creates an image with a soft background that can be varied depending on your preference.
Windows onto the world captured by the Fujifilm F660EXR.

Back of the Fujifilm F660EXR
The list of features the camera includes are too numerous to list here but of note is the ability shoot in every mode imaginable from manual to aperature and shutter priority for those who want to take full control of the camera, to the EXR mode that looks at the scene and selects the best option for the finest results. Unlike a typical “program” mode – the Fujifilm has this mode as well – the EXR uses the camera’s most advanced abilities to ensure high-quality images even in the worst or most difficult lighting conditions often involving taking a series of images and then incorporating them into a single, high-resolution image.
The above images and the following ones are just a few of the images taken on the European vacation. For more images taken on with the Fujifilm F660EXR film camera – including some of my favourite images not taken on the vactation, watch for my photo gallery which will be appearing here at a later date.

The long focal length of the Fujifilm allowed me to capture these two talking from a comfortable distance.

Olympic statue
Lausanne, Switzerland is home to the International Olympic Committee. This beautiful statue sits outside the Olympic museum. Originally photographed in colour and converted to B&W.


Fujifilm F660EXR Specs
Body type: Compact
Max resolution: 4608 x 3456
Effective pixels: 16 megapixels
Sensor size: 1/2" (6.4 x 4.8 mm)
Sensor type: EXR CMOS
ISO: Auto, 100, 200, 400, 800, 1600, 3200 (6400 and 12800 with boost)
Focal length: (equiv.)24–360 mm
Max aperture: F3.5–5.3
Screen size: 3″
Screen dots: 460,000
Max shutter speed: 1/2000 sec
Storage types: SD/SDHC/SDXCUSBUSB 2.0 (480 Mbit/sec)
Weight (inc. battery): 217 g (0.48 lb / 7.65 oz)
Autofocus
Contrast Detect (sensor)
Multi-area
Center
Tracking
Single
Continuous
Face Detection
Digital zoom Yes (2x)
Macro focus range: 5 cm (1.97″)

A street performer performs under a bridge in the city of Cologne, Germany.

A harbour in Lausanne, Switzerland.
Based on the Fujifilm FinePix F-series history, there were at least 10 distinct EXR-model travel cameras released between 2009 and 2013.
10 distinct EXR-model travel cameras released between 2009 and 2013
These cameras were characterized by the EXR CMOS sensor technology, designed for high-resolution, low light, or high-dynamic-range shooting in a compact, portable body ideal for travel photography or as an everyday carry camera.
Key models in the Fujifilm EXR F travel zoom lineup included:
F200EXR in 2009 – the first to feature the EXR sensor
F80EXR/F85EXR (2010)
F300EXR/F305EXR (2010) introduced Phase Detection AF
F500EXR/F505EXR/F555 (introduced in 2011 adding GPS and RAW capabilities
F600EXR/F605EXR/ (introduced in 2011)
F660EXR/F665EXR Introduced in 2012
F770EXR/F775EXR introduced in 2012 along with the 20X zoom
F800EXR/F820EXR introduced 2012-2013
F800EXR/F820EXR introduced in 2012-2013
F900EXR introduced in 2013
The Fujifilm FinePix F660EXR is a 15x compact superzoom built around the company's EXR technology. It features the same 1/2" type 16MP CMOS sensor as the co-announced F770EXR, along with the same 3.0" 460,000 dot LCD but loses the more expensive camera's zoom range, GPS and Raw-shooting capability. It still offers an impressive 24-360mm equivalent stabilized zoom and 1080p movie shooting.


Lensbaby: Perfect partner for flower photography
The Lensbaby Velvet: Perfect companion to take your flower photography to new heights.

My first impressions of the Lensbaby Velvet 56.
If you wanted to pick the perfect partner for flower photography, it would be hard to beat a Lensbaby.
“What the heck is a Lensbaby,?” you may ask.
Think a specialized lens (system) that is almost designed specifically to photograph flowers. And, not just your typical flower photography, Lensbaby is all about encouraging photographers to take a creative approach to flower and garden photography using built-in, selective-focus techniques.
Suffice it to say that Lensbaby offers a selection of different lenses for most of the major camera brands that uses various “selective-focus” techniques giving photographers incredible opportunities to expand their creative approach to flower photography. Although the lenses are not limited to flower or garden images – they also excel at portrait and landscape photography – there is no question that garden and flower photography is certainly their sweet spot.

A creative approach
The selective-focus approach can be subtle or extreme depending on the F-stop you select. Using a high f-stop like f5.6, f8 or f11 with the Velvet lenses creates a very subtle effect that is almost unnoticeable as you reach f8-f11, but the velvet look becomes much more obvious at f4 through f2.
In the company’s own words: “Lensbaby revolutionized creative photography forever with our unique award-winning creative-effect camera lenses. Known for their distinctive in-camera effects, our lenses and optics allow photographers to highlight specific areas of an image while creating effects that can't be mimicked.”
This post is going to focus on my first impressions of the Lensbaby Velvet 56 after taking it to the local public garden greenhouse and putting it to use for a couple of hours one afternoon in the cold of winter.

Lensbaby lenses have been around in different forms since 2004, but they have taken giant steps in just the past few years with the introduction of their Velvet series of lenses – the 28mm, the 56mm and the 85mm.

The three Lensbaby Velvet lenses pictured here from the wide angle 28mm to the 85mm telephoto lens, with the 56 mm sitting right in the middle sweet spot.
Check out Amazon for the complete listing of Lensbaby lenses and accessories, including a book about using the various Lensbaby products.
Lensbaby describes the effect as: “The Velvet effect is … designed to produce images with a uniquely soft and velvety appearance, reminiscent of classic portrait lenses from the past. They combine a sharp central focus with a smooth, ethereal glow in the out-of-focus areas, resulting in images that exude a romantic and timeless quality. The Velvet effect is particularly well-suited for portraits, still life, and any subject where a touch of artistic flair is desired. It adds a sense of depth and emotion to the image, enhancing its storytelling potential and evoking a sense of nostalgia. With its distinctive rendering and dreamy aesthetic, the Velvet effect allows photographers to create images that are both visually stunning and emotionally compelling.”
Okay, no mention of flower and garden photography, – a real miss on their part – but trust me, you will love the results.

So here are just a few more images made with the Velvet56 in just a few short hours in the greenhouse. All the images were made, handheld with an Olympus EM10 digital camera.
Although shooting handheld is a lot easier and fun than lugging around a tripod, I prefer to use a tripod if possible to ensure accurate focus and to force me to slow down and fully explore the possibilities each flower offers.
Lensbaby lenses are all manual-focus and can be difficult to get pin-point focussing accuracy at times because of their inherent soft-focus attributes. Focusing the lenses closed down (at f8 for example) and then opening them up to f5.6 -f2.8 prior to capturing the image is always a good idea. I find using a focusing aid such as a hoodman (amazon link) on the back of the camera’s focusing screen can go a long way to ensuring proper focus.

Learning to use the Velvet line of lenses is not difficult. Besides having to manually focus the lenses like vintage manual focus lenses, and setting the f-stop manually, the lenses simply mount on your camera and are ready to use. In most cases it is best to set your camera to use aperture priority. This way you can let the camera choose the ISO setting and the shutter speed to get proper exposure.
In conclusion, I recommend anyone who is serious about flower or garden photography to seriously consider adding one of the many Lensbaby lenses to their camera bag. The lenses are often available at very good prices on places like Facebook marketplace, e-bay or other on-line locations.
You can also check out camera outlets such as KEH, BH cameras and Henry’s cameras.


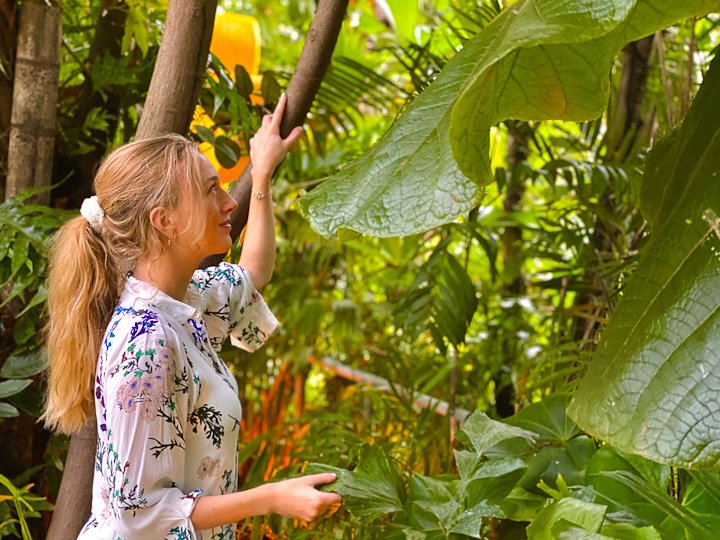
Tamron’s 500mm mirror lens: A forgotten gem
Getting in close doesn’t have to cost a fortune. Tamron’s 500mm F8 mirror lens is given new life with digital cameras and the latest in post processing software.
Here a Baltimore Oriole takes a moment before flying down to a feeder set up with oranges and grape jelly. The 500mm mirror lens with the added reach on the APSC camera allowed me to get in close. Who said these lenses are not capable of sharp images? The mirror lens’s bokeh also created this almost painterly background.
Modern cameras and post processing turn vintage lens into a woodland/wildlife gem
Years ago, I owned a Ricoh 600mm mirror lens. It was an f8 lens at a time when Kodachrome 64 was the film of choice and every image cost more than a few pennies.
The combination of manual focus with a darkened f8 viewfinder and a very slow shutter speed, together with a minuscule depth of field, made getting proper focus extremely difficult. Successful images were few and far between and the cost of film made using it difficult to justify.
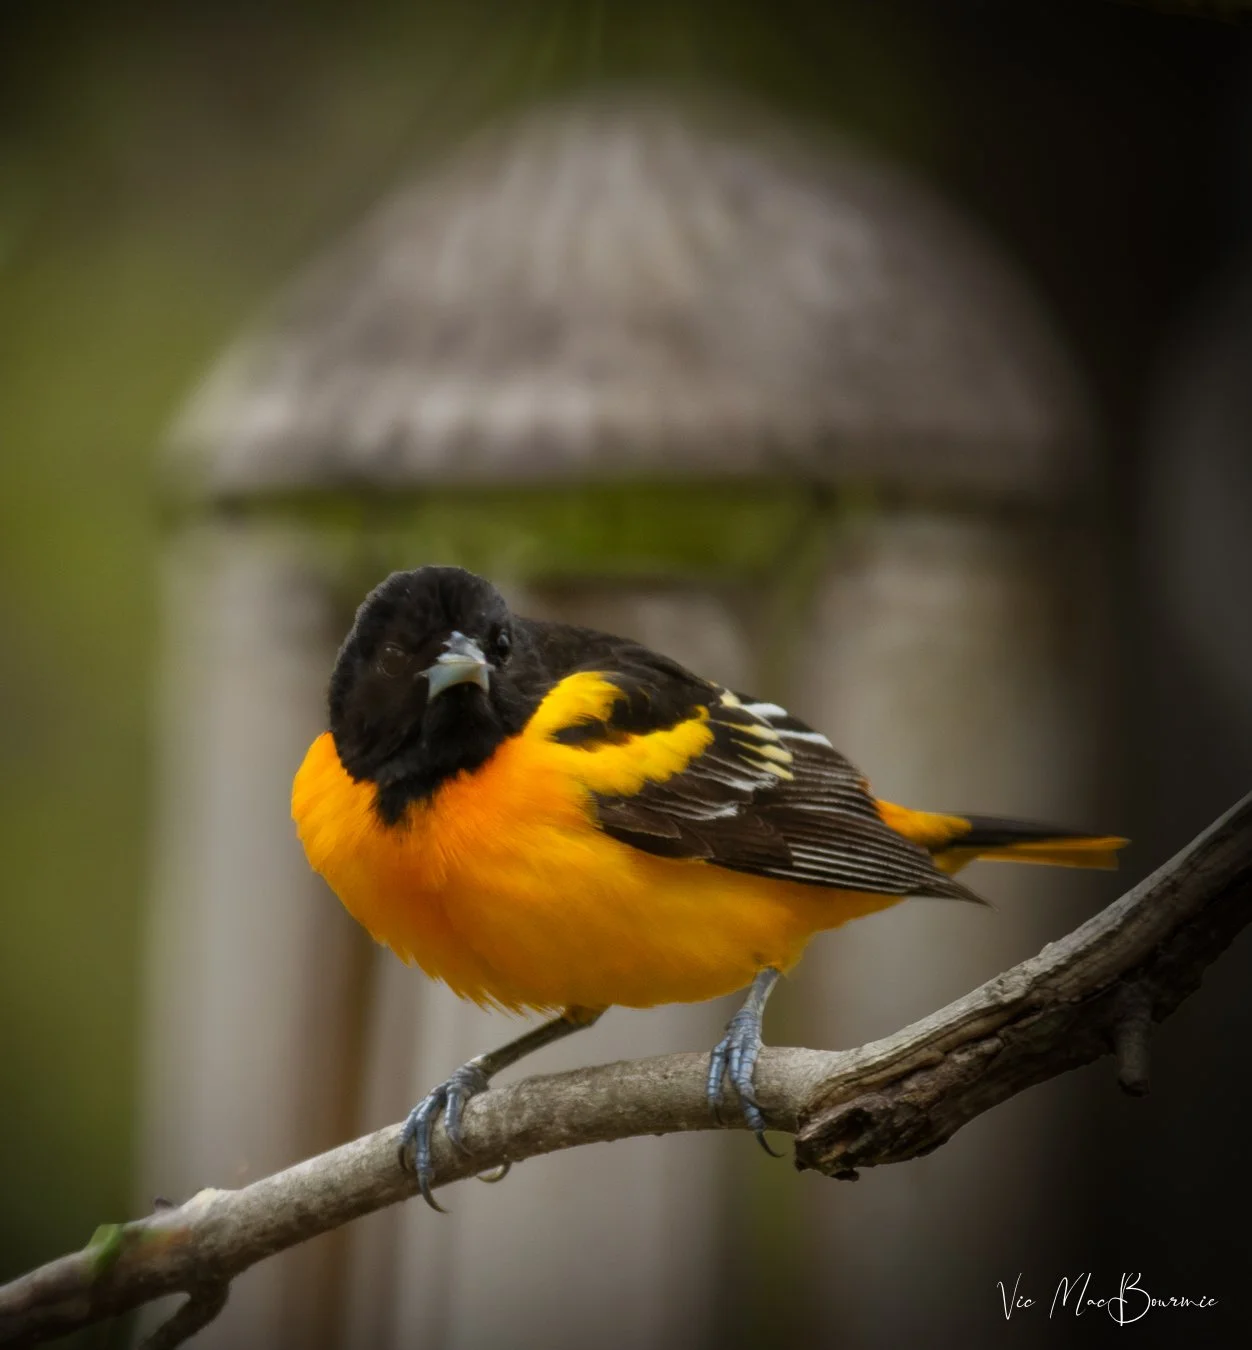
This image of the Oriole again shows the interesting bokeh the lens displays if there are no strong highlights in he background.
Needless to say a tripod and static subject was almost a necessity for success. And even then, it was wise to take several images to score a few respectably sharp ones.
Over time, that can get quite expensive, not to mention frustrating.

This image of a dark-eyed Junco was photographed through the double-paned windows of our back French door with the 500mm mirror lens. I think sharpness is certainly acceptable and although there is hints of donut bokeh, the overall bokeh is very nice in this image. Finding a simple background is key to success with mirror lenses.
A lot has changed since then, and a long supertelephoto mirror lens with a fixed F8 aperture is no longer considered quite the liability it once was.
Modern in-camera stabilization or IBIS, the ability to dramatically increase ISO and the freedom to shoot an unlimited number of digital images at no cost, transforms the mirror lens’s capabilities. Add to that, modern post processing programs with AI sharpening capabilities, and those near misses resulting from the super shallow depth of field, quickly become a thing of the past.

This mallard shows the possibilities of the 500mm mirror lens with a simple background.
In the short time I have owned the lens – and thanks to modern technology – I have found a corner in my camera bag and arsenal of photography tools for the Tamron 500mm constant f8 mirror lens. A major plus for the lens is its incredibly small size and especially its weight at only 575g.
And, for the mere $75 Canadian I paid for the mint-condition lens, I can say that it has already easily paid for itself a couple of times over. I expect even greater things in the spring, when I can get out and really put it to the test.
Just for comparison, a modern autofocus Nikon 800mm f6.3 lens will set you back about $8,500.00 US, or well over $10,000.00 Canadian. Now, it may not be fair to make the comparison, but it’s nevertheless still interesting. I guess it’s better not to even mention the $29,000.00 U.S. Canon 1200mm f8.
If a super telephoto lens with the latest autofocus technology is not something you would use regularly, a mirror lens like this Tamron SP 500mm might be the perfect compromise. I’m currently using it with my Pentax K5 APSC camera but will also be mounting it on my M4/3 bodies with an adapter. And, if I ever have the desire to shoot for the moon, attaching the 500mm mirror lens to my Pentax Q would give me the equivalent of about a 2,500mm lens.
Now that’s some pulling-in power.
Shooting through a double-pane French door at the birds outside my windows can result in some nice keepers when the weather outside is way below freezing.
In the meantime, I’m enjoying putting my $75 mirror lens through its paces in the eye of a Canadian cold front.
Mirror lenses making a comeback
If you’ve been following the latest trends in photography, you’ll know that mirror lenses are beginning to have a little resurgence of late.
TT Artisan, for instance, has released a tiny 250mm f5.6 mirror lens (Amazon link) that is making waves among photographers looking for a small, carry around lens with some telephoto reach. Its small size makes it perfect to carry around and the shorter focal length makes it easier to use whether you are shooting landscapes or street scenes.

The Tamron 500mm mirror lens fitted to my Pentax K5 APSC camera making the effective focal length approximately 750mm.
And the donut bokeh that was always cited as a problem in the past, is being embraced by a new breed of creative photographers looking for a way to have their images noticed on social media.
But that’s not the only reasons mirror lenses are making a comeback.
Let me explain.
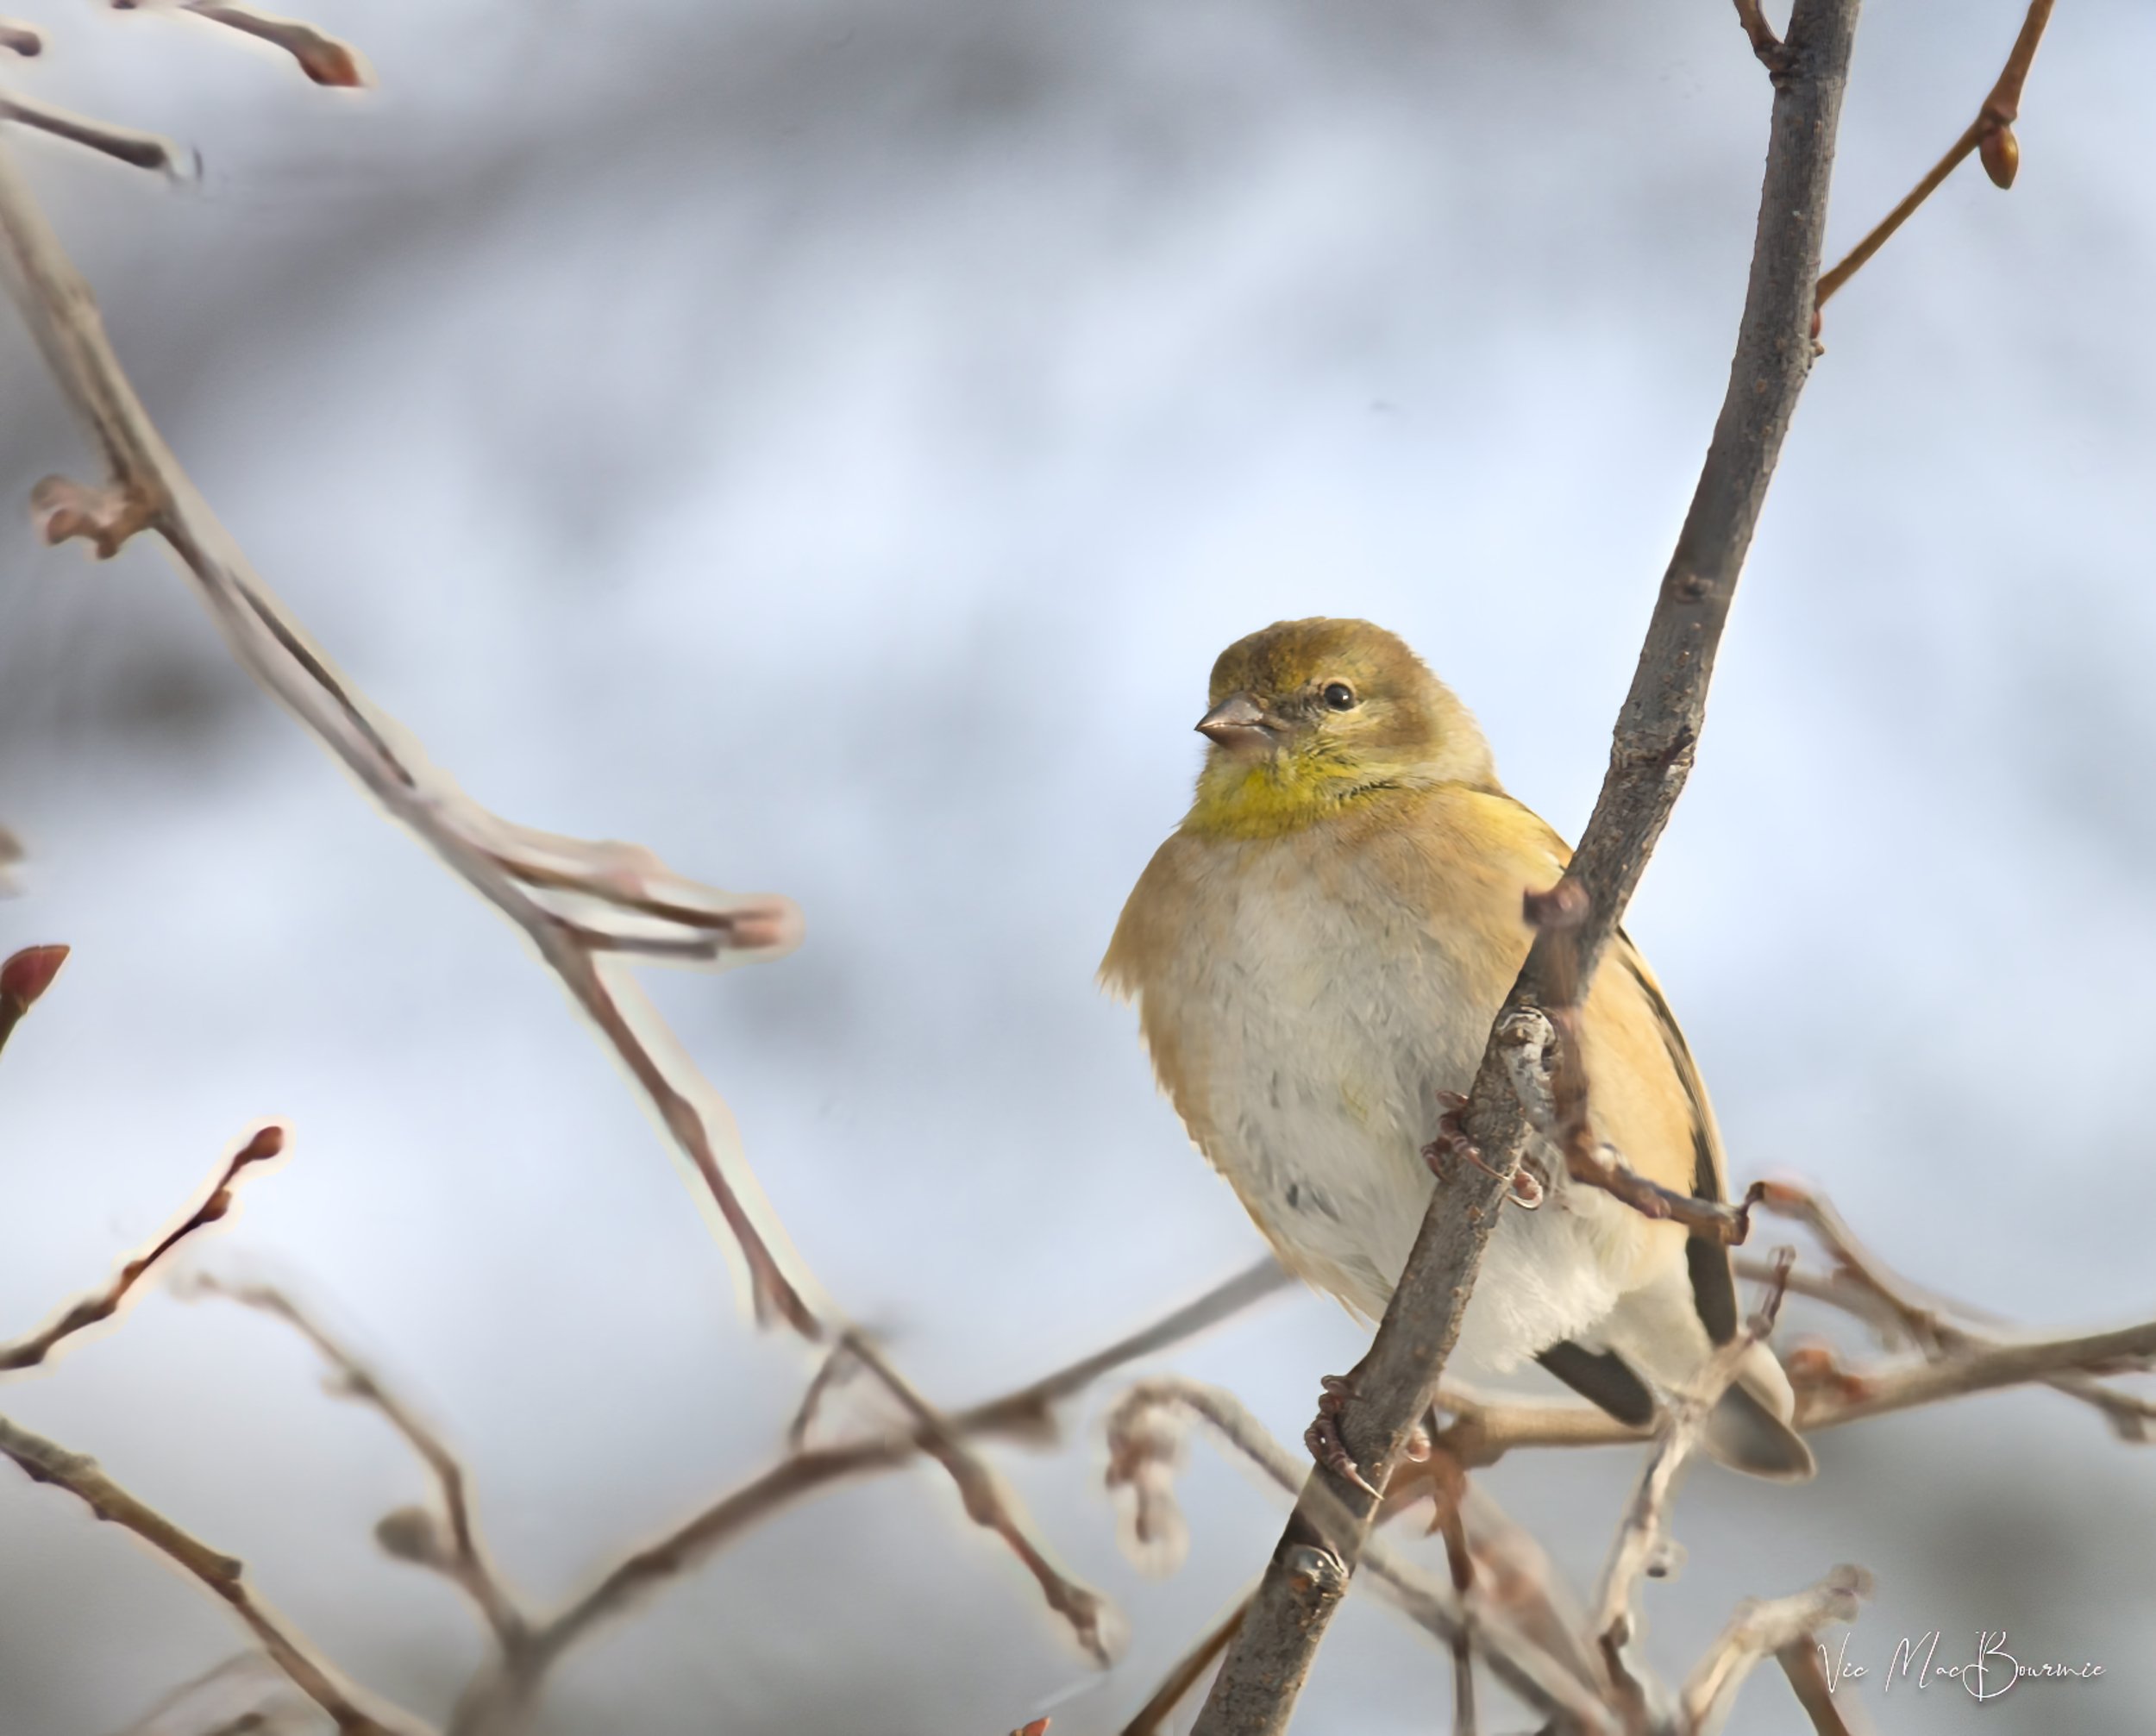
This goldfinch was also shot through a double-pane French door with the 500mm mirror lens. Notice the unusual bokeh giving the image a lovely soft look. This bird and the Junco above were just a few feet away 5-6 feet, allowing me to take advantage of the close-focussing ability of the lens.
Super telephoto that fits in your bag
On my APS-sized sensor on the Pentax K5 with IBIS, that 500mm becomes a close-focusing 750-800mm, f8 lens. Not only does the in-camera stabilization make it hand holdable in bright conditions, but the ability to bump ISO to unheard of levels when the lens was originally released in 1979, turns a once almost unusable lens into an everyday carry for photographers looking for an inexpensive super telephoto that easily fits into a camera bag.
It’s long reach is really only half the reason for my recent love affair.
Close-focussing from a distance
Its close-focussing capabilities are also worthy of mention. With a minimum focussing distance of 1.7meters (around 5-6 feet) and a magnification ratio of 1:3, the possibilities in the garden are endless.
The birds in this post, for example, were mostly right outside my window. And, while I had my fair share of throwaway images due to missed focus, the keepers make it all worthwhile.
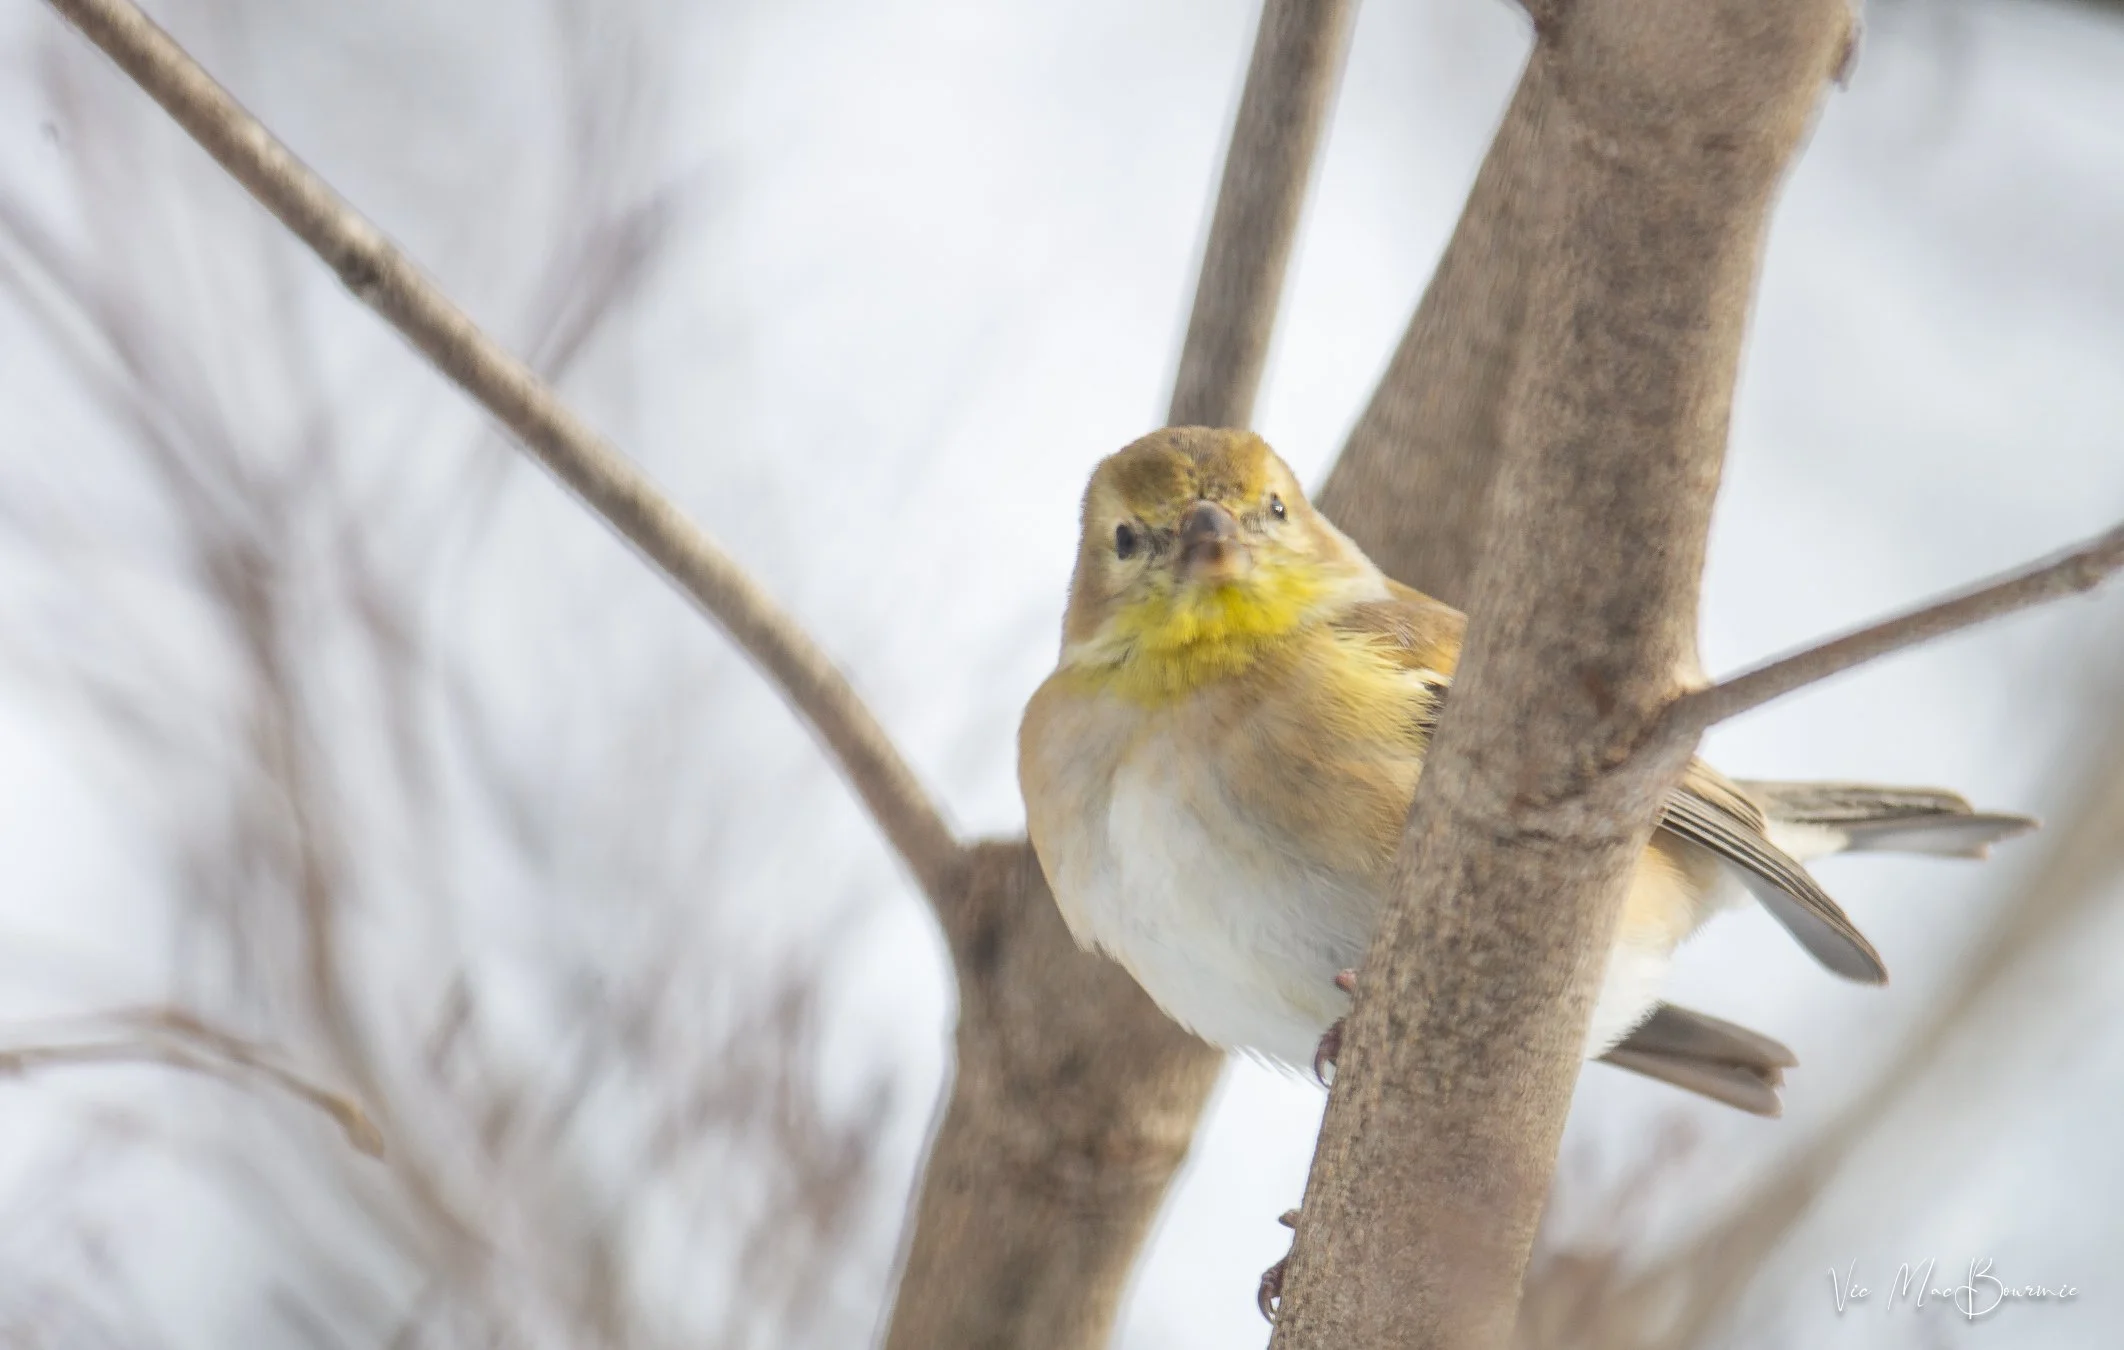
Another image of a goldfinch shot through a double-pane French door with the Tamron 500mm mirror lens.
Unusual bokeh can be a benefit
The other half is the unusual bokeh this lens exhibits. I’m not talking about the weird donut rings that can be effective but are mostly just annoying unless they are used creatively, I’m talking about the “other” bokeh few people seem to focus on when talking about mirror lenses. It’s a painterly effect that can be quite beautiful given the right situation.
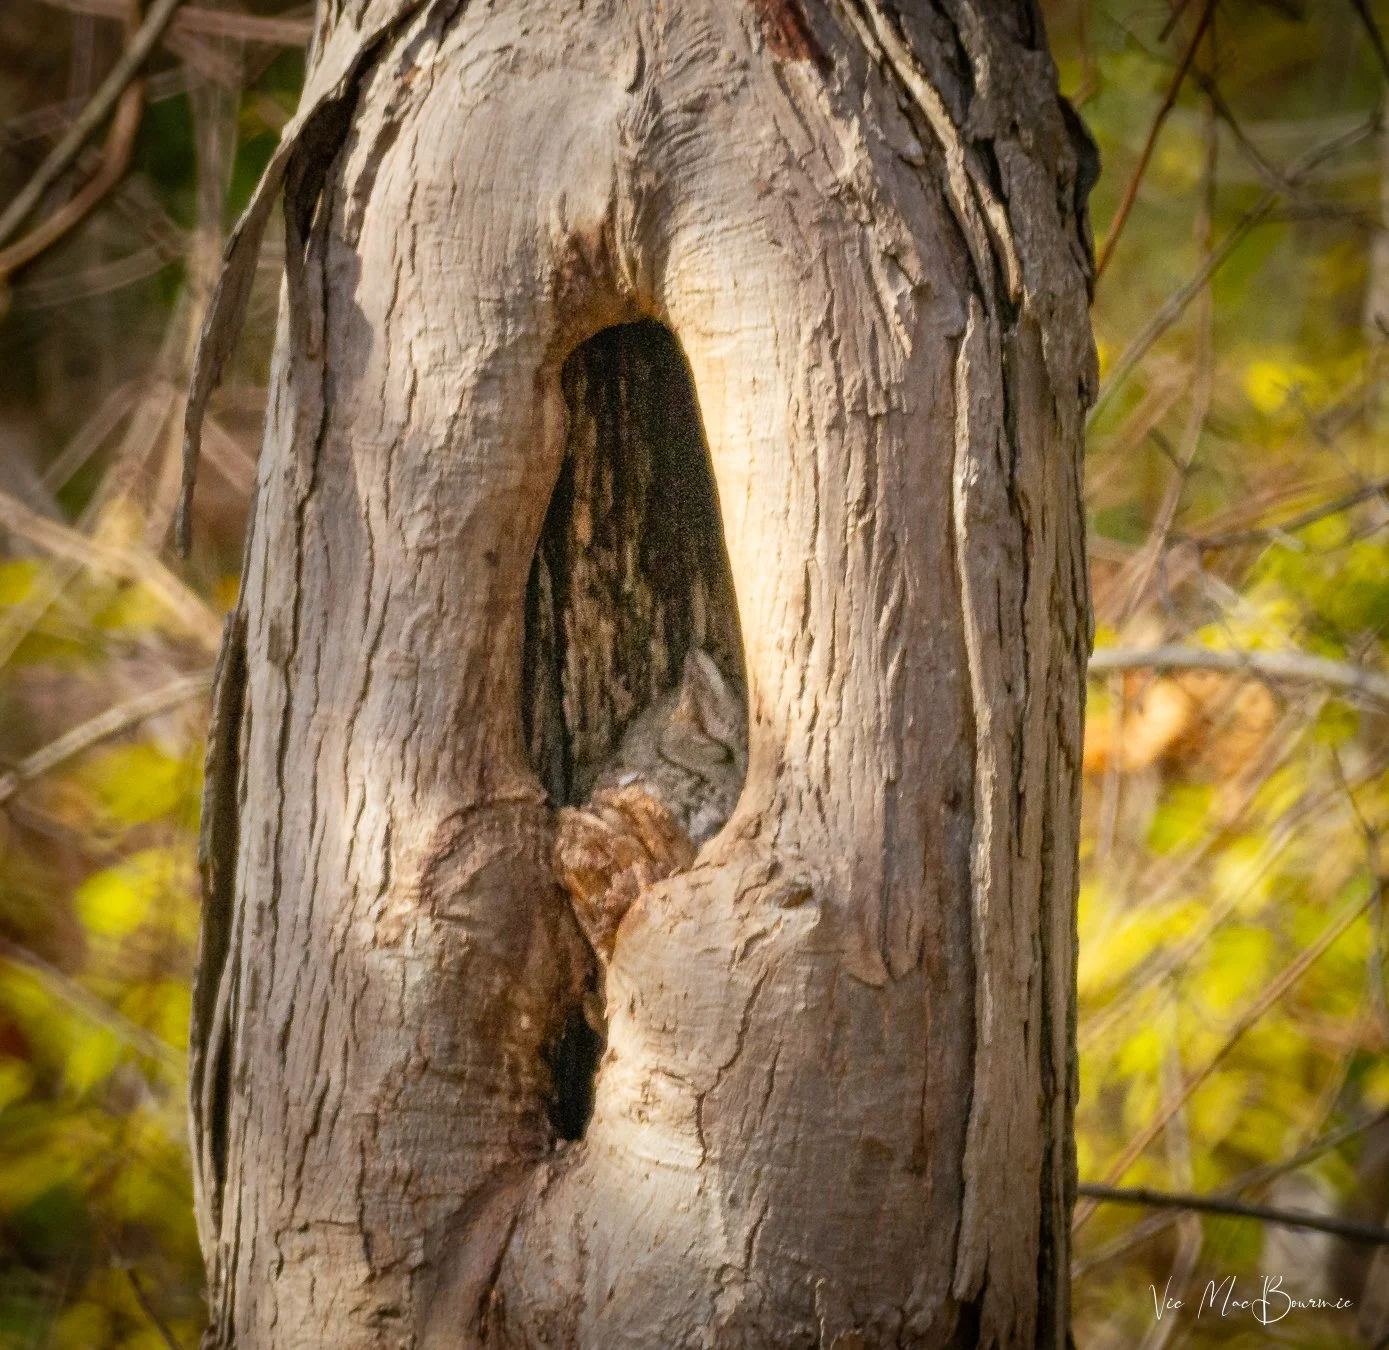
This sleeping screech owl is the perfect subject for the 800mm equivalent lens on an APSC camera like the Pentax K5. In this case, a monopod helped me steady the camera and lens.

Here, the specular highlights are bringing out the donut bokeh in the lens that can prove to be a little distracting to many viewers. It can, however, be used in a positive way for creative results under the right circumstances.

Another closeup image showing the flexibility of the 500mm mirror lens. At one moment you might be shooting a bird in a distant tree, and the next, a closeup of your favourite flower.

This extreme close-up of a flower is actually two images stacked together. Both images were taken with the 500mm mirror lens. Modern post processing programs help make the lens even more useable.
The owl image above gives a hint of the painterly bokeh in the out-of-focus green leaves in the background. The image below of a Junco in a snowstorm with two textures added, takes the painterly look to the extreme.
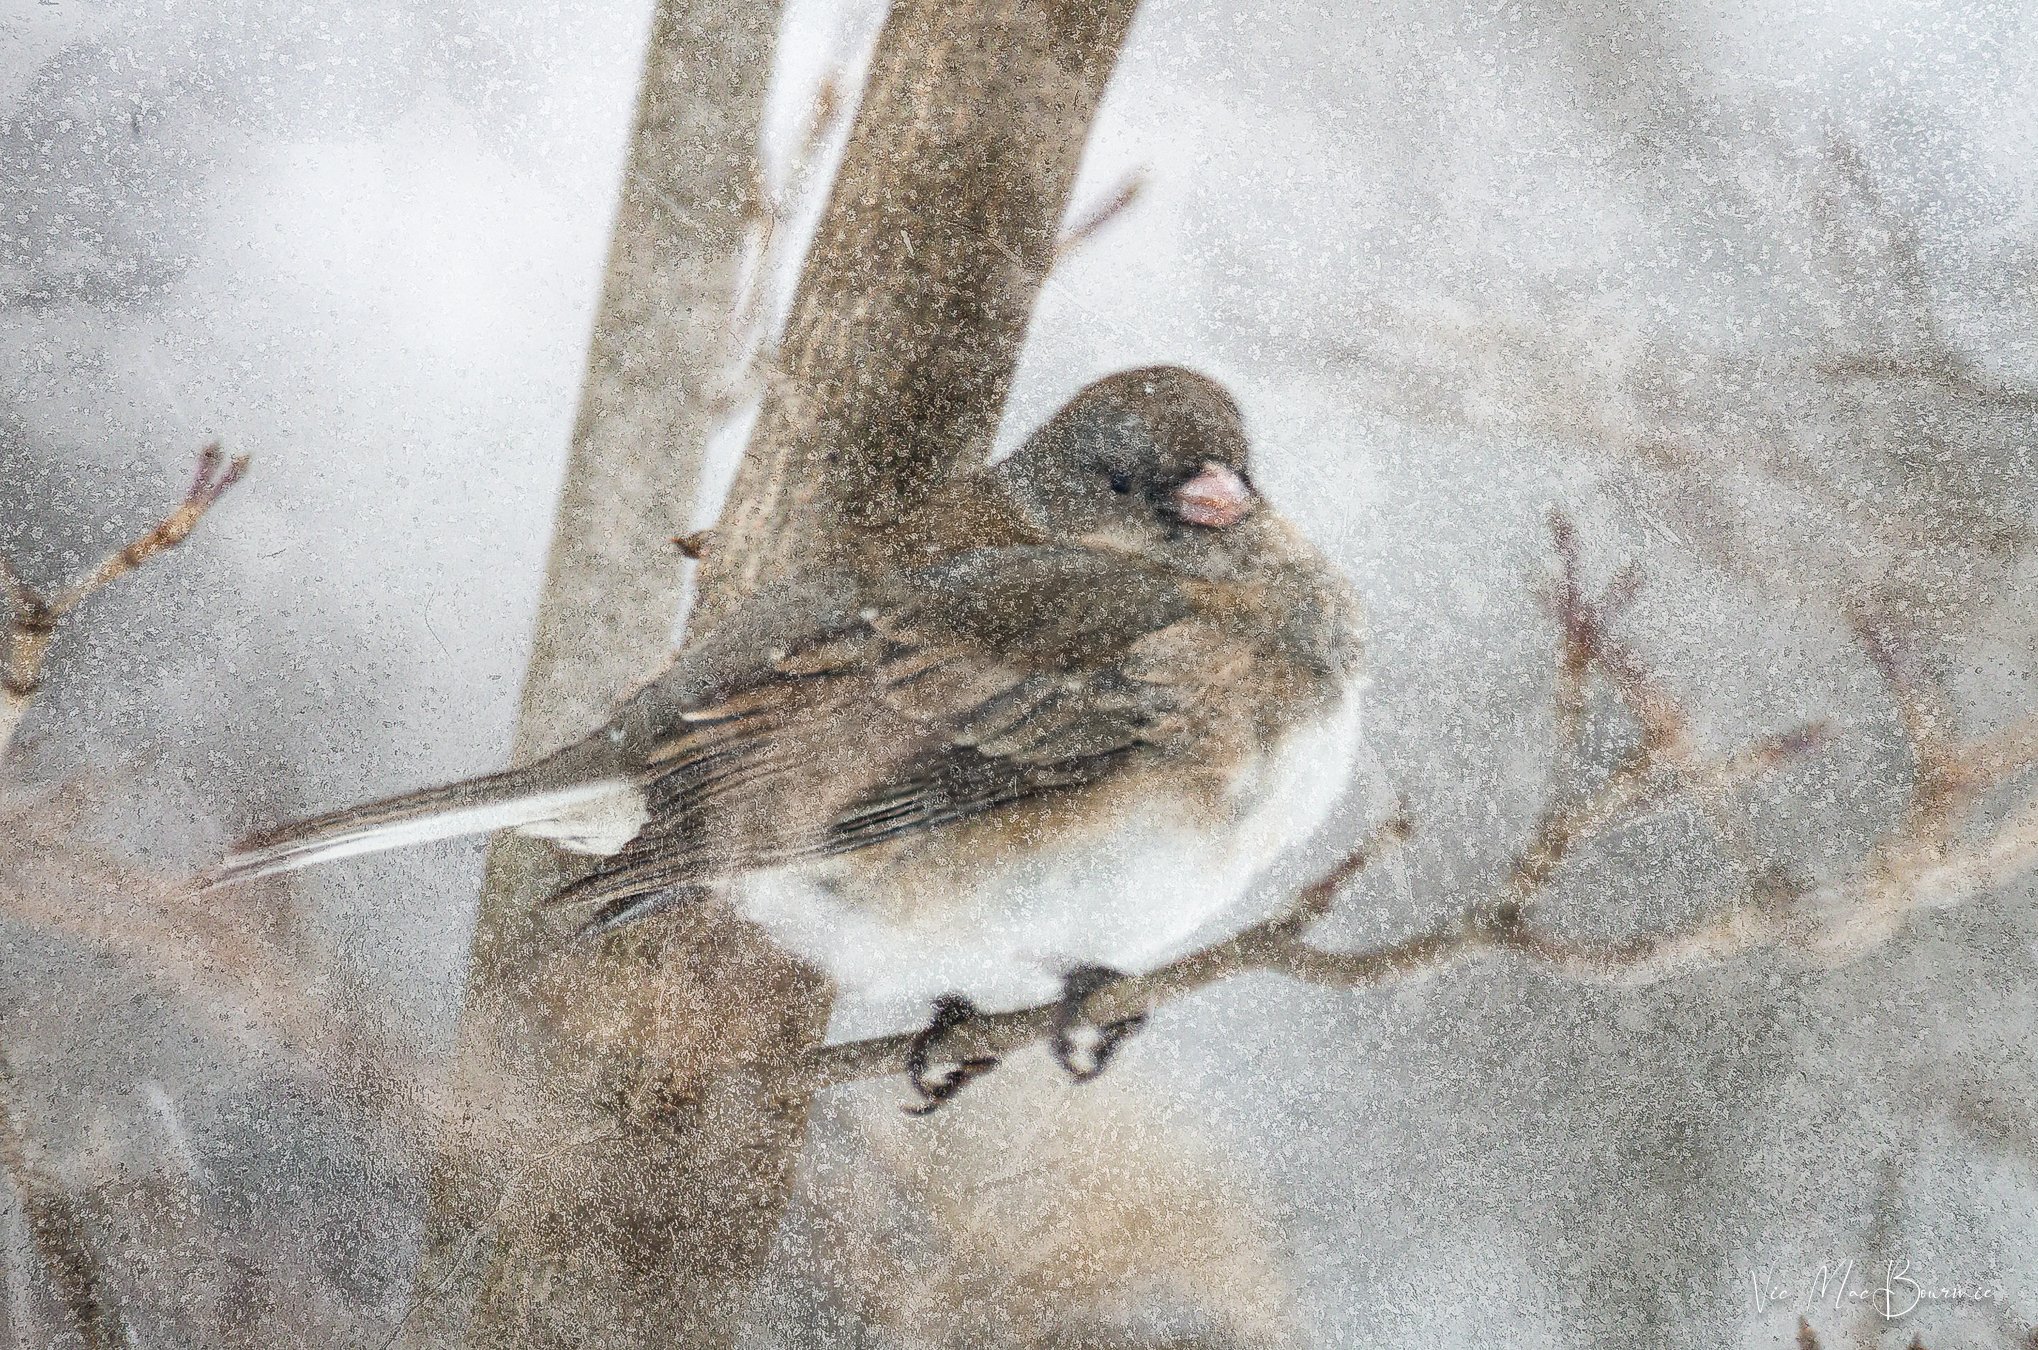
This is an interesting image that you might love or hate. Focus on the sparrow was a little off, but the overall softness of the image made it the perfect candidate to try adding some textures to create an even greater painterly effect. Here, two textures were added to get the finished result.
A little background on the lens
The Tamron 500mm mirror or catadioptric lens was originally introduced in 1979 as the smallest and lightest 500mm mirror telephoto lens ever produced. The lens was significant because it changed the thinking of optical engineers in the industry primarily because it uses Mangin mirrors. Mangin mirrors are lenses with one side of the lens being either aluminized or, in the case of Tamron's mirror lenses, silvered for peak reflectivity.
Light passes and refracts through the unsilvered front side of the lens element, reflects off the aluminized or silvered back surface, and then the light again passes and refracts through the front side of the lens element. The whole point of using Mangin mirrors within a catadioptric lens is to reduce weight and size by getting away from the heavy solid catadioptric lens designs and earlier conventional mirror lens designs which were nowhere as compact."
There are two versions of the Tamron adaptable lens known as 55B. One version is the same size as the later 55BB and has a screw in hood (This is the one I own.). The other is about 15mm longer body and has an integral sliding hood.
The 55B's are easily distinguishable from the later 55BB by the presence of the tripod mount, and the ribbed rather than dimpled pattern of the rubber grip. The lens was manufactured from 1979 to 1983.
For those who care, the optical construction is 7 elements in 4 groups. It has the high end BBAR multi coatings and a minimum focus distance (mm from film plane) 1.7m, with a magnification ratio 1:3
and a filter diameter: 82mm front; 30.5mm rear. It normally comes with a deep flock lined screw on metal hood that inverts for storage. Its Length (at infinity) 8.7cm with a weight of only 575g.
Attract birds all winter with DIY heated birdbath
Providing a reliable winter water source for backyard birds begins with an electric water heater. But it does not have to end there. Check out the DIY outdoor photo studio and reflection pond that birds are flocking to as winter approaches.
A goldfinch stops for a drink during freezing temperatures at our heated birdbath.
Water is critical for wildlife during extreme cold
A dependable source of water can be a critical factor deciding whether your backyard wildlife make it through extreme cold conditions.
The temperatures, often freezing overnight, make it difficult for our backyard birds – especially when it comes to obtaining water. Even those of us who are vigilant about keeping our feeders full, too often underestimate the importance of a reliable water source.
Ensuring a reliable source of fresh water is probably more important to our backyard birds than a source of food. Birds naturally store seeds leading up to winter and they can forage in our gardens for additional sources of food throughout winter.
But, having access to water becomes much more difficult.

A heated birdbath can be the difference between life and death for our backyard wildlife.
So, when our bird bath heater stopped working during a recent cold spell, I didn’t hesitate to go in search of another one. That led me directly to the Urban Nature Store where I had a choice of a number of heated bird bath alternatives from simple units that drop into existing bird baths to more extravagant bird baths with the heating element is embedded in the bird bath.
The selection was truly impressive. It’s important to note that heated birdbaths do not remain on at all times. Most have a thermal regulator on them that turns the unit off and on to maintain a water temperature just above freezing. This means the heater is not using electricity 24-hours a day.
I chose the K&H heater at $69 Canadian, but any of their offerings would have likely got the job done.
I must say, however, that this unit has performed exceptionally well, even in the record-cold temperatures we have experienced over the past couple of weeks.
We are lucky enough to live near a small, fast-flowing stream that provides emergency water sources to all our neighbourhood birds and wildlife that can easily access it.
However, I like to help out by ensuring a reliable water source in the garden. Not only does it make their lives a little easier, it attracts a wide variety of birds including many that may not regularly visit the feeders.
Squirrels are also regular visitors to the DIY birdbath.
For my other posts on bird baths, check out adding water to your garden and a DIY solar drip conversion.
Why water is critical for birds especially in winter
Water is critical to birds in the heat of the summer and even more important in the winter when traditional water sources are frozen over, including ponds and puddles. Bathing is an important part of a bird’s feather maintenance.
Wetting the feathers in a bird bath helps to loosen dirt and makes feathers easier to preen.
When preening, birds carefully rearrange the feathers and spread oil from the preen gland so they remain waterproof and trap an insulating layer of air underneath to keep them warm. That’s vital during cold winters where I live, especially when temperatures and wind chills can reach a bone chilling -30C and beyond and stay that way for days.
In fact, this has been a particularly bad winter in our area with prolonged periods of well-below freezing temperatures even during daylight hours. As I write this at around 11 am on January 31st, the outside temperature stands at minus 15 Celsius with a windchill of minus 23C. For those still using farenheit, that’s 5F and minus 10F with the windchill.
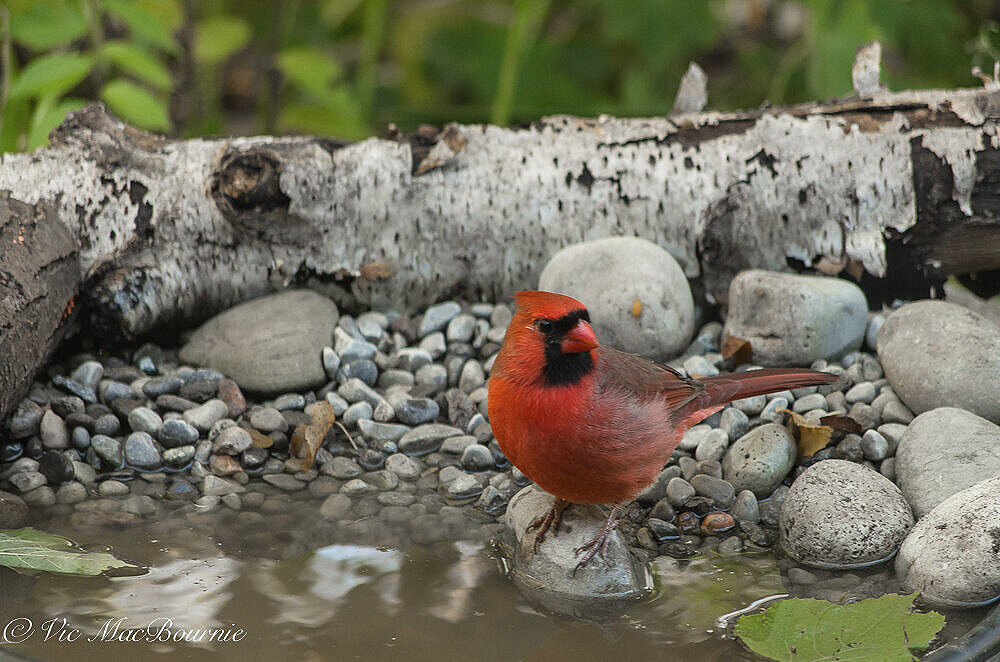
A cardinal stops for a drink among the stones in the heated bird bath and outdoor photo studio refection pond.
Birds lack sweat glands, so they traditionally need less water than mammals. They do, however, lose water both through respiration and in their droppings. Many insectivorous birds get most of their water from their food, but seed-eating birds, which are our most popular visitors in winter, have a dry diet and need to drink several times a day.
The appeal of a reliable water source may even be a stronger draw to birds than a well-stocked feeder, especially if there is no other reliable water source in the area.
Attract birds to your heated bird bath
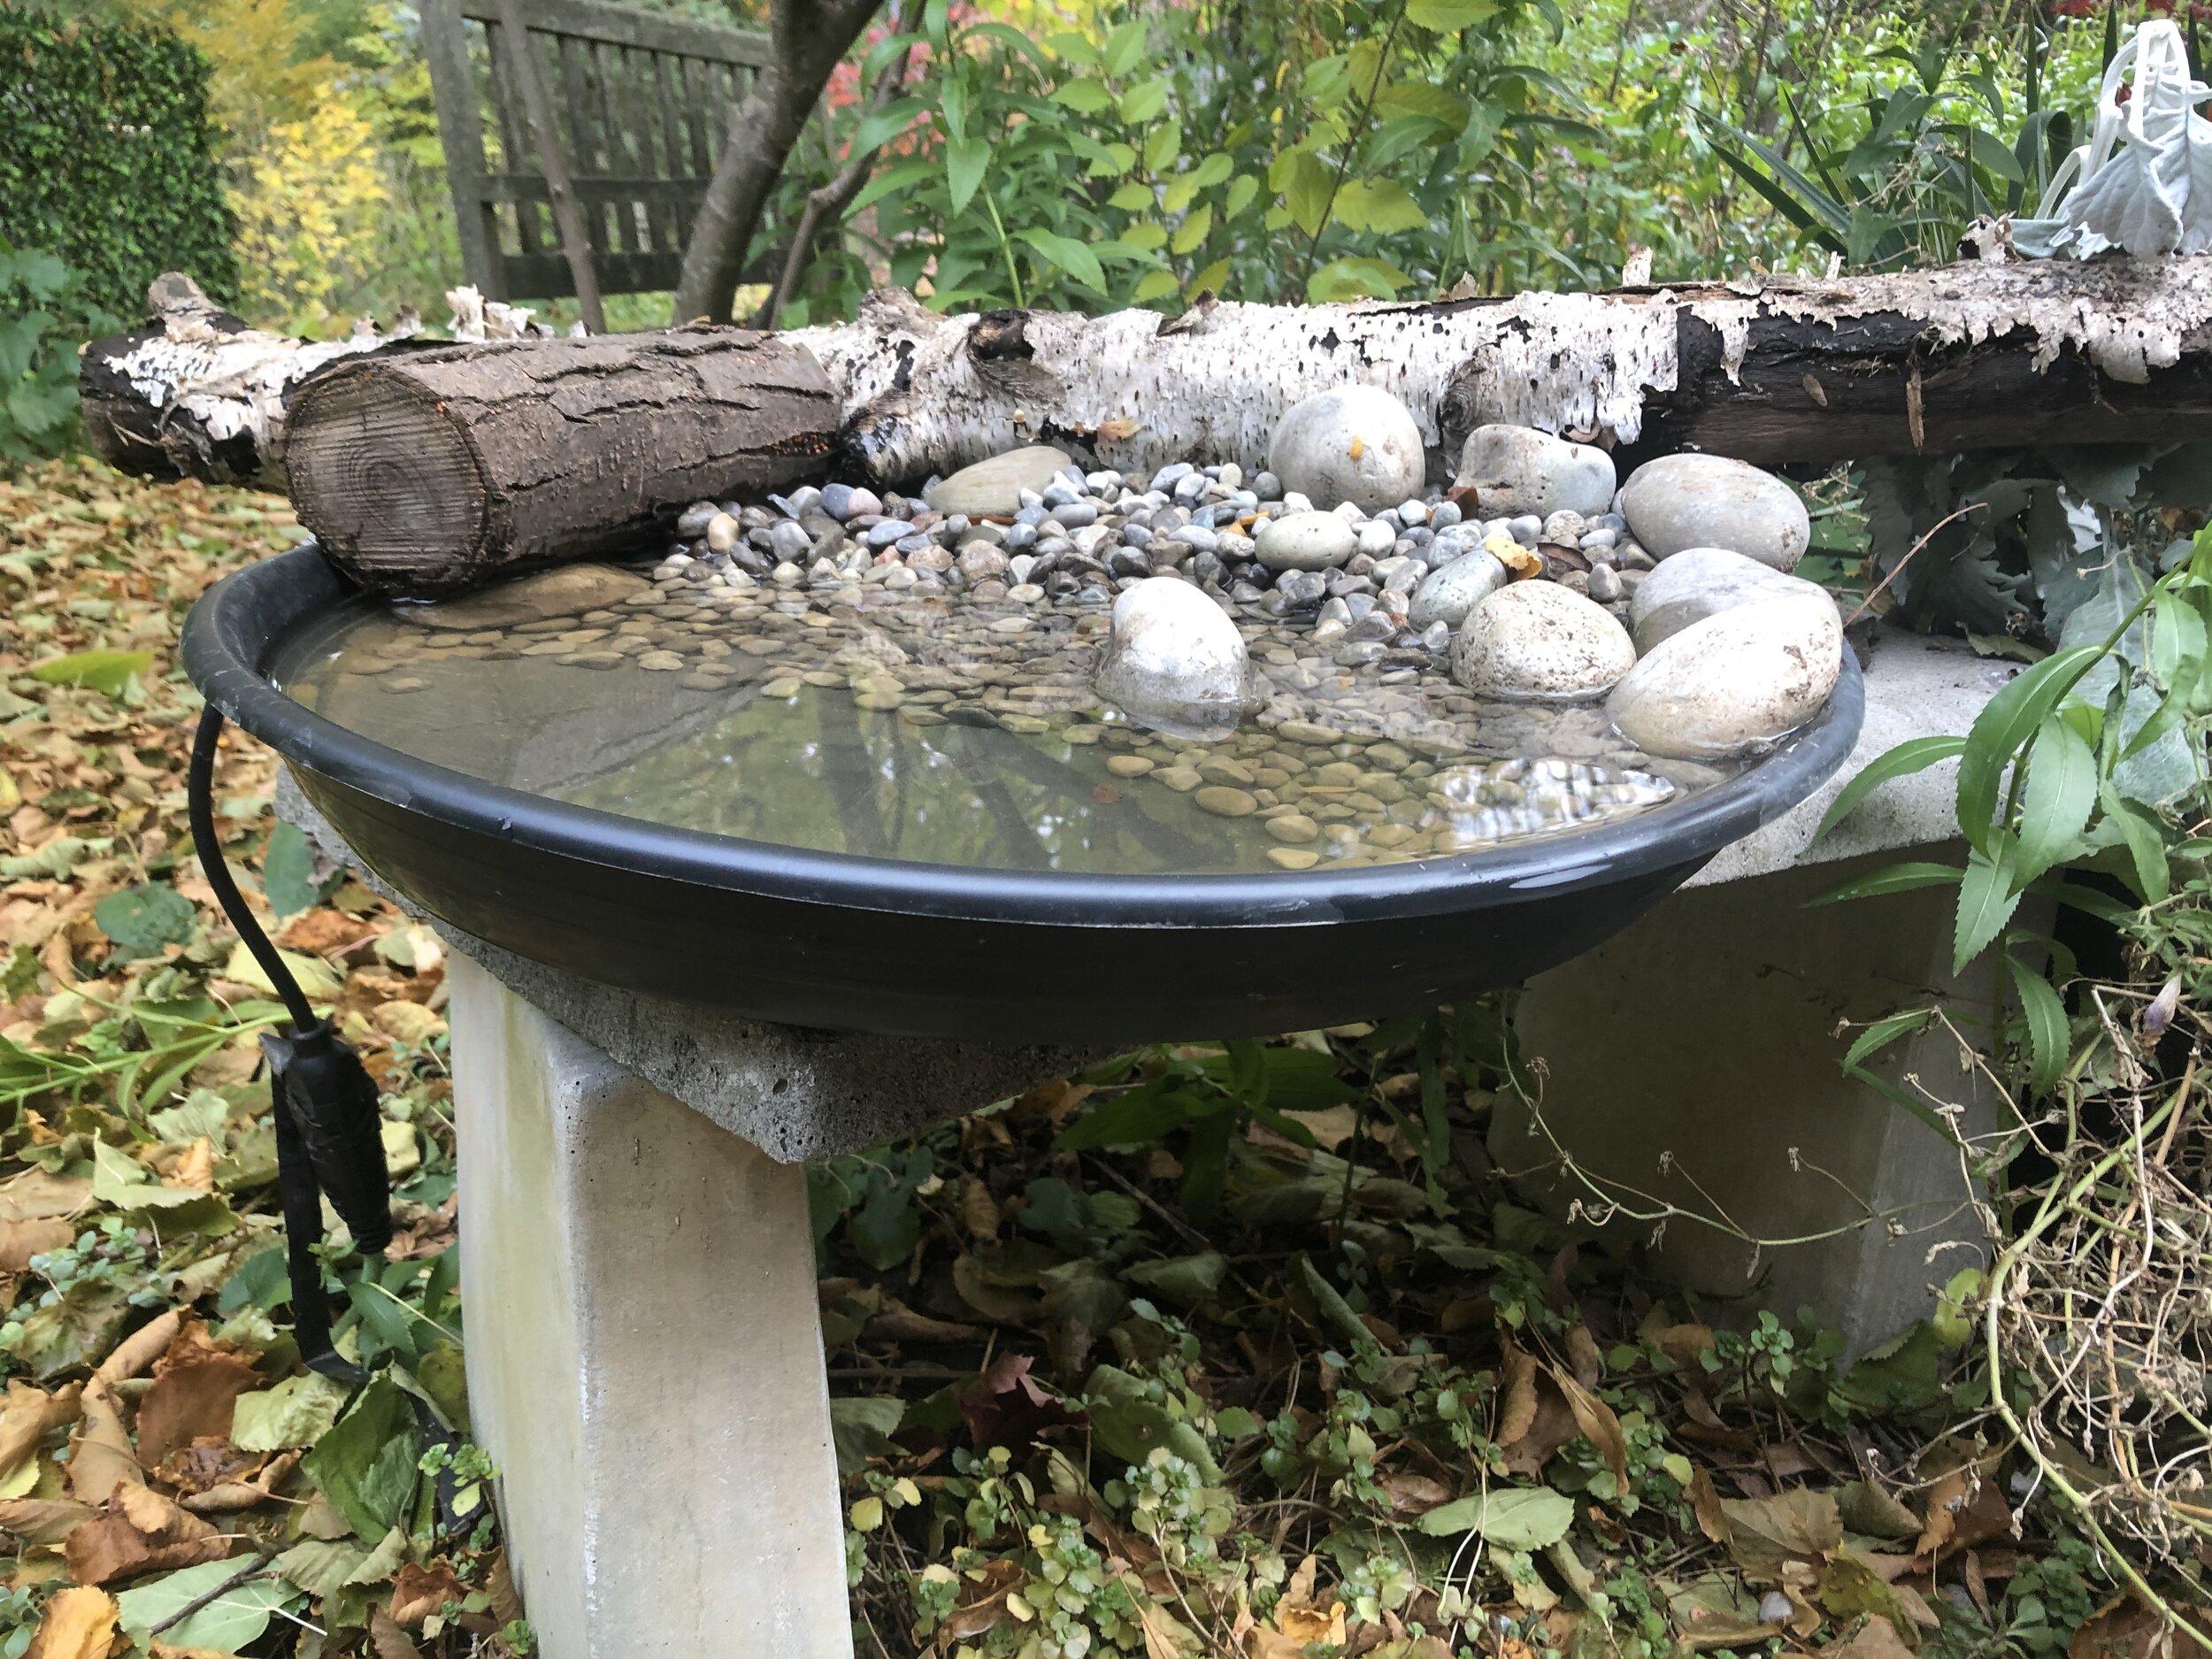
The heated bird bath ready for winter.
If you set up your heated bird bath in a separate area to where you normally have your bird bath, or your heated bird bath is entirely new to your garden, don’t be surprised if it takes a while for the birds to discover and be comfortable using it.
I have a couple of small feeders in the dogwood just above the heated bird bath, so there are always lots of birds around. Be sure to locate the feeder far enough away from the bird bath to ensure that the seed does not fall into the water.
My feeder is located just outside of our French door allowing me to photograph the birds from the comfort of our home. Consider locating yours near a window where you can both appreciate and/or photograph them.
To encourage birds to use your heated birdbath, be sure to set it up in a safe area of the garden. In winter, birds need even more cover in case of attack. We have a Coopers Hawk that visits regularly looking to make our birds into a meal.
Include perches above the bird bath to allow the birds to come down and check out the bird bath from a short distance. Include stones or landing spots inside the bird bath where smaller birds can either drink from or wade into the water slowly.
The stones also help hold the heat in the birdbath and offer birds more of an ice-free area to drink from the birdbath.
Build your own photo studio for the birds
With this in mind, I set about creating both a reliable water source and a backyard photo studio and reflection pond. In fact, I have two: one large reflecting pool and a smaller heated pool that will be the main source of water in the yard when the temperatures turn to freezing.
Our DIY project started with a round, medium-size black plastic basin that I picked up from a local nursery for just over $10.00. It’s a couple inches deep, so it’s perfect for small- and medium-sized birds to use safely. Larger birds, like jays and robins, will not hesitate to create havoc in the bath as they splash about, but we’re all good with their daily antics.
This bird bath is quickly becoming the gathering place for our backyard birds.
It sits on a concrete bench just outside our family room French door where I can easily monitor the water levels. At the same time, it’s close enough that I can use it to capture photographs of our feathered friends enjoying a bath. And, I can do it from the warmth of our family room.
Cute little Carolina Wren taking advantage of the heated bird bath to get water during winter.
An electric heater from was carefully placed in the bird bath and hidden with a thick layer of pea gravel and a few larger river rocks to give the birds a landing spot.
A birch branch across the back will help to stabilize the bird bath in case a large bird or animal decides to use it as their personal bath tub. It also creates a lovely background for the birds using the feeder. A few other branches help to hide the edge of the plastic tray, give it a little more stability and add to its natural appearance.
The heater, buried in pea gravel, keeps the bird bath ice-free in the coldest temperatures but remain hidden under the gravel.
The heated pea gravel also plays a role in helping to keep the water ice-free, but, if necessary, adding a kettle full of hot water on particularly cold mornings will keep the water open.
The pea gravel also provides birds with a gradual slope into the water much like a sandy beach. This allows birds of all sizes to enter the water to a comfortable depth, and put them in a position that creates good photographic opportunities.
Although the goal was to create a reflection pond that doubles as a heated bird bath, the round plastic dish comes up a bit short to capture perfect reflections of the birds on a regular basis. It will work nicely for a small bird on the pea gravel, but the reflection will likely fall just short for a larger bird like a blue jay or cardinal.

Quality over quantity: The importance of good bird seed
High quality bird seed sourced as locally as possible can make a significant difference in the number and variety of birds you are able to attract to your feeders.

A Goldfinch waits its turn to go to the finch feeder.
Buy locally grown for the best seed
Trying to save a buck when it comes to bird seed is not a wise decision… for a lot of reasons.
I found that out recently when I decided to pick up some cheap bird food at a local store known more for, let’s say, its car parts rather than bird food.
The specialty bird store I usually buy my seed from is in the next city over and involves a 20-minute drive, so I kept putting it off until it was too late and I needed to quickly restock my supply before a snowstorm hit.
A composite of a goldfinch and dark-eyed junco, the two birds that have taken to the new nyger seed.
The result is a large bag of bird seed that is maybe okay for the local squirrels and mice. (I’m actually putting the seed beneath our owl box hoping to attract mice to it to provide a ready-made food source for our little screech owl who lives in the yard.)
“Not only will a higher quality of seed attract more birds to your yard, it will attract a greater variety of birds.”
But, in searching the internet for a closer specialty store that stocks the seed cylinders I love so much, I discovered The Urban Nature Store – a Canadian-based bird and nature store that just happens to be located right in the small town where I live.
Turns out it’s been hiding just a couple kilometres away in plain sight for close to a year.
Why is this important? Because it verified what I already knew but choose to ignore to save a buck – high quality bird seed makes all the difference in the world. Not only high quality seed, but preferably seed that is locally sourced.
Not only will a higher quality of seed attract more birds to your yard, it will attract a greater variety of birds.
Let me explain.
On my first visit to The Urban Nature Store, I picked up a bag of nyger seed and a 25-pound bag of what they call their “no-mess blend” of bird seed.
My existing nyger seed was bringing in a grand total of zero gold finches, juncos or even sparrows, but within one day of filling the feeder with this new nyger seed, I had flocks of Juncos waiting in line to get their fill of this black gold. Today, I have a combination of juncos goldfinches and chipping sparrows lining up at the nyger feeder to get their fill of this important, high energy winter food source.
Cardinals, bluejays and a host of woodpeckers have reappeared in the yard since using a more locally sourced bird food.
There is a good reason why the old nyger proved unattractive to our backyard birds – it had simply dried out probably before I even brought it home. (For more on Nyger seed, go to my earlier post here.)
A few days after refilling the nyger feeders with this locally-purchased seed, I emptied our regular feeders at our main feeding station that was full of the cheap seed and replaced it with the no-mess blend seed from The Urban Nature Store. I also put one of the store’s seed cylinders up and within hours the feeding station was boiling over with birds lining up for a taste of this new seed. Cardinals, Blue Jays, Goldfinches, Dark eyed Juncos, mourning Doves, sparrows and a mix of woodpeckers including red-breasted and downy, just to name a few.
Dark-eyed Juncos and Goldfinches are devouring the new Nyger seed to the point where I am having to refill the feeder every couple of days.
This was more bird action than I ever really got from even the best seed from my “other” specialized bird store in the next town over. This was truly remarkable.
The mess-mix is packaged in Canada using local and international ingredients, and combines sunflower hearts, peanut halves, dried cranberries and raisin. The mix is perfect for those who want to serve a variety of premium seeds with no messy leftovers. No shells means everything is eaten. The Nature Store reports that the seed mix is very popular with cardinals, chickadees, warblers and finches. Not sure about warblers, since they are primarily insect-eating birds.
And, since I have been using this seed, the number of birds at our feeding stations has only grown steadily.
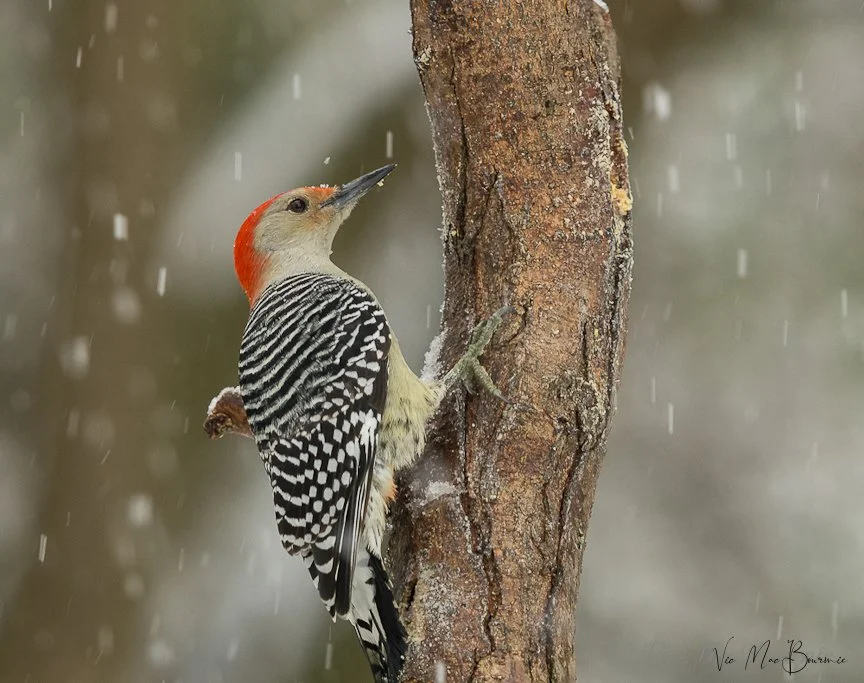
Even the woodpeckers have returned with the new seed and seed cylinders from the Urban Nature Store.
“So what’s the difference?” you may ask.
Besides being a high-quality seed, an important difference is where it was sourced and the closer to home the better. This happens to be a Canadian-based store that sources much of its seed locally.
Who knows where big box stores source their seeds from, and I know that the other “specialized bird store” I purchased my seed from in the past was American based and likely sourced much of their seed from the U.S.
The closer you can purchase your seed, the more success you are likely to have. If you are based in the U.S., look for seed that was sourced nearby. The same holds true for U.K. based readers.
In the case of nyger seed, which mostly comes from Africa, the critical factors are how old the seed is and, if it has been overcooked in ovens that remove the natural oils that give the seed its nutrients. Purchasing from a specialized bird food store helps guarantee high turnover and is less likely to leave you buying old seed that has not been handled properly.
Not only has the seed from my local Nature Store been a magnet for local birds, the seed cylinder that I purchased is still going strong more than a week after mounting it, despite continued snow and rainfall that often prematurely weakens other seed cylinders I have used in the past. The fact it has held up so well means an extended run for the woodpeckers rather than the seed cylinder breaking up and falling to the ground for the squirrels and other critters.
If you have taken the time to check out The urban Nature Store link here, you will find that it is a wholly-owned and operated chain of Canadian stores with its head offices based in Toronto. It does offer mail-order for some products for anyone who does not live near one of its 9 store locations in
Ancaster/Hamilton
Etobicoke/Toronto West
Kingston
Markham
Mississauga
North York/Toronto East
Oshawa
Pickering
St. Catharines
I encourage all my readers to check out their impressive web site and support a truly Canadian company.
However, I recognize that we have many American and UK followers who cannot or choose not to purchase from The Canadian based Urban Nature Store.
All I am saying is that whenever possible – especially when it comes to purchasing bird seed – buy it from a local supplier. If the results I am having means anything, It really does make a difference.
Fresh bird seed that comes from a locally sourced supplier can make all the difference in the world to your bird feeding success.
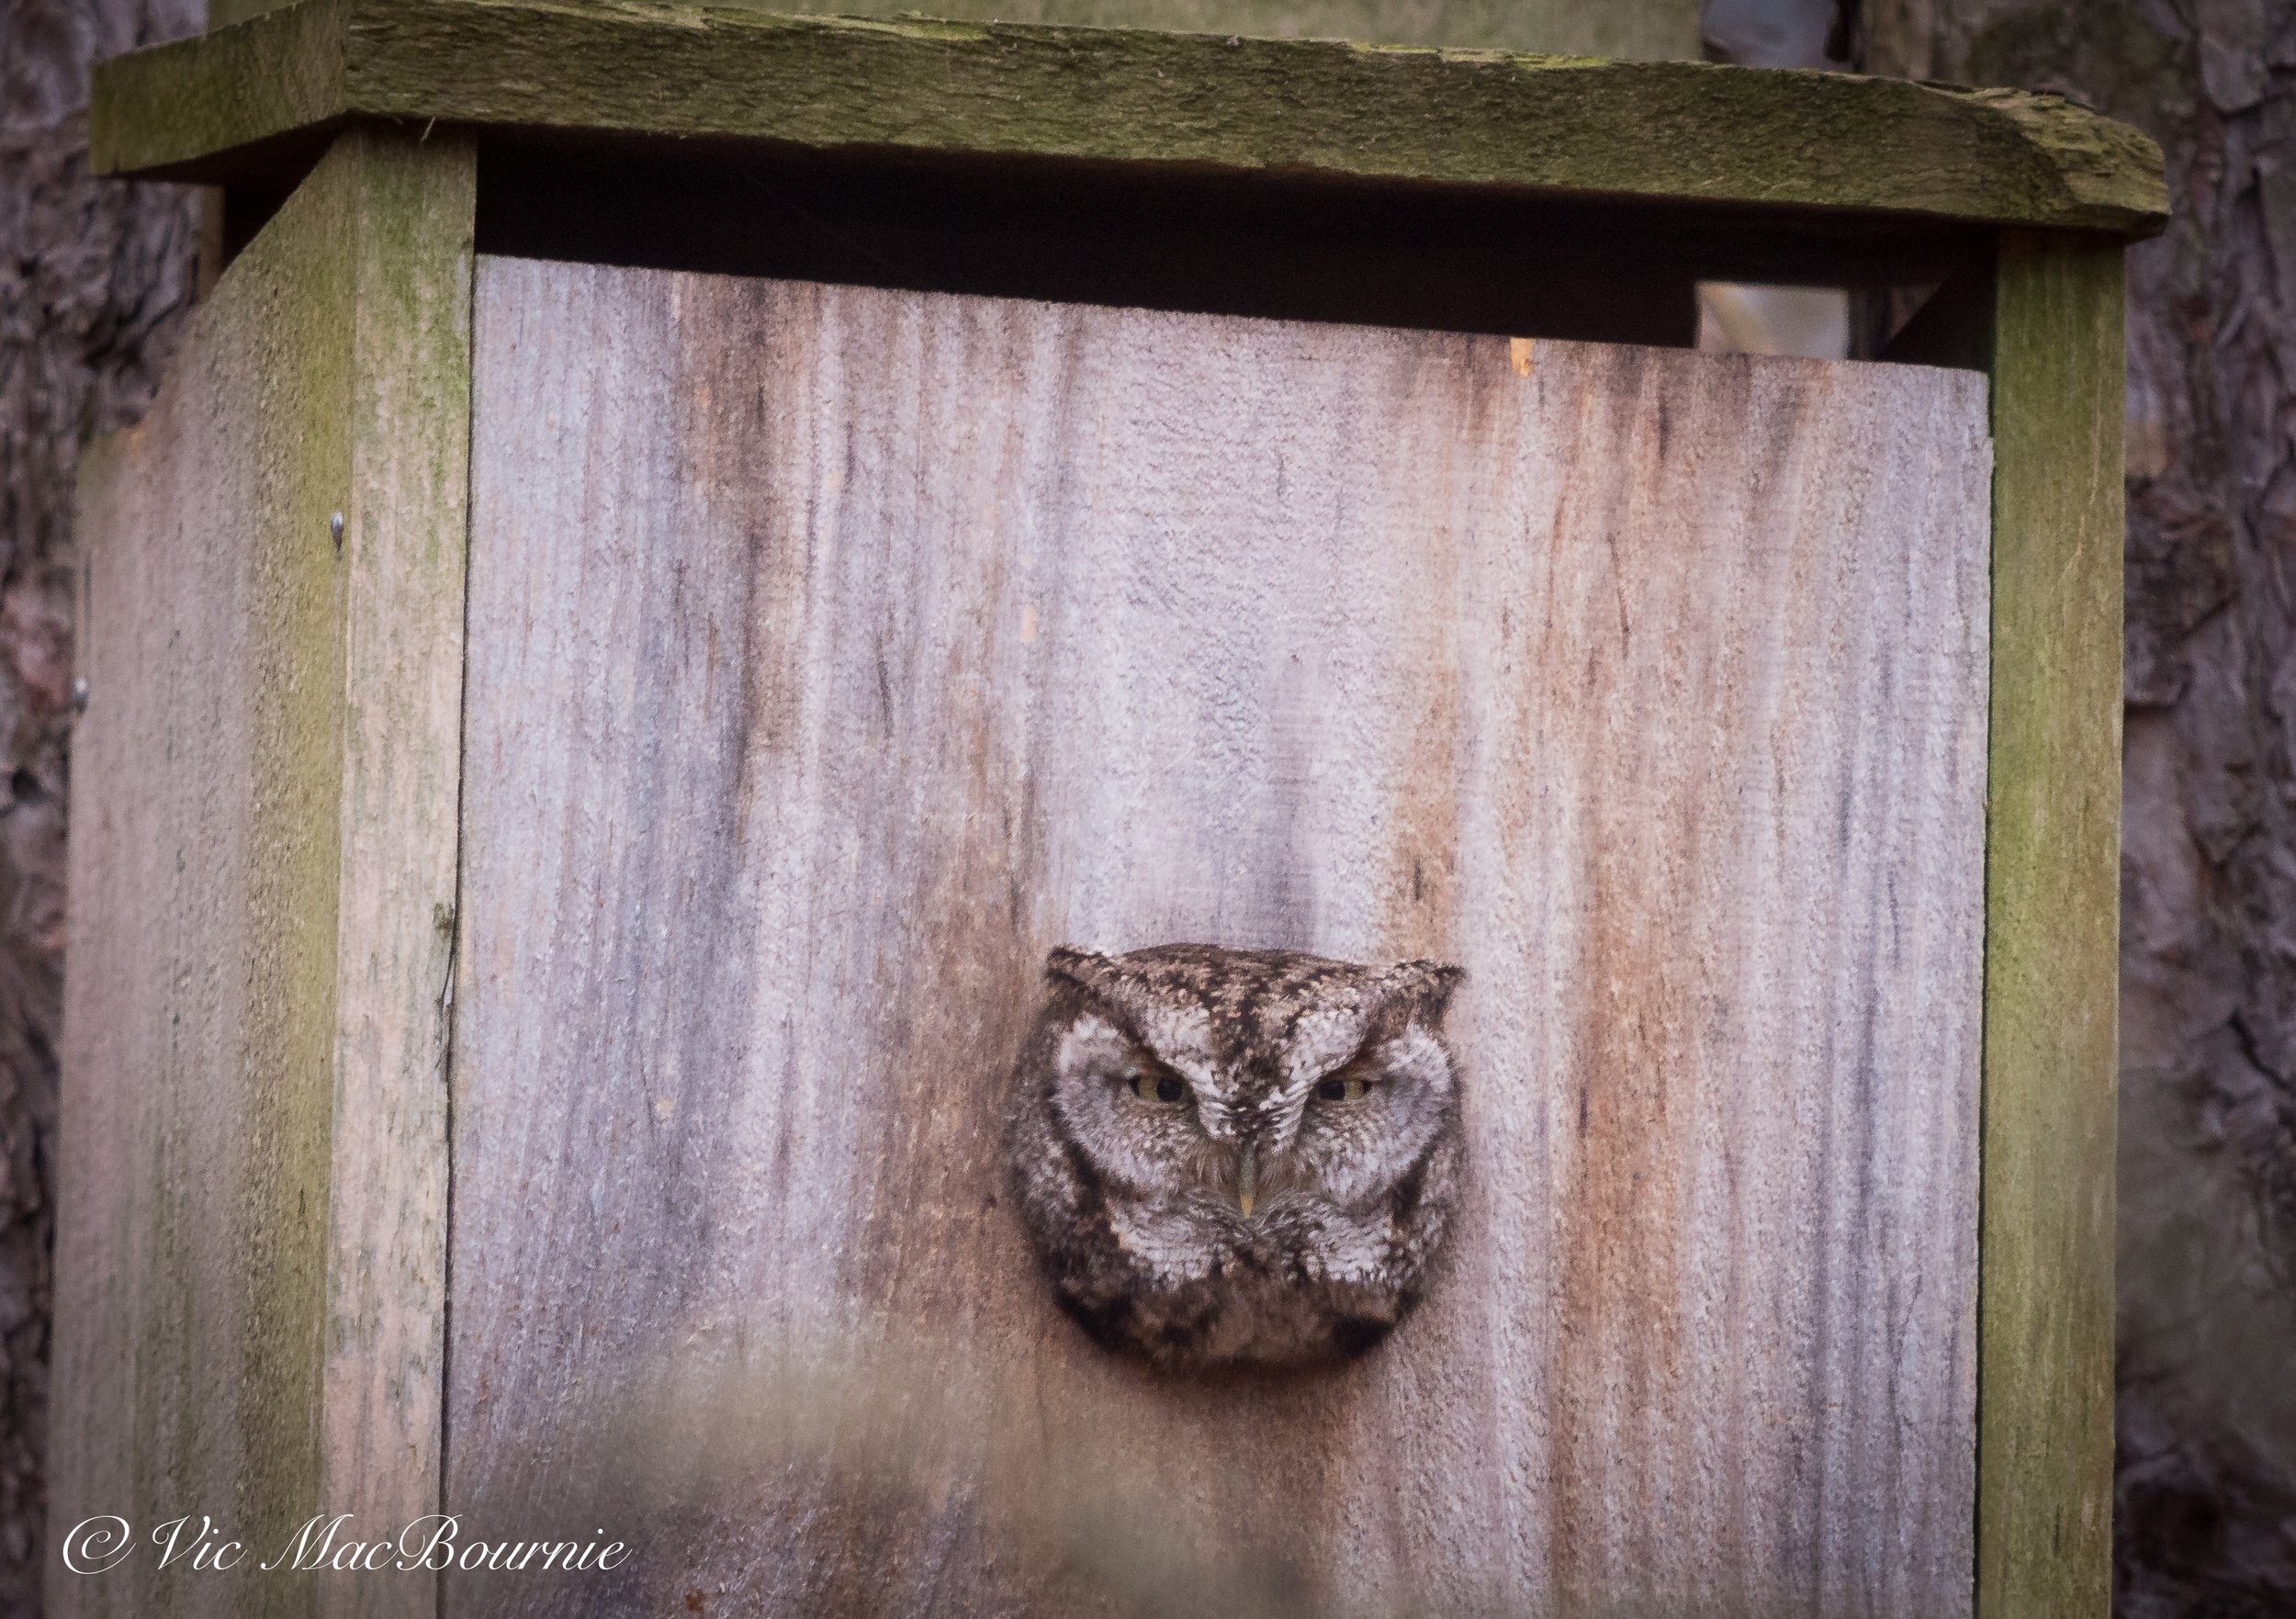
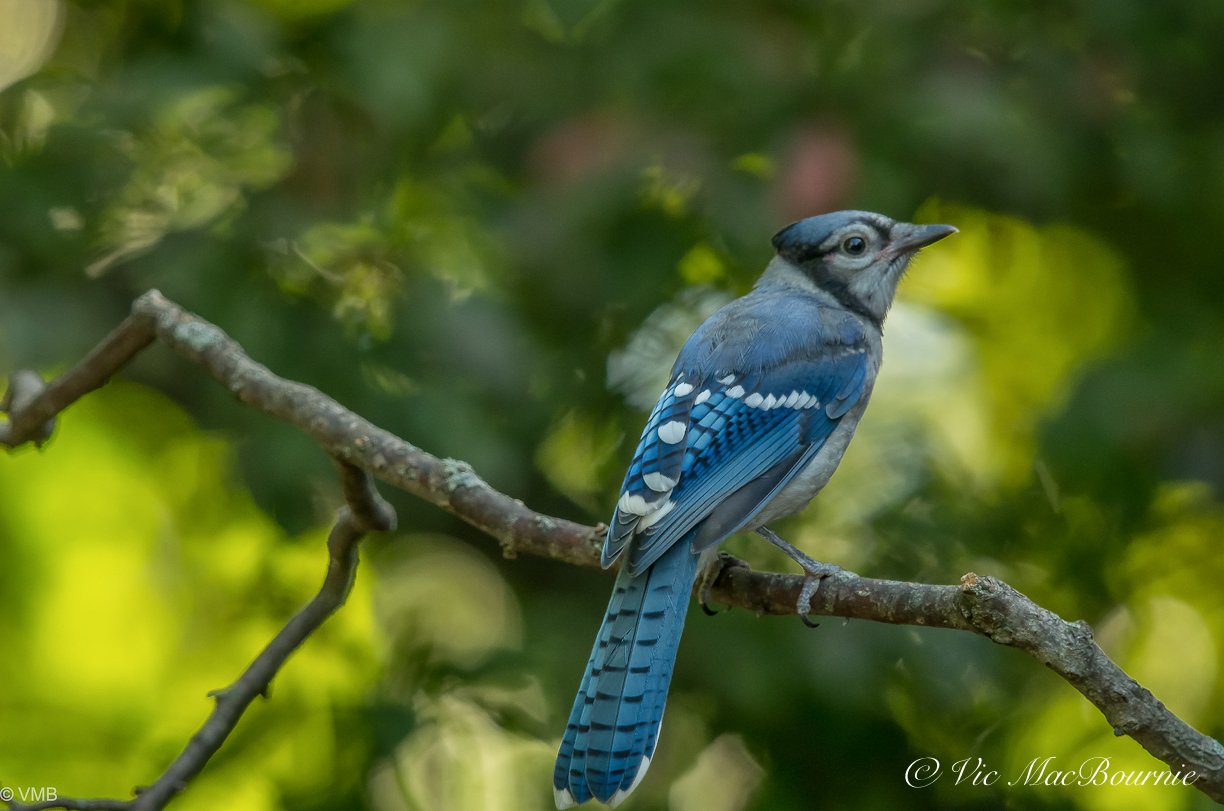


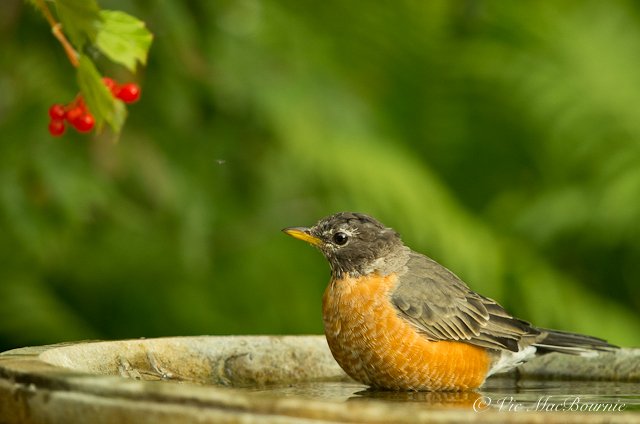


Adding a little sunshine during the cold winter months
Bringing the garden into the kitchen with a bouquet of flowers and a handful of Lensbaby lenses.

This image was made with the Lensbaby Composer and 50mm double-glass element at f2.8 with an Olympus EM10. My goal was to get an image to establish the general scene. From this image, I began to move in closer and closer to create more of abstract images working with soft, delicate lines and colours.
Lensbaby takes creative flower photography to new heights
Winter has set in and taken a firm hold of the garden, but that’s no reason not to let the sunshine in.
This week I decided to pick up a bouquet of flowers so I could get back to one of my favourite pastimes – photographing flowers. Rather than shooting in the garden, I brought a little of the garden into the kitchen where a large bay window allows a lovely soft light to bathe the flowers.
Even if you have no intention of photographing the flowers, it’s never a bad idea to bring a little sunshine into our homes during the long days of winter. We could all benefit from a little happiness these days.
It turned out to be the perfect opportunity to put a few Lensbaby lenses to good use. The following images are a little taste of my morning with a trio of Lensbaby lenses.

Moving in a little closer with the Lensbaby composer creates a delicate, soft-focus image with a very graphic element to it. Perfect focus can be difficult with Lensbabies, especially in the more wide-open aperatures such as f2.8.
Getting creative with a trio of Lensbaby lenses
If you are not familiar with Lensbaby lenses, they are specially designed lenses aimed at encouraging photographers to have a little fun by adding a more creative element to their images, mostly in the form of selective and soft focus.
Unlike traditional lenses, the goal is not to attaina perfectly sharp, sterile image.

This image was taken with the Lensbaby Velvet56 on a Lumix GF7. The Velvet series of lenses are able to focus very closely making them ideal for flower photography. The Velvet series of lenses create a dreamy, more ethereal look that sports a sharp centre and soft, glowing halo around subjects. Some would say they have a vintage look to them and are ideal for flower photography and portraits. Stopped down a little at F4-8 and beyond reduces the soft-focus effect and makes them ideal for landscape images with a dreamy look.
One Youtuber describes experimenting with Lensbabies like sitting at the high school lunch table with all the artsy students complete with body piercings, vintage clothing and “interesting hair colour.” Now, while I can’t say that would describe me in high school, it sure sounds like hanging out with them would be a lot more fun than talking calculus.
Nothing wrong with perfectly sharp, perfect sterile images, but, when it comes to creative flower photography, sharp and sterile just doesn’t make the grade.

This image was made with the Lensbaby 2.0 at F2.8 on a Pentax K5 camera. Two Lensbaby macro filters – the 4X and 10X – were added to allow the extreme closeup.
For these images, I used a combination of a Lensbaby 2.0 with a double-glass element 50mm lens, a Lensbaby Velvet56, and a Lensbaby Composer with a double-glass element 50mm. In addition, I used Lensbaby’s 4X and 10X macro filters to move in extremely close for some images. The macro filters can be stacked for even closer views.
All Lensbaby lenses are manual focus and do not have electrical contacts to communicate with your camera body. As a result, settings on many cameras need to be adjusted to work with these lenses. I usually use them on aperture priority and use the +/- compensation adjustment for fine tuning the correct exposure.
There are several other Lensbaby lenses available that create a variety of different effects.

This image was made with the Velvet 56 at around F4.
For more information on Lensbaby lenses, go to the Lensbaby website here.
Here is an Amazon link to Lensbaby lenses for those interested in pursuing this very fun and rewarding form of photography.
While Lensbaby lenses can be used for any type of photography including portraiture, street photography and landscapes, they really shine when it comes to capturing soft, delicate and impressionistic images of flowers.

Capturing the flower petals in a lovely soft light with the Velvet56. The Velvet series of lenses, which include a 28mm wide angle lens, look more like traditional lenses rather than the more unique looking Muse, Composer and Spark designs.
These images are just a few examples of my recent morning with a trio of Lensbabies and a handful of flowers on a cold winter morning.

Moving in close to explore the details of a flower using the Lensbaby macro filters takes the image more into the realm of abstract. I focussed on the lines leading into the inner flower petals for this abstract image.

Again, moving in close and having fun using shapes, lines and colours helps to free your mind from trying to capture a sharp, traditional image of a flower.

In the world of Lensbabies, sharpness and realism is certainly overrated. Exploring visually opens up a whole new world and creates a sense of freedom in your photography.

Small changes in perspective can take your images to a whole new level. This image, along with the one below are similar but different and allow small movements within the lens (not the camera) to change the look of the image as well as the focus.

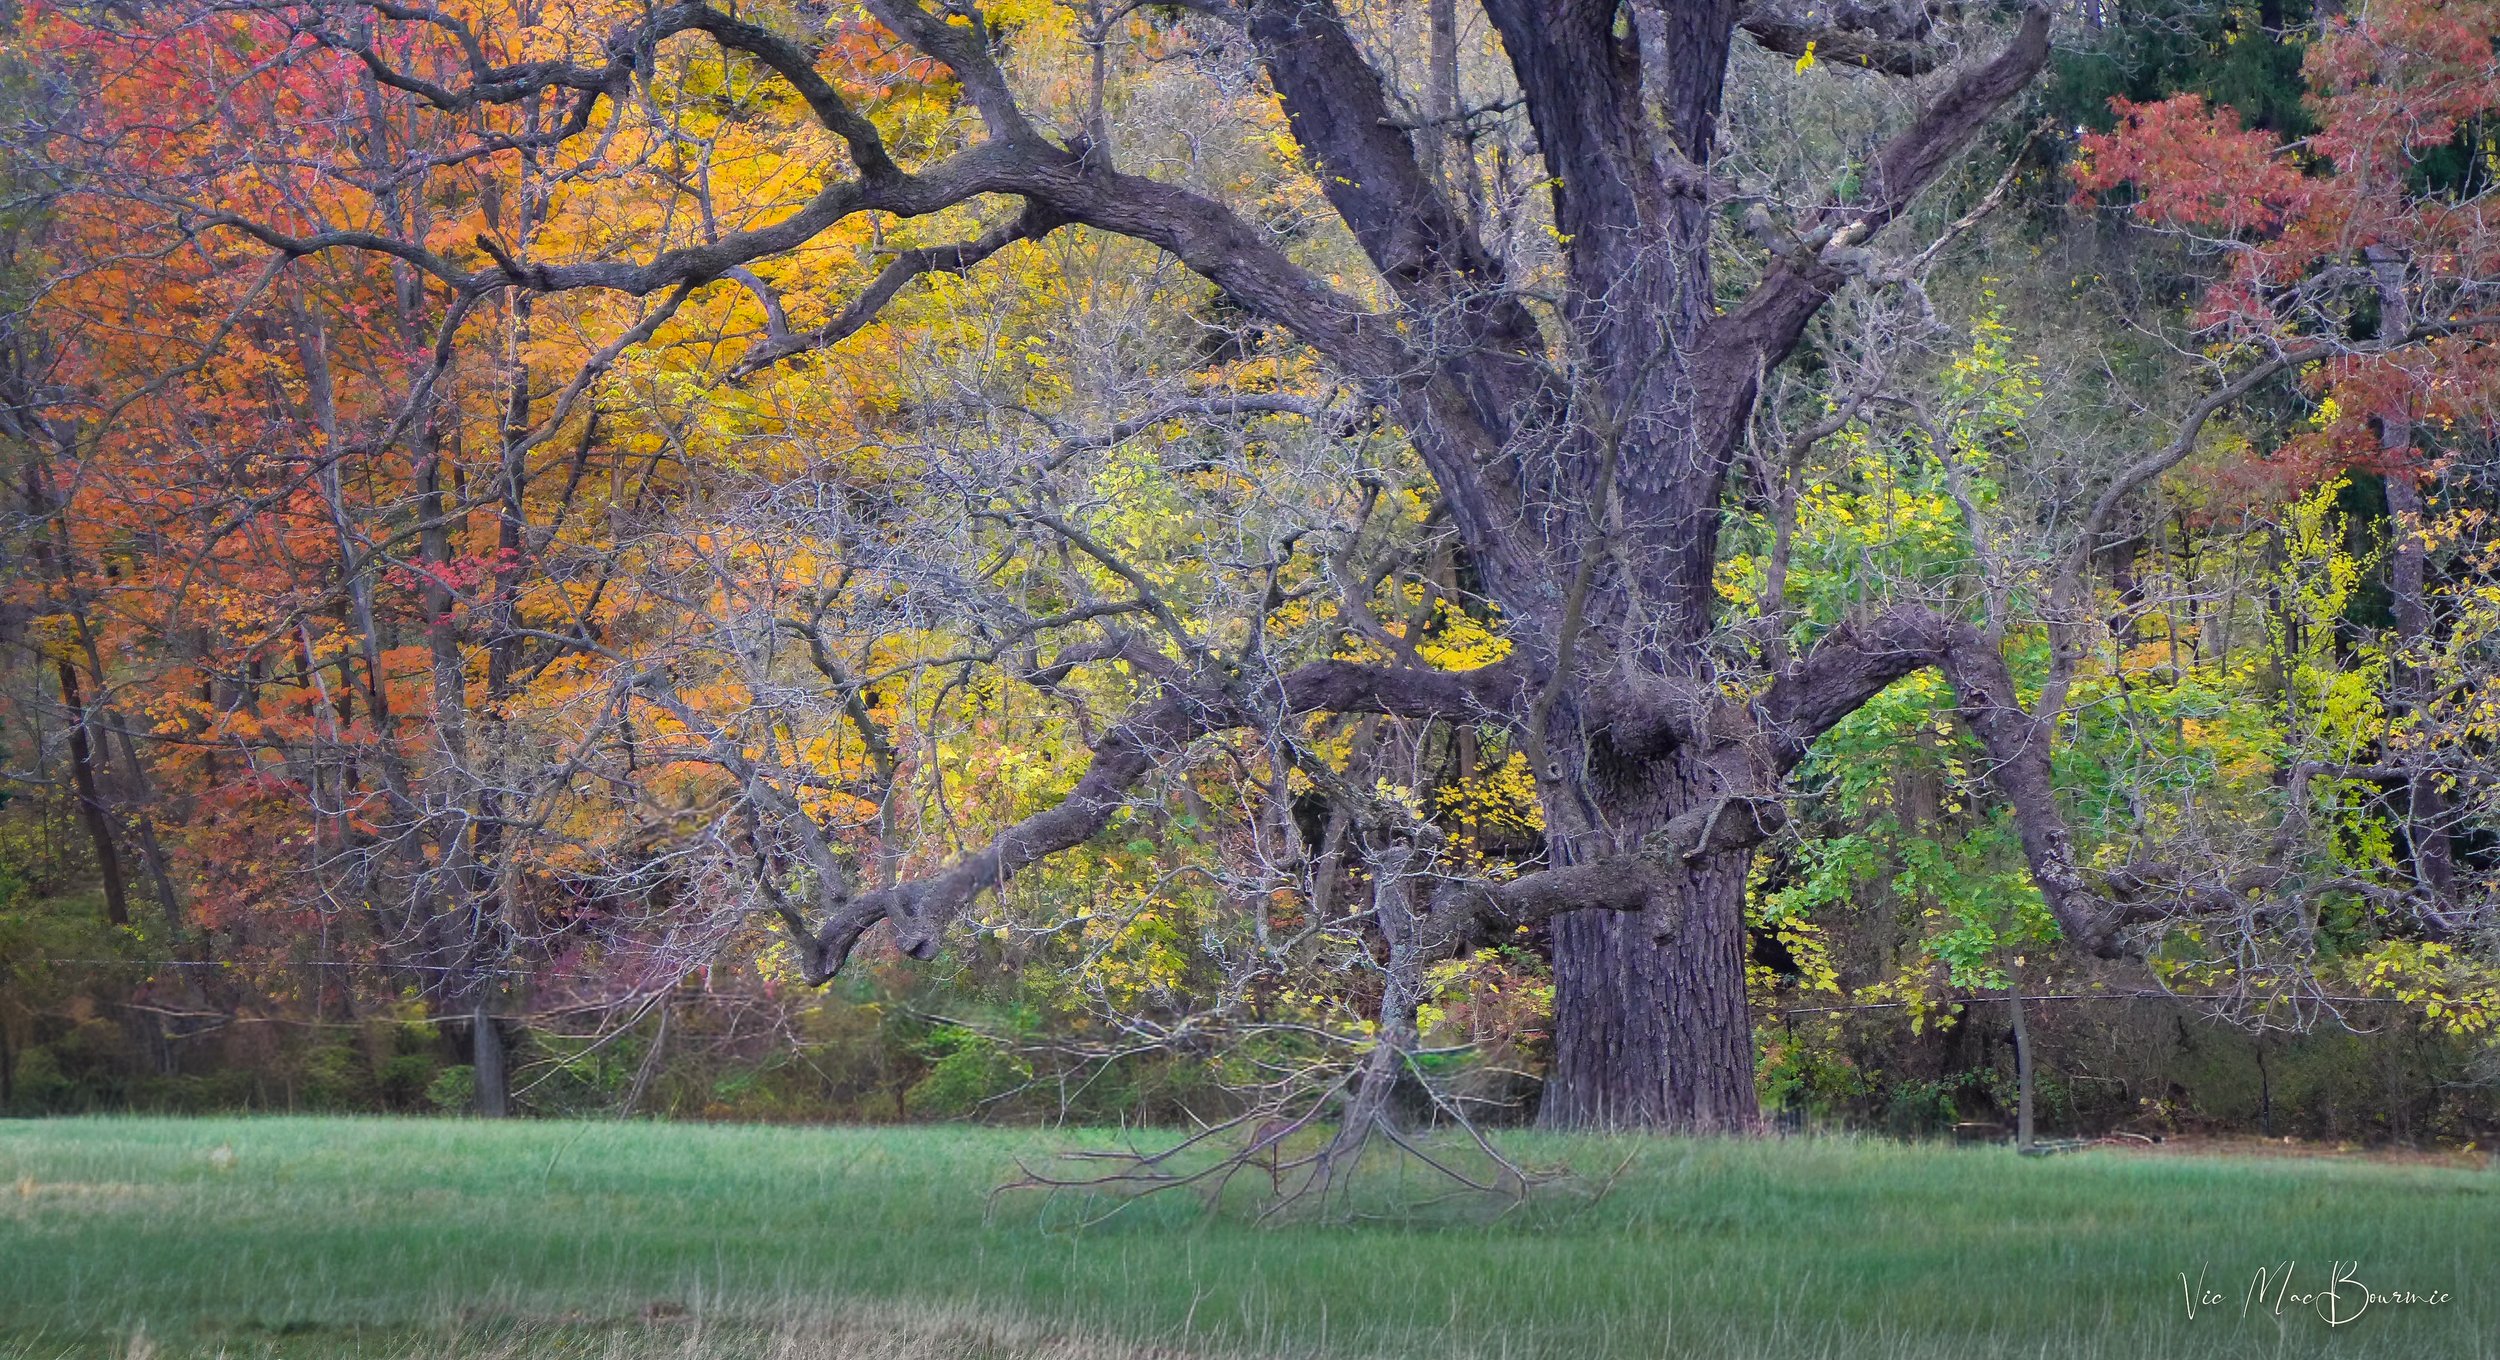
Luminar Neo’s AI module shines as an educational assistant
Luminar Neo chooses to us Ai as a learning tool to help beginner photographers.
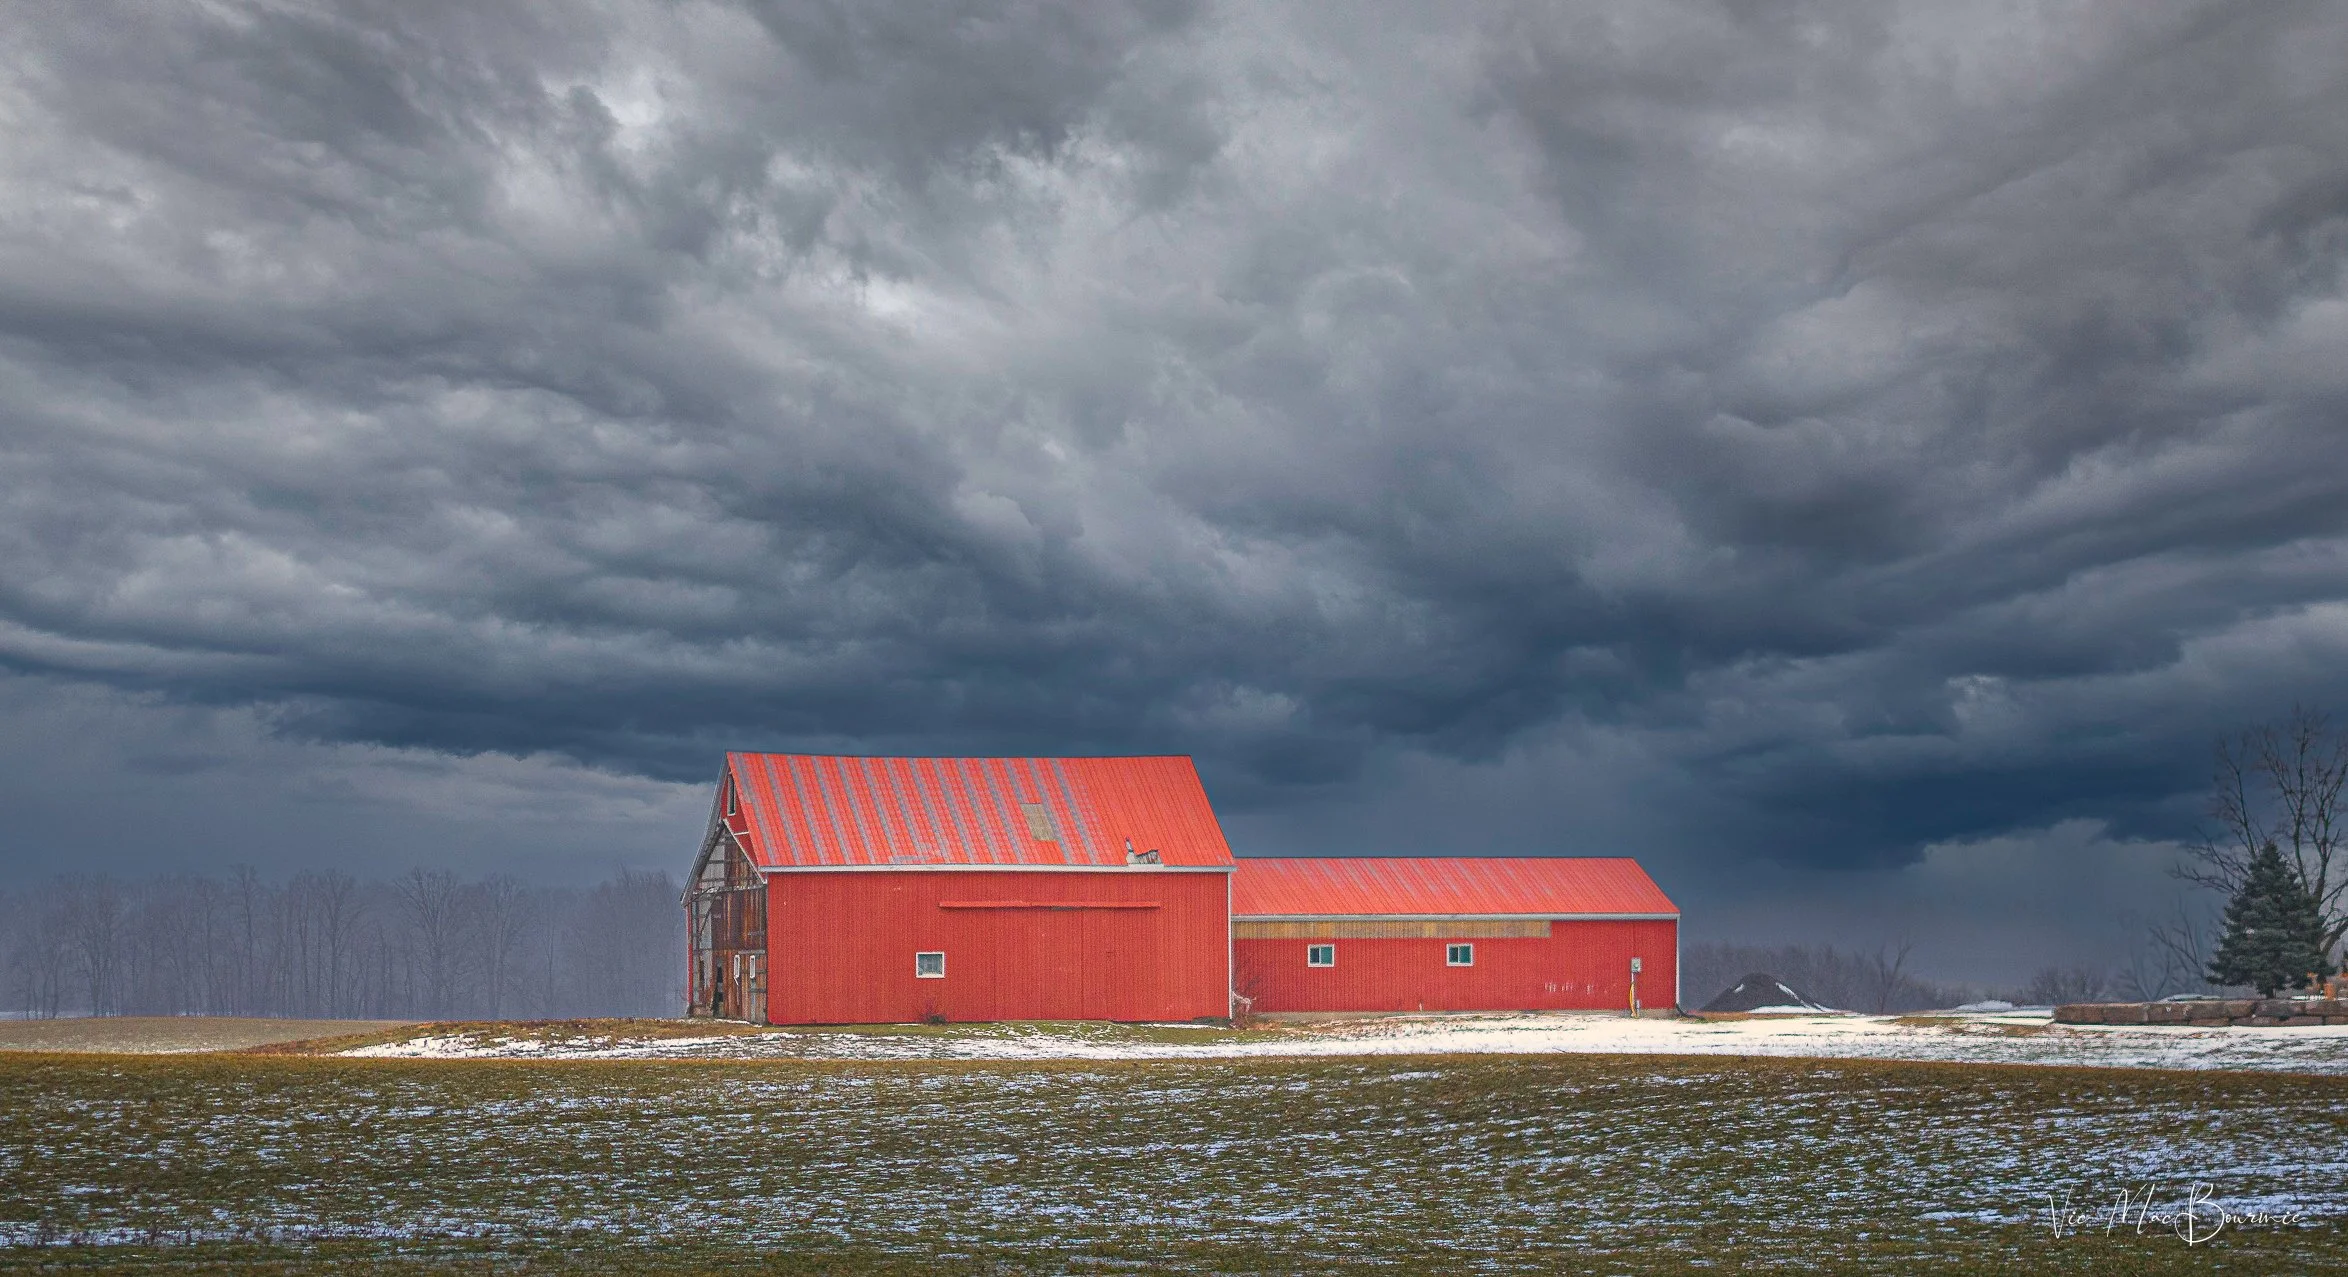
This image of red barns lit up dramatically against a stormy sky was created with a number of post processing modules. It’s important to note that the above image was NOT made with Luminar Neo’s new Ai module. In fact, an attempt to replicate it with the AI module proved fruitless. However, it’s equally important to know that the educational resources Luminar Neo’s new AI tool provides photographers – especially beginners – will help give them the knowledge they need to transform their images and create images like the one above from the original pictured below. The creators of Luminar Neo’s AI assistant believe that It is more valuable to know how to properly edit and create images than expect the computer to do all the work.
Using Ai as a learning tool
Whatever you think of Ai, there’s no denying that it is here to stay. The question many are asking is: Will AI be used for good, or for evil?
The answer to that question is still being written. Luminar Neo, however – unlike many other photo processing programs – is putting its support on the side of good.
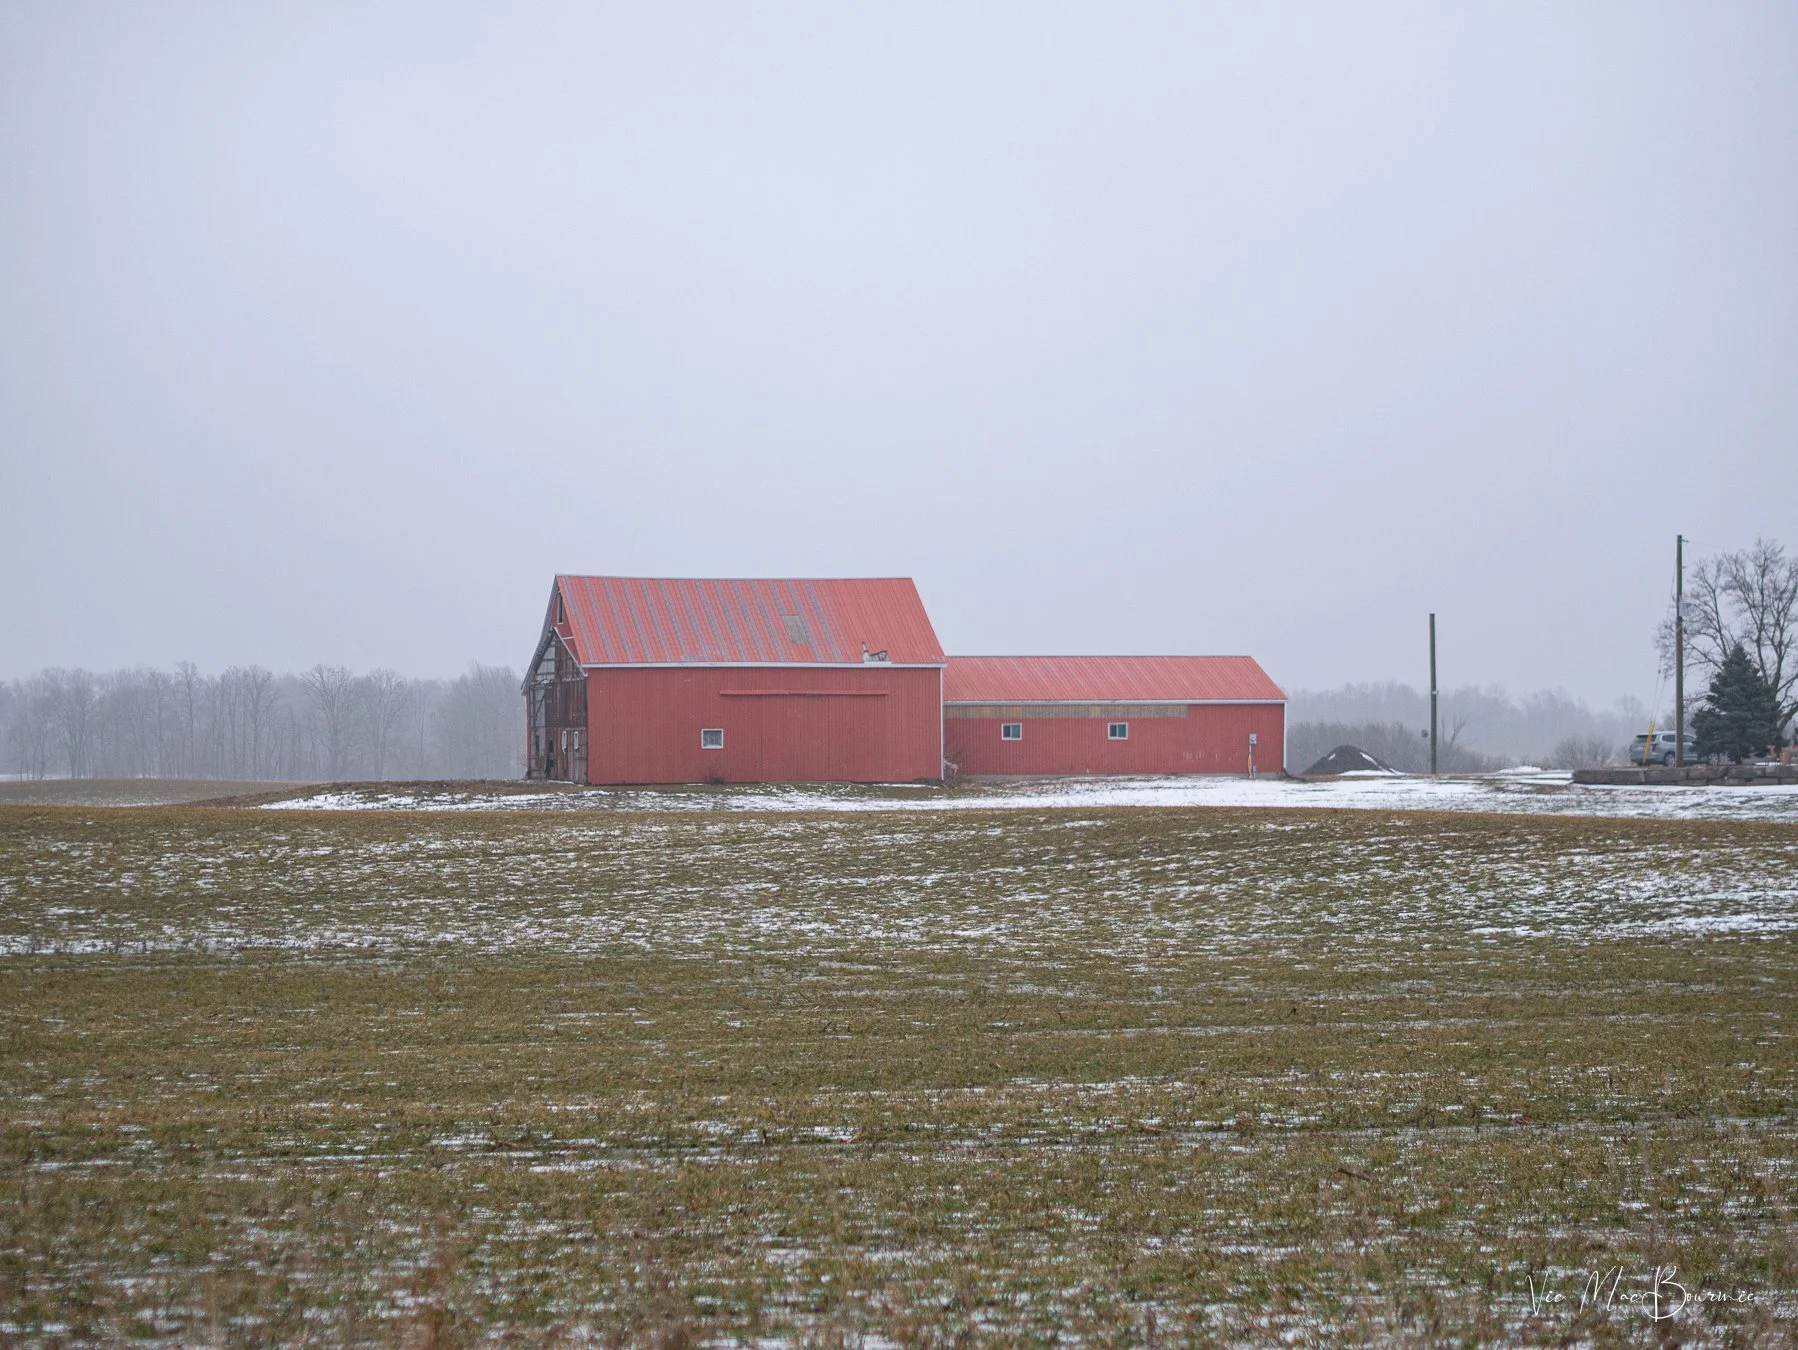
The original image straight out of camera shows distracting elements, a bland sky and uninteresting lighting.
To be more precise, Luminar Neo is tapping into the power of AI to use it as more of an educational and learning tool, than one to dramatically manipulate images.
At least that is my initial impression after putting it to the test with a number of my images. The focus seems to be at least as much about education as it is about transforming images.
Understanding the capabilities of modern photo editing programs and techniques has never been more important.
After all, getting the most out of our images, whether they are from our latest vacation, pictures of our kids, grandchildren or flowers in our garden, is the goal for most of us.
The before and after pictures of the red barns are examples of how, with a little knowledge, we can transform boring images into dramatic ones simply by understanding a little about post processing techniques.
So how does Luminar Neo’s AI assistant help us achieve similar results?
The image below shows one of three suggested edits from the Luminar Neo AI assistant module. The image is much better than the original, but falls short in comparison to the full edited version at the top of the page.
Over time, however, we the AI assistant teaches us how to achieve desired results by explaining what tools were used and making suggestions on how the image can be improved.
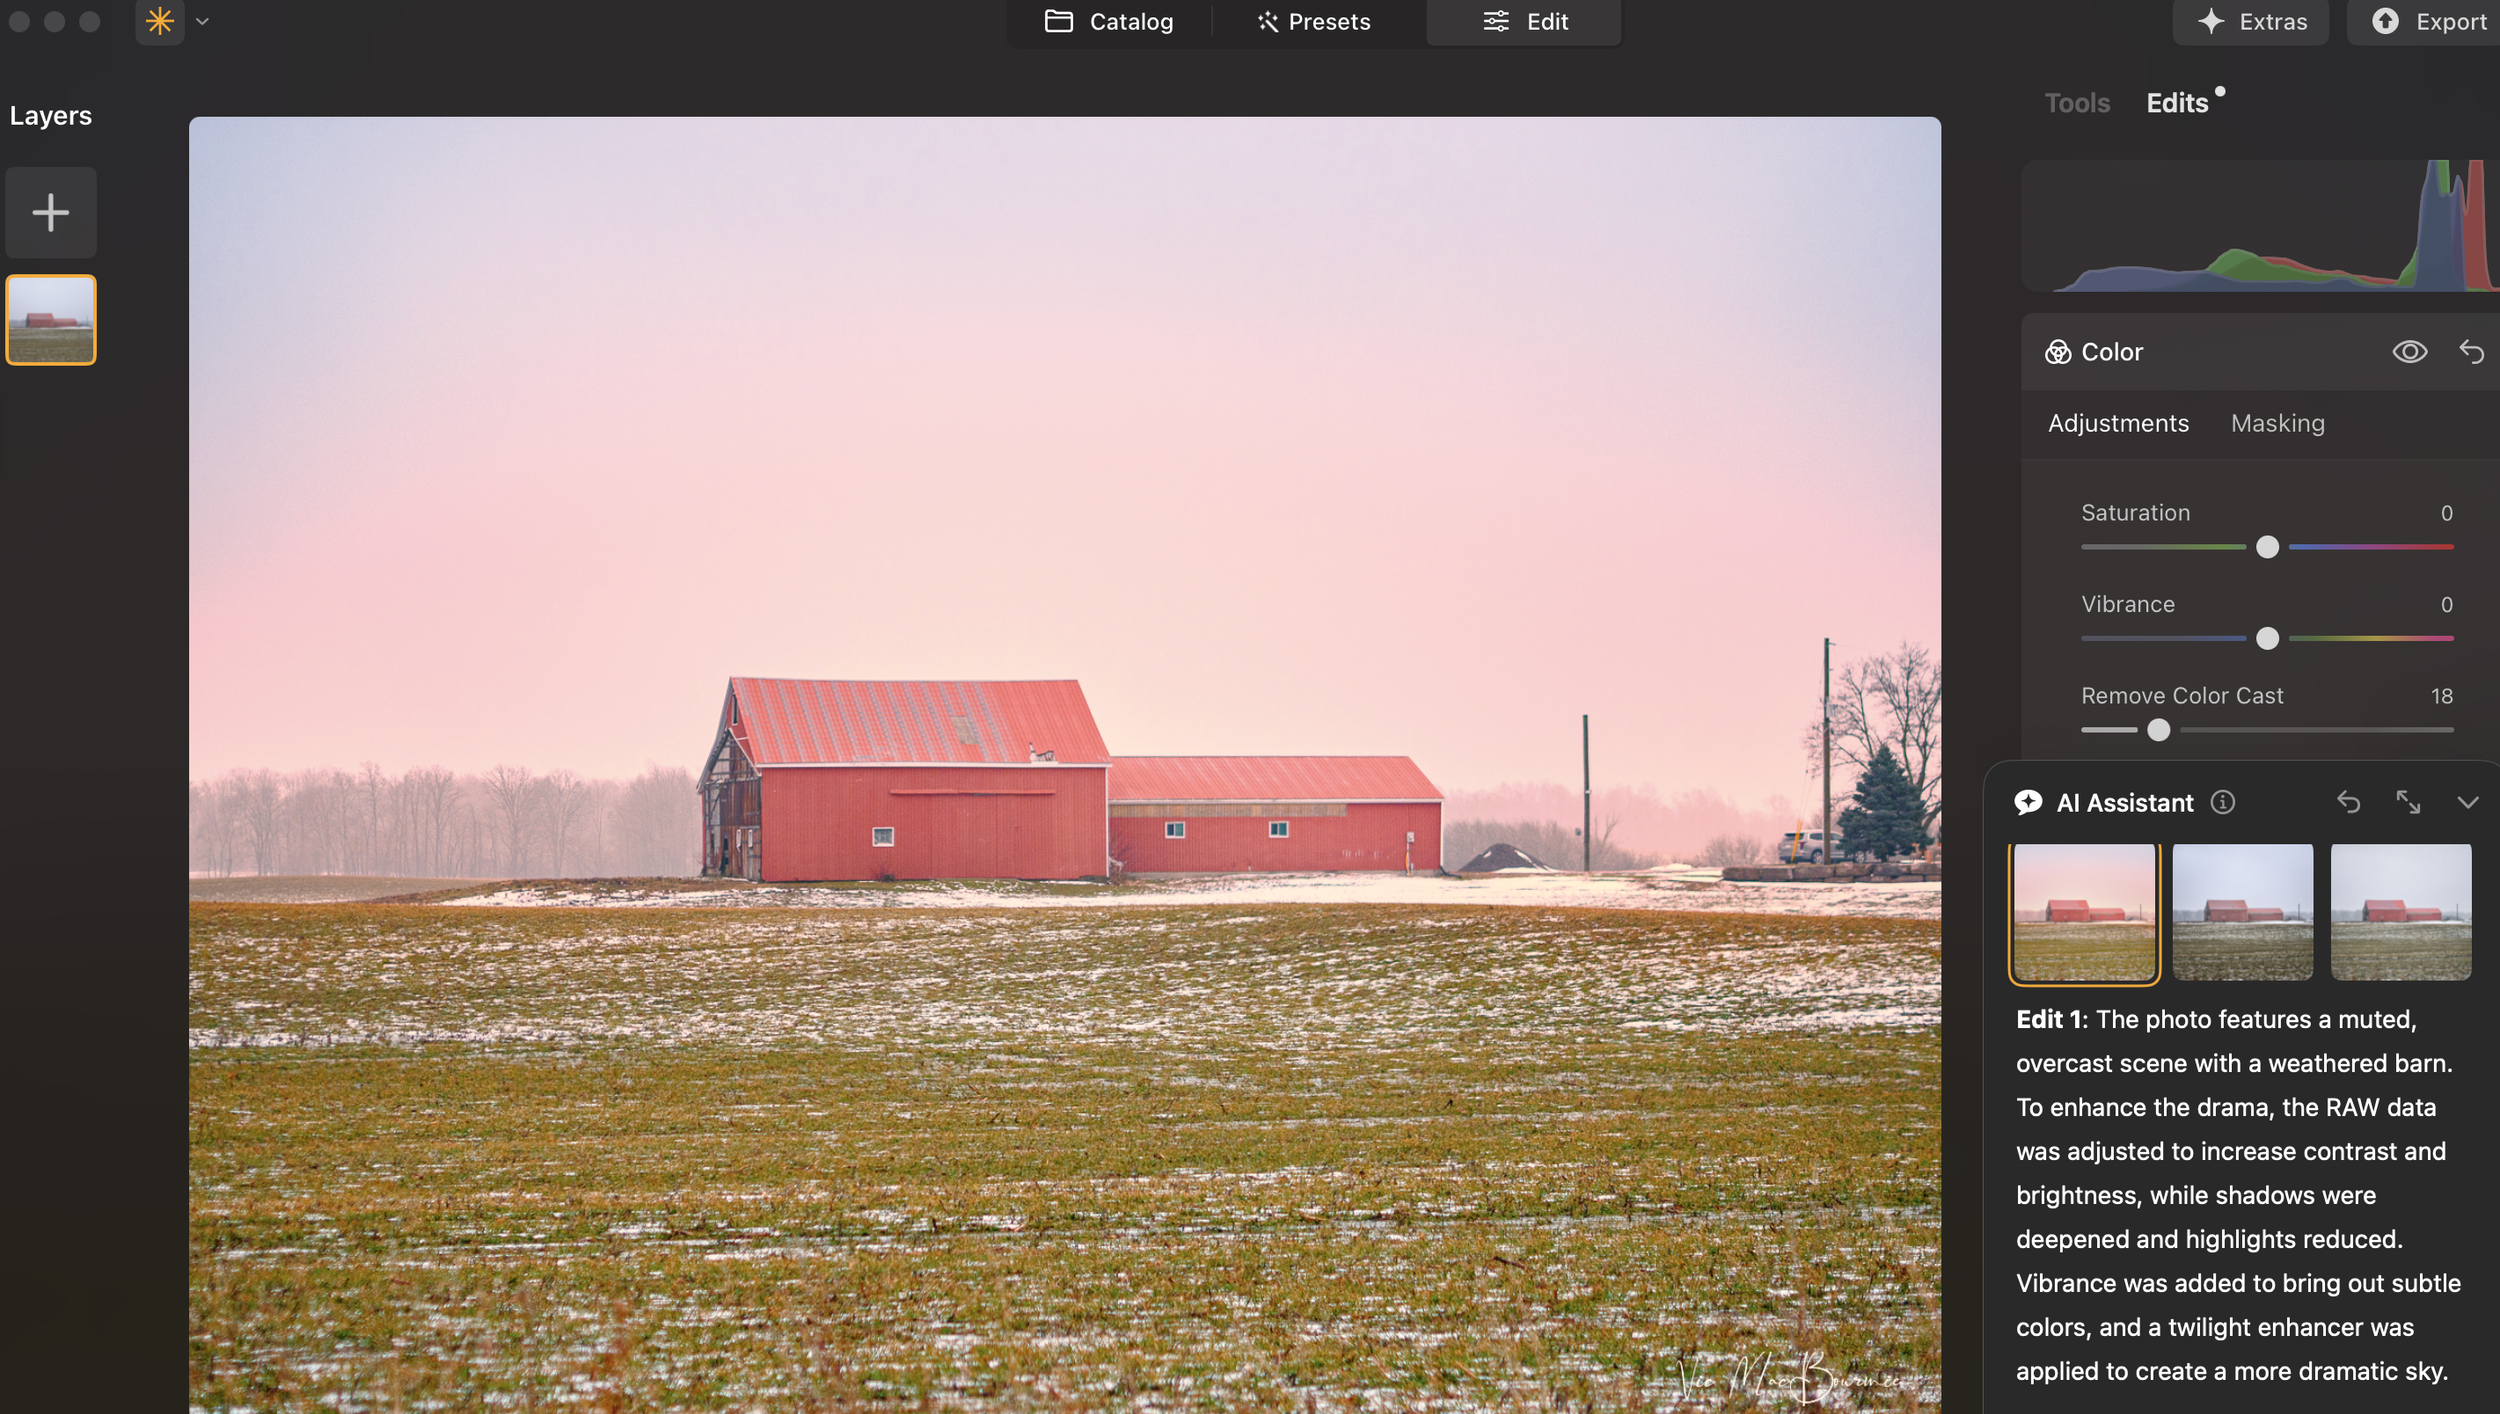
The above image is one of three suggestions Luminar Neo’s AI assistant suggested. You can see the suggestions and a detailed analysis of the above image in the Edit 1 description. You can also see that the suggested improvements are still rather subtle compared to the top image. Similar analysis are provided for Edit 2 and Edit 3.
How it works
Luminar Neo’s AI Assistant is available in both the Presets and Edit tabs and users can simply input text prompts to get AI Assistant’s editing suggestions.
There are two types of prompts.
Action prompts, like “Enhance this photo,” provide tailored recommendations with three adjustment sets and live previews, while How-to prompts, like “How do I remove this object?,” offer step-by-step guidance and buttons to quickly find the right tools in Luminar Neo.
It’s like having a personal editing advisor at your fingertips, helping you explore creative possibilities and discover the best tools and workflow for every image. You can use text commands in all Luminar Neo languages.
Back to our discussion about using AI in our work flow.
Knowledge about the tools available helped me create the top image. The original image’s sky was replaced and dramatic lighting was added in Luminar Neo’s Light Depth module.
“For the beginning photographer who has not yet perfected the art of post processing, this AI module is a tool that promises to transform their images over time and equip them with the knowledge they need to “make” outstanding images.”
In the past, we took pictures, today we make images
In photography, we often talk about “making” images rather than simply taking them. In the past, that most often was referring to “making” images in-camera during the analogue era of photography. Making images today with modern post processing can be taken a step further to include anything from minor enhancements to the photograph and removing distractions, to completely changing the image by adding elements not in the original image.
I’m not here to debate the validity of the different “levels” of enhancement, except to say that every photographer has to define the line they are not willing to cross. If you take a photojournalist approach to your photography, only minor enhancements are appropriate. If, however, photography is more a creative outlet for you, the same restrictions would not apply.
Important note: If you are looking to dramatically transform your images using ai, chances are you are not going to find those capabilities in this version of Luminar Neo’s AI module.
What you will find, however, is the ability to make positive, yet more subtle, changes to your images, while at the same time getting a thorough education on, not only what the program is doing to the image, but how the photographer can take control of the post processing and add their own creative effects using Luminar Neo’s wide range of creative modules.
For the beginning photographer who has not yet perfected the art of post processing, this Ai module is a tool that promises to transform their images over time and equip them with the knowledge they need to “make” outstanding images.
It might be the best use of Ai in any photographic post processing program. Understanding how to use post processing tools is much more important than just telling your computer to do the work. Luminar Neo does exactly that by adding three informative text-based explanations of changes it suggests for the particular image.

How to choose
This image is the result of rather subtle changes made in Luminar Neo’s new ai module. See edit 2 for the list of enhancements added to the image by the ai module.
A good illustration is this image of a baby picking flowers at a local garden.
Once the Ai module is opened in Luminar Neo, the photographer is faced with two questions: 1) Typing in a command to enhance the image; or, asking the ai module how to use the tools available in Luminar Neo to make changes to the photograph.
The first suggested prompt is a simple one and a good starting point: “Enhance this image.”
If you choose this prompt, the program goes into action generating three different suggestions to enhance the image.
For this image the suggestions range from boosting the highlights and shadows and adding more golden light, to increasing depth of field and making colour harmony adjustments.
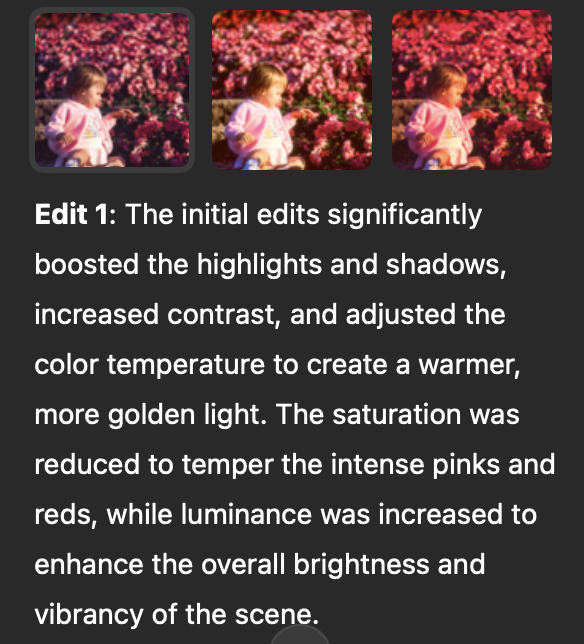
By explaining the enhancements, the beginner photographer gets an understanding of what is being done to improve the image and can take that knowledge to use with their other images.
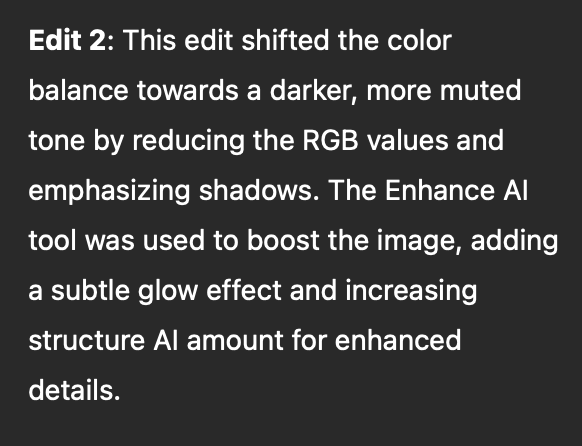
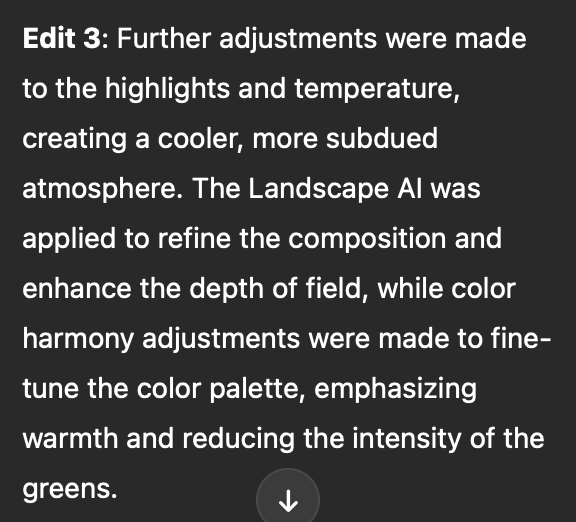

Here the ai program responds to my request on how to get the best skin tones on the baby.
Other simple commands that are available to users include changing the photograph to a B&W image.
More important are commands to teach the user how to change the image. Questions such as: how do I remove distracting elements in the image, or how do I improve the skin tones in the image?
The result is a list of suggestions the program makes to guide the user to the appropriate modules to make the changes themselves. The result, a better understanding of the capabilities of the program and how to use it to make the images you originally envisioned.

Here is an original image of a rusty car before asking Luminar Neo to enhance the photograph. Below is the result after asking Luminar Neo’s AI to enhance the image.

The enhanced version of the rusting car and the explanation (below) of what was done to the photograph.

Luminar Neo is continually improving their Ai features and will certainly further refine many of the features in their recently released AI module.
Meanwhile, beginner photographers have a built-in assistant to help them learn the intricacies of the program and expand their post processing knowledge with the end goal of creating images anyone would be proud to share with friends and family.
If you are interested in further exploring Luminar Neo and its features, please use my link here.
Create swaths of colour to fire up your spring garden
Forget-me-nots and other spring ground covers for the woodland garden
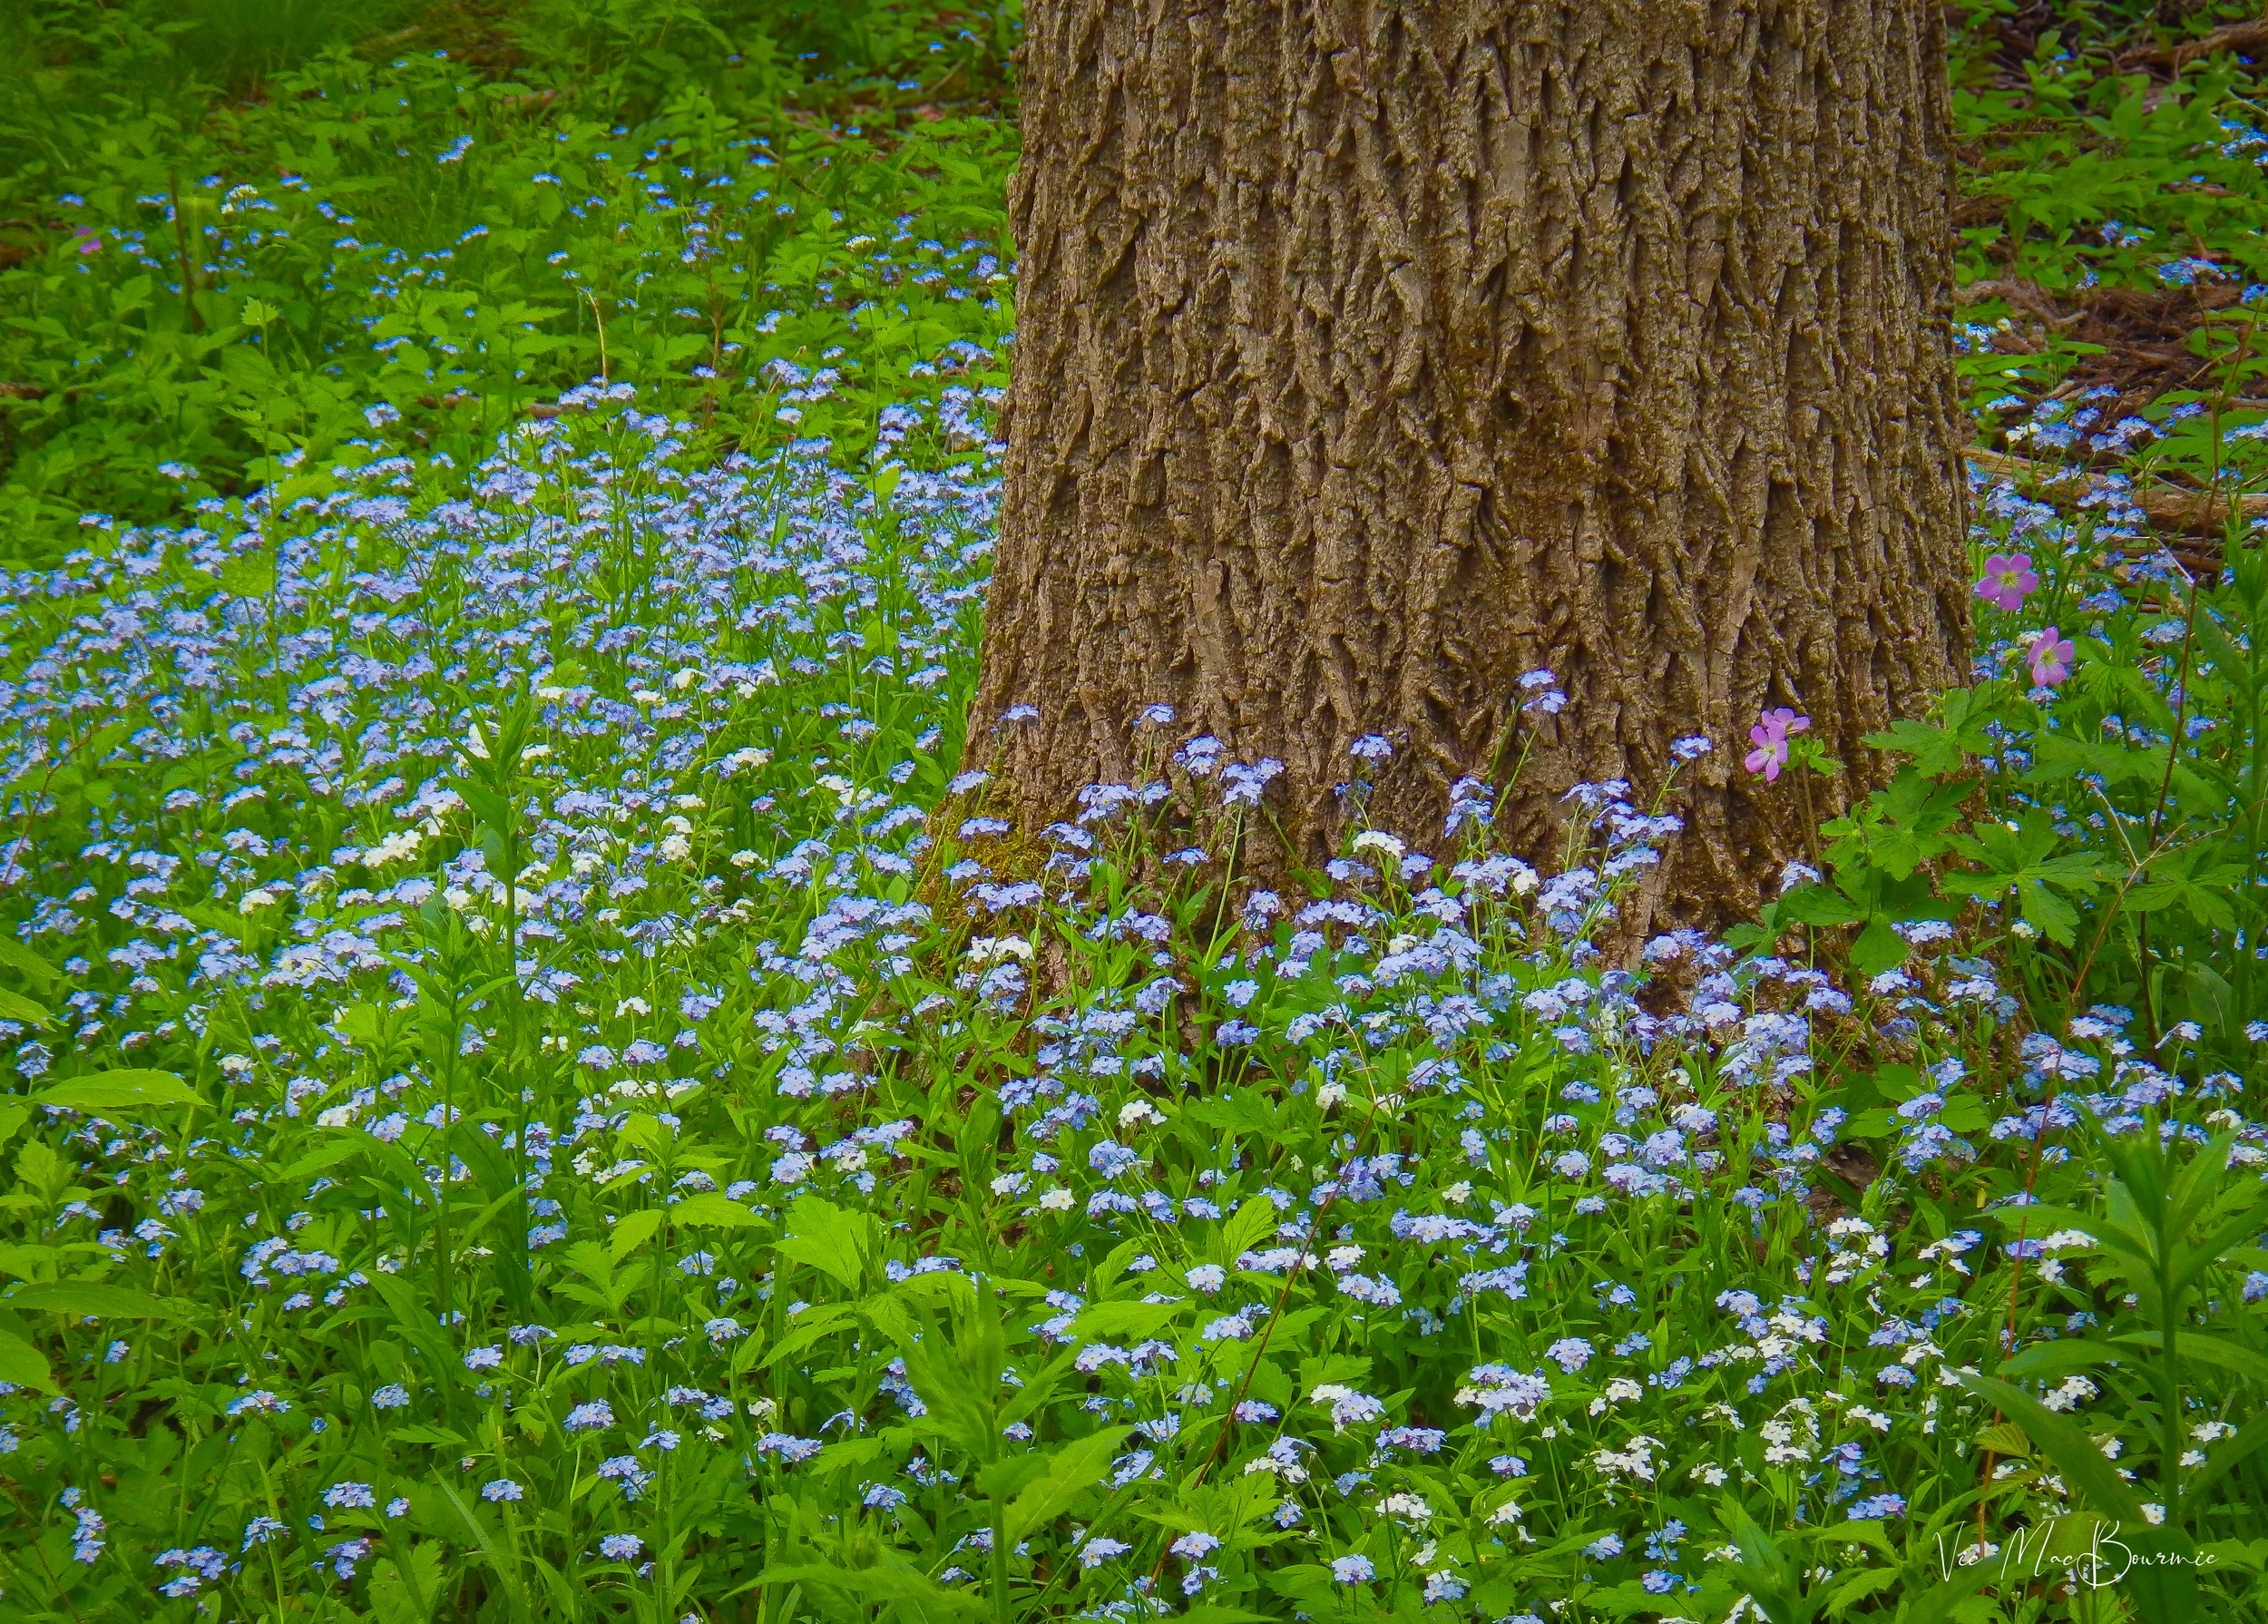
Forget-me-nots combine with other native plants including wild geranium to form a carpet surrounding this highly textured tree trunk in a nearby woodland.
Forget-me-nots and other flowering ground covers for the woodland
Few spring-blooming flowers easier to grow than Forget-me-nots, or Myosotis, if you like to impress your friends with Latin names.
These charming, low-growing spring flowers, that are well known for their tiny, delicate blue blossoms with yellow centres – though they can also be pink or white – want nothing more than cool, moist conditions to spread throughout your garden. And woodland gardens usually have plenty of these conditions to offer.
I think I started with a packet or two thrown in an out-of-the-way spot in the woodland garden several years ago. Today, these usually biennial plants put on a lovely show in the early spring just when the garden is waking up.
Last spring, during my extensive exploration of the woodland around our home, I stumbled up large swaths of these lovely little spring bloomers. If Mother Nature taught me anything, She showed me that growing Forget-me-nots for impact was not for the timid.

A fawn surrounded by Forget-me-nots and other native plants in our spring woodland garden.
The larger the swaths the better. In fact, I first noticed these flowers on my walks in the woods from a distance. One morning, a blue mist far down the path rose up from the spring greens and caught my eye. (see image below).
Little did I know that it was the beginning of Forget-me-not season in our little woodland. The plants seemed to be everywhere – circling trees, edging forest paths, weaving their way through the forest and around other native plants.
Forget-me-nots are well-suited for woodland gardens due to their ability to naturalize and spread, creating a carpet of color under trees and shrubs. Their early spring blooms attract pollinators, supporting local wildlife and contributing to the garden's ecological balance.

I stumble upon this exquisite clutch of Forget-me-nots growing on a fallen, moss-covered tree stump in a nearby woodland. Duplicating the scene in your own garden should not be difficult with these easy-to-grow plants.
When planting forget-me-nots en masse, you can achieve a stunning visual impact, creating a lush carpet of blooms that enhances the overall aesthetic appeal of the garden. This planting technique not only adds a cohesive look but also mimics the way these plants grow in the wild, forming beautiful clusters that blend seamlessly with the surrounding vegetation.
These plants require minimal care but benefit from occasional watering during dry spells and deadheading to prolong blooming. By incorporating forget-me-nots into your woodland garden, you not only elevate its beauty but also support local wildlife and promote biodiversity, making them a perfect choice for any nature enthusiast.
In my walk through the woods, there were few single plants popping up here and there. These were communities of Forget-me-nots working together, and the effect was truly memorable.
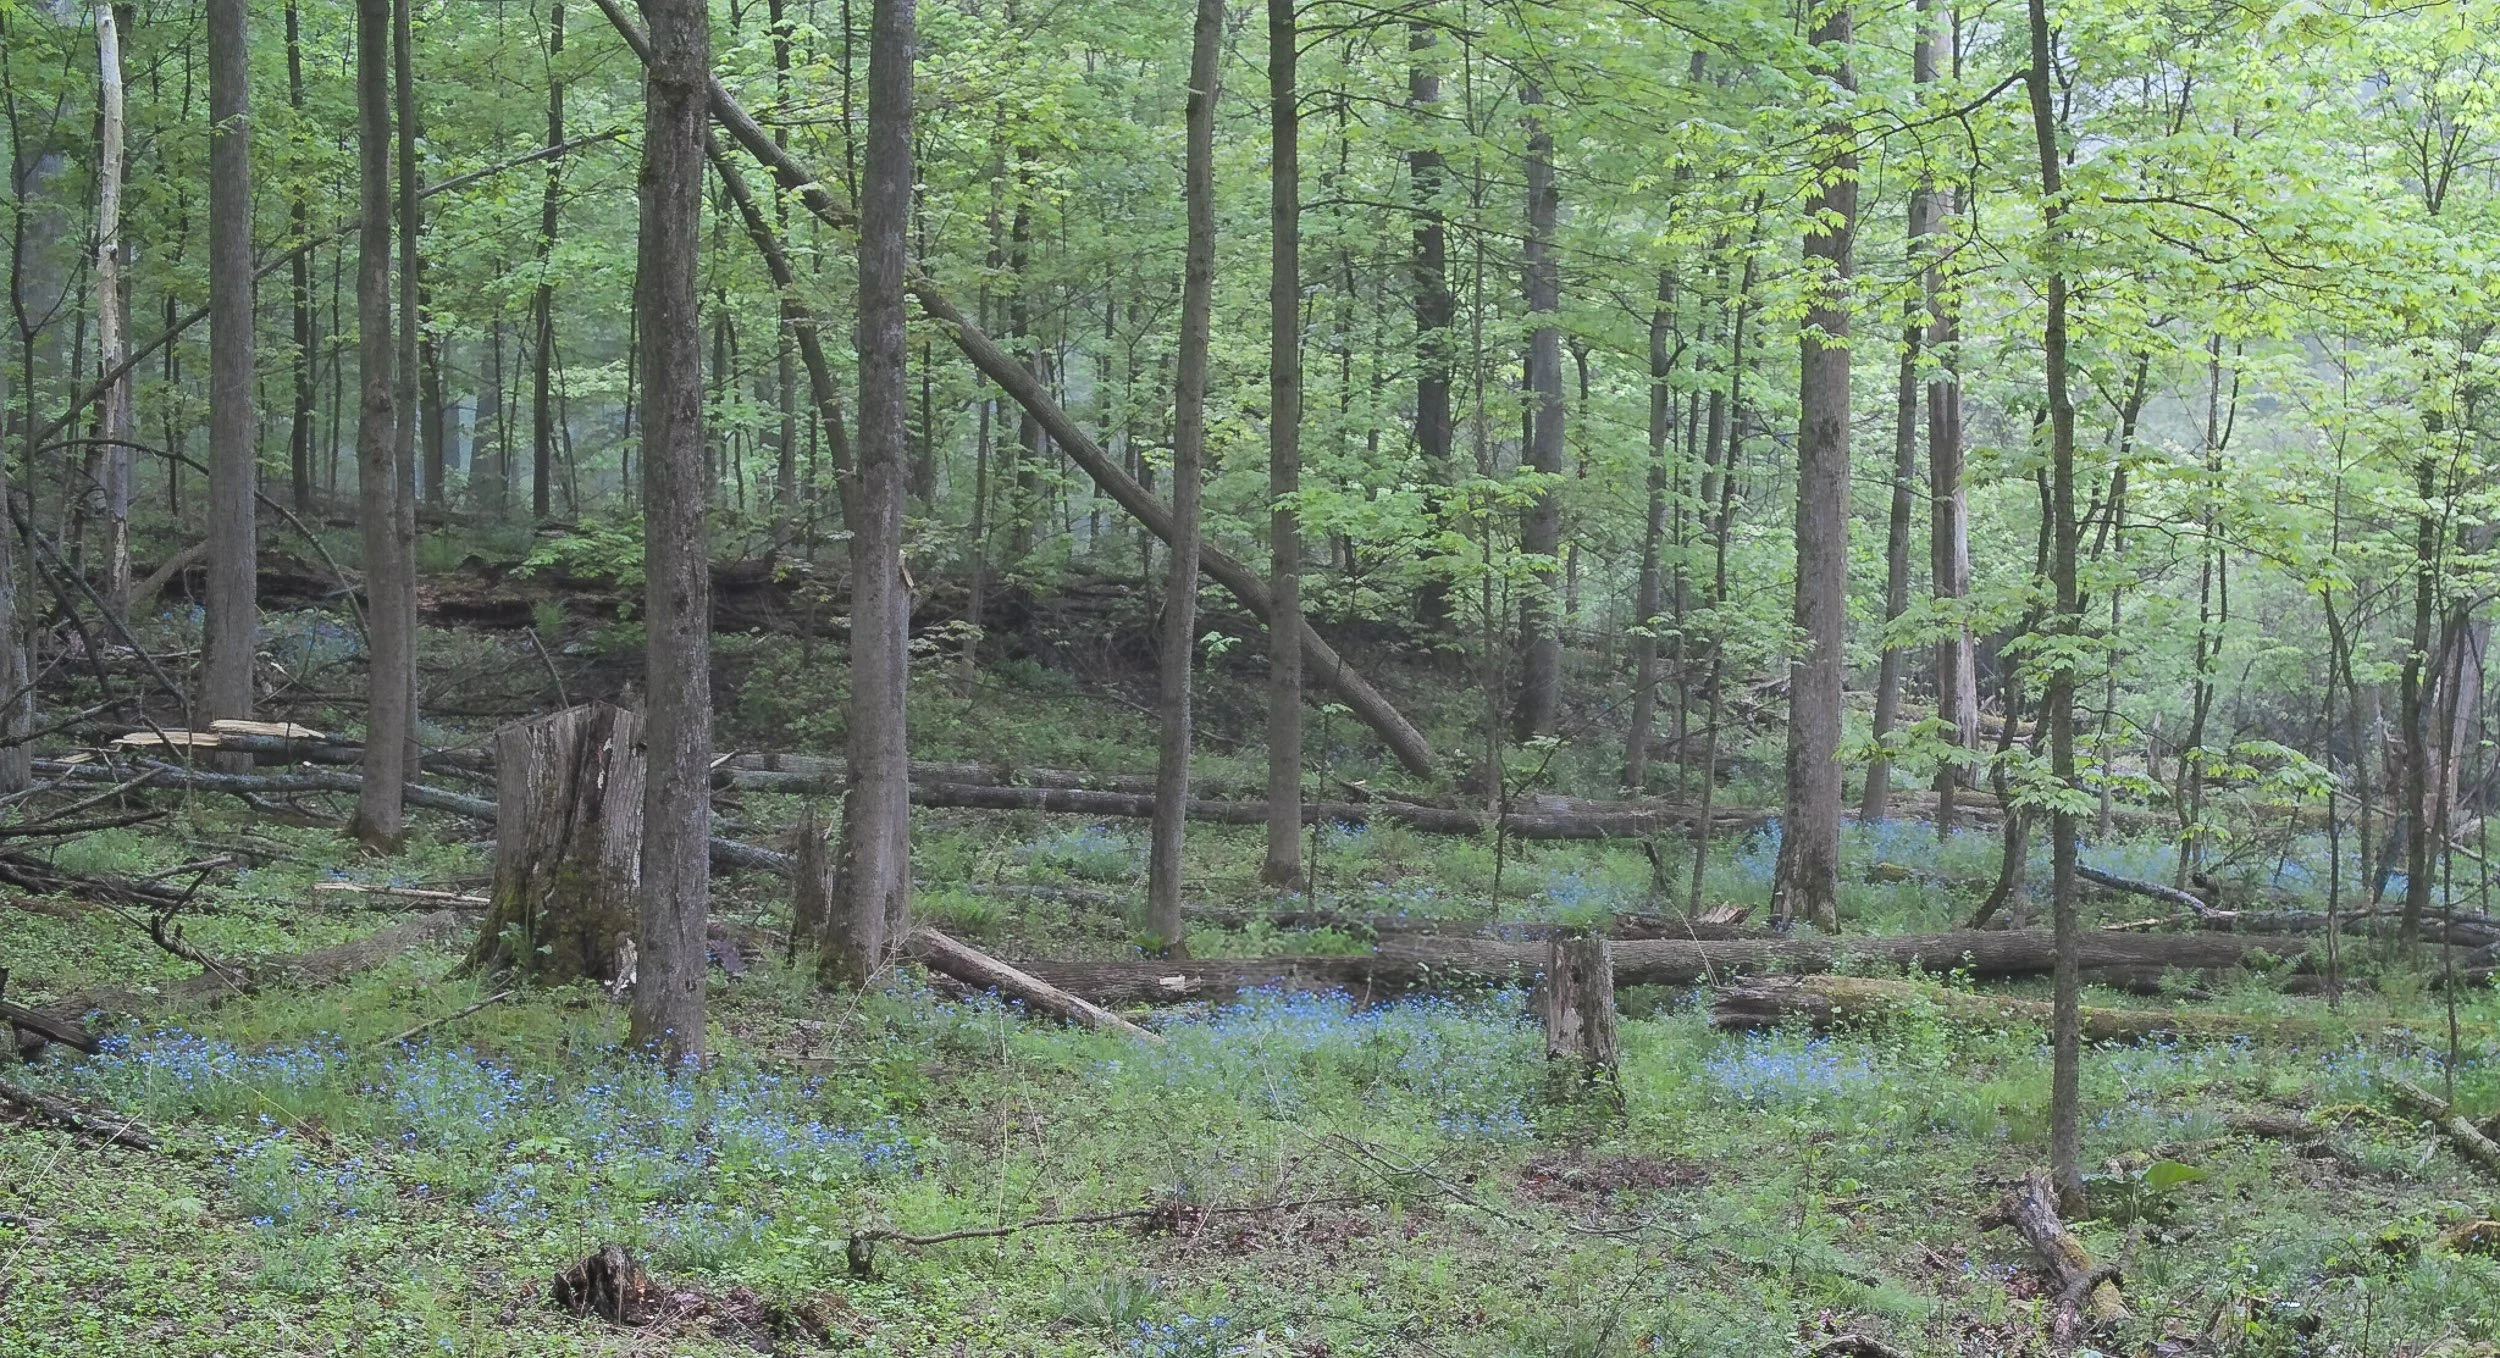
A blue mist rises out of the forest floor in spring reminding us that the Forget-me-nots are in bloom.
We need to bring some of this abundance into our gardens, even if it is just for a brief time in spring.
Grow theses plants around trees to highlight them in spring. Put them in large swaths so that from a distance their tiny flowers form a beautiful blue mist arising from a corner of our garden (see above image), and tuck them along pathways so they guide your way to a favourite destination.
Along the way, you will be joined by early pollinators.
A little background: Forget-me-nots are from the genus of flowering plants in the family Boraginaceae. In the Northern Hemisphere, they are known as forget-me-nots or scorpion grasses and are the official flower of both Alaska and Daisiand, Sweden.
The name comes from Ancient Greek and means "mouse's ear", which the foliage is thought to resemble.
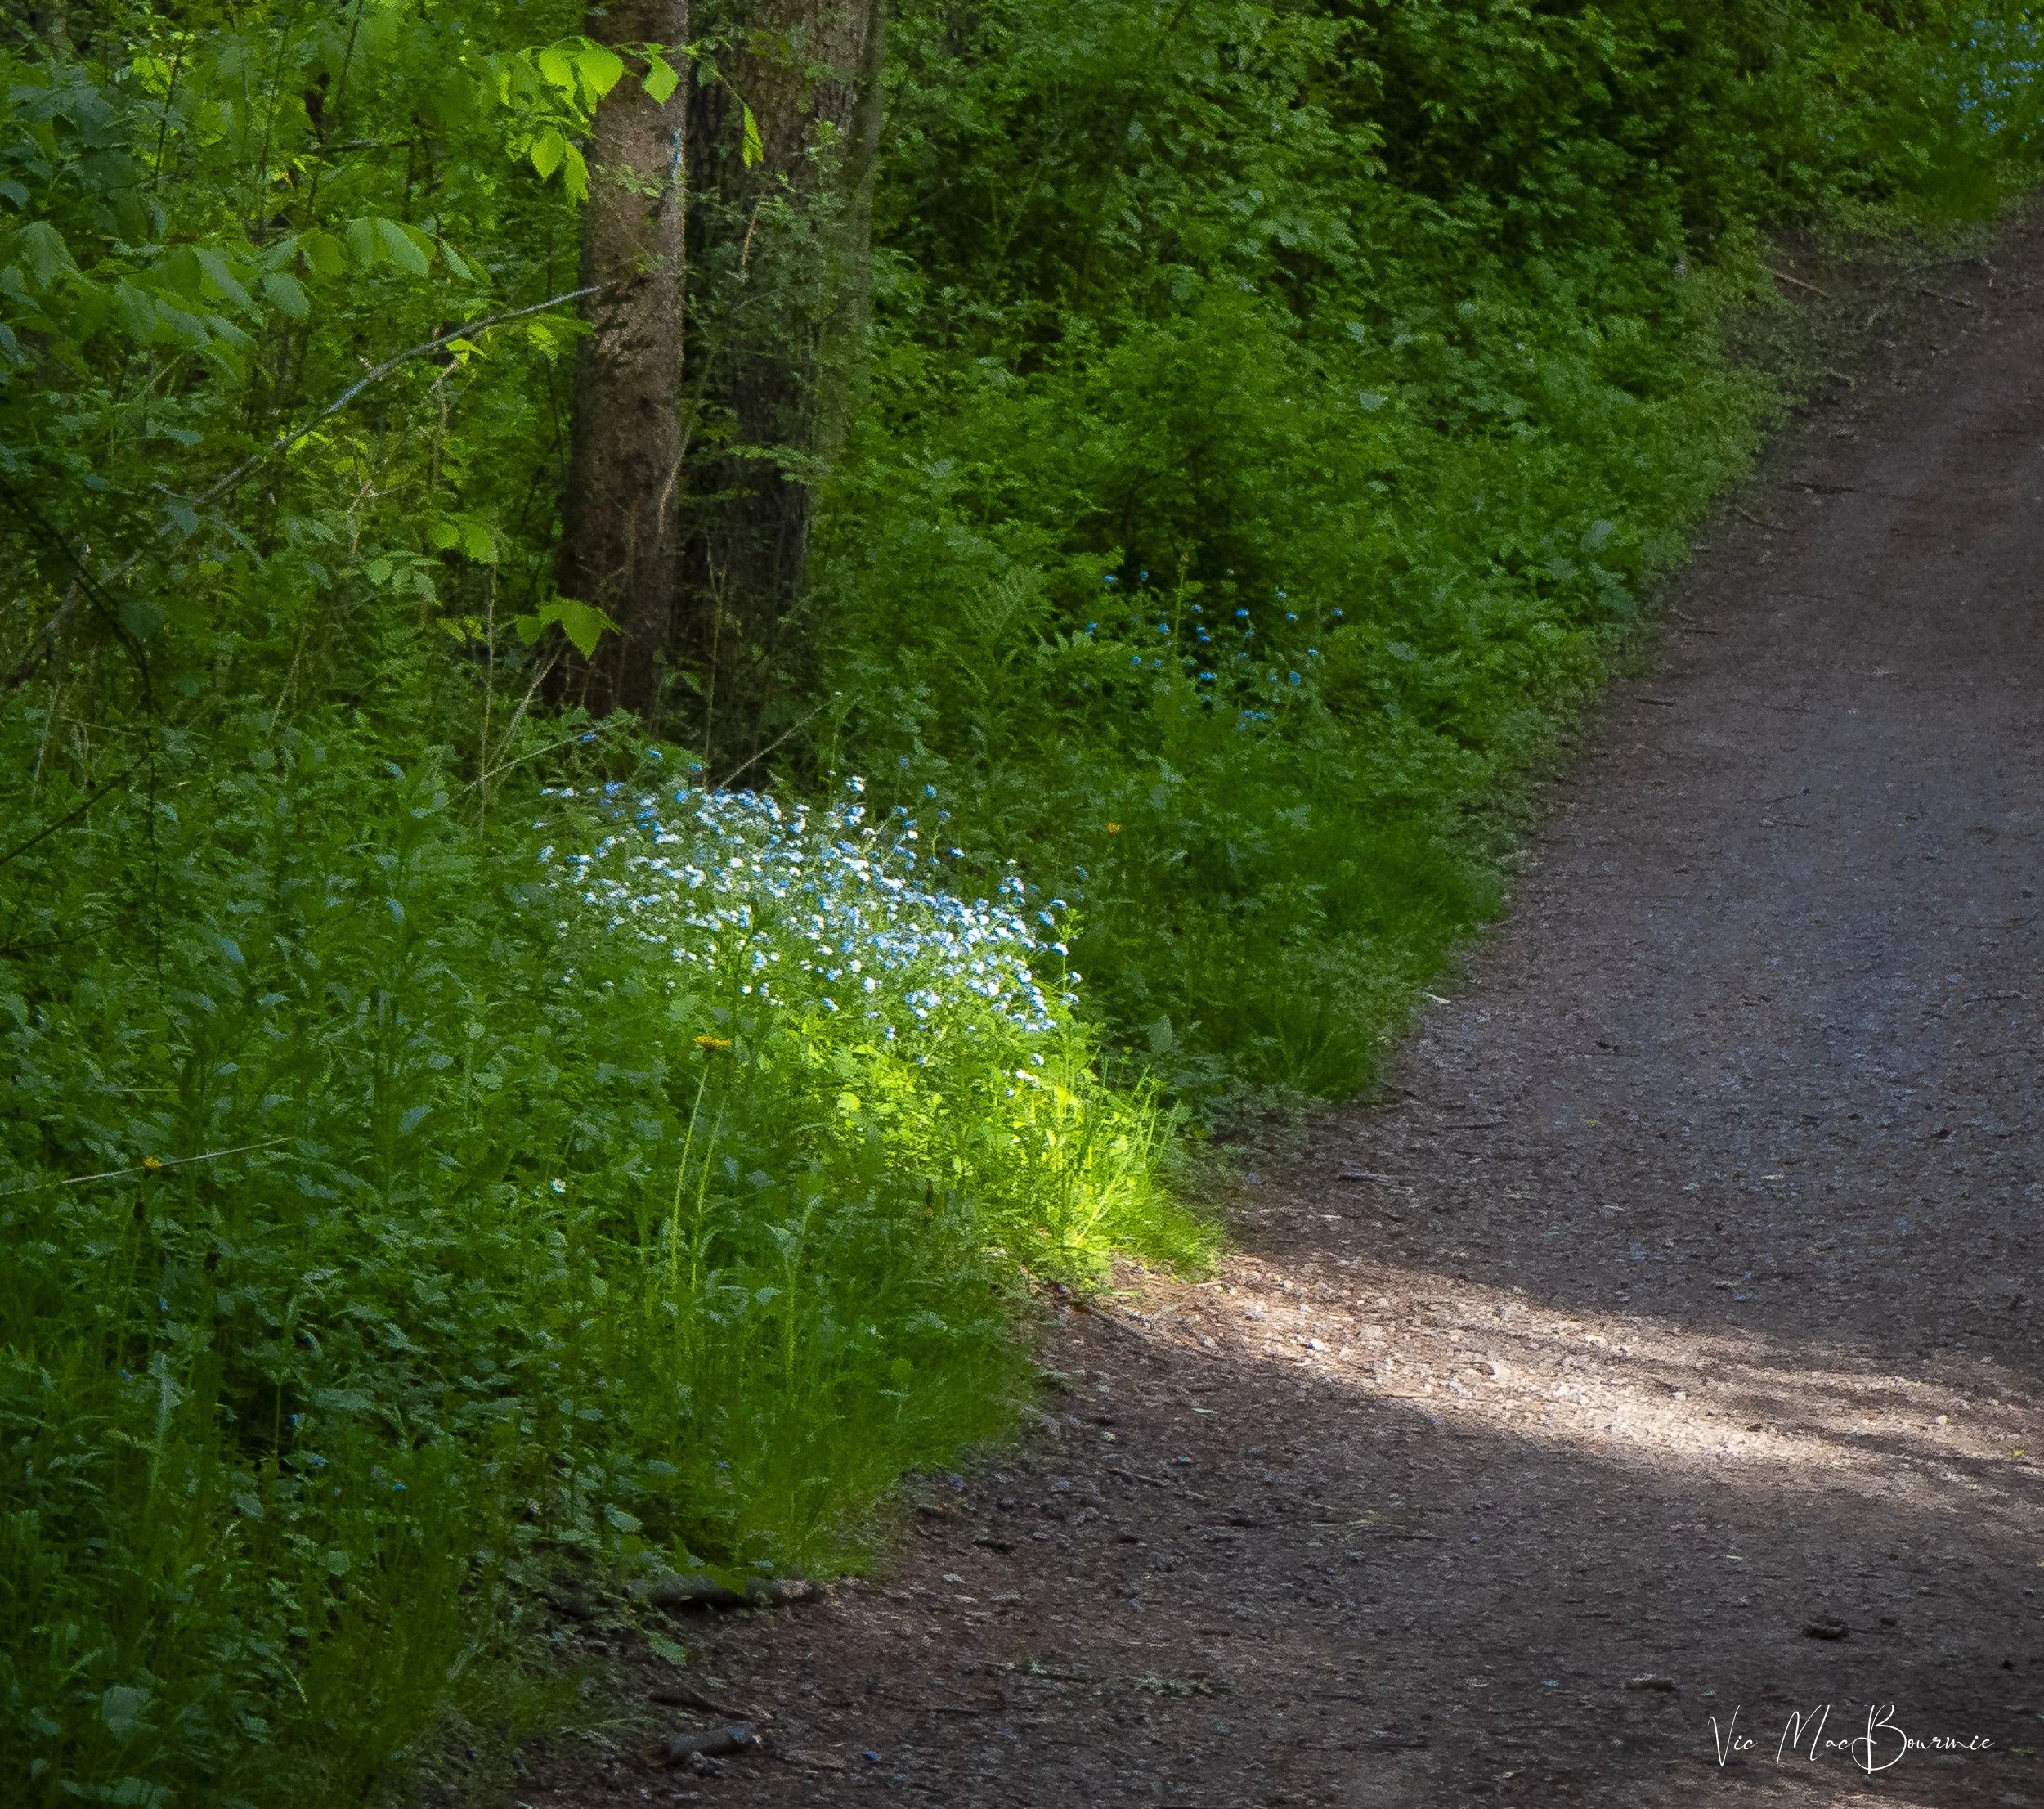
Along a pathway
Spread seeds along a pathway to add interest in quiet areas in the garden and help to lead the way.
Their foliage is alternate, and their roots are generally diffuse. They typically flower in spring or soon after the melting of snow in alpine regions.
If nature teaches us anything, it is to be bold with our plantings. As a spring ground cover, Forget-Me-Nots can really bring a smile to our faces.
The flower is native to Europe, Asia, and North America.
Unfortunately these little flowers are not long-lived and, as they say, death is not their finest hour. That’s when they grow leggy, dry up, and are often beset by powdery mildew in their waning days. To ensure a good crop the following year, however, it’s important to resist the temptation to pull them up, before they finish setting seeds.
If living with their ugly dead stems is too much, intermingle lots of perennials and annuals where they are growing to help cover up their unsightly dead stems.
These hardy, self-seeding plants thrive in cool, moist conditions, often used to edge beds with spring bulbs like tulips, but some varieties can become invasive, so deadheading is key if you don't want them to spread. far and wide.

They're tough, attract pollinators, and offer a lovely texture in woodland, rock, or container gardens
Forget-me-nots prefer cool weather and moist soil. They grow best in lightly shaded areas, but in wet soil they can take full sun. In hot-summer climates, they need shade and extra moisture to survive.
Forget-me-nots are easy to start from seeds. Just scatter seeds in a shady garden area at the end of summer. The seedlings will have plenty of time to settle in before winter. You can also start seeds indoors, but, why bother. Keep it simple and distribute seed generously in areas of the garden. Your efforts will eventually be rewarded.
How they got their name
Legend has it that a French knight walking along a river with his lady and a clutch of flowers fell into the current. Before sinking into the river forever, he threw the flowers to his lady, shouting don't “forget me.” Not sure if it’s true but there is a lesson here. When walking along a river with heavy armour on, leave the flowers be. In fact, we shouldn’t be picking any flowers in nature. Lesson learned the hard way.
Back to the plants: they are really a short-lived perennial best grown as an annual. However, it can also be grown as a biennial by planting seed in the ground in mid-summer for bloom the following year.
Of course, Forget-me-nots are just one of many woodland plants to consider as ground covers in our gardens.

Trilliums are another flowering native that can make an outstanding spring ground cover when planted en masse.
Combine other Native Ground Covers with Forget-me-nots
Native plants play a crucial role in garden ecosystems, promoting biodiversity and supporting local wildlife. When considering native ground covers for your woodland garden, trilliums, wild geranium and Canada anemones are excellent options and can work well growing among the Forget-me-nots.
Trilliums, known for their three-petaled flowers, bring a touch of elegance to woodland settings. These plants not only add beauty but also provide essential habitat and food sources for insects and small mammals. When planting trilliums, ensure they are placed in well-draining soil with dappled sunlight to encourage healthy growth. Regular watering and mulching can help maintain their vibrant blooms throughout the season.
Canada anemones, with their delicate white flowers, offer a graceful alternative for ground cover. These plants thrive in moist, shady areas, making them ideal for woodland gardens. Canada anemones also attract pollinators and contribute to the overall ecosystem balance. To cultivate Canada anemones successfully, provide adequate moisture and space them out to allow for their spreading nature while keeping them in check to prevent overcrowding.

Consider planting Canada Anemone in your garden to create a carpet of white in spring.
By incorporating trilliums and Canada anemones into your woodland garden, you not only enhance its visual appeal but also contribute to the preservation of local flora and fauna, creating a harmonious and thriving natural environment.
Concluding the exploration of native ground covers in woodland gardens, it is evident that incorporating plants like forget-me-nots and other native species offers a multitude of benefits. These ground covers not only enhance the visual appeal of your garden but also provide crucial support for local wildlife, promoting biodiversity and ecosystem balance. By planting these native species en masse, you can create a thriving habitat for insects, birds, and mammals, contributing to the preservation of local flora and fauna.


Luminar Neo and Lensbaby combine for the ultimate in creativity
Adding a creative touch with Luminar Neo and Lensbaby lenses.

Our spring dogwood proved to be the ideal subject for the Lensbaby Composer and Sweet 50mm lens with a macro filter attached. Combine this soft, ethereal image with two subtle textures using Luminar Neo’s layering and blend modes and the existing photograph is turned into a painterly image that I’m betting most would be proud to call their own.
Textures add painterly effects to ethereal images
Ansel Adams once said you don’t “take a photograph, you make a photograph.”
Back then, Adams used the traditional darkroom to create magnificent Black and White images of the natural world, often times spending days in the darkroom “making” these images.
Today, the traditional darkroom has been replaced with the digital darkroom, turning the concept of “making” images rather than just “taking” them accessible to every photographer who chooses to explore their creativity and take their photography to new heights.
In this post, I am going to explore how, combining the inherent creativity built into every Lensbaby lens with the creative tools available in Luminar Neo, can change how you approach garden and flower photography as well as portraiture and landscapes.
• Go to the bottom of this post for the latest HOLIDAY offering from Luminar Neo
In case readers are unaware of the magical qualities of Luminar Neo post processing software and Lensbaby’s creative line of photographic lenses, let’s take a moment to familiarize ourselves with these creative photography tools.

While the first image of the dogwood flower is rather subtle, this image of paperbark maple leaves in fall shows what can be achieved with heavier textures applied through Luminar Neo’s layering and blending modules. The original image was taken with the Lensbaby 2.0 and sweet 50mm lens.
Luminar Neo is a photo editing software package that combines ease of use with the power of Ai to assist photographers, who may have been hesitant to dive into more complex photo editing software in the past, to embrace the ease and convenience of a more simplified, yet powerful, editing program.
Lensbaby is a lens manufacturer that embraces and encourages photographers to push creativity by offering lenses with unique characteristics that create elegant, soft-focus effects, beautiful colour blending and soft ethereal results that enhance almost any image, especially in the garden, with flowers and portraits.
In the final days leading up to Christmas, Luminar Neo is offering a special “creative” Advent Calendar package just in time for photographers to give themselves a special gift for the season.
The lowest price is available now, but once the doors officially open, the cost will range from $119 to $159 depending on if you are a new or existing user.
The Advent Calendar includes 12 unique surprises, each hidden behind a daily window. Photographers can discover a new gift every day, such as:
🔸 Luminar license
🔸 Marketplace items (Skies, bundles and more)
🔸 X-membership subscription
🔸 Educational courses
There are different surprises depending on the Luminar Neo package you choose or currently own.
Check out the information at the end of this post for details on the special creative and educational packages.

This image was taken with the Lensbaby Composer and sweet 50. It was then brought into Luminar Neo where a number of textures were applied creating a more painterly effect. One of the textures was also used to add the lovely, subtle pink tone to the image.
Adding textures to existing images is rather simple with Luminar Neo’s intuitive photo editing program. It’s as simple as dropping a textured image on top of your main image and then choosing from a host of blend modes from a drop-down menu. Once the texture is applies and the blend mode chosen, it is up to the photographer to decide if they want to go farther using masks or a host of other editing modules within Luminar Neo.
One of my new favourite modules is Luminar Neo’s incredible “Light Depth” module that is capable of transforming flat, boring images into beautifully lit, three-dimensional images. Check out my earlier post here, for more on using the Light Depth module in Luminar Neo.

These Northern Sea Oat grasses photographed with a Lensbaby 2.0 was given added interest by using a Luminar Neo built-in golden dust texture effect. You can create your own textures, find free ones on line or purchase more professional textures through Luminar Neo. Their latest creative package might just include some of their professionally produced creative tools.
If you are interested in exploring Lensbaby lenses further, you can check prices here (Amazon.com) or here (KEH used camera exchange.) If you are interested in exploring Lensbaby lenses further, check out the offering of books available through Alibris used books here.
My earlier posts on Luminar Neo
Adding textures, manipulating lighting, or even repairing old family photos are just a few of the incredible bonus features offered by Luminar Neo’s comprehensive editing software. For more of my posts on the benefits of exploring Luminar Neo, I encourage you to check out the following posts.
• Exploring Luminar Neo mobile for your phone: click here.
• Exploring Luminar’s incredible photo restoration module: Click here.
• Can Luminar Neo act as your only photo editing program. Click here
Subtle textures were added to this macro image of a Hydrangea blossom taken with the Lensbaby composer fitted with a Lensbaby macro filter.
Of course, garden flowers are not the only subject for Lensbaby lenses and Luminar Neo textured effects. Below is an image taken recently of our new flat Coated retreiver, Colby. This image was taken with the Lensbaby Velvet 56. The Velvet series of lenses are capable of truly beautiful results with an ethereal glow that is magnified depending on the f-stop used (from quite sharp at f5.6 through f16 and getting softer from F5.6 through to F2.
Two B&W textures were added to the original image to maintain the overall B&W, painterly effect.
The image below and the above images represent just a few of the creative approaches available to photographers using special effect lenses and/or filters, and combining them with the creative effects available through Luminar Neo. Please explore the links provided for my earlier posts on Luminar Neo and be sure to click below to check out all of the special deals on creative assets, tools and educational resource materials Luminar Neo is adding for their “creative advent calendar.”

Our rescue Flat-Coated Retriever with his baseball stuffy taken with the Lensbaby Velvet 56 with two textures added for a painterly effect.
Luminar Neo’s holiday calendar of gifts explained
From December 13th to 24th, open a new surprise every day and discover creative tools, content, and inspiration worth more than $1000.
The calendar can also be gifted to friends, family, or photography enthusiasts, making it a thoughtful and creative holiday present.

Here’s what all the excitement is about. Unlock your treats every day leading up to the big day.
Calendar Timeline:
December 10: Presale begins with lower prices
December 13–24: Daily windows open (one per day)
December 16–25: Calendar available at full price
The Japanese culture has its own way to describe and experience the joy of spring greens. We too can learn from their enlightened perception of the woodland.