
How to grow common milkweed and why it should be in every garden
Common milkweed is not just for butterflies. Every garden needs a patch of these beautiful flowers in their front or back gardens.

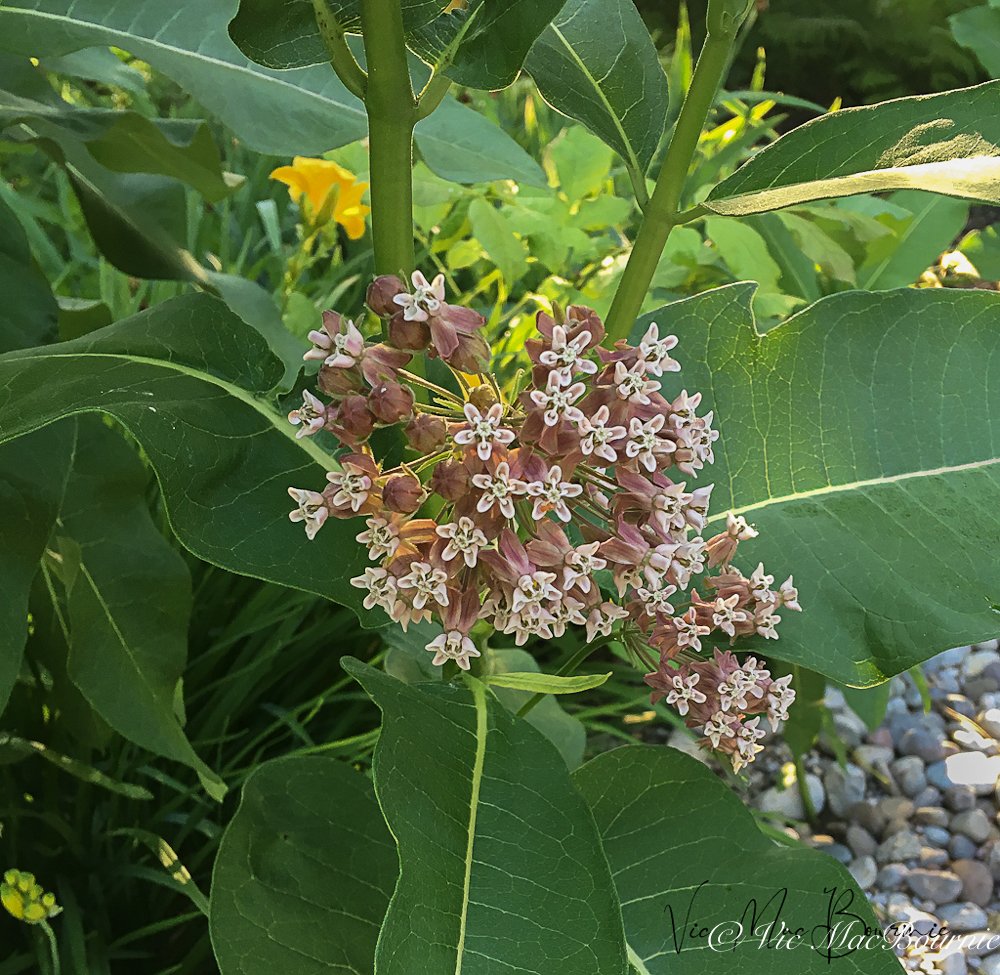
The common milkweed is an exceptionally beautiful garden plant that is critical to the future of monarch butterflies.
It’s not just for Monarch butterflies
Common milkweed is an outstanding native plant that needs to find a place in every garden. Even if it’s nothing more than a small patch in a corner of the yard, we need common milkweed in our gardens.
Yes, it is a great pollinator plant. And yes, it’s the host plant for our beautiful Monarch butterflies that are completely dependent on the plant for their future.
That should be enough to convince any wildlife gardener to have a patch of common milkweed in a prominent spot in the garden.
But too few people talk about the incredible beauty of this plant in full bloom. Massive balls of pinkish-mauve blooms that can take centre stage in any garden for their outstanding beauty.
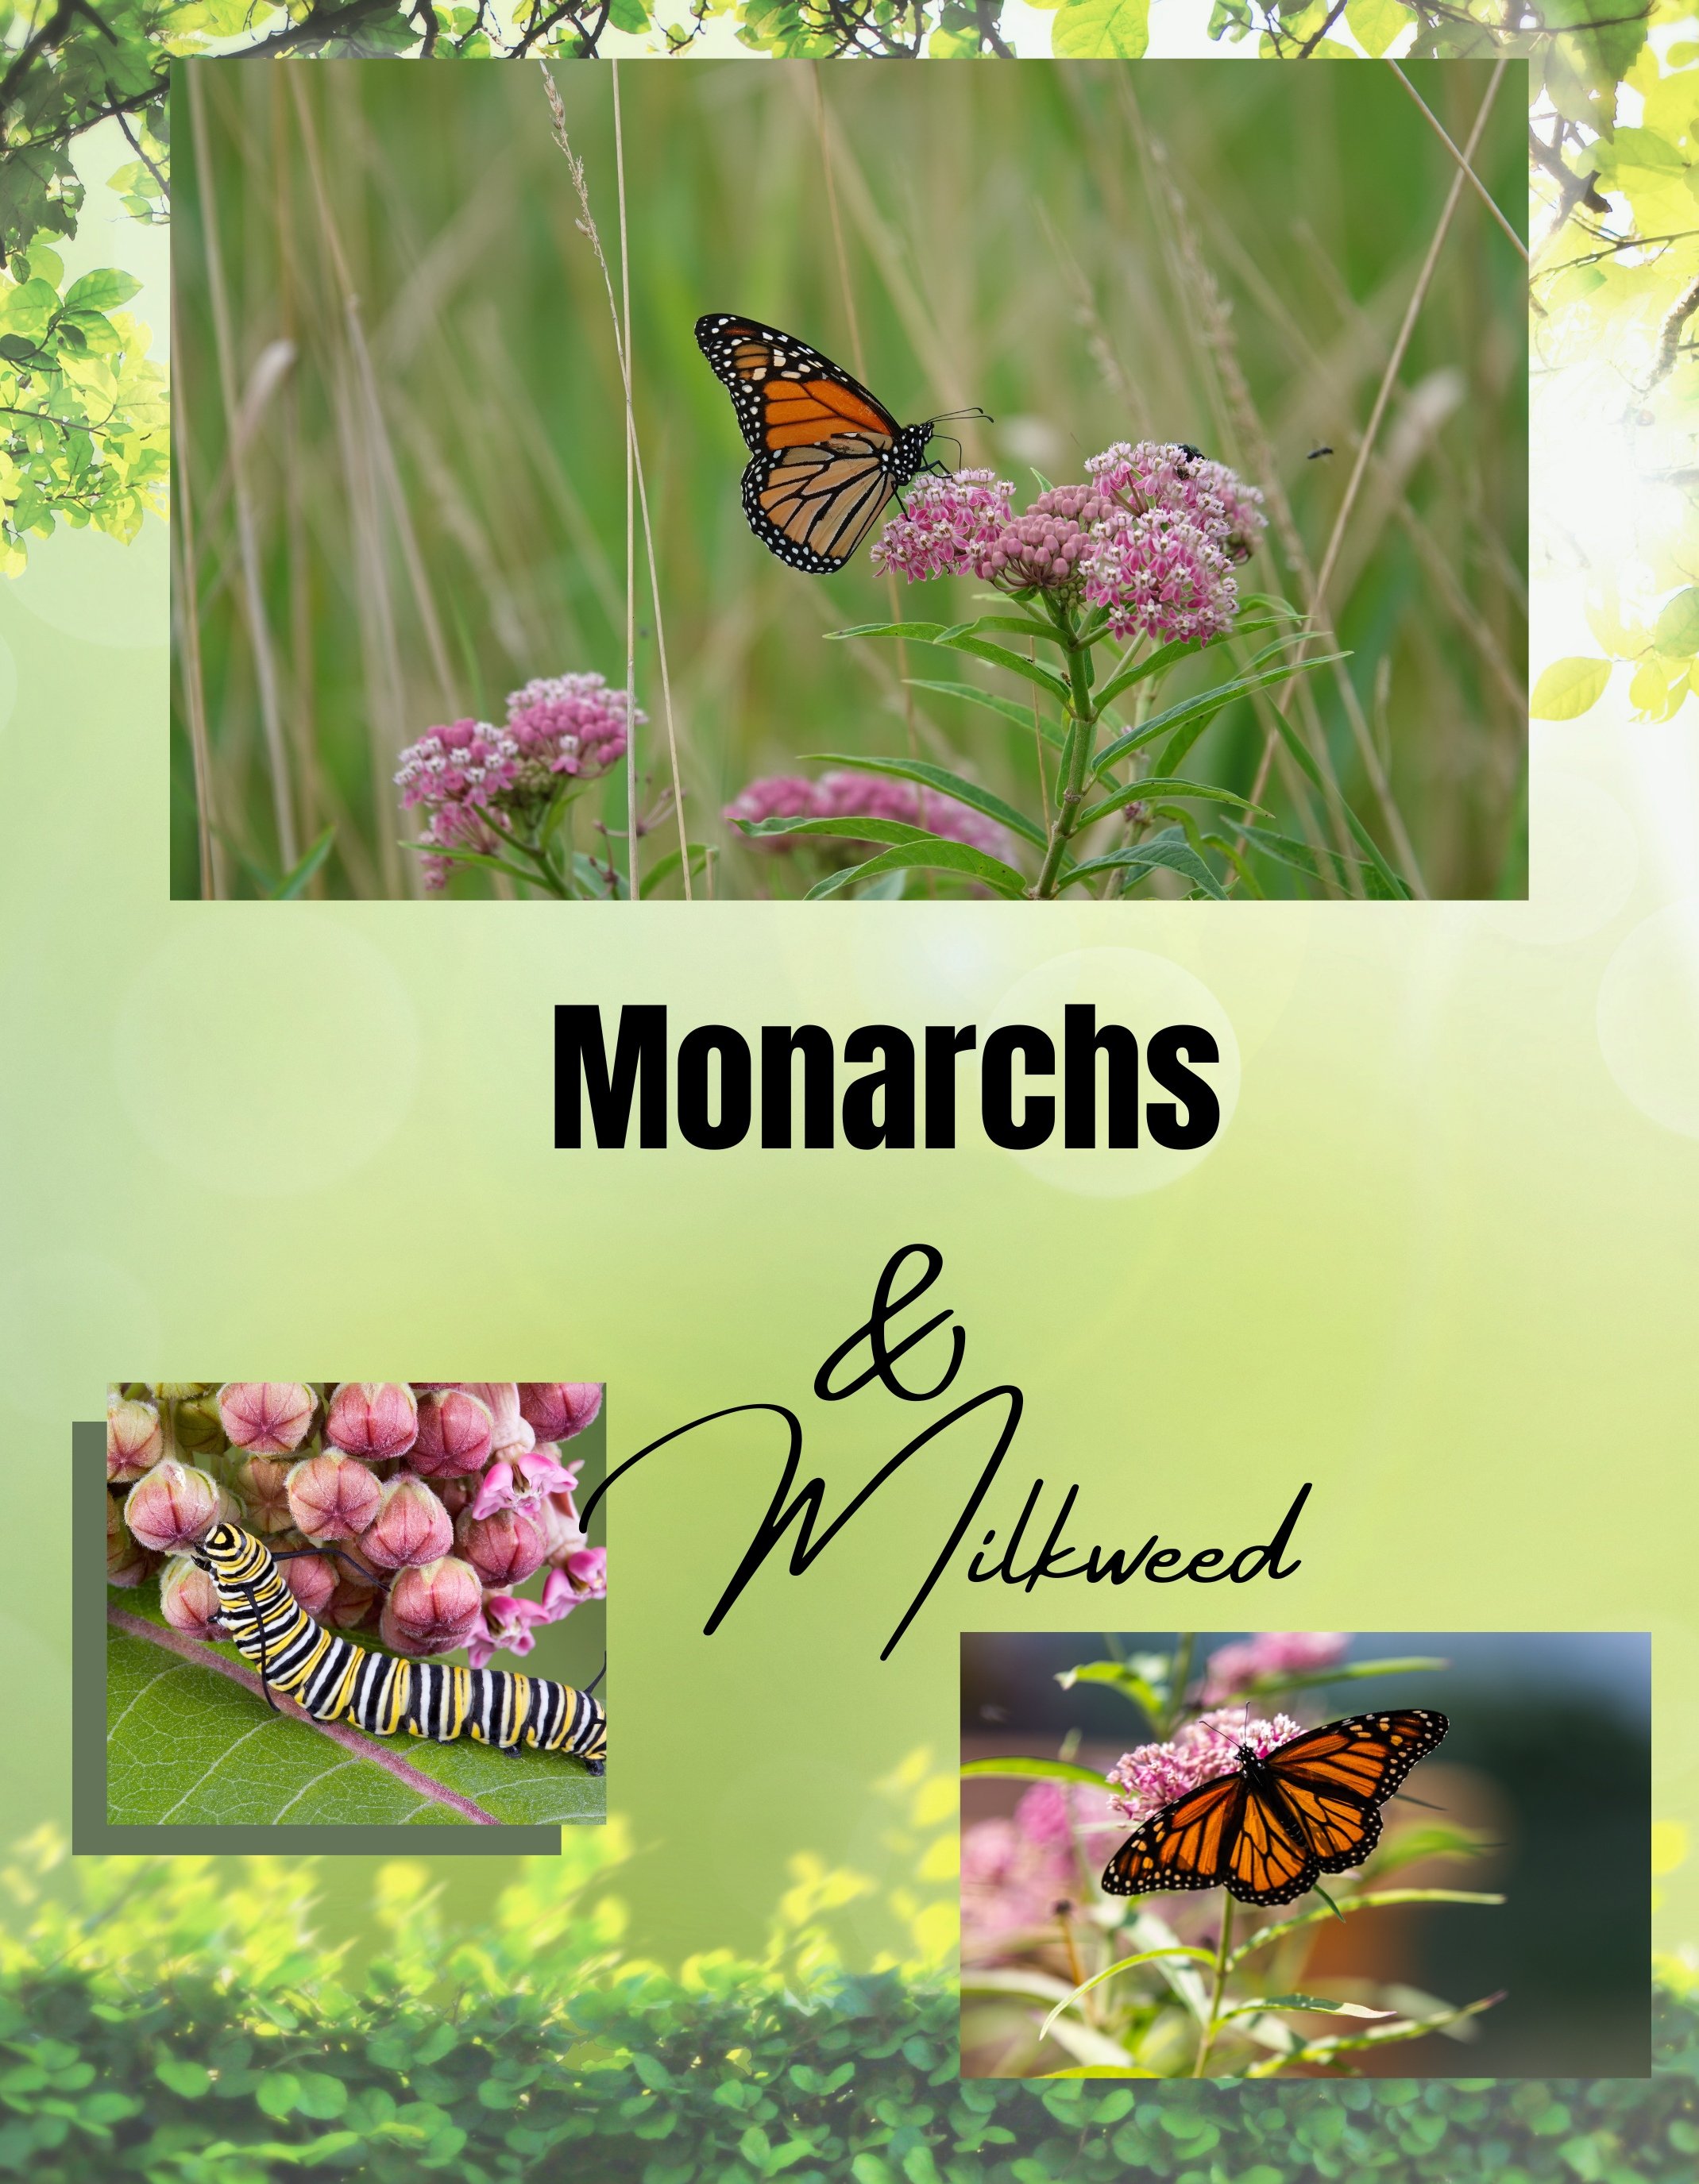
Our monarch butterflies are dependent on milkweed for their future survival. Every garden should have one of these beautiful native plants.
Add butterflies flitting about it and how can you go wrong?
Common milkweed, scientifically known as Asclepias syriaca, is a native perennial that can be found throughout North America.
As we said, its stunning flowers and unique characteristics make it a favourite among natural gardeners and nature enthusiasts alike.
How to grow common milkweed
To successfully grow common milkweed, you need to start with the right seeds or plants. You can find common milkweed seeds at local nurseries or online stores specializing in native plants.
Alternatively, you can also collect seeds from existing milkweed plants in your area in the fall when the large seed pods open up to reveal the unique seeds heads. The unique dispersal method of common milkweed seeds has long been a favourite of children (and adults alike) who who watch as the seeds attached to a silvery, feathered sail are lifted into the sky with the slightest of breezes.
Once you have the seeds, it’s time to prepare the soil. Common milkweed prefers well-drained soil, so make sure to choose a location with good drainage.
But don’t over improve the soil. Anyone who has seen Milkweed growing along roadsides knows that the plants can thrive in very average rocky soil. In fact, We had a large clump growing in one of our dry river beds in the front of the garden where they faced winter salt and hot sun most of the day.
I was able to move some of those plants to the backyard where they are forming a good sized clump that is welcome to grow as large as it wants.
Milkweed plants have long tap roots that can be very difficult to dig out if the plants are mature. Instead, look for young plants that can be moved much easier, but remember that tap root when you dig them out. It’s always a good idea to transplant any plant after a heavy rainfall.
Do not dig them from wild areas unless you know the plants are going to be bulldozed or threatened in another way. Check out my earlier post on Why we should not dig up plants from the wild.
If you are starting from seed, loosen the soil before planting and remove any weeds or grass. This will create an ideal environment for the milkweed seeds to germinate and establish themselves.
For more on attracting Monarch butterflies, check out my earlier post on Butterfly Weed.
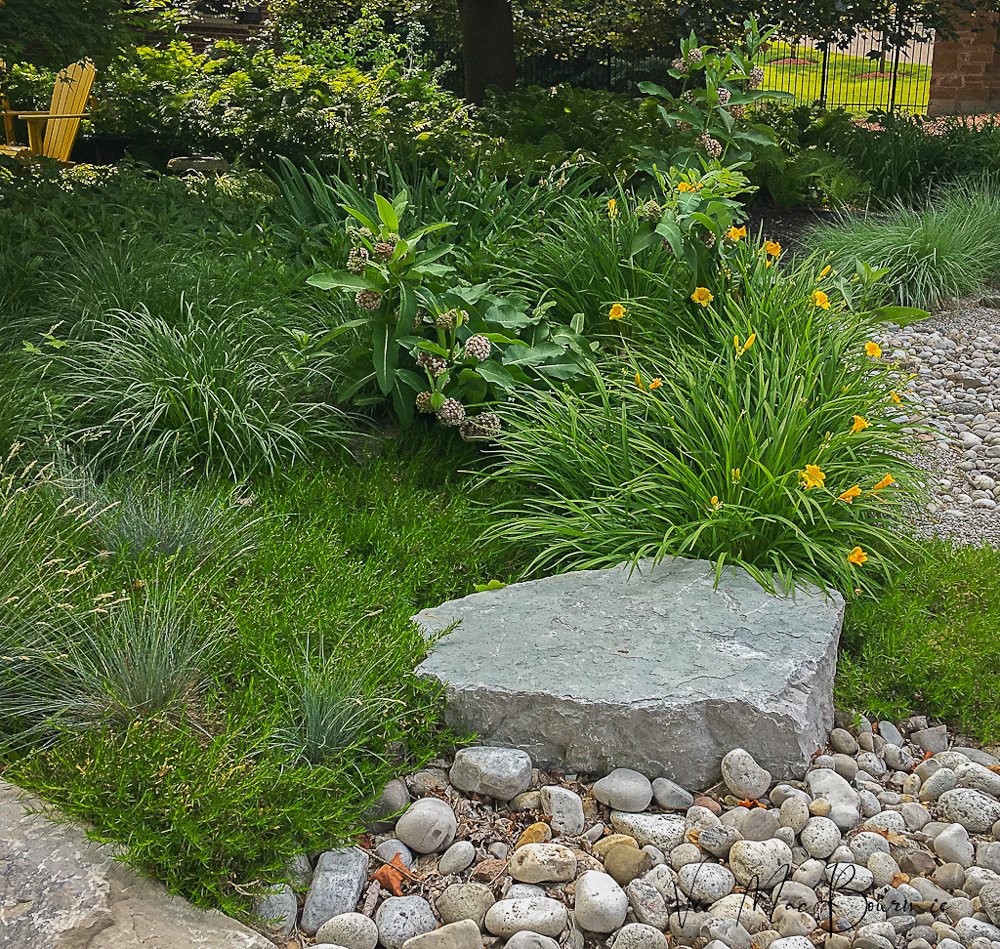
The Milkweed plants growing in the centre of the front garden provide food for monarchs while offering beautiful summer blooms followed by interesting seed pods in fall.
When it comes to planting, sow the seeds directly into the soil in early spring or fall. Lightly cover the seeds with soil, ensuring they are not buried too deep. Water the area gently to keep the soil moist but not waterlogged.
As the seeds germinate and sprout, thin out the seedlings to provide enough space for each plant to grow.
Common milkweed can reach heights of up to six feet, so make sure to give them enough room to flourish.
Remember, patience is key when growing common milkweed. It may take a year or two for the plants to fully establish and bloom, but the wait will be worth it.
Importance of Common Milkweed
Now that you know how to plant and grow common milkweed, let’s explore its crucial role in supporting pollinators.
Common milkweed is a magnet for various pollinators, including bees, butterflies, and hummingbirds.
Its vibrant flowers produce nectar, which serves as a vital food source for these important creatures.
As pollinators visit the milkweed flowers to feed on nectar, they inadvertently transfer pollen from one flower to another, enabling the plants to reproduce. This process of pollination is essential for the survival and diversity of many plant species.
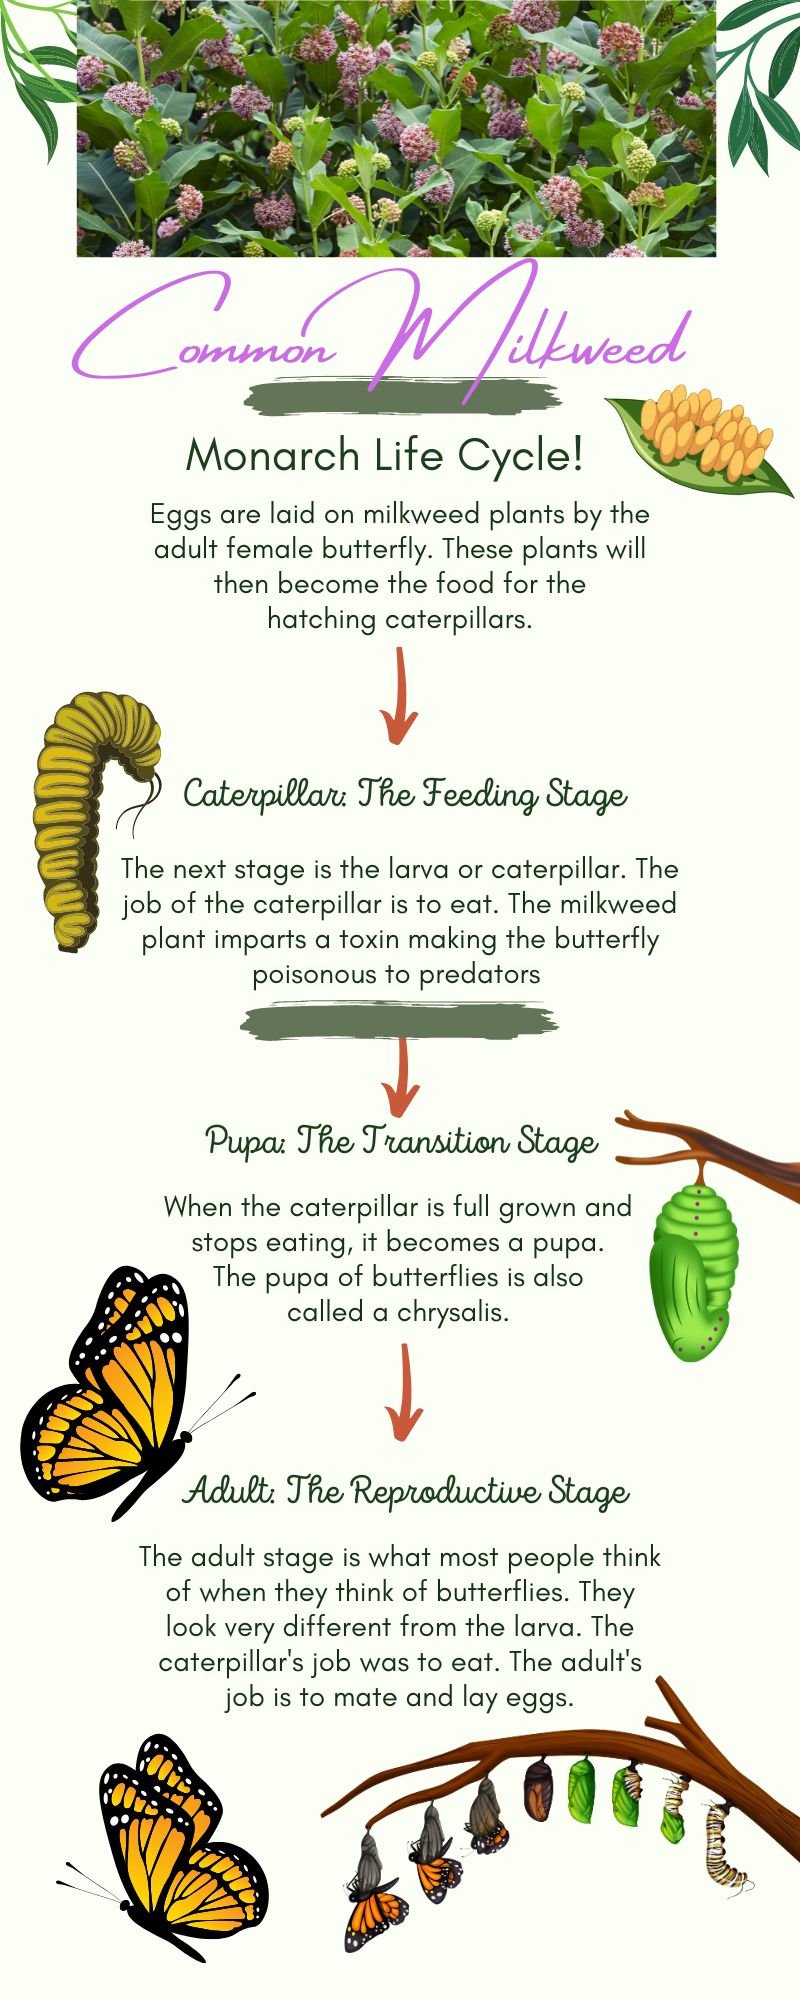
As we know, common milkweed is a host plant for the monarch butterfly.
Monarchs lay their tiny eggs exclusively on milkweed plants, and the caterpillars that hatch from these eggs rely solely on milkweed leaves as their food source. The leaves of the milkweed are important because they impart toxins that make the Monarch butterflies poisonous to birds and other predators.
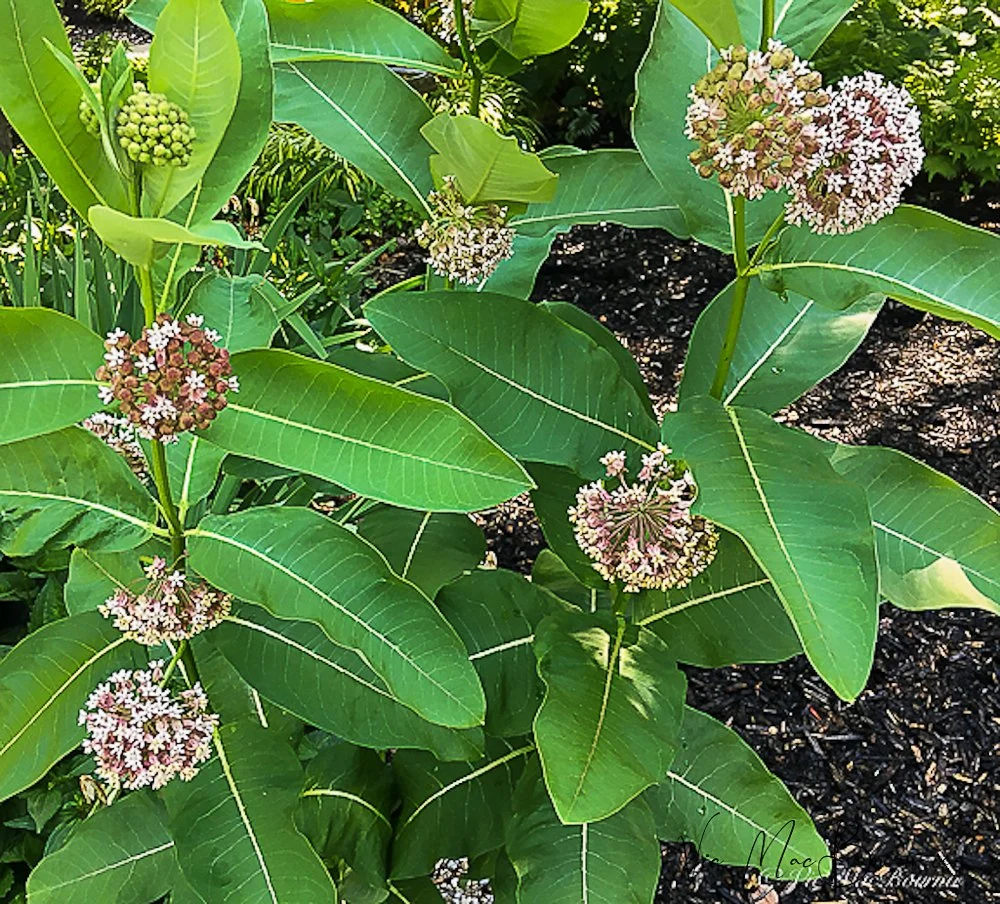
Milkweed flowers in full bloom in the front garden. Some of the smaller plants were transplanted to the backyard to begin a patch there as well.
By planting common milkweed in your garden, you are providing a critical habitat for monarch butterflies and contributing to their conservation.
Additionally, common milkweed also attracts a wide range of other beneficial insects, such as ladybugs and lacewings, which help control pests in your garden naturally. One of the more fascinating insects you will likely find on your milkweed plant is the milkweed beetle. The red and black beetle should not be considered a pest but, in fact, is part of the complicated ecosystem that exists on the milkweed plants.
Studies show that Milkweed plants that include a host of insects including aphids and milkweed beetles, prove to be more successful in bringing monarch larvae through to complete metamorphosis. So, leave your plants in a natural state, and when you notices the leaves are being eaten, it is most likely the monarch butterfly caterpillar munching on the leaves, and that, after all, is the reason we planted the milkweed.
Milkweed plants for every garden
So, by growing common milkweed, you not only enhance the beauty of your garden but also play a vital role in supporting pollinators and maintaining a healthy ecosystem.
Here are some tips to help you keep your common milkweed garden thriving.
First, make sure to water your milkweed plants regularly, especially during dry spells.
While common milkweed is relatively drought-tolerant, providing adequate moisture will promote healthy growth and blooming. However, be cautious not to overwater, as excessive moisture can lead to root rot.
Keep the area around the plants free from very competitive weeds or shrubs. Milkweed’s long tap root enables it to grow alongside other less competitive plants including grasses.

Lumix LX7: Perfection in a tiny, full-featured package
Panasonic’s Lumix LX7 is the ideal camera for the advanced photographer looking for a premium camera in a tiny package.

The Panasonic Lumix LX7 captured the fine details of this scene at a local restaurant. The incredible small size of the LX7 made it easy to slip into my pocket enabling me to take it along without it getting in the way.
First impressions of this tiny Leica-equivalent workhorse
It’s difficult to imagine Panasonic jamming more features into its tiny LX line of enthusiast cameras without it looking more like a full-sized digital SLR. But they have, or should I say, they did way back in 2012 when they released the DMC-LX7 to succeed the highly acclaimed LX5.
The combination of having manual control f-stops at my fingertips (just like the old days) on the extremely fast and superb Leica lens, as well as image dimension control, put this camera at the top of my must-have list. The traditional style aperture ring covers F1.4 to F8, with detents at every third stop. These features built into the lens makes it much easier to set both the aperture and picture dimension without having to dig deep into the camera’s menus. There is a separate switch on the side of the lens that sets the focus from autofocus, manual and autofocus macro.
In addition, the LX7’s mostly metal construction gives the camera the proper heft reminding you that this is a serious camera. A redesigned grip makes the camera comfortable in my hand, leaving the most important controls within easy reach.
Click on the link to see a complete list of Panasonic’s Point and Shoot cameras.
For more information on the LX10, click on the link to go to the Panasonic Lumix site where you can purchase the camera directly from Panasonic on a monthly payment plan.
Add to that the camera’s close-up capabilities and it becomes an ideal camera to take out into the garden to capture flowers and insects. In fact, the DMC-LX7’s macro setting allows the photographer to focus on a subject that is only 1cm away from the camera when the lens is set to 24mm wide-angle.
That’s impressive.

The Panasonic Lumix LX7, shown here with a high quality TT Artisan optical viewfinder, is a nice combination for street photography, capturing quick snapshots of kids in action as well as garden images (see below.)

The Leica lens showing both the aperture control and the image dimension control rings.
What about that impressive Leica lens?
It’s a 4.7-17.7mm, F1.4 - F2.3 lens, or the equivalent of a 24-90mm in the world of 35mm. Now, imagine what it would cost you to purchase an extremely fast Leica 24-90mm lens, and you’ll realize just how good of a deal this camera is if you are looking to create outstanding images with a pocket-sized camera.
The lens alone is worth the price of admission.

The rear view of the Panasonic Lumix LX7.
Why should we care that the lens is fast?
A fast lens allows us to do two things: first it helps to get images in low light situations, and second, it allows us to capture images with more pleasing out-of-focus background. A soft background is generally more pleasant, especially when you are taking portraits or focusing on a butterfly or flower in your garden.
Most point-and-shoot style cameras force you to either dig into the menus on the back of the camera to change the f-stop, or use a wheel on the back of the camera. The LX7’s placement of the aperture ring on the lens – where most of us old timers are used to it – makes it both convenient and nostalgic for anyone who used a 35mm film camera in the past.
I can honestly say I have not been disappointed in the least.
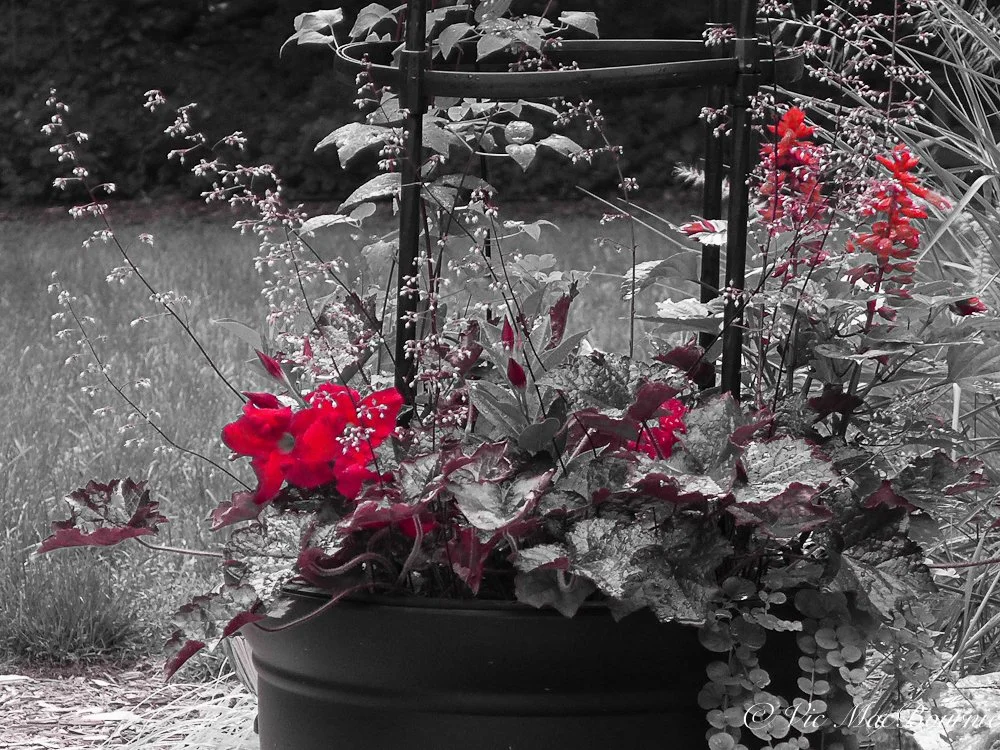
One of the many filter modes available on the Panasonic LX7 that creates a B&W image extracting only the objects in red. Other colours can be chosen to extract in the image. A nice feature that is good to get familiar with to create some interesting images.
Why buy the Panasonic Lumix LX7 over the LX5?
The LX7’s sensor and image processor have both been improved over the LX5, resulting in less noise at high sensitivities.
Other new features on the Lumix LX7 include the aforementioned manual aperture ring, higher resolution LCD display, a built-in neutral density filter, 11 fps continuous shooting, HDR capabilities, and the ability to record movies at 1080/60p (with stereo sound).
Panasonic has also built 70MB of memory into the DMC-LX7. The LX5 offered only 40MB of built-in memory. The 70MB will hold five RAW or sixteen JPEGs at the highest quality setting – perfect for those times you either run out of room on your card or forget to insert it before going out for a day of photography. It will at least allow you to capture those special moments until you can get your card back into the camera.

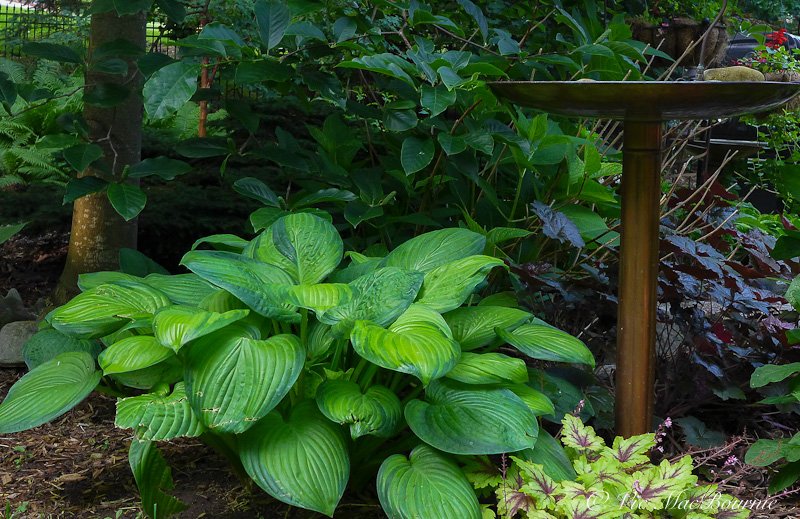
The image shows a garden vignette taken with the Panasonic Lumix LX7 featuring the impressive Leica 24-90mm (35mm equivalent) lens.
The extremely fast lens together with the camera’s impressive optical image stabilization (OIS) helps you get images in even the lowest light conditions.
These additional features are added to an already impressive array of features that have made their way into the LX-series over the years, resulting in a very capable camera that can serve the photo enthusiast as well as the professional looking for a second camera to carry in their pockets.
So far, in my small sample-size usage of the DMC-LX6 camera, I have found little to dislike.
Lumix LX7 weaknesses worth considering
It would have been great if Panasonic had made it possible to be able to screw filters on to the front of the lens – especially a polarizing filter. However, there is an ingenious accessory available for the camera that makes it possible to add filters to the front of the camera.
I am also a big fan of having built-in viewfinders on my cameras. LX7 users have to rely on the large LCD screen on the back of the camera, unless they are willing to put out a few hundred dollars to purchase Panasonic’s impressive EVF accessory. The electronic viewfinder snaps into the camera’s hot shoe and offers full integration with the LX7’s electronics. It’s an excellent addition, if not a little pricey and only available on the used market.

The high-quality TTArtisan viewfinders work well on the LX7 but offer no communication with the camera’s electronics.
Alternatives are available including third-party accessory optical viewfinders such as the TTArtisan viewfinders. (see image above) The TT Artisan optical viewfinder works well on the LX7 as an alternative to the more expensive Electronic Viewfinder offered by Panasonic as an accessory. Click on the link for my earlier post on these inexpensive TT Artisan viewfinders.
Finally, the camera’s feature packed menus can be a little difficult to navigate at first. It would be wise to spend some time in the menu system navigating to your favourite features to be truly comfortable using the camera.
Why should you buy the LX7 now?
The fact that the Panasonic LX7 is now available on the used market for a fraction of its original cost ($499 U.S.), makes these cameras a steal for anyone looking for the highest quality enthusiast camera in a very small, but full-featured package.
Although the LX-series are holding their price better than some 10-year-old-plus digital cameras, it’s important to realize that these were never meant for the inexpensive digi-cam market.
Who should buy the Lumix LX7?
This is an ideal tool for any photo enthusiast looking to have a camera with them at all times – either in the garden, on vacation, or snapping shots of the kids (grandkids) going about their business.
Small enough to slip into a coat or even pants pocket, a small purse or camera bag, the LX7 is totally capable on its own out of the box. Add the external electronic viewfinder, filters etc and these little Leica equivalent cameras leave little to desire.
Maybe you’re thinking that the 90mm equivalent lens just won’t cut it at the long end when you’re trying to get shots of birds or pull in distant scenic shots.
Well, Panasonic solved this problem in the LX7 by including Ai intelligent zoom that doubles the 90mm equivalent to 180mm. Yes, there is some loss of quality at the longer end – which would be expected – but consider the tiny size of the camera and the fact you can get a fast 180mm equivalent Leica lens without having to lug around an oversized camera and lens.
By lowering the image size, you can also use the Extended Optical Zoom feature to get similar results.

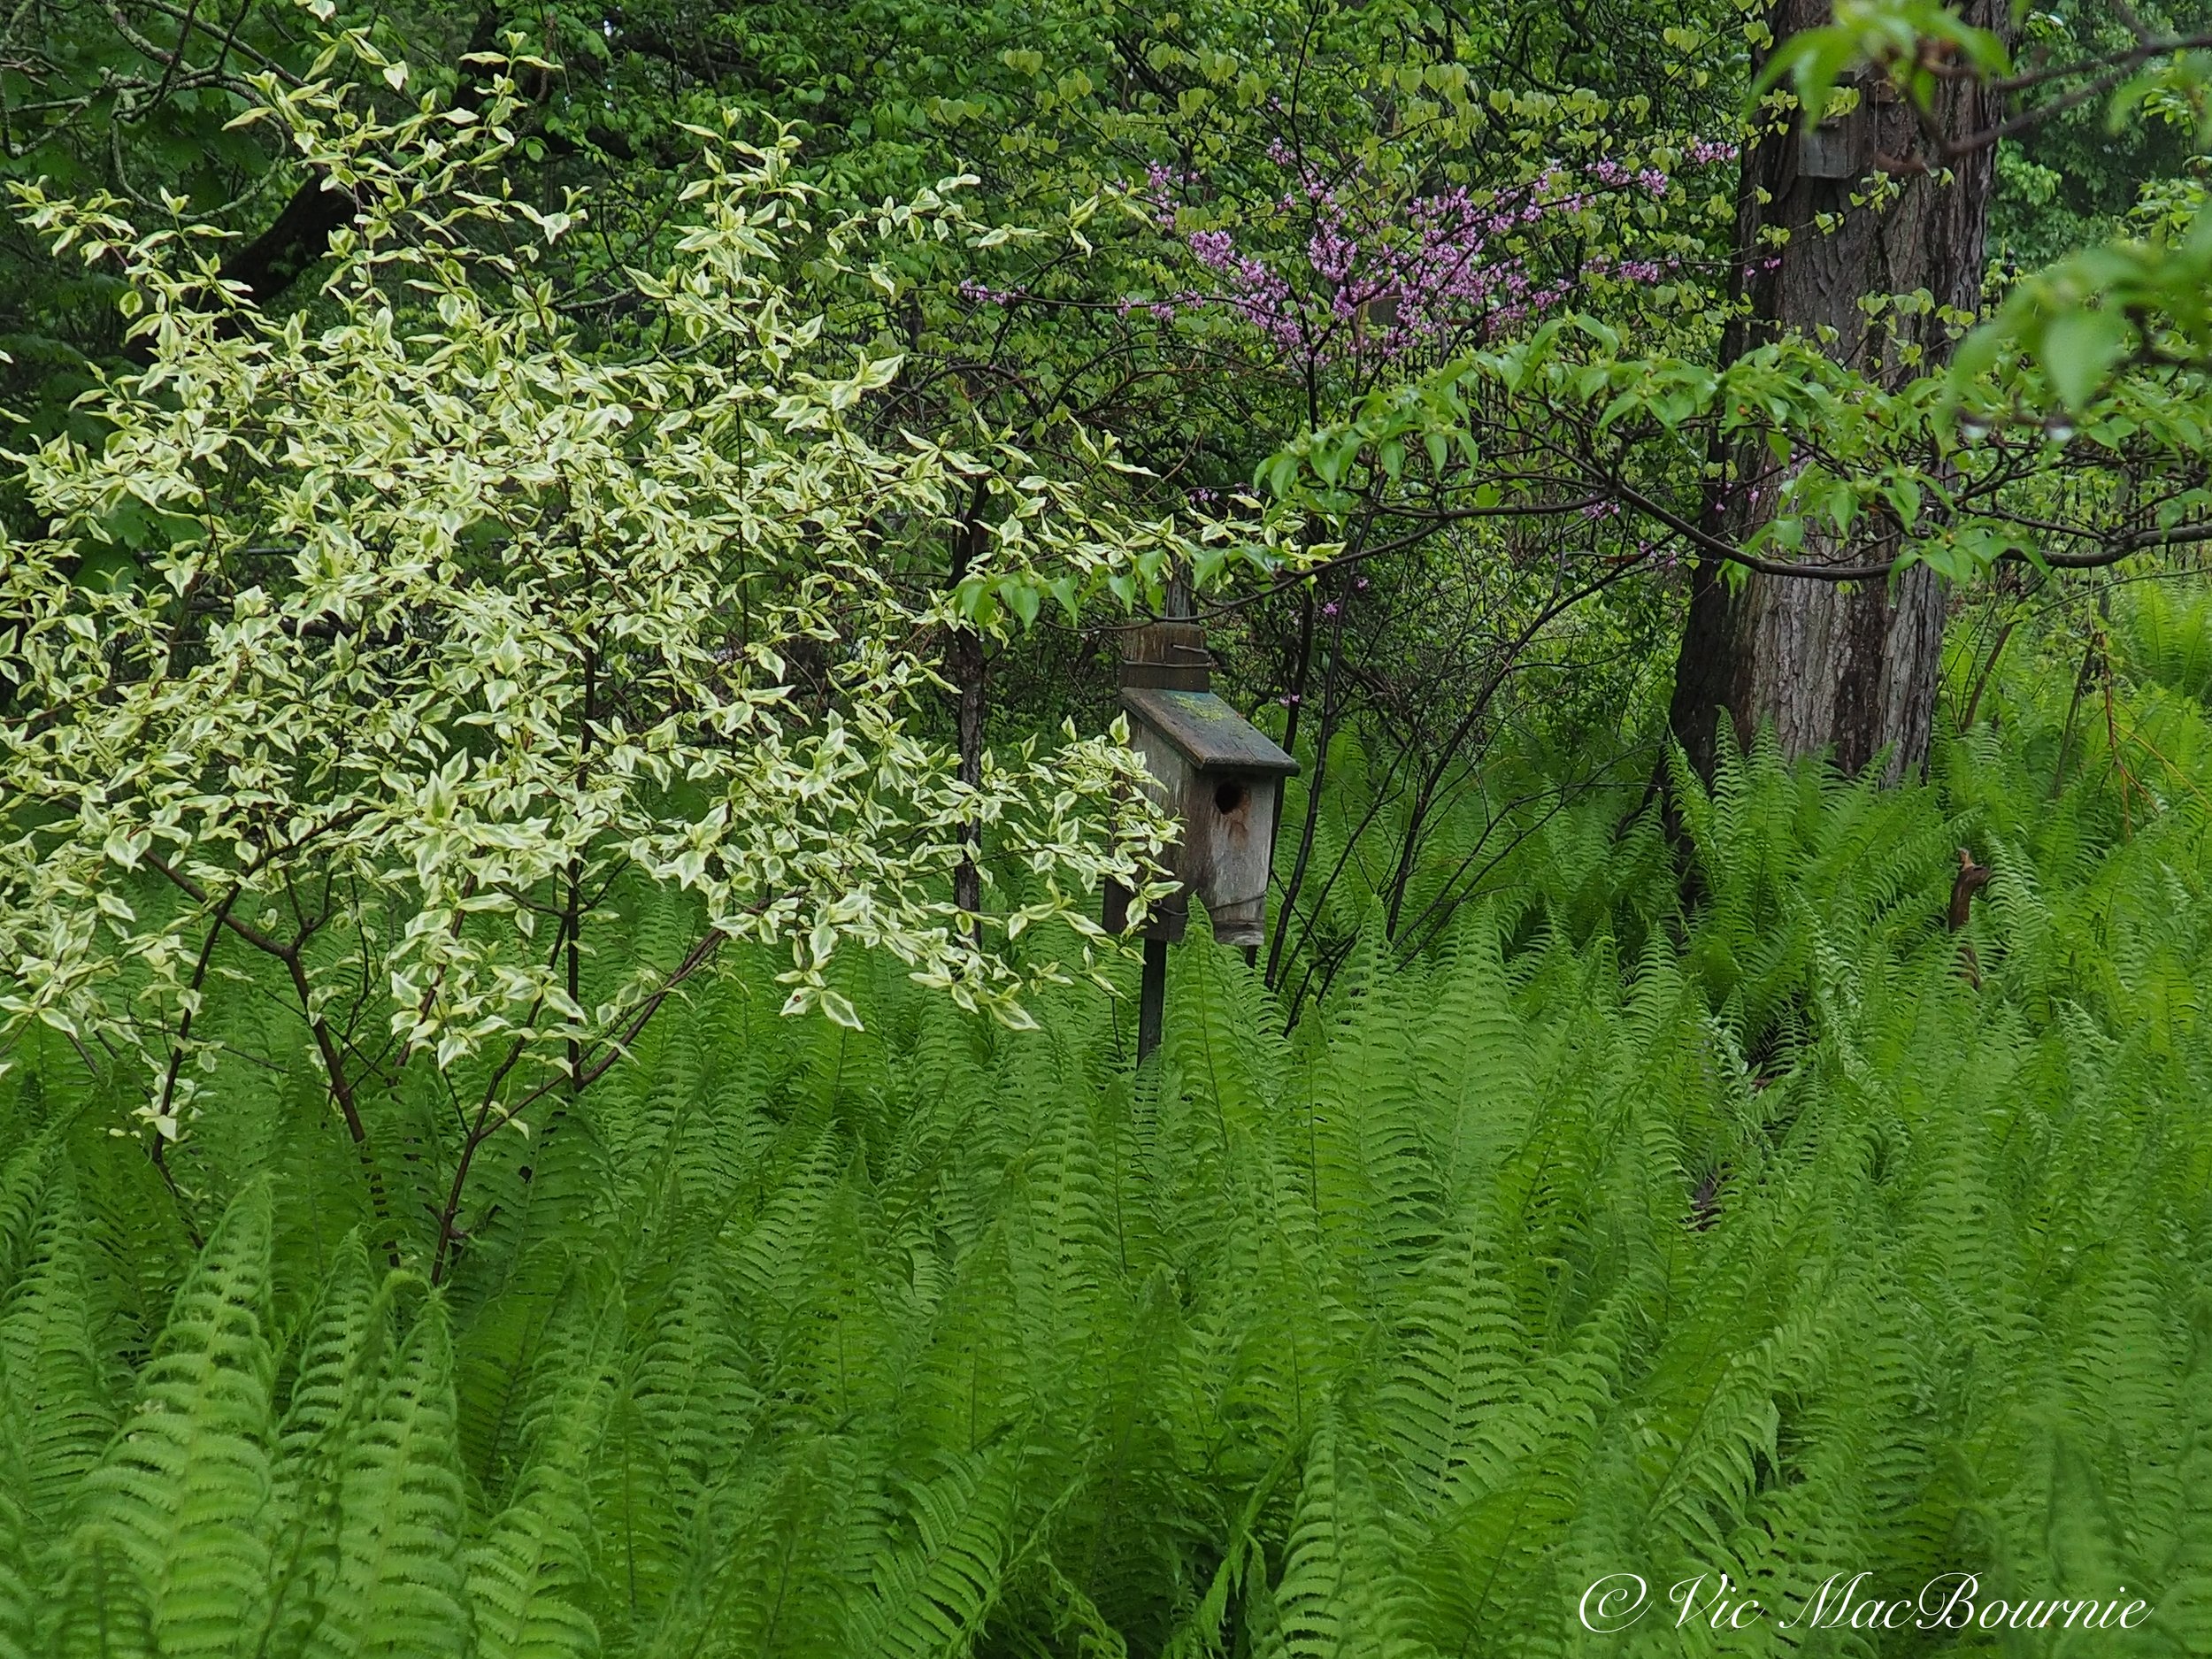
The LX7’s wide angle capabilities are ideal for capturing general garden scenes that require a fast lens.
Just slip this baby in your pants pocket and you are good to go.
This is not a camera for someone interested in bird or wildlife photography. Yes, you might get lucky with a friendly bird or chipmunk, but generally even a 180mm lens is not long enough for most serious bird photography.
If you are working around the garden, however, deadheading or watering your containers, its a great camera to have at your side. Pull out the LX7 for a quick shot of the butterfly or the perfect spray of cardinal flowers. Who knows maybe a hummingbird working the flowers. Just zoom in with the telephoto to get the shot or go to the 24mm equivalent for a wider shot of the garden in its prime.

The outstanding Leica lens can pick up beautiful details and colour even with the camera's relatively small sensor.
Features of the LX7
High sensitivity 1/1.7-inch MOS sensor (10.1 megapixels)
24 – 90 mm (35 mm equivalent) ultra wide-angle f/1.4 - 2.3 Leica DC Vario-Summicron lens (3.8x optical zoom)
POWER O.I.S (optical image stabilizer)
3.0-inch (920,000-dot) TFT LCD
Optional full manual operation
HD 1080p/60 quality movie clips in AVCHD and Motion JPEG format
HDMI output

The Panasonic LX7 close-up capabilities make this camera perfect for taking out in the garden.
History of the LX-series of cameras
Panasonic’s LX-series cameras have long been a favourite for premium compact cameras for the past decade.
The LX7 is the final version of a long list of LX enthusiast cameras beginning with the LX1, that combined the expertise of Panasonic with the exquisite craftmanship of Leica lenses. The pairing works beautifully.
Known over the years for their larger-than-average sensors, more recently the LX series (beginning with the LX3 and moving through the LX5 to the LX7), have earned their reputations for their fast and superior Leica lenses.
In fact, the LX7 is almost identical to the Leica D-LUX 6 which was made in the same factory by Panasonic for Leica. Check the link for the full scoop on the Leica D-LUX 6.

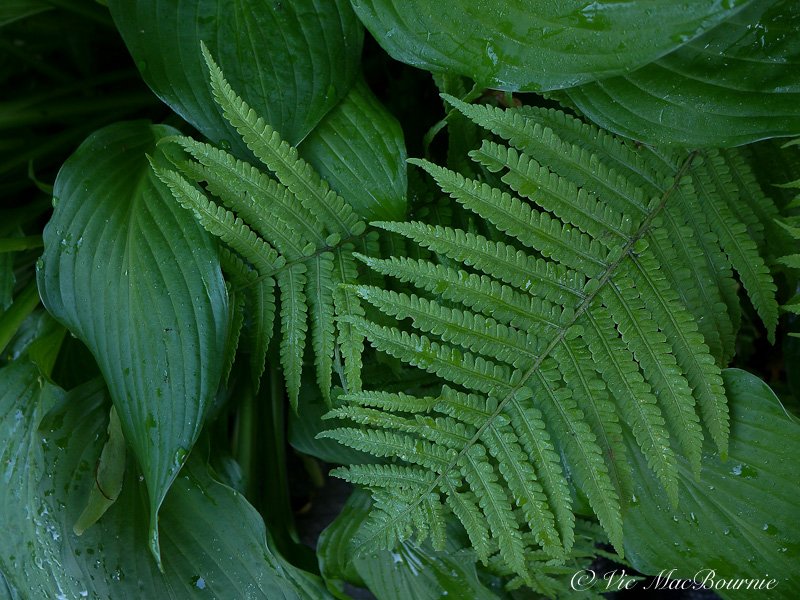
A close up image of a hosta with ferns is captured beautifully by the Leica lens.
The LX7 was replaced two years after it was first introduced by the LX100 in 2014.
The LX100 is, in many ways, a significantly different camera to the LX7. Not only does it sport a built-in electronic viewfinder (EVF), it features a larger sensor.

The impressive LX100 takes the LX line of cameras to an even higher level.
The Lumix DMC-LX100 (above) has managed to squeeze in a Four Thirds sensor, whose area is twice as large as a 1" sensor and five times bigger than the 1/1.7" sensor in the LX7.
While the LX100 has the larger sensor in comparison to the LX7, it doesn’t actually use the entire sensor, instead cropping it to allow for multi-aspect shooting (similar to how the LX7 uses its sensor).
The result is that the effective sensor area on the LX100 is really 1.5X larger than 1" and 4.3X the size of 1/1.7".
For more information on the LX100, click on the link to go to the Panasonic Lumix site where you can purchase the camera directly from Panasonic on a monthly payment plan.
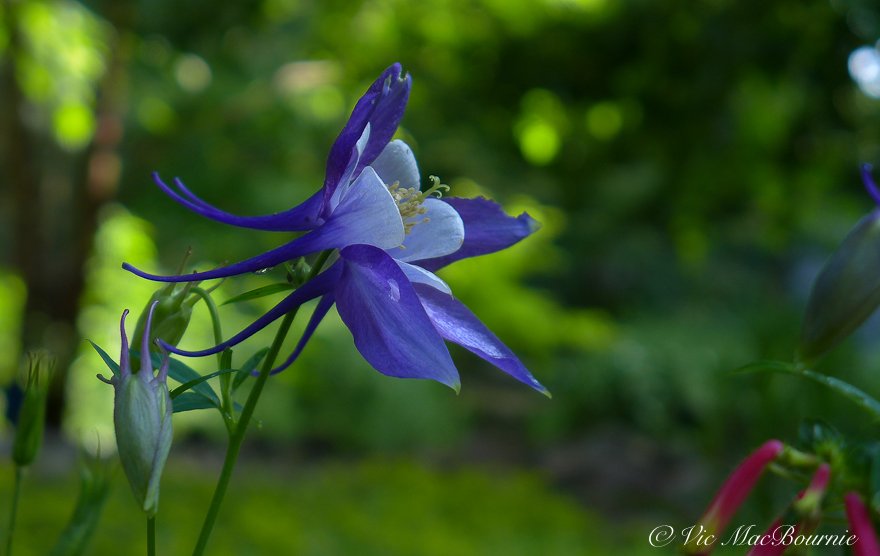
A columbine is captured beautifully by the Panasonic Lumix LX7.
What’s so special about the LX-Series of cameras and the LX7?
If you are a lover of small, full-featured cameras than the LX7 will appeal to you.
Add in the beautiful Leica lens and it’s really hard to go wrong. You can shoot this camera in full manual mode (including focus) or flip it to Ai for full automatic exposure. The camera even shoots RAW as well as aperture, shutter and program priority modes. There is also a complete offering of modes that leave little to be desired.
For old-school photographers there is even a step-zoom feature that allows you to jump to five preset positions (24, 28, 35, 70, and 90 mm).
In addition you can take double exposures, time lapse photography and HDR (high dynamic range) images.
You can also choose from sixteen special effects filters, that can be used in both stills and video, and can be fine-tuned to your creative preferences.

This 3-D printed grip adds to the ergonomics of an already outstanding camera.
Adding ergonomics to the LX7
The beauty of the Panasonic LX7 and the entire LX series line of cameras is their size. Small enough to fit in your pocket and use the camera as a go-everywhere tool to capture day-to-day experiences also makes it a little too small for those of us with larger hands.
That’s where Jim Rinner and his incredible photographic knowledge and talent comes into play. Rinner’s Ebay store at Shutterspeedblog, is the result of his incredible engineering skills to design the most exquisite hand grips many complete with an integrated thumb grip. Jim sent me one for my beloved Sigma DP2 and, upon further investigation, I see that he has designed a grip for the LX7.

This exquisitely printed grip for the LX7 is just one of several Jim Rinner offers, including the complete line of Leica D-Lux cameras, as well as a host of others.
Jim is a retired professional photographer and inventor with 75 (currently) US patents and with dozens more pending. In his spare time he puts is skills, along with $5,000 in CAD software, five 3D printers, and a love for photography to work creating exquisite camera accessories for a multitude of cameras ranging from the Sigmas, to Lumix, Leica and a host of cameras in between.
One look at he grip, and it’s not hard to see the attention to detail that Jim puts into these accessories. In the case of the grip for the DP2, not only does it sport an exquisite finish, it also leaves openings to replace the battery without removing the grip. The built in thumb rest is an excellent addition to the camera helping the photographer to use the camera with one hand for street photography without fearing the camera will slip from their grasp.
The accessory wraps around to the back where it enables the photographer to access all of the controls without getting in the way.
One only needs to check out his incredible EBay store to see the work he has done in the creation of so many photographic accessories.
The LX7 vs a Smartphone
You may be thinking, “I don’t need a camera my smartphone is all I need.”
Well, think again.
The LX7 is smaller than most smartphones, boasts a fast Leica lens, offers features too long to list as well as excellent video capabilities, and can be purchased for a lot less than your average smart phone.
It’s small enough to take everywhere and there is no doubt you are holding a finely crafted piece of machinery.
You could go out and buy the Leica equivalent for two or three times the price, or just be smart and nab yourself the Lumix LX7 and all the accessories for an even better price.
There is something about that Leica lens.
For a in-depth look at the Panasonic Lumix LX7, go to DPreview’s review here.

How to attract Blue Jays and are they mean birds?
They’re boisterous, bullies that add a hit of colour to our backyards. Blue Jays are one of the most beloved birds in our gardens, but it was not long ago when they were threatened by a deadly virus that wiped out hundreds of thousands of birds.

A blue Jay taking advantage of a bird bath. Their territorial habits have resulted in them being unfairly labelled as mean birds.
Blue Jays rebound after severe hit from West Nile
They’re loud, arrogant, boisterous bullies, and some may even consider them mean. But most bird lovers are happy when they see them at the feeders or, better yet, nesting in their backyard.
Not everyone, however.
Like some family members, blue jays arrive, make a lot of noise, steal all your food, hang out for longer than you want them sometimes and then leave without as much as a thank you.
Blue Jays have returned to our backyards after a couple of lean years caused by a multitude of deaths resulting from West Nile disease that hit Blue Jays hard.
And nothing could make me happier.
If you are looking to attract Blue Jays to your yard, take a minute to check out my post on my two favourite Blue Jay feeders.
Back when West Nile emerged in the late 1990s into the 2000s, dead crows and blue jays provided early warning of the outbreak. In the year 2007, research by the journal Nature warned that populations of seven species of birds, including robins, blue jays and crows showed “dramatic decline” across the continent since West Nile emerged in the U.S. in 1999. The research compared 26 years of bird breeding surveys to arrive at the results. The report stated that the disease, primarily an avian virus spread by mosquito bites, killed hundreds of thousands of crows and jays.
The virus targeted seven species – American crow, blue jay, tufted titmouse, American robin, house wren, chickadee and Eastern bluebird. Only the blue jay and house wren were able to bounce back in 2005.

Six Blue Jays raid the bird feeder especially the seed cylinder which is, without a doubt, their favourite. For more on the seed cylinder, see an earlier blog post on my 5 best bird buys.
Earlier this summer I had nine – count’em nine – blue jays on my birdfeeder at once. A few more in the trees scattered throughout our woodland and another making itself at home in one of the birdbaths.
Then they spotted an owl way up in a tree and all hell broke loose for about five minutes until the owl flew off into some denser foliage.
One thing I can honestly say is that there is never a dull moment with these guys around.
And people love to see their colourful plumage in their backyards. These intelligent and adaptable birds that grow to about a foot long will feed on pretty much anything in our backyard landscapes, but are certainly very happy helping themselves at our bird feeders.

Blue Jay in crab apple. Blue Jays are very territorial birds that has resulted in a reputation for being a “mean” bird.
Are Blue Jays mean birds?
Blue Jays have gained a reputation in many circles for being mean birds, not only around the bird feeders but in their natural surroundings.
This reputation is probably the result of their loud rambunctious vocals as well as the the fact that they can be very territorial during nesting season and even around a bird feeder or bird bath.
At the bird feeder you will often find them visiting as a family group in large numbers. Their sheer size, rambunctious attitude and loud calls often force smaller, more timid birds to move on, leaving the feed for the Blue Jays to feast on all on their own.
Blue Jays’ long, sharp beaks also make them a formidable foe against even larger woodpeckers at our cylinder feeders.
It’s not hard to see how they have earned the reputation for being mean birds.
But most of their aggressive nature is the result of four factors:
Protecting their nest
Protecting a food source which includes a bird feeder
Protecting their fledglings either on the nest or near the nest
Protecting their flock when resting (bathing/feeding)
Yes, blue jays are territorial but they have to be to protect themselves.
Their aggressive approach to any raptor that decides to come into their territory is another example of how “mean” these birds can appear. Blue jays fear raptors but will – together with crows – aggressively harass a hawk or owl that wanders into their area, not backing off until the raptor moves on.
But Blue Jays have earned the reputation of being “mean” birds for more than just their bravado around the feeders and when raptors appear near their nests.
Blue Jays can seem downright mean in our eyes when they aggressively protect their nests and even bird feeders. They’ve even been know to attack humans who get too close to their babies on their nests. You may not realize you have invaded their territory and just think the birds are being extremely aggressive.
Blue Jays can also be very aggressive toward garden snakes, which is another reason they have earned a bad reputation.
Blue Jays are also known to eat other birds’ babies as well as frogs, which probably has not helped their reputations.
Blue jays have full repertoire of calls and sounds
These guys are not limited to their ear piercing raucous calls of jay, Jay, jay. Their repertoire includes a variety of musical sounds and they can apparently do a remarkably realistic imitation of the scream of a Red-shouldered Hawk. They’ve also been known to try to imitate humans on ocassion.
Often times I hear odd sounds and expect to see a rare bird emerge from the tree, only to find that the unusual sounds are from a blue jay. They can certainly communicate in a number of voices.
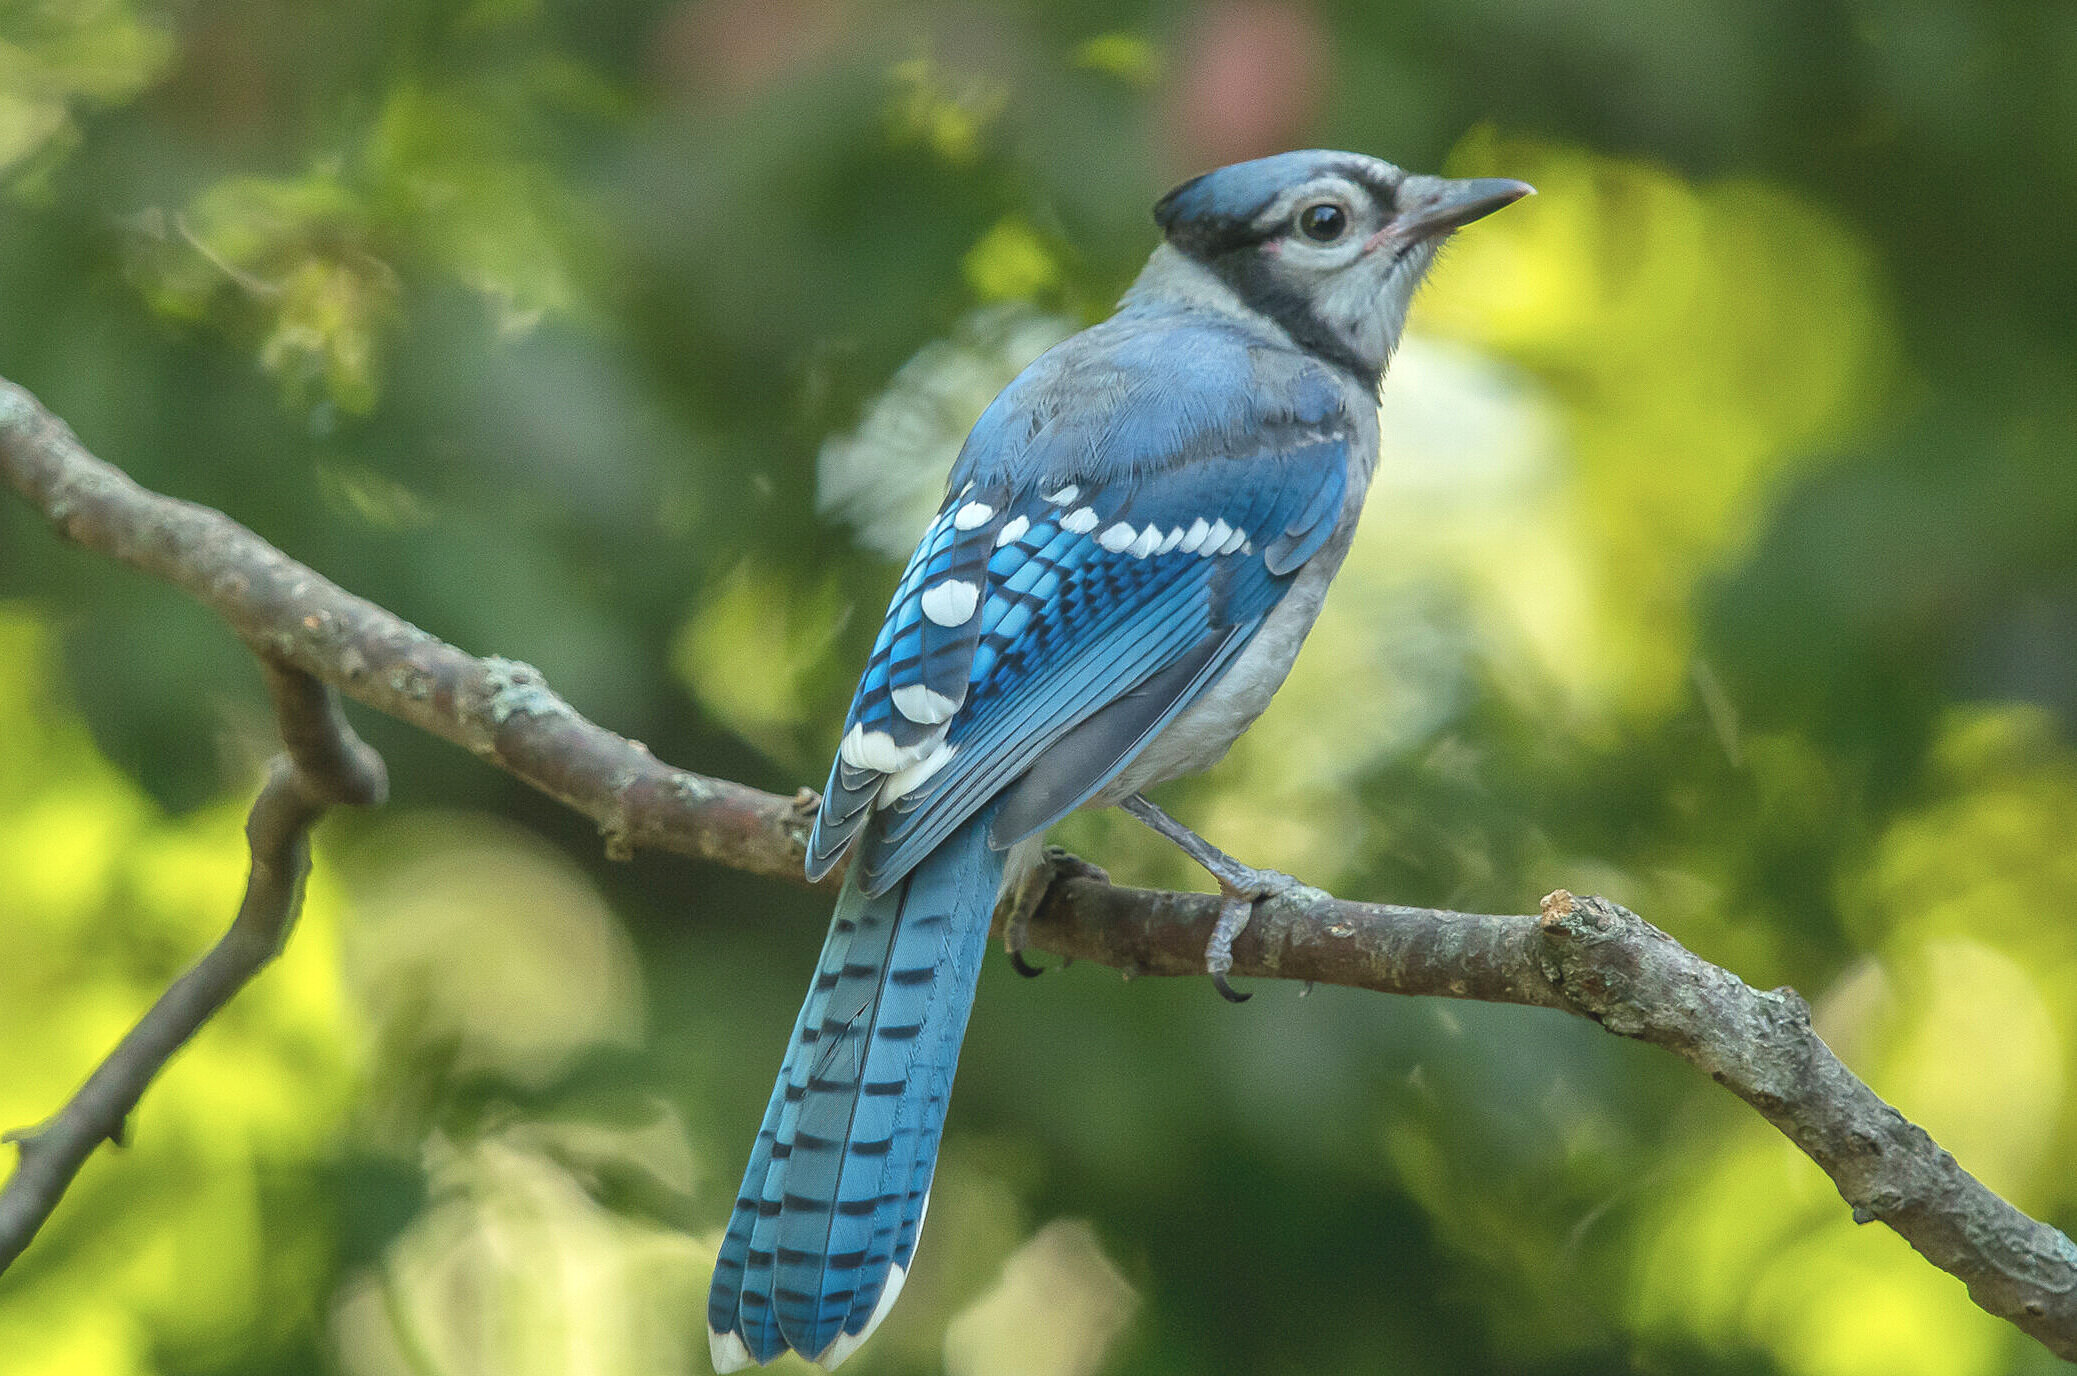
Blue Jays are among our more colourful and boisterous backyard birds.
What Blue Jays eat
The birds are omnivorous, with vegetables, fruits and berries making up more than 70 per cent of their diet, including beechnuts, acorns, seeds, grain and, of course, a variety of berries and small fruits like service berries and dogwood berries.
They can be seen foraging in trees and shrubs as well as on the ground. Their large, strong beaks allow them to pound open hard nuts and seeds like acorns, which they harvest and store in holes in the ground for later use.
Needless to say they help plant many an oak tree in our forests and our own backyard landscapes.
Being opportunists, as summer progresses, they also like to feast on caterpillars, beetles and grasshoppers, but they’ll also eat snails, spiders other birds’ eggs, small rodents like mice, frogs, baby birds and carrion.
Just a reminder that using native plants and trees in our backyard landscape designs, including oak, dogwood, serviceberries and chokecherries are always a good idea.

Where Blue Jays nest
Both Blue Jay parents take part in feeding the nestlings who spend about 17-21 days in the nest before going out on their own. Blue Jay eggs, between 3-7, are greenish or buff, sometimes pale blue, spotted with hints of brown and gray. Incubation is about 16-18 days.
Look for nests anywhere from about eight feet to as high as 50 feet above the ground, made up of twigs, grass, weeds, bark strips and moss. They can be quite messy often lined with rootlets combined with paper, old rags, string and other debris found in urban areas.
Their range is large, stretching north well into eastern Canada and as far west as Alberta and down south to Florida. Although they are common at our bird feeders year round, many do migrate during the day further south.
They are in the same family as Crows and Magpies and are found throughout eastern oak and pine forests where they breed in deciduous or mixed woods and is often quite common in heavily wooded suburbs or parks.
Climate change is increasing the blue Jays’ range farther north in Canada, but, at the same time, spring heat waves are diminishing their range slightly because of the heat threatening young nestlings in hotter parts of both the U.S. and Canada.

Discover the Beauty and Versatility of Virginia creeper
Virginia Creeper is an excellent native vine that can be grown up trees and trellises or used as an effective ground cover in the woodland garden.
A high value ground cover for birds and other wildlife
There are many reasons why our native plant Virginia Creeper (Parthenocissus quinquefoliais) is a fantastic addition to most gardens, from its stunning visual appeal to its practical benefits and value for wildlife.
So, let’s dig a little deeper and unleash the magic of Virginia Creeper.
When it comes to enhancing the aesthetics of your woodland garden, few plants can rival the beauty and charm of Virginia Creeper. With its vibrant green leaves that turn into a stunning display of red, orange, and purple in the fall, this versatile vine adds a touch of elegance and drama to any garden landscape.
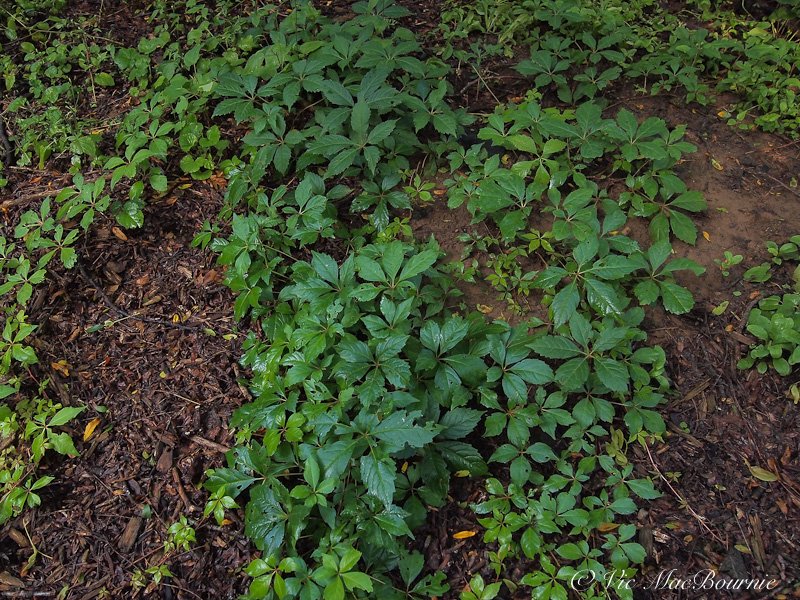
Here is an example of Virginia Creeper in our garden acting as a ground cover.
Virginia Creeper is hardy in zones 3-9, drought tolerant, and grows in pretty much any soil from poor to humus-rich woodland soil. It can handle both wet and dry conditions as well as sunny or shady areas.
It is a woody deciduous vine that can climb or trail up to 30 - 40 feet (up to 12 meters). The only real limiting factor is the structure it is climbing on, whether it be a tree, fence or trellis.
Virginia Creeper climbs by means of tendrils with discs that fasten on to bark, rocks or any structure. Although it is often said that the vine will damage brick, it is not true. The discs will, however, leave unsightly marks on siding or bricks and can push into spaces between brick and siding or, if left unchecked, into spaces above the home’s faschia.
Its coarsely toothed leaves have five leaflets (occasionally as many as seven) that radiate from the tip of the petiole. It is one of the earliest vines to begin changing colour in fall.
The delicate tendrils of Virginia Creeper gracefully climb up trees, fences, and walls, creating a picturesque scene that is sure to captivate anyone who sets foot in your garden. Whether you’re looking to create a romantic, cottage-style garden or a more contemporary design, Virginia Creeper is the perfect choice to add depth, texture, and visual interest to your outdoor space.
First memories of Virginia Creeper
I remember the first time I came across Virginia Creeper. It was early fall and I was working on a photographic slide show about a creek and meadow that ran behind our first home. In a wooded area I noticed a beautiful vine growing over an old tree stump. The combination of vibrant colours – greens, yellows, oranges and reds – together with its delicate tendrils caught my attention and resulted in a prolonged photographic study of the plant.
It wasn’t until later that I learned the name of the plant and the fact that it was native to our area.
I’ve loved the plant ever since. There was no need, however, to plant it in our current garden, the birds took over that job for me.
All I needed to do was recognize the plant both for its beauty, its benefit to wildlife and its role in the woodland garden, and let it do its thing.

Images of Virginia Creeper shown here in it’s many colours and uses from climbing walls and trellises to being used as a ground cover.
How Virginia Creeper transforms your woodland garden
In addition to its stunning visual appeal, Virginia Creeper offers a range of practical benefits that make it an ideal choice for your woodland garden.
One of the key advantages of this vine is its ability to provide natural shade and cooling effects. As the tendrils climb and spread into nearby trees or trellises, they can create a dense canopy that helps to reduce the temperature in your garden, providing a cool and comfortable environment for you to relax in during hot summer days. This natural shading also helps to protect delicate woodland plants from excessive sunlight, preventing them from wilting or drying out.
Another practical benefit of Virginia Creeper is its ability to act as a natural privacy screen. As it grows and covers fences, walls, or trellises, it forms a thick barrier that shields your garden from prying eyes, creating a secluded and intimate space for you to enjoy. This can be particularly valuable if you have neighbours nearby or if you simply prefer to have some privacy in your outdoor sanctuary.

This image shows Virginia Creeper in different stages of growth. Insects are obviously munching on the plants. Virginia Creeper is a host plant to the Sphinx moth caterpillar.
Furthermore, Virginia Creeper is known for its low maintenance requirements. Once established, it is a hardy and resilient plant that can withstand various weather conditions, including drought and frost. It is also resistant to most pests and diseases, making it a hassle-free addition to your garden.
For more information on ground covers to consider for your garden check out the following posts: Bunchberry: perfect ground cover, Three Great Ground Covers for a woodland garden, Easiest ground cover to grow, How to grow and care for creeping thyme, Moss and moss-like ground covers
How I use Virginia Creeper in our garden
In our garden, Virginia Creeper is used primarily as a ground cover in a natural area as well as a climber that is scrambling up one of our mature locust trees, where I can easily keep my eye on it.
Used as a ground cover, Virginia Creeper spreads readily to fill bare spots locking its tendrils onto the cedar mulch and going to work covering the ground with a thick cover of green leaves followed by berries in fall. Right about the time the berries appear, the plant’s leaves begin turning the ground into a beautiful tapestry of fall colours of red, orange, yellows and purples.
I like to grow it along with numerous other groundcovers such as stonecrop, epimedium, wild geranium and Mayapple. The result is a tapestry of woodland groundcovers that compete for their place on the forest floor.
Yes, Virginia Creeper can spread rapidly and cover small plants, stumps and even climb trees and shrubs. As explained later in this post, that is its task in the natural world. As gardeners, we need to accept these traits and just learn how to control them as much as exploit them.
Valuable habitat for backyard wildlife
Lastly, this versatile vine serves as a valuable habitat for wildlife. Its dense foliage provides shelter and nesting sites for birds, while its berries attract a variety of insects and small mammals. By incorporating Virginia Creeper into your woodland garden, you are not only enhancing its natural beauty, but also creating a welcoming haven for local wildlife.
Birds such as chickadees, nuthatches, mockingbirds, finches, flycatchers, tanagers, swallows, vireos, warblers, woodpeckers, and thrushes will all feast on the berries and the insects this vine attracts. Deer too, will gladly sample the grape-like fruit.
The green to blue-black berries mature in late summer or early fall and persist on the vines until eaten by wildlife.
So, whether you're looking to create a cool and shaded retreat, add privacy to your garden, minimize maintenance tasks, or support local wildlife, Virginia Creeper is the perfect plant to fulfill your practical needs.
“As a culture we have allowed ourselves to hate a plant that we enabled, while it yet serves us a massive purpose we fail to recognize widely.”
The pros and cons of planting Virginia Creeper
Not everyone agrees that Virginia Creeper is a valuable addition to a garden. One only needs to scan Facebook’s garden forums to witness the hatred many gardeners have for this native plant.
The problem is that most of these gardeners are unaware of how to properly use this sometimes aggressive native vine and the role it is meant to play in the natural environment.
Gardeners who are looking for small, neat and tidy yards made up of well-behaved plants growing in individual clumps, will likely not appreciate the aggressive growth of Virginia Creeper.
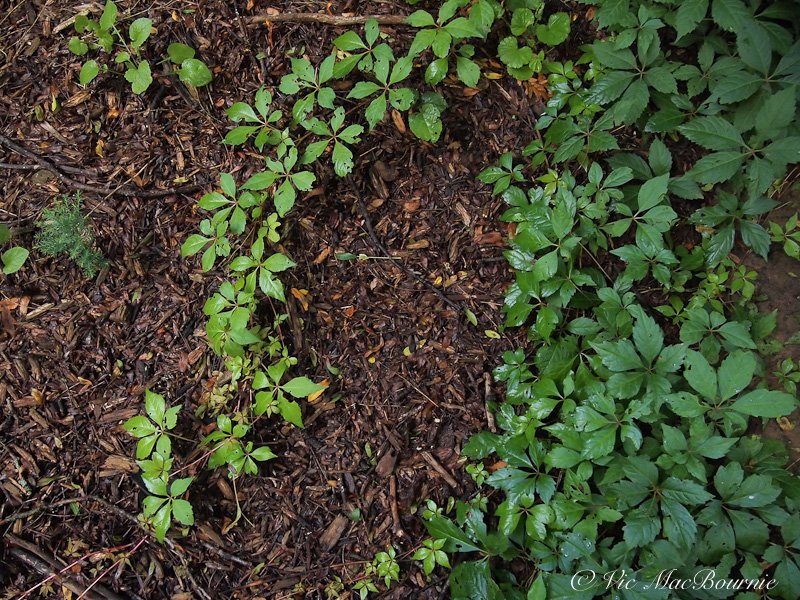
Virginia Creeper tendrils makes their way through the mulch adding texture in summer and a tapestry of colour in fall.
These same gardeners will probably not appreciate the qualities of other aggressive ground covers as well, whether they are native or non-native.
It’s important to understand the role Virginia Creeper plays in the natural environment.
In an informative essay by Wisconson-based Johnny Nativeseed on Facebook, Virginia Creeper is given its due as an early and important colonizer in the natural woodland.
In their words: “The lies told about this plant are a projection of those who despise it rather than truly know it, or it’s purpose in nature.
“While it’s abilities to climb are vaunted, and hated by humans who decimate the environment it calls home, it is humans who have caused this plant to appear as nemesis, when really its true purpose is in a forest environment that never intended humans to strip it bare… .
The author goes on to explain that “Virginia Creeper and Wild Grape both hold great value to nature in many ways.
“They both host various native fauna, and they both grow in like environments, sharing the duties of an important job in what was once vast, unending forest.
“In the endless canopies of former ancient forests that blanketed this land prior to the arrival of colonizers, if a tree died of disease or age, it’s weakness while dying, or it’s eventual death would punch a hole in the dense canopy under which both Virginia Creeper and Wild Grape Vine typically grow small, muted, ineffectual, and unnoticed.
“That new source of light however is all the batteries needed to juice these two valuable vines into becoming super performing plants bent on their fulfilling their multifaceted purpose.
“The vines sudden rapid growth in the newfound sunlight causes them to race for it, greedily feeding on the light, reaching massive, accumulative size in an extremely short time.
“They know their time in the sun will be short, by their perspective….
“In a world we have deforested, defoliated, colonized and bent to our will, these two vines have been wrongly vilified by the true villans themselves.
As a culture we have allowed ourselves to hate a plant that we enabled, while it yet serves us a massive purpose we fail to recognize widely.
These plants both are major food sources for insects and animals alike. This includes an invasive species we have all come to despise.
The Japanese Beetle: Virginia Creeper and Wild Grape
The author goes on to explain how Virginia Creeper and Wild Grape are magnets to the Japanese Beetles.
“Japanese Beetles will favour Virginia Creeper and Wild Grapevine before almost any other native, vegetable, or ornamental plant.
And it is with this magnetism that we must shift our perspective on to see that these vines are our allies….
The author uses the vines to attract the beetles so he can very easily pick and flick them into soapy water, daily….
“The vines, in their new purpose, act as a foil and in doing so, save the entirety of the other garden/prairie/yard space.
So while some may scream to get rid of the vines for false fear that they destroy healthy trees, or attract a hated invasive beetle...knowing fact and purpose while shifting perspective is all that is needed to utilize, co-habitate, and have success with these two venerable and useful native vines.”
Conclusion: Embrace the Charm and Benefits of Virginia Creeper in Your Woodland Garden
In conclusion, Virginia Creeper is a truly remarkable vine that brings both beauty and practical benefits to your woodland garden. With its stunning visual appeal, it enhances the aesthetics of your outdoor space, adding a touch of natural elegance and charm. But it doesn’t stop there. This versatile plant also offers a range of practical advantages that make it an ideal choice for any gardener.
From providing natural shade and cooling effects to acting as a privacy screen, Virginia Creeper creates a comfortable and secluded environment where you can relax and enjoy the serenity of nature. Its low maintenance requirements make it a hassle-free addition to your garden, allowing you to enjoy its beauty year after year without constant upkeep.
But perhaps one of the most rewarding aspects of incorporating Virginia Creeper into your woodland garden is the positive impact it has on local wildlife. By providing shelter and nesting sites for birds and attracting insects and small mammals with its berries, this vine becomes a valuable habitat for various creatures, contributing to the biodiversity of your garden.
So, whether you're looking to enhance the aesthetics of your woodland garden, create a cool and shaded retreat, add privacy, minimize maintenance tasks, or support local wildlife, Virginia Creeper is the perfect plant to fulfill your practical needs. Embrace the charm and benefits of this remarkable vine and let it weave its magic in your outdoor sanctuary.
• Looking for more garden news, check out Feedspot for a list of some of the best garden websites including Ferns & Feathers Woodland/wildlife gardening site.

Olympus PEN camera delivers sophistication in a stylish package
The Olympus PEN and PEN-EPL camera systems are examples of digital cameras that combine style with a little retro to create the ideal combination for amateur and advanced amateurs looking for a compact everyday camera.
First impressions of the Olympus PEN E-PL2
Very few camera manufacturers can successfully make retro cool again, while still delivering modern features.
Many of the major brands have tried and failed. Olympus, on the other hand, has never lost the “cool” factor with its PEN series of digital cameras beginning with the PEN E-P1 and running through a series of successful launches to the current E-PL10 model. (See image below)

A combination of sophisticated style and retro looks is packed into the highly capable E-PL10 package shown in this Olympus promotional image.
Not only has Olympus maintained the “cool” factor, it has also introduced a sophistication to their PEN series. There is also something to be said for big performance in a small compact body.
Cool, sophisticated and incredibly capable all wrapped up in an exquisite package that makes you just want to make memorable images.
Looking for more information on Olympus cameras, check out my review on the Olympus E-M10.

This image of a chipmunk was shot with the Olympus Pen E-PL2 with the 40-150mm kit lens.
But the PEN series actually got its start before many of us were likely even born. Its roots trace back to October, 1959, where it began life as an inexpensive, analog half-frame SLR compact camera that enabled photographers to double the output of a typical role of 35mm film.
It remained in the Olympus 35mm film camera arsenal until the early 1980s.
In 2009, Olympus released the PEN E-P1, a digital mirrorless interchangeable-lens camera, and the digital story of the Olympus PEN series began.
If you are looking to add a camera or lens to your arsenal, be sure to check out the huge selection of photography equipment at KEH Camera Exchange.
Today, the E-PL10 sports handsome styling in a compact package that uses a 16 megapixel sensor and impressive 3-axis in-body stabilization, along with a host of features including a flip-down touchscreen display, UHD 4K video capture, 6.1 frame per second burst shooting with continuous autofocus, Wi-Fi plus Bluetooth connectivity and 121-point autofocus system. It’s available in three colours – black, mocha and white – and will set you back abour $600 U.S. for the body only.
More recently the Olympus Corporation’s camera division – including the Digital PEN series – was purchased by Japan Industrial Partners, and is currently run under the name OM Digital Solutions.
The PEN’s compact size, sleek design and impressive feature-packed offering makes it a favourite for advanced amateurs looking for an everyday carry camera that performs like a full-sized near-professional camera.

Our Japanese-style garden taken with 14mm lens and TT Artisan optical viewfinder.
I was lucky enough to score an older, used PEN-E-PL2 model complete with both kit lenses (14-42mm and 40-150mm) and the impressive fisheye converter (Olympus FCON-P01 Fisheye Converter) for a very reasonable price.
The fisheye converter is a high quality lens attachment made in Japan specifically for the 14-42mm f3.5-5.6 ll MSC lens. It snaps on via a bayonet mount to the front of the 14-42mm lens and is used best at the 14mm end. There is also a scene mode that should be set to get the most out of the attachment.
Olympus states on its website that the fisheye converter “lens attachment allows you to easily take fisheye-style shots. In addition to capturing unique and intriguing shots of pets with a fisheye effect, you can also shoot photos with emphasised perspective when shooting up close since you can get as close to the subject as 7cm from the lens front.
It weighs in at a hefty 112 grams, includes a built-in metal tulip hood and is constructed with 3 elements in 3 groups. Olympus states it is the equivalent of an 11mm lens (22mm in 35mm equivalent). This falls a little short of the angle of view most stand alone fisheye lenses provide, but the fisheye effect works well with the additional width.
Check out this Olympus post for more on getting the most out of your fisheye photography with Olympus cameras.
Although these PEN series cameras are holding their value better than some older digital cameras, they are still available for a fraction of their original price if you take your time tracking down a solid example on Ebay or other online used-camera retailers.
The Olympus E-PL2 is a 12-megapixel Micro Four Thirds system camera with in-body stabilization released in 2011 to sit above the E-PL1 (released in February 2009) in the product line, but beneath the E-P2. If that’s a little confusing it’s because Olympus actually has two PEN lines – a higher end line and a “light” line that is aimed at more novice photographers rather than the solely enthusiast camera consumers. Both used the same sensor, with the E-PL line dispensing of a back control dial opting instead for a wheel and adding a built-in flash.

This unfiltered Bee Balm image is shown in the first of a series of images below taken at the 14mm length.

The Bee Balm taken at 14mm with camera filters set to Pop art.

The Bee Balm taken at 14mm with camera filters set to soft focus.
The E-PL2 was actually the fourth Olympus PEN camera released over a two-year period back in its day.
More importantly, the E-PL2 sported an improved LCD screen over the E-PL1 that increased to 3 inches and a doubling in resolution to 460K dots. A higher ISO rating, face detection AF mode and some variations in the Art Filter modes, as well as a new at the time collapsible M.Zuiko Digital ED 14-42mm f3.5-5.6 ll MSC lens that takes the fisheye attachment as well as two other converters – a wide angle and macro converter. (MSC is a connotation signalling that lens can be zoomed silently for use in video work.)
It also features the Olympus super control panel on the back LCD screen that puts most of your settings in one convenient place. It’s just part of the customization available with the camera that allows users to set the camera up to their liking.
The E-PL2 went through some minor cosmetic changes to give it a more curvaceous look over its predecessors improving ergonomics and giving it a touch more style.
On the back, a blue tooth accessory below the hot shoe –aptly named the Pen pal – allows you to add a small device to transfer your images from the camera to the smartphone.
In addition, an electronic EVF – the VF-3 – can be purchased separately. It sports a high resolution of 920,000 dots, a 100% field of view, long eye relief of 17.4mm, and 90° tilt mechanism. The EVF enables stable framing for outdoor, low-angle, and telephoto shooting and can be found used on EBay and other used-camera outlets.
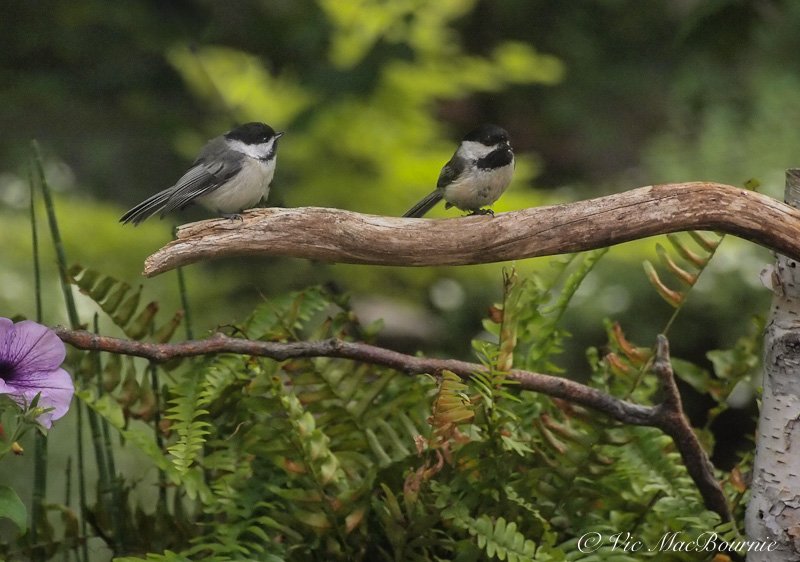
A couple of chickadees photographed with the Olympus 40-150mm kit lens.
For a detailed review of the camera specs, check out the extensive review at DPreview.
I’m not interested in getting into the fine details of the camera. That’s the expertise of the people at DPreview (see link above.)
I’m more interested in how the camera performs in the garden, in everyday use and on vacation. First let’s get it out there that although the PEN “light” series is a simplified version of the PEN series, it doesn’t feel like a “light” version. These cameras have a premium feel and touch to them and are no way considered lightweight and flimsy like many cheap point-and-shoot models.
I’ve been using the camera off and on for the past month or two and am thoroughly impressed. Truth be told, I miss the digital viewfinder of my Olympus E-M10, but that aside, the camera and kit lens packages have performed admirably.
The compact size and light weight makes it an easy choice if you just want to grab a few shots in the garden.

A close up of our clematis flower taken with the Olympus Pen E-PL2.
Put the camera on Program mode and shoot it like a typical point-and-shoot camera without much thought. Switch it to IA and the camera picks the most suitable program mode to get the shot. Non-photographers will love the convenience of these modes, but if you are looking for a little more control, the camera offers full shutter, f-stop and manual modes.
The selection of “Art filters” can add a nice creative touch to your images, if used judiciously. To add an even more creative approach, there is the ability to shoot double exposures, HDR photography and time lapse exposures.
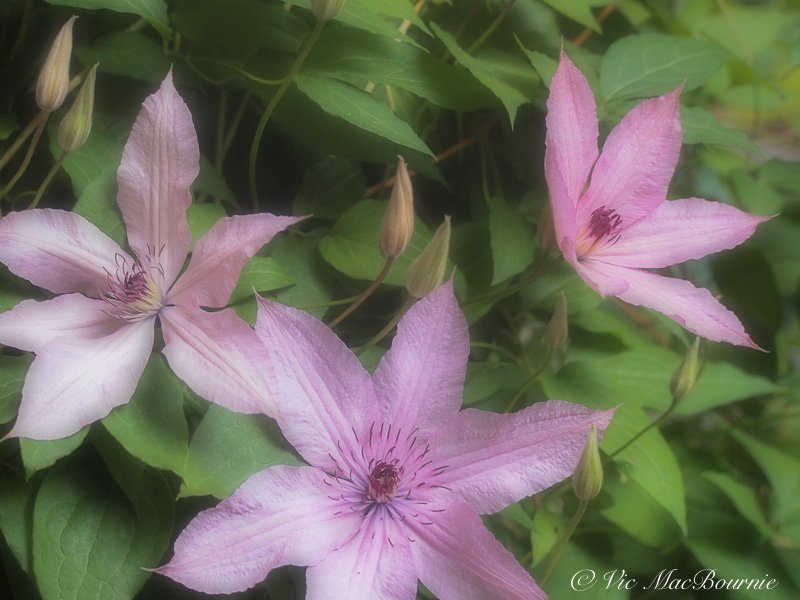
Using the built-in soft focus filter on flowers can be effective in the right situation.
Not bad for a stylish little camera that can be tucked into a pocket as easily as a purse.
The E-PL2 is a 12-year-old camera and it shows at times. The LCD panel is fixed on the back of the camera. I would prefer it to at least articulate to allow a low image without having to lay on the ground. Newer PEN cameras offer and articulating screen.
Focus is good, but obviously falls short of today’s more modern cameras. There is certainly some hunting when trying to focus on a smaller subject with a busy background.
It has face detection that is excellent for getting in-focus shots of toddlers on the move. It also has follow focus and continuous autofocus, but I prefer to leave it on single autofocus most of the time.
Focusing with more vintage, manual focus lenses can be difficult, but live mode makes full use of the LCD screen and by using the magnifying glass you can move in closer to nail the focus.
Olympus did not make focus peaking available for manual focus lenses until around the time of the E-P5.
Video is only 720P at 30 frames per second, which is good enough for most users but falls a little short for serious videographers. The camera sports only a single microphone but an accessory can be added to get stereo sound if you need it.

The TT Artisan optical viewfinder works well on the Olympus E-PL2. The viewfinder is considered “dead” and does not communicate in any way with the camera’s electronic system.
The PEN series of cameras does not come with a viewfinder.
To combat that, I added the The TT Artisan 28mm optical viewfinder which is a nice addition to the Pen E-PL series of cameras. This optical viewfinder has no electronics built into it and therefore transmits no information from the camera.
For more on the TT Artisan viewfinder, check out my earlier post here.
The camera’s selection of art filters is impressive and fun to use. Everything from soft focus, (see clematis image above), to pop colour, B&W and dramatic colour as well as pinhole is available for experimentation both in photo and video mode. The camera also allows for filter stacking –combining filters for even more varied effects –combining pop art and pinhole for example to create a real retro look.

The TT Artisan optical viewfinder looks like it was made for the exquisite styling of the Olympus E-PL2.
Several scene modes simplify the process still further and the various colour modes – natural, vivid, monochrome, muted – further enhances the creative choices. I prefer natural for most of the garden shots, but vivid offers an almost “velvia” look to the images.
There are buttons that let you customize the menu and set up shooting styles and preferences in advance.

A less expensive but still usable alternative is this tiny, plastic optical viewfinder that lacks the clarity of the more expensive glass and steel TT Artisan finder.
If you are looking to capture images of flowers or insects up close, there is an accessory that clips on the hotshoe and allows the photographer to aim small LED lights at the subject.
The close-up spotlight is an excellent accessory for garden and macro photographers that slides on to the hotshoe of the camera and provides the photographer with two movable LED lights that can be positioned to add a constant light source for flower or inset photography, for example.
Battery life is good considering the sole reliance on the back LCD panel.
A love-hate relationship with Hostas
If you live in deer country you likely share my love/hate relationship with hosta.
How I grow Hostas in the land of the deer
When I first discovered hostas I thought I had died and gone to heaven. Since then, I realize hostas can be as much a stairway to heaven as a highway to hell.
I’m aging myself big time here, but let me explain my love-hate relationship with the hosta.
Much has been written about the joy of planting these incredibly hardy and versatile plants in the garden, and I’m the first to say that they make the ideal ground cover for the woodland garden adding texture, and, if variegated hostas are used, some interesting colour to the shadiest of areas in the garden.
A beautiful variagated hosta takes its place in the woodland garden where it benefits from the constant watering from th bird bath.
Most proponents of hostas, I’m sure, are gardeners who have a fenced yard and live in the middle of a subdivision no-where near even the slightest hint of a deer.
That’s not me and my garden.
For years, I welcomed deer to the yard and even enticed them with a lovely assortment of grains and corn in a backyard feeder. So, it goes without saying that the deer thought everything was fair game including, of course, my inherited hostas that made up a good part of the meagre greenery when we first moved into our home.
And these were not today’s new hybrid, deer-resistant hostas. These were the most delicate, almost lettuce-like, old-world hostas that the deer simply loved to munch on whenever given the chance. From young fawns to big old bucks, it didn’t matter. When the hostas were up and just beginning to look their best complete with those fresh spring greens, the herds of deer would move in and overnight cut them down to a few spindly stems.

Hostas and ferns form the perfect combination in any garden.
All they left behind was their droppings to remind me who was in charge in these parts.
Needless to say, I got the message.
I decided that no matter how much I loved having the deer around, if I was ever going to have a garden, I needed to stop encouraging them to drop by for breakfast, lunch, dinner and the occasional midnight snack.
A combination of events happened to change the all-or-nothing banquet for the local deer herds.
First, I stopped feeding them their own 80-pound bags of corn and oats. Second, a new breed of residents began moving into the neighbourhood that believed the first thing they needed to live here – at any cost – was a good fence around their large properties. Despite the semi-rural area never having fences for more than 60 years, the new neighbours all seemed to agree that fences were vital to mark off their territory and keep out the big bad wildlife.
Looking for more information on ground covers? Please check out my other posts on ground covers I use in the woodland garden.
• Bunchberry ideal ground cover
• What is the easiest ground cover to grow?
• Creeping thyme as a ground cover
• Moss and moss-like ground covers
• Virginia Creeper as a vine or ground cover
Okay, for good or bad, that changed the movement of the deer through the neighbourhood. Although my garden remains open to deer, fewer and fewer deer are roaming the neighbourhood and manage to make it into our yard.

Bobbex has proven to be very effective in our garden to protect our hosta and other young plants from deer and rabbit predation.
The combination of fewer deer and my religious use of a deer and rabbit repellent known as Bobbex, has really made a difference to the deer and rabbit damage in the backyard. A regular supple of this spray-on repellent and generous application to my favourite hosta and other plants seems to have done the trick. Let me be clear, I don’t spray it on every hosta or plant, just the ones I want to protect. And it works very well.
Here is an Amazon link to Bobbex, but you should be able to find it at most good garden nurseries as well as department stores.
For the first time in years, the hosta that I protect, are being allowed to grow into magnificent specimens.
A recent photo expedition into a local conservation area verified the effectiveness of this deer repellent. The Conservation area was trying to reclaim an area from the damages of the local deer herd and posted a sign informing the public that they sprayed regularly with Bobbex. I figure that if the Conservation Authority uses the repellent, it is both effective and safe to use in my garden.
Bobbex has an “interesting” smell that is neither pleasant, nor unpleasant. In any case, the smell disappears once the product dries on the plants. It must be reapplied after rains.

The combination of hostas, ferns, cedar trees and a Pagoda dogwood form the perfect border between our property and our neighbour’s backyard.
Deer-resistant hosta can help
Eventually, however, the reduced number of deer, and some research into more deer-resistant hosta varieties taught me that there are, in fact, hostas that deer will not devour in a single night’s snack.
The result, I can now grow a few hosta successfully.
In fact, one of the favourite spots in our garden is an area bordering our property and our neighbour’s (see image above) where I have combined a selection of hostas, ferns, wild geranium, sweet woodruff and a couple more ground covers and just let them compete with one another and run as wild as they like. Our neighbours have added to the tapestry with more hostas and ground covers under the shade of our giant Linden tree and their King Crimson maple. They also like the look enough to keep the hostas sprayed regularly to send what few deer wander into the yard looking elsewhere for dinner.
In other areas of the garden, large, leather-leaf hostas with thick crinkly leaves stand up to most of the abuse deer can throw at them. By summer’s end, they can be tattered from the sampling deer take over the course of the summer as well as some minor slug damage, but by the end of summer they are still standing and offering at least most of their glorious texture and colour to the garden repertoire.

This scene shows a small blue hosta used as a specimen in the Japanese inspired garden complete with a school of complimentary blue fish swimming through the ferns and epimediums.
What hosta-varieties are safe from deer?
First off, I’m no hosta expert. There are people who dive so deep into hostas that they can recite all 70 species and know the latin names of the more than 3,000 registered varieties.
Once again that’s not me.

These small, bluish hostas have been growing in the dry river bed for more than 10 years and have needed no care or even need for splitting.
I know Emperess Wu is considered to be the biggest at more than 4 feet high with a spread of between 4-5 feet. Heck, its deeply veined leaves stretch out to more than 1.5 feet long and wide. Then you have the mini hostas coming in at a few inches wide with names like Little Squirt Hosta, Munchkin fire Hosta, and Mighty Mouse Hosta.
I’m pretty sure we have the Mighty Mouse variety growing in our dry river bed pathway (see above). Beautiful little blue hostas that just keep coming up every year with no real need to divide these compact little hostas for the past ten or so years. I would not say they would be safe from deer, but where we have planted them, in a rocky area surrounded by pea gravel and river rocks, means they have never had a single deer try taking a bite out of them.
Around the patio, we have another variegated hosta that has performed admirably and helps light up the dark area. (see image below).

How to grow hosta in the woodland
I’ve never been a proponent of the single specimen approach to gardening, and hostas are treated no different.
In most cases, I like to grow hostas as a ground cover in competition with other plants such as ferns, sweet woodruff etc. This is particularly evident in the space between our property and the neighbour’s.
But there are situations, especially with the larger hostas, that I grow them more as specimens in the garden to show off their size and handsome looks. The large blues and the large variegated hostas work well more as specimens.
We also grow some of our miniature hostas as specimens alongside Japanese Painted ferns and a nice clump of black mondo grass.
Of course, the very nature of hostas lends itself to experimentation. Don’t be afraid to dig these guys up and split them every few years to multiply your numbers and spread them around the garden.
Watch out for slugs, they can be nasty to the aesthetic beauty of your prized hostas.
I will often leave the leaves of the hostas to overwinter and clean them up in the spring, but this can promote slug infestation. So, if you are worried about attracting slugs, be sure to clean up the dead leaves in the fall before they begin to get mushy.

These smaller hostas have been growing in our pea gravel pathway for several years.
You can’t kill hostas
One last thing before I end this post. If you are worried about killing hostas, don’t be. These things are tougher than tough. I once left a number of hostas I had dug up during the summer out all winter. And it was a bad winter with prolonged spells of freezing temperatures and plenty of snow even for a Canadian winter.
Sure enough, when spring returned, the bare-root hostas lying upside down in a pile beside the shed, began growing their tender leaves getting ready for summer.
Like I said, these are tough, easy-to-grow show stoppers…. unless, of course, you have lots of deer to feed.

Best native ground covers for shade, and how to get the most out of them
Here are a few of the top native ground covers for shady locations.
Why choose native plants as a ground cover?
These ostrich ferns act as an ideal native ground cover in this area of our garden. The ferns grow large and can easily reach three feet in height so they are not a ground cover for every area of the garden. Unlike lower-growing ground covers where you can grow flowers up through it, these ferns require large shrubs or small trees to be grown up through them.
If there is anything woodland gardeners are constantly searching for, it’s top performing ground covers to create the all important ground layer on the woodland floor.
A good ground cover performs many tasks in the garden, not the least of which is acting as green living mulch that helps to shade the soil and keep it from drying out. Some provide food for wildlife, others have flowers for pollinators and still others provide cover for small animals and reptiles.
Whether you have a shady backyard or a patio that doesn’t receive much sunlight, ground covers are perfect for adding beauty and greenery to those shaded areas.
Exploring the Benefits of Ground Covers for Shade
So what are the benefits of using ground covers for shade in your garden?
These versatile plants not only add beauty and visual interest to our outdoor spaces, they also offer a range of practical advantages. One of the key benefits is their ability to suppress weeds, reducing the need for constant maintenance and weed control.
Additionally, shade ground covers help to conserve moisture in the soil, preventing excessive evaporation and reducing the frequency of watering. They also act as a natural mulch, insulating the soil and protecting it from extreme temperatures.
Another advantage of using ground covers for shade is their ability to prevent soil erosion, especially on slopes or areas with poor drainage.
By covering the ground with their dense foliage, they stabilize the soil and prevent it from washing away during heavy rains. Furthermore, these ground covers provide habitat and food for beneficial insects, birds, and other wildlife, contributing to a thriving ecosystem in your garden.
So, by incorporating shade ground covers into your landscape, you not only create a beautiful and low-maintenance garden but also support biodiversity and ecological balance.

Canada Anemone is another great native ground cover to consider if you have a more sunny area. The mass of white flowers in the spring is a welcome addition for pollinators and creates interest early in the gardening season.
Top Native Ground Covers For Shade
Trying to decide what ground covers will work best in your garden requires careful thought. The very qualities that make them great ground covers, are also qualities that many fear in their garden – primarily aggressive growth.
Unfortunately, aggressive growth is what makes ground covers both desirable and an annoyance when, either the wrong ones are planted in the garden, or the right ones are planted in the wrong areas and quickly get out of hand.
It’s even worse if these ground covers are considered invasive – pushing out native ground covers in natural areas.
Looking for more information on ground covers? Please check out my other posts on ground covers I use in the woodland garden.
• Bunchberry ideal ground cover
• What is the easiest ground cover to grow?
• Creeping thyme as a ground cover
• Moss and moss-like ground covers
• Virginia Creeper as a vine or ground cover
Vinca minor – also known as Periwinkle – has been a popular ground cover over the years, but is considered a non-native, invasive species that has taken over large areas of natural woodlands. This evergreen perennial boasts beautiful blue or white flowers and glossy green leaves. It spreads quickly, forming a dense carpet that effectively suppresses weeds and requires minimal maintenance.
Sounds perfect, but when it gets into natural areas it can strangle native ground covers that provide more benefits to local wildlife.
It’s best to pass on using periwinkle, now that we know its inherent problems.
Why Choose A Native Ground Cover
Choosing native plants not only enhances the beauty of your shade garden but also contributes to the overall health and sustainability of the ecosystem. Native plants have evolved over time to thrive in the local climate, making them well-suited to withstand the area’s unique weather conditions.

Infographic shows some of the best-performing native ground covers for shady areas.
By selecting native ground covers, you’re helping to preserve the natural biodiversity of the region and provide habitat for local wildlife. Additionally, these plants require less water, fertilizer, and pesticides compared to non-native species, making them more environmentally friendly and cost-effective.
So, by incorporating native plant ground covers into your shade garden, you’ll not only create a visually stunning oasis but also contribute to the preservation of the natural heritage.
Let’s explore further!
Now that we understand the benefits of choosing native plants for your shade garden, let’s take a look at some native plant ground covers for the northeastern areas of the United States and Southwestern areas of Canada.
Many of these ground covers grow over a wide ranging area, but it’s always a good idea to ensure that the ground covers you are planting are, in fact, native to your area.
Instead of periwinkle, consider one of the following native ground covers.
Foamflower (Tiarella cordifolia) is a delicate perennial with heart-shaped leaves and clusters of tiny white flowers. It spreads quickly, forming a lush carpet-like cover that can withstand the challenges of shade. They like medium to wet loamy soil and grow to about two-feet tall or (0.5 m)
Wild Ginger (Asarum canadense) is known for its glossy, kidney-shaped leaves and unique maroon flowers. It is hardy in zones 3-7. This low-growing plant (about 6 inches) thrives in moist, shady areas and can add a touch of elegance to the woodland garden, with its dark red-purple flower that appears under the plant for a short period in early spring. It’s an attractive, low-growing ground cover that keeps its foliage all through summer.
Another suggestion is Allegheny Pachysandra, a popular choice for its dense evergreen foliage and ability to tolerate dry shade. Its vibrant green leaves create a stunning backdrop for other plants, making it an excellent ground cover option. For more on this plant check out my post here.
Wild strawberry is a great choice
If you are looking for a particularly interesting native ground cover that is also a real benefit to wildlife, consider planting wild strawberry.
Wild strawberry (Fragaria virginiana) is a fast growing, low maintenance, drought tolerant spreader that fills in bare spots nicely.
It’s an excellent ground cover that spreads by runners. You can simply pinch off runners from the parent plant to create new plants. Tasty little strawberries are ready for early summer. You can even harvest the plant’s leaves to make a refreshing summer tea. Wild strawberry prefers part shade to full sun and alkaline soil. Planting it in full sun will yield sweeter berries.
Virginia Strawberry or Wild Strawberry is a ground-hugging plant rising from a fibrous, perennial root system. Hairy leaf petioles, up to 6 in. long, each bear a single trifoliate leaf. The hairy flower stalk gives rise to a loose cluster of small, five-petaled flowers followed by tasty, wild strawberries.
Found in patches in fields and dry openings, this plant produces the finest, sweetest, wild strawberry.
The edible portion of the strawberry is actually the central portion of the flower (receptacle) which enlarges greatly with maturity and is covered with the embedded, dried, seed-like fruit. Cultivated Strawberries are hybrids developed from this native species and the South American one. The similar Wood Strawberry (F. vesca), hardy in zones: 5 to 7, has seed-like fruit on the surface, not embedded, and sepals that point backwards.
Woodland Strawberry has narrower, thicker, darker green, and tougher (waxier) looking leaves than Wild Strawberry. Runners from Woodland Strawberry are up to 1 foot long, while the runners from Wild Strawberry can be 2 feet long.
Get the most out your ground covers
Now that you know about some of the top performing ground covers for shade, let’s explore some tips and tricks to ensure successful planting and maintenance.
First and foremost, it’s important to choose the right location for your ground covers.
Most shade-loving plants prefer moist, well-drained soil, so make sure to select an area with these conditions, unless the plant is listed as one that can take dry shade. Additionally, consider the amount of sunlight the area receives throughout the day to ensure it aligns with the specific needs of your chosen ground cover.
When it comes to planting, prepare the soil by removing any weeds or debris and loosening it with a garden fork or tiller. This will create a favourable environment for the roots to establish.
Next, dig a hole slightly larger than the root ball of your ground cover and gently place it in, making sure the top of the root ball is level with the surrounding soil. Fill in the hole with soil, firming it gently around the plant. Water thoroughly after planting to help settle the soil and provide moisture to the roots.
As for maintenance, regular watering is crucial, especially during dry periods. Keep the soil consistently moist but not waterlogged to prevent root rot. Mulching around the plants can help retain moisture and suppress weed growth. Pruning may be necessary to maintain the desired shape and size of your ground covers.
Trim back any overgrown or damaged foliage, and remove any dead flowers to encourage new growth.
Hopefully, these tips will help to create a beautiful, low-maintenance garden filled with the right ground covers in the right places putting the finishing touches on the woodland floor.

Grow Butterfly Weed for more than just butterflies
Butterfly weed, a member of the milkweed family, is both attractive to butterflies as well as a host plant for monarch butterflies. You want it in your garden.
Butterfly Milkweedweed (Asclepias tuberosa) is a must in any garden looking to attract a selection of butterflies.
A member of the milkweed family (Asclepiadaceae), this attractive, long-lived, 1-2 foot perennial might be best known for its attractiveness to butterflies, but don’t let that convince you that you need it.
Consider that it is one of the few flowers that can introduce a solid hit of orange to the garden with its large, flat-topped clusters (umbels) of between 10-30 individual bright orange flowers that bloom from spring through to fall, beginning as early as May in some areas and continuing through June, July, August and even into September.
The large orange clusters grow to between 1-3 inches, and sport 5 petals, sepals and hoods with horns, adding to their interest.
Butterfly Weed is a herbaceous perennial native to Eastern North America and individual blooms of the bright orange flowers can last up to two months, with a typical bloom time of June to August.
It’s flower structure is both interesting and unusual with its more or less flat cluster of bright orange flowers that create the perfect landing area for both large and small butterflies, where it is both an attractant and a larval host for the Monarch, Grey Haristreak and Queens. The long-lasting clusters of small, flat-topped flowers are topped with a yellow corona.
But that is not all. Butterfly weed’s nectar also attracts hummingbirds and is extremely valuable to its primary pollinators native bees including our Bumble bees. They also hold special value to Honey Bees.

Butterfly Weed, like all members of the Milkweed family, are particularly attractive to monarch butterflies. Here is a graphic illustrating the life cycle of the Monarch on milkweed.
This is one tough plant. It grows in USDA zones 3-9 and is native from New England south to Florida; west to Texas and north through Colorado to Minnesota. In Canada, it is native from Ontario to Newfoundland.
If you are looking for it in its native habitat, you’ll most likely find it growing in the prairies, in open woods and hillsides.

This outstanding infographic was created by Justin Lewis showing the wildlife that depend on Butterfly Milkweed.
It does best in well-drained sand or loam, but can grow in clay or even in limestone dominated areas. They prefer well-drained sandy soils, but tolerates drought.
Continuing with its tough, hardy approach, it likes lots of sun and can survive in both dry and moist soils, but maintains a high tolerance for dry conditions.
It’s also extremely deer and rabbit resistance, making it an even more important addition for woodland gardeners.
In our garden, Butterfly weed is growing in at least three different areas to provide a reliable source for butterflies and bees.
Although I bought the plants, Butterfly weed plants can be started either from seed or by taking root cuttings. It’s easiest to grow the plants from root cuttings taken in the fall, cut into 2-inch cuttings and planted vertically.
If you are growing this plant, you are more than likely to experience aphids on the plants. Lady bugs and other predator insects should take care of the problem in fast order, but if the aphids get out of control, a regular hits with the hose should keep them under control.
Because the plants are a host plant for butterflies, it should go without saying that no pesticides should ever be used on the plants, including those that advertise as “natural.”
The only natural pesticide is nature itself.
The plants is more or less trouble free, but too much watering could lead to root rot. Other fungal diseases are possible as well but they are nothing to worry about or take any real action against.
There are cultivars available including those with bright yellow flowers (Hello Yellow), reddish flowers (Gay Butterflies) and a golden-orange flowered variety that has been bred for alkaline soils, but stick with the native plants for best results unless you want to experiment with the hybrids.
The three-inch-long, by half-an-inch wide dark green leaves grow in an alternate fashion along the stalk and will often curl upward along the central vein.
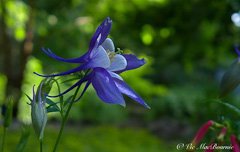
Rocky Mountain columbine: Adding a hit of blue to your garden
Rocky Mountain Columbine is an excellent addition to any garden, adding a spot of elegance and a punch of blue.

A Rocky Mountain Columbine in full bloom adds a delightful hit of blue in the garden alongside another hummingbird favourite Cuphea Vermillionaire (right). The image also shows a columbine in bud as well as columbines that have started to go to seed.
A favourite of hummingbirds, bees and butterflies
Rocky Mountain Columbine (Aquilegia caerulea James) is the ideal way to add a spot of colour to a part-sun, dappled shade garden.
This hardy, native perennial that brings the garden to life with its multiple extra-large, 2.5-inch, blue and white flowers sitting above the foliage, makes a welcome addition to any garden.
Common names include: Rocky Mountain Columbine, Colorado blue columbine, Dailey’s columbine, White Colorado columbine. They are part of the Ranunculaceae family and grow in USDA hardiness zones 3 through 7.
I’m always looking to add a little blue to the garden, and since these blue and white flowers are attractive to pollinators including hummingbirds and butterflies, even better.
Grow them in dappled shade in a rich, loamy soil where the roots and the plant can be somewhat sheltered from the heat of the direct sun.
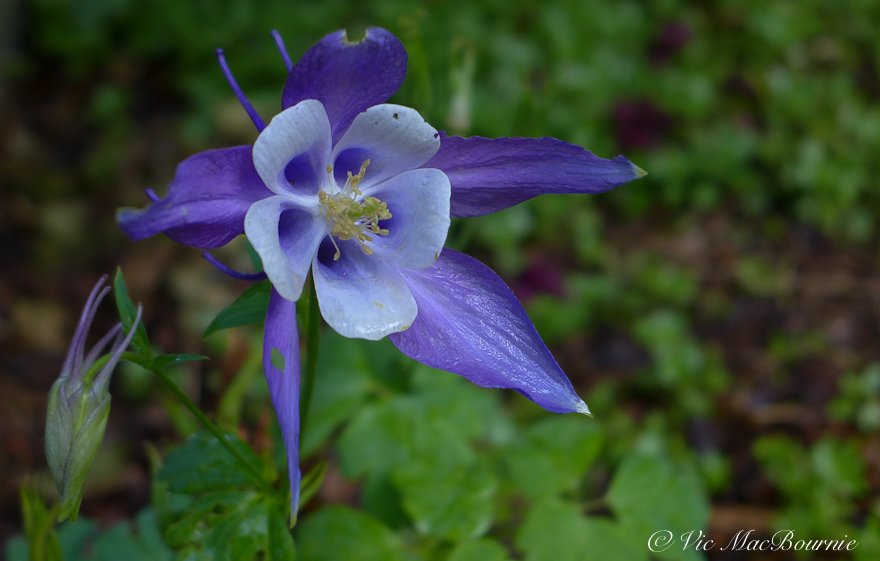
This image shows the beauty of both the flower and its bud.
This year I have added a number of the plants to the hummingbird corner in the hope that our hummers will take to them. If not, they still add a spot of colour and elegance to that corner of the patio where they complement other blue flowers including the petunias and the large agapanthus lillies that add a bold architectural shape with their large blue flowers.
Like the orange and yellow native woodland columbine (acquilegia canadensis), Rocky Mountain Columbine likes a more open, part-sun environment, where it can often be found growing naturally along forest edges in its native habitat.

Rocky Mountain columbine growing alongside Cuphea in the garden.
In the wild, you’ll find them in a range of habitats, but especially in aspen groves, in the upper levels of the Rockies. They are found in rocky slopes or near streams in open woodlands at elevations of 2100 - 3600 metres.
These columbines are native from western North America – Montana to Arizona and New Mexico.
The flowers themselves might not be long-lived, but make up for it by readily self-sowing seeds around the garden. Provide an area of dappled shade and fertile, moist, well-drained soil, and chances are the plants will spread in the garden and provide plenty of new flowers throughout the years.
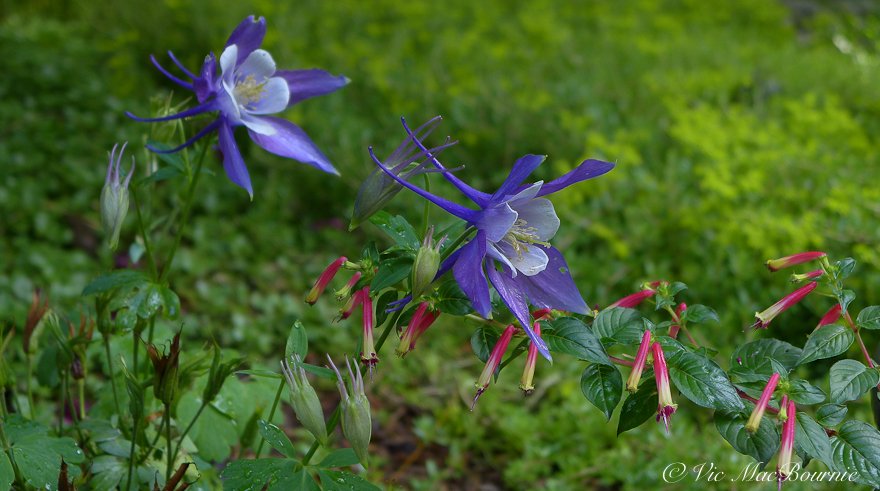
Rocky Mountain blue columbines blooming along with Cuphea Vermillionaire as part of our hummingbird corner.
This magnificent columbine has extra-large, 2.5-inch scented blooms. In fact, these flowers are the largest of the entire genus.
The plants grow to about 3 feet by 2 feet with sky blue petals and a white corolla.
With proper care, that includes a mid summer cut back, these plants can provide a long bloom period stretching from early spring through to summer with a second flowering late Summer to Fall.
Where I live, these columbines are not native, but we certainly have plenty of our native columbines growing in the woodland garden. For more on our native columbine, be sure to check out my earlier post here.
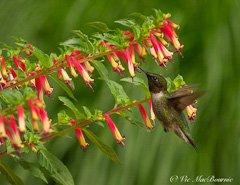
Cuphea Vermillionaire takes centre stage in hummingbird corner
If you are looking to attract hummingbirds, you need to include Cuphea Vermillionaire on your list of plants. Grow it in the landscape or in containers and planters.

A hummingbird works the long, tubular orange/red and yellow flowers in our garden.
Firecracker plant adds explosion of colour and hummingbirds love it
Cuphea may be best known for attracting hummingbirds to your garden, but it doesn’t stop there.
Also known as the firecracker plant or cigar plant, Cuphea Vermillionaire is a great plant to add a non-stop riot of explosive colour to your garden, whether it’s grown as a perennial in warmer climates in zones 8 and higher, or an annual in colder zones.
The cigar-shaped red/orange and yellow flowers may not look impressive on their own, but when the plant is covered with hundreds and hundreds of flowers continuously blooming on a single plant, it’s more than impressive.
Different hybrids are available, including one where the flowers are more pink, but if it’s hummingbirds you are after, the regular red and yellow variety is probably the best.

An up-close image of Cuphea showing its dramatic colour and fringed opening.
Cuphea is primary plant in our hummingbird corner
Cuphea is the primary plant making up our hummingbird corner. Three plants in pots surround our patio container pond/waterfalls and form a light airy feel combined with Salvia Black and Blue, petunias and ferns just to name a few.
Three or four commercial feeders are also part of the hummingbird haven that is situated in a corner of our patio where the little birds can be enjoyed to the fullest.

Hummingbird sips on the Vermillionaire flowers in our hummingbird corner.
It’s also set up as an outdoor photo studio to make photographing our visitors as easy as possible. Of course, hummingbirds are not the only ones attracted to the area. Butterflies, small birds, dragonflies and our friendly chipmunks are all at home among the almost tropical feel of the corner with the waterfalls, ferns and colourful flowers.
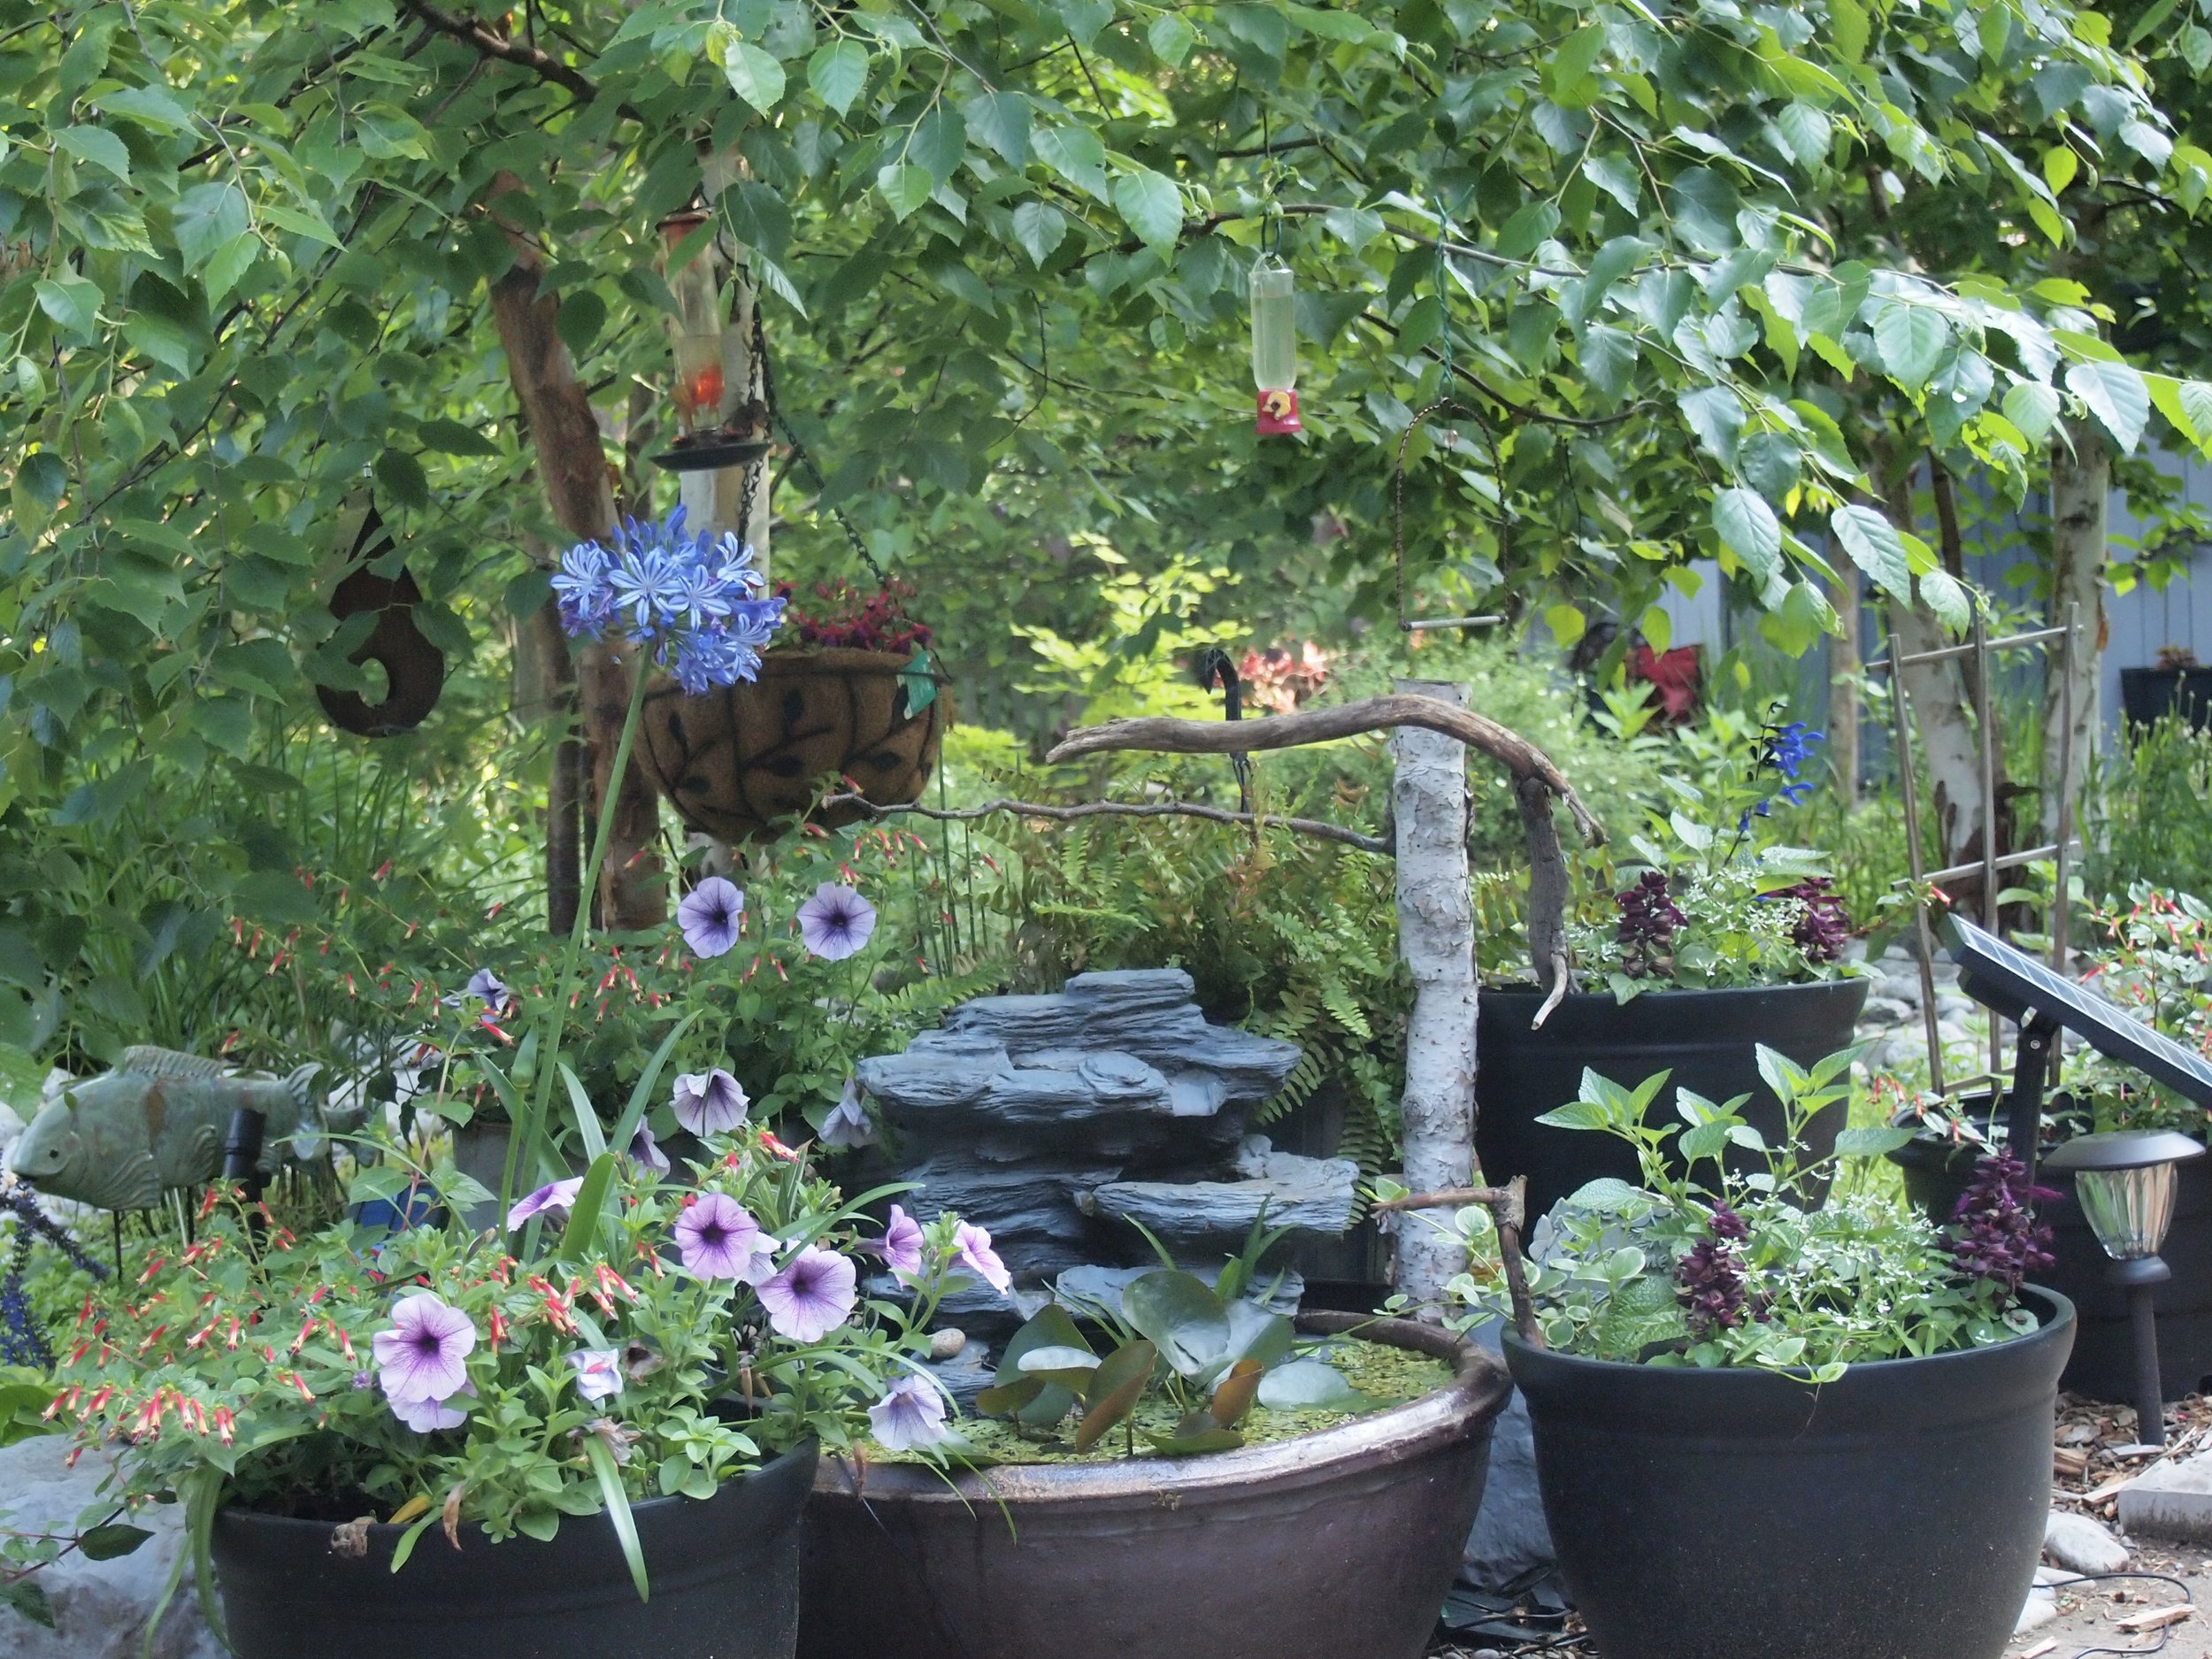
This early spring photo of the Hummingbird corner shows the cuphea planted at left and right in containers.
Cuphea might be tricky to find at your nursery
Depending on where you are located, finding the underused annual might be a little tricky.
I went to three of the largest nurseries in our area early this spring asking for the plant and all three not only did not have any, most had no idea what I was talking about.
Funny enough, I stumbled upon the plants at Home Depot where they were selling the plants. I was looking for the Proven Winners variety, because their plants always perform well, but the Home Depot plants are performing admirably in just their first month.

The hummingbird corner surrounded by three Cuphea plants (see top left) is not only attractive to hummingbirds. This chickadee family (four in the image) was caught taking turns bathing in the waterfalls.
How to grow Cuphea
Cuphea is a real heat loving plant, so be sure to plant it in a sunny area for best flowering and to avoid the plants from getting leggy.
Cuphea Vermillionaire is one flexible, low maintanance flowering plant that does not need deadheading and can handle almost anything you throw at it.
The deep orange tubular flowers dangle on 18-24 inch stems from spring right through to fall and create a mounding form in the garden.

Cuphea growing in container with petunias and other flowers attractive to hummingbirds.
Although Vermillionaire can withstand dry periods better than most plants, it’s a good idea to keep the plant moist throughout the growing season. Once the plant is established, it does not require a lot of water.
If you are growing it as a perennial, it can take up to a year for it to get settled, so be sure to regularly water it in the first year. Also wait until spring growth begins, if you want to do some pruning on it.
Providing regular fertilizer will help keep the plants healthy and constantly flowering.
If you are located in a marginally hardy area, mulch the plant heavily during winter and then remove it in spring.
These plants are certainly worth overwintering if you can.
Unfortunately, Cuphea is susceptible to some garden pests including aphids, whiteflies and Japanese beetles. The hummingbirds will likely feast on the smaller insects, but keep your eye out for any infestations.
Picking off Japanese beetles is probably a good idea and spraying aphids with the hose should keep them under control.
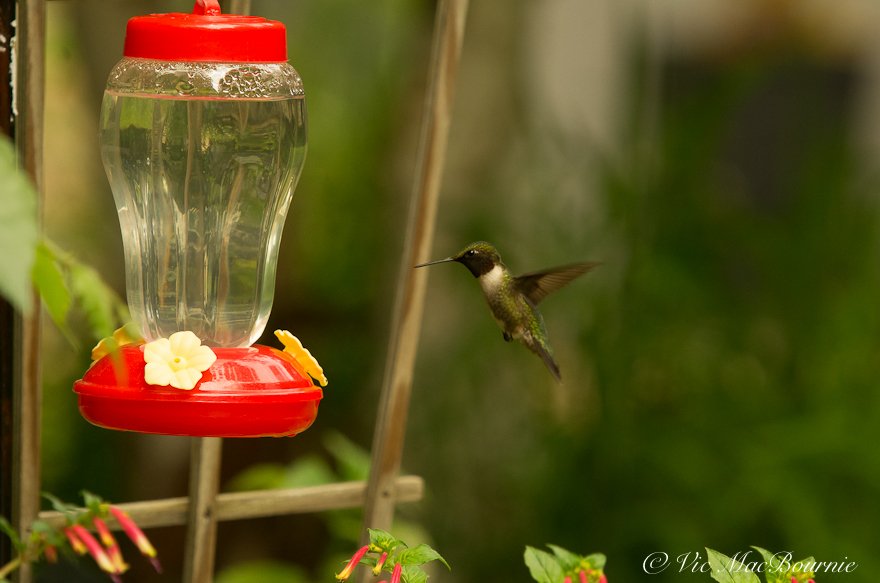
Commercial feeders combined with Cuphea is irresistible to our hummingbirds.
Why do hummingbirds love Cuphea?
The long trumpet shaped tubular plants are particularly attractive to hummingbirds primarily because they are one of the only ones who can feed on these long tubular flowers.
Most bees and butterflies do not have the ability to reach the nectar in the flowers leaving an abundance for hummingbirds.
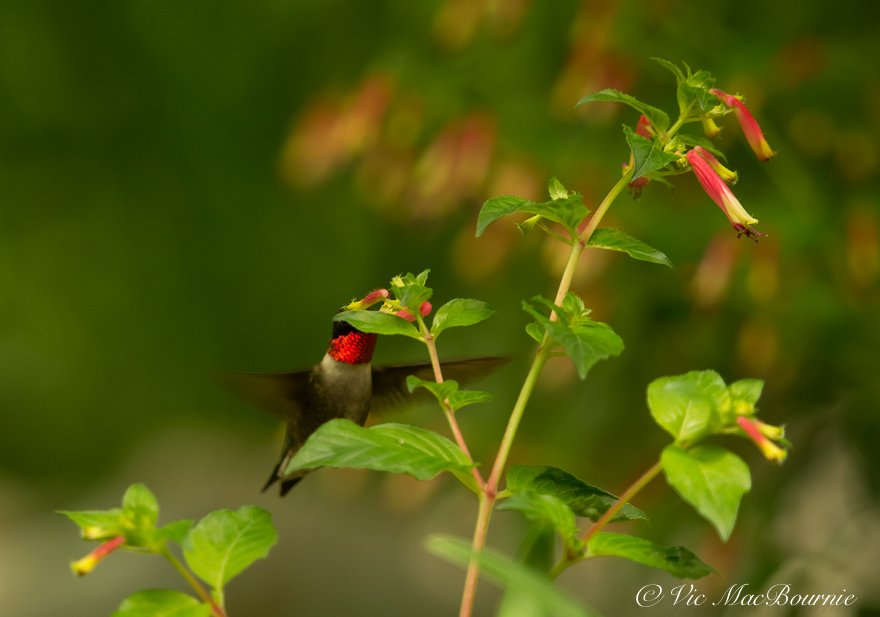
A male Ruby Throated Hummingbird feeds at Cuphea.
The combination of their long, slender beaks and their even longer tongues make this a plant designed almost exclusively for the hummingbird. That means there is always plenty of nectar available in the plants for the little birds.
The plant’s mounding habit, also makes the flowers very accessible to the birds and their flight pattern enables them to check out several flowers quickly and efficiently.
If you are in a small garden, consider using the plants in containers as a filler plant and pair it with other sun-loving performers. Consider growing them all by themselves in a large hanging basket or paired up with other plants to create a hummingbird hanging basket.
So, be sure to add a few Cuphea plants to your garden this year, whether it’s to attract and feed hummingbirds, or just to add a splash of hot colour to a sunny area of your garden.
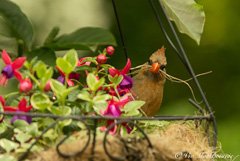
Pentax K5: And Day In the Life of My Garden
The Pentax K5 is a 13-year-old camera that continues to perform against some of its top competitors in the advanced amateur role.
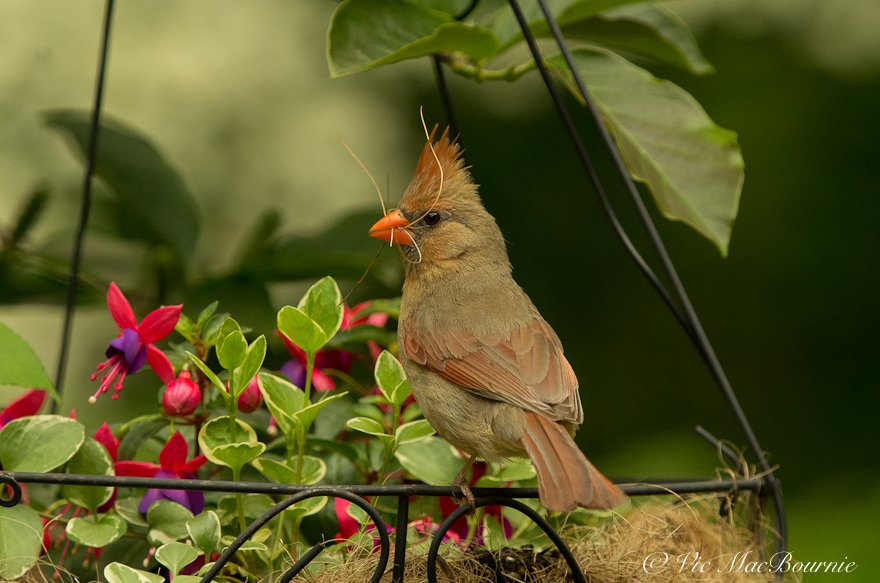
This female cardinal spent several minutes gathering nesting materials from the hanging baskets. Pentax K5, 300mm lens F*, f6.3, 3200 ISO.
A 13-year love affair with the Pentax K5
The Pentax K5 was released in 2010 as the venerable camera brand’s answer to to the Canon 7D, Nikon D7000 and Olympus E-5. The launch price of $1,600 for the body only certainly showed the enthusiast camera market that Pentax was serious about playing with the big boys when it came to digital cameras.
The new Pentax camera boasted a 16.3 megapixel CMOS sensor with a higher maximum sensitivity (ISO 51200) than any APS-C camera up to that date, continuous shooting at 7.0 frames per second and a 1080p full HS video mode, not to mention an upgraded SAFOX IX + AF system, and a few new digital filters and custom image modes.

The 13-year-old Pentax K5 still looks good and performs well after all these years. Pentax marketed the camera being able to reach an ISO rating of 51200.
What does all this mean in 2023? It means, despite its age, the Pentax K5 remains a very competent camera that is more than capable of capturing garden images, documenting travels or creating lovely images of your children, grandchildren pets and wildlife.

Cornus Kousa dogwood in full bloom in the fern garden. Photographed with 28-105mm Pentax lens, ISO 1600, 28mm, f5.6.
In fact, it is my go to camera when I’m looking for the best quality in my, admittedly aging, arsenal of cameras.
Together with the trusty 300mm F4.5* Pentax lens, it is responsible for most of my favourite images in the garden.
I consider the Pentax K5 my workhorse camera.
The Pentax K5 is not a particularly pretty camera to look at or super fun to use. It just gets out of the way and gets the job done, day in and day out.
Not to be overlooked, a convenient backlit window on top of the camera makes setting and checking exposure extremely simple even if glare from the sun makes the back LCD screen impossible to read. The small window provides all the basic information a photographer needs to know to obtain proper exposure including: Shutter speed, ISO, Aperture, Exposure compensation, battery level, and much more.


Top panel information for the Pentax K5

Hummingbird at feeder with swing in background. Pentax K5, 1/125 sec, 800 ISO, f4.5 on the 300mm f4.5*.
Today, the camera is available for a fraction of its original selling price. A quick look around used prices shows that a good quality body could be easily picked up for between $200 and $250. Some come complete with a kit lens or even better.
If you look hard, you may even find an used body with one of Pentax’s prized limited series lenses for a good price.
Check out the prices here at Adorama, or here at KEH cameras, or here at Canadian owned Henry’s Cameras.
Although prices have come down considerably for the former Pentax flagship model, the K5 can still compete with many of today’s newer cameras. The 11-point autofocus system, ergonomics, and tough weather and dust resistant body has withstood more than just inclement weather.
Later models of the K5, especially the K5 lls, where Pentax removed the anti-aliasing filter, are especially competitive with newer full-featured bodies. The IIs is almost identical to the K-5 II except that its anti-aliasing filter has been removed. (Removing the built-in filter helped start a trend in DSLR cameras that resulted in sharper images, albeit with the introduction of moire in some rare situations.

The back LCD screen and top viewing screen of the Pentax K5.
The K5 is certainly larger than many of the camera’s in my arsenal – especially the tiny Pentax Q camera system (Links to my earlier posts) and my new Olympus kit – but the K5 is not too large or heavy to carry around on a regular basis.
Thankfully, most of my images these days are created just steps out the back door in my woodland/wildlife garden. The ability to create a range of images right outside your door opens up a lot of opportunities that are difficult if you are having to travel long distances to capture images.
On this day in the middle of June 2023, just as the garden flowers were beginning to emerge, I decided to work on my first “A Day in the Life of my Garden” feature documenting the garden using one camera and a couple of lenses.

Chipmunk captured on an old rotting log. Pentax K5, 1/160sec, ISO 400, F4.5.
The day began around 7am in my favourite chair in the back garden, a huge mug of coffee and, of course, my dog Holly (link to post about Holly – a dog with a heart so big she needs a pacemaker to keep it going.)
Focus on Hummingbirds
My first challenge was to capture the hummingbirds working the feeder at my new Hummingbird Hangout (link to my post). They start early taking turns at the various natural and commercial feeders and offered up a series of images with the 300mm F4.5 mounted on a monopod.

Hummingbird at feeder. Pentax K5, 1/125 sec, 800 ISO, f4.5 on the 300mm f4.5*.
The fact that it was still early morning and the light was low made capturing the fast birds a little tricky, but by cranking up the ISO to 3200 on the K5 and shooting wide open at F4.5 on the 300mm, I was able to score a few reasonably sharp images of the hummingbirds in action without having to resort to using a flash.
The crop factor of the APS-C sensor turns the 300mm lens into the equivalent of an approximately 450mm f4.5 enabling me to get good frame-filling images of the hummers feeding. I particularly like how the slightly out-of-focus swing frames them in the background.

A hummingbird works the Cuphea. Photographed with the Pentax K5 and 300mm. Shot at 1/1000sec,ISO 1600 at f8 with a heavy crop.
On the K5 I use back-button focus almost exclusively. It helps to get fast moving action without the camera constantly searching for focus. It is especially useful when the bird or animal is sitting in one spot for a period of time. (Back button focus takes the focusing duties away from the shutter button on top of the camera and transfers it to a separate button in the back. I find the back button setup on the K5 very ergonomic and easy to get to with my thumb while my index finger works the shutter.)
Photographing hummingbirds can be challenging. Using electronic flash is the best way to stop their wings in flight and bring out the beautiful colours in their feathers, but I enjoy the challenge of shooting them without flash by waiting for them to stop for a brief moment in their flight.
There is no question that the K5 drive was set to high resulting in numerous images to sort later in the day.

A huge crop, (almost 50 per cent) on this tiny wild geranium (Herb Robert), shows that the 16 megabyte files can stand up to heavy crops and still look acceptable. Pentax K5, 50mm macro lens, 1/125 sec, f2.8, ISO 200.
Cardinals, sparrows gather nesting material
At the same time, a female cardinal and chipping sparrow intent on starting families began pulling out parts of our coco mat hanging basket liners to use for nest building material.

A Chipping sparrow joined in with mama cardinal gathering nesting material from our hanging baskets.
Still armed with the 300mm made photographing the female cardinal focused on gathering nesting material relatively easy. Later, a chipping sparrow joined her in the search for nesting material.
Going back and forth between the nest builders and the hummingbirds kept me busy for most of the morning.
(see more images in the photographic gallery)
Capturing the garden up close
After giving the K5 a good workout capturing nest-building and hummingbird action, it was time to do a little macro photography.
The jury is out on whether to use a tripod for macro work these days. The combination of being able to crank up the ISO to high levels and the availability of impressive in-camera stabilization has convinced many photographers to forego the tripod and shoot handheld. Although I have shot using this method in the past, the situation lent itself to using a tripod.

Clematis shot with Pentax K5 and 50mm F2.8 manual focus macro lens. Pentax K5, 1/50th sec, F7.1, ISO 400.
Using a tripod can be a real pain, but it forces you to slow down and think about what you are trying to achieve. At the same time, a tripod allows you to use a lower ISO to create an image with less noise and more apparent sharpness.

The Pentax manual focus 50mm f2.8 macro lens was used to capture this image of fuschia. Pentax K5, 1/125 sec, f3.2, ISO 200.
Few flowers were blooming at the time, but I was able to use the remaining early morning open shade to focus in on a combination of annuals and perennials using the 50mm SMC f2.8 “A” manual focus macro lens on the K5.
Unlike more modern mirrorless cameras, the K5 offers nothing special to assist photographers with manual focus, except the live view mode that shows the image on the large 3-inch, 912K pixel LCD screen on the back of the camera. There are no “marching ants” to help ensure the subject is in focus, but the Live View is a useful feature to help nail manual focus on the camera.
The 50mm macro is a sweet lens that I use both on my Pentax cameras – the K5 and IstD – as well as my Olympus kit. I can also use it with the Pentax Q system with an adapter. On the miniaturized Pentax Q, the 50mm macro becomes a 250mm macro with the crop factor. On the Olympus, with a crop factor of two, the lens becomes a sweet little 100mm macro.
The 50mm macro is perfect for flower photography. If I was shooting insects or butterflies, I would have used a 100mm macro allowing the same magnification from a longer distance.
When using the tripod, it’s a good idea to turn off camera stabilization and either use an electronic shutter release, or the 3-second delayed shutter release built into the camera’s operating system. A button on the back of the camera gives you instant access to the delayed shutter, which is more convenient than having to go into the camera’s menu.
Speaking of the camera’s menu system, anyone familiar with using Pentax will find the menu system is easy to use and laid out in a very intuitive way.

Agapanthus in bloom in the garden.

This image shows clematis flowers just prior to blooming. The 50mm macro together with the K5 was able to pick up details such as the fine hairs on the plant. Pentax K5, 1/100 sec, f2.8, ISO 400.
(see more images in the Pentax K5 gallery)
Taking advantage of a backyard studio and photo blind
Unless you can find some open shade or use a flash to even out the light, mid-day is usually a good time to take a photography break.
Later that afternoon, I decided to test the camera and 300mm lens out in the photographic blind and small outdoor photo studio I created in a corner of the yard. It’s a small reflection pond with a natural backdrop that has helped me capture many good images of birds, squirrels and chipmunks in a natural setting. Here’s a link for more information on creating a natural outdoor photo studio.
The combination of a portable Tragopan photographic blind and the DIY outdoor photo studio creates the ideal opportunity to create professional looking bird and wildlife images at any time.
Although I was unable to get the chipmunk or birds to work their way down to the water where it’s possible to get reflection images, I was able to get a few nice shots of one of the local chipmunks.
I set the blind up about 10-12 feet from the outdoor studio and am able to get frame-filling images with the Pentax K5 and 300mm lens. A small hill filled with wildflowers and shrubs behind the outdoor studio helped create a natural, soft green background.
Here are a few images from an hour or two of shooting in the afternoon.

A chipmunk is photographed in a natural setting in afternoon light with the Pentax K5 and 300mm lens. A Tragopan blind together with a DIY outdoor natural studio helps make these shots possible. Pentax K5, 1/160sec, ISO 400, F4.5.

The Pentax K5 and evening light
As evening settled in, it was a good time to change over to my 28-105mm wide angle lens for some general garden photography.
Even after hundreds of images, the battery remained strong. In addition, the K5’s impressive viewfinder showing 100% coverage and includes diopter adjustment, proved comfortable to use over the course of the day.

Look for interesting compositions in the garden. It does not have to be an extreme close up of a single flower. I used the 300mm lens to capture this image and create a more compressed perspective. Pentax K5, 1/250 sec, f5.6, ISO1600.
Ergonomically, the camera is comfortable in the hand with a large protruding grip in the front that makes handling even larger lenses easy. A wheel in the front and another in the back provides easy access to controls, and the separate exposure compensation button and ISO button on top of the camera provides access to two of the most-used features photographers need.
The camera is well laid out and is easy to use. A separate drive is available but not necessary unless you feel you need the extra grip and battery power.
Pentax K5: A water and dust resistant work horse
There’s a good reason that the Pentax K5 has garnered a reputation as a stalwart work horse. Its 16 megapixel CMOS sensor, together with its easy handling, in-body stabilization and array of modes and filters makes it an ideal camera for photo enthusiasts and advanced amateurs. Add to that it’s water and dust resistant, making it a good choice for outdoor professional photographers, especially if it is teamed up with one of Pentax’s weather resistant lenses.
If specifications are your thing, please click on this link to go to the Dpreview photography website, where you will be greeted by more specs than you could ever hope for in life.
Here is a list of the key features of the Pentax K5.
16.3Mp CMOS sensor
ISO sensitivity span of 80-51,200 (equivalent)
1080p HD movie mode
Limited in-camera movie editing functionality
Socket for external microphone input
Triple-axis sensor-based shake reduction (horizontal, vertical and rotational correction)
New SAFOX IX+ 11-point AF system (improved over the K-7)
Support for older Pentax lenses with manual aperture rings
Magnesium alloy body shell
Improved handheld HDR function (JPEG mode only)
Continuous shooting up to 7fps
100% viewfinder coverage (0.92x magnification)
Choice of PEF or DNG RAW files
3in, 921k pixel LCD screen

Would I buy the Pentax K5 today?
Buying a Pentax K5 today could be an exceptionally good purchase for a photographer looking for a solid camera at a very good price. If you are an advanced amateur looking to dive deeper into nature photography and have no need for the latest and greatest camera, I would highly recommend tracking down a good used body.
The weather and dust resistant qualities of the camera make it exceptional for outdoor use in inclement weather conditions and the availability of high quality Pentax lenses and those from third-party manufacturers, makes it an affordable choice.
If you can get the IIs version without the anti-aliasing filter, always choose that one over the regular K5 or slightly upgraded K5 II.
Happy shooting.

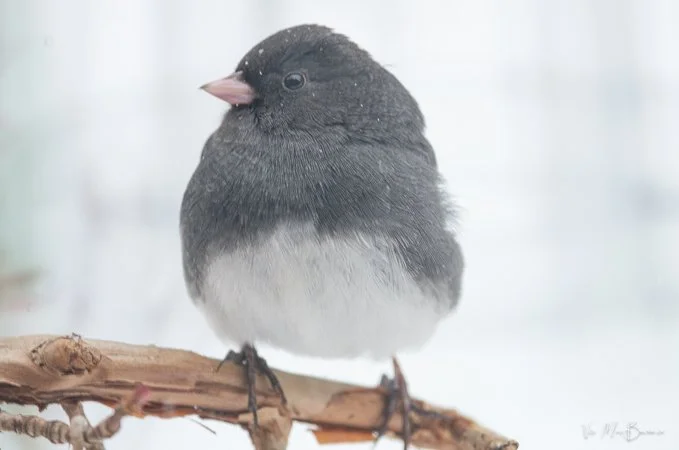
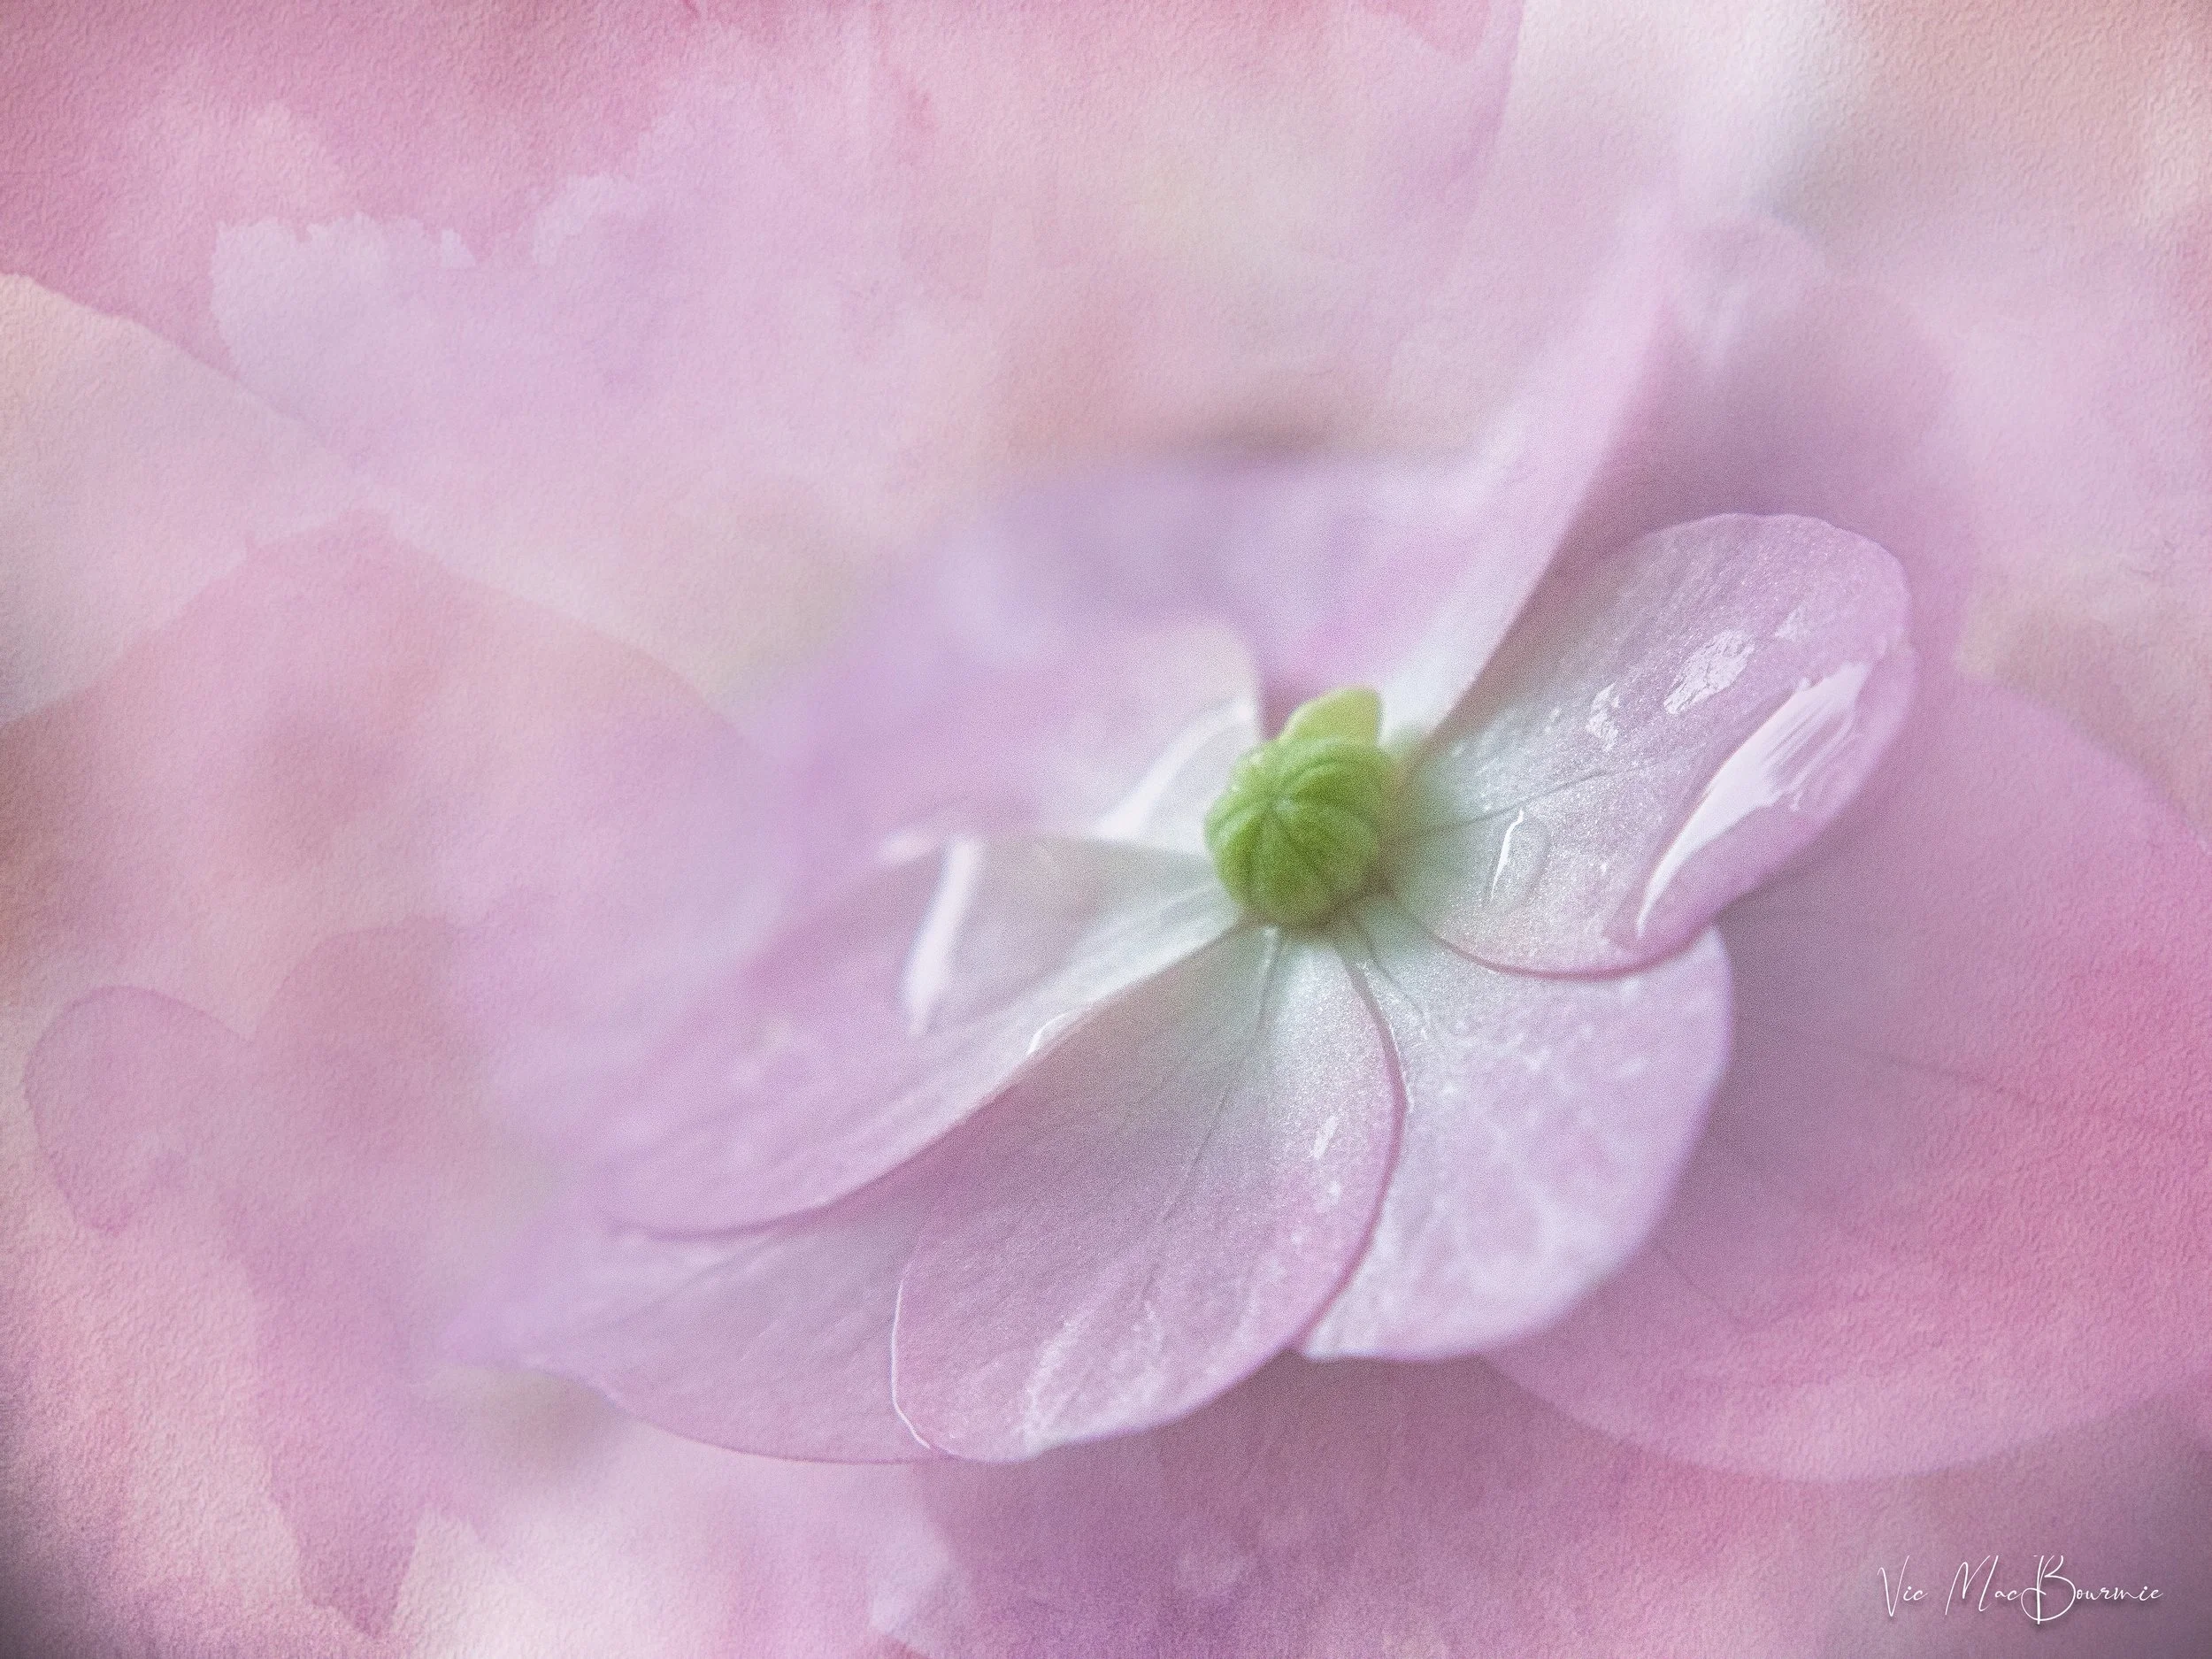


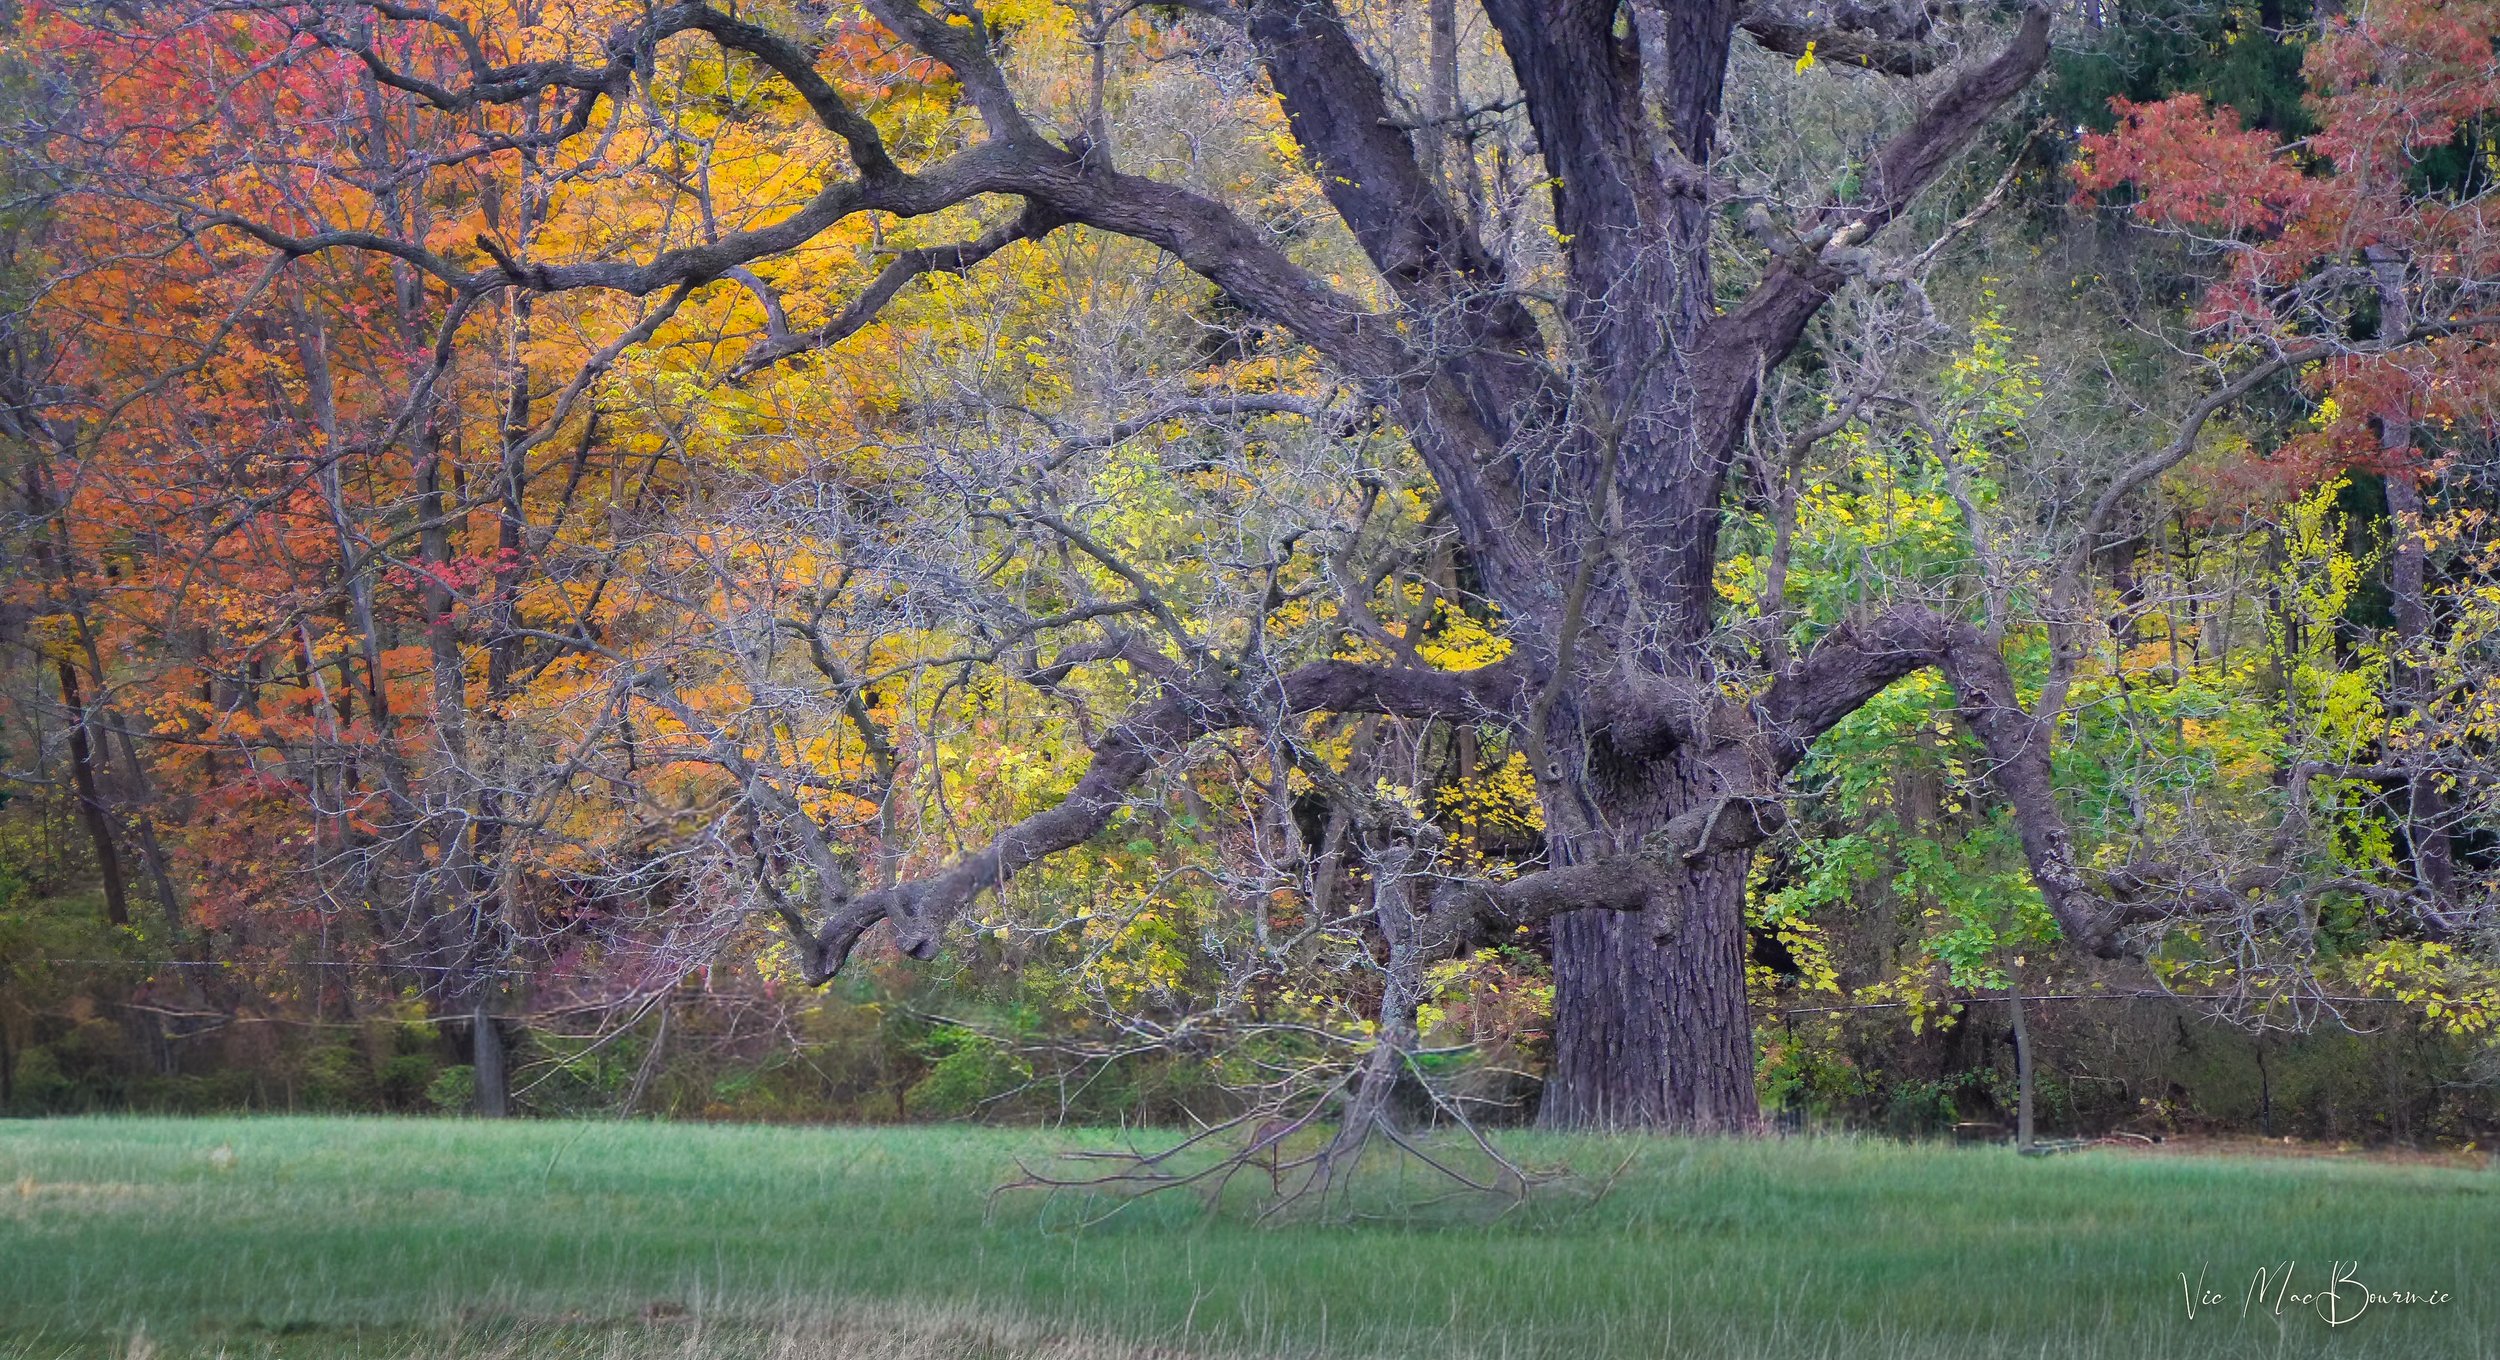


Embracing weeds and native plants is focus of 2023 Chelsea Flower Show
If we can learn anything from the 2023 Chelsea Flower Show it is that we need to begin embracing weeds in our garden both for their aesthetics and to benefit the wildlife in our gardens.

Wildflowers and what many would call “weeds” abound in this image of a garden design created for the Chelsea Flower Show.
Chelsea Flower Show designers make room for wildlife
If we can take anything away from the 2023 Chelsea Flower Show, it’s that wildlife gardening and weeds are the future.
Forget grass. Presenters from the BBC were quick to note that not a single one of the magnificent demonstration gardens included a single blade of traditional grass.
Instead, the landscape designers focused on native plants aimed at providing assistance to wildlife – everything from native bees and caterpillars to birds, mammals, amphibians and reptiles.
In doing so, they fully embraced using what many traditional gardeners would call “weeds” in the designs.
It’s not the first year some of the world’s top designers looked to “weeds” as a primary source of planting for their outstanding show gardens.
Just last year a gold medal went to a garden design celebrating garden rewilding after the reintroduction of beavers to an area in England.
“Gardeners have to remember that it is not about what they want, but about what the land wants.”
Natural gardens are not new to Chelsea. They have been gaining ground over the years and stealing the spotlight from more traditional garden styles as far back as 2002 when Irish-born landscape designer Mary Reynolds shocked the garden establishment as the youngest designer to win a gold medal at Chelsea with her naturalistic approach to gardening.
Mary, whose story was made into the movie Dare to Be Wild, remains an ambassador for natural gardens writing a comprehensive and inspiring book called The Garden Awakening, and continually speaking out against much of today’s traditional landscaping practises.
For More: check out my review of her book Garden Awakening
“Gardeners have to remember that it is not about what they want, but about what the land wants,” Reynolds once told the BBC.
So, maybe it was no surprise that war has been officially declared against traditional gardening at Chelsea.
“The war against traditional gardens is about to go nuclear,” reported the The Daily Telegraph in response to the latest weed-friendly garden designs at this year’s show.
In an informative article in Phys.org, the author Brigette Duseau explores the increasing acceptance of using weeds in landscape design
Duseau points out that this year, “no less than one third of the 12 main gardens in the competition feature weeds such as nettles, knapweed, dandelions, chickweed or buttercups that generations of gardeners have spent their lives rooting out.”
In fact, the six-time Chelsea Flower Show gold-medal landscape designer Cleve West included as many as 19 weed species in his garden, constructed around the dilapidated remains of a 19th-century house.
Weeds in the garden design – built for a charity that helps young homeless people – proved to be the perfect metaphor for these youth who should not be discarded.
“Weeds play a very significant part in repairing land …. They are pioneer plants that go in and repair the soil," he said.
“They sort of have a microbial activity in the soil that helps make soils healthy, fertile and it provides food for early pollinators—even homes for some invertebrates,” he told Duseau.
"So they play a very important part in biodiversity."
Move away from traditional to more natural gardens
Over the years leading up to this year’s show, there has been a growing move away from traditional non-native plants to more native plants and “weeds.”
And, if you are thinking weeds have no place in your garden, let me say that the results from this year’s gardens were simply stunning. Then again, they always are at the Chelsea Flower Show.
If you are not aware of the annual Chelsea Flower Show every May, you may be surprised by the BBC’s comprehensive coverage of the 5-day flower and design show.

Another example of the use of wildflowers in the Chelsea Flower Show garden designs can be seen in this image. Notice also that the flowers are planted in a loose, naturalistic style, rather than as single specimens.
Go HERE For the complete listing of BBC coverage. Go HERE for the link to BBC’s YouTube coverage.
The British broadcaster provides us YouTube watchers across the pond with hours and hours of coverage from interviews with British celebrities (think Downton Abby) about their impressions of the show and their personal gardening challenges, to detailed analysis of the 12 main large display gardens that are part of a total of 36 total garden design installations. There are features on the incredible flower growers that somehow manage to get all the plants flowering during the show, new plant introductions and examples of how to use more traditional flowers. There are also impressive displays for small balcony and patio container gardens geared to those of us with smaller garden spaces.
The amount of information on plants, garden design and philosophy is second to none, and it’s all there for us to take advantage of on our smart, high definition, large-screen TVs – for free.
What more could we ask for in life.
If you are not taking advantage of your smart TV and internet provider to tune in to the best gardening channels on YouTube, you have no idea what you are missing. Do yourself a favour and take a few minutes to learn how to plug into this wealth of gardening knowledge and entertainment. Just be aware, the rabbit hole is deep. And if you do not have a “smart TV,” it’s well worth purchasing one just to watch the gardening channels alone.
I’m already addicted to YouTube gardening channels, including Linda Vater from Oklahoma City, The Native Plant Gardener from New Jersey and a host of others, but when Monty Don and the Chelsea Flower Show is being streamed via YouTube, it’s always prime watching.
Unlike Home & Garden Television that is nothing but real estate shows, the vast number of gardening programs available on YouTube more than make up for Home & Garden’s severe inadequacies.
But enough of the free promotion for YouTube. It’s time to get back to the Chelsea Flower Show.
For a fun look at images from the show, be sure to catch the Guardian newspaper photo feature here.

The outdoor laboratory in the Royal Entomological Society Garden that embraces the use of weeds and wildflowers to encourage insects.
Best Chelsea Flower Show gardens featuring weeds and wildflowers
• The Royal Entomological Society Garden (silver medal winner) Anyone looking to gain knowledge about attracting insects to their yard will benefit from paying close attention to this garden design by landscape architect Tom Massey.
Here again, weeds have their place, including dandelions and clover.
The design includes an outdoor laboratory for visitors to study the insect life in the garden. Visitors to the garden are taken down into the landscape, offering an ‘insect’s eye view’ and a space in which to study. The lab’s roof structure is inspired by a compound insect eye and the lab is used for real scientific research, monitoring and studying insects visiting the garden.
Diverse topography across the site — rammed earth floors, hoggin pathways, dead wood, piles of rubble, bare sand and gabion walls — provide numerous and varied habitats for insects. Water in still pools and flowing streams provides additional important insect habitats and adds interest to the aesthetic and soundscape of the garden.
A dead tree ‘sculpture’, cut into rings and elevated on steel poles, ‘floats’ over biodiverse planting and a standing dead tree and tree stump provide further sculptural habitat. Planting for pollinators and a wide range of other beneficial insects forms a beautiful and resilient scheme that will provide year-round food, habitats and interest.

Large pieces of concrete and aggregate is interspersed with wildflowers giving the garden a natural, overgrown look.
• Centre for Mental Health’s The Balance Garden (Silver medal) The garden uses crushed site waste as aggregates producing a wealth of wildflowers, grasses and hardy shrubs that thrive in stressful environments, as well as sand piles and habitat layers for wildlife.
Large concrete pieces reclaimed from waste salvage make up a central area overlooking a clear pool. Suspended steel walkways allow movement through the space and access to the wild planting layers.
At the heart of the garden is a ‘mushroom den’ made from a reclaimed steel-clad shipping container. The planting layers contour from wetland towards a denser, shadier canopy of food forestry and ‘edimentals’ while ‘weeds’ are celebrated as an important part of urban ecology.
• The Fauna & Flora International Garden Designed by Chelsea award-winning garden designer, Jilayne Rickards, and landscaped by Tecwyn Evans, of Living Landscapes, the Fauna & Flora Garden maps the journey of an ecotourist on a gorilla trek, tracing a rough track through a succession of lush and changing landscapes.
The design uses thistles, brambles and nettles to illustrate a typical gorilla habitat.
The path eventually leads to a gorilla nest – set among bamboo and other typical gorilla foodplants – and a towering waterfall, surrounded by a variety of weird and wonderful plants commonly found at high altitudes.
This ‘gorilla garden’ not only tells the story of the endangered species and its precious habitat, but also aims to raise public awareness of the critical importance of protecting nature around the world, and how this can be best achieved by putting people and collaboration at the heart of conservation efforts.
Don’t miss Horatio’s Garden – A gold medal and the Best in Show
The Horatio garden was inspired by a young man who was researching the creation of an accessible garden at the spinal injuries unit of the Salisbury District Hospital where he volunteered, before he was tragically killed at the age of 17 in a polar bear attack during an expedition to Svalbard.
The award-winning design explores how gardens can be viewed differently from a variety of perspectives – with a focus on how spinal patients may be forced to view the garden from different angles dependent on their injuries.
A water feature not only adds sensory experiences but is important for attracting wildlife into the garden which proved to be one of the most important features spinal patients communicated to the garden designers.
For more information on winning garden designs, be sure to check out the work of Country Living here.
Seven sanctuary gardens in 2023 show
This year’s show gardens included seven sanctuary gardens – smaller gardens that focus on the benefits of gardening on our well being. Central to each design was the benefits to wildlife and sustainability the gardens were able to offer both gardeners and those who visit.
One woodland inspired garden designed by Thomas Hoblyn celebrated British crafts – from a treelike medal arbour to embroidered cushions and candlesticks.
The garden’s colour palette was based on three colours that make up a single forget-me-not-flower, including violet, blue and red. Two zones make up the garden including a wetland meadow of sedges and rushes, and a shaded woodland glade.
Centre for Mental Health’s The Balance Garden
Another inspirational garden is The Balance Garden that explores the mental health benefits nature can bring to our lives and ways we can bring more of it into our gardens. The designers are quick to point out that the garden encompasses a myriad of wildflowers – plants many gardeners would consider to be weeds.
“We’ll be educating people about the classic question of ‘what is a weed?’ and realigning people’s perception – if it looks beautiful, why not keep it?” explained garden designer Jonathan Davies to Gardens Illustrated. (link to the full story)
There are too many gardens in the show to attempt to cover them all, but plan on spending several hours – up to ten – watching the BBC’s first-rate coverage. It certainly is more bingeworthy than most Netflix shows.
A rainy day is the perfect opportunity to settle in for tours of the gardens and expert information on plants, shrubs, trees and helping our local wildlife.
Some of the gardens you’ll want to pay special attention to include:
• South Korean environmental artist and designer Jihae Hwang explores a rugged mountain garden design in her garden: A Letter from a Million Years Past. The design explores a primeval forest with massive rocky outcrops inspired by the Jiri Mountains, known as the Mother Mountain of Korea. The garden is the perfect example of how we can incorporate boulders in our landscape and the plants that thrive in these harsh, but natural areas. It’s also an example of how beauty is not dependent on a flush of colourful flowers.

A combination of native plants, including Black Eyed Susans and lobelia create a natural habitat for insects, birds and other garden wildlife.
Learning from Chelsea: Using “weeds” in our own gardens
If we can learn anything from the designers at the 2023 Chelsea Flower Show it is that weeds, or what many of us like to call wildflowers, not only belong in our gardens, but can be a beautiful, natural addition that creates habitat for wildlife big and small.
Of course, one gardener’s weed is another gardener’s flower and that can change dramatically depending on what horticultural zone you are gardening in. Native plants are very dependent on that zone, so it’s important to find out what plants are truly native to your area and do your best to get seed or locally grown wildflowers.
It’s also a good idea to plant the flowers in more of a loose, cottage-style garden rather than single plants trying to survive on their own. Nature does not really work this way, so there is no reason that we should be bound by growing plants in neat little groups.
Designers at the Chelsea show combined both methods to give the gardens a loose, but still organized feel that would be presentable to the majority of visitors, but still provide wildlife with a natural habitat.
Even if a more natural approach to gardening is not your cup of tea, consider setting aside a small part of your garden where you step back and let nature take over.
You might just be surprised with the results and I’m sure you’ll enjoy not having to weed and worry about every little plant that shows up in your naturalized garden.

Create a hummingbird hangout in your garden
Creating a hangout in your garden just for hummingbirds involves providing them with their favourite things and then sitting back and enjoying the fun they have.
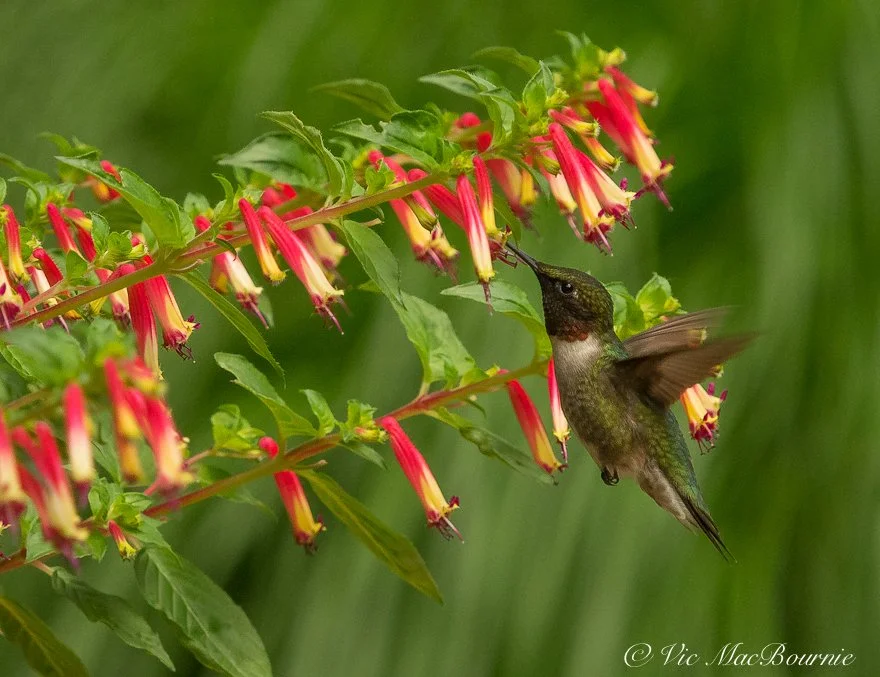
This hummingbird works the Cuphea plants in the Hummingbird hangout I created both to attract these little birds and as an outdoor studio to photograph them in their environment.
By adding their favourite annual and perennial flowers, a variety of feeders, bugs and water, how can they resist?
Creating a hangout for hummingbirds is not only relatively simple, it will provide hours of entertainment during the summer as more and more of the winged visitors decide your garden is the place to be this summer.
The main ingredients for your hummingbird haven should focus on natural feeders (their favourite nectar-producing annual and perennial flowers) a couple of store bought feeders with a DIY 4:1 water to-sugar-ratio mixture and, if possible, a gentle source of water for a refreshing bath. The gentle source of water can be as simple as a mister or small solar powered fountain in a bird feeder or even a shallow pool of water.
This spring, I decided to focus on creating a central area in the garden that is particularly attractive to hummingbirds. An area that I knew the hummingbirds couldn’t resist but, also, one that would give me the best vantage point to photograph our little friends.

Hummingbird feeding at Cuphea.
Obviously, hummingbirds were not the only target. I knew that backyard pollinators, like our native bees and butterflies and even other birds, would be regular visitors to the hummingbird hangout, but the focus is definitely on the hummingbirds that have appeared in the backyard every spring for a number of years.
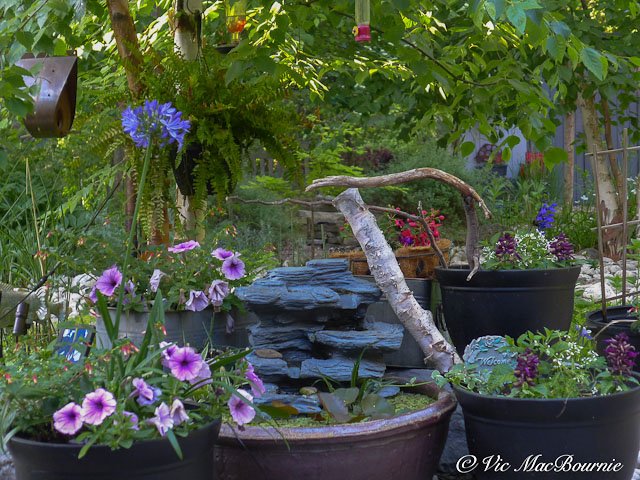
The hummingbird corner aimed at attracting as many of the birds as possible.
Hummingbird hangout makes for the perfect outdoor photo studio
In the past, commercial feeders, native plants and annuals have been situated around our patio attracting them to the general area where I wanted to photograph them. This year, however, my plan was to focus their activity in a smaller corner of the patio and create a natural setting that would make photography much easier, as well create an environment and backdrop for capturing them in the best light.
What I didn’t realize is that it also would create the ideal backdrop for a host of other garden visitors, from bees to butterflies, birds and, of course, our friendly chipmunks.
For more on hummingbirds in the garden, check out the following posts:
• How to help Hummingbirds during migration
• Five tips to attract hummingbirds
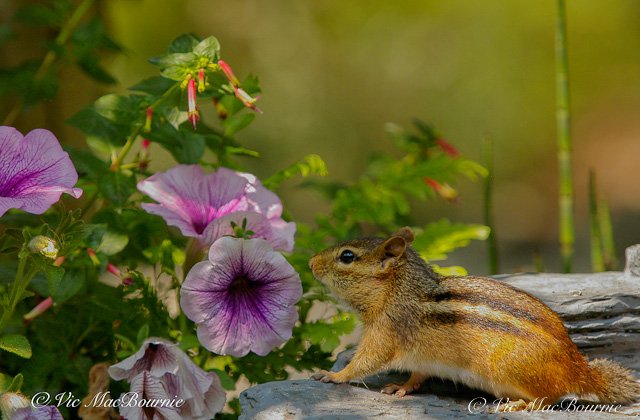
A chipmunk takes a moment to smell the flowers on the waterfalls located in the Hummingbird haven.
Creating the hummingbird hangout
My idea for the hummingbird hangout was simple: Provide the hummingbirds with as many of the flowers they love as natural feeding stations, add a couple of different commercial feeders and place both the feeders and containers filled with their favourite flowers around our container pond equipped with a small waterfalls that I’m hoping will bring even more hummingbirds into the area.
I’m hoping the combination of high-quality, natural feeding stations of their favourite flowers, a reliable source of nectar from the traditional hummingbird feeders and the added sound of gentle running water, will be too much for them to ignore.
The pond and flowers will also attract a myriad of smaller insects and spiders which, we cannot forget, is the number one food source for hummingbirds, especially when they are raising young.
The entire hummingbird hangout is backed by a birch tree clump that is particularly attractive to insects – hummingbirds favourite food source.

Hummingbird works Cuphea in the garden.
Adding a waterfalls to the hangout
I was lucky to have an unused, natural-looking waterfalls that fit perfectly into the container pond and enabled me to create an instant multi-tiered waterfalls. Earlier in the spring, I had seen a Youtube video that showed hummingbirds attracted to a small waterfalls, so, I thought, why not add it to their hangout?
By using a small, inexpensive solar panel and water pump, I hoped to create enough flow to add a nice sound to the entire design. I quickly learned, however, that the inexpensive solar pumps from Amazon and other on-line locations were not going to cut it in this instance.
Not only did these small inexpensive solar-powered pumps struggle to move enough water, the slightest cloud would shut the system down, reducing the joy of having the waterfalls running on a consistent basis.

A hummingbird feeds from what turns out to be the favourite hummingbird feeder.
Getting the best solar-powered water pump for the job
Instead, I opted for a more expensive (but still relatively cheap) larger solar panel and pump that included a built-in battery that the solar panel is able to charge over the course of the day.
The performance of this new, larger solar panel and small pump made by NFESOLAR has been nothing short of outstanding. Not only does it push the perfect amount of water over the falls, it does so even if the sun is behind a cloud. That’s when the battery kicks in and provides that additional power needed to keep the waterfalls working throughout the day.
Most small solar panels shut down immediately if they are not in full sun. Even cloudy days will often stop them from working properly.
If working in shaded situations wasn’t enough to sell me on this solar panel and pump combination from NFESOLAR, the fact that it runs late into the evening on its battery power makes this combination perfect for the hummingbird hangout.
Depending on how sunny it was during the day, the pump will continue to work up to about three hours after the sun is no longer shining on the solar panel.
It certainly helps to have the pump run non-stop all day and into the early evening. Having a continuous flow of water provides birds who visit the waterfalls with the assurance that it will be running during the day. Although I have only seen a single chickadee on the waterfalls in the first weeks of its operation, I’m sure more birds will test the waters once they discover it.
By adding a small amount of seeds on the waterfalls, I’ve encouraged our chipmunks to check it out on a daily basis.
On very hot days, I have a mister that attaches to a hose that can be added to the hangout to make it even more desirable for the hummingbirds and other backyard wildlife.
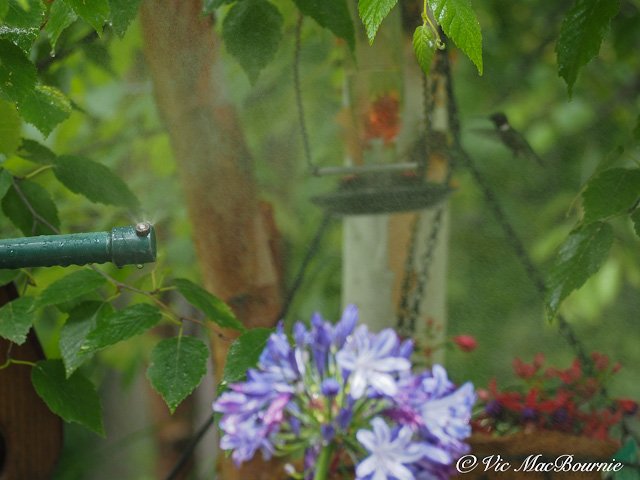
Adding a mister provides a refreshing source of water for the hummingbirds to bathe while in flight.
What plants to use to entice the hummingbirds?
There are a host of plants that can be used to attract hummingbirds, but I opted for a combination of annuals and perennials.
The plants include three Cuphea annual plants (also go by the names firecracker plant or Vermillion), Salvia black and blue annual, columbines, petunias, fuschia and perennial salvia. Very nearby are several cardinal flowers as well as two stands of bee balm.
I have also used plants to create a more natural feel around the pond, including maidenhair and Boston ferns, scouring rush (used in a separate container as well as inside the pond), a hardy dwarf water lilly and pond, a pond bluebell and oxygenators to keep the water fresh.
For a complete list of some of the best hummingbird plants to use in containers or even hanging baskets, check out my earlier post here.
Best hummingbird feeders
When you are choosing the feeders for your hummingbird hangout, consider offering at least a couple of alternatives. I have two feeders hanging from a birch tree directly over the pond and container plants. Another large glass feeder hangs nearby.
One of the two feeders hanging in the birch tree is a large glass feeder, the other is a small tubular feeder that is meant to be hung in a container or hanging basket. Because it is so light, I can hang it out on a small branch for easy access by the hummingbirds. Without any doubt, this is their favourite. In fact, it is so popular I am having to fill up the feeder on a daily basis.
The larger, glass feeder is a great backup in case the smaller tubular feeder is emptied before I can refill it.
I’ve had this larger glass feeder for years and it has performed well, and is easy to clean.
Neither the larger glass feeder or the smaller tubular feeder have perches for the birds to sit on while they feed, but the large feeder nearby has four perches for the birds to feed while resting. The hummingbirds seem to like the perches at times, especially if they are feeding for a prolonged period.
Although the feeders in the hangout don’t have feeding perches for the hummingbirds, I have included a small branch for the birds to land on just above the waterfalls, as well as a larger branch for other birds to stop by a check out the neighbourhood.
However, the birds tend to just hang out in the many small branches provided by the birch tree.
In fact, the hummingbird hangout sits on our patio on the edge of what I like to call our birch grove. The area is made up of three large clump birches overhanging a dry-river bed with a bubbling rock at one end. The shady area is a favourite spot for birds looking for insects and a quick visit to the bubbling rock.
Birch trees attract a lot of insects and caterpillars to the garden and therefore are important trees for hummingbirds and other birds during nesting season when they need an abundance of protein to feed their growing offspring.

Creeping phlox: Ground cover adds splash of purple to the garden
If you are looking to add a splash of purple to your landscape, look no further than creeping phlox. This tough ground cover is a standout in spring when it blooms profusely.
Purple ground cover shines in spring but sparkles all year round
Purple has become one of the trendy colours in the garden, and one of the best ways I’ve found to get it is with a healthy addition of creeping phlox.
Not only are the purple flowers stunning in spring when they bloom for weeks, the foliage remains an attractive almost-moss-like mass of deep green throughout the summer long after the flowers have disappeared.

I never get tired of seeing the creeping phlox flowing down between the large boulders holding back the garden along the driveway.
Where to grow creeping phlox
Creeping phlox (Phlox subulate) is a real favourite in hot, sunny locations where it is happy to take in the full-day sun.
We have ours growing in the front of our property, where it not only gets full hot sun for most of the day, but also gets snow and road salt piled high onto it throughout the winter.
Not only does it keep coming back, it just performs and even gets better as it slowly spreads with each passing year.
If creeping phlox can take this type of abuse, it will grow happily in less taxing conditions in a sunny or even part-shade area of the garden.
Our neighbours have a nice patch growing as a low ground cover in a more traditional garden.
If you are trying to grow it in a shady woodland garden, look for Phlox stolonifera, which is a similar spreading, mat-forming phlox native to wooded areas and along stream banks in the Appalachian Mountains and other parts of North America.

Purple creeping phlox weaves its way through the river rock, boulders and ornamental grasses during its early spring bloom that lasts for weeks.
It really shines in early spring when the normally dark green prostrate plant bursts with lavender flowers.
It’s a real show-stopper in our front garden as it creeps among and weaves through the low-growing, ornamental grasses and onto the stones of the dry river bed.
It has also been encouraged to grow up against large boulders that separate the raised garden from the driveway.
In some areas it literally flows down between the large boulders creating a lovely soft edge to the rather hard-edged boulders. I never get tired of seeing the flowers flowing down between the boulders almost like a stream finding its way through the mountainside.

Creeping phlox weaves its way through low-growing ornamental grasses.
The purple flowers also blend in nicely with another mossy alternative, creeping thyme, that also grows over and along the large boulders. Together they form a nice tapestry in the spring with their purple flowers that are quick to attract pollinators, including our native bees out early looking for nectar and pollen sources.
Is creeping phlox invasive?
Creeping Phlox spreads rapidly and, while it puts on quite the display in the spring, it takes a back seat for the remainder of the year forming a perfect dark green backdrop for our blue-green grasses that emerge through the ground cover in this hot sunny, dry area of our garden.
It is not an invasive plant. In fact, its shallow roots make it easy to pull up and transplant in another part of the garden or share with a neighbour.

Creeping phlox puts on its display in early spring with its vibrant purple/mauve flowers that cover the plant in masses.
Is creeping phlox deer resistant?
The foliage mats are cushion-like, resembling moss, hence the common name of moss phlox. It is native to the central and eastern portions of Canada and the United States.
This herbaceous perennial grows in zones 3 to 9 in a rich, well-drained soil and comes in pink, red, white, blue, rose and lavender.
It’s a tidy plant that grows up to about 6 inches high with a spread of up to 2 feet for a single plant.
It eventually forms a thick mat and, for Woodland gardeners, it’s deer resistant. The fact our resident deer leave it be, should be enough to put reeping phlox high on anyone’s list of plants.
Creeping phlox likes full sun but tolerates some shade.
An added bonus is that it also attracts butterflies and provides an early food source for insects in the spring where it will be one of the first to bloom in your garden.
Looking for more information on ground covers? Please check out my other posts on ground covers I use in the woodland garden.
• Bunchberry ideal ground cover
• What is the easiest ground cover to grow?
• Creeping thyme as a ground cover
• Moss and moss-like ground covers
• Virginia Creeper as a vine or ground cover
Should you find a spot for creeping phlox in your garden?
There is always room for a little creeping phlox in a garden either as a spot of colour in the front of a garden bed or used as a ground cover where other taller plants are grown up through it.
It’s a tough plant that can take lots of abuse and continue to shine. In fact, several years ago ours was more or less dug up when we installed large boulders down the side of our driveway. When the project was completed, I took what little of the phlox remained and put it back in the area where it was dug up.
Within a year it was back and performing with its same vigour.
If you are looking to add a little purple to areas of your garden, you should consider adding this hardy, tough little plant to your garden beds or rock garden.

A weekend of warblers in the woodland garden
It was an unforgettable weekend of warblers in the woodland garden. Here’s how it happened and how it can happen to you if you create the right habitat.
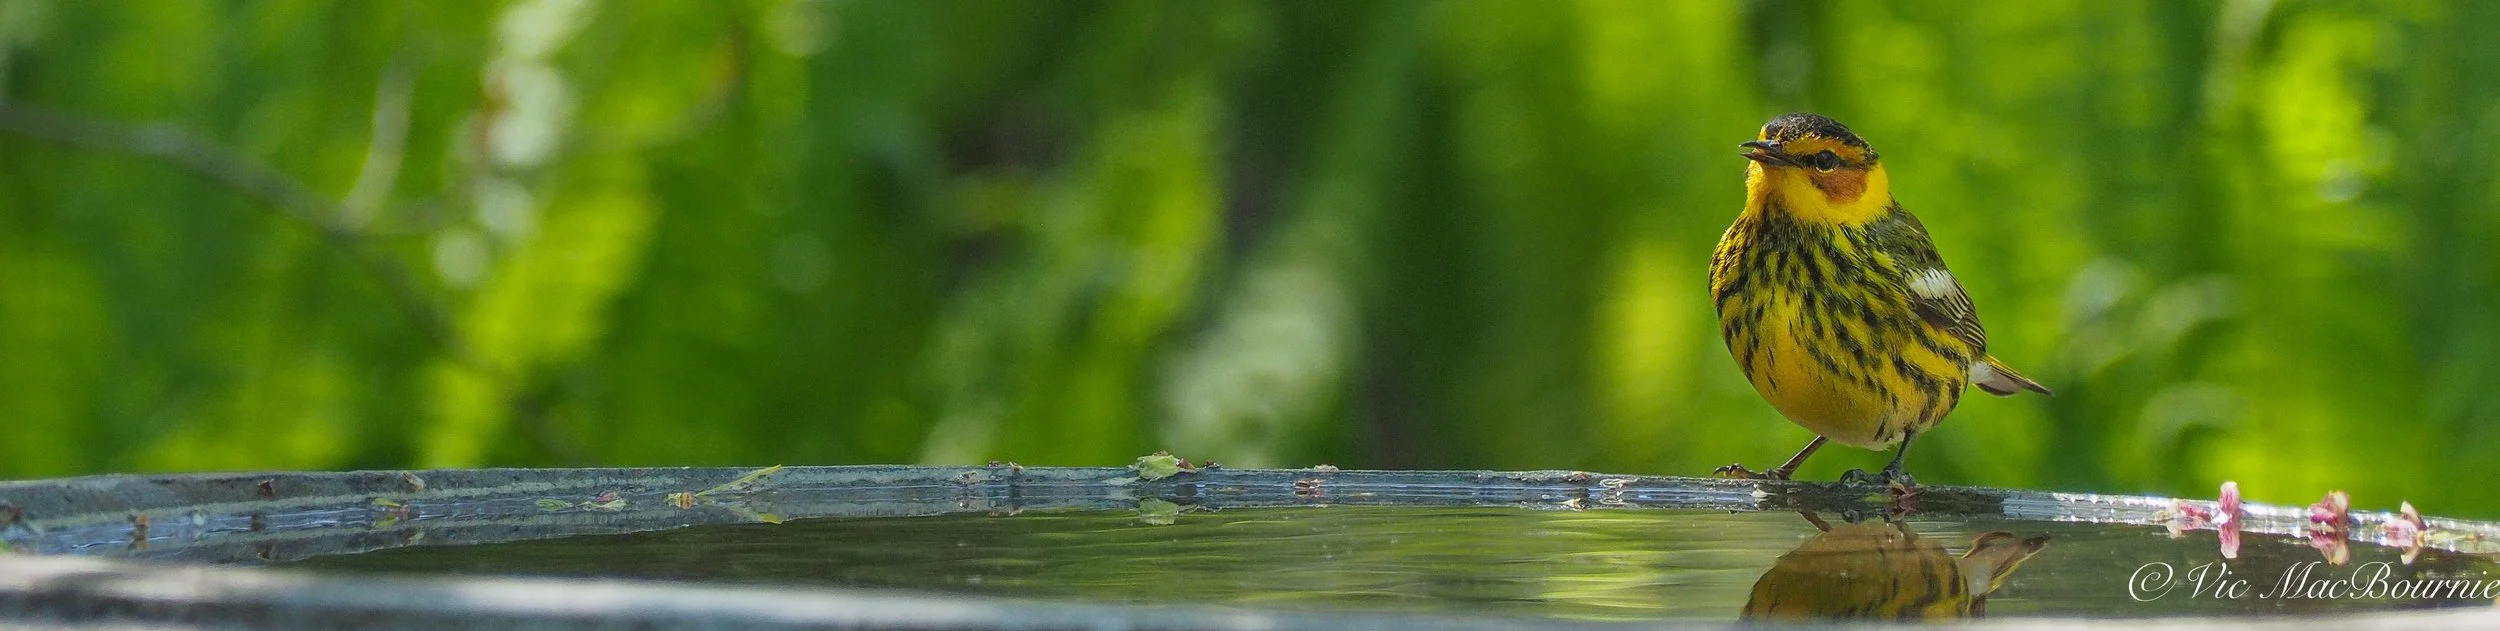
A Cape May warbler stopping by in the garden to feast on insects and my selection of reliable water sources.
How to attract warblers, even for a weekend
It was an unforgettable Mother’s Day weekend of warblers in our woodland garden.
It started with a quick glimpse of what appeared to be a Blackburnian warbler flitting about in the blooms of our yellow magnolia tree capturing insects, and ended with me sitting in my Tragopan photo blind photographing warblers from a few feet away as they came down for a drink in one of our many bird baths. The bird bath that seemed to attract them most happened to be directly under a flowering dogwood in full bloom.
Some non-birders (my wife included) might say “so what, they’re just birds.”
To that I say: “No, warblers aren’t just any birds. They’re special, and these species don’t normally hang out in gardens. At least not where I live in Southern Ontario.”
We had Blackburnians, Cape May and Yellow-Rumped warblers… and that’s just the ones I saw.
In fact, most birders know full well that the annual pilgrimage to Pt. Pelee’s Festival of Birds, on Canada’s southern most tip, is really one of the only ways to catch a glimpse and hopefully a photograph one or two of some of these more rare warblers that are all filtered to the tiny spit of sandy forest on Lake Erie. Most of the birds are so exhausted from flying over the lake that they take refuge at the Point of land and, in many situations, allow a close approach.
Birders come from around the world just to catch a glimpse of some of these rare warblers and other migratory birds.
So, to have a few drop down into our little woodland during their migration to more northern locations, is an honour I don’t take lightly.
In fact, for a brief second or two, I had two Cape May warblers (see image below) drinking from the bird bath at one time.

This Yellow Rumped warbler was one of several warblers that dropped down into our garden for the weekend.
How many warbler species worldwide, in North America?
Warblers are one of the most common types of birds, and, hence, they have a wide distribution, covering Africa, Europe, North and South America, Australia, Asia, the Pacific islands, and the subarctic region.
I read recently that Old World (Europe) warblers are in the family called Sylviidae and comprise close to 350 species. In Europe they are related to the thrushes and the flycatchers.
Although warblers look similar and are often mistaken for finches, wrens, or sparrows, they are not related songbirds.
Here, in what is considered the New World (North America), there are 52 species of warbler. In North America, Warblers are members of the wood-warbler family (Parulidae). Worldwide, there are 13 families called warblers.
That’s a lot of warblers worldwide.
But, I would bet that most people (outside of birders) have either never seen a warbler, or would not be able to identify one even if they did.
Warblers are a group of small birds that are also known as perching birds. Their plumage can range from drab colours like gray and brown to bright colours like vibrant red, blue, and yellow.
They might be best know for their trilling and quavering songs, which is actually how they earned their name. Their songs range from rather dull to loud and piercing mating calls in spring.
The name warbler actually comes from an Old French word “werbler,” which means to sing in trills.
How far do warblers migrate?
Identifying their calls might be the easiest way to know they are in the garden.
Their beautiful, almost tropical-sounding songs, are a reminder of how far they’ve migrated to get to our gardens. Many are travelling from Central and south America to far reaches of northern Canada to breed.
Are warblers common in the garden?
One of the reasons more gardeners are not familiar with these birds is because they are not common backyard birds.
The warblers that do visit backyards are elusive and most often spend their time higher up in the tree canopy where they have access to more insects, caterpillars etc.
So, even the more common warblers like the Yellow warbler, often go unnoticed by most casual gardeners who may mistake the flash of yellow for a Goldfinch or even a female oriole.

The Cornell lab or Ornithology is an excellent place to go for help identifying these birds or to get more information.
Can you attract warblers with typical birdfeeders?
Your typical birdfeeder full of sunflower, millet and other goodies is not going to bring warblers into the yard.
You need insects, caterpillars and other creepy crawlies to attract these primarily insect-eating little beauties.
And, for so many gardeners, that’s the problem.
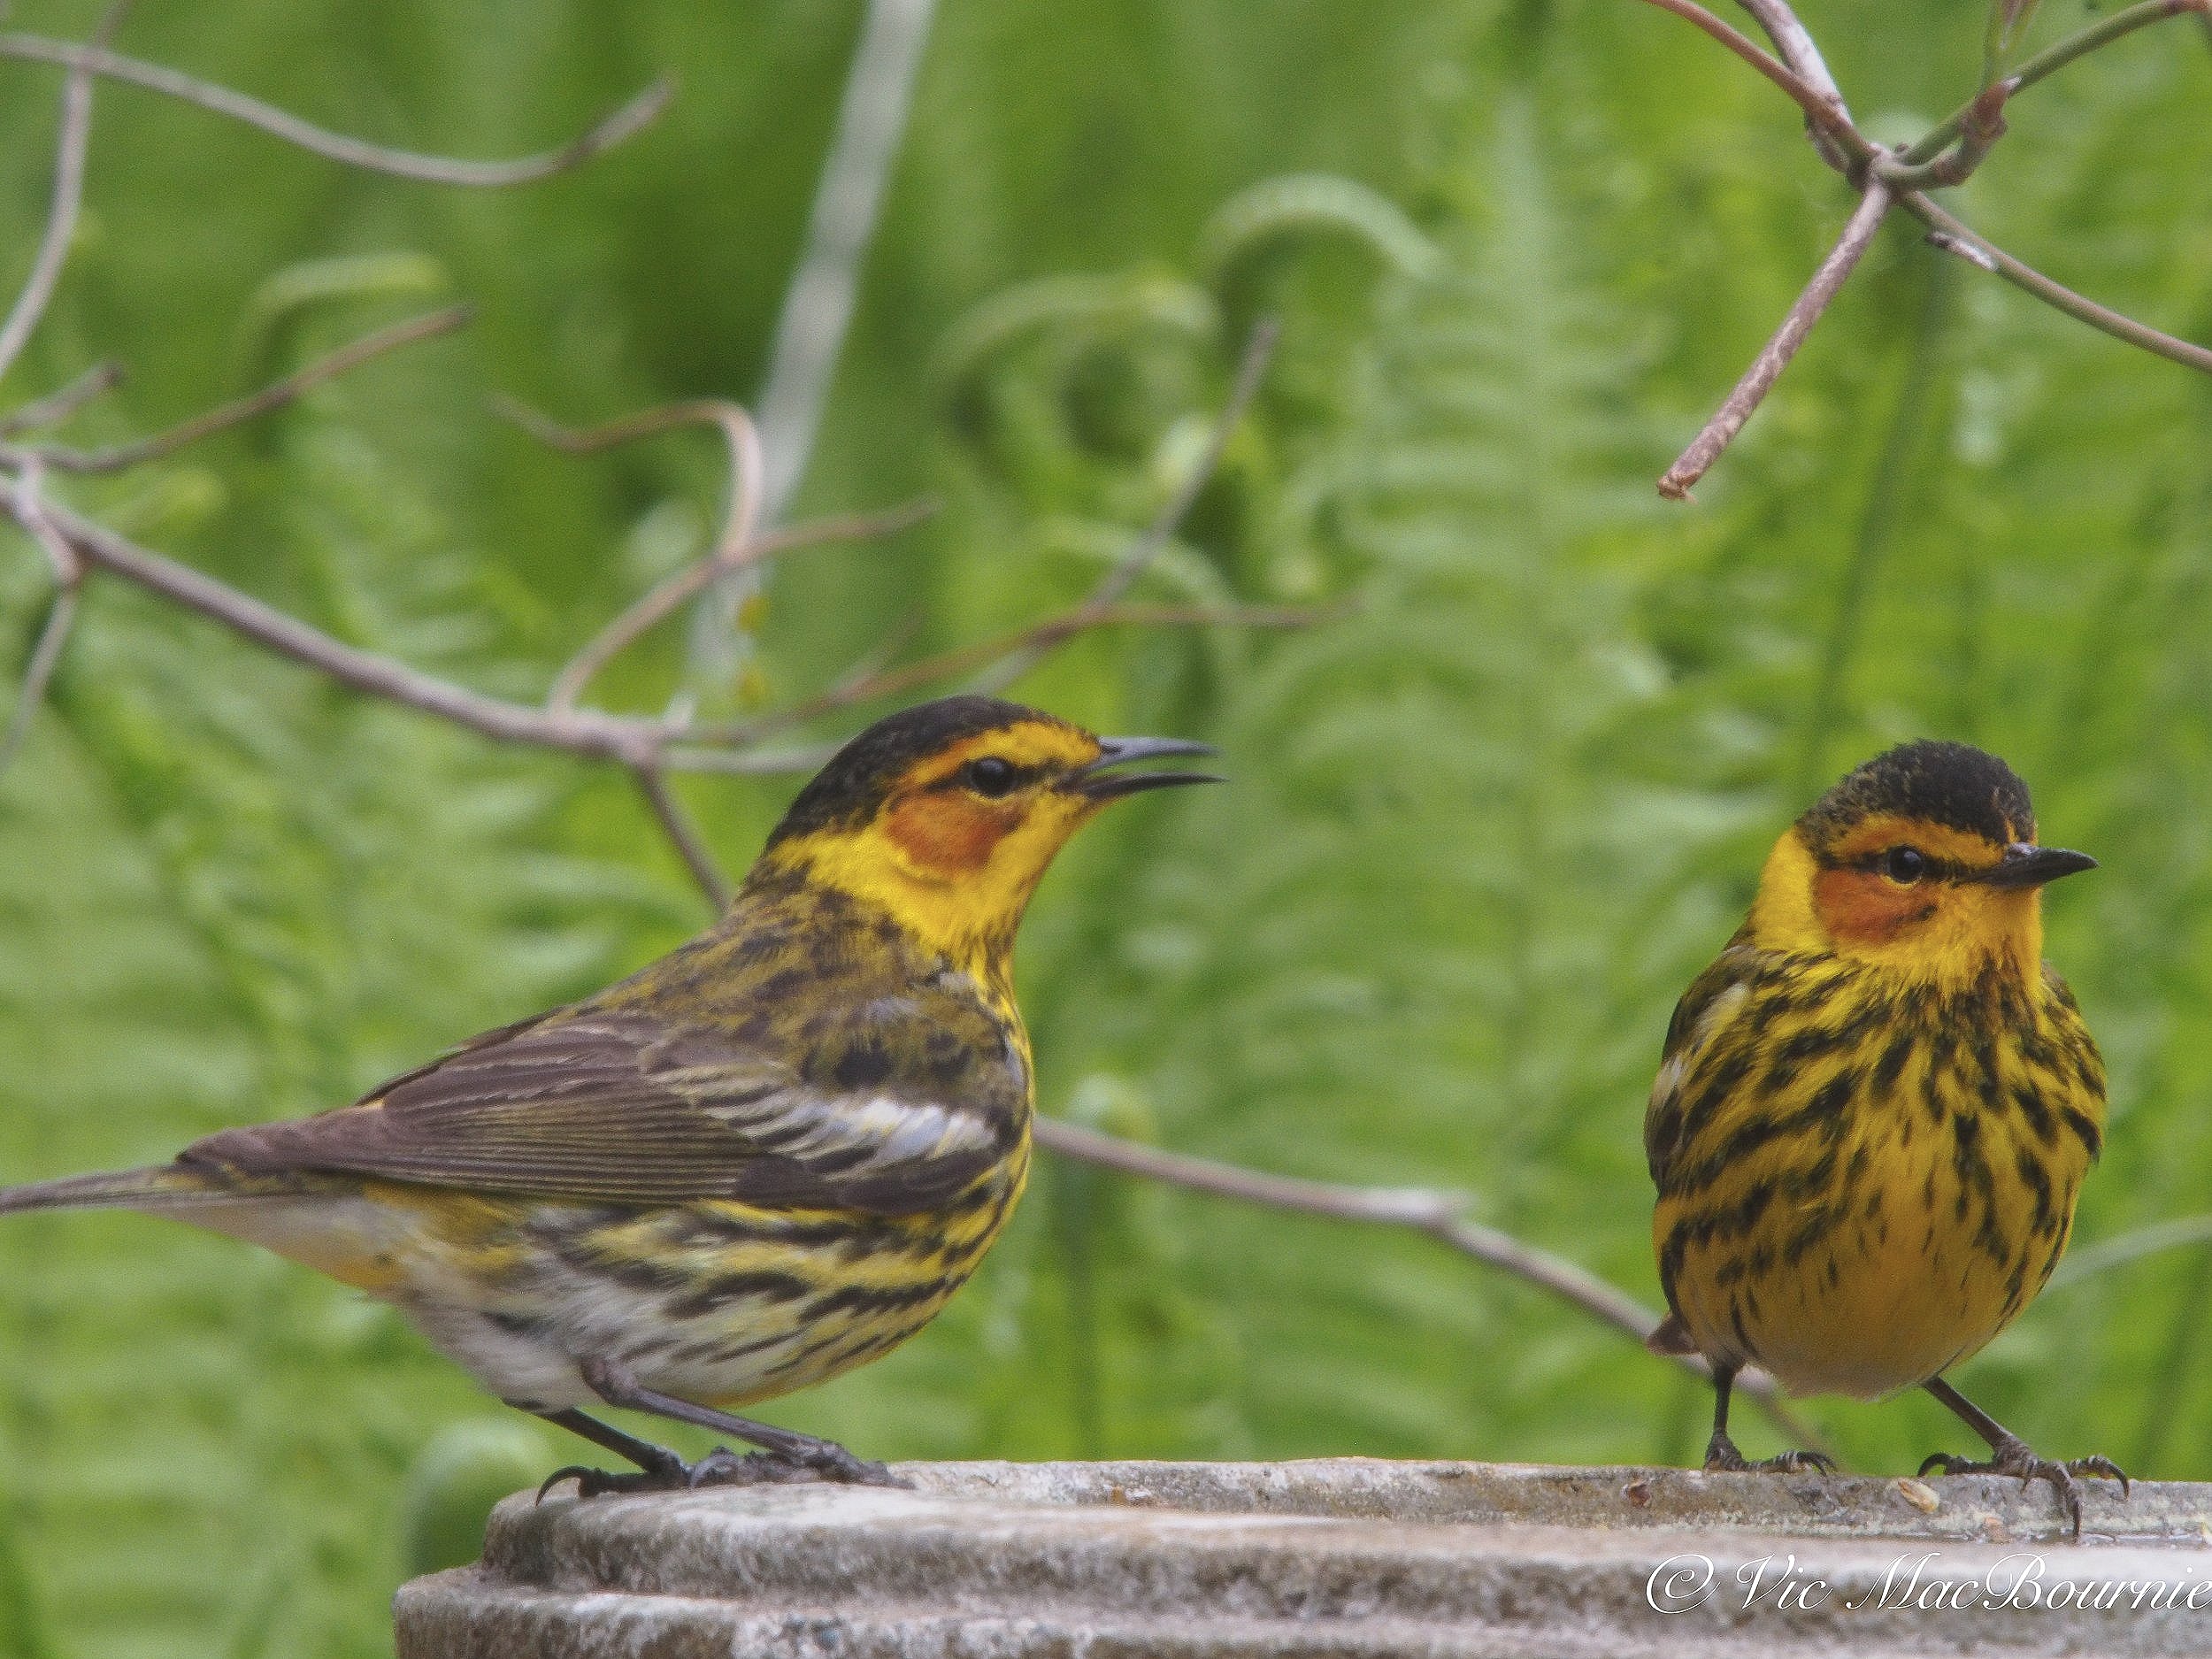
Two Cape May warblers enjoying one of our bird baths. To capture a single Cape May warbler is thrilling enough, but to get two in one frame was a real thrill.
One only needs to go on any of the garden forums on Facebook to read about the insect carnage.
In fact, I am finding it extremely difficult these days to follow garden groups on Facebook when every second question is about how to kill insects and caterpillars in the garden.
Let me scream it from the tree tops: “It’s natural to have insects, caterpillars and other creepy crawlies in your garden. Let Mother Nature take care of them the way she has for thousands of years. This IS birdfood.”
Okay, sorry for the rant.
And, I’m not saying there are not situations where action needs to be taken to deal with a major infestation, but it should be rare rather than a daily occurrence in the garden.
How can we attract warblers?
But, back to weekend warblers in the woodland garden.
I am convinced – or at least I’m going to try to convince myself – that one of the reasons the warblers chose our garden to spend a few days is the availability of insect life, and reliable sources of water in several areas of the garden.
Without these, the warblers would have had no reason to drop down preferring to continue on their way to better locations.
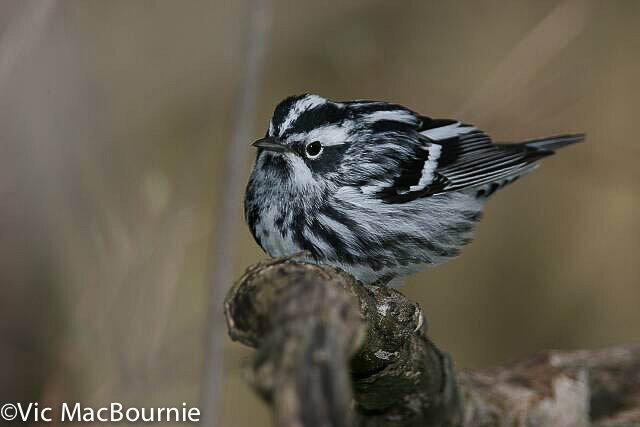
Black and White warblers are less colourful than most but are beautiful in their own simplicity.
To make the weekend of warblers even more special for me, is the fact that we are surrounded by acres of wild forest that I’m sure would have been an excellent source of food for these warblers.
But, by intensifying the availability of insects through a variety of native plants, shrubs and trees, our gardens can become magnets for migrating birds in need of quick hits of energy via insects and caterpillars. Also, I witnessed a number of the warblers rooting around in the fallen leaves for insects.
Some, like Indigo Buntings and Orioles, (links to my posts) might stick around and call our garden home for the summer. If so, they, along with more common backyard birds who depend on an abundance of insects and caterpillars in spring to feed their offspring, will help to keep any outbreak in check while they bring life, colour and their sweet songs to our gardens.
So, if you hope to attract warblers to your garden, even for just a short period during migration, you need to ensure the following:
Reliable sources of fresh water preferably in a variety of birdbaths and natural looking ponds including patio container ponds and on-ground baths. A natural pond with easy access to shallow areas is excellent for all wildlife.
Native plants, shrubs and trees that in turn attract plenty of insects, spiders, caterpillars and other creepy crawlies. Oaks, willows and birch trees are good starters but our warblers seemed to be drawn to our flowering yellow magnolia and dogwoods, which no doubt were attracting insects to the garden.
Leave your fallen leaves. I noticed that the warblers were often on the ground rooting through the fallen leaves from the previous fall, which never really get “cleaned up” in our gardens. Most of the leaves stay where they fall and are just moved off walkways onto the gardens where the spring flowers force their way up through them.
Do not use any insecticides in the garden. Learn to live with the odd outbreak and let Mother Nature do her job to keep the garden in a natural, balanced state.

A Cape May warbler at the bird bath.
Interesting facts about warblers
• Warbler migration begins in April from South and Central America making their way down to Canada and the United States. Some, such as the Tennessee warbler and Magnolia warbler, fly farther north to breed in Canada’s boreal forest as well as a few small areas in the United States.
• The more common yellow warbler and yellow throat are seen throughout parts of Canada and the United States.

A beautiful but more common Yellow warbler searches the grasses for insects. Yellow warblers are more common in woodland gardens, especially those that have extensive forests or woodlots nearby and are hosts to native plants, shrubs and trees that attract insects and caterpillars.
• Warblers tend to have thin bills, which enable them to pick up and hold on to insects and caterpillars.
• Because of their colour and active lifestyle, they are often referred to as the butterflies of the bird world.
• Warblers are fast-flyers and can reach impressive speeds of up to 25 mph or (more than 40 kilometers per hour.)
• They can fly long distances: For example the Canada warbler travels more than 3,000 miles during migration
• Warblers songs: Warbler songs are used not only to attract mates, they’re also used to communicate with one another. Warbler mates have even been known to sing duets together.
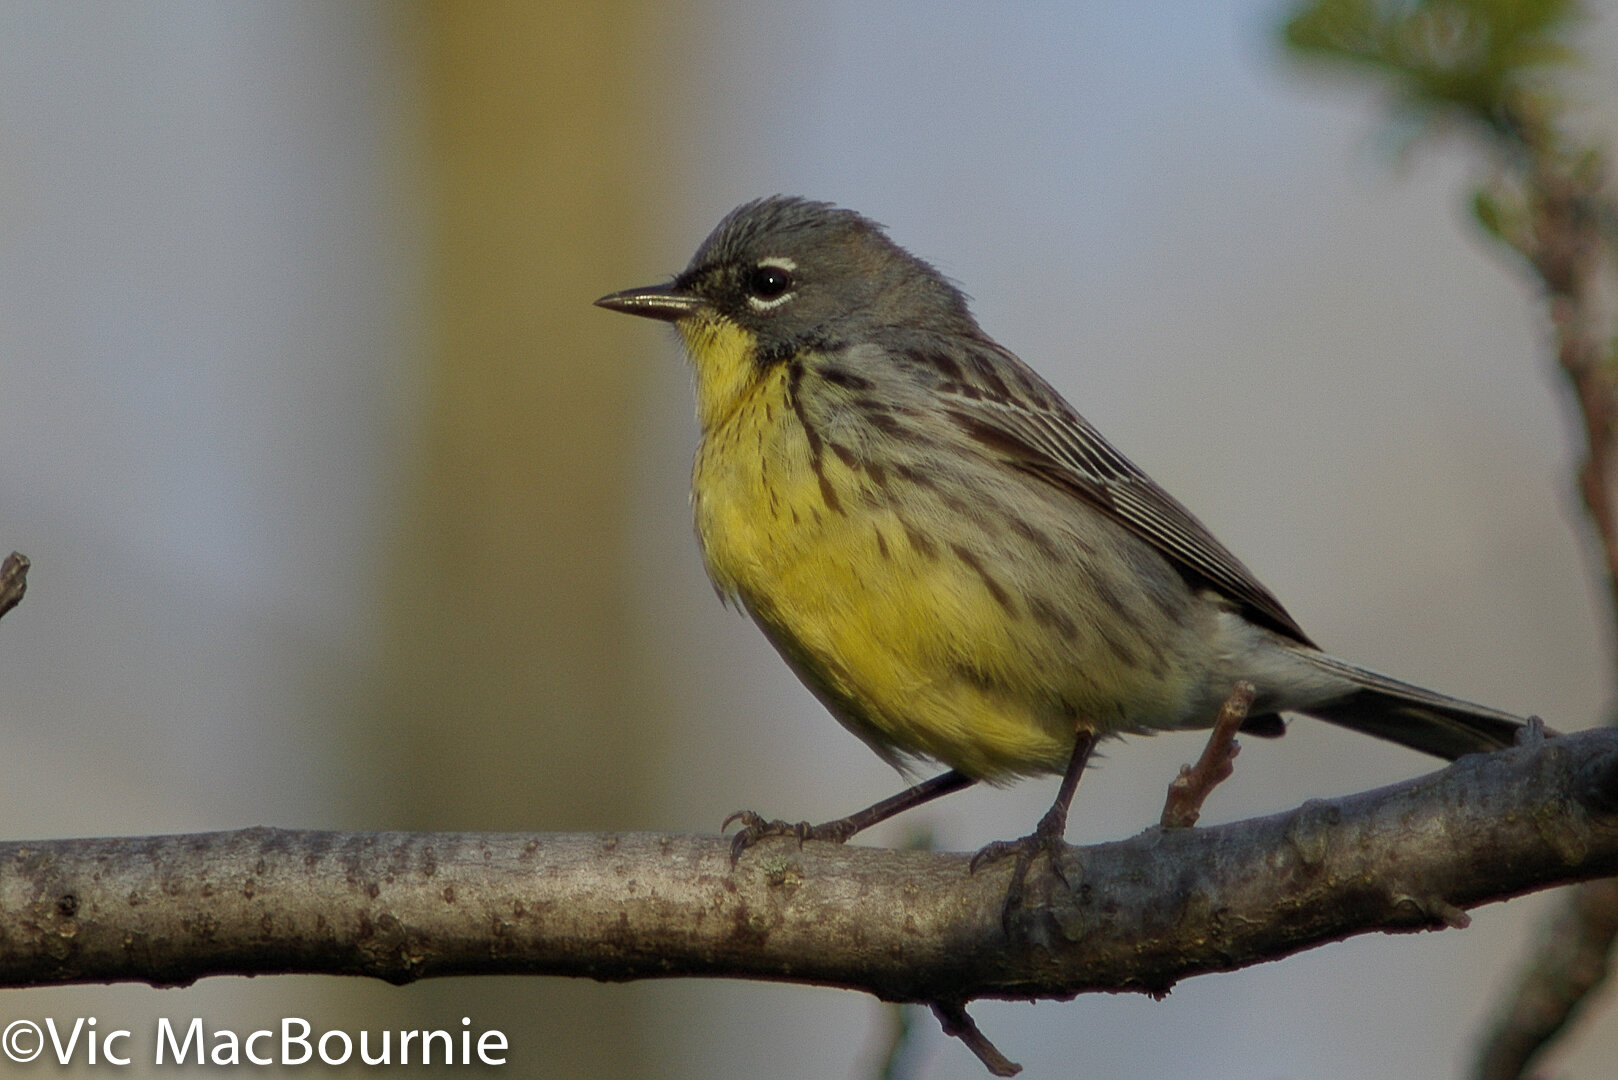
A more rare Northern Parula warbler photographed at Pt. Pelee National Park. These birds breed in eastern North America from southern Canada to Florida.
• Suet feeders likely play a role in helping these birds survive the worst winters. So, it is a good idea to keep suet out all winter for the birds and to keep an eye out for special visitors. Who knows, you might be lucky enough to be one of the few who can say they saw a warbler in the cold of winter.
• Warblers depend on the boreal forest. In fact, more than half of the warblers breed in the boreal forest which stretches from Alaska into Newfoundland.
• What do warblers eat most? Warblers mainly eat insects, spiders, caterpillars and mosquito larvae.
• Although most warblers are solitary birds, they can be seen at different times of the year in solitary pairs, small groups and in small families.
• Why are they called warblers? Warblers picked up their names from the trills of their songs.
• What is the biggest threat to warblers: Warblers obviously face many threats during migration from hitting high-rise buildings to being caught up in dangerous storms and not being able to find enough food to survive migration. Other threats include parasitism and, of course, the actions of humans through the use of herbicides and pesticides. Climate change also poses risks to these small birds either from sudden extreme weather conditions to changes that affect the availability of sufficient insects at crucial times of the year.
• Warblers build a variety of nests mostly in trees, but also can be found in tall grasses. These nests can range from typical small cup-like structures typical of most nests, to domes in grasses, in bushes, or even hidden inside the ground. Typical construction material ranges from whatever might be available to them including hair (human or animal), long grasses, spider webs, and soft mosses and lichens.
• Warblers generally have an incubation time of about 12 days. The females have an average clutch of 2. The baby birds fledge after about ten days and are independent of their parents after as little as 2-3 weeks.
In conclusion
Normally we don’t attract warblers to our gardens. Instead, they decide to grace us with their presence in our gardens. We can, however, create habitat that is inviting to warblers and hope that they recognize our efforts, even if it’s just for a weekend.
That same habitat will be an invitation, not only to warblers, but to a host of birds, butterflies, mammals and reptiles.
A healthy garden will be attractive to a greater variety of wildlife than we can even imagine. The results are dependent so much on the location and the environment where the garden exists. All we can do is our best to create a welcoming habitat and hope for the best.
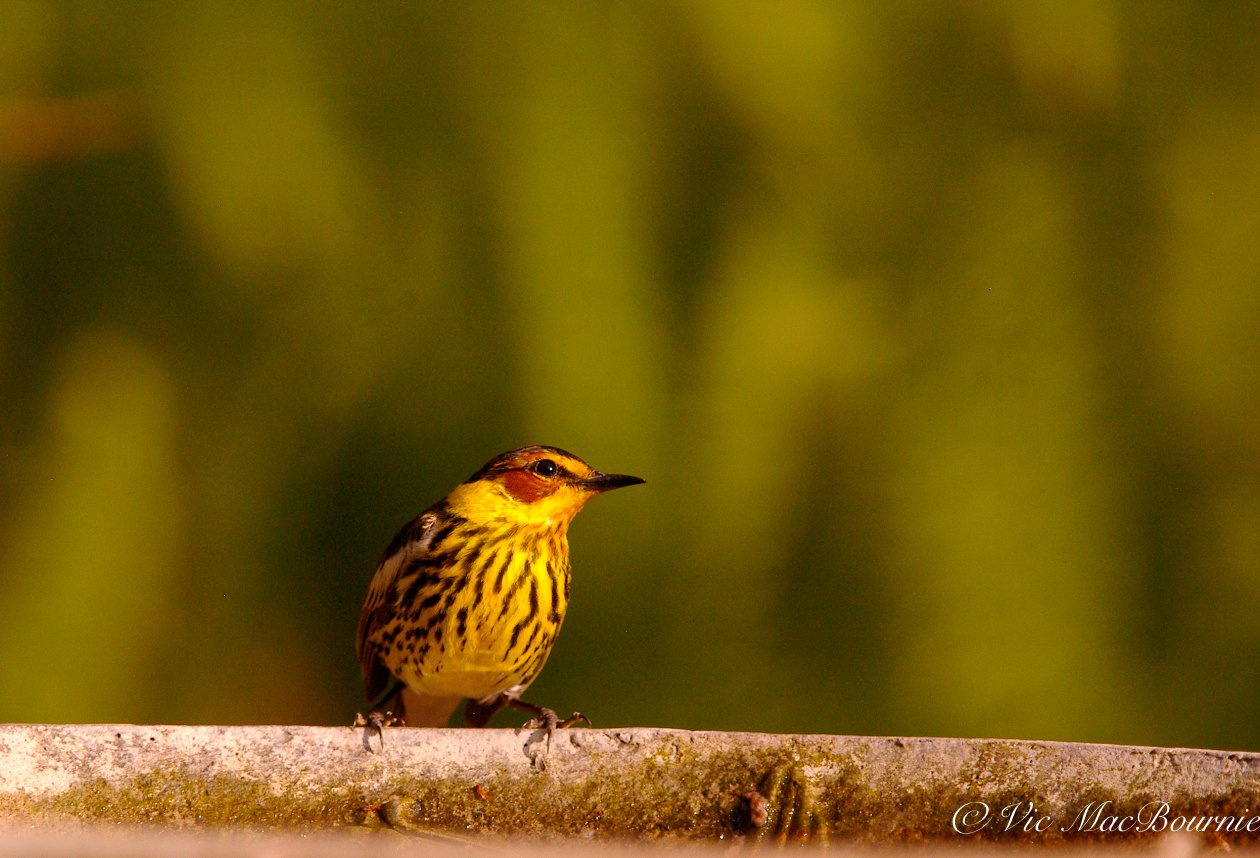
Photographing backyard Warblers, Robins and Blue Jays
For those interested in garden and wildlife photography, I thought I would give you a little background. While photographing warblers, I was also able to capture a robin and blue jay so I have included some of those images as well to illustrate the lens and camera capabilities.
My intro to bird photography
I’ll never forget my first introduction to serious bird photography.
It was at Pt. Pelee National Park during the Migratory Bird Festival when birders and bird photographers from around the world gather in great numbers to see and capture images of these tiny birds.
Let’s just say there were days when the photographers and birders outnumbered the birds 20:1. But it was certainly an eye-opening experience.
The bird photographers gear made the photojournalists at sporting events look like they were carrying point-and-shoot cameras and lenses compared to the monster lenses at the national park.
I can safely conclude that, judging from the size and quality of the lenses, many of the beautiful images you see of warblers come at a very hefty price tag.
Serious bird photography can be extremely expensive. Big, fast lenses can cost as much as a small used car. Not to mention the latest cameras, tripods and tripod heads. Add in the cost of overnight stays and travel to birding hot spots and you can imagine how the costs add up.
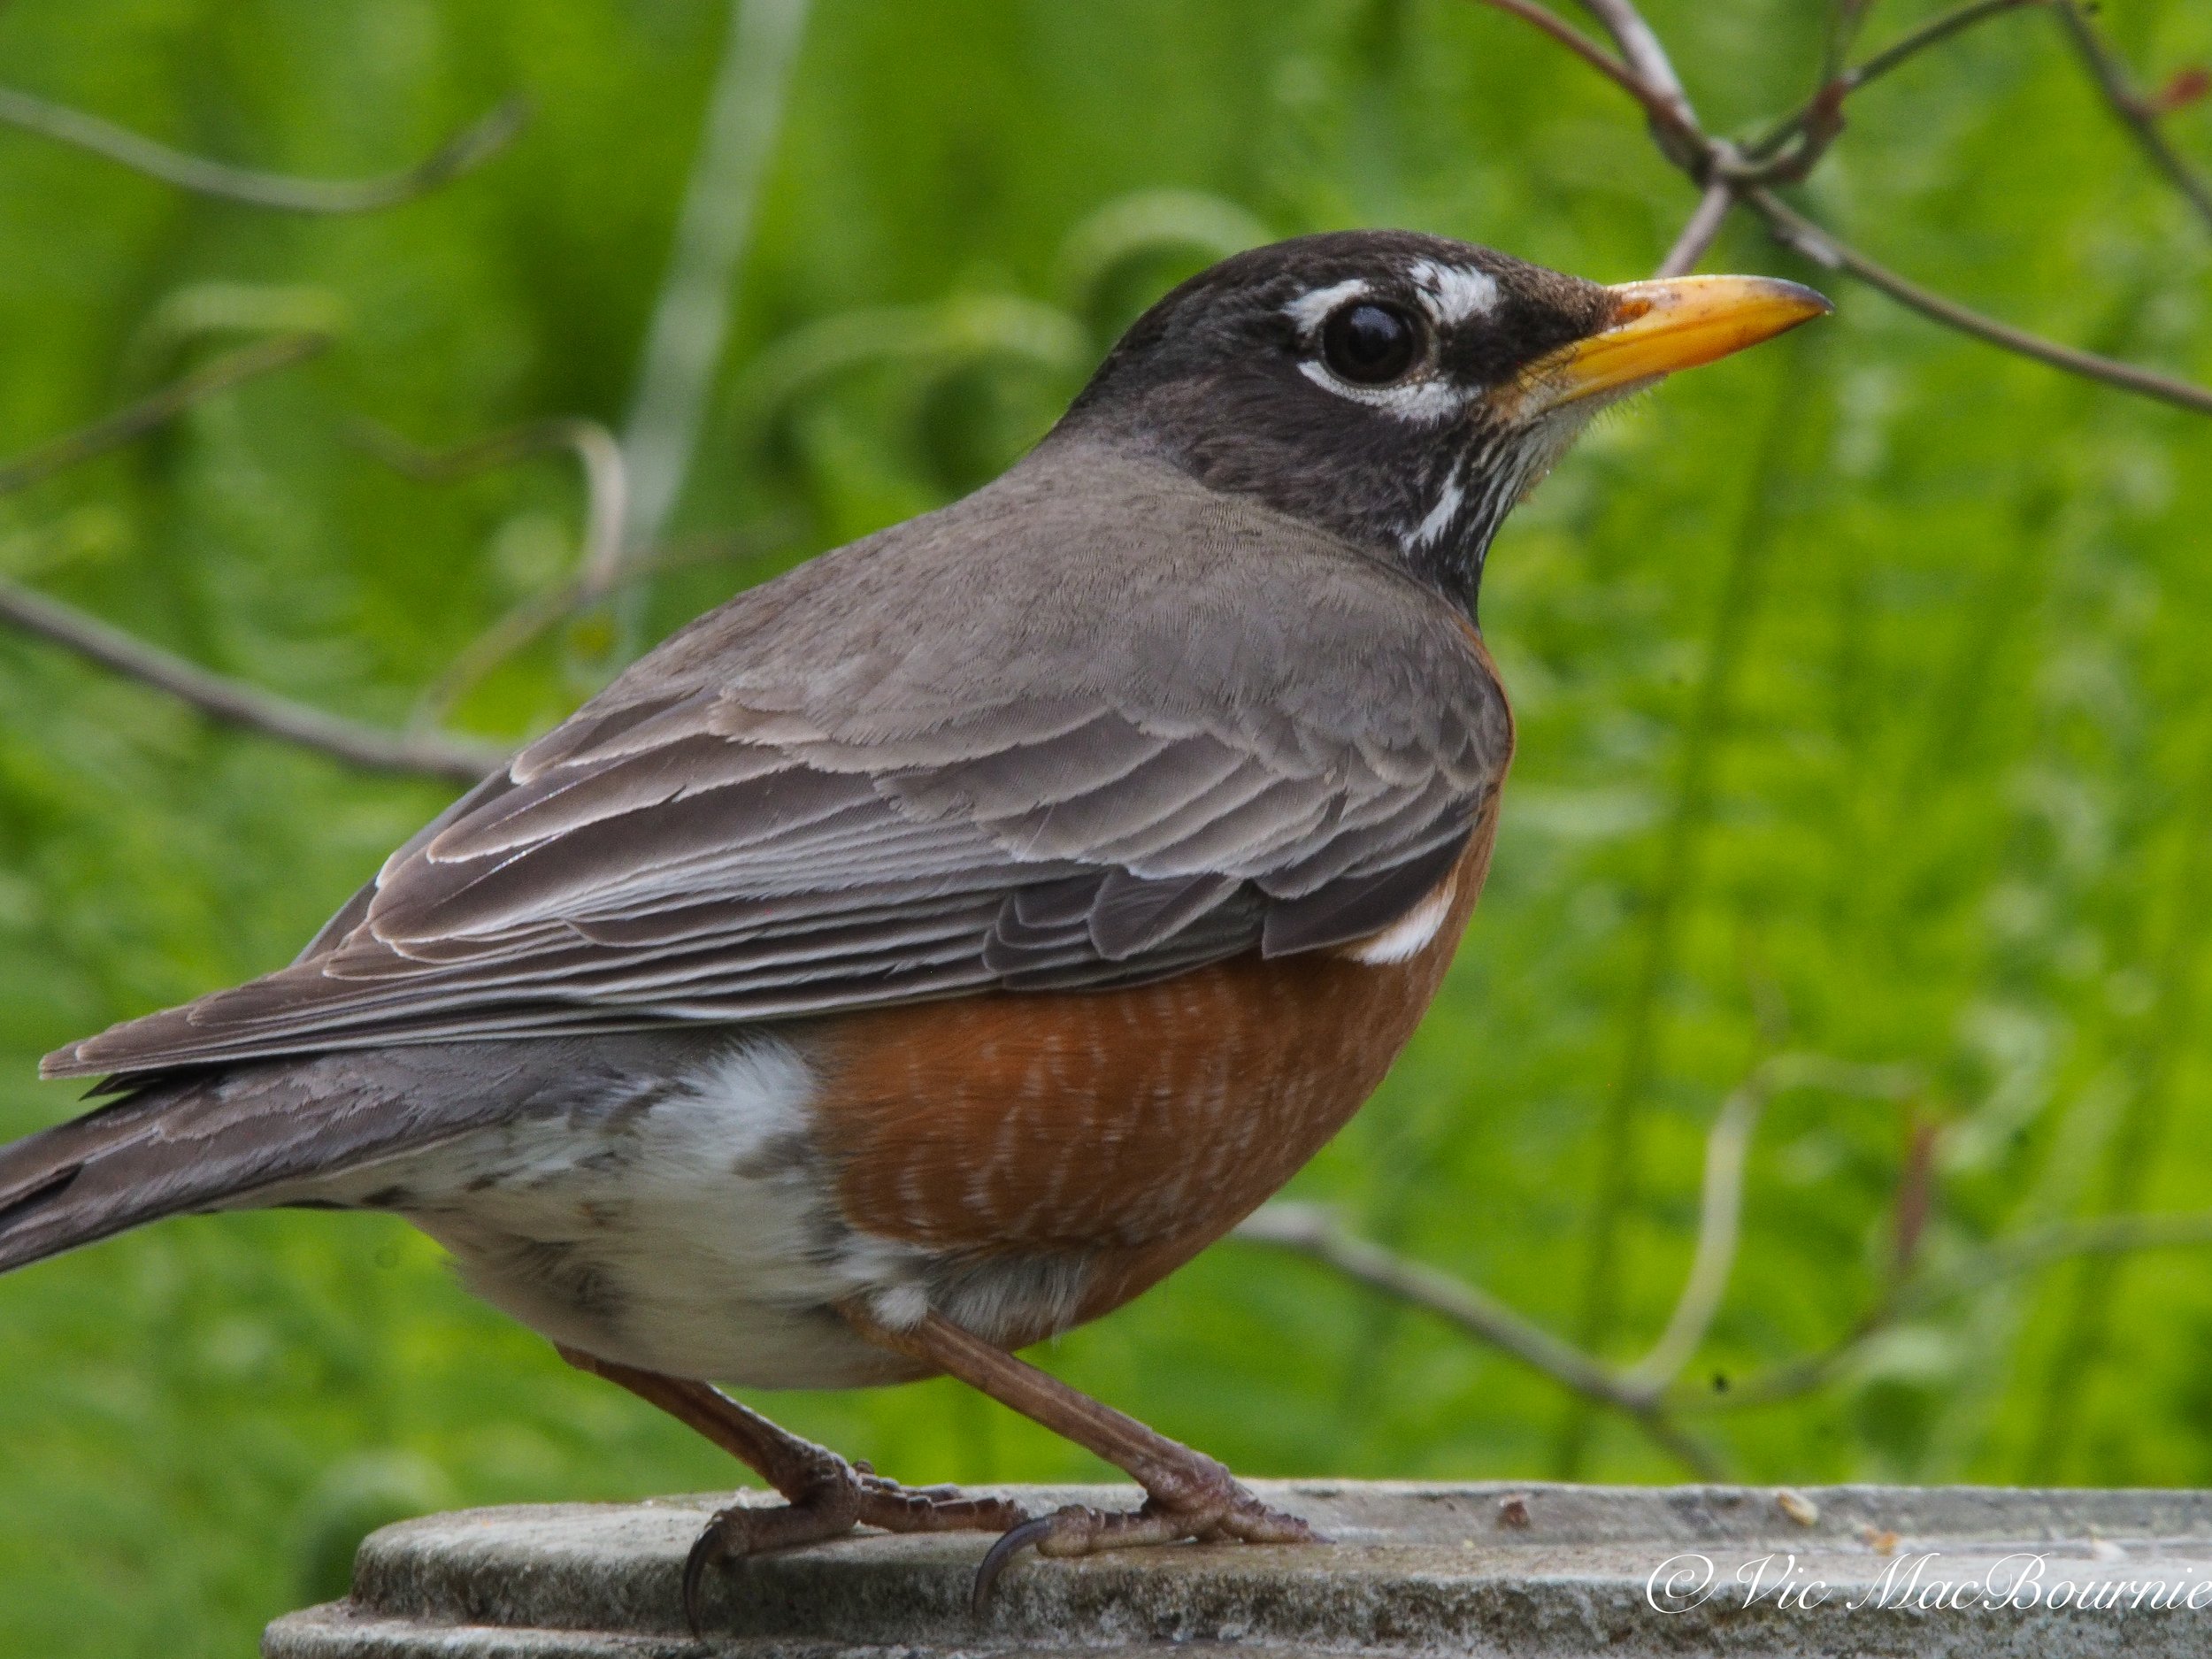
American Robin taken with Olympus EM-10 and Pentax 300mm F4.5 * lens with converter.
So, that makes stepping out into your backyard and catching a few shots of warblers almost priceless.
I was lucky enough to capture our weekend warblers with two very old cameras and a couple of vintage lenses: including a 20-year-old, 6 megapixel, Pentax istD and an 8-year-old Olympus OM-D E-M10 (link to my post) together with my favourite wildlife lens the 36-year-old Pentax 300mm F* f4.5 (link to my post) and the kit Olympus 40-150mm zoom lens.
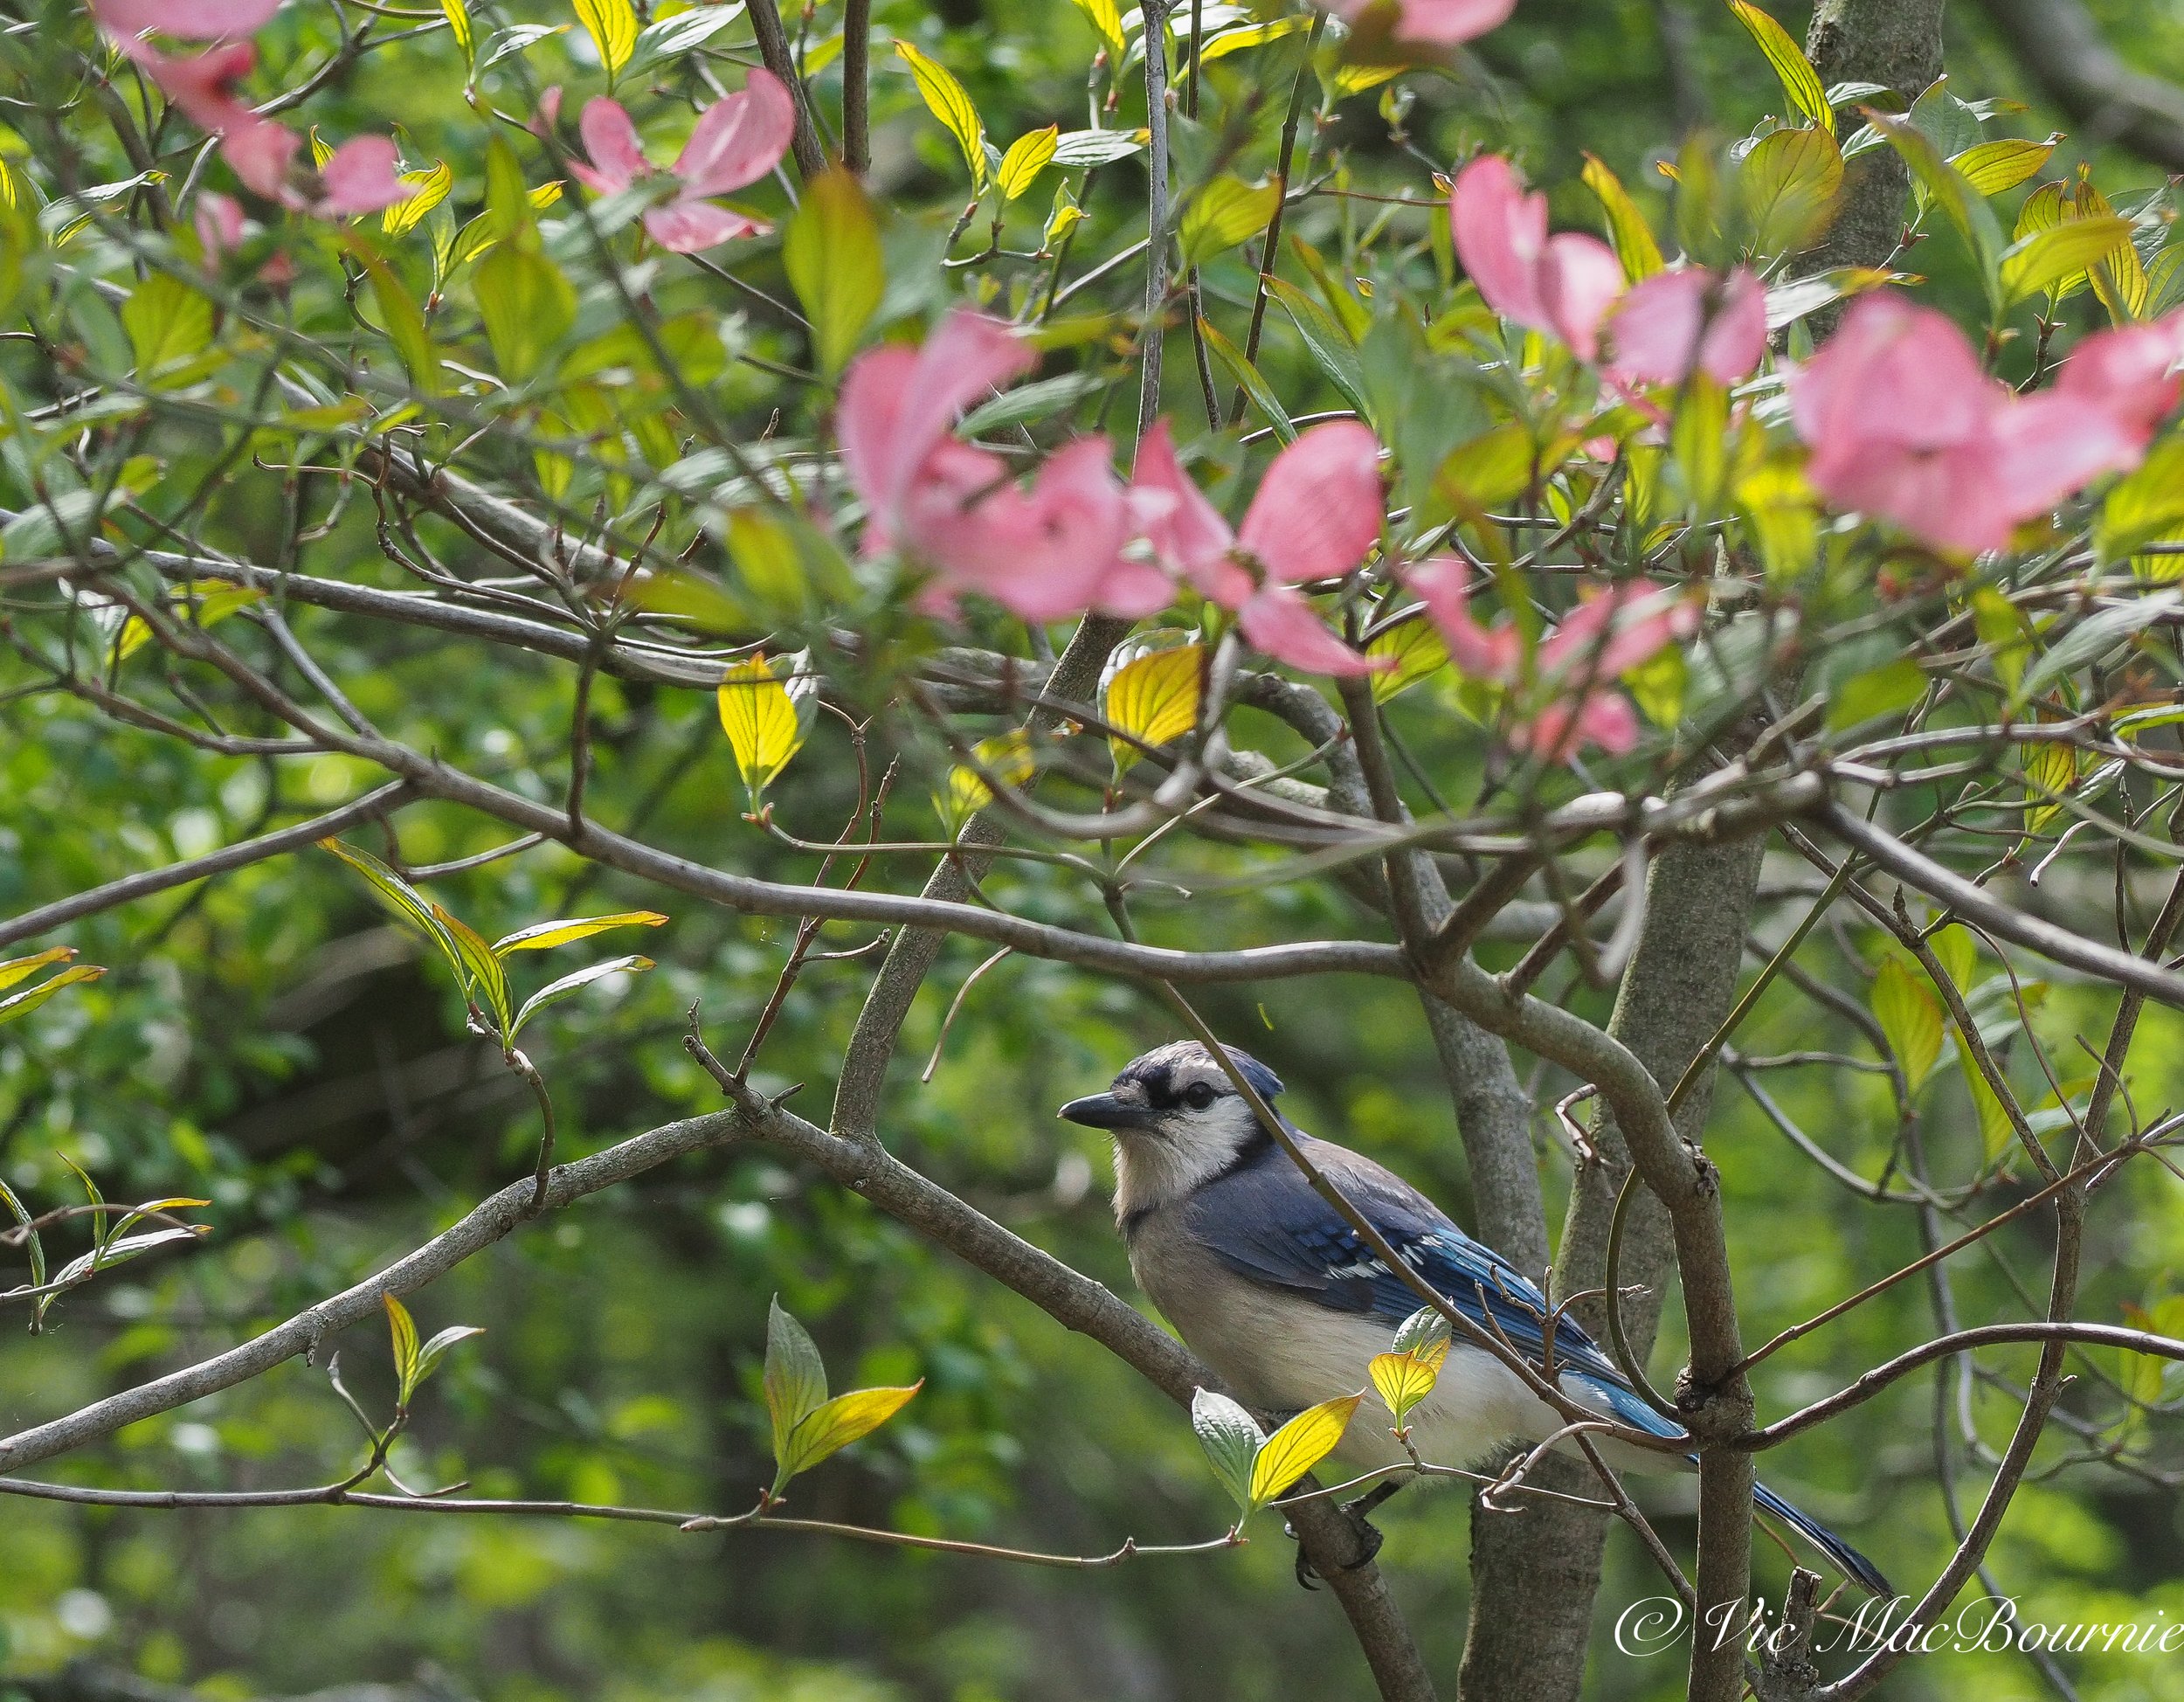
Blue jay photographed with the Olympus EM10 and 40-150mm lens.
The crop factor on the 300mm with the Pentax istD gives me the approximate equivalent of a 420mm lens. I also used a converter on the Olympus that allowed me to attach the 300mm lens to the Olympus with a crop factor of two creating the equivalent of a 600mm lens.
The converter does not transmit any information to the camera and turns the lens from autofocus to manual focus. The Olympus, like many micro4/3 cameras have features that make using manual focus lenses much easier to use.
All this being said, capturing images of these tiny birds would not have been easy without my secret weapon.
The secret weapon for me is the Tragopan photographic blind that allowed me to get in very close to the birds. Once I recognized that the birds were regularly frequenting one of our bird baths, it was a simple matter to set up the blind near the birdbath and wait them out.
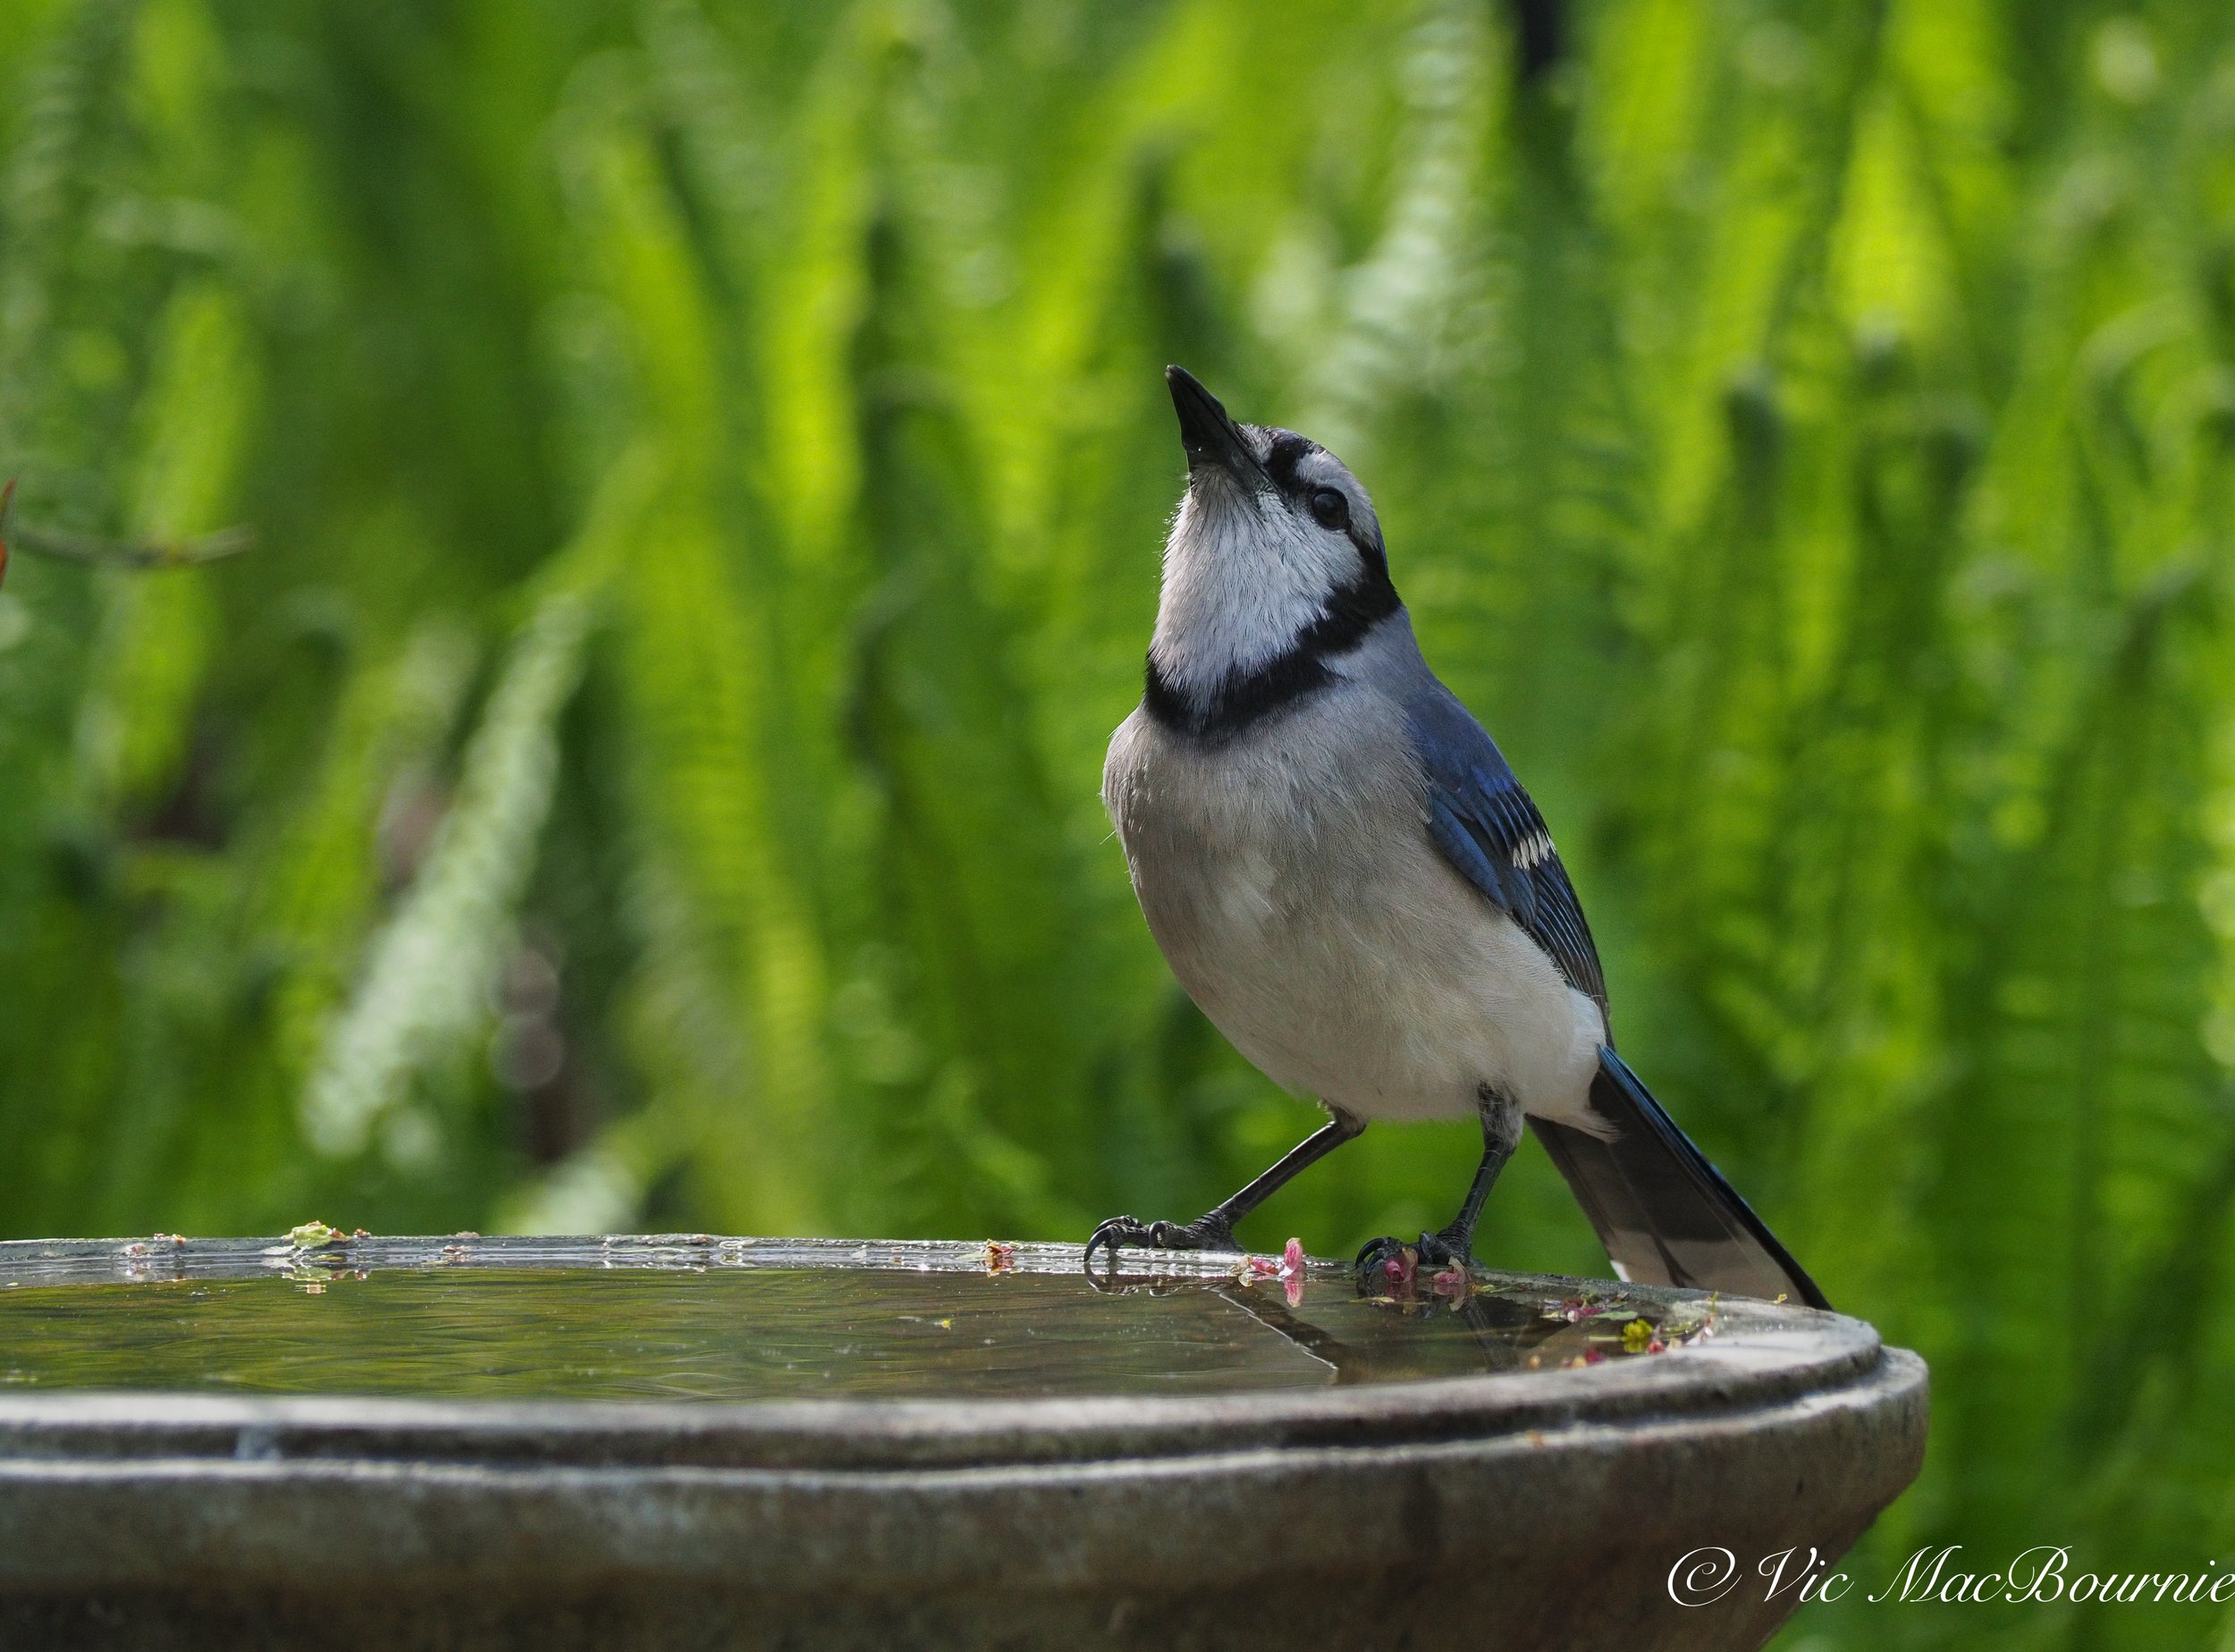
Blue Jay at bird bath taken with the Olympus EM-10 and 40-150mm at 150mm (equivalent to 300mm).
My goal was to capture an image of a warbler in the flowering dogwood. Unfortunately, I was unable to capture that shot, but I did manage to get them on the bird bath. During the process, I was able to capture a blue jay in the dogwood tree and on the birdbath. (see above).

Nature’s garden art (Five tips and DIY ideas)
Garden art comes in many forms in a Woodland Garden, from nature in the form of a moss-covered boulder or a fallen tree branch to a rusty buck standing watch over the garden. Garden art can be subtle or add a little whimsy to your outdoor space.

This late winter image shows how garden art like this Easter Island head, can add interest to the garden even in late winter when the garden is not at its best.
Mother nature provides its own artistic touch
If you are looking for garden art to enhance your woodland, look no further than Mother Nature – a mossy boulder, an elegant tree branch rising out from a bed of ferns. This is nature’s art at its finest.
If we take the time to really look carefully, nature often provides her art to us for free.
Fallen pine cones that “litter” the ground are works of art in themselves.
The moss-covered tree trunk works perfectly placed along the woodland pathway.
These are the gifts nature gives us if we look for them.
Look for natural materials that get better with age
But relying entirely on natural elements as art may not be enough to satisfy every gardener’s desire to inject a little sophistication and a touch of elegance into their woodland.
If you are looking to purchase artistic elements for your garden, consider investing in natural materials that age gracefully. Almost anything made with copper will improve with age.
That patina copper takes on with age is just too beautiful not to invest in if given the chance.
I think garden art works best when it is not only elegant and sophisticated, but serves a useful purpose.
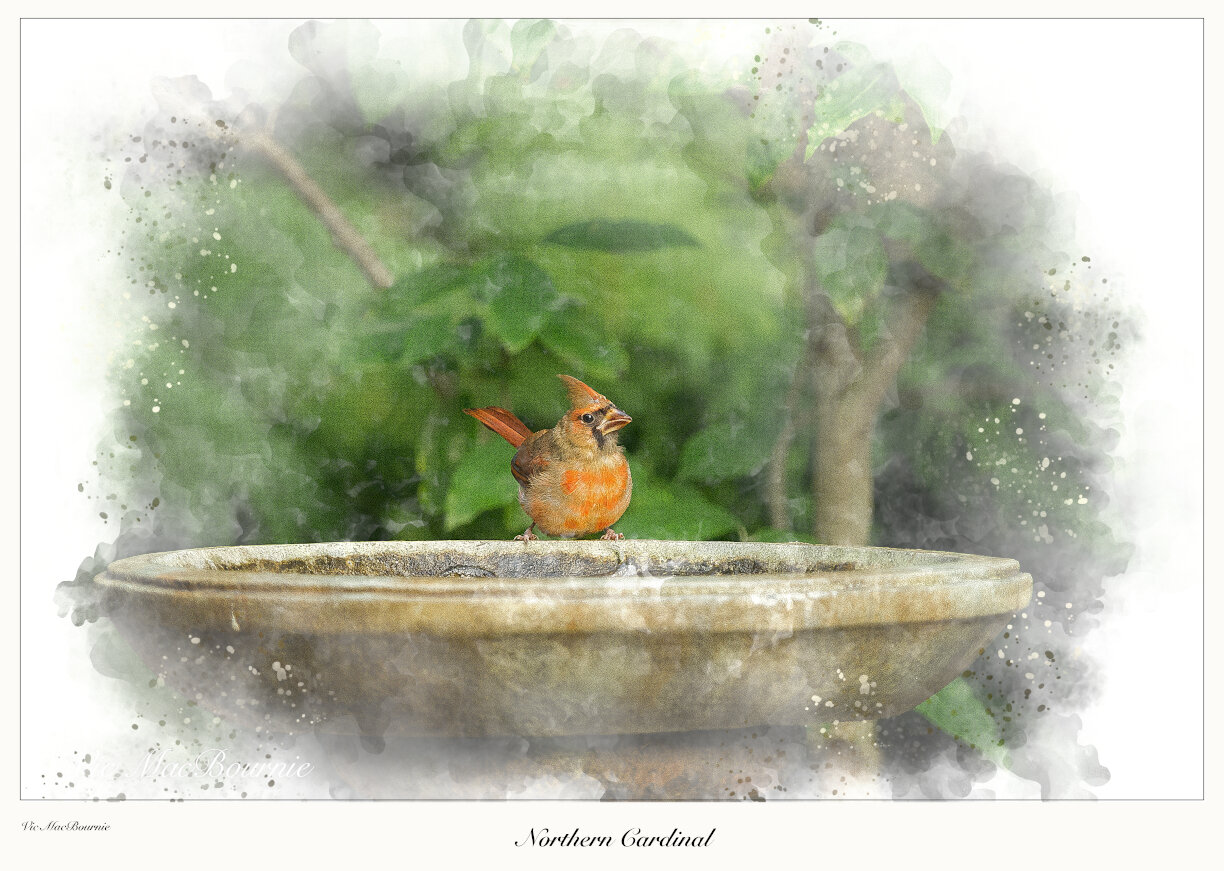
An elegant birdbath is itself a piece of garden art. But, when a cardinal is added to the scene, nature’s art truly shines.
Copper birdhouses and birdbaths ideal for the woodland
Birdhouses and birdbaths are perfect examples of garden objects that, if chosen well, can not only add sophistication to a corner of the garden, but attract our feathered friends – one of nature’s finest work. How can we resist a cardinal on a birdbath or a goldfinch at a beautiful feeder?
Many of the finest bird feeders are being made by artisans and can be found on places like Etsy. The copper-enhanced Baltimore Oriole and hummingbird feeders found on Etsy are just two examples of how artisans are recognizing the value of garden art and meeting our needs for a more sophisticated approach to garden art.
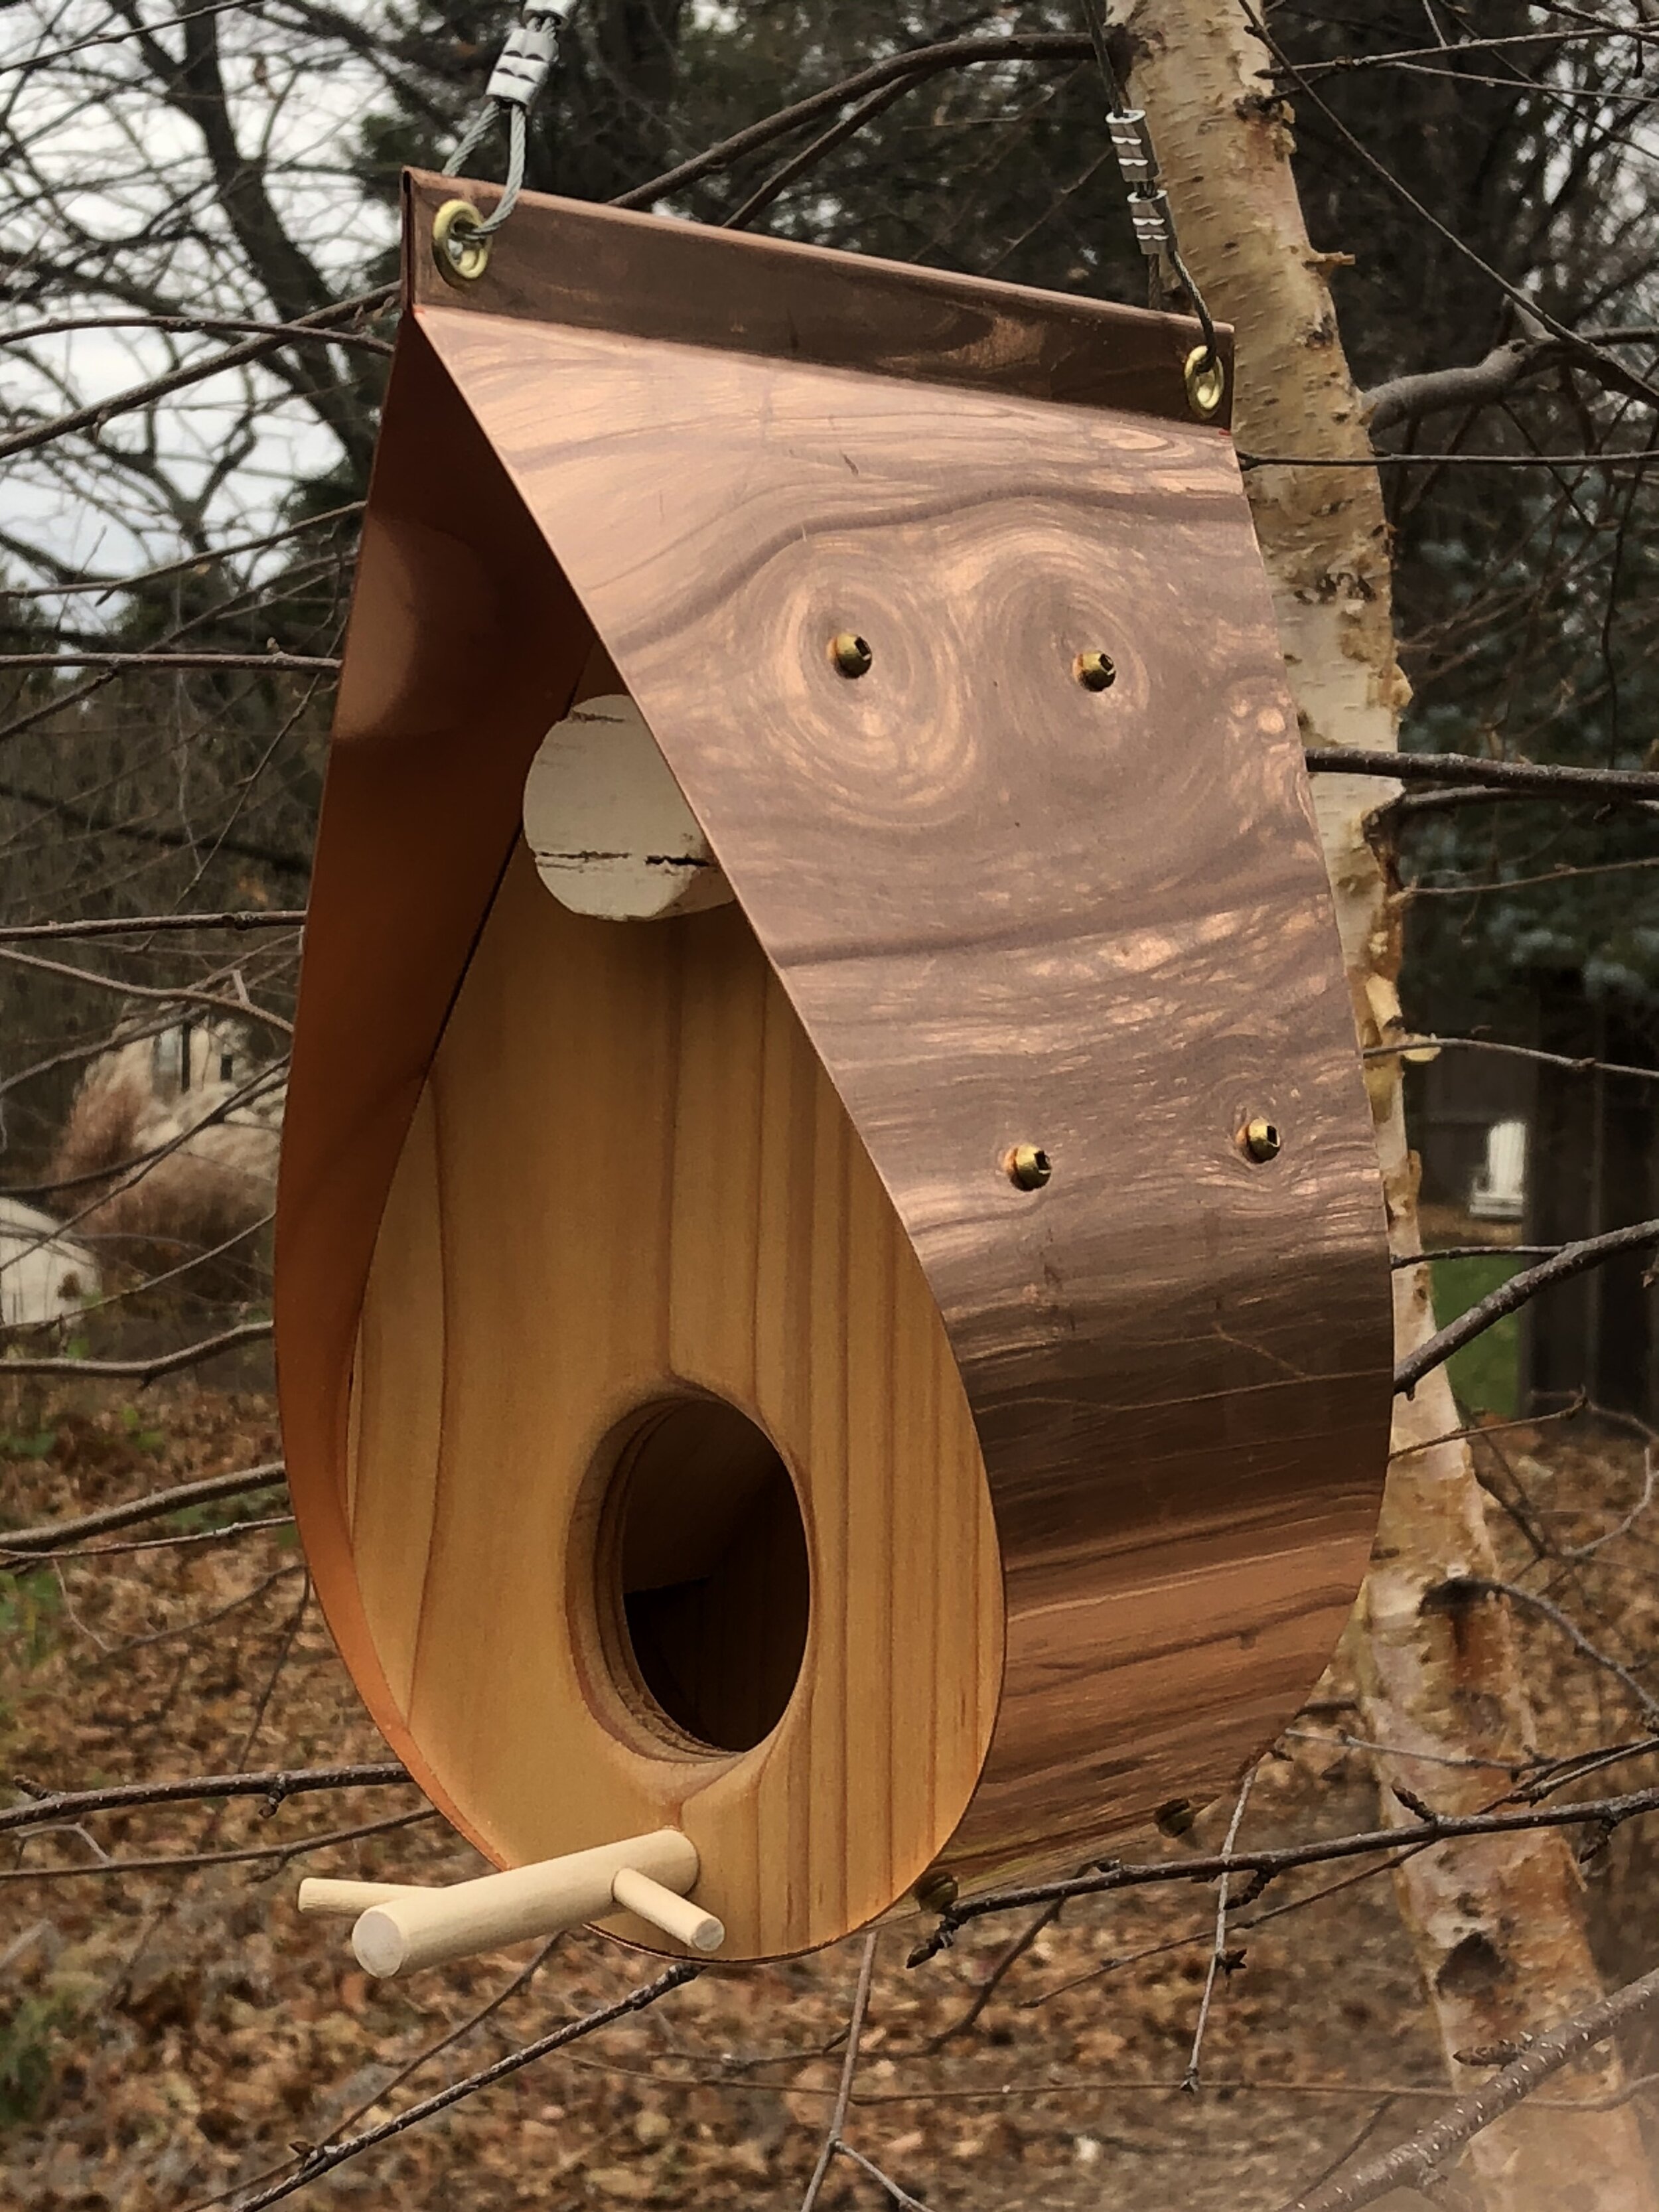
The ultimate bird feeder made with copper and cedar.
There was a time not too long ago when the only garden art available amounted to plywood cutouts of an elderly husband and wife from ‘behind’ out weeding in the garden. You remember them. Everyone had a good laugh at the couple’s expense.
But those times have changed.
I wrote a post about an architect couple from France who moved to Toronto and started a business combining their architectural skills and love of natural materials to create an exquisite bird feeder made from copper and cedar. (see picture) This feeder, although expensive, will provide a lifetime of joy and can be passed on to your children. It is available in new copper (as illustrated) or copper that has already been chemically aged with a lovely verdigras patina.
There are, of course, other bird feeders that are works of art, but don’t expect to find them at your discount store.
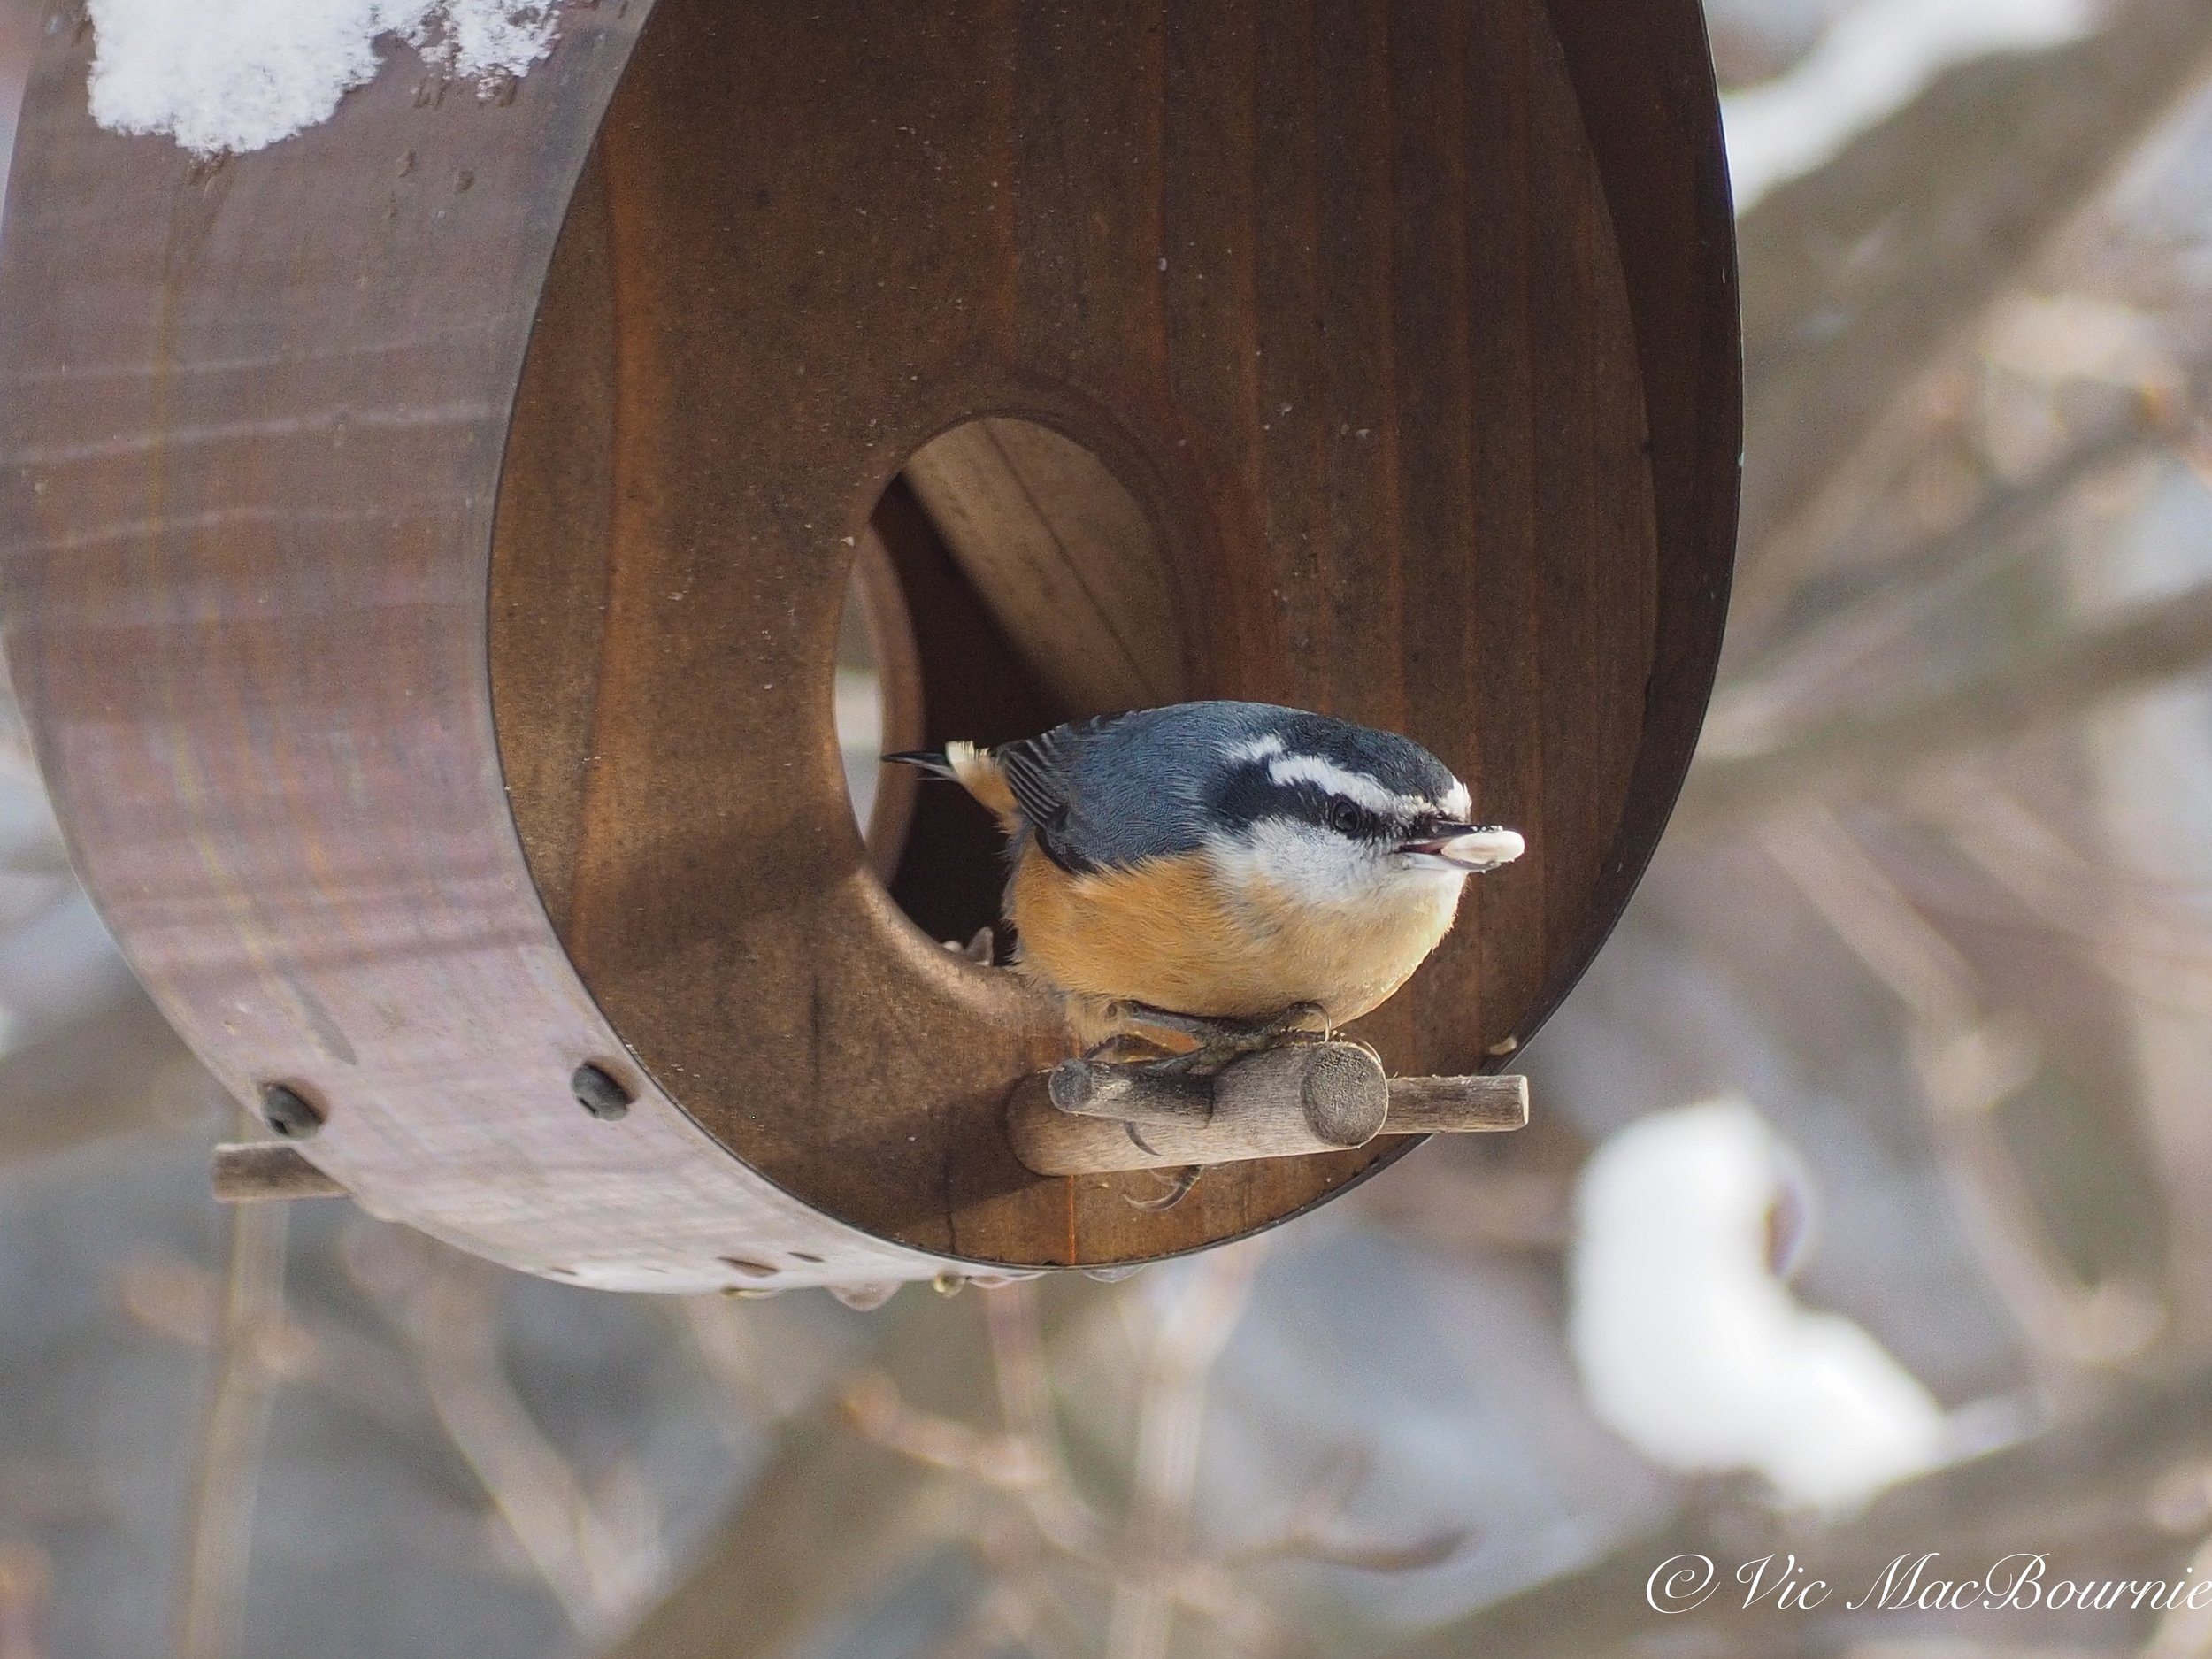
The copper and cedar bird feeder has aged nicely and taken on a lovely patina in only a few short years. And the birds love it too.
Although a finely aged concrete bird bath has been a staple in so many gardens, copper birdbaths not only look beautiful, they have natural microbial benefits that can make them a better choice.
I wrote about an elegant copper bird bath available at a fine garden and home boutique, but similar ones are available at many bird and home stores.
For more on growing your garden on a budget, check out my in-depth article here.
Use the iconic garden bench as art

The garden bench – especially an older, moss and lichen covered bench – can be a beautiful, yet useful addition to the garden.
Many years ago – certainly more than 20 years – I was desperate to get a garden bench. We lived in a typical subdivision and I was working diligently to create a mini woodland garden in the yard. The bench represented a destination along a simple path in this tiny garden. I wrote an earlier post on designing a woodland garden in a small yard and focused on the importance of a pathway in a small garden to help the viewer experience the garden as they walked through it.
Not only did our traditional garden bench provide a destination for the visitor, it offered the gardener a place to rest and enjoy the garden from a different perspective.
It’s another excellent example of how we can turn a utilitarian garden object into a wonderful piece of garden art.
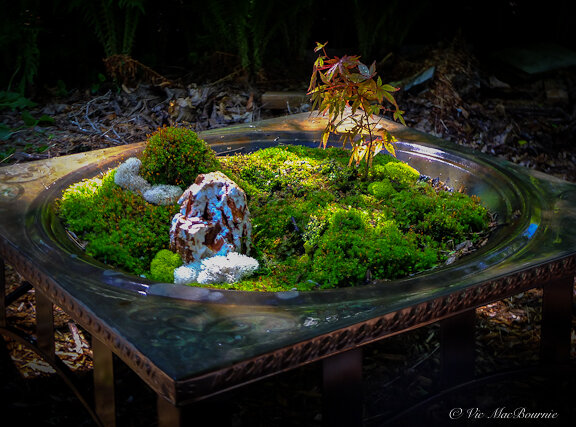
Creating your own garden art is always the best approach.
Five tips and DIY ideas to add art to your backyard landscape
Look for naturally-aged garden objects such as birdbaths, birdhouses and garden benches that people are selling either at garage sales or at on-line sites such as Kijiji. I have picked up some of my favourite “art” pieces this way.
Use techniques (like the one described below) to age newer items rapidly so they better fit into your woodland setting
Most “artistic” elements are best discovered rather than presented for everyone to see. Consider using vegetation to hide your art, especially more whimsical pieces that, when unexpectedly discovered, will bring a smile to your visitor.
Purchase lasting pieces that incorporate natural materials like copper, cedar and even rusty steel that will add a rustic element to your garden.
Whenever possible, look to nature for its existing art forms. The beautifully coloured rock, an old cedar tree root, an elegant piece of driftwood. These are often found objects that add a natural element to the garden and be combined with bought items to create a lovely juxtaposition of old and new.
In those days garden art, even a nice garden bench was not easy to find. I did, however, find an inexpensive wooden bench at a discount department store and bought two. More than 20 years later they still form a focal point in our woodland garden. Never, however, do I actually sit on them. These inexpensive garden benches have taken on an incredible aged look, covered in lichen and mosses. After a spring rain, they more or less turn a soft green as the thick moss bursts to life from its more dormant state.
Our two benches now hold large black containers that are planted with colourful, hard-working annuals that create a hit of colour in the garden and draw attention to the beautiful wooden benches.
In another part of the garden, we have a small cement garden bench that is beginning its aging process. Letting it age naturally is a slow process. It might be time to help it along a little using the following method. It’s perfect for quickly aging cement containers, benches and garden statuary.
How to give concrete a mossy, aged patina
A quick search on the internet provides several alternatives to creating an aged look for new concrete. It works on statuary as well as concrete containers. Mother nature and time does most of the work naturally, but some simple steps help to hurry the effect along. What might take mother nature years to create, can be done in a few weeks or months by following these steps.
• Start by mixing a weak solution of water and black acrylic or water-based paint and apply it to the cement statuary. Let dry and apply a second or third coat. The effect is simply to give the statuary a ‘dirty’ look rather than the stark white one it often has when it is new.
• Mix yogurt or buttermilk in a bucket with equal amounts of water, compost or soil and even some manure. You can add in some crushed moss at this stage as well. The result should be a thick spreadable paste.
• Paint on the mixture to the cement statuary or container ensuring you cover all areas especially creases where moss would naturally take hold.
• Take a handful of moss and rub the surface of the concrete to spread the moss spores into the concrete.
• Finally, store the concrete statuary or container in a moist and shady spot to encourage the aging process and keep it moist for a number of weeks until you see the moss get established.

Our gardens need to be inspirational places and what better way to achieve that than to add a few pieces of garden art, whether they are nature’s art like the boulder or store-bought statuary.
Statuary is great addition for the woodland garden
Garden statuary has always been a part of the garden and works well as it ages, often taking on a mossy patina.
In my Japanese-inspired woodland garden, we have incorporated traditional Japanese statues praying together surrounded in a patch of moss. With a little encouragement, I am hoping they will take on a mossy appearance for a truly aged look.
In another area of the garden, a statue of Saint Francis, the patron saint of animals, would be a perfect addition.
We have a number of aging cement statues of small animals tucked away throughout the garden. For much of the growing season they are mostly hidden from view, tucked away in the vegetation. It would be easy to miss them on a walk through the garden.
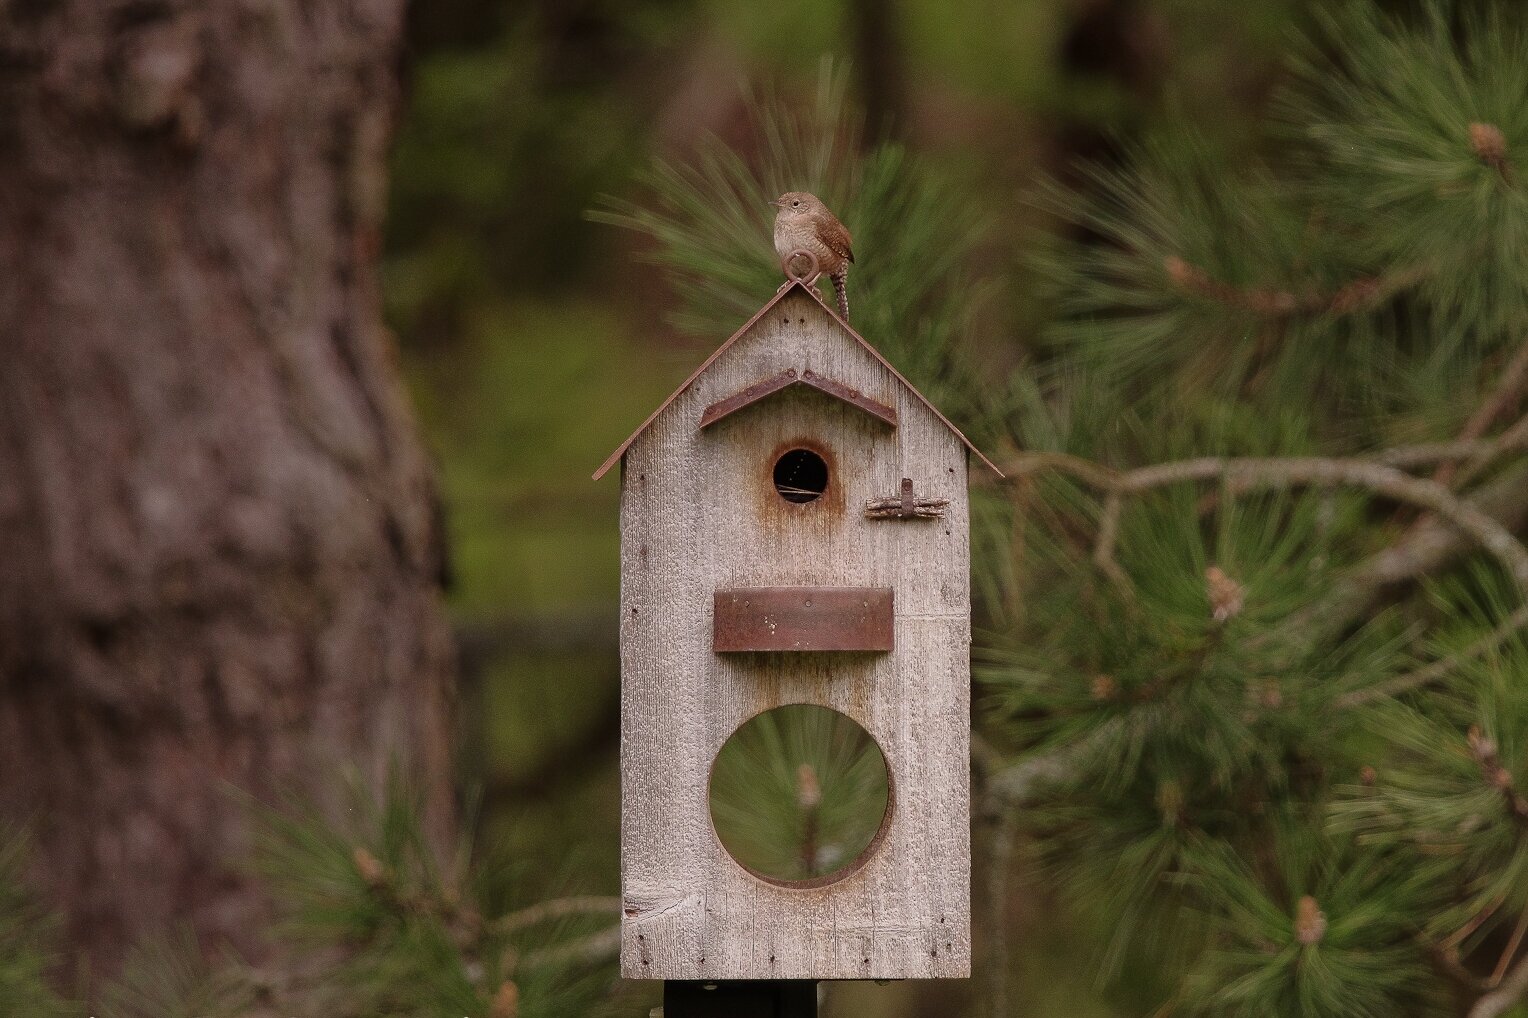
This rustic bird house and feeder fits the woodland theme and provides the ideal home for this Carolina wren.
In most woodland gardens, however, garden art should be more subtle. Consider a trip to your local nursery or rockery in the spring and scour their new moss-covered boulders to find the one that works perfectly in your woodland setting.
In another area, a gnarly branch that fell from a tree can serve as art. Place it somewhere in the garden where it’s natural beauty can age gracefully and work its way back into the soil while it provides homes for insects, small reptiles like red-backed salamanders and toads.
The moss-covered rock or twisted branch may also form the perfect natural landing spot to catch some great photographs of birds in your garden. Encourage moss and lichens to grow in the cracks but leave enough room to tuck in a few sunflower seeds to attract the birds to the exact spot you want to photograph them.
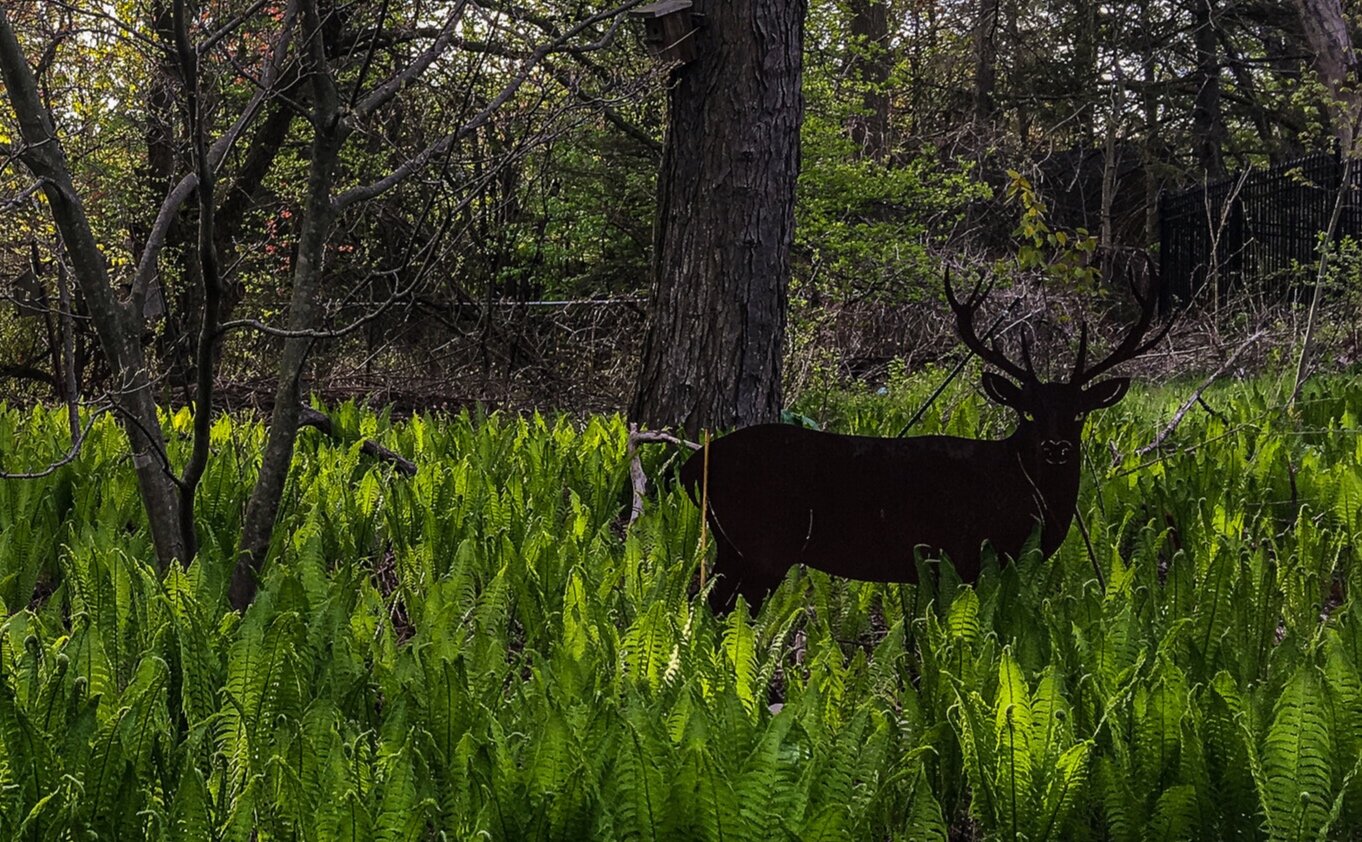
Rusty Buck standing guard in the ferns ties in to the rustic theme of the garden art in this section of the garden.
The rusty buck as garden art
Probably our favourite piece of garden art my wife and I purchased was from a boutique garden store we noticed on a day-outing. The store was tucked away in a small Mennonite community about an hour and a half drive from our home. We both noticed it as we drove by and immediately turned around to check it out. It’s another example of a piece that gets better with age. Now every time we see our rusty buck tucked in the ferns, it brings a smile to our face. Not sure what the native male deer think when they see our rusty buck, but it’s been knocked over on the ground in the morning more than once. Could be the wind, could be a jealous buck. We may never know.
Gardening on a budget links
Ten money-saving tips for the weekend gardener
DIY Bark Butter feeder for Woodpeckers
DIY reflection pond for photography
Click & Grow is ideal for Native Plants from seed

Simple solar fountain adds sparkle to your birdbath
Small solar panels can transform your bird baths and water features into enticing places for backyard birds.

This Robin was attracted to the moving water of the DIY solar fountain that was originally a dripper. (See image below.)
Moving water attracts birds and creates sound in the garden
Solar fountains not only look and sound great, they can become a big factor in attracting a greater variety of birds to our bird baths.
We have several solar fountains in the garden operating in our water features, including one in a new project that incorporates a solar fountain driving a mini waterfalls in our container pond. There is also a larger solar panel powering our on-ground bubbling rock where birds, chipmunks and squirrels regularly visit to either bathe or get a drink from the bubbling rock or the small pond where the water pools.
In another area, a floating fountain bubbles over in our DIY naturalistic bird bath. This is a favourite of chickadees, cardinals, nuthatches and a host of woodpeckers as well as squirrels and chipmunks that can easily access the bird bath from a nearby dogwood or a small concrete bench.
And finally, a lovely copper and slate dripper turned DIY solar fountain, provides a source of moving water in our most prized copper bird bath. (Click on the link, for the full story on converting the dripper to a DIY fountain)
Together, these water features combine to help create a backyard wildlife garden that is attractive to an assortment of wildlife from birds, to mammals, amphibians and reptiles. What many of us probably don’t realize is that a water source is vital to all types of wildlife. In fact, our garden wildlife are more dependent on water than most of us realize.
It’s important also to provide garden wildlife with water they can easily access. A birdbath doesn’t always accomplish that for small animals.
For more on adding water to your garden, check out my earlier posts
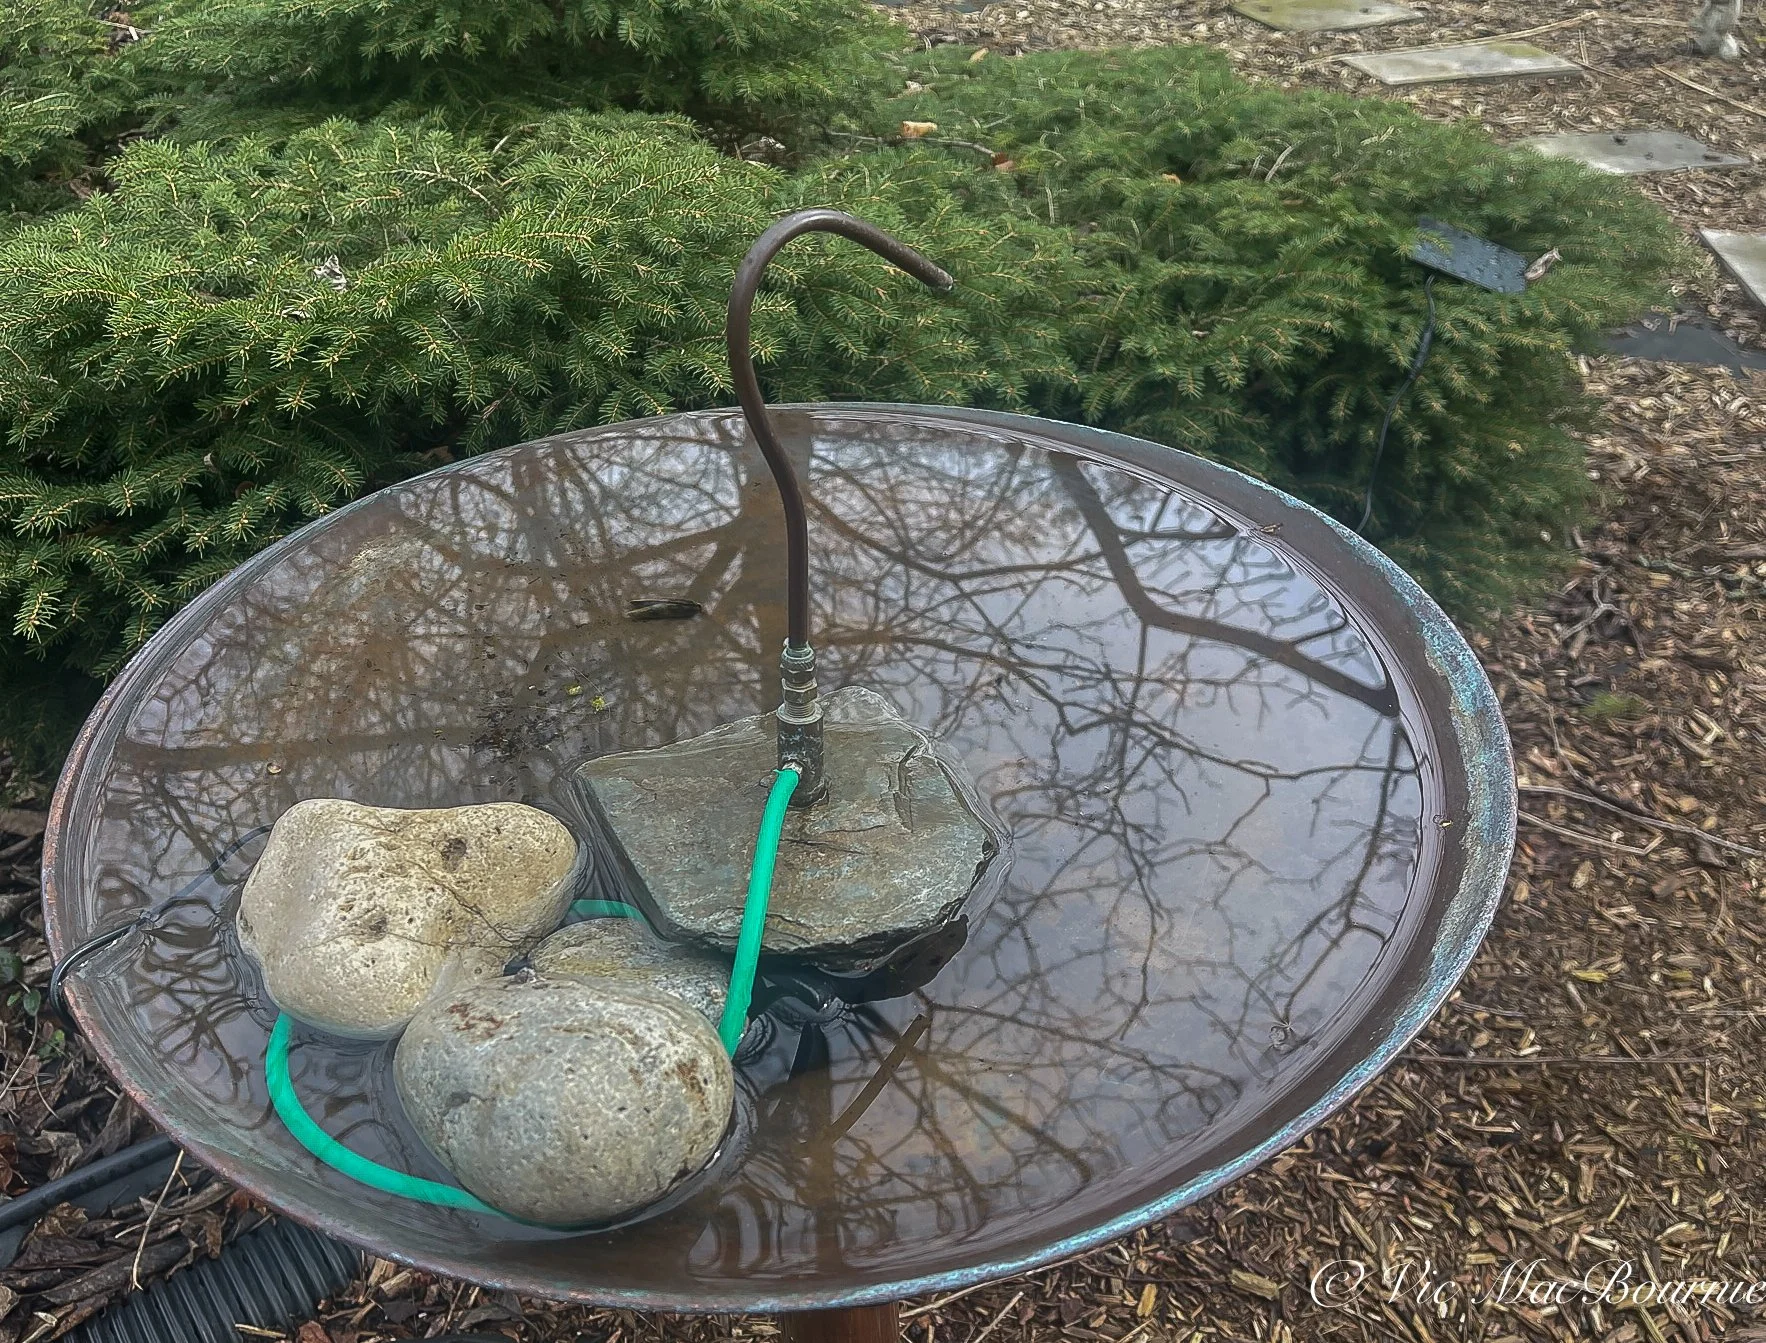
This dripper was hooked up to a solar-powered pump to convert it to a small solar fountain. The solar panel can be seen in the background on the evergreen.
What birds art attracted to moving water?
Many birds are particularly attracted to moving water. Visually, the sparkle of moving water catch the attention of birds either flying over the garden or simply moving about. During migration in spring and fall, the moving water might be a factor on bringing unusual birds into your garden for a brief visit.
In addition, the movement of the water is a signal that the water is not stagnant and may send a message that the water is fresh and a more healthy choice.
Hummingbirds, Orioles, Jays, Robins and Goldfinches are just a few of the birds that are attracted to moving water. Add to that list Bluebirds, Chickadees, Nuthatches and even Woodpeckers.

Our large solar panel (8X13 inches), complete with its separate solar battery controller, is used to drive our small bubbling rock. The battery allows the pump to be used on shady days and into the evening when there is no sunlight available.
Why use solar rather than regular electrical outlets?
The solar panels I am speaking about are ridiculously inexpensive.
I usually order mine from Amazon, (link to solar fountains) but recently purchased two for a great price from Walmart’s on line outlet. The solar panels and pumps were less than $25 each and arrived to my home in less than two weeks. These pumps are so efficient that they likely pay for themselves in the first year.
But, more importantly, unlike traditional electrical outlets that limit where you can use the power, these small solar panels and pumps can be moved around the yard to your liking.
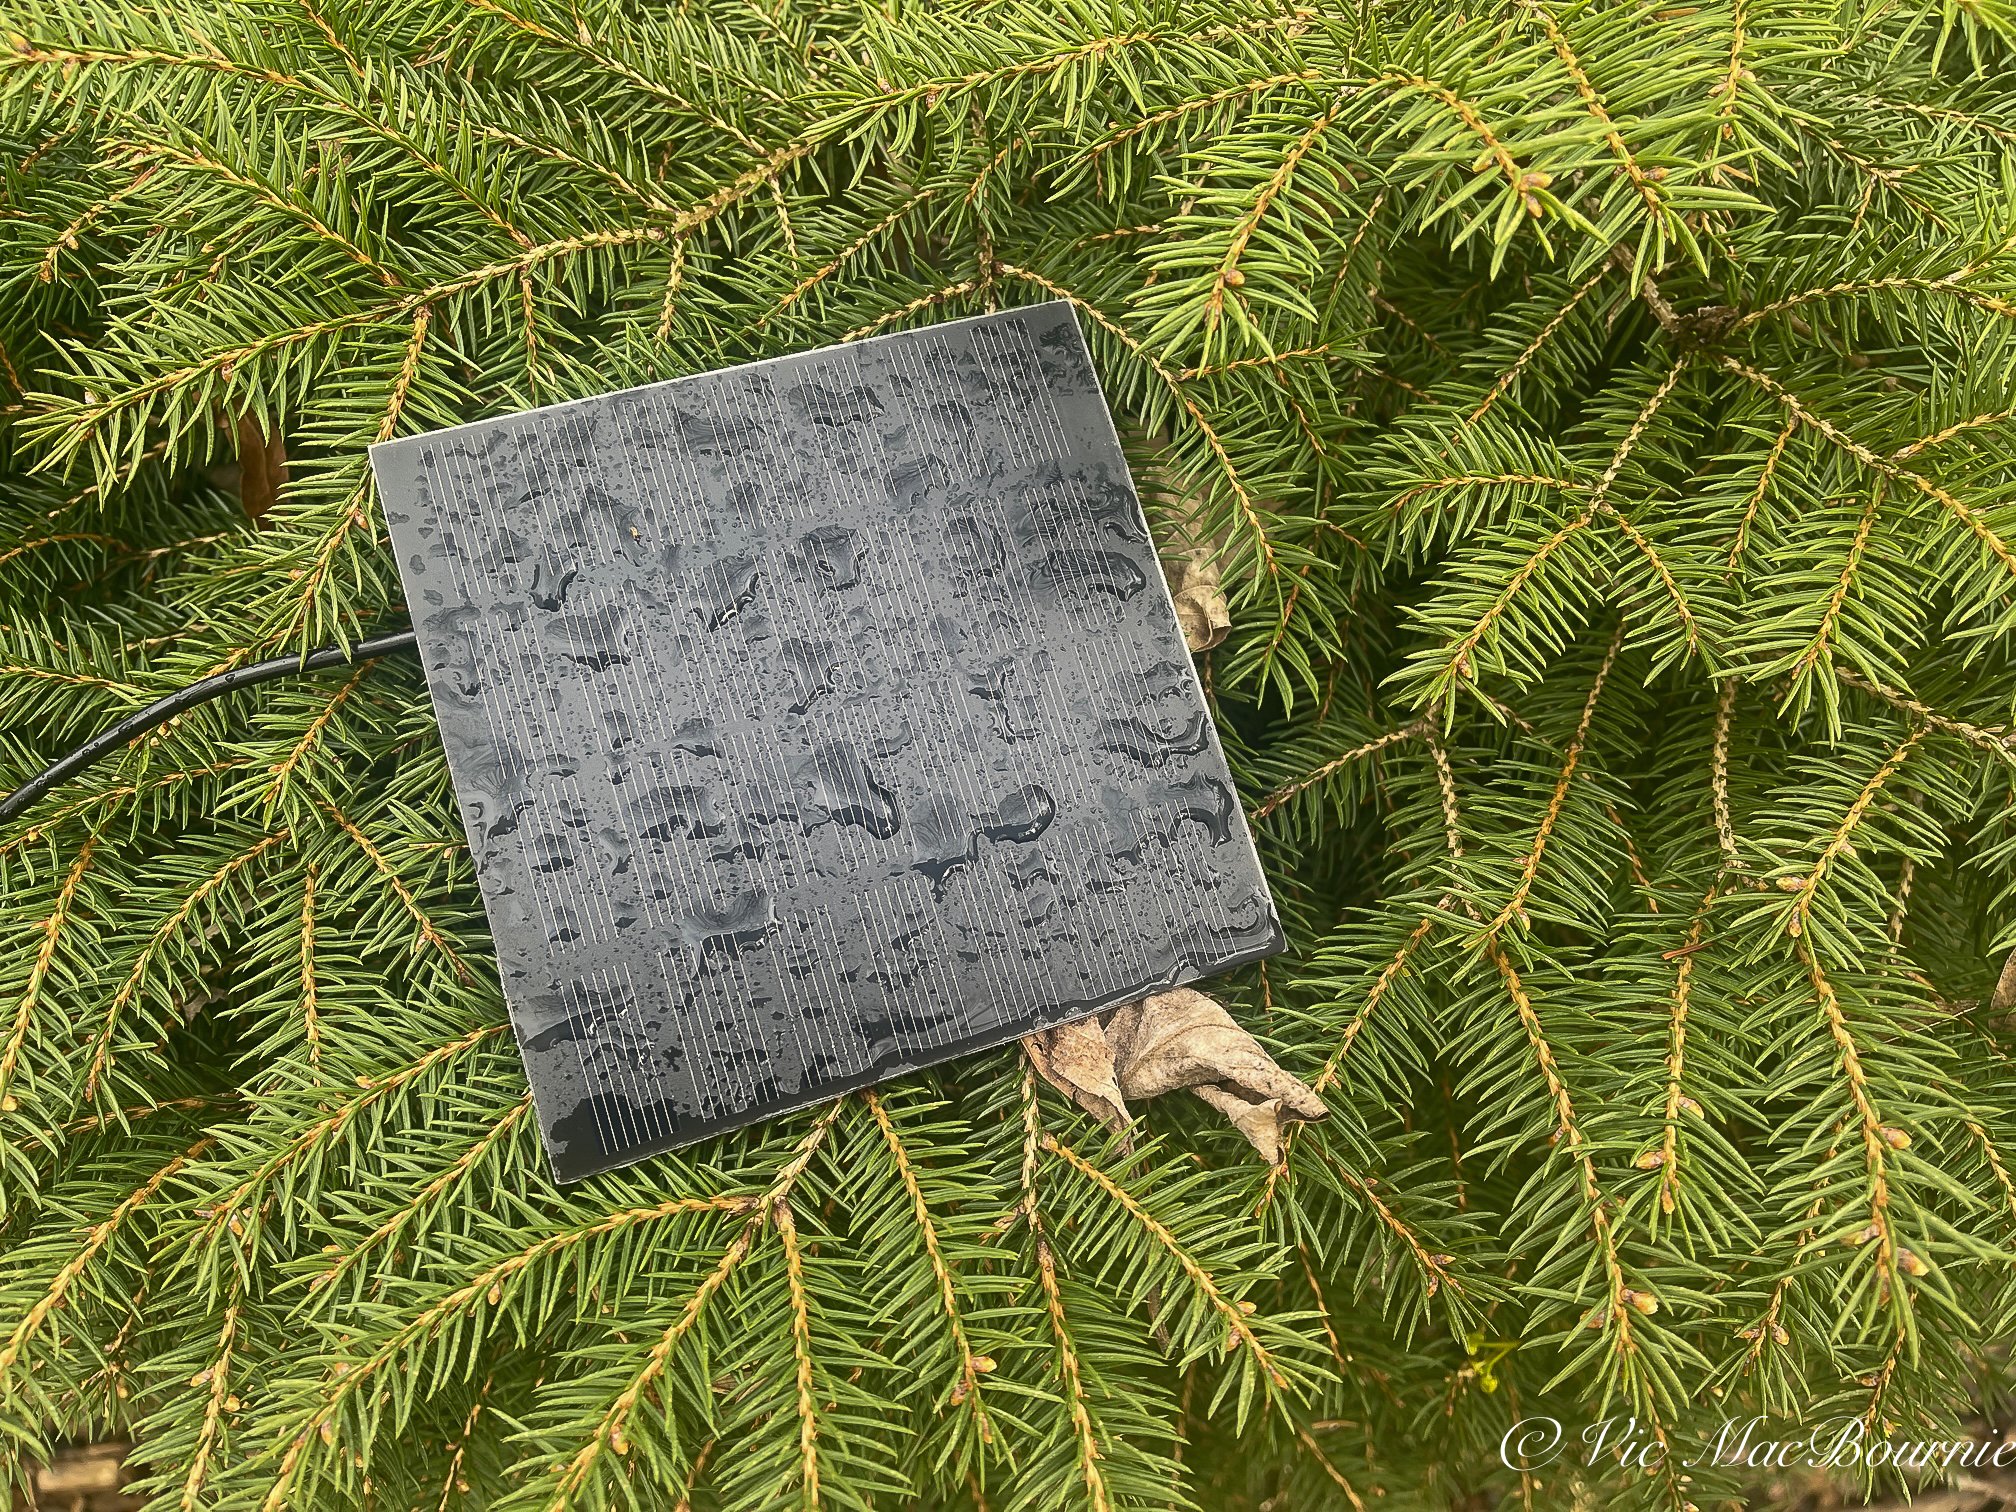
The small solar panel come with a long electrical cord to allow the panel to be moved a distance to catch the sun.
Want that bird bath in a different corner of the yard? Just move it along with the tiny 4.5-inch X 4.5-inch solar panel and tiny pump.
In addition, the safety aspect of using these small solar panels makes them indispensable in the garden.
With solar, there are no more worries about having children or pets around potentially dangerous electrical outlets combined with water.
Sure, the power output of these little pumps is nowhere near the potential power of traditional electrical outlets, but in most cases that amount of power is not needed unless you need a heavy flow of water over a waterfalls or a bubbling rock. Solar can still deliver that kind of power but it involves purchasing a much larger and more expensive solar-powered system.
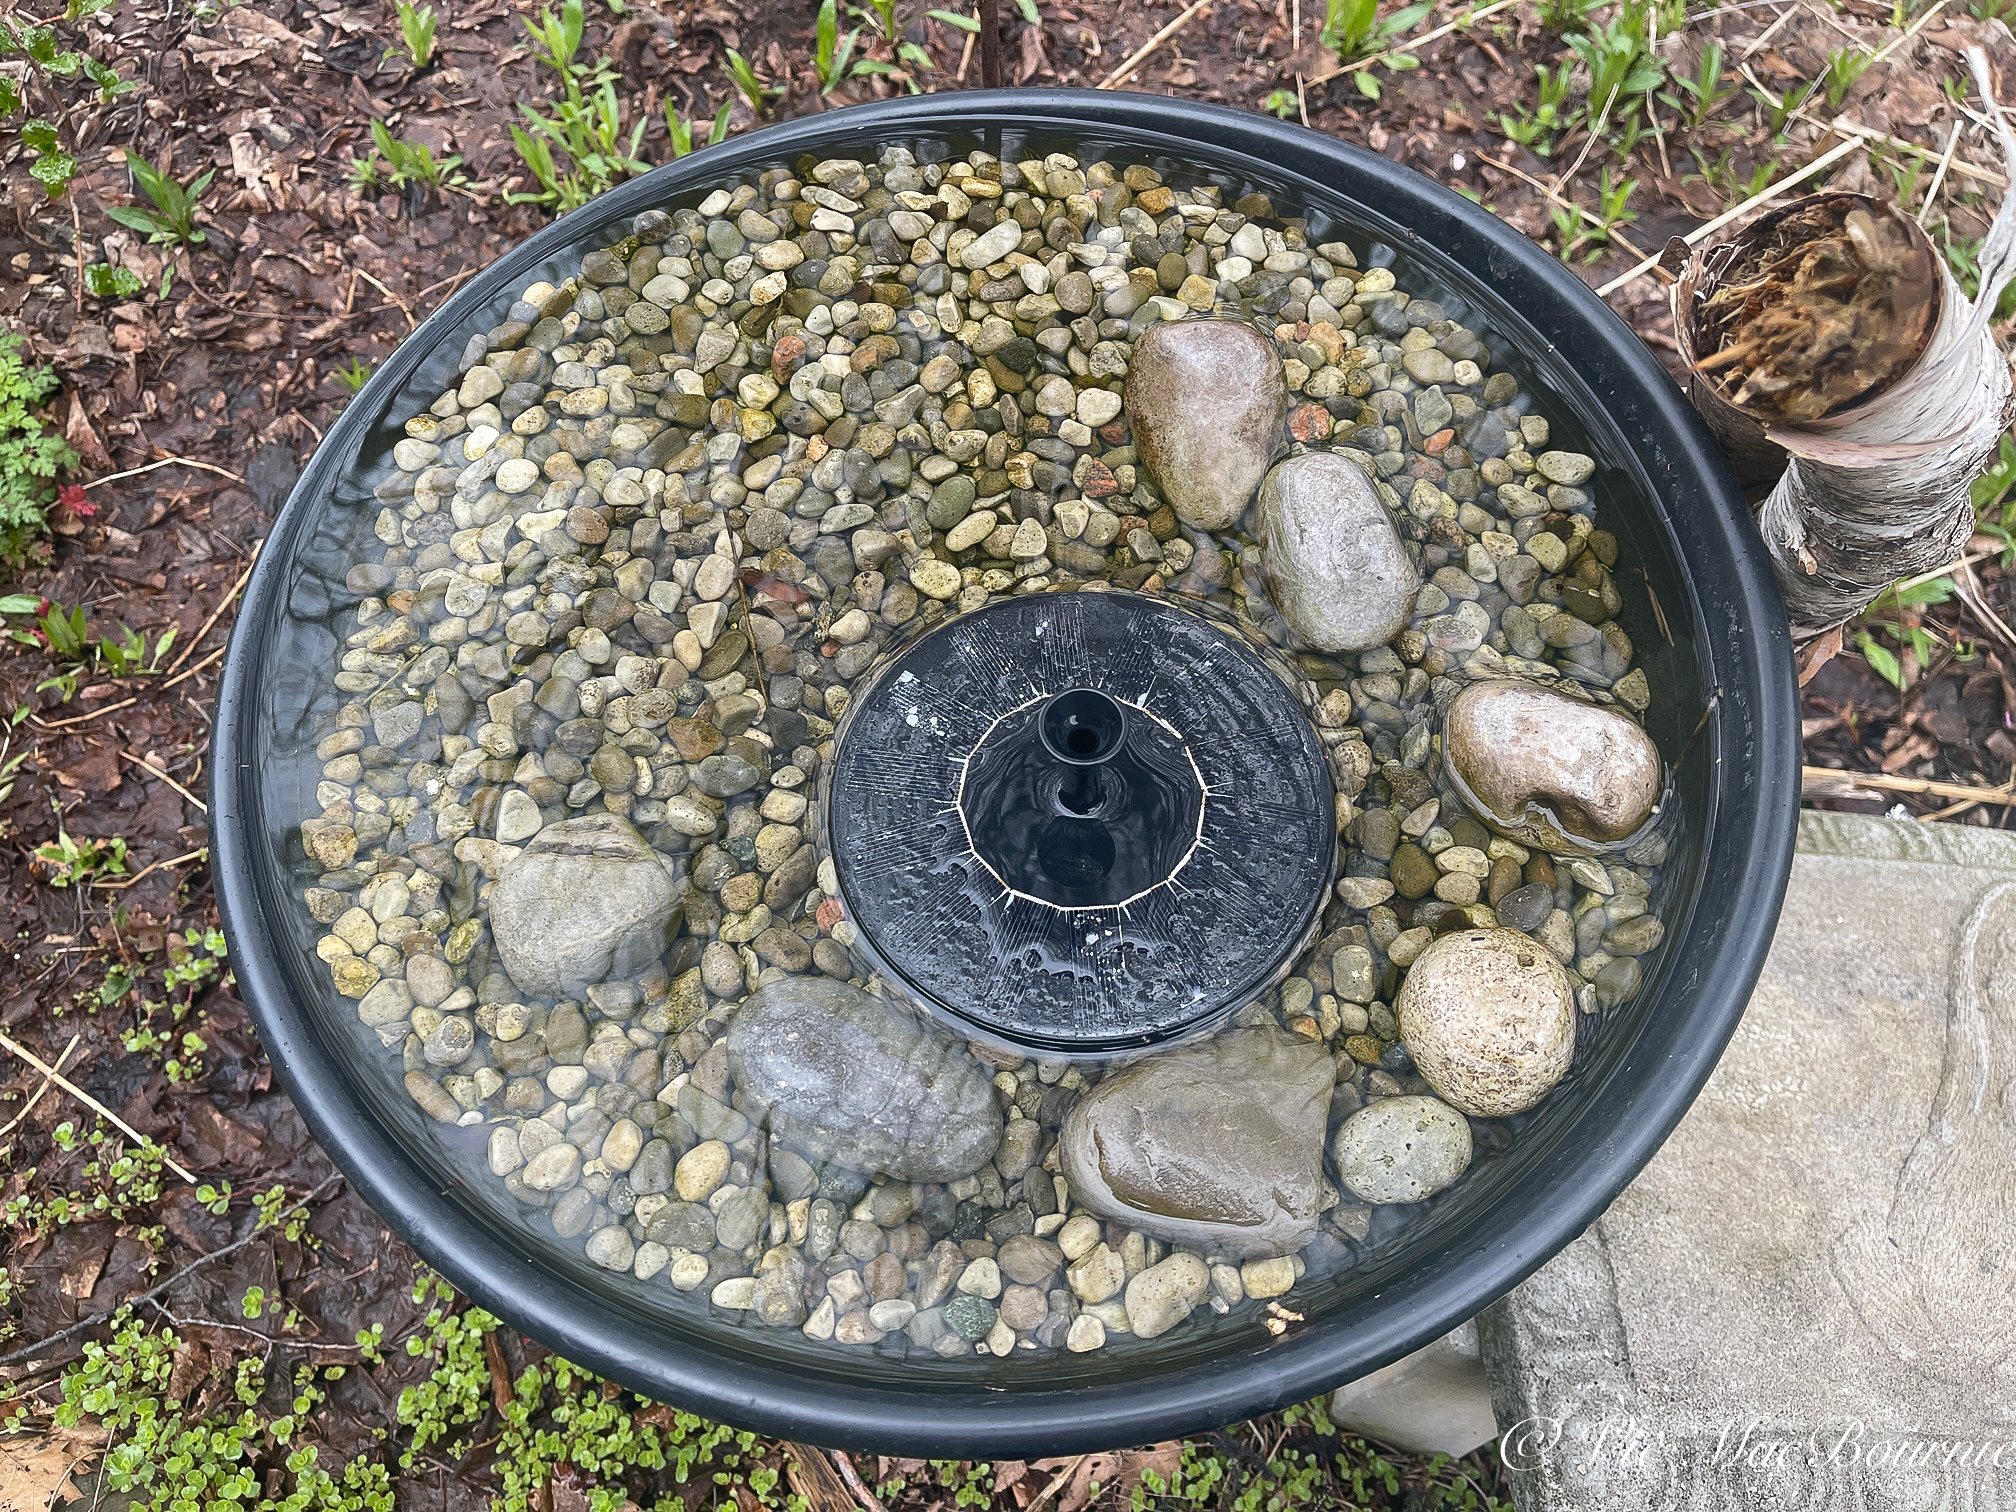
A floating solar powered fountain can be an ideal addition to a larger birdbath that spends enough time in the sun to keep the floating fountain on for significant parts of the day. I use stones to keep the fountain in the centre of the birdbath.
Solar falls short in the shade
Of course, these solar pumps are far from perfect.
If you are looking for power to drive a lot of water, you won’t be satisfied with these mini pumps. And, if you set up your fountain in a shady part of the garden, you may not get enough sun to power the pump through the small solar panel.
Even if you do get sun at the location you have set up your fountain, you’ll have to move the solar panel throughout the day to follow the sun. Thankfully, the panel comes with a long chord to help you find a sunny area near the pump.
The solution is to step up to a solar panel that includes batteries that store the power so that it is always available, including in the evening when there is no hope of tapping into the suns energy.
Similar to solar lights that store the sun’s energy during the day and then operate at night, these solar panels include a replaceable battery or batteries that enables the user to flip a switch in the evening to run the water pump.
The solar pump we use to drive our bubbling rock incorporates a solar battery that allows us to drive the water and a small LED light during the evening. The problem is that the solar panel is much larger and harder to hide in the garden. If you are okay with garden visitors being able to see your larger solar panel (8X13 inches) than these higher end solar pumps solve that problem nicely.

Low and lovely: Five great low growing ornamental grasses
There is always room for smaller, low-growing ornamental grasses in your garden. Here are five you will want to consider.

Early summer dwarf fountain grass combine with Japanese Forest Grass in this front garden.
Five ornamental grasses you need to know about
If you’re in love with ornamental grass, but either have a small garden, or are not interested in large clumps of taller grasses, you need to look into the smaller, low-growing ornamental grasses available.
We have a number of them growing in our front and back gardens, some that appreciate full sun and others that prefer a location with more shade.
Defining a low-growing grass is not always easy. Little Bluestem, for example, grows to about 18 inches and may not be considered by some to be “low growing” but it’s certainly a terrific native plant that actually was awarded perennial of the year in 2022. For more on Little Bluestem be sure to check out my full story here.
Japanese Forest Grass, especially the all-gold variety, is another outstanding performer that you may want to consider in your garden. I would not consider it a tall-growing ornamental grass, but neither is it a low-growing grass. Check out my earlier post on ornamental grasses, for more on the Japanese Forest Grass (Hakonechloa aurelia).
New varieties of grasses are introduced every year, so it’s a good idea to either go online to check out the latest varieties or visit your local nurseries to get a good idea of what grows best in your growing zone.
The grasses mentioned below are all deer resistant.
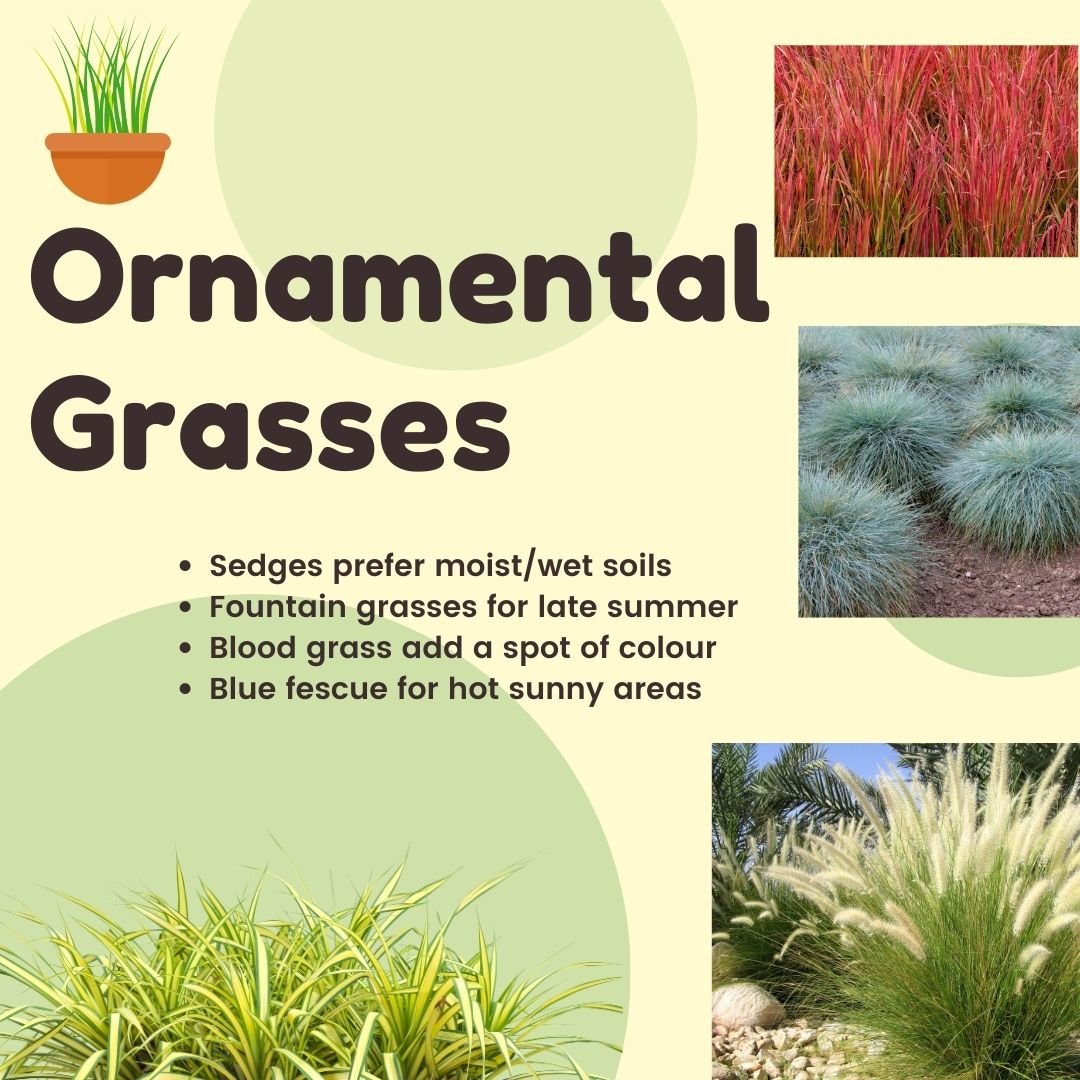
Ornamental grasses add movement and texture to the garden that is sometimes hard to attain with other plants. Here we have a combination of Japanese Forest Grass (top right), Blue Fescue, Fountain Grass and a Sedge (bottom right).
Fountain grasses add a touch of elegance to the garden
Fountain grass: (Pennisetum Alopecuroides) Without a doubt the Pennisetums are a beautiful variety of grasses that really make a statement in late summer into fall when their (flowers also called inflorescences) begin to bloom. But, even before they start to bloom, the grasses add an elegant look in the garden helping to create movement when the breezes pick up.
There are many perennial fountain grasses – including the large and very popular annual purple fountain grass often used in containers as the thriller. Karley Rose, for example, is a larger perennial fountain grass that makes an excellent addition to any garden with its pinkish inflorescences. I have Karley Rose growing in both our front and back gardens, but it might be considered too large to be considered a low-growing grass.
If you are looking for low-growing varieties, consider Hamlen Dwarf Fountain Grass that grows to about 35 inches (90cm) or the miniscule Little Bunny Fountain Grass with a height of only about 12 inches (30cm.) Both are hardy to zone 5, like to be grown in full sun and prefer a dry to moist soil.
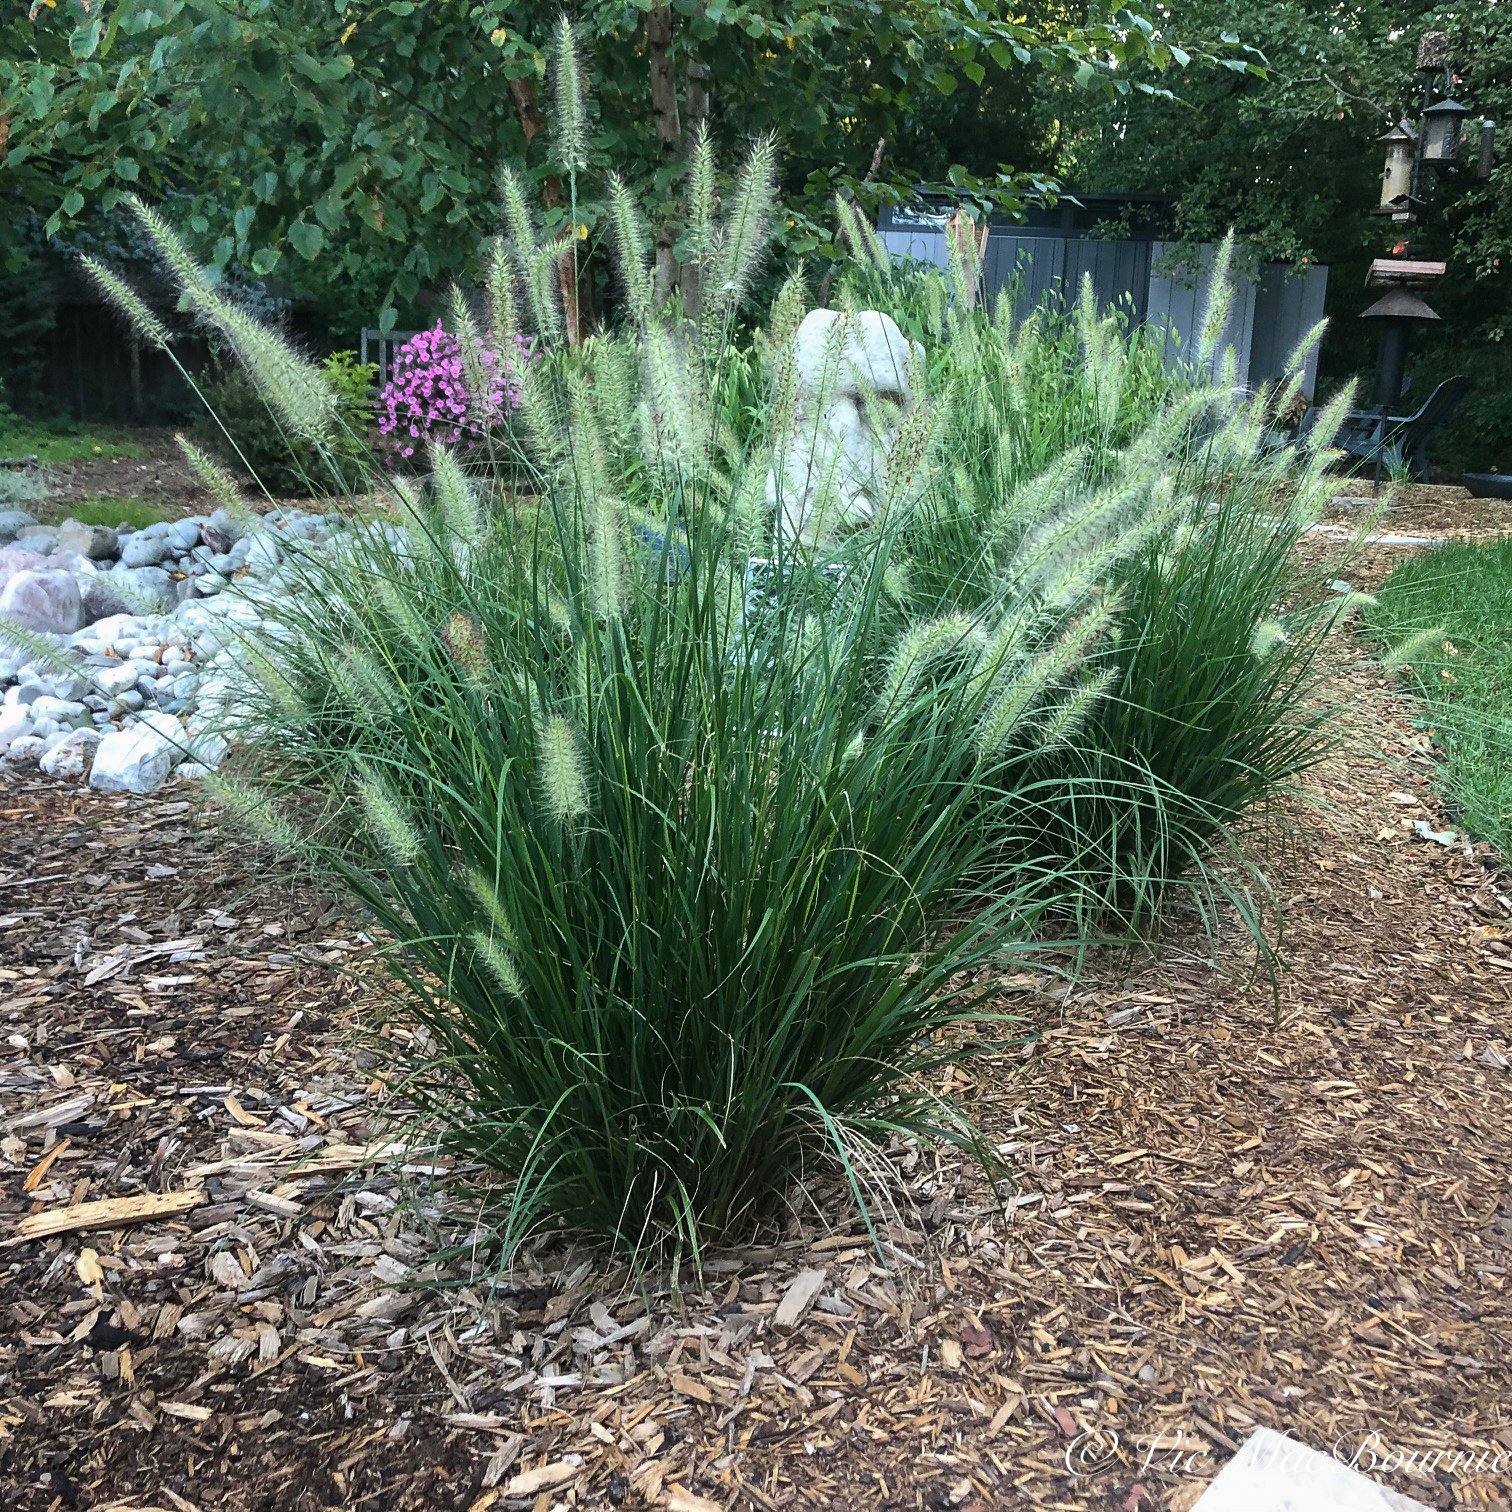
These dwarf fountain grass are just beginning to flower in our back garden. The inflouresences (flowers) turn a wheat colour and usually bloom well into fall.
Ideas on using fountain grass in the garden
Use these small fountain grasses in the front of a border or as small specimen plantings on their own. We use them in our front garden as accent plants in a sunny area along a dry river bed as well as in the area of our Japanese-inspired garden.
Japanese Blood Grass adds colour to the garden
Japanese blood grass (Imperata Cylindrica) another perennial garden winner for those who want to add a little pop of colour to their garden beds. (See photo in graphic above) Growing to a height of about 17 inches (45 cm) with a spread of 11-12 inches (30 cm), Blood grass is best grown for its blood-red tips that appear in mid- to late-summer and add a touch of bold colour to the garden.
Blood grass grows well in average to moist soil, in full to partial sun and is hardy to zone 5.
Ideas on using blood grass in the garden
I use Blood grass as a natural ground cover growing among the low-growing sedum (stonecrop) under our clump birch trees. The grass not only adds a little colour, but it seems to be at home in the dappled shade under the birch trees where it stays completely under control.
I also use it as a background for a “school” of ceramic fish (see post on Fish in the Garden) that swim through the grasses and around our birch clumps.
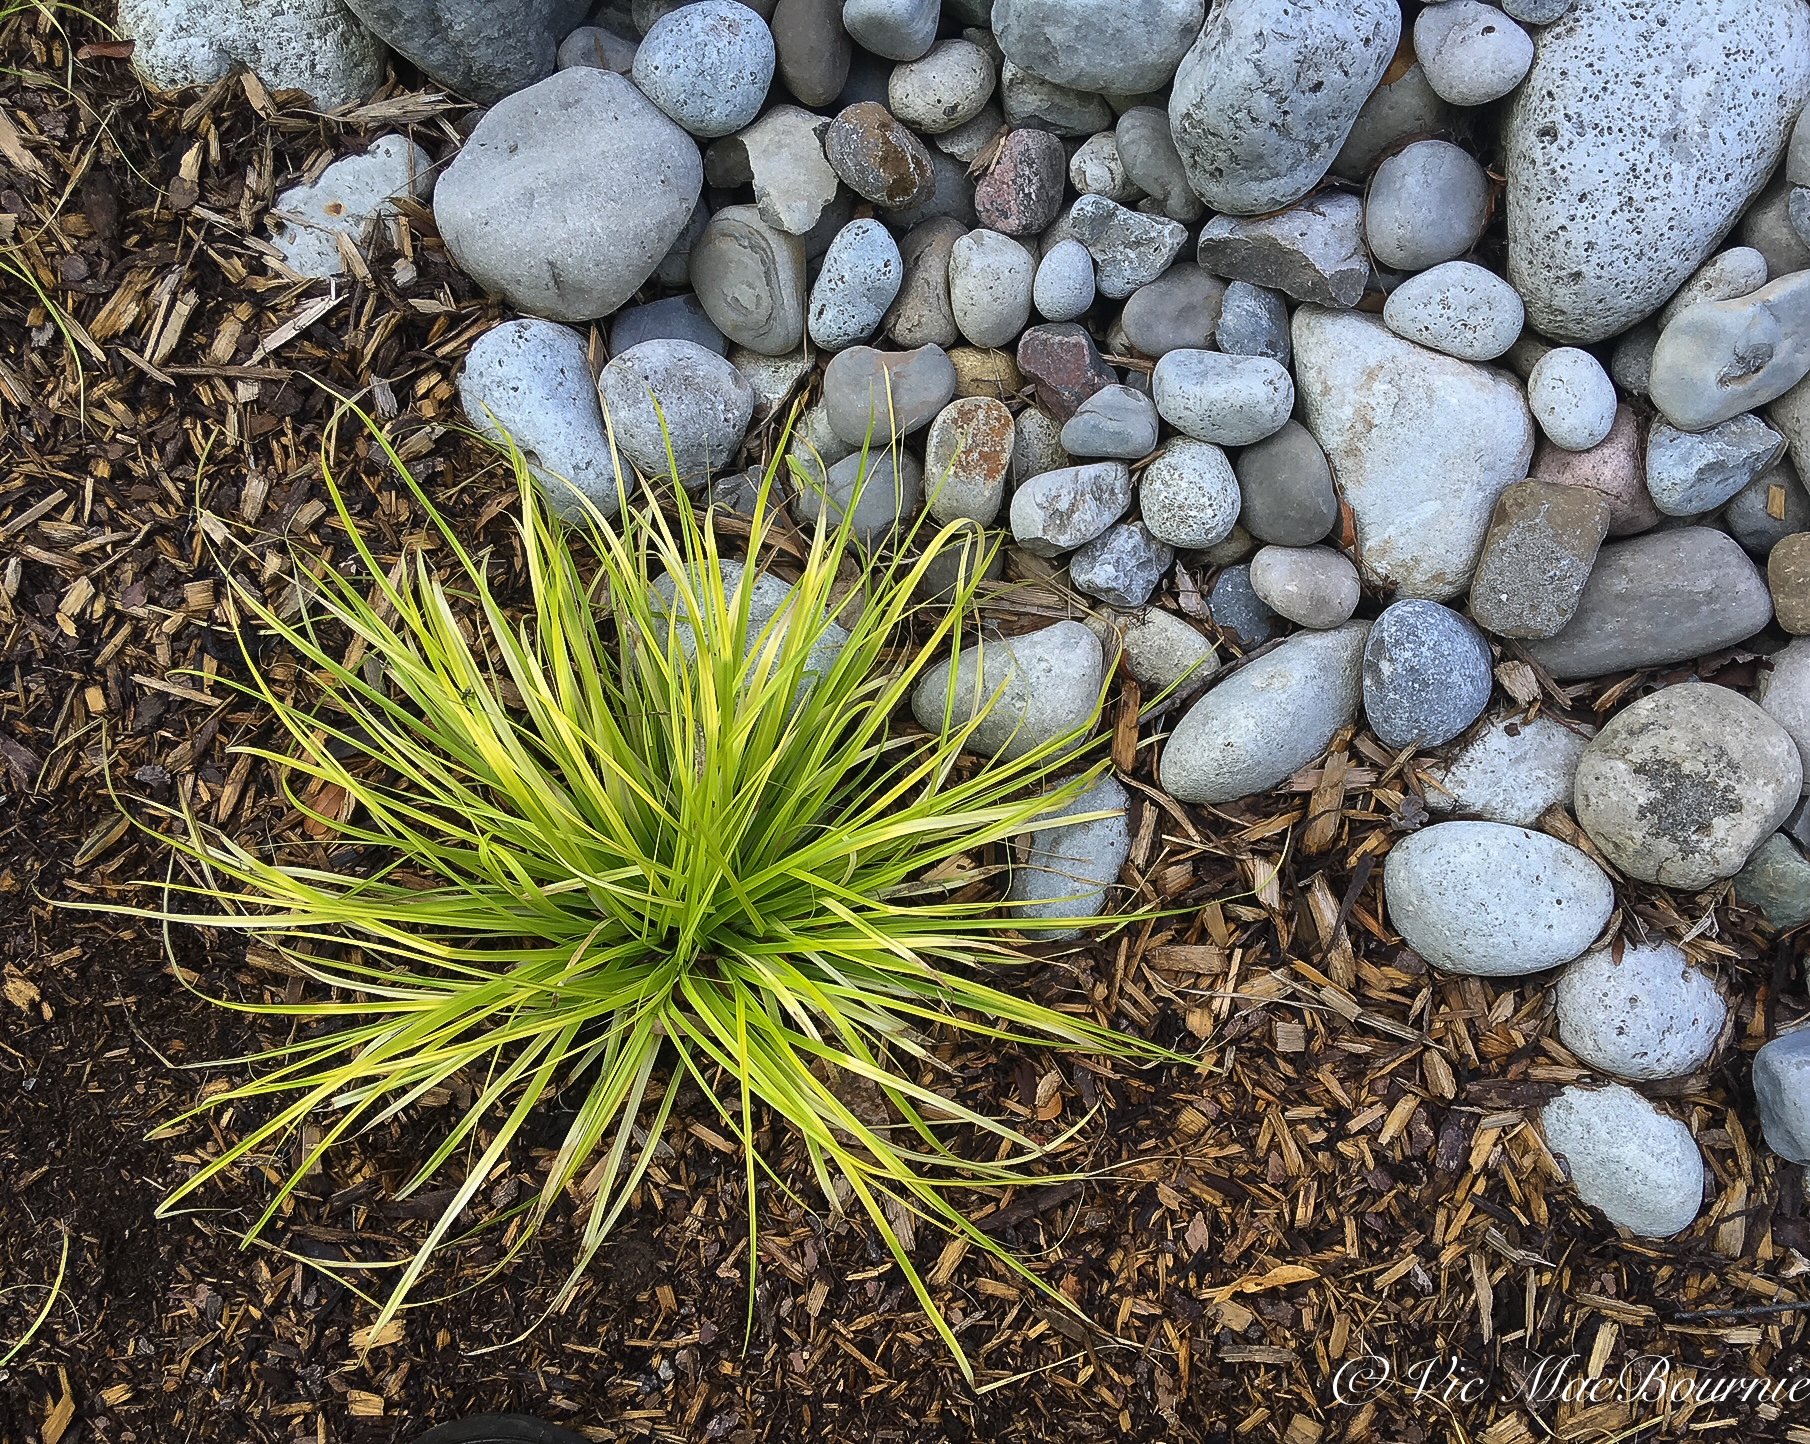
This colourful golden sedge adds a nice chartreuse touch to the garden.
Sedges are perfect for wet areas of the garden
Bowles Golden Sedge (Carex) There are a variety of sedges available that look and act much like ornamental grasses. The biggest difference between sedges and grasses, however, is that the sedges perform best in moist soils. They are the perfect plants for wet or very moist areas in the garden.
Take it from me, if you are planting them in a sandy soil in a sunny spot, you will need to water them almost daily to get them looking and performing their best.
Bowles Golden Sedge has become a nice addition to our garden with its variegated chartreuse leaves. With a height and spread of about 24 inches (60 cm), they are not the most low-growing of the sedges – that would be Blue Zinger Sedge (Carex Glauca Blue Zinger) at a mere 12 inches (30cm), Ice Ballet Sedge (Carex Morrowii Ice Ballet) with a similar height , Ice Dance Japanese Sedge (Carex Morrowii Ice Dance), and Evergold Variegated Japanese Sedge (Carex Oshimensis Evergold) at a mere 8 inches (20cm) with a similar spread.
Where to use Sedges in the garden
It’s important to remember that the sedges like moisture in the soil – even wet soil. Obviously, an area of the garden that enjoys lots of moisture is the ideal spot to plant sedges, but you can create good growing conditions with a little effort. Last year, I moved three sedges from a sunny dry area where they were not doing well, and planted them in cluster near our patio where I can easily water them regularly. They quickly bounced back and performed nicely throughout the summer into fall.
Almost immediately after the move, the three sedges began to look much better, with a faster growth habit and better colour.
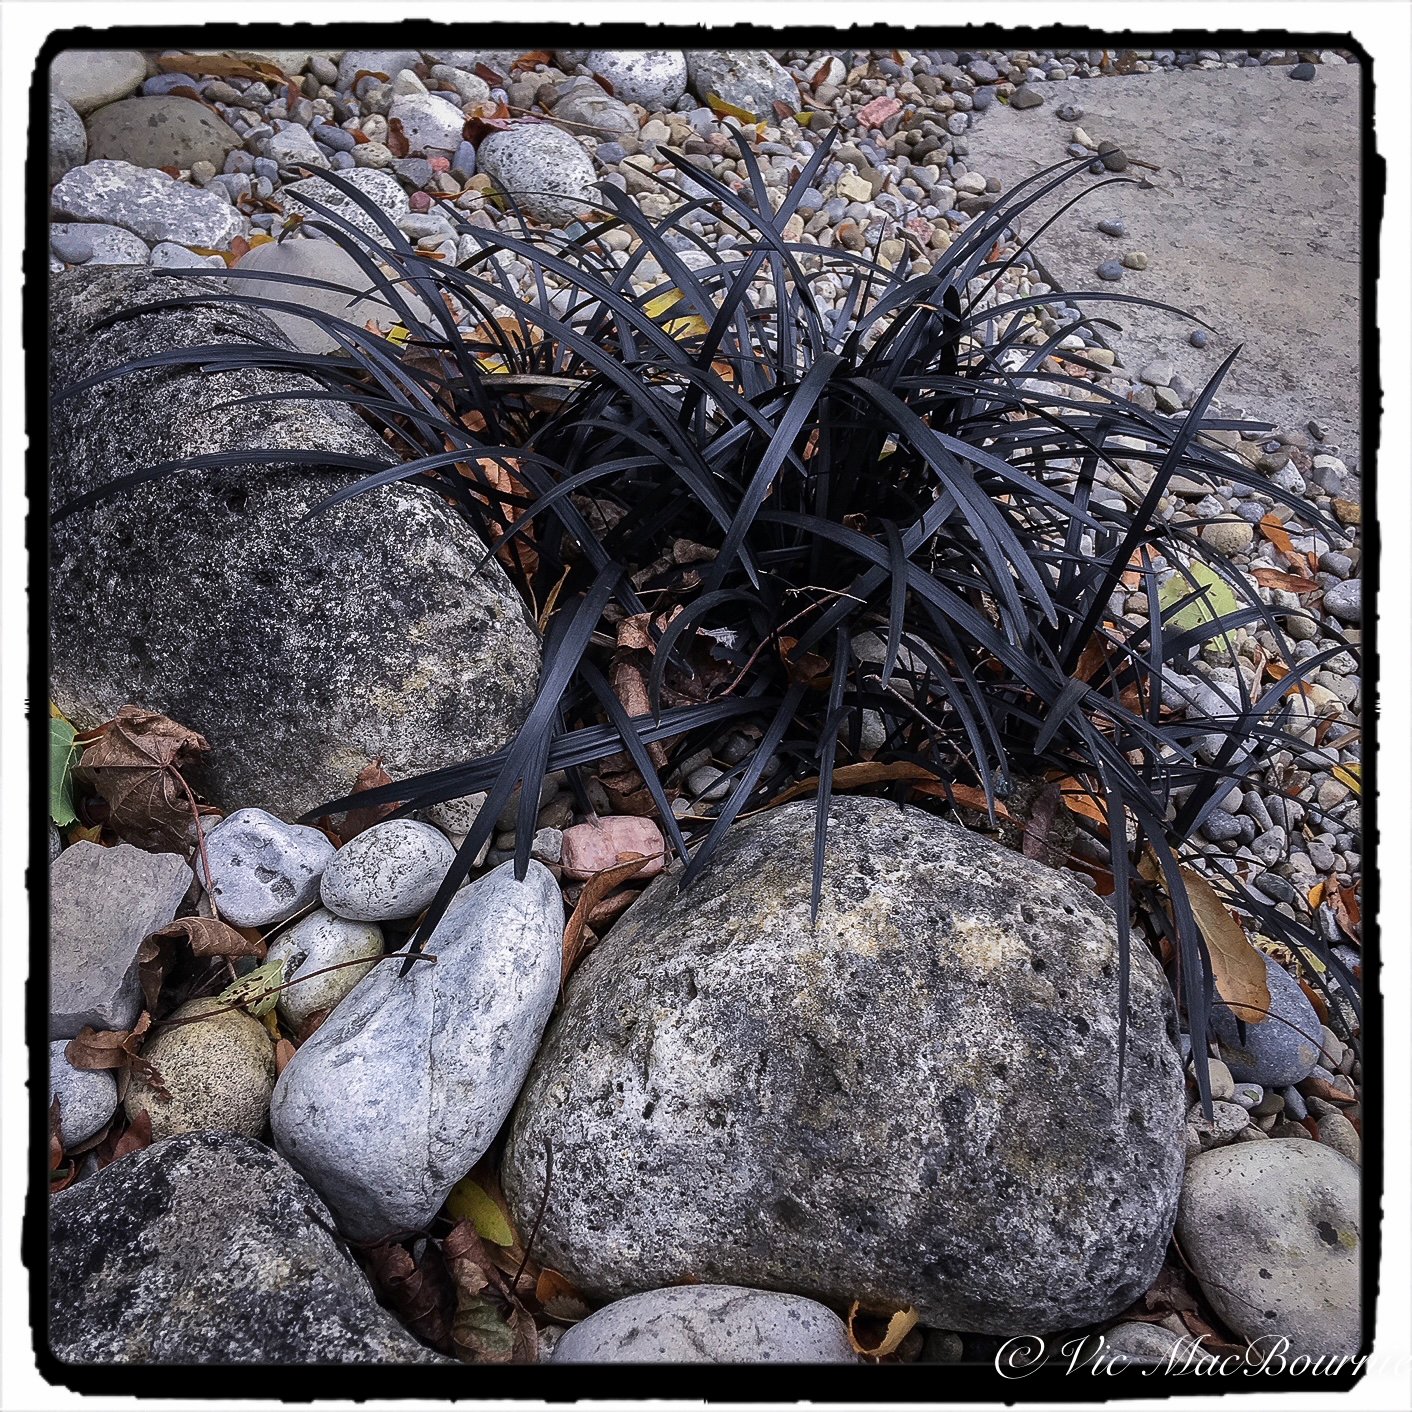
A good example of black mondo grass growing in our dry river bed.
Black Mondo Grass for a bold statement in the garden
Black Mondo grass (Ophiopogon Planiscapus Nigresce) Black plants of any kind are always in high demand and, when that plant is actually described as a “grass,” you know it’s something special.
While not actually a grass, this hardy to zone 5 perennial grows to a height of between 5-6 inches (15cm) in average to moist soil in full to part sun. It spreads nicely into a clump of up to 17-18 inches (45cm), and can be used in the landscape as a nice tidy edging or as an accent to bring focus to an area with it’s dark foliage.
Black mondo grass can take on a greenish colouring if it’s in too much sun. In addition, it has small purplish flowers that can almost go unnoticed. They can be left on the plant or cut off if you want to maintain that grassy look.
Keep the plant well watered as well.
How I use Black Mondo Grass
I use a lovely clump of black mondo grass almost like an island growing in a dry-river bed. The strapping black grass-like foliage always brings a smile to my face when I see it growing up among the grey pea gravel and river rock. Under the right conditions, it can be striking.
Our clump has grown to the point that I need to divide it, so I am hoping to use it as an edge near our patio where I can appreciate it up close on a daily basis.
Blue Fescue adds a touch of colour to dry, sunny areas
Blue Fescue The adaptibility of Blue Fescue (see photo in graphic above) makes this grass a favourite among gardeners. Not only is this a tough little grass that can take hot, sunny, dry areas, it brings a blue-grey element to your landscape.
The fescues are actually considered a perennial evergreen grass that likes dry to average soil in full to partial sun. It grows to about 10 inches in height (25cm) with a similar spread. It grows in very distinctive clumps, so if you’re looking for a smooth grass to act as a replacement for a traiditional lawn, these are probably not ideal.
Looking for more information on ground covers? Please check out my other posts on ground covers I use in the woodland garden.
• Bunchberry ideal ground cover
• What is the easiest ground cover to grow?
• Creeping thyme as a ground cover
• Moss and moss-like ground covers
• Virginia Creeper as a vine or ground cover
How to use Blue Fescue in the landscape
This grass is ideal for a hot, dry area where it can be used as an edge or planted in drifts. In the right location, its clumps of blue foliage can be stunning. Inflouresences add more elegance to the plants later in the summer through fall.
I use it both in our front and back gardens near dry river beds where its grey foliage complements the stone while it stays short and compact never intruding or competing too much with the simplicity of the dry river beds.

Coleus: A colourful addition to the shade garden
Coleus is a plant that more gardeners need to consider both at container plants as well as additions to the landscape.
Three Coleus you need to consider for your containers
If you are looking for more colour in your shade-based containers or landscapes, it might be time to focus on Coleus with its variety of colours, shapes and sizes.
Coleus has got to be one of the most underrated and underused annual plants of its time.
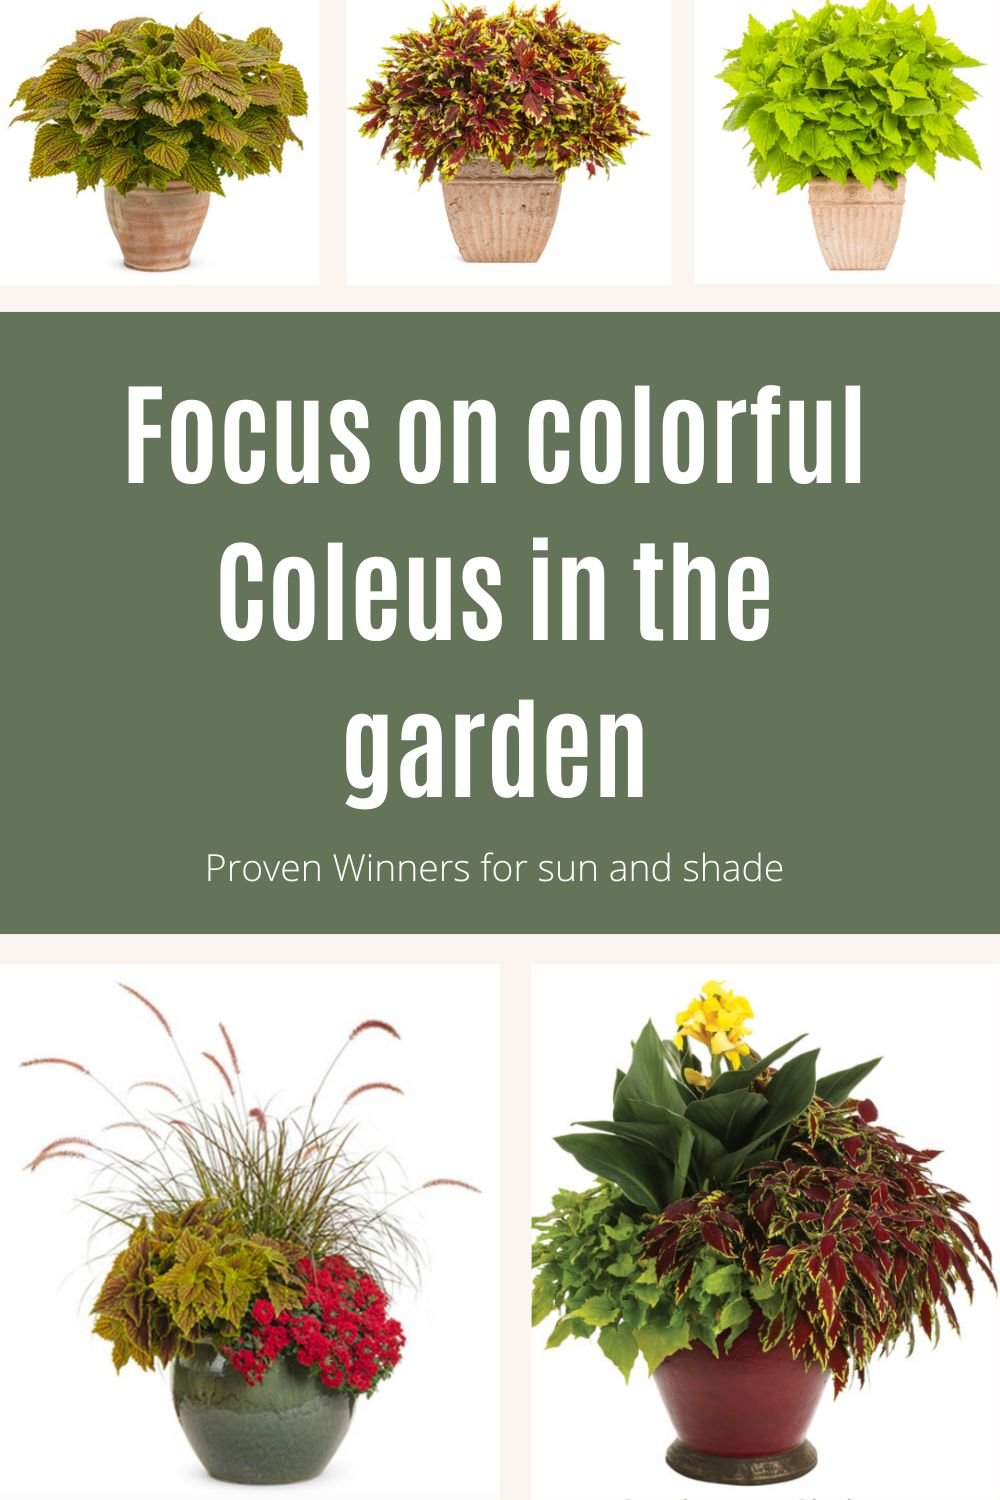
A combination of Proven Winners Coleus in containers.
If you have hesitated to embrace these incredibly colourful and easy-to-grow annuals in your garden, it’s time to give them some love.
Anywhere you have planted ferns and hostas is a good place to plant Coleus for a little or a lot of colour.
Coleus, by the way, is not only for shade gardens. New varieties of Coleus are available that can take both sun and shade.
These plants have come a long way in the past couple of years thanks to the work of the people at Proven Winners and other plant propagators who have created new hybrids that can take both sun and shade, and look extremely good doing it.
Proven Winners alone lists 17 different Coleus in its arsenal. Everything from plants with colourful foliage patterns to those with solid colours such as the deep reds in Rediculous, the burnt orange colours and ruffled edge of Wicked Hot, or the incredible lime greens of Lime Time.

Golden Dreams Coleus by Proven Winnder combines nicely with grasses in this container planting.
If you want to see Coleus in action both as singular plants in a container, or in combinations with a host of other plants, check out Proven Winners top ten Coleus suggestions.
I have used Coleus in our front containers to add colour in areas that usually get deep shade and was thought to be good for only ferns, hostas and the like.
This year, after so much success in the past few years, a variety of Coleus will take prominent spots in both our front and back containers and maybe find a spot or two in our landscape.
The results have been impressive.

Proven Winners Golden Dreams Coleus creates a soft, restful background that does not fight for dominance in the landscape.
In fact, last year I planted a Proven Winners Colorblaze Golden Dreams Coleus in a large container to hide some utilities, and not only did it grow so large that it hid the utilities, it turned out to be the star of the Japanese-inspired garden.

This Golden Showers Coleus was used in the Japanese-inspired garden to hide utilities and blend in the natural colours of the garden with its soft, golden tones.
One of the reasons it worked so well in the Japanese garden is that Golden Dreams Coleus, though colourful with its chartreuse leaves and red veining, tends to be a calm, restful background plant that brought together the greens of the surrounding foliage, and reds of the Bloodgood Japanese Maple that provided the plant with afternoon shade.
This is the beauty of Coleus plants that come in such a range of colour combinations that they can work as both a bold statement in the garden or a calming, quiet addition depending on how you choose to use them.

The chartreuse and red of this Coleus is an outstanding addition to any garden.
A Golden performance in the garden
The award-winning Golden Dreams Coleus, like many Coleus plants, performs well in both sun and shade. All it asks for is a reasonable amount of humidity which it certainly got in our humid climate where moss grows naturally between the flagstones.
In very low humidity environments, you would be best to grow it in an area where it gets plenty of afternoon shade.

This Golden Showers Coleus brings in the colours of the garden and helps to create a cohesive feel and look to the Japanese-inspired garden.
Deadheading not needed
There is no deadheading necessary for these plants. In fact all I ever did was plant it, water it regularly and watch it grow. You can pinch it back to thicken up the plant, but it’s not really necessary.
Deer resistant foliage plant
Even the deer wanted nothing to do with this foliage plant, which makes Coleus ideal for woodland gardeners that share their space with a hungry herd of deer.

Coleus is seen here in a small container adding colour to a primary green fern garden but also picking up the yellow of the adirondack chairs.
How to grow Coleus in containers and in the landscape
These plants can grow quite tall. In fact mine was so happy it probably reached three-feet tall and close to that same distance in width by the end of the summer.
If you are planting several specimens out in the garden, plant them about 18-24 inches apart to form an impressive clump of foliage.
In a container, one is probably all you need. They certainly grow large enough to use as a thriller in the container pulling together colours from your other plants.
Of course, the wide variety of Coleus demands that the gardener do a little research on the habits of each plant to get the most out of them.
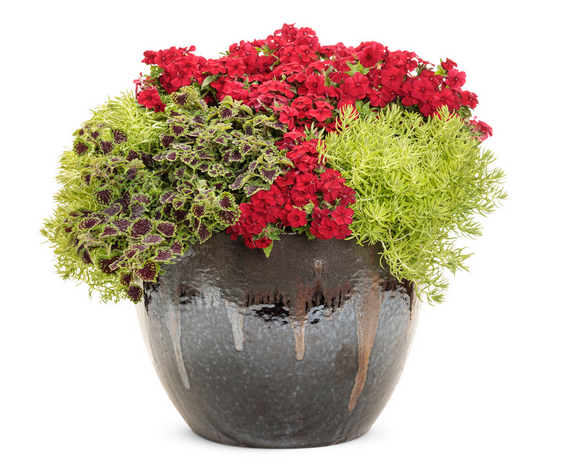
The smaller Chocolate Drop Coleus combines nicely in this container as a filler.
Many varieties of Coleus to meet all your needs
There are too many varieties to describe each of them, but here are a few you might be interested in planting.
In the Proven Winners Color Blaze family, consider Chocolate Drop (Coleus scutellarioides) for a sun or shade location.
This is a smaller Coleus that grows between 18 inches to about 2 feet with smaller rounded green leaves boasting a deep crimson centre that spreads out toward the edges of the plants.
Proven Winners describes the colors as black and green but the overall effect is not quite that extreme.
Like Golden Dreams, there is no need for deadheading and the plants are pretty much maintenance free.
Where I live, they are treated as annuals, but if you are in a very warm climate, they are considered hardy in zones 10-11.
Their trailing habit makes them great for flower beds and containers, but they do better as a spiller rather than a thriller.
Mini Me Watermelon is new this year
If you are looking for an even more compact coleus to add to your container, or one with some serious colour punch, the Proven Winners Mini Me Watermelon is the one.
It might be tricky to find because it’s new this year, but this little red and chartreuse coleus growth ranges from 12 inches to 20 inches with a spread restricted to between 10 and 18 inches.
It’s a new type of ColorBlaze that is substantially smaller than the rest of the ColorBlaze coleus. Proven Winners says the plant is still being developed and may have variable leaves or branches that can be easily taken out if necessary.
Again, this Coleus, with its watermelon-coloured foliage rimmed with golden chartreuse accents can take both sun and shade.
Like most coleus, this one is designed to bloom well into fall until it is hit with the first heavy frost of the year. It’s deer resistant and can be used as a thriller with its upright growth.
Proven Winners says the plant can be used in borders, containers as well as mass planting in the landscaping.

Going Black & White in a world of colour
Black and White photography has always been an expression of art and there is no better way to appreciate your garden than explore its inner beauty with B&W. Strip the colour away and focus on the lines, shapes and textures within the garden. Today’s digital cameras, including the Pentax Monochrome are well suited for capturing our gardens in B&W, and today’s software editing programs help get the most out of the images.
Pentax K-3 Monochrome makes it easier and more affordable

This image of a Barred Owl captured in a nearby woodland was photographed with my Pentax K5 and 300mm F4.5 with a 1.4 converter and then converted to B&W with post processing in Lightroom.
Our gardens can often be a riot of colour. Taming that colour may involve moving in close to isolate a single flower or using complimentary colours to bring harmony to the scene.
But have you ever thought of just eliminating the colour altogether to create that simplicity we all strive for in our images?

Pentax has just released a B&W-only version of its highly capable K-3 camera resulting in an affordable B&W only camera.
Nothing inspires simplicity quite like the magic of Black and White photographs. And, although B&W photography took a back seat with the introduction of digital photography, it never went away.
In fact, creating B&W images has never been easier.
Almost all modern digital cameras have the capabilities of shooting excellent B&W images.
In addition to shooting B&W in the camera, most imaging software programs (ie. Lightroom and Photoshop) can easily convert colour images into high quality B&W photographs.
Cameras like my Fujifilm X10 make getting to the B&W settings very simple and even include basic filters to control the tones and contrast in the images. Other modern cameras, however, hide the B&W settings deep in the menus making them a little tricky to find.

The back LCD screen of the Pentax K-3 Monochrome includes a lovely monogram distinguishing that this camera shoots only Black and White.
Pentax/Ricoh brings B&W photography to the masses
And some cameras, like the recently announced Pentax K-3 Mark lll Monochrome, are designed only to shoot in B&W.
Pentax has just recently joined Leica as the only manufacturers to offer photographers cameras that focus on B&W only.
And, at a suggested retail price of about $2,199.95 for a feature-packed and proven high-quality camera, exquisite B&W photography has just become very affordable in comparison to Leica’s $9,000 price tag for the M11 Monochrome.

The Pentax Monochrome offers an affordable alternative to the expensive Leica Monochrome.
Let’s face it, for many of us B&W photography is an after thought.
For the younger generations, B&W photography is another way to get a vintage look in their images much in the same way as the emerging trend of using older digicams or print film to create that look.
But Pentax has just made getting that vintage look fun and affordable.
Add a couple of Pentax’s venerable vintage K, M or A lenses and combine those with a couple of Pentax’s exquisite limited lenses and it’s not hard to understand why the release of this camera is a dream-come-true for B&W enthusiasts.
Pentax notes on its website that “Monochrome (or black-and-white) photography is the origin of photographic expression. Without color data, monochrome can more clearly depict the form and texture of a subject using light, shadow and the in-between gradations…”
“For users who want to master monochrome photography, the PENTAX K-3 Mark III Monochrome features an image sensor specifically designed to capture monochrome images only. By designing the camera solely for the purpose of monochrome photography, each pixel detects brightness data of the light coming through the lens. The obtained data is then directly converted to compose an image.”
What makes B&W-only cameras special?
The sensors in the cameras are designed specifically for getting the best black and white images possible complete with a higher dynamic range, a sharper image, more pleasing tones and better low-light results.
By taking one of Pentax/Ricoh’s most successful DSLR’s and incorporating an APS-C-format CMOS image sensor specifically designed to capture monochrome images, Pentax is able to offer an already proven, high-quality camera that just happens to be designed for B&W photography to the masses.
And, although I’ll admit a bias toward Pentax cameras after shooting with them all my life, the result in an exquisite example of form and function.
Pentax notes that: “By designing the camera solely for the purpose of monochrome photography…“The photographer can create extra-fine monochromatic expression in an image high in resolution and rich in gradation.”
The Pentax Monochrome also offers photographers three custom image modes for even further creative control. These exclusively designed modes for the monochrome-specific image sensor include: Standard, hard and soft.
“Each mode provides minute adjustment of parameters such as tone, key, contrast, and sharpness” Pentax notes in its website. “This allows the photographer to personalize images for the desired finishing touch.”
Pentax cameras have always been a favourite of mine when it comes to design in both form and function.
Add to the beauty and elegance of the camera, its ability to use all of the beautifully constructed vintage lenses on the Pentax cameras, and you have yourself a winning combination right out of the box.
Pentax didn’t miss a thing in the design of the Monochrome.
The K-3 Mark lll Monochrome camera body has a distinct stealth look to it, from the greyed-out Pentax writing on the front of the camera to the white backlight illumination on the LCD data panel on the top of the camera, and the Monochrome lettering printed in the upper-left area of the back panel above the LCD window.
Even the camera’s User interface menu features a black-and-white colour scheme as default, while the icons printed on buttons and switche across the camera’s exterior are finished in three shades of gray.
So, if you are serious about B&W photography, or are looking for some inspiration to take your photography to a higher level, this new Pentax offers the ability to dive into the simplicity offered through B&W.
But, if you are not sure about jumping into B&W photography at that level just yet, you can experiment by using the B&W settings on your existing digital cameras.
Here are a few tips on how to explore B&W photography with your existing cameras.
If you think you may want to explore B&W photography further, consider enrolling in the course link below.
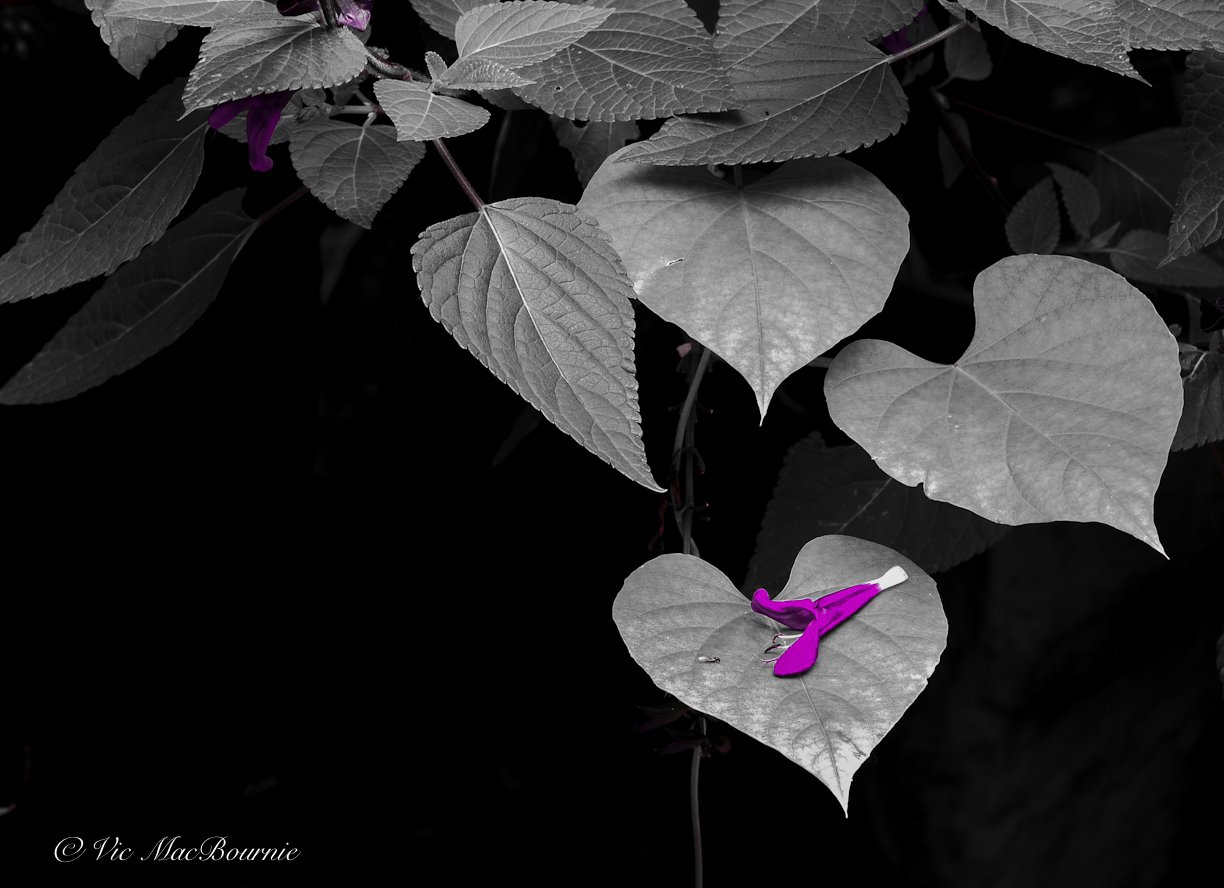
This B&W image in the garden is made more dramatic with the single salvia flower in colour. The simplicity of the image is what makes it stand out from a full colour image or a full B&W.
3 ways to shoot in B&W
Dig into your camera settings and find the B&W filter. Almost every modern camera includes the ability to set the camera to capture images in B&W and sepia or “old fashioned” look.
In post production with software. Whether you use Lightroom, Photoshop or some other photo software, there is always a simple way to turn a colour image into a B&W. There is also software designed specifically to get the most out of your B&W images using tonal controls etc.
For dedicated B&W photographers, consider purchasing the Pentax K-3 Monochrome or the Leica Monochrome. These cameras only shoot B&W, but the results can be stunning.

A dusting of early morning frost brings this B&W image to life. Note the contrast in the image with the white frost jumping out from the dark shadows. The simplicity of the image is really in its unperfect pattern.
Spend some time digging in the the special effects filters in the camera settings and you will likely come across them. Both my Lumix cameras and traditional Pentax DSLRs have the B&W settings buried in the menu settings. Most modern cameras also offer Sepia and/or “old fashioned” settings which are monochrome images with a hint of amber.
A simple click of the mouse is all it takes in Lightroom to transform a favourite colour image into black and white. There are even separate image software programs aimed at serious B&W photographers. (Among the best is Nik Silver Efex described as a means to “Master the art of black and white photography with the most comprehensive range of darkroom-inspired controls to help you create stunning monochrome images. )
It’s important to note that, while converting a colour image into B&W can be as easy as a simple click in most photo editing software programs, the conversion is usually just the beginning of the process. Once the B&W conversion has been completed, there are a number of adjustments that need to be made to complete the process and get the desired image.
Most photographers who shoot for B&W develop their own procedures in the conversion process to create the best result. (For a complete article on converting colour images to B&W using Photoshop, check out this in-depth article in photoshopessentials.com
The steps used in Adobe Lightroom often include:
Increasing the contrast of the image (create deep blacks and solid whites)
Using sliders to control highlight and shadow areas
Sharpen areas of the image that you want to stand out
Crop distracting areas that might not have been as noticeable in the colour version
How popular is B&W garden photography?
Consider that Britain’s Guardian newspaper even includes a B&W category in their annual garden photography contest. These stunning images from the photo contest in B&W should be plenty of inspiration to convince you to try B&W garden photography.
If you need more inspiration for B&W flower photography, try browsing these images from Fine Art America.
While it has never been easier to create B&W images, don’t be fooled by how simple modern cameras have made the process. Creating images with great depth in the blacks and impressive tonal qualities throughout the images, is certainly an art form.
I’ll be the first to admit that my expertise in this area is limited, but I do enjoy experimenting with images and believe strongly that a photograph is often just the beginning of the creative process, whether that involves creating a B&W from a colour image or turning a colour photograph into a digital painting.
Creating an effective B&W image is really all about simplicity.
Whether you create B&W images through software manipulation, take the image with a camera set to B&W program mode, or use one of the monochrome-only cameras, the results can be very effective.
Here are five of the best cameras to create Black & White images according to Artnews
Fujifilm X-Pro3 Mirrorless Digital Camera. ...
Sony a7R III Full-Frame Mirrorless Camera. ...
Leica Q2 Monochrom Full Frame Compact Digital Camera. ...
Sigma DP3 Quattro Compact Digital Camera. ...
Sony Alpha a6000 Mirrorless Digital Camera.
For a detailed description of each camera go to the Artnews website
B&W conversions via external software
The following are a few images from my garden created from colour images. I have included some of the original colour images to help readers see what can be done with a little imagination.
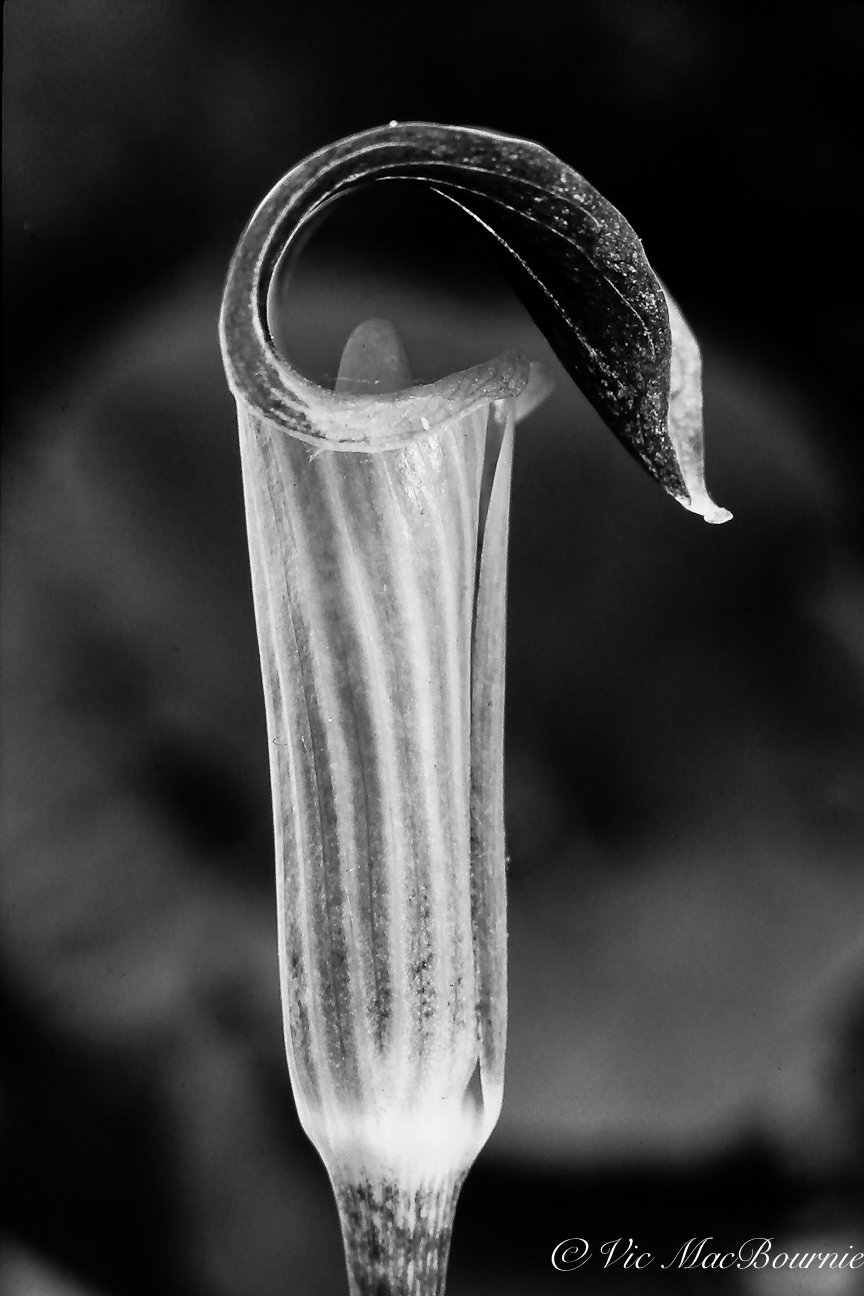
Woodland Wildflower in B&W
The simplicity of this image in colour makes it a perfect candidate to convert into a B&W image. The Jack in the Pulpit is set against a dark background making tweaking of the main subject much easier by darkening the shadows to some extent and lightening the highlights in Lightroom. Maintaining some detail in the background helps to give the image a natural look. In a studio, a solid black background would be effective but give the image a more contemporary look.


Monarch on thistle
Capturing successful wildlife in B&W can be more difficult. The simplicity of the background and the high contrast of the black veining in the monarch helps make this image work in B&W. In my mind, the out-of-focus flower in the bottom right is less noticeable in the B&W image compared to the same colour photograph.


Contemporary tulip
A macro shot of a tulip works in both colour and B&W because of the inherent simplicity of the image. The negative space in the B&W image creates a different feel than the same space in colour. There is no doubt that in the colour image more tulips make up the background, but the B&W leaves that up to your imagination.


Even wildlife can look good in B&W. This young buck was almost lost in the colour image, but with some manipulation I was able to make it more prominent.

This fern is lit by a ray of sunshine allowing it to stand out among background ferns in shadows.

This B&W image combines textures in the concrete bunny bench with the lovely Black-eyed-Susans that have been lightened in Lightroom to make them stand out even more.

Similar to the main image in this article, frost rimming elements on the forest floor adds plenty of drama. By maintaining the whites of the frost, but deepening the blacks in the shadows, the image is simplified.

An early snowstorm helped to simplify this red squirrel looking for food beneath the Northern Sea Oat ornamental grass. Once again, it is the simplicity of the image that helps it to work as a B&W image. Without the snow simplifying the bottom and areas in the background, the image would likely have been too busy to work as a B&W.
Shooting B&W in camera
Most high-quality digital cameras made today have B&W capability built right into them. Some even only photograph in B&W offering the highest quality monochrome images. These highly specialized cameras are designed for the most discriminating B&W photographers and are probably not necessary for most of us who just want to photograph our gardens and possibly hang a few artistic garden images on our wall.
Fujifilm cameras are known for replicating their original 35mm films in a digital format. My Fujifilm X10, for example, includes digital versions of former Fuji films including Provia, Astia and Velvia settings that allow photographers to replicate the same colours and feelings we remember in the film and slide eras.
Included is a B&W digital film that includes the ability to add traditional digital colour filters to enhance scenes, especially the ability to enhance skies. These same filters, a green filter for example, can create subtle differences in the leaves of trees, flowers etc.
Focusing on B&W images only in your garden
Going out into the garden with the sole aim of shooting B&W involves taking a different approach to your garden photography. It is an exercise worth tackling on a regular basis to help develop an “eye” for B&W images.
It can be fun, too, but be ready for plenty of images that just don’t work in B&W. As your B&W vision develops, your success ratio will certainly increase to the point that you will be wanting to frame them up and hang them on your wall.
A black and white garden image just has more artistic merit to hang on a wall than most colour photography.
Another feature on the Fujifilm X10 and most other digicams is the ability of the camera to take a black and white image that picks up just a single colour – green, yellow and red. I noticed a similar feature is available in the Lumix ZS50 travel camera and my Pentax Q cameras. Used sparingly, this can be very effective. The following are two images using this filter that I think work to some degree.
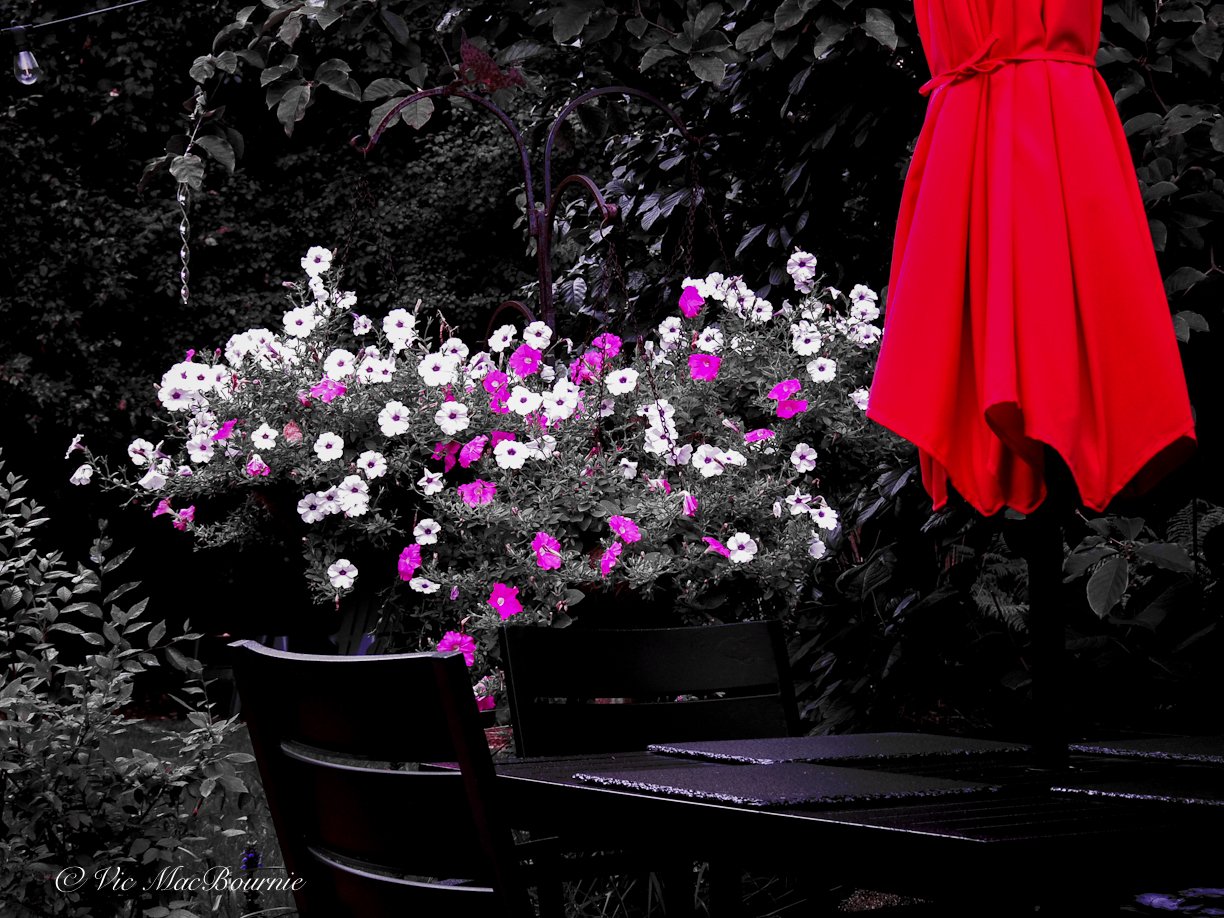
This image used the red and purple filter in the camera to add colour to the primarily B&W image.
Using the red filter creates a B&W image that picks up any element in the photograph that is red. In the image above, I also used the purple filter to bring out some of the flowers’ colour. The effect is interesting and requires a little thought to make it work. Below, the green filter was used to pull out the foliage of the wild geranium just to add a pop of colour. A true B&W or colour image would not have worked well in this situation, but works to some degree with these filters to give the image a unique look.

In conclusion
At a time when your garden lacks inspiration, taking advantage of the B&W capabilities in your camera can provide inspiration to take up a new challenge. Late Fall is an ideal time to begin develop your eye for simplicity. When winter finally hits, and snow buries parts of our garden, you will be ready to capture the beauty and simplicity of the winter woodland garden.
This is the time Black and White photography comes into its own.
If you are looking for more information on B&W photography in the field or in the garden, take minute to check out the YouTube video Walks on The Wild Side where photographer Scott Walker provides excellent tips on taking B&W nature photography.