

Making a difference: Shannon turns monoculture farm into a pollinators’ paradise
Shannon McNally is just one of the many women making a difference in the preservation of nature. Shannon and partner, Justin, were recognized for their work in restoring a once monoculture farm into a pollinator’s paradise. Shannon’s work with monarch butterflies also shows her commitment to the natural world.
NAPPC recognize her tireless work
It’s easy to excuse Shannon McNally for being nervous when she accepted her award from NAPPC as Canada’s best Farmer-Rancher.
Afterall, accepting an award from experts in the field of pollination – professors, scientists and other highly educated seasoned professionals – is one thing, but when it’s the first award you can remember receiving since a 4th Grade fairness award, it’s a big deal.
Especially when you’re only in your 20s, have no formal education in the field and very little experience in farming.
As you can imagine, receiving a national award from the North American Pollinator Protection Campaign (NAPPC) and the Pollinator Partnership, is a VERY BIG deal.
Shannon and her partner, Justin, received the award for converting more than 33 hectares at White Church Farm of a monoculture soy and corn farm in Hamilton, Ontario, Canada, into a pollinators’ paradise.
“It’s been five years ago now when I made the decision to join all of you who have been fighting for a greener future,” she said in her acceptance speech for the award.
“In 2017, Justin and I both quit our jobs to become first-generation farmers. At the time I was 23 years old with little experience or related formal education. My strengths relied entirely on my relentless passion for creating more space for nature and using the internet,” she explained.
“Caring was truly my biggest asset. I wanted to highlight that because I know that each and every one of you have that same strength too,” she said in a zoom call to an audience of co-award winners, organizers, professors and experts in the field.
Her passion for the environment and her dedication to making a difference in a natural world where climate change is threatening everything she cares so much for led her to take on the challenge.

Shannon McNally in one of the fields she works in Hamilton, Ontario Canada. Photo courtesy Shannon McNally.
“If I had waited until I felt confident enough, experienced enough or educated enough to start trying to make a difference, I would never have started. As a rookie in this community, I was constantly inspired by all of you and truly humbled to be in your company and to connect with you today,” Shannon said in her speech.
Since taking on the challenge, Shannon has been working hard to reshape the land with a plan for long-term biodiversity.
Bringing back nature
Each year, she works to restore large areas by planting permanent, native plant species including up to 30 trees and hundreds of perennial wildflowers. And that was just last year.
In addition, she has also planted more than 5 acres in permanent, mixed bee forage, created clover pathways around the farm, cultivated diverse, mature tree lines and hedgerows, and recently established a 2-acre permaculture orchard.
Each year, the farm grows a succession of sunflower fields for bee forage and bird seed and they plant a cover crop for pollinators.
“In this era of climate crisis, she explained in her acceptance speech, “we need everyone’s strength and contribution. Each of us has such an important role to play and we no longer have the luxury of time to get in our own way.
Her call to action did not go unnoticed by her peers at the NAPPC awards ceremony.
“NAPPC is thrilled to recognize Shannon McNally with the 2021 Canadian Farmer-Rancher Pollinator Conservation Award,” says Dr. Lora Morandin, Research and Conservation Director at Pollinator Partnership.
“Shannon’s work to provide habitat for pollinators and support biodiversity on her farm is an excellent example of how growers can incorporate conservation within their production systems. Creating pollinator habitat also supports beneficial insects that control pest insects, which can reduce the need for chemical pest control. We hope that the work Shannon and other farmers are doing to help pollinators provides inspiration to others to find ways to support pollinators and other wildlife or their farm or in their yard.”
The North American Pollinator Protection Campaign is a coalition group administered by Pollinator Partnership. NAPPC's mission is to encourage the health of resident and migratory pollinating animals in North America.
P2’s mission is to promote the health of pollinators, critical to food and ecosystems, through conservation, education, and research. The Canadian arm of Pollinator Partnership (P2C) is a registered not-for-profit organization.
The organization is quick to point out that pollinators perform a nearly invisible ecosystem service that is a precious resource requiring attention and support. It adds that disturbing evidence found around the globe, shows that pollinators and the service they provide is increasingly in jeopardy.
Shannon is more than aware of the ever emerging deadline she and others face to not only slow the trend but to work hard to reverse the trend as quickly as possible.
Not unlike woodland gardeners toiling away to rewild their small urban or rural plot of land using native plants, trees and shrubs, Shannon also realizes that the work she is doing on the small farm is just one step in the solution.

Her work with Monarch butterflies this past year is an example of her commitment to helping wildlife and was one reason she was recognized by NAPPC.
Helping monarch butterflies through social media
“I really enjoy participating in conservation efforts, but often feel overwhelmed by wanting to help ALL of the at-risk and endangered species,” Shannon wrote to her Facebook followers earlier this year.
“I do as much as I can here, but I feel the biggest impact I have is through sharing on social media. The possibility of someone being inspired into action and the potential ripple effect that could have is what gets me the most excited,” Shannon explains.
“With so many disheartening headlines these days, finding joy in nature and cherishing the positive outcomes from even the smallest of actions is worth celebrating. My hope with sharing this is that you can feel the same joy I do when I watch these monarchs fly away after 5 1/2 weeks of attentive care.”
In the coming year, Shannon plans to restore a riparian area with native trees and shrubs as well as install a monarch-focused garden featuring three milkweed species.
The work she is planning on a monarch-focused garden follows her success this past year of raising 100s of monarchs from eggs and sharing her work with others through social media.
Plans are still in the works for next year but Shannon says her focus will be on creating habitat for other native species rather than any rearing and releasing monarchs.
“It was a wonderful, educational and inspiring experience this year and I'm excited to see what next year has in store.”
More NAPPC award winners
Some of the other 2021 Pollinator Award Winners included:
2021 NAPPC POLLINATOR ADVOCATE - UNITED STATES
This Charleston, SC based non-profit organization works to engage students of all ages within their own environments through observation-based learning. Ted Dennard, a lifelong beekeeper and the founder of Savannah Bee Company, and Tami Enright, a fellow beekeeper and environmental educator, have dedicated their lives to protecting pollinators, founding The Bee Cause Project and securing a national partnership with the Whole Kids Foundation. The organization solicits honey bee grant and observation hive program receives hundreds of schools’ participation applications annually, and more than 550 schools and organizations have received bee grants to date, impacting thousands of children across North America. They have also introduced digital hives as an alternative for schools or community centers that cannot host a live beehive, and have just launched a Pollinator Garden Grant for Libraries.
DAN AND MICHAEL O’LOUGHLIN
2021 NAPPC-NACD FARMER-RANCHER - UNITED STATES
Dan and Michael O’Loughlin operate a 200-acre farm in Yamhill County, OR that primarily grows tall fescue seed. There are few pollinator initiatives in Oregon that the O’Loughlins have not supported or helped, including having surveyed bees at over 1,500 locations for the Oregon Bee Atlas, having worked with the county to establish trials assessing roadside pollinator seed mixes, having created pollinator habitat at schools through the State School Garden Network, and having served as leaders in the State Pollinator Protection Initiative, the Oregon Bee Project. O’Loughlin Farm has also made major strides to increase insect biodiversity. The farm rarely uses insecticides owing to the high endemic populations of beneficial insects and vertebrates, and insectary plantings are key to this strategy. Many of the plants they use are important nectar and pollen sources and butterfly host plants.
2021 NAPPC POLLINATOR ADVOCATE – CANADA
Pollination Guelph, founded in 2008, is an entirely volunteer-run charitable organization that focuses on protecting pollinator habitats by building and maintaining public and private gardens throughout Guelph, ON. Several notable projects include Eastview Pollinator Park, The Gosling Pollinator Gardens at Hospice Wellington, Trans Canada Trail Pollinator Gardens, and Clair Road Emergency Services Centre Pollinator Habitat Meadow. In addition to on-the-ground work, Pollination Guelph reaches out to its diverse audience with numerous education initiatives and advocacy campaigns through their website in the form of videos, web links, downloads, factsheets, and newsletters on a wide range of topics. The organization also hosts an annual symposium featuring workshops and networking opportunities that is attended by people from all over Canada. In addition, their Community Grant program enables other nonprofit groups in Guelph to establish and maintain pollinator habitat. In 2021, this program provided a total of $10,000 to 16 local organizations.
ESPECIES, SOCIEDAD Y HABITAT, A.C.
2021 NAPPC POLLINATOR ADVOCATE – MEXICO
Especies, Sociedad y Habitat, A.C. (ESHAC) is a nonprofit organization that uses a human community-centered approach to implement projects that promote the conservation of natural resources and endangered species while promoting sustainable use of biodiversity. ESHAC has implemented more than 30 projects in northeast Mexico, impacting more than 30,000 hectares of priority area for conservation in the region. Over the last five years, ESHAC has been collaborating closely with Don Martin-CONANP to promote the conservation of the Mexican long-nosed bat (Leptonycteris nivalis), with special emphasis on protecting cave roosts and enhancing foraging habitat along their migratory corridor. To date, they have planted over 9,500 agaves near critical roosts and restored over 250 hectares of habitat. They have also worked with local communities to develop holistic management approaches, train 79 individuals form 5 communities in sustainable and regenerative agriculture and grazing techniques, and pioneer a drone-based survey protocol to evaluate foraging resources for pollinating bats at the landscape level.
EMILIO VIEYRA
2021 NAPPC FARMER-RANCHER – MEXICO
Emilio Vieyra owns and operates Mezcal Don Mateo de la Sierra to produce one of the few environmentally friendly, sustainable mezcals. He ensures that the areas where they grow agaves remain forested and was one of the first to receive recognition of Bat Friendly© practices, keeping the recognition each year since 2016. In keeping with this recognition, Emilio allows at least 5% of his agaves to flower for bats and other pollinators. The majority of bats visiting their plants are the endangered Mexican long-nosed bat (Leptonycteris nivalis), showing the impact of their practices at the local level. Regionally, Emilio is educating his peers and extending his practices to other mezcal producers. He also hosts practical seminars covering all his production processes for bartenders and others during the flowering season, creating many other promoters of Bat Friendly© practices in the process.
TORONTO AND REGION CONSERVATION AUTHORITY
2021 NAPPC ELECTRIC POWER
Toronto and Region Conservation Authority’s (TRCA) The Meadoway is an active urban restoration project in Toronto, ON that encompasses 200 hectares and 16 linear kilometers of the Gatineau Hydro Corridor between the Don River Ravine and the Rouge National Urban Park. The goals of the revitalization are to create and maintain a diverse, native meadow habitat for local wildlife and to create and active East-West link between Toronto and the Rouge National Urban Park. Full project completion is expected by the end of 2024, but by the end of 2021, 64 hectares will have been restored, completing 70% of the project. The Meadoway will connect seven rivers and ravine systems, 15 parks, 16 km of trail, 13 neighborhoods, over 200 hectares of greenspace, and more than 1,000 diverse species of flora and fauna. Corporate and community groups have also been engaged as participants in stewardship activities including the planting of native potted stock, garbage collection, invasive species removal, and interpretive walks.
More on Pollinator Partnership
Pollinator Partnership’s mission is to promote the health of pollinators, critical to food and ecosystems, through conservation, education, and research.
The Pollinator Partnership is working to protect pollinators and their habitat with projects all over the North America and globally. See what local and regional initiatives are active near you.
Pollinator Partnership Canada (P2C) is a registered not-for-profit organization dedicated exclusively to the protection and promotion of pollinators and their ecosystems through conservation, education, and research.
Birds, bats, bees, butterflies, beetles, and other small mammals that pollinate plants are responsible for bringing us one out of every three bites of food. They also sustain our ecosystems and produce our natural resources by helping plants reproduce.
Pollinating animals travel from plant to plant carrying pollen on their bodies in a vital interaction that allows the transfer of genetic material critical to the reproductive system of most flowering plants – the very plants that
bring us countless fruits, vegetables, and nuts,
½ of the world’s oils, fibers and raw materials;
prevent soil erosion,
and increase carbon sequestration
Trail camera turns garden photography into backyard safari
The Wingscapes BirdCam Pro is a unique Trail Camera that allows extremely close focus to capture birds and mammals at feeders, birdbaths, bird houses and in the garden. Trail cameras, originally designed for hunters, are now becoming popular for homeowners and gardeners wanting to document the wildlife in their backyards.
Wingscape models capture birds and mammals up close
It’s like a baby cam but instead of keeping an eye and ear out for a little one, it watches over your backyard for wildlife wandering through your garden.
For anyone who wants to know what is passing through or hanging out in their backyard night and day, one of the popular trail cameras is essential.
Trail cameras for home security and to document backyard wildlife
Woodland/wildlife gardeners may not know too much about these popular cameras, originally designed to allow hunters to document the wildlife using a particular trail out in the field.
While they continue to be a tool for hunters, more and more the cameras are finding their way into backyards not only to document the wildlife that are using the yard throughout the day and, especially, throughout the night, but also to act as a security camera to capture any potential security threats in the backyard.
Place one on your deck, for example, for security and to monitor wildlife. Realize, however, unless they are secured, they can be stolen or the digital cards removed by knowledgeable thieves. They will also put out light to capture images and video. Animals are not bothered by the lights but humans will notice it.
(If you are interested in exploring garden photography at a higher level, be sure to check out my comprehensive post on the Best camera and lens for Garden Photography.)

The benefit of the Wingscape Bird and Trail camera (pictured above) is that you can get up close and personal with backyard wildlife.
For more suggestions and some of my favourite garden things, be sure to check out my Favourite Things post.
Quality and features of the cameras and images vary widely, but most capture high-quality images and video both night and day. Some of the higher-end models even send the images to your smart phone to allow you real-time monitoring of the camera.
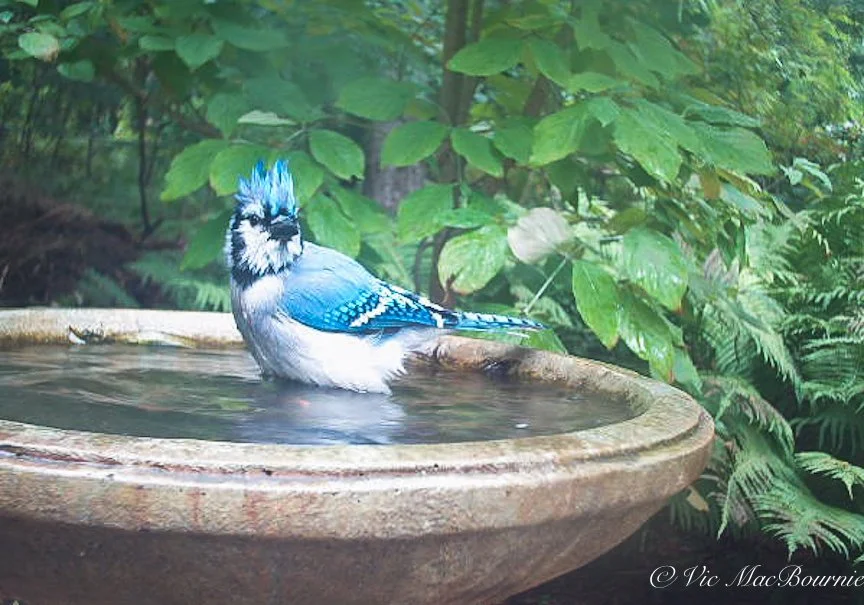
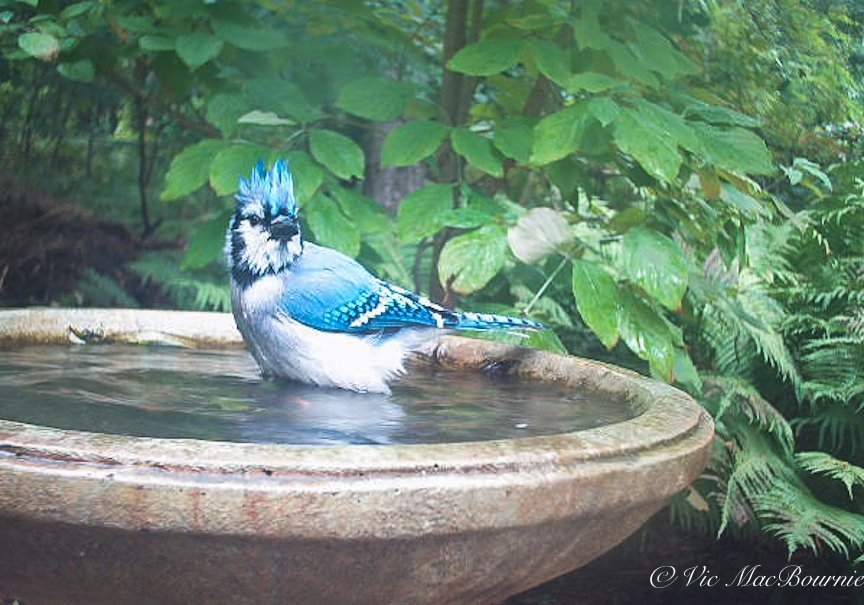
This photo of a Blue Jay at the bird bath was captured by the specialized bird camera. Imagine if it was a more rare bird or even a raptor that visited?
I’m not here to give readers a review of the best and worst trail cameras because I don’t own them all. I will, however, provide readers with some of the better cameras recommended by those who have tested the various models and tell you about my experience with my hybrid trail/bird camera.
Top five trail cameras from Bestreviews.guide
My hope is that this article simply introduces Woodland/wildlife gardeners to the possibilities these cameras offer them.
(I was fortunate enough to purchase a highly specialized trail camera (the Wingscapes BirdCam Pro) designed to capture birds and other wildlife images up close. More on that later in the article.)

Blue Jay at the BirdCam. The trail camera can be set up to show date and time, helpful if you are documenting times that wildlife appear.
Back to the Trail cameras. The cameras, that primarily run off of batteries, are meant to be left out in the field for months on a trail through any type of weather documenting the wildlife in the area. Some are available with supplementary solar power panels to give batteries a longer life, others use solar powered batteries to keep them going in the field for months. Most come with straps and other methods of attaching them to trees. They also have tripod attachments that enable the cameras to be used with a tripod or device that uses tripod-style attachments.
Woodland/wildlife gardeners can mount them to a tree, a pole or just place them on a tripod and move them around the yard to capture the fox, the skunk maybe the coyote or deer that you suspect are wandering through your yard while you sleep. Unlike hunters who have to worry about the expensive cameras possibly being stolen or damaged out in the field, gardeners can leave the camera out without any real fears of the camera being stolen or damaged.
If you are lucky enough to have a den in the yard, set the camera up near the den to document the life of your new little neighbours. Maybe you will be lucky enough to capture the babies as they emerge into the world and discover your garden.
The possibilities are endless.

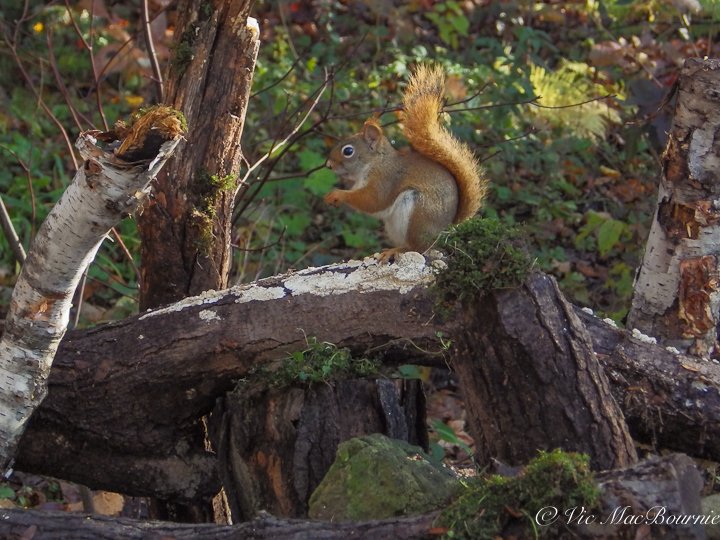
The BirdCam is perfect to use at an outdoor photo studio that is specifically set up to photograph wildlife. Here a red squirrel is photographed up close and personal.
If you are still curious about what these trail cameras are capable of, check out a few of the thousands of Youtube videos that have been put up from all corners of the earth. My favourites are videos documenting wildlife in national parks ranging from the Florida Everglades to videos from Algonquin Park in Northern Ontario, Canada. Here is a good one from a small watering hole in Arizona.

This deer was caught on our trail camera in the middle of the night. These cameras are a great way to monitor what animals are roaming your property at night.
A few months ago I decided I needed a trailcam after watching our neighbourhood fox regularly wander through the yard. I have seen several deer, racoons and a few possums, but I suspected we probably had more wildlife visitors than I realized, including the odd coyote.

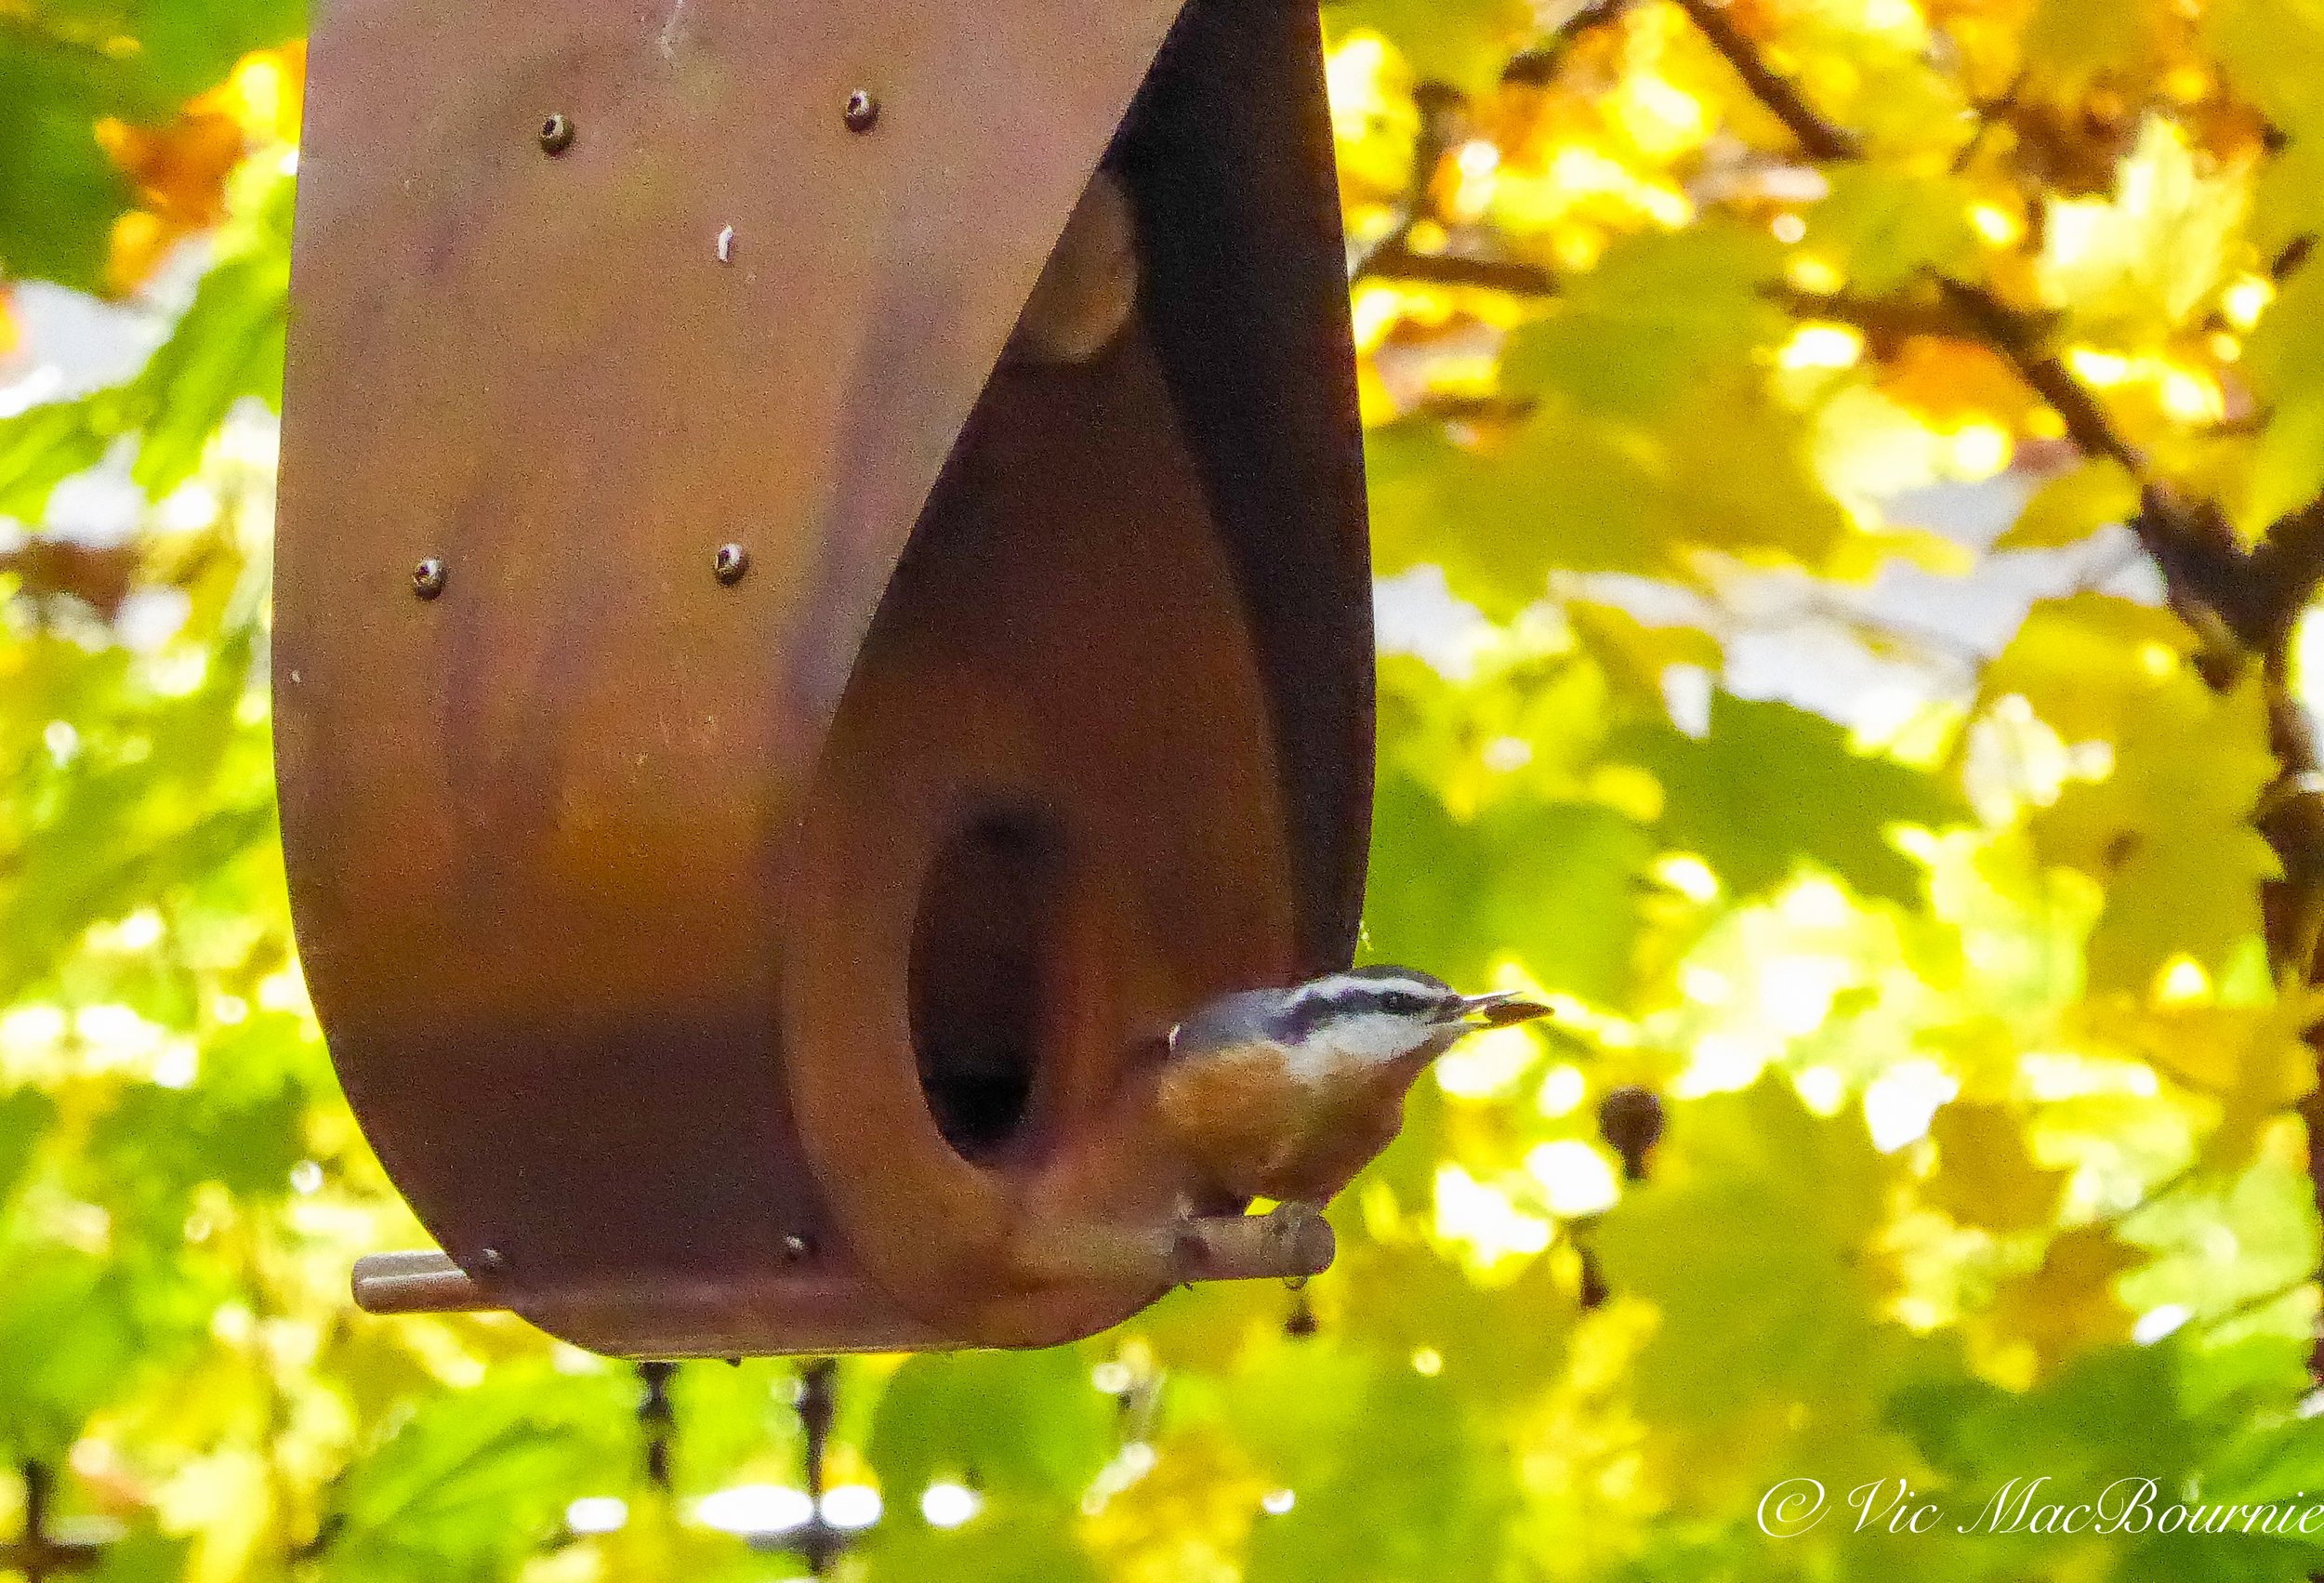
Another image of a wren caught on the BirdCam Pro at the birdbath.
The Wingscapes BirdCam Pro a hybrid trail camera
Regular visits to Kijiji where there are always several used trailcam models of varying quality and price points available, led me to the Wingscapes BirdCam Pro.
Although it can operate as a regular trail camera, the Wingscapes BirdCam Pro has the ability to focus very closely to capture birds and wildlife up close – very close – like 6-inches to infinity.

Trail cameras are a great way to see what animals are roaming your gardens at night. Here, a friendly skunk skitters across the frame in front of the camera. Night images are not always the best but they can be used to verify what animals are in the yard.
The BirdCam Pro is a weatherproof, motion-activated with an 8MP camera that includes an adjustable flash for nighttime photos and videos. It also includes a timelapse setting for recording non-animal subjectslike weather and plants emerging from bud over a period of time. It also features a 2-inch color preview screen and can also send images directly to your computer with an optional Wi-Fi SD card. Here is the bad new, the item is discontinued from Moultrie. The good news is that a later version is still available. (see below).
Traditional Trail cameras are not really designed to capture images or video that close to the camera. Most are simply trying to capture larger wildlife (deer, bears, moose) from a distance of 10-20 feet or more. They do an excellent job capturing these images.
Birdwatching Bliss, another blog site did an extensive comparison between the Wingscapes BirdCam and traditional trail cameras. You can read the full review here.
The Wingscape BirdCam Pro (which is no longer available from Moultrie) has the ability to manually focus the wideangle lens to capture small birds up close, for example, at a feeder or on a birdbath. Although this model is no longer available (I purchased mine from Kijiji used but in an unopened box), another later version, the Time Lapse Pro is still available, at least on Amazon. It may also be available at specialty stores. The Wingscapes TimelapseCam Pro produces 20MP pictures, has a focus range from 6 inches to infinity and a flash range to 25 feet. It also shoots HD video at 1080P with sound.
It’s important to note the the TimelapseCam Pro lacks the motion sensor that enables you to capture birds or animals that move into the scene. The Timelapse model, therefore, is of less value to those hoping to capture images of wildlife. It can be set up near a feeder or bird bath and programmed to take an image every 15 seconds for example. This would leave you with a lot of empty images.
I would recommend looking for a used BirdCam Pro model.
My BirdCam Pro has caught images and video of wildlife and birds in the backyard, including the video of a bluejay at one of my bird baths featured on this page.
I often set it up in the morning at one of my bird baths and let it to its thing for the entire day. Earlier this year I was able to catch a surprising image. I usually have several families of Baltimore Orioles living in and around our garden and visiting regularly, but this year none stayed around past a few days in the spring. I was convinced that none were around until I checked my SD card following a day of shooting at the bird bath.
Sure enough, a young oriole was photographed at the birdbath. It told me that at least they were still around.
In one evening it caught video of two skunks, a racoon and a possum at my woodpile. It’s night video capture is only B&W and not always publishable because of uneven lighting, but it does give you a good indication of the wildlife in your backyard.
Newer trail cameras are more than able to capture high quality video in B&W.
Wingscapes AutoFeeder for the birds
Related to the Wingscapes BirdCam is another interesting tool for bird lovers. The Wingscapes WSBF02-00132 AutoFeeder, is an automatic bird feeder that spills out a set amount of bird feeder at the same time of day. The battery operated digital timer can program up to 4 feed times a day, releasing food from its 1-gallon seed hopper from 1 to 10 seconds each feeding.
In conclusion
Trail cameras have been used for years by hunters and have only recently been discovered by homeowners, gardeners and wildlife lovers as a way to track what lives or passes through their gardens.
Besides the fun of downloading your SD card to see what visited over night, the cameras are a great resource to chart the different animals as well as learn about their movements. As a wildlife photographer, learning that the neighbourhood fox trots through the yard every morning between 6 a.m. and 7a.m and takes a very specific route every day, is incredibly valueable information if I want to photograph it with my high-end camera. The images from the TrailCam can be quite good, but it still won’t compare with a photograph made with a DSLR and a long lens from a photographic blind.
These cameras are great tools but take some getting used to before you are rewarded with good images. Realize that they work when the camera sees movement and therefore can be fooled by foliage blowing in the wind. Don’t expect miracles over night. Work with the camera and experiment with it in different locations, at different times of year and in different situations until you are getting successful images.
Once you master them, you will be rewarded time and time again.

Take your Travel camera to the backyard to capture great garden photography
A Travel camera like the Panasonic Lumix camera is the ideal choice for capturing fall in your woodland garden. It’s portability makes it easy to carry around on your daily chores, yet its list of full features leaves nothing to chance. From long telephoto lenses to capture wildlife, to excellent macro capabilities and video, one camera really can do it all.

A maple leaf stands out in its bright fall colour among the spent ferns in the Woodland garden.
What’s the best camera for garden photography?
Can you use a travel camera to document your garden?
Absolutely you can. Not only can you use a small, point and shoot travel camera to photograph your woodland garden, but it just might be the ideal camera to get the job done.
A high-quality travel camera is small enough to easily fit into a pocket, but most pack a full set of features including a very long zoom lens that lets you get in close to most birds and wildlife. Their macro capabilities are also perfectly acceptable to photograph garden flowers, butterflies and insects, and their list of built-in filters turns the art of photographing and documenting your garden over the seasons into a creative adventure.

This Panasonic Lumix Travel camera is an ideal choice for garden photography.
Although the travel camera category was designed as the one-stop solution to capture a vacation with a single point-and-shoot camera that tucks nicely into a purse or pants pocket, what’s not to say it can’t be used as the ideal “staycation” camera in your backyard?
Click on the link to see a complete list of Panasonic’s Point and Shoot cameras.
Using it on a regular basis in the garden is also great practise for the time you need it to document that epic vacation. There is no better way to learn the ins and outs of a camera than to use it on a regular basis.

This close-up of a red squirrel shows the telephoto capabilities of the Lumix DMC-ZS50 camera.
(If you are interested in exploring garden photography at a higher level, be sure to check out my comprehensive post on the Best camera and lens for Garden Photography.)
Many travel cameras are about the same size as a smartphone but offer so much more flexibility and creativity.
Let’s make this clear, this is not a review of a specific camera. I’ll let camera experts do that on their blogs or YouTube channels.
This is a general article to help guide gardeners with their photography needs. Although it focuses on a particular camera, this is not the latest travel camera and lacks features many modern cameras now support. The article explores the “travel camera niche” and how gardeners can get the most out of using these types of cameras on an everyday basis in their backyards or travelling to some of the great gardens of the world.
In this article, we’ll use the Panasonic Lumix DMC-ZS50 travel camera (about 6 years old now) and feature a number of photographs taken with it one fall morning.

Image of raccoon high in the forest canopy. The image was taken with the DMC-ZS50 at the full 700mm telephoto.
Although I am using the Panasonic Lumix, the article pretty much pertains to any good point-and-shoot camera on the market today.
The modern Panasonic Lumix travel camera is the Lumix DV-LX100 Mark ll, which sells for upwards of $1,000. For those who like to compare specifications, this 21.7 MP Four Thirds MOS sensor camera sports a 24-75mm Leica DC Vario-Summilux F1.7-2.8 lens, comes with wi-fi and bluetooth and a 3-inch touch screen monitor. It has 4K video and 4K photo technology at 30 frames per second.
As you can see, these new cameras are packed with high-end features.

Using a soft focus filter gives a dreamy effect to this image of a Flowering Dogwood in fall colour.
I decided to use my Panasonic Lumix DMC-ZS50, a travel camera that made its debut back in 2015, to document my fall garden. The camera, which originally sold for as much as $500 back then but can now be purchased used for a fraction of that cost, comes with a 30X optical Leica zoom lens ranging from a lovely 24mm wide angle to an almost unbelievable 720mm telephoto lens. This kind of power will easily fill your viewfinder with everything from a humminbird to that colourful cardinal.
It handles low light conditions admirably and includes a Live View Finder to enable you to take photographs when lighting conditions make it difficult to use the 3-inch LED screen. The technology available in these point-and-shoot cameras, even a six-year-old model, is impressive. An eye sensor in the camera, for example, automatically detects your viewing preferences and switches image display to the Live View Finder when you are ready to use it.
If you are looking to purchase a new travel camera, deciding which of the many cameras to purchase involves some research on what features mean the most to you.


Besides the high quality Leica lens in the Panasonic cameras, I particularly like the ability to easily be in control of the camera settings. The Lumix DMC-ZS50, for example, includes a control ring around the lens that reminds me of my older manual focus cameras.
The Control Ring provides smoother manual control of the exposure, zoom and focus: leaving the photographer free to concentrate on shutter operation with their other hand.
The camera maker describes it this way: “Its intuitive design, precise focusing; plus smooth and silent operation, gives you total control over every picture and video taken.”
Speaking of video, these travel cameras’ abilities to shoot high-quality video just keeps getting better with the introduction of each new model.
Many models even allow you to easily shoot time-lapse sequences.
Why would I want that, you ask? Imagine setting up your camera on a tripod in front of your favourite flower and watching it open up over the course of the day, but seeing it all happen in 20 seconds on your computer screen or television. Or, set up the time lapse feature on a monarch butterfly about to emerge from its pupae and experience its transformation before your eyes.
Maybe you just want to set up the camera to document a day in the garden and how the sunlight changes over the course of the day. The time-lapse feature will get the job done.

Japanese Maple leaves in fall colours cover ornamental grasses and wildflowers.
Today’s Travel Cameras
Modern travel cameras come equipped with an even larger array of features, larger sensors that produce even higher quality images and videos. You can expect to pay anywhere from about $500.00 to more than $1,000.
The highly rated Sony ZV-E10 is priced at more than $1,000 Canadian, while Panasonic’s Lumix G100 sells for close to $700. Nikon’s Z fc will set you back almost $1300 U.S. or close to $1,400 Cdn.
Many have adopted features such as touch control focus on the back screens similar to a smartphone or tablet.
This article is not a review of the latest cameras. For a full comparison of modern travel cameras, check out this link from Digital Camera World for the latest in portable travel cameras for 2021.
Feeling the Heartbeat of (woodland) Trees
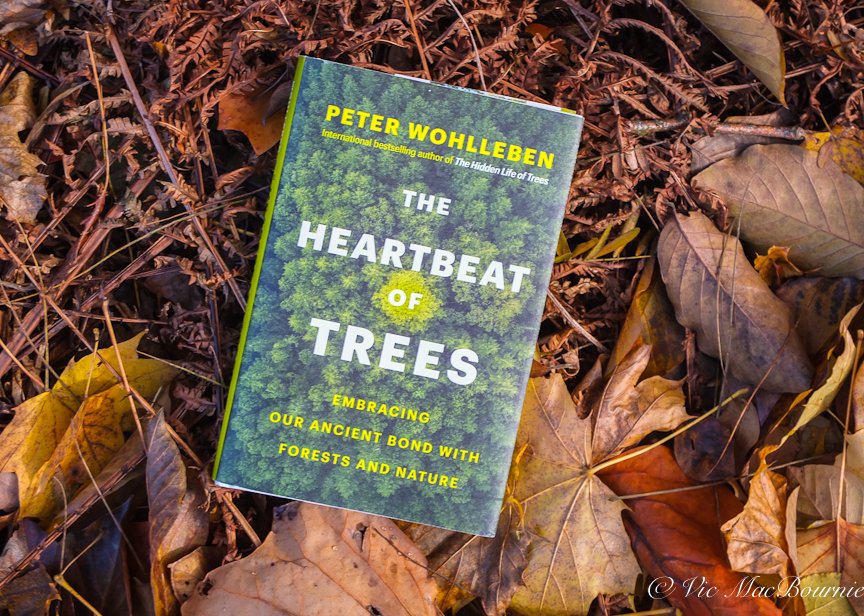
The importance of a single tree outside your door, to the increasing threat to our ancient forests and woodlands is explored in Peter Wohlleben’s newest book The Heartbeat of Trees, Embracing our Ancient Bond with Forests and Nature. The followup to his award-winning book The Hidden Life of Trees is a must read for woodland gardeners and anyone who cares about the environment and the future.
Can a tree improve our health?
Can a single tree in your backyard or even a city-owned tree in the front yard make a difference in your life, in your health, in the health of your family?
Most of us tree lovers would say, ‘yes’. But do we really know, or are we simply using our belief systems to justify our desire for more trees?
Sleep easy my friends, there is evidence that a single tree in your front yard, even if it is a lonely “city tree” can make a difference – a big difference.
In his book, The Heartbeat of Trees, Embracing our Ancient Bond with Forests and Nature, author Peter Wohlleben cites a large-scale study conducted in Toronto, Canada by scientists at the University of Chicago that showed a single tree planted by a front door improves health and well-being.
Scientists apparently gathered data from about 30,000 Toronto residents – and from about 530,000 trees the city had already mapped.
The results are certainly eye opening.

The Heartbeat of Trees follows up on the success of The Hidden Life of Trees.
The study found that “ten more trees in a residential neighbourhood improved the health of the residents as much as an increase of $10,000 in income a year ( including the improved medical care that comes with such an increase.)”
Wohlleben adds that this is not just about mental health.
If you are interested in this book or other gardening books be sure to check out the impressive selection at Alibris (link).
“The liklihood of heart and circulatory diseases, the leading cause of death in North America these days, dropped measurably. Eleven more trees in the neighbourhood was an improvement in cardio-metabolic health equivalent to an additional $20,000 a year or, measured another way, it reduced a person’s biological age by 1.4 years.”
This is just one of the gems found in this New York Times best-selling author’s follow-up to The Hidden Life of Trees, a book that not only revealed to the world the incredible importance of trees in our climate-threatened world, but was also made into a critically acclaimed movie by the same name. Go here, to check out my earlier article on this ground-breaking book.
(Dr. Nadina Galle has taken her inpspiration from The Hidden Life of Trees and The Heartbeat of Trees and used it as a building block in her groundbreaking work to use smart technology to monitor the health of the urban forest. Read about her outstanding work here in my recent article The Internet of Nature.)
Pocket Forests are an intriguing approach to creating miniature forests. Check out my post on creating a mini-forest.
A forest prospers as a family group
The author is quick to point out, however, that although a single tree is a great thing, a forest is much better.
The Hidden Life of Trees was clear about the benefits of forests over singular trees planted on a front yard surrounded by non-native grass and facing the world – the beating sun, the cold winds, freezing temperatures – on their own. He compares the “street trees” that are found in most urban environments, to “street kids.” These lone trees face difficult and almost always shortened lives compared to trees that share resources as a family group in a proper forest or woodland.
The new book places more of the human element into the equation.
Wohlleben is convinced that ancient ties linking humans to the forest remain alive and intact. The test so many of us face is whether we are able, in an era of cell phone addiction and ever-expanding cities, to allow ourselves to rediscover nature, to reconnect with the forest and feel its heartbeat once again.
Whether we feel this connection or not, he points out with scientific evidence how our blood pressure stabilizes near trees and how the colour green calms us, while, the forest, especially at night sharpens our senses.
The 264-page book published this past June by Greystone Books is the perfect follow up to The Hidden Life of Trees, a book that introduced the world to a form of communication between a family of trees in the forest and their connection to the “Mother Tree.”
His new work takes another step into the forest and introduces readers to a host of revelations about our relationship with trees, forests and especially those who are left to care for the earth’s remaining trees.
“The Heartbeat of Trees reveals the profound interactions humans can have with nature, exploring the language of the forest, the consciousness of plants, and the eroding boundary between flora and fauna,” the book’s promotional material states. "The author “shares how to see, feel, smell, hear, and even taste your journey into the woods.”
“Above all, he reveals a wondrous cosmos where humans are a part of nature, and where conservation is not just about saving trees – it’s about saving ourselves, too.”
Forest bathing: Is it a new trend?
Nowhere is this more evident than his chapter on “Forest bathing.”
I doubt this is a new term to readers, but if it is, the act of forest bathing involves submersing yourself into the quiet, soothing sounds, smells and spirit of a natural forest.
Today, in Japan, a doctor can write a prescription for their patient that includes a “walk in the woods – a sick note, as it were, that gives you permission to spend time in the forest.”
This trend in natural medicine is making its way to Western medicine in the form of forest bathing.
For my comprehensive post on Forest Bathing, please go here.
Wohlleben points out that “with the longing for natural spaces forest bathing has spilled out of Asia, Called shinrin-yoku in Japanese, the whole thing sounds like ancient wisdom. However, it isn’t at all. Quite the opposite is true, in fact. Japanese forest agencies came up with the idea and the name in 1982 as a way to make people more aware of the health benefits of the country’s forests.
According to Dr. Qing Li of the Nippon Medical School in Tokyo, Japan, Forest Bathing is simple. In is 300-page book published on the subject, he explains how it works.
Turns out it is very simple. “Choose a forest you like (it could even be in a city park) and you go there to relax,” Wohlleben explains.
“Then you gather all your senses and dive into all the smells, sounds and sensations. According to Li, all you need to do is accept the forest’s invitation to slow down. Mother Nature takes care of the rest.”
Although he admits some skepticism over the whole “forest bathing” phenomena, he tells the story of a family walk in the forest. After some time resting and talking after a long walk in the wood he maanges, the author remembers how he and his family slowly began to relax as they enjoyed their company and the sights sounds and smells of the forest to the point where they were more relaxed than they ever could be at home.
It’s a relaxed state only the forest can help us achieve and one that takes us back to our ancient roots.
The Heartbeat of Trees is, by no means, all about natural remedies and how we can discover ourselves in the depths of ancient forests.
Ancient forests are under threat
In the final chapters Wohlleben warns readers about the threats our natural forest face and the efforts by small groups to save these critical remaining old-growth (or at least important) forests.
Unfortunately, these challenges are world wide.
He talks about his experience hiking up to a tiny ancient spruce tree names “Tjikko” that has lived for 9,550 years in a national park in Sweden. He talks about his fears for its future amid tourists trying to capture selfies with the highly threatened piece of natural history that for so many is nothing but an opportunity to stumble around it and its ancient roots for nothing more than a quick selfie for social media.
He tells the story of the Kwiakah First Nation in British Columbia, Canada that is fighting to save its forest in The Great Bear Rainforest from the timber industry. Clear cutting is threatening their traditional hunting and fishing grounds, not to mention the unique ecosystem that Mother Nature has created.
Of course, Canada is not alone. He tells of similar stories in Germany, throughout Europe where old-growth forests are non-existant and on the border of Poland and Belarus where an important forest (the Bialowieza) of oaks, lindens, hornbeams, maples and spruce is being threatened.
Wohlleben’s conclusion leaves plenty of room for optimism for our future and the future of our children.
He concludes: “… people have sown the seeds of hope across generations so that now a complete change in direction is being ushered in. A change that is taking place in not in our minds but in our hearts.”
Words well spoken, but I prefer to leave the last word with Richard Louv, author of “Our Wild Calling and The Last Child in the Woods. (See my earlier article on why children need more nature in their lives)
“As human beings, we’re desperate to feel that we’re not alone in the universe. And yet we are surrounded by an ongoing conversation that we can sense if, as Peter Wohlleben so movingly prescribes, we listen to the heartbeat of all life.”

Set the table for great garden photography with backyard wildlife studio
A backyard bird and wildlife studio combining food and water can be a magnet to attract a variety of birds and backyard wildlife and put them in a picturesque setting. Getting great photographs is easy, especially if you add a Tragopan Photographic blind to allow a close approach.
Create your own DIY backyard bird studio
How do you get great garden photography of backyard birds and other wildlife?
Capturing great images of birds and other wildlife begins with welcoming them into your yard by planting a natural landscape using native plants, shrubs and trees whenever possible.
Nothing, however, beats your own backyard wildlife photo studio designed to not only attract your favourite birds and wildlife species, but to put them into an environment conducive to great photography. Simple answer, provide a backyard dinner table where lunch is always being served. And, don’t forget to give your feathered friends and wildlife something to drink to go along with dinner. This need for birds and wildlife to obtain food and drink resulted in my latest backyard project – a combined food table and reflection pond.
My latest project combines a dinner table on one side with a small reflection pond on the other side to bring in the greatest variety of birds and wildlife. This combination makes action at the backyard photo studio hectic with activity at times, especially when you have fiesty red squirrels claiming the entire dinner table to themselves.
The combination allows me to photograph a woodpecker working a tree stump one minute, while a chipmunk gets a drink of water in a reflection pool less than a foot away.
What more can a backyard wildlife photographer ask for in life?

A blue jay visits the photo studio. Shot with a 300mm F4.5
Simple steps to building a compact, portable studio
Neither the wildlife table, nor the reflection pond take up much room. Both are designed to be portable and easily broken down.
The feeding table is nothing more than an old, black Ikea end table that was headed to the thrift store. The reflection pond (see my earlier story on how to build it a DIY reflection pond) is made from a simple rubber boot tray placed on an outdoor end table. Both, of course, are embellished with natural materials.

A red squirrel stops for a drink at the reflection pond.
Even with the two tables set up side-by-side, the whole studio takes up no more than 3-ft by 4-ft and is hidden away in the back of the yard near my bird feeding pole.
By placing the studio near the traditional bird feeding station (See my earlier story here), the wildlife is already familiar and comfortable feeding in the area.
(If you are interested in exploring garden photography at a higher level, be sure to check out my comprehensive post on the Best camera and lens for Garden Photography.)
If I could have only one lens for wildlife and birds in the garden, it would be my F* 300mm F4.5. Check out my full story on the lens by clicking the link.
I situated the wildlife studio so that it receives side lighting during the morning followed by front lighting into the afternoon and evening. I’m lucky to have a large, light grey shed (see my earlier story on the Keter Artisan shed) just a few feet from the studio that acts like a huge light reflector, especially in the morning light. The reflected light from the shed helps to soften the overall light that falls on the backyard studio.
Behind the studio, a small hill provides a natural backdrop of wildflowers and fall colours, but because the tables are only about 18 inches high, adding different background plants in pots is simple. In the past, I have used Northern Sea Oats from another area of the garden as a natural backdrop.
By experimenting with different natural elements either on the table tops or as a backdrop, the photographic combinations and possibilities are endless.

A combination of a feeding station on the left made out of an old Ikea end table is combined with a reflection pond made from a rubber boot tray on the right adds a lot of fun to backyard bird and wildlife photography. The natural materials were all found around the yard and can be replaced regularly to create different photographic possibilities.
Building a backyard studio
Building a backyard wildlife studio can be as simple as putting up a couple of bird feeders near a branch where the birds land on their way to the bird feeders, or as elaborate as designing the tabletop of natural props that allow you to photograph a variety of wildlife in different settings.
A moss-covered tree stump is perfect for hiding a handful of seeds. Add a mossy rock or two and provide a natural perch just above the tabletop to give birds a place to survey the dinner table before dropping down to feed. The natural elements can change regularly to keep the photography exciting and to ensure that not all the images have the same look.
if you are looking to upgrade your photography equipment, be it a new camera or lens, consider checking out KEH Camera Exchange. They offer a huge variety of used lenses and cameras to choose from and, you can trade in your old equipment to further reduce the already great prices.
Add seasonal elements as you find them. Acorns, pinecones, pine needles and colourful fall leaves are just a start. Cut some branches from your best berry-producing shrubs to add colour and a natural food source. I use a clamp that can be hidden to hold the branches in place. It helps to put the stems in a vase or water source to keep them from wilting too quickly.
The reflection pond uses many of the same natural elements and by using a black boot tray, the pond is literally made for you. An inch of water is all that is necessary to create the reflection, but the angle you photograph at plays an important part on how well the reflection works. The camera angle needs to be just above the level of the pond to get the best reflection.
I am experimenting with a small mirror under the water to give maximum reflective properties.
One of our resident red squirrels enjoys seeds set out in the crevices of the old logs that make up the feeding station half of the photo studio.
Tragopan photo blind brings it all together
Adding a Tragopan V6 photographic blind is really the final ingredient to successful bird and wildlife images. It allows a very close approach to both birds and wildlife in the garden, where wildlife is already familiar with human activity.
The photo blind is set up about 10 feet from the photo studio. This close approach lets me use a 300mm lens (420mm equivalent for cropped sensor) for a frame-filling image of birds and small wildlife. A simple 70-200mm lens works nicely as well.
The blind not only provides a certain comfort level for the birds and animals, it also keeps the photographer out of the elements – be it hot sun in summer, or the rain, snow and chilling winds of fall and winter.
By using a photographic blind, the need for expensive photographic lenses to get backyard images is reduced significantly. A consumer brand 70-200mm lens on a DSLR will get you high quality images. Even high quality travel camera (Lumix DSC50) or bridge camera (Pentax K5) which I am using will give you memorable images or video.
No photo blind, no problem
If you don’t have a photo blind you can still get great images, but you are going to have to work a little harder fot them.
Place a chair and a tripod where you want to sit to take your photographs and make it a habit to go out and sit there even if you are not taking pictures. The birds and wildlife will eventually get used to you being around and accept your presence. Even if they accept your presence, you need to move slowly at all times. That’s not always easy when a new bird lands just a few feet in front of you on your favourite perch.
What birds allow a close approach
There is no question that some birds allow a more close approach than others.
These are the birds you can often, with a little patience, encourage to eat right out of your hand.
These are also the birds that you are most likely photograph without the need of a photo blind.
I find chickadees, woodpeckers, nuthatches, blue jays and even Juncos to be quite approachable and accepting of photographers.
Cardinals are more elusive as are other backyard birds like Indigo buntings and, of course, raptors.
To capture images of these birds, a blind is more critical. Even with a blind, these birds can be skittish and fly off with even the slightest motion inside the blind.
In conclusion
A dedicated backyard bird and wildlife photo studio with a photographic blind may not be everyone’s cup of tea, but I guarantee that if you take a few moments to create this feeding station/reflection pond setup, you will be blessed with memorable images in no time.
It’s a great way to spend some time in the garden and put your camera to use on a weekend afternoon.
A word of caution. Don’t leave food on the table over night. Because it is low to the ground and there are no baffles or other deterrents to keep animals from feeding, it could be a magnet for unwanted visitors. I try to only put out enough food for the day. A handful or two of strategically placed food will go a long way and you can always replace it easily if the action at the studio is particularly busy.
My studio is set up right beside the shed and allows me to quickly refill the dinner table as necessary.
Happy shooting and please let me know if you build your own backyard studio. I would love to see some pictures.


Three of the best grasses for fall and winter interest
Three of the best ornamental grasses for fall and winter interest in the woodland garden include Miscanthus Sinensis, Northern Sea Oats, and Pennisetum alopecuroides or Fountain Grass. All three have excellent fall seed heads which remain on the plants throughout the winter. This article explores different ways the plants can be used either as a privacy screen in the landscape, or in containers and window boxes.
Ornamental grasses are often overlooked in the heat of the summer, but as fall approaches grasses emerge as the centrepiece of many gardens.
Ornamental grasses provide movement in the slightest wind, they’re drought tolerant and provide needed texture and height in the garden throughout summer and winter. They’re easy to grow, even easier to maintain, provide habitat for insects (bird food), and add an elegance to gardens that is difficult to obtain through traditional plantings.
In fall, their seed heads rise above the tallest of plants and often become the stars of our garden.
What’s not to love?
If you’re fussy, there’s an ornamental grass made just for you.
Be sure to check out my post on three of the best grasses for a shade or woodland garden. You might also like to read my post on Why we should leave ornamental grasses standing all winter.
Ranging in size from the massive Pampas grasses to the small and compact Caraxes; from colourful varieties like Japanese Blood grass to shades of variegated green best most evident in the popular forms of porcupine grass. There are also popular annual grasses, like the purple fountain grass, to add to the array of impressive perennial grasses.
Grasses are so adept, that they work in almost any garden style from shady woodland gardens, to sunny meadow gardens.

Miscanthus Sinensis Gracillimus or Chinese Silver Grass stands out beautifully in the fall garden with its silvery plumes. In the rear, a drift of Chasmanthium Latifolium or (Northern Sea Oats), complete with its interesting seed heads, spreads around the birch clump.
Best ornamental grasses for fall and winter
But let’s take a close look at three of the best ornamental grasses for fall.
My favourite ornamental grasses for fall and winter in my garden are Miscanthus Sinensis Gracillimus or Chinese Silver Grass, Pennisetum or fountain grass including Karley Rose, and Chasmanthium Latifolium (Northern Sea Oats).
All three are strong performers in the fall and even better in the winter when a dusting of snow creates a lovely vignette in the landscape.

This garden vignette on the edge of the Japanese garden benefits from three large Miscanthus plantings that help create a sense of privacy.
Chinese Silver Grass is perfect for privacy
Miscanthus Sinensis is an outstading ornamental grass that comes into its own in late summer when the purplish flower plumes rise up above the strapping green foliage and grows to heights of 5-6 ft, tall (150-180 cm) and in well-behaved clumps of 3-4 ft. wide (90-120 cm).
Give them plenty of sun in good to average well-drained soil and this stalwart of the late summer garden will perform admirably for years with nothing but an annual clipping.
Miscanthus is perfect as a natural privacy screen
Not only does this plant look great through summer and fall, it can be used to create an elegant natural privacy hedge. Plant it in groupings of three or five in strategic spots around your patio or fround-level deck to create a graceful, soft screen that does the same job as a static wood or metal panel, but has the added benefit of adding movement with a gentle breeze.
I use it in three places in our garden. Three large plants grow on the edge of our Japanese-inspired garden creating a lovely backdrop (see photograph above) for one of our large boulders and weeping Japanese Maple. But it’s real purpose is to act as a living privacy screen that looks as good from my neighbour’s side as our side where it creates a lovely garden vignette.
I have two other large clumps on the edges of our dry river bed to help create a natural look, and another close to the house to help hide a downspout.

Miscanthus covered in fresh snow cover.
Miscanthus as a plant for winter interest
As fall and winter approaches, the purplish flower plumes so prominent in the summer landscape take on a creamy wheat colour followed by a silvery luminance that creates a dramatic presence when backlit.
These plumes rise high above the narrow, green leaves with white midribs and last well into winter.
The leaves of the grasses slowly take on a wheat-coloured look of their own for the winter.
An added bonus is that the plant is both pest and disease free and for woodland/wildlife gardeners deer and rabbit resistant. Birds are attracted to the spent grasses in winter where plenty of insects use it to overwinter. Smaller birds will also use the strong plume stems as perches in winter, especially in more open areas devoid of natural perches. They also provide excellent photographic opportunities when they are perched on the stems.
The plant is native to Asia and can be invasive in parts of the United States and other warmer climates, so check before you plant this potentially invasive grass.
Alternatives to Miscanthus Sinensis Gracillimus in areas where it is considered invasive include natives: Andropogon gerardii (Big Bluestem), Chasmanthium Latifolium (Northern Sea Oats), Panicum virgatum (Switch Grass), or Elymus hystrix (Bottlebrush Grass).
The foliage can be cut back in early spring (4-6 inches up from the base) before the new shoots begin to show themselves. Don’t worry if you leave it a little late, just cut the spent stems a little higher so you don’t cut off the tips of the new growth. It won’t be long before new growth covers last year’s dried stems.
I use a hedge trimmer with great success to cut down my ornamental grasses. A cordless model like this from Gardener’s Supply Company is is an excellent choice and will make the task much easier.
The spent stems can get quite thick and difficult to cut in the spring.
(Be sure to read my story on best way to cut back ornamental grass.)

One of our fountain grasses in full fall bloom (November) in morning sun.
Fountain grass: A compact ornamental grass
Pennisetum alopecuroides or Fountain grass has long been a favourite in the garden. These elegant grasses form the perfect, compact, mound making them a standout in both our front and back gardens.
The easy-care and natural look of Fountain grass (their are several hybrids including a dwarf variety which I use in our garden) makes it a must for any garden looking to add summer, fall and winter interest.
Like the name suggests, the growth habit creates a fountain-like appearance in late summer and fall when the pinkish seed heads emerge surrounding the entire densely clumped mound of fine grasses. Over time, the pinkish plumes turn a creamy tan colour where they remain into late winter providing delicate foliage displays well into the winter months.
The densely clumped growth provide ideal habitat for overwintering insects. Besides the insects and larvae that overwinter in the thick grass, I have seen goldfinches feeding on the seeds of the plumes late into winter when the grasses were the only vegetation still poking their heads out of the deep snow.
This perennial is easy to grow and maintain. Mine have self seeded in the garden, and I have also divided it in the spring after the plants’ centre died out.
Centre-die-out is common with many grasses after several years of growth. You will notice a circle of dead foliage forming in the centre of the plant. At this stage, simply dig out the clump of grass, divide it into several plants (usually 3 or four) compost the centre of dead grass and plant the three or four divisions. Within a short time, the divisions will recover and fit right in.
• If you are considering creating a meadow in your front or backyard, be sure to check out The Making of a Meadow post for a landscape designer’s take on making a meadow in her own front yard.

Fountain grass in full bloom with a smaller fountain grass to the left that doesn’t get the full sun and always struggle to bloom. Northern Sea Oats, with its coppery blooms, can be seen blooming in the top left corner.
Ideal container plants
These divisions are perfect to use in containers for a year or two where their compact growth makes them the perfect filler during the spring and summer months before graduating into thrillers during the fall. I have used it in our window boxes for a year, eventually transplanting it into a larger container for a couple of years before moving it back into the garden as a full-sized specimen.
There are several types of fountain grass you might want to explore including the popular annual – purple fountain grass – that can grow to 4 feet and put on quite the late-summer and show. Remember that it is an annual in all but the warmest growing zones and will have to be replanted in spring.
Another fountain grass to consider is the hybrid Karley Rose. Proven Winners has developed a beautiful specimen (PW Link here) that grows in zones 5-9 with upright clumps of graceful arching green foliage and impressive rose-purple plumes from early summer until frost. It grows up to 40 inches in height with a spread of between 24-36 inches.
In our garden, we have grown an earlier version of Karley Rose for about 10 years. While it performs admirably in both our front and back gardens, I find its growth habit is less compact than the less hybridized versions. Our dog, Holly, loves to role in it all summer keeping it untidy and not looking its best.

Northern Sea Oats takes centre stage in this window box planting. The grass has an almost bamboo look to it. Beside the Northern Sea Oats is a small clump of Little Blue Stem which also performed well in the window box before being moved to the back meadow garden.
Northern Sea Oats at home in the woodland garden
Chasmanthium Latifolium or (Northern Sea Oats) always reminds me of the seashore. I must have first seen the plant growing in the sand while I was at the beach. Now I get to relive that same experience almost daily in my own garden.
Northern Sea Oats is one of the most interesting of the fall grasses, with it’s hop-like seed heads that flutter in the breeze and turn a purple-bronze-brown in the fall. Leave the seed heads on for winter interest or cut them off to use in dried flower arrangements.
It’s a relatively low maintenance plant that likes full to part sun and grows down to zone 4a.
It works as an accent plant, in a mass planting, naturalized in a woodland garden or used as a border edging.
Northern Sea Oats will grow to about 4 feet with a spread of 30 inches. Its foliage, that stretches right to the ground, is elegant and grows in a loose clump.
Northern Sea Oats also work nicely in containers as a late-season thriller. In fact, I used them this year in our window box as the thriller and it worked well. (see photo above) The grasses are now in our back flower meadow spreading their seed heads around for next year.
Be careful with Sea Oats, the seed heads will sprout the following year where they fall. Last year, I cut some of the seed heads off to use as a backdrop for bird photography, and noticed that this year a number of new plants are growing up where the seed heads were left.
In conclusion
If you have not experimented with any ornamental grass yet, consider picking up the annual Purple Fountain Grass and use it in a garden location where you might want to plant some larger grasses. I’m almost certain you will be converted to the joy of ornamental grasses.
If you are trying to use only native grasses in the garden, you would do well to consider purchasing Little Bluestem or Big Bluestem as starting points. These clump-forming grasses are maintenance free, easy to grow and add a little blue to the garden scheme.
Another standout in the fall garden is Japanese Blood grass. It’s a stellar performer adding a pop or red to the late summer and fall garden. The green grass tips take on a pinkish red colour in late summer into fall adding a lovely pop of colour to the landscape. I use a little of it under a birch clump where it grows up through sedum and acts as the perfect backdrop to a school of Fish in the Garden. (You can see it in the attached video)

How to define shade in a woodland or shady garden
Trying to understand the different levels of shade in the woodland garden can be complicated. Here is a guide to learning the definition of full shade, part-shade and high-canopy shade compared to full-sun and part-sun situations.
Not all shade in the garden is created equal
A question often heard in gardening circles, especially woodland gardening, is what’s the difference between part sun and part shade? How do you define full shade, full sun?
Let’s face it, the distinctions between full shade, light shade and partial shade can get very confusing.
Even more confusing is trying to understand what will grow best in these conditions. A garden bed in the deep shade on the side of your home might be quite different than the same garden bed adjacent to a white clapboard home that reflects soft, beautiful light onto the garden bed throughout the day.
The garden bed in deep shade would be ideal for ferns and hostas, but the same bed enjoying the soft reflected light would enable the gardener to experiment with a much larger array of flowering plants and shrubs, at least until a new neighbour moves in and decides a hip black-sided home is much more chic.
Either way, paying attention to how the sun plays on the garden floor will go a long way to help guide you on what plants will do best in particular areas of the garden.

A cardinal sits among the beautiful blooms of our crabapple tree in late spring before the locust and other woodland trees have cast their shade over the garden.
What to plant in a full-sun area of the shade garden
In a woodland or shade garden, full sun is not something experienced very often, although there can be spots that are open to full day sun.
In the front of our property close to the street, we experience pretty much full sun for most of the day. We have a dry-river bed across the front that allows good drainage through what was once a deep drainage ditch that seemed to suck in cars turning in the cul-de-sac on a weekly basis.
Native Ornament grasses (including little bluestem), Blue Fescue, Black-eyed Susans and creeping phlox combines nicely in the hot, dry, very sunny site.
Other areas in the garden get varying amounts of sun but, let’s face it, the majority of time the garden is in a form of shade.
It’s important not to get too wrapped up in what plants to grow in the various locations throughout your garden. Obviously a sun-loving plant is not going to do well in deep shade, but it might perform well in partial or high shade.
Push the boundaries in part-sun, part-shady sites
A little experimenting will go a long way in helping to build your knowledge about plant growing conditions. Don’t be afraid to push the boundaries, testing various plants to see how they perform in different locations.
Shade-loving plants are adapted to lower levels of light and their foliage will often burn if they are planted in an area if the sun is too direct and falls on the plant too long. These plants not only suffer from too much sun, but what that sun may be doing to the soil around it.
Shady soils can be moist or dry but sunny soil is most often dry and needs a good quality mulch to keep it moist. It may also need supplemental watering during times of drought.
The same can be said for shady soil surrounded by heavy roots. By choosing plants that do well in dry shade, success will come much easier. Try fringed bleeding heart, bears breeches and American bellflower.
Finding the right growing conditions is key to success and the amount of shade plays a key role in finding this success.
Basic light level definitions will often point to the following chart as a simple example:
Full sun - 6 or more hours of direct sun per day
Part sun - 4 to 6 hours of direct sun per day, including some afternoon sun
Part shade - 4 to 6 hours of direct sun per day, mostly before midday
Full shade - less than 4 hours of direct sun per day
When it comes to shade, however, a more detailed explanation will help woodland gardeners better understand their unique situations.
If you are looking for garden gift ideas, Amazon has put together a a great package of ideas to help you out this holiday season. Click on the Gardening 101 link below.
Guide to shade levels in a woodland garden
• Full shade is deep, all-day shade often found beneath the canopies of large maples and oak trees or if you are planting in a conifer forest. In an urban environment, this is the type of deep shade found beneath skyscraper canyons with buildings that absorb light rather than reflect it.
• Light shade is a form of dappled shade that is probably the most common in most woodland gardens. It is often the shadows that fall on the woodland floor beneath fine-leaved trees such as the ferny leaves of locust trees or birch trees. In our garden we are blessed with mature Locust trees that provide a perfect soft light throughout the day. In this light, rays of sunlight are able to filter through the fine leaves creating shifting patterns of soft light and shadow throughout the day. This light is ideal for growing most woodland plants from hostas, to dogwoods.
•Partial shade can be described similarly to light shade (above). But it can also be described as having sun for part of the day and shade for the remainder of the day. Whether this sun is at its strongest in the morning, or in the heat of the afternoon will dictate the best growing conditions for particular plants, shrubs and trees. Morning sun is ideal for most traditional woodland plants that benefit from the less intense heat and sunshine. Afternoon sun and extreme heat that it can bring is probably better for meadow plants and grasses that can survive the intensity. If would provide an ideal spot for Black-Eyed Susans, coneflowers, and native ornamental grasses.
• High shade is often the result of a woodland tree canopy that is either very mature, or one that has been heavily limbed up and raised over time to create an almost bare trunk stretching high up into the tree canopy. It can also result in a sparsely planted woodland where few trees remain to cast shade. Trees that grow in a woodland environment have fewer lower branches than those that grow in the open. The lack of low branches means that sunlight can find its way down to the understory plants at various times of the day accept at high noon. This provides favourable lighting conditions for most woodland plants, eliminating the hottest and most intense time of day.

The white trillium begins to take on a pinky shade as spring falls to summer and the tree canopy begins to shade out the spring ephemerals.
What can I grow in deep shade?
It’s important to remember that not all shade is created equal.
The shade cast by spruce and fir trees is quite different from the softer shade cast by our native white pine trees. Only the deepest shade loving wild flowers will do well under the deep and never-ending shade of a spruce grove.
The same deep shade may be found under the canopy of a mature Norway maple, but there are large times during the year where the ground layer under the maples are fully exposed to sun – namely spring and later fall through winter.
In springtime, when the warming suns rays filter through the branches of maples, oaks and other heavily leaved trees, many of our favourite spring ephemerals are free to bloom. Hepatica, Trilliums, Dog-Tooth violets, bloodroot, wild geranium, Columbines and spring beauties bloom for a few short weeks before becoming dormant until the following year. Check out my article on Three of my favourite spring wildflowers.
If you are planning a shade garden, the most important factor to consider is ensuring that the garden will be out of the intense sun during the heat of the summer and between 10 a.m. and 2 p.m.
In the past, a shady garden was not all that desirable. Gardeners, especially those new to the hobby, craved for a mass of vibrant colour associated with full sun. The dream of a cottage garden meandering through the white picket fence was just too much for many of us not to crave.
Are shade and woodland gardens becoming more popular?
Over time – either by choice or simply because our gardens matured in time and those small trees we planted 30 years ago grew into lovely mature specimens spreading their cooling shade onto our garden beds – we became woodland or shade gardeners to some degree.
Now, with climate change and everything we know about the benefits of staying out of the sun and heat, the woodland/wildlife garden has become the garden of choice for more and more environmental aware gardeners.
Embrace it. Find the joy in simple textures, the subtle shades of green and a little pop of colour provided sparingly throughout the woodland garden.
Add colourful annuals in containers in sunny spots
That’s not to say there is not room for colour. I like to find spots in the garden that get lots of sun and use containers with annuals to add a little colour to the woodland. The containers can even be easily moved around throughout the garden season to follow the changing sun patterns.
Partnering annuals with light conditions is a whole different article and one that has been covered by so many others over the years.
Proven Winners, however, have done an excellent article partnering its impressive list of plants with sunny growing conditions on its website. For a closer look on how to get the most out of your containers when it comes to sun and part-sun situations, check out the Proven Winners site here.

Native Moss and Moss-like ground covers for a Woodland, wildlife garden
Moss is quickly becoming a favourite ground cover for Woodland gardeners and those looking to create a Japanese-inspired garden. These top three ground covers are great alternatives to moss when native moss is not an option.
Three moss alternatives for a woodland garden
Maybe it’s just me, but is the gardening world finally embracing native moss as the ultimate ground cover?
The Japanese have worshipped moss for centuries.
Entire gardens centered around the perfect patch of moss, a single boulder and an ancient maple can be all one needs to create a stunning, tranquil and peaceful place.
More of us are looking for those qualities in our gardens, whether it’s a small Japanese-inspired garden or a more intimate area within a larger Woodland Wildlife garden.
The difficulty for most gardeners who love moss comes with growing and maintaining the perfect patch of moss.
The good news, however, is that we have alternatives to moss as a ground cover.
For my article on the importance of using native plants in the garden go here.
Here are three great alternatives if you are looking to create that tranquil, peaceful feeling in your woodland garden. Irish and Scottish moss are obvious choices but don’t overlook the beauty of creeping moss or the numerous Stonecrops available for hot sunny areas in your garden. These alternatives will never replace the true beauty of our native moss, but for many woodland gardeners they will provide the perfect alternative.

A Japanese painted fern creeps out over the flagstones in our front garden with ground covers Scottish moss, Japanese Spurge and Cornus Canadensis (top right).
Irish and Scottish moss as the perfect alternative ground cover
By far, the closest ground cover to real moss is either Irish or Scottish moss (Sagina subulata verna and aurea)(pictured above).
Both are perennials you can buy at most good garden centres, and both deserve prominent spots in our Woodland gardens.
The Irish moss is a more dark green whereas the Scottish moss is golden or chartreuse.
Both have delicate flowers that emerge in late spring, early summer in Zones 6-8.
They can take full sun to partial shade and some foot traffic.
I have used both types to fill the space between flagstone pavers in our front garden. But, because we are blessed with plenty of native moss growing on the property, the real moss is slowly taking over from these moss alternatives.
Once the natural mosses begin to grow in these areas, it’s probably a good time to move the Irish and Scottish moss to a more sunny area where they can spread their soft cushiony perfection elsewhere in the garden.
They are quite shallow rooted and easy to move by simply taking small clumps of it with a little soil and packing it in other areas of the garden.
It can also be used in containers to cover the soil. Put a little in a container and let it spread throughout the summer.
Looking for more information on ground covers? Please check out my other posts on ground covers I use in the woodland garden.
• Three great ground covers for the woodland garden.

Scottish moss growing between the flagstones in our front woodland garden.
Creeping Phlox is a glorious ground cover in all seasons
Creeping phlox is a real favourite in hot, sunny locations.
It really shines in early spring when the normally dark green prostrate plant bursts with lavender flowers.
It’s a real show-stopper in our front garden as it creeps among the grasses and onto the stones of the dry river bed and bumping up against large boulders on one side and blending in nicely with another mossy alternative Creeping thyme.
Creeping Phlox (Phlox subulate) spreads rapidly and, while it puts on quite the display in the spring, it takes a back seat for the remainder of the year forming a perfect dark green backdrop for our blue-green grasses that emerge through the ground cover in this hot sunny, dry area of our garden.

Creeping phlox among the rocks and grasses in our front garden.
This herbaceous perennial grows in zones 3 to 9 in a rich, well-drained soil and comes in pink, red, white, blue rose and lavender.
It’s a tidy plant that grows up to about 6 inches high with a spread of up to 2 feet for a single plant. It forms a thick mat and for Woodland gardeners it’s deer resistant. That alone should put it high on our list of plants.
Creeping phlox likes full sun but tolerates some shade. An added bonus is that it also attracts butterflies and provides an early food source for insects in the spring where it is one of the first to bloom.
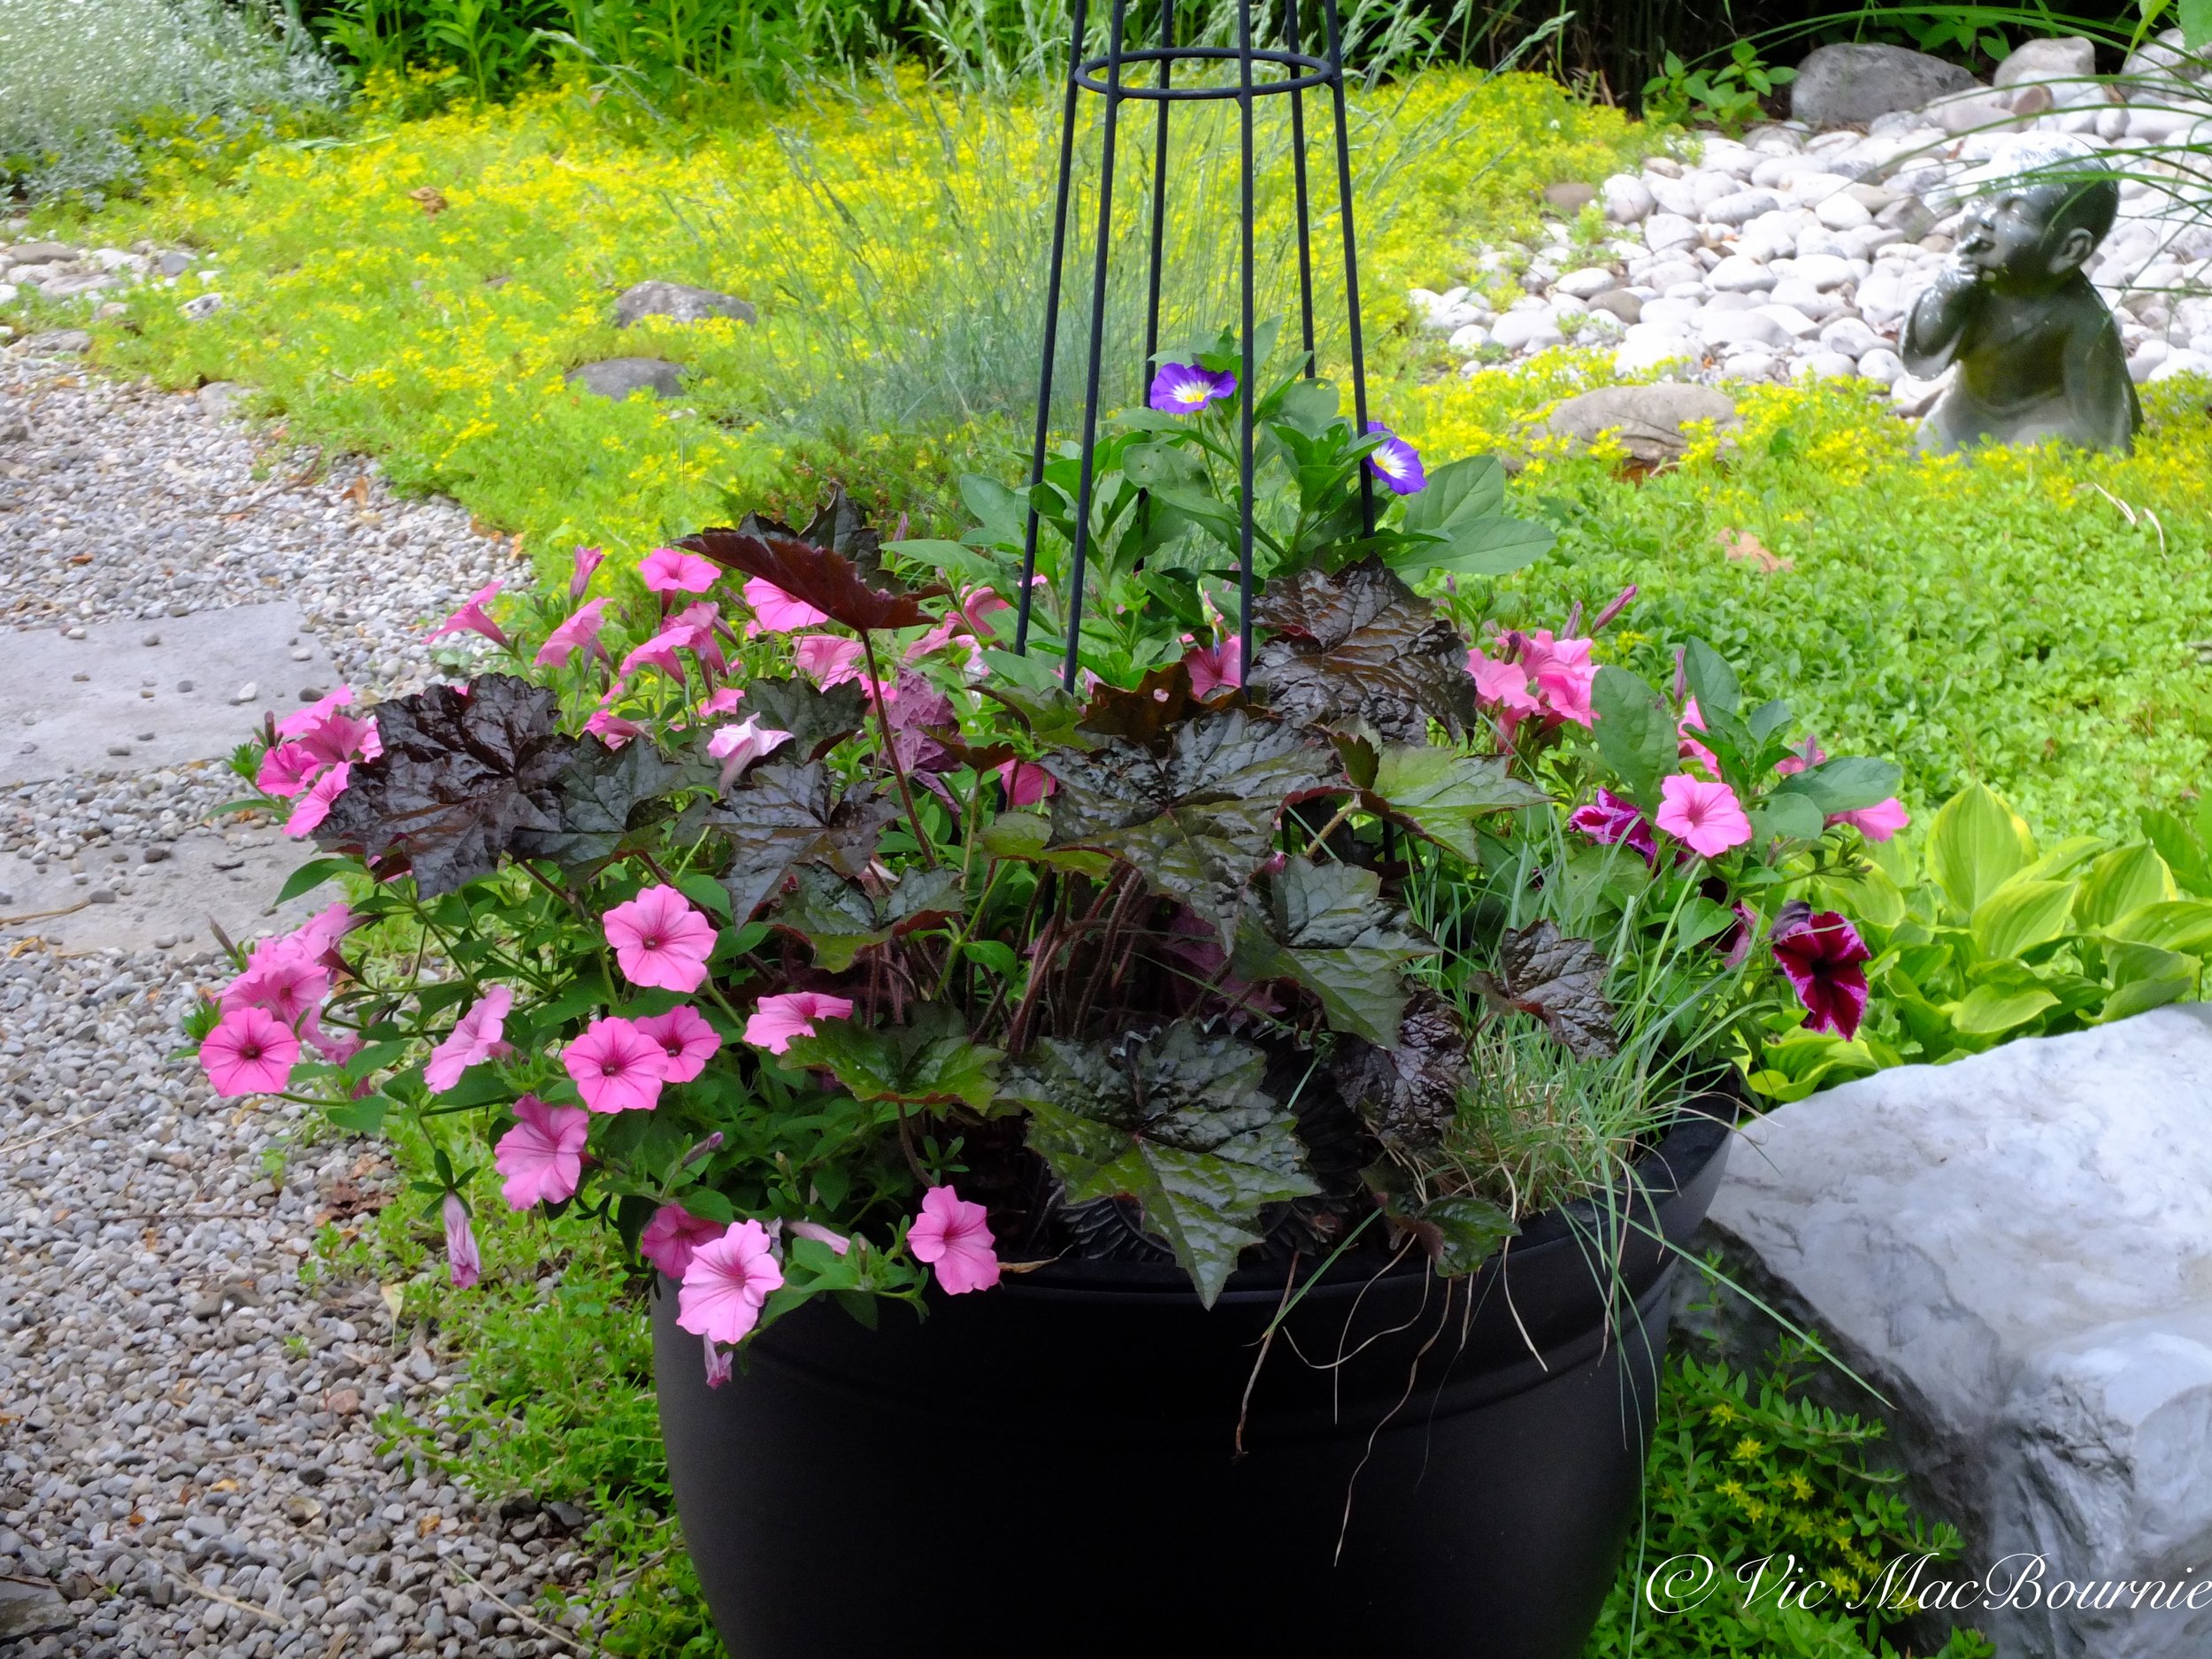
This image shows the stonecrop beginning to bloom with its yellow flowers growing behind and around the container planting.
Best sedum/stonecrop plants as ground covers
Many of us are familiar with Sedum Autumn Joy. It’s a wonderful plant that provides year-round interest and is one of only a handful of plants recommended for the New American Garden. Just to make it clear, we are not talking about that popular type of Sedum here.
There are up to 500 individual species in the Sedum genus, often called stonecrops, some of which are native to zones 5-6 and beyond.
When it comes to ground covers in hot, dry areas, these ground cover Sedums are tough to beat. Of particular note is Mossy Stonecrop (Sedum acre), which is a non-native that has a lovely yellow flower in summer and grows well in hot, sunny locations.
I use them in an area of the garden that forms a pathway across the back of our home. It’s covered in pea gravel with a dry-river bed and blue square-cut flagstone.
The sedum ground covers spill over the edges of the garden into the pea gravel softening the edges with a moss-like texture that has the added benefit of lovely yellow flowers in the summer that the bees and butterflies flock to in large numbers.
The sedum mats are easy to control and thrive in the hot, dry soil. There is just too much to say about sedum as a ground cover in this blog. I encourage you to talk to your local garden nursery experts for advice.
For more information, check out Ontario Wildflowers.
This page may contain affiliate links. If you purchase a product through one of them, I will receive a commission (at no additional cost to you) I try to only endorse products I have either used, have complete confidence in, or have experience with the manufacturer. Thank you for your support.

Birch Grove comes to life in Woodland garden
Will a Birch grove attract wildlife in the garden
Why plant a single birch tree when you can plant ten or eleven and create a birch grove?
Technically, our birch grove is not ten separate trees but there are at least ten trunks rising up out of the ground to form the stand or birch grove.
When the birch clumps were first planted about five years ago, the trees were small and offered little support to one another or to local wildlife, but it wasn’t long before these fast-growing trees put on enough growth that their branches began to weave into one another and form an overhead canopy that through a light shade on the ground below including the water from the bubbling rock. I imagine what is going on above ground is also happening underground with the trees’ roots beginning to intermingle and work together to create a highly supportive environment that best supports their needs.
Now that the canopy is forming and the branch tips are beginning to touch one another about six feet up from the ground, it’s not hard to see the affect the grove is having on the trees and the area around them.
Birds are arriving to look for food and check out the trees as a potential nesting site. It’s probably too early for nesting, but the grove certainly offers many of the requirements birds need to set up a successful family, including hosting a number of caterpillars and other insects as well as providing seeds in the fall in the form of catkins.
Beneath the canopy, a small, solar-powered bubbling rock provides a host of birds and small mammals with moving water for both drinking and bathing. The canopy helps to shade the bubbling rock and below-ground water reservoir providing cooler water for birds, mammals and even insects to enjoy three seasons of the year.

More great ideas for under your Birch Grove
Maybe a dry river bed and bubbling rock is of little interest to you. Here are a few other ideas you could create under the canopy of your Birch Grove.
A beautiful bed of moss with a lovely natural bird bath made from granite or copper.
A quiet sitting area complete with a comfortable rustic chair or natural bench. A large single flat-topped boulder would be the perfect addition.
A quiet place with a lovely bird feeder and sitting area to escape to with the birds
A small pond and sitting area where you can relax with a good book
For more stories on the value of birch trees in our woodlands, check out the following stories.
• How long before my birch tree trunks turn white?
• Why are my birch tree leaves turning yellow prematurely?
• In the video that accompanies this article you will notice two schools of ceramic fish. Click on this link for my article on Fish In The Garden.
Why not use a single birch tree?
Would a single large birch tree be good enough?
As Peter Wohllenben explains in his New York Times best seller, The Hidden world of Trees: What They Feel, How they Communicate, a single tree is on its own, braving high winds, blistering heat and full sun. It’s like a “street kid” trying to survive in an extremely difficult world without the help of parents, friends and relatives.
Life is difficult and often short for these trees.
On the other hand, The three clump birches surrounding our bubbling rock and dry-river-bed work together to create their own environment both above and below ground.
They cast shade on one another and help to cool the soil around all of the trees while preserving vital moisture the birches need to thrive in the hot summer months.
The groupings of trees also work together to slow strong, gusting winds from damaging the trees, which can be devastating for birch trees that are particularly susceptible to disease and insect infestation.
The Hidden World of Trees is clear about the benefits of multiple trees working together as a team rather than as singular specimens. In a mature forest, for example, much of the benefit is provided by the “mother tree” that helps nearby related trees through its massive root system.
In his book, Wohlleben writes: “A tree is not a forest. On its own, a tree cannot establish a consistent local climate. It is at the mercy of wind and weather. But together, many trees create an ecosystem that moderates extremes of heat and cold, stores a great deal of water, and generates a great deal of humidity. And in this protected environment, trees can live to be very old. To get to this point, the community must remain intact no matter what. If every tree was looking out for only itself, then quite of few of them would never reach old age.”
How quickly do Birch trees grow?
Birch trees are considered relatively fast growers where they are happy. On a good year, expect anywhere from 13 inches to more than 24 inches (or two feet) a year for your average White Birch tree or clump. River birches have a similar growth habit but can be a much longer-lived tree due to its better resistance to birch tree borers. The paper birch grows to a height of between 50’-70’ with a spread of around 35’ when mature.

Up lighting adds an elegant touch to the look of birch tree clumps in the evening.
Can other trees be planted in groves?
Besides the benefits the actual trees derive from planting groves over a single tree, there is also the aesthetic value that should not be overlooked. Let’s face it, several groupings of the same tree not only looks natural in a woodland setting, it’s can be very impressive in the landscape.
And you don’t have to be limited to a birch grove.
Any time you are planning to create a new garden area, consider planting multiples of the same tree to create similar effects as the birch grove.
Other plantings that would work are a grouping of multi-stemmed serviceberries or pagoda dogwoods. Imagine a grouping of Flowering dogwoods in an area of the garden. These trees are all available in multi-stem forms and grow much smaller than birch trees.
The results would be stunning, small stands that would be invaluable to local wildlife both in spring when they flower and, more importantly, in late summer and fall when the berries create a smorgasbord for native wildlife from birds to mammals.
I remember a professional landscape design plan for a small side yard where the owners required a shaded area that provided quick privacy from neighbours. The design plan called for three, fast growing native single-stem Tulip trees in a relatively confined space. The result, a fast-growing tulip tree stand that, in just a few short years, created a shaded side yard that grew fast enough to provide quick privacy for the family.
The landscaper was quick to point out that the high growth rate of these trees would require regular pruning to keep them under control.
With more time, three single-stem serviceberry trees would create a similar effect, albeit on a smaller scale.
Large plantings make a strong garden statement
But back to our birch grove and why I love it.
The simple answer is that mass plantings look great and create a strong statement in the landscape.
Planting three large clumps to create a grove or stand, makes it clear to visitors that this is an important focal point in the garden.
The beginnings of our Birch Grove
Our birch grove began with a large swath of dead grass. (see images below)
The dying grass, undoubtedly caused by our dog urinating in the area all winter, only provided an opportunity to create something new and more useful than a patch of grass.

Nature’s own grove of trees stand out among maples in the fall on the edge of a natural woodland.
How to plant a birch grove
Planting the birch grove was part of a much larger project – the creation of a bubbling rock at the head of a dry river bed that flows a into a walkway of pea gravel combined with river rock and slate stepping stones.
The design concept was to bring it all together as one large dry-river walkway.
The concept behind the birch grove was to help tie it together vertically and soften the landscape design.
Three large planting holes were dug about 10-feet apart in a triangular form and backfilled with a moderate amount of high quality soil. (I tend not to change the soil makeup in the planting hole too much, preferring to allow the tree roots to grow primarily in the soil they will eventually live in for the majority of their lives.)
Unless you have clay soil, plant the clump so that the top of the root ball is level with the soil. Planting it higher will limit its ability to get water. If you have clay soil, consider digging out larger planting holes, adding gravel to the bottom of the hole and planting the top of the root ball a few inches higher to ensure the trees don’t drown from sitting in a bowl of water.
Birch trees require moist soil so mulching around the tree roots is vital.
In our case, the mulch ranges from organic mulch such as shredded bark applied directly around the newly-planted clumps, to living mulch (plants), and non-organic mulch made up primarily of different sized river rock.
The roots of all three clumps will eventually grow beneath the dry-river bed, and the light-coloured stones will reflect any harsh sunlight which will help to keep the tree roots cool.
In other areas surrounding the stand of birches, a thick layer of sedum and ornamental grasses provide an organic mulch that, while robbing the trees of some water, also help to shade the area.
Below is a series of pictures showing the construction of the Birch grove along with the dry river bed and small solar bubbling rock.

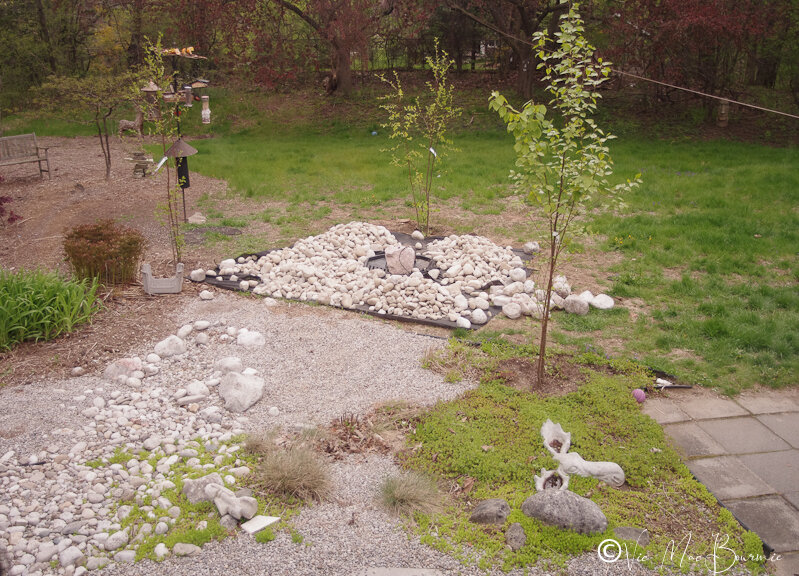


What are the best type of Birch trees to create a grove
There are several types of birch trees to consider if you are planning to create a birch grove, including Yellow Birch (Betula alleghaniensis), Sweet Birch (Betula lenta), River Birch (Betula nigra), Paper Birch (Betula papyrifera), Gray Birch (Betual populifolia)
Are some better than others? Absolutely, but it depends on the look you are after.
Birch trees grow in hardiness zones 2 through 7.
For outstanding beauty, the pure white bark of the Paper Birch is likely the best choice. It grows to about 18 meters or 60 ft. with a spread of 11 m or 35 ft. It can live to about 70 years but rarely gets to this age in an urban or even semi-urban environment.
White birches adapt to most types of soil as long as it is cool in summer preferring long winters and mild summers. They are also susceptible to a number of insects, including the highly destructive bronze birch borers. Regular fertilizing and mulching the tree roots helps the tree resist borers.
Cultivars are also available that are created to better resist borers.
Don’t underestimate, however, the more subtle beauty of the River Birch with its extensive amounts of exfoliating cinnamon-coloured bark with pink undertones. The River Birch is more borer resistant than white bark birches, which makes it a much longer-lived landscape tree.
River Birches grow to about the same height and width as White Birch, also likes full sun and is considered a fast grower.
In another area of our garden, I have used three weeping silver birches (Betula pendula) to create a small grove. The weeping birches are European species that require many of the same conditions as the native trees – primarily mild summer and cold winters together with moist soil and a sunny area.
What birds and other wildlife are attracted to birch trees?
Birds are attracted to all forms of Birch trees for the food they provide in the form of seeds (found in cone-shaped strobili), buds. Birds are especially attracted to Birch trees in spring for the wealth of insects (primarily caterpillars). Birch trees also have high sap content, which makes them a favorite of the Yellow-Bellied Sapsucker. Other birds that use Birch Trees as a food source include American Goldfinch, Black-Capped Chickadee, Blue Jays, Dark-Eyed Junco, Eastern Towhee, insect-eating Warblers, Northern Cardinals, Pine Siskin, Purple Finch, Tufted Titmouse and Nuthatches.

Picture perfect garden photography with your smartphone
Smartphones are excellent choices for garden photographers. Here are tips and tricks on how to get the most out of your smartphone camera for woodland and wildlife photography and suggestions for accessories that help you take better pictures with your favourite smartphone.
Tips and tricks to get the most out of your smartphone camera
They say the best camera is the one in your hand, and let’s face it, these days the camera in your hand is almost always a smartphone.
Not only are the cameras in today’s smartphones excellent, but the ease of sharing your garden photographs from the smartphone directly to social media or email is just too simple in comparison to the effort needed to share photos from digital cameras.
With that in mind, this post is going to focus on using a smartphone to photograph your garden.
In other posts, I’ll explore the benefits of using 35mm digital cameras and high-end point and shoot cameras, both of which offer more control, quality and accessories to tackle garden and wildlife photography.
Photo accessories add versatility to smartphones
Accessories, however, are not restricted to 35mm digital cameras.
There are some great accessories available for smartphones that will help expand your creative vision and enable you to capture images you would never have been able to capture with just your phone. More on those later.
In addition, many of the free editing programs that are available for smartphones are outstanding and can lift your garden photography to new heights.

Taken with an smartphone and edited in Lightroom to saturate the colours.
The image of the Sun’s rays streaming through the trees in the early morning (above) was taken with my iPhone following a heavy overnight rain.
I took several photos, but when I looked at them closely, I realized the best photo was an image within an image. Even with a heavy crop and some editing in a Lightroom phone app, the image held together surprisingly well.
Again, it shows what you can do with a smartphone camera, good lighting and a little knowledge about basic photographic editing.

The early morning light filters through the woodland garden and allowed me to capture a fleeting moment with my iphone camera.
One of the features that set smartphones apart from traditional cameras is the AI (artificial intelligence) now incorporated into most smartphones. This AI makes getting the proper exposure and focus for most images almost foolproof.
Although the latest smartphones are excellent and getting better every year, they’re not perfect.
Not unlike regular digital cameras, they can be easily fooled by extreme lighting conditions.
The resulting photographs will likely either be overexposed or underexposed.

By pinching the smartphone and enlarging the image, it’s possible to get good closeups or macro images of flowers like this native lady slipper. Some newer phones even have special macro lenses built into the phones.
Higher-end cameras that shoot RAW files or produce larger file sizes can withstand heavy editing without digitally “falling apart.” The smartphone digital file, however, is relatively small and severely editing the photograph can make the image unusable for all but basic sharing on social media.
The trick, especially with a smartphone, is to get the proper exposure from the beginning. Getting the best exposure often requires adjusting the camera settings to create an over- or underexposed image.

Our front Japanese-inspired garden taken with a smartphone.
Tricks to get the most from your smartphone camera
I am currently using an iphone 8 so everything I’ll write here will pertain to that phone. Other makes and models, however, offer similar features.
If you have never overridden the camera in your smartphone, or didn’t even know you could, you might be surprised what you can do with the phone’s camera settings.
For starters, if you are focusing in close on a particular flower in your garden, you can ensure it is in focus by touching the camera screen where the flower is located. This is especially helpful if you are trying for a closeup image of the flower. A yellow square will then overlap the area you touched on the screen. That cameraphone will then focus on that specific area and adjust exposure.
The closer you get to the main subject, whether it is a flower or a fall leaf, the more important it is to use the macro feature on the phone.
Once you touch the screen and the yellow square appears over the flower, you will notice that there is a sun icon with a slider line above and below it. This control allows you to change the exposure of the image. By sliding the sun image up, you brighten the image. By sliding it down you underexpose or darken the image.
The results can be dramatic.
The feature is particularly useful if you are shooting into the sun.
The amount of light coming into the camera will tell it to darken the image, but if you like the airy “high-key effect” than you can use the slider (moving it up) to keep the image bright.
If you are photographing a sunset, you may want to use the slider to darken the image and saturate the colours in the sunset. To darken the image, you would move the slider down.
I’m noticing dark, moody images have become more popular on instagram to create a more “theatrical” look.
But don’t underestimate the beauty of “high-key images.” They can be a nice effect, especially with light-coloured, delicate flowers. To bring the whiteness or brightness back to your flower images, touch the sun and slowly bring your finger up the screen. Notice the whole image getting brighter.
I was recently trying to capture an image of our flowering dogwood flowers that were back lit by the sun. The image the smartphone gave me underexposed the flower's dramatically, but by using the above technique I was able to maintain the delicate, ethereal effect I wanted in the image.
On another day, my pink supertunias were highlighted by a sunbeam that just lit them up beautifully against our grey shed which was in total shade. The smartphone read the scene and overexposed the flowers. Only by dramatically underexposing the scene was I able to recreate the pink supertunias standing out so boldly against the grey shed.
Built-in motordrive in Smartphones
One last technique to pass along that you may not know about.
Imagine you are sitting in your favourite chair in the garden checking out your instagram when a pileated woodpecker lands on a nearby branch. You raise the phone and grab a quick shot. It doesn’t move, so you grab another shot and it’s gone. You get two shots but neither is very good. In both cases the woodpecker turned its head just as you took the picture.
Here’s the tip many don’t know about: Your smartphone has a motor drive built into it. While you got two shots in the short time the woodpecker was on the branch, by holding your finger on the button you may well have got 10-20-30 shots to choose from instead.
At least one of those shots will be the perfect shot.
Grab your smartphone and give it a try.
Use your smartphones’ built-in zoom
In addition to the above technique, I’m guessing most people know about the two-finger zoom feature on smartphones that allow you to zoom in digitally on your subject.
Quality certainly suffers when you use this feature and remember to hold the camera steady when you take the shot, but the zoom feature allows you to get closer to the bird in the tree or the fawn in the back of the garden.
Don’t expect to get the same results you would with a 600mm F4 lens, but zooming in closer can make a big difference in garden photography where birds, insects and mammals are often easier to get close to.
Accessory lenses add even more versatility
Another way to add more versatility to your smartphone lens is with smartphone lens accessories.
There are a host of clip-on lenses that turn your smartphone lens into a fisheye lens, macro lens or telephoto lens. Often they are available in a package incorporating several lenses.
Checkout smartphone accessories available at Amazon, here.
The prices vary depending on the package and the quality of lenses. If you use your smartphone as your primary camera, these lenses are certainly worth considering.
Some lens packaged even include a circular polarizer, which is probably the single most important filter a garden photographer will need. The polarizer, not unlike polarized sunglasses, cuts through glare and reflection from leaves and other reflective surfaces including water but not steel.
A careful search on Amazon shows there are many lens/filters packages that include polarizers as well as star, graduated sky filters and neutral density filters. It is probably best to focus on a high quality circular polarizing filter rather than any other type of filter.
Tripod accessories for smartphones
The accessories seem endless on Amazon. Tripods and tripod adapters are also numerous. And if you find yourself using a tripod regularly, which is a good idea, you can get a bluetooth shutter release so you can take the picture without touching the phone and adding shake to the image.
An alternative is to just set a 5-10 second timer on your phone as a hands-off alternative.
Photographing your Woodland garden has never been easier.
A cup of coffee in one hand, the smartphone in the other and a walk around the garden in the early morning is sure to reveal some beautiful images.
A glass of wine in one hand, the smartphone in the other and an early evening stroll through the garden is sure to reveal even more outstanding images.
In your own garden, it’s particularly convenient to take advantage of these ideal times to take outstanding images. It doesn’t always need to be images of flowers.
When the sun is low in the sky and the wind has died down the garden becomes a magical place and the light takes on a new warmth that makes for the best photographic opportunities.
Don’t let these times go to waste.
This page contains affiliate links. If you purchase a product through one of them, I will receive a commission (at no additional cost to you) I try to only endorse products I have either used, have complete confidence in, or have experience with the manufacturer.
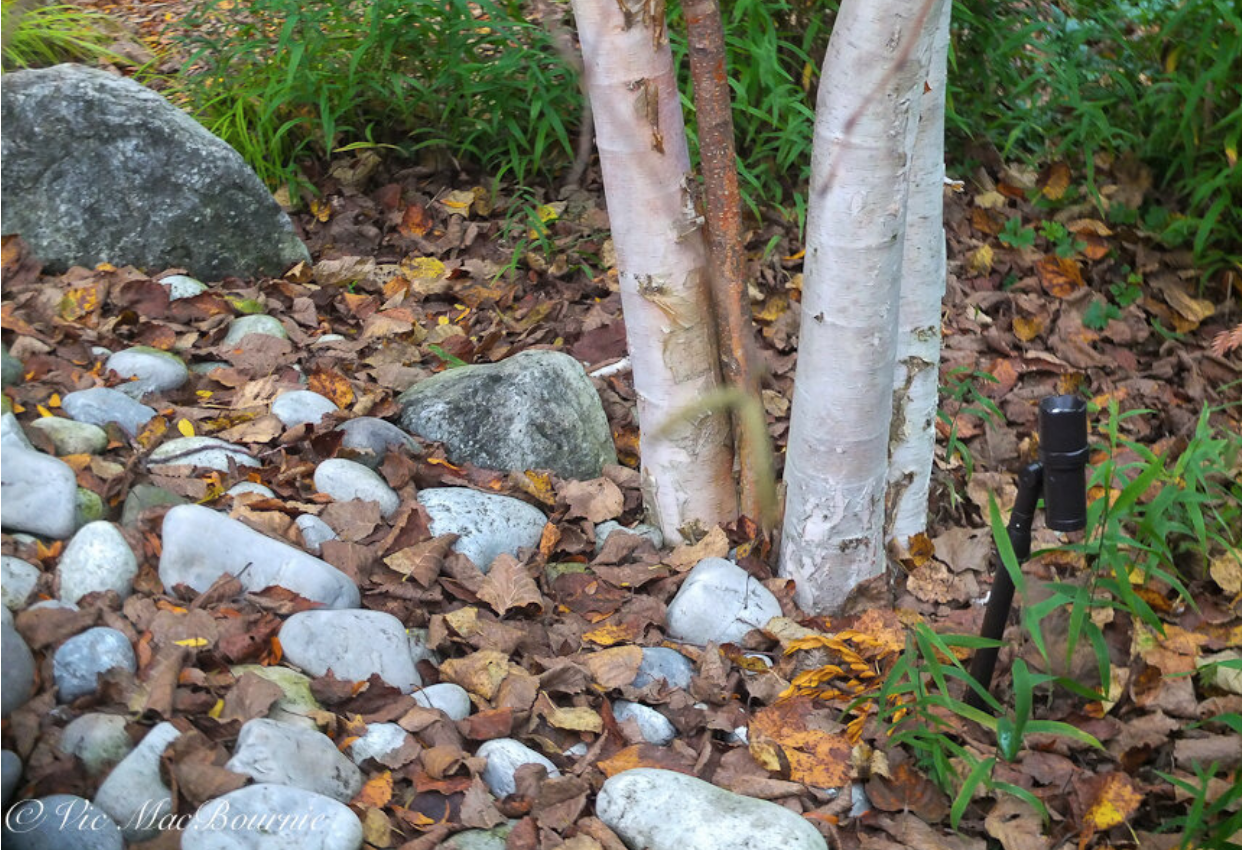
How long before Paperbark Birch trunks turn white?
Birch trees are among the most used trees in our landscapes because of their showy white bark that is a real standout in all seasons. How long does it take before the bark turns white? A typically-sized tree purchased at a local nursery can take between 3-5 years before it turns white. A more mature tree would take less time and a very young tree would take up to ten years to turn white.
One of the prettiest trees in our landscapes are undoubtedly White Birch. Their incredible white bark lights up the landscape throughout the seasons, especially if the trunks are uplighted at night to draw even more attention to their glowing white trunks.
But how long does it take the trunks of a typical Paper Bark White Birch tree Betula papyrifera to turn from the cinnamon brown colour present in immature trees into the outstanding white papery bark we are all so familiar with in the landscape?
The answer to that question may vary to some degree depending on the age of the tree purchased from the nursery, the location the tree is planted and the amount of water and, to a lesser degree, the soil conditions where it is growing.
In a typical, store-bought clump or single-stem White Birch tree that is small enough to carry home in the back of your hatchback wagon or truck, you can expect at least a 3- to 4-year wait before the trunks begin to turn white. If you purchase a more mature tree that is already beginning to show signs of whitish-orange bark, expect a year or maybe two before the reddish-brown bark with its horizontal slits (lenticels) gives way to a reddish orange bark and eventually is peeled off enough to reveal the white paper bark.
Very immature trees that are purchased as “whips” may take up to ten years before you are blessed with solid white birch bark.
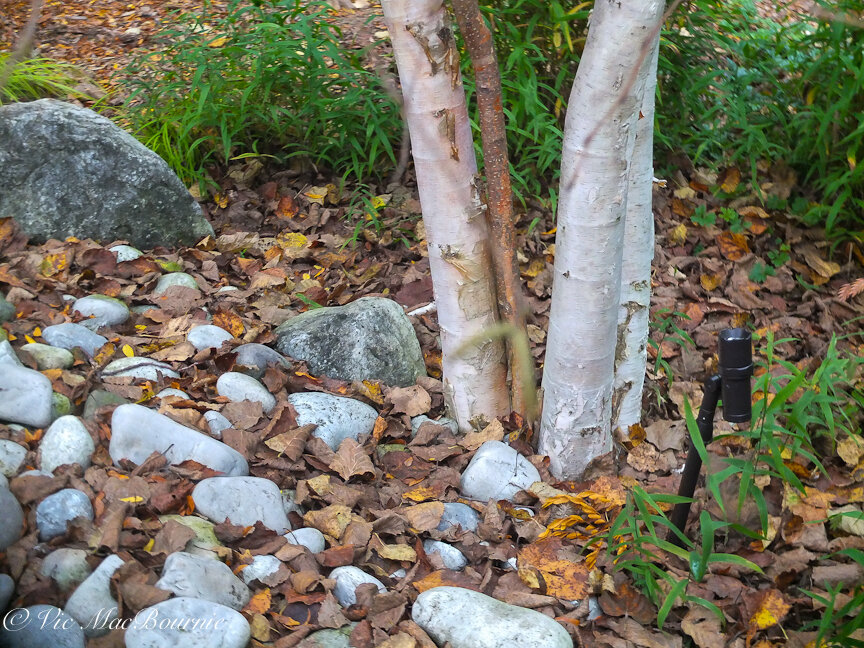
The white birch bark of this clump shows how far along the three main trunks are in comparison to the much younger fourth trunk still in its reddish-brown phase. This fourth trunk is probably 2-3 years away from taking on its all-white trunk. The solar-powered uplighting on the white trunks creates a real mood in the evenings.
How quickly do Birch trees grow?
Birch trees are considered relatively fast growers where they are happy. On a good year, expect anywhere from 13 inches to more than 24 inches (or two feet) a year for your average White Birch tree or clump. The paper birch grows to a height of between 50’-70’ with a spread of around 35’ when mature. The River Birch enjoys a similar growth habit.
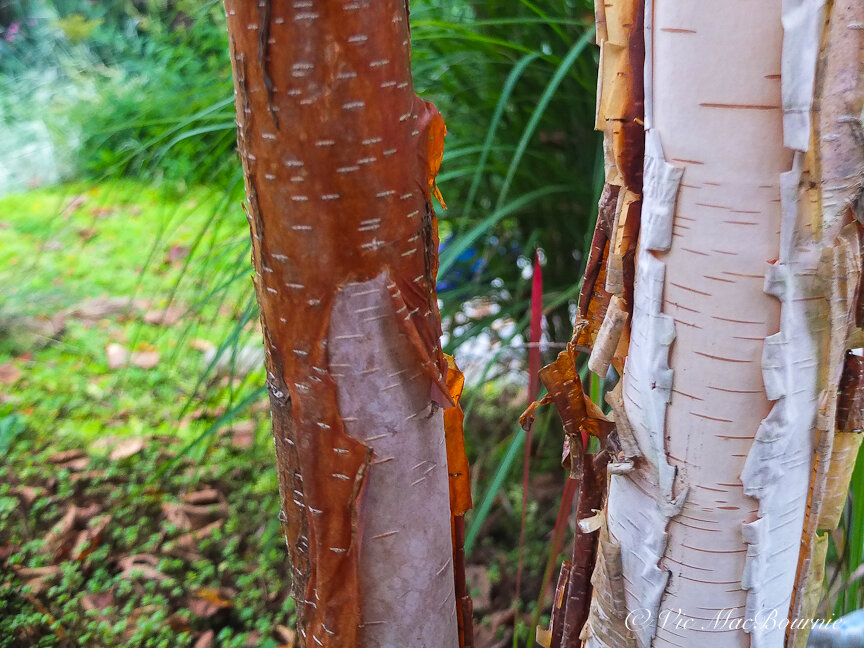
This image illustrates the peeling bark of another one of our clump birches that is just entering its pure white phase. The cinnamon bark on the left is just beginning to reveal the white bark. It’s noteworthy that this clump is just 9 or 10 feet from the clump shown above that is much further along in its transformation from reddish brown to white.
Should I plant a birch tree in my urban landscape?
The white birch is a medium-sized tree that is very common in urban landscapes despite its relatively short-lived existence under these more difficult conditions.
Birch trees are generally unable to handle excessive heat and humidity which are often exacerbated in urban landscapes where they are planted near asphalt driveways or close to homes where they are unable to get proper air flow to keep them cooler.
These urban trees and others living in zones 6 and up may live only about 30 years – even less if they are under extreme stress.
It’s a good idea to keep this in mind when planning a landscape in urban areas. Birch trees cannot be counted on to live long lives and may have to be removed leaving a large hole just when your landscape has matured nicely and is looking its best. On the other hand, if you have a very sunny area, say for example in a new subdivision, a fast-growing birch tree will bring relief from the hot sun and provide a beautiful specimen for years to come. A good idea might be to plant a small, slower-growing oak or maple tree nearby which will slowly take over once the birch tree begins to decline.
At some point, you could even cut down the birch tree to make room for the larger, more long-lived native oak or maple.
In the wild, or in a more rural location or woodland-type garden, the white birch is often able to survive longer and grow to heights of between 50 and 70 feet. A typical trunk measures about 1 to 2 feet wide. Trees in colder climates, however, can even live for more than 100 years.
The leaves of the white birch are ovate and the catkins (male and female flowers) can grow up to 4 inches long. The female catkins form cylindrical cones that disintegrate when ripe, spreading the seeds which are eaten by many birds and small mammals including chickadees, redpolls, voles and ruffed grouse.

By uplighting the Birch clumps, you can appreciate their white trunks both day and night.
For more on Birch Trees in the Woodland garden check out my other articles:
On our property, we have two areas with birch trees: a grouping of three narrow weeping purple birch in the front that were purchased as very young whips, and three clump birches planted in the back yard that together have at least ten main trunks combined.
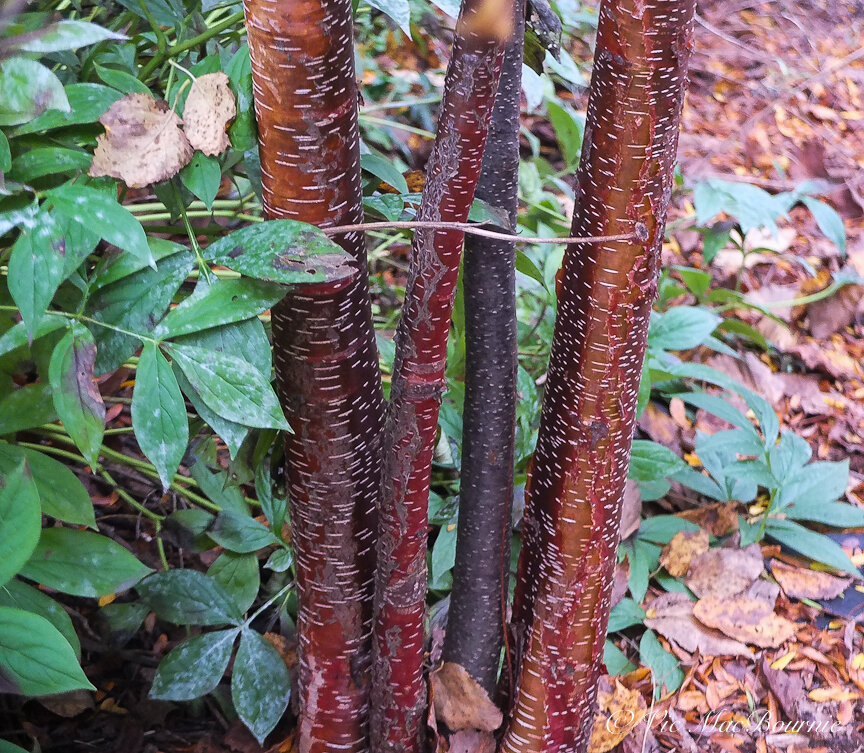
Our final clump of birch trees planted at the same time as the other two clumps, is significantly behind the other clumps in growth and maturity despite being purchased and planted at the same time. This clump, although already in the ground for four years, is still a year or two away from obtaining their white trunks.
The three young whips (Betula pendula ‘Purpurea’ )planted in the front took several years to begin displaying their white trunks. After maybe ten years of growth they have matured into a lovely grouping of weeping birch trees. These trees are slow-growing and upright as young trees, that eventually begin to weep more with age, and sport bronze-purple leaves and silver-grey bark.
The clump birches in the backyard are further along after only about 3-4 years in the ground. To give you an idea about the original size of the clumps, they were all purchased from a big-box store and taken home in the back of our Subaru Outback wagon. Although the containers were quite large, I was able to get all three into the back of the wagon to transport them home. (This helps to give readers an idea of the trees’ original size.)
Our three clump birches in the back were all planted at the same time and within about six feet to 10 feet of one another to create a small birch grove. They are, however, taking on their magnificent white trunks at significantly different rates. This tells me that the amount of sun, water and quality of soil they receive have obviously also played a role in how quickly the trees take on their papery-white trunks.
Birch trees are early colonizers after a fire or natural disaster so they prefer to grow in open sunny areas and will not do well in shade. Our clump that is the slowest to mature is also the clump that gets the least amount of sun. The other two clumps block much of the sun from the third clump.
The trees also require plenty of water, so mulching around the tree roots to retain moisture is a good idea.
Recent hot, dry spells have stressed our birch trees in the backyard to the point where their leaves are beginning to turn yellow and dropping off a little earlier than I would like. Deep watering is required, especially prior to winter to keep the trees hydrated.
(Go here, for my article explaining early leaf drop of birch trees.)
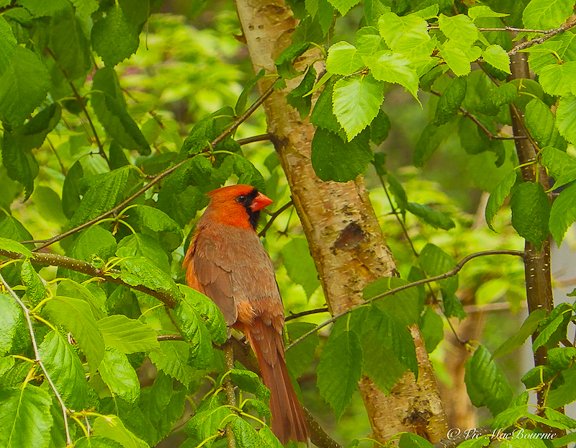
A male cardinal hanging out in a birch tree just beginning to get its white bark.
Why is the bark white?
Studies have shown that the white bark of birch trees serves it well when it comes to regulating the tree’s internal temperature, especially in the more northern climates where the trees tend to live much longer.
The white bark is known to reflect the sun’s heat away from the tree during cold spells, which helps to protect the tree’s vital cambium layer just beneath the bark.
If the Birch’s bark were the more typical dark colour found in other trees, the life-giving liquid that travels up and down the tree’s trunk through the cambium layer would be constantly fluctuating between freezing and thawing, which would eventually weaken and kill the tree. The reflective qualities of the white birch bark helps to regulate the temperature and allow the trees to survive during extreme weather conditions.
This trait is likely to play an important role in the tree’s survival as climate change continues to play havoc with our more northern growing zones.
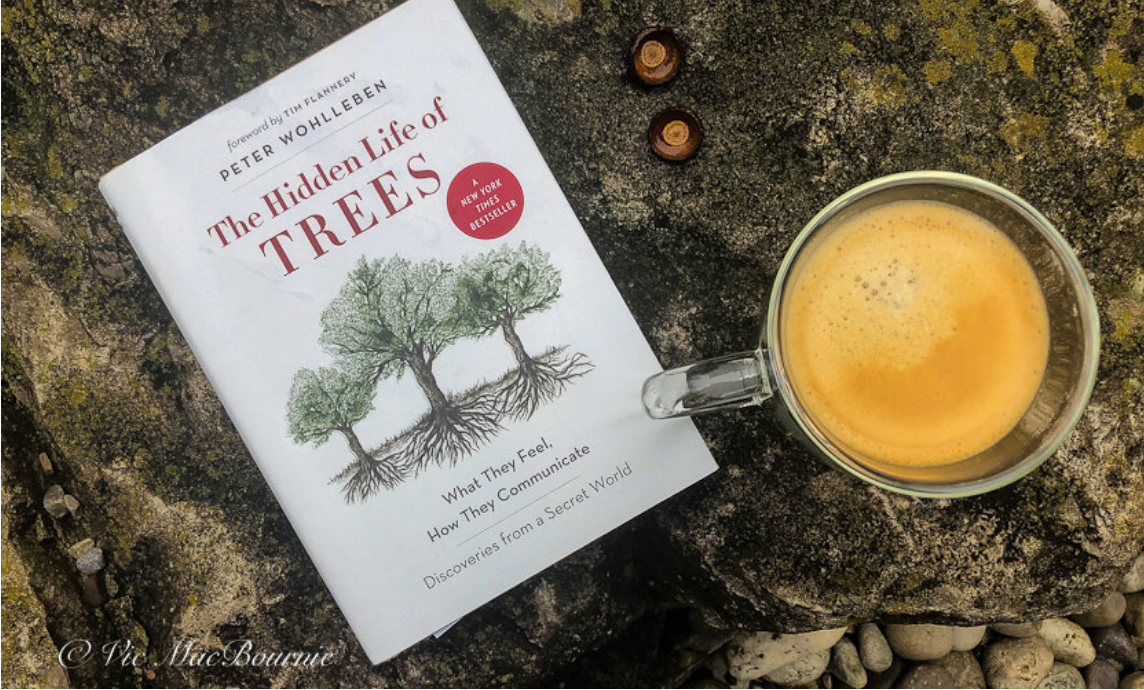
How trees communicate in our woodland gardens: The Hidden Life of Trees
The Hidden Life of Trees is a New York Times bestseller every Woodland Gardener needs to read. Author Peter Wohlleben explores how trees communicate in nature and how they struggle in urban environments calling them “street kids” and explaining the difficulties they face in our woodland gardens and on urban environments.
Do trees work together to help one another?
If you love trees – and I know every woodland gardener does – then you need to get The Hidden Life of TREES. (Amazon Link)
Peter Wohlleben’s 288-page, New York Times best seller will open up a new world for Woodland gardeners looking for answers about what is really going on in their backyards, local woodlots and ancient forests.
There is a reason this book has sold more than 2 million copies. Canadian publisher Greystone Books unleashed the book in its 8th printing on September, 2016 in the First English Language Edition, and has never looked back. (A fully illustrated coffee-table version is also available, see below.)
Not convinced about the importance of this book, consider that it has also been made into a movie. Check out this YouTube link for a taste of The Hidden Life of Trees movie version. (It will be available on AppleTV starting the month of October.)
It should come as no surprise to any of us that several backyard trees work together to create their own environment – from cooling our yards with shade to creating their own fertilization and micro environments at ground level.
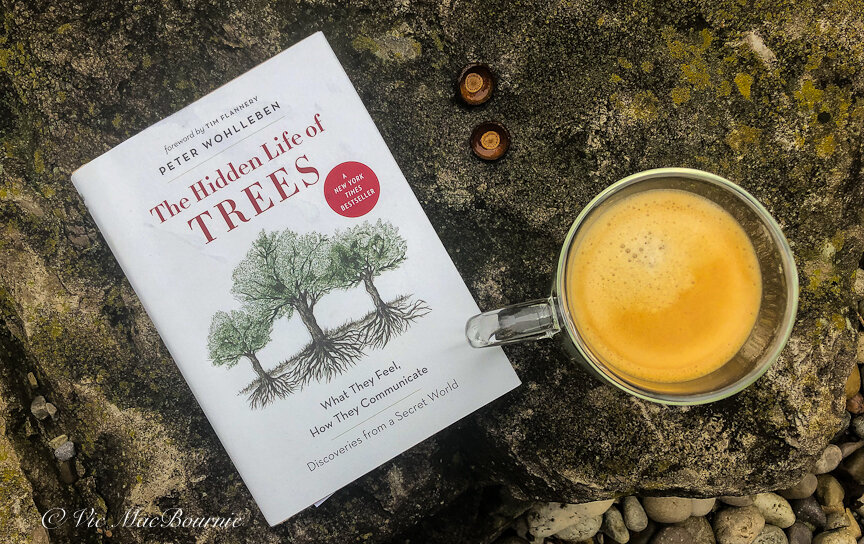
Sit back and relax with a good coffee and The Hidden Life of Trees. The New York Times best seller is a must for Woodland gardeners.
What will come as a surprise to most of us, however, is the incredible goings on under our feet – from just a few inches beneath the soil to the depths many of our mighty tree roots reach. Beneath the soil there’s a communication highway where battles are waged, where life and death struggles play out through the seasons, and where families of trees come together through the “Mother Tree” and work together, sometimes over centuries, to survive, and ensure the health and prosperity of the woodland.
If you are looking to purchase the Hidden Life of Trees, or any other gardening book for that matter, be sure to check out the outstanding selection and prices at alibris books.
Armed with this knowledge, woodland gardeners can begin to make sense of so many questions about our gardens; its forest canopies, why a variety of tree is not flourishing and how we can help our woodland thrive.
(Dr. Nadina Galle has taken her inspiration from The Hidden Life of Trees and The Heartbeat of Trees and used it as a building block in her groundbreaking work to use smart technology to monitor the health of the urban forest. Read about her outstanding work here in my recent article The Internet of Nature.)
But this is not a how-to book. There are no pictures of trees. There are no outright tips for how to plant trees, where to plant them or when to plant them.
The Hidden Life of Trees: What They Feel, How They Communicate is a book that explores the often mysterious lives of individual trees, of forests, of trees left alone to fend for themselves in urban areas, on our streets and in our backyards. This is a book, written by a German forester, about how trees have communicated with one another over decades and even centuries, how they work together to save their own against disease, natural disasters, man’s destructive habits and the invaders we have brought that threaten the very existence of our native trees. Underlying it all, is the affect climate change is having and will continue to have on our woodlands, our urban forests and ancient rainforests.
“Life as a forester became exciting once again. Every day in the forest was a day of discovery. This led me to unusual ways of managing the forest. When you know that trees experience pain and have memories and that tree parents live together with their children, then you can no longer just chop them down and disrupt their lives with large machines.”
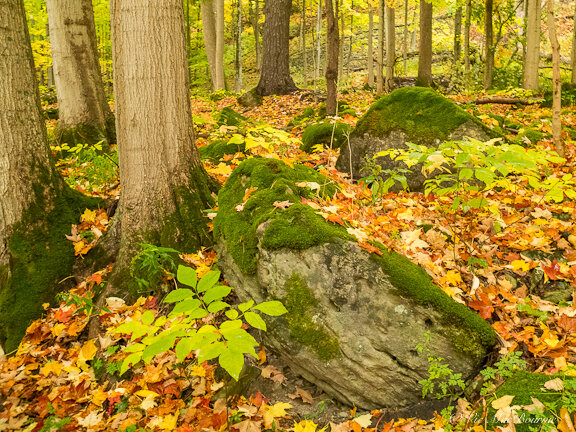
Trees work
Will a single tree thrive in my yard?
The author makes it clear from the beginning that the lone tree in the middle of our front and back yards surrounded by grass that is so prevalent in many urban homes, is not an ideal situation for a tree’s prosperity.
“A tree is not a forest. On its own, a tree cannot establish a consistent local climate. It is at the mercy of wind and weather. But together, many trees create an ecosystem that moderates extremes of heat and cold, stores a great deal of water, and generates a great deal of humidity. And in this protected environment, trees can live to be very old. To get to this point, the community must remain intact no matter what. If every tree was looking out for only itself, then quite of few of them would never reach old age.”
The above quote may well explain why our urban trees rarely reach maturity, let alone old age. Where I live, this is clearly evident in local birch trees. In the heart or our urban communities these trees rarely survive into maturity. In the older, more rural areas where trees are less crowded and are given more room to grow, Birch trees seem to do much better. In my yard, I have planted three clumps quite close to one another and they seem extremely happy, possibly beginning to communicate with one another.
As trees struggle on their own, some would die opening up the forest floor to sunlight, the author explains. “The heat of summer would reach the forest floor and dry it out. Every tree would suffer.”
Do trees help one another survive?
If we conclude that every tree is valuable to the forest community and worth keeping around, it should come as no surprise that, as Wohlleben writes, “…even sick individuals are supported and nourished until they recover.”
He compares them to a herd of elephants. “like the herd, they, too look after their own, and they help their sick and weak back up onto their feet. They are even reluctant to abandon their own.”
If you have never thought about trees in this way, you may be shocked about how deep Wohlleben goes to explain just how extensively trees communicate through primarily – but not limited to – underground networks.
For the doubters, let me just say that his arguments and scientific data are hard to ignore.
Five key takeaways from this book
• Trees are much more complicated than most of us realize and their means of communication are complex and sophisticated.
• The importance of planting a grouping (possibly an island or a grove if possible) of the same variety of native trees is much more beneficial than planting individual specimens, especially if they are non-native trees.
• Recognizing that a tree’s needs must be met not just after initial planting but long into their growth cycle is important, and reducing physical barriers can be critically important.
• Single trees planted in our yards are more on their own than we might realize, and it matters that they cannot communicate easily with other trees. Best to take extra care of these lone trees.
• A woodland garden thrives not only because it is more natural than say a cottage garden, but because trees work together to create a positive environment that helps to guarantee success even when they are threatened.
Can trees communicate?
Consider that four decades ago, scientists noticed an interesting phenomenon on the African savannah.
They noted that giraffes feeding on acacia trees moved on quickly to other trees. The same scientists discovered that mere minutes after the giraffes began feeding on the trees, the acacias began pumping toxic substances into their leaves to ward off the large herbivores. The giraffes moved on, walked past a number of nearby acacias, before resuming their feeding on a group of trees about 100 yards away.
“The reason for this behavior is astonishing. The acacia trees that were being eaten gave off a warning gas that signaled to neighbouring trees of the same species that a crisis was at hand. Right away, all the forewarned trees also pumped toxins into their leaves to prepare themselves…. The giraffes were wise to this game and therefore moved farther away … to a part of the savannah where they could find trees that were oblivious to what was going on.”
The entire book is filled with fascinating stories about how trees’ self defences are used to ward off fungal diseases, beetle attacks and even how they deal with woodpeckers and other potentially destructive mammals that depend on trees for their own survival.
This is just an example of the many ways trees may communicate in a natural environment. The book goes on to explain a myriad of ways trees communicate, but in doing so, it also explores the many ways communication between trees is cut off leaving orphaned trees alone and fending for themselves.
Communication between trees growing in managed forests and in many of our urban parks is often restricted and underdeveloped for a variety of reasons explored in the book.
How are single trees like “street kids”?
But it’s the chapters on street kids that many gardeners and homeowners will likely focus on the most.
A drive down a suburban street or through a large city reveals just how many trees are left alone to fend for themselves.
In his book, Wohlleben describes these orphaned trees as “street kids.”
“Urban trees are the street kids of the forest. And some are growing in locations that make the name an even better fit – right on the street. The first few decades of their lives are similar to their colleagues in the park. They are pampered and primped. Sometimes they even have their own personal irrigation lines and customized watering schedules.”
The problem comes when these trees decide it’s time to go out and establish themselves. They quickly meet with hard, unlivable soil and even concrete walkways, roads that don’t allow any water to penetrate down into the hard soil compacted by machinery
“When trees are planted in these restrictive spaces, conflicts are inevitable….The culprit is sentenced to death.”
It is cut down and another planted in its place, but the new one is planted in a built-in root cage to restrict its roots from ever causing damage to the surrounding hardscaping.
Sound familiar?
What problems does a single tree face?
The difficulties “street kids” face does not end there. In large urban areas, where the lights never go out, these trees never get a chance to rest. They need a period of rest to thrive. Often, the concrete traps heat and even winters, another time for the tree to rest, are non-existant.
The sun, too, heats the concrete and black asphalt to the point of killing any living organism in the soil beneath it, depriving the “street kids” of water and nourishment.
In large urban areas these problems are obvious, but take a look around at your own trees and consider if they are facing some of these same problems.
Are the roots of the tree in your front yard growing under the road? Would additional watering help it survive hot, dry periods?
Is your favourite dogwood struggling because it is now in bright sunlight most of the day after a neighbour cut down a large maple exposing it to harsh sunlight? Maybe we need to add a large shade tree nearby to reduce the amount of sunlight hitting the dogwood.
Is your concrete driveway cutting off all water to your favourite roadside maple tree? Maybe it’s time to do what I did and replace the old asphalt or concrete with stone or permeable brick to allow water to seep down into the roots of the tree. Not only will it help the tree, it also reduced the amount of toxic runoff from your driveway into the sewer systems by keeping more water on your property.
As I said earlier: this is not a how-to book, but it certainly provides food for thought about how we can help our own little forest survive and thrive in our woodland garden.
About the Author: Peter Wohlleben spent over twenty years working for the forestry commission in Germany before leaving to put his ideas of ecology into practice. He now runs an environmentally-friendly woodland in Germany, where he is working for the return of primeval forests. He is the author of numerous books about the natural world including The Hidden Life of Trees, The Inner Lives of Animals, and The Secret Wisdom of Nature, which together make up his bestselling The Mysteries of Nature Series. He has also written numerous books for children including Can You Hear the Trees Talking? and Peter and the Tree Children.
If you like the Hidden Life of Trees, be sure to check out its sequel The Heartbeat of Trees recently published.

Living with and attracting friendly little red squirrels
The American Red squirrel is a year-round resident in our woodland garden. An entertaining little tree squirrel that prefers coniferous forests, especially pine trees which are both a source of food and habitat. American red squirrels, unlike their Eurasian red squirrel are territorial and hold their own against the American grey squirrels and fox squirrels.
Red squirrels, oak trees and acorns in our woodland garden
One look at the little red squirrel and I couldn’t help falling in love.
She could not have been very old and yet was brave enough to hang out under the feeder with the big boys: Big bruising American grey squirrels (some jet black and three times larger than her), mature red squirrels, and a host of very aggressive little chipmunks.
But she held her own, keeping a safe distance from the others while she scrounged what sunflower seeds and other tidbits she could find under the bird feeders.
I’m sure mom wasn’t far away keeping an eye out for her babies. During March and April, females have litters of between three to seven babies.
If you are looking to attract the American Red Squirrel to your woodland garden, be sure to include their favourite food sources, Oaks for their prized acorns, pine trees for their seeds, native berries and flowers for their seeds (Black Eyed Susans and Purple Coneflowers are good choices). These tree squirrel also appreciate a good sized woodpile where they can hide their stash for the winter.
Technically, this little red squirrel was actually what we call an American Red Squirrel, not to be mistaken by the even cuter and much more timid Eurasian Red Squirrel.

A digital digital painting of one of our cute little red squirrels.
The British counterpart (Eurasian Red Squirrel), complete with its adorable tufted ears, is actually becoming a threatened species in most parts of Europe because of its more timid, non-territorial stand against the introduced American Grey squirrel, which are all too familiar in backyards across the United States and Canada. The Grey squirrels were introduced to Great Britain in the 1800s resulting in the slow decline of the red squirrels. It is estimated that at one time red squirrels numbered in the 3 million. That number is now at about 120,000.
Dani Conner’s baby red squirrels video
For more on the Eurasion Red squirrel, be sure to check out Dani Connor and her entertaining You Tube channel about the Eurasian Red Squirrel. Dani is a talented wildlife photographer and Zoologist originally from London, UK who is now living in Sweden.
Recently she became mom to four orphaned baby red squirrels and has spent a lot of time with them gaining their trust. The kits allowed her to photograph them and record the sound they make when they eat, which went viral on Twitter gaining 14.8 million views.
Her YouTube videos are well worth watching and she has a Patreon site you may want to investigate.

American Red Squirrel at reflection pond.
If you are lucky enough to have American red squirrels in your backyard, you’ll know why the grey squirrels won’t be forcing them out any time soon. When it comes to who gets fed first around our feeders, the red squirrels make it clear up front that they’re not about to back down to the much larger greys.
Besides their willingness to communicate (the American red squirrel can often be heard communicating with a lengthy, descending trill and a persistent chatter of assorted notes and chucks), they are not afraid to show their annoyance with competitors around a food source.
In our yard their vocalizations are also one of the early warning signs that an intruder is about – especially one of the neighbourhood foxes. The Red Squirrels carry on for quite some time warning others of the dangers – including a hawk or own if they see it first.
I’ve seen one red squirrel chase a much larger grey squirrel from one end of the yard to the other when the grey squirrel intruded on its dinner party. I think it’s as much a game as it is a show of strength because they all more or less get along under the feeder. The real aggression is more likely between two reds than a red and a grey.
It can be great fun watching these little guys from inside the photographic blind. I’m sure they know I’m there, but they eventually become oblivious to me and the blind. In fact, I’ve had them jump on the blind while I’m inside mistaking the camouflage for a real tree or bush.

An immature American Red Squirrel looking for scraps of food under the bird feeder, always on the watch for predators and other feisty fellow. How can you not fall in love with this little fella?
On another occasion one Red squirrel chased another right through the blind when I was sitting in it. In one side and out the other before I even knew I had a couple of visitors.
Red squirrels can be feisty and territorial toward intruders, especially when food is involved. A showdown between two red squirrels is sure to involve plenty of tail flicking, chattering and even foot stomping. Trust me, it may look like they are having fun, but the argument can get pretty heated at times.
That tail of theirs can measure about half the size of the squirrel and when they are not using it to assert their dominance, its primarily used for balance as the squirrel moves from tree to tree in the woodland garden.

A lovely little Red Squirrel poses on a branch as it enjoys a snack.
Are red squirrels friendly?
I’ll never forget the time I was feeding one of our red squirrels peanuts and photographing her in our front garden, when she got around behind me and jumped up on my shoulder. Now that was an experience I’ll not forget.
She didn’t stay long and after a quick sniff she jumped down onto a rock to continue scoring peanuts from me.
Although they are territorial around other red squirrels, these little fellas are quite friendly and can be trained to take peanuts right out of your hand.
Unlike our chipmunks, I tend to just toss them their treats rather than have them take the peanuts directly from my hand. (See my article on how to hand feed chipmunks.)
Are American Red Squirrels a threatened species
The American Red squirrels’ aggressive/territorial approach to guarding food helps keep our red squirrel numbers healthy and might account for our baby red squirrel holding her own in the face of a host of other, much larger squirrels around her.
Although red squirrels can be rare in some areas, including urban areas, their numbers are not under threat in North America. Unlike the Eurasian reds, whose numbers have fallen dramatically and efforts are having to be made to protect the remaining populations.
You may also have Fox squirrels living or visiting your bird feeders. It is typically found in the eastern United States and Canada. Not unlike the smaller American Red Squirrel, the Fox squirrels have a lot of red in their coats, but they are actually much larger. In fact, they are the largest tree squirrel in North America weighing up to two pounds compared to the much smaller Red Squirrels that weigh in at an average half pound.

American Red Squirrels do not hibernate. Instead they store large caches of food in what is called a midden.
According to the extremely informative website Squirrels At the Feeder, the main difference between the American and Eurasia Red Squirrels can be seen in how they store food for the winter. Both of these species stash away food for winter months as neither species hibernates. The Eurasian Red Squirrel scatters the food caches in multiple locations throughout the forest. The American Red Squirrel creates a massive central stash called a midden which it defends with its life.”
What do the American Red Squirrels eat
Since our red squirrels don’t hibernate during the winter, they are extremely busy in the fall collecting food for the upcoming cold months.
Red squirrels, by definition are omnivores, and their diet may surprise readers. Their primary diet consists mainly of the seeds and cones of evergreen trees as well as nuts and, especially acorns. Their diets, however, actually extend to include native flowers, a variety of berries, mushrooms, bugs, eggs, small birds and even mice. Yes, red squirrels can help you control the mice population around your home.
Where do Red squirrels store their food?
Our red squirrels use tree cavities, brush piles and dens as their own food pantries where they can keep them safe from other foragers. (For my earlier article on building a brush pile go here.)
Around my home, they are regular visitors to the area under the bird feeders where they gather sunflower seeds and other droppings from the feeders. Unsalted peanuts (either shelled or unshelled) are a favourite treat that I like to offer them.
Where do they live?
The American Red Squirrel prefers coniferous forests and are particularly fond of pine forests but they will also inhabit deciduous woodland and are found in woodlands in suburban and near-urban areas throughout their range.
Their range is considered wide, stretching throughout the United States from the Alaskan forests through the Rocky Mountains in Canada to about Georgia.
Can Red Squirrels be problematic?
Like any rodent, red squirrels can become an annoyance if they get into the attic or other area where they do not belong. Their winter caches of food are a dead giveaway that they have moved in.
It’s always wise to use wildlife-friendly professionals to safely remove any rodents that find their way into your home.
Be sure to seal off any areas around the home to ensure there are no areas of easy access to your attic and you can enjoy these friendly little squirrels in the natural areas of your yard where they belong.

Fired up about Vermont Castings propane Vanguard BBQs: Review
Vermont Castings is best known for its high quality wood stoves but don’t underestimate their high quality Vanguard BBQs. Our two-burner, propane Vangard model has been an excellent performer. It’s high quality build makes it a long-term investment and its good looks helps it to fit into our woodland garden patio decor. The company makes a 2-burneer, 3-burner and 4-burner unit as well as an all new Kamodo-style BBQ.
Vermont Castings Vanguard two-burner review
Vermont Castings may not be the first company that comes to mind when you’re thinking barbecues. High quality wood stoves, yes.
When it comes to BBQs, however, it’s names like Weber, Broil King, Char-Broil, Traeger, Big Green Egg and Kamado Joe – just to name a few – that dominate the BBQ market.
So, with that in mind, I did some home work and chose the long venerable brand Vermont Castings when it came time to replace our old propane gas barbecue.
After using the Vermont Castings Vanguard BBQ for two grilling seasons, I have to say that I could not be happier with my decision to buy our art-deco inspired little propane barbecue.
Vermont Castings, no doubt better known in North America for its impressive wood stoves in fire engine red and hunter green, have long been a well-respected American-based company known for the highest quality made-in-the-USA products. And they still are, but when it comes to BBQs it’s all about Canada. More on the company’s history later, for now let’s get back to these outstanding barbecues.
Be sure to check out my extensive article about cooking with cast iron including the specially designed Vermont Castings Dutch Oven.

This image, from the Vermont Castings website, shows the 4-burner Vermont Castings Vanguard model.
Like most of you out there, I’m no barbecuing expert – you won’t mistake me for a grillmaster, pitmaster or any other name these expert BBQers are calling themselves these days. But I’ve been known to fire up some impressive meals in the past two seasons with the Vermont Castings Vanguard BBQ.
For more suggestions and some of my favourite garden things, be sure to check out my Favourite Things post.
I like my planked salmon, grilled salmon, hamburgs, chicken even the odd hot dog, so getting all the bells and whistles was not really that important to me. Knowing that I could add what I needed later was enough for me. What I was looking for was a well-made, rugged, barbecue that can stay outside year round, stand up to Canadian winters and perform without a lot of drama.

Our 2-burner Vermont Castings BBQ with what I like to call its art-deco look in full view.
The only important feature I wanted was an electronic starter that this BBQ delivered. Now, I know most BBQs these days have easy-start devices, the difference with the Vermont Castings models is that it still works perfectly after almost two years. That can’t be said for many of its competitors.
Oh, and it has to look good in the woodland garden rather than scream out that I have a massive BBQ as the central focus of my backyard.
If we want to add colour into the entertaining space, we can do that through designers like Annie Selke who has a great selection of colourful outdoor accessories like rugs, cushions and drapes.
The Vermont Castings 2 burner Vanguard not only met my every need, it did it in style.
By style, I mean its good looks. You won’t mistake this all-black BBQ designed in almost an art-deco style for your run-of-the-mill big box BBQ with its cheap stainless steel top and flimsy cooking grills.
This thing is a serious BBQ weighing in at more than 143 pounds (65.00 kg for Cdns). A good portion of that weight is attributed to the impressive lid that lets you know this is not anywhere near your average barbecue. This fella can hold the heat and in a BBQ, that’s one of the most important features.
Even in the middle of a cold winter, the impressive heat-storing capacity of the cast iron lid ensures a proper cook. Less expensive BBQ don’t hold all that valuable heat in the cooking box making for uneven cooking temperatures.
What makes Vermont Casting BBQs high quality?
It’s clear from the first time you fire this baby up that it is built to hold the heat.
Unlike most BBQs on the market that fail to hold all that precious convection heat in the cooking box, the Vermont Castings design crew clearly drew on its years of expertise perfecting its hot stove to create a BBQ with some serious heat-retaining powers.
And this is the smallest BBQ in the Vanguard line.
The impressive three-burner model that most families would probably be the most interested in, weighs in at 180.8 lbs. (82.00kg), and the much larger four-burner heavyweight contestant comes in at a whopping 201.7 lbs or 91.50 kg.
If it’s BTUs you are interested in, consider these numbers: The Big 4-burner puts out up to 48,000 BTUs on its 742 sq. inches of total cooking surface with a side burner that spits out an additional 12,000 BTUs.
The slightly smaller 3-burner unit puts out 45,000 BTUs on its 683 sq. inches of total cooking surface, while our 2-burner unit produces 30,000 BTUs on its 494 sq. inches of total cooking surface.
We decided to go with the smallest BBQ in the Vanguard line because there are only two of us most of the time and there was no need for us to go any larger. But for a growing family, the three and four burner models would certainly be a better choice.
Are Vermont Castings BBQs made to last?
Vermont Castings say this about their 2-burner Vanguard line but it holds up for the larger models as well: “designed and crafted to deliver an exceptional experience that’s rooted in three core tenants:
1) BUILT TO LAST – Robust components and quality craftsmanship that stands up to extreme conditions for years to come,
2) PERFORMANCE PERFECTED – Exceptional heat control 365 days a year,
3) MAINTENANCE MADE EASY – Helping you more easily care for your barbecue for long-lasting performance. The Vermont Castings Vanguard™ 2-Burner BBQ is backed by a comprehensive 15-year limited warranty.”
Do Vermont Castings BBQs have a warranty?
Heck, most barbecues these days barely last 5 years let alone sport a 15-year limited warranty. You know, they know they are building a high quality product when they offer a 15-year warranty.
Cast iron Griddle accessory is a must
Our two-burner came with two heavy duty cast iron grills. I replaced one of them with the Vermont Castings sweet little two-sided cast iron griddle that fits perfectly where the original cast iron grill fit.

It’s a flat griddle on one side and ribbed on the other making it an incredibly versatile accessory no family should be without. This simple accessory turned our 2-burner BBQ into a breakfast maker (eggs and bacon outside on the grill is like being on a vacation every day.)
The griddle takes all the pain of frying bacon and any other messy, grease-spitting food out of the kitchen and into the backyard where, let’s face it, it really belongs. How about the perfect smash burgers, or one of our favourites, breaded schnitzel done to perfection with a little cooking oil on the griddle.

Cleanup is also simple with the cast iron griddle accessory.
In fact, I think I can say that I use the griddle almost as much as I use the regular grill side of the barbecue. French Toast, breaded chicken cutlets, garlic toast, fried onions and mushrooms of course and a whole host of other food have been transformed into goodness on that griddle.
Other accessories purchased include the Vermont Castings meat thermometer and a custom cover for the Vanguard two-burner for the winter. I must admit that the custom cover is another well-made product meant to not only last for many, many years, but to actually fit the barbecue so that it does not end up in a neighbour’s yard at the sign of the first high-wind event.
Accessories available for Vanguard series
For more serious “pitmasters” Vermont castings offers many more accessories for its barbecue lines, including a propane tank cover (otherwise the tank can be seen clearly as it sits on the outside of the unit), a Rotisserie (for the ultimate barbecued whole chicken experience), a Grill brush and a Natural Gas Conversion Kit.
Another feature of our grill is a large storage cupboard under the burners. In most barbecues, this area is used to store the propane tank, but on the Vanguard series, the propane tank is hooked on to the side of the unit leaving lots of storage in the cupboard for storage.
If the propane tank bothers you, the cover is available or you could convert it to natural gas. Personally, I like the extra storage space.
A low-smoke fire pit and Cooking Grill is great choice
If cooking with propane is really not your thing, Vermont Castings has a few new offerings that may interest you. The first is a Kamado-style BBQ (see below) and the second is a low-smoke firepit complete with a cooking grill and griddle built right into it.

The fire pit cooking griller is the ultimate backyard fire pit.
This would provide the ideal backyard cookout for family and friends.
The low smoke fire pit is built with the same high-quality build and flat black surface that allows it to blend in with either the rustic surrounding of the woodland or a contemporary backyard that benefits from the fire pit’s simplicity.
Just a few of the details on the Cooking Grill, low smoke Fire Pit:
Vermont Castings Cooking Grill and Low Smoke Fire Pit is a 2-in-1 open flame grill and outdoor fireplace
Deep Fire and Traditional Fire settings allow you to customize your flame and cooking experience
Smoke reduction air flow venting system in Deep Fire mode helps remove excess smoke from reaching your clothes, eyes and neighbour’s yard
Fueled by charcoal, wood pellets or fire wood
Included poker can be used in the fire, to lift both griddle and grate attachments while hot, and adjust ember screen
Use the cast steel cooking grate and griddle to cook in both deep fire and traditional fire mode
Use the deep fire mode to burn wood pellets for a vibrant flame with minimal ash
Heavy duty high temperature steel construction
Includes cover
Dimensions: 23 5/8” D x 23 1/2” H
Weight: 25.5 kg
For more on the fire pit, check out their website on the Vermont Castings Fire Pit and Cooking Grill.
A little history of Vermont Castings
Let’s go back in time and look at the roots of Vermont Castings.
“In 1975 Duncan Syme had an idea that could help his neighbours keep their homes warm in the face of rising energy costs,” their website explains.
“Murray Howell, a friend and consummate businessman, knew the opportunity was ripe for a venture. So, in a drafty woodshed in rural Vermont they built the first Vermont Castings wood-burning stove, the aptly named and soon-to-be iconic Defiant.
“Vermont Castings quickly became a household name. The homegrown innovation, American-made appeal, and the promise of quality and craftsmanship above all else quickly established Vermont Castings and the wood stove brand. … Syme and Howell not only created a brand, they built a following… they built a family.”
Vermont Castings was purchased several years ago by HNI Corp an Iowa-based manufacturer of wood-burning stoves, fireplaces and office furniture. The purchase included the manufacturing rights to the Signature Series line of grills – a high-end, U.S.-made line of stainless-steel grills.
Okay, you say, what does all this have to do with BBQs? Well the same care and craftsmanship that made the hot stoves so beloved are now available in the form of BBQs.
Today, Canadian Tire owns the Vermont Castings’ line of BBQs that are now only available through Canadian Tire stores and only available in Canada.
Only available in Canada you say?
For American readers who may be interested in purchasing one of these high-end barbecues, you will have to purchase it in Canada because Canadian Tire does not ship the BBQs to the United States.
The link here will take you to the complete line of Vermont Castings barbecues, including the Vanguard model and their pellet-style BBQs. It also features a grilling guide, grilling best practises and information on direct vs indirect grilling, a complete line of accessories, tool sets including pizza accessories.
I like how Vermont Castings tied in their BBQ brand with their wood stove brand with the line: “A Brand Born of Fire.” There is no question that the two work together nicely.
On the website, Vermont Castings say their mission begins with “being yourself and unapologetically following your path.
“For us,” they write, “that path began with fire, and was lit with purpose. We believe fire ignites something inside of us that makes us human. There is greater joy in the stories shared around fire. More comfort in the warmth provided by fire. And better flavours in the food over fire.”
Here in Canada the Vermont Castings line of BBQs, grills and accessories are available exclusively through Canadian Tire stores. Go here for a link to their entire line of Vermont Casting fireplaces, fireplace pits and accessories.
For more of my articles on backyard barbecues and BBQing, check out the following link: What’s better the Kamado or the Kettle
Vermont Castings offers Kamado-style grill
Oh and speaking of fire, for those who can’t part with their Kamado grills, take a few minutes to check out Vermont Castings new Charcoal Kamado-style grill.

A relatively new addition to the Vermont Castings lineup is the impressive Kamado-style grill.
Vermont Castings boasts that its Kamado style BBQ has “580 square inches of total cooking space on premium cast iron cooking grates.” It adds that “this BBQ boasts a cooking surface 27% larger than a standard circular Kamado BBQ, The Kamado-style cook box helps promote even flow of heat while the triple-walled steel body insulates from the outside allowing you to achieve and hold your desired temperature in any conditions. The calibrated air vents at the top and bottom allow better precision in achieving desired cooking conditions.
It also points out that the Kamado includes the following:
• Calibrated top and bottom airflow dampers provide precise temperature control ranging between 200°F up to 700°F
• Triple-walled steel construction provides insulation for heat retention
• Cast iron heat deflectors provide control over heat distribution for two-zone direct or indirect cooking
• Thick-gauge cast iron cooking grates retain and transfer heat to your food
Sounds like it’s definitely worth checking out.

Do NOT cut down that dead or dying tree
If you are lucky enough to have a dead or dying tree in your yard, do everything you can to protect it. The birds, animals, insects and fungus will thank you for it. Beautiful trees might be wonderful in our gardens, but dead and dying trees are more important to many birds and animal life.
Create your own “wildlife tree” in the backyard
A tree growing beautifully in your woodland is wonderful, but to birds, bugs and other backyard critters a dead or dying tree is even better.
If you have a dead or dying tree in your yard (often referred to as a “snag”) consider doing everything possible NOT to cut it down. These trees are just too important to the local wildlife to cut down for no reason than it has succumbed to the ravages of time or disease. The dead tree will quickly become a magnet for important birds, insects, and microbial fungi that might not already be present in your woodland garden.
Woodpeckers, warblers and other insect eating birds will find the dead tree irresistible and over time use it as a resource for food and possibly a home to raise their young. Depending on where you live, small mammals like raccoons, skunks, martens and even porcupines might decide to take up residence in your “wildlife tree.”
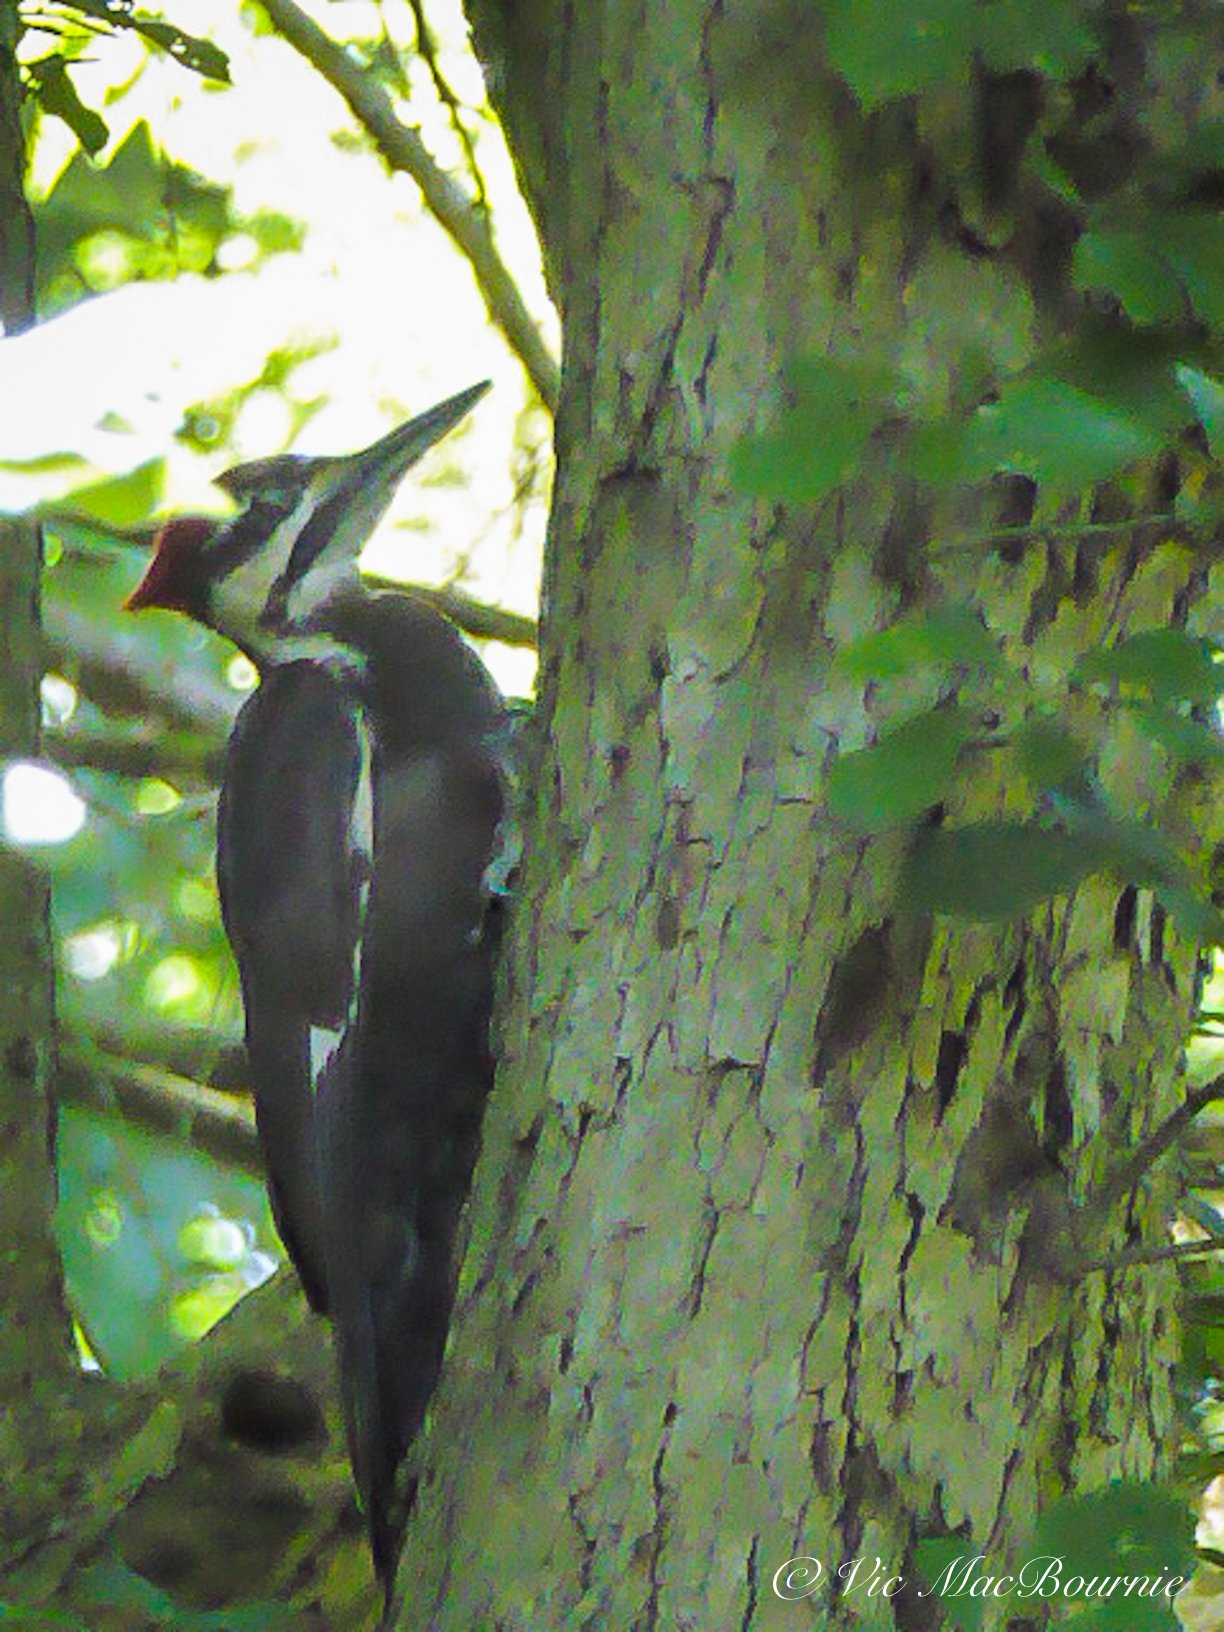
This Pileated Woodpecker was photographed working on a dying tree in a back corner of the yard.
The snags can even become more important in winter where birds that depend on insects for survival look to the snag as a source for insect, larvae and other potential food sources. During winter, birds, bats and other small animals will often roost behind the loose bark and large cracks in the wood for both warmth and shelter.
Studies show that in areas of the United States West of the Cascade Mts, 39 species of birds and 14 species of mammals depend on tree cavities for survival. Similar numbers (39 bird species and 23 mammal species) East of the Cascade Mountains depend on snags. (USDA Forest Service)
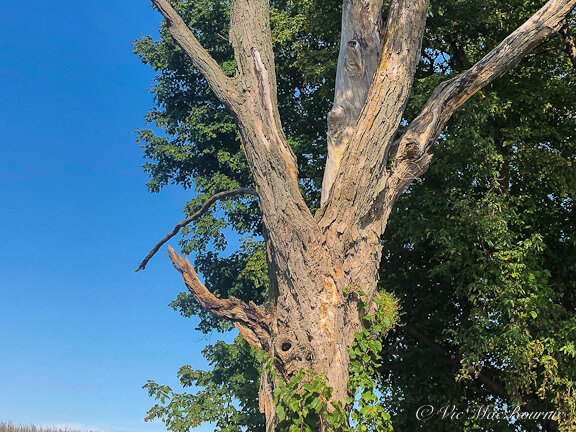
The wildlife tree is the perfect “snag” with vines beginning to climb up the trunk and natural nesting cavities.
Of course, if the dead or dying tree poses a significant danger to either individuals or your home, steps should be taken to ensure the situation is made safe. This does not, however, automatically mean that the tree needs to be cut down.
There are options to save many of these trees that we will discuss later in this article.
Unfortunately, most snag or “wildlife trees” are too quickly cut down by homeowners, city parks and even within urban forested areas for fear of injury.
These trees are too often cut down without much thought, if any, to their wildlife value or of the potential options that could save all or most of the trees to live on as an important wildlife tree.
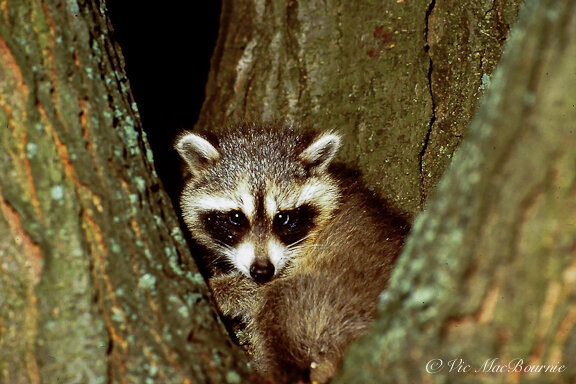
Many of our backyard animals depend on snags for both nesting and living accommodations as well as foraging for food.
Why preserve a dead or dying tree?
The dead trees, especially larger ones, provide optimal habitat for woodpeckers and other primary cavity nesters. In fact, large snags from mature trees are critical for big birds such as Pileated woodpeckers that require more available internal space for raising their young.
Woodpeckers such as the Pileated or Northern flicker actually create several new cavities in dead and dying trees per year. Many of the cavities are started by the woodpeckers for possible use in future years, but in the meantime, are often used by smaller bird species.
The woodpeckers will often start the cavities in areas of the tree that is weakened and then leave to allow nature to finish a lot of the hard work.
Fungus eventually invades the cavity and softens the wood over time. The following year, the birds may return to continue hollowing out the cavity’s internal wood, which has now become softer and easier to excavate.

Wildlife tree
Can’t you just imagine a large eagle sitting atop this old snag scouting the area for its next dinner? It’s more likely home to an owl along with a host of smaller birds, bugs and other critters.
Woodpeckers, in turn, create habitat for more than 80 other species of secondary cavity nesters, including American kestrels, a host of owls from the diminutive Screech owl to Barn owls, Barred owls and even Great Horned owls, swallows including the tree swallow and purple martins, bluebirds and a host of wrens, chickadees and nuthatches.
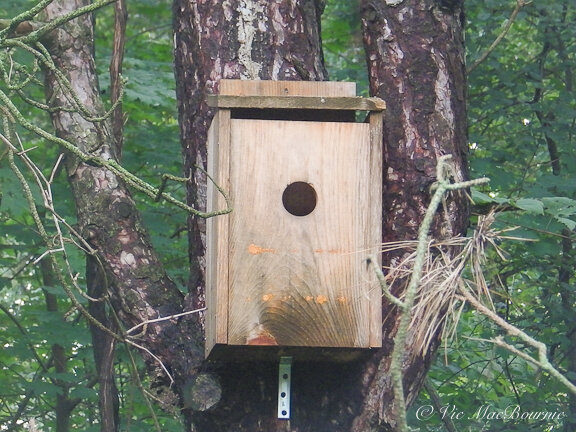
Owl box on pine snag
A screech owl box on this dying fully mature pine tree provides and opportunity to attract the diminutive little predator even if you do not have a large enough dead tree in your yard.
What do all these birds have in common?
They are primarily carnivorous or insect-eating birds that will help to naturally control mice, rats and insects in your garden. Without them, your garden can easily get out of ecological balance. In fact, many urban gardens, where dead or dying trees no longer exist, are overrun with mice and rats and skunks in part because of a lack of nesting cavities in the area for higher predators. Great Horned Owls, for example prey on skunks.
If your area has few if any natural snags, it may be the perfect time to look into installing screech owl boxes that provide nesting opportunities for these small, but highly efficient mice and rat controllers. If attracting screech owls sounds interesting, check out my full article on installing screech owl boxes in your garden, go here.
Even small snags are vital to wildlife
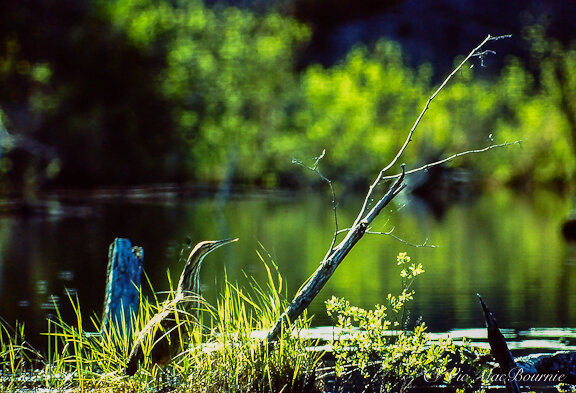
This American Bittern was attracted to this fallen snag in a pond. A dead or dying tree, whether it is standing or fallen over, can attract an amazing variety of birds, animals and insects.
Smaller snags, particularly if the wood is beginning to break down and becoming soft, provide the opportunity for smaller birds such as chickadees to make tiny cavities in dead wood as small as 4-inches in diameter.
So, even if a smaller tree dies in a corner of your garden think twice before removing it. This is the perfect opportunity to grow a vine up the snag or plant a native berry producing shrub in front of it not only to hide it from view but to provide an abundance of natural food to inhabitants of the snag.
Snags as nesting sites and foraging habitat
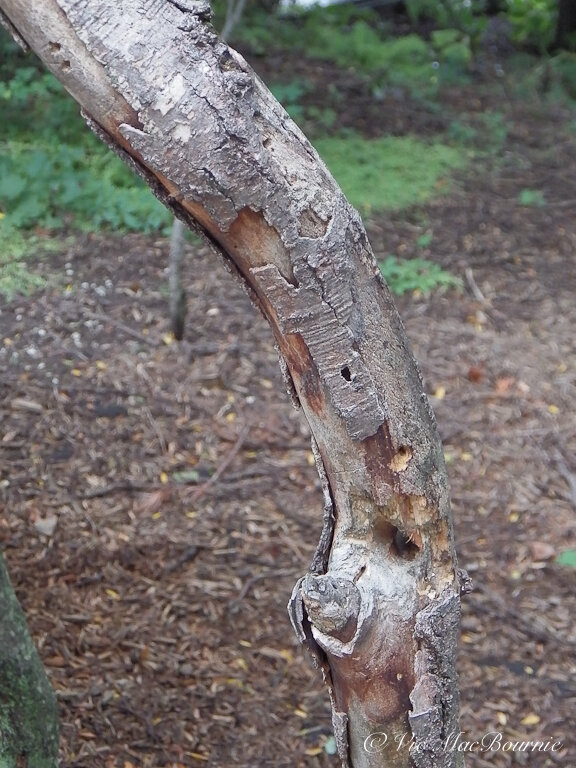
This small DIY snag is the result of burying a branch into the ground and allowing the woodpeckers, nuthatches and chickadees to go to town on it. Eventually it will rot and I’ll replace it with another.
Although many gardeners will recognize the benefit of the snag providing nesting habitat for a variety of birds and mammals, don’t overlook the foraging opportunities these same snags provide.
The dead and dying trees’ wood softens as fungus begins to take over the once dense woody interior of the tree. This soft wood, which can also exist on dead branches on live trees, provides habitat for a host of insects and other potential prey items for birds.
You might be surprised just how many invertebrates depend on dead and dying trees.
A close inspection would likely include a host of beetles, spiders, various ants, millipedes, earwigs, earthworms as well as possibly salamanders and toads on the ground beneath the tree living under the decaying bark and branches that often fall from the tree.

This snag continues to show life in another part of the tree, providing needed cover for birds and animals that are using it for habitat.
Some of the best trees for snags
• Large trees provide the most habitat resources for birds both small and large
• Conifers such as cedar, fir larch, and pine make excellent snags because they rot slowly and can remain standing longer.
• Snags of more than 12 inches in diameter and about 15 feet tall are perfect hunting perches for larger raptors.

Brush Piles
A red squirrel enjoys the bounty provided by the woodpile that can help to take the place of a snag. If you are limbing a dead tree, consider using the branches to create a wood pile. Eventually the rotting branches will create a similar benefit to wildlife that the standing dead snag would provide.
Create your own DIY snags
If your property has no dead or dying trees, you could create your own either by killing an undesirable tree in your yard, or better still by burying a large branch in an appropriate area of your yard.
Maybe a neighbour is cutting down a large tree and the tree service has no problem dropping off a large branch to your home. By simply digging a hole and burying it in the ground, you could create many of the benefits a traditional snag would bring to the yard.
I doubt you would get a pileated woodpecker making it’s home there, but you will attract woodpeckers, nuthatches, chickadees and other insect-eating birds to the yard.
If the branch is big enough, you may be able to get nuthatches or other small birds using it to raise their young.
You might want to drill some large holes in the branch to get the process started.
Snags in our yard
In our bckyard, we have a large natural snag in a corner of the yard that most visitors would be hard pressed to see unless they walked back to the more wilder area of the yard. Judging by the holes bored into it, I’m sure it is and has been home to several smaller birds.
Last year, a Pileated woodpecker was working the snag foraging for insects. I heard it before I saw it. In fact, I had to walk to the back of the yard to see the massive woodpecker at the snag.
In another area of the garden near the bird feeder, I have buried a mid-sized branch in the ground for birds to use both as a perch as well as a snag.
By drilling holes in the branch and filling them with suet and WBU bark butter, the DIY snag is regularly visited by a host of woodpeckers, nuthatches and chickadees as well as the perfect high perch for red squirrels watching for the neighbourhood fox.
If you want to take DIY snag creation to a higher level, consider wrapping a rope tightly around a large branch to cut off its nutrients from the main trunk. In time the branch will die off creating a form of snag on the tree. (I would not recommend this procedure on your favourite tree).
Smaller DIY snags can be easily made from large branches that can be drilled out, filled with suet or Bark Butter, and hung from a nearby tree. For my story on building your own hanging DIY suet feeder, check out my story here.
We have created a large DIY snag branch on a very mature crab apple tree at the back of the property. For the most part, the dead branch is hidden by the still living branches, but still provides many of the benefits attracting insects that are eventually food for the backyard birds.
In our yard, we have also created a large wood pile that can take the place of a snag by providing small animals with a relatively safe habitat as well as a good foraging location for birds. For more on building a brush or wood pile, check out my full story here.
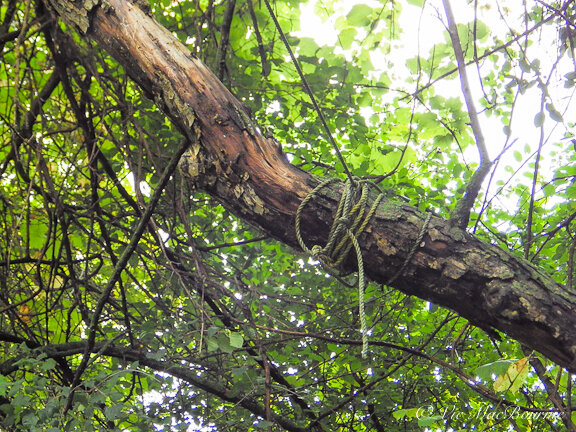
By wrapping a rope around a branch of one of our crab apple trees we are able to create a snag in a living tree. By doing this, you can create a snag where ever you choose.
Managing snags in your landscape
There is no question that a large dead or dying tree can pose a risk to life and property if not dealt with properly.
If a snag threatens the safety of a patio or play area for example, consider moving them to a safer area if possible. If that is not possible, reducing the potential damage that could be caused by the snag falling over is certainly a consideration. By removing the larger branches and using them in a woodpile for example, you keep the benefits of the dead wood without the dangers.
If the snag is a large, mature tree and poses too much danger to leave it as it is, have a tree company remove the dangerous branches and cut the tree down in size so that if it did fall, it would not hit anything and, its reduced size would pose little danger.
How long can a dead tree remain standing?
It’s also important to remember that a dead tree can stand for many years before it topples to the earth. In fact, depending on the size and type of tree, it’s likely that the dead tree will still be standing long after we are gone.
Finally, if you are concerned about a tree on your property that might be dying or has already passed, contact a local tree specialist for their expertise.
Just remember that a lot of these “tree experts” are not only in the business of making their livelihood from removing trees, they also do not want to be responsible for any chance of injuries or property damage resulting from a falling tree that they did not remove.
Common sense is always the best approach, but keep in mind there are alternatives to complete removal and they are almost always a lot less expensive.
While I get great enjoyment from my bird feeding stations, providing natural food sources to our feathered friends is always the goal we should aspire to in our gardens. I have written a comprehensive post on feeding birds naturally. You can read about it here.

Unique gift ideas for gardeners
Finding unique garden gift ideas is always challenging. Here are three outstanding garden gifts made by artisans and craftsman. You won’t find these bird feeders, native bee houses or ceramic fish art in big box stores. Order these directly from the artisans.

This exquisite feeder of copper and cedar created and handmade by local artisans is just an example of the unique gift ideas to consider this holiday season.
Unique garden gifts are never easy to find around the holiday season.
By then, most of the interesting garden material is either sold out from the previous summer or stored away in the back waiting to be brought out in the spring.
Fortunately, over the past couple of years, I have come across, and wrote about, some of the finest and unique garden gift ideas possible.
Some are for the birds, some are for the bees, and some are just plain works of art that any gardener and nature lover would love to have in their gardens.
These gift ideas are not available at Big Box stores and few specialty stores even carry them. These unique garden gifts are purchased directly from the outstanding artisans and craftspeople toiling away in their workshops.
All of them ship to customers in the United States, Canada and around the world.
Here are three unique garden gift ideas that I use in my garden and consider to be not only exquisite pieces of craftmanship, but outstanding pieces of art. Two of the gift ideas – the bird houses and the native beehouses – are also hard-working utilitarian pieces for the garden.

The copper and cedar handmade bird feeder
It’s hard to put a price on great design and high quality craftmanship, but if you could the Q&A Ultimate bird feeders would fall under the priceless category.
These are not the heavy duty feeders you fill to the brim with sunflower seed and let the birds and squirrels have their way. We can pick up those feeders anywhere.
These are exquisite little teardrop, fly-through feeders meant to hang by your patio or deck where they’ll likely steal the show whether there is a cardinal or chickadee sitting on the perch or not.
The copper roof is the first indication of their fine craftmanship, but upon closer inspection, it doesn’t take long to recognize the attention to detail in the two perches at both ends of the fly through and how the seed is fed into the inside chamber of the bird feeder.
It’s all the work of French (from France) architects Coraline Allard and Pierre Quesnel, who came to Canada and eventually set up their design business in Toronto. The bird feeders were one of their first ventures and, since that successful launch, the couple have gone on to design a number of exciting creations, including an aluminum beer box – another perfect gift for the “beer drinking” woodland gardener.
In addition, Ferns & Feathers readers (by using the code provided here) will get a 15 per cent discount at the Q&A Etsy website when they make a purchase.
You can visit the Q&A website here.
The couple was featured earlier in this full-length Ferns&Feathers story that you can read here.

Joe Prytula with one of his WeeBee houses is his backyard workshop.
A native bee house that works
You can run out to your local store and pick up a bee house, complete with bamboo straws and holes drilled into wood. Some are okay, others were never meant to really be used more than one season and still other designs are likely more dangerous to our native bees than helpful.
That’s not the case with Joe Prytula’s WeeBee Houses. These things are seriously well-thought out, well made and fun to put up and watch as the native bees find the perfect spot to go to work.
The mason bees, the leaf cutters all finding a safe and happy home in these outstanding works of craftmanship. Joe doesn’t just sell you a native bee house. Included in every WeeBee house is a thorough explanation of how to use the bee house properly to ensure the bees hatch the following spring. Also included are tools to remove the larvae from their homes and store them until their spring release.

Talk about the perfect educational gift for children, especially those with a particular interest in nature.
Joe hails from the Niagara region in Canada but ships his Weebee houses to the United States and worldwide.
If you are interested in purchasing one of Joe’s WeebeeHouses, you can either contact him through his instagram account @weebeehouse or by email at [email protected].
Joe offers a discount to Ferns & Feathers readers. Be sure to give him the discount code FernsFeathers10 to receive a 10 per cent discount.
Check out my full story on the Joe’s WeeBee houses here.
To complement Joe’s Weebee house, consider adding Our Native Bees book by Paige Embry. The two would be the perfect combination for gardeners discovering the joy of native plant gardening and attracting native pollinators.
For my compete story on Our Native Bees, take a moment to check out my full story here.

Fish In The Garden work their way through our garden and around a moss-covered boulder.
These ceramic Fish are at home in any garden
Brilliant works of art are often described as beautiful, moving … inspirational. Tyson Weiss’s ceramic Fish In The Garden are all of these things and more.
The “more” is the unique ability to take these works of art and use them to design your own art installations in the garden by moving them around and finding new inspiration in different areas of your garden, even inside your home.
By creating schools of three… five … seven fish swimming through your flower beds, fern garden or around a moss-covered rock in the Japanese garden, for example, you not only experience the art but have the opportunity to create your own installation.
The ceramic fish are made to stay out in extreme weather conditions (either extreme heat or cold) and can add a pop of colour to gardens when colour is at a premium – either in shade gardens or in today’s urban contemporary gardens where the focus is more on textural greens than colourful flowers.
I use two main schools of fish in our garden and a couple of smaller ones for our window boxes and patio container pond.
No other garden art comes close to providing a sense of movement in the garden while at the same time providing me with the opportunity to move the installations around to take advantage of the changing seasons, and highlight particular areas of the garden throughout the seasons.
Tyson works out of his impressive studio in Maine but regularly ships to clients around the world even as far away as Australia.

If you are interested in more information on Tyson’s outstanding work, check out my full article here.
To go to Tyson’s informative Fish In The Garden website go here.
In conclusion
Ferns & Feathers makes a real effort to find artisans that offer unique garden gifts that are of the highest quality. These three suggestions are guaranteed to impress anyone lucky enough to receive them as gifts.
They are not just garden items that are thrown away in a few years. All of them are made to last and age gracefully in your garden. As a result, they are priced to reflect their high quality and unique attributes.
They are the type of garden items that can be enjoyed for years and then passed on to children or friends.
They are at home in the woodland garden, the urban garden and even small, balcony-style gardens or backyard patio gardens.
Supporting small artisans is critically important during these difficult times and what better time to tap into their incredible talent than this holiday season.
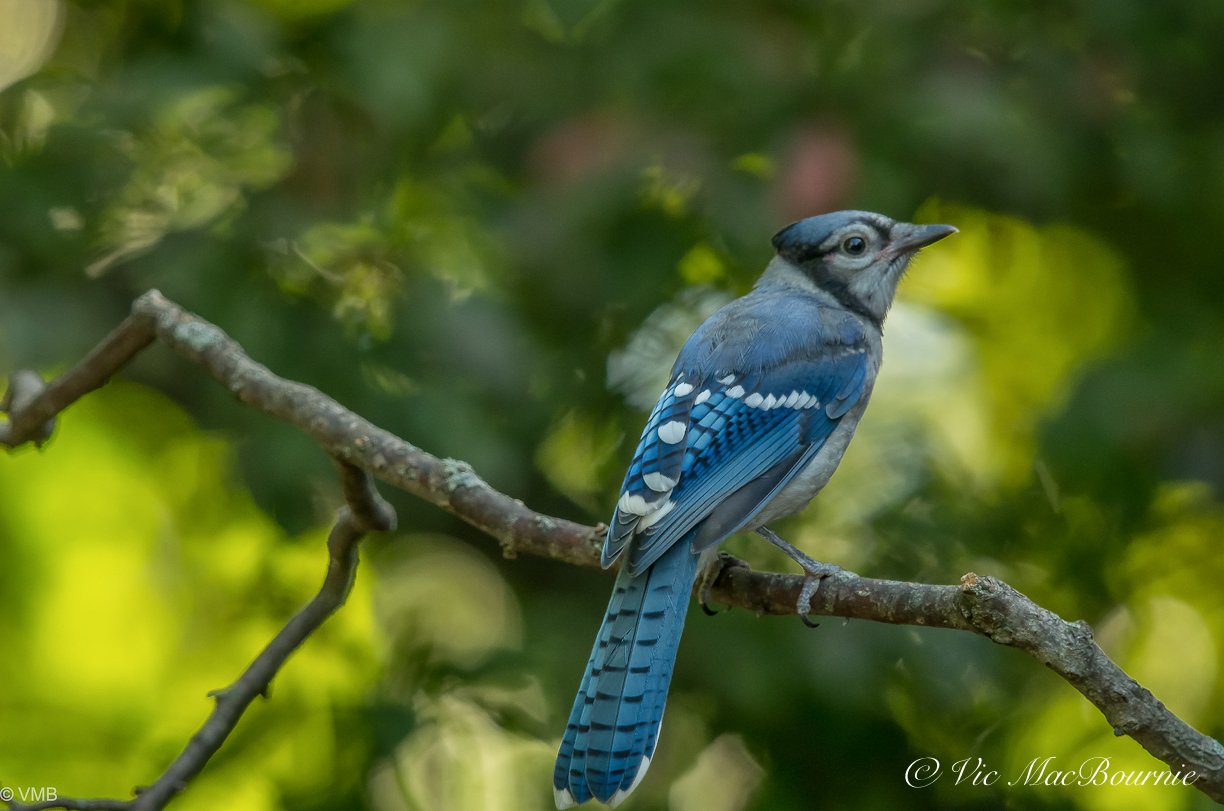


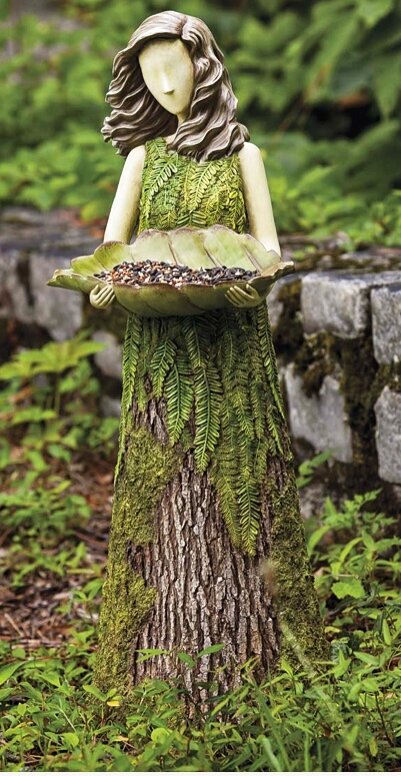

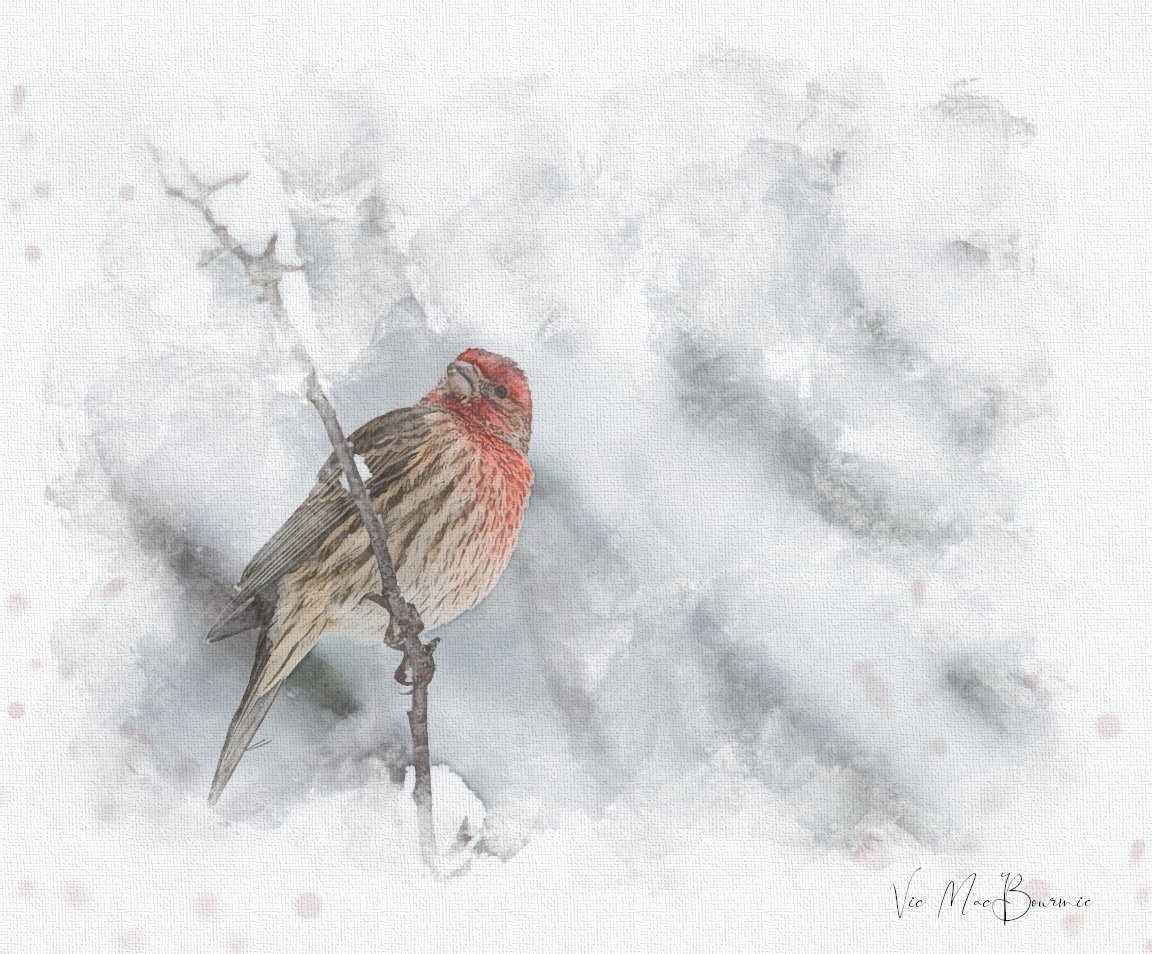
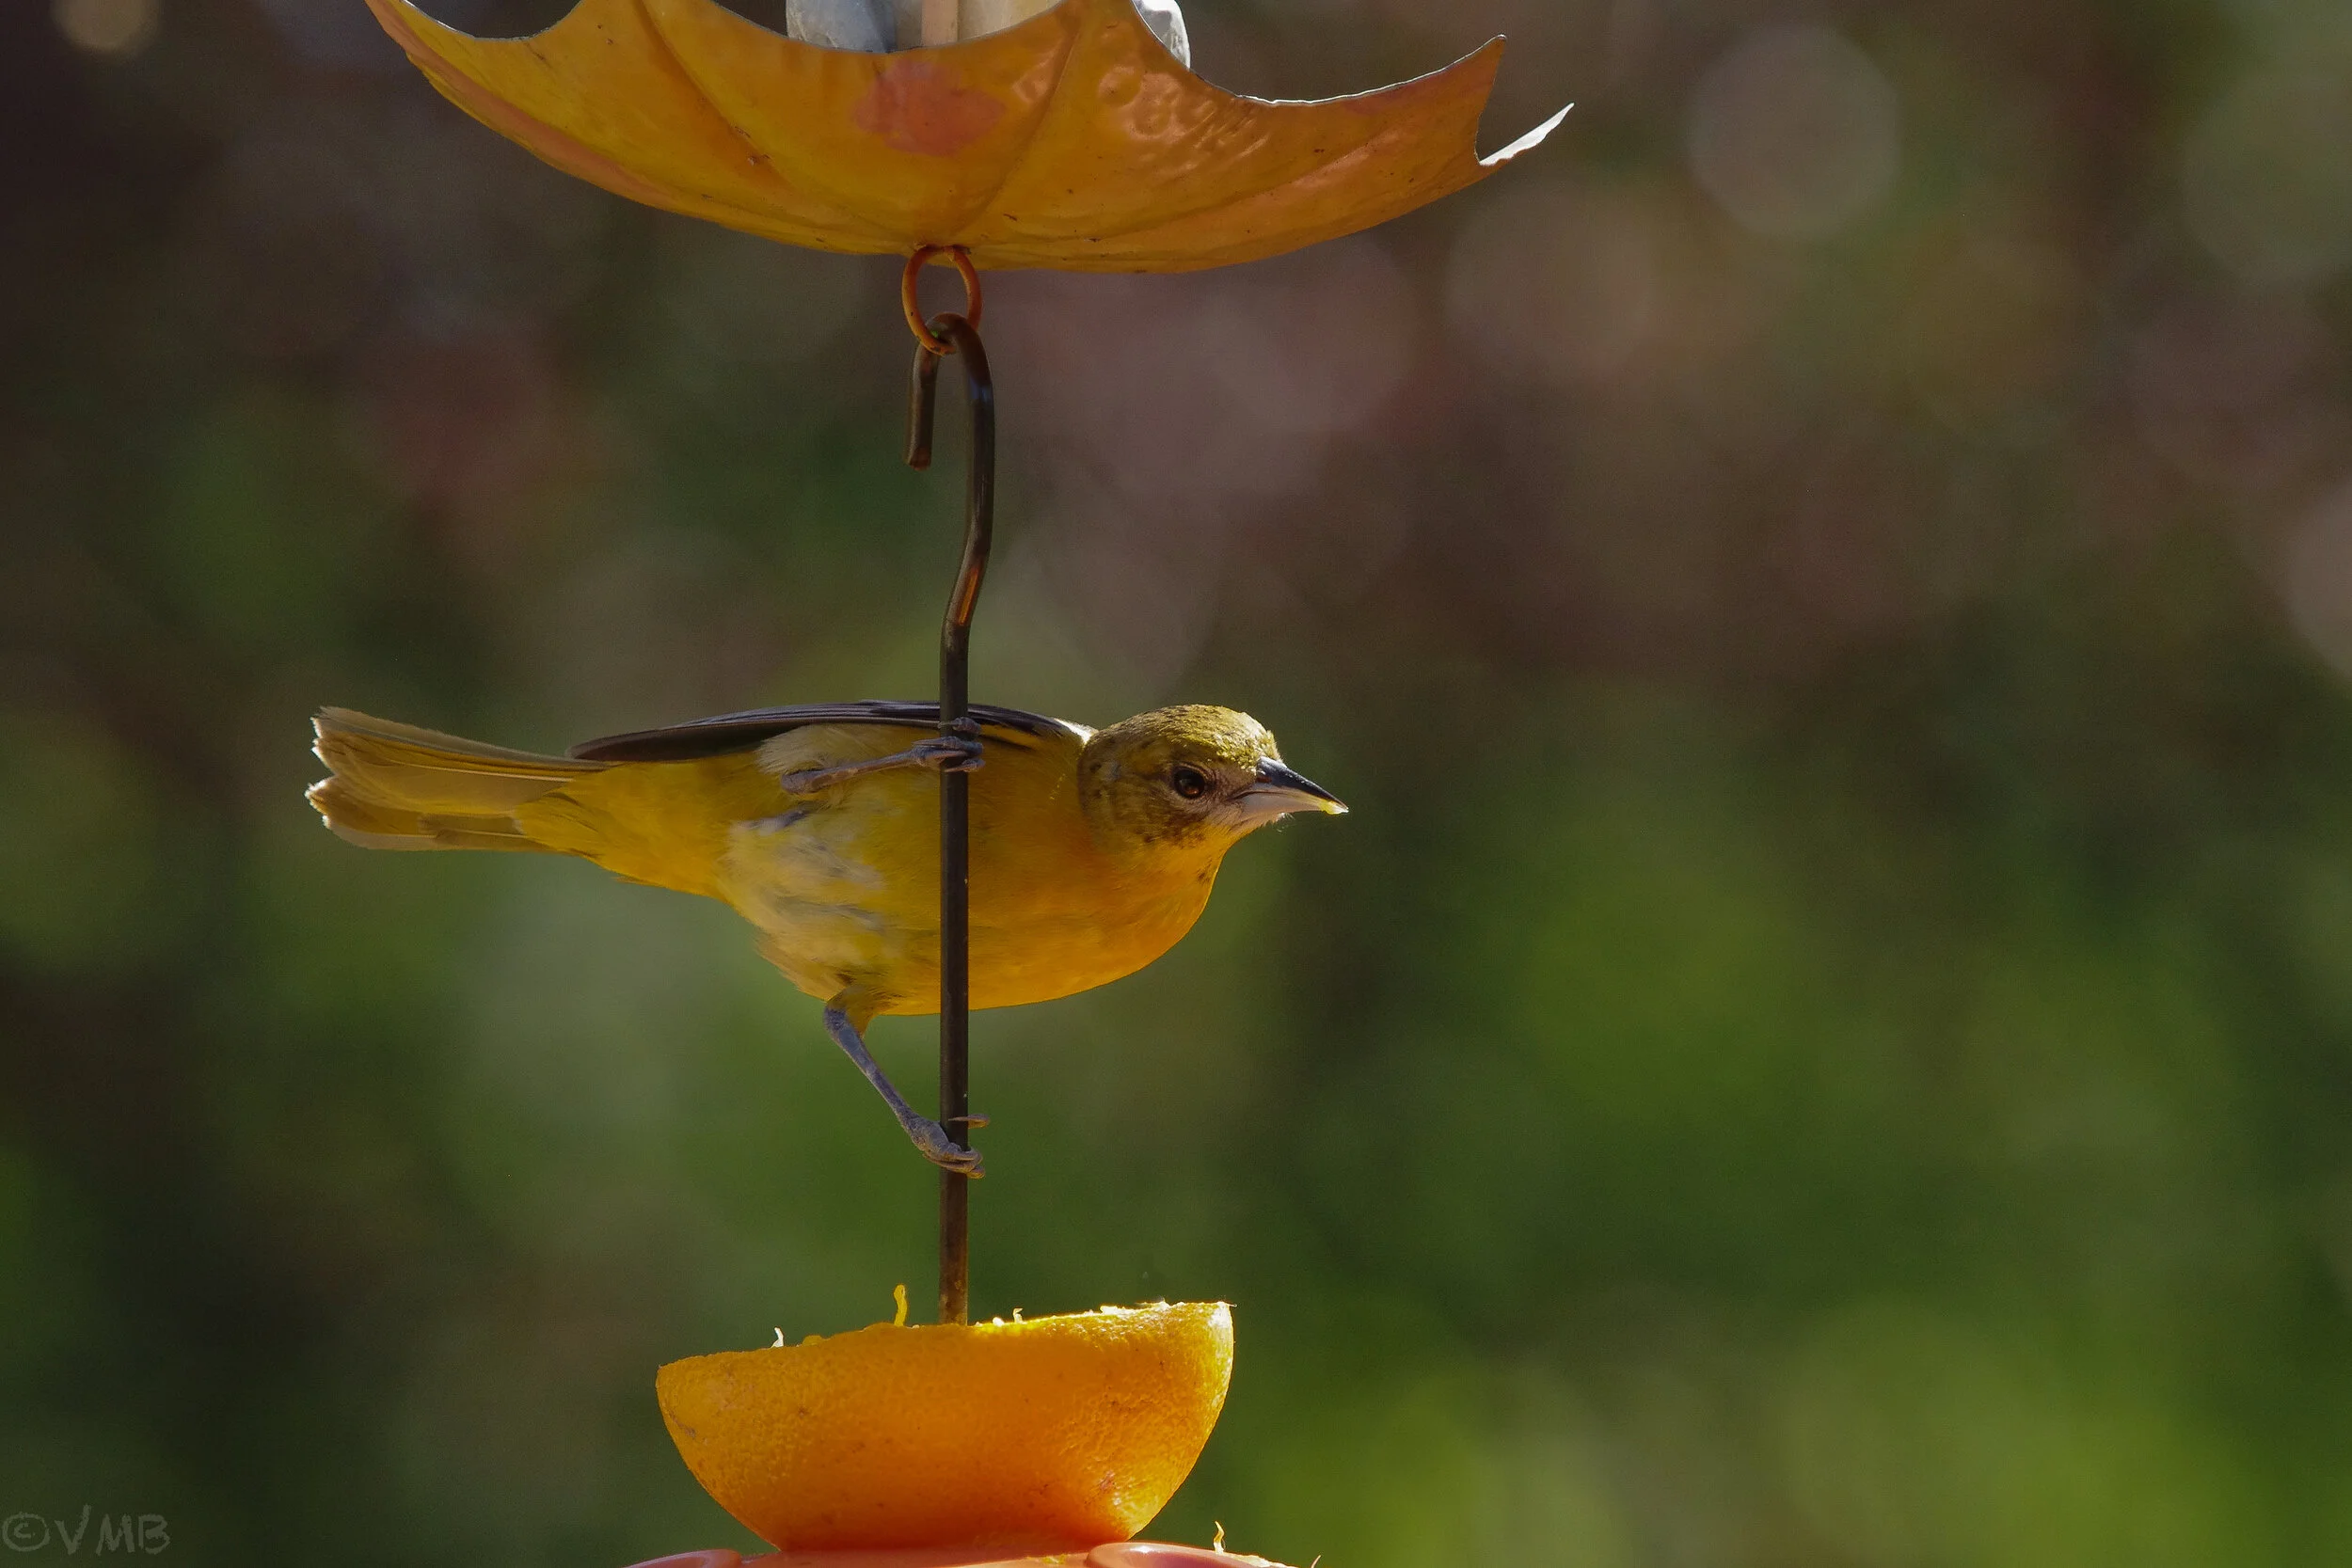


Garden photography: How to use props to photograph backyard birds
Capturing a little peace in the garden isn’t always about flower power. Try adding photographic props for birds to perch on to add a little whimsy to both your garden and your photographs. A peace sign is a “cool” prop that birds flock to like beatniks as free pot party.
Using garden props for backyard bird photography is a great way to add a little fun and whimsy to your garden photography and with the right props, the results might just “blow your mind.”
Cool peace sign prop for backyard bird photos
Flower power takes a back seat in this garden photography project.
All summer our focus has been on capturing the beauty of garden flowers, but that changes as fall approaches and we begin to focus more on birds and other areas of garden photography.
Fall is the perfect time to add a little fun to our photographic projects and using garden statuary, tools and even props can result in many memorable backyard bird images. While capturing a backyard bird in its natural environment is usually our ultimate goal, no one says we can’t have a little fun and create a backyard photo studio that includes using props much like a professional photographer would use to capture images of children, families and even our pets.
This wanna-be-hippie came up with an idea to combine a love of all things 1960s with a passion for birds, photography and gardening.
So what could be better than a metal peace sign – the “coolest” bird perch ever.
Even the birds are groovin’ it.
“If everyone demanded peace instead of another television set, then there would be peace.”
The peace sign is all part of my search for fun landing spots to photograph backyard birds. By placing props around the garden and near bird feeders, there is no end to the fun photographs available to us. Great bird photographs don’t have to reflect pure nature in our gardens.
If I could have only one lens for wildlife and birds in the garden, it would be my F* 300mm F4.5. Check out my full story on the lens by clicking the link.
Some of the best photographs I’ve seen celebrate the garden experience and welcome our forest friends to enjoy the garden – and its man-made ornaments – along with us.
By moving in close the peace sign is still recognizable but the focus changes to the bird rather than the prop. A soft backyground adds to te simplicity of the image.
So it’s really a small step from photographing them on our existing garden tools, ornaments and patio accoutrements, to setting up fun props to catch them in entertaining poses.
“No one is free, even the birds are chained to the sky.”
The “Peace sign” just seemed too perfect to pass up.
A quick search on Amazon brought up the coolest “Peace sign” – the perfect landing spot for backyard birds waiting for their turn at the bird feeder.

A couple days later and my Peace sign arrived all packed up and ready to become the latest perch for our backyard birds. After wrapping some copper wire around the perch to attach to the bird feeder pole, all that was left to do was to hang it and wait a few days so the birds can get acquainted to their cool new perch.
They took to it like beatniks would to free pot at a poetry reading party.
The peace sign perch is actually just one of many sprinkled throughout the garden.

This image was taken with a Fujifilm X10 equipped with a 28-112mm lens and shows what can be accomplished with a little planning. It helps to gain the trust of the wildlife in your garden. For more on the Fujifilm X10, go to my complete review here.
Setting up perches for an outdoor studio
It helps to keep the perches close to where you normally relax with your coffee and camera.
Eventually, one of our garden critters, whether it’s a backyard bird, chipmunk or friendly red squirrel, will explore the man-made garden perch. By keeping an eye on the spot, and watching how the light plays on the perch, it’s easy to capture it in the best light.
By hiding a handful of sunflower seeds on or near the perch, you can encourage the backyard models to the area much easier.

Most animals in our backyards like to get up high to keep an eye out for potential predators. I mounted this native bee and butterfly house on a pole and it didn’t take long for our local red squirrels to claim it as a lookout.
The simple grey background of the backyard shed helps the subject stand out and certainly does not hide the fact that the image was taken in a backyard. I was lucky enough to be in a photographic blind working the nearby feeder, when I noticed the squirrel watching me from the bee house. Although the Tragopan blind made getting the shot a little easier, these guys are friendly enough to photograph without a blind.
Focus on hummingbirds: Swinging in style
One of my favourite photography props is our elegant little hummingbird perch, a favourite spot for the local hummers to hang out.
I mount it just a few inches above a feeder where they like to perch and defend their food source.
Knowing that morning light creates a nice backlit situation made catching this rim light on the hummingbird as simple as setting up the tripod over several mornings until the bird landed in the perfect spot with just the right light.
If you are looking to upgrade your photography, consider checking out KEH Camera Exchange for excellent deals in used camera equipment from the latest camera bodies to a wide assortment of lenses.
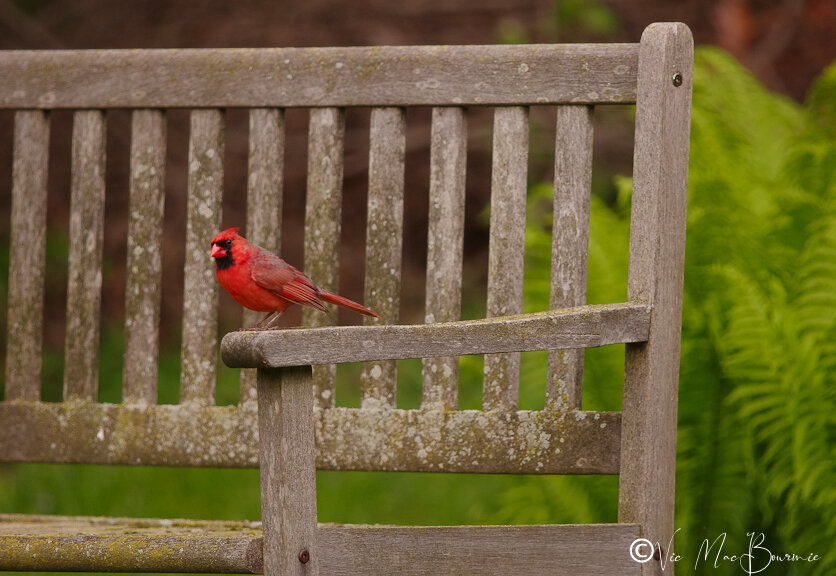
This Cardinal gives our garden bench the perfect pop of colour. There’s no need to move in close in this case, better to show the bird in its environment.
The garden bench makes the perfect prop
A garden bench is another excellent perch for backyard birds. Waiting for the male cardinal to get into the perfect spot took some patience but the pop of colour on the aged wooden bench makes for a classic garden photograph.
I decided it was best to stay back and not move in too close in this instance. Photographers often try to move in too close to birds, when a more environmental portrait actually works better.
In the image below, a closer approach seemed appropriate to catch the Chipmunk in the lovely evening light on the edge of the bench. The close approach was, at least in part, thanks to working from within my Tragopan Photographic blind. (For more on using the blind for backyard photography, check out my full report here.)

Goldfinch on windmill.
Catching the critical moment
It pays to have your camera by your side at all times in the garden. This little goldfinch was having a terrific time on the garden windmill. I was lucky enough to capture the image just when it popped its head out to have a look around.
Seconds later it was off to explore another part of the garden.

Chipmunk takes a quick break on garden ornament.
We’re are blessed in our yard with an abundance of curious chipmunks who never fail to amuse. This little guy was caught eating his lunch while I enjoyed a glass of wine on the nearby patio.

Why birch tree leaves turn yellow and fall off prematurely
If the leaves of your birch tree are turning yellow and falling off prematurely, it is likely due to a lack of water. Birch trees are shallow rooted and unable to access water deep in the ground. The solution is to deep water the tree regularly.
If your birch trees are showing early signs of stress with yellowing leaves falling off the tree earlier than expected, you are likely not alone.
It’s been a difficult year for trees throughout North America and parts of Europe with extreme heat and periods of drought that can really tax our urban forests. One just has to look at the wildfires raging around the globe to recognize the difficulty many trees are facing this year.
In our case, the combination of extreme heat (hitting 42-43C or more than 105F), periods of very little rain and a sandy soil that struggles to hold a lot of water for any period of time, has caused some minor stress to our clump birches.
I’ve noticed other birches in the area struggling much in the same way.
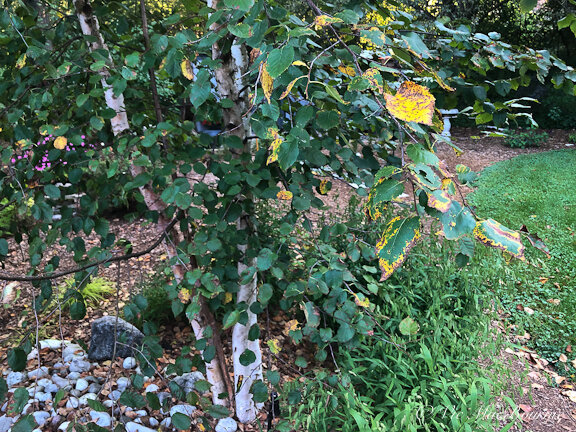
One of our birch clumps losing its leaves a little prematurely following a hot, dry summer.
Why are my birch leaves yellowing and falling off
Birches may be feeling the heat more than many other trees because they have a very shallow root structure that fails to go deep enough into the ground to tap into the cooler and more moist soil below the surface. Severe heat and drought easily dries out the top foot or two of the soil and causes some stress to the trees.
Usually, the water from melting snow keeps the soil moist throughout the spring and into the early part of summer, but without significant rainfall during mid-summer combined with severe heat, the trees will show stress by late summer into the fall. Many gardeners may think the trees are exhibiting typical fall leaf drop as the leaves begin to yellow prematurely. But, be careful the leaf drop is not related to stress from lack of water.
The yellowing leaves could also be caused by chlorosis – a mineral difficiency caused by a lack of iron. This is usually the result of alkaline soil and the trees inability to absorb iron in the soil. You’ll know this problem by observing the leaves which turn yellow with green veins. Treatment is relatively simple.
In urban landscapes, Birch trees are often competing with turf grass for the available water, and because the grass absorbs more than its share of water, the trees often are forced to go without, even after a rainstorm.
Give your trees a deep watering
If your trees are surrounded by grass, be sure to take the time to deep-water them by leaving the hose on for several hours (4-6 hours) at a slow but steady trickle.
Do not use a sprinkler for this deep watering. The idea is to get water deep into the ground. Remember, you are not trying to water the lawn around the tree. Move the hose around the perimeter of the tree at or around the drip line (not the trunk of the tree).
It’s never a good idea to have grass coming right up to the trunk of your tree.
If possible, remove all the grass from beneath the tree in a wide berth that replicates the drip line of the tree branches. Obviously, a young tree would need much less grass removed than a more mature one. As the tree grows, consider removing more and more grass to reflect the expanding root structure.
Why do urban birch trees have a short lifespan
One of many reasons birch trees have a short lifespan in an urban environment is caused by turf grass that often surrounds the trees and robs them of both nutrients and water. If it’s not turf absorbing the water around the trees before it can get to the trees’ roots, the water is often blocked by hardscaping that is covering the tree’s roots.
Whether it’s a concrete driveway, walkway or patio, this hardscaping restricts water from getting to the root system, essentially starving the trees of essential moisture.
For more on Birch Trees in the Woodland garden check out my other articles:
Planting and caring for a birch grove
In our garden, we have three clump birches about 10-12 feet apart forming a small birch grove of about ten tree trunks in total.
The problem is not grass running up to our clump birches, but they are surrounded by various plants, including ornamental grasses, sedum and a host of perennials. The birch clumps encircle a large dry-river bed that does not rob the roots of any water and provides a non-organic mulch helping to shade the soil above the trees’ roots.
The biggest problem for our clump birches is likely our sandy soil which does not hold water well at all. Knowing this, it is important to mulch the soil around the trees and ensure a deep watering during hot, dry spells every 7-10 days.
Since I have noticed the problem, I will ensure that the trees are well watered between now and the first snows of winter to ensure they are fully nourished and healthy for the long winter ahead.
Will losing leaves prematurely cause any long-term problems?
It’s a question every tree lover is going to be concerned about but, rest assured, it’s highly unlikely that a season of mild drought and resulting loss of leaves will cause a problem with the tree next season.
But prolonged drought, without any intervention from the homeowner could, in time, lead to the slow decline of the tree. Take action before it’s too late to ensure the tree gets several deep waterings prior to going into the winter months.
Why plant a birch grove
The decision to plant a mini birch grove was inspired by woodland walks where I came across large swaths of birch trees growing together and forming an impressive sight spring, summer, fall and winter. Creating a small grove of birch trees helps to recreate the same feelings I had during the woodland walks, but also creates a birch canopy that attracts birds looking for insects in spring. Birch are an excellent native tree, and one that attracts a host of insects that are crucial for birds in spring looking for protein to feed their hatchlings.
Can Trees communicate
I am also a firm believer that trees not only enjoy the company of their own kind, but benefit from sharing a space with other similar trees. The New York Times best selling book, The Hidden Life of Trees, certainly verifies these views and even suggests – complete with scientific evidence – that trees communicate with one another and even share resources when necessary.
If nothing else, the birch grove will create it’s own mini-environment by shading the ground beneath the canopy helping to preserve the ground water that is obviously important to their survival.
I look forward to the day – not far off – when all three tree canopies merge above ground and all the roots below ground are introduced to one another and begin working together as a single entity.
Meanwhile, I’ll be busy deep watering the trees so that next year they will look their best and weather whatever Mother Nature throws at them.


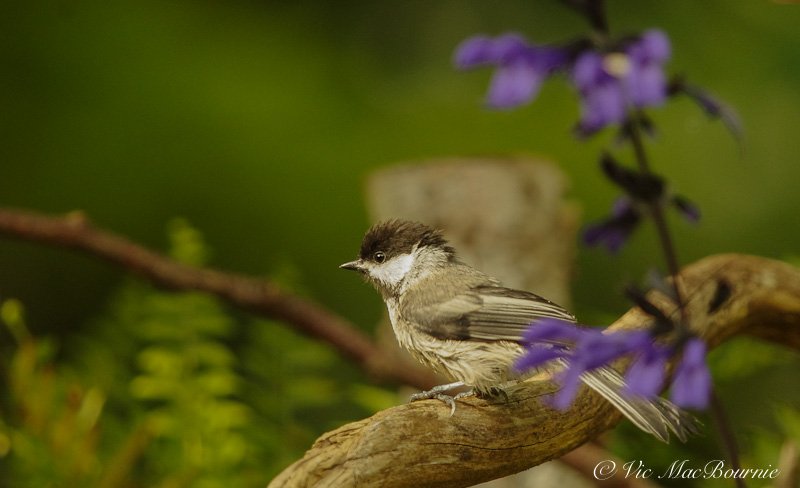


Seed cylinders: One of the best feeders for backyard birds
Seed cylinders are an excellent way to feed backyard birds. The cylinders keep the birds at your feeder longer and can be changed depending on the season and the type of birds you are trying to attract.
Woodpeckers, nuthatches, cardinals love compressed seed cylinders
When it comes to feeding backyard birds, there really isn’t a better combination than a compressed seed cyclinder fitted to your feeding station.
I have had my “ simple spike” on my Wild Birds Unlimited Advanced Pole bird feeding station for several years and am so impressed with it that I consider it (and most of the birds agree) my primary feeding source for our backyard birds.
Why are seed cylinders so popular?
Seed cylinders not only bring in a large variety of birds, they keep them at the feeder longer so you can appreciate them more, and a single large cylinder can last for weeks compared to the equivalent amount of feed in a typical hopper-style feeder. They are also super convenient to use and are available in a variety of seed combinations meant to attract different birds at different times of year.
Seed cylinders are long-lasting, which makes them especially useful if filling feeders is difficult for you or you’re going on vacation and will be unable to fill your feeders for several days. The cylinders are especially great summer food for the woodpeckers during the heat of the summer when traditional suet feeding can be a challenge.
Blue Jays are also big fans of the compressed seed cylinders as well. Click on the link for more on two of my favourite Blue Jay feeders including the compressed seed cylinder.
The cylinders help to keep birds at the feeders longer because they have to work at the seeds to remove them from the cyclinders. At a traditional feeder, the birds often swooping in, grab a bite and take off, before you can even appreciate them. Seed cylinders can give you a few extra moments of enjoyment.
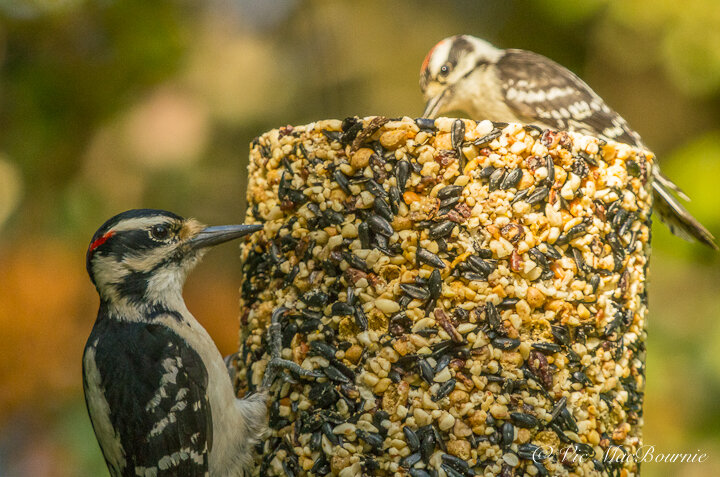
Our cylinder feeder attracts a host of birds including plenty of woodpeckers who enjoy hammering away at the cylinder to obtain their dinner.
Five Great reasons to use seed cylinders
Seed cylinders are convenient to use. They do away with bulky bags of seed and the waste that can occur when trying to load loose seed into feeders.
They keep birds at the feeder longer so that you can get a better look at the birds. They are especially useful to get good looks at more rare birds who visit such as Indigo buntings and woodpeckers.
Seed cylinders are available in several combinations aimed at different seasons and bird-feeding mixtures.
No-melt seed cylinders provide an excellent way to attract woodpeckers during warmer months when suet is not appropriate.
The feeders and seed cylinders are available in many sizes, including pucks where you can offer a variety of seed mixes at a single feeder.

The Advanced Pole system loaded with various feeders, including the seed cylinder at the top of the pole.
I purchased my cylinder spike probably ten years or more ago as a simple, inexpensive solution to replace an aging wooden open feeder.
I was looking to replace my homemade feeder with another similar open hopper-style feeder, but noticed the variety of seed cylinders available with the spike system. At the time there were far fewer choices than there are today, but still enough to convince me to move away from another hopper-style feeder.
Since then, Wild Birds Unlimited and other manufacturers have developed a number of newer feeders designed to work with their seed cylinders. (Here is a link to their assortment of cylinder feeders).
One of the drawbacks to my spike is that it does not provide any protection for the seed cyclinder from rain and snow.
As a result, the cyclinder can break down prematurely during periods of heavy rain and humidity. Although the birds may appreciate the ease at getting at the seed during these times, I prefer to make them work a little for their dinner.
Today’s cylinder designs solve the problem of an unprotected cylinder open to the elements. Most have a roofing system of some kind built into them to provide top-down protection to the seed cylinders and reduce the amount of premature break down.
I’m not sure our blue jays and woodpeckers would be happy if a roof covered their favourite feeder. They mostly just stand on the seed cylinder and pound away at it from the top.
The result, of course, is that the birds’ hard work further breaks down the top of the cylinder and opens it up to the elements.

Wild Birds Unlimited feeder complete with a cage to prevent large birds from dominating the feeder.
The new designs not only provide a roof for seed protection, several have cages to keep the larger birds from dominating the seed cylinders and giving our smaller birds a better opportunity to enjoy the benefits the seed cylinders offer.
There is no doubt that the larger backyard birds, including blue jays, woodpeckers, cardinals, grackles and even crows, descend on our cylinders and dominate them at times.
I’ll take advantage of any opportunity to restrict their access to the cylinders.
WBU’s globe cylinder feeder’s cage is large enough to accommodate mid-sized birds like indigo buntings, sparrows, nuthatches and downy woodpeckers just to name a few. The feeder handles the regular-sized cylinders which include the no-melt cyclinders. The cage also acts as perches for the birds.
And, if the pesky squirrels manage to get up to your feeder, the cage represents another barrier to protect your expensive seed.
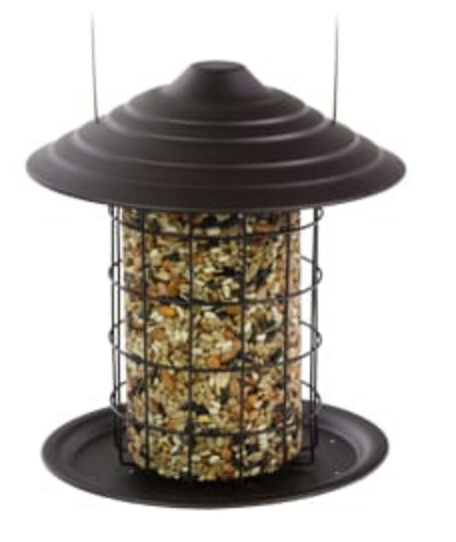
WBU’s Tidy feeder combines the best of all worlds with a built-in roof, a cage and a base to catch any fallen seed.
The Tidy Cylinder feeder is a great choice providing not only a roof to protect the seed from the elements and a cage to protect the seed from larger, more aggressive birds, it also includes a small, built-in catch tray to keep the seed from falling to the ground.
Other modern feeders provide open access to the cylinders, but add several perching areas to provide more access for smaller birds to enjoy their meal in peace.

A mostly eaten seed cylinder shows how the spike attaches to the pole and how the seed cylinder fits over the simple spike.
How the spike system works
Setting up my cylinder spike on the Wild Bird Advanced Pole system was simple. One of the benefits of investing in a system allows you to easily add various options.
The spike feeder simply inserts into the top of the pole system. Once attached, the seed cylinder (which comes with a hole drilled through the middle of it) is inserted over the spike. My feeder has a circular perch at the base that surrounds the cylinder, but most of the visitors simply jump on the cylinder and begin helping themselves.
Many of the new cylinder feeders are meant to hang from hooks rather than be inserted directly in the pole. This provides more opportunities to use them on any pole system or hung directly in trees.
How are the seed cylinders made
Seed cylinders are a compressed mixture of seed, nuts, and/or fruit and, depending on the mix, insects such as meal worms can be added. The feed is compressed into cylinders and mixed with Gelatin to hold the seed mixtures together.
Then it is cut to size and ready for use.
If you are on a budget or just looking to save some money, making your own cylinders is easy enough. There are several step-by-step “DIY” projects available on both Google and YouTube that will guide you through the process.
While I get great enjoyment from my bird feeding stations, providing natural food sources to our feathered friends is always the goal we should aspire to in our gardens. I have written a comprehensive post on feeding birds naturally. You can read about it here.

Fish In The Garden: Style, movement and a touch of whimsy
Tyson Weiss's exquisite artistic ceramic Fish In The Garden add a sense of movement and life to any garden. The cobalt and orange koi add a splash of color to your garden, while the trout can be used to add a subtle, artistic and more natural touch to your woodland garden. The fish make the perfect gift and provide gardeners with an opportunity to experiment with placing them around the garden.
Unique garden gifts: Ceramic Fish add artistic touch to any space
There’s no reason not to have Fish In The Garden, thanks to ceramic artist extraordinaire Tyson M. Weiss.
Whether you have a pond stocked with koi or not, there’s always room for these impressive, artistic fish in a multitude of colours. I’ve admired this unique form of garden art since the first time I saw a picture of them and always wondered where they would look best in my garden.
The simple answer: Almost anywhere and everywhere.
These exquisite ceramic fish, in a multitude of colours and sizes, bring your garden to life as schools roam through ornamental grasses, ferns, mosses and flowers bringing a sense of movement to the garden. Groupings of three, five, nine … weave between moss-covered rocks in the Japanese-inspired garden and can remain there throughout the winter months bringing colour and style year round. They are at home in any garden – running up a dry river bed, rising just above a pond or even submerged to create the illusion of real Koi in a pond devoid of fish.
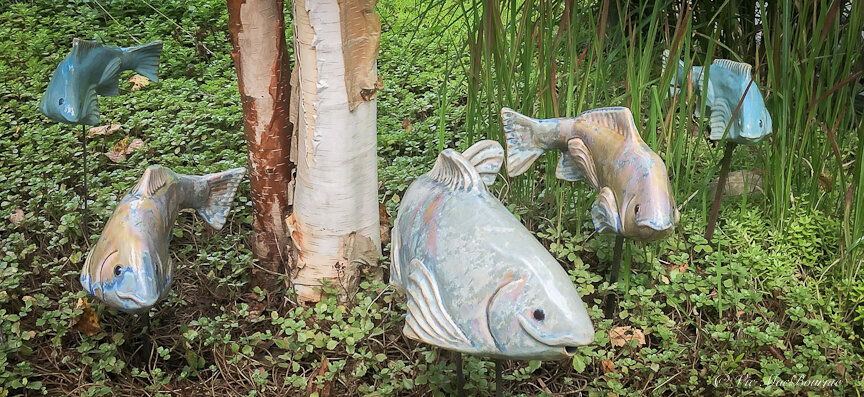
A school of fish wander through the garden over sedum around a birch clump and through the ornamental Japanese blood grasses creating movement and a sense of style in the garden.

This school of cobalt-coloured fish swim through the ferns and grasses of our Japanese-inspired garden creating a flow down a small hill and around a moss-covered boulder.
Tyson refers to the “flow” created by the schools of fish as a “fluid aesthetic” created by the curves of the swimming fish as they “move” as one through a garden.
“With the multiples, we can create these curves, and with those curves, (the fish) can curve in response to an element of the landscape,” he explained in a 2012 article in the Portland Press Herald. “Around a rock, and then curve back this way around a tree, so it fits. No garden gnome or concrete bunny rabbit will ever have context like that.”
In fact, by creating schools of fish, he explains in the article, it’s possible to “perfectly match the shapes of diverse landscapes and architectural elements. Channel the fish around a rock, through plantings and back out again. Our sculptures — brushes, if you will — bring out the artist in every gardener.”
“If that means making a bazillion fish to get it right, that’s what you have to do.”

Sharing this creative process with gardeners is, without a doubt, one of the greatest benefits of his inspirational garden art.
“Our sculptures are exquisitely crafted of a variety of high‐quality materials. They are moderately priced, somewhat above low‐end polymers and plasters, and well below expensive garden sculptures of stone and metals,” Tyson explains. “They’re even more affordable than some small shrubs and trees.”
Tyson explains that every component in the “school” reflects the hand of the artist.
“The sculptures are hand‐sculpted detail and hand‐painted. No two are exactly alike. Ten years of experience has evolved a proprietary process to meet high demand and yet preserve our founding vision. There is no mass production.”
How to place the Fish In The Garden
Unlike most garden art, where homeowners are left with only the decision of where best to place it, Tyson’s ceramic fish provide gardeners with a multitude of artistic decisions ranging from where to place the school, how many fish should be included and how to organize them for best aesthetic value. This process is, in itself, both artistic and immensely satisfying when done well.
But even when it doesn’t work as well as you hoped, it’s easily changed.
Did I say the entire experience is more fun and certainly easier than planting a new garden bed or large container. Take my word for it, whether you consider yourself creative or not, experimenting with these schools of fish might be the most fun you’ve had in the garden in years.
If you are unsure about how to place the fish in your garden creatively, Tyson’s informative website at Fish In The Garden includes several videos providing examples on how to best creatively place the fish in your garden.
The impressive site provides complete details on what styles of fish are available, how to order them, prices and other details about his artistic ceramic fish. (For details on his colourful Koi ceramic fish go here.)

The smaller ceramic fish are perfect for container plantings. Here, three work their way around Northern Sea Grass and petunias in one of our window boxes.
Can I give Fish In The Garden as a gift?
For those who might want to give the fish as unique gifts to gardening friends and family, there are even gift cards available to purchase on the site that can be sent directly to the recipient. (Information on the gift cards is available here on his website.)
The fish are the perfect gift for homeowners, especially those who appreciate the artistic whimsy that the fish can provide. These schools of art look just as much at home in a woodland garden as they would in a small, contemporary urban garden. In fact, the splash of colour that the more colourful koi provide, might just be the punch of colour to take the small urban garden to new heights.
And, by ordering the gifts from Tyson’s website, the fish can be delivered directly to you or the recipient of the gift wherever they choose to garden. The perfect gift for a friend or family member who lives in a different country, state/province or far off city.
Fish In The Garden can be shipped worldwide
Tyson is quick to point out that they can ship to virtually any address in the world, adding that that there are restrictions on some products, and some products cannot be shipped to international destinations.
The enjoyment homeowners get from having the fish in the garden, however, does not compare with the enjoyment Tyson gets from knowing his artwork is gracing gardens in his hometown of Falmouth, Maine and in gardens around the world.
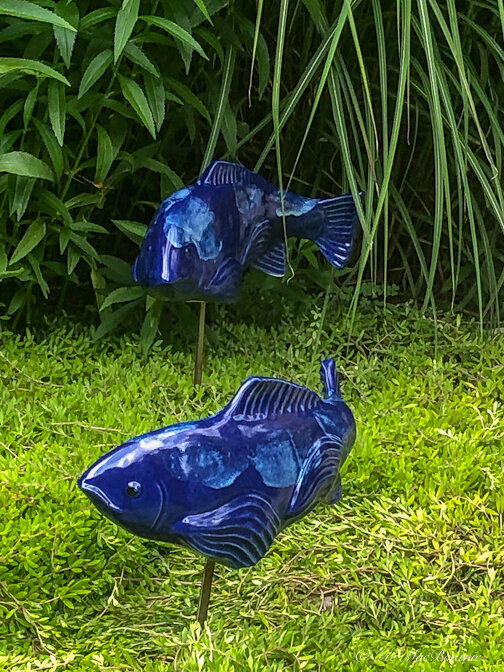
“I love it. I invented something that makes people really happy that could last indefinitely,” he says. “If you read the reviews online there are SO many stories of people meeting their neighbors and making new friends over passersby seeing these fish and asking about them.” he explains in an email to Ferns & Feathers.
“There was a long stretch where most people didn’t get it at all because there was nothing like it out there,” Tyson explains.
“The early adopters were the landscape architects, interior designers, art gallery owners: People who were both intelligent and creative that had an eye for something new. Now that people have seen them in so many shops, botanical gardens, private homes, magazine articles, social media awareness of this new idea is spreading a lot faster.”
To say his fish have made an impact worldwide is an understatement.
“Last week we shipped four orders to Australia. I've shipped to Ireland, England, Germany, Switzerland… Singapore…. Lots of people from abroad have bought them in gift shops and carried or shipped them home,” Tyson explains.
And if that is not enough, his fish are even likely gracing the home of a former American president.
“Last year a gift shop owner in Florida told me (former president) George Bush Jr. and his wife, Laura, came in and bought a bunch of fish,” Tyson writes.
Now that’s something to get excited about.
To say his clients are impressed with his work, is an understatement.
He recalls one woman who purchased 90 of his fish to give as gifts to her family.
His website is full of clients proclaiming their love for the garden art and the joy the fish have brought to them. One of his clients writes about their experience on his website:
“I had recently expanded a patch of ornamental garden this year with a Japanese theme, using traditional plants, and was searching for the most perfect and unique ornaments to add other than the typical “Buddahs” and “pagodas,” water basins and fountains that you can find anywhere,” writes one gardener.
“These fish are perfect! It looks so magical to see my koi “swimming” through my garden and have gotten many compliments on how unique and “clever” they are. If you want that little “extra” that sets your landscaping apart from your neighbors and friends... you need these fish! I am completely happy when I see them and I will most definitely be purchasing more to increase my “school.”

A grouping of fish look as good on boulders as they do in garden greenery.
Fish placement in our garden
In my garden, different schools of fish move from the front to the back gardens depending on my mood.
In the Japanese-inspired garden, a school of fish swim around our elegant ghost fern, down a small hill heading for a moss-covered rock. By adding a few more fish, the school travels past the rock over the mossy ground creating a natural curve as they head for the safety of a massive boulder.
A few small changes and the school is off in a completely different direction.
Changing the design involves nothing more than pushing a metal stake (provided with each order) into the ground.
Not far from the Japanese garden, a school of three small fish swim through the colourful and lush planting of our window box providing a little whimsy for garden visitors and one that can be seen from both outside and inside our home.
Even a single fish in the widow box or in a small container works well to add a touch of colour. They would look as good in a container on a garden patio as they would on a balcony overlooking a skyline 20-storeys high.
In the backyard, a larger school of fish work their way up past the dry river bed, over the sedum, through the blood grass and around one of our birch tree clumps. Their presence contributes to the feeling of movement in the garden. Just down along the river’s bank, a small group of fish peek out from the tall stems of native obedient plant looking to join the larger school.
In another area, I move a group of three fish to see how they look hiding in the fountain grass and provide visitors with an unexpected surprise as they walk out into the woodland garden.
As the seasons change, so too do my artistic opportunities to move the schools of fish throughout the garden.
So much fun.
No amount of traditional garden art will provide so many creative possibilities and opportunities to play with natural design in our gardens.
Certainly none will provide the same natural movement that Tyson’s fish create. Nor will they work so seamlessly into the natural landscape quite the way the fish organically fit naturally in the garden.
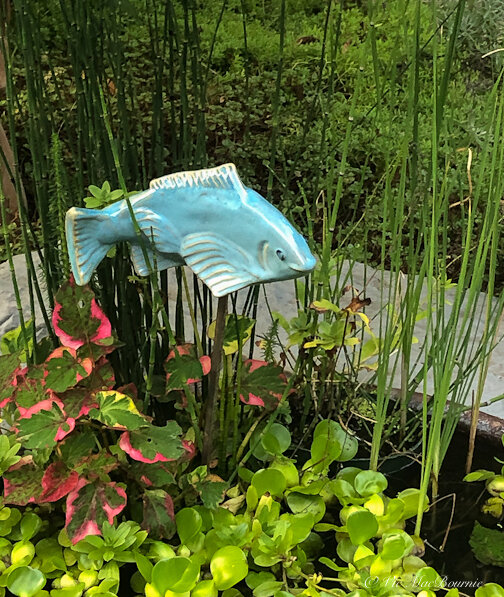
A single fish adds a splash of colour as it swims above the plants in the patio container water garden. It would look just as good in a window box 20-storeys up overlooking a city skyline.
What makes this garden art so special?
• The fish can stay outdoors in any climate, including freezing Maine or Canadian winters.
• The fish are in gardens from Alaska to Arizona
• They will not break in the cold or fade in the sunlight
• All fish come complete with a rod for placing them at the proper height in the garden
• They come in a tail left and tail right design. Schools of the fish look best (natural) with both tail directions being used to create flow
• The fish can be submerged in water for stunningly realistic results or simply to add to an existing stock of real pond fish.
Fish bring Woodland garden to life
For woodland gardeners, the schools of fish provide a multitude of opportunities to not only add a natural artistic element to our gardens, they are so easy to move around the gardens that they create changing possibilities throughout the seasons
These fish form the perfect garden art that so many of us have been searching for to bring our gardens to life in a stylish, yet subtle and convincing natural way.
Display ideas for Fish In The Garden in your Home and Garden
In the Garden:
Use schools of fish swimming among ornamental grasses and allow the grasses to hide parts of the fish for a truly natural look. Let your visitors discover them as they stroll through and around your garden.
• Place the fish among your ground covers to add interest and create the illusion that the ground cover is the sea floor and the fish are floating just above it.
• Place the smaller fish in window boxes and patio planters for year-round interest
• Bring your dry river beds to life with a school of large trout or koi running up through it around driftwood and boulders.
• Use the fish on a stone wall, large boulders or fountains and even in bird baths and on patio tables
• Incorporate the fish in your man-made ponds either swimming above the water or submerged with real fish.
In the Home:
• The fish look just as good in the home as a splash of colour for shelves, sitting on a table, on a fireplace mantle or even used much as they would in the garden but in house plants such as ferns, string of pearls and other exotics.
Use the fish in the garden throughout the spring, summer and fall months, but get the most out of them by bringing them indoors for inspirational decorating throughout the winter months
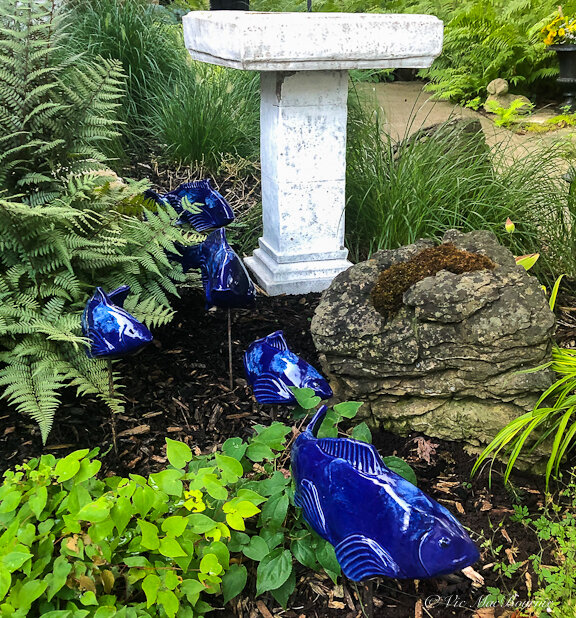
A school of fish make their way through our Japanese-inspired garden.
Garden fish idea hatched out of economic downturn
Although the idea to create artistic ceramic fish was hatched out of necessity, their birth was never guaranteed.
In fact, their creation was a 10-year process of trial and error that started with simple sketches on a notebook and grew over time to what they are today.
It was a long, arduous journey for Tyson and his fish with many iterations of the art form.
The idea of Fish In The Garden actually had its roots in 1998 when Tyson took a pottery class at Unity College, America’s Environmental College.
The teacher encouraged students to keep a notebook of their ideas to use as a building block and reminder for potential projects. That notebook – which he still has – filled with scribbles and photos and sketches including rough initial illustrations of his fish, was eventually the catalyst that led to the development of his art work.
But before that, Tyson had to deal with the necessities of life and started a successful landscaping business.
In 2008, after operating the landscaping company for ten years, and with an economy on the downside, Tyson decided it was time to make changes in his life.
The years of working in landscaping and experiencing gardens either devoid of, or lacking appropriate garden art at reasonable prices, convinced him to go back to the drawing board to further refine his ceramic fish and work on them until he was able to get his creations to look the way he wanted.
Tyson returned to an earlier version of the fish in his studio – a smaller, thinner fish that gardeners could manoeuvre to angle up or down.
Unique garden art discovered at first show in 2008
Everything changed in January 2008, when Tyson did his first show at Coastal Maine Botanical Gardens.
Landscape architects, garden store owners, even interior designers took notice of his artistic creations that found a place both in the garden and in the home on fireplace mantels and coffee tables. By the end of the next year, orders poured in forcing Tyson to begin considering alternate ways to create the highly-sought after fish.
It was around that time that he also decided he needed a new work space to help make creating his artwork a little easier.
“Several years ago I bought a dairy farm because the “barn” was a heated and insulated 4,000-square-foot space with running water. It took 2 months of carpenters working 7 days a week and $70k to get it where it is today. My house is 50 feet away. Its a nice spot, 20 acres of pasture and no neighbors.”
Up until then, each fish was made by hand and demand was beginning to outstrip his ability to create the fish. Creating twenty fish during a 50-hour work week, wasn’t going to cut it.
Creating the ceramic fish, made from sturdy stoneware clay fired to around 2,200 degrees Fahrenheit, can take up to two weeks. This process enables the ceramics to withstand extreme temperatures from severe heat to even the coldest climates.
But success was not guaranteed and the work needed to create the pieces of art was never easy.
“It is a very hands on process. Now we are casting them from molds made of my originals. It’s very labor intensive. The mold that makes the large fish weighs 90lbs. And 1 in 10 of all the fish breaks in the process, usually before the first firing when the clay is very brittle,” Tyson explains.
Looking back on his plan to create a successful company, Tyson told his former alma mater Unity College: “Business isn’t about being impulsive or emotional. It’s research and planning and bringing your idea to a place where it mirrors the vision in your head. If that means making a bazillion fish to get it right, that’s what you have to do.”
To see a YouTube video of Tyson in action check out this informative 2016 video from WMTW of Maine here.
The fish and the Pandemic
Like many companies, the pandemic hit the on-line sales of his artistic fish. Tyson is not one to dwell on negatives and says the pandemic has been difficult, but came with both a downside and upside for his business.
“I’d say it evened out” he explains. “Our Spring trade shows in Atlanta, Orlando, Las Vegas, Philadelphia, Seattle, San Francisco and Boston were a disaster. But then during the whole lockdown people were gardening and ordering things online, and using social media like never before so that offset the early losses.”
For instance, he explains in the email: “The Northwest flower Show opened on a Wednesday. On Thursday the fist case of Covid in the USA was announced… In Washington State. LOL! And I was happy about the lockdown and ‘compromised’ Trade show series.
“In April 2020, I remember working at ‘the farm’ on a granite retaining wall, listening to the peepers as the sunset light filtered through the pines to the west, sipping cheap box wine in 50F degree ‘hoodie’ weather, no bugs out yet, no iPhone to distract me. It was the happiest I’ve been in many Years.”
There is no denying the fall in sales, however.
“Pre pandemic we were at 1,000 fish per week,” he explains. “Now I think we are half that. Most likely 500 per week. Ninety per cent of this is to garden centers, art galleries, gift shop and botanical gardens that resell them.” he explains. “It’s basically a non-profit.”
But he is not letting this latest pitfall stop him from moving forward, and he hopes to use the slowdown as an opportunity to help others who are less fortunate or struggling in these difficult times.
“Soon I’ll go back to making one of a kind originals that are numbered and signed. I want to sell them for $1,000 a piece, but the client has to make a $1,000 donation to one of 5 charities I choose ( veterans, cancer research, conservation, feeding the homeless etc) and then I’ll make them a fish that comes with a letter of providence and everything. The goal is to make 1,000 fish and in doing so have raised $1,000,000 for good causes. I call it 1,000 for 1,000. There’s a wall in the studio where I plan to hang up all the receipts from the donations.”
What’s in store for the future?
I asked Tyson if he has plans for any new ideas for the future – new designs, colours and fish styles maybe?
“Oh yes,” he says enthusiastically. “There’s 10 other businesses I want to start, all of which offer new, colourful totally unique and creative items, but I need to stay focused on the fish for now. I’m already being copied many times over so I can’t say a lot about what lies ahead, but its going to be EPIC!!!!
Why the fish as garden art are so unique
• The schools of fish bring a fluid aesthetic to any garden space. Where there is no water they imply water.
• The more fish you have in a school the better it looks
• The fish can help to bring year-round colour to your garden space
• They provide the perfect focal point in the garden even when there are no colourful plants
• Consider creating a school that represents your family with large and smaller fish

Using Kintsugi to repair broken ceramic fish
Tyson is the first to point out his ceramic fish are tough. Leave them out in freezing temperatures, or let them bask in the Arizona sun. Either way these fish can stand up to a lot more than you might think.
But accidents do happen.
I was lucky enough to receive almost a dozen fish to create schools to photograph in my garden.
Only one of the fish that arrived via regular post in the large box was broken. I decided it was the perfect opportunity to experiment with the ancient art of Kintsugi to repair the broken ceramic.
First, let’s say this was my first attempt at Kintsugi and I am sure the masters are cringing at the result. For my purposes, however, I am more than satisfied with the results.
Kintsugi is the Japanese art of putting broken pottery pieces back together with gold — built on the idea that in embracing flaws and imperfections, you can create an even stronger, more beautiful piece of art.
I have to admit that the finished result looks totally appropriate in our Japanese-inspired garden.
Ceramic repair was simple
The break was clean so I knew the repair would be relatively easy
After researching the best glue for ceramics, I chose Gorilla Glue known to hold up well both indoors and outdoors in severe weather.
The glue calls for a clean damp surface for ceramic.
After applying a moist towel to the broken ceramic edge, I added a thin line of glue to both sides of the broken ceramic fish. (Directions state to use only a little glue to keep it from spilling out the sides and messing up the repair. I used a small amount but it still spilled out the sides a little. I was not concerned, however, knowing that I was going to use gold paint to cover the repair.)
The glue calls for clamping down the repaired object for up to two hours to allow for proper curing of the glue. Without the proper clamp, I decided to hold it for an hour until the glue dried.
With the fish repaired, I let it cure for a couple of days prior to painting the crack with a thin layer of gold-leaf paint purchased from a local arts and craft store.
The finished result adds a lovely artistic touch to an already beautifully finished piece of ceramic and allows the fish to once again take its place in our garden.
And example of Tyson’s metal Fish In The Garden adding an artistic element to a cedar shake wall.
Steel Fish In The Garden offer another option
In addition to the ceramic fish, Tyson offers a beautiful line of stainless steel fish on his website that are certainly worth checking out.
The metal fish can either be used in the garden much like the ceramic fish, or mounted to a wall as artwork. (Check out the website here to see them used in the garden.) They appeal to a different group of people and work well in the garden as well as in the home.
Tyson explains that the metal fish are made with heavy–gauge and hand–cut stainless steel that weathers the elements beautifully. In the summer, they shimmer with life and, in the winter, they form an organic partnership with the snow and ice.
“The steel people are drawn right to the steel fish,” Weiss said. “They don’t see the clay fish, and they don’t ask about them. And vice versa. So by doing the steel, I hit on this whole other customer, which tends to be more men.”