

Do NOT cut down that dead or dying tree
If you are lucky enough to have a dead or dying tree in your yard, do everything you can to protect it. The birds, animals, insects and fungus will thank you for it. Beautiful trees might be wonderful in our gardens, but dead and dying trees are more important to many birds and animal life.
Create your own “wildlife tree” in the backyard
A tree growing beautifully in your woodland is wonderful, but to birds, bugs and other backyard critters a dead or dying tree is even better.
If you have a dead or dying tree in your yard (often referred to as a “snag”) consider doing everything possible NOT to cut it down. These trees are just too important to the local wildlife to cut down for no reason than it has succumbed to the ravages of time or disease. The dead tree will quickly become a magnet for important birds, insects, and microbial fungi that might not already be present in your woodland garden.
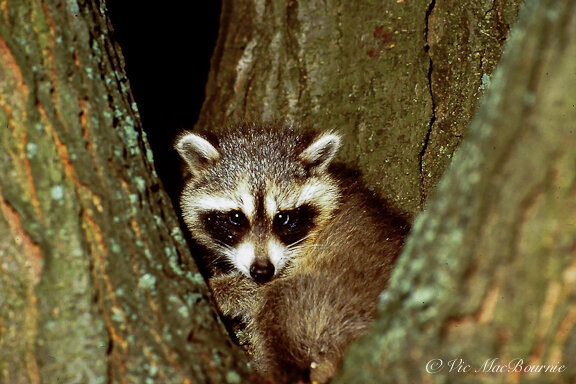
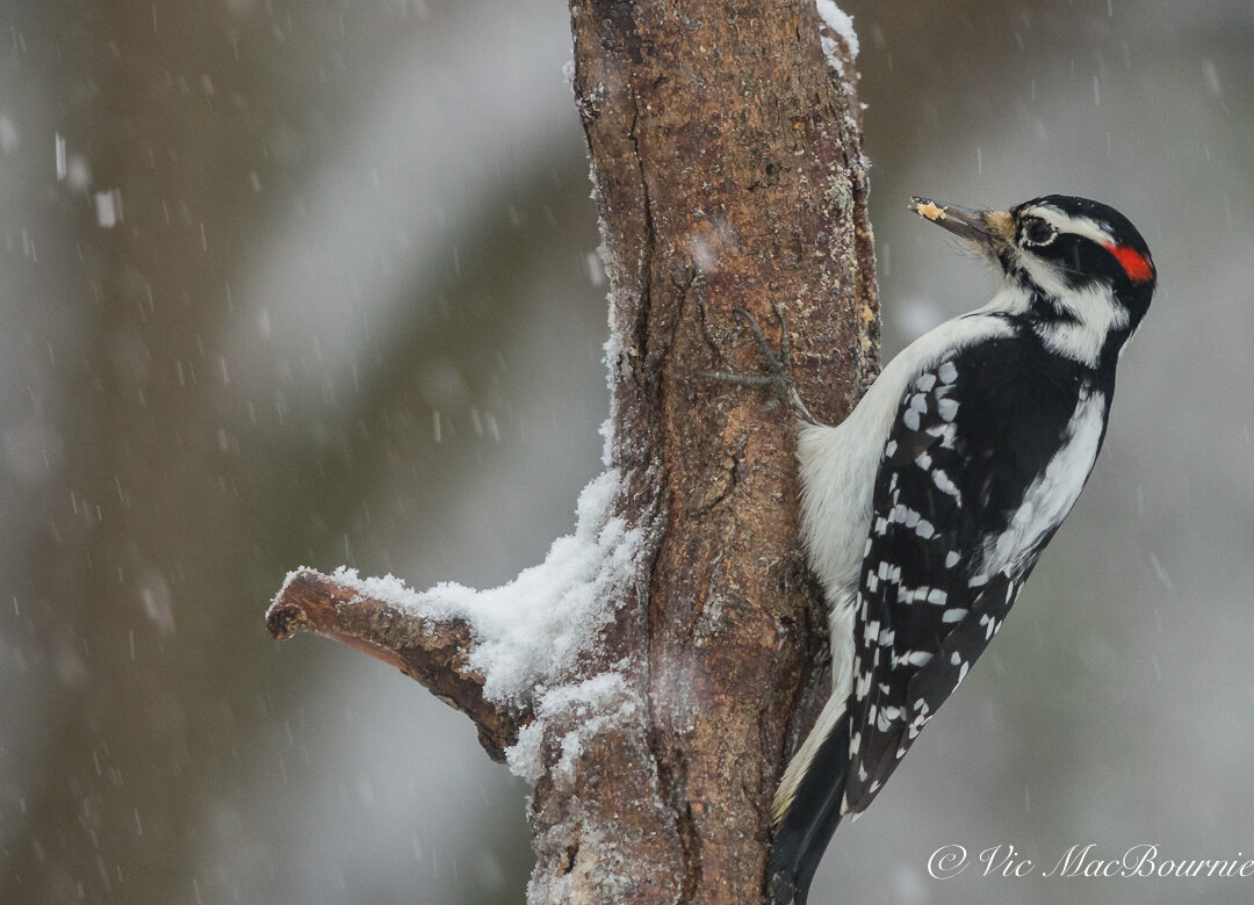
Woodpeckers, warblers and other insect eating birds will find the dead tree irresistible and over time use it as a resource for food and possibly a home to raise their young. Depending on where you live, small mammals like raccoons, skunks, martens and even porcupines might decide to take up residence in your “wildlife tree.”
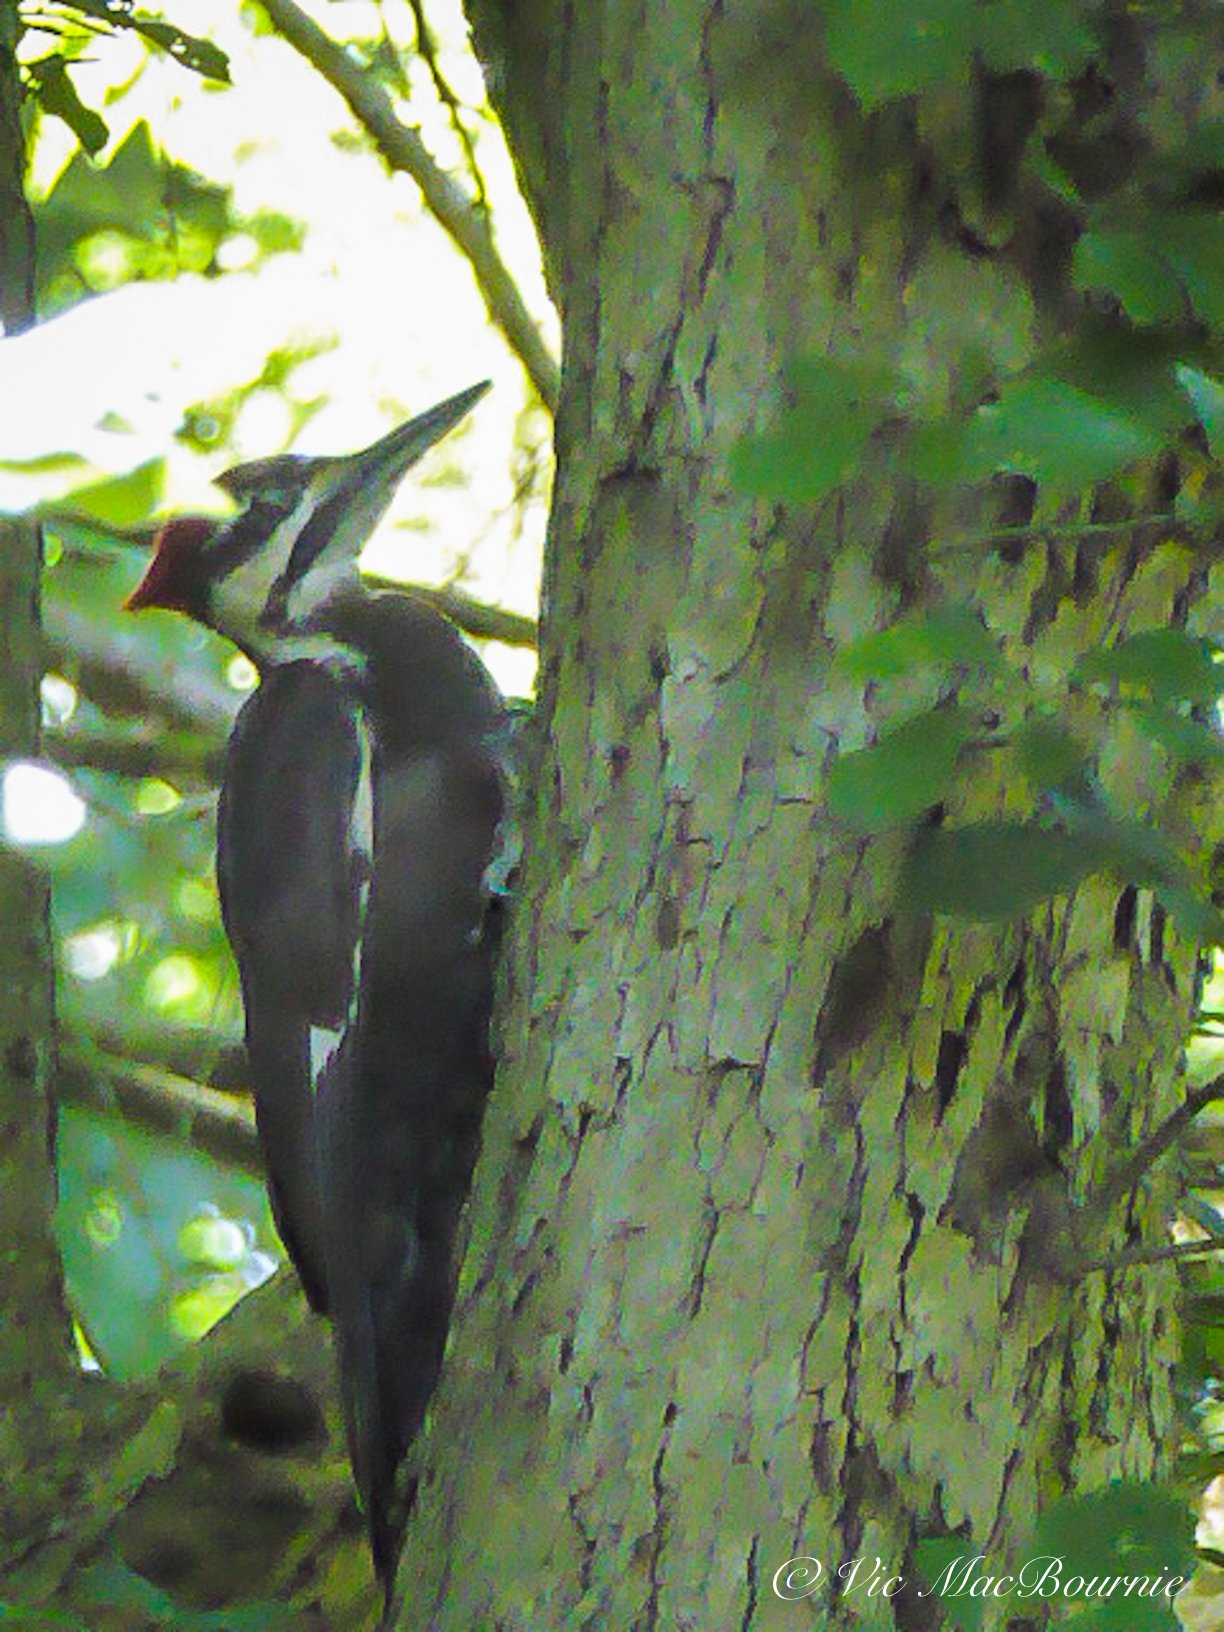
This Pileated Woodpecker was photographed working on a dying tree in a back corner of the yard.
The snags can even become more important in winter where birds that depend on insects for survival look to the snag as a source for insect, larvae and other potential food sources. During winter, birds, bats and other small animals will often roost behind the loose bark and large cracks in the wood for both warmth and shelter.
Studies show that in areas of the United States West of the Cascade Mts, 39 species of birds and 14 species of mammals depend on tree cavities for survival. Similar numbers (39 bird species and 23 mammal species) East of the Cascade Mountains depend on snags. (USDA Forest Service)
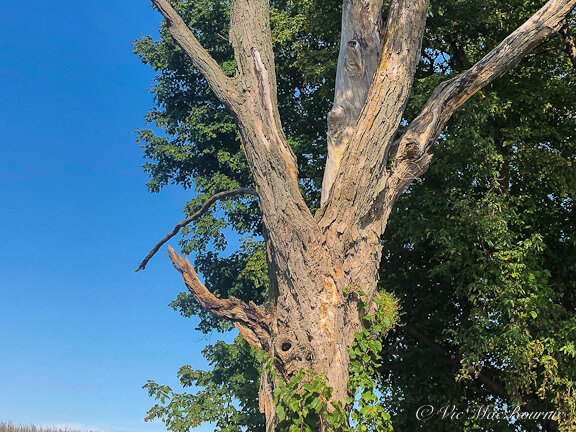
The wildlife tree is the perfect “snag” with vines beginning to climb up the trunk and natural nesting cavities.
Of course, if the dead or dying tree poses a significant danger to either individuals or your home, steps should be taken to ensure the situation is made safe. This does not, however, automatically mean that the tree needs to be cut down.
There are options to save many of these trees that we will discuss later in this article.
Unfortunately, most snag or “wildlife trees” are too quickly cut down by homeowners, city parks and even within urban forested areas for fear of injury.
These trees are too often cut down without much thought, if any, to their wildlife value or of the potential options that could save all or most of the trees to live on as an important wildlife tree.
Many of our backyard animals depend on snags for both nesting and living accommodations as well as foraging for food.
Why preserve a dead or dying tree?
The dead trees, especially larger ones, provide optimal habitat for woodpeckers and other primary cavity nesters. In fact, large snags from mature trees are critical for big birds such as Pileated woodpeckers that require more available internal space for raising their young.
Woodpeckers such as the Pileated or Northern flicker actually create several new cavities in dead and dying trees per year. Many of the cavities are started by the woodpeckers for possible use in future years, but in the meantime, are often used by smaller bird species.
The woodpeckers will often start the cavities in areas of the tree that is weakened and then leave to allow nature to finish a lot of the hard work.
Fungus eventually invades the cavity and softens the wood over time. The following year, the birds may return to continue hollowing out the cavity’s internal wood, which has now become softer and easier to excavate.

Wildlife tree
Can’t you just imagine a large eagle sitting atop this old snag scouting the area for its next dinner? It’s more likely home to an owl along with a host of smaller birds, bugs and other critters.
Woodpeckers, in turn, create habitat for more than 80 other species of secondary cavity nesters, including American kestrels, a host of owls from the diminutive Screech owl to Barn owls, Barred owls and even Great Horned owls, swallows including the tree swallow and purple martins, bluebirds and a host of wrens, chickadees and nuthatches.
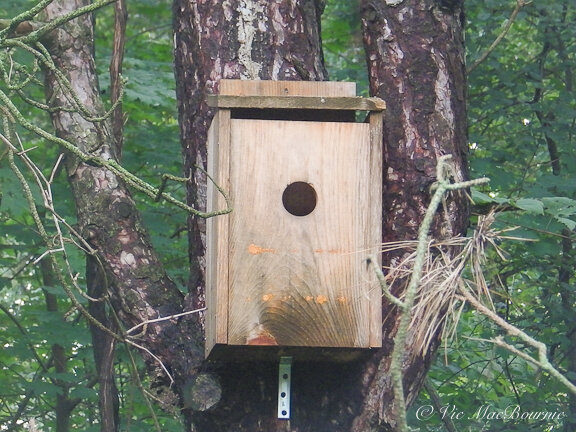
Owl box on pine snag
A screech owl box on this dying fully mature pine tree provides and opportunity to attract the diminutive little predator even if you do not have a large enough dead tree in your yard.
What do all these birds have in common?
They are primarily carnivorous or insect-eating birds that will help to naturally control mice, rats and insects in your garden. Without them, your garden can easily get out of ecological balance. In fact, many urban gardens, where dead or dying trees no longer exist, are overrun with mice and rats and skunks in part because of a lack of nesting cavities in the area for higher predators. Great Horned Owls, for example prey on skunks.
If your area has few if any natural snags, it may be the perfect time to look into installing screech owl boxes that provide nesting opportunities for these small, but highly efficient mice and rat controllers. If attracting screech owls sounds interesting, check out my full article on installing screech owl boxes in your garden, go here.
Even small snags are vital to wildlife
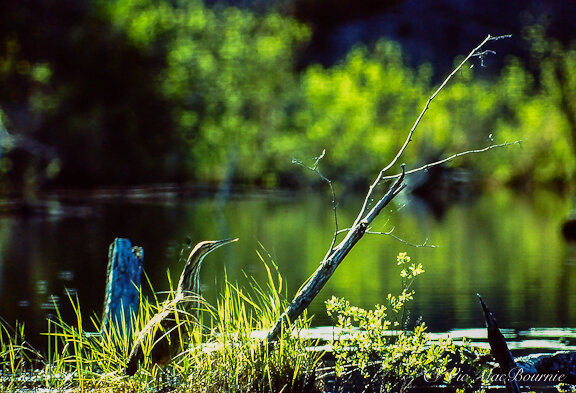
This American Bittern was attracted to this fallen snag in a pond. A dead or dying tree, whether it is standing or fallen over, can attract an amazing variety of birds, animals and insects.
Smaller snags, particularly if the wood is beginning to break down and becoming soft, provide the opportunity for smaller birds such as chickadees to make tiny cavities in dead wood as small as 4-inches in diameter.
So, even if a smaller tree dies in a corner of your garden think twice before removing it. This is the perfect opportunity to grow a vine up the snag or plant a native berry producing shrub in front of it not only to hide it from view but to provide an abundance of natural food to inhabitants of the snag.
Snags as nesting sites and foraging habitat
This small DIY snag is the result of burying a branch into the ground and allowing the woodpeckers, nuthatches and chickadees to go to town on it. Eventually it will rot and I’ll replace it with another.
Although many gardeners will recognize the benefit of the snag providing nesting habitat for a variety of birds and mammals, don’t overlook the foraging opportunities these same snags provide.
The dead and dying trees’ wood softens as fungus begins to take over the once dense woody interior of the tree. This soft wood, which can also exist on dead branches on live trees, provides habitat for a host of insects and other potential prey items for birds.
You might be surprised just how many invertebrates depend on dead and dying trees.
A close inspection would likely include a host of beetles, spiders, various ants, millipedes, earwigs, earthworms as well as possibly salamanders and toads on the ground beneath the tree living under the decaying bark and branches that often fall from the tree.

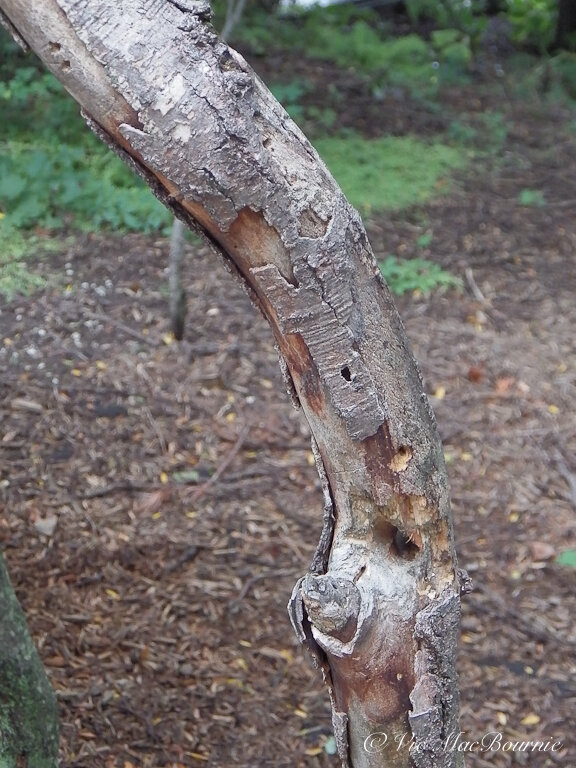
This snag continues to show life in another part of the tree, providing needed cover for birds and animals that are using it for habitat.
Some of the best trees for snags
• Large trees provide the most habitat resources for birds both small and large
• Conifers such as cedar, fir larch, and pine make excellent snags because they rot slowly and can remain standing longer.
• Snags of more than 12 inches in diameter and about 15 feet tall are perfect hunting perches for larger raptors.
Brush Piles
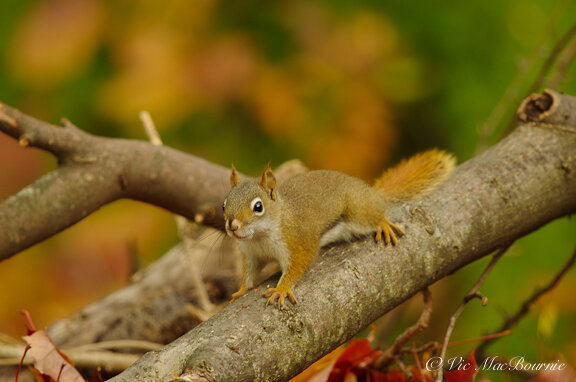
A red squirrel enjoys the bounty provided by the woodpile that can help to take the place of a snag. If you are limbing a dead tree, consider using the branches to create a wood pile. Eventually the rotting branches will create a similar benefit to wildlife that the standing dead snag would provide.
Create your own DIY snags
If your property has no dead or dying trees, you could create your own either by killing an undesirable tree in your yard, or better still by burying a large branch in an appropriate area of your yard.
Maybe a neighbour is cutting down a large tree and the tree service has no problem dropping off a large branch to your home. By simply digging a hole and burying it in the ground, you could create many of the benefits a traditional snag would bring to the yard.
I doubt you would get a pileated woodpecker making it’s home there, but you will attract woodpeckers, nuthatches, chickadees and other insect-eating birds to the yard.
If the branch is big enough, you may be able to get nuthatches or other small birds using it to raise their young.
You might want to drill some large holes in the branch to get the process started.
Snags in our yard
In our bckyard, we have a large natural snag in a corner of the yard that most visitors would be hard pressed to see unless they walked back to the more wilder area of the yard. Judging by the holes bored into it, I’m sure it is and has been home to several smaller birds.
Last year, a Pileated woodpecker was working the snag foraging for insects. I heard it before I saw it. In fact, I had to walk to the back of the yard to see the massive woodpecker at the snag.
In another area of the garden near the bird feeder, I have buried a mid-sized branch in the ground for birds to use both as a perch as well as a snag.
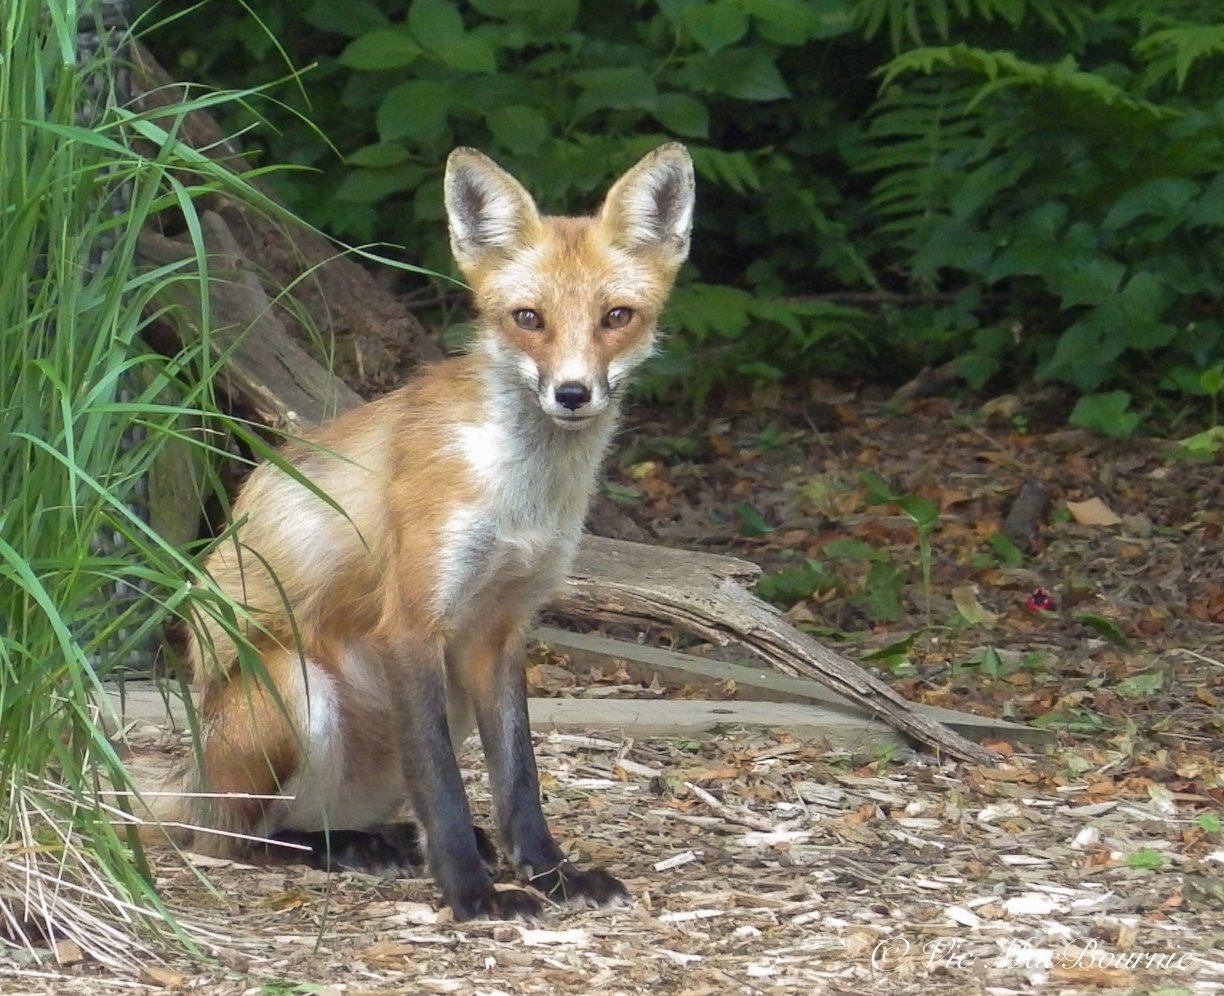
By drilling holes in the branch and filling them with suet and WBU bark butter, the DIY snag is regularly visited by a host of woodpeckers, nuthatches and chickadees as well as the perfect high perch for red squirrels watching for the neighbourhood fox.
If you want to take DIY snag creation to a higher level, consider wrapping a rope tightly around a large branch to cut off its nutrients from the main trunk. In time the branch will die off creating a form of snag on the tree. (I would not recommend this procedure on your favourite tree).
Smaller DIY snags can be easily made from large branches that can be drilled out, filled with suet or Bark Butter, and hung from a nearby tree. For my story on building your own hanging DIY suet feeder, check out my story here.
We have created a large DIY snag branch on a very mature crab apple tree at the back of the property. For the most part, the dead branch is hidden by the still living branches, but still provides many of the benefits attracting insects that are eventually food for the backyard birds.
In our yard, we have also created a large wood pile that can take the place of a snag by providing small animals with a relatively safe habitat as well as a good foraging location for birds. For more on building a brush or wood pile, check out my full story here.
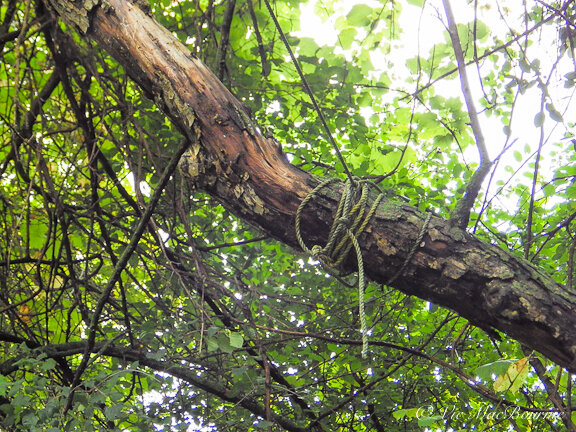
By wrapping a rope around a branch of one of our crab apple trees we are able to create a snag in a living tree. By doing this, you can create a snag where ever you choose.
Managing snags in your landscape
There is no question that a large dead or dying tree can pose a risk to life and property if not dealt with properly.
If a snag threatens the safety of a patio or play area for example, consider moving them to a safer area if possible. If that is not possible, reducing the potential damage that could be caused by the snag falling over is certainly a consideration. By removing the larger branches and using them in a woodpile for example, you keep the benefits of the dead wood without the dangers.
If the snag is a large, mature tree and poses too much danger to leave it as it is, have a tree company remove the dangerous branches and cut the tree down in size so that if it did fall, it would not hit anything and, its reduced size would pose little danger.
How long can a dead tree remain standing?
It’s also important to remember that a dead tree can stand for many years before it topples to the earth. In fact, depending on the size and type of tree, it’s likely that the dead tree will still be standing long after we are gone.
Finally, if you are concerned about a tree on your property that might be dying or has already passed, contact a local tree specialist for their expertise.
Just remember that a lot of these “tree experts” are not only in the business of making their livelihood from removing trees, they also do not want to be responsible for any chance of injuries or property damage resulting from a falling tree that they did not remove.
Common sense is always the best approach, but keep in mind there are alternatives to complete removal and they are almost always a lot less expensive.
While I get great enjoyment from my bird feeding stations, providing natural food sources to our feathered friends is always the goal we should aspire to in our gardens. I have written a comprehensive post on feeding birds naturally. You can read about it here.

Unique gift ideas for gardeners
Finding unique garden gift ideas is always challenging. Here are three outstanding garden gifts made by artisans and craftsman. You won’t find these bird feeders, native bee houses or ceramic fish art in big box stores. Order these directly from the artisans.

This exquisite feeder of copper and cedar created and handmade by local artisans is just an example of the unique gift ideas to consider this holiday season.
Unique garden gifts are never easy to find around the holiday season.
By then, most of the interesting garden material is either sold out from the previous summer or stored away in the back waiting to be brought out in the spring.
Fortunately, over the past couple of years, I have come across, and wrote about, some of the finest and unique garden gift ideas possible.
Some are for the birds, some are for the bees, and some are just plain works of art that any gardener and nature lover would love to have in their gardens.
These gift ideas are not available at Big Box stores and few specialty stores even carry them. These unique garden gifts are purchased directly from the outstanding artisans and craftspeople toiling away in their workshops.
All of them ship to customers in the United States, Canada and around the world.
Here are three unique garden gift ideas that I use in my garden and consider to be not only exquisite pieces of craftmanship, but outstanding pieces of art. Two of the gift ideas – the bird houses and the native beehouses – are also hard-working utilitarian pieces for the garden.

The copper and cedar handmade bird feeder
It’s hard to put a price on great design and high quality craftmanship, but if you could the Q&A Ultimate bird feeders would fall under the priceless category.
These are not the heavy duty feeders you fill to the brim with sunflower seed and let the birds and squirrels have their way. We can pick up those feeders anywhere.
These are exquisite little teardrop, fly-through feeders meant to hang by your patio or deck where they’ll likely steal the show whether there is a cardinal or chickadee sitting on the perch or not.
The copper roof is the first indication of their fine craftmanship, but upon closer inspection, it doesn’t take long to recognize the attention to detail in the two perches at both ends of the fly through and how the seed is fed into the inside chamber of the bird feeder.
It’s all the work of French (from France) architects Coraline Allard and Pierre Quesnel, who came to Canada and eventually set up their design business in Toronto. The bird feeders were one of their first ventures and, since that successful launch, the couple have gone on to design a number of exciting creations, including an aluminum beer box – another perfect gift for the “beer drinking” woodland gardener.
In addition, Ferns & Feathers readers (by using the code provided here) will get a 15 per cent discount at the Q&A Etsy website when they make a purchase.
You can visit the Q&A website here.
The couple was featured earlier in this full-length Ferns&Feathers story that you can read here.

Joe Prytula with one of his WeeBee houses is his backyard workshop.
A native bee house that works
You can run out to your local store and pick up a bee house, complete with bamboo straws and holes drilled into wood. Some are okay, others were never meant to really be used more than one season and still other designs are likely more dangerous to our native bees than helpful.
That’s not the case with Joe Prytula’s WeeBee Houses. These things are seriously well-thought out, well made and fun to put up and watch as the native bees find the perfect spot to go to work.
The mason bees, the leaf cutters all finding a safe and happy home in these outstanding works of craftmanship. Joe doesn’t just sell you a native bee house. Included in every WeeBee house is a thorough explanation of how to use the bee house properly to ensure the bees hatch the following spring. Also included are tools to remove the larvae from their homes and store them until their spring release.

Talk about the perfect educational gift for children, especially those with a particular interest in nature.
Joe hails from the Niagara region in Canada but ships his Weebee houses to the United States and worldwide.
If you are interested in purchasing one of Joe’s WeebeeHouses, you can either contact him through his instagram account @weebeehouse or by email at [email protected].
Joe offers a discount to Ferns & Feathers readers. Be sure to give him the discount code FernsFeathers10 to receive a 10 per cent discount.
Check out my full story on the Joe’s WeeBee houses here.
To complement Joe’s Weebee house, consider adding Our Native Bees book by Paige Embry. The two would be the perfect combination for gardeners discovering the joy of native plant gardening and attracting native pollinators.
For my compete story on Our Native Bees, take a moment to check out my full story here.

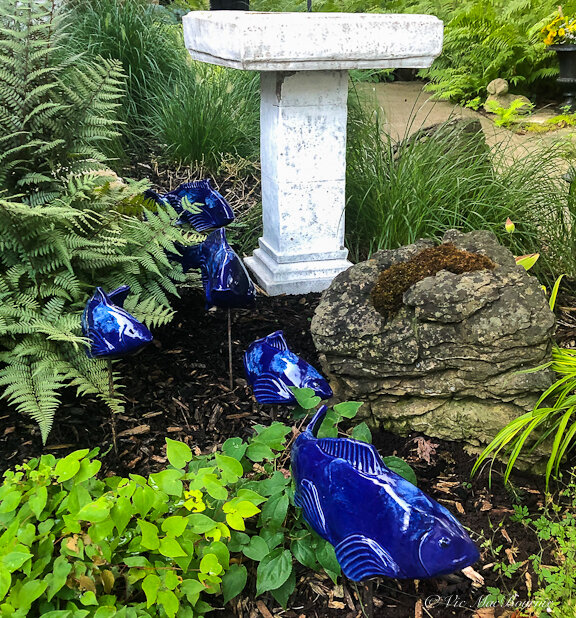
Fish In The Garden work their way through our garden and around a moss-covered boulder.
These ceramic Fish are at home in any garden
Brilliant works of art are often described as beautiful, moving … inspirational. Tyson Weiss’s ceramic Fish In The Garden are all of these things and more.
The “more” is the unique ability to take these works of art and use them to design your own art installations in the garden by moving them around and finding new inspiration in different areas of your garden, even inside your home.
By creating schools of three… five … seven fish swimming through your flower beds, fern garden or around a moss-covered rock in the Japanese garden, for example, you not only experience the art but have the opportunity to create your own installation.
The ceramic fish are made to stay out in extreme weather conditions (either extreme heat or cold) and can add a pop of colour to gardens when colour is at a premium – either in shade gardens or in today’s urban contemporary gardens where the focus is more on textural greens than colourful flowers.
I use two main schools of fish in our garden and a couple of smaller ones for our window boxes and patio container pond.
No other garden art comes close to providing a sense of movement in the garden while at the same time providing me with the opportunity to move the installations around to take advantage of the changing seasons, and highlight particular areas of the garden throughout the seasons.
Tyson works out of his impressive studio in Maine but regularly ships to clients around the world even as far away as Australia.

If you are interested in more information on Tyson’s outstanding work, check out my full article here.
To go to Tyson’s informative Fish In The Garden website go here.
In conclusion
Ferns & Feathers makes a real effort to find artisans that offer unique garden gifts that are of the highest quality. These three suggestions are guaranteed to impress anyone lucky enough to receive them as gifts.
They are not just garden items that are thrown away in a few years. All of them are made to last and age gracefully in your garden. As a result, they are priced to reflect their high quality and unique attributes.
They are the type of garden items that can be enjoyed for years and then passed on to children or friends.
They are at home in the woodland garden, the urban garden and even small, balcony-style gardens or backyard patio gardens.
Supporting small artisans is critically important during these difficult times and what better time to tap into their incredible talent than this holiday season.


Garden photography: How to use props to photograph backyard birds
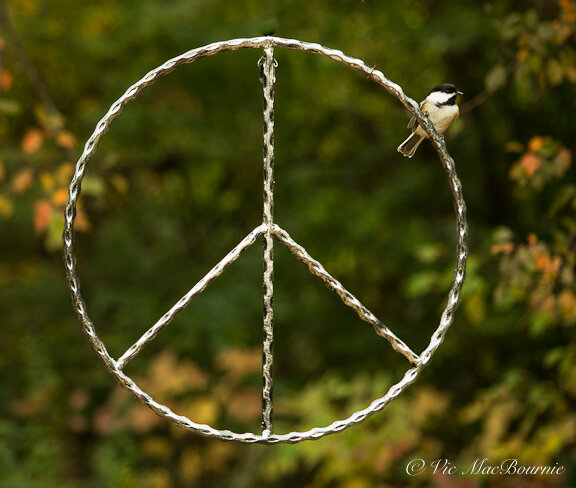
Capturing a little peace in the garden isn’t always about flower power. Try adding photographic props for birds to perch on to add a little whimsy to both your garden and your photographs. A peace sign is a “cool” prop that birds flock to like beatniks as free pot party.
Using garden props for backyard bird photography is a great way to add a little fun and whimsy to your garden photography and with the right props, the results might just “blow your mind.”
Cool peace sign prop for backyard bird photos
Flower power takes a back seat in this garden photography project.
All summer our focus has been on capturing the beauty of garden flowers, but that changes as fall approaches and we begin to focus more on birds and other areas of garden photography.
Fall is the perfect time to add a little fun to our photographic projects and using garden statuary, tools and even props can result in many memorable backyard bird images. While capturing a backyard bird in its natural environment is usually our ultimate goal, no one says we can’t have a little fun and create a backyard photo studio that includes using props much like a professional photographer would use to capture images of children, families and even our pets.
This wanna-be-hippie came up with an idea to combine a love of all things 1960s with a passion for birds, photography and gardening.
So what could be better than a metal peace sign – the “coolest” bird perch ever.
Even the birds are groovin’ it.
“If everyone demanded peace instead of another television set, then there would be peace.”
The peace sign is all part of my search for fun landing spots to photograph backyard birds. By placing props around the garden and near bird feeders, there is no end to the fun photographs available to us. Great bird photographs don’t have to reflect pure nature in our gardens.
If I could have only one lens for wildlife and birds in the garden, it would be my F* 300mm F4.5. Check out my full story on the lens by clicking the link.
Some of the best photographs I’ve seen celebrate the garden experience and welcome our forest friends to enjoy the garden – and its man-made ornaments – along with us.
By moving in close the peace sign is still recognizable but the focus changes to the bird rather than the prop. A soft backyground adds to te simplicity of the image.
So it’s really a small step from photographing them on our existing garden tools, ornaments and patio accoutrements, to setting up fun props to catch them in entertaining poses.
“No one is free, even the birds are chained to the sky.”
The “Peace sign” just seemed too perfect to pass up.
A quick search on Amazon brought up the coolest “Peace sign” – the perfect landing spot for backyard birds waiting for their turn at the bird feeder.

A couple days later and my Peace sign arrived all packed up and ready to become the latest perch for our backyard birds. After wrapping some copper wire around the perch to attach to the bird feeder pole, all that was left to do was to hang it and wait a few days so the birds can get acquainted to their cool new perch.
They took to it like beatniks would to free pot at a poetry reading party.
The peace sign perch is actually just one of many sprinkled throughout the garden.

This image was taken with a Fujifilm X10 equipped with a 28-112mm lens and shows what can be accomplished with a little planning. It helps to gain the trust of the wildlife in your garden. For more on the Fujifilm X10, go to my complete review here.
Setting up perches for an outdoor studio
It helps to keep the perches close to where you normally relax with your coffee and camera.
Eventually, one of our garden critters, whether it’s a backyard bird, chipmunk or friendly red squirrel, will explore the man-made garden perch. By keeping an eye on the spot, and watching how the light plays on the perch, it’s easy to capture it in the best light.
By hiding a handful of sunflower seeds on or near the perch, you can encourage the backyard models to the area much easier.

Most animals in our backyards like to get up high to keep an eye out for potential predators. I mounted this native bee and butterfly house on a pole and it didn’t take long for our local red squirrels to claim it as a lookout.
The simple grey background of the backyard shed helps the subject stand out and certainly does not hide the fact that the image was taken in a backyard. I was lucky enough to be in a photographic blind working the nearby feeder, when I noticed the squirrel watching me from the bee house. Although the Tragopan blind made getting the shot a little easier, these guys are friendly enough to photograph without a blind.
Focus on hummingbirds: Swinging in style
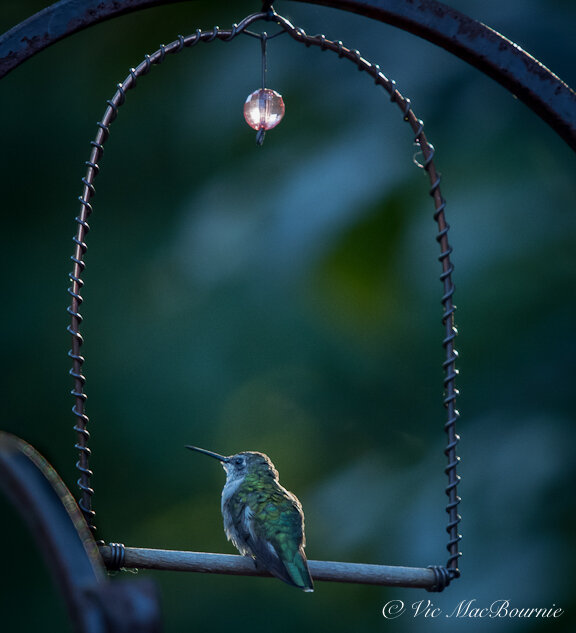
One of my favourite photography props is our elegant little hummingbird perch, a favourite spot for the local hummers to hang out.
I mount it just a few inches above a feeder where they like to perch and defend their food source.
Knowing that morning light creates a nice backlit situation made catching this rim light on the hummingbird as simple as setting up the tripod over several mornings until the bird landed in the perfect spot with just the right light.
If you are looking to upgrade your photography, consider checking out KEH Camera Exchange for excellent deals in used camera equipment from the latest camera bodies to a wide assortment of lenses.
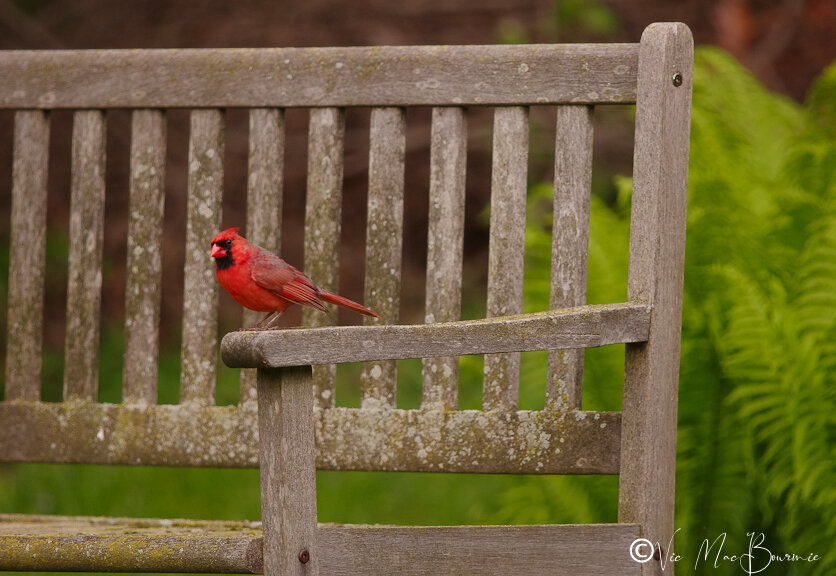
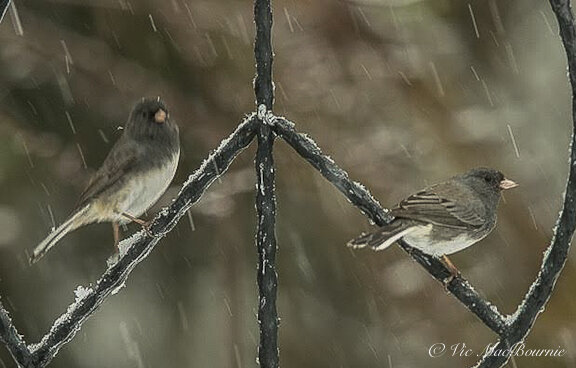
This Cardinal gives our garden bench the perfect pop of colour. There’s no need to move in close in this case, better to show the bird in its environment.
The garden bench makes the perfect prop
A garden bench is another excellent perch for backyard birds. Waiting for the male cardinal to get into the perfect spot took some patience but the pop of colour on the aged wooden bench makes for a classic garden photograph.
I decided it was best to stay back and not move in too close in this instance. Photographers often try to move in too close to birds, when a more environmental portrait actually works better.
In the image below, a closer approach seemed appropriate to catch the Chipmunk in the lovely evening light on the edge of the bench. The close approach was, at least in part, thanks to working from within my Tragopan Photographic blind. (For more on using the blind for backyard photography, check out my full report here.)

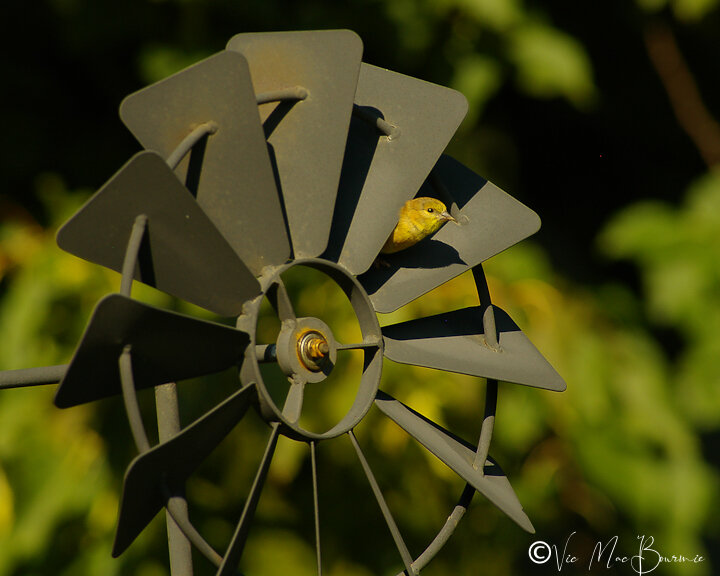
Goldfinch on windmill.
Catching the critical moment
It pays to have your camera by your side at all times in the garden. This little goldfinch was having a terrific time on the garden windmill. I was lucky enough to capture the image just when it popped its head out to have a look around.
Seconds later it was off to explore another part of the garden.
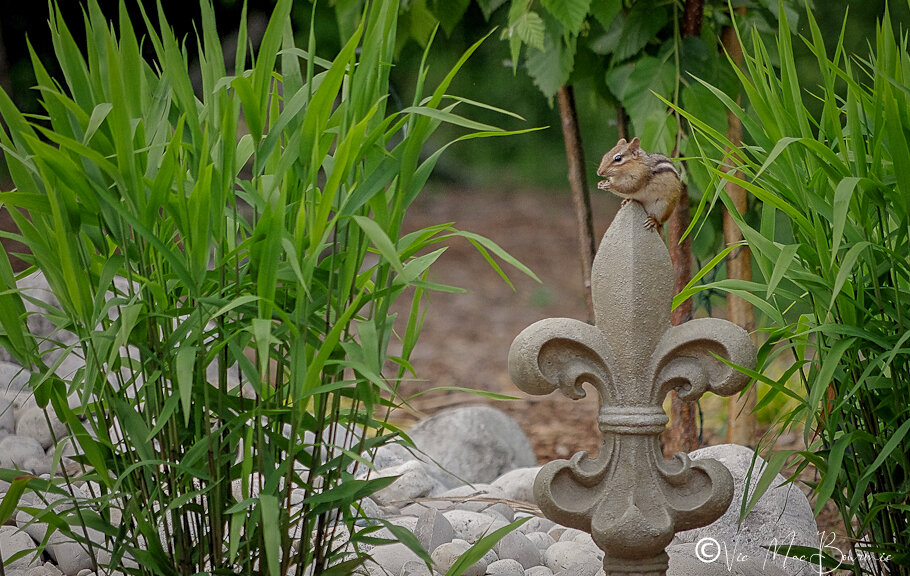
Chipmunk takes a quick break on garden ornament.
We’re are blessed in our yard with an abundance of curious chipmunks who never fail to amuse. This little guy was caught eating his lunch while I enjoyed a glass of wine on the nearby patio.


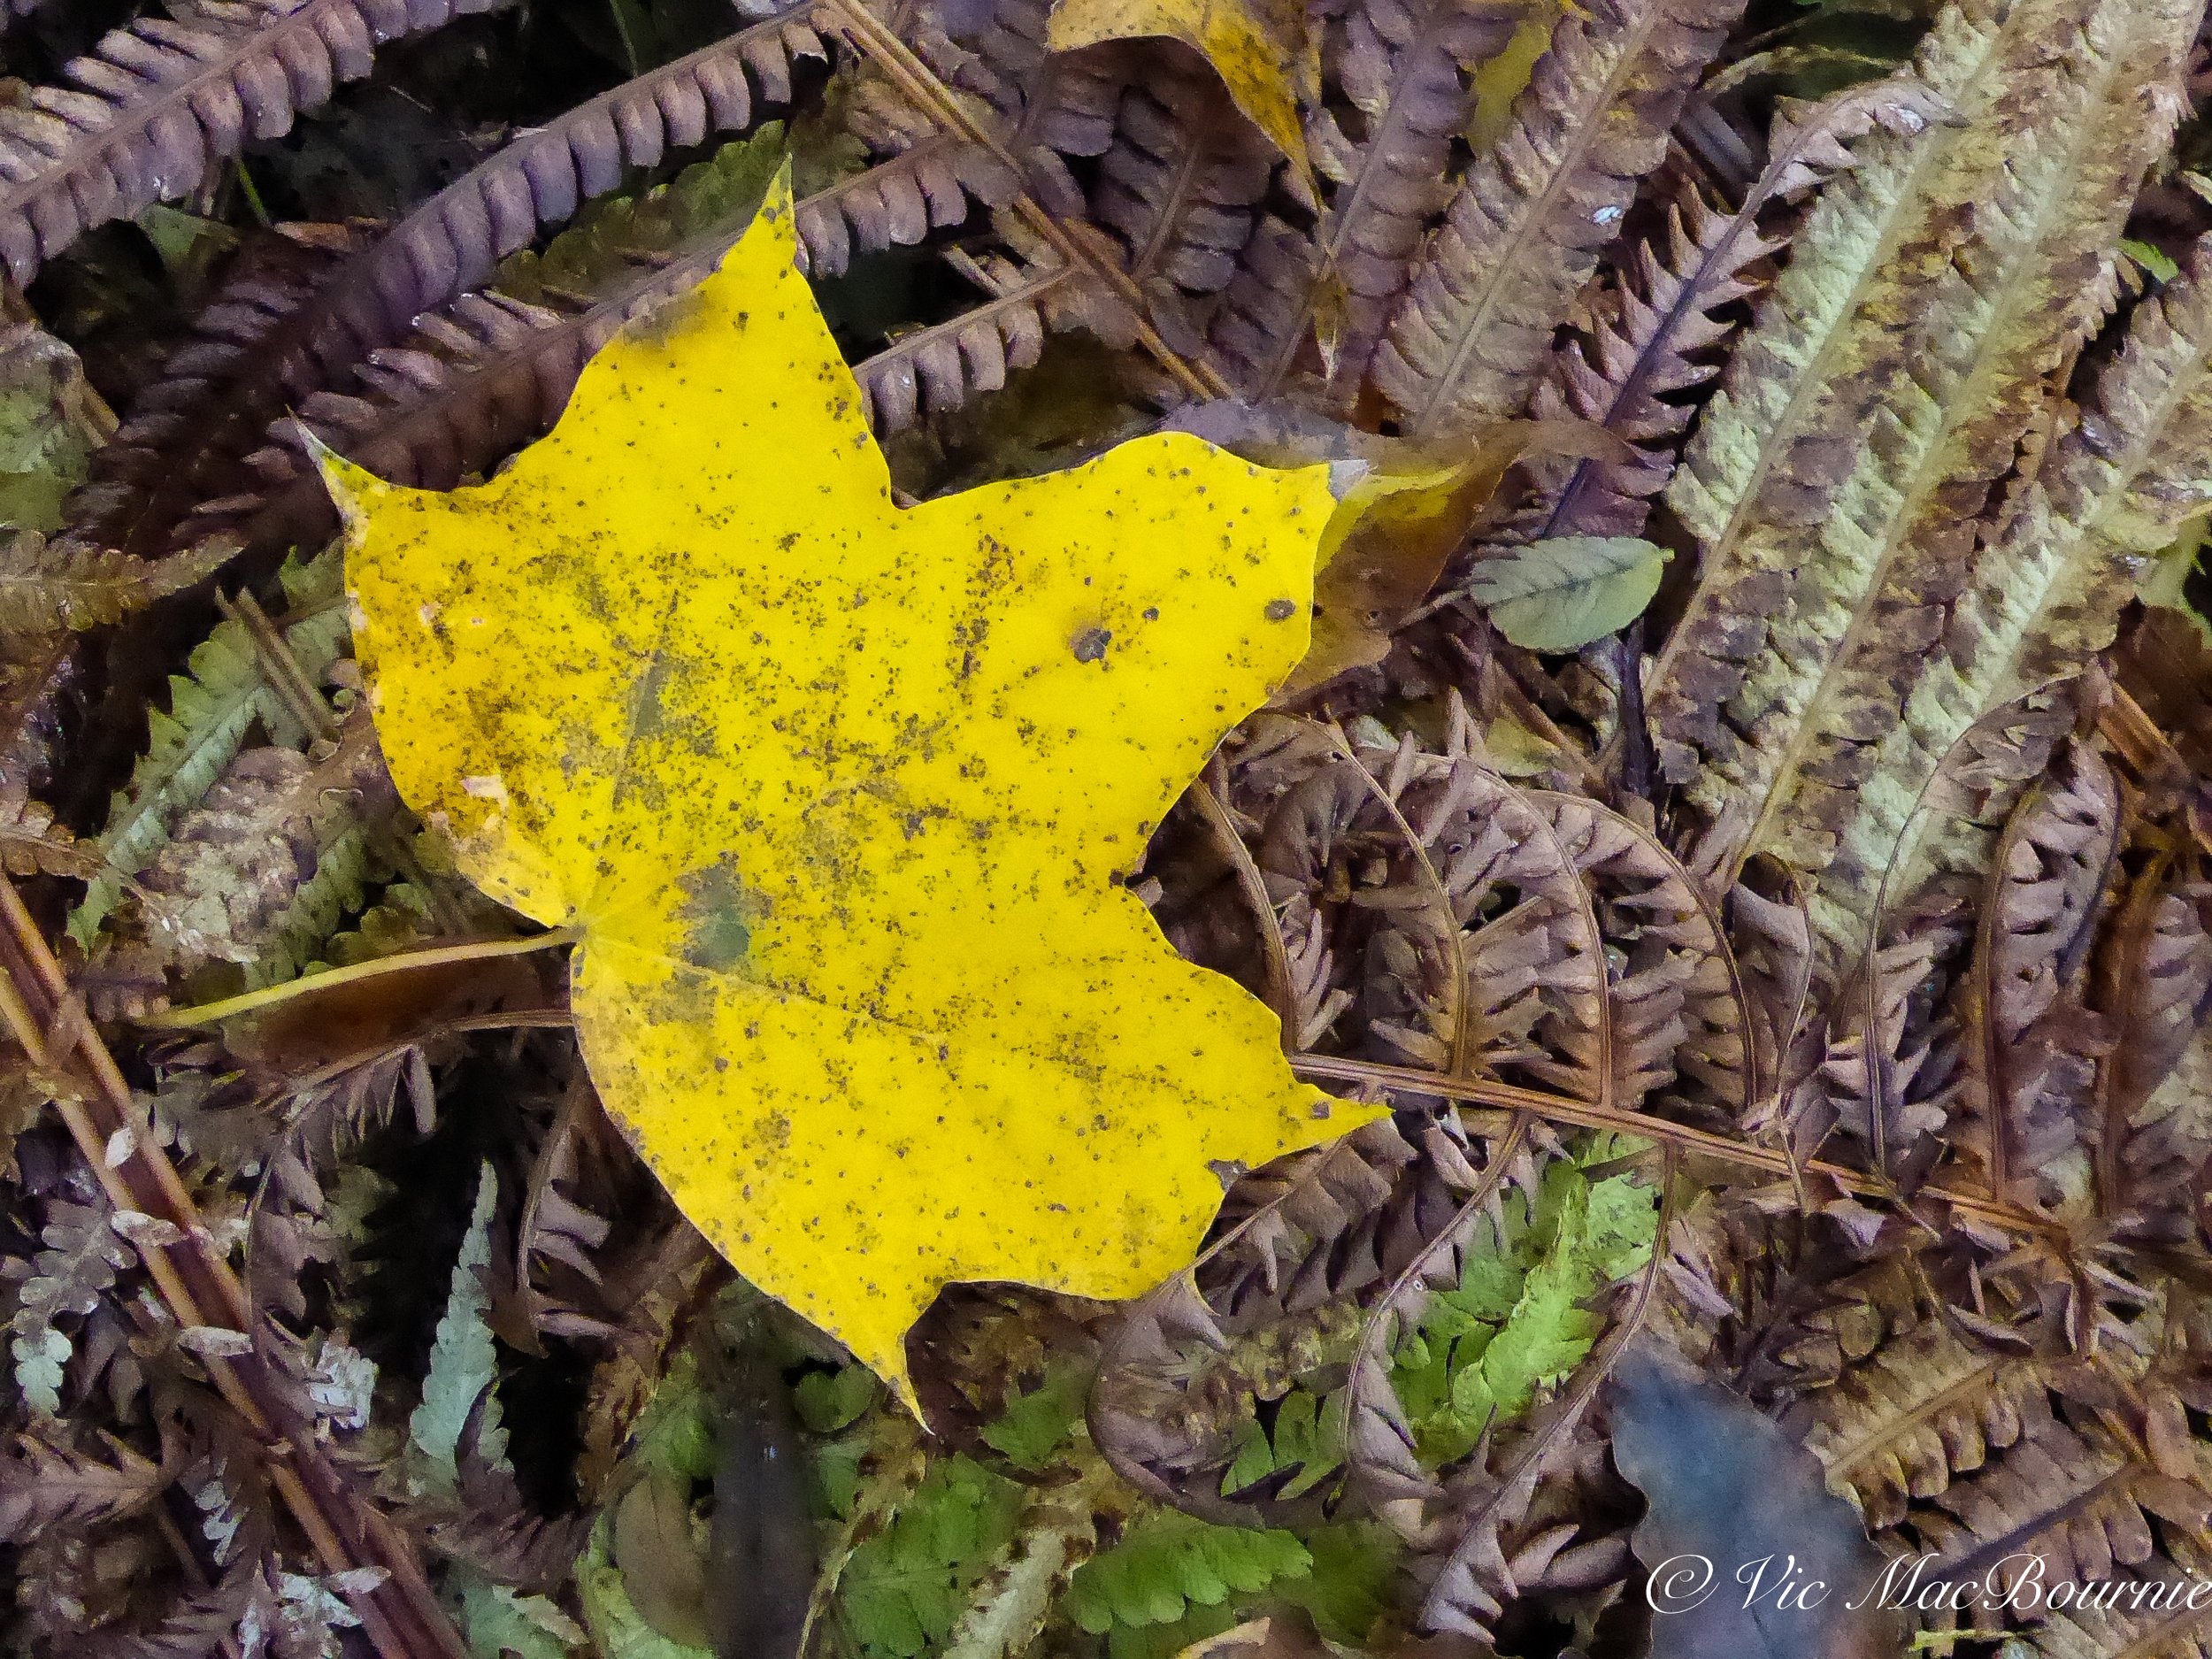
Why birch tree leaves turn yellow and fall off prematurely
If the leaves of your birch tree are turning yellow and falling off prematurely, it is likely due to a lack of water. Birch trees are shallow rooted and unable to access water deep in the ground. The solution is to deep water the tree regularly.
If your birch trees are showing early signs of stress with yellowing leaves falling off the tree earlier than expected, you are likely not alone.
It’s been a difficult year for trees throughout North America and parts of Europe with extreme heat and periods of drought that can really tax our urban forests. One just has to look at the wildfires raging around the globe to recognize the difficulty many trees are facing this year.
In our case, the combination of extreme heat (hitting 42-43C or more than 105F), periods of very little rain and a sandy soil that struggles to hold a lot of water for any period of time, has caused some minor stress to our clump birches.
I’ve noticed other birches in the area struggling much in the same way.
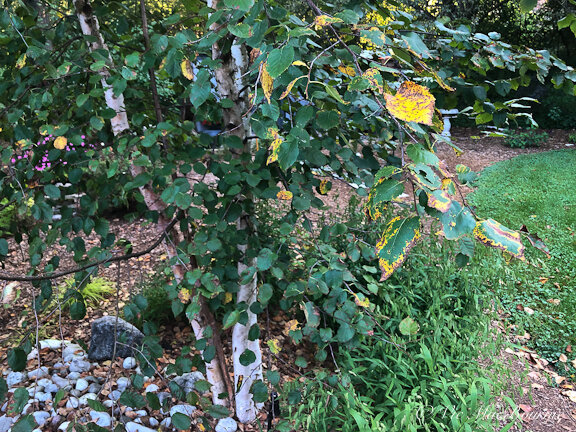
One of our birch clumps losing its leaves a little prematurely following a hot, dry summer.
Why are my birch leaves yellowing and falling off
Birches may be feeling the heat more than many other trees because they have a very shallow root structure that fails to go deep enough into the ground to tap into the cooler and more moist soil below the surface. Severe heat and drought easily dries out the top foot or two of the soil and causes some stress to the trees.
Usually, the water from melting snow keeps the soil moist throughout the spring and into the early part of summer, but without significant rainfall during mid-summer combined with severe heat, the trees will show stress by late summer into the fall. Many gardeners may think the trees are exhibiting typical fall leaf drop as the leaves begin to yellow prematurely. But, be careful the leaf drop is not related to stress from lack of water.
The yellowing leaves could also be caused by chlorosis – a mineral difficiency caused by a lack of iron. This is usually the result of alkaline soil and the trees inability to absorb iron in the soil. You’ll know this problem by observing the leaves which turn yellow with green veins. Treatment is relatively simple.
In urban landscapes, Birch trees are often competing with turf grass for the available water, and because the grass absorbs more than its share of water, the trees often are forced to go without, even after a rainstorm.
Give your trees a deep watering
If your trees are surrounded by grass, be sure to take the time to deep-water them by leaving the hose on for several hours (4-6 hours) at a slow but steady trickle.
Do not use a sprinkler for this deep watering. The idea is to get water deep into the ground. Remember, you are not trying to water the lawn around the tree. Move the hose around the perimeter of the tree at or around the drip line (not the trunk of the tree).
It’s never a good idea to have grass coming right up to the trunk of your tree.
If possible, remove all the grass from beneath the tree in a wide berth that replicates the drip line of the tree branches. Obviously, a young tree would need much less grass removed than a more mature one. As the tree grows, consider removing more and more grass to reflect the expanding root structure.
Why do urban birch trees have a short lifespan
One of many reasons birch trees have a short lifespan in an urban environment is caused by turf grass that often surrounds the trees and robs them of both nutrients and water. If it’s not turf absorbing the water around the trees before it can get to the trees’ roots, the water is often blocked by hardscaping that is covering the tree’s roots.
Whether it’s a concrete driveway, walkway or patio, this hardscaping restricts water from getting to the root system, essentially starving the trees of essential moisture.
For more on Birch Trees in the Woodland garden check out my other articles:
Planting and caring for a birch grove
In our garden, we have three clump birches about 10-12 feet apart forming a small birch grove of about ten tree trunks in total.
The problem is not grass running up to our clump birches, but they are surrounded by various plants, including ornamental grasses, sedum and a host of perennials. The birch clumps encircle a large dry-river bed that does not rob the roots of any water and provides a non-organic mulch helping to shade the soil above the trees’ roots.
The biggest problem for our clump birches is likely our sandy soil which does not hold water well at all. Knowing this, it is important to mulch the soil around the trees and ensure a deep watering during hot, dry spells every 7-10 days.
Since I have noticed the problem, I will ensure that the trees are well watered between now and the first snows of winter to ensure they are fully nourished and healthy for the long winter ahead.
Will losing leaves prematurely cause any long-term problems?
It’s a question every tree lover is going to be concerned about but, rest assured, it’s highly unlikely that a season of mild drought and resulting loss of leaves will cause a problem with the tree next season.
But prolonged drought, without any intervention from the homeowner could, in time, lead to the slow decline of the tree. Take action before it’s too late to ensure the tree gets several deep waterings prior to going into the winter months.
Why plant a birch grove
The decision to plant a mini birch grove was inspired by woodland walks where I came across large swaths of birch trees growing together and forming an impressive sight spring, summer, fall and winter. Creating a small grove of birch trees helps to recreate the same feelings I had during the woodland walks, but also creates a birch canopy that attracts birds looking for insects in spring. Birch are an excellent native tree, and one that attracts a host of insects that are crucial for birds in spring looking for protein to feed their hatchlings.
Can Trees communicate
I am also a firm believer that trees not only enjoy the company of their own kind, but benefit from sharing a space with other similar trees. The New York Times best selling book, The Hidden Life of Trees, certainly verifies these views and even suggests – complete with scientific evidence – that trees communicate with one another and even share resources when necessary.
If nothing else, the birch grove will create it’s own mini-environment by shading the ground beneath the canopy helping to preserve the ground water that is obviously important to their survival.
I look forward to the day – not far off – when all three tree canopies merge above ground and all the roots below ground are introduced to one another and begin working together as a single entity.
Meanwhile, I’ll be busy deep watering the trees so that next year they will look their best and weather whatever Mother Nature throws at them.


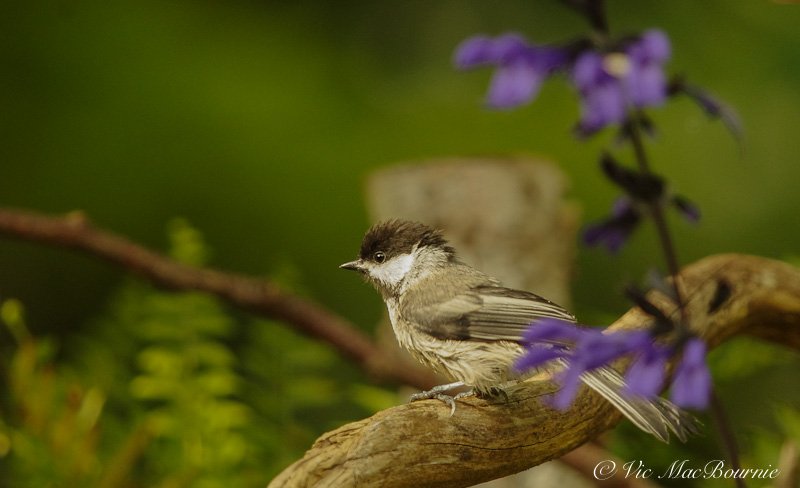


Seed cylinders: One of the best feeders for backyard birds
Seed cylinders are an excellent way to feed backyard birds. The cylinders keep the birds at your feeder longer and can be changed depending on the season and the type of birds you are trying to attract.
Woodpeckers, nuthatches, cardinals love compressed seed cylinders
When it comes to feeding backyard birds, there really isn’t a better combination than a compressed seed cyclinder fitted to your feeding station.
I have had my “ simple spike” on my Wild Birds Unlimited Advanced Pole bird feeding station for several years and am so impressed with it that I consider it (and most of the birds agree) my primary feeding source for our backyard birds.
Why are seed cylinders so popular?
Seed cylinders not only bring in a large variety of birds, they keep them at the feeder longer so you can appreciate them more, and a single large cylinder can last for weeks compared to the equivalent amount of feed in a typical hopper-style feeder. They are also super convenient to use and are available in a variety of seed combinations meant to attract different birds at different times of year.
Seed cylinders are long-lasting, which makes them especially useful if filling feeders is difficult for you or you’re going on vacation and will be unable to fill your feeders for several days. The cylinders are especially great summer food for the woodpeckers during the heat of the summer when traditional suet feeding can be a challenge.
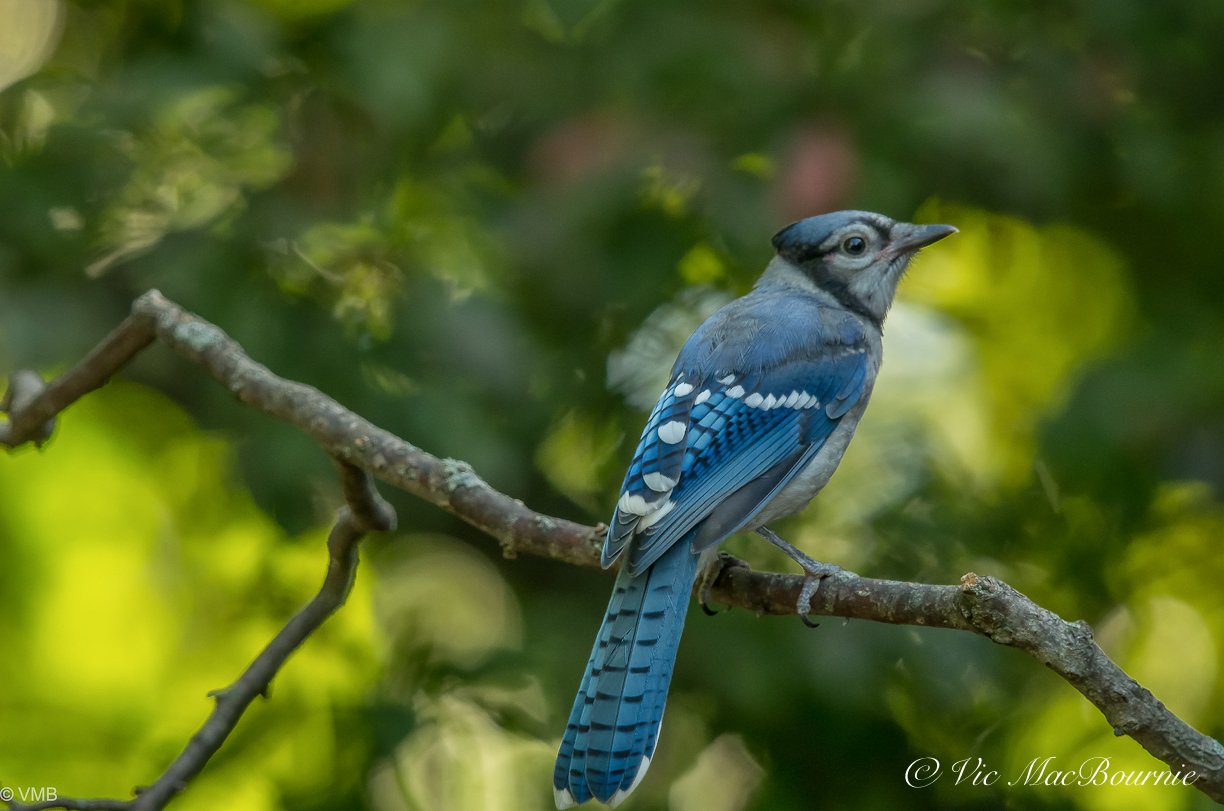
Blue Jays are also big fans of the compressed seed cylinders as well. Click on the link for more on two of my favourite Blue Jay feeders including the compressed seed cylinder.
The cylinders help to keep birds at the feeders longer because they have to work at the seeds to remove them from the cyclinders. At a traditional feeder, the birds often swooping in, grab a bite and take off, before you can even appreciate them. Seed cylinders can give you a few extra moments of enjoyment.
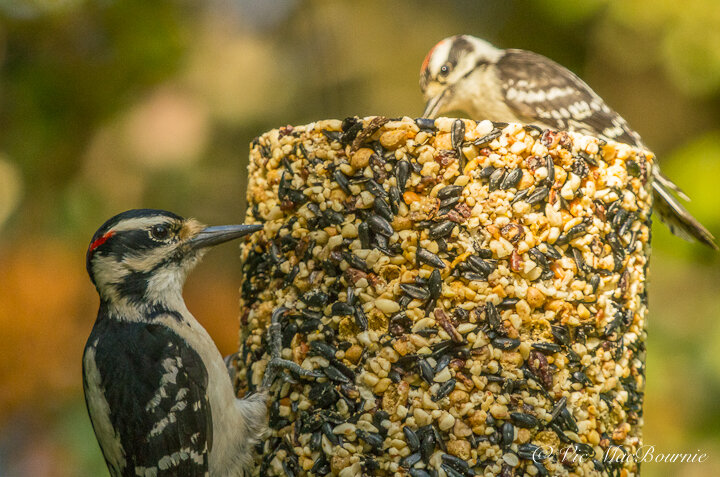
Our cylinder feeder attracts a host of birds including plenty of woodpeckers who enjoy hammering away at the cylinder to obtain their dinner.
Five Great reasons to use seed cylinders
Seed cylinders are convenient to use. They do away with bulky bags of seed and the waste that can occur when trying to load loose seed into feeders.
They keep birds at the feeder longer so that you can get a better look at the birds. They are especially useful to get good looks at more rare birds who visit such as Indigo buntings and woodpeckers.
Seed cylinders are available in several combinations aimed at different seasons and bird-feeding mixtures.
No-melt seed cylinders provide an excellent way to attract woodpeckers during warmer months when suet is not appropriate.
The feeders and seed cylinders are available in many sizes, including pucks where you can offer a variety of seed mixes at a single feeder.

The Advanced Pole system loaded with various feeders, including the seed cylinder at the top of the pole.
I purchased my cylinder spike probably ten years or more ago as a simple, inexpensive solution to replace an aging wooden open feeder.
I was looking to replace my homemade feeder with another similar open hopper-style feeder, but noticed the variety of seed cylinders available with the spike system. At the time there were far fewer choices than there are today, but still enough to convince me to move away from another hopper-style feeder.
Since then, Wild Birds Unlimited and other manufacturers have developed a number of newer feeders designed to work with their seed cylinders. (Here is a link to their assortment of cylinder feeders).
One of the drawbacks to my spike is that it does not provide any protection for the seed cyclinder from rain and snow.
As a result, the cyclinder can break down prematurely during periods of heavy rain and humidity. Although the birds may appreciate the ease at getting at the seed during these times, I prefer to make them work a little for their dinner.
Today’s cylinder designs solve the problem of an unprotected cylinder open to the elements. Most have a roofing system of some kind built into them to provide top-down protection to the seed cylinders and reduce the amount of premature break down.
I’m not sure our blue jays and woodpeckers would be happy if a roof covered their favourite feeder. They mostly just stand on the seed cylinder and pound away at it from the top.
The result, of course, is that the birds’ hard work further breaks down the top of the cylinder and opens it up to the elements.

Wild Birds Unlimited feeder complete with a cage to prevent large birds from dominating the feeder.
The new designs not only provide a roof for seed protection, several have cages to keep the larger birds from dominating the seed cylinders and giving our smaller birds a better opportunity to enjoy the benefits the seed cylinders offer.
There is no doubt that the larger backyard birds, including blue jays, woodpeckers, cardinals, grackles and even crows, descend on our cylinders and dominate them at times.
I’ll take advantage of any opportunity to restrict their access to the cylinders.
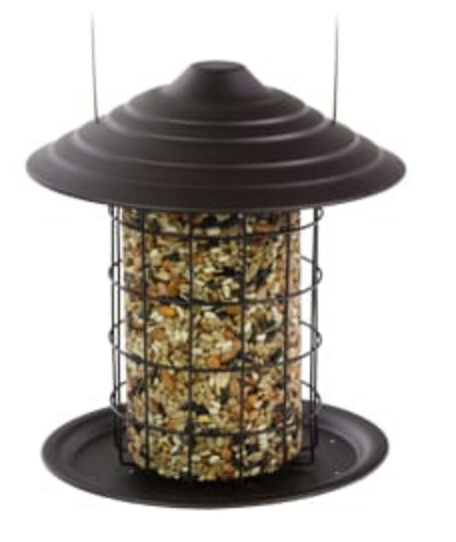
WBU’s globe cylinder feeder’s cage is large enough to accommodate mid-sized birds like indigo buntings, sparrows, nuthatches and downy woodpeckers just to name a few. The feeder handles the regular-sized cylinders which include the no-melt cyclinders. The cage also acts as perches for the birds.
And, if the pesky squirrels manage to get up to your feeder, the cage represents another barrier to protect your expensive seed.
WBU’s Tidy feeder combines the best of all worlds with a built-in roof, a cage and a base to catch any fallen seed.
The Tidy Cylinder feeder is a great choice providing not only a roof to protect the seed from the elements and a cage to protect the seed from larger, more aggressive birds, it also includes a small, built-in catch tray to keep the seed from falling to the ground.
Other modern feeders provide open access to the cylinders, but add several perching areas to provide more access for smaller birds to enjoy their meal in peace.

A mostly eaten seed cylinder shows how the spike attaches to the pole and how the seed cylinder fits over the simple spike.
How the spike system works
Setting up my cylinder spike on the Wild Bird Advanced Pole system was simple. One of the benefits of investing in a system allows you to easily add various options.
The spike feeder simply inserts into the top of the pole system. Once attached, the seed cylinder (which comes with a hole drilled through the middle of it) is inserted over the spike. My feeder has a circular perch at the base that surrounds the cylinder, but most of the visitors simply jump on the cylinder and begin helping themselves.
Many of the new cylinder feeders are meant to hang from hooks rather than be inserted directly in the pole. This provides more opportunities to use them on any pole system or hung directly in trees.
How are the seed cylinders made
Seed cylinders are a compressed mixture of seed, nuts, and/or fruit and, depending on the mix, insects such as meal worms can be added. The feed is compressed into cylinders and mixed with Gelatin to hold the seed mixtures together.
Then it is cut to size and ready for use.
If you are on a budget or just looking to save some money, making your own cylinders is easy enough. There are several step-by-step “DIY” projects available on both Google and YouTube that will guide you through the process.
While I get great enjoyment from my bird feeding stations, providing natural food sources to our feathered friends is always the goal we should aspire to in our gardens. I have written a comprehensive post on feeding birds naturally. You can read about it here.
Fish In The Garden: Style, movement and a touch of whimsy
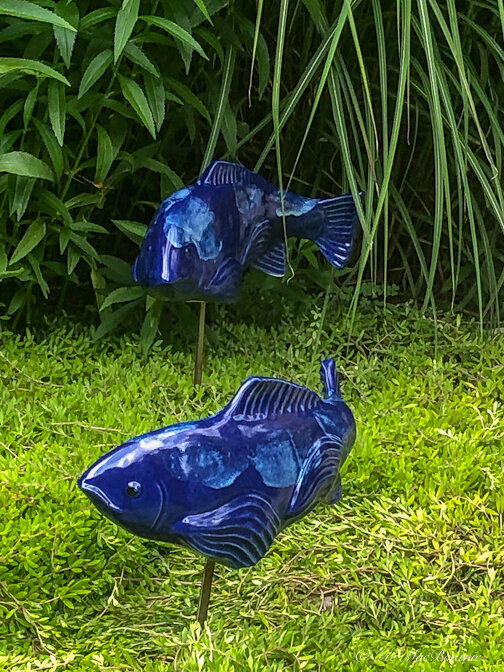
Tyson Weiss's exquisite artistic ceramic Fish In The Garden add a sense of movement and life to any garden. The cobalt and orange koi add a splash of color to your garden, while the trout can be used to add a subtle, artistic and more natural touch to your woodland garden. The fish make the perfect gift and provide gardeners with an opportunity to experiment with placing them around the garden.
Unique garden gifts: Ceramic Fish add artistic touch to any space
There’s no reason not to have Fish In The Garden, thanks to ceramic artist extraordinaire Tyson M. Weiss.
Whether you have a pond stocked with koi or not, there’s always room for these impressive, artistic fish in a multitude of colours. I’ve admired this unique form of garden art since the first time I saw a picture of them and always wondered where they would look best in my garden.
The simple answer: Almost anywhere and everywhere.
These exquisite ceramic fish, in a multitude of colours and sizes, bring your garden to life as schools roam through ornamental grasses, ferns, mosses and flowers bringing a sense of movement to the garden. Groupings of three, five, nine … weave between moss-covered rocks in the Japanese-inspired garden and can remain there throughout the winter months bringing colour and style year round. They are at home in any garden – running up a dry river bed, rising just above a pond or even submerged to create the illusion of real Koi in a pond devoid of fish.
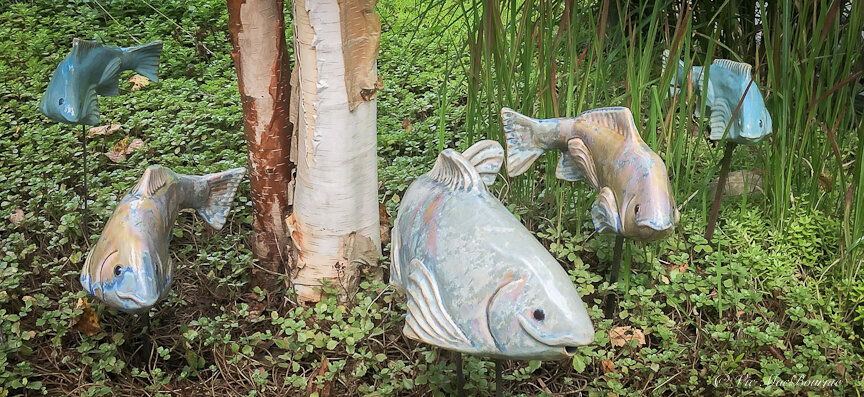
A school of fish wander through the garden over sedum around a birch clump and through the ornamental Japanese blood grasses creating movement and a sense of style in the garden.

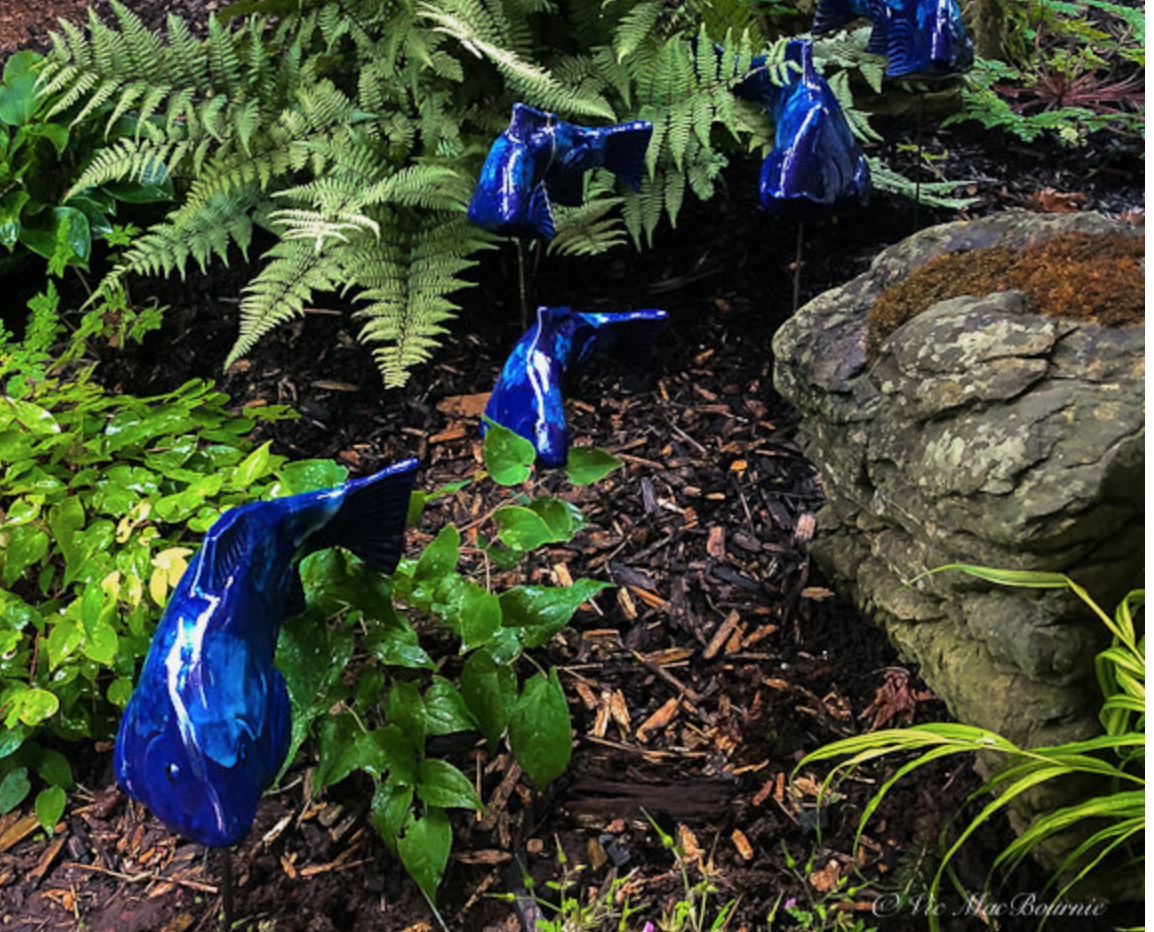
This school of cobalt-coloured fish swim through the ferns and grasses of our Japanese-inspired garden creating a flow down a small hill and around a moss-covered boulder.
Tyson refers to the “flow” created by the schools of fish as a “fluid aesthetic” created by the curves of the swimming fish as they “move” as one through a garden.
“With the multiples, we can create these curves, and with those curves, (the fish) can curve in response to an element of the landscape,” he explained in a 2012 article in the Portland Press Herald. “Around a rock, and then curve back this way around a tree, so it fits. No garden gnome or concrete bunny rabbit will ever have context like that.”
In fact, by creating schools of fish, he explains in the article, it’s possible to “perfectly match the shapes of diverse landscapes and architectural elements. Channel the fish around a rock, through plantings and back out again. Our sculptures — brushes, if you will — bring out the artist in every gardener.”
“If that means making a bazillion fish to get it right, that’s what you have to do.”

Sharing this creative process with gardeners is, without a doubt, one of the greatest benefits of his inspirational garden art.
“Our sculptures are exquisitely crafted of a variety of high‐quality materials. They are moderately priced, somewhat above low‐end polymers and plasters, and well below expensive garden sculptures of stone and metals,” Tyson explains. “They’re even more affordable than some small shrubs and trees.”
Tyson explains that every component in the “school” reflects the hand of the artist.
“The sculptures are hand‐sculpted detail and hand‐painted. No two are exactly alike. Ten years of experience has evolved a proprietary process to meet high demand and yet preserve our founding vision. There is no mass production.”
How to place the Fish In The Garden
Unlike most garden art, where homeowners are left with only the decision of where best to place it, Tyson’s ceramic fish provide gardeners with a multitude of artistic decisions ranging from where to place the school, how many fish should be included and how to organize them for best aesthetic value. This process is, in itself, both artistic and immensely satisfying when done well.
But even when it doesn’t work as well as you hoped, it’s easily changed.
Did I say the entire experience is more fun and certainly easier than planting a new garden bed or large container. Take my word for it, whether you consider yourself creative or not, experimenting with these schools of fish might be the most fun you’ve had in the garden in years.
If you are unsure about how to place the fish in your garden creatively, Tyson’s informative website at Fish In The Garden includes several videos providing examples on how to best creatively place the fish in your garden.
The impressive site provides complete details on what styles of fish are available, how to order them, prices and other details about his artistic ceramic fish. (For details on his colourful Koi ceramic fish go here.)
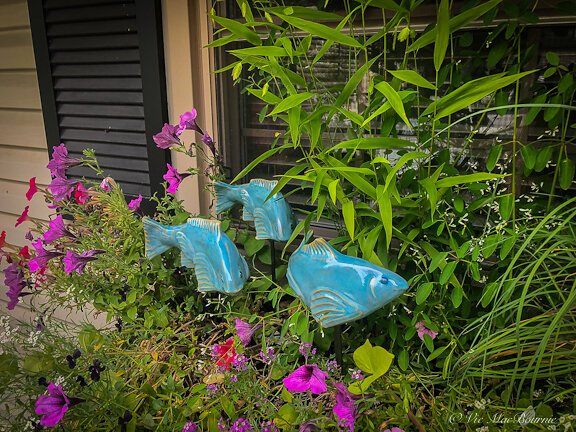
The smaller ceramic fish are perfect for container plantings. Here, three work their way around Northern Sea Grass and petunias in one of our window boxes.
Can I give Fish In The Garden as a gift?
For those who might want to give the fish as unique gifts to gardening friends and family, there are even gift cards available to purchase on the site that can be sent directly to the recipient. (Information on the gift cards is available here on his website.)
The fish are the perfect gift for homeowners, especially those who appreciate the artistic whimsy that the fish can provide. These schools of art look just as much at home in a woodland garden as they would in a small, contemporary urban garden. In fact, the splash of colour that the more colourful koi provide, might just be the punch of colour to take the small urban garden to new heights.
And, by ordering the gifts from Tyson’s website, the fish can be delivered directly to you or the recipient of the gift wherever they choose to garden. The perfect gift for a friend or family member who lives in a different country, state/province or far off city.
Fish In The Garden can be shipped worldwide
Tyson is quick to point out that they can ship to virtually any address in the world, adding that that there are restrictions on some products, and some products cannot be shipped to international destinations.
The enjoyment homeowners get from having the fish in the garden, however, does not compare with the enjoyment Tyson gets from knowing his artwork is gracing gardens in his hometown of Falmouth, Maine and in gardens around the world.
“I love it. I invented something that makes people really happy that could last indefinitely,” he says. “If you read the reviews online there are SO many stories of people meeting their neighbors and making new friends over passersby seeing these fish and asking about them.” he explains in an email to Ferns & Feathers.
“There was a long stretch where most people didn’t get it at all because there was nothing like it out there,” Tyson explains.
“The early adopters were the landscape architects, interior designers, art gallery owners: People who were both intelligent and creative that had an eye for something new. Now that people have seen them in so many shops, botanical gardens, private homes, magazine articles, social media awareness of this new idea is spreading a lot faster.”
To say his fish have made an impact worldwide is an understatement.
“Last week we shipped four orders to Australia. I've shipped to Ireland, England, Germany, Switzerland… Singapore…. Lots of people from abroad have bought them in gift shops and carried or shipped them home,” Tyson explains.
And if that is not enough, his fish are even likely gracing the home of a former American president.
“Last year a gift shop owner in Florida told me (former president) George Bush Jr. and his wife, Laura, came in and bought a bunch of fish,” Tyson writes.
Now that’s something to get excited about.
To say his clients are impressed with his work, is an understatement.
He recalls one woman who purchased 90 of his fish to give as gifts to her family.
His website is full of clients proclaiming their love for the garden art and the joy the fish have brought to them. One of his clients writes about their experience on his website:
“I had recently expanded a patch of ornamental garden this year with a Japanese theme, using traditional plants, and was searching for the most perfect and unique ornaments to add other than the typical “Buddahs” and “pagodas,” water basins and fountains that you can find anywhere,” writes one gardener.
“These fish are perfect! It looks so magical to see my koi “swimming” through my garden and have gotten many compliments on how unique and “clever” they are. If you want that little “extra” that sets your landscaping apart from your neighbors and friends... you need these fish! I am completely happy when I see them and I will most definitely be purchasing more to increase my “school.”

A grouping of fish look as good on boulders as they do in garden greenery.
Fish placement in our garden
In my garden, different schools of fish move from the front to the back gardens depending on my mood.
In the Japanese-inspired garden, a school of fish swim around our elegant ghost fern, down a small hill heading for a moss-covered rock. By adding a few more fish, the school travels past the rock over the mossy ground creating a natural curve as they head for the safety of a massive boulder.
A few small changes and the school is off in a completely different direction.
Changing the design involves nothing more than pushing a metal stake (provided with each order) into the ground.
Not far from the Japanese garden, a school of three small fish swim through the colourful and lush planting of our window box providing a little whimsy for garden visitors and one that can be seen from both outside and inside our home.
Even a single fish in the widow box or in a small container works well to add a touch of colour. They would look as good in a container on a garden patio as they would on a balcony overlooking a skyline 20-storeys high.
In the backyard, a larger school of fish work their way up past the dry river bed, over the sedum, through the blood grass and around one of our birch tree clumps. Their presence contributes to the feeling of movement in the garden. Just down along the river’s bank, a small group of fish peek out from the tall stems of native obedient plant looking to join the larger school.
In another area, I move a group of three fish to see how they look hiding in the fountain grass and provide visitors with an unexpected surprise as they walk out into the woodland garden.
As the seasons change, so too do my artistic opportunities to move the schools of fish throughout the garden.
So much fun.
No amount of traditional garden art will provide so many creative possibilities and opportunities to play with natural design in our gardens.
Certainly none will provide the same natural movement that Tyson’s fish create. Nor will they work so seamlessly into the natural landscape quite the way the fish organically fit naturally in the garden.
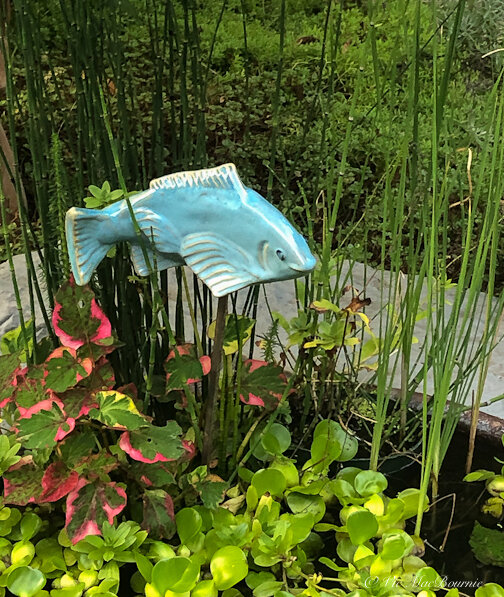
A single fish adds a splash of colour as it swims above the plants in the patio container water garden. It would look just as good in a window box 20-storeys up overlooking a city skyline.
What makes this garden art so special?
• The fish can stay outdoors in any climate, including freezing Maine or Canadian winters.
• The fish are in gardens from Alaska to Arizona
• They will not break in the cold or fade in the sunlight
• All fish come complete with a rod for placing them at the proper height in the garden
• They come in a tail left and tail right design. Schools of the fish look best (natural) with both tail directions being used to create flow
• The fish can be submerged in water for stunningly realistic results or simply to add to an existing stock of real pond fish.
Fish bring Woodland garden to life
For woodland gardeners, the schools of fish provide a multitude of opportunities to not only add a natural artistic element to our gardens, they are so easy to move around the gardens that they create changing possibilities throughout the seasons
These fish form the perfect garden art that so many of us have been searching for to bring our gardens to life in a stylish, yet subtle and convincing natural way.
Display ideas for Fish In The Garden in your Home and Garden
In the Garden:
Use schools of fish swimming among ornamental grasses and allow the grasses to hide parts of the fish for a truly natural look. Let your visitors discover them as they stroll through and around your garden.
• Place the fish among your ground covers to add interest and create the illusion that the ground cover is the sea floor and the fish are floating just above it.
• Place the smaller fish in window boxes and patio planters for year-round interest
• Bring your dry river beds to life with a school of large trout or koi running up through it around driftwood and boulders.
• Use the fish on a stone wall, large boulders or fountains and even in bird baths and on patio tables
• Incorporate the fish in your man-made ponds either swimming above the water or submerged with real fish.
In the Home:
• The fish look just as good in the home as a splash of colour for shelves, sitting on a table, on a fireplace mantle or even used much as they would in the garden but in house plants such as ferns, string of pearls and other exotics.
Use the fish in the garden throughout the spring, summer and fall months, but get the most out of them by bringing them indoors for inspirational decorating throughout the winter months
A school of fish make their way through our Japanese-inspired garden.
Garden fish idea hatched out of economic downturn
Although the idea to create artistic ceramic fish was hatched out of necessity, their birth was never guaranteed.
In fact, their creation was a 10-year process of trial and error that started with simple sketches on a notebook and grew over time to what they are today.
It was a long, arduous journey for Tyson and his fish with many iterations of the art form.
The idea of Fish In The Garden actually had its roots in 1998 when Tyson took a pottery class at Unity College, America’s Environmental College.
The teacher encouraged students to keep a notebook of their ideas to use as a building block and reminder for potential projects. That notebook – which he still has – filled with scribbles and photos and sketches including rough initial illustrations of his fish, was eventually the catalyst that led to the development of his art work.
But before that, Tyson had to deal with the necessities of life and started a successful landscaping business.
In 2008, after operating the landscaping company for ten years, and with an economy on the downside, Tyson decided it was time to make changes in his life.
The years of working in landscaping and experiencing gardens either devoid of, or lacking appropriate garden art at reasonable prices, convinced him to go back to the drawing board to further refine his ceramic fish and work on them until he was able to get his creations to look the way he wanted.
Tyson returned to an earlier version of the fish in his studio – a smaller, thinner fish that gardeners could manoeuvre to angle up or down.
Unique garden art discovered at first show in 2008
Everything changed in January 2008, when Tyson did his first show at Coastal Maine Botanical Gardens.
Landscape architects, garden store owners, even interior designers took notice of his artistic creations that found a place both in the garden and in the home on fireplace mantels and coffee tables. By the end of the next year, orders poured in forcing Tyson to begin considering alternate ways to create the highly-sought after fish.
It was around that time that he also decided he needed a new work space to help make creating his artwork a little easier.
“Several years ago I bought a dairy farm because the “barn” was a heated and insulated 4,000-square-foot space with running water. It took 2 months of carpenters working 7 days a week and $70k to get it where it is today. My house is 50 feet away. Its a nice spot, 20 acres of pasture and no neighbors.”
Up until then, each fish was made by hand and demand was beginning to outstrip his ability to create the fish. Creating twenty fish during a 50-hour work week, wasn’t going to cut it.
Creating the ceramic fish, made from sturdy stoneware clay fired to around 2,200 degrees Fahrenheit, can take up to two weeks. This process enables the ceramics to withstand extreme temperatures from severe heat to even the coldest climates.
But success was not guaranteed and the work needed to create the pieces of art was never easy.
“It is a very hands on process. Now we are casting them from molds made of my originals. It’s very labor intensive. The mold that makes the large fish weighs 90lbs. And 1 in 10 of all the fish breaks in the process, usually before the first firing when the clay is very brittle,” Tyson explains.
Looking back on his plan to create a successful company, Tyson told his former alma mater Unity College: “Business isn’t about being impulsive or emotional. It’s research and planning and bringing your idea to a place where it mirrors the vision in your head. If that means making a bazillion fish to get it right, that’s what you have to do.”
To see a YouTube video of Tyson in action check out this informative 2016 video from WMTW of Maine here.
The fish and the Pandemic
Like many companies, the pandemic hit the on-line sales of his artistic fish. Tyson is not one to dwell on negatives and says the pandemic has been difficult, but came with both a downside and upside for his business.
“I’d say it evened out” he explains. “Our Spring trade shows in Atlanta, Orlando, Las Vegas, Philadelphia, Seattle, San Francisco and Boston were a disaster. But then during the whole lockdown people were gardening and ordering things online, and using social media like never before so that offset the early losses.”
For instance, he explains in the email: “The Northwest flower Show opened on a Wednesday. On Thursday the fist case of Covid in the USA was announced… In Washington State. LOL! And I was happy about the lockdown and ‘compromised’ Trade show series.
“In April 2020, I remember working at ‘the farm’ on a granite retaining wall, listening to the peepers as the sunset light filtered through the pines to the west, sipping cheap box wine in 50F degree ‘hoodie’ weather, no bugs out yet, no iPhone to distract me. It was the happiest I’ve been in many Years.”
There is no denying the fall in sales, however.
“Pre pandemic we were at 1,000 fish per week,” he explains. “Now I think we are half that. Most likely 500 per week. Ninety per cent of this is to garden centers, art galleries, gift shop and botanical gardens that resell them.” he explains. “It’s basically a non-profit.”
But he is not letting this latest pitfall stop him from moving forward, and he hopes to use the slowdown as an opportunity to help others who are less fortunate or struggling in these difficult times.
“Soon I’ll go back to making one of a kind originals that are numbered and signed. I want to sell them for $1,000 a piece, but the client has to make a $1,000 donation to one of 5 charities I choose ( veterans, cancer research, conservation, feeding the homeless etc) and then I’ll make them a fish that comes with a letter of providence and everything. The goal is to make 1,000 fish and in doing so have raised $1,000,000 for good causes. I call it 1,000 for 1,000. There’s a wall in the studio where I plan to hang up all the receipts from the donations.”
What’s in store for the future?
I asked Tyson if he has plans for any new ideas for the future – new designs, colours and fish styles maybe?
“Oh yes,” he says enthusiastically. “There’s 10 other businesses I want to start, all of which offer new, colourful totally unique and creative items, but I need to stay focused on the fish for now. I’m already being copied many times over so I can’t say a lot about what lies ahead, but its going to be EPIC!!!!
Why the fish as garden art are so unique
• The schools of fish bring a fluid aesthetic to any garden space. Where there is no water they imply water.
• The more fish you have in a school the better it looks
• The fish can help to bring year-round colour to your garden space
• They provide the perfect focal point in the garden even when there are no colourful plants
• Consider creating a school that represents your family with large and smaller fish

Using Kintsugi to repair broken ceramic fish
Tyson is the first to point out his ceramic fish are tough. Leave them out in freezing temperatures, or let them bask in the Arizona sun. Either way these fish can stand up to a lot more than you might think.
But accidents do happen.
I was lucky enough to receive almost a dozen fish to create schools to photograph in my garden.
Only one of the fish that arrived via regular post in the large box was broken. I decided it was the perfect opportunity to experiment with the ancient art of Kintsugi to repair the broken ceramic.
First, let’s say this was my first attempt at Kintsugi and I am sure the masters are cringing at the result. For my purposes, however, I am more than satisfied with the results.
Kintsugi is the Japanese art of putting broken pottery pieces back together with gold — built on the idea that in embracing flaws and imperfections, you can create an even stronger, more beautiful piece of art.
I have to admit that the finished result looks totally appropriate in our Japanese-inspired garden.
Ceramic repair was simple
The break was clean so I knew the repair would be relatively easy
After researching the best glue for ceramics, I chose Gorilla Glue known to hold up well both indoors and outdoors in severe weather.
The glue calls for a clean damp surface for ceramic.
After applying a moist towel to the broken ceramic edge, I added a thin line of glue to both sides of the broken ceramic fish. (Directions state to use only a little glue to keep it from spilling out the sides and messing up the repair. I used a small amount but it still spilled out the sides a little. I was not concerned, however, knowing that I was going to use gold paint to cover the repair.)
The glue calls for clamping down the repaired object for up to two hours to allow for proper curing of the glue. Without the proper clamp, I decided to hold it for an hour until the glue dried.
With the fish repaired, I let it cure for a couple of days prior to painting the crack with a thin layer of gold-leaf paint purchased from a local arts and craft store.
The finished result adds a lovely artistic touch to an already beautifully finished piece of ceramic and allows the fish to once again take its place in our garden.
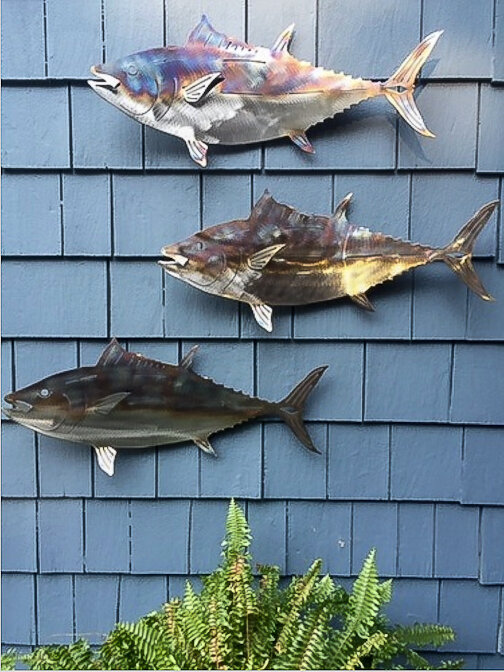
And example of Tyson’s metal Fish In The Garden adding an artistic element to a cedar shake wall.
Steel Fish In The Garden offer another option
In addition to the ceramic fish, Tyson offers a beautiful line of stainless steel fish on his website that are certainly worth checking out.
The metal fish can either be used in the garden much like the ceramic fish, or mounted to a wall as artwork. (Check out the website here to see them used in the garden.) They appeal to a different group of people and work well in the garden as well as in the home.
Tyson explains that the metal fish are made with heavy–gauge and hand–cut stainless steel that weathers the elements beautifully. In the summer, they shimmer with life and, in the winter, they form an organic partnership with the snow and ice.
“The steel people are drawn right to the steel fish,” Weiss said. “They don’t see the clay fish, and they don’t ask about them. And vice versa. So by doing the steel, I hit on this whole other customer, which tends to be more men.”
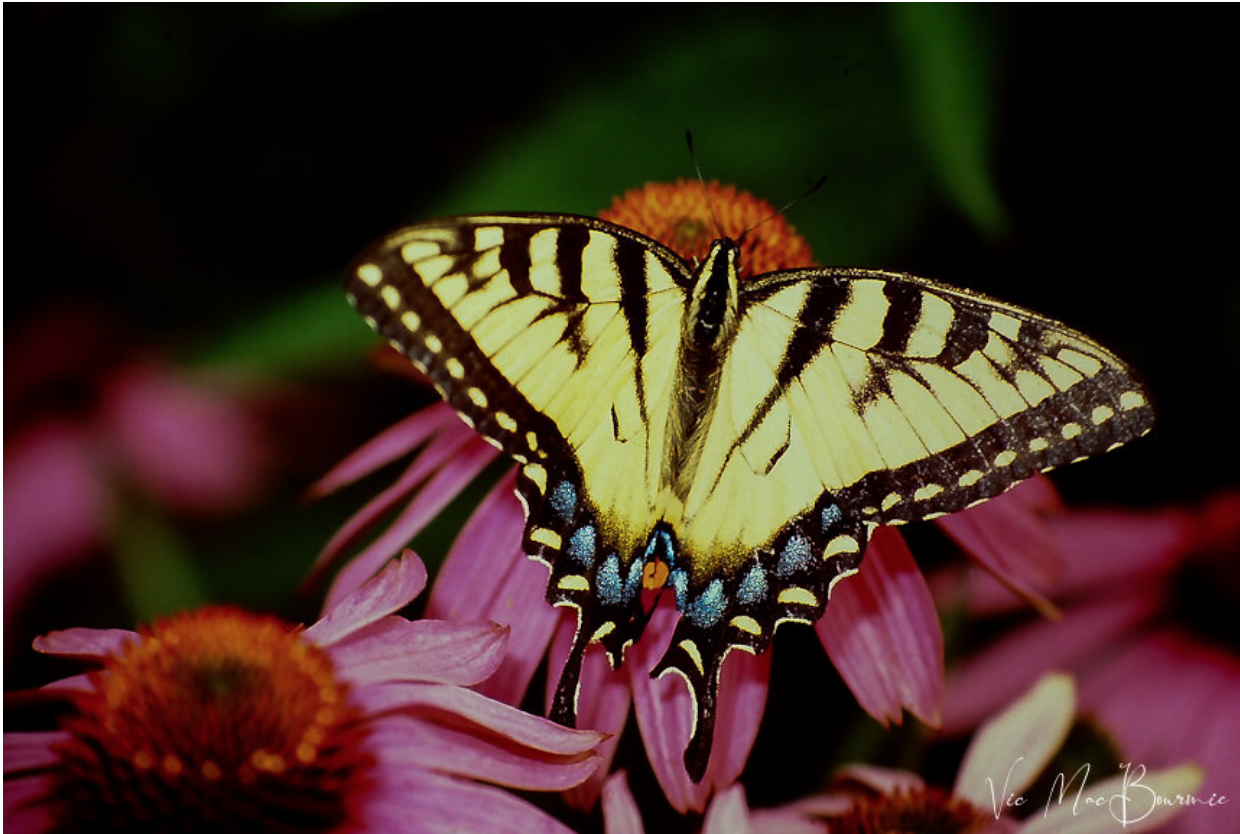
Purple coneflower: Great native plant to attract butterflies and birds
Perfect for building a wildflower meadow
Few flowers light up a garden with bees and butterflies quite like Purple Coneflower.
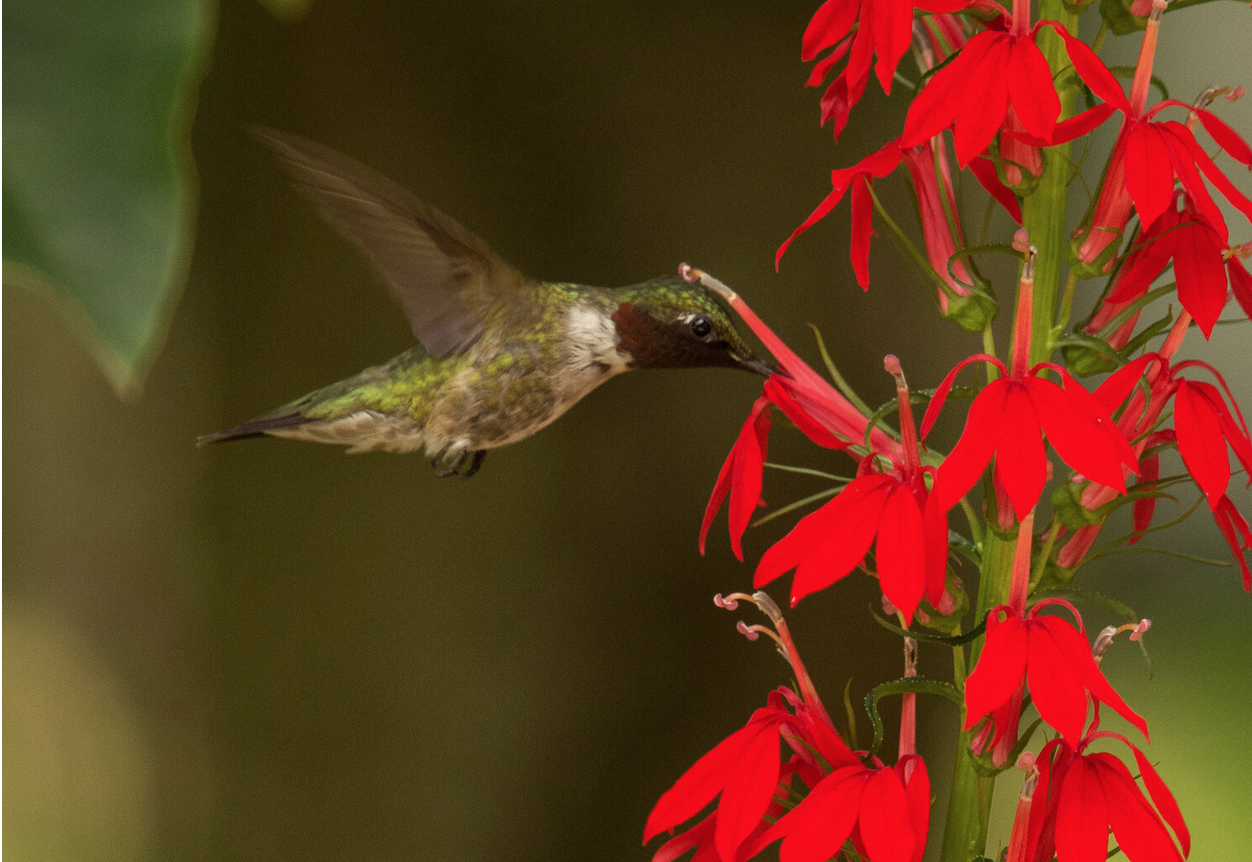
Plant the native species of purple coneflower, spread the seeds around your garden and enjoy the benefits of these strong, upright native prairie-based plants that are truly magnets for swallowtails, painted ladies, monarchs, and an assortment of fritillaries.
Birds like them too, including hummingbirds that are attracted to the plant while it is in bloom and goldfinches, blue jays and cardinals who depend on the plants for its abundance of seed throughout the winter.
Stick with the Native coneflowers
More recently, coneflowers have become so popular that they are now available in a variety of colours including white, yellow, orange, red and even green. Plant them if you wish, but make sure the native species of coneflower (Echinacea purpurea) has a prominent spot in the garden.
The yellow coneflower (Ratibida pinnata) and thin-leaved purple coneflower are perfect companion plants to the more traditional purple cousin. They are also easy to grow, do well in a variety of soil types and are hardy from zones 3-7.
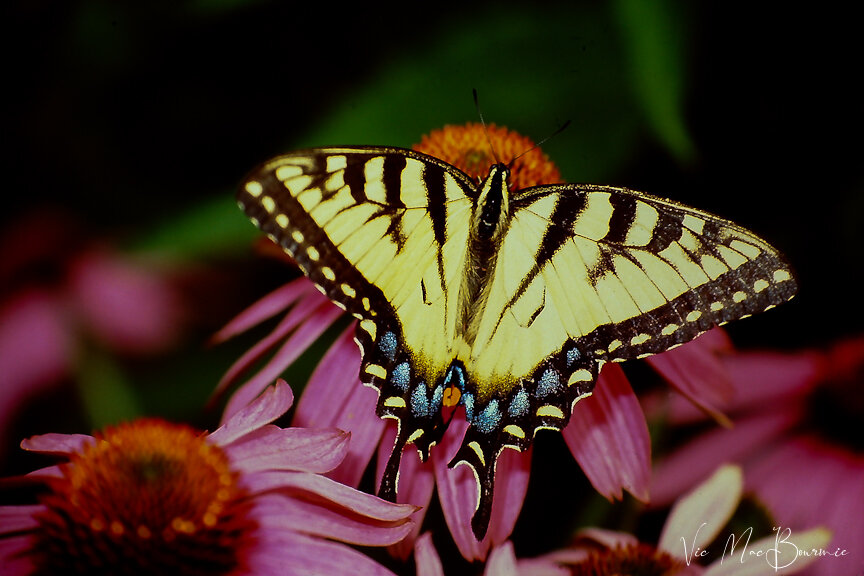
This beautiful yellow swallowtail stops at our purple coneflower to drink in its rich nectar.
A prairie meadow in your backyard for the bees, butterflies and birds
Most of us in southwestern Ontario stretching up into northeastern United States define our living and gardening area as the deciduous forest zone.
While this holds true for the most part, Lorraine Johnson writes in Grow Wild! Native Plant Gardening in Canada, parts of our gardening zones fall in “the most easterly range of the tallgrass prairie ecosystem.”
She writes: “For the gardeners whose lots are treeless and, for whatever reason, have no plans to plant trees, this sunny-meadow model can form the basis of a native-plant garden.”
What better opportunity to experiment with the Coneflower family along with black-eyed Susans and meadow grasses. Even a large sunny area in your woodland garden would be the ideal spot to create a native wildflower meadow garden.
The importance of these gardens cannot be underestimated.
In her book Our Native Bees, (see my article here) Paige Embry explores the concept of turning turf, or at least a portion of the lawn, into a prairie meadow to attract native bees and butterflies. She points to efforts made in the United States by golf courses to take advantage of great swaths of high-maintenance lawn and turn them into low-maintenance native prairie meadow.
“If the idea of flowers growing in the grassy lawn isn’t quite achievable yet, there’s always the golf course route. Take out some of that lawn and convert it into a home and dining hall for bees. It’s all a matter of rethinking normal,” she writes.
As one researcher at the University of Minnesota explains: “the hardest part of getting a bee lawn into use isn’t developing the seed mix; it’s dealing with people’s vision of what a lawn should be….”
If you are interested in creating a naturalized border or mini meadow, be sure to check out my post Fields of Gold: Sunflowers and Goldfinches.
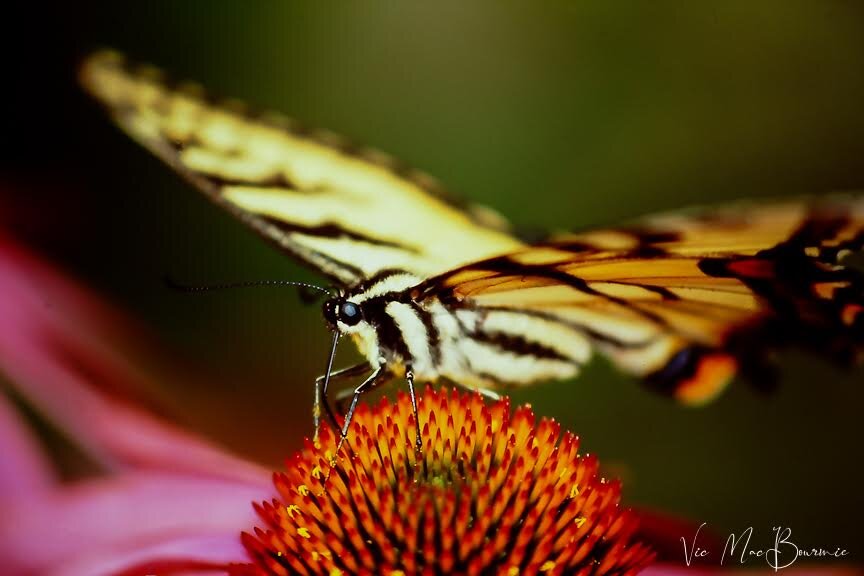
Yellow Swallowtail sips from a purple coneflower.
Plant coneflowers from seed to save money
Don’t be surprised if your plant dies out after a time. In some situations, purple coneflower can be considered a short-lived perennial. Although your main plant may die off, by sprinkling the seed about the garden you should have a nice regular supply of the plants.
The good news is that they are great plants for those looking to save money and don’t mind growing them from seed. (For more ways to save money gardening, check out my earlier story here.)
They are easy to grow from seed. Collect the seed from your own plants, or from a neighbour’s plants (after asking them of course) or you can purchase them at your local nursery.
The seeds benefit from a cold-moist stratification method to break down the hard seed coat and ensure that it germinates at the proper time, however, coneflowers are not dependent on this for germination.
Germination is improved if the coneflower seeds are placed in a container of damp sand and placed in a refrigerator for about two months. In spring plant them directly in the garden or get a head start by using grow lights.
If all that sounds too complicated, just sprinkle them throughout the garden in the fall in areas you would like to grow a clump of them and exercise some patience. Nature will take care of th stratification process and the seeds should germinate in spring provided critters, including birds did not find them first.
Learn to know what the seedlings look like so you don’t mistake them as weed seedlings.
Are Purple Coneflowers easy to grow?
The plants are easy to grow in most soils, are not bothered by pests, require little to know fertilizer and can take some shade. For best performance, a sunny location is best.
The coneflower is hardy from zones 3-9, and native to Eastern and Central United States from Canada into more southern areas.
How large do coneflowers grow?
It grows to about 4-feet high, but can get to 5-feet under the right conditions. Flowering begins in about mid-summer and continues to flower through to the fall. Like Black-eyed Susans, definitely leave the flowers on throughout the winter months not only for their aesthetic value but, more importantly, as a valuable food source for birds.
The coneflowers’ strong stems and spent flowers stand high above even heavy snow accumulation to provide perfect landing spots for birds to feed on the abundance of seeds.
Plants grown from seed, either manually or naturally spread around the garden, can bloom in the first year, but expect to wait a full growing season before you see blooms on the plants.

Adirondack chairs: Best choice for a woodland garden?
The classic Adirondack chair is the perfect addition to any woodland wildlife garden and signal to visitors that this is a casual place and one to relax in, rather than a stuffy, formal style of garden.
Resin, wood or steel they are all stylish additions to your garden
I don’t know when I fell in love with Adirondack chairs, but I’m sure it was on one of my early visits to Northern Ontario.
Those early recollections of sitting on a dock watching the sunset and listening to the loons are stamped in my memory. Adirondack chairs (also known as Muskoka Chairs here in Canada) are reminders of those long days camping and spending time at a lodge in the Algonquin Park area.
And then there were the days our young family spent in the Adirondacks on vacation in New York’s Finger Lakes, as well as memories of sitting back and enjoying the beautiful scenery during our week-long vacation at Lake Placid.
I’m sure similar memories are forever stamped in the minds of so many of us who have a certain fondness for these iconic chairs.
In our gardens, Adirondack chairs take centre stage in both the front- and backyard, helping to bring a little of the lake district back home. A pair of bright yellow chairs welcome visitors to our home and make a very clear statement that our gardens are clearly a place to relax.

Our yellow Adirondack chairs welcome visitors and let them know this is a casual, relaxed atmosphere rather than a stuffy, formal garden.
Adirondack chair: Perfect in a woodland setting
The casual atmosphere Adirondack chairs create make them the perfect addition to the woodland wildlife garden.
There’s a reason the iconic Adirondack is so popular.
The Adirondack chair’s rugged design belies its incredible comfort and uncanny ability to provide the perfect horizontal surface to rest your arm, let alone a glass of wine, beer bottle or can of cider. While its ability to hold a drink comfortably certainly plays a role in its popularity today, the design’s long history suggests that there’s more than convenience behind this North American wide love affair.
A short history of the Adirondack chair
The Adirondack chair traces its history back to the early 1900s in Westport, New York, where a fellow named Thomas Lee created the rudimentary beginnings of the “Westport” chair to provide his family with comfortable outdoor seating.
He passed his plans on to a friend and local carpenter, Harry Bunnell, who then ran with the basic design, added a few refinements and began manufacturing the “Westport” chair for all to enjoy. The Westport incorporated much of today’s modern Adirondack chair, but included a solid seating and back surface.
For more suggestions and some of my favourite garden things, be sure to check out my Favourite Things post.
In 1904, Bunnell submitted a patent for the chair and continued to produce the chair for 25 years.
Bunnell’s changes to Lee’s original design included a foot rest (a popular option with today’s Adirondack designs), sideboards to cover the underside of the chair and the use of Hemlock or Basswood instead of Maple.
The main difference between the original Westport Chair design and today’s Adirondack Chair is the incorporation of a slatted design both on the back and seating area of the chairs. The use of the slatted design allows for a more rounded and comfortable form that has translated well with those looking for the perfect place to rest and enjoy their favourite drink, whether that’s a morning coffee, afternoon glass of wine, or evening around the compfire with a favourite craft beer.
Polymer (resin) vs steel vs wood Adirondack chairs
There is no question that the newer, high quality moulded polymer or resin chairs are the best Adirondack chair designs available. Not the cheap plastic ones often available for less than $25 at big box stores (use them as garden accents or chairs that are rarely called on accept at large gatherings).
These high quality Adirondack chairs are seriously heavy and often made from recycled resins. Their colour is true, from the exterior that does not fade in prolonged sunlight throughout the entire piece. That means even a deep scratch is not going to show up. No need for painting – ever. They are virtually indestructible. I don’t know if they are all guaranteed for life, but the good ones might as well be.
Those two yellow Adirondacks that greet our guests are both examples of these indestructible chairs that spend the entire year in our front garden taking on all types of inclement weather. All these chairs ever need is an annual washing with a power washer. They are Canadian made by a Brantford, Ontario company Leisure Line and purchased at Costco several years ago. This company also has matching side tables and ottomans available. While you cannot order directly from the factory, they are sold at a number of locations besides Costco.

Our steel Adirondacks have stood the test of time and continue to perform at the highest level despite being left out throughout our punishing winters.
While our polymer chairs are outstanding in every way, we were also lucky enough to purchase four alloy Adirondack chairs at Costco more than 20 years ago that continue to perform flawlessly despite being left out on their own through our challenging Canadian winters.
They are finished in a lovely shade of brown sand-textured factory paint that has stood up extremely well over the years.
Again, these were high-quality chairs meant to last and have become an excellent investment over the years.
We do not have any wood Adirondack chairs in the garden.
Although wood Adirondack chairs are truly representative of the classic design, we have chosen to steer clear of them.
Our Canadian winters are just too harsh for these chairs to withstand. The wooden chairs demand too much maintenance between regular painting, tightening loose connections and dealing with the eventual rot of even the best wood products.
They are available as kits for a reasonable amount of money and with proper care can last a lifetime. I’m not interested, however, having to pack away between 6-10 chairs every fall only to have to pull them out again in the spring.
Like woodland gardening, the idea is to do as little as possible and enjoy the garden rather than become a slave to it.
What better than the comfort of a Adirondack chair to make that happen.
And did I tell you how good the bright yellow Adirondack chairs look in the middle of winter after a major snowstorm.
A reminder that summer is not too far off.
A few of the best chairs to consider
The following are just a few of the Adirondack-style chairs that come highly recommended.

The Keter Adirondack chair includes a built-in cup holder and comes in three colours: Teal, Black and White.
The Keter Adirondack chair, quality and style
If you follow this blog you know my feelings about the high quality of Keter products. I own a number of the company’s products from their impressive sheds (see complete story and review here) to their BBQ table (turned potting shed table) and storage boxes.
While I have not used their Adirondack chairs (Amazon link), I can assure buyers that Keter’s quality levels are of the highest quality.
These chairs are available in three colours: Teal, black and white. Their high-quality, rust-proof, all-weather polypropylene resin does not warp, rot or fade and even includes a convenient cup holder built into the armrest. The chairs are rated for 350 lbs. and, like all Keter products, are easy to assemble.
An Adirondack with all the options

This impressive combination will add style to any yard.
If you are looking for a nice polymer Adirondack complete with matching side tables and foot rests, the Highwood Classic Westport Adirondack chair (Amazon link) in a classic Nantucket Blue is another excellent choice.
This made in the USA chair can be left outside all year without cracking, peeling or rotting and, like all polymers, never needs sanding, staining or painting and is easy to assemble.
The optional chairs and side tables are a nice touch that are not necessarily available with other Adirondack chair manufacturers.

An exquisite lounger from Gardener’s Supply Co.
A beautiful lounger for any garden
While I’m not a huge fan of using wooden Adirondack chairs in the garden if you are leaving them out unprotected throughout the winter, there are certainly situations where nothing delivers the look of an expensive high-end lodge look like an exquisite wood lounger. These elegant hardwood Adirondack chairs with built-in ottoman (link to Gardener’s Supply Company) is the perfect addition to a covered porch, glass house or pergola.
Gardener’s Supply Company describes the chair as a plantation-grown Brazilian eucalyptus chair finished with a beautiful brown umber stain for long lasting outdoor use and exceptional durability in all climates.
“The Adirondack chair provides extra wide and curvy seat for incredible comfort! The built-in sliding ottoman can be used in multiple positions or stowed away completely under the seat.”
Will this require some upkeep, absolutely. It the upkeep worth it, absolutely.
• As an affiliate marketer with Amazon or other marketing companies, I earn money from qualifying purchases.

Foliage and texture in a woodland garden design
Woodland gardens are dependent on foliage texture for much of their subtle beauty. Three native plants, ….. Jack in the Pulpit, Solomon’s Seal and Mayapple are three plants that are standouts in the woodland garden for their foliage rather than their subtle flowers.
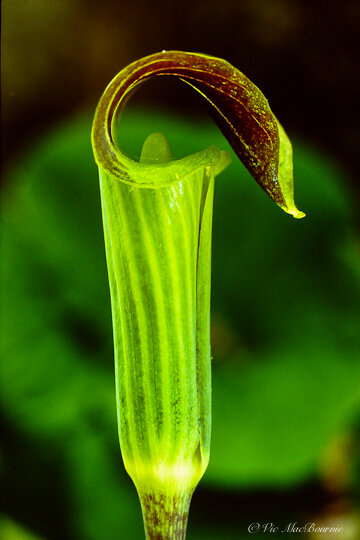
Jack in the Pulpit shown in lovely light in our front woodland garden.
Three native plants to consider: Jack-in-the-Pulpit, Solomon’s Seal and Mayapple
Woodland gardeners know that not all flowers need to be colourful, but all gardens benefit from incorporating highly textured foliage plants.
In fact, some of the most interesting woodland plants are very understated: flowers are often green and are even hidden beneath the plants’ own leaves.
Unlike the often bright colours found in many traditional perennial gardens, woodland gardeners have learned to appreciate the subtle beauty of these foliage-based plants. They know that it is the highly textured foliage of these plants, the different shades of green, leaf shape, fall colours and even the colourful berries, that make these understated plants extremely valuable in the woodland landscape.
When it comes to understated plants that rely on textures and foliage, three plants come to mind: Solomon’s Seal, Jack in the Pulpit, and Mayapple. But there are many others that add interest to our woodland floor that often go unnoticed.
Ferns, mosses, stonecrops, and so many other plants help to build the tapestry that make up a woodland garden.
In her book Foliage & Garden Design, garden writer Marjorie Harris turns her focus on the importance of using foliage as the star in garden design.
“The foliage garden is a restful place where beauty unfolds more slowly than in a perennial garden,” Harris writes. “It’s a place where the textures of leaves are far more important than the colours of flowers. Foliage plants can have blossoms and berries, lure butterflies and birds and provide a sanctuary and a shelter.”
She goes on to explain an important concept in a shaded woodland garden.

A fern glen in the woodland garden creates a large exapanse of texture in a sea of green.
“Establishing a foliage garden means entering a more sophisticated world both aesthetically and visually,” she explains.
Compared to the perennial garden that is often so dependent on great drifts of colour, gardens based on foliage are more muted and subtle. “Verticals and horizontals; distance and perspective; positive and negative spaces; mass and shape – these become your tools,” Harris explains.
If you are interested in pursing more about designing a garden with foliage, the Harris book is still available on the Amazon.com used market here.
Why are some plants’ flowers so understated?
In a world where colour plays an important role in attracting pollinators, birds and butterflies for a plant’s survival, the question needs to be asked: Why are some woodland wildflowers so understated? It’s possible that many plants in the woodland are understated for their own survival. By staying under the radar, they are able to escape many of the animals that might want to browse on them for dinner.
Whatever the reason, it’s important for gardeners to learn to appreciate their presence in the shady areas of our woodlands.
Three subtle plants that add interest through foliage
Jack-in-the-Pulpit stands above the crowd: Arisaema triphyllum, commonly named Jack In The Pulpit is a favourite in our garden as much for its unusual shape, as it is for its bright red berries that emerge in the fall.
The plant, which is found throughout the north-eastern United States and stretching into Ontario, Quebec and the Maritimes, earned its name for its resemblance to a preacher standing in a pulpit.
Dominated by a large, cylindrical and hooded flower that grows almost unnoticeable at first from beneath two large, glossy leaves, this mostly green flower with brown stripes can grow to between 1-3 feet tall.
By late summer, the flower is replaced by a large cluster of bright red berries that is an attractive meal for many birds and mammals. (Note that the roots and berries of this plant can cause blisters on the skin and irritation in the mouth and throat if ingested.)
Each berry in the cluster contains 1-5 seeds that are attractive to wood thrushes and wild turkeys as well as squirrels and even box turtles.
A 1980 study found that fungus gnats may be the most effective pollinators of these unusual plants. Pollination is performed when the gnat or other small insect makes its way to the spadix or column often referred to as the “Jack.” The columnar ends with a sheath called a spathe. The spadix contains male or female flowers (or both). Pollinators crawl beneath the hooded spathe, down the spadix collecting pollen from the flowers.
According to the Nature Conservancy of Canada, Jack-in-the-pulpit is being threatened in natural woodlands by invasive alien species such as garlic mustard and buckthorn.
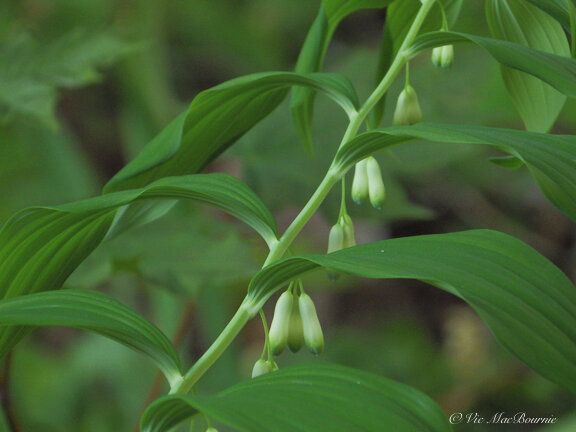
Solomon’s seal is a favourite for shade gardeners
The arching stems of Solomon’s Seal rising above other plants in our front woodland garden is always a welcoming site in spring.
Polygonatum, also known as King Solomon’s-seal or just Solomon’s seal, is known for its zig-zag arching stalks that can grow up to 5 feet long and sport nodding, greenish-white, tubular flowers that hang in pairs below the stalks.
Their tubular whitish flowers, often among the earliest flowers to bloom in the woodland, droop down beneath the stalk and are attractive to hummingbirds.
Check out my complete article on Solomon’s seal.
Butterflies are also attracted to the delicate spring blooms of the Solomon seal flowers.
The green flowers eventually transform into large blue berries that are favoured by the Veery, American Robin, Wood Thrush and Bluebird
Solomon’s seal prefer a woodsy soil of moist, rich acidic soil but can also be found growing in more sandy or even clay loam.
If you are looking for a plant to grow at the base of a tree, consider growing a clump of them at the base of a tree.
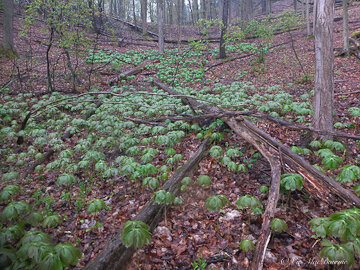
Mayapple: An ideal shade-loving ground cover
The Mayapple earned its name from the large, apple-like fruit that grows under the umbrella of its large leaves where it often goes completely unnoticed by woodland gardeners.
The early spring wildflower, which can be highly poisonous provides much needed nectar for pollinators and the large, “apples” are eaten (only when competely ripe) by raccoons, skunks, opossums and even box turtles.
The mayapple can spread to incorporate large swaths of woodland where the conditions are right and are therefore excellent for use as a large, bold groundcover.
Mayapple is one of the first Carolinian zone wildlflowers to emerge in the spring in the woodlands of southern Ontario and the northeastern United States, so it became a magnet for many of us photographers just looking for something, anything, to focus on in the early spring woodlands.
So, you can imagine that it didn’t take long for me to start growing a clump in my yard. Turns out it was so successful that I was able to spread it around where it continues to thrive in swaths throughout the garden.
The Mayapple is actually in the Barberry family and grows naturally everywhere in the eastern half of the United States stretching as far north as Quebec and south to Florida and Texas.
For more on the Mayapple, go to my earlier post located here.
• As an affiliate marketer with Amazon or other marketing companies, I earn money from qualifying purchases.

Bird feeding station ideas (Five of the best feeders)
A centralized bird feeding station is a great way to focus birds’ attention on your feeders and to discourage squirrels and other mammals from stealing all your food. Here are five great options to add to your bird-feeding pole to make it even more enticing for backyard birds.
Advanced Pole System offers bird feeding solutions
If you are serious about birds, purchasing or building a comprehensive bird feeding station is likely one of the best decisions and investments you’ll make.
Twenty years ago, I would never have thought our single pole bird feeding station would continue to be the central focus of our bird feeding station today.
But it continues to perform as well, if not better, than it did the day I purchased it.
A high quality, comprehensive bird feeding station not only helps to focus the feeding in a specific area of your garden where you can watch the birds, it allows you to customize it with optional feeders to attract a greater variety of birds and easily adapt the feeders to seasonal needs.
While I get great enjoyment from my bird feeding stations, providing natural food sources to our feathered friends is always the goal we should aspire to in our gardens. I have written a comprehensive post on feeding birds naturally. You can read about it here. If you are looking for high quality bird feeders, consider spending a little more and purchasing recycled resin feeders like the ones in the photo below. Be sure to check out my post on why resin feeders are better than wood.

Our Advanced Pole System from Wild Birds Unlimited with the dual baffles and a couple of Wild Birds Unlimited recycled resin feeders. For more on the resin feeders go to my post on why resin feeders are better than wood ones.
The pole system I use, for example, changes throughout the year depending on what I am feeding. Smaller optional feeders that easily attach to the main pole are used at different times of the year to provide fruit, while others are ideal for offering meal worms, peanuts or jelly for orioles.
Other optional accessories provide different landing and perching spots for the birds as well as add-on trays to catch seed and provide an area for larger birds to feed.

Here you can see the Advanced Pole system in action. Five Baltimore Orioles take advantage of their many options with oranges, jelly and nectar all available to them in addition to a compresses seed cylinder (top), and suet. The “Decorative Branch Perch” provides them with an ideal place to land and feed.
There are many systems available that offer an array of options, but one of the most comprehensive and customizable systems is the Advanced Pole System from Wild Birds Unlimited. (Check out WBU on-line brochure of the entire system)
If you are not familiar with the franchise, it offers brick and mortar stores throughout Canada and the United States as well as a comprehensive on-line store.
Another, simpler, but convenient and high quality pole is available through Gardener’s Supply Company on-line store. It is particularly adaptable for decks or other locations where you may want a feeder close to a window.
Gardener’s Supply describes it as a kit that includes five 16-inch sections of 1-inch diameter pole. you can use as many sections as you like for the desired height. The kit also includes two adapters that allow you to mount a wooden or metal item at least 3-inches square on the bottom. Black, powder-coated steel pole is unobtrusive, letting your feeder or birdhouse take center stage.
Gardener’s Supply also offers some of the finest bird feeders you could find to hang from the pole system. The company’s on-line store has a complete offering of bird feeders that are certainly worth checking out here.
I purchased our bird feeding station pole from a local Wild Bird Unlimited store at least 20 years ago and it has performed exceptionally well since then. Even after several moves around the garden, it continues to stand up to the rigours of a host of heavy, seed-laden feeders, birds, squirrels and difficult Canadian winters.
To see the pole in action, check out my earlier post on attracting blue Jays and my article on my two favourite Blue Jay feeders. And, be sure to check out my post on why seed cylinders are a must for any feeding station.

This woodpecker is feasting on a seed cylinder on the Advanced Pole feeding system in our backyard.
Five of the best optional bird feeders for your pole system
1) The Spike: By far my favourite option is a simple spike that fits on top of the feeder pole to hold compressed seed cylinders. The seed cylinders are woodpecker magnets but they also attract Blue Jays, nuthatches, chickadees and cardinals just to name of few. The key to the cylinders is that they not only attract the birds, the birds stay longer because they have to work at removing the seeds from the cylinder.
2) Catch Tray Feeder: WBU offers a catch tray that attaches directly to the pole and catches much of the feed that is cast aside by birds that are more interested in their prized sunflower seed. The tray is perfect for feeding larger birds by offering shelled peanuts and other larger snacks to our feathered friends.
3) Suet cage: The built-in suet cage that attaches directly to the WBU pole is just a simple way to offer suet or compressed seed cakes to the smaller birds throughout the year. Although I also use a separate WBU suet feeder complete with a tail feather prop for larger woodpeckers, the pole mounted cage offers convenience and is used to provide nesting material to birds in the spring. Spent grasses, and other goodies are stuffed into the cage for the visiting birds to take with them after their snacks.
4) Half ball: For special treats, including oranges in the spring and suet balls in winter, WBU offer optional, clip-on, steel half balls that are perfect for holding dried fruit and other smaller offerings including a handful of meal worms. They are available in basic black and orange to attract orioles.
5) Covered plastic dishes: The plastic, removable dishes are ideal for offering special treats that benefit from being somewhat sheltered from the elements. The roof is separate and can be adjusted to suit the heights of the birds you expect to be attracting or to ensure the food is properly covered. Fresh berries and meal worms are perfect offerings for these small dishes. Because they are easily removed from the steel carrier, they can be brought in the house for a quick cleaning.
Give birds a place to land near your feeders
There are two excellent accessories that I consider almost essential to my Advanced pole system.
The first is the Decorative Branch Perch that serves not only as an additional source to hang various feeders, but more importantly a comfortable perch for birds to land on before moving in on the feeders. The perch fits directly on the Advanced Pole and allows easy positioning 360-degrees around the pole.
The wire “leafs” are the ideal spot to squeeze in large orange halves for orioles or hang smaller feeders.
One of my favourite options on the pole system is a simple, small, open cylinder that fits on the pole and provides a holder for a good-sized natural tree branch. The option is perfect for photographers looking to capture natural images of birds at the feeder. The ability to position the branch anywhere in the 360-degree circle around the feeders is perfect for taking advantage of different lighting situations and backgrounds.
It’s also super easy to swap out different branches so that not all of the bird photographs contain the same branch images.
Why use a pole system to feed birds?
A key benefit to using a single pole system as your primary feeding station for birds is the ability to keep unwanted visitors from eating all your seed. Squirrel and raccoon baffles are a must to keep the critters from getting up and feasting on your expensive feed and potentially destroying expensive feeders.
With the single pole system, you can focus all your efforts on deterring the squirrels and other mammals rather than fighting to keep them away from various parts of the garden with expensive feeders designed to spin-off squirrels or close down feeding opportunities for our non-feathered friends.
Placing the pole system in an inaccessible spot is vital to success. Keep the pole system about 10 feet away from trees and other structures (including your home or a shed) where squirrels can jump aboard.
Depending on the athletic ability of your backyard squirrels, you may have to move the pole even farther away. I have an Olympic-calibre black male squirrel that can jump vertically higher than most of my baffles. I’m hoping all the high-quality seed he is feasting on will eventually cause him to get too fat to continue these medal-winning high jumps.
There is no doubt that a concentrated feeding area can bring in unwanted visitors to your feeders, including mice and rats. There are important steps you can take to keep these unwanted visitors from your yard. Be sure to check out my comprehensive post on Keeping Rats and Mice out of your yard.
Check out my best birding buys article for more on bird-feeding poles and other optional feeders
• As an affiliate marketer with Amazon or other marketing companies, I earn money from qualifying purchases.
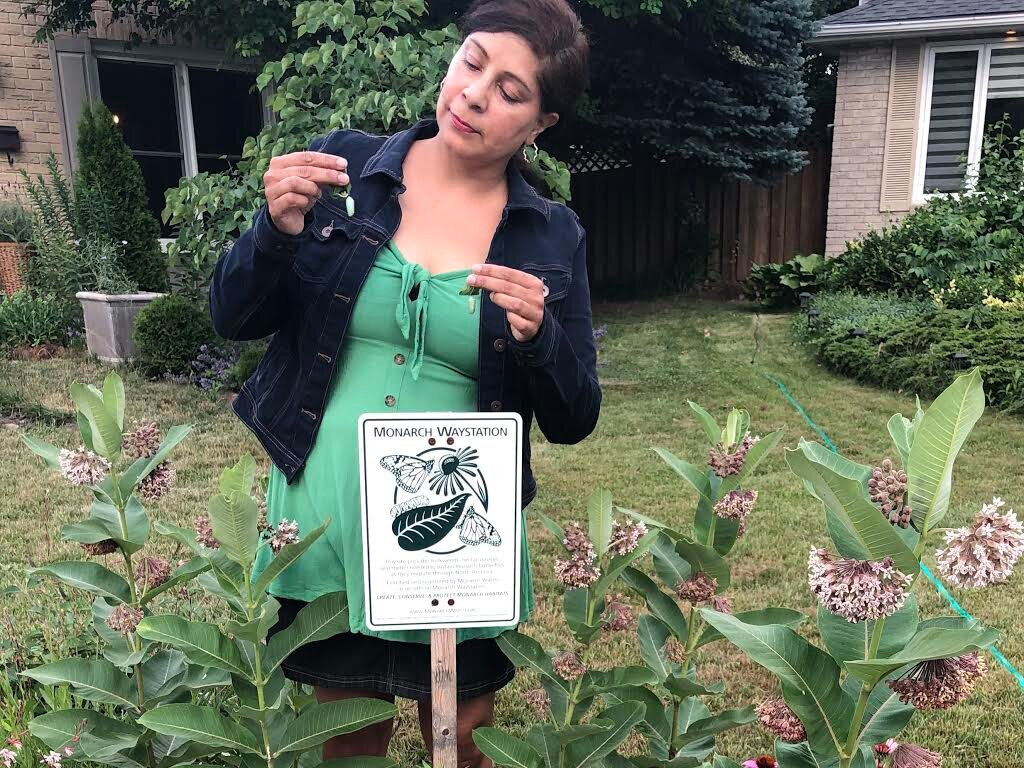
Why kids need more nature in their lives
Educators, authors and experts agree about the importance of providing more nature in the lives of children. Nature Deficit Disorder has been linked to children's ability to focus among other things. Debra Toor of Burlington Ontario is doing her part to help children learn about monarch butterflies, vultures and native bees through on-line courses she uses to teach children around the world.
Benefits of outdoor education: Teachers, parents, experts speak out
How important is it to teach our children about birds, butterflies, pollinators and the natural world in their own backyard?
Extremely important, according to experts in the field from professors in Environmental Science to on-line educators, authors and millions of parents who want their children to grow up knowing as much or more about the environment and the natural world around them than they did when they were growing up.
The learning opportunities for young children in even a small garden are endless whether it’s watching the life cycle of a monarch, seeing a fawn feed from its mother, or becoming familiar with local bird species and how they survive throughout the seasons. Outdoor education has never been a more important component in a child’s physical and mental development whether its a few hours spent in a woodland garden or a walk in the woods.
“Children have a natural affinity for the living beings all around them,” says Nancy Lawson, author of The Humane Gardener. “Cultivating that sense of wonder is as easy as walking out the front door and encouraging them to explore things at their level – the shape of a fallen leaf, the sound of a bee buzzing on a flower, the busy ants carrying seeds to their nests,” she adds.

A child gets a close look at daisies in the garden.
What’s the value of Outdoor Education for young students
“Just a little bit of awareness during those early years will stay with them for a lifetime.” says Lawson, who also operates an informative website The Humane Gardener, Cultivating Compassion for all Creatures Big and Small.
“I find it amazing that almost everyone I talk to in this line of work has a vivid memory of some spark that was lit during a camping trip with their parents or while helping their grandma in the garden. It may subside for a while during the growing-pain teenage years but then somehow takes over again in adulthood. It’s like that early exposure to nature just gets in your bones,” she adds.
Julia Daly, who works at Saanich Native Plants in Victoria B.C. and has extensive experience in plant identification, species at risk management, ecological restoration, and native plant gardening, knows first hand how important early childhood learning and backyard environmental science is to young children.
Over the past year, her 4 and 6-year-old daughters helped turn a 2x5 meter section of barren lawn space outside their backyard fence into a diverse native plant pollinator meadow that is now teaming with life.
“My children have found that if they provide quality habitat, wildlife will come and benefit. They are coming to understand that if each of us does something, we can make a difference on a large scale. And this gives them a sense of power and hope,” she explains.
“Young people are faced with the overwhelming task of remediating environmental damages passed down by previous generations (e.g., climate change, habitat loss, pollution, and invasive species). Introducing children from a young age to outdoor play and the relationships found in nature, within their own backyards and neighbourhoods, provides them with the knowledge and confidence to better understand and care for their local and global environment.”
“Outdoor play holds a child’s interest because it is always changing (weather, seasons, etc). Children instinctively value nature,” Daly explains. “Outdoor learning is accessible and low cost. For families without a backyard, regular walks to a local natural area to observe seasonal changes, and learn about native plants, insects, and the diversity of wildlife that depend on them, can have a huge influence.
Dealing with Nature deficit disorder
In an article from the Child Mind Institute, author Danielle Cohen states: The national panic about kids spending too much time indoors has become so extreme that the crisis has a name: Nature deficit disorder.”
She explains that the shift is largely due to technology: “The average American child is said to spend 4 to 7 minutes a day in unstructured play outdoors and over 7 hours a day in front of a screen.”
Recent studies illustrate the importance of being outside. In fact, “most of the studies agree that kids who play outside are smarter, happier, more attentive, and less anxious than kids who spend more time indoors. While it’s unclear how exactly the cognitive functioning and mood improvements occur, there are a few things we do know about why nature is good for kid’s minds,” she writes.
These benefits include: increased confidence, creativity and imagination, and responsibility. Exposure to nature also provides a different stimulation activating more senses – such as hearing, smell and touch.
“As the young spend less and less of their lives in natural surroundings, their senses narrow,” explained Richard Louv, author of the book Last Child in the Woods: Saving Our Children From Nature-Deficit Disorder.
Giving children “experiential education” in the environmental sciences by getting out into our own backyard and local parks is critical, explains Jessica Slomka, a lecturer at the University of Toronto with a Phd. in Earth Sciences.
“The outdoors is a natural laboratory where students and children can experience nature first-hand in all of its complexity (something a textbook cannot accurately capture), she explains.
“Providing children with the opportunity to explore the natural world in their own backyard and neighbourhood green spaces allows them to observe interactions between species, such as a bees buzzing around the flowers, and processes in natural systems, such as sand rolling along a stream bed, ask questions about what they see (why? how?), and follow their curiosity and interests to seek out answers by continuing to observe and interact with these natural systems.
“As a result, children develop a personal connection to the natural world and their local environment, which may, in turn, foster a lifelong sense of responsibility, passion, and respect for nature,” Slomka explains.
Helping children discover nature
Debra Toor, an on-line educator, is doing her part to teach young children about everything from the life cycle of monarch butterflies to the importance of the Turkey vulture in the natural world.
And, although she works out of her home in Burlington Ontario, her message is carried around the world from Canada and the United States to Singapore, South Africa, Poland and Belarus. She’s also touched the minds of thousands of children in Ireland, England, India and even the United Arab Emirates.
Spreading the word to the world
In the United States she has taught on-line classes to students in Michigan, California, Georgia, Florida, North Carolina, New York, Tennessee and Texas. In Canada, her backyard wildlife courses have reached school children in British Columbia, Newfoundland, Ontario and Quebec.
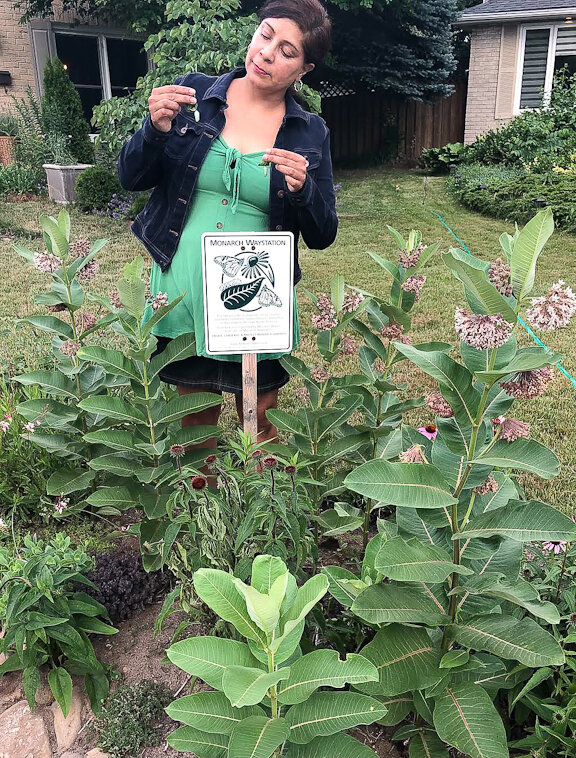
Debra Toor in her backyard checking out a Monarch chrysalis in her milkweed patch.
And the list continues to grow as more educators and concerned parents discover the value of educating young students in the importance of the natural world and the steps that these students and future leaders can take to protect native flora and fauna.
The former communications director for Earth Day Canada, an environmental communications non-profit organization, has been involved in environmental communications for more than 10 years. So, it was only natural for her to start her own company, Conservation Scientists in Action.
“My mission is to educate about ecosystem services of wildlife and how scientists are using tools and methods to learn about declining wildlife populations,” she explains, adding that she also works to explain “how scientists use scientific data to advocate for wildlife recovery programs and to support legislation.”
What does all this mean to the students who take her courses?
“Each topic is designed to get students to think about the roles of wildlife, specifically, how do they help the earth? I place an emphasis on how wildlife benefits humans, not to be human-centric, but to drive the message home that we cannot survive without wildlife,” she explains.
In my 25+ years of being an environmental educator, I have learned that the way to get people to be more open to wildlife is to see the big picture of how we are all interconnected.”
Children get to experience nature up close
A tall order for sure, but one she tackles by focusing on school children primarily in Grades 1-7, but also high-school-aged students. Her presentations are far from dry. Children interact with her live and are entertained with videos showing nature in action.
“My classes are interactive expeditions that allow students to become Jr. Biologists as they investigate videos and images of wildlife interacting in habitats, and conservation scientists as they use scientific methods and tools.”
Based on feedback from parents and teachers, students love the videos clips, Toor explains.
“I make sure to include videos of incredible scenes that they have never witnessed before. Students also really enjoy using their voices in the expeditions to make observations and inferences, and to ask and answer questions.”
She tells a story about childrens reactions during a video of a bald eagle stealing carrion from a group of vultures.
“There is one vulture video I show where a bald eagle snatches a dead animal away from squabbling turkey vultures. The kids are always fascinated with the scene. We discuss why it is that the eagle, although a hunter, stole the vultures’ food. Answers range from “the eagle is lazy” to the eagle is hungry…” One day, a Grade 5 student answered “Bald eagles will also scavenge because it takes less energy to scavenge than it does to hunt.”
That’s one smart student.
Teaching the children is a logical extension from her earlier work in the field: “One of my roles was to collaborate with researchers and experts to create publications, including community guides for schools, employee groups and community groups,” she explains.
In love with the Turkey Vulture
Her expertise and quest for knowledge led her to a fascination with one of nature’s – shall we say less-loved birds – the Turkey Vulture. That eventually led to a book publishing in 2015 entitled Survival Secrets of Turkey Vultures. That publication eventually led to her beginning to make presentations as a Microsoft Educator to advance literacy of wildlife ecosystem services with a focus on vultures. The Microsoft program folded during the pandemic, but Toor had already began using the experience and knowledge gained in the program to start her own business. So, when the program ended, she was able to spend more time working on her own on-line business.
A focus on Monarch butterflies
Much of her focus has been on the fascinating story behind the adventures of Monarch butterflies. But Toor doesn’t just talk about the incredible story behind the Monarch – she lives with it everyday in her backyard.
“My yard is monarch waystation. It’s a challenge because I live in a neighbourhood where manicured lawns are the norm,” she says, explaining that she shares a front yard with a neighbour so is unable to tear out the grass.
“My yard, as far as I know, is the only one in the entire neighbourhood with a front yard milkweed patch,” she explains."
The sign on Toor’s front lawn supporting monarchs has proven to be a great way to meet her neighbours and pass along her enthusiasm for monarchs.
“I love the sign because it educates people. In the spring, a father and his young daughter approached me to say they love my butterfly garden.”
Toor encourages everyone who is interested to join the Monarch Way Station Program by going to https://www.monarchwatch.org/waystations/
The process is fairly simple, she explains:
Fill out a registration form, and agree to grow milkweed and mostly native nectar sources, refrain from using pesticides and herbicides, etc.
There is a fee for certification, and registrations get a certificate recognizing their property as a monarch waystation, and a yard sign.
There are downloadable resources for beginners.
Monarchs certainly take centre stage in her courses.
Toor’s Nature courses for students
In one of her courses, Monarch Butterfly Expedition, which is available year round, students get to see Monarchs in the fall fuelling up on goldenrod in Ontario as they begin their migration south to Mexico. Students get to see them arrive in Mexico after the long journey where they gather in massive numbers and “hug the branches and trunks of the oyamel trees” to keep warm. The students get to see monarch eggs hatching, forming a chrysalis and eventually emerging from that same chrysalis.
Along the way they learn about monarch habitats, adaptations, life cycle and great migration, how monarch butterflies help the earth (ecological niche), food webs, human impacts as well as conservation and citizen science.
It’s a learning experience not available in most schools.
In addition to the Monarch Butterfly Expedition, teachers and home-schooling parents can pick from a myriad of other educational courses including:
• Backyard Animal Expedition, where students are exposed to the often misunderstood Opossum, skunks and racoons and learn about their habitats, adaptations, how they help the earth as well as information on human-wildlife conflicts, wildlife rescue and rehabilitation, and conservation and citizen science.
• Monarch Butterfly Adventure, where the class is encouraged to find and hatch their own monarch butterfly.
• Vulture Expedition where students investigate vultures in their habitats and meet the conservation scientists who work with them.
• Pollinator Expedition where students meet the little things that run the earth from bees to butterflies, moths and bats. Students are able to watch video of bumble bees emerging from their ground nest, Cavity nesting bees emerge in the spring and a leaf-cutter bee build her nest.
There is also a course on the changing seasons and how animals adapt.
Toor operates a website www.conservaction.info where teachers, homeschooling parents and families can register for the courses or just gather information about what she has to offer.
To see her in action with students check out this YouTube video.
Toor is not alone in her attempt to spread her knowledge to students at home or in the classroom and the more than year-long stay-at-home orders has made on-line education just that much more important for now and into the future.
Acorn Naturalists offer expertise
Acorn Naturalists, a group based in the United States was founded more than three decades ago by teachers to create and distribute high quality, hands-on learning resources for use both inside and outside the classroom.
According to their website, they offer “school supplies, science and nature activity kits, as well as hand-on educational resources for parents, classroom teachers, naturalists, camp leaders, outdoor educators, homeschoolers, preschool and afterschool educators.”
The award winning group, based in California but also serving Canada, offer a fascinating array of nature products including everything from animal skull replicas to very realistic track and scat replicas. Not everything is replicas. Sanitized real owl pellets can also be purchased as well as educational displays and posters, innovative science kits and games, pine cone bird feeder kits, pocket plant presses and an animal tracking kit (ideal for Canadian winter tracking.)
You can check out their website at https://www.acornnaturalists.com/
• For more information on Nature Deficit Disorder among children, check out the Article Why Kids Need to Spend Time in Nature by going to Child Mind Institute
• For more information on Children and nature be sure to check out Children & Nature Network
As an affiliate marketer with Amazon or other marketing companies, I earn money from qualifying purchases.

How to attract colourful backyard birds (Cardinals, Bluejays, Goldfinches)
Who needs to go to the tropics to see colourful birds when you have them right in your backyard – Cardinals, Bluejays and Goldfinches. This article explains how to attract three of our favourite colourful backyard birds, how to feed them and how to keep them coming back to your yard.
What they eat and how to attract them
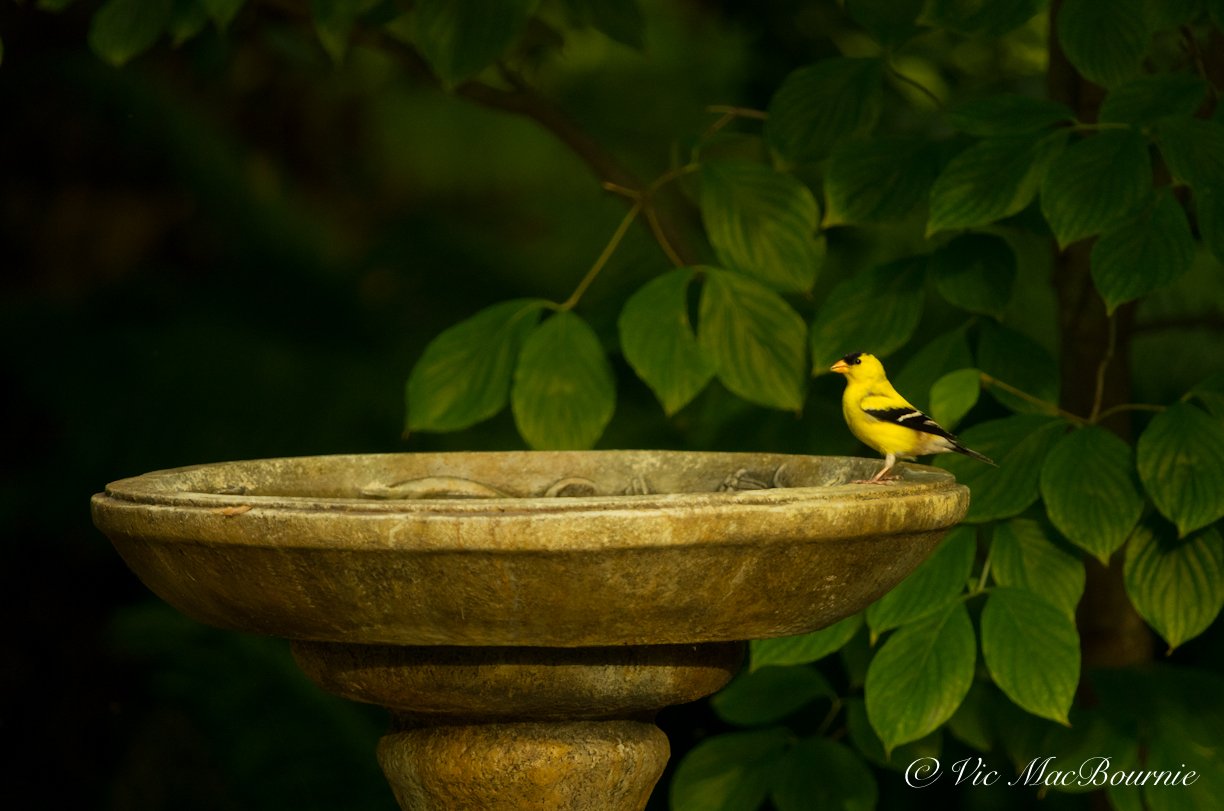
A Goldfinch stops by the birdbath to get a drink in the early evening.
When it comes to birds, everyone loves a little colour in their backyards. That’s why the Cardinal, Blue Jay and Goldfinch are among the most desirable birds in our woodland wildlife gardens.
The Cardinal, Blue Jay and Goldfinch are among the easiest, seed-eating backyard birds to attract to your feeders providing you are giving them their favourite foods. Add natural sources of food from berries to insects, nesting habitat, and, of course, a reliable water source and you will create plenty of colour in your backyard.
While I get great enjoyment from my bird feeding stations, providing natural food sources to our feathered friends is always the goal we should aspire to in our gardens. I have written a comprehensive post on feeding birds naturally. You can read about it here.
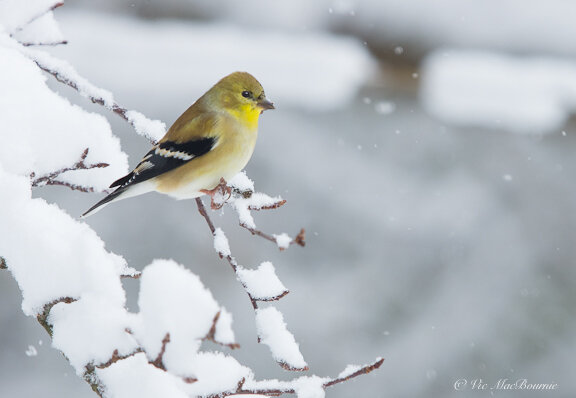
This image shows the subtle colour of a Goldfinch in winter during a snowstorm.
Of course these three stunners are not the only colourful birds we can attract to our backyards. My favourite colourful additions to the garden is the incredibly colourful Indigo bunting and the orange and black combination of the Baltimore Oriole. These two highly sought after and extremely colourful birds are more difficult to attract to your backyard feeders so I have tackled those in separate articles. (See my earlier stories on attracting Indigo Buntings and Orioles to your garden.)
To read my article on how the Goldfinch gets its stunning colour and how to attract them with native plants? Click here.
In this post, we’ll take a look at the Cardinal, Blue Jay and and Goldfinch: what they eat, where they nest and what little extras we can do to attract them to our backyards.
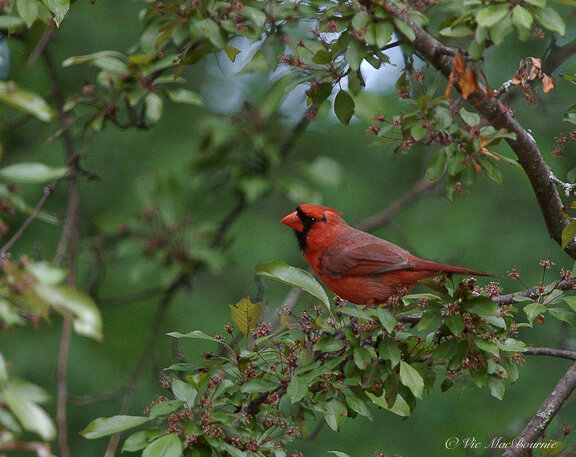
A male cardinal in a crabapple tree in spring.
Cardinals: everyone’s favourite backyard bird
It’s hard not to fall in love with Cardinals. Their cheerful persistent songs, the male cardinal’s bright red coat of feathers standing out in the landscape, and the buff-coloured female just as beautiful in her muted colours especially after a fresh snowfall.
These are year-round birds in our area and a regular at the feeders spring, summer, winter and fall.
A sure way to keep them around is to always have a supply of black-oil sunflower seeds in the feeders.
I use a no-mess blend of cracked sunflower seed from Wild Birds Unlimited.
Cardinals’ powerful jaws, and curved beaks give them the ability to easily open larger, harder seeds with great ease. They will readily take to not only both types of sunflower seed, but peanut pieces and safflower.
Cardinals are actually one of the few birds who seem tho really enjoy safflower seed. In fact, I have a separate feeder filled with safflower aimed primarily at attracting cardinals.
Cardinals will readily eat from most feeders, but consider providing them with a large platform feeder as well.
Although most of us know the cardinal as a regular visitor to our backyard feeders, seeds are not their only source of food. Like most birds, Cardinals rely on a steady supply of caterpillars and insects in early spring and summer during the mating season and to raise their young.
Host plants for butterfly larvae – including milkweed, coneflowers, goldenrod, black-eyed Susan aster, and lupines – will encourage cardinals into your yard and provide them with sources of protein to raise their young.
Cardinals are also attracted to fruit bearing plants, especially red fruit-bearing plants. The male cardinal actually gets its bright red coat from the carotenoid pigments in the red fruit. Serviceberry is a cardinal magnet in our garden but so too are are the berries of sumac and dogwoods. The red berries of the native Flowering dogwoods are favourites but not the raspberry-type fruit of the Cornus Kousa which is actually eaten by few if any birds.
(If you are considering planting a Serviceberry, be sure to check out my earlier article on this native tree and shrub here.)
The breeding season for the Northern male Cardinal runs from as early as March through to September. The nest, which is often found in dense shrubbery or in branches of smaller trees anywhere from 1-15 feet off the ground, is made up of twigs, bark strips bits of roots and even paper. It is often lined with vines, grass and hair.
Because they are not cavity dwelling birds, they are not attracted to a bird house.
They do, however, enjoy using backyard bird baths. Look for one that is two- to three-inches deep.
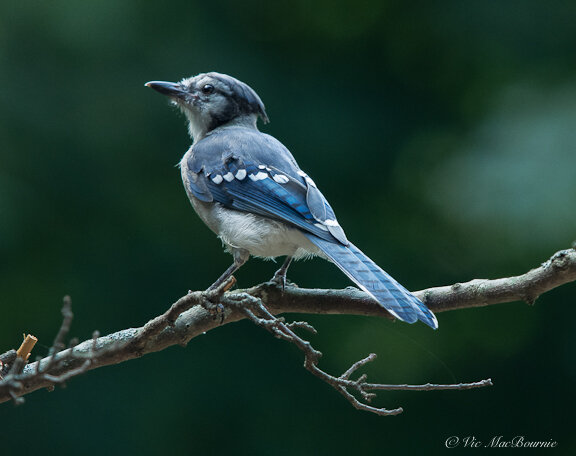
A blue jay shows off its stunning colours.
How about those Blue jays?
These guys might be considered bullies at the bird feeder but their incredible colour is just too good for most of us not to attract them to our backyard feeders.
And there isn’t a nut they cannot crack.
Start with a good helping of shelled or unshelled peanuts in a platform feeder and you’ll likely get your share of Blue jays in short order.
Their long, strong black bills are built for cracking open the hardest of nuts. In the forest, it comes in handy making short order of even tough nuts like acorns.
At our feeders, peanuts, large striped sunflower seeds, black oil sunflower seeds and the condensed seed cylinders (wild Birds Unlimited) favoured by Blue Jays and woodpeckers are guaranteed to attract them to your feeders.
Blue Jays are also attracted to corn, grains and suet at our feeders.
If you are looking to feed them naturally, acorns (from the oak tree) are an excellent source of food. Beechnuts (from beech trees) are also among their favourites.
While they are most often seen at our feeders, insects are still an important part of their diets including grasshoppers and caterpillars. The Cornell Lab of Ornithology reports that the stomach contents of Blue Jays studied over the course of a year showed that they contained about 22 per cent insects, with the remainder being acorns, nuts, fruits and grains.
We can’t overlook the fact that blue jays have been known to raid the nests of other birds and eat both the eggs and or the nestlings. If this is something that disturbs you, attracting Blue Jays may not be right for you.
Blue Jays nest from March through July in an open cup of twigs, grass, and sometimes mud, lined with rootlets. The nests are often in the crotch or thick outer branches of coniferous or deciduous trees. The Cornell Lab of Ornithology reports that Blue Jays often set up their nest in all types of forests but most often near oak trees on forest edges. They are quick to nest in both urban and suburban areas where both Oak trees and bird feeders are often in abundance.
Be sure to provide them with a reliable water source as well. A large, deep bird bath (3 inches at its deepest) will be a good source for your local Blue Jays.
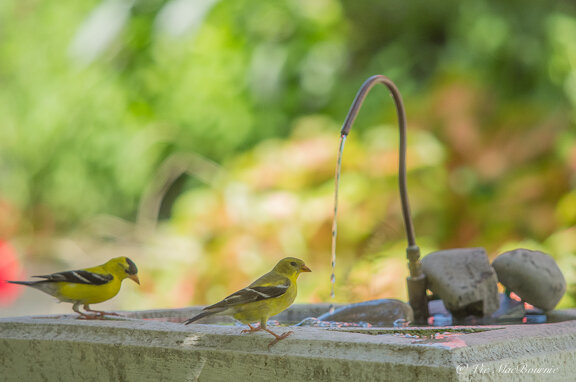
Goldfinches at the bird bath with a solar-powered DIY dripper.
Goldfinches: Add a touch of tropical to your backyard
It’s not hard to think of the Goldfinch when Harry Belafonte sings about the Yellow Bird up high in banana tree.
One look at the male or female American Goldfinches in their finest colours is a reminder of how beautiful our local backyard birds are throughout most of the United States and Canada. No need to travel to tropical regions to see colourful birds and hear their lovely song.
More and more of our American Goldfinches remain here year round helped along by numerous bird feeders and seeds from our flower beds and roadside weeds.
These primarily seed-eating birds are drawn to Niger seeds at our feeders. Be sure to provide the small, black seeds in special feeders designed to allow access to the tiny beaks of the finches. Also available are finch socks filled with Niger that are easily hung from trees or a hook at the feeders.
In nature, Goldfinches eat mostly seeds, especially those in the daisy family. Although they do eat some small insects in summer as well as spring buds, bark from twigs, and maple sap, they always come back to seeds.
It’s not uncommon to see them foraging along fence lines in weedy areas gathering the seeds of thistle, grasses and the seeds from elm, birch and alder trees. Consider leaving an area in your garden to grow wild if you want to add a natural feeding source for Goldfinches as well as other birds that depend on these areas as a food and nesting area.
Audubon reports that Goldfinches are late season nesters, timing their nestlings just as daisy-like flowers begin producing seeds.
Nesting occurs mostly during late summer between July and August in deciduous shrubs or trees usually less than 30 feet above the ground. The nest is a compact cup of plant fibres, spiderwebs and plant down.
Goldfinches will readily come to bird baths. Consider a small, shallow one (depth 1-2 inches) for these diminutive colourful birds.
As an affiliate marketer with Amazon or other marketing companies, I earn money from qualifying purchases.

What’s the best bird bath?
The best bird bath is the one that backyard birds use the most. But not all bird baths are created equal. The best approach is to have a selection of different bird baths that provide a variety of water sources for birds.
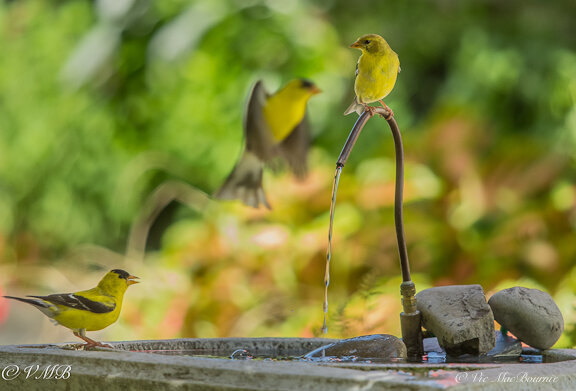
Goldfinches are attracted to the moving water from this DIY fountain.
What bird baths do birds use the most?
The best bird bath for your garden is the one the birds use the most.
It doesn’t have to be pretty, colourful, made of marble or have a three-tiered fountain.
In fact, it can be downright ugly. If the birds like it, then it’s the best for your woodland wildlife garden.
The question that really should be asked is: What bird bath do birds use the most?
The answer to that question is more complicated because birds, like we humans, are all different.
Having several very different bird baths at various levels will attract the largest number of birds to your backyard. This will not only attract a greater variety of birds, it will also limit territorial confrontations and ensure there is always a reliable water source in your garden. But, if I could have only one bird bath, it would be a very large concrete one raised a few feet off the ground, that has a rough surface for the birds to walk on, starts off quite shallow (a half inch) and gradually slopes toward the middle to about two to three inches deep.
I don’t own that bird bath. Instead, I offer the birds a multitude of above ground, hanging, and on-ground water sources of varying sizes where they can drink or bathe to their hearts’ content.
Provide birds with a choice of bird baths
In our front and back gardens, for example, there are usually between 10-12 bird baths on the go at any time during the spring, summer and fall. Most were purchased over the years either new from a store, purchased used from on-line marketplaces or home-made by yours truly.
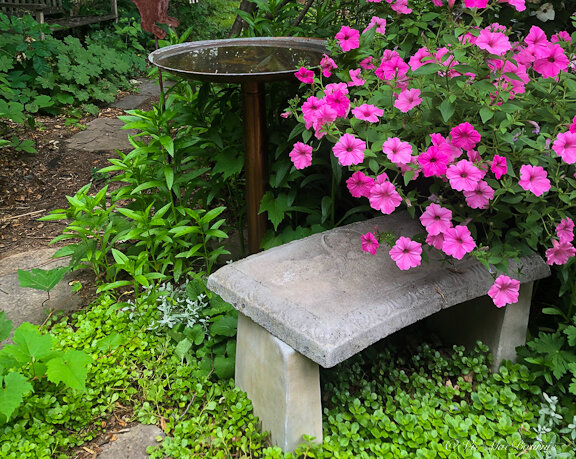
A copper bird bath is always a good choice both for its aesthetics as well as its antimicrobial benefits.
All of them are very different and appeal to an ever changing variety of birds.
Some include running water. Others are very natural with rocks, pea gravel and moss. Most are concrete, but some are copper, fibreglass, plastic and ceramic. One is only for drinking water.
Do you need that many bird baths?
Absolutely not. But if you hope to attract a variety of birds, a few different bird baths placed strategically in your yard will be a major factor in meeting their varying needs.
If I could have only one bird bath, it would be a very large concrete one raised a few feet off the ground, that has a rough surface for the birds to walk on, starts quite shallow (1-inch) and gradually slopes toward the middle to about two to three inches deep.
Best bird baths for particular bird species
A look at the various bird baths in my garden and how the birds use them is a good way to establish the general hierarchy of backyard bird baths.
By examining how the birds use the various bird baths in my yard, readers can get valuable information about what type of bird baths might be best for their yards.

The goldfinch adds a hit of colour as it visits one of our many bird baths. The Flowering dogwood in the background adds a nice background to the image.
A favourite for our backyard birds
One of my favourite bird baths is a three-year-old concrete model that sits in a corner of the yard beneath a flowering dogwood and attracts probably the greatest number and variety of birds in our garden. I think its attractiveness to birds is as much about its location in the garden as it is about its construction, but more on locating a bird bath later in the article.
This bird bath has a rough surface to give birds confidence they will not slip. It has a 60-inch circumference and fairly steep sides leading to about a 2.5-inch-deep centre.
It’s not built for smaller birds who shy away from jumping into the depths of the bird bath.
The lip on the bird bath is wide and rough enough that smaller birds will not hesitate to land on it for a drink, but unless the water is quite low in the bird bath (often by the end of the day if used regularly that day) the smaller birds such as chickadees, goldfinches, nuthatches and small sparrows choose other bird baths in the garden.
This bird bath is particularly attractive to larger backyard birds including cardinals, Blue Jays, woodpeckers, thrushes and grackles that visit the bird bath daily both for drinking and bathing.
It’s also short enough that squirrels and chipmunks can jump up to it to get a quick drink if necessary.
Don’t be afraid to move bird baths to a new location
The location of this bird bath is also ideal. It’s in a 1/2 shade location that gets late afternoon and evening sun. It sits nicely right below a flowering dogwood that provides plenty of perching areas for the birds to work their way down to the water when they feel it is safe. There are no hiding places around it that would allow predators to stalk it easily and it’s also in a far corner of the yard that does not get a lot of human traffic.
It may not be possible to place your bird bath(s) in ideal conditions, but don’t hesitate to move bird baths around the yard to look for a spot where the birds feel especially comfortable using it.

This home made bird bath is actually nothing but a plant stand and a glass bowl. We add a few rocks to it and a solar powered fountain.
Copper bird bath has antibacterial qualities
In another corner of the yard, close to the home, is a large copper bird bath purchased from a couple on Kijiji. The elegant copper bird bath proved too good to turn down despite a hefty price tag for a used bird bath and the hour-long drive to pick it up.
This is by far the largest of the traditional bird baths in our garden, with a 70-inch circumference and a middle depth of just over 2 inches.
It’s a popular choice for birds both big and small as well as a number of chipmunks and red squirrels who visit it regularly throughout the day.
Its close proximity to a garden seat and container planter gives the chipmunks and squirrels easy access to the bird bath that I can clearly see from the comfort of our family room.
The antibacterial qualities of copper is just an added bonus to its large water reservoir, gradual slope to the middle and it’s two-inch central depth. Its small rounded lip makes it easy for small birds to grasp for a quick drink and its depth is a favourite for our cardinals to use as their nightly bathing spot.
The copper bird bath’s biggest downfall is the fact that it, like any metal bird bath, can quickly overheat the water if left out in the sun for any given time. Even in the shade, the water can heat up on particularly hot days.
Our copper bird bath is in a shady area of the garden, but more importantly, it is very close to the hose and gets a cold-water top up on most days, especially on particularly hot ones.
Any metallic bird bath should be placed in a shady spot where it gets as little sun as possible to prevent the water from overheating.
A perfect solution is to purchase a copper hanging birdbath that you can tuck in a shady spot under a large tree, preferably near your favourite sitting area. This copper bird bath (see below) from Gardener’s Supply might be the perfect addition to your garden.
If your favourite place to watch the birds is on your deck, the deck mounted bird bath, also from Gardener’s Supply should do the trick.
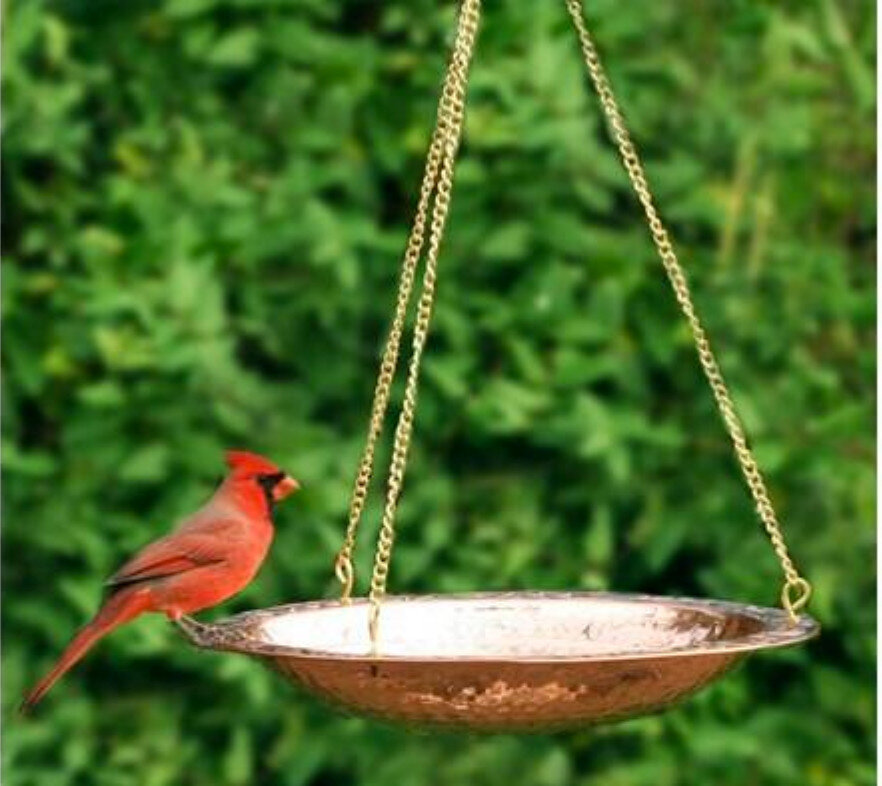
This copper bird bath from Gardener’s Supply is ideal for hanging in a tree near your favouring sitting place.
Benefits of a copper bird bath
Copper’s malleability has made it a popular building material dating back close to 10,000 years where it has been used to make tools, eating utensils and other important household objects.

If a deck is your favourite hangout spot to watch birds, a copper birdbath that attaches directly to the deck makes not only enjoying the birds easy, but filling and cleaning the bird bath is simple too.
Today, whether in its pure state or combined with other metals to create alloys such as brass or bronze, it is primarily used to create decorative indoor and outdoor objects that age gracefully, especially in the garden where it takes on a beautiful patina over time.
Often overlooked is copper’s anti-algae and anti-bacteria qualities that make it the perfect choice for bird baths and bird feeders. Easy to clean, with its own limited self-sterilizing qualities, copper bird baths should get high marks when considering the purchase of a new bird bath. Their longevity, antibacterial qualities and natural good looks as they age in the garden makes them a fine investment if you are looking for both a piece of art and highly functional bird bath for your garden.
Although a copper bird bath seems like a perfect addition to any garden, besides the high purchase cost, they also tend to be quite light in comparison to a concrete or resin bird bath and as a result are easily damaged if they are knocked over onto a hard surface. When placing your bird bath, try to keep it away from a concrete pathway or patio where it would likely be damaged if it fell over or was knocked over.
If purchasing an expensive copper birdbath does not interest you, you can take advantage of the antibacterial qualities of copper by simply stripping copper wiring of its plastic sheathing, wrapping it around an object and placing it in the birdbath. Try tucking it under a couple of rocks to keep it hidden and stop any curious mammals or crows from carrying it off.

A rock placed in the bird bath gives smaller birds a safe and familiar landing place to drink from.
Add a solar fountain
I recently picked up two smaller copper-look bird baths on line that work well near our patio. I suspect they might have been for sale at a good price because the previous owners didn’t have much luck attracting birds with them.
At first glance they looked awfully deep and their steep, metal sides likely scared away any birds.
Perfect, I thought when I picked them up. A few modifications later, and our two very attractive bird baths would work well for both aesthetics and, more importantly, our backyard birds.
To solve the problem, a large rock was simply placed in the middle of the bird bath. The rock is large enough to protrude out of the water enough to give smaller birds a comfortable and safe landing spot to stop for a quick drink or dip into the bird bath.
The other bird bath was a perfect candidate for my DIY Solar drip turned fountain. Because the centre was so deep, I was able to bury the solar pump under the flat stone that is part of the drip. The combination works perfectly with the moving water attracting birds and the flat rocks giving them safe access to the water.
If you are looking to add a solar pump to a bird bath, it’s best to get a deeper one so the pump is in deep water even if the birds splash a fair amount of water out of the bird bath.
When birds think square is cool

Our square bird bath in the Japanese-inspired garden.
Let’s face it, everyone wants nice things in their garden.
If it can double as a piece of art, it’s even more valuable. That’s how I feel about our square, super heavy bird bath that graces our front Japanese-style garden.
It fits perfectly into the Japanese garden aesthetic with its simple straight lines, heavy square pedestal stand and equally heavy square top. The entire bird bath is painted white with an acrylic paint that gives it a sophisticated look rather than the rustic one often associated with traditional cement bird baths.
I love its looks, but more importantly, so do the birds – especially the Goldfinches that visit it daily on multiple occasions. But they are not alone, our neighbourhood Robins also have a soft spot for this bird bath as well.
Very different birds – one very large and aggressive while taking a bath, the other quite small and shy – attracted to the same bird bath.
What’s the story here?
It turns out that this bird bath has a huge square rim (3-inches wide) surrounding the round and rather deep centre pool (1.5- to 2.5-inches deep) that has a natural shallower spot in the middle. The robins hop right in and fully enjoy themselves in the deeper water, while the Goldfinches stay on the large brim and easily sip at the water’s edge. Small, decorative indentations (leaf motif) are often filled with water and allow the Goldfinches to sip from them in complete safety.
Other birds, especially Cardinals, also visit the Japanese-style bird bath that sits nicely in the shade under the perching branches of a mature Japanese Maple.
Nearby, is a massive boulder with a small natural pool in it that fills with water after a heavy rain. On my daily watering rounds, I always fill the small natural pool after filling the bird bath. The small pool is a favourite for small birds but it’s so small and shallow that it is not a reliable source of water. The nearby bird bath creates that all important reliable source of water for the birds.
Tiny concrete bird bath is a small-bird favourite
Since we are still in the front garden, let’s talk about the tiny concrete bird bath that has become a real favourite for small birds, and chipmunks winter, summer, spring and fall.
It’s been in the same spot for probably eight years, is a mere 1.5 inches-deep when it is brimming full (almost never) and measures only 22 inches in circumference. But the Goldfinches, Chipping sparrows, chickadees and chipmunks gravitate to it daily. In fact, keeping it full of water is almost a full-time job during the heat of the summer.
Why do birds like this bird bath so much?
The key to the success of the tiny bird bath is the fact that small birds feel extremely safe using it. It’s only about 14 inches off the ground, has a rough surface and is shallow enough that they can jump right in and get down and dirty (or should I say clean).
It’s surrounded by naturalistic gardens and sits in the shade of the canopy of three mature trees: A very large Crimson Maple, a good-sized Japanese Maple and a large single-trunk Serviceberry.
With good vision all around, little threat from above, and an abundance of quick escape hatches this bird bath has become a safe, quiet place that creates a comfort level that these small birds like to take advantage of whenever possible.
Two large, moss-covered limestone boulders provide both the birds and the chipmunks with a perfect place to preen after their baths. It’s not uncommon to see them taking turns flitting from the bird bath to the rocks and back again. Our front garden is also a quiet place, away from a lot of human activity making the bird bath even more desirable for shy birds.
On-ground water sources are a favourite
Ever seen a flock of birds having the time of their life in a puddle after a storm? It’s often a dirty puddle by the side of the road with a massive lake right next to it and they choose the puddle. Why?
It’s all about safety and easy access for these smaller birds.
And that’s the beauty of small, shallow on-ground water features sprinkled throughout the garden.
These water sources could be simple – an old lidless piece of tupperware – or more involved like concrete formed into a leaf pattern. Either way, the birds, mammals, amphibians and reptiles will thank you for providing much needed water at ground level where they have easy access to it.
Add a bubbling rock
A small, solar-powered bubbling rock is one of the most heavily used water sources in our woodland garden, but it’s not what you may think.
When I first installed the bubbling rock, I imagined birds flocking to the bubbling end sipping and splashing about and just having the time of their lives.
That didn’t really happen. Sure, on occasion a bird will perch on the rock and sip or frolic about in the bubbling end of the rock, but it’s more likely that the birds, chipmunks and squirrels drink from the water reservoir at the bottom of the bubbling rock.
It’s common knowledge that birds are attracted to moving water whether it’s a simple drip or the steady flow from a bubbling rock, but like anything, the reliability of that water is of prime importance. I believe that because the solar fountain is only on during sunny periods, the bubbling water is less reliable than the water in the reservoir and the birds and animals have gotten used to going to the reliable source.
Keep that in mind the next time you let your bird baths go dry for an extended period of time.
Nevertheless, between the reservoir and the bubbler, it’s a popular spot in our garden.
Concrete leaf and a moose’s ears prove popular
We fell in love with it the minute we saw it, paid too much for it, but have enjoyed it for years. A large rhubarb leaf molded into a concrete on-ground bird bath that needs to be filled daily and holds a tiny amount of water.
But I don’t know what the chipping sparrows would do these days without it. They are the leaf’s biggest fans in the bird world.
In the mammal world, the leaf has become a hangout for one of our friendly chipmunk families that decided the water-filled leaf made for the perfect backyard swimming pool going so far as to dig through and around large river rock and pea gravel to locate their back door right next to the leaf.
Living their best life among the soft sedum and rocky outcrop surrounding their backyard pool I guess.
In another area of the garden is Bruce (Springsteen) the moose with large ears that are actually quite deep water reservoirs. My fondest memory of Bruce the moose, was the time a mother Oriole brought her entire brood to bathe in Bruce’s oversized ears.
It was quite the sight.
The two ears act as water reservoirs. The ears are not big. In fact, the young Orioles had to take turns jumping into the ears, but once they got in they found the water quite deep (about 3 inches). No worries though. The tight confines ensured the little birds were not going to slip or fall over. Maybe that’s why mom brought them in to see Bruce.
Anyway, everyone had a great time playing in Bruce’s ears for about 10 minutes before flying off.
Hanging bird bath at home in a tree
If you are like me and like to watch the birds up close during your morning coffee, a hanging bird bath is the best option. Ours sits in a large yellow magnolia that actually overhangs our patio. In the mornings, the boisterous Carolina wrens and Chickadees use it for a quick morning bath or drink and I get to watch them between sips of coffee.
Our hanging bird bath is from Lee Valley and sports a very shallow (1-inch in the deepest part) ceramic bowl with a terra cotta edge to provide grip for the small birds. It needs regular filling, so placing it in a shady, easily accessible spot allows you to keep your eye on its water levels throughout the day.
Because it is so shallow, by placing a layer of pea gravel in it, butterflies, dragonflies and other insects may also become regular visitors.
In conclusion (not all bird baths are created equal)
Bird baths are no different than most things in life – a single solution is rarely the best.
Success will be more likely if you incorporate a few different bird baths to attract different types of birds. Large deep ones for big birds like Jays, Cardinals, Grackles, Orioles even the neighbourhood crows. Smaller, shallow birdbaths for Chickadees, goldfinches, nuthatches, sparrows, house and purple finches. On-ground bird baths for shy birds that prefer to bathe at ground level.
I have yet to mention our three massive garden water bowls that sit on the ground between 8-12 inches high. On more than a few occasions, I have seen a large hawk use one of the bowls as a bird bath.
Generally speaking the bigger and deeper the bird bath, the bigger the birds will be who use them.
A solar fountain is an excellent addition to any bird bath. Use one with a gentle spray nozzle to provide hummingbirds with an opportunity to cool off by flying through the spray.
Remember that bird baths don’t have to be expensive.
Birds aren’t looking for pretty. They are way to busy surviving.
Give them a helping hand and you’ll be rewarded ten times over.
Providing birds with water is vitally important, but don’t forget to provide food as well.
While I get great enjoyment from my bird feeding stations, providing natural food sources to our feathered friends is always the goal we should aspire to in our gardens. I have written a comprehensive post on feeding birds naturally. You can read about it here.
As an affiliate marketer with Amazon or other marketing companies, I earn money from qualifying purchases.

DIY: Moss garden container (in a few simple steps)
Creating your own moss garden container is a fun and rewarding experience. This container was created in the Japanese style from a former copper fire pit combining moss, a Japanese Maple and a large stone.
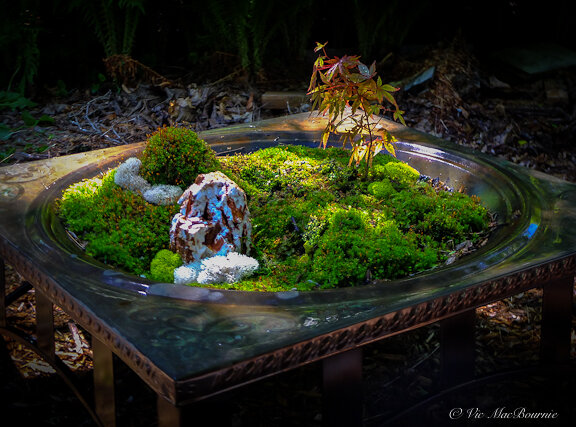
The finished moss garden container in its copper former fire pit.
DIY moss garden at home in Woodland garden
I had been harvesting moss from our old fire pit for years, but it was now time to turn it from an eyesore into a DIY piece of garden art for the woodland garden
And, once the idea came to me, I was surprised how easy it was.
I like to think the finished result was years in the making, but it actually only took about an hour worth of work once the plan was put into motion.
The result of my work, and probably about $20 in costs, is the creation of a beautiful moss garden container and a natural piece of art that looks right at home in the woodland garden and imparts a touch of Japanese-style elegance along one of our shaded paths.
I set the moss container up in a spot in the garden where I can see it when I sit on the patio. In the morning, when I’m out with my coffee, the Japanese Maple is back lit and the moss lights up as if a small spotlight were on it.
Looking for more money-saving tips for your garden. Be sure to check out my in-depth article on building your garden on a budget.
It certainly steals the show in the morning.
Although I chose to use an old, weathered fire pit with a beautiful copper top, any large bowl could serve the same purpose.
Check out thrift stores, Craig’s list or Kijiji for old fire pots that would make appropriate containers for the moss garden.
You might already even have something in the shed that would work perfectly. A galvanized steel container would impart a similar old-world feeling.
What you will need:
• A large container of some sort. Preferably with drainage holes. If there are no drainage holes, you will need to drill a few holes in the bottom to allow for proper drainage. It’s good to keep the bowl damp but not full of water.
• A base to grow the moss on. While most of us will use soil (slightly acidic soil is an excellent base), this fire pit has always been full of wood that was mostly already burnt into a charcoal. I simply left the partially burnt wood in the fire pit, in a shady spot over the years, and the most beautiful moss grew on the charcoal. In fact, plenty of years I harvested a good amount of it for use in garden containers and, by the next spring or even later that fall, it had all grown back in.
• As an alternative to growing your own moss, you can now purchase it from on line sources or likely even at high quality nurseries that specialize in garden crafts and DIY projects. Just make sure it is commercially grown and not taken from the forest. Commercially grown sheet moss performs better and is more uniform. (Check out the Supermoss sheets available at Amazon. Similar moss sheets might be available at your local nursery.)
• If you are planning to use you moss bowl in a sunnier location, consider using one of the moss-like perennials such as Irish or Scotch moss. Even thyme will give you that moss-like look without the need for much, if any, upkeep. (see my earlier article on moss-like ground covers)
• I used a small Japanese Maple mostly because we had one growing from a seed in the garden that was the perfect size for the project. I was seriously considering using a maidenhair fern rather than the Japanese Maple, but I have another project in mind that would be better suited for the fern. A small, elegant fern like the Maidenhair would be perfect, but you could also use a store-bought orchid (which would obviously need to be brought in over the winter). The damp environment in the moss bowl would likely be the perfect medium for growing an orchid.
• If you want to keep it simple, consider using elegant twigs cut from your own garden, (corkscrew willow branches work beautifully and can be purchased at most garden shops). Strip the bark and let the sun bleach them to make them stand out against the moss. Other choices include an interesting stone, much like the one I used in this setting.
• In this case, I put the Japanese Maple into a small biodegradable pot packed with fresh soil which could be easily swapped out for another plant without disrupting the moss.
• A single large stone or an odd number grouping of say 3 stones helps to anchor the design and could become the focal point of the moss garden or an anchor point to balance off the plant material. In Japanese gardens, rocks have long been used as anchor points and used to show the strength and stability of the garden and the earth.
• In my design I actually went out and purchased a rock to use in the design. Although I have lots of rocks on the property, I was looking for a certain type of stone that would look appropriate in the design. I went looking for a stone with earth-tone colours that was unique and would stand tall in the moss, appearing to emerge out of the earth rather than sitting on top of it. A grouping of threee similar stones emerging from the moss at varying heights would be stunning and likely all you would need in the moss garden.
• Finally I added a little reindeer moss and supermoss bits (purchased from the same craft store as the rock) to give the design texture and a little more variety of moss.


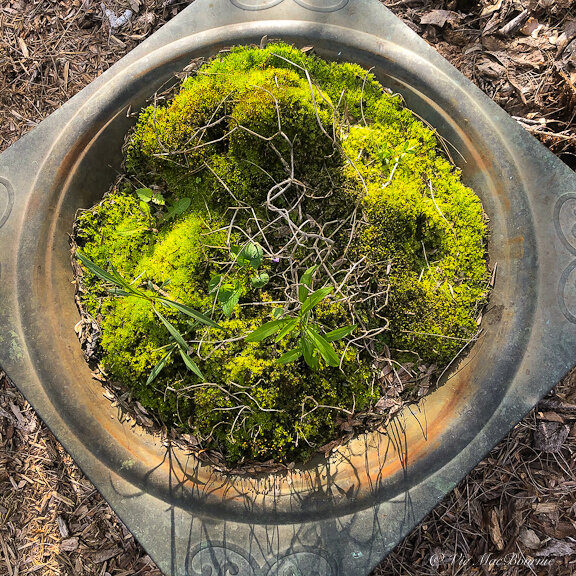
Simple steps to put the creation together
• Once all the items for the design are ready, it is time to begin creating your moss masterpiece.
• In my case the moss was already in place and my first steps involved cleaning up the moss of small plants (we can call them weeds) that had made their way into the moss as well as dead branches etc. I carefully removed the weeds and tucked the moss back into the holes created by removing the plants.
• If you are using commercially bought sheet moss, you will simply lay that over your acid-based soil and tamp it down for a nice fit. It is probably a wise idea to create an undulating surface with the soil prior to laying the moss in, just to give the design a more natural look.
• Once the moss is in place, cut out areas to place your stone(s) and place them into the soil, before replacing the moss around the base of the stone(s). Make sure the stones are emerging out of the moss rather than sitting on top. In proper landscaping designs, it is not uncommon for three quarters of the rock to actually be buried in the earth. Depending on the stone(s) you choose, you may not have to bury the stone(s) that deep, but it is vital that the stone(s) appear rooted in the earth.
• The same procedure is more or less followed by planting the tree or orchid etc. Create a pocket in the soil for the plant to sit in. I put the tree in a small container and planted that into the moss but you could plant it directly into the soil. If you are using an orchid, you would either plant it in a container with the suitable orchid mix or ensure the proper mix is in the pocket you created. By using a container, it’s easy to change up your design throughout the season by simply changing the container.
• Now it’s time to gently water your moss garden with a fine mist.
Caring for your moss garden
If done properly and placed in a mostly shady location your moss garden should need little care over the summer, spring and fall. In winter, depending how cold it is where you garden, you might want to cover the container or move it to a shed or garage.
Any plants that are growing in the container can either be left where they are if they are cold hardy, protected from the cold if you are concerned, or removed and taken indoors. The moss itself should not need any special care accept to clear any fall leaves off it before winter.
Although you may think it needs to be in an area of deep shade, mosses actually benefit from a little indirect sun preferably in the morning. If you can put your moss container in an area that gets dappled shade in the morning it should do very well.
One of the beauties of creating a moss container is that it can be moved around the garden either during the day or more likely through the seasons to give it just the right amount of sun and shade.
Monitor the moss to keep it free of leaves and unwanted plant growth.
Water your moss daily if possible but ideally only with a light misting. Do not drown the moss in water, a light misting to keep it damp is ideal.
A once a week watering to keep the soil below the moss damp will help create moisture around the moss.
Fertilization is not needed. If you feel you need to fertilize a plant growing in the moss, just fertilize around the plant itself, preferably by removing a small amount of moss, fertilizing the plant, and returning the moss in its place.
Other than that, enjoy your moss container.
Gardening on a budget links
Ten money-saving tips for the weekend gardener
DIY Bark Butter feeder for Woodpeckers
DIY reflection pond for photography
Click & Grow is ideal for Native Plants from seed
Remove your turf and save money
Hiring students to get your garden in shape
As an affiliate marketer with Amazon or other marketing companies, I earn money from qualifying purchases.
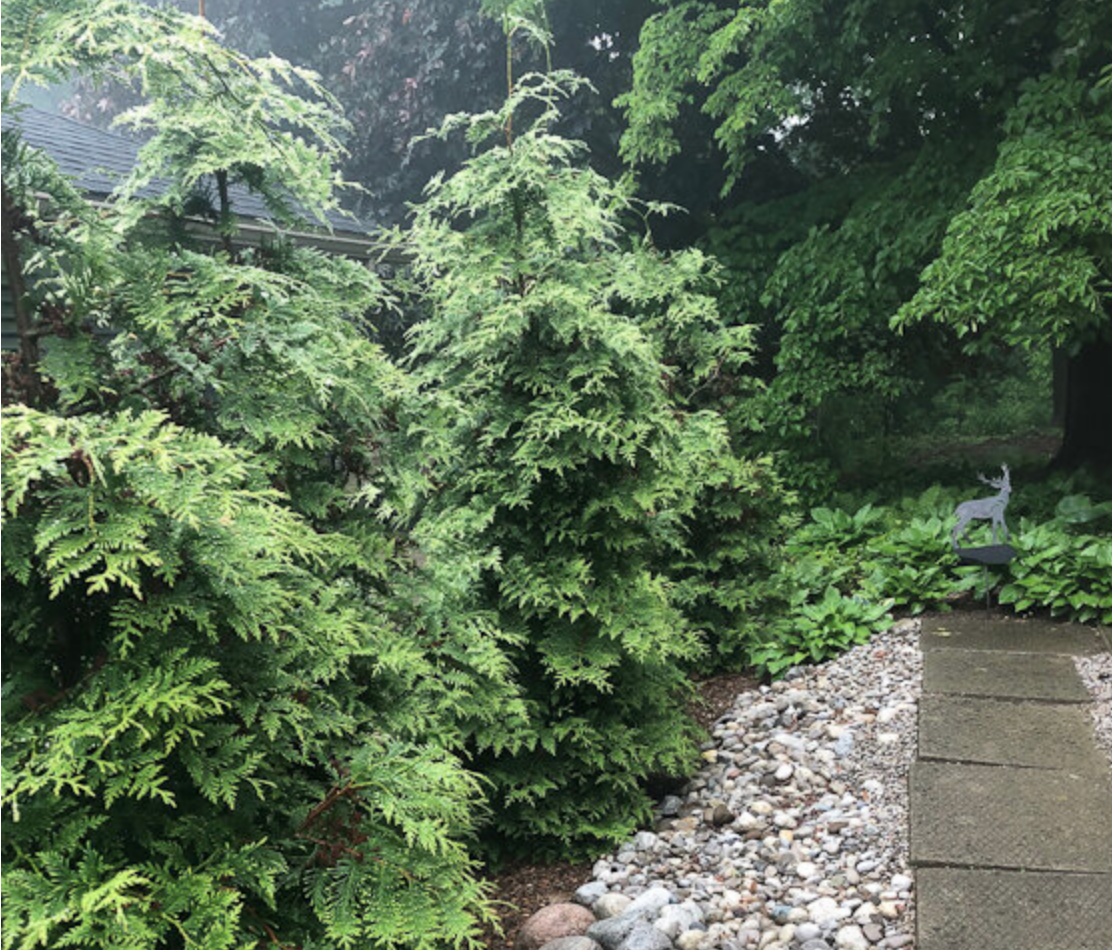
Green Giant cedars: Fast growing arborvitae ideal for privacy
Go big or go home so the saying goes. I think it might better read, Bring Big home in the form of Green Giant cedars. If you are looking for a fast-growing privacy hedge or an elegant evergreen to make a statement in your woodland garden, the Green Giant might be the answer.
Green Giant arborvitae create year-round privacy fast
Is there room anymore in our gardens for big? Big trees, big shrubs, big boulders – BIG, Bold colour and plantings.
Well, make room for the Green Giant. Thuya Green Giant, Green Giant Arborvitae, call it what you wish. These are big, bold evergreens in your garden and we all need more of these type of statements in our woodland gardens.
Want privacy? This is how you get it. And not just in the summer. Green Giants provide year-round privacy and they do it quickly. There is no need to wait years to eliminate that eyesore or bothersome neighbour.
It seems like everything is miniaturized in garden centres these days, aimed more at timid gardeners who have been convinced that their properties are too small to handle any larger-sized trees, plants and shrubs.
Well, Green Giants are here to prove that big and bold is beautiful. If there was a bean stock, Thuya Green Giant would outgrow it and look fantastic doing it.
Let’s take a closer look at these evergreens – also known as Green Giant Arborvitae – that grow big fast, provide the perfect evergreen screen when you need it in a hurry, have a beautiful dense deep green colour and a natural loose habit that allows them to fit into a natural woodland setting. They are shelter for wildlife during our cold winters, a nesting spot for birds in spring and summer and best of all, deer leave them alone. That’s not all, Green Giants are not bothered by insects or disease and can stand up to most adverse weather situations.
A cedar deer don’t like
Yes, you read that right. A cedar that deer, including those all around our property, will not devour in a day.
Thuja Green Giants (Thuja Standishii Plicata ‘Green Giant’) did not earn their names from being timid.
These things can grow to enormous heights (40-60 ft) with a width of between 12-20 ft. And they don’t waste time doing it putting on 3 to 5 feet of growth a season when they’re happy.
These pyramidal shaped cedars grow in zones 5-7 and are an excellent disease-free substitute for other plants like Western Red Cedar or Leyland Cypress. Spring growth emerges a fresh lighter green and winter colour is a darker, bronzer shade.

These Green Giants form the perfect natural privacy screen between our neighbours and us, creating a wall of soft evergreen that even the birds enjoy.
They can grow happily in full sun to partial shade, in acidic or alkaline soil and are not fussy about whether it’s sandy or heavy clay.
So, in other words, these things will grow just about anywhere, in any soil conditions.
Use them as a specimen tree and let them be free to grow into their natural shape in your yard, or plant them together every 5 to 6 feet to create a privacy barrier to your property from neighbours, unsightly objects and busy streets. Their dense foliage will go a long way to not only block out the view but reduce noise and act as a possible wind-break.
Your choice to grow as a specimen or a privacy screen, but I always lean to allowing a tree to grow into its natural shape.

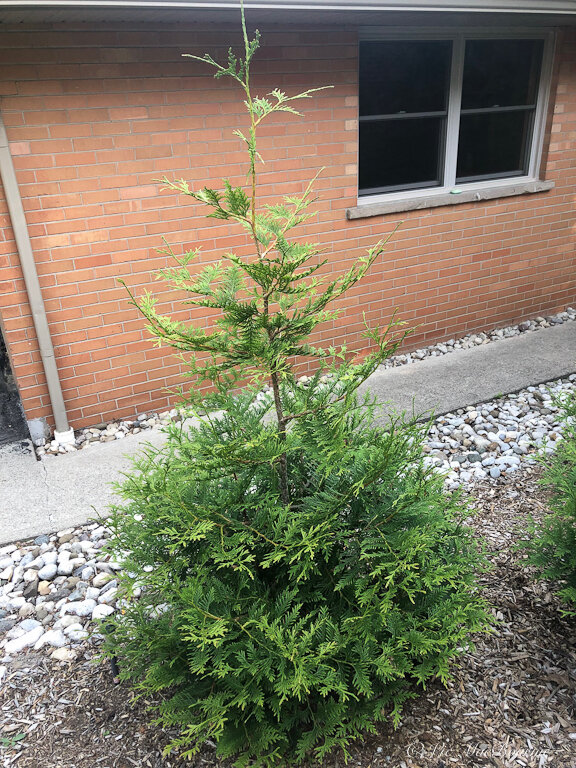

Green Giants on our property
In fact, the pictures above show the 8 Green Giants my neighbour and I planted between our properties last summer.
The results are impressive.
We chose the Green Giants to replace an unsightly, overgrown deciduous hedge that had long past its prime. They were planted close together (about 6 feet) and staggered them to give the foliage more room to grow and spread out.
The result is stunning. The growth rate is spectacular.
The original 5-foot cedars grew two to three feet the first year we planted them and they are already forming a solid screen between us.
I’m hoping we can grow them more as large specimens with minimum pruning but time will dictate that. If they get too big width-wise, we could always remove a couple to give them more room to grow naturally.
This spring, I have noticed that the birds have discovered it and I think are beginning to take up residence in their lovely dense foliage.
Of particular note to those looking to save some money. Two of the eight trees we planted were much smaller than the other six trees. The nursery ran out of the larger trees, so we purchased two of the smaller, less expensive cedars.
Buy small and save big on Green Giants
As an experiment, we put them up front where they will receive more direct evening sun than the larger specimens. We expected the smaller ones to perform better than the larger specimens and eventually catch up to the point where it would be hard to recognize any real difference between them.
We were shocked to see the smaller cedars almost catch up to their larger neighbours in one season of growth. I imagine that by the end of the second year, it will be hard to distinguish between the smaller cedars and the larger ones.
So, if you are looking to save money as well as make the planting procedure much easier with the smaller root balls, consider going with the smaller versions of the cedars at the nursery. The growth rate is so strong on these trees that you will not have to wait long before they begin filling in and meeting your goals.
Emerald cedars vs Green Giants
I am going to go out on a limb here and just say it – why are so many gardeners choosing Emerald Green cedars (Thuja occidentalis ‘Smaragd’) over Green Giants or other, more natural looking, cedars?
I believe it all goes back to what the nurseries are offering and the push toward a smaller-scaled landscape because (in my mind) it certainly is not because Emerald Green cedars are nice.
They may look nice on the nursery lot with their bright green foliage but, to my eye, they don’t look appropriate in most landscapes. Hardy to zone 3b and growing to a height of only 12 feet with a spread of only about 4 feet, I can see why homeowners are originally attracted to these trees.
But the narrowness and upright, extremely dense foliage and brighter green colour just gives these a far too stiff and formal look to my liking. They work fine in a more formal setting, but I really don’t think they belong in a more natural setting and certainly not in a woodland garden.
My biggest problem with them is that, because the growth is so tight, the branches don’t intermingle well together and when they do, they often die off because of a lack of sun. The result, if any pruning is done to them, are ugly brown dead areas.
Is it obvious that I don’t like them much?
Just to add to my dislike, these things don’t live long at all averaging only about 30 years.
Consider the Black cedar or white cedars if deer are not an issue
My first choice in cedars is by far Black cedars (Thuja occidentalis ‘Nigra’). These are very much like Green Giants but are described as a selection of a native North American species. The Black cedars’ natural foliage that is a dense, dark and green with a little bit of a dusty-green look is even nicer than the Green Giants’ also impressive foliage.
A friend of mine recently put in a row of the black cedars along a fence and the result is stunning.
Black cedars grow fast to about 20 feet with a 7 foot spread, but not as quickly as Green Giants. The Nigra takes a pruning well and likes at least some sun over the course of the day.
The only reason my neighbour and I chose Green Giants over Black cedars is the fact that deer would have devastated the Black cedars within a week of planting them.
Following black cedars, our native swamp cedars, (Thuja Occidentalis) commonly known as the Arbor Vitae, Arborvitae, Eastern Arborvitae, Eastern White-cedar, Northern White Cedar, Northern White-cedar, Swamp-cedar, would be my next choice. These are often sold at the nurseries in spring as bare rooted cedars. They look spindly and not very attractive upon purchase, but are very cheap, grow fast and eventually thicken up to create an almost impenetrable privacy wall or impressive specimens. Under the right conditions, these are also very long lived.
These white cedars are perfect, accept they are high on the list of favourite food for our local deer population.
Again, Green Giants are of no interest to deer. My neighbour and I went through an entire winter where the deer left our Green Giants alone, and we did not even spray them with any deer repellent.
Impressive to say the least.
Why don’t I like Emerald Green cedars. They grow too tightly, too slowly and don’t provide the privacy that Green Giants or other more ‘loose-growing cedars’ can provide homeowners. In addition, their bright green foliage stands out in the landscape too much, in my mind. Rather than forming a perfect dark background, the Emeralds want to take centre stage.
Their biggest problem, as I mentioned earlier, is that because of their tight growth habit, if they begin to grow together like we want them to so they provide privacy, they will die off where they touch because of a lack of sun. If enough space is left between them to allow for their mature growth, they fail to provide the wall of privacy that the homeowner originally bought them for.
I know that landscapers are using them a lot and nurseries are pushing them to homeowners as the perfect hedging material, but consider their drawbacks before you go ahead and plant them.
One of our neighbours has them along their driveway, and every year they have to wrap them in burlap to stop the deer from snacking on them as well as protect them from cold winds. That’s not something I’m interested in doing, but if you are okay with it, by all means plant them.
Many homeowners like Emerald cedars, I happen to not be one of them. I’m definitely biased, so if you like them, plant them.
Green Giants are far from perfect
This is not to say that Green Giants are the perfect tree.
Anything that grows as fast as Green Giants come with their own problems. Silver maples, poplars and birch trees are good examples of fast-growing trees that, although they have their benefits, also come with big problems.
The faster a tree grows, generally the weaker its wood.
Why does that matter?
It matters most in severe weather when heavy snows or high winds can snap branches off. Whether they hit your home or just leave the trees unsightly, it’s never a good thing to have branches breaking on your trees.
In the case of cedars, it’s not uncommon for the tree branches to split resulting in either complete destruction of the tree or severe disfiguring.
This winter we did have a severe late winter snowstorm that left our cedars bent over by the heavy snow. I went out with a broom to clear some of the snow knowing that the trees can suffer damage in these situations. Turned out that they bounced back immediately and came through the storm with flying colours.
Another problem with fast growing trees is that they tend not to have long lives. Green Giants are given about a 40-year life span. I’m sure that in the right conditions they can live much longer but on average that is what you can expect.
The sheer size of these fast-growing trees is obviously a problem for some people. If you are young, you might want to consider the full mature height of these trees. They get large and can take up a lot of room if they are allowed to grow naturally. That can be a good or bad thing depending on the size of your yard and how you plan to use the tree(s) in your landscape.
My neighbour and I are, let’s say well past being called ‘young’ so having a fast-growing tree is perfect for us.
Let’s just say we are not too worried about either outliving the trees or about them getting to big in our lifetime. Your situation might be different. If so, a different type of tree might be a better choice, but don’t immediately write off a fast growing tree like the Green Giants.
If you need a quick cover that looks great, it’s hard to beat the vigour and beauty of the Green Giant cedar.
As an affiliate marketer with Amazon or other marketing companies, I earn money from qualifying purchases.
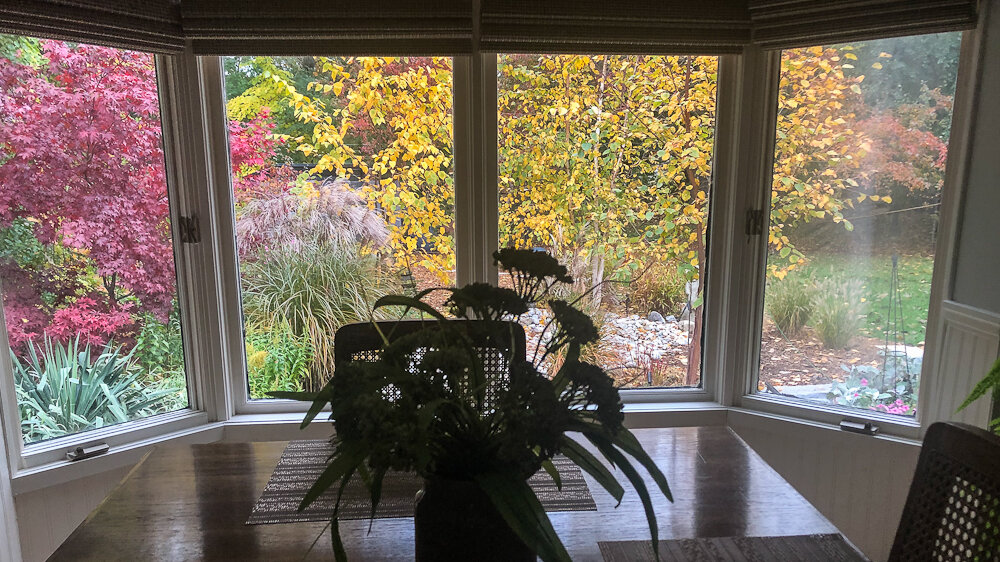
Can I plant trees close to my house?
Creating a window into your low-maintenance Woodland Garden can be as simple as planting a tree or shrub up close to your favourite window to experience nature up close. Most gardeners have been happy to view their gardens from afar. Now is the time to consider landscaping our yards to bring our gardens indoors. Consider creating garden vignettes that incorporate a beautiful bird bath, a bird house or even better an elegant bird feeder, or water feature just outside your window for full-season interest and a window into your woodland.

Planting trees in close to your home and windows helps to give you a window into your woodland.
Trees planted close to windows create rooms with a view
You shouldn’t have to step outside to enjoy your Woodland and wildlife garden. By creating impressive views from inside your home, the garden and its wildlife always has a presence.
Whether it’s a full fledged Woodland that stretches out as far as the eye can see, or a smaller area in your garden, consider finding ways to welcome it into your home.
In winter, you’ll appreciate looking out at the birds flitting from branch to branch. In spring, you might be lucky enough to watch a pair of cardinals build a nest and raise their young.
There are plenty of ways to bring the outdoors in, but I find planting trees, shrubs, grasses, ground covers and flowers close to the windows in our one-storey house to be the best way to experience the woodland garden at all times.
Looking out and seeing birds in the branches just outside the window is such a pleasant experience compared to looking out over a sea of grass with gardens in the distance.
I also don’t worry about tree roots invading our basement. I am aware that this can and does occur at times – mostly in 100-plus year old homes with massive oak trees or maples planted very close to the home. By planting trees with less aggressive rooting systems, these problems can be averted.
A few good trees to plant near a home include birches, various forms of apple including crabapples, dogwoods, Japanese maples and hawthorn trees.
Trees to keep away from your home’s foundation include silver maple, poplars and white ash.
Our trees are far enough away that I am not concerned that they will ever get large enough to do any damage to the foundation of the home. Besides, I won’t probably be around by the time that occurs. In the meantime, I am going to enjoy feeling one with nature.
Getting up close and personal
There are many ways to get up close and personal with nature.
Some involve constructing outdoor structures … or building expensive three- and four-season rooms that reach into your garden and surround you with your woodland in a climate-controlled, mosquito-free environment.
Perfect, but often very pricey.
It’s a whole lot easier and much less expensive to simply take advantage of what’s already staring you in the face.
Existing windows and doors are an opportunity many gardeners overlook when it comes to maximizing their gardens. It’s not enough to simply look out over the garden, try to bring the woodland in close to give you an intimate window into the goings on in your garden. Birds flitting from branch to branch or a mother feeding her young just on the other side of the window provides all the entertainment you need over your morning coffee, breakfast, lunch and dinner.
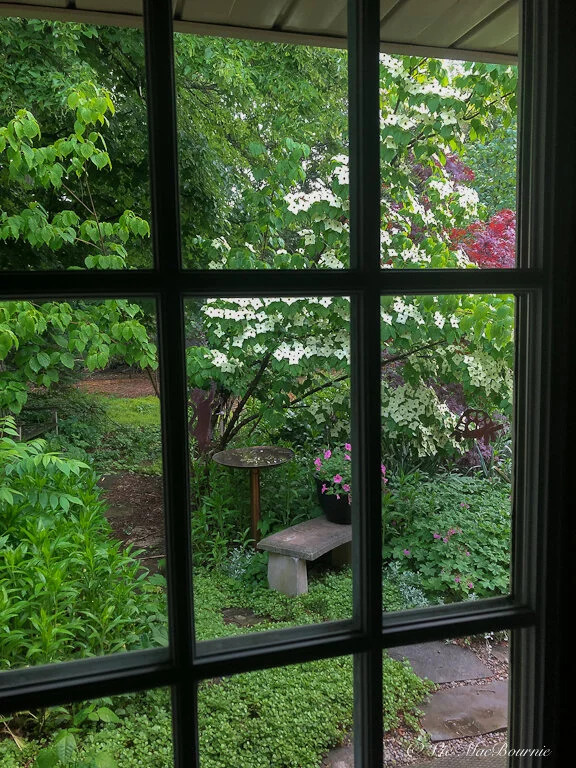
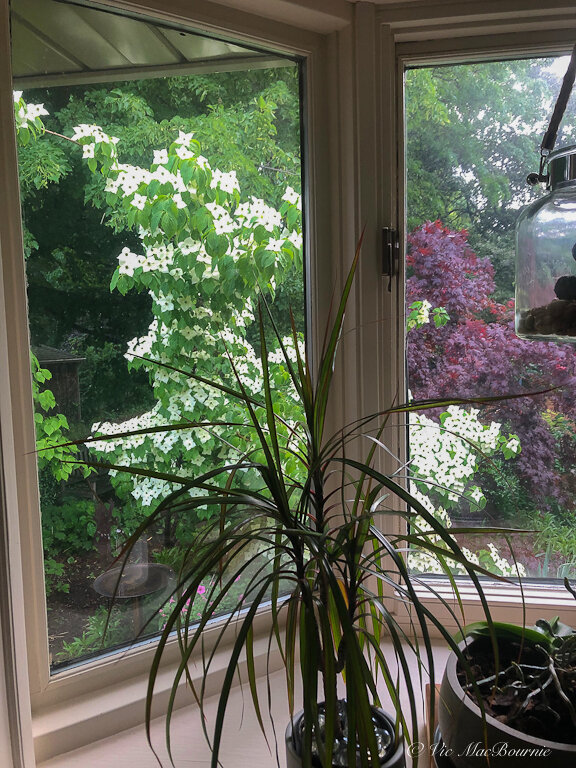
Create vignettes outside your windows
Similar to indoor decorating, look to create vignettes on the outside that you can appreciate from inside.
French doors, for example, provide the perfect opportunity to create a beautiful vignette just outside the doors.
Outside our family room French door is a beautiful copper birdbath, a small concrete bench, a container full of annual flowers as well as a beautiful flowering Cornus Kousa. A small flagstone pathway gives the viewers’ eyes a view past a rose bush and into the main garden.
From the couch in the family room, I can watch a steady procession of birds at the birdbath and admire the beautiful view of the flowering dogwood. In winter the birdbath is heated to continue to provide entertainment while giving the birds vital fresh water and a bathing opportunity even in the dead of winter.
In your garden, it may be nothing more than a grouping of pots filled with colourful plants or dramatic grasses, garden art or a simple bird bath, or water feature that you can appreciate from both indoors and out.
Five ways to bring the Woodland inside:
• Spend time standing at or looking out the windows of your home in every season and dream of what you might want to view. Then make it happen
• Plant trees or clumps of trees close to your home outside windows and doors to give you intimate views of nature from inside your home.
• Plan a lovely vignette outside your favourite window.
• If you have a window overlooking a neighbour, consider planting cedars. Make sure they are either native white cedar, black cedar or a cultivar that is loose and natural feeling. Some of the cedars sold at nurseries are more ornamental and not really the best for hedging. The best cedars grow taller than a fence, provide year-round interest and attract birds both as nesting areas and food sources. Hang a small feeder nearby for even more entertainment.
• If you need new windows or doors, take advantage of the opportunity by either increasing the amount of glazing (glass) or using a French door or sliders over a standard door. Maximize your view and then create the view you dream of through landscaping.
Wise words from a professional landscaper
A landscape professional once told me that a good landscape allows people to live in it not just admire it from afar.
It’s an approach we all need to consider more carefully when we create our landscapes. Planting trees or shrubs close to windows and places where we spend the most time is a sure fire way to fully experience our gardens.
Natural tree canopies replace umbrellas
Why use a massive garden umbrella to give you shade from the afternoon sun, when a large tree canopy can do it with greater style? Plant that tree now and by the time it provides you with the canopy you desire, your existing umbrella will need replacing.
We are lucky enough to have large windows in both the front and back of our ranch-style home. In addition, to open the garden up even more, every exterior door has been converted to either have a large window or turned into a French door for maximum viewing.
To some extent, our gardens are designed around the windows.
Our large front picture windows look out onto a grassless woodland setting that includes, among other plants and trees, Japanese maples, a lovely serviceberry, fully mature Crimson and red maples as well as our neighbour’s large blue spruce trees.
But it’s our view out into the back garden that best illustrates our attempt to bring the Woodland indoors.
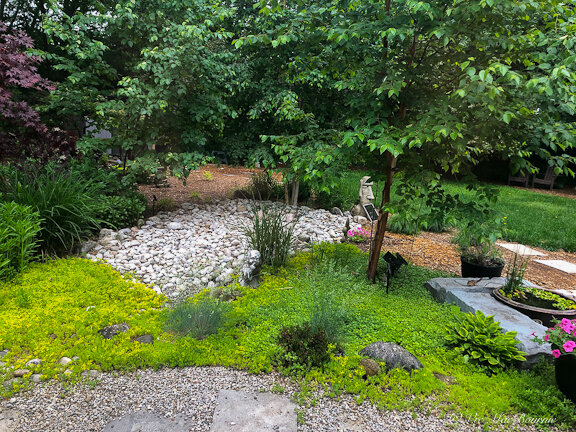
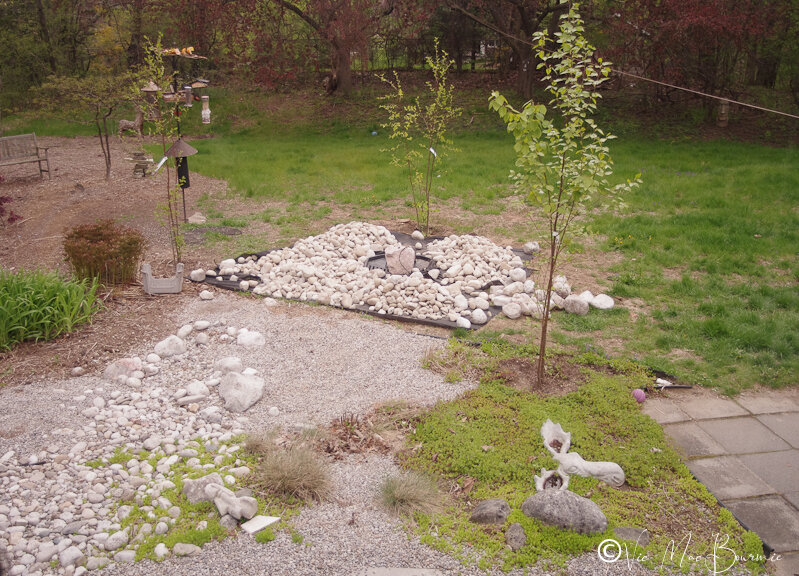

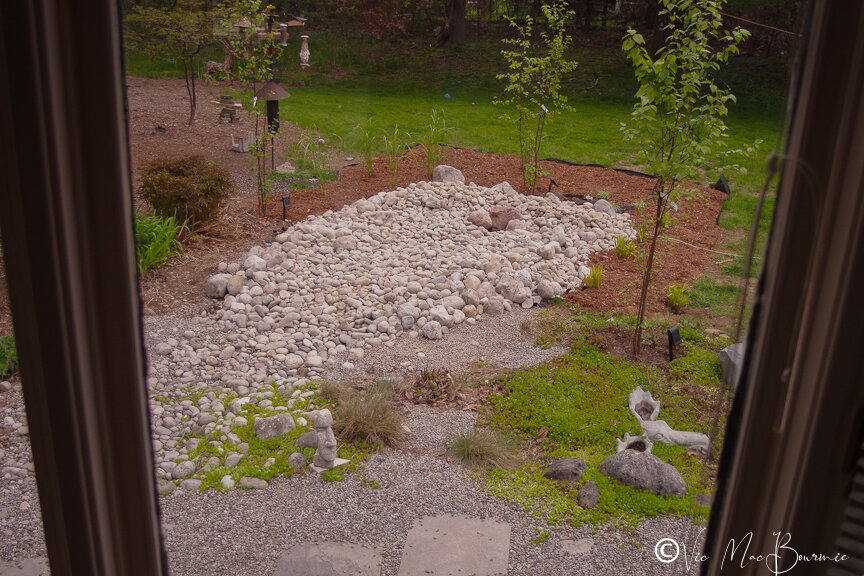
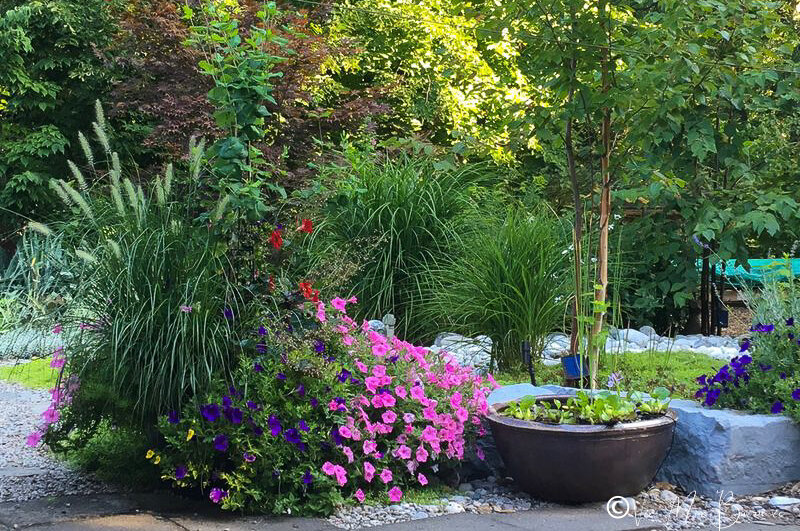
Creating a view: Designing a dry-river bed
After years of looking out a large dining room bay window into our back garden, it donned on me that we really needed to create an interesting view that we could appreciate year round.
The view had always begged for something special, but I could never decide how best to use the space.
Over the years, it primarily served as our main bird- and deer-feeding stations. The birds and deer provided plenty of entertainment, but it was time for a change.
Although it was completed just three years ago, it’s fair to say this project was years in the making.
It began with a plan to create a dry-river bed that connected to an existing pathway of river rock, pea gravel and flagstone stepping stones – a landscaping project my wife and I completed many years earlier. I liked the look and feel of the existing pathway and thought it would be good to bring that same feeling out into the landscape.
Since a bubbling rock has always been a dream of mine, we incorporated a small solar powered pump with a bubbling rock at the head of the dry-river bed. The idea was coming together in my mind but it needed more to make it look natural and bring it together as a cohesive landscape.
Eventually, after combing Pinterest for dry-river ideas, the concept of a bubbling rock and dry river bed running through a forest of birch trees was born.
Soon after, three clump birches were planted in the area around where the dry river bed would eventually go. The bubbling rock and dry river bed followed.
Grasses, ground covers and native flowers have been added since then to soften the hard edge of the river bed rocks and, three years later, the entire project is beginning to settle nicely into the landscape.
The birches seem happy and the branches are growing together creating a lovely birch-grove canopy over the bubbling rock and dry river bed.
Together, the tree canopy and fresh moving water attract plenty of birds, chipmunks and red squirrels that come in for a taste of the cool water rising up from the underground and spilling over the rock into the river rock below. I have even seen toads and snakes visiting the area.
Add solar lights for night views
At night, three solar-powered spotlights on the birch clumps allow us to enjoy our birch grove at all times, whether we are sitting outside or inside at the dining room table.
In fact, the lighted birch grove is the last thing I see every night and never fails to bring a smile to my face.
Now is the perfect time to consider creating vignettes outside your windows and doors to bring your Woodland garden into your home. I guarantee it’ll bring a smile to your face every day.
I would love to hear from you on how you were able to take advantage of existing windows and doors to create a dream view.
Take a few minutes to share your thoughts down below and inspire others to bring their Woodland indoors.
This page contains affiliate links. If you purchase a product through one of them, I will receive a commission (at no additional cost to you) I try to only endorse products I have either used, have complete confidence in, or have experience with the manufacturer. Thank you for your support.

Raised planters are a hit in the woodland garden
Living with deer is a wonderful experience. Everyday I see them browsing through the yard is both a joy and a horror. What are they after today? Will the prized hostas survive this time around? So, why not serve them a delicious smorgasbord right at the perfect eating height. We decided to experiment with veggies and herbs this year in raised planters. I know the rabbits can’t get them but I have a feeling the deer are going to thank me big time. Follow along this summer and see if the deer get more produce than I do from our raised-planter experiment.
From veggies to garden nursery, changing strategies

The two raised planters to the left in the photo fit in nicely with the Keter sheds (that’s a second, smaller shed on the right) and the two on-ground planters, also made by Keter, that flank each side of the shed doors.
We bought our home based on a picture the previous owners left on the kitchen table at the open house.
It was a picture of two deer walking through the yard.
That sold it for me.
At the time, my wife, daughter and I were living in the suburbs surrounded by homes, pools and annoying neighbours. I spent my evenings and weekends in the nearby town of Ancaster (where we now live) trying to get photographs of deer. At that time, I was a little obsessed about getting photos of these lovely creatures.
Lots of deer: Careful what you wish for
When we bought the Ancaster home, one of the first projects I did was set up a bird-feeding station. It wasn’t long before the deer came to the bird feeders and it wasn’t long after that I came to the realization that if birds came to my feeders, I bet deer would come to feeders especially made for them.
I was right.
One morning I woke up to 17 deer in the yard waiting for me to go out and fill their feeder.
In fact, by about the third year of feeding the deer, they would be waiting for me when I returned from work around midnight.
For more suggestions and some of my favourite garden things, be sure to check out my Favourite Things post.
Five, six, eight would be in the yard gathered around the feeder. They were so used to me by that time that they would back off only about three feet when I approached them with their special feed of oats and corn.
They became so friendly that I’m sure they would have let me touch them, if I ever tried.
It got to the point where we couldn’t sit outside without being visited by a couple of deer looking for a handout.

The two raised planters are seen here with the woodland garden in the background.
High cost of feeding deer
Eventually, I realized, however, that we could not have anything nice because of the all the deer.
Not only were they eating me out of house and home, but they treated my emerging garden like a smorgasbord – the garden was the salad and the feeder became the main course.
A number of on-line nurseries offer assistance on buying deer-resistant plants. They are worth familiarizing yourself with so you don’t spend a fortune feeding the deer with precious plants.
The Burpee site is another mail-order company offering an extensive list of deer-resistant perennial seeds and plants for purchase through mail order.
I cut down on the food and eventually fewer deer visited looking for handouts.
Don’t get me wrong, they are still welcome in my garden and continue to indulge on our hostas, but the tradeoff of having these magnificent animals around is well worth it to me.
Before I plant anything these days, I check to see if they are deer resistant. I’ll still use plants that I know deer enjoy, but I try to put them in areas that are a little difficult for the deer to reach. It doesn’t work, but I keep trying.

The Keter raised planter pictured here prior to being filled with soil shows the watering system at left and the plastic spacers that both give the unit support and act as dividers for different herbs or veggies.
Lots of visitors to the woodland wildlife garden
Deer, of course, are not the only garden visitors. Rabbits, groundhogs, squirrels (both grey and red) chipmunks and a host of other hungry visitors live here too. So the thought of growing vegetables had never really crossed my mind until recently.
Mary Reynolds’, The Garden Awakening, (see earlier blog) got me thinking about Forest Gardening. A little research on YouTube especially New Jersey YouTuber James Prigioni got me thinking maybe it was time to tackle a little more food cultivation in the garden.
Problem is, besides berries from the many Dogwoods on the property, crabapples, serviceberries and various nuts from trees, I was convinced vegetables and low-growing berry crops would not stand a chance in the garden. There are ways to keep the critters out but I was not interested in fencing my property.
Just fencing off a small area using something like the Pest Free Garden from Gardeners’ Supply Company would certainly get the job done.
But I decided to go with raised planters.
A quick visit to our local big-box store resulted in not one but two handsome black, self watering raised planters made by a company named Keter for a garden area I am developing in front of a new shed. It didn’t hurt that the raised planters were made by the same company that made the shed and, therefore, fit nicely into the grey and black colour scheme. Check out my review of the Keter shed here.
Simple to assemble raised planters
It also was not a coincidence that as soon as I saw the raised planters at Costco, I grabbed them. After purchasing more Keter garden products in the last year and a half than I care to admit, I knew the quality of these Keter Urban Bloomer XL raised planters would be top notch and assembly would be simple and satisfying.
Construction, however, didn’t start well.
I overlooked the instructions for the first planter in the box so, like most men, decided to proceed without them. First thing I did was break a tab off the leg trying to detach it from the packaging. I’m not all that handy, so breaking things before I even get started is not out of the ordinary.
I had three more legs to detach and, for the life of me, I could not figure out how to detach them without breaking them off. Second leg, same thing. Broken tab.
I knew Keter products well enough by now to know that this was not the norm with their products. Everything else I built from them (and like I said there were many) made Ikea look like amateurs.
It was about that time that I discovered the instructions in the box.
Well, guess what? The tabs were meant to be broken off from the packaging material. Wow, I thought to myself, not only do I get to build these things, but I even get to break things on purpose. Life is just too good.
A few minutes later and the first one was built. After already building one (without instructions for the most part), the second one went together even easier and quicker. Within 1/2 an hour or so, both were built and in place ready for soil and seeds.
Keter states that with The Urban Bloomer XL, there’s no need to dedicate lots of space to have a substantial vegetable garden.
And, for us old folks, no need to bend over while planting and harvesting our veggies. That’s a good thing.
The extra-large elevated planter ( capacity of 110 L | 29.06 Gallons) features a shelf for storing gardening supplies and a smart watering system that incorporates special fabric for evaporation and regulated watering.
Its 44.8 inches in length and 18.6 inches in depth provides plenty of space for planting vegetables and herbs. The planters are advertised as UV and weather resistant, requiring virtually no maintenance and are easy to clean. What more can you ask for? A drainage plug at the bottom of the planter provides a convenient way to reduce the amount of water if necessary.
They are also quite light even with soil in them and would make the perfect raised planter for a balcony or small courtyard.
Their dark colour makes them not only a stylish addition to a balcony or patio, but also works to absorb heat to keep plants happy from early Spring through the cooler Fall temperatures.
One thing I can say about Keter is that the vinyls/plastics they use in their products are outstanding.
I’ve always been a natural-materials guy, but when I discovered how realistic Keter products are, I was sold. In fact, the company has won awards for the vinyls they have created. I joke that our grey-weathered shed looks more like weathered cedar than real weathered cedar looks. And it was weathered the day we bought it. I didn’t have to wait for it to take on that beautiful weathered grey colour.
Will they work to keep deer away
Keter doesn’t say anything about deer though.
In fact, after assembling them, I realized that my planters are raised to the perfect height for our four-legged friends to chow down with the greatest of ease.
They will definitely keep the rabbits away but I’m not too sure about the deer.
Oh well, it wouldn’t be the first time I set up a buffet for our resident deer.
And, like I said, watching them enjoy my backyard as much as I do, is a small price to pay.
Just leave me a tomato or two would you guys… I do like my toasted tomatoes.
Throughout the summer, I’ll keep readers updated on my success and failures with my raised planters.
Raised planter update
Okay so after our first summer with the raised planters I can report that I did not see a deer munching my tomatoes. I can also report that the deer missed out because one of our local raccoons got there first. Turns out a local raccoon decided to help itself to the tomatoes and snap pees.
Back to square one. This year we moved the planters around to the side of the house and although I have not given up with the tomatoes and other veggies, I am converting the raised planters to more of a woodland wildlife nursery where I can begin growing woodland flowers and shrubs from cuttings and seeds. I predict that will be a little more productive in the long run.
I hope to pick up some garden cloches from Garden supply to deter the raccoons from what is left of my tomatoes and other veggies.
If you like Keter products, and you are as disorganized as I am, you might want to consider getting their shed tool organizer. Again it’s another high quality product that solves the problem of messy tools cluttering up your tidy shed.
• None of the products in this review were provided to me from Keter. They were all purchased by me at a local Big Box Store.
As an Amazon Associate I earn from qualifying purchases. This page contains affiliate links. If you purchase a product through one of them, I will receive a commission (at no additional cost to you) I only endorse products I have either used, have complete confidence in, or have experience with the manufacturer. Thank you for your support.


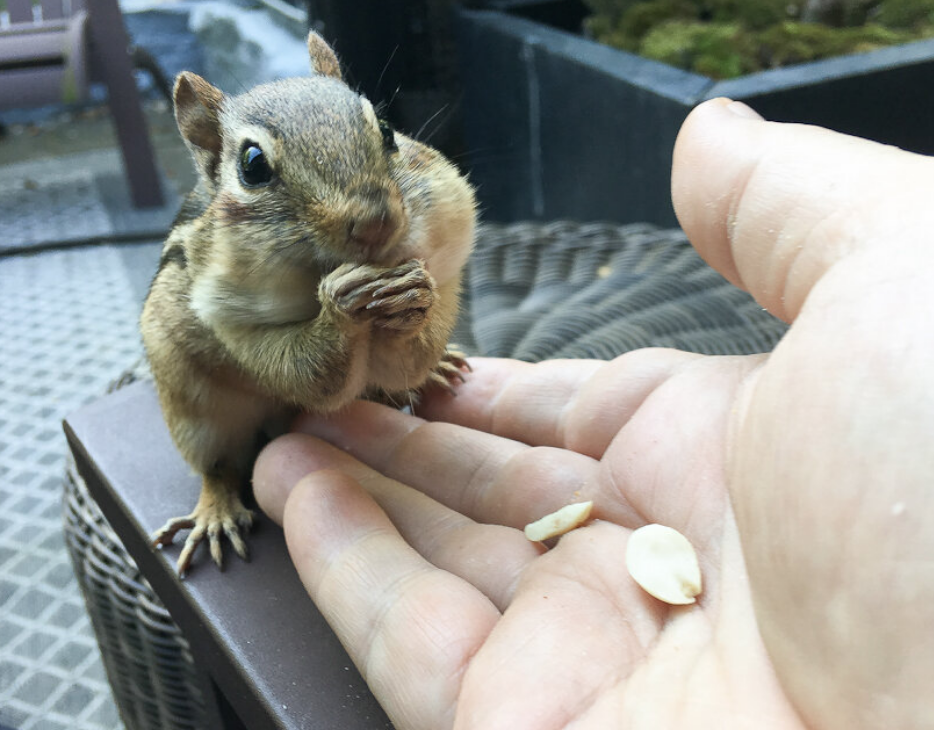
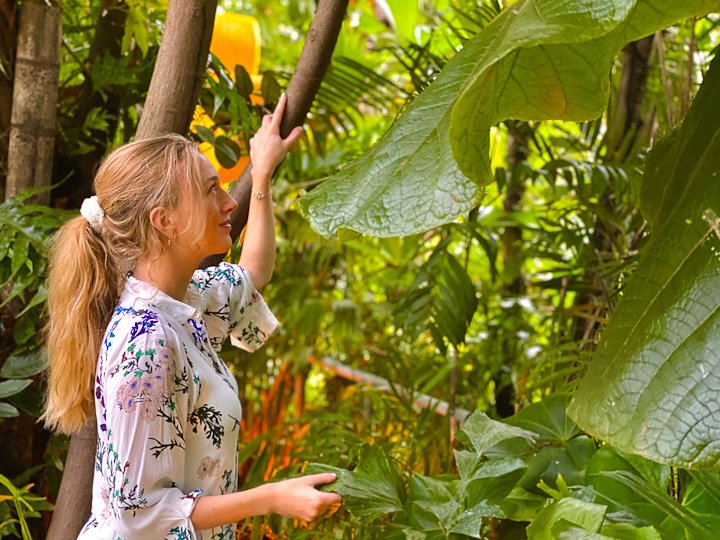


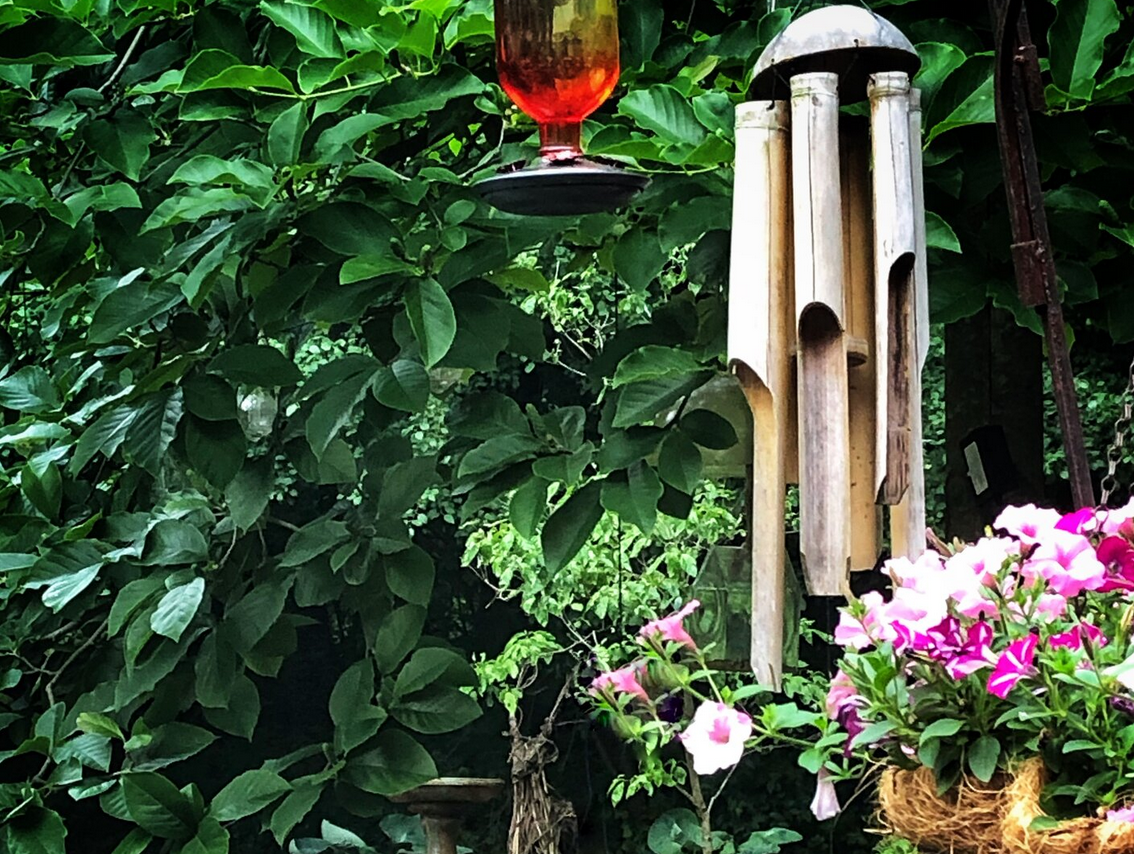

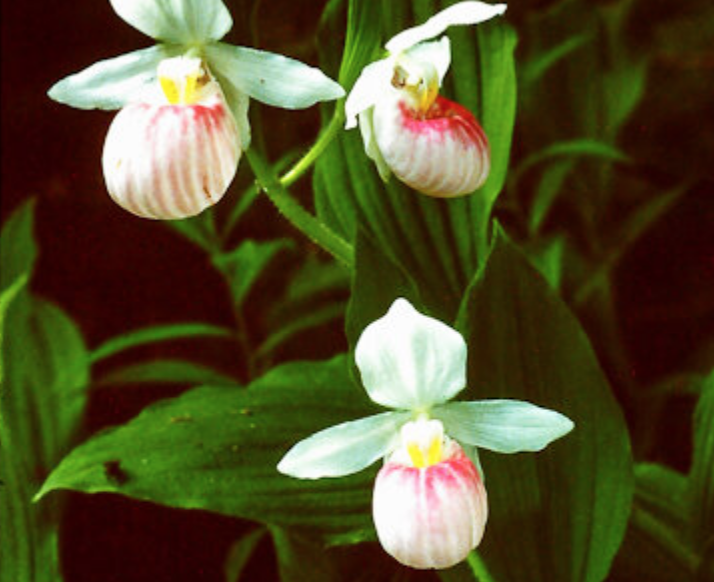
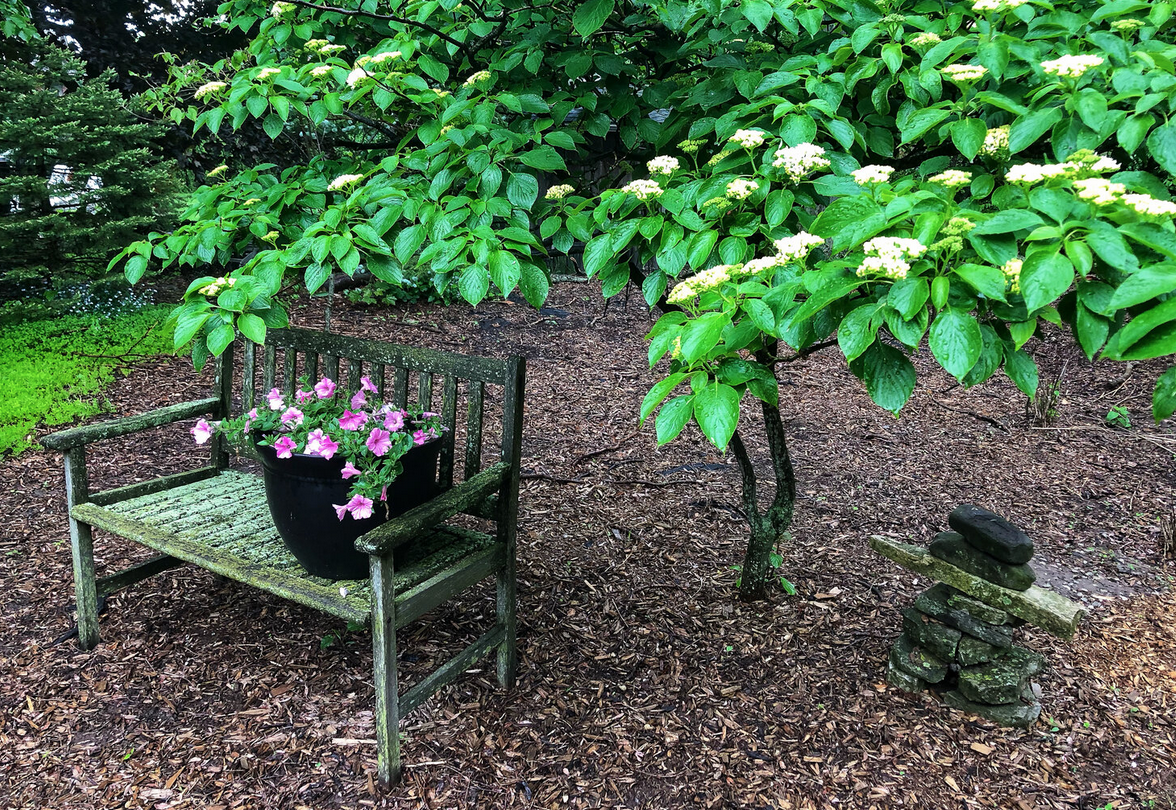
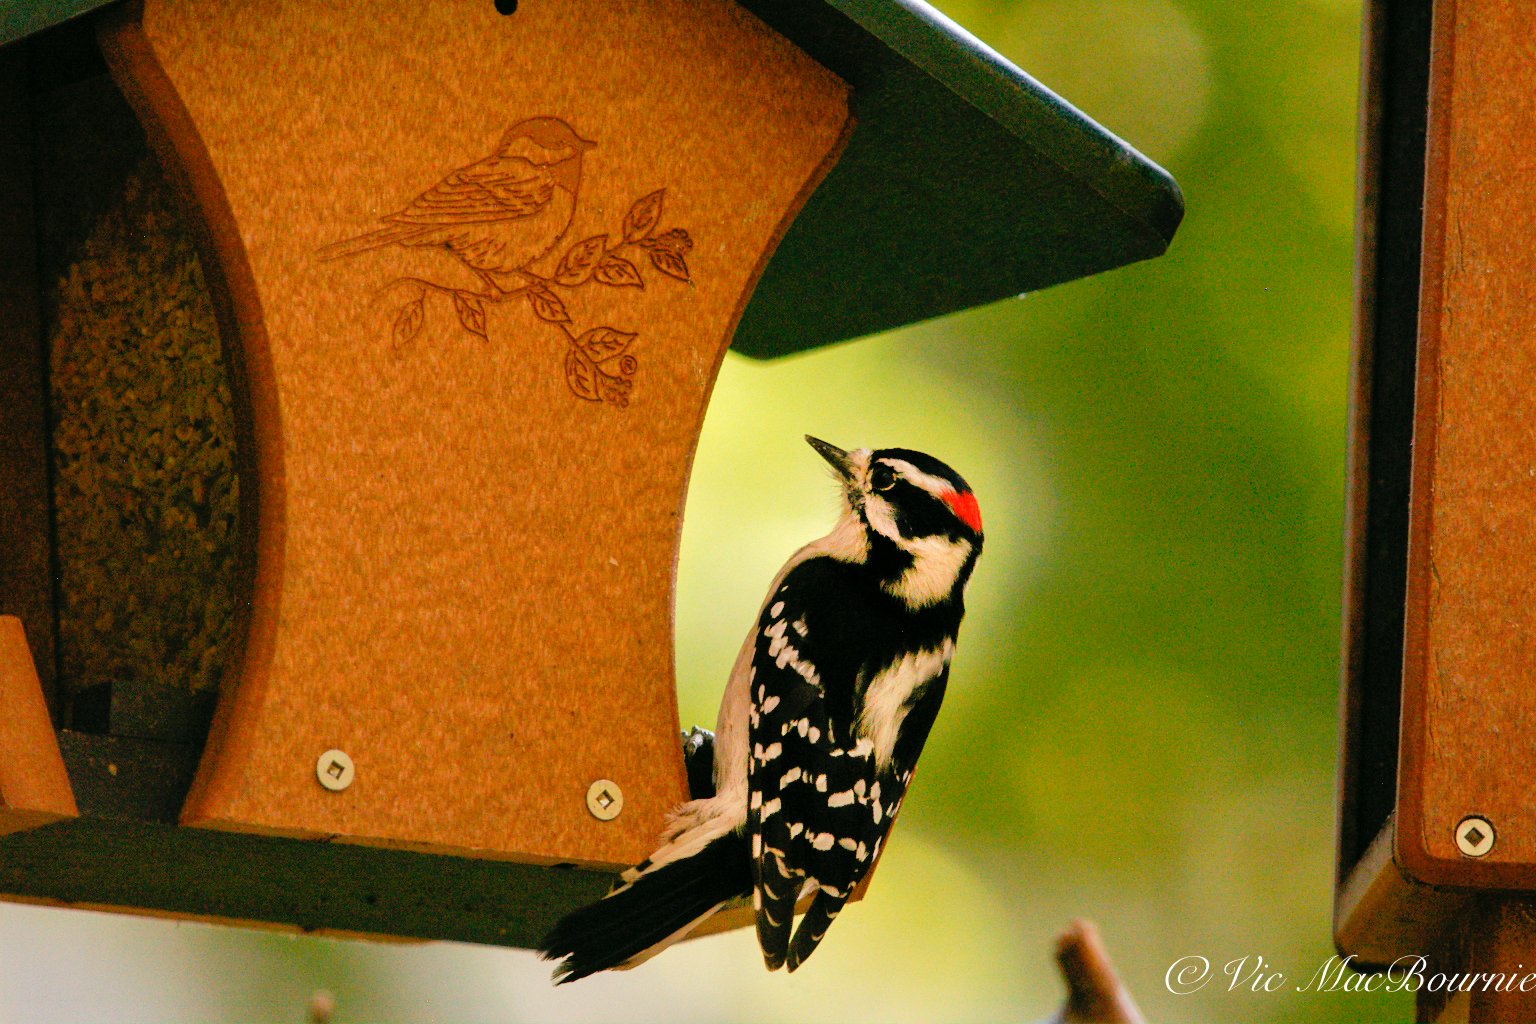
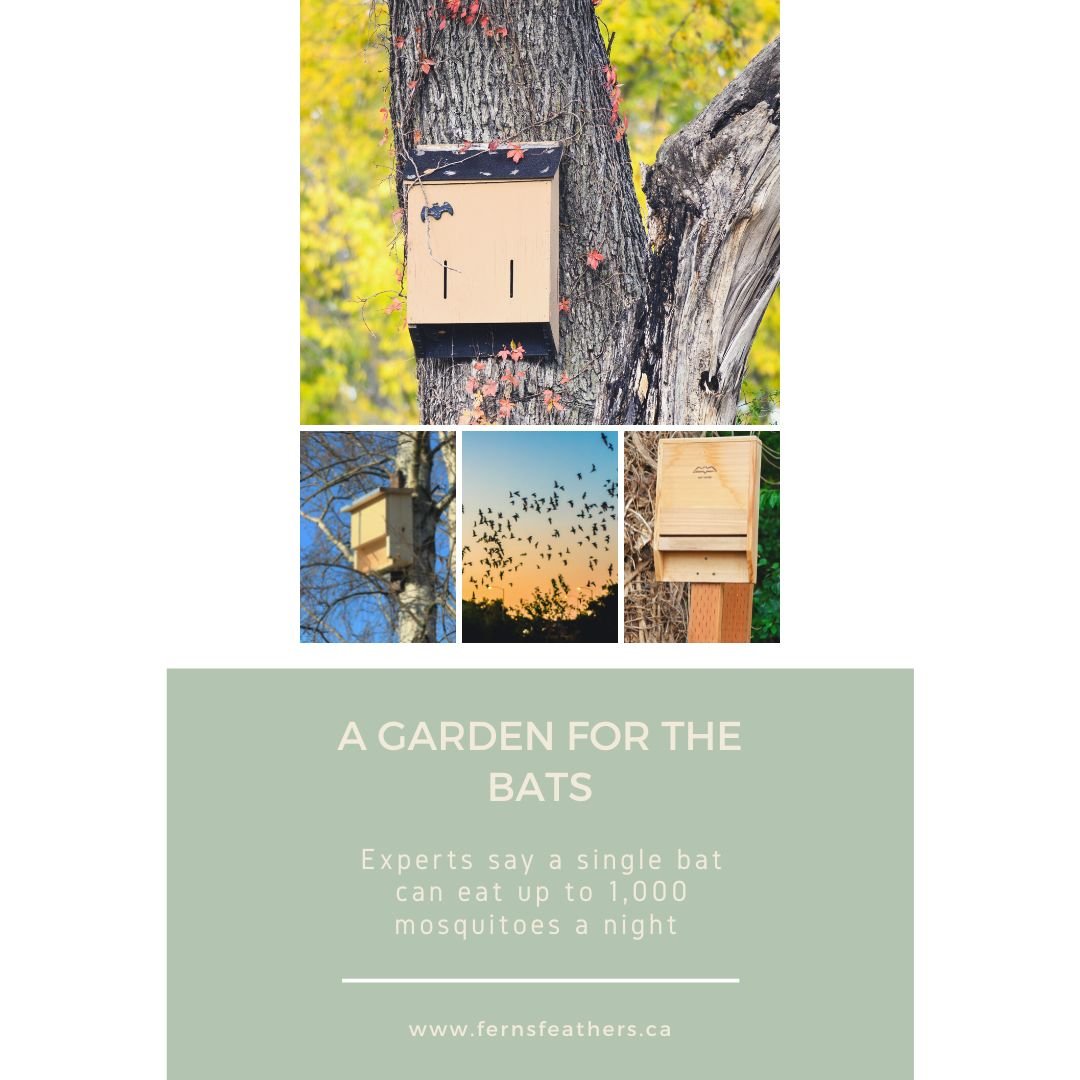
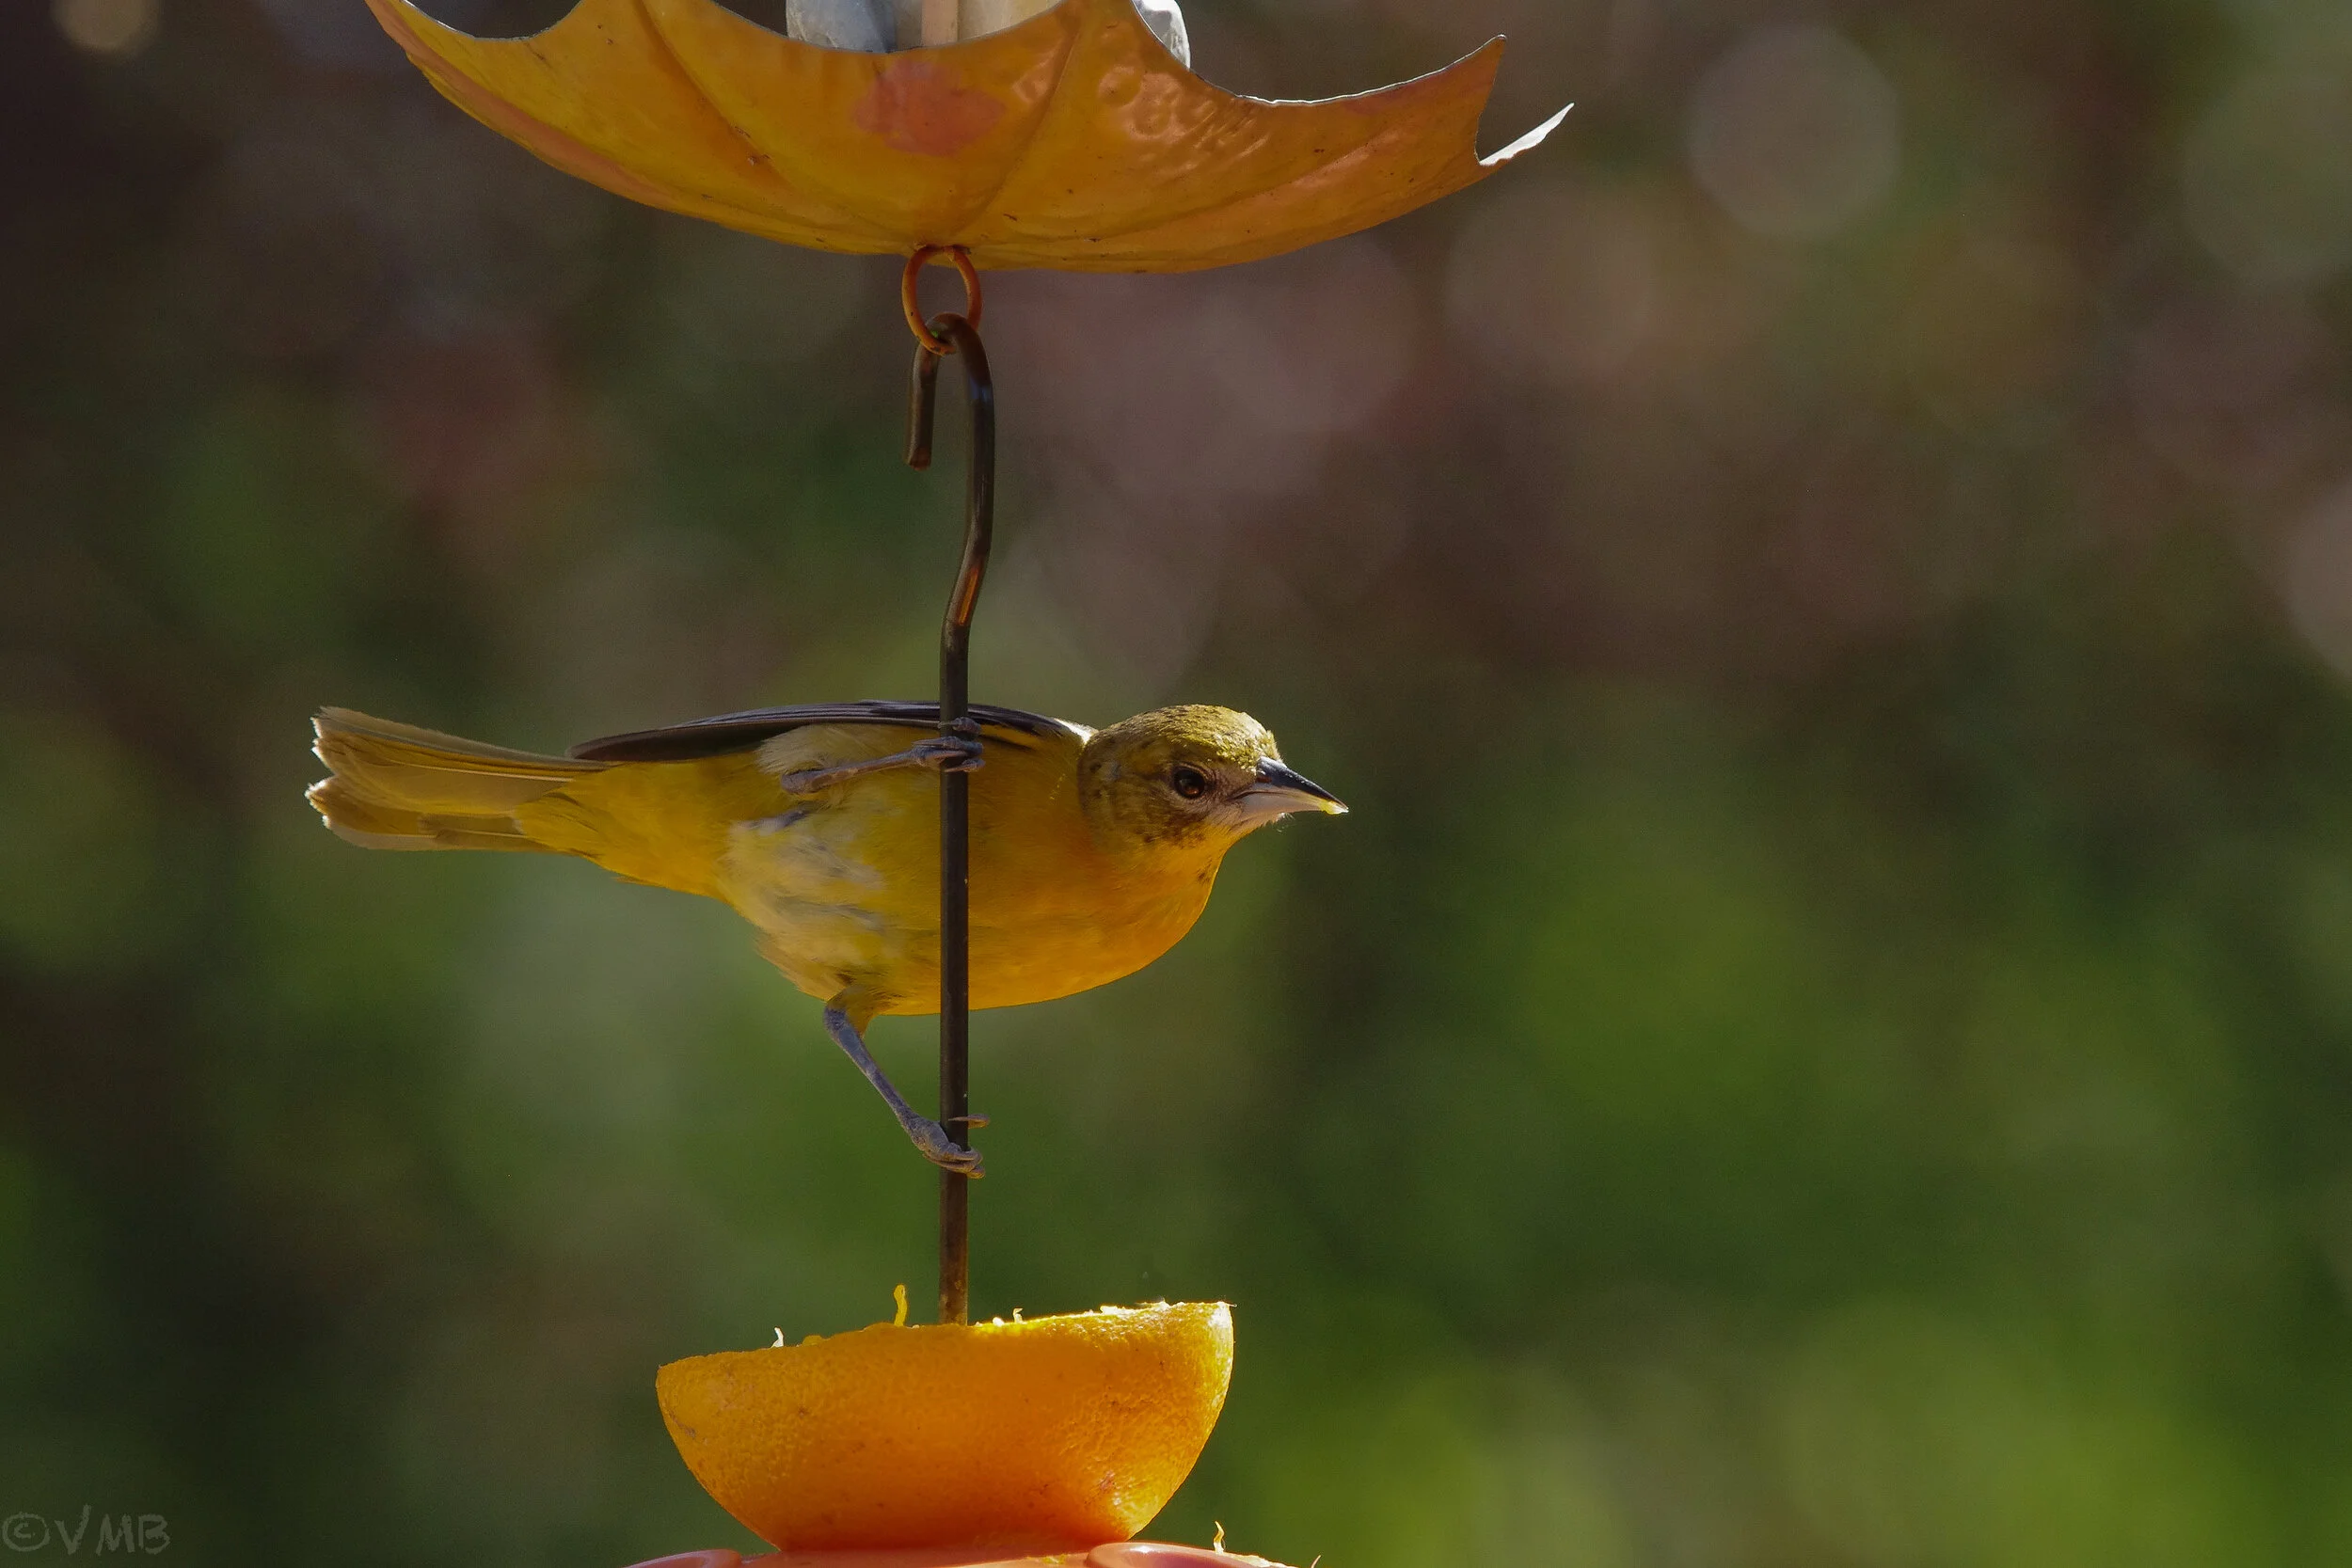
How to attract Orioles with oranges, jelly and insects
There is something exciting about looking out the window in May and seeing a flash of bright orange in the early spring. It’s a sure sign that the Orioles are back. And it’s not too late to get the Oriole feeders set up, the oranges cut up and the Jelly mixtures in place for the flush of Orioles.
Go natural: Provide insects and berries for Orioles
I’m sitting in my home office in the middle of May with a light dusting of snow on the ground watching Baltimore Orioles working one of the orange halves I left out on the feeder for them
Last year, I remember as many as seven swarming the feeder. They were feasting on oranges and nectar from a commercial feeder that I had put out for them to catch their attention as they migrated back to their more northern summer breeding grounds here in Canada, from winters in Mexico, Central and South America.
If you want to attract Orioles and keep them around year round, you’ll have to make sure your Woodland provides them with everything they need so they decide to call it home. That includes an upper tree canopy where they often build their nests.
While I get great enjoyment from my bird feeding stations, providing natural food sources to our feathered friends is always the goal we should aspire to in our gardens. I have written a comprehensive post on feeding birds naturally. You can read about it here.
Orioles live in open woodlands particularly those with deciduous trees and lots of insects.
Oranges will go a long way to entice Orioles to visit your yard in spring, but grape jelly, nectar (in the same 4 to 1 ratio of water and sugar used to attract hummingbirds) provided in commercial feeders and berries in your garden from native trees and shrubs will help to convince the birds to stay around all summer. Don’t forget to provide an abundance of insects, including meal worms, which is the main food of Orioles when feeding their nestlings and throughout the remainder of the summer.

A male oriole works an orange half on the top of an Oriole feeder filled with the same sugar water mixture used for hummingbird feeders.
Here in Southern Ontario and Eastern United States we are limited to the Baltimore and orchard orioles. There are actually nine orioles throughout the United States, but only five are common.
The Bullock’s is found throughout Western Canada and the United States.
Once you’ve got them, and providing you give them the requirements they need, they often return year after year to raise their young.
More on what are the best Oriole feeders here.
Spring migration troubles 2021
Of Note: In the spring of 2021 many homeowners who normally have had Baltimore Orioles in their gardens are reporting that the birds either did not show up or appeared for only a day or two and moved on never to be seen again. I usually have a large number of orioles in the garden throughout the summer raising their young. This year, although a few passed through, none stayed around for more than a day or two. I have seen similar reports of decreases in Baltimore Oriole numbers throughout southern Ontario into northeastern U.S.
There appears to be no obvious reason for this concerning turn of events. A late cold spell that ripped through the Great Lakes area right around migration time brought freezing temperatures, including heavy snow, which may have resulted in fewer birds surviving migration or more birds choosing to nest further south. I will try to update this page if there is any more news on the plight of the Orioles.
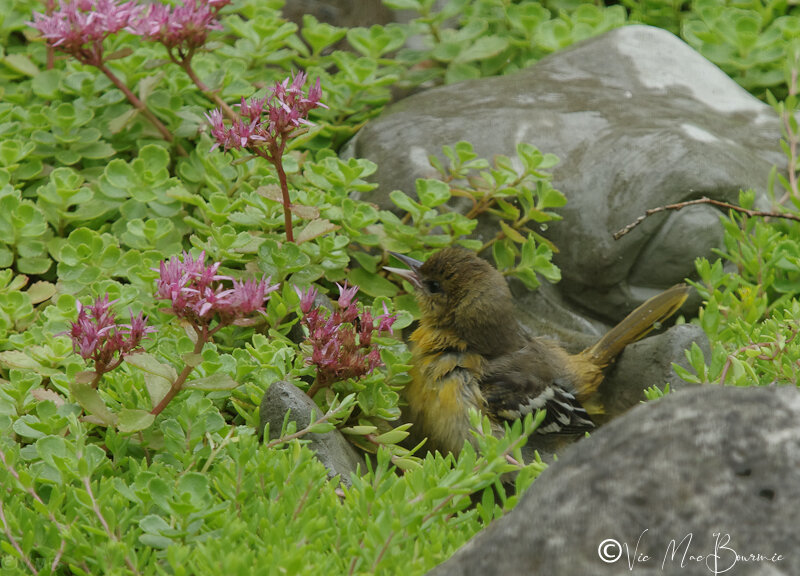
A young Oriole enjoys a bath in one of our on-ground water sources that happens to be a concrete antler belonging to our concrete moose named Bruce (as in Springsteen) the moose.
It wasn’t too long ago when our Woodland garden was completely devoid of Orioles. Not that they weren’t around. People regularly talked about seeing them in the Conservation area surrounding us. I just never saw them in my garden.
Then I got serious about enticing these beautifully coloured birds into our garden.
Oriole nests are elaborate sac-shaped works of art
Now, they are not only here regularly in the spring and throughout the summer, a pair have even nested in a large maple at the front of our property. I don’t always find their nests, but I often see the young birds with their parents.
Orioles can take up to 12 days to build their elaborate, pendulous sac-shaped nests on the ends of branches in tall trees often in more open areas. Their nests are unique when it comes to North American birds’ nests.
In spring, the female oriole build’s her nest with thin, intertwined fibers that form what might seem like a delicate pouch but, in fact, can hold up to seven eggs.
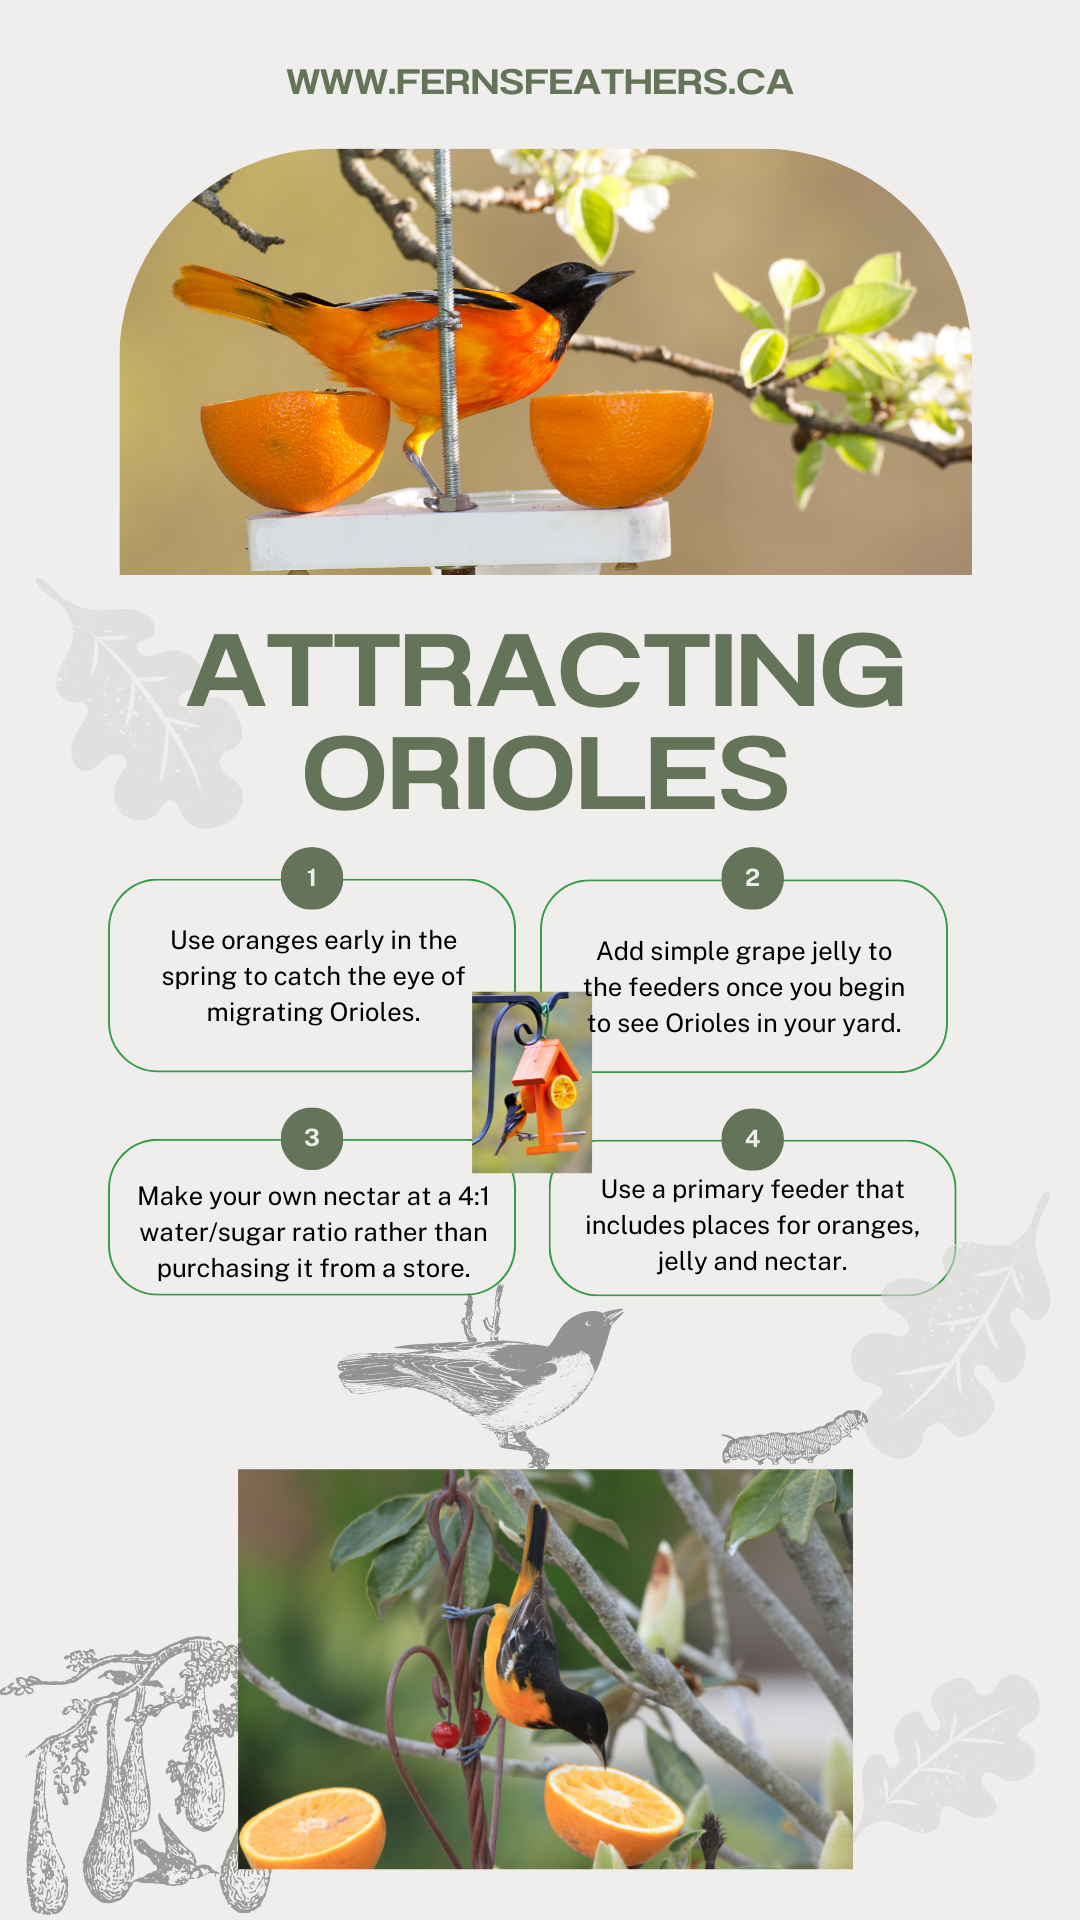
By putting out oranges early in spring, we can attract orioles to our yards. Once we have them coming to our yards we can add grape jelly to keep them coming back.
For more information on how orioles build their nest check out audubon’s highly informative article on their site here.
Last year, a mother brought her entire brood to our on-ground water source where they had a great time splashing around in the ears of our concrete moose.
All it took to get them here originally was a couple of oranges cut in half and placed in areas where the Orioles are likely to see them. Now our neighbours have joined in to the excitement and put orange slices around their yard as well.
Once you have them, it’s time to add grape jelly to your yard. It has to be basic grape jelly, not a jam. You can buy special oriole jelly in plastic bottles at many good bird stores, but just buy a good grape jelly. I like to use Welch’s grape jelly, but any no-name jellies should be fine. Mix it with a little water and the Orioles will lap it up often choosing the jelly over the orange halves.
Orioles are attracted to the colour orange, so many of today’s feeders use the colour to catch the bird’s attention.
One trick that I like to use is after the orioles are finished with the orange half, I fill it with jelly. They seem to appreciate my effort. It’s a constant exchange of old oranges with new ones, and filling the spent oranges with grape jelly.
Five cool facts about orioles
• Orioles are in the same family as blackbirds and meadowlarks and are most often seen perched at the tops of trees or flitting through the upper foliage looking for insects.
• Their chatter is quite distinctive as is their call. Once you have heard it, you are unlikely to forget it.
• Watch your peas. Orioles enjoy fresh or frozen or dried peas
• Orioles live up to 11 years in the wild and longer in captivity.
• Female orioles become a deeper orange every time they molt. Older females can be almost as bright as their male counterparts
• Orioles got their names from the black and orange of Lord Baltimore’s family crest, which is similar to the family’s crest
• the Baltimore oriole is Maryland’s state bird
• Orioles have distinct alarm calls to warn of predators, but will not hesitate to mob and harass predators that threaten or come near nests.
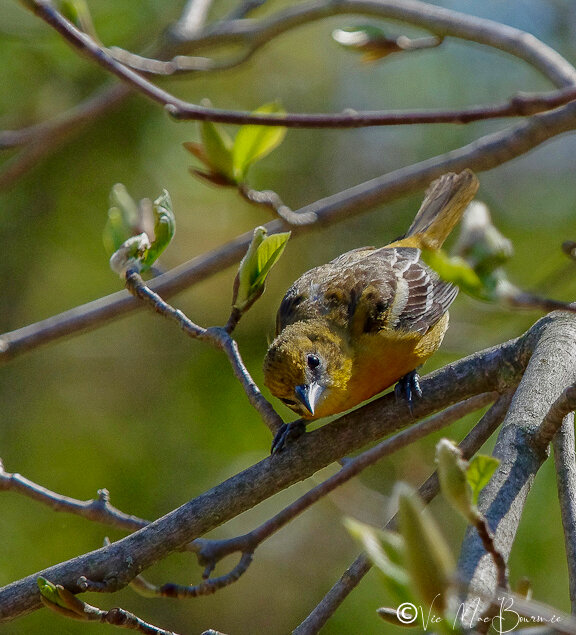
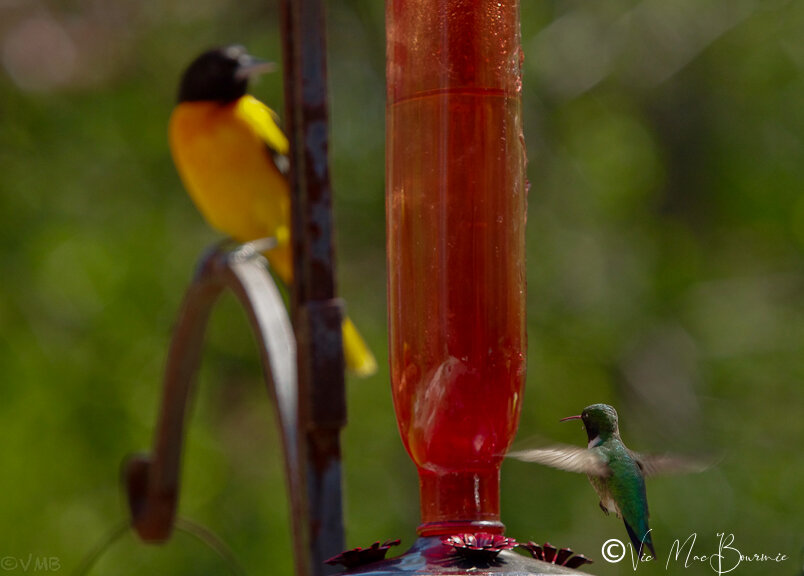
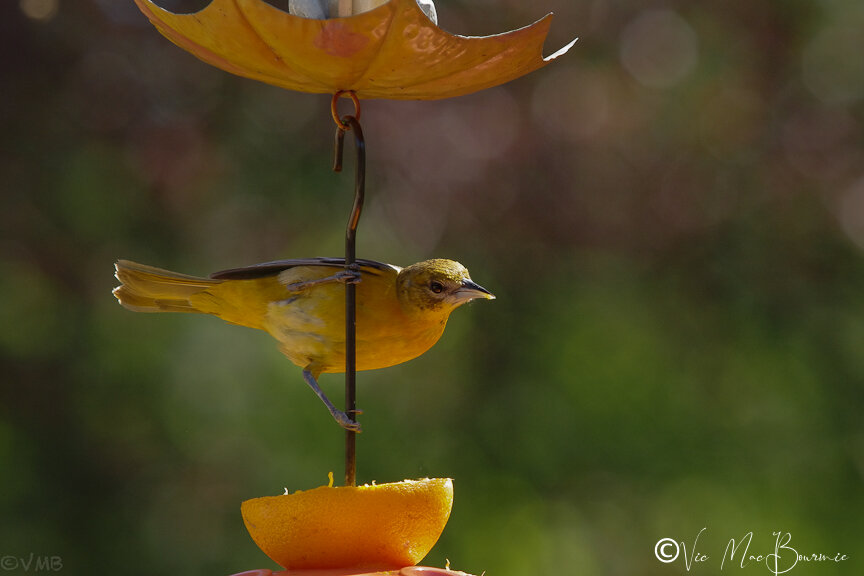
Oriole feeders have come a long way
Many modern feeders will provide areas to mount oranges as well as cavities to put the jelly into. Some feeders also offer the Orioles several choices, including jelly, orange halves and nectar.
Some, such as the Birds Choice Flower Oriole Bird Feeder include a reservoir to hold grape jelly as well as places to mount orange halves. Look for feeders that also provide perches for several of the birds to comfortably and safely perch while they are eating. It’s not uncommon to have several at your feeders at once.
The nectar that is used for orioles is the same as the nectar used for hummingbirds. It should be made the same way – 4 parts of water to one part of sugar.
I like to boil my water first and then measure out the 4:1 ratio. The boiling water helps to dissolve the sugar more perfectly and seems to keep my feeders’ nectar clear longer. Remember to let it cool to room temperature before filling your nectar feeders.
Don’t be surprised if the orioles start to feed from your hummingbird feeders. They are a regular at my feeders, even when they struggle to fit on them properly.
In saying that, however, it’s not uncommon for our hummingbirds to drink from the oriole feeder.
Orioles love moving water
Don’t underestimate the value of moving water. Although orioles get much of their water needs filled by nectar from our feeders and plants, water still plays an important part in attracting these beautiful birds. They are especially attracted to the sight and sound of moving water, whether it’s a fountain, a dripper or a bubbler. I wrote a full article about converting a dripper into a solar fountain. You can read it here.

Five of a total of seven Orioles pictured here taking advantage of our various feeders that included orange halves, home-made jelly feeders and a nectar feeder.
In summer meal worms are an excellent choice for Orioles
Finally, once you have attracted the Orioles, you will need to be prepared to change their diet as summer approaches. You may notice them using your orange and jelly feeders less and less. That’s when to start shifting what you are feeding them from oranges and jelly to meal worms, either live ones (which are ideal) or dried ones. It’s a good idea to rehydrate the dried meal worms with some water before putting them out in your feeders. Or, put them in a dish and add a little water to rehydrate them. This makes it easier for the birds to swallow them.
Both types are available at bird-feeding stores or through Amazon. Feeding meal worms will not only attract Orioles to your garden. They are the prime source of food for Bluebirds at a feeder as well as robins and other insect eating birds.
Special meal worm feeders are also available. Because squirrels are not interested in meal worms, these feeders can hang anywhere in the garden including from nearby tree branches.
The Baltimore Oriole spends its winters in florida and farther south in Central America. They migrate north to breed throughout the northeast United States and into southern parts of Canada.
Insects are the birds’ primary food source in summer
Although they are attracted to Oranges and jellies on their migration routes, their real food is a variety of insects.
The Orioles that visit our gardens are using the oranges and jelly as a quick burst of energy. By the summer, when they are raising their young, they spend much of their time foraging for insects to feed their babies. The parents will still come to the feeders for quick bursts of energy, but they may also almost disappear if they are not nesting nearby.
Besides mealworms, Orioles will also eat wasps and other insects. It is vital to avoid using pesticides in the garden to ensure a large supply of insects for these birds. During the summer, when orioles are feeding their young, insects may provide up to 90 per cent of an oriole’s diet.
Native shrubs and bushes that produce an abundance of berries are excellent food sources for these birds. Consider planting elderberries, blueberries, blackberries, serviceberries and raspberries just to name a few. I have written an entire article about the importance of serviceberries in our wildlife gardens. You can read it here.
Although oranges are their favourite fruit, they will also eat apple, peaches, bananas and berries.
Providing them with special suet mixes that include fruit pieces and berries is a good source of high energy for them.
Plant bright, but dark-coloured fruits such as mulberries, cherries and purple grapes as well as raspberries. They also like flowers that produce high quantities of nectar including vines such as trumpet vines.
As an Amazon Associate I earn from qualifying purchases. This page contains affiliate links. If you purchase a product through one of them, I will receive a commission (at no additional cost to you) I only endorse products I have either used, have complete confidence in, or have experience with the manufacturer. Thank you for your support.

How to attract indigo buntings to your backyard
Attracting Indigo Buntings and other insect-eating birds is never easy. Here are a few tips to help you create a more diverse variety of birds in your backyard.
Attracting Indigo Buntings and other insect-eating birds can be difficult
Indigo Buntings have always been one of my favourite birds, but attracting them to our backyards is not always easy.
I am lucky enough to have indigo buntings coming to our feeder several times a day. And, they are going to one very specific feeder that I have made sure to keep filled with its favourite foods.
Attract Indigo Buntings with natural food such as insects
These birds of the open woodlands will come to specific seeds in your feeder, especially during migration, but they are among the many birds we may see in our backyards that largely depend on insects, spiders, grasshoppers, aphids, beetles, cicadas and caterpillars as their main source of food during the spring and summer months.
While I get great enjoyment from my bird feeding stations, providing natural food sources to our feathered friends is always the goal we should aspire to in our gardens. I have written a comprehensive post on feeding birds naturally. You can read about it here.
So, how do we attract Indigo Buntings and other insect-eating birds, including blue birds, wrens and warblers to our yards and keep them coming back, or, better yet, convince them to call our yard their home?

A male Indigo Bunting sits among the flowers of a crabapple in spring.
To successfully attract Indigo Buntings and other primarily insect-eating birds to our yards depends on a multi-faceted approach that begins with providing them with the food they prefer at our feeders – primarily small seeds such as thistle or nyjer, and white proso millet. Sunflower chips – the type available in no-mess blends – can also attract these beautiful birds. A high quality finch mix which includes many of these favourite seeds and, of course, live or dried meal worms will keep them interested in what our feeders are providing.
Use white proso millet and bark butter to attract Indigo Buntings
In addition, I have had success with Wild Birds Unlimited soft suet nuggets known as “Bark Butter Bits” in attracting Indigo Buntings and other insect eaters.
I have found that white proso millet mixed with dried meal worms keeps indigo buntings coming back day after day.
Indigo Buntings are among the most shy birds in my garden. Even the slightest movement from a distance can send them flying off into the nearby cover of our large crabapple trees. Providing several feeding stations or, even better, a caged feeder helps to give them a better sense of security in the commotion that so often surrounds a large feeding station.
Once the feeder foods are in place, ensure there is an abundance of water in the yard and try to provide it in many different forms – from on-ground sources, to hanging bird baths in trees and other quiet areas of the garden, as well as traditional bird baths. (See my earlier story on providing water sources here.)
Once these two key ingredients (food and water) are in place, we need to focus on providing the birds with their natural food sources which includes an abundance of insects as well as berries.
Berries as a key food source: Plant blueberries and serviceberries
Indigo Buntings are drawn to many types of berries including blueberries, strawberries, serviceberries blackberries and elderberries, just to name a few. Many of these fruits could be purchased from local grocery stores and provided at feeders, but why not start now to ensure at least some of these berries are being provided naturally in our gardens?
By planting a few of these berry producers and leaving an area of your garden to go wild with wild strawberry, raspberries etc you will provide perfect habitat for a host of birds that like to dine on berries. Indigo buntings will often forage in these wild areas for seeds, bugs and berries. They can be seen flitting about through the grasses or in shrubs.
In spring, they will often even eat the buds of their favourite trees and shrubs. There is no questions that these “wild” areas provide excellent habitat for a host of insects and keep the birds returning to that corner of your yard.
These berry producers, especially serviceberries, are excellent additions to your woodland/wildlife garden. (See my earlier post on serviceberries here.)
Blueberry plants are also an easy introduction to the garden. You can grow them in containers where you can more easily control the PH levels. (Blueberries like a slightly acid soil) I have two blueberries growing in a large container and another Proven Winners’ hybrid plant that I planted this year in a raised container.
Chances are you will have to work hard to get any for yourself once the birds and garden critters have had their fill, but that’s okay. If you can’t bear the idea of giving up all your favourite fruit to the birds, cover them with a cloche to save some for yourself and offer the remainder to the birds. The critters got all the berries last year. This year, I am determined to get at least a few for myself.
Okay, so we have the feeders set up, an abundance and variety of water sources and berry producing trees and shrubs planted in the garden.
That’s an excellent start and one where many gardeners will be satisfied, but not us. Woodland/wildlife gardeners who really want to attract Indigo Buntings and other insect-eating birds to their backyards will want to take the extra steps to not only attract the birds but the insects and caterpillars that will really bring these birds to our gardens.

Immature Indigo Bunting showing its lack of complete colouring.
Insects: Provide the key ingredient to success
Now let’s talk about those insects that Indigo Buntings are so dependent on for their survival.
It goes without saying that the use of indiscriminate insecticides is not going to result in success. In fact, every effort should be made to create a pesticide-free habitat for the wildlife in your yard.
It never hurts to put up a sign in your front garden advertising that your property is a pesticide-free zone. Unfortunately, we cannot control what our neighbours do but, let’s hope they will follow our lead and reduce or eliminate the insecticides they choose to use on their properties.
Eliminating pesticides is an excellent start, but if you live in a typical suburban lot you may need to take extra steps to make your property insect-friendly.
Here are a few suggestions to increase the number of insects on your property with links to earlier posts on Ferns & Feathers.
Plant an Oak tree: If at all possible, look for an area in your yard where you can plant an oak tree. Studies show that oak trees support the greatest number of insects and caterpillars of all the trees in the forest. Without going into great detail, there is no better tree in the landscape to support a healthy insect and population. In fact, Doug Tallamy in his book Bringing Nature Home states that a “single white oak tree can provide food and shelter for as many as 22 species of tiny leaf-tying and leaf folding caterpillars.”
Go here to read my posts on oak trees.
• What tree should I plant in my yard.
• Columnar oak is perfect for small yards.
And that is just a tiny fraction of the fauna that depend on a single oak tree. In fact, the mighty oak supports 534 species of fauna, more than any other tree we can plant in our gardens. (See my earlier post here on the importance of oak trees in our landscapes.)
Create a brushpile: Pick a corner of the yard and begin adding sticks, branches and other woody cuttings from the garden to the pile. Maybe some old grasses or last year’s leaves could also find a home in the corner. You are not looking to make a compost pile (although an active compost pile is good too), you are mostly just making a place where insects can gather preferably out of the hot sun. Over time the branches will break down and create good habitat for insects and other small fauna. We have two such areas: one is a massive pile in one corner of the yard that gets added to every year. Some might describe it as an open compost pile but I never turn it, have not removed any “compost” and top it with only garden material from branches to cut grasses, leaves and old container plantings in the fall. The other is the result of pruning two large trees, where I asked the tree company to just leave the branches on the ground. This is an open brush pile and favourite playground for the chipmunks and red squirrels in our yard.
For my earlier post on building a brushpile go here.
Leave some fruit to rot: This is a great way to attract fruit flies. I use a shallow hanging bird bath which is a perfect place to put pieces of apple, watermelon, oranges for the Orioles, bananas etc. These attract all kinds of insects as well as butterflies etc. The fruits get moved to the open compost area once they begin to over ripen.
Leave your leaves in the fall: This is the singularly most important step you can take to encourage an abundance of insect life in your woodland garden. It is vital for insectivorous birds during the extremes in winter when food is scarce and in spring, when migrating birds are returning craving good sources of protein. Despite living in an area surrounded by forested Conservation lands, most of my neighbours are obsessive about picking up every last leaf on their grass and in their yards. Bags and bags of leaves are put out every fall through spring to ensure not a single leaf remains on their properties. It reminds me of how important leaving the leaves on the ground is when I look out the window in late fall, winter or early spring and see a host of birds, rummaging through the leaves looking for insects and larvae winter, spring, summer and fall. (See earlier article here.)
Mud puddles or shallow spots: Many insects, including butterflies can be drawn to shallow mud puddles where they drink and obtain much-needed minerals from the soil.
Backgrounder on the Indigo Bunting
These migratory birds (genus passerina cyanea) spend the winter primarily throughout Central America but breed throughout the eastern United States up into southern Ontario around the Great Lakes and southern parts of Quebec west to Manitoba. An interesting fact about these birds is that they migrate at night, using stars as their guiding lights.
They can often be spotted on the edge of woodlands and along rural roadways where they like to perch on telephone lines and tall trees and share their song for hours on end.
The indigo-blue males, with their striking blue heads that softens to a more cerulean colour on the body, pronounce their presence with joyful songs through the late spring and summer.
It may come as a surprise, since it is their striking colour that sets them apart in the bird world, that their jewel-like colour does not actually come from blue pigment in their feathers, but, instead, from microscopic structures in the feathers that refract and actually reflect blue light.
The males sport short conical bills that are dark on the top and a silvery-gray on the bottom.
Females, not unlike many other bird species such as cardinals and orioles, are much more subdued in colour with shades of brown and beige with hints of blue on her wings or rump.
Indigo Buntings like to nest in shrubby areas rather than high in the treetops. this is another good reason to leave some unkept shrubby areas in a corner of your garden.
Who knows, you may be able to convince a couple to nest in your yard where you can enjoy them all summer, up close and personal.
The perfect opportunity to photograph the family as they grow and prepare for their epic migration to lands far, far away.
Good luck and let me know if you have any success attracting Indigo Buntings this season.
As an affiliate marketer with Amazon or other marketing companies, I earn money from qualifying purchases.

How to attract Native Bees to your wildlife garden
It’s time our 4,000 native bee species took centre stage rather than playing second fiddle to European honey bees. In her book Our Native Bees, Paige Embry puts native bees in the spotlight where they belong.
Creating a lawn for native bees: Time to rethink normal
The value of our native bees can’t be underestimated, but every day, every year, every growing season they play second fiddle to those “other” bees.
Their role in the natural world could not be any more clear than their importance to native plants.
(For my article on the important role of native plants, go here.)
In a world where insects and other creepy crawlies get a bad rap, solitary bees are the Rodney Dangerfield of the Bee world.
They certainly don’t deserve that disrespect.

Our Native Bees is a stunningly beautiful book that explores the importance of North America’s endangered pollinators. it is pictured here with a WeeBeeHouse native bee home.
Considering the work native solitary bees do for us, they should actually be celebrated as one of the most important contributors to the natural world and a vital part of our agricultural economy.
Why don’t they get the respect they deserve?
Paige Embry, author of the Our Native Bees book is a true solitary bee aficionado. “It annoys her — rightly — that most people know next to nothing about the 4,000 species of native bees nesting in the ground, in trees and in the sides of our houses,” points out the New York Times, in a review of her book.
“The hardest part of getting a bee lawn into use isn’t developing the seed mix; it’s dealing with people’s vision of what a lawn should be…If we didn’t have to worry about our neighbours, I think there would be a much more diverse look.”
Count me among those who knew “next to nothing about the 4,000 species of native bees.”
I never really gave bees much thought even though the solitary native bees are regulars in our backyard.
After reading her book (Published by nature and garden book publishers Timber Press in 2018) and my own research, I still consider myself a novice when it comes to native bees. There is so much to learn, but Embry’s book is a good beginning for anyone wanting to explore the world of native solitary bees.
Our Native Bees: North America’s Endangered Pollinators and the Fight to Save Them is clear and concise, mixed with entertaining stories and anecdotes about author Embry’s journey into discovering North American native bees from her childhood to present day. The book is by no means a dry, complex, scientific or academic approach to protecting and attracting native bees.
It’s their story and she tells the troubled tale with the novice native bee lover in mind.
“Native bees are the poor stepchildren of the bee world,” she writes in the introduction of the book. Honey bees get all the press – the books, the movie deals – and they aren’t even from around here, coming over from Europe with the early colonists.”
She goes on to point out that in 2015 the U.S. federal government “issued a plan to restore 7 million acres of land for pollinators and more than double the research budget for them.”
Sounds great, where’s this disrespect you talk about?
The disrespect came in the name of the new program: the “National Strategy to Promote the Health of Honey Bees and Other Pollinators.”
As Embry aptly points out: “Four thousand species of native bees, not to mention certain birds, bats, flies, wasps, beetles, moths, and butterflies, reduced to ‘other pollinators.’ ”
It’s the sad tale of our native bees. But with the efforts of Embry, bee researchers and entrepreneurial dreamers who are working hard to help our native bees get the respect and recognition they deserve, there is certainly some reason to be optimistic for the 4,000 species of native bee that call North America home.
No-one is kidding themselves, however, the story of their survival is still being written and there is no guarantee it will have a fairy-tale ending.
Let’s make this clear from the beginning, Embry has nothing against honey bees.
“They dance and make honey and can be carted around by the thousands in convenient boxes, but from a pollination point of view, they aren’t super-bees. On cool, cloudy days when honey bees are home shivering in their hives, many of our native bees are out working over the flowers. Bumble bees do their special buzz pollination of tomatoes, blueberries, and various wild species…. The trusty orchard mason bees are such hard-working yet slovenly little pollen collectors that several hundred can pollinate an acre of apples that requires thousands of honey bees.”
Embry asks: “Where are the book and movie deals for these bees?”
Where indeed?
Our Native Bees book, however, is a good beginning.
The little black, 195-page gem of a book is actually written in two halves: The first half focuses on the commercial importance of native bees in the agricultural world and tells the story behind California’s massive almond industry among others; the second half explores the importance of the native bees in nature and efforts made to save them including an unlikely pairing between the future of native bees and intensive work being done at a U.S. golf course to create ideal habitat for them and other pollinators.
The Power of Bees
In her final chapter of Our Native Bees, Embry writes about the power of these extremely docile native bees. Here are a few excerpts from that chapter:
Bees have power: They have the obvious power of pollination and supplying us with many of our favourite foods. they also have an unexpected superpower – the ability to form connections and build community among people. … People come together to volunteer at bee labs or help with bee surveys. Some use vacation time to take bee classes and hunt for bees.
Bees are reselient: If we just stop kicking the bees quite so hard, we can help them – and see the results immediately. Renounce pesticides. Plant flowers that bees in your area like. Be a little slovenly in the garden; leave some old broken stems and a little bare dirt show. The bees will come.
Bees are diverse: Most people think of honey bees when they hear the word bee or, even worse, they envision a yellow jacket or some other kinds of wasp. Twenty thousand species rife with differences being reduced to either a very unusual outlier of the group or something that is not a member of the group at all.
In the first half of her book, Embry sets up the difference between imported honey bees and our native bees.
For a complete novice, when it comes to the importance of bees and their role in agriculture, I have to admit that the information Embry provided was both enlightening and fascinating.
Embry’s love affair with bees and her subsequent book actually had its roots with the the tomatoes of her Georgia childhood.
“The summertime table in my house always had a plate of sliced tomatoes on it. … When I grew up and moved away, I too, grew tomatoes…, she writes in the book.
“Some pollination happens as a result of wind just shaking the plants, but more and bigger tomatoes result with the help of bees. Not just any bee can do it, though. It wasn’t until I was nearly fifty that I learned that honey bees can’t produce those tasty red and orange globes. Tomatoes require a special kind of pollination called buzz pollination, where a bee holds onto a flower and vibrates certain muscles that shake the pollen right out of the plant.”
“If the idea of flowers growing in the grassy lawn just isn’t quite achievable yet, there’s always the golf course route. Take out some of that lawn and convert it into a home and dining hall for bees. It’s all a matter of rethinking normal.”
So, it turns out that bumble bees and other native bees are the keys to tomato pollination.
Embry goes on to devote an entire chapter to the question: “Did Greenhouse Tomatoes Kill the Last Franklin’s Bumble Bee?”
You’ll have to read the book to get the answer to that question, but it raises a concern about big agriculture and the future of our native bees.
Native versus naturalized bees
In case you were wondering what’s the difference between Native and Naturalized bees, Embry explains it in the following way: “The North American bee is one that evolved right here. The honey bees we know are not native because they came over from Europe with the early colonists. Some of those early bees escaped into the wild (they went feral), where they did quite well. Those feral bees are considered naturalized, not native.”
Native Bees’ economic value
Like many of us, I had not given much thought to how fruit and nuts get to our table and the importance of pollination to that end.
Little did I know that the pollination of massive orchards and fields were so dependent on bees and that non-native honey bees were the key pollinators. All this despite the fact our native bees are more efficient, harder workers and free for the taking if only we could figure out a way of attracting them to acres and acres of endless orchards and agricultural fields.
It should not come as a surprise that the story of our bees, both honey and native bees, are rooted in the agriculture industry and the bees’ future could very well depend on that same industry for good or bad.
Much has been written lately about the future of bees and other pollinators and how their numbers are being threatened by pesticides.
But enough of that. The agricultural story and the work being done behind the scenes is a fascinating part of the native bee story. The fact that Canadians, more specifically New Brusnwick, played a key role in their story, and not in a good way, furthers my interest in the plight of these fascinating little bees.
Native Bees’ value in our gardens
It’s in our gardens, however, where our focus lies.
Native bees have quickly become a favourite of concerned homeowners many of whom are taking actions in an attempt to save them. Even if it’s nothing more than putting up small bee habitats on their properties where the solitary bees can safely procreate and live their lives. (For my post on WeeBeeHouse native bee habitats see below)
Gardener’s Supply Company, in Burlington, Vermont also offers an impressive native bee house for readers looking to begin provding a home for native bees. Their page also includes an interesting video of the bee house in action. To view it, click here.
Best five things I learned from Our Native Bees
1) There are at least 4,000 species of native bees in North America in every shape, size and colour you can imagine.
2) Sweat bees – beautiful green iridescent native bees – get their name because some like to lick up sweat
3) Most native bees are small, live alone and do not sting either because they have no stingers or are so docile that it would take a life and death situation to get them to sting.
4) Native bees vary in size from the mighty carpenter bee (about an inch in length) to the tiny Holeopasites calliopsidis that isn’t much bigger than Roosevelt’s nose on a dime. And it’s not even the smallest native bee in the United States. That honour goes to Perdita Minima.
5) There are 20,000 species of bees worldwide that are responsible for the seeds of rebirth of three-quarters of the flowering plants in the world.
Bees in the Grass: Rethinking Normal
We all have to take a serious look at the acres of grass that dominate our urban and rural neighbourhoods. (For my post on removing lawns see below.)
Embry wastes little time advocating for a change in the way homeowners see their carpets of monoculture they call grass. She uses an example that is both shocking and encouraging.
She turns her focus to golf courses and goes into great detail about two programs at American golf courses that encourage setting aside natural areas on the golf course for native pollinators.
The first program stems from a 2002 report from the Xerces Society for Invertebrate Conservation who teamed up with the U.S. Golf Association to write a report called “Making room for Native Pollinators: How to create Habitat for Pollinator Insects on Golf Courses.”
The second program, and one she turns her attention to, is a program out of Europe, Operation Pollinator, started by Syngenta, one of the world’s largest agrochemical comanies (another name for a pesticide company).
The program started in the United Kingdom in the early 2000s after a survey of golfers revealed that what they liked most about going out for a round of golf was the nature they sometimes stumbled across in the more natural areas of the course. That, together with the desire to reduce the costs of operating a course, lead to the unexpected marriage between nature and a massive pesticide company.
By creating a natural area for pollinators, the pesticide company was able to use their expert biologists to turn perfect turf into pollinator-friendly areas. The plan cut down on the cost of pesticide while at the same time providing more nature for the golfers.
“Operation Pollinator for golf courses came to the United States in 2012, and by 2016 more than 200 golf courses in twenty-nine states had an Operation Pollinator plot. The plots range from half an acre to more than a hundred.”
To say the program has been a smashing success for native bees is a huge understatement.
This program, of course, brings us to our own lawns and gardens.
Embry asks: “What golf courses are doing with Operation Pollinator is going a step beyond just adding some flowers to the grass. They are removing turf in areas that don’t need to be grass and replacing it with flowers for pollinators. That’s one approach, and it works in some places. Sometimes, though, you want a lawn to be a lawn , a place for play, picnics, and soccer pitches. What if a lawn can be all that and a place for pollinators too?”
She goes on to talk about incorporating more clover, and the thirty-seven bee species found on clover in grass in a Minneapolis study.
This simple addition to turf allows for the soccer pitches, while still providing some native bee habitat.
From the simple addition of clover into the lawn Embry moves on to the “making of a bee lawn.”
The transformation from golf-course turf to the perfect bee lawn has been the focus of many studies and creations that has met with varied success over the years.
As one researcher at the University of Minnesota explains: “the hardest part of getting a bee lawn into use isn’t developing the seed mix; it’s dealing with people’s vision of what a lawn should be…"
“If we didn’t have to worry about our neighbours, I think there would be a much more diverse look.”
Embry goes on to explain as a possible solution: “If the idea of flowers growing in the grassy lawn just isn’t quite achievable yet, there’s always the golf course route. Take out some of that lawn and convert it into a home and dining hall for bees. It’s all a matter of rethinking normal.”
Yes, Ms Embry, it certainly is.
Thanks for shedding some light on our native bees.
As an affiliate marketer with Amazon or other marketing companies, I earn money from qualifying purchases.