Front and backyard landscaping with rocks, gravel and mulch
Rocks, whether they are massive boulders, smaller rocks, river rock or pea gravel, all have their place in a natural woodland garden. Placing them properly can be tricky. Here are some tips to help gardeners feel confident using them as a landscape feature.
Look to nature to create a natural, rockin’ landscape
There is nothing like a moss-covered rock placed perfectly in a garden to create a natural focal point.
But take that same moss-covered rock and place it improperly in the garden and it quickly creates an unnatural look that suggests the gardener or landscaper was decorating with stone rather than using it to create a natural feeling in the garden.
Decorating with stone is the single biggest mistake gardeners and landscapers make when using boulders, rocks and stone in the landscape. If your goal is to create a natural-looking garden, try not to get caught in the decorating mode.
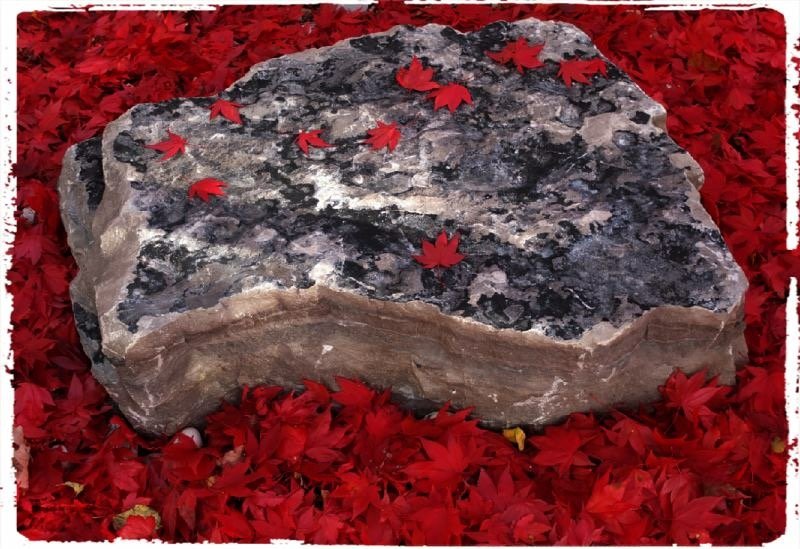
An example from my garden on how not to place a rock. Notice that it is sitting on top of the mulch (Chipmunks have appeared to even have burrowed under it). In addition, the rock is standing on its end in an attempt to maximize its size. Much better to let it lie on its side while using it to hold back a little soil. (I have some digging to do.)
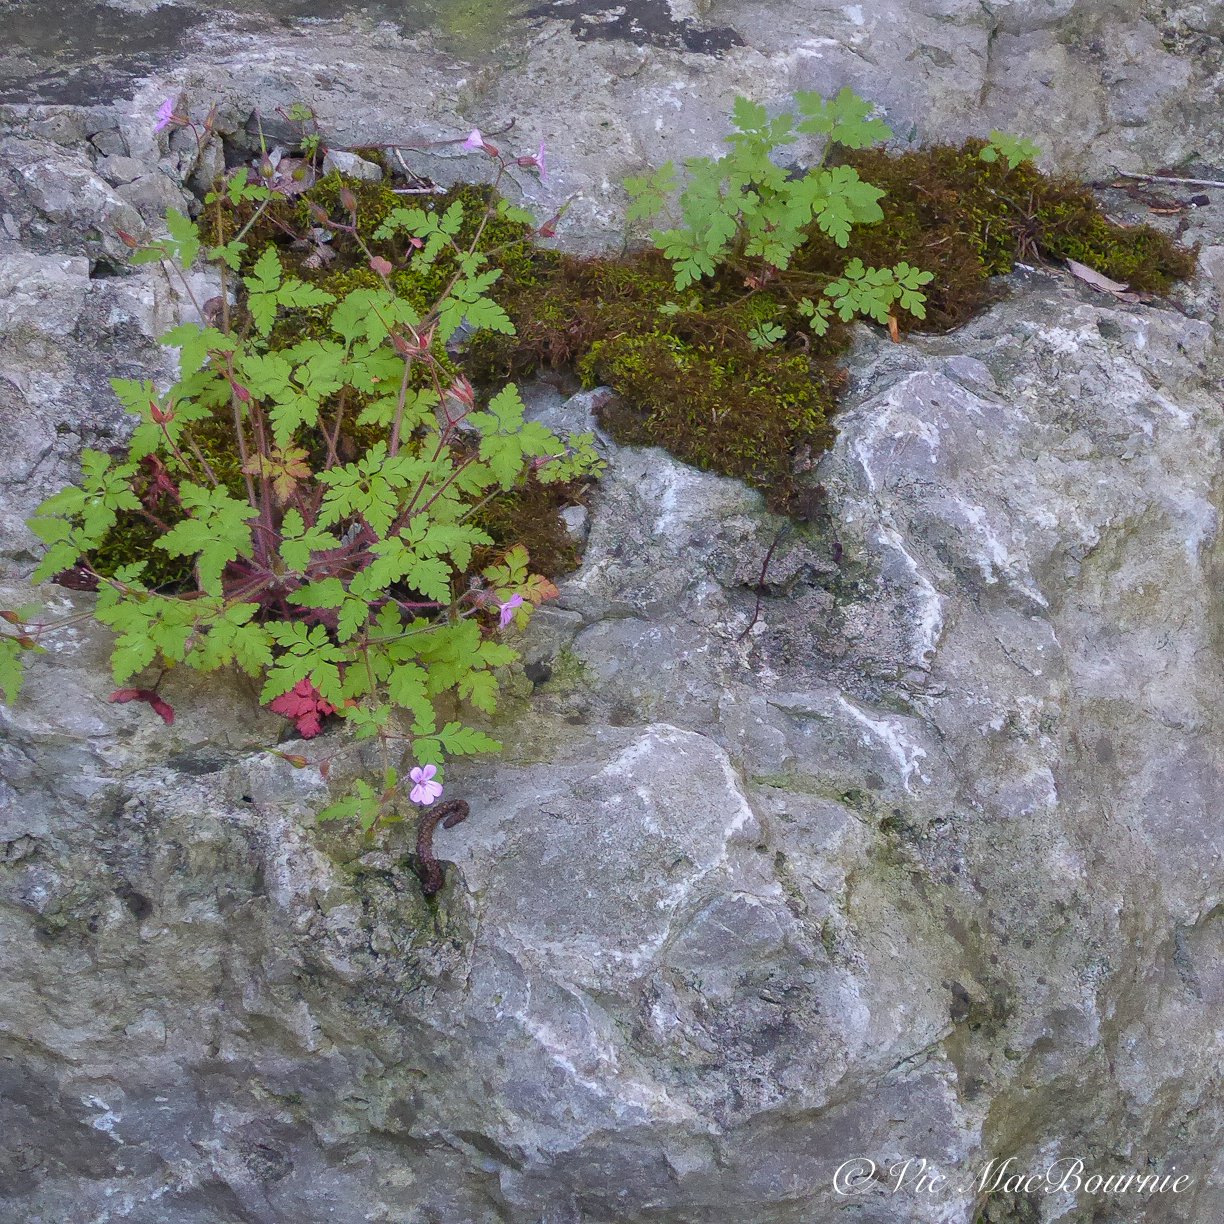
Always take your cues from nature. In fact, it never hurts to find some rock moss to grow on the rocks to help with the natural look.
There are many reasons to use rock and stone in the garden: for utility purposes such as a retaining wall to hold back soil; to create garden design elements such as a dry river bed or a natural stone pathway; or as a focal point such as large moss-covered boulders rising out of the ground.
“The job of the natural gardener is to place elements in the garden as nature does. The site of every object in the garden should answer the question “why is that there?” We may choose to place a boulder where it might have ended up had it rolled sown a hill to our garden. Or where it may have emerged from a glacial till as the surrounding soil was washed away by 10,000 seasons.””
All of the above projects can be made to look natural to some degree or more decorative if the wrong choices are made such as using a type of stone or rock that is not indigenous to the area. Bright white quartz rarely has a place in a natural landscape.
Using boulders, rocks and pea gravel in a natural landscape creates wonderful opportunities to capture stunning moments in the garden.
A walk through most neighbourhoods reveal the “decorating” mistakes. There are those who place small rocks meticulously around the edge of a border; or those who place river rock in a half circle to replicate a dry river bed; or, the worst sin of all, placing boulders on top of the soil rather than digging them into the landscape. To make matters worse, these boulders sitting atop of the landscape are often placed on sloped ground making it look like our beautiful boulder is about to roll down the hill.
Placing stones to look natural in the landscape
So what’s the secret to placing stones properly?
Jeff Cox, in his book Landscape with Nature provides this solid explanation: “The job of the natural gardener is to place elements in the garden as nature does. The site of every object in the garden should answer the question “why is that there?” We may choose to place a boulder where it might have ended up had it rolled sown a hill to our garden. Or where it may have emerged from a glacial till as the surrounding soil was washed away by 10,000 seasons.”
He asks readers if they can “feel the presence of large boulders somewhere down under the earth? Can you feel them slowly rising toward the surface or rather the surface slowly descending toward them? Look at your site. Where would one of these boulders emerge? Get a feel for it. Then bury the bottom 2/3 of the boulder to make it look like its coming out of rather than going into the ground,” says Cox.
“Take any three objects such as three different rocks and arrange them anyway that seems balanced,” he adds. '“An evenly spaced straight line seems very static and unsubtle. A much more satisfying arrangement is for the two smallest rocks to be relatively close together and the third larger rock at sOme distance, their masses balancing on an unseen focal point somewhere between them.”
“In a natural garden try to use plants as nature might. The goal is not to border our beds with bright colours but to pay homage to natural beauty with artistic interpretations of it,” Cox concludes.
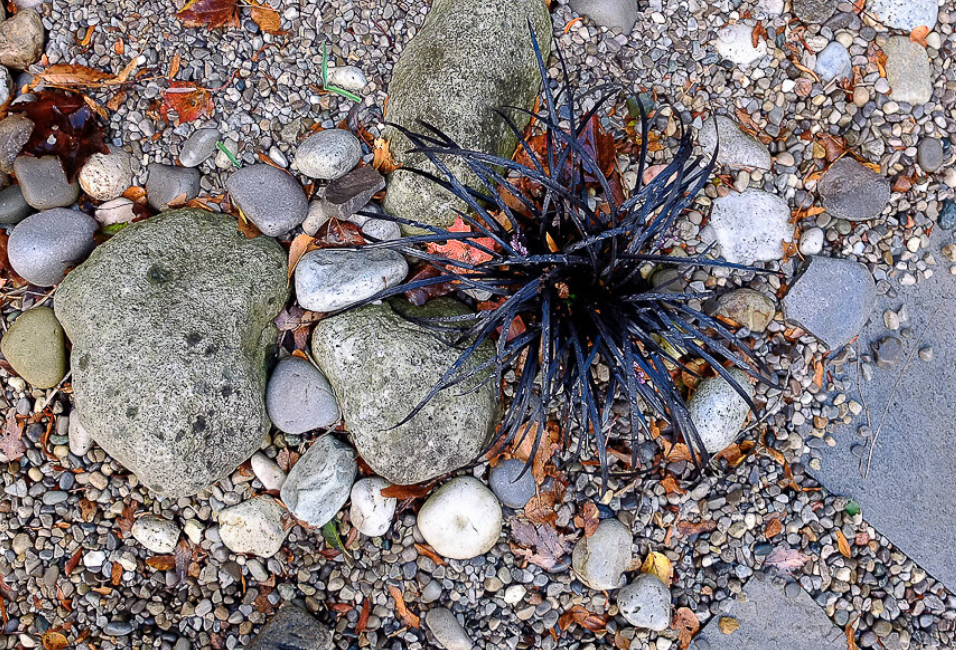
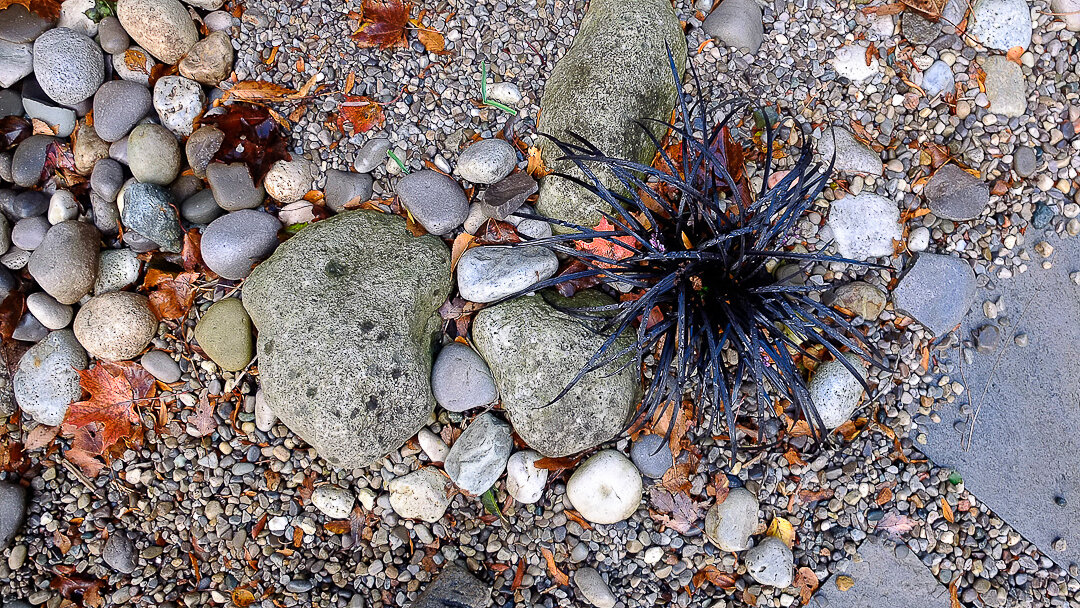
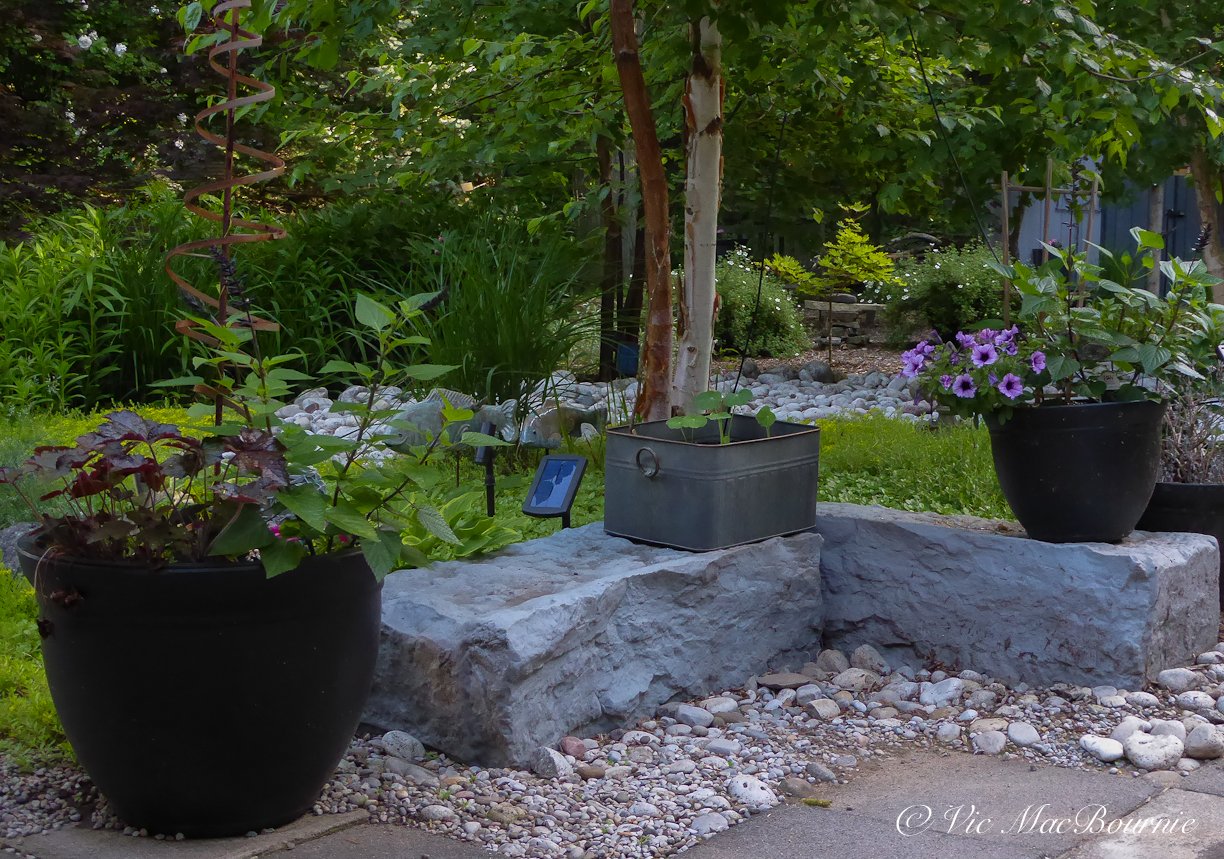
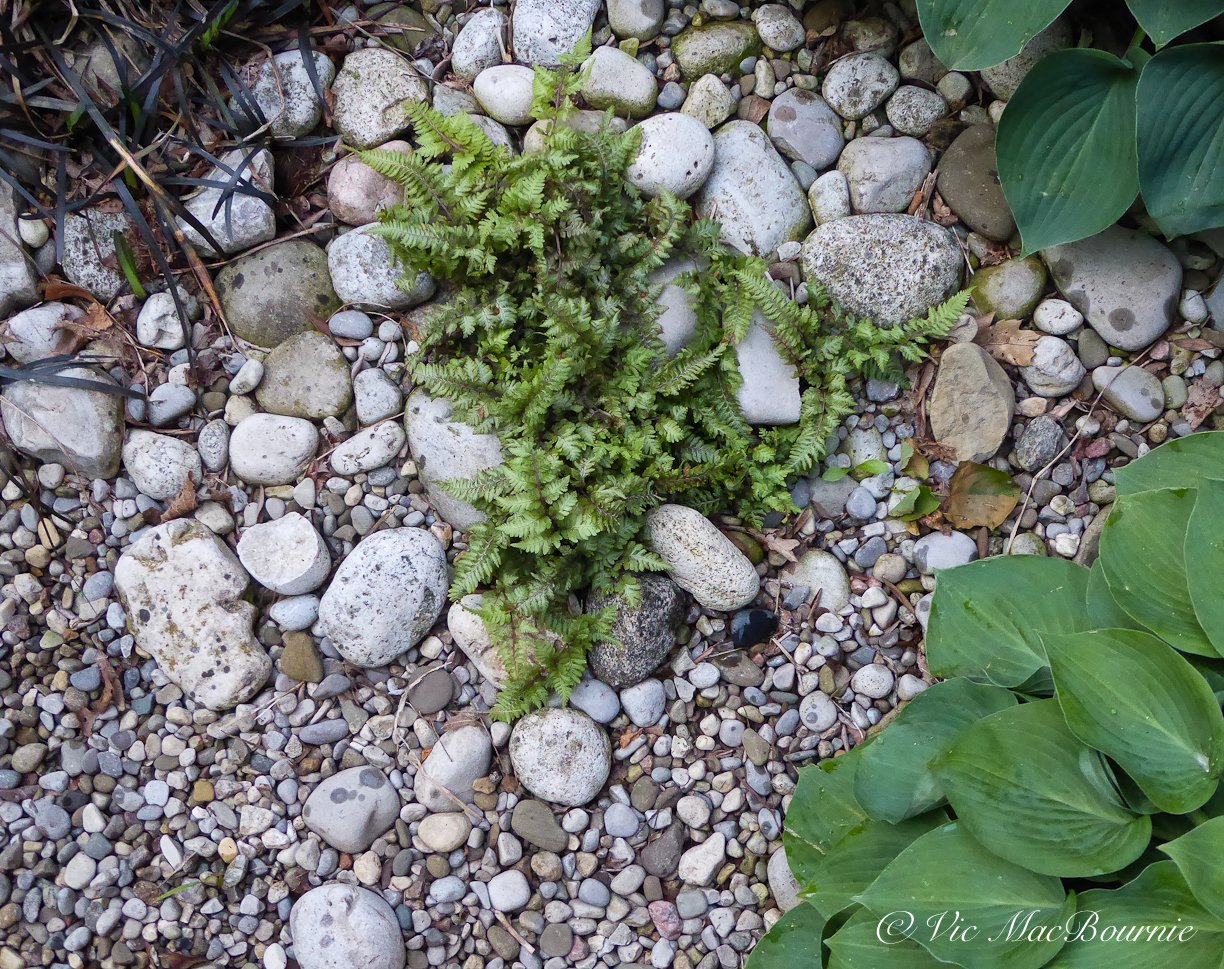
Here is an example of using different-sized river rocks and pea gravel along a dry-stream-look path that looks to nature to give the garden vignette a natural feel. In nature, a black mondo grass seed may have gotten caught up in the rocks and began growing. The natural vignette helps create interest to slow the visitor along the pathway. I used black mondo grass so that the plant blended in to the more or less black and white scene. A brightly coloured flower would have spoiled the lovely monochrome garden vignette.
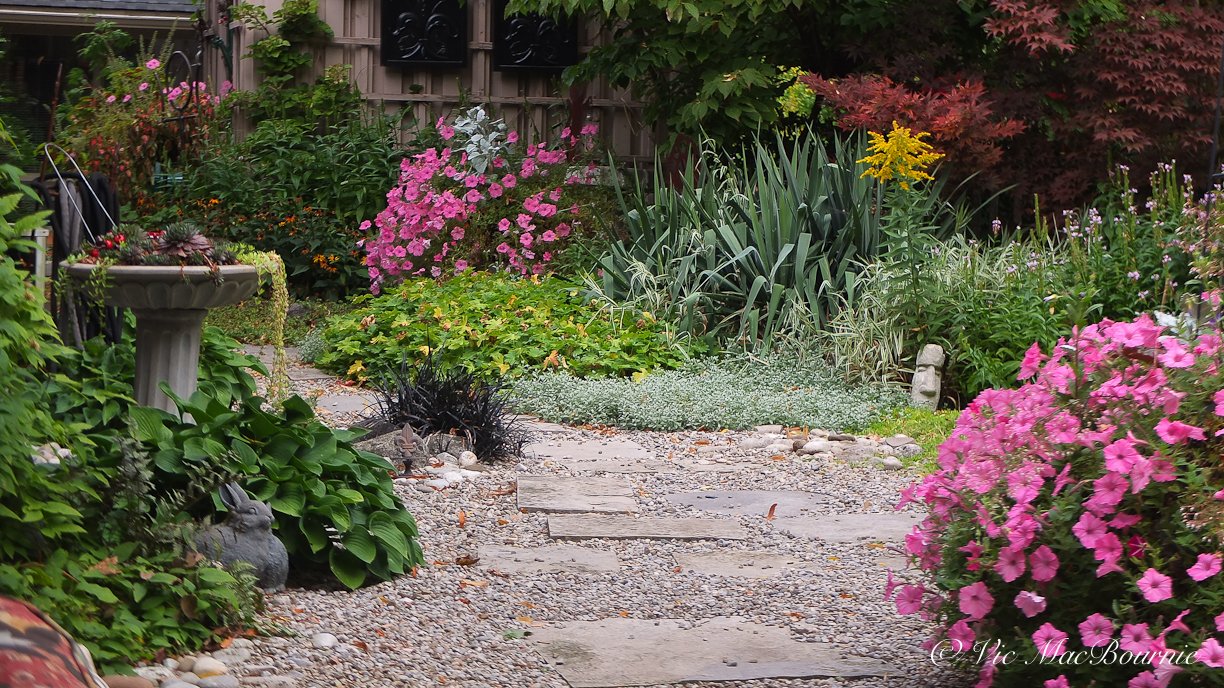
The simple answer: try to place the stones as they would appear in nature.
Not sure how they would appear in nature?
Learning from nature’s rock placement
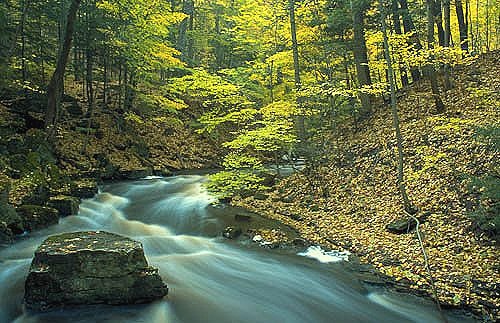
Take an afternoon to visit a natural stream and study how Mother Nature places the rocks and stones with the larger ones anchoring the stream, smaller ones closer to the edge of the stream and pea gravel and or sand filling in the edges suggesting areas where the water has a gentler flow. Notice how, in nature, not all the river rock is the same size. There are boulders, large rocks and smaller rocks. Often there will be several sizes of river rock as well as pea gravel and sand.
(Looking for inspiration, check out my post on using local woodlands as inspiration for your garden.)
To create a realistic dry river bed, you don’t need to include all the sizes, but using only one size of river rock for the entire stream bed, is unlikely to look natural. When you are ordering from the rockery, include at least two sizes of river rock, some larger boulders and pea gravel.
The result will have a more natural look and allow you to transition down from the larger rocks to the smaller ones right down to the pea gravel on the edges of the stream filling in any holes between the larger rocks.
Placing larger boulders in the landscape
When it comes to placing large boulders, plan to do some digging.
In nature, boulders sit in the landscape, not on top of it. Even if a piece of a large boulder has broken off another boulder, it will in time be absorbed into the landscape through a combination of sinking into the soil through regular freezing and thawing, and soil building up around the boulder as leaves and forest detritus gets blown around the base of the boulder.
You may have thought you purchased a large boulder for your garden, but if I said you may have to bury a quarter to a half of the boulder underground for it to look right, it doesn’t take long to realize that boulder you purchased is not going to make as big a statement in the landscape as you might have thought. Most boulders need to be buried deep in the ground to look natural in the landscape. Boulders should look like they are rising out of the landscape.
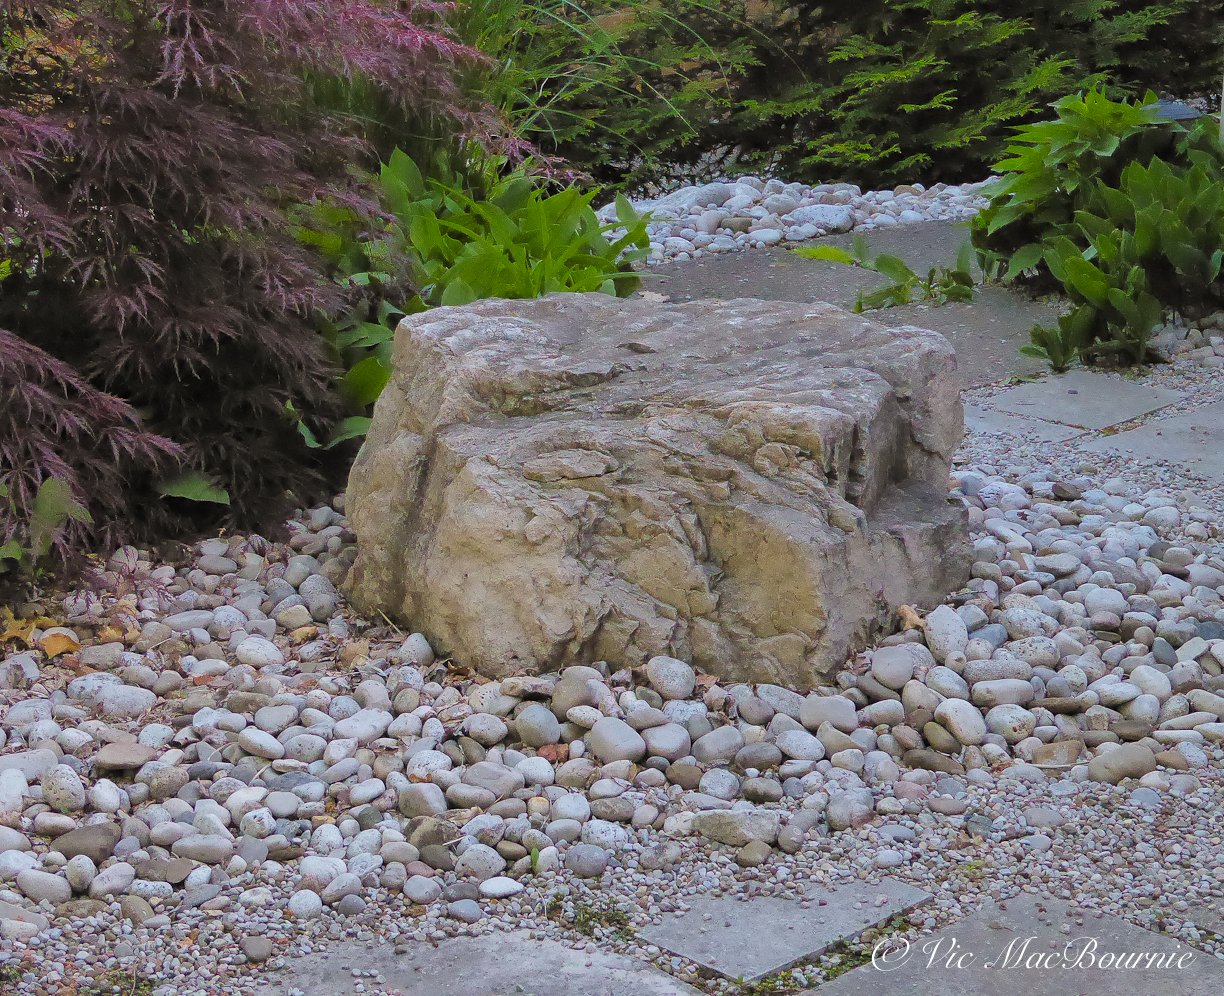

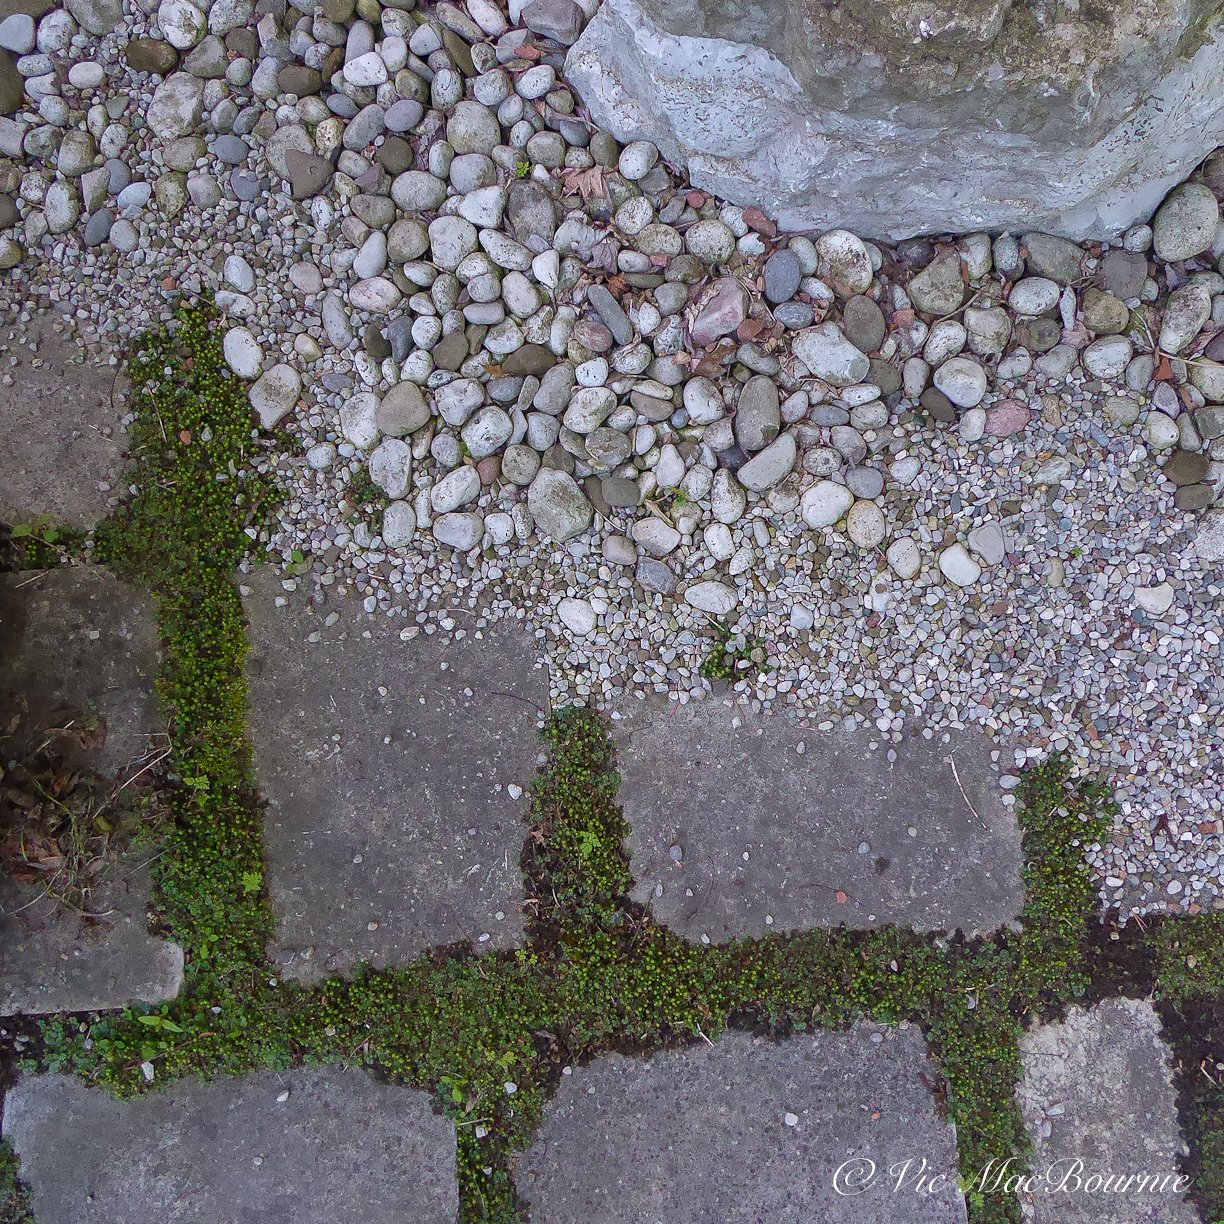
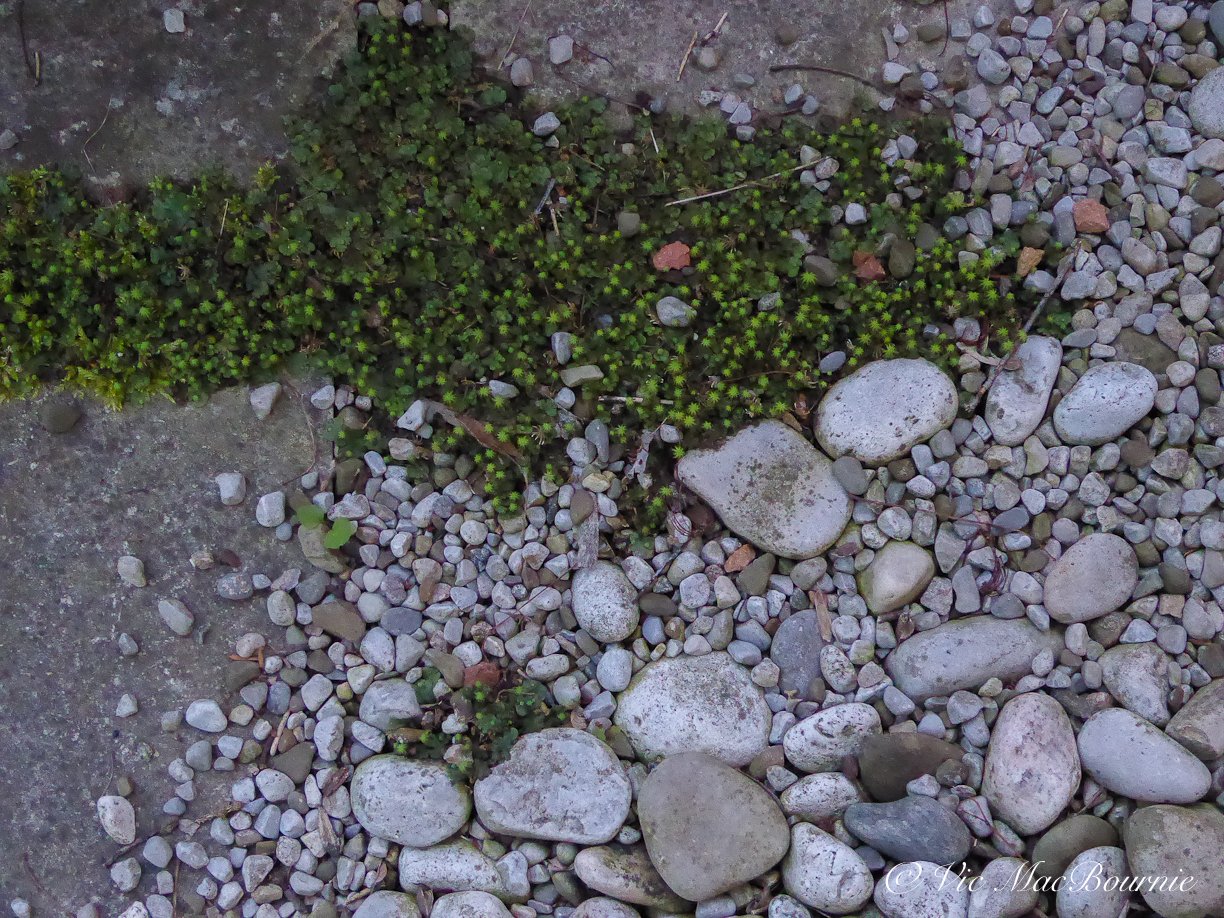
Depending on the boulder, you may get away with sinking it just a couple of inches into the ground. Just make sure that the boulder looks like it was always part of the landscape.
If you are placing boulders, it’s best to think odd numbers. Not unlike planting flowers in groups of 1-3-5, using the same way of thinking also works for placing rocks.
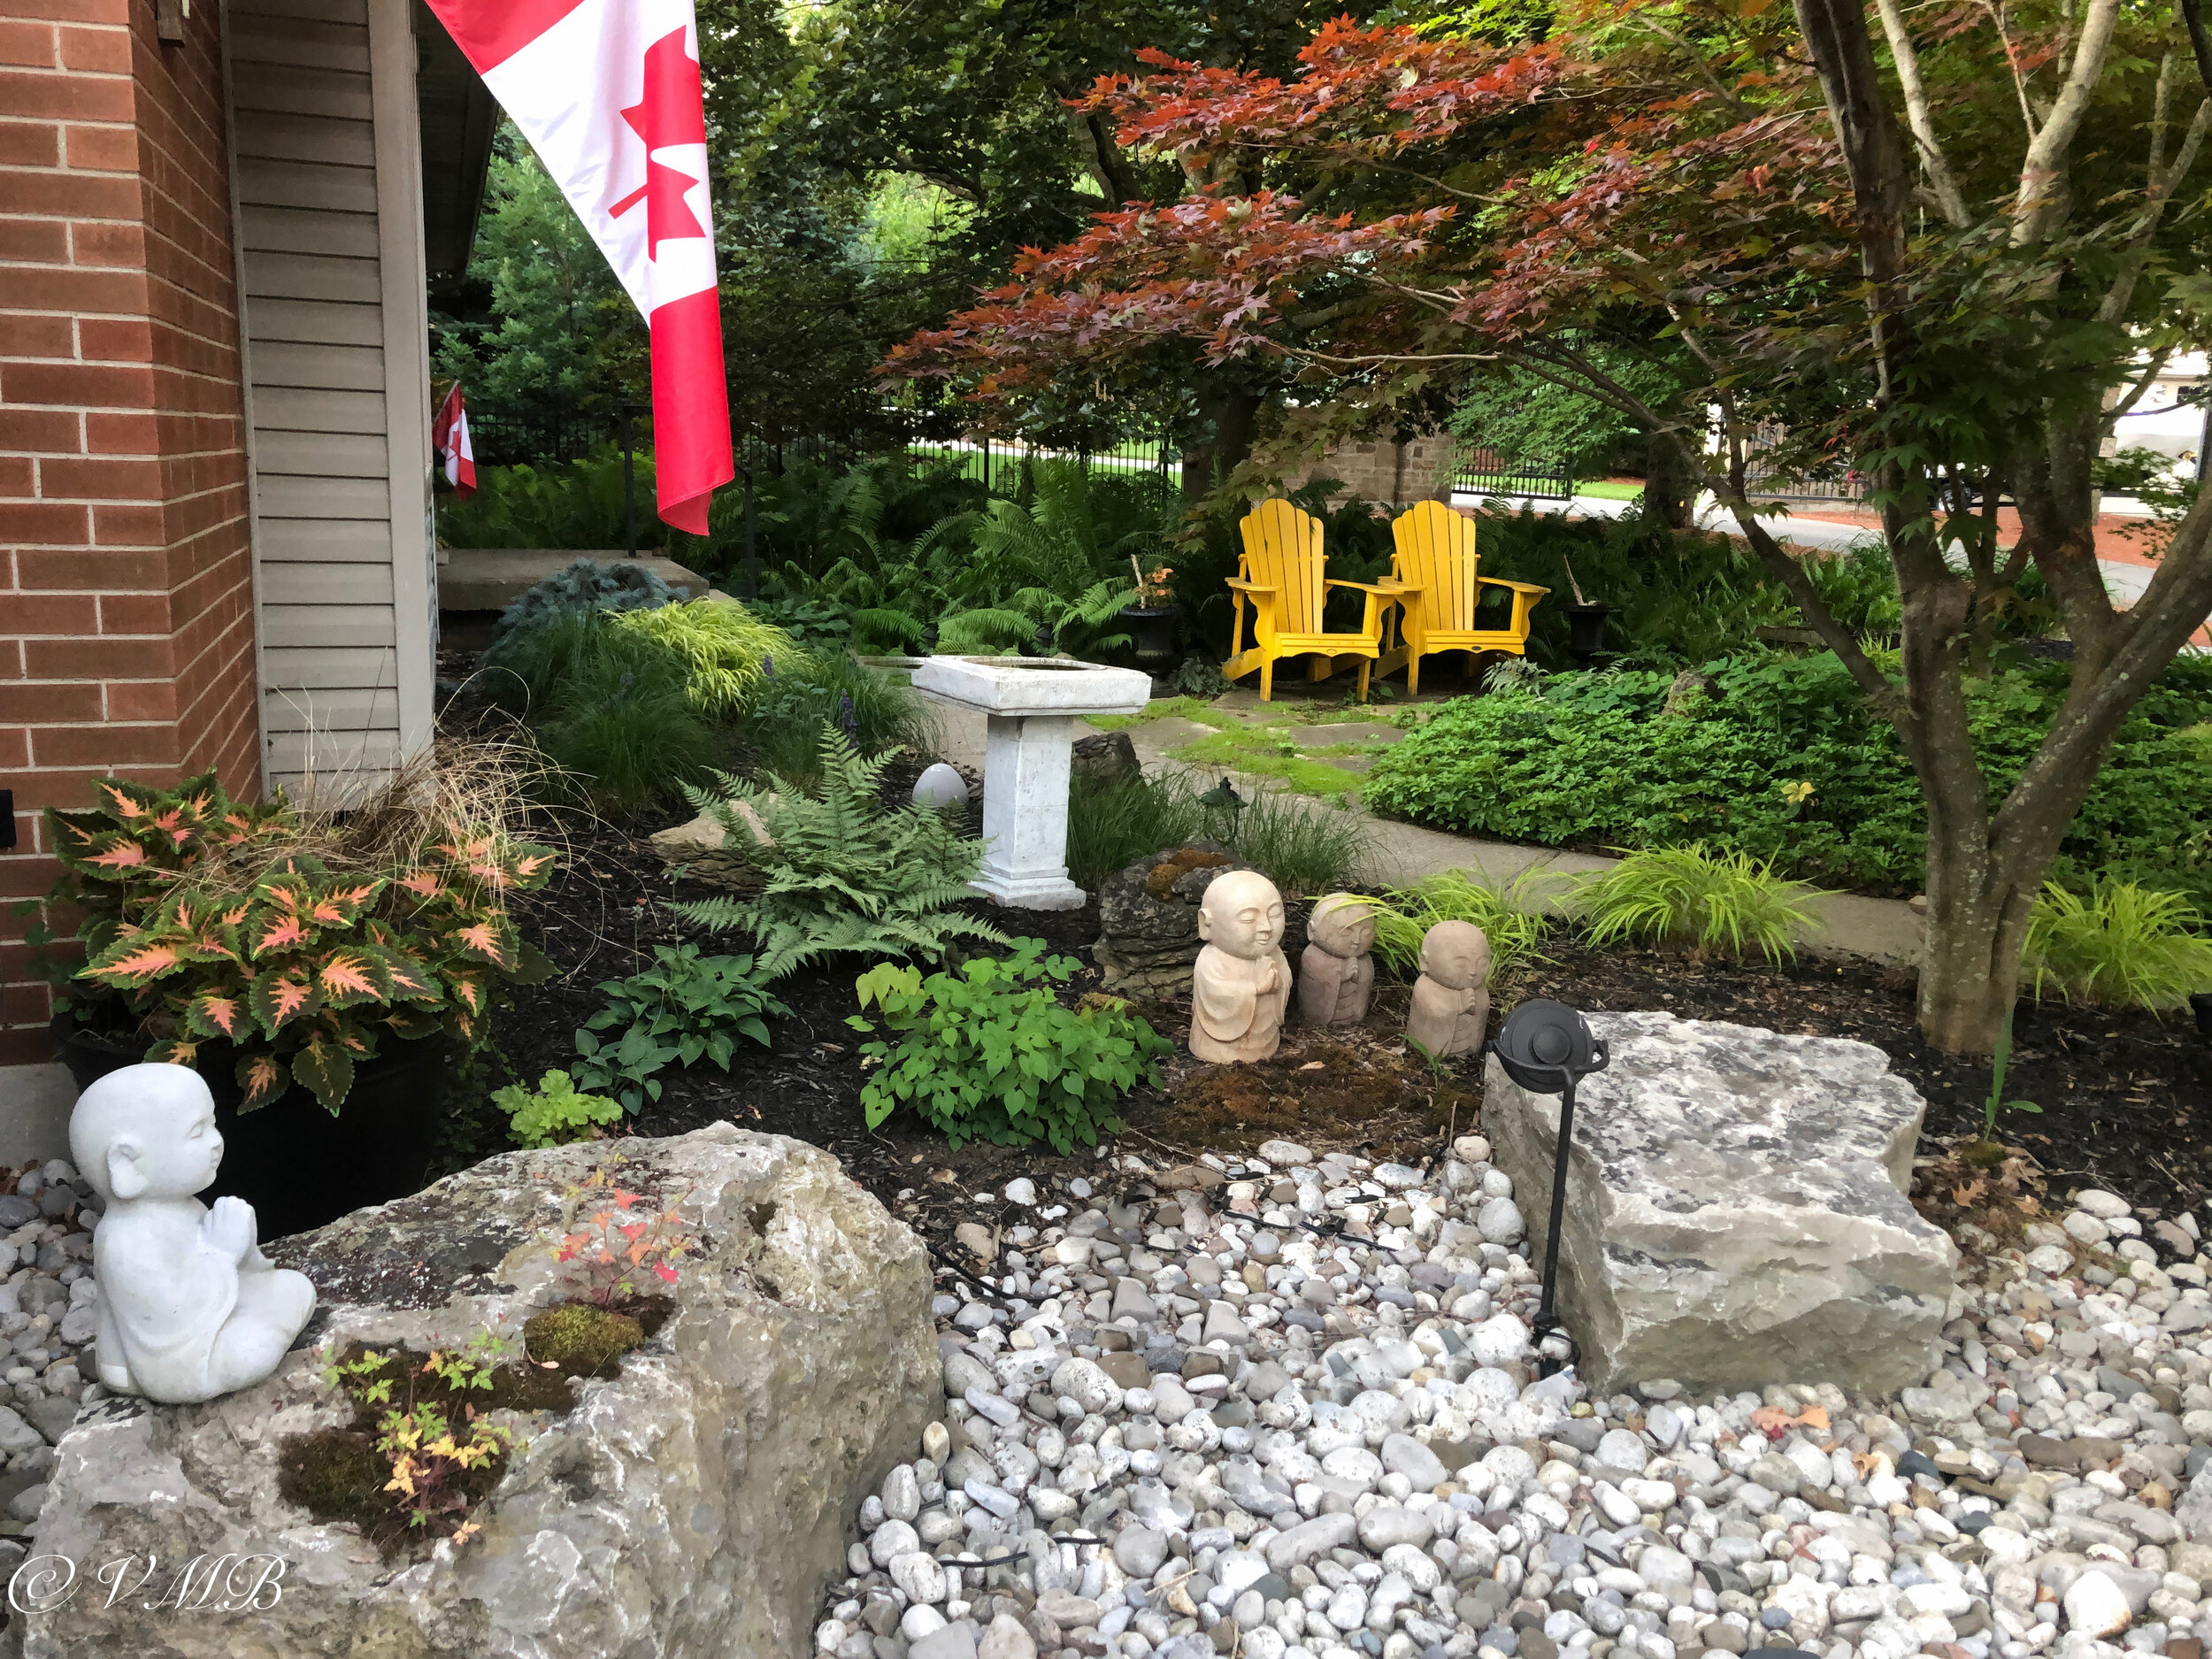
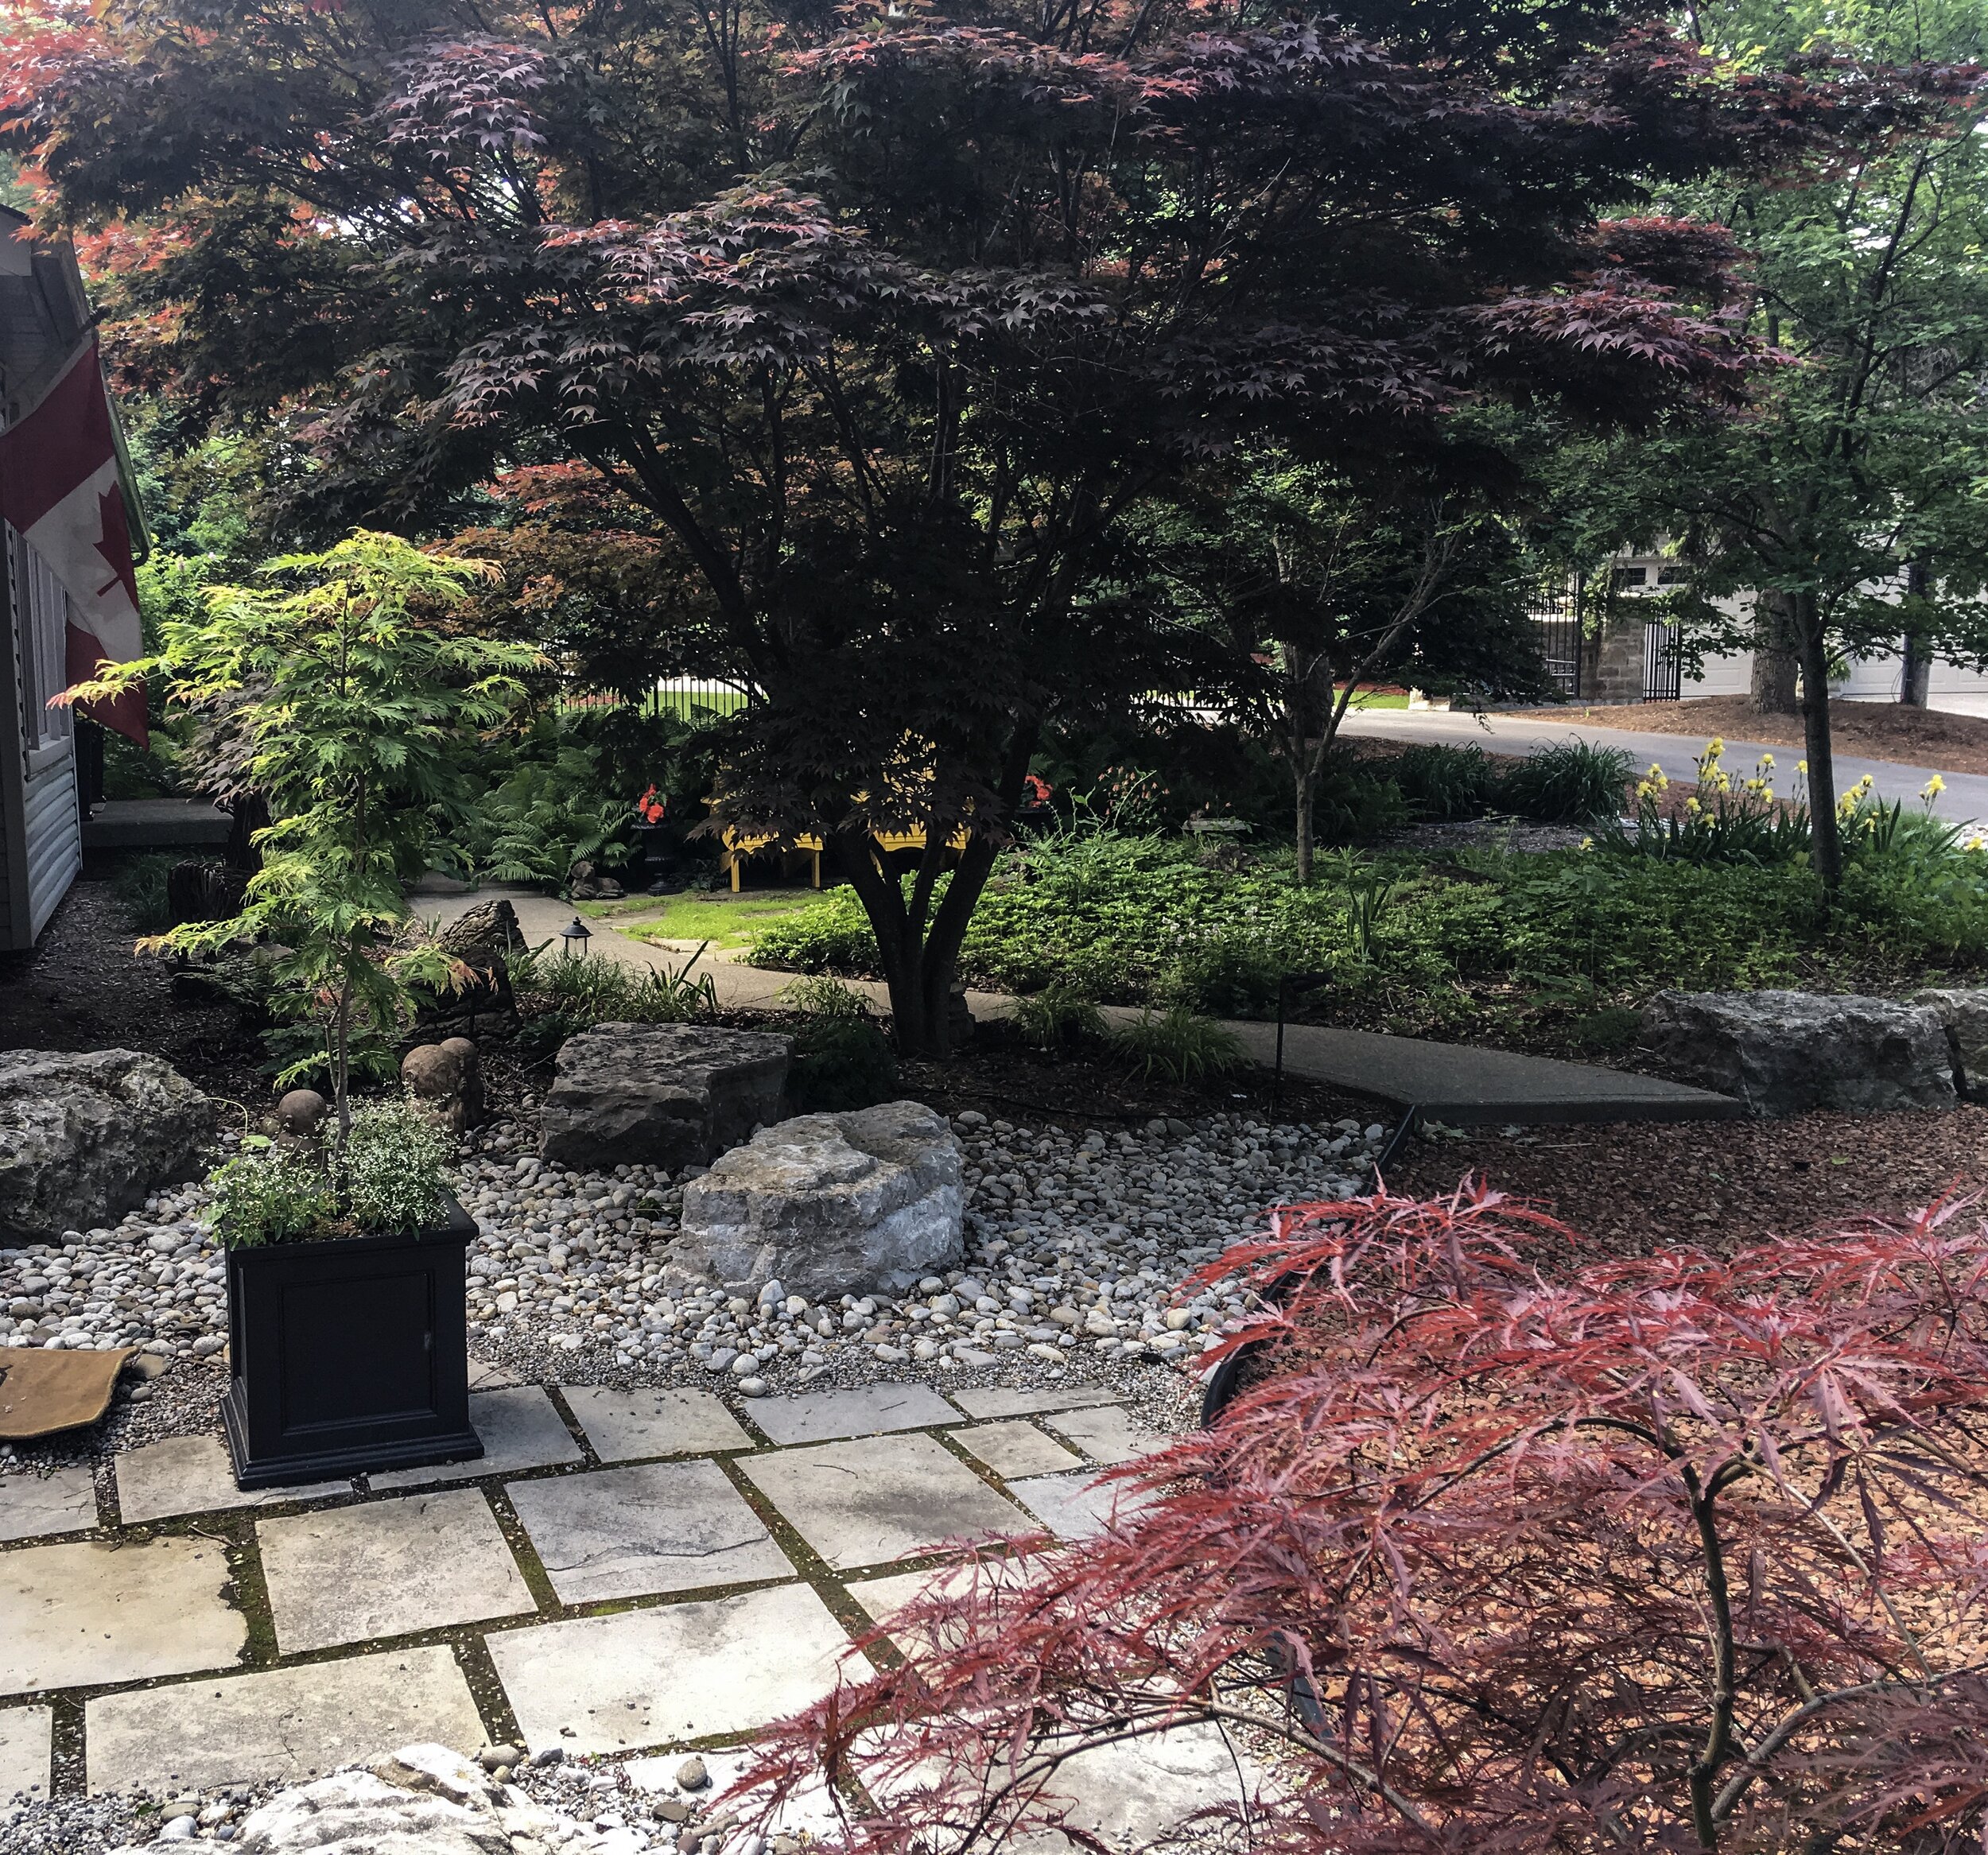
In our Japanese-inspired garden, I was lucky enough to scoop up a number of massive boulders from a neighbour's backyard project.
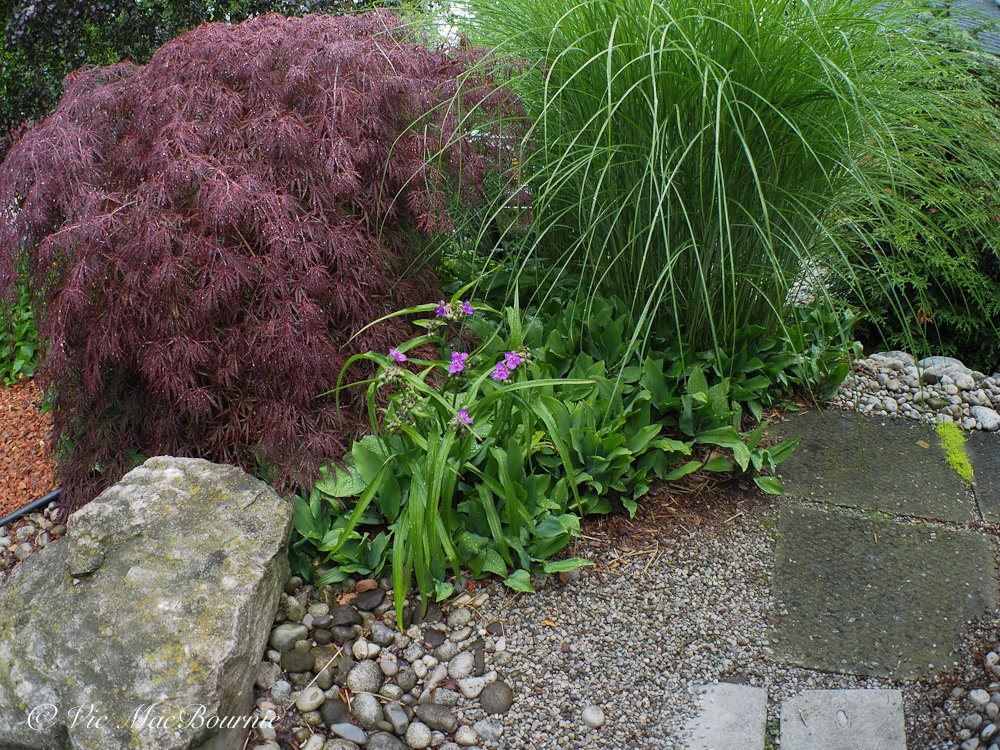
The trick was how to use them effectively. By using three of them in one grouping and a single one on the other side of the Japanese-inspired garden, I was able to keep the groupings to odd numbers. The boulder sitting by itself on the one side is teamed with large grasses and a weeping Japanese Maple providing visual balance between the two groups of boulders.
Staying with the Japanese-inspired garden and placement of the large boulders. In true Japanese style, a single boulder may be all that is in the garden surrounded by sand or fine pea gravel that is meticulously raked to give the appearance of waves surrounding the boulder.
In our design, I chose to use the boulders as if they represented mountains. Around the outside of the boulders I placed river rock in two sizes and then used pea gravel to fill in any holes and tie into the pea gravel throughout the garden and around the square-cut flagstone that take visitors through the garden into the backyard.
Using rocks along a pathway between houses
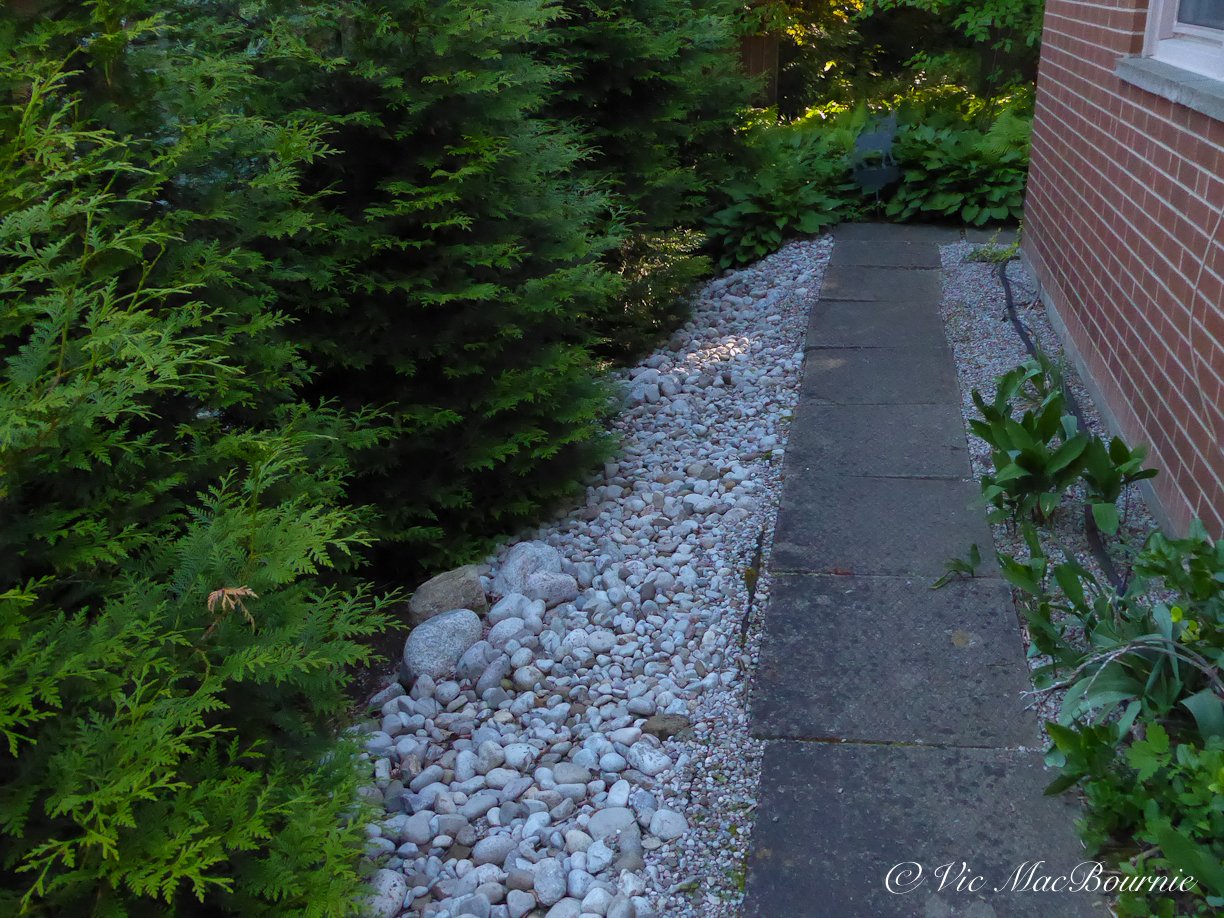
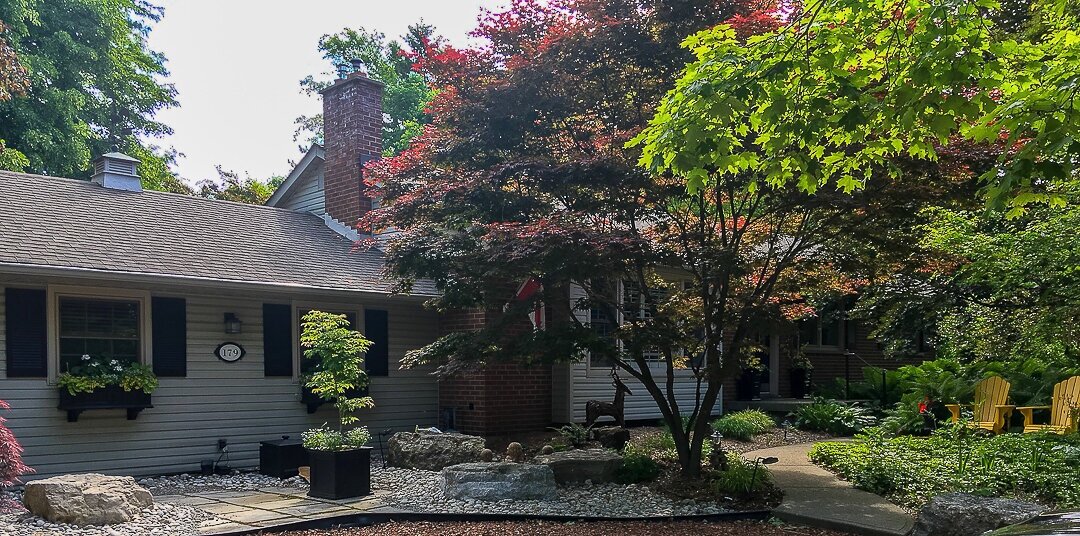
Our Japanese-inspired garden runs across the front of our home with a pathway leading through it to another pathway that leads into the backyard. By continuing the use of stone from the Japanese garden along the pathway leading to the back yard, the two spaces work together to create a natural flow.
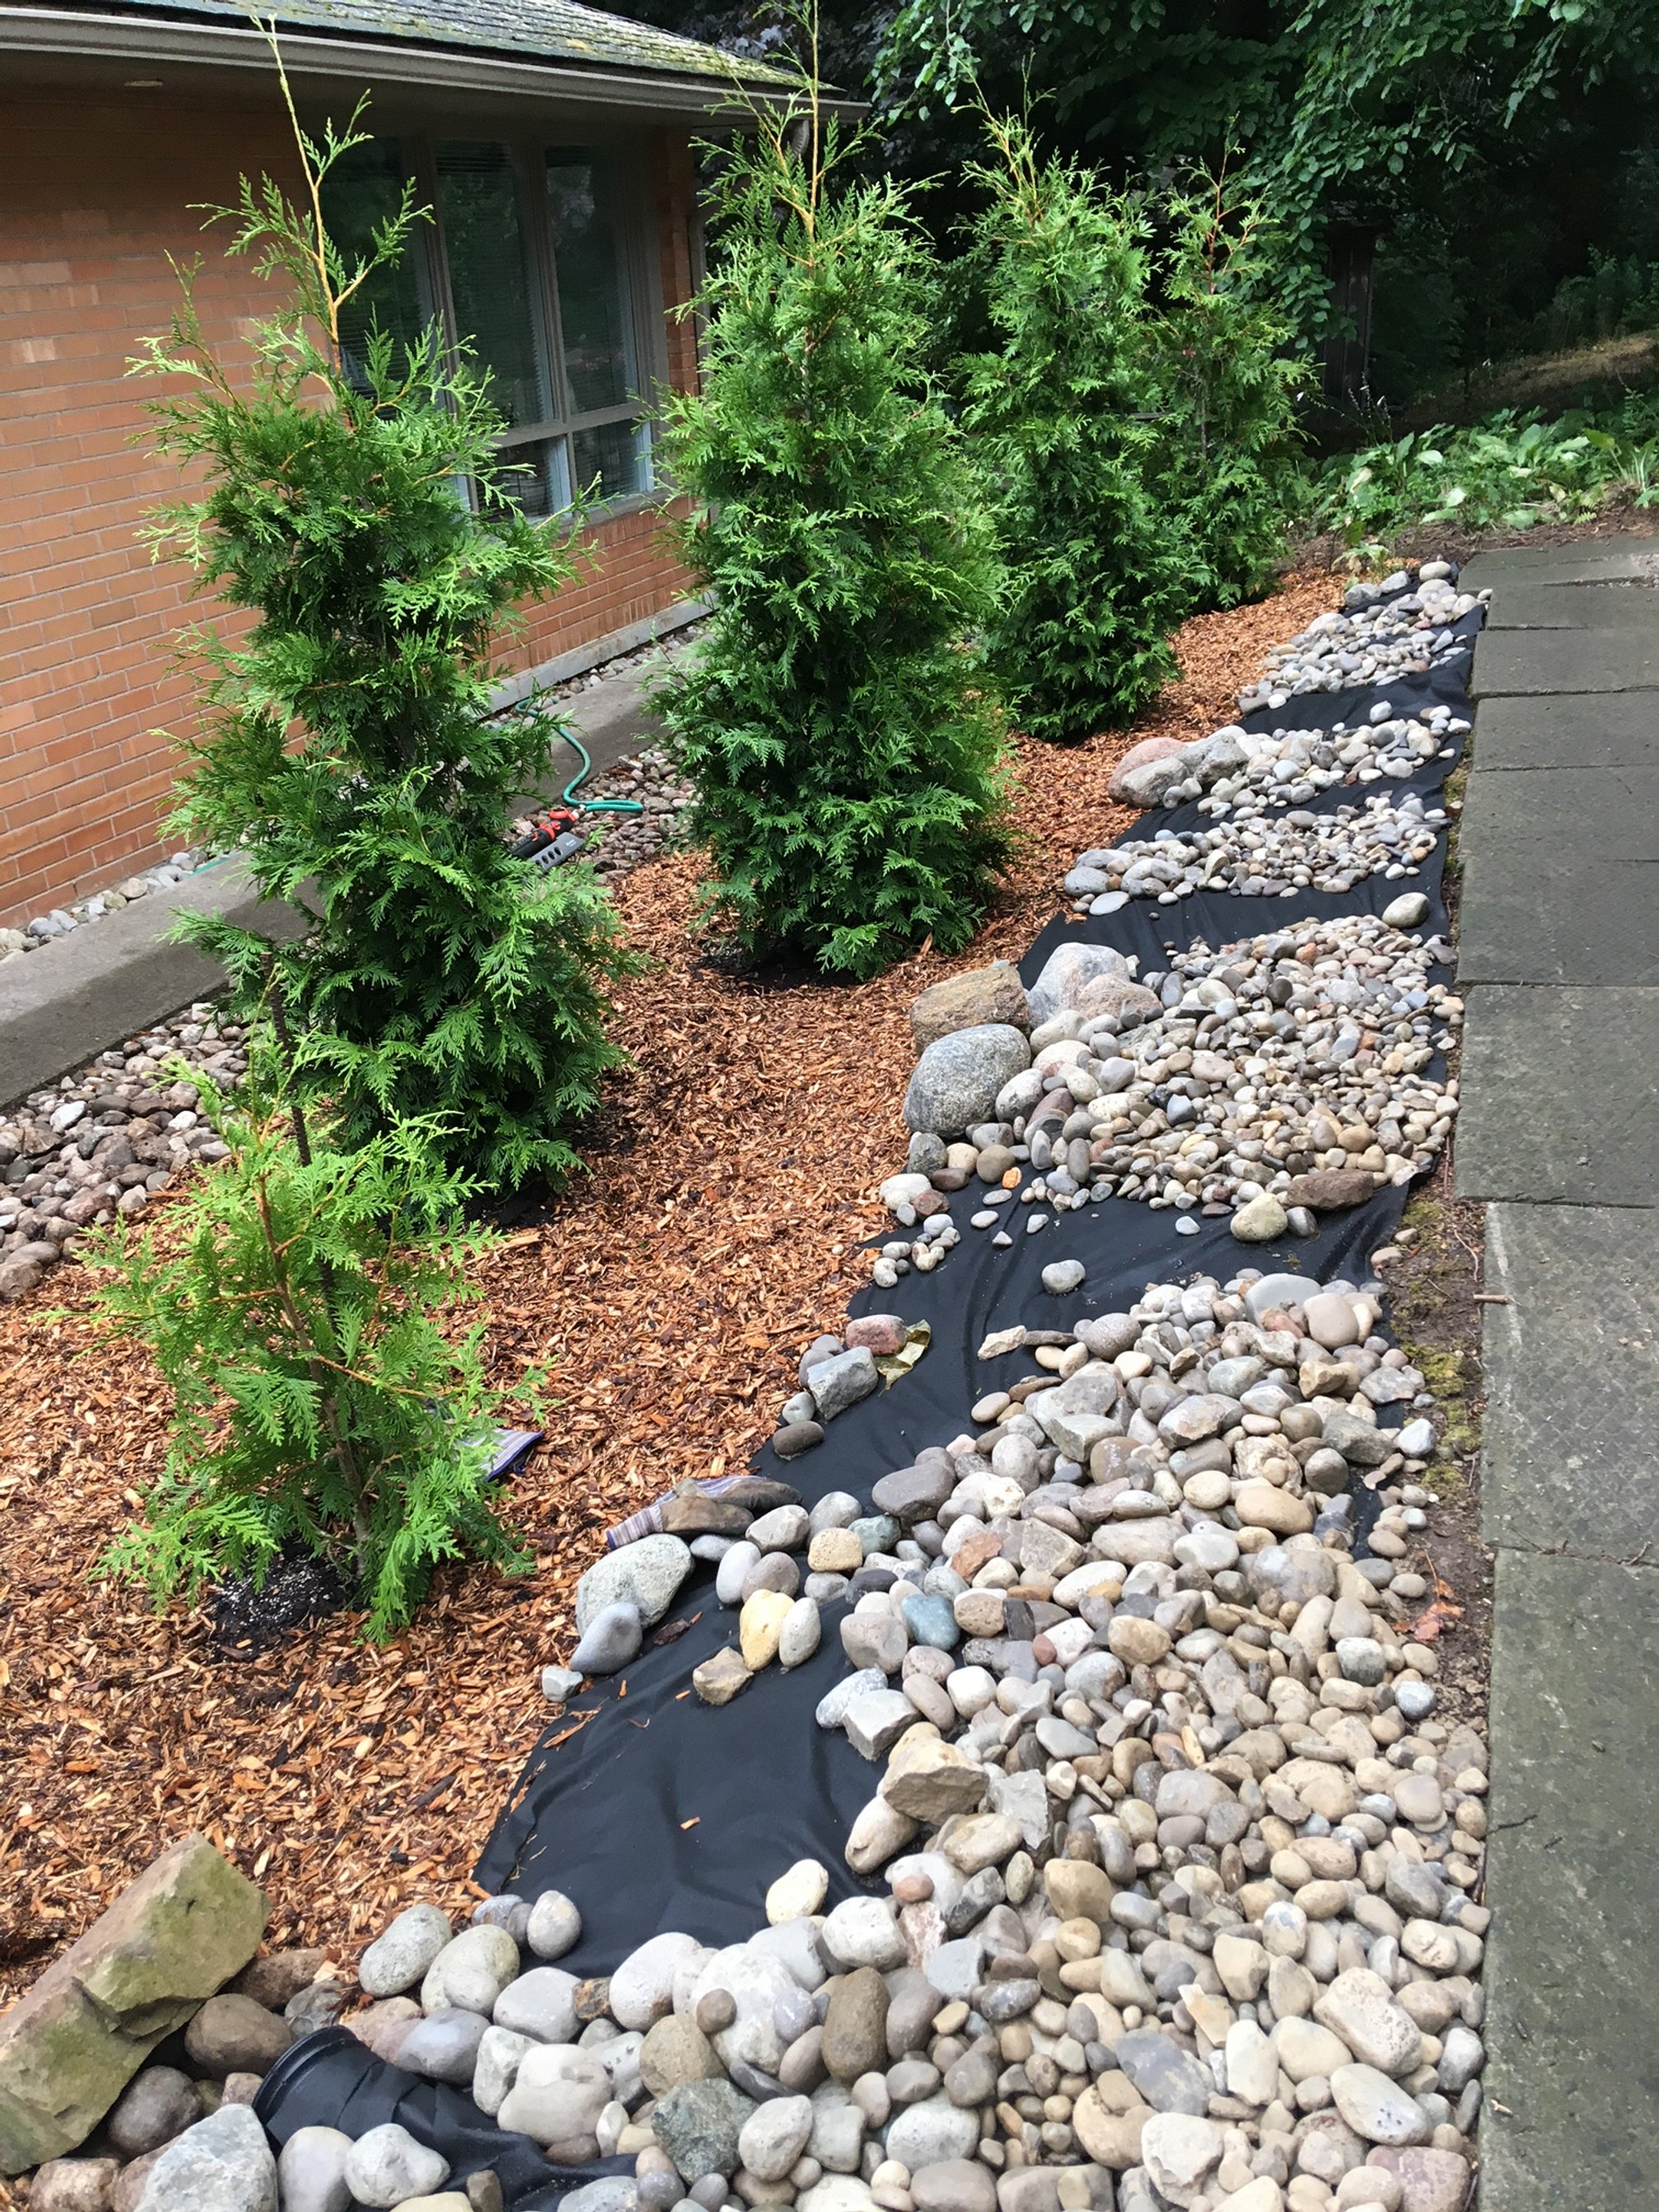
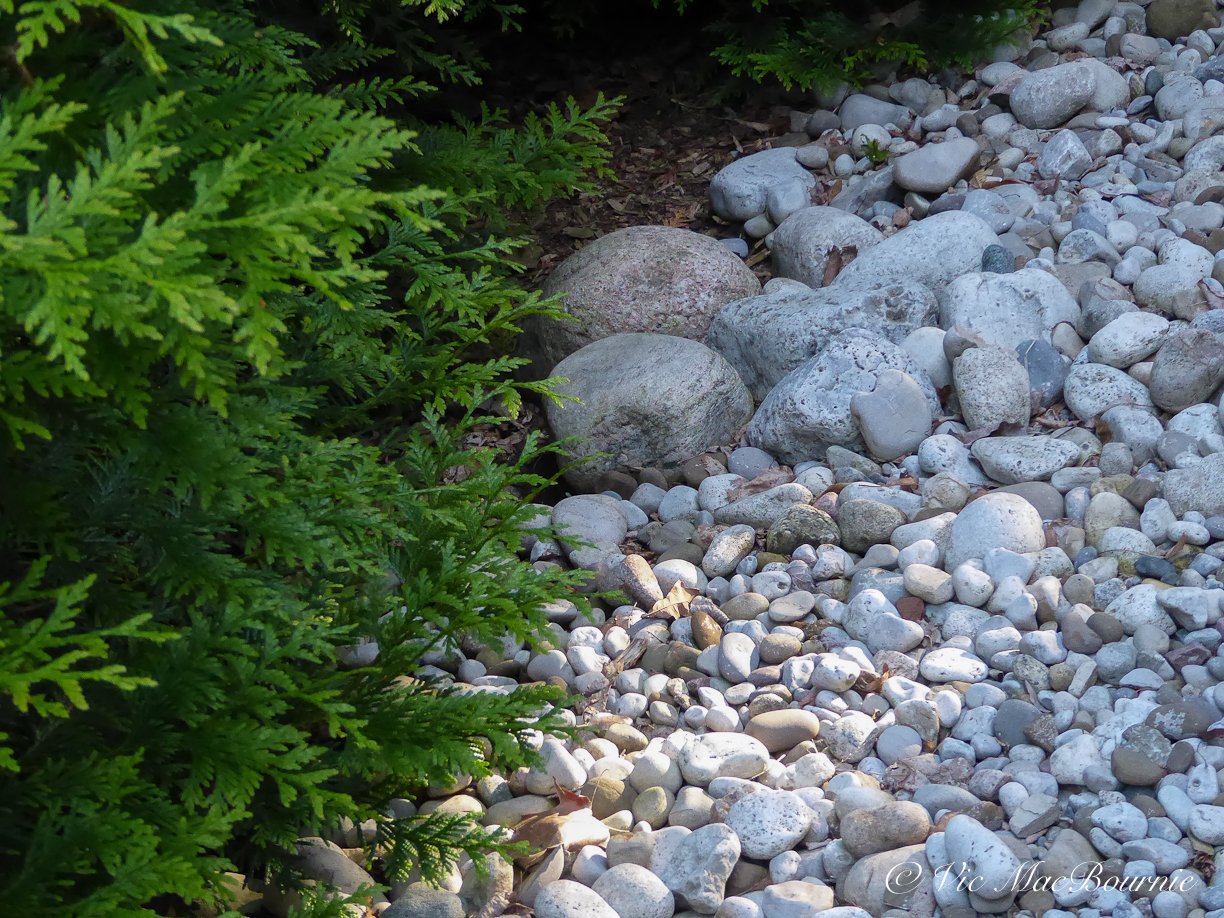
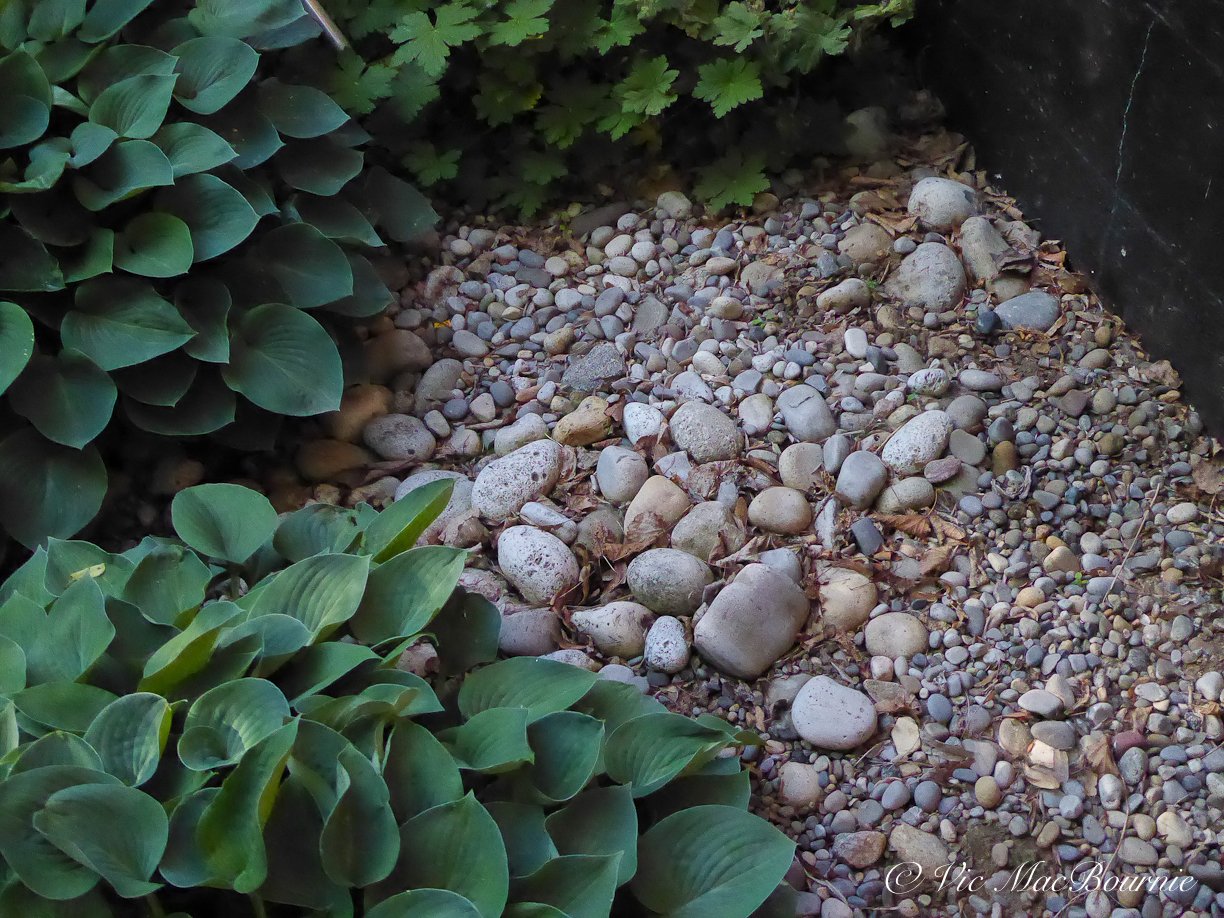
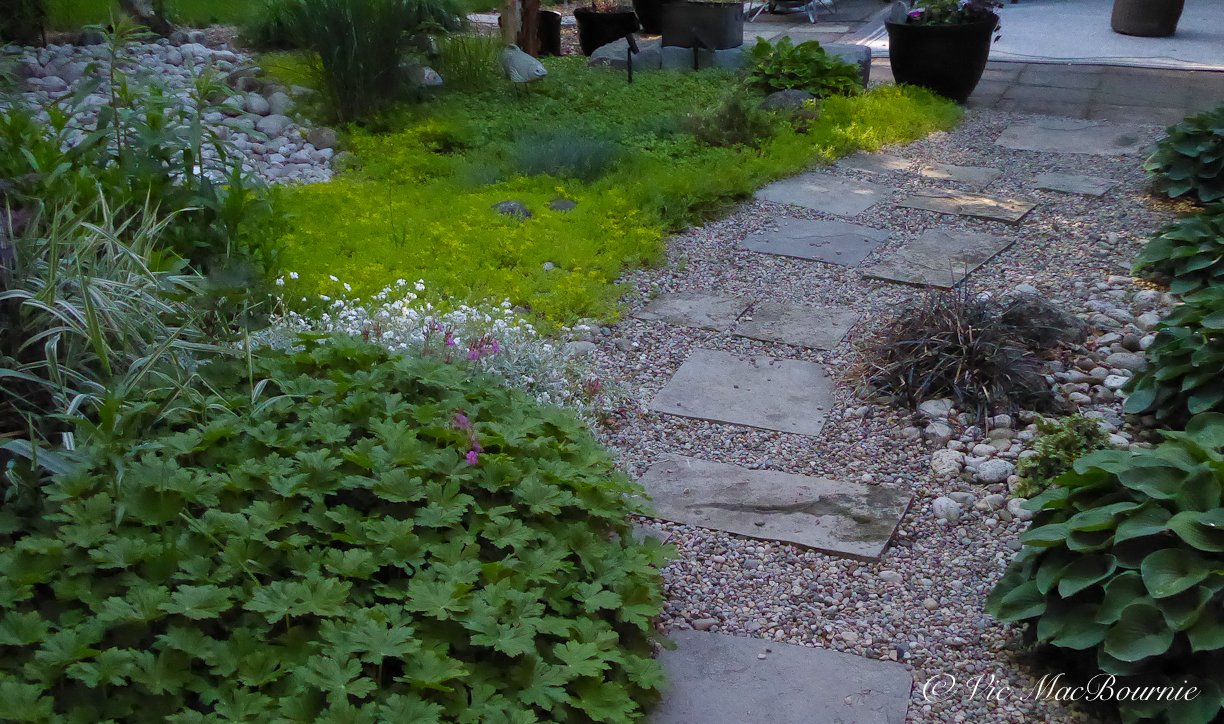
Green Giant cedars separate our property from our neighbours creating privacy and a beautiful green backdrop that opens up at the end of the pathway into a view of our neighbour’s lovely yard and our woodland garden. (The three pictures above show how we installed the river rocks between the path and the Giant Green cedars using a combination of three sizes of river rocks and finishing with pea gravel. The pictures also show how much the cedars have grown in just four years.
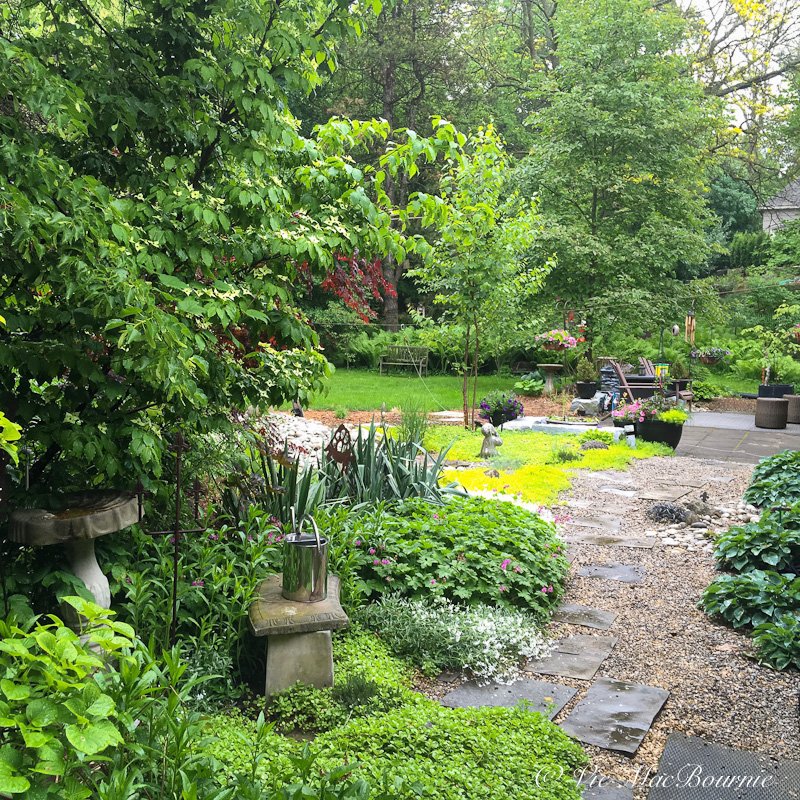
On both sides of this pathway we have used stone as a mulch to tie in the back and front gardens. The same dry-river pathway is picked up across the back of the home helping to tie the entire garden from front to back.
Along the side pathway, several layers of black landscaping cloth were laid down to keep weeds at bay. This was followed up by using large river rocks (hand picked at the rockery) to form small rockfalls along the pathway just to add interest rather than having all the same size river rocks. Once the larger rocks were in place, we began adding wheelbarrows full of river rock followed by shovel fulls of pea gravel to fill in any holes between rocks and add more texture to the vignette. Closer to the trees’ roots, we laid down a thick layer of natural shredded cedar bark.
The result is a completely maintenance free landscape that looks natural and makes walking down the path a lovely experience.
Author Profile: Vic MacBournie is a former journalist and author/owner of Ferns & Feathers. He writes about his woodland wildlife garden that he has created over the past 25 years and shares his photography with readers.
Three Top Woodland garden books
Three of the best woodland gardening books to help you create the garden of your dreams. The Wild Garden, The Living Landscape and the Ken Druse’s exceptional book The New Shade Garden are all books that will open a new world for gardeners looking for solutions and landscape ideas.
Plus a few more too important to leave off the list
Winter is a time to sit back with your favourite gardening book and begin planning for the gardening season ahead. That sense of anticipation is a feeling that is hard to deny and leads me to turn another page of my favourite gardening book looking for new ideas and possible garden vignettes I can implement this spring and summer.
YouTube gardening channels and other blogs just can’t replace the joy of a good, well-worn and tattered garden book, maybe a coffee and a comfortable chair.
I am currently leafing through Dogwoods, (link to book from Alibris with incredible prices on used books) an incredibly informative and entertaining book I picked up from Alibris books (an umbrella group of independent book sellers based in the United States and the U.K. that offers used books at extremely reduced prices.) If the book has taught me anything, it’s that I need more Dogwoods in my life.
Many of the books below are available through a number of book retailers, but I urge you to check out Alibris for outstanding deals on perfectly good used books at ridiculously reduced prices.
Here are three gardening books (plus links to several more) that can turn winter evenings into productive gardening days.
So let’s get started.
The Wild Garden: A Woodland bible
The Wild Garden (amazon link) might well be considered the bible of Woodland gardening.
(Link to Wild Garden from Alibris Books, Movies and Music)
With its roots going back to its first publishing in 1870, the new edition includes an introductory essay by award-winning photographer and landscape consultant Rick Darke (The Woodland Garden) who underscores the importance of not only the author’s original ground-breaking, and hugely influential approach to gardening at that time, but its importance to today’s environmental-conscious gardeners and more naturalistic, ecological landscape designs.
It’s a message more gardeners need to embrace as our planet comes under new, and constant threats to its very survival.
A kindle version is also available for this book.
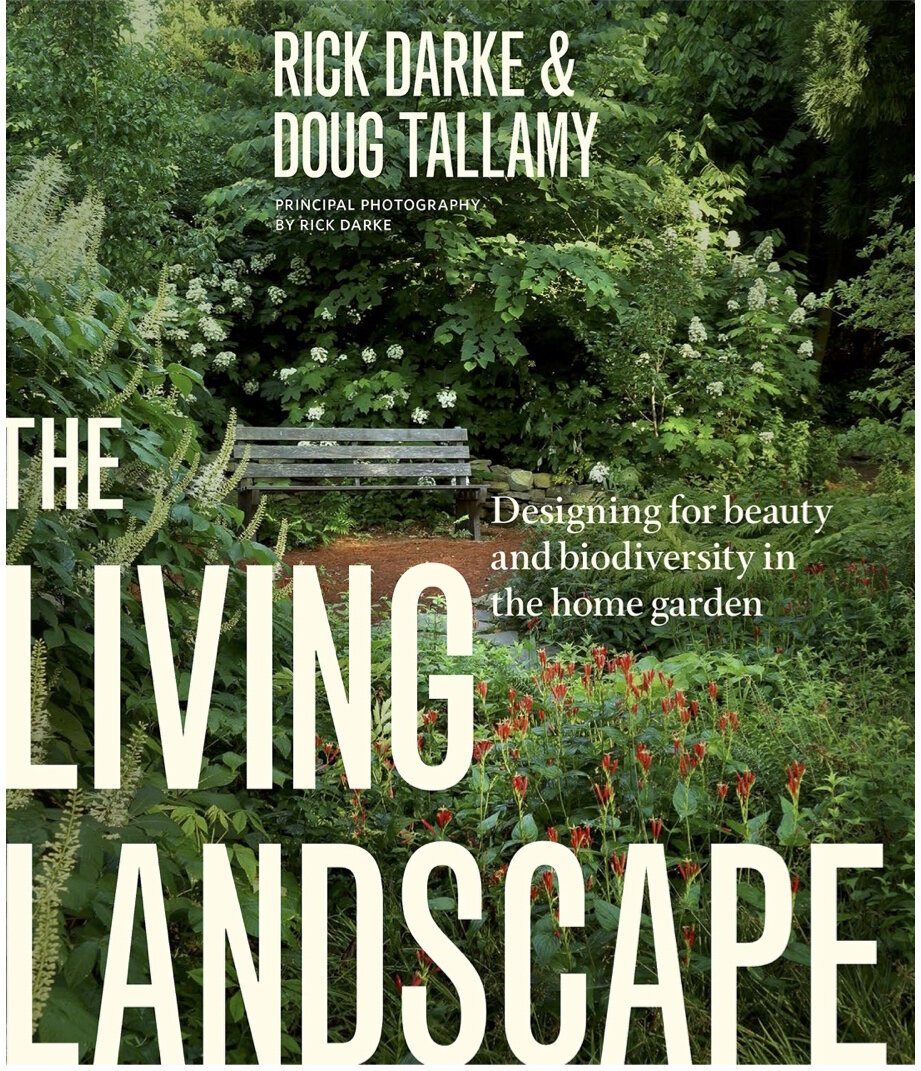
The Living Landscape explores how to take modern family needs and apply them to a natural landscape that feeds the soul of Woodland gardeners and those looking to bring nature back to their gardens.
From the Chicago Tribune: “If there was but one book on our garden library shelf, William Robinson’s The Wild Garden would be the single tome, at once revolutionary and oozing charm. . . . With photographer and writer Rick Darke’s added chapters and insight, we understand more than ever the wisdom and urgency of Robinson’s garden gospel.”
The 356-page book includes more than 100 outstanding photographs taken by Darke that include images of modern “wild” gardens to give readers an understanding of how today’s gardeners and landscapers are interpreting the naturalistic garden. The Wild Garden includes the complete original text and illustrations from the fifth edition of 1895.
The hardcover book, published by Timber Press, is also available in a more economical Kindle edition.
The Living Landscape: A guide to backyard design
The Living Landscape: Designing for Beauty and Biodiversity in the Home Garden is another offering by Rick Darke and Timber Press.
This is a book that I keep going back to for new ideas and approaches to creating a garden that is both inspiring and family friendly as well as sympathetic to the natural environment.
It’s for gardeners who want it all but need a little help bringing their wildest dreams to fruition. In this almost 400-page guide to backyard design, Darke teams up with author Douglas W. Tallamy (Bringing Nature Home and Nature’s Best: A New Approach to Conservation that Starts in Your Yard) to create a blueprint for today’s ecological gardener looking to achieve a home landscape that satisfies their soul, their kids’ need to have a play area, some privacy and maybe even a little veggie on the side.
The Living Landscape is also available at Alibris Books, including used versions at excellent prices.
A tall order for sure, but one that is becoming increasingly in demand in backyards big and small all over the world.
The Living Landscape will guide homeowners in the creation of an outdoor space that provides both human needs while still feeding their desires to create a beautiful, wildlife-friendly space that connects them to their favourite natural areas. Along the way the authors provide ideas, richly illustrated with photographs, on incorporating outdoor rooms and entertaining areas.
The authors use favourite wild areas to guide home gardeners in methods they can use to apply these observations of natural areas to their own gardens to create and maintain a diverse, layered landscape that is so important in today’s Woodland gardens.
For my take on using natural areas as inspiration for your own backyard, check out my post here.
Available in both hardback and Kindle version.
The New Shade Garden: Druse sheds light on the beauty of shade
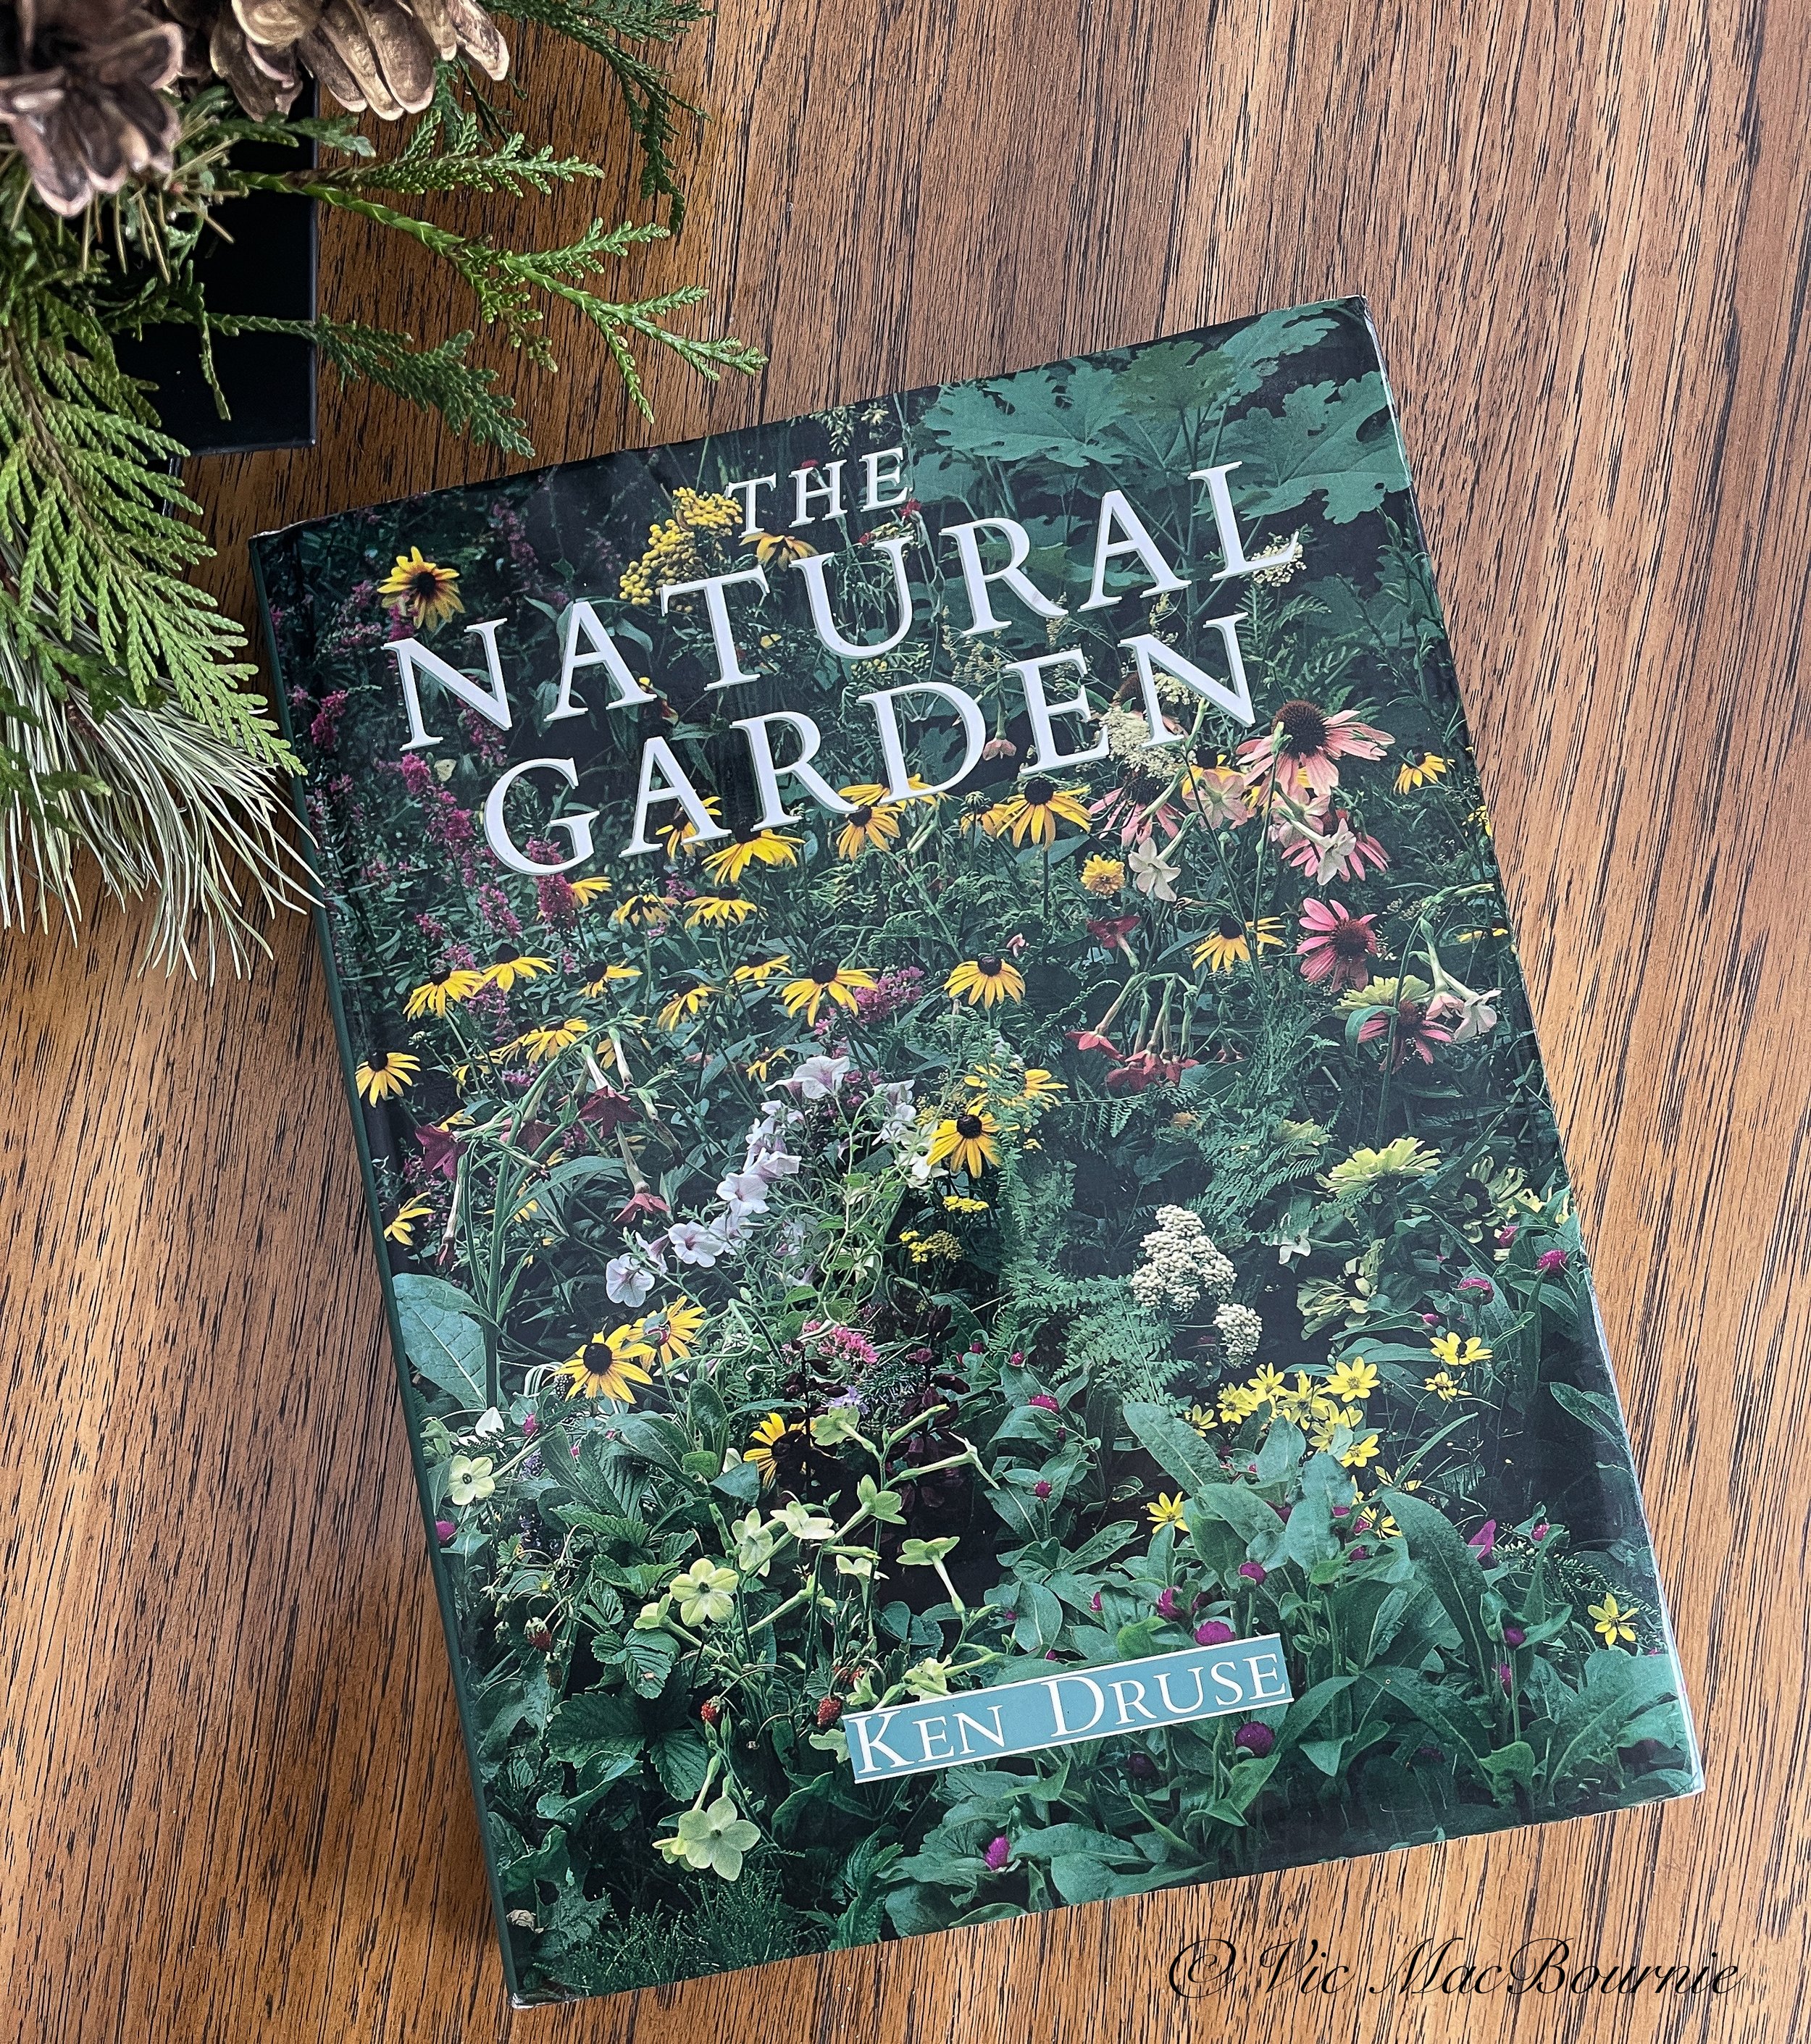
The New Shade Garden: Creating a Lush Oasis in the Age of Climate Change is another important, comprehensive garden book from award-winning garden author Ken Druse ( The Natural Habitat Garden, Natural Garden, The Natural Shade Garden).
For new gardeners looking to create their own ecologically-sensitive oasis, or an experienced gardener looking for help dealing with their ever increasing shade garden and wanting to become more environmentally aware, this book or any other books by author Ken Druse listed above will set you on the right path.
If you are interested in more on the New Shade Garden, check out my complete review here.
Be sure to check out Alibris Books, Music and Movies for used versions of these books.
The 256-page, richly illustrated, informative tome on shade gardening and its importance in a changing world, could not be more appropriate for Woodland gardeners and Woodlanders in training looking for guiding principles.
Druse explains the importance of creating shade gardens in the context of climate change and how to work with nature, including making the most of the constraints that may arise.
The New Shade Garden provides gardeners with a manual to begin down the Woodland path or methods to turn a less environmental, water-starved traditional backyard, into one that works with nature, climate change and ever-evolving garden aesthetics.
Published by Harry N. Abrams and available as both a hardcover and Kindle edition.
The Humane Gardener and Wildscape books: Ideal for gardeners who care
If gardening with nature, woodland creatures, birds and the natural environment are among the reasons you garden, you simply have to put The Humane Gardener and Wildscape on your list of must-haves.
And, if you have friends who think the same, these make the perfect gift to inspire them to even greater things in their gardens.
I have written extensively about author Nancy Lawson’s critically acclaimed books.
Lawson doesn’t pull any punches about the importance of respecting the creepy crawlies, animals and other visitors we share our gardens with on a daily basis. Her approach to wildlife gardening is, however, both informative and easy to incorporate in our daily lives.
If you are interested in exploring Nancy’s books further, please check out my full reviews listed below.
Nancy Lawson, The Humane Gardener. (link to my full review.)
The Humane Gardener (Amazon link)
Wildscape book review with links to reviews of each chapter of the book.
Wildscape (Amazon link)
Author Profile: Vic MacBournie is a former journalist and author/owner of Ferns & Feathers. He writes about his woodland wildlife garden that he has created over the past 25 years and shares his photography with readers.
Garden Assistants: Don’t be afraid to hire some help
Creating a backyard escape has never been more important than it is today. Hiring unemployed students or part-time gardeners could be incredibly rewarding both for homeowners as well as students and small business people who learn new skills and appreciation for the importance of gardens.
Hiring garden helpers: best decision I could make
Sometimes a gift comes knocking and other times we have to go looking for it. When it comes to garden help, I’ve had it both ways. And, both times, hiring individuals to help with the garden has been one of the best decisions I’ve made.
I’m NOT talking about a landscape company to come and cut the grass, blow leaves, prune trees to within and inch of their lives and generally cause a bigger commotion than is necessary.
I am talking about two types of garden help: First a young man with little garden knowledge but a strong back and a good work ethic; and two, a young very knowledgeable woman who makes gardening her full time work.
Consider hiring a student to help fulfill your vision
My first foray into hiring help for the garden came just as Covid began to kick in. As stores and restaurants closed, jobs became quite scarce for young people. Finding work was difficult to say the least.
It was about that time that I got a text message from a young man – home from university – and looking for work. I had hired him the year prior for some garden work so I knew the type of young man and worker he was.
And, so the gift that came as a message on my phone: “Hi Vic… If there is any outdoor work that you would like to get done this summer I would be very happy to come and help out. If you are not comfortable with it, I completely understand, though I could come with my own gloves, water etc and stay outside to ensure proper distancing. Let me know what you think, no rush.”
It was a gift from heaven. I had ideas and together with his young, brute strength we managed to transform the back garden that year.
His timing could not have been better.
Like most of us, our backyard garden became our refuge during the most difficult days of the pandemic. It’s always been a place my wife and I retreat to when we need some peace from the world, but it has never been more important than it was then.
(For more on gardening on a budget check out my in-depth here.
Our garden was looking a little shabby. The projects were piling up in my mind as fast as my right hip was disintegrating and making the simplest of these projects an extremely painful exercise.
And along comes the answer to our problems in the form of a young man looking for summer work to help pay for his university.
Sometimes you just need a little muscle
I am sure we are not alone. Those of us lucky enough to have homes and gardens to retreat to, who are still employed or living comfortably in retirement, owe it to our youth to help them get through difficult times.
I had a garden vision, I just needed someone to make it happen and hiring a student in this case was much less expensive than hiring a landscaping firm.
Just two weeks later and our backyard was transformed by this young man.
Bringing the garden vision to life
Nine yards of natural cedar mulch plus an additional 15-20 bags have replaced huge swaths of grass and over-run gardens that are now perfectly edged.
Trees have a new home, hostas and grasses split into multiple plants and moved to new locations around the garden.
A massive woodpile was created to provide a home for chipmunks, birds, snakes, salamanders and a host of insects.
Patio stones lifted and straightened after years of slowly sinking into the ground and making the patio look shabbier than it was. Stone edges were added to the patio. Old composters and BBQs disposed of and, in some cases, replaced after laying new patio stones.
Stepping stones placed strategically around the garden to help bring it all together.
When the work was completed, I could tell he was almost as pleased with the results as I was. There was a lot for him to be proud of here.
Together, an old retired guy with a bad hip and a young man with a quiet disposition and a fierce work habit, got together to create something extremely important – a garden.
My vision, his muscle all came together in just a few weeks of work.
And I barely lifted a finger.
Truly a gift my wife and I will enjoy for years to come, and, who knows, maybe our Woodland garden inspired a young man to take a real interest in the environment, gardening and one day creating his own Woodland retreat some time in the future.
A young woman with expertise and a vision
Fast forward to this year and that hip I mentioned earlier was only getting worse. Garden work was not an option. Heck, walking from one end of the garden to the other proved too difficult some days.
That’s when My Garden Helper, Michelle, came into the picture. Michelle operates her own gardening business aimed at helping seniors stay in their homes longer by taking care of all the garden work that gets more and more difficult as age and old bones take over.
This was the year I needed someone like Michelle more than ever. After years of having to do all the work ourselves, my wife and I were able to find someone to make life just a little easier.
From her first visit, I knew we were going to make a great team. It wasn’t just her eagerness, but when we toured the garden and I explained my non-traditional approach to gardening, I could tell she got me and my vision of a garden for wildlife rather than a pretty picture of plants lined up in a row.
Not only did I see that she got my vision, but I knew quickly that I could benefit from her garden vision and experience.
From the back half of summer, through to fall, Michelle would drop by for about four hours every second week to help out. She split and moved plants, cleaned up a couple of wilder areas, planted bags and bags of bulbs that I can’t wait to see emerge this spring and helped with a little fall cleanup.
She’ll be back in spring to begin on some of our new projects and together we’ll create a garden to dream of.
If you have been putting off hiring some help, now is the perfect time to line up your Garden Helper for next season.
Gardening on a budget links
Ten money-saving tips for the weekend gardener
DIY Bark Butter feeder for Woodpeckers
DIY reflection pond for photography
Click & Grow is ideal for Native Plants from seed
Mulch: Organic vs Non-organic
The decision to use an organic vs a non-organic mulch is not always obvious. Here are some tips on when and how I use mulch in our woodland gardens .
How and when to use various types of mulch in the garden
Our garden gets by with four types of mulch. But only one is organic.
The organic mulch – mostly shredded cedar bark – is my primary go-to mulch that I have used in the garden since day 1. I can’t begin to even think how many truck loads of cedar mulch we have had dumped at the top of the driveway over the past twenty-plus years. Much of it is long gone, absorbed into the earth helping to make for a richer, more woodsy soil.
Other mulch selections in the garden include pea gravel, river rock, boulders and a red aggregate that I use as a driveway rather than asphalt or concrete. The aggregate is not only pleasing to look at, but more importantly, it allows water from rains or snow cover to seep into the ground and feed the roots of our trees rather than running down the driveway, onto the street and into the already overburdened sewer systems.
The garden’s design will often dictate when and what type of mulch to use.
A woodland garden benefits from shredded bark that looks natural and decomposes over time enriching the earth.
But there is room for other types of organic mulch, including pine needles (a favourite in the United States), cacao hulls and, of course, compost. Cacao is a great mulch to use in small quantities near a front door or a patio so you can take in the rich chocolate smell the mulch gives off.
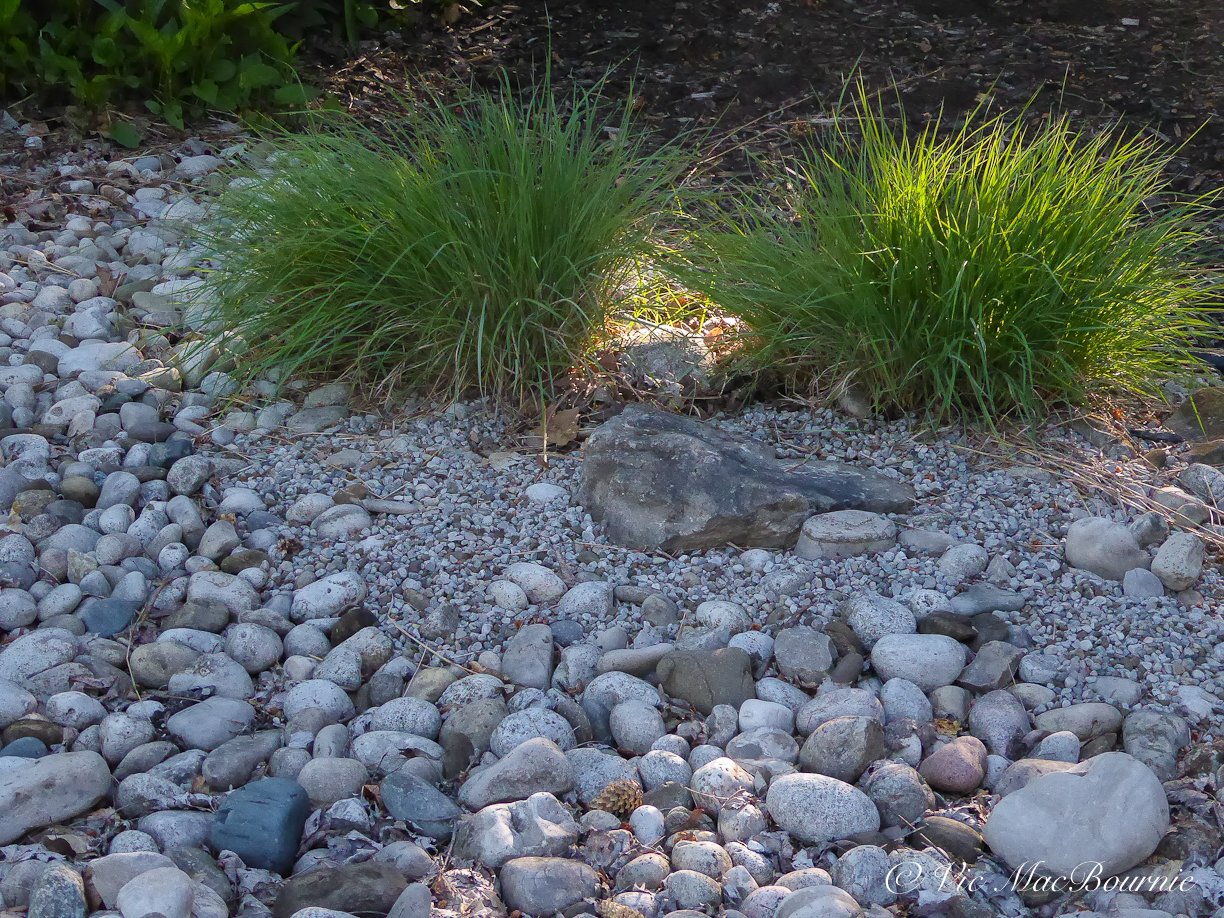
Looking down on an island of black mondo grass planted in a dry river path to break up stone and give it a more natural look. (also see below)
5 uses for organic mulch
1) Use as a substitute for a living ground cover (either for a short- or long-term solution)
2) Around individual plants to keep weeds out, moderate the temperature and water content of the soil
3) As a first step to cover large areas that will eventually become part of the natural garden
4) Together with black landscape fabric to eliminate weeds or grass to begin or revitalize an area in the garden
5) To create a natural pathway through your woodland landscape
5 uses for non-organic mulch
1) Use pea gravel and stepping stones for an inexpensive, yet pleasing pathway that is more formal than a shredded bark path
2) To create dry-creek beds as garden focal points or to deal with drainage problems
3) In service areas around the home where you have no intention of adding bedding plants (ex: around utility boxes)
4) Consider converting an old asphalt driveway back to stone to eliminate water runoff and create a more textured, natural appearance.
5) Around your home’s foundation to encourage better drainage
Our garden’s organic mulch has not all been cedar. When one of the neighbours cut down a massive spruce tree on their front lawn several years ago, I asked the tree company workers if they would drop the entire tree on our driveway when they had finished shredding it. They were happy to oblige, but warned me that it would create a very acidic soil when it broke down.
It sat at the top of the driveway for a few weeks that fall and literally burned itself up as it began to decompose. I remember finally going out to move it onto the garden on a cool morning and it was so hot that every shovel full created enough steam that it appeared to be on fire.
I think I put about six inches of mulch down the side of the driveway that year.
I could not argue with the price, but it was ugly stuff with bits of spruce needles mixed in with the still-sappy branches. The next spring I covered the whole thing with a thin layer of cedar mulch and proceeded to allow it all to break down. Today, you would be hard pressed to find much evidence of the spruce tree and the final result is not acidic soil.
Just recently we moved two dump trucks full of cedar mulch into the backyard as part of a major landscaping project to eliminate as much grass as possible and create new gardens.
It involved putting down a layer of landscaping fabric to cut off any light to the existing grass, followed by at least three inches of cedar mulch.
I am definitely not a fan of black landscape fabric, but I always use it, (or old newspapers) as a first step in a new landscape project.
A combination of all our mulches come together in this images. Large boulders combine with pea gravel, river rock, crushed red brick (driveway) and even a little cedar bark mulch to create this ground cover.
The landscape fabric is great for keeping weeds out and, more importantly, killing existing grass. Its major problem, however, is that it also blocks living organisms from moving through the different layers of soil. If you are trying to build a healthy, woodsy soil, black landscape fabric certainly does more harm than good, over the long term.
My plan is always to remove it over time as the weeds and grass die off. I would expect that it is ready to be removed one to three years after it was installed.
In the meantime, I usually begin cutting large planting holes in the fabric a year after installing it. By then most of the grass is dead and it’s safe to begin gardening as long as you are careful to cover the bare soil with a thick layer of mulch after planting.
This process not only eliminates the huge task of removing the turf, it also takes advantage of the decomposing turf and leaves behind a nice layer of top soil to begin gardening. Patience is the key obviously.
If a low-maintenance garden is your priority, by all means leave the fabric and continue to garden through it. While it lasts a long time, it will eventually break down in the soil and lose its effectiveness as a weed barrier.
When it comes to using non-organic forms of mulch, the black landscape fabric always remains in place.
These are usually areas that I have no intention of ever converting to a traditional garden, so the fabric’s main purpose is to ensure nothing grows up through it.
In fact, it’s not unusual for me to double it up just to ensure unwanted guests can never make an appearance. They usually do, eventually, but it can take years before the weeds begin to break through the fabric.
Non-organic mulch
Non-organic mulch, mostly pea gravel and river rock, play a major role in our gardens.
They are used extensively in both the front and back gardens bringing a cohesiveness to the entire space while serving as a natural bridge from the garden to the hardscaping areas located closer to the house.
Great effort is made to make them look as natural as possible. Too often, homeowners and some landscapers try to get “cute” with river rock. In a woodland or natural garden, surrounding a tree or a garden with river rocks positioned in a perfect circle just doesn’t work. It looks unnatural and would never occur in nature, so try to come up with a more natural approach.
A natural-looking dry river bed, for example, benefits from more than one size of river rock to help it take on a more natural appearance. Ideally, very large river rocks need to be set in place at strategic locations throughout the river bed to anchor the design. Then, a layer of medium-size river rock added as the base, followed by smaller river rock pushed out toward the edges and finally pea gravel in what would be the stream’s washout area.
Now you don’t have to go to such extremes every time you use pea gravel or river rocks in the landscape, but it helps to keep it as natural looking as possible.
Our dry-river-bed journey began by filling in a large gully in the front of the house after cars kept falling in while turning at the end of our cul-de-sac. By turning the drainage ditch into a dry river bed using mostly river rock along with some pea gravel to fill in the edges, the water that naturally flowed through the area in the spring and during heavy rainfall, is allowed to continue along its course under and through the river rocks. The dry river bed solved three problems: it eliminated an eyesore; cleaned up any standing water that hung around in the spring; and still allowed the water to flow through the drainage gully.
Since then, we have used river rock and pea gravel, as well as some large boulders, to crate a Japanese-inspired garden in a part of the front yard. The river rock and pea gravel continue down the side of our home and pick up again in the backyard where they are used extensively as both a dry river and pea gravel pathway leading to the patio.
Inorganic mulches like stone can be effective in the landscape if used with care. Try to soften the harsh look of stone by allowing plants to spill over the edges. At times, I will even plant right into the pea gravel to create an island of green in the sea of stone. Along the back path, I have a planting of black mondo grass growing in a small island of larger river rock that never fails to make me smile when I see it.
Elsewhere, grasses grow out from a dry river bed suggesting a small island in the creek bed.
Woodland nurseries you need to know about
Not all Nurseries are created equal. Most provide plants your average gardener is looking to plant. But Woodland gardeners and native-plant gardeners are not your average gardeners. Here are four specialty nurseries you will want to check out online if you are looking for special plants or just reliable information on growing plants you already own.
Nurseries specializing in Woodland plants
It’s not always easy to find Woodland plants in your local nurseries. Even if they do carry one or two native woodland plants, there’s no guarantee the plants were not harvested from the wild or that they will do well in your area.
In the past few years since writing the original article, more and more nurseries are carrying more native and woodland plants. In fact, most nurseries are recognizing the move toward more natural and native plants, whether they would be considered “woodland” plants or more sunny meadow-style plants.
Buying from reputable local nurseries is always the best choice, but when they don’t carry what you are looking for or lack the expertise to help you in your Woodland endeavours, there is no shame tracking down nurseries that specialize in hard-to-find native plants.
Here are four that know their stuff (two American-based and two Canadian). All are working hard to offer the best native plants possible. Please recognize that transporting plants across borders is often very difficult or impossible.
Fernwood Nursery & Gardens (U.S.)
Rick and Denise Sawyer have been running “Maine’s Shadiest Nursery” since 2012 in Montville, Maine. Their nursery specializes in native and Woodland plants hardy to their area.
They are proud to say they have one of the largest collections of shade tolerant plant collections in New England, many of which are propagated at the nursery. Display beds at the nursery help demonstrate how the plants can best be grown and grouped together aesthetically.
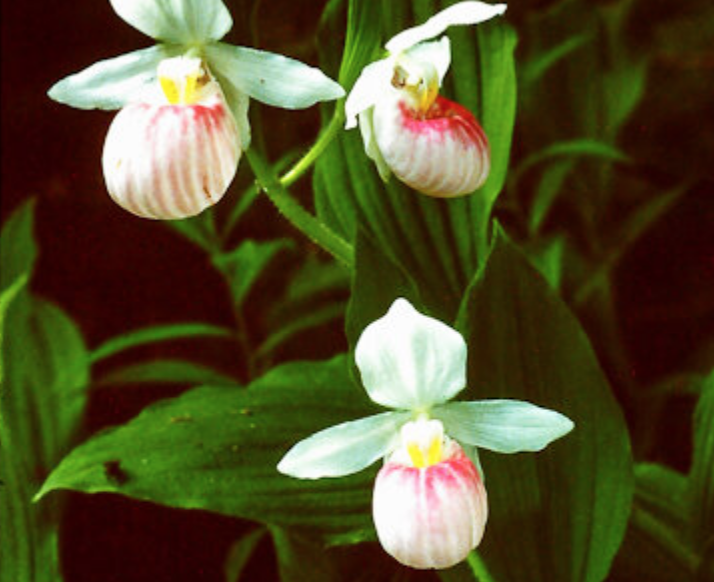
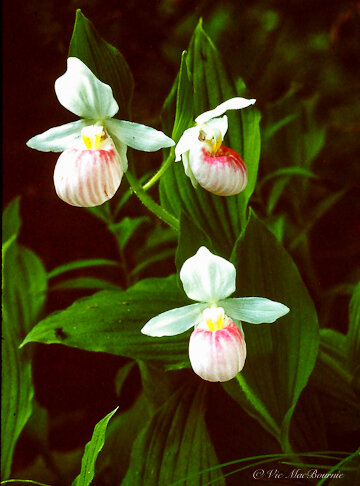
Wild native showy lady slippers can be difficult to grow. They can be almost impossible to find at regular nurseries, but they are available through responsible specialty growers.
They do not appear to do mail-order, which is unfortunate for those living outside their area. Their down-to-earth blog, documenting life at the nursery is a good read with lots of interesting tidbits for the Woodland gardener. You can find their website at fernwoodnursery.com
Big-time hosta lovers, their website lists close to 20 with good descriptions of each. What really caught my eye, however, was the Cypripedium retinae or Showy lady slipper which they feature in a beautiful photograph showing a massive grouping on their website planted with Maidenhair fern. A glorious combination.
Other featured plants include:
Trillium grandiflorum flora plena – this double flowering great white trillium prefers a sweeter soil and more sun than most trilliums. Being sterile, the flowers bloom longer than the single and then turn from white to pink.
Sanguinaria canadense multiplex – a double flowering form of our native bloodroot that blooms a little later and much longer than the single. Grows to 6″ and tolerates drier shade.
Anemonopsis macrophylla – a wonderful Japanese woodlander with nodding lilac and white flowers on 3′ stems in late summer.
Anemonella thalictroides – ‘Snowflake’ A 6″ double flowering selection of our native. Two months of bloom beginning April/May.
Convallaria ‘Cream da Mint’ – larger leaves have gold edges on green centers with a glaucus coating, especially in the spring.
Convallaria ‘Fernwood’s Golden Slippers’ – leaves are all gold with white flowers and red fruit. Not as aggressive as most Lily-of-the-Valley.
Great Lakes Orchids (U.S. Mail order)
Is a family owned tissue culture laboratory and licensed nursery specializing in hardy terrestrial orchids. You read that right. Their orchids are grown in a laboratory using tissue culture techniques. No worries here about wild-dug orchids.
Check them out at greatlakeorchids.com
In fact, this nursery is devoted to the One Test Tube at a Time Initiative, established to share their “services, laboratory, seedlings, plants, and expertise to help save endangered orchid populations.”
There are diminishing plant populations growing in various habitats and areas. For a number of reasons these plant populations are unable to re-establish themselves or fall outside of funding sources that would allow them to remain protected or undisturbed. We would like to see the return to thriving orchid populations for the benefit and enjoyment of all.”
They offer via-mailorder a large variety of orchids both native and non-native selections, including Lady Slipper Orchids, Chinese orchids and European fringed orchids.
Their website says they are branching out with select hardy perennials and bog plants.
Besides their great work, here is the real reason I have included Great Lakes Orchids in this list: The sites Growing Tips for raising Cypripediums is first rate. If you already have native Lady Slippers in your woodland or hope to acquire them at some point soon, you have to bookmark this site and study these growing tips.
If you live in the United States, consider supporting this group by purchasing some of their plants.
Ontario Native Plants (Cda mail order)
And now a plug for newcomer and local mail-order nursery, Ontario Native Plants. A gardening friend and I decided to place an order with this Hamilton-Ontario area online provider of native trees, shrubs, grasses and wildflowers and were pleasantly surprised by not only the product we received but their professional approach. Packaging was first rate. The website says they deliver anywhere across the province of Ontario.
If their website onplants.ca is any indication of how their business will grow in the future, we can expect big things from this nursery. Their 2020 catalogue lists about 100 products. In addition, they have a newsletter notifying regular customers of promotions and native gardening tips.
Since the initial writing of this post, Ontario Native Plants have certainly grown and now offer a huge variety of top-notch native plants to Ontario Gardeners. Their 2023 catalogue can be seen here. Get your orders in early spring for best delivery dates.
For my full story on this outstanding provider of native plants, be sure to check out my posts here.
Included in the list of individual plants are groups of plants packaged together that offer, for example, high-colour impact, fall beauty, as well as shady and sunny rain garden packs. There is a fern package, a pollinator pack and a Prairie pack. As an example, the Sun Lovers pack in the 2020 catalogue includes 12 plants made up of 2 plants from 6 species.
The website is extremely informative breaking down the native plants into light requirements, moisture requirements and soil type. Well done.
This post is not sponsored by any of the above nurseries. As an affiliate marketer with Amazon or other marketing companies, I earn money from qualifying purchases.
The first step to building our Woodland Garden
Building your dream garden may start with planting a tree or your favourite shrub. For us it began by escaping our new-home subdivision and taking the leap to an older fixer-upper that provided us with the property we needed to start our dream Woodland garden.
Our woodland garden began with a pool in our neighbour’s backyard. We didn’t know it then, but life in a brand new home in the middle of the suburbs where late-night pool parties, loud teenagers and the never-ending drone of gas powered mowers was the norm, was enough to push my wife and I to extremes.
These weren’t our dreams – the pools, the parties the close proximity to neighbours.
So, it was time to sell and move into a home that, in the end was totally opposite to the one we were living in at the time.
A for-sale sign went up and before long we were in ‘our’ dream home. Well not exactly a dream home, more like a dream property. We only had one child, so my wife and I decided to go against the grain and buy a small house on a big property rather than a big house on a small property.
It was the best decision we ever made for our sanity.
In the end, we compromised a little and bought a small home (at least by 1980s standards) on a decent-size lot pushing a half acre. To say the home was a fixer-upper would be a bit of an understatement.
What does this all have to do with building a woodland garden, you ask?
Focus on the garden for long-term happiness
Our dream was never really to own a huge multi-level home. We realized we wanted to create a peaceful, natural area around us where we could enjoy nature rather than jumping in the car every weekend to go to cottage country to escape the neighbourhood noise.
The final selling factor, at least for me, was a photo album left on the table of the house left opened to a photo of a group of deer in the backyard of the very home we were touring. For many gardeners, this would be a deal breaker. For me it only made me want it more.
SOLD.
Building the woodland garden
Then the slow process of building the garden began in fits and starts. Not unlike the home, the garden, what little of it there was, needed a lot of work.
We brought in soil and mulch, planted trees and native wildflowers. Expanded the gardens and eliminated grass. Then eliminated more grass. Check out my post on the benefits of eliminating grass.
We brought in boulders, lugged hundreds of wheelbarrows of stone, pea gravel, mulch and soil into the backyard. Check out my post on the importance of using stone in the garden
My wife and I made paths, created dry-river beds in the front and the back and it continues to this day.
Check out my post on some of the DIY projects my wife and I tackled over the years.
Finally, more than 20 years later, the combination of time and a lot of hard work is turning our patch of rural suburbia into a woodland garden rather than a patch of grass surrounded by neighbouring patches of grass surrounded by forest.
Now, most mornings my dog, Holly, and I step outside on the patio and enjoy some peaceful time together before the neighbourhood wakes up.
Be sure to check out some of my other posts on putting together a woodland garden or natural garden. Ken Druse’s book The Natural Garden is a great place to start. His newer book The New Shade Garden is an excellent source of information. Or take a minutes to check out this post on the 5 best books for woodland gardening.
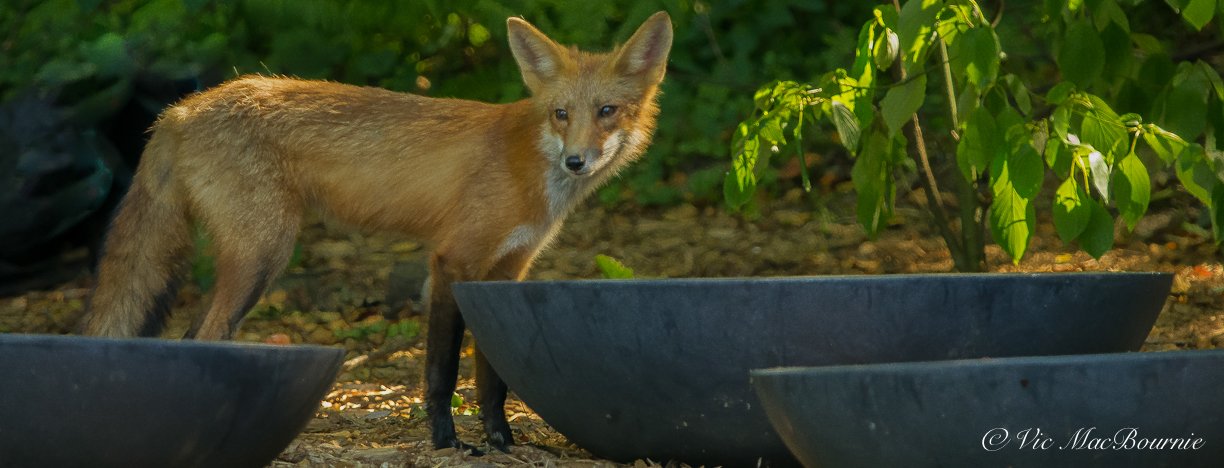
The birds are at home here. On any given morning, a young fox wanders through looking for breakfast and maybe a deer or two comes through and offers me a chance to photograph them before they are off for their daily adventure. I’ve watched skunks wander through the yard, rabbits, more chipmunks and red squirrels than I can count and even a lone coyote. Snakes have returned to the property after not seeing a single one for many years here. Toads, fireflies and a host of native bees and butterflies call our property home.
It’s taken a while to get here, and we know we will never be done. But we took that first step that needed to be taken.
Your first step might not be to sell your home, it might be to go out and plant your first tree, shrub or native wildflower.
So what are you waiting for? Take that first step. You never know where it will lead you.
Mulch Mania: Building a foundation for a low-maintenance garden
Building a solid foundation starts with your garden’s soil and there’s no better way to build a high-quality soil than to use mulch. Cedar mulch forms the foundation of our low-maintenance woodland garden. It’s benefits are too numerous to list but here’s a start.
A temporary alternative to natural ground cover
Good or bad, we all remember the gardens of our childhood.
I remember dry, barren earth that literally turned to sand when you held it in your hands. It was the 1960s and the only plants that grew in the front gardens were traditional purple iris.
Not that my parents didn’t try. They turned over the soil religiously revealing the darker damp soil for a few hours until the sun baked it again.
It’s hard to imagine a worse recipe for building high-quality, healthy soil. But they toiled on, sometimes adding peat moss or top soil. The ending was always the same. Dry, bleached and baked sandy soil.
The missing ingredient was, of course, mulch. I am sure it was available at that time, but it certainly wasn’t piled up in bags at every building supply, grocery and nursery store.
Today, cedar mulch is so common in our area, it’s hard to believe there are any cedar trees still standing.
Organic mulch is commonly made from bark or wood chippings, but it can also be made of grass clippings or pine needles (a popular choice in parts of the United States,) to name just a few.
Non-organic mulch is another option and another blog post but includes stone such as pea gravel, aggregates and man-made substances.
Cedar mulch is a forest byproduct made from the shredded wood of cedar trees. Compared to pine mulch, the inherent nature of cedar makes it a longer-lasting mulch in the garden.
The benefits of mulch far outweigh any argument for not using it. Not only is cedar mulch attractive, whether you choose natural-, black-, brown- or red-coloured, it has a pleasant smell for the first few weeks it is put down, helps unify the garden and better shows off the plant foliage.
Despite its obvious benefits, it’s still not unusual to see uncovered, baked earth on my daily walks, usually accompanied by the homeowners on their hands and knees pulling weeds or, God forbid, turning the soil over so they can enjoy a few hours of dark soil before the sun comes out to bake it beige again.
Mulch is the perfect backdrop for the foliage of this Pagoda dogwood, while it protects and insulates the soil below. Over time it breaks down and adds a woodsy organic material to the soil.
In many ways, mulch actually takes the place of a living ground cover.
And, although bark mulch is a great beginning to amending your soil an creating a more woodsy soild, it’s best not to consider it the finished product.
In a woodland garden, a native and natural ground cover such as wild geraniums, bunchberry or ferns are a more desirable alternative than organic mulch, but there are plenty of situations where a ground cover is not feasible at the time.
That’s where an organic mulch truly shines.
Without going into all the benefits of heavily mulching your gardens, let’s examine just a few of the reasons mulch should be high on your list when you are building your Woodland garden.
Water retention: By shading the soil with a thick layer of mulch (ideally 3 inches or more), evaporation, both from the sun and wind, is minimized.
It also helps to regulate the temperature of the soil further reducing water evaporation and giving the plants a layer of insulation that helps keep the plants’ roots cool in the summer and warm in winter.
It is important to note, however, that mulch can also act as a barrier that makes getting sufficient water to your plants’ roots more difficult. It is much more water-efficient to target the plants individually either through a drip system or by hand watering them individually.
Deep watering a plant by leaving the hose dripping at its roots for several hours will allow the water to dive deep into the ground rather than getting locked into the mulch layer or just licking the top inch of the soil.
If your garden is properly mulched, you need to water less often but when you do water, ensure you are deep watering and targeting the plants’ roots.
One of the often overlooked benefits of mulch is that it helps prevent water runoff by trapping the moisture and moving it slowly to the soil below.
During a major storm, for example, water that might traditionally just run off in one direction, flooding one area and leaving another area more or less dry, will be better constrained to the general area it fell on. The result, a more evenly irrigated garden that will retain the moisture much longer than barren earth – possibly days or even weeks.
Weed Inhibition: Everyone is striving for a low-maintenance garden. Mulch is the key ingredient to achieving that end. But, let’s not kid ourselves it can’t perform miracles, especially if it is spread too thinly over the soil.
We’ve all seen it. A layer of mulch so thin that you can see the soil through it. Using large pieces of bark rather than the shredded bark, is often the biggest culprit here.
Unlike the shredded mulch, or pine needles, the bark pieces are too large to properly cover the soil and the resulting gaps make it too easy for seeds to find their way to the soil. (If you really love the look of the larger bark pieces, consider using the shredded mulch as your primary covering and top dress with the larger pieces.)
if the ground is not covered properly, once the weed seeds germinate, pulling them out brings more soil to the surface and before you know it, your garden is covered in weeds.
The key is to block light from reaching the soil to keep the seeds from germinating.
Some seeds will germinate right in the mulch but without proper soil they are either not long-lived or easily removed because it is near impossible for them to get properly rooted in the bark medium.
Also, if you water your individual plants rather than a general watering of the entire garden, the weeds’ roots often eventually are starved of water and die off. This is especially true following a wet spring. Weeds from the previous year will sprout in the damp mulch left by snow cover, but as the mulch dries out, the seedling roots will often die off.
A common complaint against the use of cedar mulch in the garden is that it can deplete the amount of nitrogen in the soil. While this can be true, it is not something most homeowners should be worried about.
What is more worrying is the practise of piling mulch around trees and plants in a volcanic mound that is almost guaranteed to kill the plant over time.
I often see it done by unknowing city workers who like to pile mulch up the tree’s trunk as high as possible thinking they are conserving water. Do not fall into this trap. Roots of trees and plants do not benefit from mulch touching them in any way.
Keep the mulch away from the plants and, instead, create a bowl of mulch around the tree trunks or plants where the sides can hold the water or at least slow its runoff from around the plant or tree. The bowl should be larger according to the size of the tree or plant and can actually extend out to the drip line of a young tree or plant.
The Garden Awakening will change the way you garden
Mary Reynolds’ The Garden Awakening is an important book during these troubled times. It is both a gardening book and a road map we all need to follow into the future. For some it is a treasure map to help them rediscover nature and themselves. For others, it will provide them with a new way of looking at their gardens, their land and their life. Please, click on the link for the full review.
The Garden Awakening
Designs to Nurture our Land & Ourselves
By Mary Reynolds
“If nature is left to its own devices and without imbalances in the ecosystem such as the overpopulation of hungry deer or an infestation of rabbits it will reclaim its territory and become Woodlands once more.”
This might be one of the most inspirational gardening books I have ever read.
It’s certainly not your average how-to gardening book. If you are looking for a typical gardening book, The Garden Awakening might not be for you.
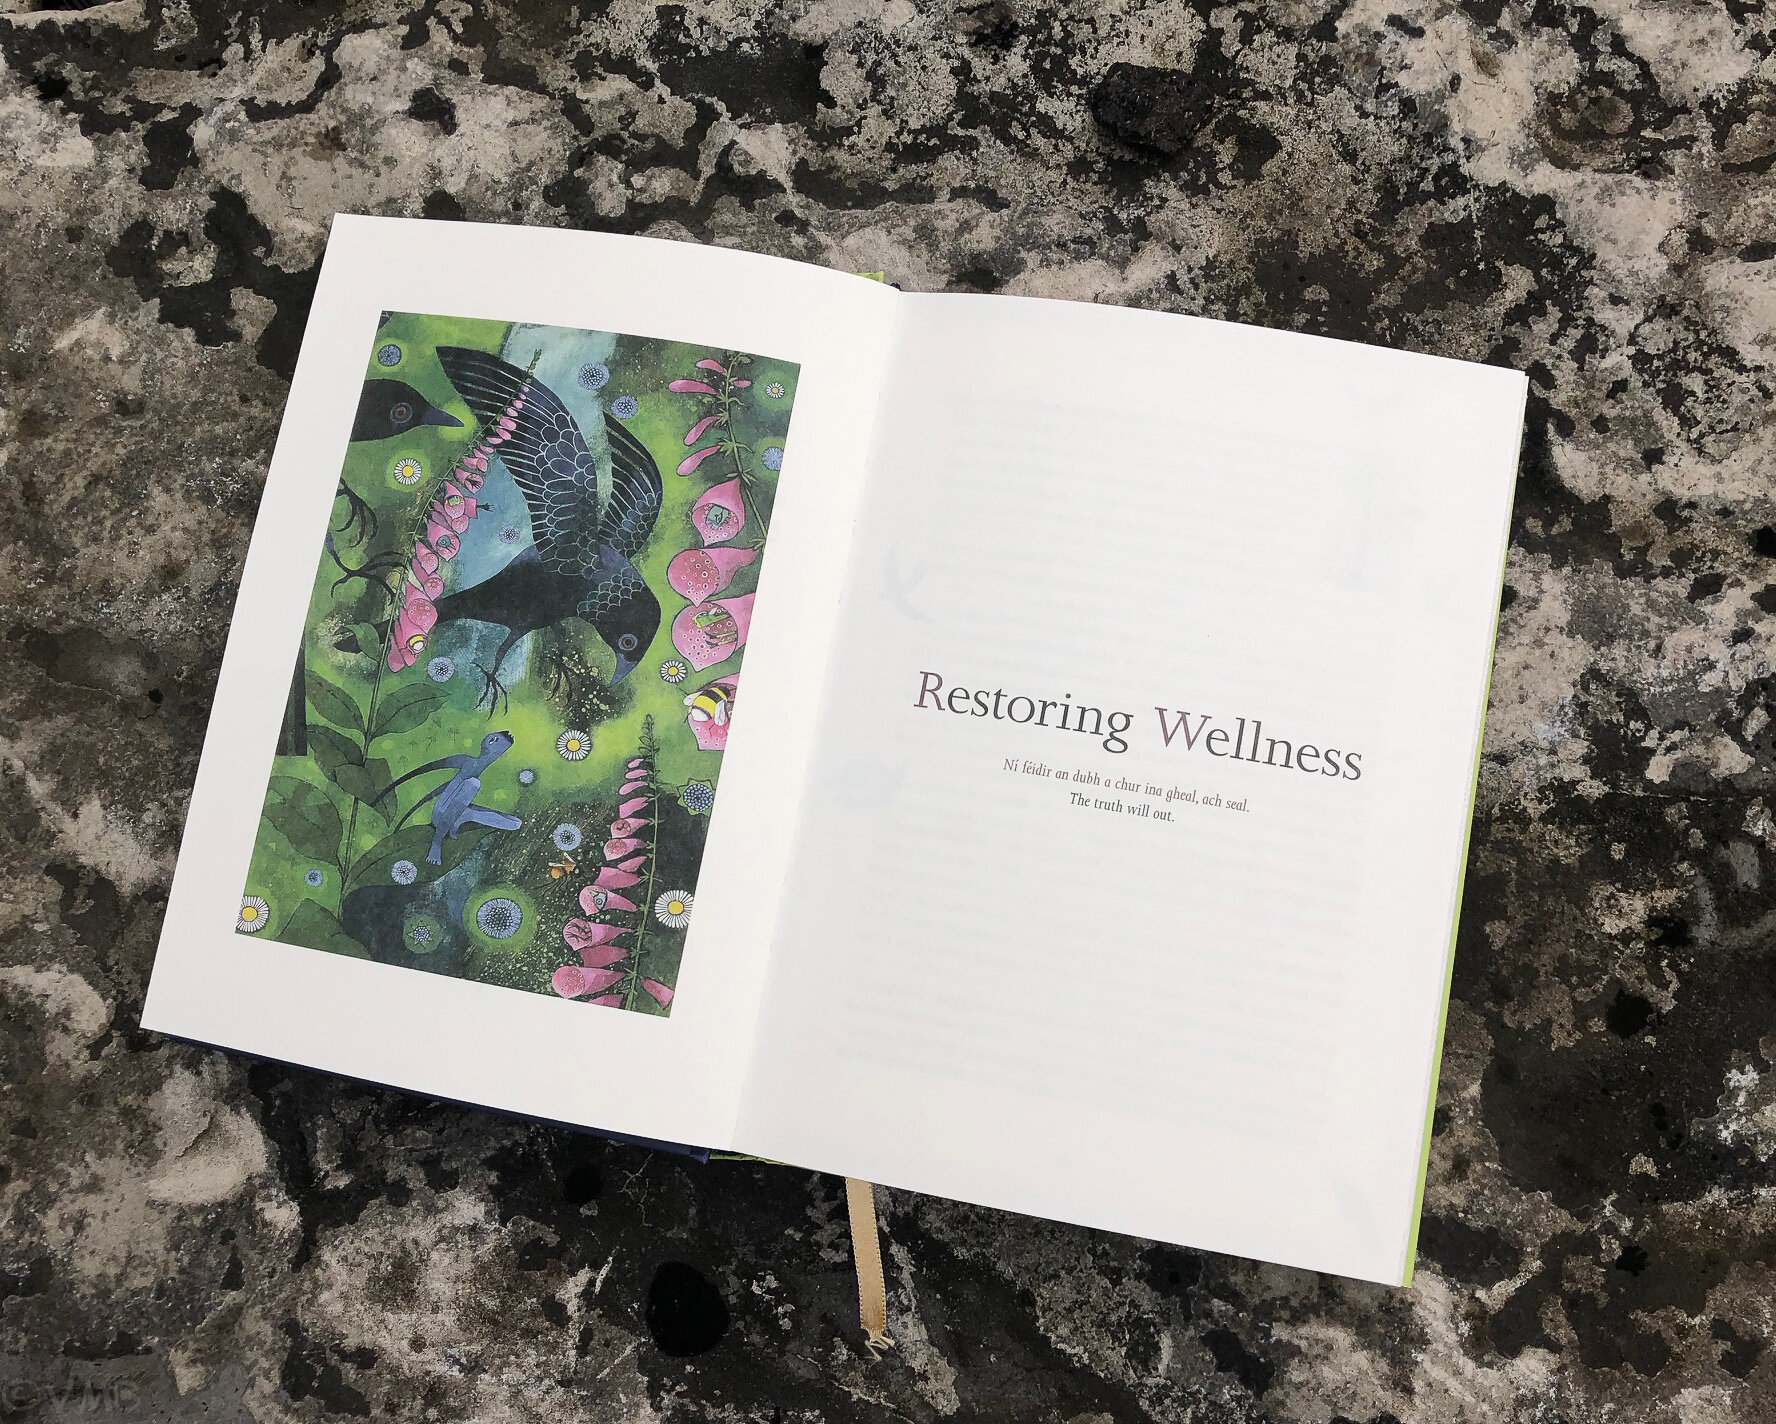
Beautiful illustrations by artist Ruth Evans both on the cover and throughout the book.
But if you are interested in the environment, restoring your garden to a healthy, productive space and/or creating a Woodland naturalized garden, then you owe it to yourself to spend some time with Mary Reynold’s book, The Garden Awakening, Designs to Nurture our Land & Ourselves and her vision for the future of gardening.
Since this writing, Ms Reynolds has published a second informative book titled We Are The Ark. This follow to The Garden Awakening, expounds on her successful approach that each garden can be a small Ark in a world for where wildlife desperately needs our help.
For more information on using native plants to restore your garden, take a moment to check out my article on the importance of using native plants in your garden. For full post go here.
An important book at a crucial time
The Garden Awakening is an extremely important book for the time. It’s a reminder that we are destroying the very land we depend on for survival. It’s a reminder that the world we live in cannot continue to absorb this abuse and not unleash its own fury back upon us.
And, as climate change continues to change the world we live in, it’s important that we as inviduals take action to stem the tide.
But Reynolds offers solutions to problems that we need so desperately in these trying times.
Her inspirational book actually provides a roadmap for anyone interested in doing their part to not only protect but revive the land they live on. Along the way, she provides a “treasure map for finding your way back to the truth of who you are.”
“We are the ark” movement
Be part of the movement
Her movement, “We are the Ark” is bringing together like-minded people around the world to join her in creating a healthy environment, one garden at a time. It provides an important stepping stone to a better environment, a healthier garden and a more optimistic future.
“Gardens were like still-life paintings; controlled and manipulated spaces.... somehow, somewhere along the way gardens had become dead zones.”
If Ireland’s feisty Mary Reynolds is not familiar to you, I suggest you watch a movie called Dare to Be Wild, which maps her journey from an outsider to a gold-medal winner at the prestigious Chelsea Flower show. The movie used to be available on Netflix, but I notice that it is no longer available. (The link provided above will take you to Amazon where it is available as a DVD.)
The movie led me to her book, her vision and her unique and thoughtful approach to gardening.
To purchase the Mary Reynold’s book, here is a link from the excellent book seller Alibris: Books, Music, & Movies for The Garden Awakening. Below is the Amazon link.
For those without access to the movie, take note; Mary Reynolds was the youngest garden designer to win the highly coveted gold at the 2002 Chelsey Garden Show. That alone should be enough to interest you in her book.
Reynolds doesn’t waste much time getting to the point. She describes a vision of her embodying a crow flying over the landscape where she comes across a woman (let’s call her Mother Nature) in a forest clearing. She is then swept up high into the heavens and when she finally wakes up she comes to the instant recognition that she “shouldn’t make any more pretty gardens.”
She realizes that she must be guided by the natural world, rather than pure beauty, in her work as a garden designer.
Unlike nature, “gardens were like still-life paintings; controlled and manipulated spaces.... somehow, somewhere along the way gardens had become dead zones,” she writes.
Being in harmony with nature
The revelation that she was “failing to work in harmony with nature,” eventually leads her to unveil 5 garden design ideas in a system aimed at helping anyone, including gardeners, connect with nature.
Throughout the book, Reynolds returns to her Irish roots and uses folklore to help explain her spiritual views of nature and gardening.
Of particular interest to Woodland gardeners, Reynolds explains that all land strives to become a mature Woodland and the job of the gardener is to allow the land to become what it desires to be.
She also encourages people to design their own gardens and provides a road map in five chapters. Each chapter slowly opens up the world of garden design and includes suggestions for intimate garden areas; a nighttime place, a praying place, a gathering place…
In another chapter, she talks about designing with the patterns and shapes of nature. This all leads to a chapter encouraging readers to put their garden design concepts onto paper, including several illustrations and designs that help readers visualize their garden design ideas.
Throughout the book, Reynolds offers suggestions on plants, although these plants might not all be appropriate for all garden zones.
The book wraps up with a chapter on Forest Gardening, a style of gardening that seems to be once again gaining in popularity and importance.
Many would say that Forest gardening is a logical extension to Woodland gardening. It involves producing food by developing a multi-tiered Woodland where berries, nuts and root vegetables are encouraged to be grown.
Her forest garden includes seven layers beginning with the upper canopy including a shrub layer, a layer for herbaceous plants a ground cover layer, an underground layer and finally climbers or vines.
This is a book every Woodland gardener will enjoy and learn from. It’s a book that should be required reading for all gardeners at a time when our futures may well depend on it.
If you are interested in having Mary Reynolds help design your garden virtually, be sure to check out my post on Ms Reynolds’ virtual makeovers.
Flowering Crabapple trees: Spring flowers and berries for the birds
Crabapple trees are sometimes overlooked in the landscape because over the years they have become quite common. But they can be the perfect understory tree for both small and large yards.
Flowering crab is ideal for yards big and small
Flowering Crabapple trees have always been a popular under story tree providing homeowners with impressive spring flowers followed by an abundance of bird-loving berries later in the summer through fall.
Their popularity, however, has meant they are easily overlook when it’s time to consider purchasing a new tree for the front or back yard.
But that would be a mistake.
Crabapples are excellent understory trees that offer a full range of sizes, flower and leaf colour as well as an abundance of fruit for birds and other wildlife. They are long-lived trees that are hardy in zones 4-8. The leaves provide habitat and larval food for many species of moths and butterflies and the spring flowers provide food for early pollinators. As the trees age, it becomes home to lichens and fungi and the gnarly branches and trunks often have lots of cavities for nesting birds.
Crabapples have become a staple in urban landscapes and are used as dependable street trees and ornamental options. If allowed to grow to their natural shape, they have and irregular rounded shape with a wide spreading canopy.
Are crabapples good to eat?
Most crabapples are edible although their level of bitterness varies considerably and their level of acidity varies considerably. In the United States crabapples have had a place in culinary and beverage industries.
Crabapples’ history is actually tied to the making of hard cider in the 1600s and 1700s. This tart little fruit can make a really interesting hard cider. They have also traditionally been grown commercially to make crabapple jellies.
Crabapples’ flower show is short lived
Although many homeowners purchase flowering crabapples for their outstanding spring show, gardeners should remember that the flowers only last 2-3 weeks.
It is, therefore, what the crabapple looks like for the rest of the year that makes a more lasting impression on the landscape. There are plenty of crabapples with green leaves, but there are also plenty with leaves that have a lot of red in them to help provide an accent in what would otherwise be a very green landscape during the summer.
There are large crabapples that can grow up to 30 feet tall, and dwarf varieties that stay in the five feet by five foot wide range.
Four great crabapples to consider in the woodland
Prairie Fire crabapple – is a hybrid that feature many of the traits of other great crabapple varieties. It blooms bright pink in the spring, sports dark green leaves with a purplish overcast throughout the summer, and dark purplish-red fruit in the fall that attract birds all winter. It’s hardy in zones 4 through 8 and has excellent disease resistance. One of its finest traits is that Prairie Fire happily tolerates clay soil. It stays on the small size into maturity and is an ideal urban landscape tree.
Purple Prince Crabapple – has a massive flower disply in spring along with its purple foliage following soon after. Hardy in zones 4-8, it is well known for its improved disease resistance and stands about 16-18 feet tall and 15-18 feet wide.
Sargent Crabapple – A perfect ornamental tree for small urban yards. Grows only 8-10 feet tall and 8-12 feet wide It buds are dark pink but blooms white attracting all the pollinators. The flowers are followed by bright red berries that birds can snack on all winter. Hardy to zones 4-8.
Royal Raindrops Crabapple – Blooms deep pink along upward spreading branches. The leaves flush out a reddish purple colour and stay dark green with a purple overcast throughout the sumer. Small purple berries stay on the tree all winter to feed birds and other backyard wildlife. It is happy to grow in zones 4-8.
Like many overly-hybridized flowers, trees and shrubs that do not have fruit, the Spring Snow crabapple may appeal to those who want a crabapple without any of the fruit. Fragrant wihite blooms in an upright form that grows to between15-25 feet tall and a similar similar width. I can’t recommend these overly hybridized trees that offer little to nothing for wildlife, but I recognize they may have a place in a garden close to a patio, deck or cement pathway.
If you do plant a sterile tree, try to ensure you plant plenty of native plants, shrubs and trees to help the wildlife that will get no benefit from the sterile tree.
Two mature crabapples in our woodland, wildlife garden
Our two large crabapples are fully mature specimens that take centre stage in the garden at certain times of the year where they take up residence growing across the back of the property.
I’ve never really looked into exactly what variety we have, but they are most likely of the Royal Raindrop hybrid series with an abundance of deep pink flowers along its branches. The leaves of our crabapples flush out a reddish purple colour and stay dark green with a purple overcast throughout the summer. An abundance of small purple berries remain on the tree all winter and feed the resident and migratory birds.
Our neighbours planted smaller more upright crabapples (Harvest Gold) that sport larger fruit that has a distinctive yellow colour and remain on the branches well into the winter. These are a popular ornamental variety that really stand out in the winter landscape.
(here is an excellent Chart from Frank Schmidt and Son that illustrates the variety, shape, and flower colours of a host of crabapples.
Our crabapples have been pretty much ignored since we moved to the property more than 25 years ago. Besides thinning out some dead branches over the years, we have done little to the trees and prefer them to take on a natural rounded look.
Originally, the trees were surrounded by grass, but over the years, we have ignored the grass and planted native wildflowers around them allowing the area to become a mini meadow. I think the two crabapples are much happier growing in a more natural area and the wildlife that live off the tree are provided with a soft landing. (For more on the importance of providing a soft landing check out this link to the University of Minnesota Master Gardeners Extension.)
Besides cutting out a few dead branches, the trees have been more or less maintenance free while providing outstanding deep red spring colour followed by a small, hard, red berry that persists well into winter, just when birds are looking for a high quality food source.
I’ve noticed that more and more of our American Robins that are remaining in our snow-covered landscapes throughout winter, are using the crabapples as a food source throughout the winter. Waxwings also appear in large flocks to work the crabapples.
Why are crabapples so easily overlooked?
As a child growing up in the 1960s and '70s, I remember the abundance of crabapples in our suburban neighbourhood. My best friend’s family had a lovely crab apple that bloomed a soft pink in the spring and was covered with crab apples throughout the summer into fall. I don’t remember birds devouring the berries but I do remember some awesome crab apple fights among the neighbourhood kids (no eyes were lost.)
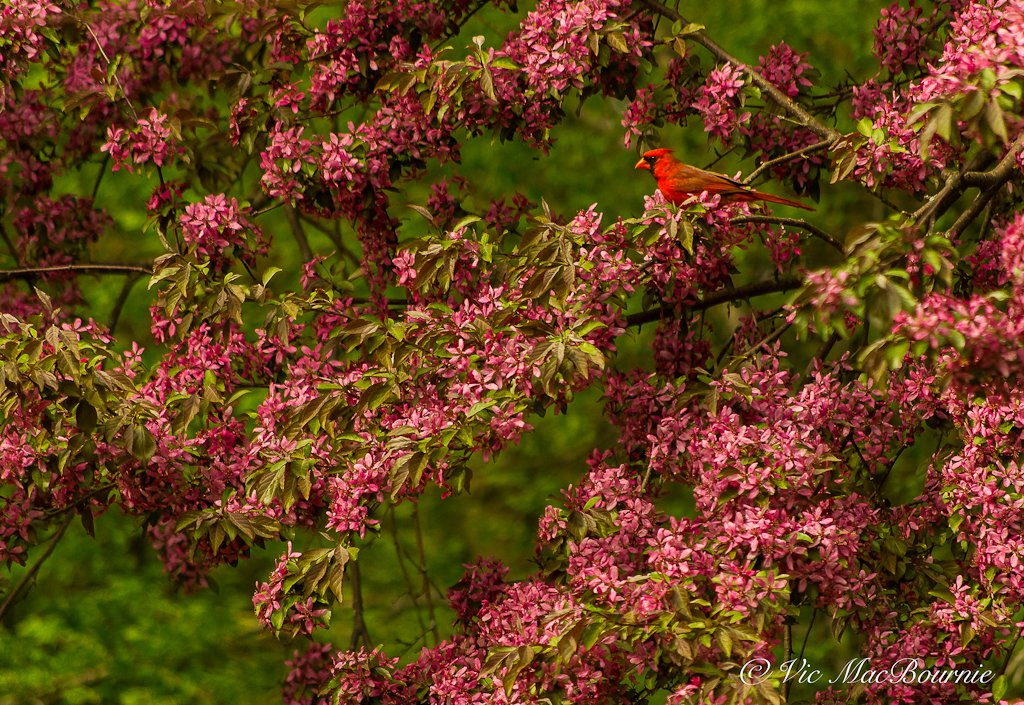
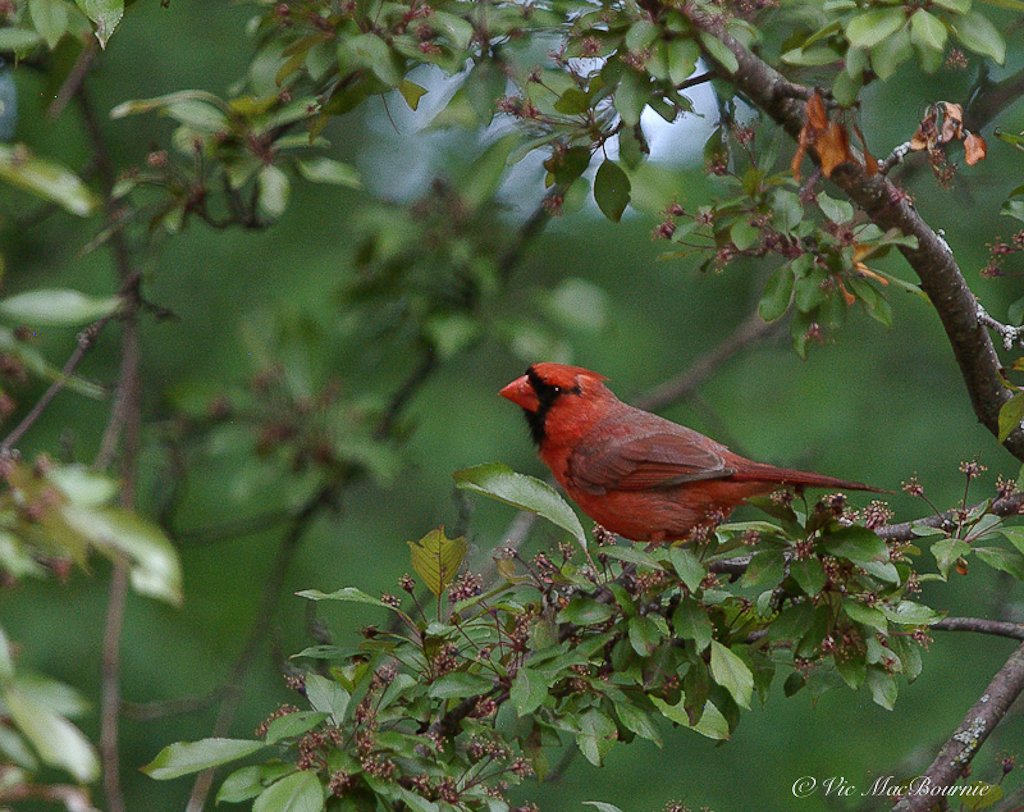
Image shows a male cardinal in a flowering crab just as the flowers have ended and the fruit is beginning to form on the tree.
I also remember annual fall cleanups of hundreds of thousands of crab apples in the grass, on the sidewalk and spilling out on the road.
The crab apples were smallish and hard and although there was an abundance of them, they were not particularly problematic.
I can’t say the same for my other buddy’s crab apple. That family’s crab apple tree produced large (almost miniature apples) that rotted quickly and became very messy. They were particularly attractive to wasps craving the sugar content after the crabapples were crushed all over the sidewalk and road. the crabapples were so numerous that they created a hazard almost like walking on marbles. Eventually, most years there were so many on the ground that they had to be cleaned up with brooms and shovels.
That was an example of the wrong tree for the area so close to the sidewalk. The same tree planted in a garden setting would create the perfect wildlife viewing and photography stage as all the neighbourhood birds and animals would flock to the area for the sweet food source.
It’s situations like this that probably convinced today’s gardeners that crab apples are messy trees that they don’t want in their landscapes. I can understand that thinking entirely.
Plant crab apples in the right area
In the right location, crab apples can be outstanding specimen trees in both large or small yards.
A blue jay among the flowers of a crab apple tree in spring.
Plant them in an area where the berries are free to fall to the ground as a source of food for birds and other backyard wildlife and let them clean up the ground under the tree. Of course, grass is never the best ground cover in a woodland setting, especially if you are striving for the perfect lawn.
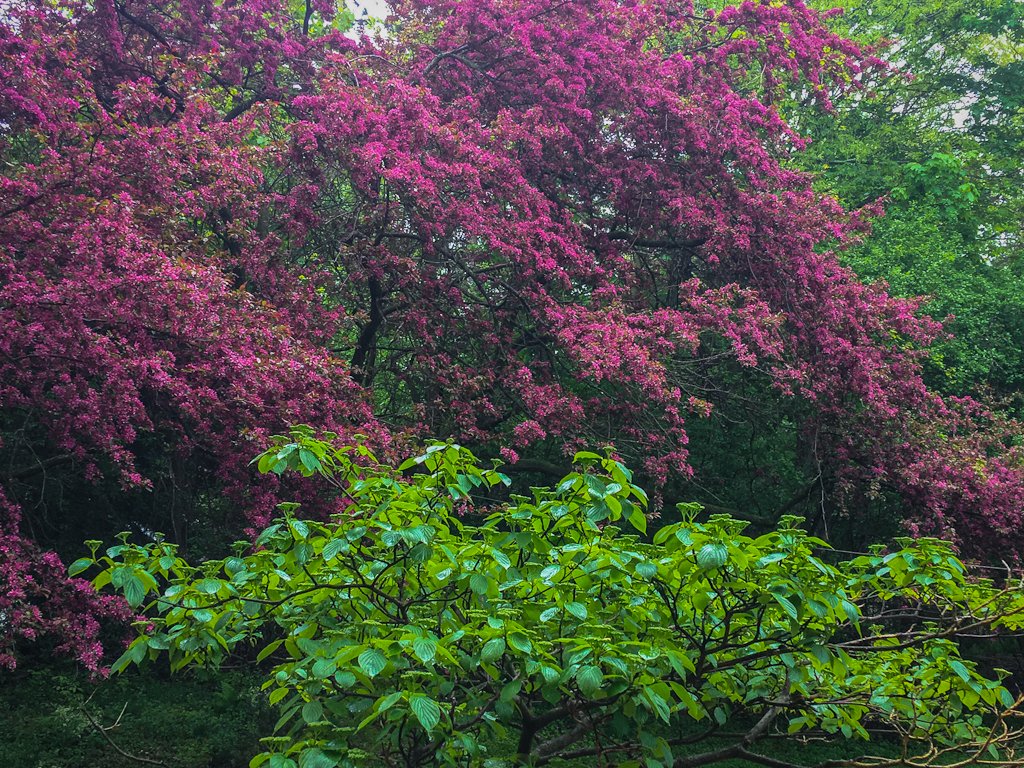
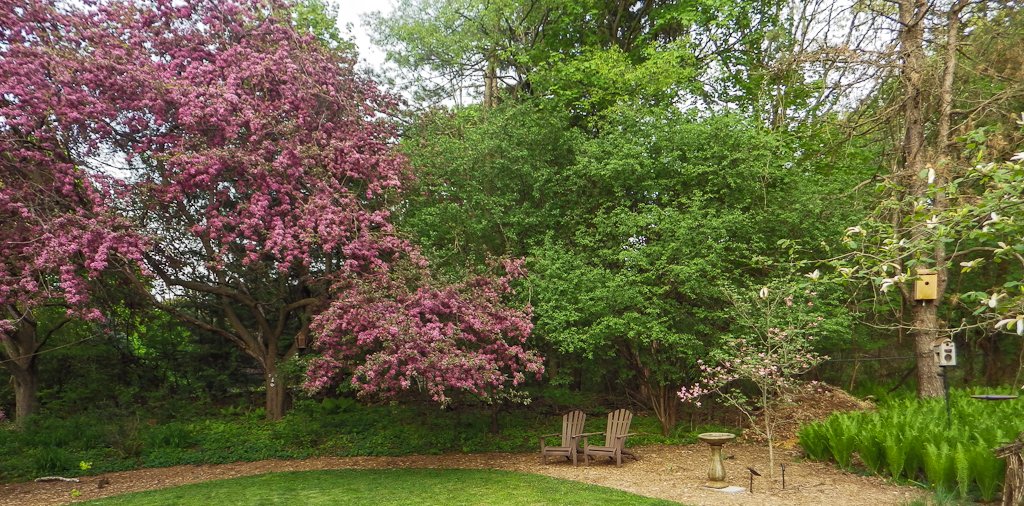
Image shows our mature crabapple in flower in the landscape.
A more natural ground cover where the berries can be left in place rather than “cleaned up” creates a much more sustainable situation in the garden.
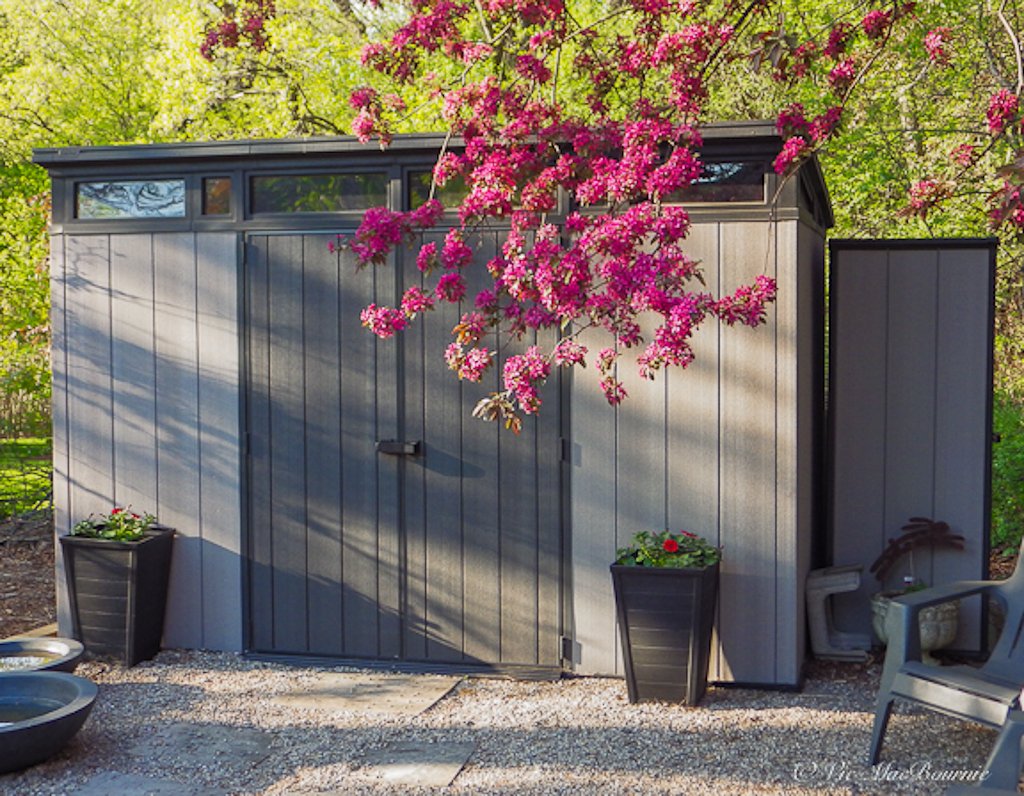
A Crabapple branch in full flower hangs in front of a grey Keter shed.helping to set off the dark pinks of the crabapple flowers.
Pruning crabapples: leave them natural
Please refrain from over pruning your crabapple trees into ridiculous balls or other unnatural shapes. I’ve seen too many crabapples that have been trimmed back to the extreme leaving only a trunk with a small ball of branches. I guess this is done to keep the tree small. Like most trees, it is best to leave them to grow into their natural shape, which in the case of a crabapple, usually mean a spread as wide as their height. Celebrate them and enjoy their natural beauty.
How to garden in the shade (Why shade gardening is important in 2022)
The Natural Shade Garden originally published in 1992 has inspired gardeners to embrace shade in this era of climate change.
What to plant in a shaded area of the garden
I don’t know why shade gardening developed a bad reputation in some circles, but times are changing and gardeners are beginning to recognize the benefits of gardening in the shade.
For woodland gardeners, learning to get the most out of the little sun our gardens receive has always been a key factor in the success of our shade gardens. And, learning how to deal with varying levels of shade in the garden – full shade, part shade, open shade – is a constant learning process.
Is shade in the garden a good thing?
Some gardeners may still ask: Is shade good for a garden?
The answer is a resounding yes, especially as many of our gardens are hit by the extremes of climate change. Shady areas not only allow us to grow plants we couldn’t in a sunny area, shade helps to cool our gardens the wildlife that live in it and the soil that our plants depend on for nutrients.
If the soil is too hot, it will dry out too quickly and lose its effectiveness as a growing median.
The Natural Shade Garden, written by garden writer extraordinaire Ken Druse in 1992, helped to introduce many gardeners to the benefits of gardening in the shade.
Since then, the combination of climate change – with its extreme heat and droughts – forced gardeners to rethink their approach, and the growing awareness of our role in rewilding urban landscapes, has slowly convinced many more gardeners to embrace the benefits of shade and woodland gardening.
In fact, Druse’s book, The New Shade Garden updates The Natural Shade Garden with information on dealing with the problems associated with climate change as well as providing a new generation of gardeners less concerned about visual beauty in the garden and more concerned about the garden’s ability to reduce carbon dioxide in the environment. Take a moment to check out my earlier review of The New Shade Garden.
In his book The Natural Shade Garden, Druse challenges readers to imagine an idyllic garden where shade plays a major role in the landscape.
Why we love a shade garden
The author opens by asking readers to imagine a walk in the woods where they might come across a sunny meadow, and a stream cutting through waist-high flowers.
“Follow its path and you’ll come to the edge of the woodland. This half-shade is the habitat of the evergreen and deciduous shrubs: mountain laurel, blueberry bushes and deciduous rhododendrons, for example.”
Even if we have never taken this “walk in the woods” there is a certain familiarity with his description of the experience. Maybe it reminds us of a favourite garden or, maybe, it’s the garden of our dreams and one we long to experience.
The Natural Shade Garden is a roadmap to help us get there.
In the book’s opening, the author goes on to explain that the “small trees that line the forest – dogwoods, redbud, and shadblow (serviceberry) – mingle with the spreading shrubs. Pass into the darkness and you’ll find more woody plants of the under story blooming in turn: witch hazel, Fothergilla, and oakleaf hydrangeas…. Spring in the deciduous forest explodes with masses of flowers that bloom and fade before the emerging leaves veil the light from above.”
Shade gardens focus on texture rather than raw colour
To some – those who worship colourful garden beds – Druse’s idyllic garden might sound rather dull.
But to the more experienced gardener – those who recognize the importance of a tranquil garden that celebrates leaf texture, shape and architectural interest over the use of gaudy colour – the shade garden represents a new awakening, free of daily chores including the constant upkeep associated with deadheading, fertilizing and heavy watering.
It’s where ferns can take centre stage in the heat of summer. Where hostas are at home growing through the native ground cover of wild ginger and where birds build their homes in the many tree and shrub layers that are the source of much of the shade in the garden.
Throughout the book, Druse takes us on a journey through shade gardens pointing out the ingredients to success.
Let’s explore some of the plants and shrubs that Druse suggests gardeners use to create the successful shade garden.
What plants grows best in the shade
Best ground covers for a natural shade garden
Any plant that spreads to cloak the soil can be used as a ground cover. That includes low-growing shrubs, herbaceous perennials, vines and grasses. Druse explains that even “a good-sized hosta, can be used as a ground cover…. A mass planting of evergreen azaleas might be considered a ground cover.”
Druse doesn’t leave out the “most famous ground cover of them all: grass lawn.”
“No other living plant can stand so much foot traffic. But there are problems with lawn (My post on eliminating lawn). Besides the fact that it has to be mowed often, fertilized endlessly, watered, weeded, and mowed again, it doesn’t like shade very much.” Druse explains that lawns are a “gross-feeder” that “perishes not only from lack of light, but also from insufficient nutrition.”
So what are the alternatives?
Moss: If you are blessed with moss already, enjoy it, explains Druse. “I’ve met one gardener,” Druse writes, “who gave up trying to keep a lawn in the shade and let his soil go to moss. He was very surprised to find that it kept up quite well, even under teenagers and touch football.”
Today, moss as a lawn substitute is not rare. In Japan and more humid areas where moss grows naturally, it has become a more common ground cover.
Moss is best used for smaller areas where it can be kept clear of garden debris and kept moist year round.
Moss may not need mowing, but it does require some upkeep to ensure it thrives and looks its best.
Back in 1992, when The Natural Shade Garden was written, moss was not as available as it is today. Now, sheets of moss can even be purchased to create large areas of beautiful, soft mosses. If you have mosses growing in your garden, take note of the conditions and experiment with it in other areas of your garden with similar growing conditions.
Other grass alternatives include:
(Be sure to check out my post on best ground covers.)
• Irish and Scotch mosses: are actually sun-loving perennials that look and act much like traditional moss. (Click here for my post on moss-like ground covers)
• Ajuga, vinca, moss pink and moneywort all can take some light foot traffic.
Dry shade tolerant ground covers include:
• Japanese pachysandra
• Vinca
• Epimediums (Be sure to check out my post on Epimediums)
• Galium
American barrenwort (Vancouveria hexandra) (hardy to zone 5) “is a light and airy alternative to so many of the leatherleaf subshrubs,” explains Druse.
Berry-producing ground covers include:
• Bunchberry is the smallest dogwood that sports the same white dogwood flower bracts that its larger siblings the flowering dogwoods have. Bright red flowers follow in fall. (Be sure to check out my separate post on Bunchberry here.)
• Contoneasters: Both evergreen and deciduous varieties.
• Cowberries: A native cranberry
• Creeping snowberry also called wintergreen
• Oregon Grape
• Mock strawberry
These are just a sampling of the ground covers that Druse lists in great detail.
Some of the best shrubs and deciduous perennials for shade
The Natural Shade Garden turns the spotlight on the middle layer of the woodland garden stating: “A garden makes its strongest impression in the middle layer – between the gound covers and the trees. It’s where the eye naturally comes to rest. So, it’s an area that requires special consideration. This is home ground to the herbaceous perennials and the flowering shrubs.”
It’s these plants that will form the framework of the landscape, Druse explains.
“Choosing plants from the woodlands and the edges of the forest, and carefully selecting and preparing their new home, will be your mission.”
Favourite shrubs and perennials for the Natural Shade Garden
Early bloomers to add colour:
• Baneberries
• Cimicifugas
• Goatsbeard
• Astilbes
• Meadowsweet Filipendula purpurea
• Meadow rue
• Columbines
• Corydalis
• Dutchman’s-breeches
• Hellebores
• Solomons seal
• Foxgloves
•Cardinal flowers
• Sedums
• Hostas are essential for the natural shade garden.
Shrubby plants for the New Shade Garden
• Azaleas
• Rhododendron
• Oak Leaf Hyrangea
• Rough leaved Hydrangea
• Annabelle Tree Hydrangea
• Star magnolia
• Viburnums (Check out my story on 7 viburnums for the woodland garden)
• Red-twig dogwood
• Rose of Sharon
• Winter hazel
• Mountain laurel
Paperbark Maple: Understory tree with year-round interest
The paperbark maple (acer griseum) is a mid-size understory that fits both small gardens as well as larger woodland-style gardens.
Paperbark Maple ideal for late fall colour in small urban yards
Paperbark Maples are as useful in the winter landscape with their exquisite, peeling cinnamon-coloured bark, as they are in summer when they perform as a beautiful, mid-size understory tree.
But don’t underestimate the Paperbark Maple’s outstanding performance in late fall when they light up the landscape long after most of the other deciduous trees are left naked.
Where to plant the Paperbark Maple for best results
Be sure to plant Paperbark Maple (acer griseum) in an area of your garden where you can appreciate it in every season.
Our Paperbark Maple is just steps away from our patio where we spend most of our time. It takes centre stage in late fall when its leaves just begin turning colour long after all the other deciduous trees have dropped their colourful leaves.
The Paperbark Maple is a lovely oval to rounded small tree with an open habit and upright branching. In fall, the dainty, three-lobed soft-green maple leaves turn a rich, rusty red.
How long does it take to reach maturity?
Acer griseum are a slow growing tree that will eventually reach about 25 ft. tall and between 15-20 ft. wide.
But unless you are buying a mature specimen, don’t expect the tree to reach those heights any time soon. Paperbark maples grow 6 to 12 inches a year depending on growing conditions.
Exfoliating papery bark is the show stopper year round
While the tree’s fall colour is often overlooked, the tree’s exfoliating papery sheets of bark that peel to reveal cinnamon-brown new bark is rarely overlooked in the landscape. It’s the bark, not unlike that of the river or white birch trees that makes acer griseum a special tree in a landscape.
How long before the bark on a paperbark maple begins to peel off?
If you have planted a young tree, don’t be surprised if you do not see any exfoliating bark for a few years. This can take up to seven years and is more evident on mature trees.
Do paperbark maples have pest problems?
Remarkably free of serious pest problems, the trees tolerate a wide range of conditions from sun to shade and wind.
They can also be attractive as a place to nest for birds, but are not known to be particularly effective in attracting either birds or other wildlife. The trees put out small yellow flowers in spring which can attract pollinators followed by two winged seeds about 1 cm long with a 3 cm wing, which can be a food source for backyard wildlife.
How to grow and use Paperbark Maples in the landscape
They like to grow in soil that is kept consistently moist, but not soggy, and are best grown in zones 5-8 in filtered sun, full sun or partial shade.
They are effective as an understory tree in a woodland or shade garden but because they like some sun, paperbark maples can be used as a specimen tree in a more open garden.
The compound leaves have a 2-4 cm petiole with three 3-10 cm long dark green leaflets.
What companion plants look good with Paperbark maples?
Good companion plants are various sedges, hostas and, of course a range of native spring wildflowers from trilliums, bloodroot and anemones, to bluebells. Keep the plants around the base of the tree on the shorter side so you can appreciate the full effect of the peeling bark.
These deciduous trees are at home in foundation beds in both front or back yards as an accent plant to greet visitors with its impressive bark. They can also work well in more wild, woodland settings, and in wetland conditions as transitions between the more formal garden and open spaces.
These trees are not native to North America. The Acer griseum originates from central China and was introduced to the U.K. in 1901. It came to North America a few years later. Cultivars include the columnar Copper Rocket.
What are good alternatives for the paperbark maple?
While the paperbark maple is an impressive, four-season tree that is at home in both the shade garden as an understory tree or as a specimen in a more sunny location, it may not be the best choice if you are looking for more native and wildlife-friendly trees in your landscape.
Other options to consider over the paperbark maples are, of course our native dogwoods ranging from the pagoda dogwood (cornus alternifolia), flowering dogwood (cornus florida), Redbud (cercis canadensis), Paw Paw (Asimina triloba) and the serviceberry (Amelanchier canadensis).
Our native serviceberry is an excellent choice maintaining similar growth habits, beautiful white flowers in spring followed by red berries in fall that are a favourite food source for birds and other wildlife. It’s fall colours (oranges and reds) are also similar to the paperbark maple.
How to use Japanese Maples in the landscape
Japanese Maples are not native to North America but they are becoming more and more common understory trees, used primarily for their stunning beauty in the landscape.
The Japanese Maple is a popular small- to mid-size tree that fits into any landscape, but is especially at home in today’s more compact urban properties.
The enormous selection of varieties available – from the weeping, cutleaf trees that can be tucked into the smallest of spots and are at home in containers, to the full-size acers that add architectural interest and hits of colour to the understory of larger woodland gardens – makes Japanese Maples a staple in today’s landscapes.
There is an incredible variety of Japanese Maples (genus Acer), some that have red/purple leaves, others that feature green leaves and still others that boast a more golden foliage. Some varieties even have a variegated leaf. Many Japanese Maples have a palmatum leaf structure, but some have more lacy, cutleaf foliage that range from mildly serrated to more extreme forms. Some Japanese Maples grow tall (up to 20-25 feet), others are more upright, ideal for narrow areas.
Even the bark of the Japanese Maples vary widely in both colour and textures.
There is definitely a Japanese Maple to fit any and all landscapes.
Japanese maples are generally pest free. Although deer may check them out, they generally leave them alone. I have never experienced a problem with deer in our garden. Male deer, however, have been known to use the smaller trees either to remove antler velvet, or as a sparring partner during mating season. That’s never a good thing for maintaining the shape of your maples.
For more on Japanese Maples and Japanese-inspired gardens, be sure to check out my post on Five tips to create a Japanese-inspired Gardens. For more on the majesty of a mature Japanese Maple and how to care for them in the garden. The weeping Japanese Maple: ideal for yards big and small.
Japanese Maples are relatively slow-growing trees that can easily take 20-25 years to mature into beautiful specimens. The upright varieties can put on maybe a foot of growth a year once they are established, while the smaller weeping varieties might only put on six inches or less.
With this in mind, if you want a large specimen, you might have to invest in a larger (more expensive) specimen from a good nursery.
Don’t be surprised if it takes three or even four years after planting a large specimen to begin showing signs of real growth again. For the first few years after planting, the tree’s roots will be working to settle into their new environment and will put on very little top growth.
If you want to see what your Japanese Maple can become, just take a look at the spectacular Japanese Maple that makes its home in the Portland Japanese garden. (Link to outstanding photos of the tree) Photographers are actually known to make annual pilgrimages to the tree each year in fall just to try and capture its magnificence.
While they are not native to North America, Japanese Maple trees can be an important addition to a woodland garden adding year-round interest to the understory, while providing nesting spots and other benefits for birds and other wildlife.
These stunning trees that grow in zones 5-8, are native to Japan where they have developed many different cultivars, each with their own growing styles. Some golden varieties of Japanese Maples do not do well in the colder zones. If you are looking to add one of these stunning trees, ensure it has extra protection from extreme cold and winds during the winter months.
Used effectively as an understory tree, the larger Japanese Maples can work in landscape plans to form the perfect transition from the height of say, a two-storey home, to the garden’s ground level.
Japanese Maples can be used in containers in the warmer zones (7-8-9) where the containers do not freeze completely.
Do not put prized Japanese Maples in containers in zones 5 and 6a without providing significant winter protection. (I made that mistake and lost two trees during a particularly cold winter.) Consider moving them into a greenhouse if you want to grow Japanese Maples in a container in these colder zones.
The smaller threadleaf weeping varieties of Japanese Maples work beautifully as specimen trees in rock gardens or as part of a water feature reflecting the flowing nature of a waterfalls.
Most of us are familiar with the classic “Bloodgood” variety. These are the larger, hardy red-leaved Japanese Maples that are quite common in neighbourhoods where they have been growing for decades.
How to use Japanese Maples effectively in the landscape
Used effectively as an understory tree, the larger Japanese Maples can work in landscape plans to form the perfect transition from the height of say, a two-storey home, to the garden’s ground level. The building forms a backdrop to show the delicate architecture of the tree. A stucco or light-coloured building, for example, can work beautifully to show off the structure of the tree in all seasons.
The smaller threadleaf weeping varieties of Japanese Maples work beautifully as specimen trees in rock gardens or as part of a water feature reflecting the flowing nature of a waterfalls.
Elsewhere, the mid-size trees are perfect to place a small bench beneath the long horizontal branches to create a focal point in the garden.
The red/purple leaf varieties act as a break from the sea of green in the summer landscape. Consider planting Japanese Forest grass below them for a natural look. All gold Japanese Forest grass works nicely with the Bloodgood maples. In our front garden, I have planted Japanese Forest grass under the large Bloodgood to form a loose groundcover. (You can actually see it in the image below.)
What native trees are good alternatives to Japanese Maple
The traditional Japanese Maple is an elegant, mid-size tree with a horizontal branching habit with interest in all seasons.
That sounds a lot like our native dogwoods, including both the Pagoda Dogwood (cornus alternifolia) and the Flowering Dogwood (cornus florida). Both are excellent native alternatives to the Japanese Maple. For more on Dogwoods, be sure to check out my post on Six of the Best Dogwoods.
Below, is an example of how a smaller sumach tree can be the perfect native alternative to a Japanese Maple. The fall colour on this sumach is absolutely stunning.
Another good alternative is the Mountain maple (Acer glabrum) is a small understory tree that grows between 10-12 feet tall with pink flowers in spring. Its leaves turn bright red in fall not unlike Japanese Maples.
Redbuds, both western redbud (cercis occidentalis) and Eastern redbud (Cercis canadensis) are perfect alternatives to Japanese Maples. Redbuds grow to between 15-30 feet and sports pink flowers in early spring. Check out my post for more on our native redbuds.
Four tips to growing Japanese Maples
Japanese Maples are not difficult to grow but there are steps you can take to ensure their success. They are not an inexpensive tree to plant so anything we can do to give them a good start is a good idea.
When choosing a location, ensure your tree is planted in an area with good drainage. Japanese maples do not like wet feet and their roots could eventually develop root rot and succumb to being planted in a very wet area. The soil should be allowed to dry out between watering. If you must plant a tree in what you think is a wet area, amend the soil as much as possible with sand and grit to promote drainage. Dig a large hole and fill the bottom with stone to keep the roots above water. When you are planting the tree, make sure you plant it an inch or two higher than the soil level to ensure it does not sink into a water-logged bowl.
Do not plant Japanese Maples too deep whether you are planting in a wet area or not. Japanese Maples, like all trees, need oxygen to the roots of the plant. When planting the tree, consider planting it higher than the soil level in the pot it was growing in, especially if you are planting it into a clay-based soil. Create a berm around it so that as it settles into the ground it does not sink below its original soil line. Planting the tree too deep will force the tree to put out feeder roots where the trunk is below ground. Instead of putting on top growth, all its energy will go into putting out root growth where there should not be any. This will slow the tree’s growth and possibly kill it over time. It’s especially important with grafted Japanese Maples. The graft should never be planted below the soil level. It goes without saying that the trees benefit from mulching around the roots but not directly around the trunk of the trees. We’ve all seen the volcano of death style of mulching that almost always leads to a weakened tree and eventual death.
The final set of tips is actually aimed at homeowners trying too hard to create the perfect landscape. I am a strong believer that turf grass should never (or rarely) be grown right up to the trunk of the tree. There are several reasons for this, but among the most critical is the tendency for homeowners, or worse lawn care companies, to injure the tree’s trunk by either hitting it regularly with a lawnmower, or even worse, girdling the trunk with a weedeater. Once the bark around a tree’s trunk is damaged severely, the tree is unable to get food and water up to the main body of the tree leading to eventual weakening and death. This can happen over several years of abuse by the lawnmower or weedeater.
Over fertilization, especially later in the season (June and beyond), can threaten the health of the tree by forcing it to put out too much growth just before the tree goes into hibernation. Extreme cold will then kill off this new growth prior to spring. Japanese Maples are slow growing trees. Have patience. Fertilizing is probably not necessary, but if you do feel you want to add a slow release fertilizer, apply it in early May and keep the nitrogen level low (no more than 15)
Below are two images of a Japanese Maple known as Full Moon Maple (Acer shirasawanum 'Aureum') that never gets large. Fertilizing it will only injure the tree rather than encourage more growth. This link shows a more mature specimen.
This full moon maple (Acer shirasawanum 'Aureum') seen here in early fall is a golden-coloured tree that stays small even in maturity.
Japanese Maples in our woodland garden
In our garden, Japanese Maples take centre stage in both the front and back yards. In the front, three Japanese Maples combine with two full-size maples and a serviceberry to create the upper and lower canopies so important for a woodland style garden. The main Japanese Maple (acer Bloodgood) was the first tree planted in our landscape 25 years ago and welcomes visitors to the pathway leading to the front door.
It has come a long way from the tiny tree I originally planted to a graceful acer that has spread to form a lovely canopy over the walkway. I’ve had to raise the canopy of the tree several times over the years, but I still like to keep it low enough that I’m forced to bend a little to walk beneath its branches.
A second Acer palmatum, (Beni Schichihenge) was added later as a large specimen Japanese Maple that adds a touch of elegance to the landscape and is especially striking in its autumn clothing with its delicate pinkish-orange leaves.
A weeping cutleaf variety adds colour to the Japanese-inspired garden where it softens the hard-edge of the large boulders that grounds the one side of the garden.
Together, they form a triangle in the front landscape that helps to bring a cohesion to the front garden adding colour to the spring, summer and fall landscapes.
There is no denying that Japanese Maples steal the show in fall when their vibrant colours shine through for a number of weeks before they shed their colourful leaves, sometimes all at once following a frosty morning.
On those days, the leaves from our main Japanese Maple form an incredible carpet of crimson red leaves making for the most perfect groundcover for a number of days before they begin to dry out and curl up.
How to grow Japanese Maples
It’s important to remember that Japanese Maples are understory trees, meaning that they do not like to receive full sun for the greater part of the day. Doing so will likely cause the leaves to burn as the summer heat is turned up.
In colder zones such as zones 5-6, Japanese Maples may be able to take more direct sun, but in the hotter zones it is imperative to grow the trees in partial shade and keep them away from mid-day and afternoon sun.
Some direct light results in better colour for many of the varieties.
Japanese Maples can handle heat, it’s the sun that will burn the leaves. New foliage is especially susceptible to burning. Depending on where you are, a couple hours of morning sun is fine but going beyond 1 pm in full sun will likely begin to do damage to the health of these trees.
Make sure they are protected later in the day when the sun is at its strongest. This is especially true in very hot locations.
Salt can also cause the Japanese Maple leaves to burn, whether the salt is in the air near oceans or if your area has hard water. By adding a little gypsum to the soil at planting, the minerals in the water will be leached out. Top dressing the soil around the roots with a little gypsum can also help.
Japanese Maples, like most maples, benefit from deep watering, especially in hot climates or in the heat of summer. While they would not be considered a deep-rooted tree, they are not shallow rooted either.
Deep watering also helps flush out salts that build in the soils.
For more on deep watering, check out my post Why is the Tree in my Front Garden Dying.
When to prune Japanese Maples
It’s best to prune Japanese Maples in either winter or summer. Pruning them in the spring will remove the beautiful new growth that make these trees stunning in early spring and summer.
Winter is an ideal time because you can see the shape of the tree best and work with the branch structure to enhance its architectural interest.
Japanese Maples should never be sheered or shaped into a ball. They are meant to be elegant trees with long horizontal branches that lend a delicate look to them. Their growth pattern is not unlike many of our native dogwoods that like to spread out horizontally.
If you are unsure about how best to prune Japanese maples to enhance their inherent beauty, consider hiring a trained arborist who understands how to properly prune these trees to enhance their inherent qualities.
A typical tree service, known more for cutting down trees, might not be the best to use for pruning your Japanese Maples.
Can you grow Japanese Maples from cuttings?
Take cuttings from spring growth when it is still flexible and not quite what you would called woody.
Put them in a glass of water immediately, before putting them into potting soil with plenty of perlite and a little rooting hormone if possible.
Strip off a number of leaves to create nodes. This is where the roots will eventually emerge.
Keep the cuttings well watered and misted throughout the spring and you could be blessed with new trees perfect for creating bonsai specimens.
Planting a Japanese Maple
One of the keys to getting the perfect Japanese Maple is to pay particular attention to the shape of the tree before setting it into the ground.
Japanese Maples like neutral to slightly acidic soils so start with a good draining soil mix and consider adding a little acidifier to the soil – a good azalea or rhododendron mix would work well. If you have hard water in your area, a little gypsum in the planting hole will help remove some of the minerals in the water. Add just a small amount, maybe 2-3 per cent.
Backfill the soil about halfway and then water in the tree to ensure it gets a good start. At this point you could add a couple handfulls of a mild fertilizer in a 5-3-1 ratio.
Continue backfilling around the tree until the soil is an inch or two below where the soil level was in the pot. Give it another good watering and then add mulch to lock in the moisture in the soil and protect it from direct sun.
Proven Winners’ Salvia gets our patio containers Rockin’
Proven Winners’ Rockin’ Deep Purple Salvia is the star of our patio container this year. It’s been attracting hummingbirds and Bumble Bees like groupies at a rock concert and it’s low-maintenance habits have really made a fan out of me too.
One of our hummingbirds pay Rockin’ Deep Purple salvia a visit. Notice the dark calyx surrounding the purple flowers that give the plant a cool look even when the flower has faded and fell to the ground.
One season of Deep Purple will make you a fan too
Proven Winners’ Rockin’ Deep Purple Salvia are the rock stars of our patio containers this summer.
All you need to do is spend an afternoon on the outdoor patio and there’s no denying Rockin Deep Purple salvia’s popularity. Like groupies at a rock concert the hummingbirds and bees just keep buzzing around the plants. It’s now September, and these plants have been performing since I planted them in spring.
This image catches the hummingbird’s beautiful green feathers against a dark backdrop.
It’s hard to imagine what they have in mind for an encore this fall.
Last year I planted another Proven Winners’ salvia – Rockin’ The Blues salvia – out in the landscape and missed most of the hummingbird action.
This year, however, I decided to put the plants in large black containers on the patio where I could keep a closer eye on its fans.
Our native Bumble bees are in love with the Deep Purple salvias in the garden. If you are interested, check out my post on the importance of our native bumble bees.
The aerial acrobatics is great fun to watch as the hummingbirds battle over the plants.
Oh man, I was not disappointed. The bees and hummingbirds have been visiting the dark purple flowers almost since the day I planted them in spring.
Besides the attractiveness of these plants to pollinators and hummingbirds, their extremely low-maintenance growth habits have made a real fan out of me too.
These hybrid salvias from Proven Winners are not new. They’ve been around since about 2017, but they’re new to me. And they are new to the hummingbirds in our garden who have put these tough, upright plants on their regular hourly feeding rounds for the summer
In fact, as the end of summer approaches, the hummingbirds are actually beginning their aerial acrobatics over and around these Rockin’ salvias in a show of dominance to keep competitors away.
A female hummingbird works the Rockin’ Deep Purple salvia.
When the dark purple flowers are finished blooming, the calyx, which holds the flower petals, remains a really dark purple almost black and gives the effect that the plant is still in bloom, when it’s actually not. Traditional salvias’ calyx’s turn brown and lessen the appearance of the plants. Not these Rockin’ ones.
The light green foliage on the plants looks good throughout the summer too and there is no need for pruning these neatly-growing upright plants or even deadheading.
A dragonfly takes a quick break on the Deep Purple salvia calyx topping off the plant in fine form.
The only chore is to clean up the fallen petals left lying on the ground. I like to leave the purple flower petals on the patio for a while because they look so good just laying there.
Rockin’ Deep Purple salvia is joined by a lighter blue version named Rockin’ Playing the Blues. The entire Rockin’ series features fragrant foliage, a long blooming time, a tolerance for extreme heat and, most important, are very attractive to pollinators.
The Salvias have been alive with Bumble bees from spring through summer.
In addition there is the Rockin’ Golden Delicious with striking yellow-green foliage and Rockin’ Fuchsia with its unique fuchsia coloured flowers.
This hummer eyes its next flower as it makes its rounds in the garden. I love that the flower is in focus here but the hummingbird is just out of the camera’s focus range as it prepares to move in for a meal.
What to expect in the garden
You can expect a height of between 24 - 36 inches on these upright plants in the garden with a comparable spread.
Keep them well watered and fertilize about once a week for best blooms.
Ours are in sun for most of the day and are doing well. Proven Winners says the plants perform at their best in part sun to sun.
The good news is that the plants will bloom from spring right to the first hard frost.
They are hardy in zones 9a, 9b, 10a, 10b, 11a, 11b. In colder zones, you can just treat them like an annual.
Plant them in the garden beds and use them as thrillers in large containers. I guarantee, you won’t be disappointed.
For those who worry about using a cultivar in their garden, Proven Winners say the plant is “sterile so it will not set seed and that means it will just bloom, and bloom and bloom all season without stopping.”
The company also says the salvias “can easily trim to keep the shape or size where you want it, and it will branch out and become even thicker and more full of flowers.
Proven Winners states that: “Regular watering and fertilizing will keep the plant at maximum colour and growth but it is amazingly tough and once established in a pot it will tolerate lower levels of food and water. However, severe drought will cause lower leaves to drop and if this happens give it a quick haircut removing the upper 1/3 of growth and once it’s back to normal watering it will fill back in.”
I could not resist putting in this B&W photo of the lone salvia flower on the leaf. For more garden B&W photography, you can check out my earlier post A woodland garden: Study in B&W.
Just keep on rockin’
Salvias are a great addition to any wildlife garden and a plant that you’ll want to feature in several areas of your garden. Look for spots that you know will get plenty of sun and plug them into the landscape in groupings of three to maximize their benefits.
I like the drama of Rockin’ Deep Purple, but Rocking Playing the Blues added a nice soft blue to the garden last year. Next year I’ll look for Rockin’ Fuschia to add a pop of colour to a sunny spot. I’m thinking they would be showstoppers in our black containers.
Why is the tree in my front yard stressed and losing its leaves?
We are not the only ones stressed out about climate change. Our suburban forests are feeling the heat too and many homeowners are not doing enough to ease that stress. The result, trees that probably won’t make it past adolesence before a lack of water kills them.
Why is the tree in our front yard dying?
It’s a question that is asked on gardening groups daily especially in the heat of summer.
The simple answer is almost always a lack of water getting to the roots of the tree, but that is an oversimplification of a series of complex problems many inner city and suburban homeowners are facing and most are, unfortunately, choosing to ignore.
Chances are good that the tree is not dying, but under stress. Chances are also pretty good that, if action is not taken, the tree will begin to show more serious signs of decline. Over time, a lack of action will result in such decline that the tree will eventually die or have to be cut down or left as a snag for birds and other wildlife. It may take several years for the tree to finally give up and give itself over to the borers and woodpeckers.
But that tragic ending is not inevitable.
For more on dealing with trees showing stress, check out these posts:
• Why Birch Tree leaves turn yellow and fall off prematurely
• Birch clumps at home in the woodland
• Do not cut down that dead or dying tree
Don’t give up on your stressed tree too early
In a recent Facebook post a homeowner showed a picture of a maple tree in her front yard. She had already concluded that it was dying, and it appeared nothing anyone was going to say would change her mind. Despite assurances from others that the tree was just under stress and needed help, she maintained it was too late. The helpful posts from other gardeners were simply ignored because "other maple trees in the suburban neighbourhood,” according to the poster, “had already died or were in the process of dying.”
I don’t doubt that most of the neighbourhood trees were dying out.
One look at the picture, and it was clear the tree was a good example of a “street kid tree,: an orphaned tree, if you like.
Chances are, most of the trees in the neighbourhood were suffering from the same problem and dying off one by one. Their deaths certainly pointed to a major problem, but it most likely wasn’t what the homeowners all believed – that a disease was running through the neighbourhood.
In a woodland garden, there are more trees to cast shade. Here a large shade tree casts a delicate shade on smaller, understory trees and help them get through times of less rainfall. In addition, the ground is covered with a mulch to hold the moisture in the ground and ferns grow around the larger shade tree to help hold the moisture in the ground.
Now, there are many factors that could cause the trees to die off – including a disease spreading among them – but judging from the picture and what I could see on neighbouring properties, I’m pretty confident that the problem was water.
To be more specific, a lack of water getting to where it needed to go.
I’m also confident that the neighbourhood residents would tell you that they water diligently and assure anyone who asked that “there was no way watering was the problem.”
Make no excuse, the real problem is water and the role it plays on our suburban and inner city “Street trees.”
Watering the grass is not the same as watering a tree.
Five reasons suburban trees may not make it to adulthood:
• Most of the trees being pushed at local nurseries are meant as understory trees, meaning growing under the shade of larger trees like maples, oaks and other shade trees. Growing alone in the middle of a lawn means full sun. These trees are not prepared to deal with that much sun, especially these days when temperatures are soaring to new heights and staying there for weeks instead of just a few days. If the trees survive it’s likely because they benefitted from the two-storey home that might shade them for a period during the day.
• In most of today’s new neighbourhoods, water is diverted from the roofs of homes to underground pipes and shipped directly to the waste water plant where the already clean water is “cleaned” and fed back into lakes and rivers offering nothing of value to the plants and trees it was originally meant for. Again, it points back to a lack of water. In addition, these same trees are often planted close to a paved driveway that blocks any water from seeping through to roots that may have travelled under the pavement.
• The tree is often planted in the middle of a sea of grass that also sucks up what little water makes it to the ground, leaving little to no water for the tree. And, because it is planted in grass, it is susceptible to the gas-powered whipper snapper that trims the grass around the tree while it carves out the tender bark of the young tree and leaves it unable to send water and nutrients up its trunk if it could even find any.
• The volcano effect where homeowners pile up mulch around the trunk of a young tree sentencing it to a slow death.
• Finally, our little tree is an orphan in a sea of well fertilized and pest-free turf grass. Unlike its cousins in the forests that have a mother tree, siblings, cousins and a whole community to support it, our little guy is on its own to face the weather, harsh conditions and a lack of shade all on its own.
“Not only is turf grass a non-native species offering little to nothing of value to wildlife, pollinators and other insects that feed our birds, it’s sucking the life out of our suburban trees by stealing most of the water meant to give them life.”
Are suburban trees in trouble?
What’s a “street” tree you ask?
The term is explored in great detail in Peter Wohlleben’s best selling book, The Hidden Life of Trees, where the author uses it to explain the complex association and communication that a healthy woodland or forest exhibits and compares it to the everyday struggle inner city and suburban trees face.
The Hidden Life of Trees was clear about the benefits of forests over singular trees planted on a front yard surrounded by non-native grass and facing the world – the beating sun, the cold winds, freezing temperatures – on their own. He compares the “street trees” that are found in most urban environments, to “street kids.” These lone trees face difficult and almost always shortened lives compared to trees that share resources as a family group in a proper forest or woodland setting.
(You can read all about this excellent book in my earlier post The Hidden Life of Trees, and more here on Dr. Nadina Galle and her revealing work at her website “The Internet of Nature.”)
Dr. Galle, a Canadian living and working in the Netherlands, is focused on how we protect the urban forest into the future and she wants technology to be leading the way.
“Roughly 50-70 per cent of the urban forest in any given city is on private/homeowner land, which means only 30-50 per cent is actually in the maintenance area of the city,” Dr. Galle tells Ferns & Feathers from her home in the Netherlands.
“This is crucial because it shows the massive role homeowners can have in the development and longevity of the urban forest,” she explained via email.
That “role homeowners play” begins with taking care of the “street trees” on our properties that are part of the urban forests.
The importance of “community” in the natural world is brought home by the work of a group of women in Ireland who have taken the term micro or “pocket forest”to new heights.
By planting intensive miniature forests on tiny lots, some as small as a single shopping mall parking space, the team are proving that a full grown native forest does not have to take hundreds of years to grow into maturity, but can be done in as little as 20 years. For more on their work, check out my earlier post here.
City trees just need a little help
To better explain the concept of “street trees,” think about a teenager trying to grow up in the inner city without parents, a real safe place to call home and no friends or support to help them get through difficult times. Chances are that “street kid” is not going to make it to adulthood, but that doesn’t mean that without a little help that the same kid can’t become a successful adult.
The same can be said for our “street trees.”
Street trees under stress need our help to survive more than ever.
Our lonely trees are struggling
Let’s get back to the tree under discussion.
The picture showed a well-established maple tree surrounded by a sea of grass and a tiny garden around the base of the tree trunk edged with larger river rocks.
It’s a recipe for disaster that, unfortunately, is not that uncommon in many subdivisions.
(Just for some background, Street Trees in the inner city have a life span of as little as nine years. In human terms, that’s not much older than a toddler.)
The homeowner assured readers that the little garden around the tree was not the problem because other maple trees in the neighbourhood had died and had not had a garden around the trunk.
Wrong. The little garden wrapped tightly around the trunk may not have caused the tree’s decline, but is certainly another part of the bigger problem. The garden was climbing up the trunk suffocating the tree and possibly bringing disease to its trunk.
Removing the grass around a tree is an excellent idea that should be encouraged, but make it large. If you can spread it out beyond the drip line of the tree’s canopy. Every few years make it larger as your tree continues to grow and the drip line spreads out. This will allow water to travel to the roots much easier than having to penetrate the fibrous, thirsty roots of turf grass.
Remember that street kid. Let’s compare the garden to taking a winter coat away from the street kid in the middle of winter. Probably not the only reason the teenager is going to struggle during the winter, but a significant contributing factor. If the teenager gets sick, has no support structure and the temperatures continue to drop, there is a good chance the child will perish from the cold and sickness. The coat would certainly be considered a contributing factor, but death would likely be the result of pneumonia or hypothermia.
A little help with a warm coat and chances are the teen would have not gotten ill and survived winter just fine.
The right amount of water for our struggling tree will result in the same life-saving result.
Many homeowners, think a quick watering of the front lawn is all that the tree needs.
In other words, if the grass looks good, we are good to go,
Nothing could be further from the truth.
A need for deep watering
Trees need water and the bigger they are, the more they need. So as a tree grows in your front yard you need to take this into consideration. This doesn’t necessarily mean you need to water more and more as the tree ages. It does mean, however, that the tree needs to be able to access water deeper in your soil. Tree roots will find that water, providing there is sufficient water to find.
A huge problem in suburbia is, you guessed it, those acres of turf grass so many homeowners like to worship from the sidewalk.
Not only is turf grass a non-native species offering little to nothing of value to wildlife, pollinators and other insects that feed our birds, it’s sucking the life out of our suburban trees by stealing most of the water meant to give them life.
Even a heavy rain is likely only going to water the grass and the first few inches of the soil.
That’s likely not enough.
We need a deep watering. The kind our suburban trees often get in spring when 3 feet of snow slowly melts and the water works itself slowly and deeply into the ground.
That’s a deep watering.
How do you deep water a tree?
In other words, pull out your garden hose, turn it on to a little more than a trickle (not full open,) put it at or around the drip line of the tree (approximately where the outer leaves of the tree are located) and let it run for three hours. Then move it about a quarter of the way around the tree and let it go for another three hours… and then do that at least two more times until you have watered around the entire circumference of the tree. Yes that’s up to 12 hours of watering, but not 12 hours of all-out watering.
You don’t need to do this on a weekly basis.
On a good year, where we get lots of rain, you may not have to do it at all.
If you have a woodland garden where the tree roots are shaded for most of the day and enjoy the company of other trees, you may not have to ever do it.
But if you are going to plant a tree, in the middle of your yard, in the blistering sun, with turf grass all around it sucking up what little moisture there is, plan on doing it several times over the summer.
That’s the reality.
If that’s too much to ask, be prepared to lose your priceless tree just when it is beginning to look good and add value and some shade to the property.
What other factors cause stress in trees
One look around a typical suburban neighbourhood these days and you would be hard-pressed to find a property with more than a single sad tree growing in the front yard.
Too often the properties are small and the thought of a large oak or maple tree growing in the front yard is too much for new homeowners to imagine. They worry about the roots heading straight for the foundation, or worse, the tree falling on the home and demolishing it in one full swoop. Needless to say the oak tree won’t reach anywhere near that size in the homeowner’s lifetime.
Instead, miniature trees (more properly named under story trees) guaranteed to grow no more than 10 or 12 feet, are purchased and proudly planted in the middle of the grass where they are exposed to 12 hours of searing sun day after day, are open to salt spray from the roads and freezing winds in winter.
They have no protection, are usually non-native trees so likely can’t deal with the harsh conditions we throw at them, and they are asked to do this all alone. But, and this is important, they have pretty double flowers that are infertile so they don’t bear fruit and make a mess (sorry for the sarcasm). Some, in fact many homeowners, would unfortunately call that a win-win. Not for wildlife it isn’t.
Unfortunately, the chances of that under story tree surviving are slim. If it does survive, it will most likely struggle its entire life and never perform the way it was originally meant.
And the more of them that are planted, the more our suburban forest is threatened. As our large native shade trees slowly give way to weeping whatevers, so too will the birds, insects and mammals that depend on the large native trees for the caterpillars and other insects they provide.
If you live in a typical new subdivision, take a drive to an older, nearby neighbourhood where the houses are older and lot sizes are also on the small size. Notice the large Maples and Oak trees growing and recognize the character the surviving trees provide to the neighbourhood. These trees were likely planted at a time when today’s miniature, weeping variety of trees were not yet available. Imagine, one of these in your front yard or towering over your patio in the backyard. Imagine the shade, the birds singing and the whisper of the leaves in the evening.
Now go out a plant one for the future. The under story tree can go in next year or the year after when the shade tree can protect it from the heat of our ever increasing mid-day sun.
Perfect grass: Waste of time or ideal backdrop?
So you’ve got a perfect lawn. That don’t impress me much. In fact, the perfect lawn is becoming a thing of the past for anyone who cares about the environment. It’s time to explore a more naturalized landscape that is becoming popular as more gardeners realize the environmental impact of traditional lawns.
Is it time to replace lawns with more ecological alternatives?
“So, you’ve got a perfect lawn. That don’t impress me much.”
Every time I look out into a sea of perfectly manicured green grass, complete with in-ground sprinklers, an annual contract with the local lawn pesticide company and an obsession with a common non-native ground cover that, quite frankly, is a boring monoculture, I cringe.
Sure, a little grass might have its place, but it pales in comparison to a beautiful, healthy garden full of native plants that attract pollinators, butterflies and other fauna. Slowly more homeowners are understanding the horrors that a massive sweep of perfect lawn can bring to a landsccape. Extensive use of fertilizers, herbicides and pesticides combining into a lethal brew that not only kills the soil the grass depends on, but leaks into our rivers and streams or into our wastewater where taxpayers are forced to pay to clean it again.
And, to make matters worse, that perfect lawn does not come cheap.
That might be the reason more and more homeowners are choosing to actually cover their property with an expensive carpet of synthetic lawn, all in the name of obtaining the look of a “perfectly boring lawn.”
For those who think the synthetic lawn is the ideal alternative, consider its potential environmental impacts: it absorbs heat, has to be sanitized from pet waste, it compacts the soil under it, and restricts any real hope of encouraging insects and worms to flourish either above or below ground.
Used sparingly, synthetic grass has its place I guess. It can solve some common problems homeowners in small urban yards face. But there are probably better, less expensive and more environmental friendly alternative ground covers or mulch that can get the job done.
Grass is without a doubt the most expensive ground cover you could choose
In fact, that green grass so many homeowners strive for is costing them big time.
In our front garden, all the grass has long since gone, replaced by plants, trees, groundcovers, stone, rocks and natural cedar mulch.
One estimate has the average cost of an American homeowner, just to water the lawn, at about $570 a year. That doesn’t take into account so many other factors including environmental/ethical costs of achieving that perfect green lawn.
There are the chemical pesticides, herbicides and fertilizers (banned in many Canadian cities), lawn repair, aerating, rolling, dethatching and it goes on and on. Oh, and let’s not forget the cost of the tools needed to keep the lawn looking perfect.
The bigger the lawn, the more expensive the tools. Consider a riding lawn mower valued at about $2,000 for your average model. You can pay more, a lot more, if you really want to cut that beautiful lawn in style. Forking out $3,000 for the pleasure of owning a machine to cut your lawn for 5-6 months a year would not be an exageration.
If a riding mower is unnecessary or out of the price range, a regular high quality lawnmower should set you back between $500-$700. There’s even robot mowers that will set you back several thousand dollars. Then there are the the must-own, loud and obnoxious gas-powered edgers, the leaf blowers that now seem to have become grass-clipping blowers or dust movers in most urban neighbourhoods.
Add the heavy, lawn-crushing rollers homeowners have been convinced are vital for that perfect lawn.
Yes, crushing what little air is left in the sickly, chemical-filled soil so the lawn looks flat is critical. Following a good rolling, is when the aerators come out to pull plugs out of the soil to add back some of the air that was just taken out of the soil by the heavy roller. And, let’s not forget the deep-grass rakers known to remove thatch – better known by gardeners as organic material slowly breaking down naturally into the infertile soil.
And the fall brings out the leaf vaccums because no grass worshipper would want to leave any organic matter on the lawn or garden to break down and improve the soil.
Does anyone else see the absurdity in all this?
It’s difficult to put a real price on this lawn obsession, but it’s clear there are a lot of companies making a big-time profit on homeowners’ blind obsession with their lawns.
One person who decided to dig into his monthly water usage compared the same time period from May 13 to August 11th. He found that during this period his water usage went from 9,724 gallons of water to a whopping 19,448 during the same period year-to-year.
What made the stats even more alarming was that the difference was almost entirely attributed to one month - the month of May. The water usage in that month alone went from 8,700 gallons to 2,251 gallons. The reason? He watered his lawn every other day because he chose to lay new sod in the front yard. His lawn is small, requiring moving his sprinkler only once to cover the entire front property and he only watered for 15 minutes at each location.
What was the real price of laying that beautiful new sod?
Just think of how much water is being used on larger properties to obtain the perfect lawn.
It’s absurd.
Here are a few things to consider:
• The average homeowner spends up to 100 hours every year walking behind a noisy, exhaust-spewing lawn mower.
• In 2005, lawns covered an estimated 63,000 square miles of America - about the size of Texas
• Most brands of grass seed contain almost nothing but Kentucky bluegrass and other introduced species not built for most Canadian or American backyard conditions.
• A typical cost for spring treatment by a lawn care company can range from $300 to $500 that include aeration and power raking (both unhealthy choices for your lawn.)
•The biggest drain on our water resources during the summer is outdoor use, primarily lawn and garden watering, according to a British Columbia, Canada report. Compared to residents’ winter water use, summer use is close to 65 per cent more.
• In many areas throughout North America, most of the rainfall or precipitation occurs in the winter months, not the summer.
• A garden hose can deliver (and waste if left on) more than 600 litres (132 gallons) of water an hour.
• A typical lawn needs a maximum of 25 mm (one inch) of water per week. Any more is likely wasted and is beginning to cut off oxygen to the roots of the grass and threatening its vigour.
Why do we love our lawns so much?
Lawns are the most grown crop in the United States. That’s sad when you think that no-one gets any nutritional value out of this so called crop. Lawns are grown simply to make the fronts of homes fit in with the neighbourhood and the homeowners look and feel good about themselves.
In Britain, TV gardening superstar Danny Clarke revealed recently that small garden lawns are one of the most common mistakes he sees gardeners in that country make. Danny says sacrificing border size for lawn is a mistake he is seeing over and over again. The result is tiny, narrow borders with little room for more than one or two plants stretching along a fence.
Even in the official birth place of the lawn, gardeners are realizing the amount of work lawns, even small ones, take to maintain. Clarke explains, “You spend more time mowing your lawn and looking after it than you do tending to your plants.”
He goes on to explain that “lawns never look 100 per cent unless you are on them 24/7, weeding and feeding them. To keep a lawn looking good you need to be mowing it, believe it or not, at least once a day.”
Well, I’m not sure about cutting it every day, but the longer you allow grass to grow, the more stress you put it under with each cut.
Clarke goes on to explain: If I had a small garden I wouldn’t have a lawn. I would ban lawns and just have plants. Plants are what makes your garden. If you want an aesthetically pleasing space, then the more plants you have in there the better”
• If you are considering creating a meadow in your front or backyard, be sure to check out The Making of a Meadow post for a landscape designer’s take on making a meadow in her own front yard.
On our property the lawn is almost gone
On our property, the lawn has slowly disappeared over the 20 plus years we’ve lived here. What once took about 1.5 hours of lawn cutting and edging, now takes maybe 10 minutes. All the grass has been removed in our front garden, and about 90 per cent removed from the back. All that actually remains is a small round patch in the middle of the yard that acts as an open area and forest edge for the plants and trees in the perimeter.
According to an article in Scientific American: “To have a well maintained lawn is a sign to others that you have the time and/or the money to support this attraction. It signifies that you care about belonging and want others to see that you are like them.”
The long history of lawns
The lawn as we know it was invented in the 18th century for English country estates. In those days, owners could count on a cool, rainy climate in addition to an army of servants to keep up with the yard work. Introduced to North America a few decades later, European turf grasses like Kentucky bluegrass allowed North Americans to grow a patch of green on their property as a symbol of prosperity.
Well, at least we could try. Lawn care experts say most Canadian homeowners set themselves up for a war against nature they cannot win using the standard arsenal of non-native turf grasses—no matter how many hours of labour, gallons of water and piles of fertilizer they employ.
To this day, lawns continue to be a sign of financial success. Many homeowners hire landscapers to guarantee the perfect lawn without having to invest their own time to cutting, bagging and edging their lawns.
But the days of the perfect lawn are disappearing fast. Water, pesticide and herbicide restrictions, along with increased awareness of the environmental costs, possibly through increased social media presence, are forcing homeowners to rethink the value of a wasteful lawn.
Lawns are thirsty and bad for the environment
According to Scientific American: Lawns require the equivalent of 200 gallons of drinking water per person per day.” It reports that Californians, for example, have taken to shaming (#droughtshame) neighbours who persist in watering their lawns.”
As Bob Dylan once wrote: “The times they are a changin.”
Even if older Canadian and American homeowners refuse to give up their perfect lawns without a fight, their more environmental-aware children are slowly adopting a more natural landscape design aesthetic.
One only needs to take in the garden designs beginning to dominate shows like the famed Chelsey Flower Show in England to see that naturalized gardens are more and more on-trend. The growing movement embraced by a younger generation reflects a more natural lifestyle and the return of naturalized lawns welcoming more native wildflowers, encouraging clover and other flowering weeds.
Over the course of more than 20 years in our home, my wife and I have eliminated 80-90 percent of the grass on the property. It’s been a long, arduous journey but I have gone from probably two hours of lawn mowing to maybe 10 minutes. The great swaths of grass have been replaced by living and non-living ground covers. Natural cedar mulch river rock and pea gravel make up the non-living ground cover, while sedum, ferns, mosses, and traditional ground covers make up the remainder of the living mulch.
Gardening on a budget links
Ten money-saving tips for the weekend gardener
DIY Bark Butter feeder for Woodpeckers
DIY reflection pond for photography
Click & Grow is ideal for Native Plants from seed
Remove your turf and save money
Hiring students to get your garden in shape
This page contains affiliate links. If you purchase a product through one of them, I will receive a commission (at no additional cost to you) I try to only endorse products I have either used, have complete confidence in, or have experience with the manufacturer. Thank you for your support.
When is the best time to move a plant, shrub or tree?
What’s the best time to move that tree, shrub or plant? Moving plants is always a little scary but if done well, it can be done successfully. here are some tips to make sure the move comes off without a hitch.
The question many gardeners often ask is either, can I move this plant now, or, is it too late to move this plant or tree?
My answer is a simple one – “It’s almost never too late to move a plant, tree or shrub.”
In my opinion, it’s never a bad time to move a plant, shrub or tree if it is not doing well where it is currently planted or you just can’t live with a plant in a particular spot any longer. With the exception of extremely late in the fall when the ground has either begun to freeze up or is just days away from serious frost, or in winter, gardeners should not worry too much about moving most plants.
Now, that’s not to say every plant is going to transplant successfully. There are plants – especially those with long tap roots – that are extremely difficult to move. If you are careful, however, and take steps not to stress the plant too much and give it a nice new home with good soil in a preferred spot, chances are it will bounce back quickly and be much happier in its new location.
There’s also some ideal times to move trees, shrubs and plants. If either a plant is not doing well in the area it is currently located, or, if it has to be moved for various reasons, don’t hesitate to get the shovel out and get busy making the move.
So far this spring I have already moved a small Dogwood tree (Cornus Florida), a Pagoda Dogwood Tree (Cornus Alternifolia) three Golden Carex plants, a group of Milkweed plants and Black Eyed Susans that were moved from the front of our yard to the back garden, and a clump of Monarda that got divided to spread the plant around the garden. The common milkweed plants turned out to be the most difficult because of their long tap roots. it too a few days for them to recover but luckily I chose to move them during rainy and cool period in early June.
Early fall when the soil is still warm is the perfect time to move plants, shrubs and trees. Just make sure that the plants get several weeks in the ground prior to the soil freezing for the rest of the winter. Remember that the soil will stay warm long after we get our first freezing temperatures.
In addition, in the next few days, I expect to move a grouping of Solomon’s Seal, Canada Anemone, Bunchberry and who knows what else will find a new home before the heat of summer hits us all.
Over the years I have moved so many plants and trees it’s hard to remember them all, but I do recall moving a huge Blue Spruce, three Eastern White Pine, numerous hostas, ferns, Japanese Maples and a large Red Maple that was growing in a corner of the yard and is now three storeys high.
Out of all the trees, plants and bushes I have moved, I can only think of one dogwood that I have lost because of the move. However, many of the plants and trees that have found new homes have experienced serious set back as a result of the move.
It’s important to reduce your expectations after the transplant. If you are moving a flowering tree in early spring, chances are it will not flower that year or maybe sparingly. If it’s a perennial, it may not flower or the flowers may be sparse and smaller than usual.
In the first year after the move, much of the plant’s energy will be going into re-establishing its root system before it begins its growth period. The best you can do is to keep it well watered for the first year. Refrain from over fertilizing the plant so as not to encourage a lot of new growth which can stress the plant while it is trying to establish a good root system.
If you do use a fertilizer try not to use one with a high nitrogen content. The best fertilizer for root growth is one that is balanced with enough phophorous that will promote vigorous root growth when it is applied over the entire root zone of the plant. Phosphorous is represented by the first number (of 3) listed on the fertilizer. Look for a fertilizer with a 3-1-1 or 6-2-2 NPH label.
If you are looking for more natural sources of high-phosphorus fertilizers consider adding the following around your plants (information derived from https://greenupside.com/):
Bone Meal – contains 12 to 16 per cent phosphorus by weight. It is easy to obtain and a good source. Add some Bone Meal into the hole before replanting.
Bat Guano – 4 to 8.6 per cent phosphorus by weight. If you know where a group of bats are roosting, possibly in a box in your garden, this might be an easy source of phosphorous. See my earlier post on bats in the garden.
Hair – is known to contain about 26 per cent phosphorus by weight. Know a barber or hair dresser?
Enriched Rock Phosphate – contains 17 to 30 per cent phosphorus by weight
Fish Meal – contains 4 to 6 per cent phosphorus by weight
Cottonseed Meal – contains 2.5 to 3 per cent phosphorus by weight
Worm Casting – contains 2.5 percent phosphorus by weight
Blood Meal – contains 1.5 per cent phosphorus by weight
Manure – contains 0.2 to 4 per cent phosphorus by weight
Compost – contains 0.5 to 1 per cent phosphorus by weight
This Carex was not happy where I originally planted it along with a couple of others. In fact, when I checked it again this spring the roots had hardly taken to the very dry soil. I waited until spring to remove them and replant them in an area where I could ensure their roots would receive regular watering. Sometimes moving plants to an area that is more accessible to water is reason enough dig them up.
What is the ideal time to move a tree, shrub or plant?
Early Spring is best time to make a move
Although it may change to some degree depending on the plant, tree or shrub, early spring before new growth has begun is almost always the best time to move a plant. Unfortunately, that is not always a good time for gardeners to get out and begin digging up plants, even if they know exactly where they were planted.
Inevitably, the task is left until later in the spring when the new growth is up and the plant is easily identified. This is still a good time because the soil should still be quite damp from winter melt and spring rains.
After a good rain
Other than the spring, the next best time to move a plant, tree or shrub is after extensive rains preferably several days of rain. This ensures that the rain water has infiltrated deep into the ground and saturated the root system. Not only does this make digging out the plant much easier, it helps to severely reduce the stress of pulling the plant out of the soil making successful transplanting more likely.
Early fall can be a good time for a move
Early fall can also be a good time to move a plant. By fall, plants are beginning to approach dormancy creating a window for gardeners to move plants, or plant new ones before first frost. In Zones 5-7, there is a two-month window from about mid-September to mid-November before the first fall frost makes successful transplanting more risky. Gardeners are looking to make the move while leaving a large enough period of time for the roots of the plant to settle in and get some kind of foothold before a serious frost.
Tips to help move the plant, tree or shrub successful
If you have a sandy soil or you think it is is dried out give it a good, deep watering the day before to make the move less stressful on the plant. If it’s a delicate plant and you want to give the move every chance of success, you could go around the dripline of the plant with a sharp spade the day before the transplant to begin freeing up the plants and give the fine external roots a day or two to recover from being severed.
Keep the plant well watered leading up to the move, but not so saturated that the existing soil falls away from the roots when you dig the plant out to make the move.
Have your new planting hole already dug before digging out the plant that will be going into the hole.
In the past, it was thought that the new hole should be filled with new, highly fertile soil mixed with compost and a slow release fertilizer. There is a school of thought that says this practise can lead to a plant with roots that can become root bound if the surrounding soil is of low quality. A good compromise might be to create a planting hole with a mixture of about 50 per cent high-quality soil and compost and 50 per cent of the original soil that was removed from the hole. This combination gives the plant a good start but encourages the roots to eventually spread out in search of nutrients etc.
You can add some bone meal to help the roots get a good start.
And, of course, water your plants in well in their new home.
Celebrate No Mow May along with the butterflies, birds and bees
The No Mow movement is sweeping the world after getting its start in Britain. It is now being picked up by environmental groups, cities and towns and individual homeowners looking to do their part to help native flowers and fauna.
The No Mow May movement is picking up steam around the world. We can all play our part by just doing less.
Plantlife gives birth to No Mow May movement sweeping the world
Turns out we have permission not to mow our grass in May.
Not only do we have permission, some very important people, environmental agencies and lovable tree huggers are actually encouraging us not to cut the grass. Instead, just let it go and see what comes up. They promise we might even be pleasantly surprised.
Turf grass has long been considered a waste of time and money, but ever increasing information points to extensive turf grass being extremely detrimental to native fauna from insects and pollinators to mammals, amphibians and reptiles that are losing habitat at an alarming rate.
Need proof? Check out my earlier article about why we need a whole lot less grass in our lives.
We can thank some folks in Great Britain at Plantlife for this little grass-cutting reprieve. In their own words: “Plantlife is a British conservation charity working nationally and internationally to save threatened wild flowers, plants and fungi . We own nearly 4,500 acres of nature reserve across England, Scotland and Wales. We have 11,000 members and supporters and HRH The Prince of Wales is our Patron.”
Talk about working to save native plants, Plantlife can boast some pretty serious achievements.
For example, Plantlife, with its HQ in Salisbury and field staff spread across Britain including national offices in Wales and Scotland, was instrumental in the creation of the Global Strategy for Plant Conservation and is a member of Planta Europa, a pan-European netwok of more than 60 wild plant conservation organizations.
So Plantlife might have led the way, but now environmental groups, cities, towns you name it are jumping on board to declare May as No Mow Month to kick off spring and provide a healthy boost to native flowers and grasses, and the bees, butterflies, birds and other wildlife that thrive in more natural landscapes.
• If you are considering creating a meadow in your front or backyard, be sure to check out The Making of a Meadow post for a landscape designer’s take on making a meadow in her own front yard.
Letting areas of the yard go back to nature can result in native wildflowers springing up in places you would never expect.
Cities and towns take No Mow May to new levels
Here in Ontario, for example, a town outside Toronto, East Gwillimbury, is actually encouraging residents not to cut their grass to “ help support pollinators during this crucial spring period as they are seeking their first food sources of the season such as dandelions and other flowers typically found in lawns. This movement is important as research indicates a mass extinction of insects is underway. Of particular concern in recent years, is the decline of the bee population.”
Residents are asked to avoid mowing lawns until June with the goal of preventing disturbance of overwintering insects and amphibians that may be burrowed or hiding in leaves and lawns, and to increase food sources to pollinators.”
And, if that is not enough, they are turning it into a competition where residents sign up for the challenge, pay $5 and receive a lawn sign to “show neighbours” they are supporting No Mow May.
All the donations are going to the David Suzuki foundation Butterfly Way. The Butterfly Project has expanded to hundreds of communities throughout Canada with more than 1,000 volunteer Butterfly Rangers who, together with recruits planted pollinator patches in thousands of yards, gardens, schools and parks in 2021.
Greenpeace gives No Mow a boost
Even Greenpeace has jumped on board to promote the No Mow May Challenge. In an article on its website, Greenpeace points to why a flowering meadow is so much better than a well-mown lawn.
Greenpeace states: “By compiling several European and American studies in a meta-analysis, the Université du Québec à Trois-Rivières has revealed that lawns create manufactured ecosystems with low biodiversity, a condition that worsens as the intensity of mowing increases. Lawns that are mowed more frequently are linked to a decrease in the number of invertebrates and have less plant diversity, while the presence of pests and invasive species goes up. We have every reason to think twice about our obsession with perfectly manicured lawns.”
Bee City USA joins in the No Mow May fun
In the United States, similar projects are underway. Bee City USA, an initiative of the Xerces Society, has been promoting No Mow for a number of years and report that in 2020, residents of Appleton Wisconsin, a Bee City USA affiliate, convinced their City Council to suspend their weed ordinance for the month of May. More than 435 registered property owners participated in the campaign and the local university joined in to study the results.
The Bee City USA website points out that the findings were very impressive. “Not only were the abundance and richness of bees higher in the yards of properties participating in No Mow May, but they were way higher. Participating yards had three-times higher bee species richness and five-times higher bee abundance than nearby parks that had been mowed.”
Getting back to Plantlife, the originators of No Mow May. The website reports that last year (2021) the conversion to wilder lawns resulting from the No-Mow approach, saw records of bee orchids, snake’s-head fritillaries and eyebrights. To further dru home the results, it Plantlife reports that a “three-acre meadow can be home to 9 million flowers producing enough nectar to support a half million bees every day.”
if that’s not reason to take a break from mowing in May, I’m not sure what is.
And don’t forget, Letting the grass grow is a big step in creating the perfect environment for fireflies to breed.
Okay so you just can’t live without a well-manicured lawn for a month. Maybe you are having a garden party or some important event that means not cutting the grass is not an option.
What else can you do if No Mow is a No Go
You can help pollinators throughout the spring and summer by:
Planting a specialized pollinator garden in the backyard. Look for a variety of native flowering plants, such as Asters, Bee Balm, Milkweed and Coneflowers, or other natives depending where you garden. Try to achieve varying bloom times that begin blooming in spring and continue through until fall.
Maybe you can find a small section of your yard that can remain uncut all summer long. Even a small area in an out-of-the-way corner of the yard left uncut can make a difference to pollinators, insects and other wildlife looking for natural habitat.
Consider decrease the mowing frequency throughout the summer. Let your lawn grow a little longer than normal, cut it higher when you do cut it and keep the mowing to only once or twice per month.
Mow at the highest setting. This allows low lying flowers to continue to grow and decreases re-flower time for those that are mown.
Tips to create a mini meadow-inspired garden
Creating a mini meadow garden in a sunny area of your yard is an excellent way to attract a variety of pollinators from bees to butterflies and everything in between.
Can I have a meadow garden in a small space?
Just like you can create a woodland-inspired yard in today’s smaller urban backyards, so too can you find a sunny spot in your backyard to create a meadow-inspired garden that will bring you many of the same joys that a full-sized meadow offers.
That includes a natural, ever-changing planting with an abundance of colour and texture that is a magnet for birds, butterflies, bees and other pollinators.
In a small garden, you may not be able to have the meadow of your dreams, but with the right plants you can have one most gardeners only dream about. And creating it is relatively simple.
I have been working on creating a meadow-inspired garden across a small hill located at the back of our yard that gets strong afternoon sun despite being under the canopy of two old crabapple trees.
By transplanting native grasses such as Little Bluestem, Black-eyed Susans, Purple Coneflowers, native sunflowers and other meadow plants, I have been able to fill in a good portion of the hillside garden. I expect to see some positive results from my efforts this summer as the plants begin to grow in and take shape. More native plants and seeds will follow this season to help fill in any empty areas. I’m also counting on nature to do its thing as well to help me along the path to a lovely little meadow-inspired garden.
In their book, Garden Revolution, How our Landscapes can be a source of Environmental Change, Larry Weaner and Thomas Christopher, write: “Native meadow is likely the best answer to North America’s over reliance on lawn, a means of saving the enormous quantities of water, fertilizer, herbicides, pesticides, and fossil fuels annually invested in the cultivation of turf. Unlike shrublands and forests, meadows can be established from seed in a relatively short time to gravitate toward open space and expansive views, attributes not common in a forest or shrubland.”
The authors ask why, then, does grass continue to dominate our landscapes?
They point to the quality of seed that has been sold in the past to create these meadows and the desire by homeowners to have an instant meadow in a single season.
“Meadows can work, but only if the gardener selects plants and uses techniques that reflect the local habitats and ecological processes that will affect their survival and proliferation.This is why successful meadow will look quite different in different regions.”
Goldfinch works on a sunflower in a naturalized flower border.
For more on creating a naturalized meadow and wildlife habitat, be sure to check out my post Fields of Gold: Sunflowers and Goldfinches.
Their approach to creating a successful meadow is a fascinating look at working with nature using native plants and a more ecological approach. Although it is aimed at creating and maintaining large meadows with the least amount of work, their approach is certainly one that works in a mini meadow-inspired garden.
If you have visions for a larger meadow, Garden Revolution is a must read gardening guide to creating meadows and other inspirational gardens by working with native plants.
If you are interested in exploring this approach in greater detail, check out my more extensive post on Garden Revolution here.
• For more on creating a meadow garden, check out this comprehensive post on how Garden designer Angela den Hoede created one at her home.
• If you are looking for ideas on using low-growing ornamental grasses, be sure to check out my post on Five low-growing ornamental grasses.
The following, however, are some tips on creating your mini meadow-inspired garden.
A monarch takes a moment to work on the flower of the common thistle. Letting your meadow go a little “weedy” can attract some beautiful friends for a visit.
What’s the difference between a Meadow or Prairie garden?
Whether you choose a meadow-inspired garden or a prairie-inspired garden, the process is somewhat similar.
• If you want mostly colourful flowers, then a meadow-inspired garden is the direction you want to go. Use ever-blooming annuals to get your garden going. In fall dig them into the garden and replant for next year. Or plant your meadow with perennials that also flower generously (oxeye daisies, coreopsis and black-eyed Susans). Eventually a combination of the two will give you a good start on your continuous flowering meadow.
• If you are more a fan of grasses than you might want to lean to a more prairie look. Grasses rather than flowers hold centre stage in the prairie garden. In mid summer, however, the prairie leaps into bloom with wildflowers that complement the height and habit of grasses.
• A meadow planting is shorter than the prairie-inspired garden that features grasses like Big Bluestem, compass plant and others that can easily reach head height and beyond. If you still like the prairie look, there are plants that stay on the shorter side such as Prairie Dropseed, grama grass, foxtail barley, butterfly weed and blanket flower to name just a few.
• In a meadow garden, more attention will have to be paid to maintaining the existing flowers because these gardens tend to want to move toward grasses unless given proper guidance.
It won’t take long for pollinators like this native bumblebee to find your mini meadow.
Six steps to a Meadow Startup
Sally Roth, in her informative book Natural Landscaping: Gardening with Nature to Create a Backyard Paradise, provides the following steps to create a Meadow-inspired garden.
Strip or smother existing sod.
Till or turn the soil until it is smooth.
Water the area thoroughly with a fine to medium spray.
Wait for weed seeds to sprout. Slice off with the blade of a hoe, taking care not to disturbthe soil. Repeat as often as you have patience for.
Sow meadow garden seed.
Weed until meadow seedlings are well on their way.
For a fast Meadow mix from seed, Roth suggests the following plants be included
Baby blue eyes: (Nemophila menziesii) This delicate low-grower has charming blue flowers above a ferny foliage.
Bachelor’s-Buttons: (Centaurea cyanus) Branched and bushy plants with long-lasting blooms in blue, pink, rose, white and deep red-purple.
California poppy: (Eschscholia californica) Vivid orange flowers that form cups above lacy gray-green foliage. Pink and purple cultivars are also available.
Calliopsis: (Coreopsis tinctoria) A graceful, knee-high plant with abundant gold, russet, mahogany, or two-toned daisies and ferny foliage.
Corn cockle: (Agrostemma gitbago) Simple, silky flowers in vivid magenta-purple atop a branching midheight plant with grayish foliage.
Other plants to consider include: field poppy, Scarlet flax, Cosmos, Tickseed, sunflower.
If a more perennial style garden is more to your liking consider the following plants
Birdfoot violet, Black-eyed Susans, Bluets, Butter-and-eggs, Butterfly weed, Foxtail grasses, Goldenrods, Heath aster, Heliopsis, Little Bluestem, Moth mullein, New England Aster, Oxeye daisy, Panicled aster, Wild bergamot, Winged sumac and Yarrows.
If you are on the lookout for high quality, non-GMO seed for the Pacific North West consider West Coast Seeds. The company, based in Vancouver BC says that “part of our mission to help repair the world, we place a high priority on education and community outreach. Our intent is to encourage sustainable, organic growing practices through knowledge and support. We believe in the principles of eating locally produced food whenever possible, sharing gardening wisdom, and teaching people how to grow from seed.”
Tips to attract birds to your mini meadow
Remember to plant the flowers that set seeds that you know will attract birds later in the season. Both annual and perennial sunflowers (see story) are good for starters, as are cosmos and coneflowers.
Allow the “weeds” to take root. The seeds and or fruits of lamb’s quarters, pigweed, pokeweed and ragweed will attract a variety of birds.
Leave areas of the garden undisturbed as much as possible. These are excellent areas for birds to tuck their nests in to shrubby plants or even grasses.
Plant perennials that spread into large colonies to create cover for the birds.
Leave the leaves and don’t cut your meadow until spring or, if necessary, late winter so that birds can seek food and shelter in standing plants throughout the cold months.
Butterflies you may attract to your meadow-inspired garden
Depending on where you garden, you can expect to see many of the following butterflies in your mini meadow-inspired garden.
Buckeye
Cabbage White
Common blue
Common Sulphur
European skipper
Gray hairstreak
Indian skipper
Meadow fritillary
Monarch
Orange sulphur
Painted Lady
Pearly crescentspot
Red admiral
Red-spotted purple
viceroy
Zebra swallowtail
Much of the information from this article is from Sally Roth’s informative book Natural Landscaping. For more in depth information check out her gardening book.
The Hidden Kingdom of Fungi opens a secret world into our forests and homes
The Hidden World of Fungi is a book for those who want to dig deep into the fascinating world of fungi in the forests, in our homes, industry and even our bodies.
A detailed, scientific approach to the study of Fungi in our forests and our homes.
The Hidden Kingdom of Fungi takes readers into a secret world and traces the intricate connections between fungi and life on earth.
Along the way, author Keith Seifert, describes how these remarkable microbes enrich our lives: from releasing carbon in plants, to transmitting information between trees in the form of mycorrhizal fungi.
This book, from Canadian publishers Greystone, takes readers of Entangled Life and The Hidden Life of Trees into the world of Fungi in its more than 200 pages backed by scientific research and the incredible knowledge of author and fellow Canadian Keith Seifert, who has spent more than 40 years studying fungi on five continents. The Ottawa, Canada resident has researched microscopic fungi from farms, forests, food and the built environment, to reduce toxins and diseases affecting plants and animals.
In the book, The Hidden Life of Trees, the authors clearly connected the communication between our forest and backyard trees with the communication highway created by the mycorrhizal fungi buried beneath the soil.
In the Hidden Kingdom of Fungi, mycologist and author Keith Seifert takes the concept to a whole other level, describing in detail the process and the interdependency.
This book is for anyone who wants to explore deeply into the world of fungi, whether it’s the obvious forms that we see growing in the forests and in our gardens to the more hidden ones that live in our homes, bodies and farms.
Mushrooms and fungi in our forests
The importance of fungi in our forests and backyard woodlands can’t be underestimated.
In fact, the author points out that fungi are critical partners in the eventual success or failure of all forests. No matter how anemic the woodlot, in the autumn you will find mushrooms growing and throwing their spores into the wind. They are most obvious in fall, but no matter what time of year you are in a forest, you are surrounded by fungi that are hidden in plain sight.
As the author points out, fungi covers the outside of leaves and bark, hide inside leaf tissue or wind their hyphae around the roots of trees. They are always at work decomposing dead pockets of wood, in the soil breaking down plants.
Are fungi part of our lives?
From our forests, to industry and into our homes, fungi play a major role in our lives and our existence.
Readers will gain knowledge into where these fungi came from and how yeast, lichens, slimes and molds evolved and adapted over millions of years. Toward the end of the book, the author explores how fungi are being used to clean up oil spills and break down plastics.
The book even touches on the role fungi is playing a role in nuclear disasters such as the Chernobyl disaster in Ukraine.
The use of fungi to clean up or detoxify spills from mining disasters, accidents or simply heavily polluted areas is call mychoremediation, and it is being used by scientists around the world. Fungal mycelium absorption capabilities have been tested to be used to clean up after forest fires, nerve gas attacks and fuel spills in land and sea.
The author points to an oil spill in 2007 in San Francisco that used a combination of human hair and oyster mushrooms to mop up the spill.
Through research into fears that Ukrainians eating wild mushrooms in and around the Chernobyl fallout zone, researchers found that many mushrooms accumulated heavy metals (such as cesium 137) in their mycelium. The research showed that mushrooms could be cultivated to extract isotopes from the soil then harvested and incinerated for disposal.
It’s just one of many fascinating ways fungi could be used to change our world into the future.
Proven Winners 2022 Gardener’s Idea Book is another winner
Proven Winners has done it again with their free 2022 Garden Ideas booklet and download. The 42-page booklet is full of great garden tips and ideas to help you get the most out of your garden this year.
You can download your free copy directly from Proven Winners’ website
Proven Winners’ 2022 Gardener’s Idea Book takes a page or two from last year’s informative booklet and adds some interesting extras that are sure to pique your interest.
If you have not ordered your free printed copy, you can download the 42-page booklet just by logging in to the Proven Winners’ web site and going to the Gardener’s Idea Book download. There are a total of 14 excellent downloads on this web page, including this year’s Idea Book and last year’s outstanding Gardener’s Idea Book.
Other downloads include: A new Vision for Hydrangeas, PW perennials, Landscape Solutions for the South, and a new vision for Native shrubs. Some of the downloads are even available in French and Latin.
If you love the Proven Winner’s Idea Book, Check out my link to the 2023 Idea Book here.
Here is a link to the 2021 Proven Winners’ Gardener’s Idea Book.
Proven Winner’s 2022 Gardener’s Idea Book cover.
Like last year’s booklet that included a series of planted containers featuring outstanding combinations of Proven Winners’ plants, this year’s booklet follows up with 4 pages offering up tips on choosing container companion plants. Proven Winners provides valuable information on creating containers of plants that prefer similar growing conditions and plants with similar growth rates. Both features are important to get the most out of your containers. Not only do they provide a list of the plants along with images of what you can expect, Proven Winners’ experts also provide planting maps on how best to create the look.
If you are like me and depend on containers to add colour and interest to your garden, you will appreciate the ease of following these guidelines to create stunning containers for both sunny and shady areas.
The booklet also explores five tips for creating outstanding window boxes for shaded areas, and a separate feature about using window boxes around living areas such as decks and patios to create more cozy living areas.
It’s important to note that, although Proven Winners has outstanding plants and shrubs that can be real standouts in the garden, they are cultivated plants and therefore not native. As a result, these cultivated plants, while performing admirably when it comes to flowering or growth habits, are unlikely to provide wildlife with the same benefits as the species or native plants that the fauna has evolved with over centuries.
See my article on why we should use native plants in our gardens.
Proven Winners’ Gardener’s Idea book offers plans on installing a rain garden complete with planting suggestions.
Focus on Rain Gardens
Proven Winners explores one of the growing trends in natural gardens with a focus on building and planting a small rain garden. The rain garden plan provided in the booklet focuses on a shaded area along a driveway. How many of us have that exact problem, where water runs down between the houses in the long narrow strip separating the driveways?
Proven Winners’ booklet helps to provide a solution for the problem with this two-page feature that provides a simple construction plan along with a planting scheme and, of course, excellent photographs to illustrate the final look.
Tips on creating a DIY planter table
Other articles in the booklet include creating a planter table that centres around creating a living centre piece of flowers, herbs and vegetables. The large table with living plants running down the middle is an impressive creation and would provide a topic of lively discussion around the dinner table with friends.
A smaller, DIY planter table on a budget is a great project for either a smaller garden or a great option to introduce children to garden dining, as well as maintaining a small herb and vegetable garden.
There are other pages devoted to Proven Winners’ favourite social media gardeners including Laura LeBoutillier from @GardenAnswer and Jenny Simpson @gardeningwithcreekside.
Plenty of garden plans and illustrations
Several pages are devoted to creating new garden areas designed for specific results. All of the designs include complete planting guides as well as photos to illustrate the final result. Of course, they all feature Proven Winners product, but gardeners could easily swap out some of the Proven Winners suggestions for some of their own favourites native plants.
The individual gardens include a “summer sunglow” garden centered around a small shed or children’s playhouse that include plantings of coleus, verbena and Lemon Coral Sedum with grasses forming the backdrop.
A hummingbird garden design is provided in the Gardener’s Idea booklet.
A garden to attract hummingbirds
Other garden designs include a sun worshippers design, a garden for hummingbirds, a lush bold border and a border designed as a deer-friendly border for those of us who struggle with deer in our yards.
That’s already a lot of value packed in to the booklet, but it’s really only the beginning of the information provided to readers.
Tips to create your own Moonlit Garden
The four pages dedicated to a moonlight garden using primarily white and cream plants and night blooming flowers is full of great ideas. The impressive garden featured in the booklet is large, but downsizing the plan to include a smaller area of the garden, let’s say a corner or even just the area around your patio, is entirely possible and more likely a realistic goal for most homeowners.
Not only does a moonlight garden look great in the evening and is perfect for those who like to entertain, for wildlife gardeners the moonlight garden is ideal for attracting moths and bats to the garden.
To wrap it up, the booklet offers ideas and tips on using plants as a screen for unsightly views or privacy from your neighbours.
There are also pages focusing on gardening in arid spaces, and extending the life of your outdoor plants by bringing them indoors during the winter, and finally, an overview of Proven Winners’ newest introductions both perennials and shrubs.
In Conclusion: Proven Winners comes through again
Granted, the entire Idea Book is an advertisment for the company’s many plants and garden shrubs. Also, it should not be dismissed that none of their plants are natives, and the proliferation of cultivated garden plants is threatening the very existence of many of our native plants. Nevertheless, there still is a place in our gardens for these plants, especially the annuals that provide outstanding colour to our mostly-green woodland gardens. And, it’s not to say that just because these plants are non-native cultivars, they are of no value to wildlife such as pollinators, insects, etc. Many of these plants continue to attract hummingbirds and pollinators and quite possibly can be host plants for larvae. They just don’t usually do it as well as native plants.
So, by all means, use native plants whenever possible, but don’t be afraid to take advantage of the suggestions provided in the Proven Winners Idea Book and go with them.
I can almost guarantee that you will be impressed with the results.


