

Get a jump on Holiday shopping with these Black Friday deals
Great gift ideas for gardeners, birders and photographers
One of my favourite YouTubers when it comes to gardening is Oklahoma City’s Linda Vater. If you have not checked out her YouTube channel be sure to give it a watch.
She has just moved into “The Cottage on The Hill” earlier this year and in one year transformed both her front and back gardens, removing the grass and converting the front into a pollinator-style garden. Her smallish backyard has become primarily an outdoor entertaining area but there are lots of great gardening ideas in the back as well, expecially for those of us who like to garden in containers.
Linda has just released her Five-Year Garden Journal, which I know will be a garden keepsake for any any gardener who either purchases it for themselves or for a friend. It’s available on Amazon (see link below) or simply click here on the Five-Year Garden Journal to check out this lovely Journal that only gets better with each tattered page. Linda also has a book of her own out The Elegant and Edible Garden that readers might want to explore further.
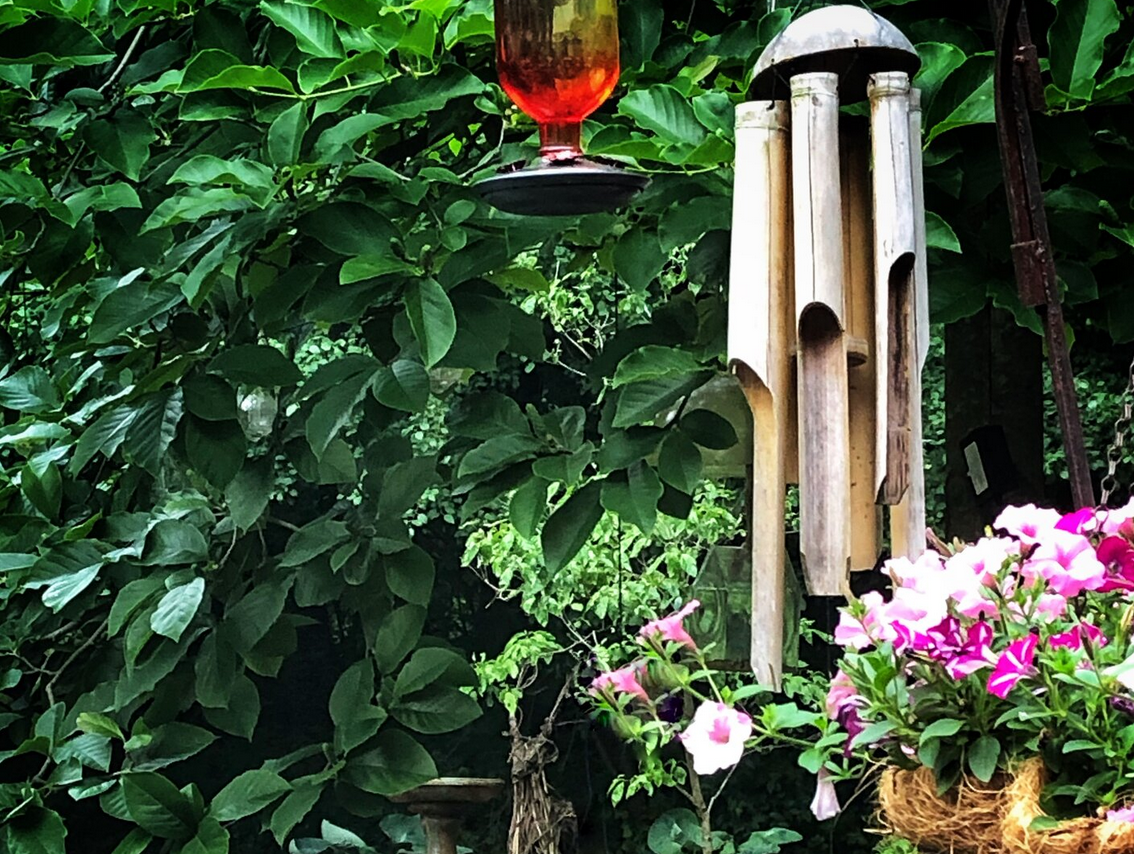
Finding tasteful ways to deal with your garden hose is not always easy. In the front garden, I use a black box meant to hold the hose and hide it away when it’s not in use. The hose box matches our window boxes and pretty much melts away into the landscape. Here is a link to the hose box, and window boxes amde by Mayne. I love their simplicity and how they offer a number of containers to suit any home decor.
Looking for a pair of boots for the fall and winter. There are some great sales on at Muck Boots for the weekend. Boots for women, men and kids are available in a variety of styles and for a variety of purposes. Check them out on the link below or just click on this link to take you to the U.S. site.
In the back I’m using a rusty hangar that I like but nowhere near as much as I like this hose hangar. Not only is it a solid piece, but its double ground stakes will help it stand straight in the garden. Even better, it’s on sale for Black Friday.(see the link below).
While we are on garden hoses, Linda Vater fans probably know how much she likes these new steel hoses that are all the rage these days. Tough as nails with promises to never kink tangle or puncture these stainless steel garden hoses are really making a name for themselves. If you are thinking about trying one of these out, now might be a great time. The 50 foot hose with a nozzle is also on a Black Friday sale. And they deliver to Canada for our Cdn. readers.
If you read my last post, you’ll know that I’ve spent the last two weeks recovering from a hip replacement. Great fun. If it taught me anything, it taught me to take it easy when it comes to gardening and to ensure you have the right tools to make the job easy. First on my list is this handy little garden helper. (see link below). This heavy duty gardening bench and kneeler is discounted almost 40 per cent and is another great Black Friday Sale you’ll want to grab as soon as possible. It’s a great gift for our own knees, or the knees of mom, dad, grandma or grandpa.
There are so many great garden items on special during the Black Friday deals that I could not begin to name them all. Plus it’s kind of fun to explore on your own. Click here to see hundreds of garden deals you might want to check out to get a head start on your Holiday shopping.
And if it is bird lovers that are on your holiday shopping list, here are some great deals for them as well.
And finally, for the budding backyard photographers there are lots of great Black Friday sales to cash in on this weekend. I for one love my camera lens coffee mug for my first cup in the morning. These are fun gifts for your photographer friends.
One of the great things about the advancement of solar energy and solar batteries is that we no longer need to run expensive wiring throughout the garden. Instead, we can just use a solar panel or two to run everything from pond pumps to landscape lighting. Do you have a she shed in the corner of the yard or maybe even a greenhouse that could use some heat and lighting?
Shopsolarkits is a U.S.-based company is changing all that. The company offers a range of solar packages that will do everything from lighting up your off grid home to lighting a backyard flat, or bunky.
I hope everyone has a great Thanksgiving weekend.
Garden Assistants: Don’t be afraid to hire some help
Creating a backyard escape has never been more important than it is today. Hiring unemployed students or part-time gardeners could be incredibly rewarding both for homeowners as well as students and small business people who learn new skills and appreciation for the importance of gardens.
Hiring garden helpers: best decision I could make
Sometimes a gift comes knocking and other times we have to go looking for it. When it comes to garden help, I’ve had it both ways. And, both times, hiring individuals to help with the garden has been one of the best decisions I’ve made.
I’m NOT talking about a landscape company to come and cut the grass, blow leaves, prune trees to within and inch of their lives and generally cause a bigger commotion than is necessary.

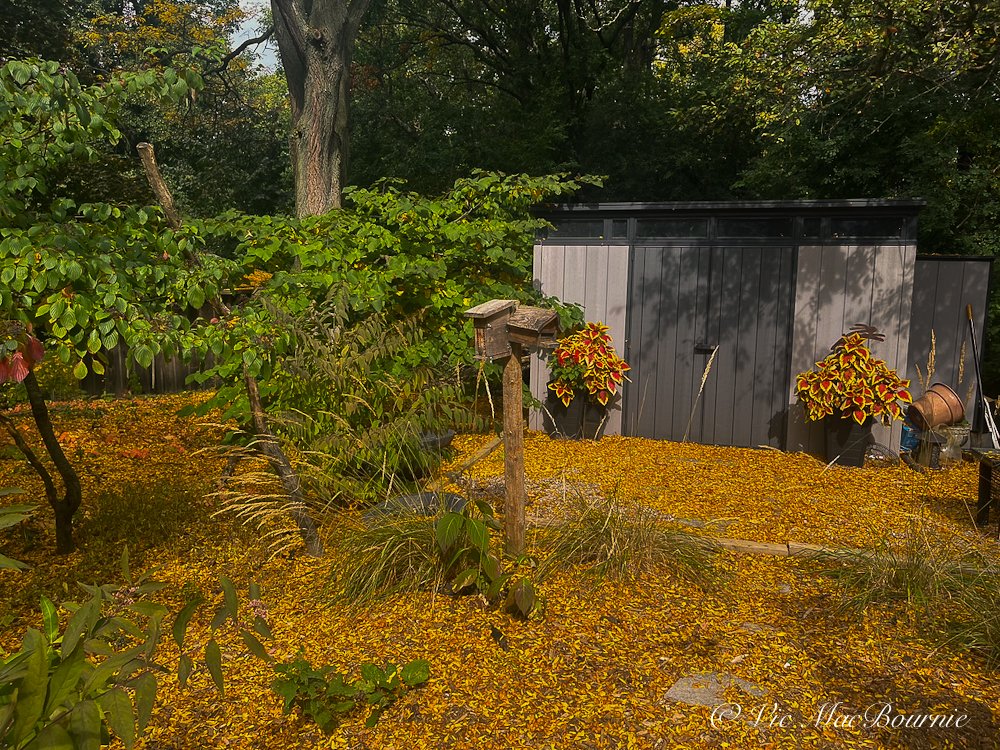
Our dogwood in full fall colours stands out in the woodland garden and adds a little pop to the landscape.
I am talking about two types of garden help: First a young man with little garden knowledge but a strong back and a good work ethic; and two, a young very knowledgeable woman who makes gardening her full time work.
Consider hiring a student to help fulfill your vision
My first foray into hiring help for the garden came just as Covid began to kick in. As stores and restaurants closed, jobs became quite scarce for young people. Finding work was difficult to say the least.
It was about that time that I got a text message from a young man – home from university – and looking for work. I had hired him the year prior for some garden work so I knew the type of young man and worker he was.
And, so the gift that came as a message on my phone: “Hi Vic… If there is any outdoor work that you would like to get done this summer I would be very happy to come and help out. If you are not comfortable with it, I completely understand, though I could come with my own gloves, water etc and stay outside to ensure proper distancing. Let me know what you think, no rush.”
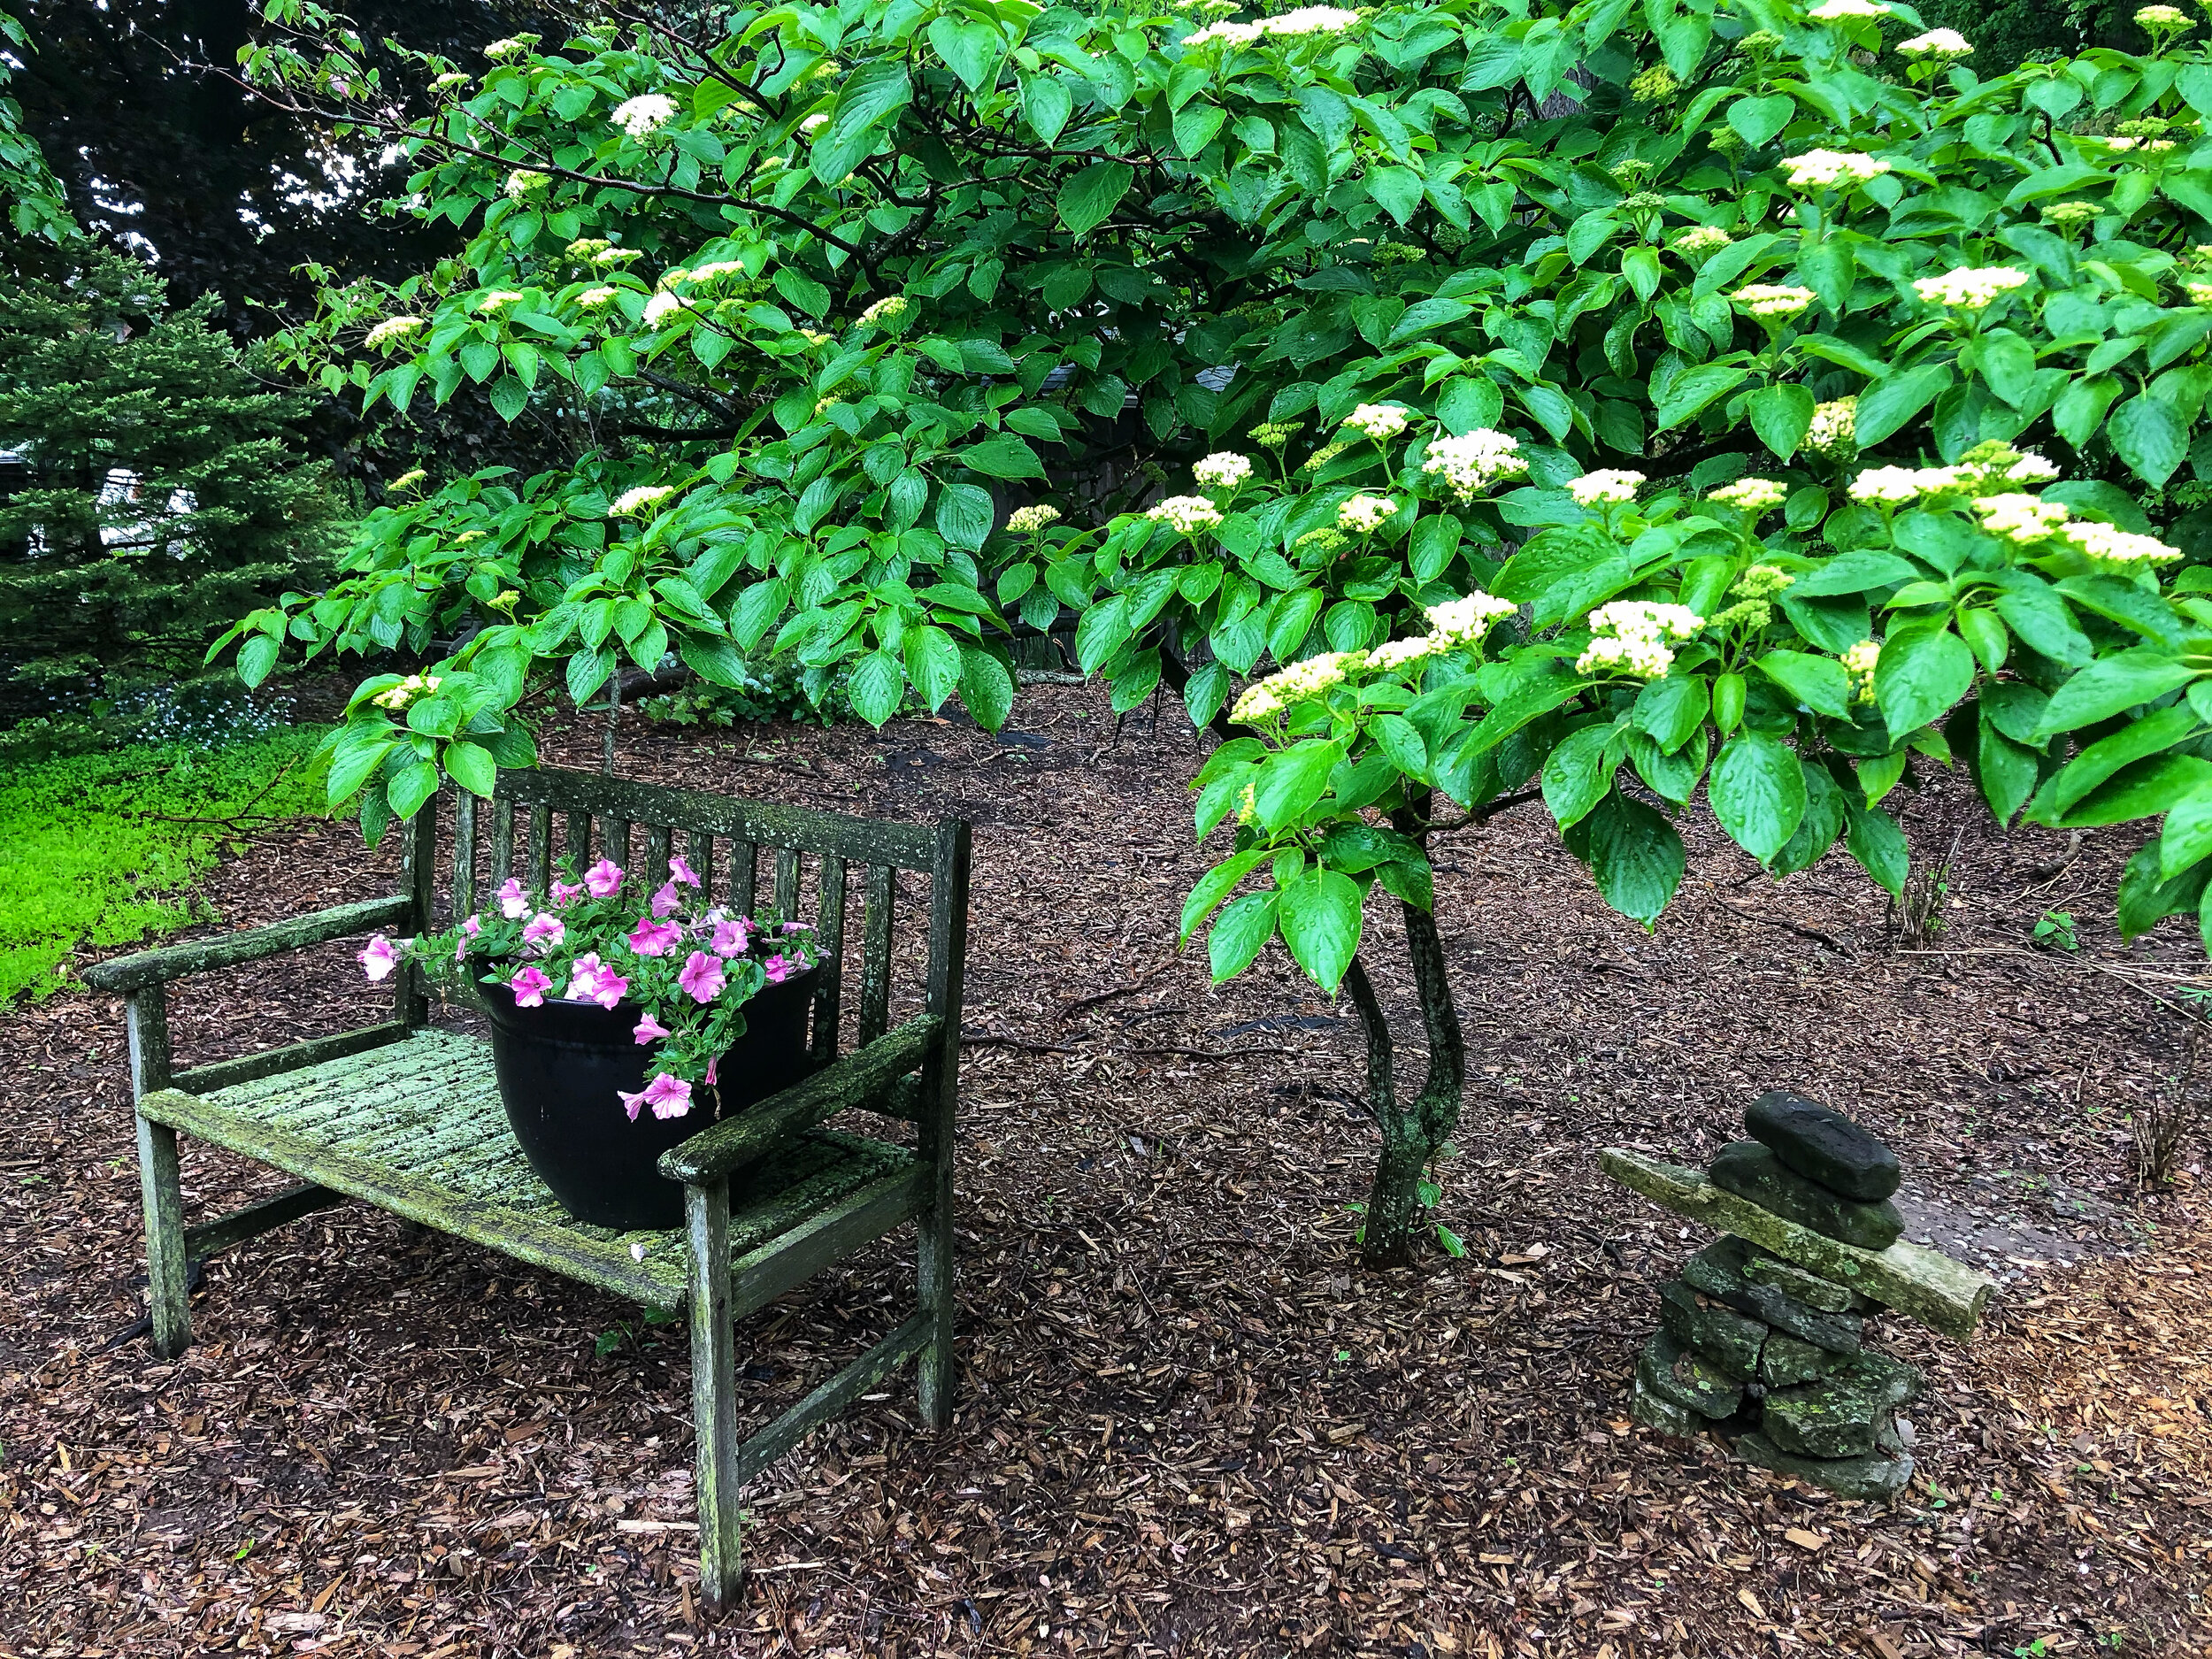
Keeping everything tidy in the Japanese-inspired garden is just one of the benefits of having a little help around the garden.
It was a gift from heaven. I had ideas and together with his young, brute strength we managed to transform the back garden that year.
His timing could not have been better.
Like most of us, our backyard garden became our refuge during the most difficult days of the pandemic. It’s always been a place my wife and I retreat to when we need some peace from the world, but it has never been more important than it was then.
(For more on gardening on a budget check out my in-depth here.
Our garden was looking a little shabby. The projects were piling up in my mind as fast as my right hip was disintegrating and making the simplest of these projects an extremely painful exercise.
And along comes the answer to our problems in the form of a young man looking for summer work to help pay for his university.

This image shows some of the work our student finished be removing most of the grass and covering the ground with mulch and stepping stones.
Sometimes you just need a little muscle
I am sure we are not alone. Those of us lucky enough to have homes and gardens to retreat to, who are still employed or living comfortably in retirement, owe it to our youth to help them get through difficult times.
I had a garden vision, I just needed someone to make it happen and hiring a student in this case was much less expensive than hiring a landscaping firm.
Just two weeks later and our backyard was transformed by this young man.
Bringing the garden vision to life
Nine yards of natural cedar mulch plus an additional 15-20 bags have replaced huge swaths of grass and over-run gardens that are now perfectly edged.
Trees have a new home, hostas and grasses split into multiple plants and moved to new locations around the garden.
A massive woodpile was created to provide a home for chipmunks, birds, snakes, salamanders and a host of insects.
Patio stones lifted and straightened after years of slowly sinking into the ground and making the patio look shabbier than it was. Stone edges were added to the patio. Old composters and BBQs disposed of and, in some cases, replaced after laying new patio stones.
Stepping stones placed strategically around the garden to help bring it all together.
When the work was completed, I could tell he was almost as pleased with the results as I was. There was a lot for him to be proud of here.

By working with a garden helper, those little things are easier to take car of and the garden can look its best for a longer period over the summer and fall.
Together, an old retired guy with a bad hip and a young man with a quiet disposition and a fierce work habit, got together to create something extremely important – a garden.
My vision, his muscle all came together in just a few weeks of work.
And I barely lifted a finger.
Truly a gift my wife and I will enjoy for years to come, and, who knows, maybe our Woodland garden inspired a young man to take a real interest in the environment, gardening and one day creating his own Woodland retreat some time in the future.
A young woman with expertise and a vision
Fast forward to this year and that hip I mentioned earlier was only getting worse. Garden work was not an option. Heck, walking from one end of the garden to the other proved too difficult some days.
That’s when My Garden Helper, Michelle, came into the picture. Michelle operates her own gardening business aimed at helping seniors stay in their homes longer by taking care of all the garden work that gets more and more difficult as age and old bones take over.
This was the year I needed someone like Michelle more than ever. After years of having to do all the work ourselves, my wife and I were able to find someone to make life just a little easier.
From her first visit, I knew we were going to make a great team. It wasn’t just her eagerness, but when we toured the garden and I explained my non-traditional approach to gardening, I could tell she got me and my vision of a garden for wildlife rather than a pretty picture of plants lined up in a row.
Not only did I see that she got my vision, but I knew quickly that I could benefit from her garden vision and experience.
From the back half of summer, through to fall, Michelle would drop by for about four hours every second week to help out. She split and moved plants, cleaned up a couple of wilder areas, planted bags and bags of bulbs that I can’t wait to see emerge this spring and helped with a little fall cleanup.
She’ll be back in spring to begin on some of our new projects and together we’ll create a garden to dream of.
If you have been putting off hiring some help, now is the perfect time to line up your Garden Helper for next season.
Gardening on a budget links
Ten money-saving tips for the weekend gardener
DIY Bark Butter feeder for Woodpeckers
DIY reflection pond for photography
Click & Grow is ideal for Native Plants from seed

Mulch: Organic vs Non-organic
The decision to use an organic vs a non-organic mulch is not always obvious. Here are some tips on when and how I use mulch in our woodland gardens .
How and when to use various types of mulch in the garden
Our garden gets by with four types of mulch. But only one is organic.
The organic mulch – mostly shredded cedar bark – is my primary go-to mulch that I have used in the garden since day 1. I can’t begin to even think how many truck loads of cedar mulch we have had dumped at the top of the driveway over the past twenty-plus years. Much of it is long gone, absorbed into the earth helping to make for a richer, more woodsy soil.
Other mulch selections in the garden include pea gravel, river rock, boulders and a red aggregate that I use as a driveway rather than asphalt or concrete. The aggregate is not only pleasing to look at, but more importantly, it allows water from rains or snow cover to seep into the ground and feed the roots of our trees rather than running down the driveway, onto the street and into the already overburdened sewer systems.
The garden’s design will often dictate when and what type of mulch to use.
A woodland garden benefits from shredded bark that looks natural and decomposes over time enriching the earth.
But there is room for other types of organic mulch, including pine needles (a favourite in the United States), cacao hulls and, of course, compost. Cacao is a great mulch to use in small quantities near a front door or a patio so you can take in the rich chocolate smell the mulch gives off.
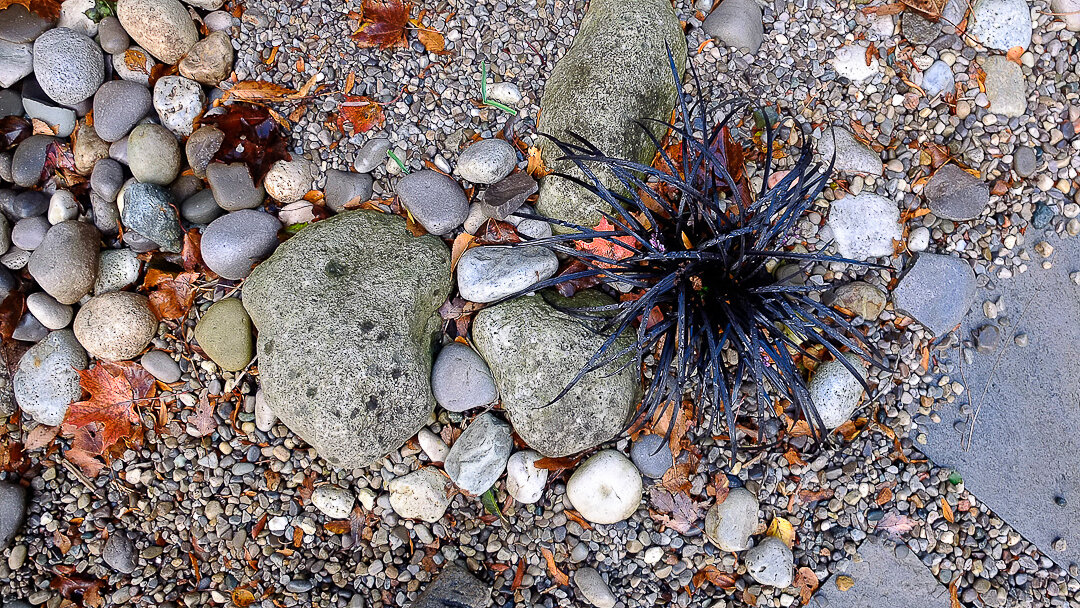
Looking down on an island of black mondo grass planted in a dry river path to break up stone and give it a more natural look. (also see below)
5 uses for organic mulch
1) Use as a substitute for a living ground cover (either for a short- or long-term solution)
2) Around individual plants to keep weeds out, moderate the temperature and water content of the soil
3) As a first step to cover large areas that will eventually become part of the natural garden
4) Together with black landscape fabric to eliminate weeds or grass to begin or revitalize an area in the garden
5) To create a natural pathway through your woodland landscape
5 uses for non-organic mulch
1) Use pea gravel and stepping stones for an inexpensive, yet pleasing pathway that is more formal than a shredded bark path
2) To create dry-creek beds as garden focal points or to deal with drainage problems
3) In service areas around the home where you have no intention of adding bedding plants (ex: around utility boxes)
4) Consider converting an old asphalt driveway back to stone to eliminate water runoff and create a more textured, natural appearance.
5) Around your home’s foundation to encourage better drainage
Our garden’s organic mulch has not all been cedar. When one of the neighbours cut down a massive spruce tree on their front lawn several years ago, I asked the tree company workers if they would drop the entire tree on our driveway when they had finished shredding it. They were happy to oblige, but warned me that it would create a very acidic soil when it broke down.
It sat at the top of the driveway for a few weeks that fall and literally burned itself up as it began to decompose. I remember finally going out to move it onto the garden on a cool morning and it was so hot that every shovel full created enough steam that it appeared to be on fire.
I think I put about six inches of mulch down the side of the driveway that year.
I could not argue with the price, but it was ugly stuff with bits of spruce needles mixed in with the still-sappy branches. The next spring I covered the whole thing with a thin layer of cedar mulch and proceeded to allow it all to break down. Today, you would be hard pressed to find much evidence of the spruce tree and the final result is not acidic soil.
Just recently we moved two dump trucks full of cedar mulch into the backyard as part of a major landscaping project to eliminate as much grass as possible and create new gardens.
It involved putting down a layer of landscaping fabric to cut off any light to the existing grass, followed by at least three inches of cedar mulch.
I am definitely not a fan of black landscape fabric, but I always use it, (or old newspapers) as a first step in a new landscape project.
A combination of all our mulches come together in this images. Large boulders combine with pea gravel, river rock, crushed red brick (driveway) and even a little cedar bark mulch to create this ground cover.
The landscape fabric is great for keeping weeds out and, more importantly, killing existing grass. Its major problem, however, is that it also blocks living organisms from moving through the different layers of soil. If you are trying to build a healthy, woodsy soil, black landscape fabric certainly does more harm than good, over the long term.
My plan is always to remove it over time as the weeds and grass die off. I would expect that it is ready to be removed one to three years after it was installed.
In the meantime, I usually begin cutting large planting holes in the fabric a year after installing it. By then most of the grass is dead and it’s safe to begin gardening as long as you are careful to cover the bare soil with a thick layer of mulch after planting.
This process not only eliminates the huge task of removing the turf, it also takes advantage of the decomposing turf and leaves behind a nice layer of top soil to begin gardening. Patience is the key obviously.
If a low-maintenance garden is your priority, by all means leave the fabric and continue to garden through it. While it lasts a long time, it will eventually break down in the soil and lose its effectiveness as a weed barrier.
When it comes to using non-organic forms of mulch, the black landscape fabric always remains in place.
These are usually areas that I have no intention of ever converting to a traditional garden, so the fabric’s main purpose is to ensure nothing grows up through it.
In fact, it’s not unusual for me to double it up just to ensure unwanted guests can never make an appearance. They usually do, eventually, but it can take years before the weeds begin to break through the fabric.
Non-organic mulch
Non-organic mulch, mostly pea gravel and river rock, play a major role in our gardens.
They are used extensively in both the front and back gardens bringing a cohesiveness to the entire space while serving as a natural bridge from the garden to the hardscaping areas located closer to the house.
Great effort is made to make them look as natural as possible. Too often, homeowners and some landscapers try to get “cute” with river rock. In a woodland or natural garden, surrounding a tree or a garden with river rocks positioned in a perfect circle just doesn’t work. It looks unnatural and would never occur in nature, so try to come up with a more natural approach.

Little Bluestem, Milkweed and Black Eyed Susans give a natural look to this dry river bed that takes advantage of small boulders, river rock and pea gravel for a more natural look.
A natural-looking dry river bed, for example, benefits from more than one size of river rock to help it take on a more natural appearance. Ideally, very large river rocks need to be set in place at strategic locations throughout the river bed to anchor the design. Then, a layer of medium-size river rock added as the base, followed by smaller river rock pushed out toward the edges and finally pea gravel in what would be the stream’s washout area.
Now you don’t have to go to such extremes every time you use pea gravel or river rocks in the landscape, but it helps to keep it as natural looking as possible.
Our dry-river-bed journey began by filling in a large gully in the front of the house after cars kept falling in while turning at the end of our cul-de-sac. By turning the drainage ditch into a dry river bed using mostly river rock along with some pea gravel to fill in the edges, the water that naturally flowed through the area in the spring and during heavy rainfall, is allowed to continue along its course under and through the river rocks. The dry river bed solved three problems: it eliminated an eyesore; cleaned up any standing water that hung around in the spring; and still allowed the water to flow through the drainage gully.

This Japanese-inspired garden uses massive boulders, river rock and pea gravel as a mulch.
Since then, we have used river rock and pea gravel, as well as some large boulders, to crate a Japanese-inspired garden in a part of the front yard. The river rock and pea gravel continue down the side of our home and pick up again in the backyard where they are used extensively as both a dry river and pea gravel pathway leading to the patio.
Inorganic mulches like stone can be effective in the landscape if used with care. Try to soften the harsh look of stone by allowing plants to spill over the edges. At times, I will even plant right into the pea gravel to create an island of green in the sea of stone. Along the back path, I have a planting of black mondo grass growing in a small island of larger river rock that never fails to make me smile when I see it.
Elsewhere, grasses grow out from a dry river bed suggesting a small island in the creek bed.
Woodland nurseries you need to know about
Not all Nurseries are created equal. Most provide plants your average gardener is looking to plant. But Woodland gardeners and native-plant gardeners are not your average gardeners. Here are four specialty nurseries you will want to check out online if you are looking for special plants or just reliable information on growing plants you already own.
Nurseries specializing in Woodland plants
It’s not always easy to find Woodland plants in your local nurseries. Even if they do carry one or two native woodland plants, there’s no guarantee the plants were not harvested from the wild or that they will do well in your area.
In the past few years since writing the original article, more and more nurseries are carrying more native and woodland plants. In fact, most nurseries are recognizing the move toward more natural and native plants, whether they would be considered “woodland” plants or more sunny meadow-style plants.
Buying from reputable local nurseries is always the best choice, but when they don’t carry what you are looking for or lack the expertise to help you in your Woodland endeavours, there is no shame tracking down nurseries that specialize in hard-to-find native plants.
Here are four that know their stuff (two American-based and two Canadian). All are working hard to offer the best native plants possible. Please recognize that transporting plants across borders is often very difficult or impossible.
Fernwood Nursery & Gardens (U.S.)
Rick and Denise Sawyer have been running “Maine’s Shadiest Nursery” since 2012 in Montville, Maine. Their nursery specializes in native and Woodland plants hardy to their area.
They are proud to say they have one of the largest collections of shade tolerant plant collections in New England, many of which are propagated at the nursery. Display beds at the nursery help demonstrate how the plants can best be grown and grouped together aesthetically.
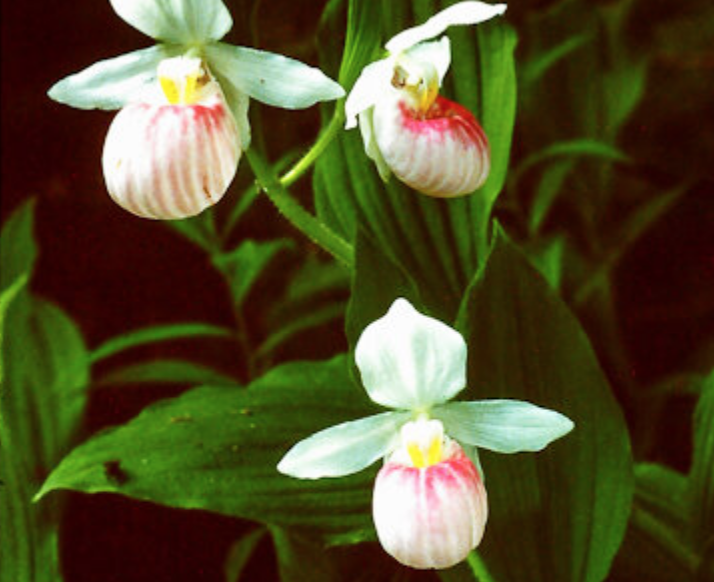
Wild native showy lady slippers can be difficult to grow. They can be almost impossible to find at regular nurseries, but they are available through responsible specialty growers.
They do not appear to do mail-order, which is unfortunate for those living outside their area. Their down-to-earth blog, documenting life at the nursery is a good read with lots of interesting tidbits for the Woodland gardener. You can find their website at fernwoodnursery.com
Big-time hosta lovers, their website lists close to 20 with good descriptions of each. What really caught my eye, however, was the Cypripedium retinae or Showy lady slipper which they feature in a beautiful photograph showing a massive grouping on their website planted with Maidenhair fern. A glorious combination.
Other featured plants include:
Trillium grandiflorum flora plena – this double flowering great white trillium prefers a sweeter soil and more sun than most trilliums. Being sterile, the flowers bloom longer than the single and then turn from white to pink.
Sanguinaria canadense multiplex – a double flowering form of our native bloodroot that blooms a little later and much longer than the single. Grows to 6″ and tolerates drier shade.
Anemonopsis macrophylla – a wonderful Japanese woodlander with nodding lilac and white flowers on 3′ stems in late summer.
Anemonella thalictroides – ‘Snowflake’ A 6″ double flowering selection of our native. Two months of bloom beginning April/May.
Convallaria ‘Cream da Mint’ – larger leaves have gold edges on green centers with a glaucus coating, especially in the spring.
Convallaria ‘Fernwood’s Golden Slippers’ – leaves are all gold with white flowers and red fruit. Not as aggressive as most Lily-of-the-Valley.
Great Lakes Orchids (U.S. Mail order)
Is a family owned tissue culture laboratory and licensed nursery specializing in hardy terrestrial orchids. You read that right. Their orchids are grown in a laboratory using tissue culture techniques. No worries here about wild-dug orchids.
Check them out at greatlakeorchids.com
In fact, this nursery is devoted to the One Test Tube at a Time Initiative, established to share their “services, laboratory, seedlings, plants, and expertise to help save endangered orchid populations.”
There are diminishing plant populations growing in various habitats and areas. For a number of reasons these plant populations are unable to re-establish themselves or fall outside of funding sources that would allow them to remain protected or undisturbed. We would like to see the return to thriving orchid populations for the benefit and enjoyment of all.”
They offer via-mailorder a large variety of orchids both native and non-native selections, including Lady Slipper Orchids, Chinese orchids and European fringed orchids.
Their website says they are branching out with select hardy perennials and bog plants.
Besides their great work, here is the real reason I have included Great Lakes Orchids in this list: The sites Growing Tips for raising Cypripediums is first rate. If you already have native Lady Slippers in your woodland or hope to acquire them at some point soon, you have to bookmark this site and study these growing tips.
If you live in the United States, consider supporting this group by purchasing some of their plants.
Ontario Native Plants (Cda mail order)
And now a plug for newcomer and local mail-order nursery, Ontario Native Plants. A gardening friend and I decided to place an order with this Hamilton-Ontario area online provider of native trees, shrubs, grasses and wildflowers and were pleasantly surprised by not only the product we received but their professional approach. Packaging was first rate. The website says they deliver anywhere across the province of Ontario.
If their website onplants.ca is any indication of how their business will grow in the future, we can expect big things from this nursery. Their 2020 catalogue lists about 100 products. In addition, they have a newsletter notifying regular customers of promotions and native gardening tips.
Since the initial writing of this post, Ontario Native Plants have certainly grown and now offer a huge variety of top-notch native plants to Ontario Gardeners. Their 2023 catalogue can be seen here. Get your orders in early spring for best delivery dates.
For my full story on this outstanding provider of native plants, be sure to check out my posts here.
Included in the list of individual plants are groups of plants packaged together that offer, for example, high-colour impact, fall beauty, as well as shady and sunny rain garden packs. There is a fern package, a pollinator pack and a Prairie pack. As an example, the Sun Lovers pack in the 2020 catalogue includes 12 plants made up of 2 plants from 6 species.
The website is extremely informative breaking down the native plants into light requirements, moisture requirements and soil type. Well done.
This post is not sponsored by any of the above nurseries. As an affiliate marketer with Amazon or other marketing companies, I earn money from qualifying purchases.
The first step to building our Woodland Garden
Building your dream garden may start with planting a tree or your favourite shrub. For us it began by escaping our new-home subdivision and taking the leap to an older fixer-upper that provided us with the property we needed to start our dream Woodland garden.
Our woodland garden began with a pool in our neighbour’s backyard. We didn’t know it then, but life in a brand new home in the middle of the suburbs where late-night pool parties, loud teenagers and the never-ending drone of gas powered mowers was the norm, was enough to push my wife and I to extremes.
These weren’t our dreams – the pools, the parties the close proximity to neighbours.
So, it was time to sell and move into a home that, in the end was totally opposite to the one we were living in at the time.
A for-sale sign went up and before long we were in ‘our’ dream home. Well not exactly a dream home, more like a dream property. We only had one child, so my wife and I decided to go against the grain and buy a small house on a big property rather than a big house on a small property.
It was the best decision we ever made for our sanity.
In the end, we compromised a little and bought a small home (at least by 1980s standards) on a decent-size lot pushing a half acre. To say the home was a fixer-upper would be a bit of an understatement.
What does this all have to do with building a woodland garden, you ask?
The Woodland garden starts in the front and carries through to the back. We’ve included a Japanese-inspired garden (at left) in the front garden.
Focus on the garden for long-term happiness
Our dream was never really to own a huge multi-level home. We realized we wanted to create a peaceful, natural area around us where we could enjoy nature rather than jumping in the car every weekend to go to cottage country to escape the neighbourhood noise.
The final selling factor, at least for me, was a photo album left on the table of the house left opened to a photo of a group of deer in the backyard of the very home we were touring. For many gardeners, this would be a deal breaker. For me it only made me want it more.
SOLD.

A fox stops by to take a drink from one of our water bowls.
Building the woodland garden
Then the slow process of building the garden began in fits and starts. Not unlike the home, the garden, what little of it there was, needed a lot of work.
We brought in soil and mulch, planted trees and native wildflowers. Expanded the gardens and eliminated grass. Then eliminated more grass. Check out my post on the benefits of eliminating grass.
We brought in boulders, lugged hundreds of wheelbarrows of stone, pea gravel, mulch and soil into the backyard. Check out my post on the importance of using stone in the garden
My wife and I made paths, created dry-river beds in the front and the back and it continues to this day.
Check out my post on some of the DIY projects my wife and I tackled over the years.
Finally, more than 20 years later, the combination of time and a lot of hard work is turning our patch of rural suburbia into a woodland garden rather than a patch of grass surrounded by neighbouring patches of grass surrounded by forest.
Now, most mornings my dog, Holly, and I step outside on the patio and enjoy some peaceful time together before the neighbourhood wakes up.
Be sure to check out some of my other posts on putting together a woodland garden or natural garden. Ken Druse’s book The Natural Garden is a great place to start. His newer book The New Shade Garden is an excellent source of information. Or take a minutes to check out this post on the 5 best books for woodland gardening.
The birds are at home here. On any given morning, a young fox wanders through looking for breakfast and maybe a deer or two comes through and offers me a chance to photograph them before they are off for their daily adventure. I’ve watched skunks wander through the yard, rabbits, more chipmunks and red squirrels than I can count and even a lone coyote. Snakes have returned to the property after not seeing a single one for many years here. Toads, fireflies and a host of native bees and butterflies call our property home.
It’s taken a while to get here, and we know we will never be done. But we took that first step that needed to be taken.
Your first step might not be to sell your home, it might be to go out and plant your first tree, shrub or native wildflower.
So what are you waiting for? Take that first step. You never know where it will lead you.
Mulch Mania: Building a foundation for a low-maintenance garden
Building a solid foundation starts with your garden’s soil and there’s no better way to build a high-quality soil than to use mulch. Cedar mulch forms the foundation of our low-maintenance woodland garden. It’s benefits are too numerous to list but here’s a start.
A temporary alternative to natural ground cover
Good or bad, we all remember the gardens of our childhood.
I remember dry, barren earth that literally turned to sand when you held it in your hands. It was the 1960s and the only plants that grew in the front gardens were traditional purple iris.
Not that my parents didn’t try. They turned over the soil religiously revealing the darker damp soil for a few hours until the sun baked it again.
It’s hard to imagine a worse recipe for building high-quality, healthy soil. But they toiled on, sometimes adding peat moss or top soil. The ending was always the same. Dry, bleached and baked sandy soil.
The missing ingredient was, of course, mulch. I am sure it was available at that time, but it certainly wasn’t piled up in bags at every building supply, grocery and nursery store.
A natural mulch of fallen leaves is not only beautiful, but acts like a cover for plants, insect and small animals throughout the winter months.
Today, cedar mulch is so common in our area, it’s hard to believe there are any cedar trees still standing.
Organic mulch is commonly made from bark or wood chippings, but it can also be made of grass clippings or pine needles (a popular choice in parts of the United States,) to name just a few.
Non-organic mulch is another option and another blog post but includes stone such as pea gravel, aggregates and man-made substances.
Cedar mulch is a forest byproduct made from the shredded wood of cedar trees. Compared to pine mulch, the inherent nature of cedar makes it a longer-lasting mulch in the garden.
The benefits of mulch far outweigh any argument for not using it. Not only is cedar mulch attractive, whether you choose natural-, black-, brown- or red-coloured, it has a pleasant smell for the first few weeks it is put down, helps unify the garden and better shows off the plant foliage.
Despite its obvious benefits, it’s still not unusual to see uncovered, baked earth on my daily walks, usually accompanied by the homeowners on their hands and knees pulling weeds or, God forbid, turning the soil over so they can enjoy a few hours of dark soil before the sun comes out to bake it beige again.
Mulch is the perfect backdrop for the foliage of this Pagoda dogwood, while it protects and insulates the soil below. Over time it breaks down and adds a woodsy organic material to the soil.
In many ways, mulch actually takes the place of a living ground cover.
And, although bark mulch is a great beginning to amending your soil an creating a more woodsy soild, it’s best not to consider it the finished product.
In a woodland garden, a native and natural ground cover such as wild geraniums, bunchberry or ferns are a more desirable alternative than organic mulch, but there are plenty of situations where a ground cover is not feasible at the time.
That’s where an organic mulch truly shines.
Without going into all the benefits of heavily mulching your gardens, let’s examine just a few of the reasons mulch should be high on your list when you are building your Woodland garden.
Water retention: By shading the soil with a thick layer of mulch (ideally 3 inches or more), evaporation, both from the sun and wind, is minimized.
It also helps to regulate the temperature of the soil further reducing water evaporation and giving the plants a layer of insulation that helps keep the plants’ roots cool in the summer and warm in winter.
Wood mulch is used here to cover the ground around woodland plants including bee balm and ferns.
It is important to note, however, that mulch can also act as a barrier that makes getting sufficient water to your plants’ roots more difficult. It is much more water-efficient to target the plants individually either through a drip system or by hand watering them individually.
Deep watering a plant by leaving the hose dripping at its roots for several hours will allow the water to dive deep into the ground rather than getting locked into the mulch layer or just licking the top inch of the soil.
If your garden is properly mulched, you need to water less often but when you do water, ensure you are deep watering and targeting the plants’ roots.
One of the often overlooked benefits of mulch is that it helps prevent water runoff by trapping the moisture and moving it slowly to the soil below.
During a major storm, for example, water that might traditionally just run off in one direction, flooding one area and leaving another area more or less dry, will be better constrained to the general area it fell on. The result, a more evenly irrigated garden that will retain the moisture much longer than barren earth – possibly days or even weeks.
Weed Inhibition: Everyone is striving for a low-maintenance garden. Mulch is the key ingredient to achieving that end. But, let’s not kid ourselves it can’t perform miracles, especially if it is spread too thinly over the soil.
We’ve all seen it. A layer of mulch so thin that you can see the soil through it. Using large pieces of bark rather than the shredded bark, is often the biggest culprit here.
Unlike the shredded mulch, or pine needles, the bark pieces are too large to properly cover the soil and the resulting gaps make it too easy for seeds to find their way to the soil. (If you really love the look of the larger bark pieces, consider using the shredded mulch as your primary covering and top dress with the larger pieces.)
if the ground is not covered properly, once the weed seeds germinate, pulling them out brings more soil to the surface and before you know it, your garden is covered in weeds.

Here is a good example of natural wood mulch being used to cover the ground while our native virginia creeper gets a chance to establish itself as a living ground cover or mulch.
The key is to block light from reaching the soil to keep the seeds from germinating.
Some seeds will germinate right in the mulch but without proper soil they are either not long-lived or easily removed because it is near impossible for them to get properly rooted in the bark medium.
Also, if you water your individual plants rather than a general watering of the entire garden, the weeds’ roots often eventually are starved of water and die off. This is especially true following a wet spring. Weeds from the previous year will sprout in the damp mulch left by snow cover, but as the mulch dries out, the seedling roots will often die off.
A common complaint against the use of cedar mulch in the garden is that it can deplete the amount of nitrogen in the soil. While this can be true, it is not something most homeowners should be worried about.
What is more worrying is the practise of piling mulch around trees and plants in a volcanic mound that is almost guaranteed to kill the plant over time.
I often see it done by unknowing city workers who like to pile mulch up the tree’s trunk as high as possible thinking they are conserving water. Do not fall into this trap. Roots of trees and plants do not benefit from mulch touching them in any way.
Keep the mulch away from the plants and, instead, create a bowl of mulch around the tree trunks or plants where the sides can hold the water or at least slow its runoff from around the plant or tree. The bowl should be larger according to the size of the tree or plant and can actually extend out to the drip line of a young tree or plant.
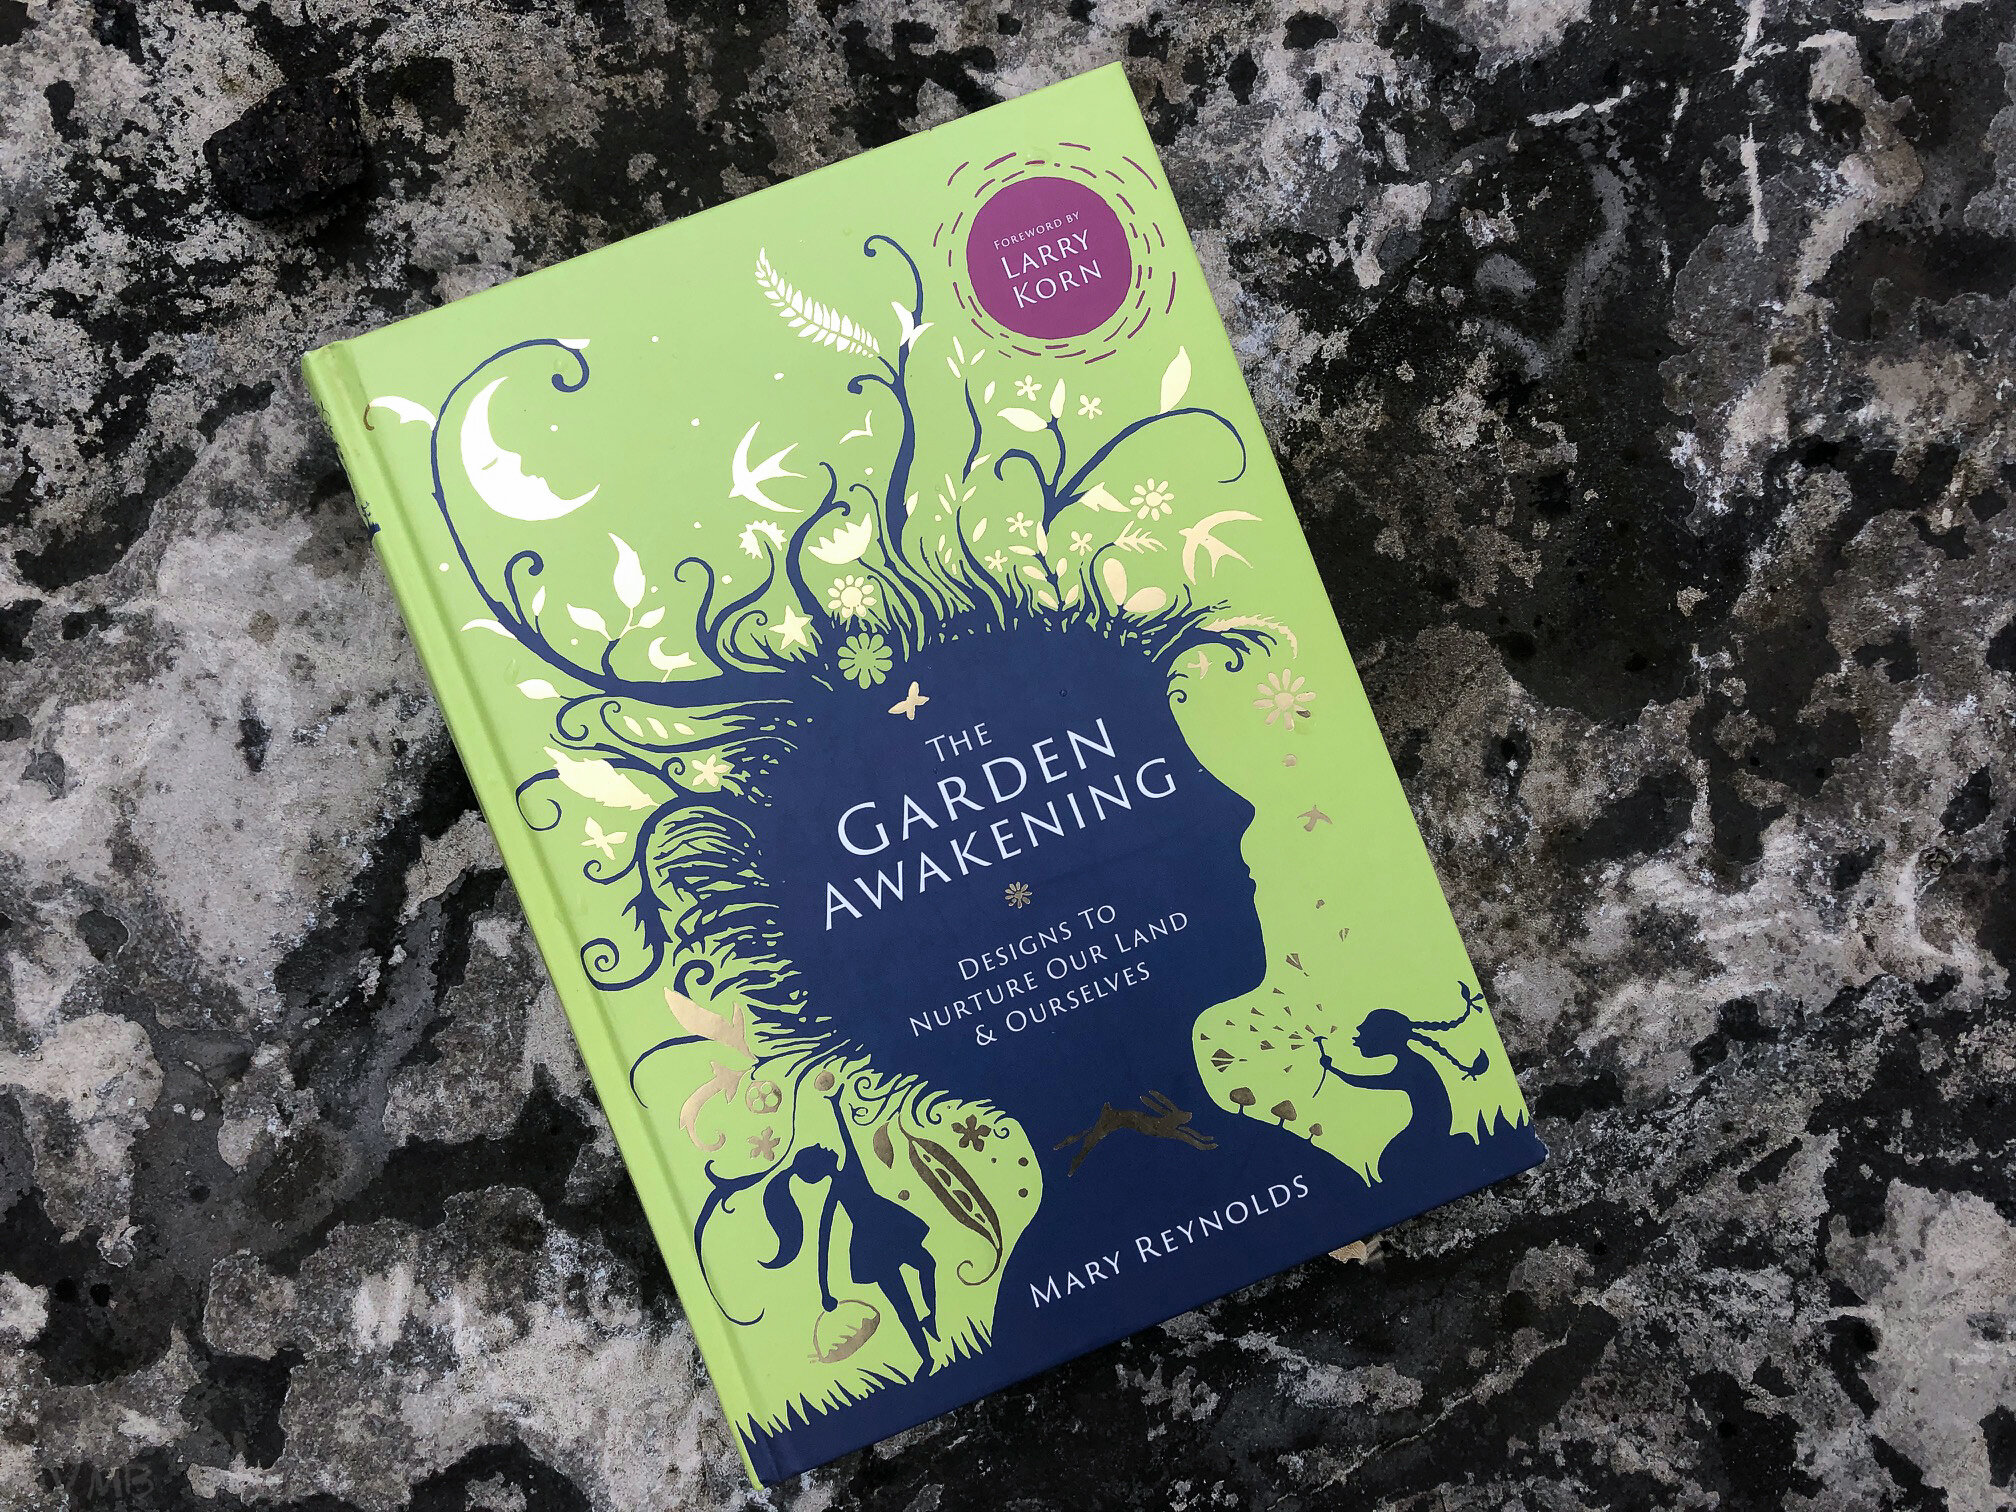
The Garden Awakening will change the way you garden
Mary Reynolds’ The Garden Awakening is an important book during these troubled times. It is both a gardening book and a road map we all need to follow into the future. For some it is a treasure map to help them rediscover nature and themselves. For others, it will provide them with a new way of looking at their gardens, their land and their life. Please, click on the link for the full review.
The Garden Awakening
Designs to Nurture our Land & Ourselves
By Mary Reynolds
“If nature is left to its own devices and without imbalances in the ecosystem such as the overpopulation of hungry deer or an infestation of rabbits it will reclaim its territory and become Woodlands once more.”
This might be one of the most inspirational gardening books I have ever read.
It’s certainly not your average how-to gardening book. If you are looking for a typical gardening book, The Garden Awakening might not be for you.
Beautiful illustrations by artist Ruth Evans both on the cover and throughout the book.
But if you are interested in the environment, restoring your garden to a healthy, productive space and/or creating a Woodland naturalized garden, then you owe it to yourself to spend some time with Mary Reynold’s book, The Garden Awakening, Designs to Nurture our Land & Ourselves and her vision for the future of gardening.
Since this writing, Ms Reynolds has published a second informative book titled We Are The Ark. This follow to The Garden Awakening, expounds on her successful approach that each garden can be a small Ark in a world for where wildlife desperately needs our help.
For more information on using native plants to restore your garden, take a moment to check out my article on the importance of using native plants in your garden. For full post go here.
An important book at a crucial time
The Garden Awakening is an extremely important book for the time. It’s a reminder that we are destroying the very land we depend on for survival. It’s a reminder that the world we live in cannot continue to absorb this abuse and not unleash its own fury back upon us.
And, as climate change continues to change the world we live in, it’s important that we as inviduals take action to stem the tide.
But Reynolds offers solutions to problems that we need so desperately in these trying times.
Her inspirational book actually provides a roadmap for anyone interested in doing their part to not only protect but revive the land they live on. Along the way, she provides a “treasure map for finding your way back to the truth of who you are.”
“We are the ark” movement
Be part of the movement
Her movement, “We are the Ark” is bringing together like-minded people around the world to join her in creating a healthy environment, one garden at a time. It provides an important stepping stone to a better environment, a healthier garden and a more optimistic future.
“Gardens were like still-life paintings; controlled and manipulated spaces.... somehow, somewhere along the way gardens had become dead zones.”
If Ireland’s feisty Mary Reynolds is not familiar to you, I suggest you watch a movie called Dare to Be Wild, which maps her journey from an outsider to a gold-medal winner at the prestigious Chelsea Flower show. The movie used to be available on Netflix, but I notice that it is no longer available. (The link provided above will take you to Amazon where it is available as a DVD.)
The movie led me to her book, her vision and her unique and thoughtful approach to gardening.
To purchase the Mary Reynold’s book, here is a link from the excellent book seller Alibris: Books, Music, & Movies for The Garden Awakening. Below is the Amazon link.
For those without access to the movie, take note; Mary Reynolds was the youngest garden designer to win the highly coveted gold at the 2002 Chelsey Garden Show. That alone should be enough to interest you in her book.
Reynolds doesn’t waste much time getting to the point. She describes a vision of her embodying a crow flying over the landscape where she comes across a woman (let’s call her Mother Nature) in a forest clearing. She is then swept up high into the heavens and when she finally wakes up she comes to the instant recognition that she “shouldn’t make any more pretty gardens.”
She realizes that she must be guided by the natural world, rather than pure beauty, in her work as a garden designer.
Unlike nature, “gardens were like still-life paintings; controlled and manipulated spaces.... somehow, somewhere along the way gardens had become dead zones,” she writes.
Being in harmony with nature
The revelation that she was “failing to work in harmony with nature,” eventually leads her to unveil 5 garden design ideas in a system aimed at helping anyone, including gardeners, connect with nature.
Throughout the book, Reynolds returns to her Irish roots and uses folklore to help explain her spiritual views of nature and gardening.
Of particular interest to Woodland gardeners, Reynolds explains that all land strives to become a mature Woodland and the job of the gardener is to allow the land to become what it desires to be.
She also encourages people to design their own gardens and provides a road map in five chapters. Each chapter slowly opens up the world of garden design and includes suggestions for intimate garden areas; a nighttime place, a praying place, a gathering place…
In another chapter, she talks about designing with the patterns and shapes of nature. This all leads to a chapter encouraging readers to put their garden design concepts onto paper, including several illustrations and designs that help readers visualize their garden design ideas.
Throughout the book, Reynolds offers suggestions on plants, although these plants might not all be appropriate for all garden zones.
The book wraps up with a chapter on Forest Gardening, a style of gardening that seems to be once again gaining in popularity and importance.
Many would say that Forest gardening is a logical extension to Woodland gardening. It involves producing food by developing a multi-tiered Woodland where berries, nuts and root vegetables are encouraged to be grown.
Her forest garden includes seven layers beginning with the upper canopy including a shrub layer, a layer for herbaceous plants a ground cover layer, an underground layer and finally climbers or vines.
This is a book every Woodland gardener will enjoy and learn from. It’s a book that should be required reading for all gardeners at a time when our futures may well depend on it.
If you are interested in having Mary Reynolds help design your garden virtually, be sure to check out my post on Ms Reynolds’ virtual makeovers.

How long do hummingbirds live in the wild
Wondering how long that little hummingbird that visits your yard every year will be returning. If everything goes well, you might be surprised how long the hummers might be returning to your yard.

This image shows a hummingbird working a small feeder with a perch in the background.
Some hummingbirds can live up to ten years
Hummingbirds are fascinating creatures, but have you ever wondered how long they live in the wild? The lifespan of a hummingbird can vary depending on several factors.
One of the key factors that influence the lifespan of hummingbirds is their species.
Different species of hummingbirds have different lifespans. On average, most hummingbirds live for about 3 to 5 years in the wild. However, some species, such as the Ruby-throated Hummingbird, can live up to 10 years or more.
Hummingbirds face many dangers in nature, which can impact their lifespan. Predators play a significant role in determining the lifespan of hummingbirds.

Providing several sources of nectar-producing flowers is particularly important for the health of our hummingbirds.
Birds of prey, snakes, and even domestic cats pose a threat to these tiny birds. However, hummingbirds have developed unique adaptations to help them escape predation.
Their incredible speed and agility allow them to quickly evade predators. Additionally, their small size and ability to hover in mid-air make it difficult for predators to catch them.
Migration can be a dangerous time for hummingbirds
During migration, hummingbirds face additional dangers.
These small birds migrate huge distances, often travelling thousands of miles. Along their journey, they encounter various hazards, including extreme weather conditions, lack of food sources, and exhaustion.
Some hummingbirds may not survive the migration and perish before reaching their destinations. However, the majority of hummingbirds are able to successfully complete their migration and continue their lifecycle.
In conclusion, the lifespan of hummingbirds in the wild can range from 3 to 5 years, with some species living longer.
Factors such as species, habitat, and predators all contribute to their lifespan.
Hummingbirds have evolved unique adaptations to escape predation, and while they face dangers during migration, the majority are able to complete their journey successfully. Understanding these factors can help us appreciate and protect these remarkable creatures.
For more on hummingbirds in the garden, check out the following posts:
• How to help Hummingbirds during migration
• Five tips to attract hummingbirds

Hummingbird at feeder surrounded by petunias.
How to help hummingbirds survive in our gardens?
One of the best ways to help hummingbirds survive in our gardens is by providing them with both feeders and natural food sources.
Hummingbirds have a high metabolism and need to consume a large amount of nectar to fuel their energy. By placing hummingbird feeders in our gardens, we can provide them with a reliable source of nectar.
When choosing a hummingbird feeder, opt for one with bright colors, as hummingbirds are attracted to vibrant hues.
It’s also important to clean the feeders regularly to prevent the growth of mold or bacteria, which can be harmful to the birds. A mixture of four parts water to one part sugar is a suitable nectar solution for hummingbirds.
In addition to feeders, it’s crucial to create a garden that offers natural food sources for hummingbirds. Planting flowers that produce nectar-rich blooms, such as trumpet vine, bee balm, and salvia, will attract hummingbirds to your garden.
These flowers not only provide a natural food source but also add beauty and color to your outdoor space.
Another essential element for hummingbirds in our gardens is a water source.
Hummingbirds enjoy bathing and drinking from shallow water sources. Consider placing a birdbath or shallow dish filled with clean water in your garden. Make sure to change the water regularly to keep it fresh and prevent the breeding of mosquitoes.
By providing both feeders and natural food sources, as well as a reliable and safe water source, we can create an inviting habitat for hummingbirds in our gardens.
These small efforts can make a significant difference in helping these remarkable creatures thrive and survive.
Linden tree: A stalwart in our woodland garden
The Linden is an important part of our woodland garden providing deep shade in summer and habitat for wildlife as well as lovely fall colour.
How Lindens help wildlife in our yards
Not a day goes by that I don’t appreciate the beauty of our mature Linden tree in the backyard. It stands on the edge of our property just outside our family room where I can observe the many comings and goings as it changes from season to season.
It’s a favourite of our squirrels – both red and grey – backyard birds and raccoon families that use its dense branches and leaves for nesting and hiding out from summer’s full sun.
It’s not uncommon to watch our hummingbird feed from one of our feeders and then head up into the safety of our Linden tree where it can rest high in the tree’s branches or feed from its fragrant spring flowers.

Linden tree from my childhood home that I watched grow up from a staked sapling to a 60-plus-year-old tree.
Actually, Lindens have always been a part of my life.
As a child, I watched our little Linden grow up in front of me from a tiny sapling into a fully mature tree that now dominates the front of my childhood home. It became the climbing tree for my nephews and a shady play spot and picnic area for my daughter and her cousins whenever they came to visit grandma and grandpa.

In spring and summer it provides a deep shade for many of our native wildflowers, from wild geraniums to trilliums, violets and Mayapple. Our ferns and hostas also thrive in the deep shade of our massive tree.
Our Linden was a mature tree – towering above our one-storey home – when we purchased it more than 25 years ago. Little leaf Lindens can grow to about 80 feet tall (24m) with a spread between 40 to 50 feet (15m). In most urban landscapes Linden’s normally grow 40 to 50 feet (15m) tall with a 35- to 40-foot-spread.
Lindens take on a very attractive pyramidal form as they age (as seen in the larger image above). This creates a large shaded area below, making them an ideal spot for a garden bench, sitting area or small dining area.
They would be considered by some to be a little messy dropping their flowers in spring followed by small, ball-like seeds later in the year. Of course, their dense leaf cover creates a lovely deep yellow, natural groundcover in fall after they shed their leaves. I just leave them on the ground for the wildlife to use.
In spring, its bright green leaves combine with our neighbour’s mature Crimson maple leaves creating a lovely contrast that lasts throughout the growing season and create effective habitat for a host of wildlife.
Our large, mature Linden tree towers over the woodland garden providing shade to the understory trees and plants.
How do you identify linden tree leaves?
Linden tree leaves have distinct identifying characteristics that set them apart from other tree leaves.
The key feature is their heart-shaped form, with a pointed tip and a rounded base. The edges of the leaves are serrated or toothed, adding to their unique appearance.
Another distinguishing trait is the asymmetrical leaf base, where one side is slightly larger than the other.
In terms of size, linden tree leaves are typically medium to large, ranging from 2 to 6 inches in length.
They have a smooth texture and a glossy surface, which gives them a vibrant and attractive look in the landscape. The color of the leaves varies throughout the year, transitioning from a fresh green in spring and summer to a vibrant yellow in the fall.
Our mature Linden towers above understory trees such as a Japanese Maple and Cornus Kousa in the landscape.
To further identify linden tree leaves, you can also examine the leaf veins. The veins are prominently visible and radiate from the central midrib toward the edges of the leaf. This venation pattern is characteristic of linden trees and can help distinguish their leaves from those of other tree species.
What is special about a linden tree?
Little Leaf Lindens are excellent trees to create shade in your garden.
Their dense foliage and broad canopy provide ample shade, making them a popular choice for homeowners and landscapers alike.
But what makes linden trees truly special goes beyond their shade-providing abilities.
Fragrant flowers attract bees, butterflies and even hummingbirds
One remarkable feature of linden trees is their fragrant flowers.
In late spring and early summer, linden trees produce clusters of small, yellowish-white flowers that emit a sweet, intoxicating scent. These flowers not only add beauty to the tree but also attract a variety of pollinators, including bees and butterflies.
The nectar-rich blossoms serve as a valuable food source for these insects, supporting their populations and contributing to the overall biodiversity of the area.
Medicinal uses of Linden trees and leaves
Linden leaves have long been used in traditional medicine for their calming and soothing effects.
They are often brewed into herbal teas that are believed to promote relaxation and alleviate stress. Additionally, linden leaves are known for their anti-inflammatory properties and can be used topically to soothe skin irritations and reduce swelling.
In conclusion, linden trees are not only beautiful shade trees but also play a vital role in supporting wildlife and providing medicinal benefits.
Whether you're looking to enhance your garden’s aesthetics or create a peaceful retreat, a linden tree is a special addition that will bring numerous benefits to your outdoor space.
Are linden trees native to the U.S. and Canada?
Linden trees can be grown in a variety of zones in both Canada and the United States, but are native to Europe and Asia.
These trees are adaptable and can thrive in different climates and conditions.
The ability of linden trees to grow in different zones makes them a popular choice for homeowners and gardeners looking to add beauty and shade to their landscapes. Whether you live in Canada or the United States, you can enjoy the benefits of linden trees in your garden or outdoor space.
In the United States, linden trees can be grown in zones 3 to 8, making them suitable for a wide range of states. From the northern states like Minnesota and Maine to the southern states like Texas and Florida, linden trees can be found in various regions across the country.
In Canada, linden trees can be grown in zones 2 to 7, which cover a large portion of the country. This means that linden trees can be enjoyed in regions such as British Columbia, Alberta, Ontario, and Quebec, among others.
With their attractive foliage, fragrant flowers, and the wildlife they support, linden trees are a valuable addition to any garden or woodland area. So, if you're considering planting a linden tree, rest assured that it can thrive in the appropriate growing zones in both Canada and the United States.
What are linden leaves good for?
Linden leaves are not only beautiful, but they also have several practical uses.
One of the main benefits of linden leaves is their medicinal properties. These leaves have been used for centuries in traditional medicine to treat various ailments. They are known for their calming and soothing effects, making them a popular choice for herbal teas and infusions.
Linden leaf tea is often consumed to help with anxiety, stress, and insomnia.
In addition to their medicinal uses, linden leaves are also beneficial for the environment. They are rich in nutrients and can be used as a natural fertilizer for plants. By composting linden leaves, you can enrich the soil and promote healthy plant growth.
Linden are host plant for certain insects and caterpillars
Furthermore, linden leaves are a valuable food source for certain insects and caterpillars. They provide nourishment for species such as the linden looper moth and the linden hawk moth. These insects play an important role in the ecosystem as pollinators and as a food source for other animals.
So, while linden trees are admired for their shade and fall color, their leaves offer even more benefits. From their medicinal properties to their role in supporting wildlife, linden leaves are truly valuable. Whether you’re enjoying a cup of linden leaf tea or observing the insects that depend on them, linden leaves are a wonderful asset to have in any garden or woodland area.
What animals, insects, and birds depend on Linden
These trees attract a wide range of animals, insects, and birds, making them an important part of any woodland garden or natural habitat.
One of the main beneficiaries of linden trees are butterflies. Species such as the Eastern Tiger Swallowtail and the Red-spotted Purple rely on linden trees as a food source for their caterpillars. The leaves of the linden tree provide nourishment and support the growth of these beautiful butterflies.
In addition to butterflies, linden trees also attract a variety of birds. Species like the American Goldfinch and the Ruby-throated Hummingbird are known to visit linden trees for their nectar-rich flowers. These birds play a crucial role in pollination and contribute to the overall health of the ecosystem.
Furthermore, linden trees provide shelter and food for mammals as well. Squirrels and chipmunks are often seen scurrying up and down the trunks of linden trees, collecting seeds and nuts.
These trees also offer a safe haven for nesting birds and provide a habitat for small mammals like bats.
Linden tree: An ideal tree for a woodland garden
In conclusion, linden trees are not only visually appealing but also support a diverse range of wildlife. From butterflies and birds to mammals, these trees play a vital role in providing food, shelter, and habitat for various species. By planting linden trees, you can create a thriving ecosystem in your own backyard.

Weeping Japanese Maple: Perfect for a small space
Weeping Japanese Maples are excellent trees to include in your landscape. They are small enough to add an accent to even the smallest yard but elegant enough to draw attention in a larger yard.

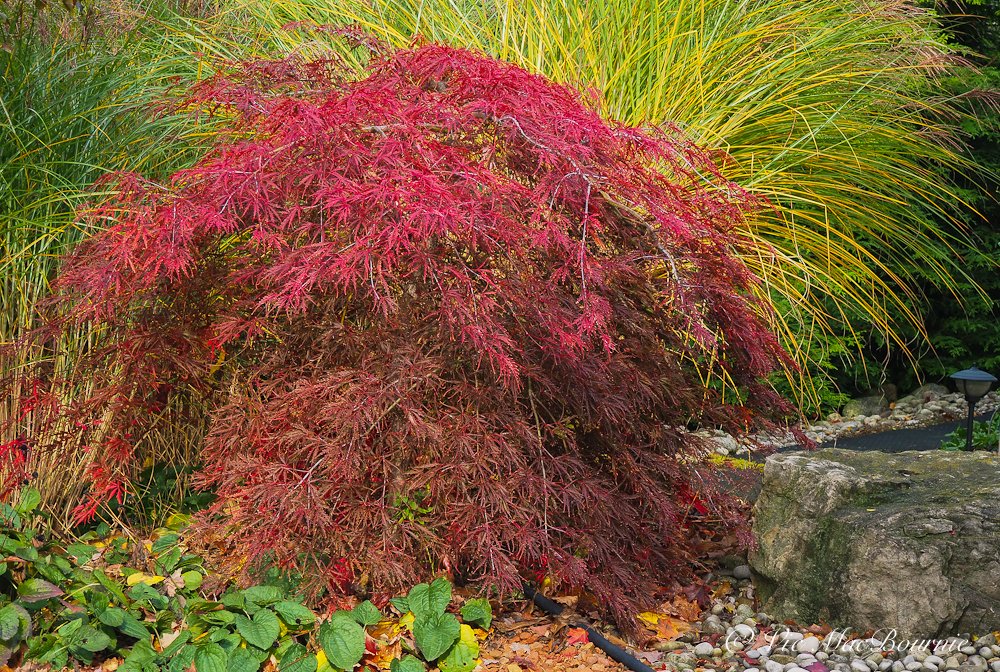
Our weeping Japanese Maple branches flow beautifully to the ground around the large boulder as part of our Japanese-inspired garden.
Our weeping Japanese Maple may not be very large, but it’s a big performer in the Japanese-inspired garden where it anchors one side of the garden with its delicate branches softening the hard edge of a giant boulder.
Its unusual form and dark red foliage makes a bold statement despite its rather demure size.
In fact, you would be hard pressed to find a better tree for that location in our Japanese-inspired garden.
Let’s take a closer look at weeping Japanese Maples with any eye on how to get the most out of these small-growing trees.
How big does a weeping Japanese maple get?
All Japanese Maples should be grown as understory trees, meaning they are generally smaller trees meant to grow in the shade of larger trees or buildings that protect them from harsh weather, especially extreme sun and heat.
Most weeping forms of Japanese Maple are dwarf, cutleaf varieties meaning that they are not only smaller than a regular, say Bloodgood variety, but are more susceptible to harsh conditions.
Interested in Japanese Maples. For more information be sure to read my other posts here:
The same weeping Japanese Maple in its fall colors just before it drops its leaves.
The typical weeping Japanese Maple will grow to about 8 feet with a similar width, but I have found the weeping Japanese Maples grow at a particularly slow pace.
While a traditional Japanese Maple can grow one to two feet a year, the weeping Japanese Maple will put on growth much more slowly. Be prepared for a vertical growth rate of just a few inches per year.
You can expect the average dwarf, weeping Japanese Maple to reach between 4-5 feet over a ten-year period making them ideal small trees for small yards or areas in the garden where you are looking for a tree to provide a spot of color without ever dominating its planting space.

Examples of the beauty of Japanese Maples including some of the weeping variety.
Which Japanese maples are the weeping variety?
There are many varieties of weeping Japanese Maples to choose from including:
• Acer Palmatum Dissectum ‘Inaba Shidare.’ This red to maroon weeping maple grows to about 5 feet with a six foot width and sports bright red fall colour. This laceleaf, pendulous tree is very hardy and is able to adapt to most situations, including sunnier areas. Three to four hours of sun helps the tree keep its best color. It can be grown in containers and is hardy in zones 5-9.
• Acer Palmatum Dissectum ‘Waterfall.’ This weeping maple leaves emerge an almost neon green in spring turning a golden yellow to orange into fall. It grows to about 5 ft by 6 ft in about ten years and is hardy in zones 5 through 9.
• Acer Palmatum Dissectum ‘Orangeola.’ Leaves emerge in spring in various shades of red, orange and green helping to give the tree an interesting look. This multi-colored pendulous dissectum acer is considered one of the most cascading Japanese maples. The leaves turn an orange red in fall and the tree is a little more compact than others reaching only about 4 ft tall with a width of about 5 ft over the course of ten years. It is hardy to zones 5 through 9 and can be grown as a container plant.
How to care for a weeping Japanese maples? Are they hardy?
Weeping Japanese maple are hardy trees (zones 5-9) that do not require a high degree of special care.
Although they benefit from some sun, they are meant to be understory trees and, therefore, benefit from being in the shade for the sunniest and hottest parts of the day.
Some varieties may have better color if exposed to short periods of sun.
Besides adequate water and mindful pruning, these small trees require little maintenance.
A nice example of the weeping Japanese Maple in front of Miscanthus ornamental grasses in our front yard.
How to prune weeping Japanese Maples?
Please use restraint when pruning your weeping Japanese maples and do not remove the lower half of the trees to create umbrella-looking trees in the landscape.
Japanese Maples have inherent beauty and unlike, say a weeping Catalpa tree, do not benefit from harsh pruning. I have seen Japanese Maples that are pruned into odd umbrella-looking trees that look out of place in the garden. Maybe the owners wanted to plant flowers under the trees or just didn’t think the pendulous branches would benefit from touching the ground.
Try to refrain from severely pruning these trees in such a manner. Embrace their inherent pendulous habit and let them reach their full beauty. Feel free to trim them up off the ground if you feel you must, but I have never pruned the bottom of our weeping tree and don’t intend to in the near future.

Falling in love with the Olympus 45mm F1.8 and MCON P02
The Olympus 45mm F1.8 teamed with the MCON P02 takes an already outstanding lens and makes it significantly better.

The Olympus 45mm F1.8 captures the fine detail and vivid colours of this front garden in fall with its exquisite grasses and vibrant hydrangeas.
How to maximize the Olympus 45mm F1.8 for macro with the P02
Fall is the perfect time to get out your camera and lenses and fall in love all over again, especially when it comes to macro or closeup photography. Combine the Olympus 45mm F1.8 with the Olympus P02 and it’s a love affair made in heaven.
That love affair may have roots in the wonderful colours of autumn, but it can just as easily extend to some of your finest cameras and lenses. The Olympus 45mm F1.8 is one of those lenses you’ll fall in love with over and over again.
I recently picked up a mint copy of the 45mm silver version for a fraction of its regular price and teamed it up with the magnificent MCON P02 to give me the ultimate walk around lens with impressive close focus capabilities.
This compact Olympus lens – now under the name OEM Systems – was first introduced to micro 4/3rd users in 2011. At that time, it was the fastest prime available on the micro 4/3 system.
Today, it is still easy to carry around, offers some of the sweetest bokeh of any lens, is very sharp and has fine, vivid colours.
It might have earned its reputation as a superb portrait lens, but it more than holds its own as an all-purpose lens, whether you are in your favourite woodlands, on the street or on vacation.

The close up capabilities of the Olympus 45mm F1.8, when paired with the MCON P02 as seen here, is very impressive.
Slip the Olympus MCON P02 macro converter onto the front of the lens and you’ve got an impressive, fast, short telephoto and macro lens.

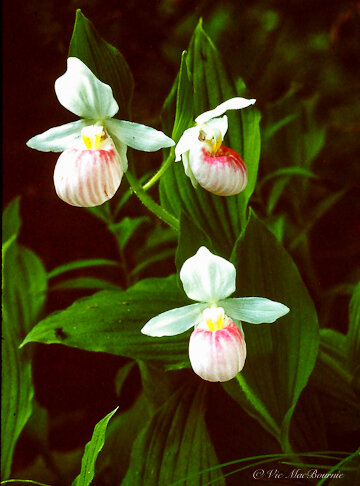
The Olympus MCON P02 closeup lens also works nicely with the Olympus 14-42 kit zoom lens that was used here to capture these orchids.
What better opportunity to run it through its paces than during the annual fall celebration of colour.

The Olympus 45mm F1.8 captures this lovely fall scene with its vivid colours.
There’s lots to like about the Olympus 45mm lens
Sure, it’s a fast lens that creates tack sharp images even in low-light situations, but that’s just the beginning of what makes the lens a must-have. Focus is both fast and very precise. Build quality is very good, and its 116 grams (0.26 lb) makes the lens easy to carry around at all times.
Video shooters will appreciate the near silent autofocus capabilities of the lens, which benefits from its MSC (Movie-Still-Compatible) technology.
Check out the Olympus official site for the best deals of the day.
What’s not to like?
If you want to get picky, there is the rather expensive lens hood sold as an accessory and the fact that the lens’s minimum focus distance stretches out to almost 20 inches (19.69 to be exact) or 0.50 m for those of us using metric. The result is a magnification factor of only 0.11.
There’s not much we can do about the cost of the lens hood except keep our eye open for a good used one.
The lens’s poor close-focusing capabilities is an easy fix. Add the MCON P02 converter to the front of the lens and the 45mm opens up a new world to users. But more on that a little later.
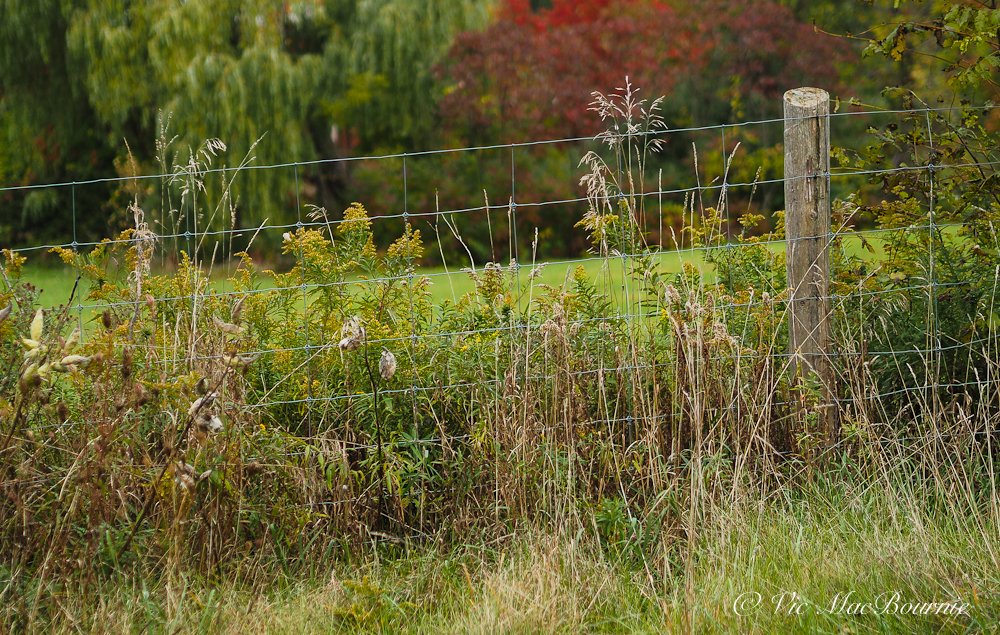
This fence line image was shot with the Olympus 45mm wide open at F1.8. Sharpness is excellent with a nice soft out-of-focus background.
Olympus 45mm F1.8 in the woodlands and in the fields
Lens specs have their place, but until we take the lens out into the field, it’s hard to really appreciate the quality and value of the lens.
So I took the lens out for a morning of early fall color on the roads around my home recently.
I have always prefered a short telephoto approach for most of my fall images. I find the telephoto helps to focus in on the intimate details rather than show the all encompassing view of a wide angle lens.
If you are looking to add a camera or lens to your arsenal, be sure to check out the huge offering from KEH Camera Exchange.

This early fall image of the open farm lands near our home was taken with the highly praised Olympus 45mm F1.8.
First impression of the Olympus 45mm
My first impressions of this lens were more than favourable.
Everything that has already been said about the lens proved true in the first few shots. Sharp even wide open, fast and effective focus, silent, great bokeh and lovely colour rendition.
And you don’t have to take my word for it.
Former Olympus ambassador and enthusiast Robin Wong states: “No matter what lenses I use on the street, I always fall back to this beautiful medium-telephoto focal length, and 45mm just fits my compositional vision almost perfectly.”

Fall in the woodland garden offers several opportunities to capture natural images like these Pagoda Dogwood berries waiting for the birds to finish them off. The medium telephoto lens helps capture the pleasing scene in a natural setting.
He goes on to say: “Being able to blur off the background is something I treasure, and the Olympus 45mm F1.8 does this very well, being a medium telephoto range as well as having a wide open aperture of F1.8. The rendering of the bokeh? Simply creamy and beautiful. Just what I needed to make some portrait shots “pop.”
Rob Trek, YouTuber and Olympus enthusiast, recommends photographers purchase the Olympus 45mm F1.8 as their first prime lens because it will give you “the best bang for the buck in terms of value…in terms of your creativity and your photography and the kinds of pictures you take.”
YouTuber Steven Heise says: “There are a lot of lenses that perform well, but then there are a small handful of lenses that come to the party ready to rock the house. This is one of those kinds of lenses.
“This is hands down one of the best budget portrait lenses you can buy for micro 4/3. When you take into consideration the image quality of this lens, the incredible sharpness, the color, the contrast and the quickness and accuracy of the autofocusing system, the answer just becomes abundantly clear.”

My sweet dog Holly taken with the Olympus 45mm F1.8 close to wide open.
Peter Forsgard, a former Olympus ambassador based in Finland, describes the lens as “One of the best quality money ratio you can get on any M Zuiko lens. I think the 45mm is the one. It’s not very expensive, but the image quality is stunning.”
He calls it the “perfect lens for environmental portraits.”
Steve Huff, another Olympus enthusiast, had high praise for the lens in his review shortly after getting the lens in October 2011. He compared the 45mm F1.8 with the Olympus 12mm F/2 after declaring the 12mm the best micro 4/3 lens ever made. “After using this 45 1.8 for a few days I can say that this lens is equally as delicious. Yes, I said delicious! The IQ from this lens on the E-P3 is nothing short of astounding for the micro 4/3 format. Some of the best quality I have seen from any M4/3 camera/lens combo.”
Here are a few impressions of the lens from Olympus users gathered from forums around the internet.
• “The images are tack sharp, the colours warm and flattering, the focus is both quiet and fast, and the “Bokeh” which all the Olympus haters go on about is feathery soft.”
• “Perfect for portraits, it’s also great for giving a different perspective on landscapes and cityscapes…. Sharpness is the outstanding feature of this lens though. You notice it from the first shot you take. It makes you feel like a pro. Contrast and colour are so good that you’ll barely need to adjust your photos in Photoshop or the like…. The bottom line is that this is a near perfect and therefore essential lens for a bargain price.”

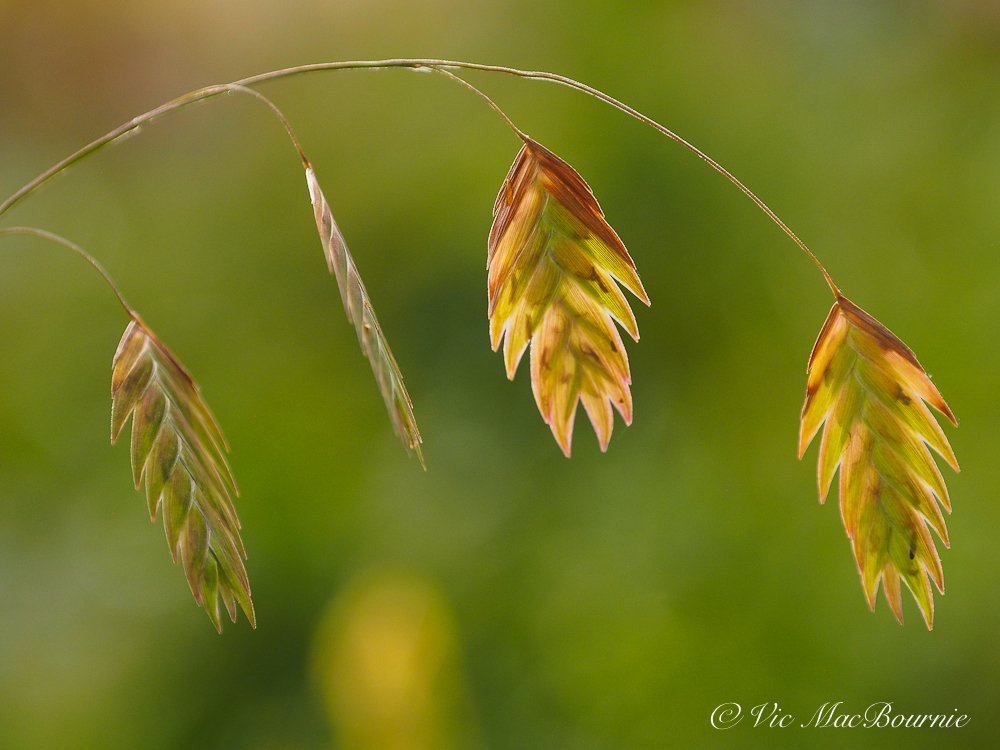
Birch clump with Northern Sea Oats.
I think it’s fair to say that in all my research into the 45mm F1.8, I struggled to find anyone critical of the lens.
Of course there is a reason for all this praise, and it stems from the fact that the lens is among the best in its class.
The short telephoto is ideal for everyday garden and nature photography. It’s probably not long enough to capture most wildlife including birds, small mammals and insects, especially since its minimum focus distance leaves a little to be desired.
But that’s where the Olympus MCON P02 macro converter steps into action.
One weakness of the Olympus 45mm F1.8 lens is its close focus capabilities. Add the Olympus MCON P02 and that problem is easily solved making it the perfect walk around lens. Oh, and just take a look at that creamy bokeh.

Olympus camera equipped with the P02 macro filter.
Close-up photography with the 45mm F1.8
Very few of us really need true macro, meaning 1:1 magnification. What most of us focus on is better described as close-up photography, which is magnification less than 1:1 or lifesize.

The MCON P02 screws on to the front of your lens to reduce the minimum focus distance of the lens.
By adding the Olympus MCON P02 filter to the Olympus 45mm F1.8 you get an outstanding close-focus performer that benefits from having a lovely creamy background.
The high-quality filter that screws on to the front of the lens is constructed in 1 group with 2 elements and weighs a mere 52g. It comes with quality front and rear lens caps and a step-up ring.
Use it wide open to explore creative selective focus effects like the purple Beautyberries below.
Or, use the lens’s inherent sharpness to create exquisitely finely detailed images like the Northern Sea Oat grasses above.
For more on close-up photography check out my post here.

The lens offers endless opportunities to be creative, including the ability to shoot selective focus images using the macro converter with a large aperature of f1.8.
Why the MCON P02 close-focusing lens instead of a true macro lens?
There are many reasons to go with the P02 over a true macro lens. First, there is the cost savings. You should be able to pick up a P02 for less than $100 and considerably less than that if you are lucky enough to find one on the used market.

Olympus camera with 45mm F1.8 and P02 converter on front of lens.
In comparison, a true macro lens will set you back 5X the cost of the P02 and add another lens to your camera bag. There is something freeing about using a single sweet little lens that can double as an exquisite macro lens.
To screw the filter to the front of the lens, a ring first needs to be removed from the front of the lens.
When used with the 45mm F1.8, the lens’s closest focusing distance is almost cut in half to approximately 24cm. The image below from the Olympus website shows the difference between the close focus capabilities of the lens with and without the P02.
For more on the MCON P02, check out the official Olympus site.

This image from Olympus shows the close focus capabilities of the 45mm lens with the MCON P02.
MCON P02: A versatile addition in the palm of your hand
Don’t think for a minute that the P02 is made only for the 45mm. This little add-on filter is a versatile addition to your camera bag and fits nicely on the 14-42mm kit zoom as well as a number of other Olympus lenses. On the popular ED 14-42 F3.5-5.6 EZ the add-on lens turns the lens into a semi-macro lens with the shortest shooting distance of 18cm and the maximum image magnification of 0.38x (35mm equivalent: 0.76x). It comes with step-up rings to attach it to a 37mm filter diameter lens.
For a complete list, see chart below.
M.ZUIKO DIGITAL ED 14-42mm F3.5-5.6 EZ
M.ZUIKO DIGITAL 14-42mm F3.5-5.6II
M.ZUIKO DIGITAL 14-42mm F3.5-5.6IIR
M.ZUIKO DIGITAL 45mm F1.8
Just add a step-up ring for use on the following lensesM.ZUIKO DIGITAL 25mm F1.8
M.ZUIKO DIGITAL 17mm F1.8
M.ZUIKO DIGITAL ED 12mm F2.0
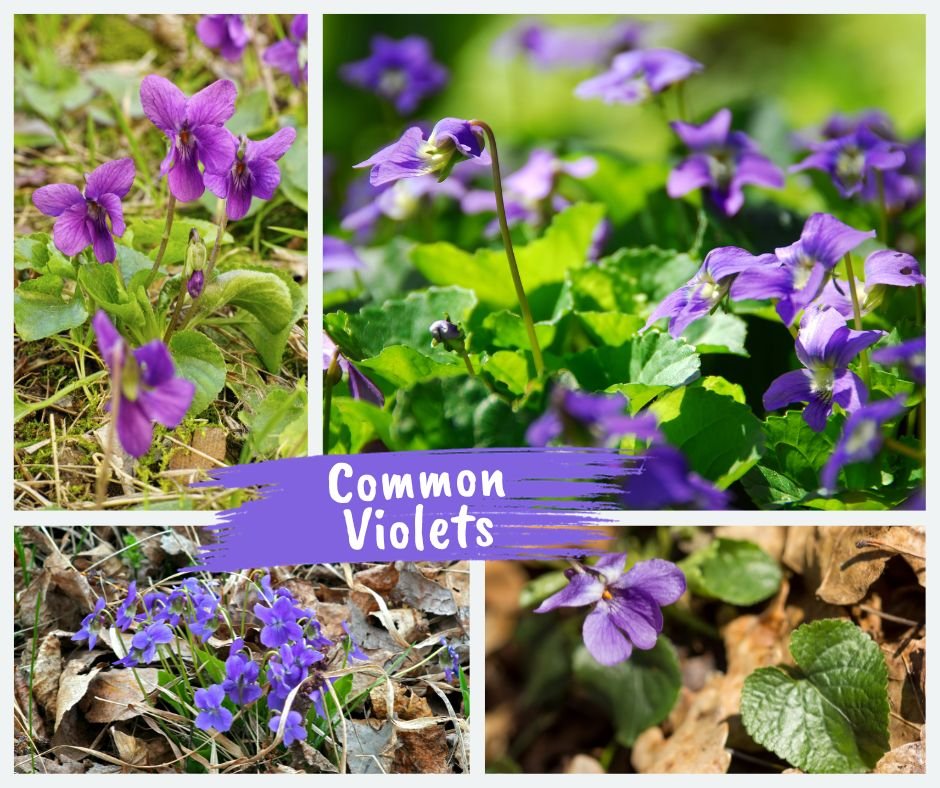
What are the benefits to growing native violets?
Our common native violets are important wildflowers that need to have a place in our gardens and even in our grass.
Native butterflies depend on our common violets
In our garden, common native violets are welcome wildflowers.
Whether they are growing happily in the grass or adorning wild areas of the garden, common violets will always have a home here.
I extol the virtues of commonplace violets due to their critical and pertinent role within our local ecosystems. Their vivid purple, yellow and white blooms are a delightful signal that spring has arrived, leading the way for other native wildflowers, which will continue to flourish right through to the summer.

But it is not just their charming appearance that makes them essential; it is their ecological significance that truly stands out.
These little plants serve as host for many butterfly species, particularly the fritillaries, as well as a range of essential insects. This interaction guarantees the perpetuity of these species. Recognizing the significance of this relationship is vital and therefore we should resist the impulse to remove these wildflowers from our yards.
Their presence is not just an aesthetic addition to our landscapes; it is a fundamental factor in ensuring the survival of our native wildlife.
Moreover, I must highlight that violets are not just a symbol of spring. They bloom from the early days of spring continuing into the colder months, bringing colour and life to our gardens even in early winter. This makes them not only a visual treat but also a constant source of sustenance for a variety of local insects and pollinators.
Rather than eliminate them, we need to applaud and appreciate the remarkable roles of such ordinary plants like the violet, in contributing to the biodiversity of our ecosystems.
Our common native violets are host plants to many charming fritillary butterflies such as the Great Spangled, the Aphrodite, Atlantis, Silver Bordered, and Meadow fritillary butterflies.
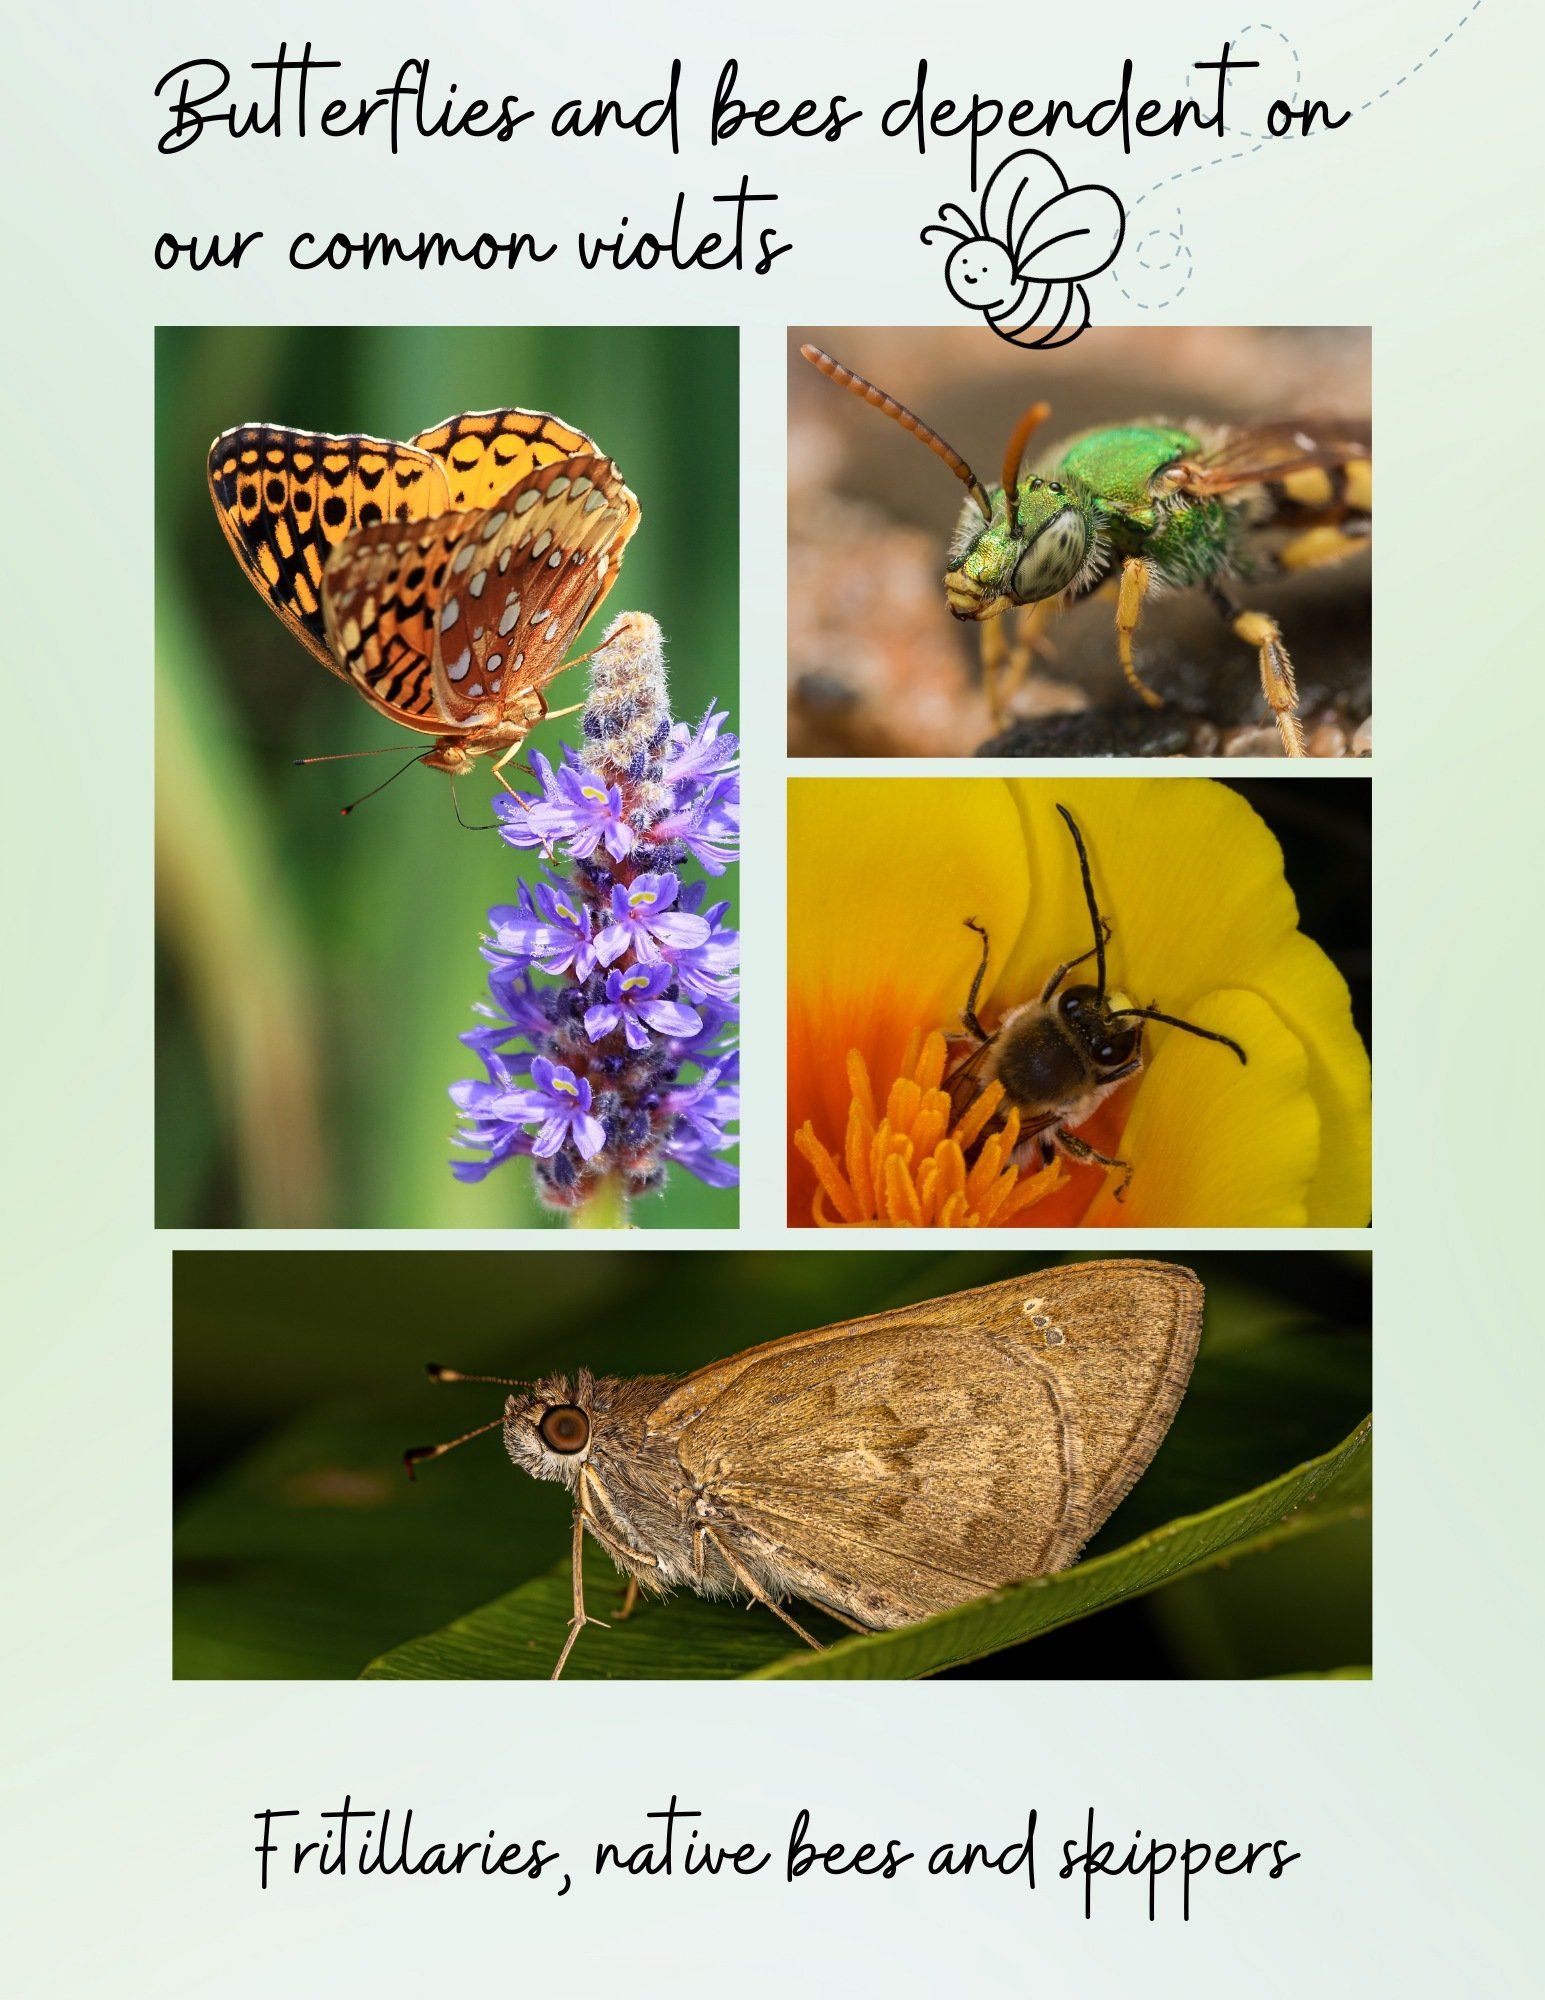
What does it mean to be a host plant mean, and why does it matter?
Host plants play an integral role in the sustenance of our indigenous wildlife. They are crucial in providing nourishment for the larvae of butterflies and other insects.
The colourful and captivating butterflies we so cherish are in fact bi-products of these caterpillars who, in their initial stages, rely heavily on these host plants for their sustenance and habitat.
However, the fascinating metamorphosis from a caterpillar to a butterfly is a process that requires a bit more elaboration. During this transformation, the host plants serve as the primary source of food and nutrients for the caterpillar. They also provide the much needed sanctuary for these creatures to grow and develop safely.
A prime example of a host plant would be common violets, these nurturing plants are known to host a variety of butterfly species.
In order to conserve these vital host plants, one simple practice we can adopt is to discourage the unnecessary weeding of our gardens and lawns. By preserving these plants, we provide more than just a home for caterpillars, we are supporting the lifecycle of butterflies, and in turn, the vibrancy and balance of our native fauna and flora.
The critical role host plants play is undeniable. Not only do they foster growth and development for caterpillars, they are instrumental support systems to our indigenous fauna and flora.
Where are common violets found?
The common blue violet (Viola sororia), also known as common meadow violet, purple violet, woolly blue violet, or wood violet grow in a wide range across eastern North America in the United States and Canada in areas ranging from zones 2 through 11.
A similar violet (Viola odorata) is a species in the viola family, native to Europe and Asia. Commonly known as wood violet, sweet violet, English violet, common violet, florist’s violet, or garden violet, this small herbaceous perennial has been introduced into North America and Australia.
Although our common blue violet are best known for their spring blooms, common violets can grow from spring into winter, making them extremely important wildlife plants.
There exists a wide variety of 35 Viola species throughout Canada, from the Atlantic to the Pacific Ocean, extending up to the northern treeline. These include varied habitats such as forests, prairies and marshlands. A notable species is the green violet (H. concolor) frequently seen in southern Ontario.
As we said earlier, these Viola species play a crucial role as host plants to a myriad of fritillary butterfly species. Preserving these plants will significantly aid in the survival of our native wildlife, particularly our cherished butterfly species.
Within the realms of the United States, the humble common violet has embedded itself in the core of its native ecosystems. The plant serves as a host to an array of Fritillary butterflies. The importance of its preservation is paramount. The robust flower thrives in zones 2 to 11, surviving from spring to winter, acting as a reliable food source for larvae. As such, it is imperative to reorient our gardening approach from removing these perceived ‘weeds’ to fostering these foundational aspects of our biodiversity.
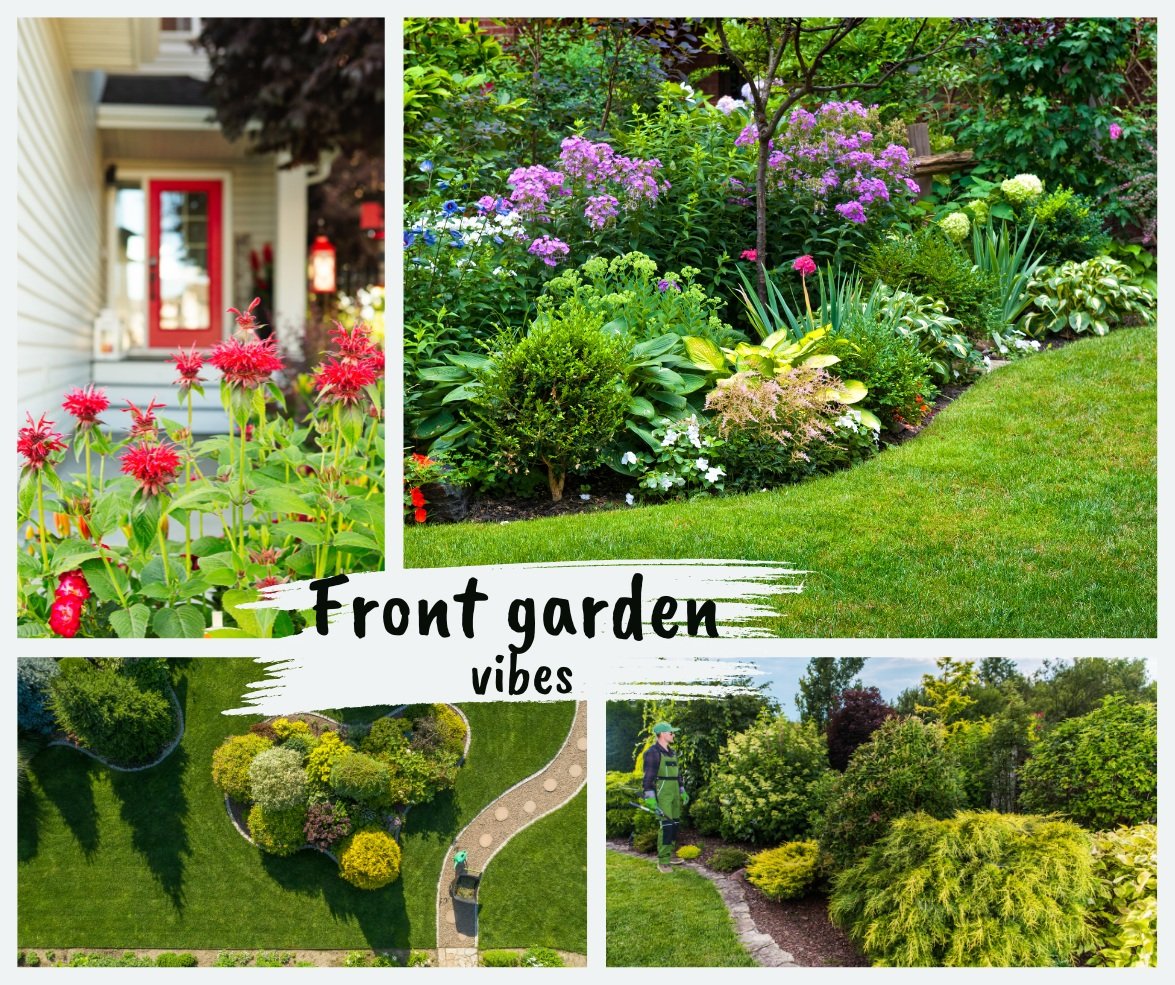
Front yard ideas: Embrace your garden style
Create a front garden that pleases you rather than your neighbours.

The Japanese-inspired garden in late fall blends seemlessly with the front woodland garden where the two adirondack chairs add a punch of colour and centre of focus in all four seasons.
Be bold not boring in your front garden
Front yards don’t have to be boring, but fear of being different often results in front yards conforming to every other yard on the street.
And that almost always leads to a street full of boring front yards. Typically, a sea of grass, small foundation garden beds and maybe a small single tree in the middle of the yard.
It’s much better to be bold, make a statement and create a front landscape that reflects a style that makes YOU happy rather than the neighbours.
In our rather small front yard, we have worked to create a very casual woodland garden in the main area leading with a Japanese-inspired woodland garden in another part of the front yard.

Adding interesting garden elements such as the Adirondack chairs, bird bath and ceramic “Fish in the Garden” creates points of interest that do not over power the garden plants.
In this “small front garden” all grass has been removed. Instead, there is a total of nine trees, a variety of ground covers including ferns, pachysandra, epimediums, moss, creeping phlox, foamflower and bloodroot, just to name a few. It also has several drifts of black-eyed-susans and ornamental grasses big and small, as well as many more native plants, several massive boulders, a dry river bed, two bird baths and two very prominent yellow Adirondack chairs on a small flagstone patio.
Yes, that’s a lot to pack into a smallish front yard, but it’s an example of what is possible once you remove the grass and open up your vision to a front yard that does not conform to what most homeowners consider acceptable. My immediate neighbour also removed all of their front grass and created an oasis of native, non-native plants, trees and shrubs that, together, create an exceptional habitat for a host of wildlife from mammals to reptiles, from a variety of birds to pollinators too numerous to name here.
Unfortunately, we are the minority on a street of orphaned trees growing in a sea of never ending lawns and boring foundation plantings. And, this is in an area surrounded by conservation lands and massive natural forests.
Time to rethink our front landscapes
I recognize, however, that our front woodland garden landscape design might not be for everyone. Maybe a less aggressive approach that includes some grass and sweeping gardens with a variety of tidy perennials, might suit you better. Maybe a more contemporary garden made up primarily of evergreens is something that would appeal to you more.
To enhance the overall appeal of your front yard, here are five landscaping ideas that will help transform your outdoor space into a more welcoming one.
Create a Welcoming Pathway: A well-designed pathway leading to your front door not only adds visual interest but also guides visitors to your home. Consider using natural stone pavers or colourful tiles to create a unique and inviting pathway.
Incorporate Colourful Flower Beds: Add vibrancy and charm to your front yard by planting colourful flower beds. Choose a variety of flowers that bloom at different times of the year to ensure year-round beauty. Be sure to incorporate native plants to attract local wildlife and promote biodiversity.
Install Outdoor Lighting: Softly illuminate your front yard with strategically placed outdoor lighting. Not only does it enhance the safety and security of your home, but it also adds a warm and inviting ambiance. Use path lights to highlight the pathway and accent lights to showcase architectural features or focal points. Don’t use bright lights that disrupt the lives of animals and insects that depend on darkness to survive.
Add a Water Feature: Incorporating a water feature, such as a small fountain or a pond, can create a soothing and tranquil atmosphere in your front yard. The sound of running water adds a sense of serenity and can mask unwanted noise from the street.
Utilize Vertical Space: Make the most of limited space by utilizing vertical elements. Install trellises or arbors and grow climbing plants. This not only adds visual interest but also creates privacy and shade.
This professional garden design (below) created for a Pacific Northwest garden, (see full story here) is a perfect example of what can be done when a bold approach is taken.

A landscape design or a middle-size front garden shows intensive planting including several trees, shrubs and plantings. Notice the lack of grass in the plan.
Try designing around a focal point in the garden
Once you embrace your style with courage and commitment, try to settle on a focal point in your garden.
The focus of our front yard are actually the two very yellow Adirondack chairs that, more than anything, make a statement that this is meant to be a casual place – almost our cottage in the city.
I like to think that a woodland garden, by its very nature, is a casual unpretentious landscape that conveys a message that the people who live here care about the environment, wildlife and native plants more than impressing others, including the neighbours.
More on the Environmental Benefits of a Woodland Garden.

A dry river bed and creeping phlox combine for a colourful spring display.

A Natural Approach
Allowing the creeping phlox to flow over the large boulders creates a natural feel in the front garden rather than a traditional over-manicured front garden.
It is also a front yard that is not wild and out-of-control and possibly seen as an eyesore on a street of very, very traditional front landscapes.
Our front garden is also in constant change – from the native plants in the main garden, to the annuals that fill our two window boxes.
Birds make nests in the trees, visit the bird baths on a regular basis and devour the fruit of our native serviceberry tree in early summer. Deer visit the garden to sample the plants and even the local foxes often use the area to hunt.

Our front garden in late fall showing the Japanese-inspired garden with large boulders on the left, together with the middle canopy Japanese maples, grasses black-eyed-susans and cottage-style adirondack chairs.
It may not, however, be a front yard that appeals to everyone.
So, let’s take a look at a variety of front landscapes that lie between our grassless woodland garden and a traditional front yard.

A few different examples of tiny garden design styles.
More front yard ideas: The tiny front yard
Whether it’s a cottage garden, a contemporary garden or something in between, the important thing is to embrace your style and move forward.
If you are short of space, embrace that vibe.
• Remove the grass
• Use paving or mulch to cover the entire space
• Consider using containers to grow your favourite plants
• Create one centre of interest – a bistro table and two small chairs or a small water fountain for the birds.
• Don’t be afraid to use at least a few large-leaved plants like hosta, elephant ears or a large fern to create visual interest.
• Try to keep the space simple and use natural elements as much as possible.
• The goal is not to make the garden pretty by using too much colour or unnatural materials. Bright white quartz stone rarely looks right in a garden, but pea gravel or river rock can work well. Better yet, large moss-covered boulders can be a perfect statement piece for even a tiny garden.
One of the most common situations I am asked about is what to do with a very small inner-city front garden with an existing mature tree where grass struggles to grow. The key to success here and in most difficult situations is to work with, rather than against, what nature is offering you.
In a tiny garden
My suggestion: Remove all the grass. Bring in some large boulders (not mid-size rocks) and bury them in the landscape. Please don’t let them lay on top of the soil. Boulders need to be dug in so that at least one-third is under the ground. This gives the impression that the boulders are rising out of the ground rather than placed on top of it.
Add some native ground covers, or mulch the area heavily with a pea gravel or bark mulch. Include a simple flagstone pathway, a bird bath – maybe one carved out of one of the boulders – and a small tree or large multi-stemmed shrub (maybe a serviceberry) that is trimmed up like a small multi-stemmed tree. The bird bath could be replaced over time with a bubbling rock or natural looking fountain. The moving water will help attract more birds and other wildlife.
A selection of larger garden designs using islands to create interest and variety.
Larger front yard covered in turf grass
A more typical surburban front yard offers more choice and more challenges.
Removing all the grass might not be an option or even a desired result.
The question to ask yourself is whether it is worth your time and effort to care for the grass, including lugging the lawn mower and other instruments of destruction from the back yard to the front yard on a weekly basis. If you plan to remove the grass, it might be best to do it over the course of several years rather than all at once.
By creating ever expanding garden islands in your existing turf, you can slowly migrate away from turf entirely, or just leave strips of grass that are easily mown with a single pass.
My suggestion: Consider a five year plan where most of the grass is slowly replaced by large garden islands. Individual islands can serve different purposes and allow you to experiment with different plants and even styles.
One island could be set up to attract birds with fruiting shrubs and an under-story tree like a Flowering Dogwood. Add some native purple coneflowers and black-eyed-susans to provide late-summer food sources for birds. Supplement these sources with annual sunflowers to add some whimsy and provide more food and habitat for birds. A bird bath and small bird feeder is a nice addition.
Another island might focus on plants that thrive in acidic soil. Once you have amended the soil to acidify it, you can begin to plant hydrangeas, blueberries, and other acid-loving native woodland plants that can be more easily grown together rather than trying to combine them with non-acid loving plants. Mulch the acidified soil with pine needles to enhance the soil and keep the plants healthy.
In another island you may want to turn your attention to edibles. Plant your favourite herbs, one or two tomato plants, your favourite garden vegetables and maybe a favourite fruiting tree like a peach or even an orange or lemon tree if you are in the warmer growing zones.
If you like the cottage/meadow look, a garden island allows you to create that look in a smaller scale rather than trying to manage a massive meadow garden that can easily get out of control. Grow all your favourite plants, but grow them in a manageable-sized garden where you can focus your energy into creating a wild but still-in-control cottage garden. More on meadow gardening here: Create a mini meadow; The making of a large meadow
The above collage (bottom right) shows a large garden island made entirely of evergreens. This is perfect to create winter interest as well as provide year round habitat for wildlife.
In conclusion: A front garden for your enjoyment
In the end, it’s important to first create a front garden that pleases you. If you can, keep in mind that your garden should not look so out of place in the neighbourhood that you are going to draw too much negative attention. That can be difficult if you are in a very traditionally minded neighbourhood. In that case it might be wise to go all out in the backyard, while you take a slightly tamer approach in the front yard.
I have read about so many homeowners trying to do the right thing only to be forced to cut down their gardens because neighbours or home owner’s associations choose to continue living in the 1950s.
If you find yourself in this situation, create a garden that pleases you most but maintains a enough of a traditional garden appearance that it does not attract too much attention.
If you are in a more progressive area, or in one that is far from your neighbours, have some fun. Go bold and create a garden for you, your local wildlife and the natural environment.
You won’t regret it.

How to get the Moody Green look in your images
The moody green theme has become extremely popular in today’s social media apps. Creating that vision in your own garden images begins by building a Lightroom preset that helps you create the images.

This dark, moody image of a monarch on sunflower is a good example of how, with proper post processing, an average image can be transformed into something more memorable that you would be happy to call your own.

Original image
The original image shows the typical greens and colours in the monarch.
Dark-Green look is perfect for garden photography
Garden photography offers an opportunity to capture beautiful images as well as give your cameras, lenses and accessories a real workout. The problem many photographers have is coming up with new ideas to take their garden photography to another level.
Creating high-key painterly images with your garden photographs (see images below) is certainly one way to add an artistic impression to your photography, but so too is doing the opposite and going dark and moody. (see above image)
In this post, we are going to explore tips on how to create this moody effect with our existing garden images, including revealing the Lightroom settings I use to create these dark green, moody images.
The camera you use to achieve these images can be as simple as your phone’s camera or a favourite point-and-shoot. For tips and reviews on my favourite cameras for garden photography, check out the following posts: Pentax K5, FujiX10, Pentax Q, Canon Powershot Elph, Panasonic Lumix, Olympus E-10 or Olympus PEN series of cameras.
Photography programs, however, such as Lightroom and Photoshop, even free programs like Gimp and Krita become integral to creating these memorable garden images.
Late fall and winter is also the ideal time to cozy up to your computer and experiment with some of your existing images.
I often use these digital post processing programs to create painterly images of my favourite flower and bird images. For more on how I create these images, check out my posts here: Creating Painterly Images from photographs, Digital images of hummingbirds.
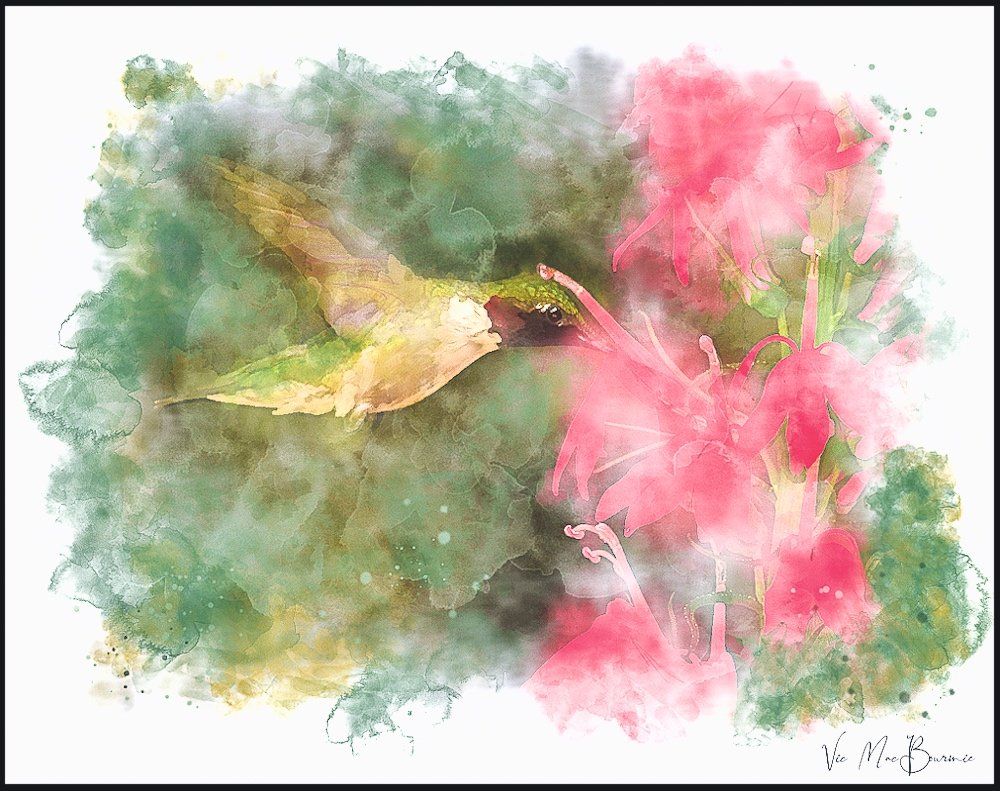
This high-key painterly image is an example of how you can turn your favourite photographs into beautiful painterly images using programs such as Lightroom and Photoshop.

This painterly image is an example of what you can achieve using post processing on one of your favourite photographs.
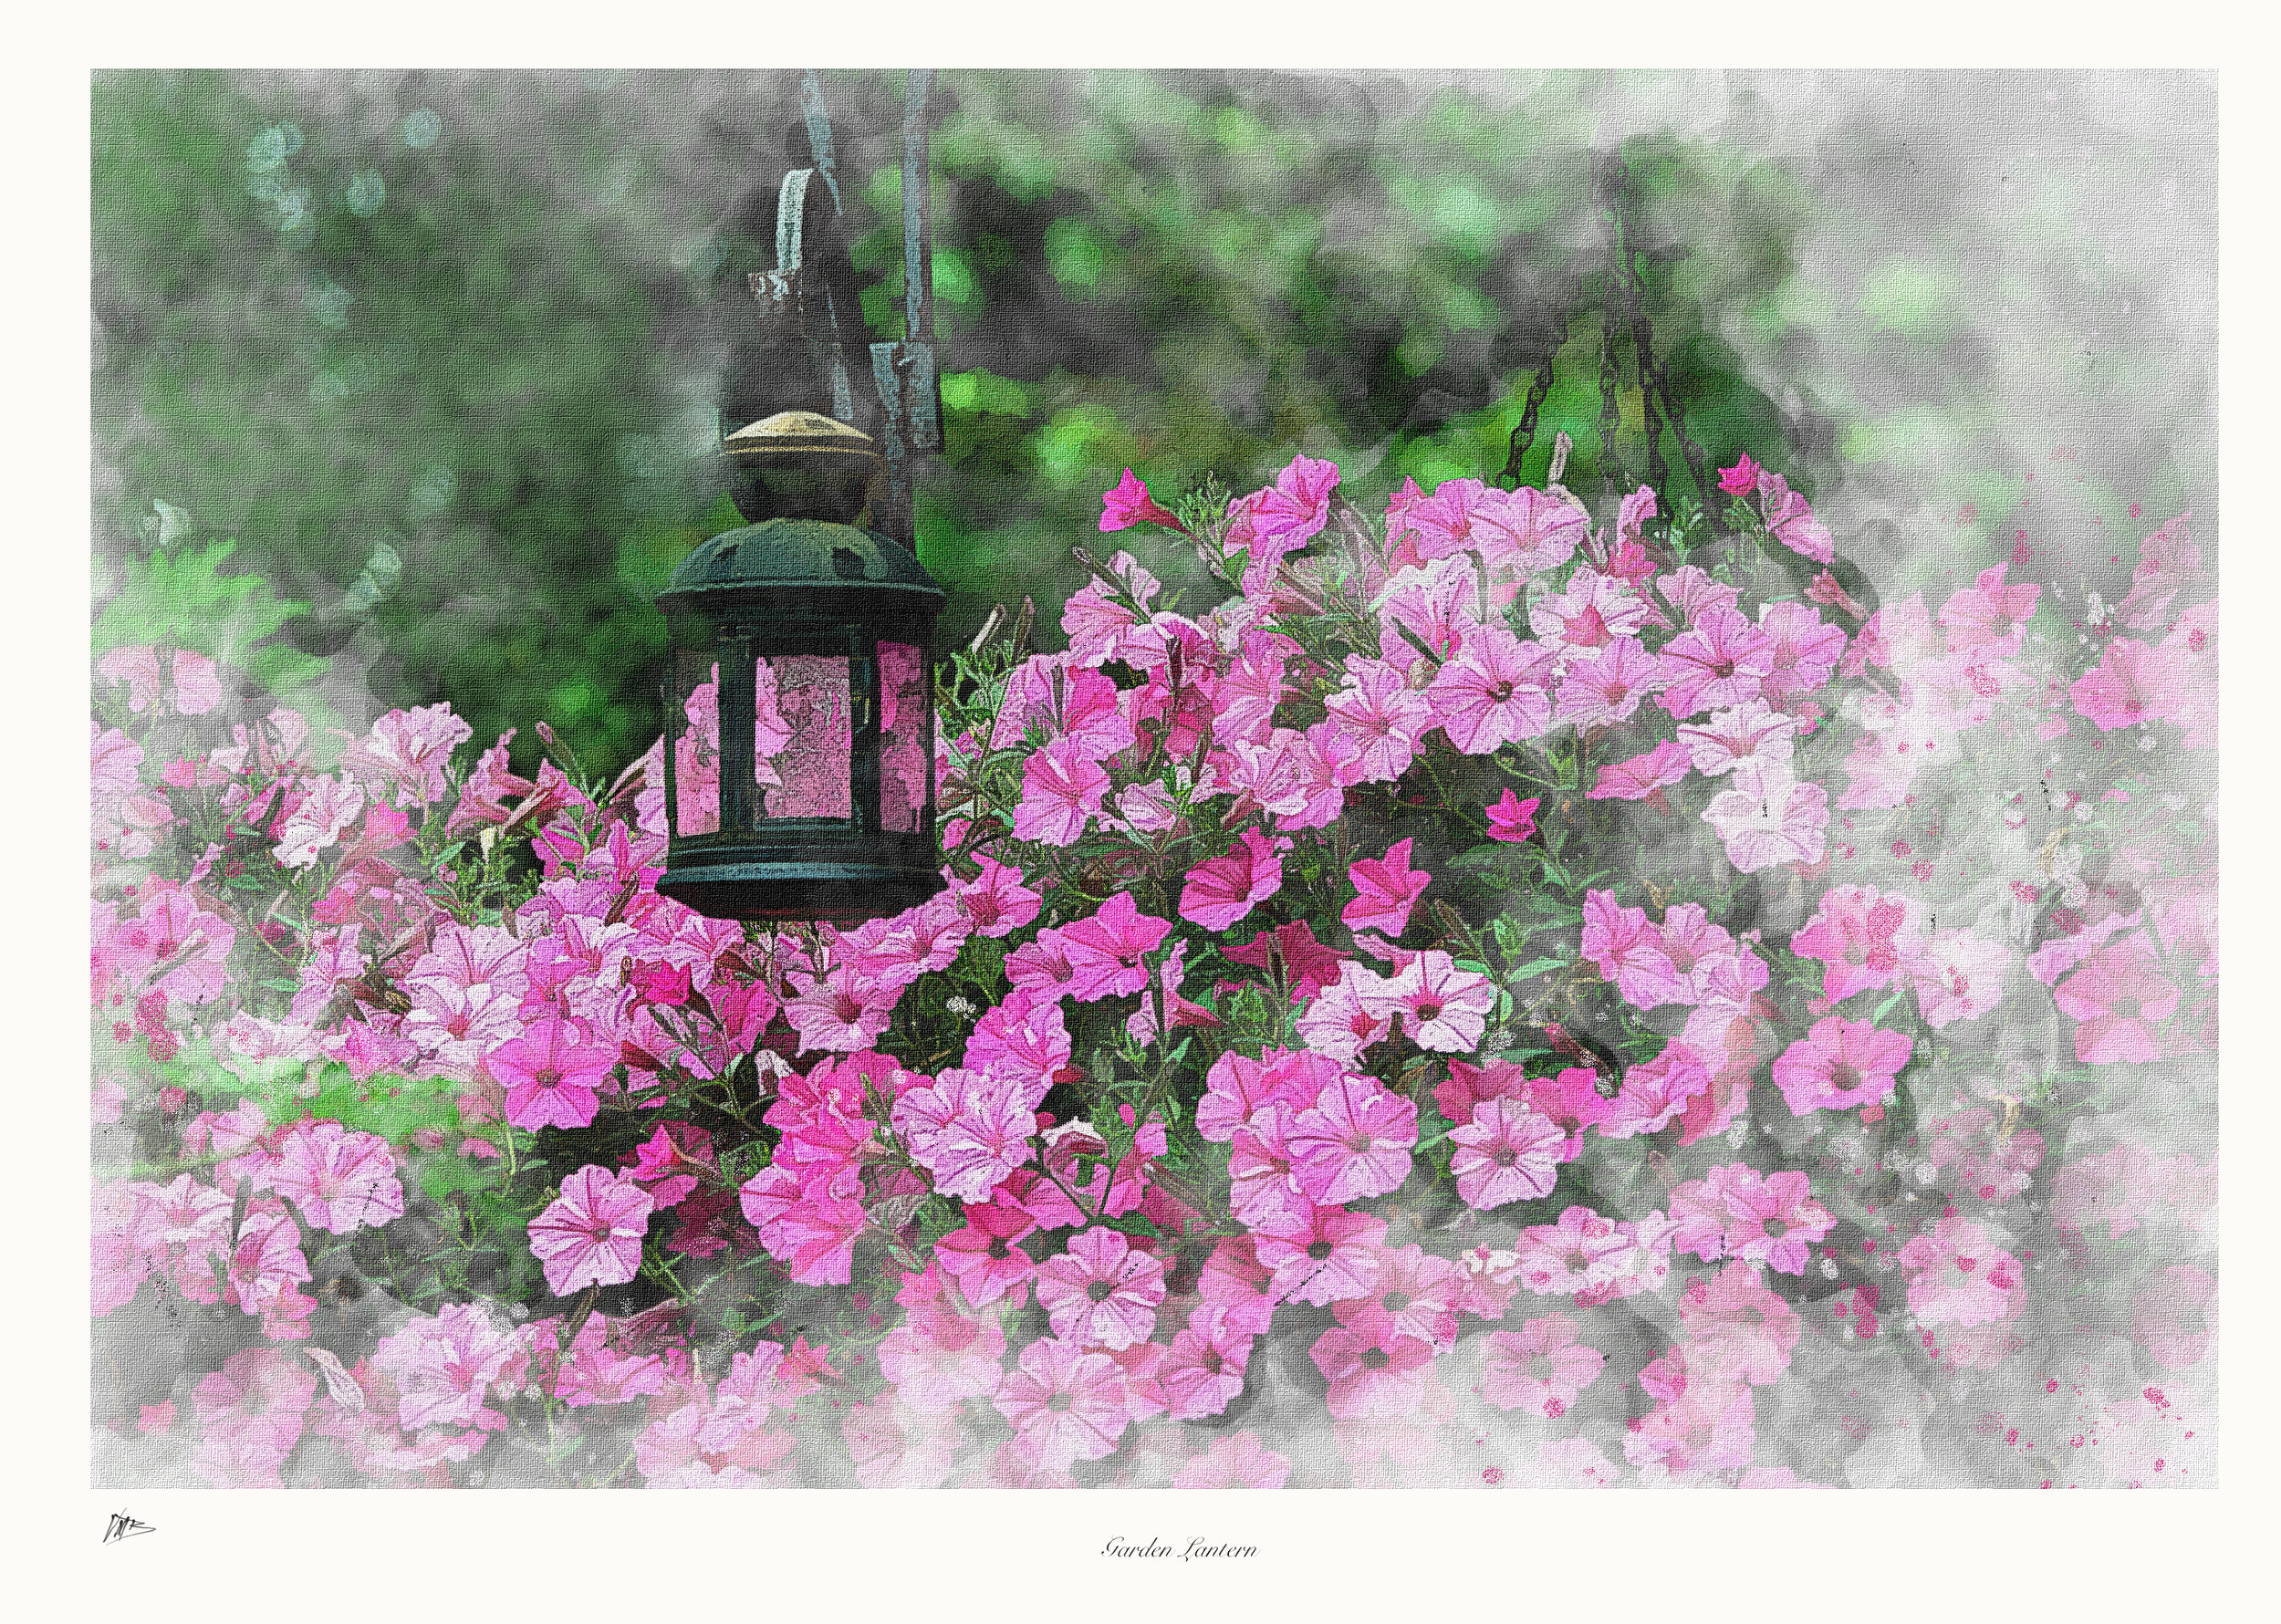
This painterly image of a typical backyard scene is an example of how you can transform you backyard photography into works of art.
Most of these processes involve creating high-key images of birds in winter or flower images. These results can be beautiful in their own right, but a growing trend in photography is creating a dark and moody feel in the images that often revolves around the greens contained in the image. This involves converting your vibrant spring and summer greens into dark, moody greyed-down greens while maintaining the other colours in the image.
I don’t consider myself an expert in post processing images, but I recognize that being able to create memorable images – whether they are fall scenes, portraits or garden images – requires some familiarization with these photography post processing computer programs.
Mastering basic techniques can transform your images from standard photographs into impressive works of art or simply bring out the best in your photography.
Below are just a small sampling of my Moody Green images I created using my Lightroom preset.
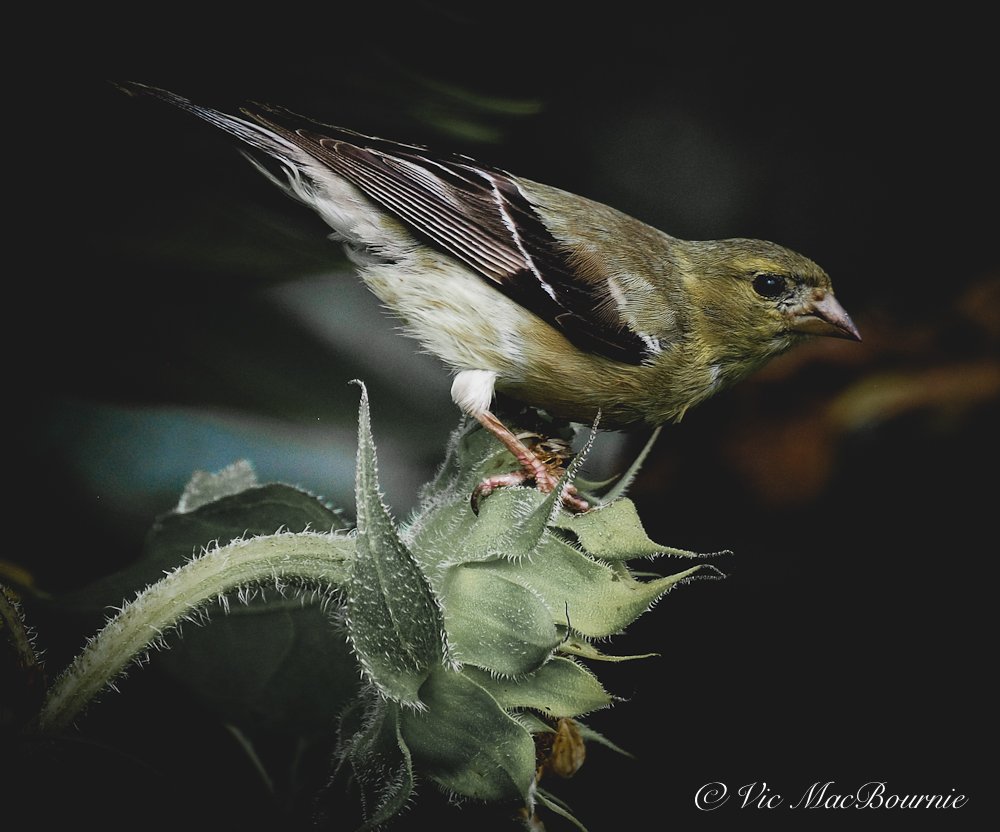
This image shows a goldfinch on sunflower that is post processed using my moody green preset in Lightroom.

This image of Black-eyed Susans and Blue Lobelia was taken with a vintage Auto 110 lens on the Pentax Q and then transformed with my Lightroom preset that darkens the bright greens but allows the other colours to appear more saturated.

Notice how the moody-green preset transforms the greens in the image while leaving the magenta colours in the obedient plants.
Create your own Moody-Green preset in Lightroom
So, how do we transform these images from average to memorable moody green garden photographs?
While similar effects can be created in Photoshop and other photo post processing programs, I simply use an older version of Lightroom to create the effect.
Lightroom presets are usually just a good starting point
Anyone who uses Lightroom presets knows that they are usually nothing more than a very good starting point.
Instead, you’ll likely need to tweak each individual image to get the desired results. Sometimes that involves decreasing the exposure, raising the blacks, playing with the shadow sliders or working with the HSL (hue, saturation and luminence) sliders to perfect the colours in the image.
The main focus of the dark-green moody look is to grey-down or add more black to the greens in the image. This is done by desaturating the greens while leaving most of the other colours intact to some degree.
Many photographers sell their favourite presets
You can purchase a moody-green preset from many photographers who offer them for sale on-line usually on their personal websites. All of these presets would likely give you slightly different, but similar results. By tweaking your finished presets, you can create more presets with slightly different looks that might work better with another type of image.
Once the original preset is tweaked, ensure that you save it under a different name. I have created a number of presets to give me different results from cinematic effects to high-key pastel images.
Rather than try to sell my moody green preset, I offer it here for readers to experiment and create on their own.
Here are my preset settings for Moody Green images
The following are my settings to create moody-green images with Lightroom 4. More up-to-date versions of Lightroom will give you finer control of the sliders, but the end result should be similar.
Feel free to copy these levels to create your own moody-green preset. Remember, most images will still need tweaking to achieve your desired results. Also, be warned that some images will not work at all with this and other presets.

Getting started with creating your own Moody-Green preset starts here. Notice the right side panel that the highlights are turned down, shadows are way up…


Creating presets in Lightroom
By following the above settings, you should be able to create the moody look that is so popular on social media these days.
Once you have created an image you are satisfied with, simply save the Lightroom preset under Develop/new preset.
By going through your existing images and picking out photographs that you think might work with the Moody- Green theme, you can test it out with the click of your mouse.
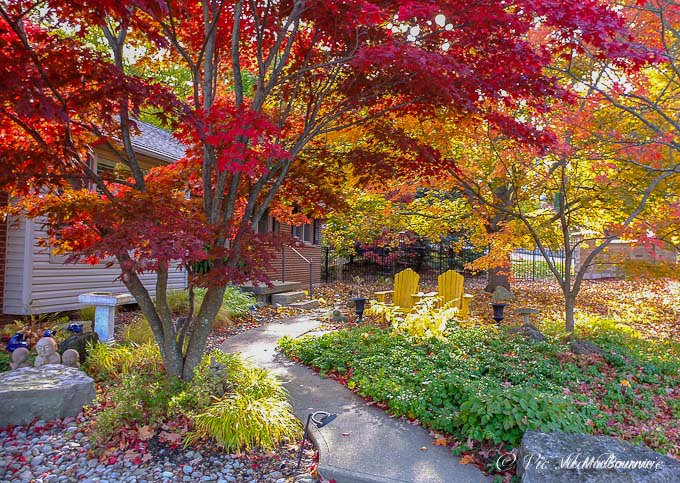
Mature Japanese Maple is star of the woodland garden
There is nothing like a mature Japanese Maple in a landscape with its elegant horizontal branches stretching out and shading the ground below.
How to properly grow, prune and plant Japanese Maples
A mature Japanese Maple is truly a spectacular site no matter the season. Their slow growth habit also makes even a mature Japanese Maple the ideal tree for today’s more compact front and back gardens.
Even in maturity, most Japanese Maples will reach only 15-20 feet (4.5 meters) in height. But getting to these lofty heights will take a while considering they will grow on average only about 1-2 feet (about .5 of a meter) per year. These non-native trees are generally hardy in zones 5-8. If planted in a sheltered micro-climate area close to your home, you might be able to stretch it to even lower zones.
That’s why a Japanese Maple (see image below) was the first tree I purchased when we moved into our home more than 25 years ago.

This images shows a trio of Japanese maples in our Japanese-inspired garden. The large, mature tree was the first tree we planted on our property 25 years ago. In the foreground is a weeping cutleaf Japanese Maple. A third Japanese Maple grows in the black container. A fourth Japanese Maple is actually growing in the garden behind the main maple.
I remember purchasing it on sale for about $25. Today, it’s a large, mature Bloodgood Japanese Maple that takes a prominent spot in our front garden and anchors our Japanese-inspired garden.
Twenty-five dollars and 25 years later, our little Japanese Maple – home to a red-eyed vireo family one year – is now a priceless addition to the front yard and contributes immensely to the curb appeal of our modest home.
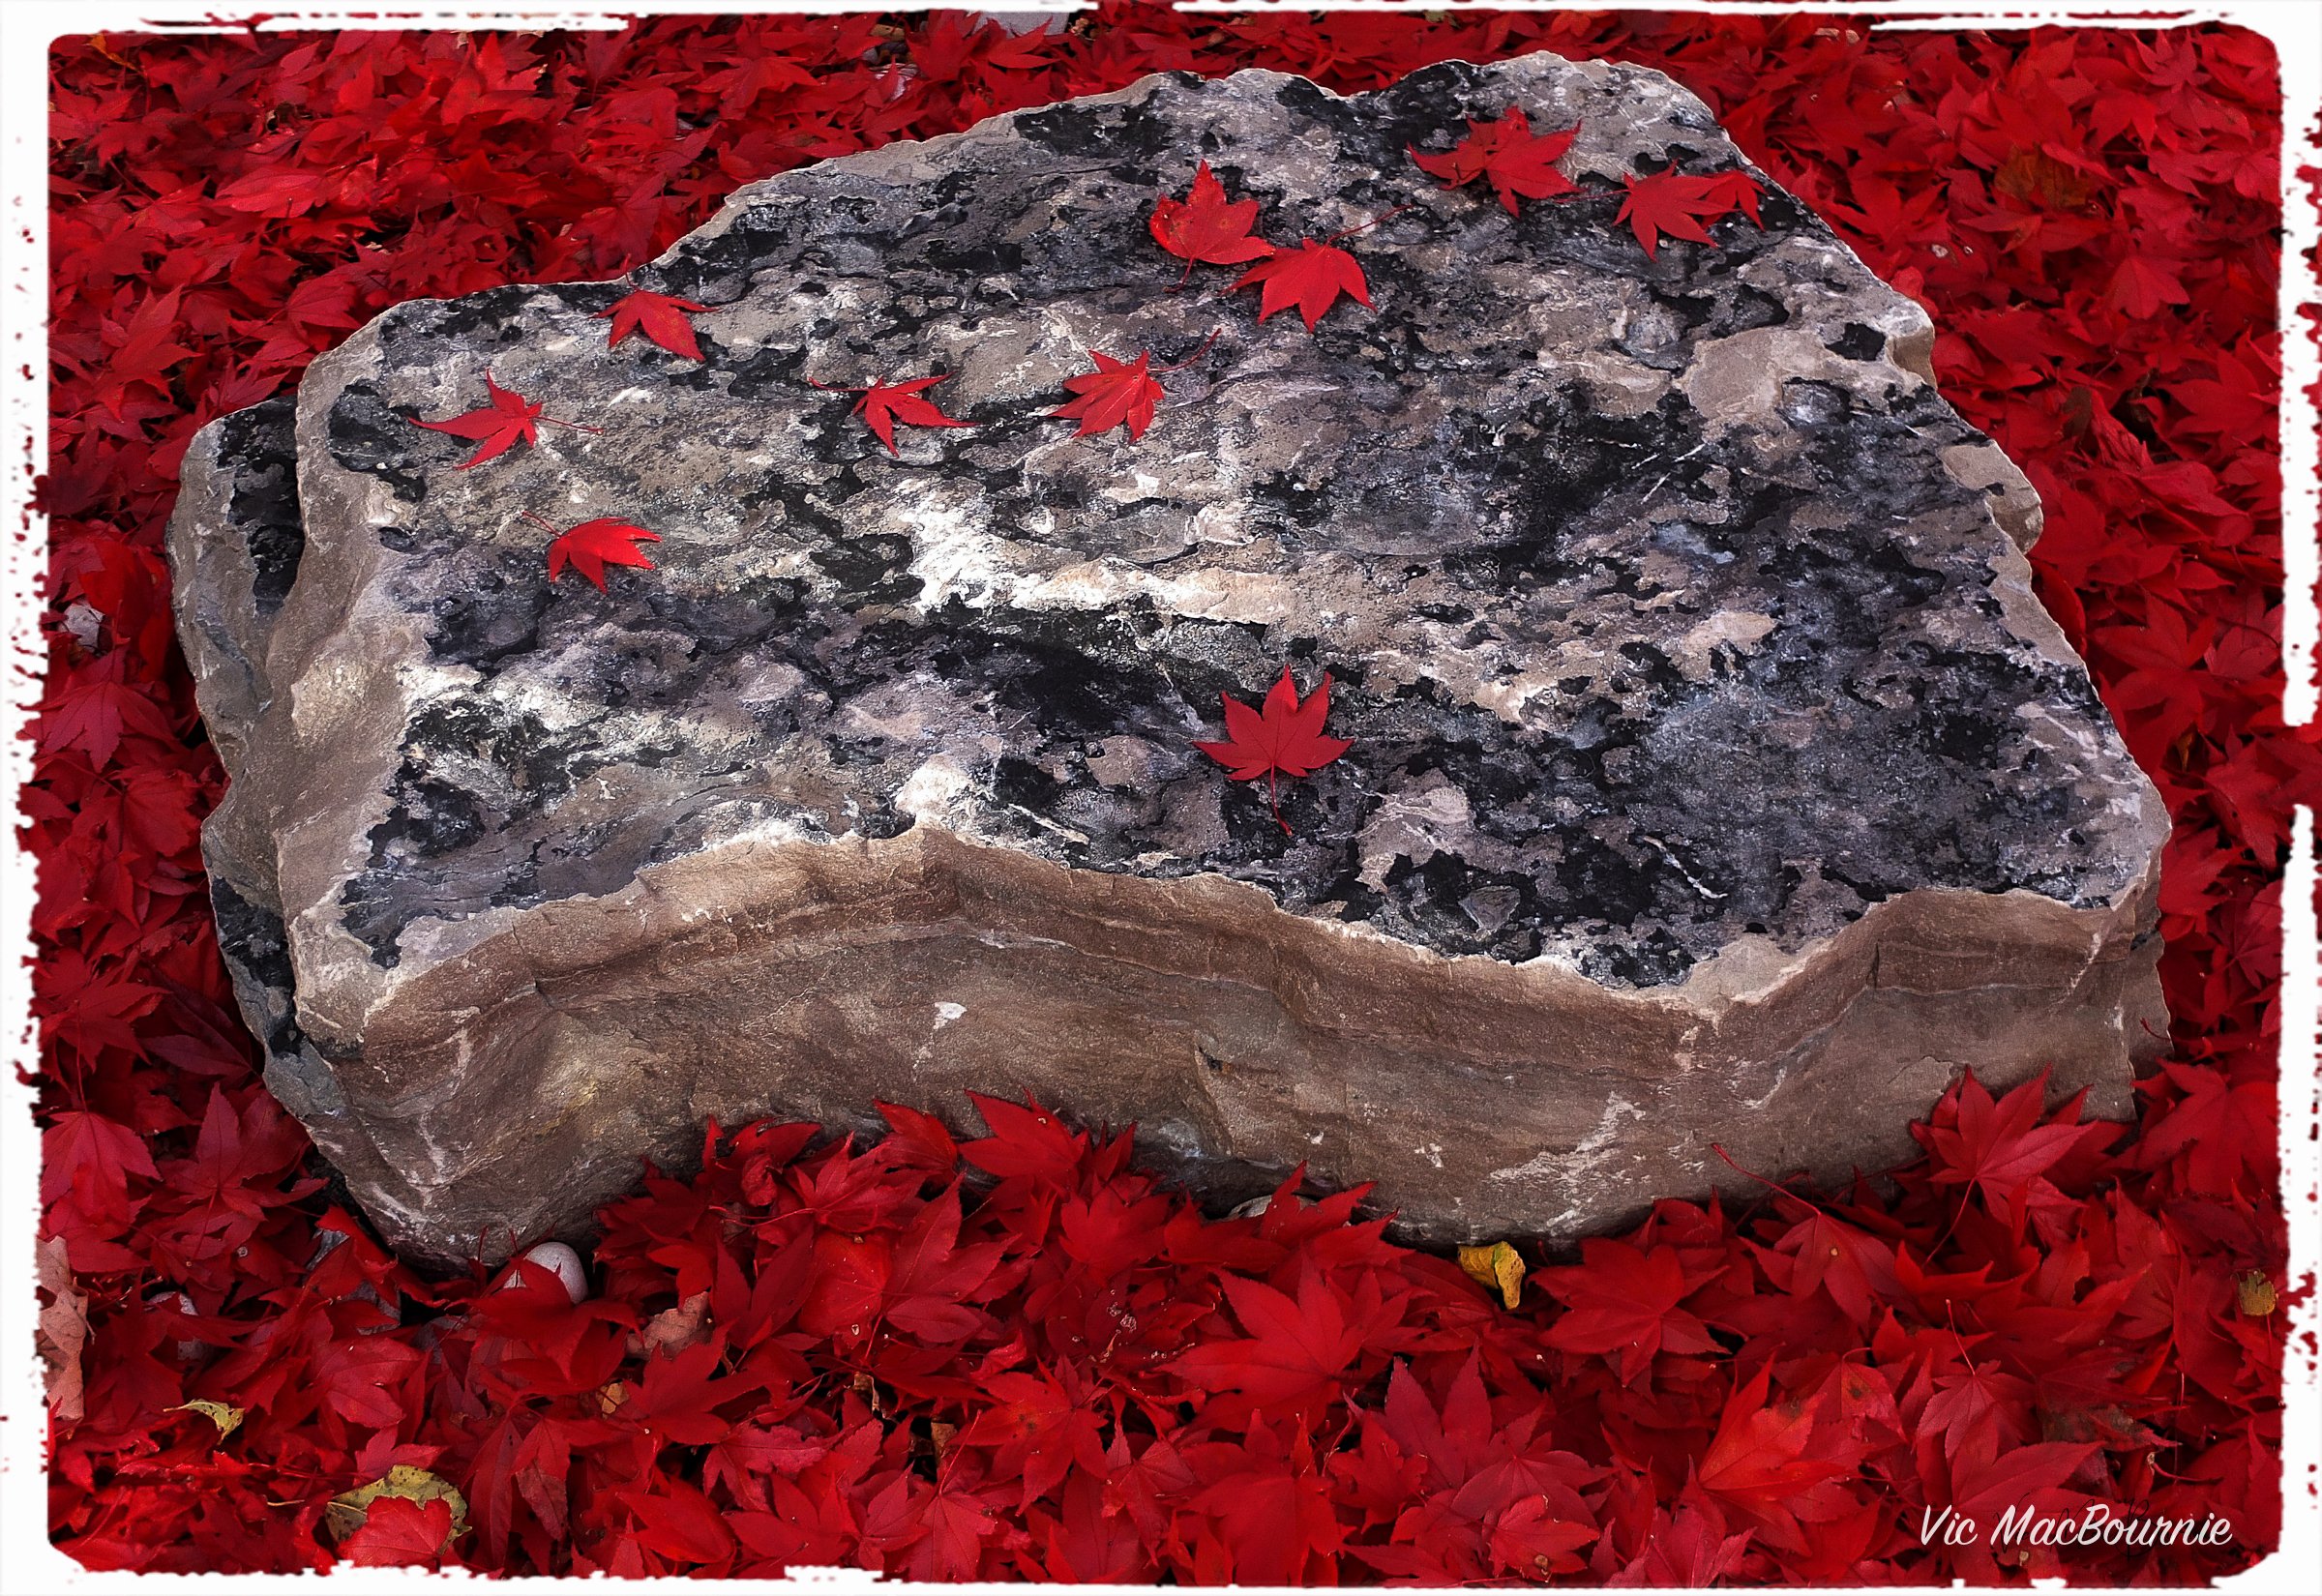
Japanese maple leaves form a beautiful, vibrant ground cover after falling off the tree.
Its beauty is evident in its early spring foliage which gives way to a darker red leaf colour through summer changing to an incredible crimson red in fall before the leaves all drop over the course of a day or two and create the most magnificent ground cover for several glorious days. The image above shows the leaves shortly after falling from the tree in fall and creating the most glorious of ground covers.
• For more on using Japanese Maples in the landscape check out my other posts:
•How to Use Japanese Maples in the Landscape

These images of mature Japanese Maples are illustrative of how these magnificent trees should be grown with respect and reverence for their inherent beauty. Any pruning should be done discretely to enhance their natural beauty.
Consider mature size when planting a new Japanese Maple
It’s important to consider the final, mature height and width of these trees when you decide to plant one.
Since there are many different Japanese Maples – all with varying growth habits – it’s important to do your research on the particular variety of tree you have purchased to ensure that you give it room to spread out.
It’s easy to think this tiny tree will stay small all its life and plant it too close to your home or other structures.
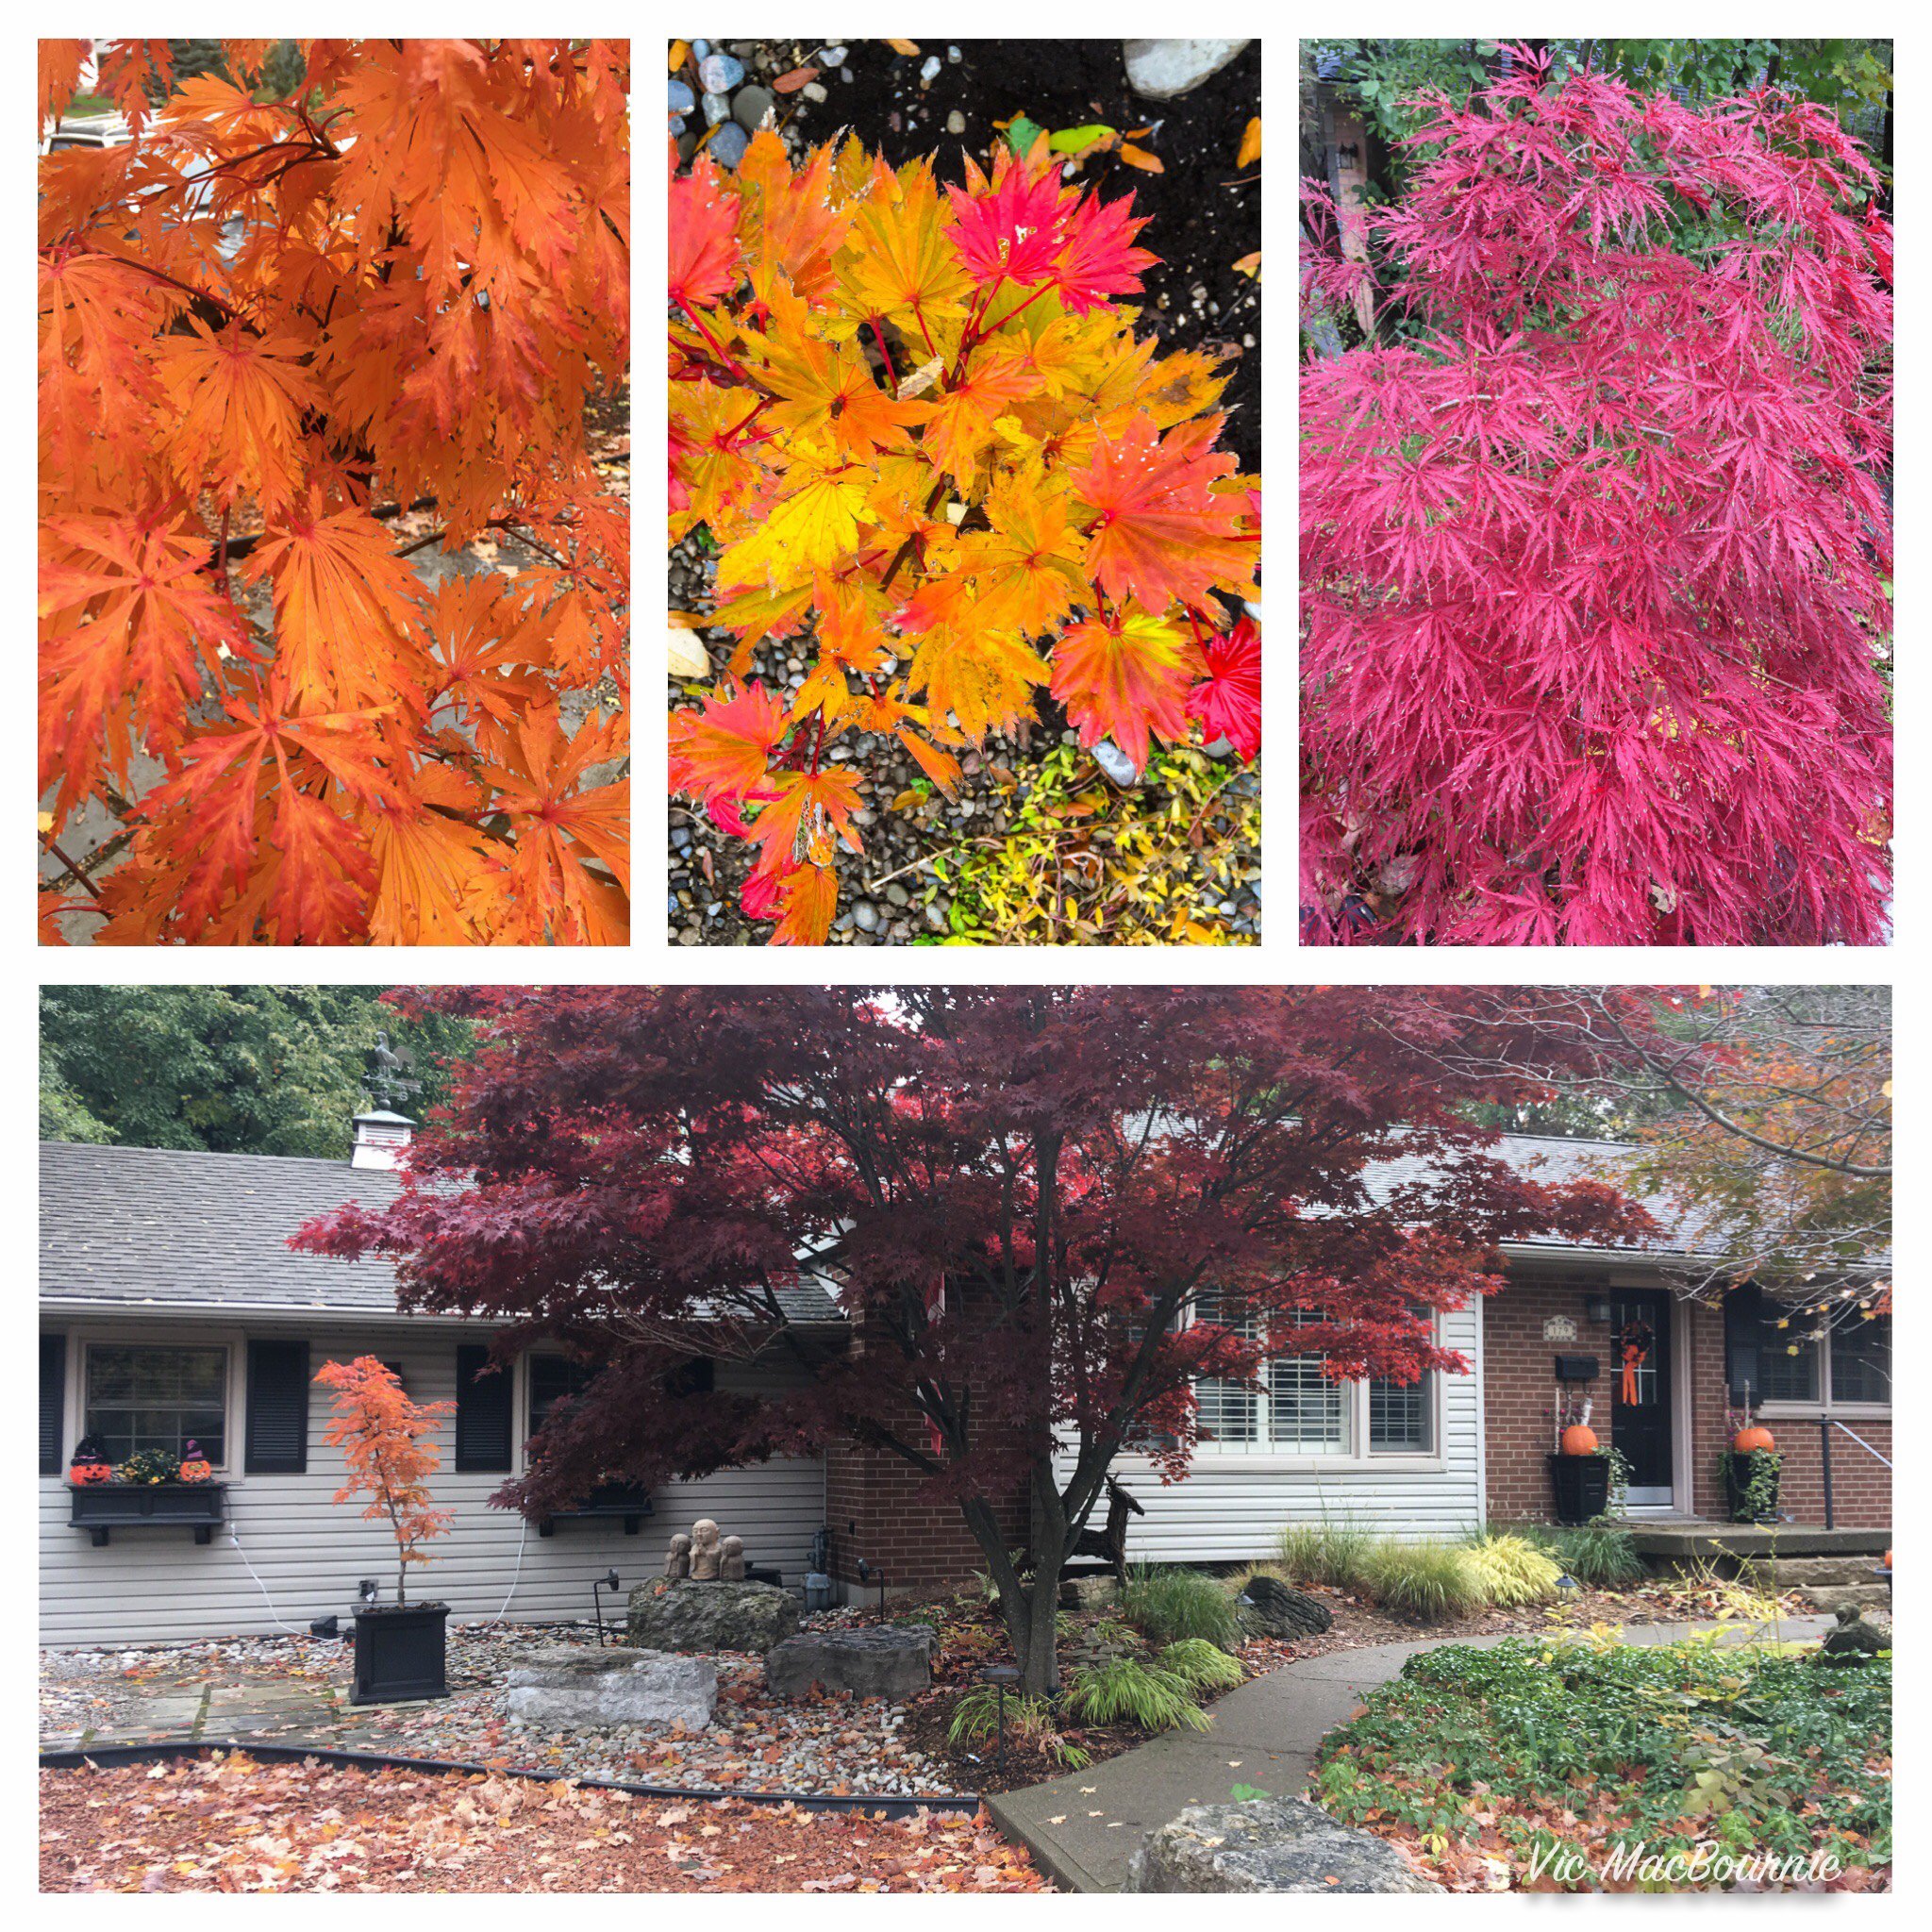
Image shows a mature Bloodgood Japanese Maple and the various leaf patterns of the different Japanese Maples including the Laceleaf, full moon and cutleaf varieties.
Let your Japanese Maples spread their horizontal branches
Although they don’t grow very tall, most Japanese Maple’s, except for the weeping varieties, are meant to be grown in a way that allows their branches to spread out horizontally.
In fact, a properly grown, mature Japanese Maple can have a horizontal spread equal to or even greater than its height.
As Japanese Maple trees mature, they should be treated more like a flowering dogwood trees and allowed to take on their natural shape. These are not trees you want to heavily prune into tight balls or columnar shapes. (There is a columnar variety available if you really have a constrained space.)

A mature Japanese Maple in fall colours.
Please don’t heavily prune these trees into ridiculous shapes. As they mature, these majestic trees deserve to be allowed to grow the way nature intended.
If you are not sure how to prune these trees, either leave them to grow on their own, or hire a professional tree pruner who specializes in Japanese Maples. Be careful, a lot of tree companies will tell you they can prune the tree only to destroy your tree’s lovely horizontal shape.
I was actually shocked to see one of the top garden websites’ using an image of a Japanese Maple pruned to the point that I’m sure would be a crime in Japan or at least a mortal sin. In all seriousness, just plan to give these trees ample room to spread out and you will be amazed at how beautiful they will become in time.
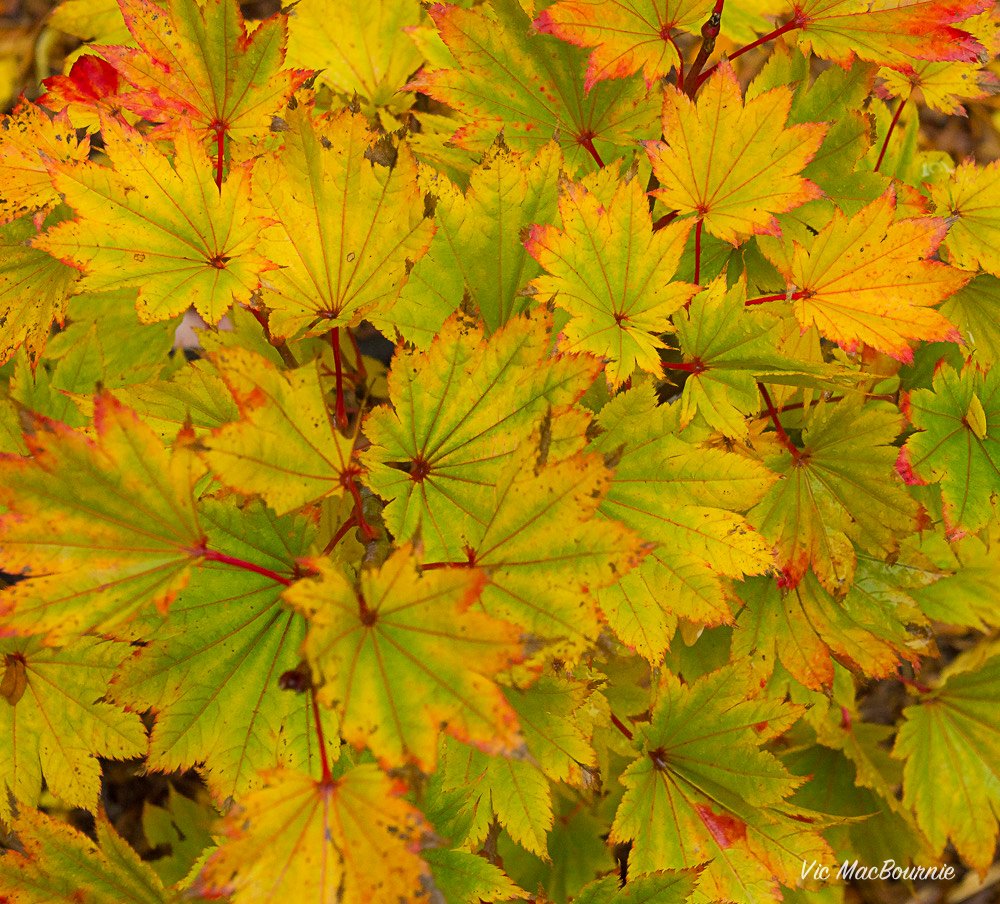
Acer shirasawanum 'Aureum' (Golden Full Moon Maple) in its fall colours.
Japanese Maples for very small or tight areas
Ont of the great things about Japanese Maples is that there is a huge variety available, including ones that never get very large at all.
So, rather than trying to grow a Bloodgood variety in a tiny space, consider one of the slower growing varieties that never get much larger than three or four feet. These include the cutleaf weeping Japanese Maples that can be spectacular in their own right.
However, there are acer palmatum varieties with such a slow growth rate that they will never get too large for a small space.

A very young Acer shirasawanum ‘Aurem’ Golden Full Moon Maple growing in our back garden. Below is the same tree after about seven years of growth.
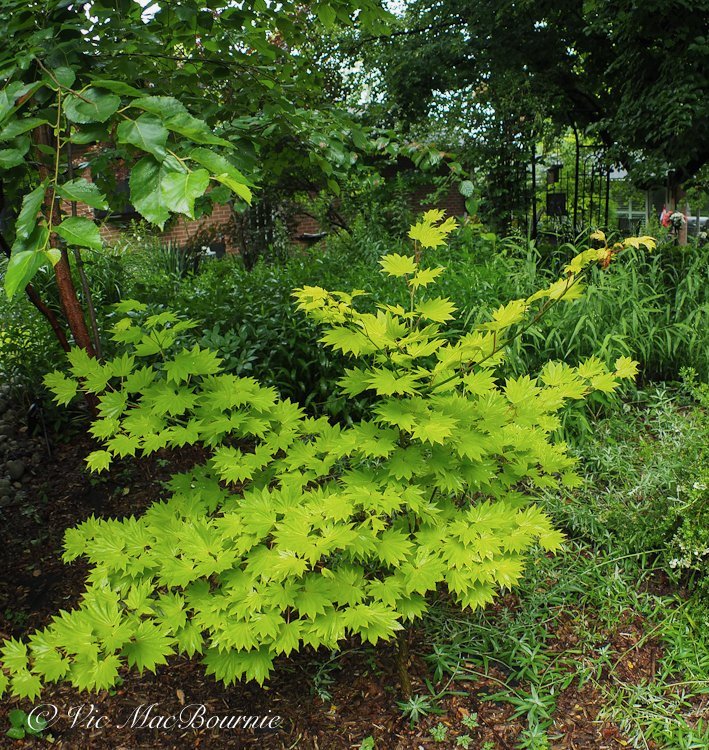
Acer shirasawanum ‘Aurem’ Golden Full Moon after about 7 years of growth.
In our woodland garden, we have a Acer shirasawanum ‘Aureum’ (Golden Full Moon Maple), with a mature height of about 15 feet. It’s extremely slow growth habit means reaching this height would probably take your lifetime. A lovely mature specimen can be seen here on Kiefer Nursery’s website.
One of the more expensive and surely one of the most beautiful specimens, these are best grown as a true understory tree in the shade of larger trees where they can get ample shade to protect their magnificent golden foliage.
Diseases to watch for in your Japanese Maples
Japanese Maples are relatively healthy trees without any significant diseases. However, like any plant, they can still be susceptible to certain diseases.
One common disease that affects Japanese Maples is powdery mildew. This fungal infection appears as a white, powdery coating on the leaves, causing them to become distorted and eventually drop off. Powdery mildew thrives in humid conditions, so it’s important to ensure good air circulation around the tree and avoid overhead watering.
Verticillium wilt can be deadly for Japanese Maples
Another disease that can affect Japanese Maples is verticillium wilt. This fungal infection attacks the tree’s vascular system, causing wilting, yellowing leaves, and eventual death. Verticillium wilt is difficult to control once a tree is infected, so prevention is key. Avoid planting Japanese Maples in soil that has previously been infected with verticillium wilt and ensure the tree is well-watered and properly fertilized to maintain its overall health.
I have personally experienced Verticillium wilt that quickly killed two of my favourite Japanese Maples and then took out another red maple in a corner of the yard after I threw the dead Japanese Maple with soil attached in the back near the regular maple. I believe the contaminated soil got into the soil around the young red maple and killed it over the course of a year.
Lastly, Japanese Maples can also be susceptible to root rot, especially if they are planted in poorly drained soil. Root rot is caused by various fungi and can lead to the tree’s decline and death. To prevent root rot, it’s important to plant Japanese Maples in well-draining soil and avoid overwatering.
By being aware of these common diseases and taking preventive measures, you can keep your Japanese Maples healthy and thriving.
Regularly inspecting the tree for any signs of disease and promptly addressing any issues that arise will help ensure the long-term health and beauty of your Japanese Maples.
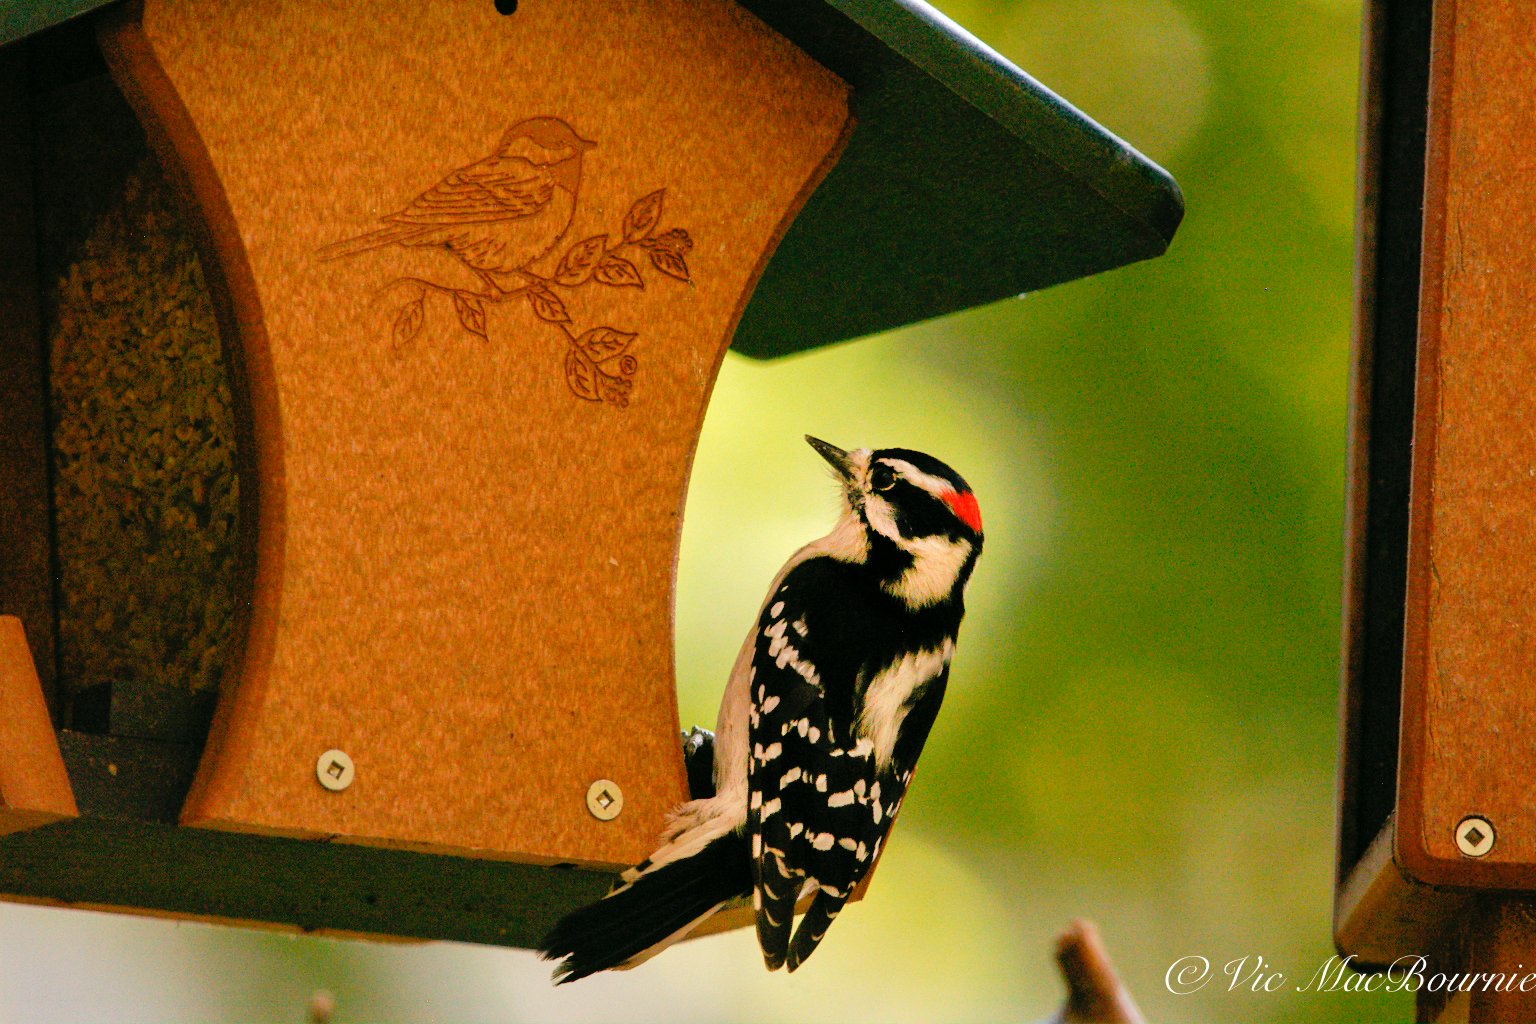
Large bird feeder plays big role at feeding station
Large bird feeders are an excellent choice to not only provide a reliable food source for backyard birds, but also makes keeping them filled less taxing, especially in winter.
Fill-and-forget-it makes larger bird feeder best choice

A large resin, hopper-style feeder is a good all round choice as a bird feeder.
A large bird feeder is a great investment to attract a huge variety of backyard birds.
In fact, incorporating a large bird feeder into your backyard-feeding strategy will play an important role in both attracting more birds as well as making the feeding experience much more enjoyable.
Let’s face it, going out every day to fill your feeders can quickly become a chore you can do without.
More importantly, if you fail to keep your smaller bird feeders full, backyard birds may look at your feeding station as an unreliable source of food and go elsewhere.
If you are just starting out on your bird feeding journey, purchasing the largest, high quality bird feeder you can afford is probably your best chance at success. It’s a lot easier to keep a large feeder filled and ensure the birds return to a reliable food source than to spend your time trying to keep a small feeder filled.

Our bird feeding pole showing a number of feeders including the large black industrial strength fly-thru feeder on the right.
One visit from a squirrel, and the small feeder can be emptied in minutes. If the empty feeder goes unnoticed for any period of time, birds will begin to look elsewhere for a reliable food source.
Consider using smaller feeders for more specialized seeds, including niger, safflower and millet. These sources of food are preferred by more specialized birds and, for the most part, are not as appealing to squirrels. There is a good chance they will not be raided by squirrels or birds looking for sunflowers. As a result, they will need less filling and monitoring than if they were filled with more desirable sunflower seed.
Three large feeders add variety and reliability
I use three large feeders at various times during the year. One is ideally built for black oil sunflower (see image above of large black screened feeder), another is a large feeder that works like three smaller feeders that allow me to offer a variety of food to specific birds. The final feeder is a larger, covered hopper style feeder that is good for a variety of birds and seed concoctions.
If you are either looking to purchase your first feeder, or your first large feeder, consider purchasing a large resin hopper feeder, They tend to be the best all-round choice. The larger feeders not only hold plenty of seed, but they offer sufficient space for larger birds like blue jays to perch while they eat.
Industrial strength black oil bird feeder
The black oil sunflower feeder is a massive, fly-through, industrial type feeder that leaves the seed completely open to the elements. Made from industrial strength steel mesh, this is an ideal fill-and-forget-it feeder that can act as a real magnet for many backyard birds that thrive on black oil sunflower seed. That, as most of us know, includes almost all backyard birds.

The above Green Meleave Bird Feeder, that holds up to 6.5 lbs of seed, is similar to our larger industrial fly-through feeder. This high quality feeder is made entirely of metal and the bird-shaped safety lock lid makes the feeder extra secure against squirrels, deer and raccoons.
Our large black industrial-grade feeder makes it the ideal feeder to take on squirrels and even racoons that might make it up our feeder pole system. Even deer have trouble shaking out much seed with their noses.
Because its metal screen leaves the seed open to the elements, black oil sunflower – with its protective outer shell – is best used in this feeder.
Our feeder is large enough to allow several birds to feed on it at once, including several smaller birds that can actually fly into the interior of the feeder and feel protected surrounded by their favourite food. I can’t help but think birds imagine themselves in heaven when they actually fly into the feeder and realize they are literally surrounded by their favourite food.
This feeder can stay full for more than a week, depending on the time of year and the number of birds using the feeding station.

Three cylinder feeder offers variety of seed to specialized birds
The second feeder we use on a regular basis is a large, three-cylinder feeder like this one from Heath that allows you to feed three different types of food and includes 6 feeding perches. These feeders are particularly attractive to smaller perching birds.
These feeders are completely covered and do a good job of keeping the seed dry even in harsh weather conditions.
I use this style of feeder to provide a variety of bird feed to attract more specialized birds at different times of the year. In spring and summer, for example, I use one of the feeding cylinders for white proso millet, which is a favourite for Indigo Buntings. In another cylinder, safflower can be used to give Cardinals their own special treat. The third cylinder can be filled with a combination of no-mess sunflower seeds and meal worms for nuthaches, chickadees and woodpeckers or specialized finch food for goldfinches, housefinches etc.

Hopper-style feeders are excellent choices for general bird feeding. The larger hopper in the front not only holds more food, but gives larger birds more area to perch while they eat. The size of the feeder you choose is in part dependent on the type of birds you are looking to attract.
Large hopper-style feeder is always a solid choice
The final choice is a large hopper-style feeder that is an excellent all-round feeder for a variety of birds.
I particularly like the resin-feeders (see post on why resin feeders are superior to wood ones) for their more hygenic properties.
Filling these feeders is easy and cleaning them, especially the Wild Bird Unlimited feeders that have removable bottom plates, involves a simple blast of water and a little soap.
I use the large hopper feeder and a smaller one to hold the expensive, no-mess feed that is my mainstay for most of the summer when I don’t want a build-up of seed and husks under the feeders.
I also recommend trying to purchase resin feeders over the wood ones. Although the more modern resin feeders are more expensive, they tend to last longer and, most importantly, are easier to clean. For more on choosing resin feeders over wood ones.

This Audubon squirrel feeder, available on-line from walmart offers strong construction and weight sensitive feeding….
Another option is to invest in a steel hopper-style feeder much like this one available from Walmart and other sellers. This hopper style feeder even has weight sensitive adjustments that help you target the type of birds that can use the feeder.
This style of feeder was one of the first feeders I purchased when I started to feed birds. The feeder was exceptionally well made and lasted for years before I replaced it. The all-metal construction makes them ideal for situations where squirrels and racoons are a problem, and the touch sensitive feeding bar makes it ideal for discouraging larger heavier birds like Blue Jays, Grackles and blackbirds that tend to throw feed on the ground in search of their favourite seed.

Large covered table feeders can be a useful addition
Now that we have explored the importance of including a large feeder as part of your bird feeding arsenal, let’s look at another large feeder that also offers lots of potential.
Feeders such as the Large Amish Homemade Gazebo Vinyl Bird feeder (also pictured above as a clickable Amazon link), is an ideal choice for those looking for both an attractive and an effective bird feeder. The fact it is vinyl rather than wood makes the feeder even more desirable.
Large covered table feeders can be ideal to attract certain types of birds to your yard. Many of these feeders are also very attractive and can be used as functional pieces of art in your landscape.
To show them in their best light, these feeders really need to stand alone in a picturesque area of the garden where they can shine. Look for feeders like the Large Amish Homemade Gazebo feeder that has a large, built-in seed storage container.
Without built-in seed storage, the covered table feeders either have to be filled on a daily basis, or simply become attractive works of art in the landscape.
If they are used as stand alone feeders, they will also need to have their own pole and guards to keep squirrels and raccoons off the feeder.

A nuthatch feeds from a small resin hopper-style feeder.
Can a large bird feeder save you money?
Whether you are just starting out on your bird feeding journey, or have been feeding backyard birds for a number of years, investing in a large high-quality feeder is a good choice.
A large feeder will help ensure that your yard becomes a reliable source of food for the neighbourhood birds. They are particularly important in winter, when keeping feeders full becomes both more important as well as more difficult.
Large backyard feeders can indeed save you money in several ways. One of the main advantages is that they allow you to purchase bird seed in bulk instead of smaller bags. By having one or two larger bird feeders, you can use an entire large bag of bird seed, which is usually more cost-effective than buying multiple small bags. This way, you can take advantage of bulk discounts and save money in the long run.
Another benefit of using larger feeders is that they can help minimize food waste. When squirrels, raccoons, and deer are unable to access the feeders, there will be less spilled food or seeds eaten by these critters. This means that more of the bird seed will be available for the birds you are trying to attract, reducing the need to constantly refill the feeders and ultimately saving you money on bird seed.
By investing in larger backyard feeders, you not only save money on bird seed but also ensure that the food you provide is primarily consumed by the birds you want to attract. This can lead to a more enjoyable bird-watching experience and a greater variety of bird species visiting your backyard. So, if you're looking to attract backyard birds while also saving some money, consider using larger bird feeders.

Fields of gold: How to create ideal wildlife habitat
Creating a habitat for wildlife can be as simple as a flower border extending down the side of a driveway or across the back of your yard.
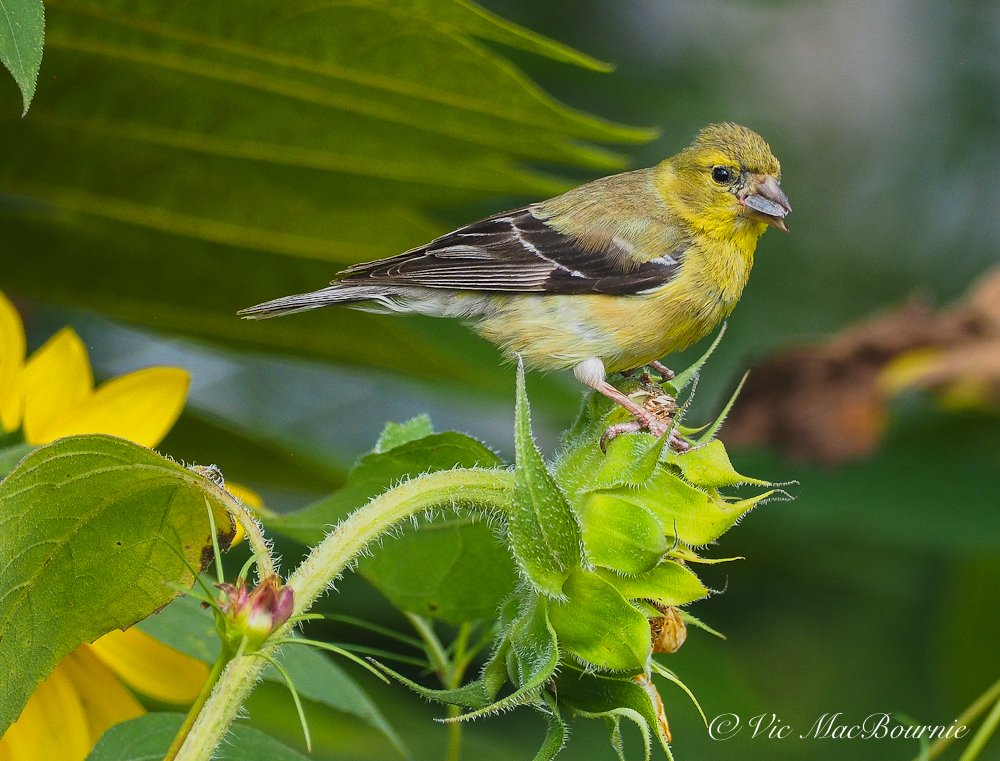
This image shows a goldfinch feasting on a sunflower in a long naturalized border of sunflowers, asters, coneflowers, goldenrod and other native and non-native flowers.
How to create a naturalized flower border for wildlife habitat
The combination of dozens and dozens of colourful Goldfinches and monarch butterflies feeding on hundreds of sunflowers and a mix of other native and non-native plantings was simply too much to pass by.
As a gardener and photographer, these are situations begging us to explore further. The massive border stretching along a roadway leading into an old cemetery is obviously not natural. Although parts of it were planted, it had been left to naturalize on its own resulting in the creation of a wonderful wildlife habitat that would not be difficult – except for its sheer size – to duplicate in our own gardens
This is not a typical precious garden border we see in so many urban landscapes.
Creating a naturalized flower border with a combination of native and non-native flowers, with an eye on providing seeds for birds and other wildlife, is the key to creating ideal wildlife habitat.
(All the images on this post are from the flower border wildlife habitat.)
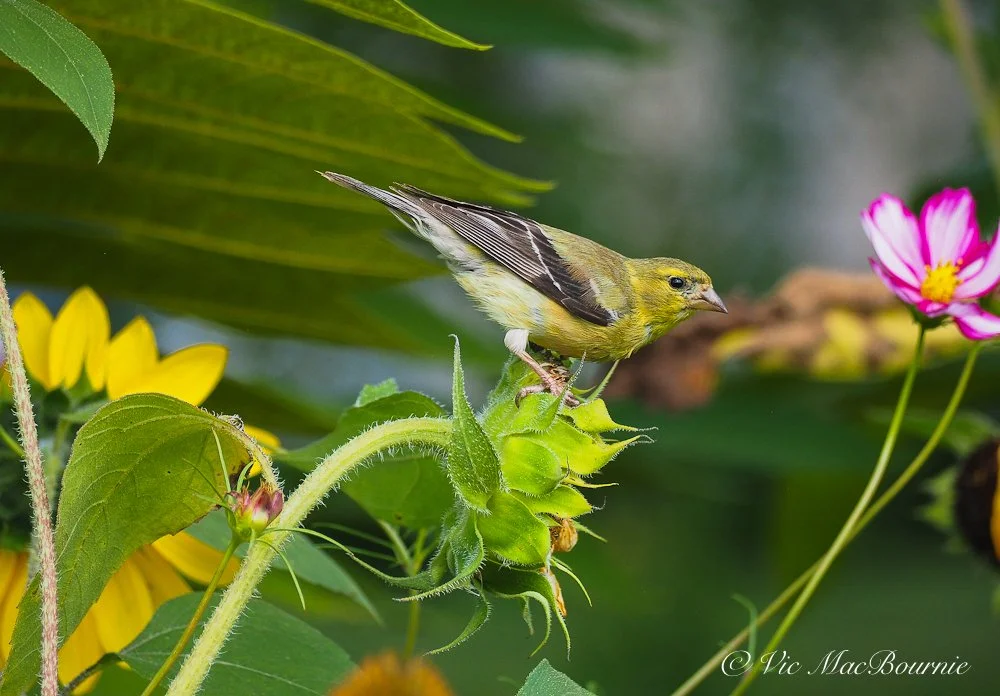
A goldfinch perched on a sunflower among other wildflowers and a colourful cosmos.
How to create wildlife habitat
These plantings grow together creating a wall of foliage where birds, red squirrels, mice, insects and who knows what else can seek refuge in a natural wildlife habitat.
What it’s not is a single coneflower planted in a sea of mulch, or a grouping of three sunflowers held erect with poles and supports.
There are no individual plants in this naturalized border.
This is habitat – real habitat. Habitat that birds, butterflies and a host of other wildlife flock to for food and cover.

A small portion of the naturalized border that could be duplicated in our gardens on a small scale.
If you ever wanted to create outstanding wildlife habitat, this is the way to do it. Take notes, take pictures and work to create something similar in your own backyard.
The border measures at least the length of a football field, yet it is only maybe 10-12 feet deep running along the side of a chain link fence.
In late summer and fall, it is truly a magnificent entrance to what many would consider a solemn place.
But here, it works as a celebration of life if there ever was one!
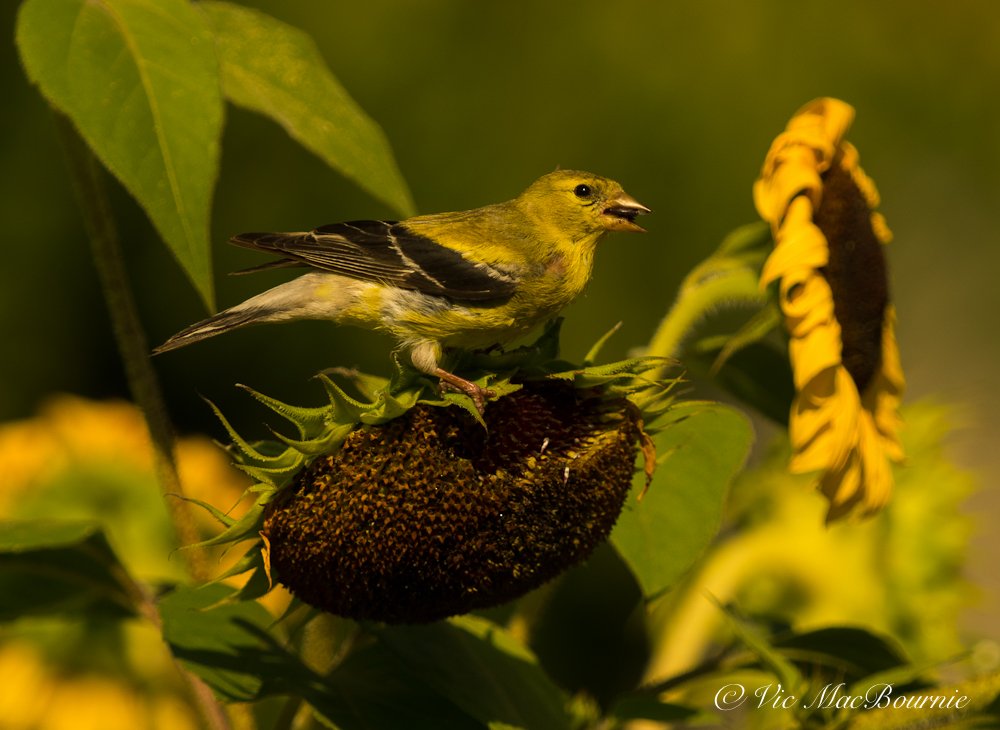
Goldfinch on sunflower at naturalized wildflower border.
Lessons learned from the ultimate wildlife habitat
Besides its obvious wildlife benefits, the naturalized border’s greatest gift is an opportunity to learn from its magnificence.
We can explore it, study it and learn from it with the idea of creating a smaller version that offers the same benefits to our backyard wildlife.
This is actually a form of mini meadow created from what would have been a wasted strip of grass running alongside a roadway leading into a cemetery. (See posts: Making a mini meadow, and the Making of a Meadow.
It’s really a shame that more cemeteries, golf courses and other public areas don’t adopt a similar approach to wasted spaces where grass seems to be the only option in their minds.

A goldfinch tucked in among the sunflowers growing in a naturalized garden.
The naturalized border provides us with an opportunity to record – even if it’s only in our minds – the vision of a more or less naturalized border incorporating sunflowers, coneflowers, goldenrod, cosmos and a host of other native and non-native flowers.
I love using natural areas as inspiration for our garden. Check out my link for more inspiration on learning from what Mother Nature offers.
Back to our naturalized border and wildlife habitat.
I stumbled upon the magnificent naturalized flower border while out photographing Great Blue Herons and White Egrets at a nearby pond.
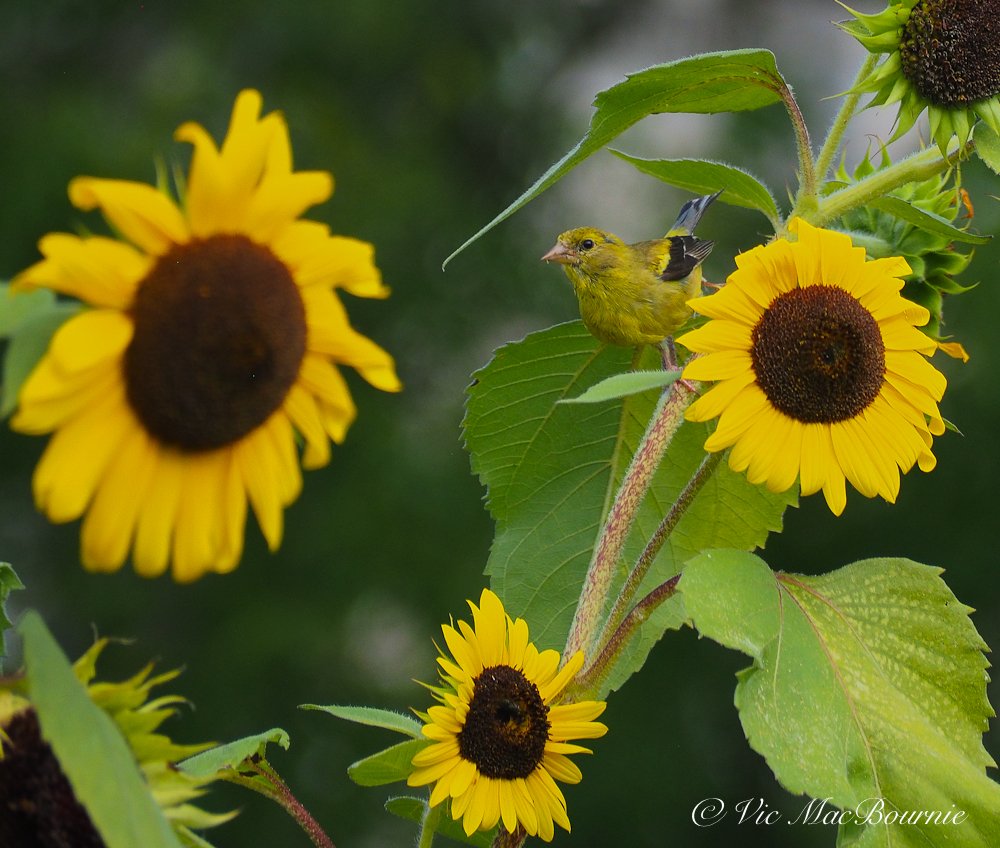
It’s not always necessary to move in extremely close to your subject. Don’t be afraid to step back and create a more environmental image showing the bird’s surroundings, especially when they are this beautiful.
After an afternoon with the herons and egrets, (see images below) the flower border literally stopped me in my tracks and forced me to drive over for a closer look.

Goldfinches were not the only ones feasting on the abundance of sunflowers.
As I drove up to it, the long, naturalistic border of sunflowers, coneflowers, New England asters, goldenrod and cosmos, – just to name a few – slowly revealed its true magnificence. Birds and more birds feeding voraciously on the sunflowers, coneflowers and other seed heads that filled the border.
If you ever wanted to see nature at work, it was here in great abundance.
Goldfinches to be more exact. Sure, there were a few chickadees, sparrows and even a couple of hummingbirds that joined in on the feast, but for the most part it was primarily goldfinches. I am sure other birds join in on the action over the course of a day but the overwhelming number of goldfinches was hard to ignore.
Monarch butterflies also visited the plants regularly as they prepared for their long journey south for the winter.

It was a spectacular scene and one I knew I had to return to the very next day.
And that I did, accompanied by an arsenal of cameras and long lenses. Truth be told, I actually returned for a second day because the action along the border was too good to ignore.
It was also the perfect opportunity to try out various cameras and lenses for my camera reviews on this site.
Cameras and lenses used to document the wildlife habitat border
While my Pentax K5 and 300mm F4.5 * lens documented most of the action, I have to admit that the Olympus EM-10 equipped with the 40-150mm kits lens resulted in many of my favourite images. Pentax’s X5 Bridge camera with its built-in 26x optical zoom, offering 22-580mm equivalent (35mm) held it’s own with the goldfinches but was by far the most difficult to use. Once I set the the camera to multiple burst mode, my success rate improved.
The overall results during the two-day shoot were well worth the effort.
More images of the naturalized border here.

A monarch lands on a chocolate coloured sunflower with its complementary colours.
Photographers: Don’t pass up a perfect opportunity
The first quick visit to the border following the afternoon at the pond photographing egrets and herons, was enough to tell me that I stumbled across something very special with a lot of opportunity.
If you are thinking about creating your own wildlife habitat in your backyard, Prairie Up, An Introduction to Natural Garden Design, is a good starting point. In this book, Benjamin Vogt shares his expertise with prairie plants in a richly photographed guide aimed at gardeners and homeowners. His step-by-step blueprints point readers to plant communities that not only support wildlife and please the eye but forces us to rethink traditional planting and maintenance.
The fact that no other photographers were there capturing the incredible scene told me that maybe no-one else noticed the potential opportunity.
Turns out I wasn’t alone, however. On my visit the next day, it was obvious that this scene did not go unnoticed. A number of other photographers also recognized the potential of the naturalized flower bed and were already at work when I pulled up.

Although most of the images show a soft green background, I was able to position the camera in such a way to create a blue sky background in this image.
It’s important that we photographers don’t pass up good opportunities to capture great images, especially when they are presented to us so readily.
Whether it is in our own gardens, or at a nearby cemetery, or public flower garden, these opportunities are simply too good to miss.
That may mean visiting the location over and over again looking for a variety of photographs from close-ups to more environmental images.
Also, situations like this is the perfect opportunity to experiment with different lenses and cameras. Try different vantage points. Get down low to use the sky as a background, or move around to get a more pleasing background. Change your depth of field to create soft backgrounds.

A wide angle view of a naturalized border designed to create wildlife habitat at its finest. Notice that the plants grow together rather than as individual plants.
Don’t be afraid to even pull out your wide angle lenses (see image above) to document the entire scene.
The wide angle images are perfect for obtaining an overview of the of the border and then use it to plan your wild habitat border in your own yard.

In this image, the soft out of focus flowers creates a pleasing background that highlights the Goldfinch.
Wild border is perfect place to experiment with your cameras
Try not to simply set the camera lens and shoot away all day with a single setting. By adjusting your f-stop, you can create dramatically different images using a combination of depth of field, different focal lengths and even a variety of cameras.
The flower border that originally caught my eye was hard to miss from the road leading to the pond where I was heading to photograph wading birds. But, it was easy to admire and pass by if you were too focused on getting to your original destination.
It’s always a good idea to take the time to investigate these types of opportunities.
For more images from my two-day shoot, be sure to check out my photo gallery here.
Below are a couple of images from the nearby pond. While they are good enough images of a heron and egret, the location failed to provide the variety that the sunflower border offered.
In my mind, time was better spent at the naturalized border.

Great blue Heron at the nearby pond. Photographed with Pentax 300 f4.5 and 1.4 converter.

White egret at the pond. Photographed with Pentax 300 f4.5 and 1.4 converter.
While the majority of the photographers in the area were focused on the big birds, I preferred to turn my cameras on the smaller birds among the sunflowers.
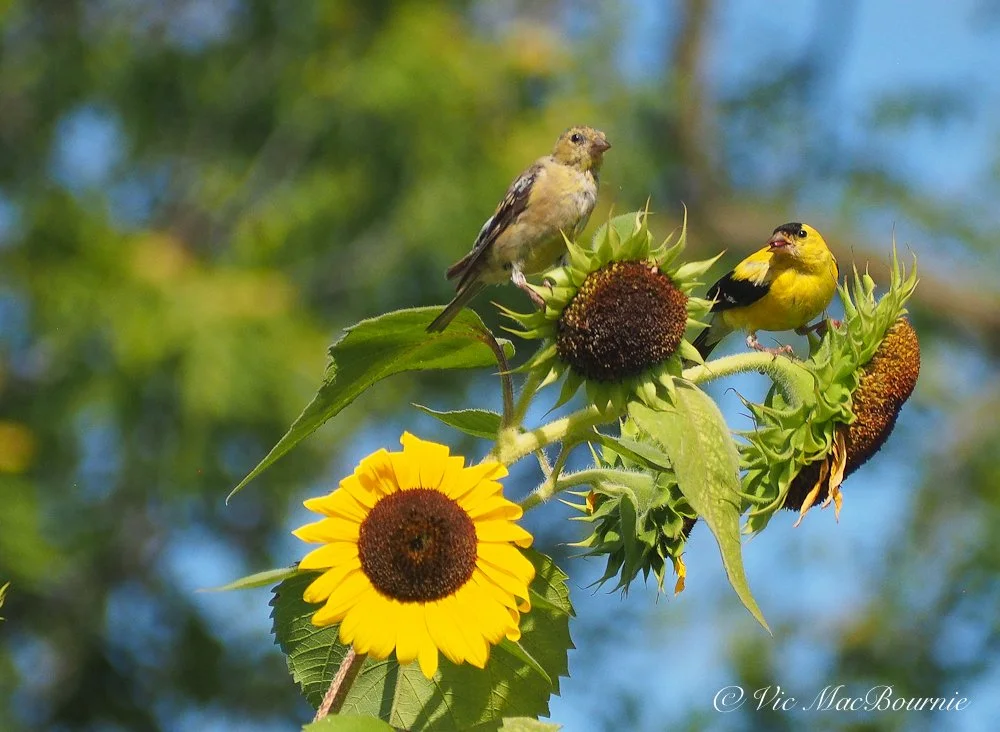
Two goldfinches work the sunflowers in the naturalized border.
Although the birds were skittish to some degree, their frenzied feeding allowed a closer approach than normal allowing me to get good frame-filling images at the long end of the zoom.
Use your car as a blind whenever possible
As the day passed on, all the other photographers left leaving me alone with the birds. This presented me with the opportunity to use my car as a moving photographic blind. By driving slowly along the road, I was able to get even closer to the birds and butterflies that showed little fear of the car.

Sunflowers and goldenrod grows together in the natural border helping to create the ideal wildlife habitat.
Best of both worlds: A flower border for wildlife photography
Stumbling upon this beautiful, naturalized flower border and wildlife habitat was, to me, the perfect ending to the summer. While many of the flowers had lost their lustre and it was obvious the border would soon be little more than a graveyard of dying flower stalks, it was also full of life.

This image show a small part of the naturalized flower border. It’s not hard to see how much of a great wildlife habitat it makes for all types of wildlife.
In death, the dying flowers gave life to the birds, the bees the butterflies and the many insects, reptiles and mammals that no doubt called the flower border home.
It is only fitting that it all takes place at the front entrance to a magnificent cemetery.
For me, it provided an opportunity to combine my two greatest loves in life – gardening for wildlife and photography.
It also provided an opportunity to learn, experiment and be creative without travelling hundreds or thousands of miles in search of photographic opportunities.
The location of this wildlife habitat was a short drive from my home, and I was able to get a sneak peak at how I can recreate that same wildlife habitat right at home in my own garden.
Next year I hope to get similar images without even leaving my backyard.
Embracing fall: Ideas for gardeners both indoors and out
Fall is the time we transition from the heat of summer to the warming colours of autumn both in the garden and in the home. Check out the ideas for both the home and the garden.

Embracing the warmth of fall colours begins in the garden but there’s no reason we can’t celebrate the season indoors too.
Fall by far is my favourite time of year. The garden takes on its tapestries of colour, and cool misty mornings make the coffee in hand so much more appreciated.
It’s also a time of transition – from shorts and T-shirts to sweaters; from flowers to grasses and bright berries.
In the home and on the patio there are changes happening too. It’s a good time to put away the bright colours and adopt the earthy, warm colours of fall. It’s also the time to begin thinking about gift giving and get a head start on the holidays.
We’ve put together some helpful suggestions to assist you in the transition and offer some great gift-giving ideas.

This fun door mat from Anthropologie is a fun and very seasonal way to welcome visitors to your home.
Let’s start at the front door. Nothing says welcome to our homes like a fun door mat, especially one that celebrates fall. This Oh My Gourd coconut fiber doormat can welcome visitors at the front or back door. It’s exclusive to Anthropologie, and is a great starting point in the transition from summer to fall.

These lovely brass numbers will add a touch of class to your front entry. Also from Anthropologie.
Anthropologie also features these elegant brass and black house numbers that are a welcome addition to any front entryway. These are only available online but can be picked up at a nearby store to reduce shipping costs. They are sold individually and come with their own mounting hardware.

There is nothing more synonymous with fall than the captivating smell of pumpkin spice and these candles bring it indoors or out. Check out a wide selection from Anthropologie.
Staying on the Gourd theme, Anthropologie also offers a number of pumkin themed candles in exquisite containers that will warm up any room – indoor or outdoor – that you place them in.
Fall, with its cooler temperatures, is the time we enjoy being outside enjoying the migrating birds, the butterflies and the evolving warmth and texture that begins taking over the woodland.
A barbecue with family and friends is the perfect weekend activity.

Fall is the time to get out and do some entertaining in the backyard. These colourful acrylic glasses are the perfect companion.
These Lucia Acrylic Goblet Wine Glasses are perfect for the deck, patio or under a pergola as the rain falls all around us. They come in a variety of colours from mint to cobalt, turquoise and a lovely hot pink.
If you are lucky enough to have a sheltered outdoor space, extending the entertaining season well into fall offers numerous possibilities.
A small woodburning firepit or gas fire table can bring us outside through fall and even well into winter.

The Sedona fire bowl from Woodland Direct adds warmth and a touch of class to your outdoor space.
WoodlandDirect specializes in fire pits, fire bowls, outdoor fireplaces and the like and offer an incredible variety of choices and styles to suit even the most picky of buyers.
The Sedona Copper Fire Bowl, above is a good example of the exquisite detail available from WoodlandDirect.

Less expensive options are also available from less specialized stores. Walmart even carry the popular, contemporary styled Solo Stoves (above) that are small enough to take with you to the cottage or even camping, but still have a place in your backyard.
For a full look at the firepits Walmart offers, including many that are on sale click here.
Of course fall is the time to get into the garden and muck about digging out, transplanting and clearing areas in preparation for next year. Muck boots make a variety of garden boots and shoes to tackle even the dirtiest of jobs with a little style. Check out their full line of women-, men- and kid-approved boots for the garden or everyday use.

For those lucky enough to have a covered garden area, fall is the perfect time to transition from summer colours into the warm tones associated with autumn. This scene from Anthropologie focuses on just that with an assortment of warm colours and textures. One of the highlights is the Abstract Pillar Compote planters featured on the table and below.

Decorating this space is always fun and adding a modern touch seems to work well in these spaces. These Abstract Pillar Compote planters are the perfect size to act as a focal point a gathering place. Use them for plants, but don’t be afraid to use your imagination. A bird bath, even a contemporary bird feeder to welcome the chickadees into your more personal space.
Imagine them full of large pine cones or simply covered in a rich layer of exquisite moss or planted with the simple elegance of a maindenhair fern.

The Boston fern is from Macy’s outstanding collection of natural looking plants.
Finally, if you need plants around you all winter, but can’t seem to keep them alive indoors, Macy’s offers an outstanding collection of extremely natural looking plants. These are not your craft store collections that neither look natural, nor stand the test of time.
Macy’s Department Store collection is both extensive and exquisite in their realism. The above Boston fern is just one example of the detail of these plants. Place them on your enclosed patio or porch (recommending for indoor use only) and bring them indoors to enjoy them throughout the winter. No muss, no fuss.
The Boston fern, for example features deep green fern leaves extending outwards and created from the finest materials. The natural looking stone planter is included.
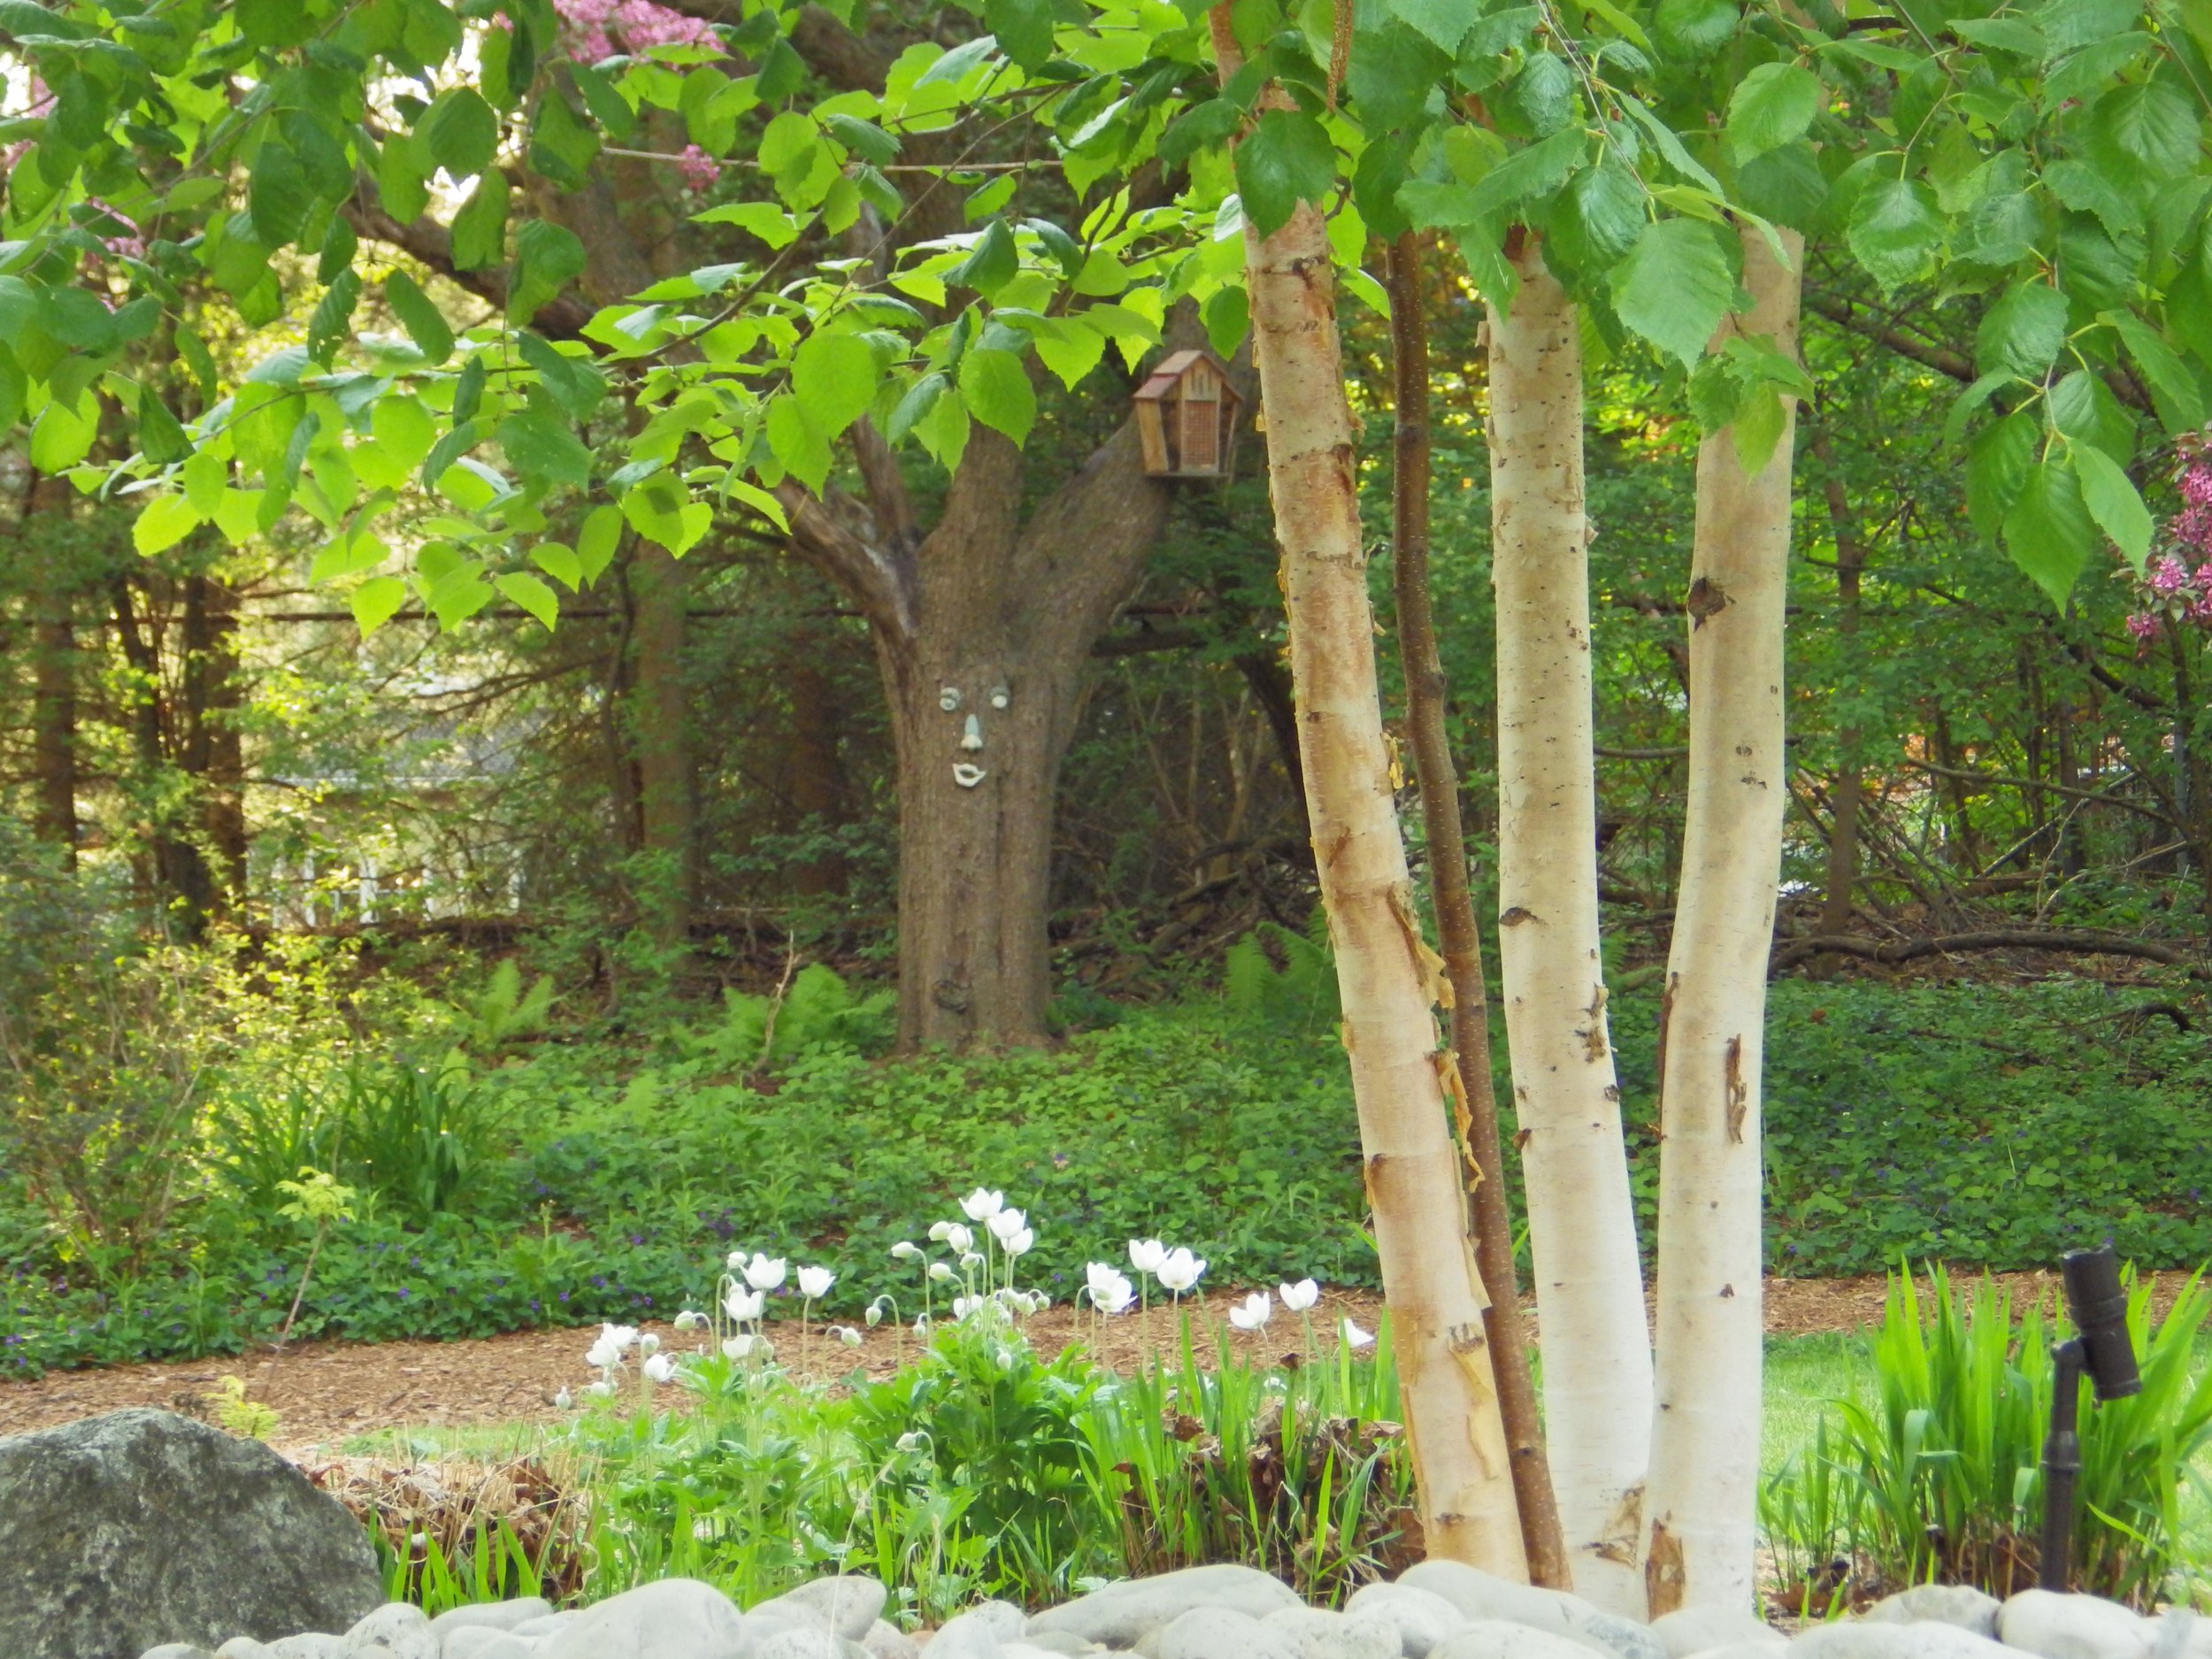
Best shade trees: Poplar tulip tree, birch, maple and oak
Shade in our landscape has never been more important. Here are four great shade trees to consider in your landscape.
Tulip trees are perfect if you need quick shade in a sunny area
The Poplar Tulip Tree is a magnificent tree that stands tall and straight in our landscape – taller and strighter, in fact, than any other tree in the woodland.
If you have space, plant a tulip tree (Liriodendron tulipfera) in your yard for almost immediate impact.
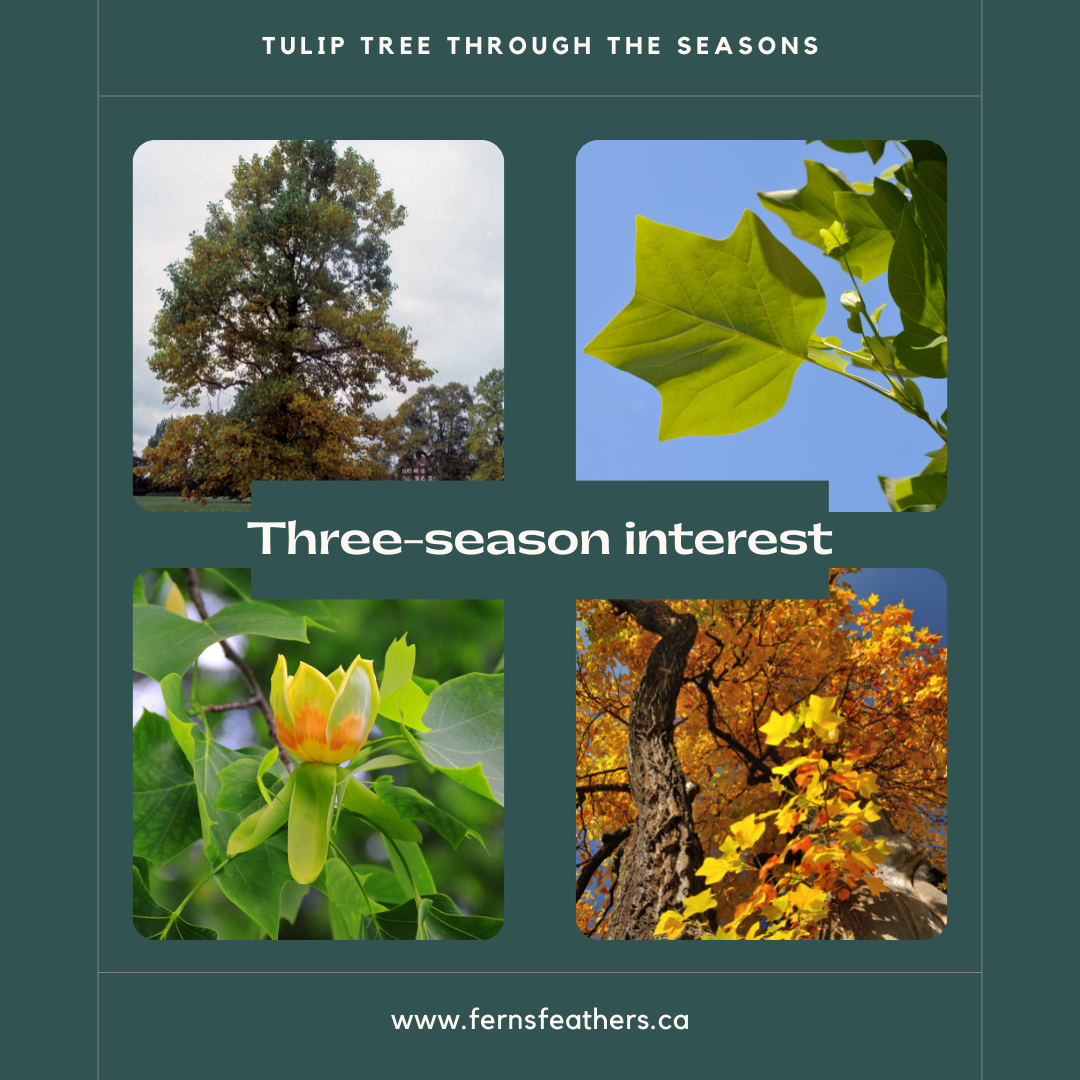
From its stunning appearance to its positive impact on the environment, the Poplar Tulip Tree is a deciduous tree you will want to explore fully.
Standing tall and proud, tulip trees have captured the imagination of nature enthusiasts for centuries.
These magnificent trees have a rich history that dates back thousands of years. Native to North America, tulip trees have been an integral part of the continent’s ecosystem for centuries.
They have flourished in the diverse landscapes, from the eastern United States to parts of Canada.
In fact, in one of my favourite garden design books Outdoor Living Spaces, How to Create a Landscape You Can Use & Enjoy, the landscape designer suggests using a “grove” of Poplar Tulip Trees in a tiny courtyard to create an almost instant canopy, privacy and lovely shade in just a few short years. This bold use of our native Tulip tree is just one example of how important shade has become in our landscapes.
The illustration below shows the grove of Tulip Trees in the upper corner of the tiny yard. Although the trees will eventually grow quite large and some may have to be removed, the designer is not afraid to use them to create shade quickly.

Even in a small yard, the landscape designer boldly used a grouping of Tulip trees to provide both shade and privacy.
By grouping the trees closely in a confined space, the designer explains that the trees are forced to grow tall and narrow as they compete for the light. With proper pruning techniques they can be kept relatively narrow as they reach up to the sky, rather than stretch out.
Tulip trees provide the primary shade as well as the foliage canopy for privacy.
For more information on the best trees for wildlife, be sure to check out the works of Douglas Tallamy. His book Nature’s Best Hope and The Nature of Oaks are excellent places to start.
I actually tapped into this concept in our garden by using three clump birch trees in a small area of our back garden. (See below for more details.)
Even the indigenous people held great reverence for the tulip tree, recognizing its importance and utilizing its resources for various purposes.
More on the Tulip Tree here.
Let’s take a moment to explore the origins of these majestic giants and their ancient heritage.

The unusual shape of the tulip tree leaf is seen here as it lays on the forest floor in fall.
These majestic giants are known for their towering height, reaching up to 150 feet or more. With their distinct tulip-shaped leaves, they add a touch of elegance to any landscape.
But it’s not just their appearance that makes them unique.
Tulip trees also boast vibrant flowers that resemble tulips, hence their name. These beautiful blooms attract a variety of pollinators, including bees and hummingbirds, making them an essential part of the ecosystem.
Additionally, tulip trees have a straight trunk and smooth bark, which sets them apart from other tree species. Their wood is highly valued for its strength and durability, making it ideal for construction and furniture.
Of course tulip trees are not the only native trees that are capable of providing shade in our garden.
Below are other great native trees ideal for throwing shade in our garden. They include the maple tree in fall colour, the large mature oak tree, the tulip tree and birch trees.

Excellent shade trees include from top left: Maple tree, Oak tree, Tulip Tree and birch trees.
Here are three more of the best shade trees for your garden
Fast-growing shade trees can transform your outdoor space into a much cooler environment in a reasonable time period. Depending, of course, on how large they are when you plant them, these trees can transform your yard both aesthetically and by cooling it over the course of the summer.
Before exploring the specific trees, it’s important to understand why shade trees are so important.
Shade trees not only provide relief from the scorching heat of the sun, they also offer numerous benefits for both humans and the environment.
They can help reduce energy costs by providing natural cooling, improve air quality by absorbing pollutants, and create a peaceful and inviting atmosphere.
The criteria for selecting fast-growing shade trees can vary depending on your needs and the size of your garden.
When choosing shade trees, it’s essential to consider their growth rate, adaptability to your climate, and overall size.
Fast-growing shade trees are preferred because they provide quick relief from the sun’s heat and can transform your outdoor space in a shorter period. Additionally, you’ll want to select trees that are well-suited to your specific climate conditions, ensuring they can thrive and grow successfully.
Lastly, consider the overall size of the tree at maturity, as you’ll want to ensure it fits within your available space. By keeping these criteria in mind, you’ll be able to select the perfect fast-growing shade trees for your oasis!
My choices for the three outstanding, fast growing shade trees are as follows: The birch tree either single or multi-trunk, the maple tree either single or multi-trunk, and the oak tree.
All three are relatively fast growers, extremely important for the environment and wildlife, and capable of creating a beautiful canopy in a hurry.
Let’s explore each of these individually.

This mini birch grove creates a lovely dappled shade beneath and around the dry river bed.
The Birch Tree: Adds dappled shade to the landscape
Birch trees have so much going for them in our landscape, especially in today’s more compact yards. The white paper birch is an exquisite tree, but the river birch is usually a better choice.
In fact, there are about 60 different species of birch (Betulaceae). Grow them in well-drained soil, with plenty of moisture and sunlight. Birch trees are found in zones 2-6 and are known as a pioneer species that are often found growing near lakes and rivers in their natural habitat. These medium-sized trees generally reach between 30 and 50 feet with bark that can be white, grey, yellow, silver or black. Because they are fast growers, birch trees can be short-lived trees.

A birch tree clump shines in winter showing off its peeling, textured bark.
Known as extremely fast growers, these trees – either as single or multi-stem specimens – are attractive in all seasons, but especially in winter when their peeling white bark and textural qualities stand out against a stark landscape.
In our landscape, I borrowed the idea (see above) of planting several trees in a small space, close together to create upward growth by forcing them to compete for sunlight. Three birch clumps amounting to 11 trees create a small birch grove around a dry river bed and bubbling rock.
More on the birch grove here.

This birch tree clump is one of three that form a mini birch grove in our woodland garden.
The leaves of the trees forming the small birch grove throw a lovely open shade on the dry river below, while creating a magnet for local wildlife including birds, butterflies and other insects. In just a few short years, the trees have grown sufficiently to be able to hang bird houses, feeders and birdbaths from the stronger branches.
The Maples: Huge selection to choose from
Maple trees offer homeowners a variety of alternatives to create shade in their yards. From the smaller and more delicate Japanese maples, to larger native maples that are medium-fast growers but boast outstanding fall colour. Some, like the Norway maples are extremely fast growers but can be invasive.
Most maple trees prefer cool temperatures in plant hardiness zones from 5-9. A few of them are cold-hardy that can even tolerate sub-zero winters down to zone 3.

The incredible fall colour of our native maples make them an almost irrisistable addition to the garden.
Although not as showy as birch trees – with the possible exception of the paperbark maple – the native maples are renowned for their incredible fall colours. In addition, unlike birch trees, maples tend to throw a much deeper shade below and around them.
If you are looking for a cool place to sit under the shade of a tree, a native maple tree is an excellent choice. Maples are also important trees for wildlife attracting a variety of birds, caterpillars and insects. In addition, the deep shade provides excellent nesting potential for birds and habitat for other wildlife.
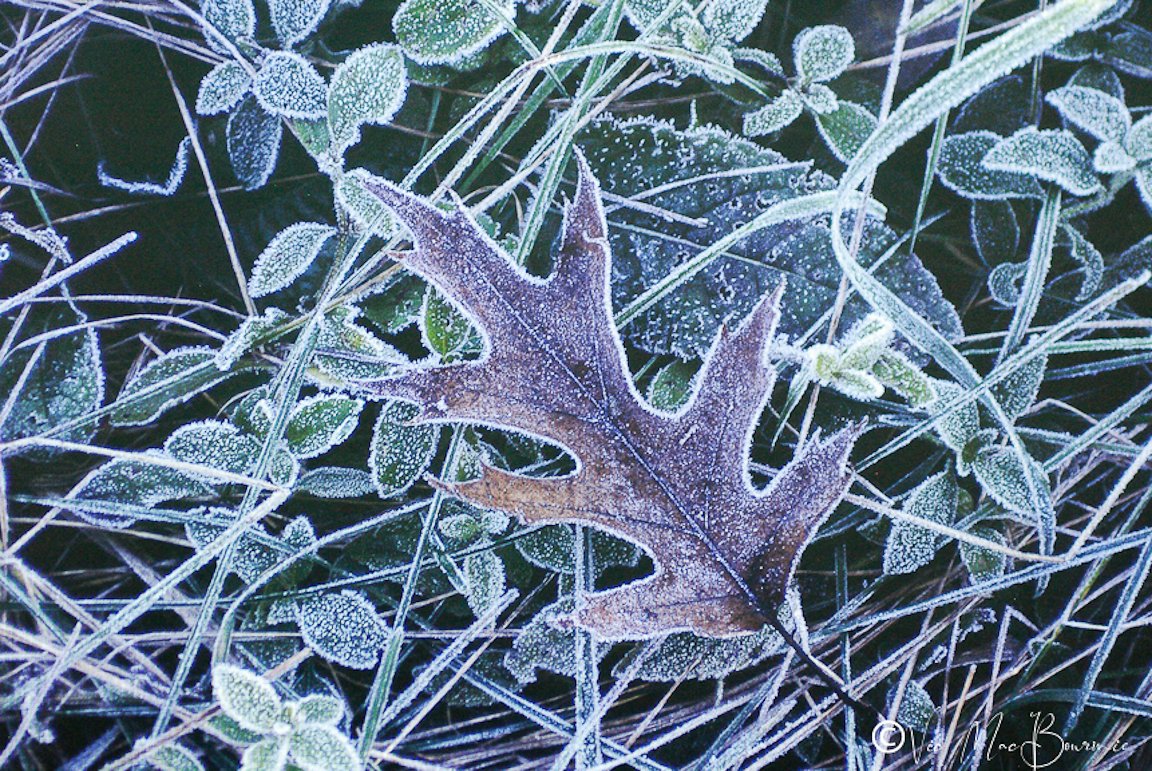
An oak leaf is rimmed in frost on the forest floor.
The Oaks: A haven for wildlife
Studies show that Oak trees are the most valuable wildlife trees in any landscape. That alone is reason enough to plant oaks in your yard. Considering their value for wildlife, the shade these trees throw can be considered a pure bonus.
Oaks are not considered fast-growing trees, but their sheer size means that they can get to a size to throw shade quite quickly and, in the right situation, can reach for the sky at a good pace. At maturity, Oaks can reach heights of several hundred feet but average about 100 feet or (30 meters).
Different varieties can be grown in zones 3 up to 11, so there is virtually no place where an oak can’t be used to throw shade.

If you have ever wondered how important an oak tree can be for a backyard, this infographic should convince you to be sure to add one to your yard.
It’s important to consider the mature height of the oak you want to plant, but don’t let their mature height sway you too much from planting these important trees. There is a good chance that they will not get close to their mature height in your lifetime.
For more on oak trees, be sure to check out these posts: The mighty oak, What tree should I plant in my backyard, A columnar oak perfect for small backyard or narrow space.
Let’s get back to the Tulip tree
As we continue our journey into the world of tulip trees, it is crucial to highlight the conservation efforts aimed at protecting and preserving these trees.
Due to their historical significance and ecological importance, organizations and individuals have come together to ensure the survival of North America’s native tulip trees.
Conservation initiatives focus on various aspects, including habitat restoration, seed collection, and public awareness campaigns. By restoring and protecting the natural habitats of tulip trees, we can create safe havens for these majestic giants to thrive.
Seed collection programs play a vital role in preserving the genetic diversity of tulip trees, ensuring their resilience against threats such as disease and climate change.
Furthermore, raising public awareness about the value of tulip trees fosters a sense of appreciation and encourages responsible stewardship. Together, these conservation efforts contribute to the long-term survival and flourishing of North America’s native tulip trees.
One of the top reasons to plant and preserve the Poplar Tulip Tree is its fast growth rate and ability to provide ample shade.
This magnificent tree has the remarkable ability to reach impressive heights in a relatively short period of time. With its rapid growth, it can quickly transform any landscape into a shaded oasis, providing relief from the scorching sun during hot summer days. And we all know that our summers are getting hotter each year and the need for shade in the garden is increasing exponentially.
Whether you’re looking to create a cozy spot for outdoor activities or seeking natural shade for your garden, the Poplar Tulip Tree is an excellent choice.
Another compelling reason to plant and preserve the Poplar Tulip Tree is its significant environmental impact and carbon sequestration abilities.
Like all large trees, the Tulip Tree is an integral part of nature’s intricate web by doing its part in a crucial role in mitigating climate change. The Tulip Tree has a remarkable capacity to absorb and store carbon dioxide from the atmosphere, helping to reduce greenhouse gas emissions.
By planting and preserving these trees, we can contribute to the fight against global warming and create a more sustainable future. Additionally, the Poplar Tulip Tree acts as a natural air purifier, filtering pollutants and improving air quality.
Its presence in urban areas can help combat the harmful effects of pollution, creating healthier and more livable environments for both humans and wildlife.
So, by choosing to plant and preserve the Poplar Tulip Tree, we not only enhance the beauty of our surroundings but also make a positive impact on the planet.
In addition to its environmental impact, the Poplar Tulip Tree also serves as a vital wildlife habitat and supports biodiversity.
The tree’s large size and dense foliage provide shelter and nesting sites for a variety of bird species, including woodpeckers, owls, and songbirds.
These birds not only bring joy with their songs but also play an essential role in controlling insect populations and pollinating plants.
Moreover, the Poplar Tulip Tree attracts a diverse range of insects, which serve as a food source for birds, bats, and other small mammals.

Where do hummingbirds go in winter?
Ever wonder where the heck our hummingbirds go during the winter. You’ll find out all about their incredible journeys and where they spend their winters here.
How long do hummingbirds live in the wild?
Hummingbirds are well known for their incredible migration patterns.
In fact, one hummingbird was documented travelling up to 1,200 miles (1,931 kms) over a 12-day period – amounting to 100 miles (almost 161 kms) per day. That’s an astoundingly fast migration that might have been assisted by a strong tailwind.
It’s hard to imagine our tiny, delicate birds travelling such great distances, but twice every year they embark on these incredible journeys.

This male Ruby-Throated works a salvia flower in mid-summer. Providing food sources throughout the summer into late fall is critical for both our resident hummingbirds and those that stop in on our gardens for food and rest during migration.
While travelling 100 miles a day is possible, most hummingbirds average about 25 miles (40 kms) per day on their migration routes.
Many of our hummingbirds travel more than 1,500 miles (2,414kms) to more southerly regions.
In case you are wondering how far that is, imagine travelling from Toronto, Canada to Miami, Florida (1,485.7 miles). Most of us would not even think of driving that distance, let alone walk or get there any other way than by jet propulsion.
Hummingbirds do it, on their own, twice a year and many times over their lifetimes.
How far south they fly, probably depends on where they are starting their journey. Many of the hummingbirds that spend the breeding season farther north in Canada, will likely overwinter along the Florida or Atlantic coasts.
A quick calculation means that a typical migration could take up to 60 days, or a full two months, before the birds reach their final destinations. Most migrations, however, will not take that long.
More birds braving colder climates
Every year there are more and more reports on the internet of birds – including hummingbirds – overwintering in more northern states. Just a few years ago, a Toronto, Canada couple spent the winter caring for a female Baltimore oriole in their backyard during a bitterly cold winter season. (You can check out their fascinating story here.)
Along the route, the hummingbirds must feed regularly on both insects and nectar and face many dangers, including storms, droughts and predators. Storms can easily blow these tiny birds off their regular migration routes and force them to burn up additional energy to get to their locations.
Be sure to check out my earlier post on How we can help hummingbirds during migration.
Many hummingbirds face serious threats during migration. Some, obviously fall victim to these threats and don’t survive.
How long do hummingbirds live?
Hummingbirds are fascinating creatures, but have you ever wondered how long they live in the wild? The lifespan of a hummingbird can vary depending on several factors.
One of the key factors that influence the lifespan of hummingbirds is their species. Different species of hummingbirds have different lifespans. On average, most hummingbirds live for about 3 to 5 years in the wild. However, some species, such as the Ruby-throated Hummingbird, can live up to 10 years or more.
Another factor that affects the lifespan of hummingbirds is their habitat and environment. Hummingbirds that live in areas with abundant food sources and suitable nesting sites tend to have longer lifespans. Additionally, the availability of water sources for drinking and bathing is crucial for their survival.
Predators also play a significant role in determining the lifespan of hummingbirds. Birds of prey, snakes, and even domestic cats pose a threat to these tiny birds. Avoiding predators and staying vigilant is essential for their survival.
In general, the lifespan of hummingbirds in the wild can range from 3 to 5 years, with some species living longer. Factors such as species, habitat, and predators all contribute to their lifespan. Understanding these factors can help us appreciate and protect these remarkable creatures.

A female Ruby-Throated hummingbird scratches her chin while resting on a commercial perch in our garden.
According to the informative website Operation Ruby Throat, The hummingbird project: the Ruby-Throated Hummingbird (Archilochus colubris) breeds from Florida to Maine; westward across the Great Plains to the foothills of the Rockies; from south Texas north to southern Canada; and northwest into Alberta. They are defined as neotropical migrant insect- and nectar-eaters.
Where do Ruby-Throated hummingbirds go in winter?
According to researchers, Ruby-Throated hummingbirds mostly pass through south Florida during migration but a small number of the tiny birds are known to overwinter in Florida and on the Gulf Coast. Most, however, continue their migration to central Mexico and and even farther south to northern Panama.
There are reports of a few hummers spending winters in Cuba, Hispaniola, Bahamas, Bermuda, and southeastern U.S. coastal areas.
Although little is known about the fall migrational routes, research does show that many of the birds gather in Louisiana and/or Texas in mid September before flying across the Gulf. Others, choose not to cross the Gulf, instead taking an overland route through Mexico.
Research shows their winter distribution to be as follows:
Very common throughout areas of Mexico
Common in Nicaragua
Panama – Rare but reported in the northwestern section
Rare sightings in the United States usually along the Gulf and Atlantic coastlines.
Rare in Belize. Mostly only seen during migration
Guatemala – Uncommon
El Salvador – Uncommon
Honduras – Uncommon
Costa Rica – Uncommon
Costa Rica is at the far end of the hummingbirds wintering range, but many hummers travelling from their breeding grounds in the United States and Canada spend winters in Mexico and Nicaragua. They are less common in Guatemala and Hondouras .
Many hummingbirds from North America, make their way to Mexico and Central America.
These regions provide the perfect winter habitat for hummingbirds.
The availability of food is crucial for their survival during these months when resources are scarce in their breeding grounds.
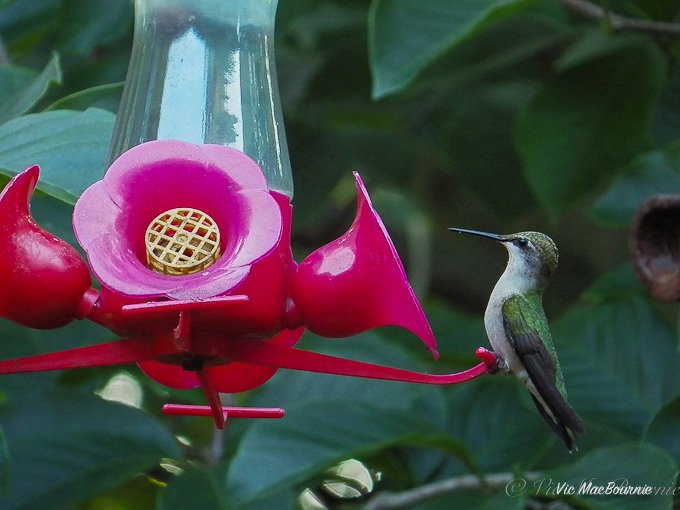
Providing a reliable source of homemade nectar can be critical for hummingbirds’ survival as they prepare to embark on their migration. Be sure to read my tips on preparing nectar (link below).
With their tropical climates and diverse plant life, Mexico and Central America offer a constant supply of nectar-rich flowers that hummingbirds rely on for sustenance. The abundance of insect life in these warmer climates provide the much needed protein the hummingbirds count on for survival.
Many of us who feed hummingbirds with commercial feeders (link to high-quality Walmart feeder) and homemade nectar may not realize that a hummingbirds’ diet is dependent on a rich supply of insects and spiders. Fruit flies and other small insects are an important source for these tiny birds. Leaving rotting fruit out near feeders is a good way to supplement their food supply.
Be sure to check out my post on tips to Making your own homemade hummingbird nectar.
In addition to the abundance of food, these regions also offer suitable nesting sites and protection from harsh weather conditions. Hummingbirds find shelter in the lush forests and tropical landscapes, where they can rest and conserve energy for their return journey in the spring.
The migration of hummingbirds is a remarkable feat of endurance and adaptation. It showcases their ability to navigate long distances and adapt to different environments.
By understanding their migration patterns and the importance of wintering grounds, we can better appreciate and protect these fascinating creatures while they are with us over the summer months.
Providing them with natural food sources as well as homemade nectar will ensure that they have the needed energy to make the incredible journey.