

DIY: A solar drip for the birds
Converting a rarely used bird bath dripper into a solar powered fountain that is used daily, is a simple, DIY project that will please both the birds and the birdwatchers.
Turn a bird bath dripper into a solar-powered fountain birds will love
Birds love moving water and a drip, drop is about as good as it gets for them.
So, when I saw a nice copper bird bath dripper on Kijiji this spring, I jumped on it. The dripper was very high quality and I couldn’t pass it up. A copper drip tube attached to a lovely piece of slate with brass hose fittings.
It just doesn’t get any better than that.
Fast forward to this fall. Back on Kijiji looking for a cheap plastic bird bath to use this winter with an electric heater to provide water for our winged visitors throughout the freezing Southern Ontario winter, and … there it was. A magnificent copper bird bath for a very reasonable price. I remember saying to my wife that “someone in Toronto was going to get a great deal on a used copper bird bath.”
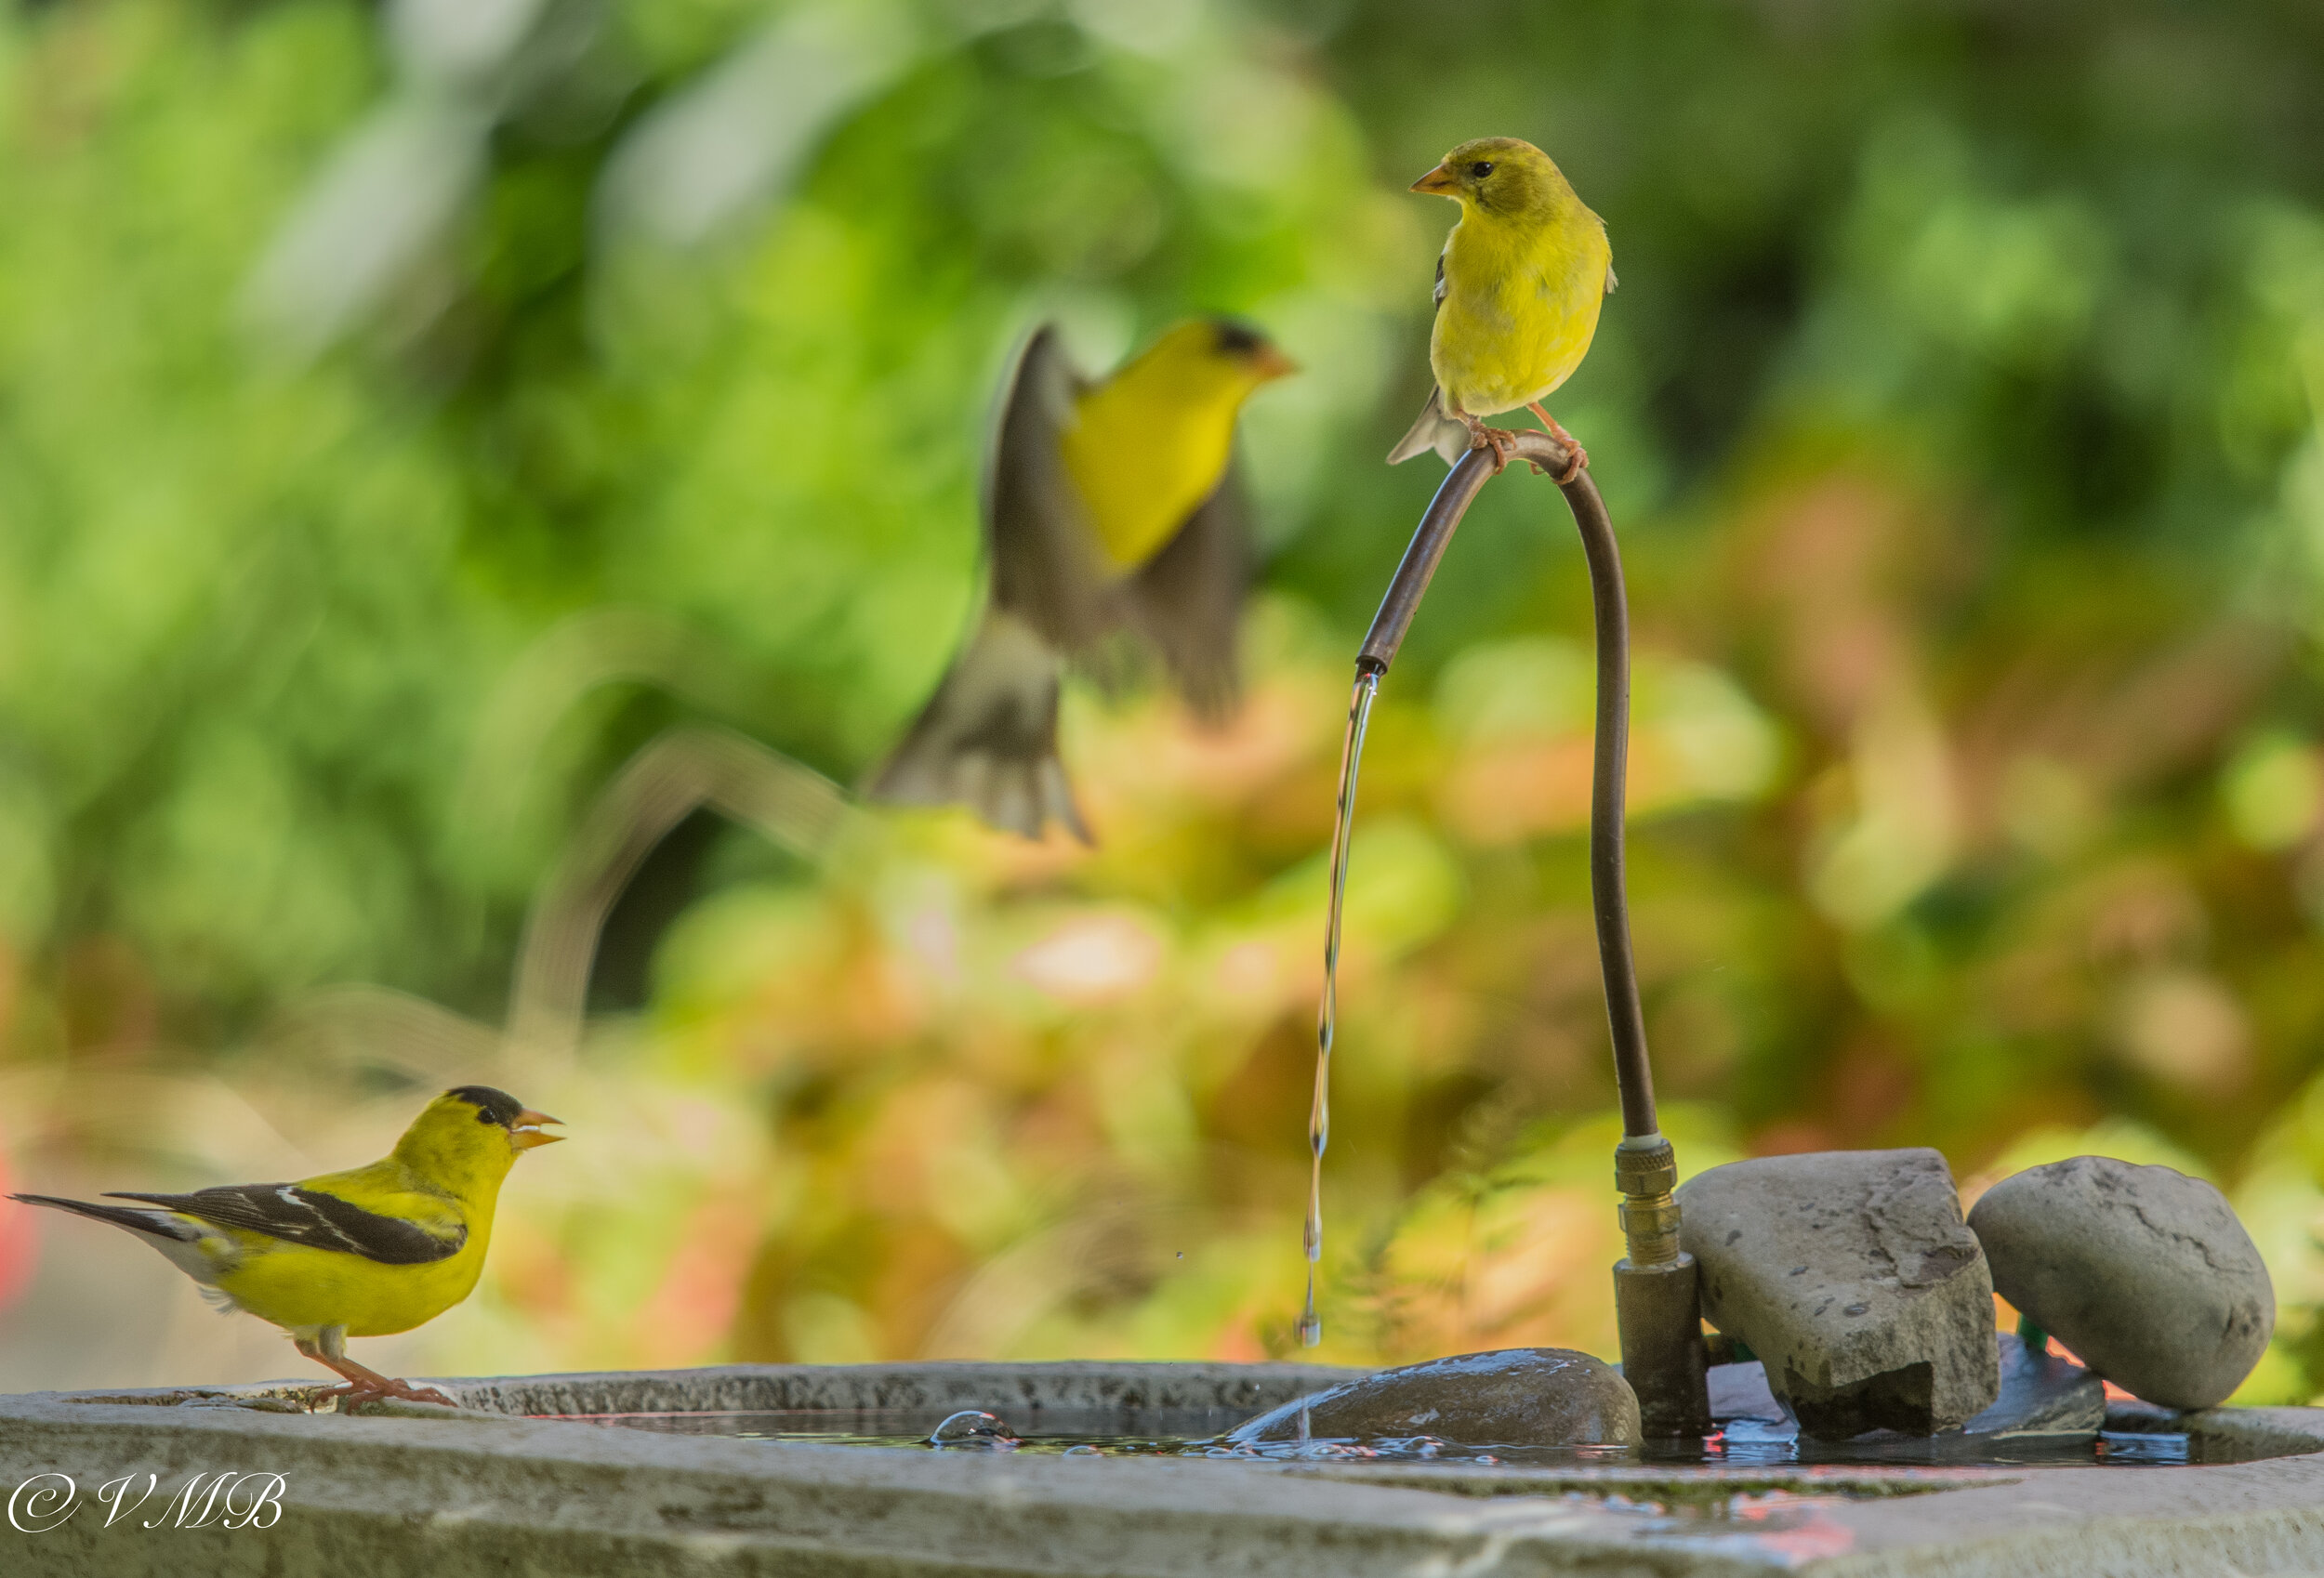
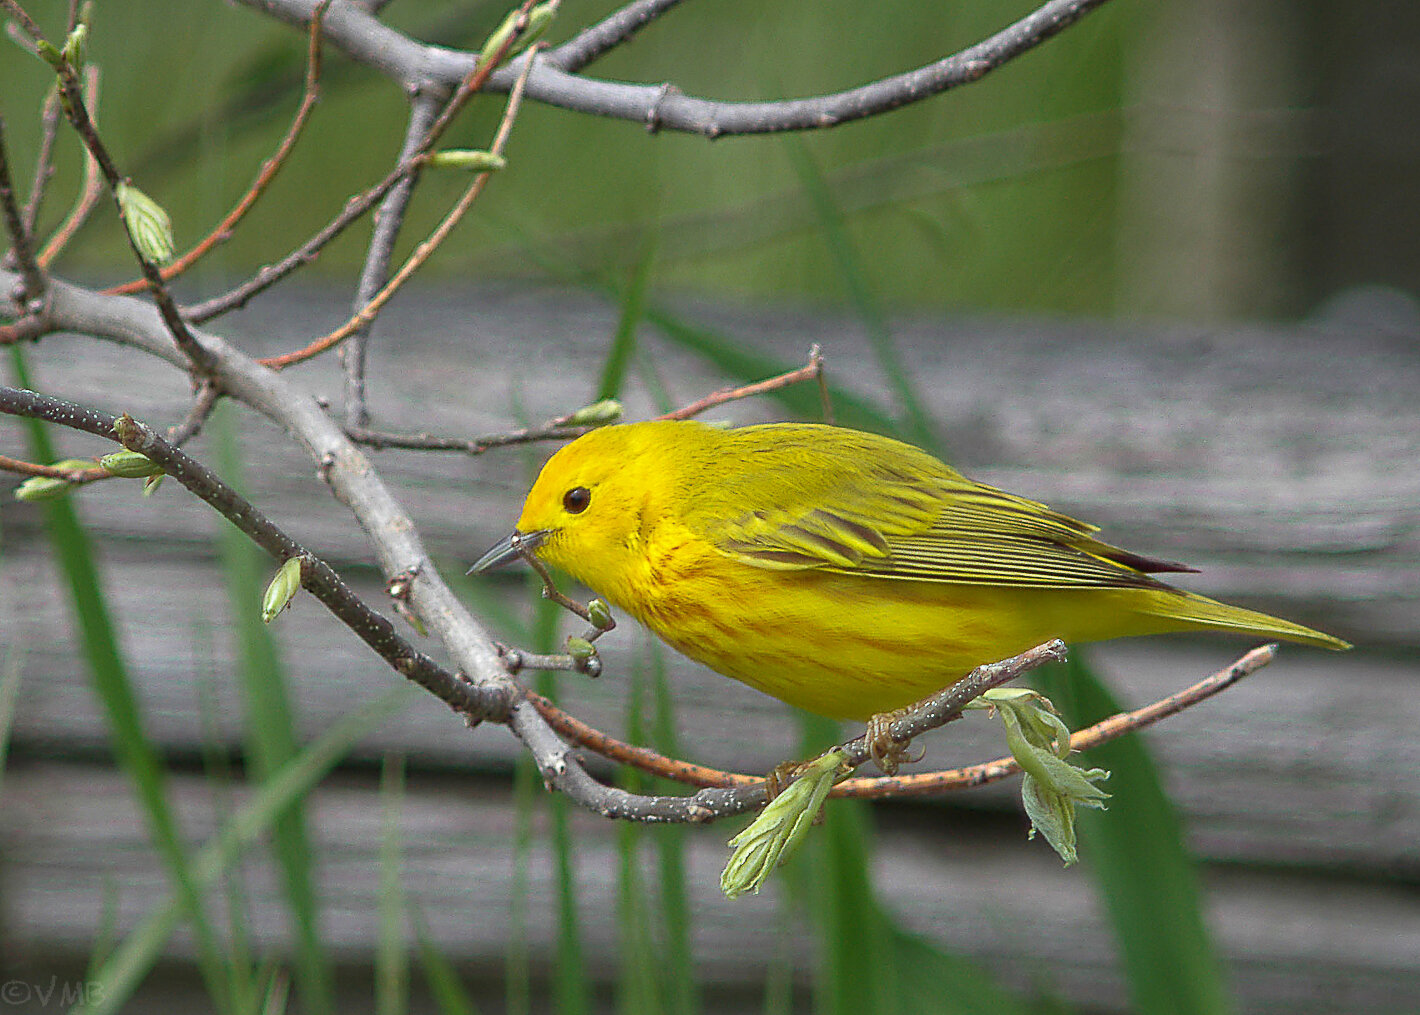
The converted dripper that operates as a solar-powered recirculating pump is certainly a treat for the Goldfinches in the garden.
The cheap plastic bird bath turned out to be an expensive copper one but I couldn’t be happier. The next morning I was on my way to Toronto (about a one-hour drive) to pick up the birdbath. To help justifiy the two-hour return trip, I combined it with a grocery delivery to my daughter who, it turned out, lived just 10 minutes from my prized bird bath.
Keeping an eye open for bird baths, bird houses and bird feeders on your favourite on-line used marketplace sites like Kijiji or Craigslist is a good way to get started with backyard birding or just to upgrade or add to your baths, houses and feeders.
Besides scoring the copper bird bath, I decided to do a slight hack on my already converted dripper to use it with the new bird bath.
For more suggestions and some of my favourite garden things, be sure to check out my Favourite Things post.
Although birds love drippers, the units need to be hooked up to a hose that needs to be left on while the amount of water is controlled to the point where just a drip at a time falls into the birdbath. Eventually, though, if left on and unattended, the bird bath overfills and drips over the edge potentially flooding an area.
I tried to make it work. I really did. Set up a nice deep bird bath that actually had a small leak. So it could handle the constant dripping without really overflowing. Trying to get the right flow was a pain and remembering to turn it off added to my frustration.
If only I could convert it to a recirculating dripper or even use it like a fountain.
Once I got the idea, it didn’t take long to convert the dripper to a solar powered unit. It’s no longer a “dripper” but that doesn’t matter because it is recirculating the water in the birdbath rather than adding to it.
The original dripper unit came with a very long, thin rubber hose that connected to the hose faucet. By cutting that into a short (maybe 6-inch) hose and connecting that to the pump’s outlet via one of the alternative fountain heads provided by the solar pump, the unit works even better than expected.
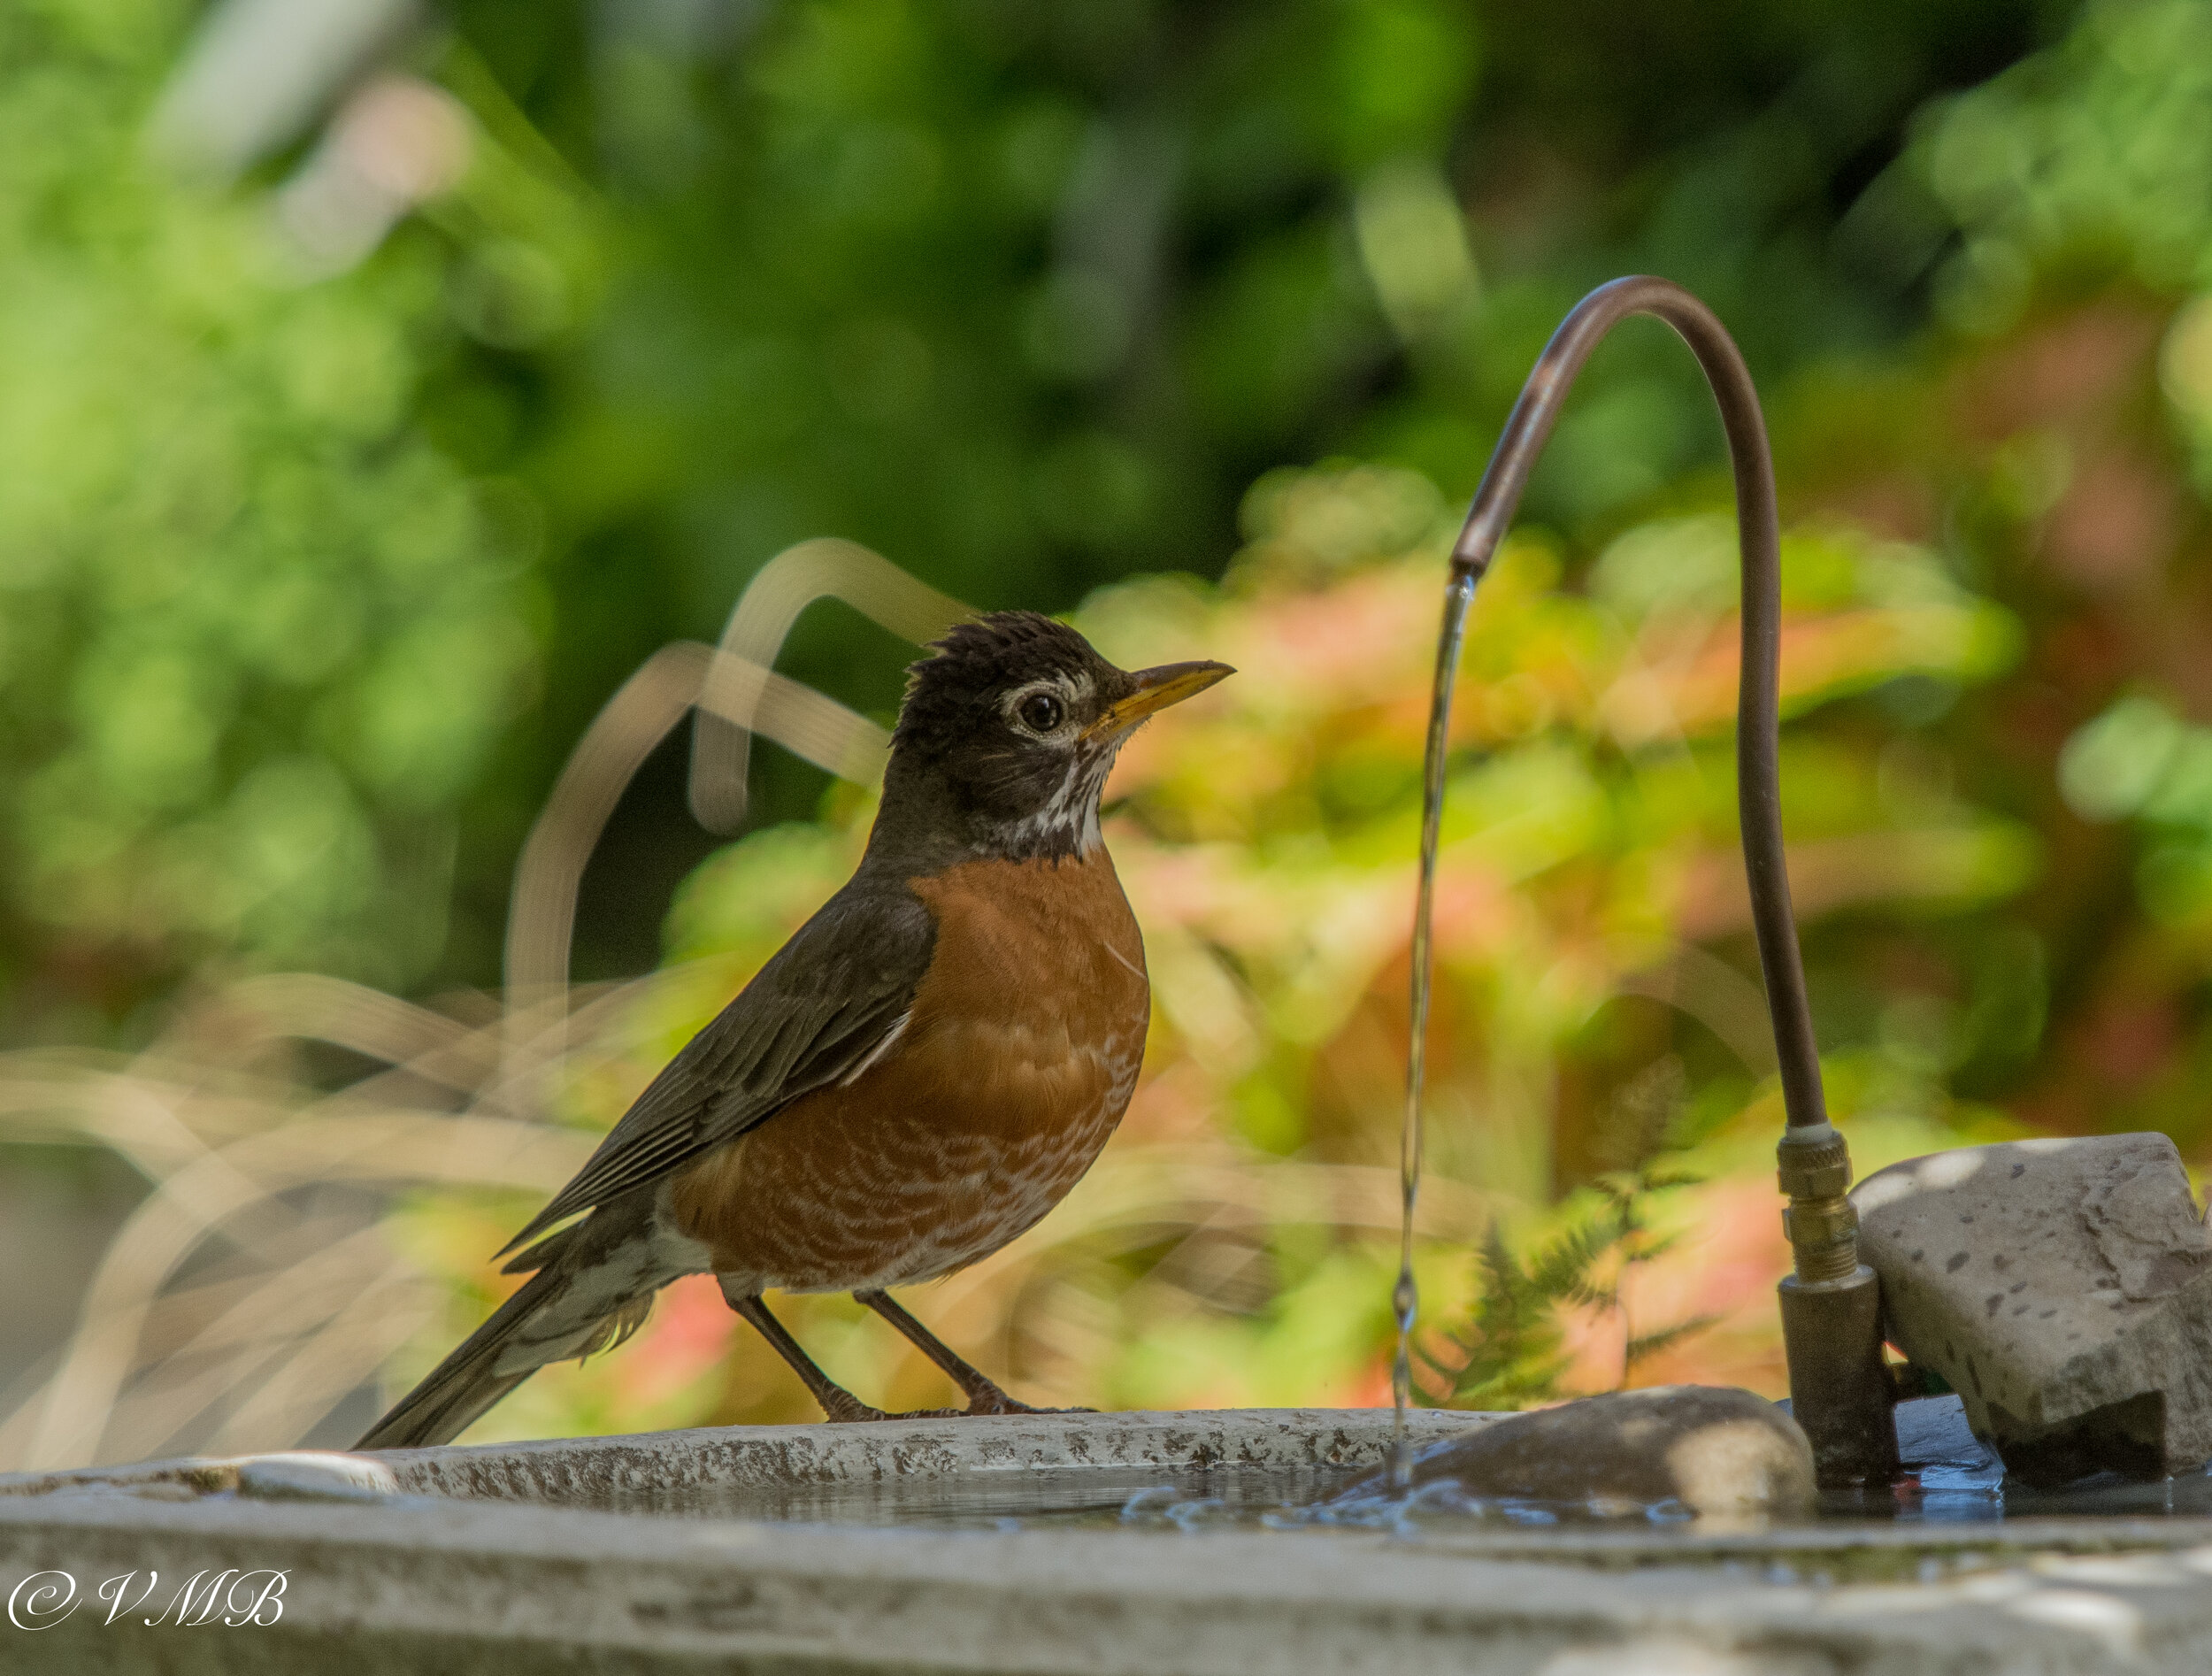
A robin takes a drink from the bird bath with the solar-powered fountain.
When the sun was out, it provided birds with a gentle flow of water recirculated from the bath itself.
This approach worked well but a small problem emerged. Trying to keep water levels high enough so that the small solar pump stayed below water became a daily concern.
The combination of birds using the bird bath, evaporation and some splashing caused by the fountain, created a daily water loss that meant constant monitoring of water levels. Everyday the water had to be topped up for fear of the bird bath running too low on water and potentially ruining the pump.
So, a small change to the original dripper conversion should work well with the new bird bath and its new location. By hiding a large bucket of water near the copper bird bath and sinking the solar pump to the bottom of the bucket, there is no fear of running the pump dry. On sunny days the bird bath will likely overflow a little but it’s placed in an area that does not get a full day of sun and will benefit from access water. A little overflow on sunny days will help to keep the water fresh and the bird bath full. In addition, I can’t help but think that it might be the perfect place to grow a thick carpet of moss around the birdbath where the access water will fall.
We set up the new bird bath and dripper/fountain right outside our family room French door to give us a window into the woodland and our keep an eye on the action at the bird bath. I’ll report back on how it’s working and how much the birds are loving it. It’s always a good idea to place feeders and bird baths so that you can watch them from inside your home. Read my blog on “A window into your woodland,” here.
I want to put a real plug in for these small, inexpensive solar-powered recirculating water pumps. This will be the third solar pump I’m using in the garden and I expect to put an order in for another one. There are so many uses for these small pumps. They come with a number of different fountain heads from a single stream of water to a gentle multi-stream fountain that would be perfect for hummingbirds who like to play in gentle streaming fountains.
A quick look on YouTube under “small solar fountain” turns up numerous DIY projects.
Definitely worth trying out.
For more on Building your Garden on a Budget, check out my earlier in-depth article here.
Consider installing a high-end, off-grid solar power system
If you are like me and don’t have electricity in your garden, or at least don’t have it in the far reaches of the garden, consider installing a complete off-grid solar-powered electrical system like the American-based Shop Solar Kit company.
Maybe you have a pergola in the back of the garden, or even a she-shed that you would like to have full power running a small refrigerator, sound system or full-size lamps and lighting. If you need to run pumps and lighting to a garden pond, you can do it with one of these highly capable systems that, once installed, operate at no cost to you at all.
There are complete DIY kits available for approximately $1,500 and up.

Gardening on a budget links
Ten money-saving tips for the weekend gardener
DIY Bark Butter feeder for Woodpeckers
DIY reflection pond for photography
Click & Grow is ideal for Native Plants from seed
Remove your turf and save money
Hiring students to get your garden in shape
If you are interested in backyard birds, please consider signing up for my backyard birds newsletter. The sign-up page is at the bottom of my homepage. Not only will the newsletter provide in-depth articles on attracting, feeding and photographing backyard birds, I am also working with local artisans to provide discounts on incredible bird-related feeders, houses and other goodies backyard birders will love. In addition there will be regular giveaways , including gardening books and birding items.

Building a brush pile for your Woodland garden
A brush pile provides habitat for a multitude of mammals, insects and reptiles. But the real bonus of a backyard brush pile is that it may just lure in new birds that don’t normally visit your Woodland garden.
Wood piles provide perfect hunting grounds for insect-eating birds
There are days we look out from our patio and lose count of the chipmunks. At one point eight under the bird feeder was our record.
That’s been shattered a few times since then. Add to that a handful of spunky red squirrels and a couple of black and grey ones, and it doesn’t take much to see that our four-legged friends have found a home here.
In our yard, rabbits and groundhogs are always around and then there is our neighbourhood fox on patrol morning and evening. Deer make themselves at home during different times of the year, as do the skunks and possums.
So why would I build a woodpile in the backyard?
A woodpile is a valuable safe spot for so many of your backyard critters providing many of them with a safe place to live and others with food sources in the form of insects, amphibians and small mammals. Woodpiles developed over time become a go-to place for insect-eating birds to look for food sources. As they begin to break down over time, they become a home for fungi, reptiles and amphibians.
Not a day goes by when these critters don’t provide us with hours of entertainment chasing one another about the yard, running through the understory on some highway of branches known only to them, and sending out warnings of pending danger when the fox or hawk shows up looking for a quick meal.
Just recently I set up a trail camera pointed at the brush pile and in one night I was able to see two skunks, a racoon and a possum at our wood pile. That shows just how busy the pile is in the evening and throughout the night. A trail camera can be an excellent way to find out what animals are visiting a particular area of your garden.
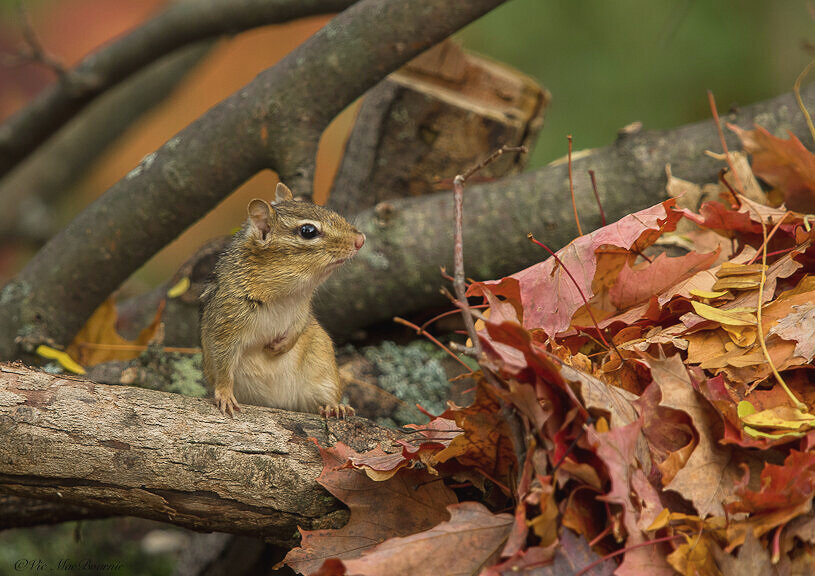
Our woodpile is a very popular spot for both the chipmunks and red squirrels. I can’t imagine how many sunflowers are tucked away in the crevices of the branches. A generous addition of leaves creates a more comfortable spot for garden critters as fall and winter approaches.
I’ll never forget the day a neighbourhood cat caught one of our chippers in the backyard. I ran out to scare the cat, who dropped the chipmunk as I approached at a dead run. The cat had no intention of leaving the chipmunk, but I scared it enough for the cat to drop the little guy at my feet. Before I knew it, the little chipmunk scampered up my pant leg, up my back and perched itself on my pretty much bald head. Sitting there was as far away from the cat that it could possibly get. The cat missed the great escape and was looking through the grass for little chipper who, by then, had settled onto the top of my head like he was king of the world.
I wasn’t looking forward to the cat noticing the little guy on my head and clawing its way up my leg and onto my unprotected skull, so I just turned around and walked away with chipper’s little claws clinging to my scalp. We left the bewildered cat frantically searching for the little guy in the tall grass. I simply reached up, grabbed the little guy and set him free in another corner of the garden.
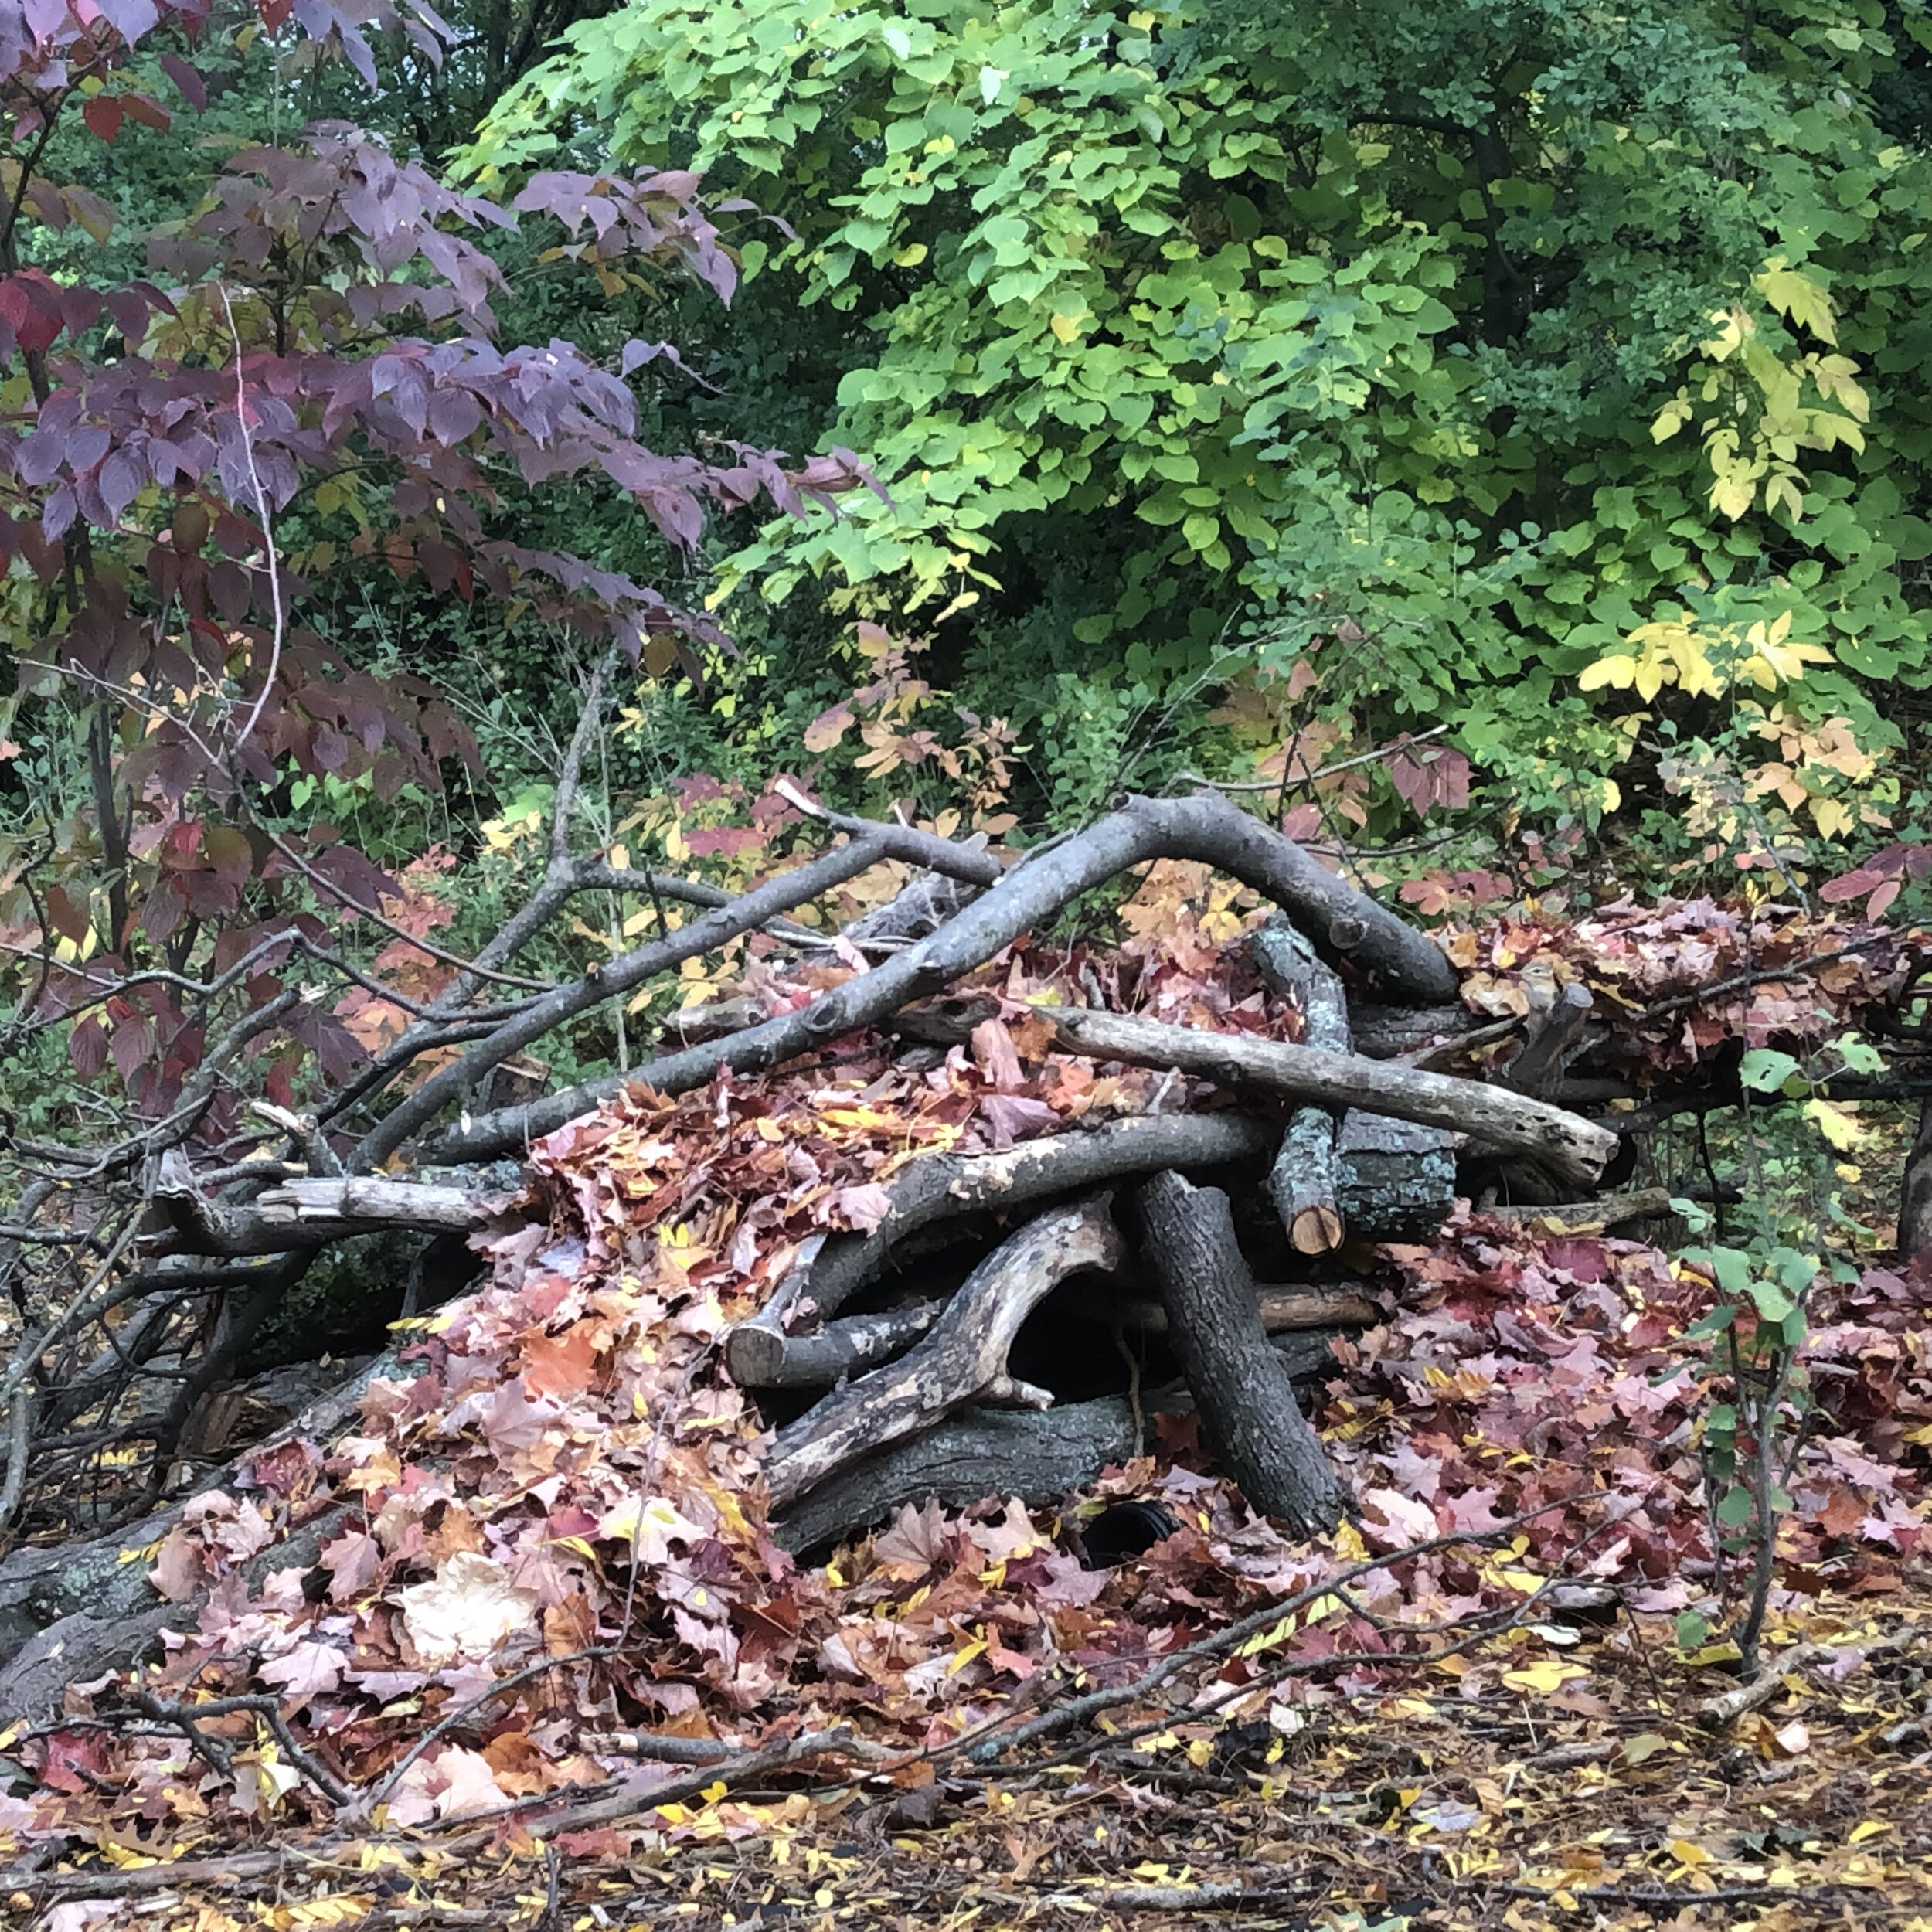
The backyard wood pile is being covered in leaves moved from the front of our home. The leaves provide a blanket over the woodpile and provide an even better habitat for insects, small mammals and reptiles that call it home.
Two lessons learned here: First, keep your cats in the house where they can’t kill every wild neighbourhood creature trying to live their lives; and two; provide the little creatures areas where they can feel relatively safe.
And, a wood pile or brush pile is one of those safe places.
They form micro-habitats where mammals, birds, reptiles and insects come together.
They can be as simple as a variety of branches piled into a corner of the yard and added to regularly, or as complex as a highly planned structure of carefully placed branches rising out of the depths of the soil with specially formed pockets for amphibians, integrated bird houses and vines interwoven through the branches.
The branches can be placed horizontally or dug into the ground to rise up vertically. Either way, it should not take long before your woodland friends will check out the woodpile.

Wood piles provide a natural habitat for so many of our Woodland friends.
Consider building your woodpile in an area of the garden where it gets dappled sun, providing a habitat that is neither too hot in the summer months, nor too cold for hibernation through the winter.
Depending where you are and the fauna already living in the yard, you can expect small mammals from chipmunks to rabbits and groundhogs. Don’t be surprised if you attract a skunk or mice, which is a good reason to build your pile in a corner of the yard away from the home or a well-used patio.
Yellow warblers are an insect-eating bird that might become a regular visitor to your brush pile.
Snakes, toads, salamanders and a host of insects will likely find the woodpile hard to resist, especially as the branches begin to decompose and return to the earth.
This fall, the woodpile has become the dumping ground for bags of leaves from the front of the home. (Click for my Blog post on why you should leave your leaves) The leaves will act like a blanket protecting the insects, reptiles and small mammals that have taken up residence in the woodpile. As the leaves decompose, the leaf mold will encourage more microbial life and help the branches break down even further. The leaves will also give birds a place to scratch around this winter looking for hidden insects and pupae.
Birds that might not normally visit your Woodland will find the woodpile provides a smorgasbord of insects. Bluebirds, woodpeckers, orioles, robins and warblers to name just a few insect-eating birds, that might become regular visitors to your woodland.
You can encourage them to discover the woodpile with a little help from some dried meal worms sprinkled about and maybe pushed into some natural cavities in the tree stumps. Meal worms are available at most good bird stores. UK readers can check out Gardenbird for a complete supply of food and birding accessories.
Encourage some berry producing vines to weave their way through the branches and you are inviting even a greater variety of birds to your yard.
While I get great enjoyment from my bird feeding stations, providing natural food sources to our feathered friends is always the goal we should aspire to in our gardens. I have written a comprehensive post on feeding birds naturally. You can read about it here.
An added bonus is that brush piles are excellent places to set up a photographic blind to capture your woodland friends in their natural habitat.
In addition, if it is safe to do so, leave dead trees, tree stumps and branches rather than having them removed by tree services. Dead trees are vital for many birds who depend on them to create nesting cavities. Woodpeckers and bluebirds are just two that come to mind.
Just recently, I heard a tapping in the back corner of the garden and went over to investigate. Upon inspection, I could still hear it but could not locate the source of the tapping. Then, a large Pileated woodpecker appeared not more than 10 feet away from where I was standing, from the back side of a dead tree. Tapping away oblivious to me standing there in amazement. It was working what was left of an old dead tree that so many homeowners would have long removed at a high cost to both them and the wildlife that depend on it.
My suggestion, just leave it. If the snag does not pose a danger, leave it for the birds. Maybe let a vine like virginia creeper grow up it and provide the birds with an ideal habitat where it can find places to live and sources of food.
If you are interested in backyard birds, please consider signing up for my backyard newsletter. The sign-up page is at the bottom of my homepage. Not only will the newsletter provide in-depth articles on attracting, feeding and photographing backyard birds, I am also working with local artisans to provide discounts on incredible bird-related feeders, houses and other goodies backyard birders will love. In addition there will be regular giveaways , including gardening books and birding items.
This page contains affiliate links. If you purchase a product through one of them, I will receive a commission (at no additional cost to you) I try to only endorse products I have either used, have complete confidence in, or have experience with the manufacturer. Thank you for your support. This blog would not be possible without your continued support.

Why leave your leaves
Let them fall and leave them be. It’s time to rethink how we deal with fall leaves. If we let them be over the winter, insects, birds, reptiles and mammals will have a fighting chance not only to survive winter, but to get through an often demanding spring with enough food to feed themselves and their babies.
Create a Woodland where insects thrive summer and winter
That’s my motto when it comes to fall leaves. Sure, a few get picked up and brought to the back where they are allowed to decompose in a corner of the yard but pretty much the remainder just stay where they fall for the winter. In Southern Ontario we can get some cold winters complete with a heavy snow cover. The leaves act like a blanket between the tender roots of plants and shrubs, helping to reduce the extreme of the freeze-thaw cycles of a Canadian winter.
But that’s not the best reason to leave the leaves. In fact, it’s never been more important for us to change the way we normally deal with the leaves that fall on our property. There was a time when we burned every last leaf on our properties (many rural property owners still burn their leaves). Today, we simply put them out on the curb or shred them into tiny pieces with gas-powered or electric machines to speed up composting.
Neither burning, nor shredding is best for insects, birds and mammals that depend on us to change our old habits.

The above photo illustration courtesy of Facebook’s Pollinator Friendly Yards is the perfect illustration of what is going on in neighbourhoods where leaves are beginning to fall. Thanks to Leslie Nelson Inman for allowing us to use the illustration.
As winter approaches and most of the insects on our properties disappear, it’s easy to forget about them and their needs. What we don’t realize is that many insects go into a type of hibernation through the winter months, while others, like monarchs, actually migrate to warmer regions. Some simply tolerate the cold and wait out the winter by sheltering and using various warming techniques, including changing body fluids into a form of antifreeze. Although most insects have a one year life cycle, some require two or more years to fully develop.
Insects can overwinter in any stage of development such as eggs, larvae, pupae, nymphs, or adults. But no matter the form, they need places to get them through our winters.
Fallen leaves are important habitat for countless life forms, everything from caterpillars of various moths and butterflies to spiders, sowbugs and salamanders, just to name a few.
(For years, my wife and I have used the plastic leaf claws to pick up leaves that fall on our driveway and pile up against large boulders along the edge of the driveway. We then put them into a collapsible bag (see above) drag them into the back yard where they are either dumped in areas of the garden or piled in a corner. I highly recommend this approach to picking up your leaves. It’s handy and a lot easier on your back)
Insect larvae, microbes and worms overwinter in leaf litter often as pupae. Turtles, toads and salamanders use leaf litter to hide and hunt for prey. Chipmunks, worms and insects rely on leaf litter during winter to help shield them from the cold, and wintering birds forage in fallen leaves for these insects.
There are many places where an insect can overwinter, including burrowing into the soil, in the leaf litter layer or under the leaves and stems of dead plants that are often surrounded in fallen leaves, under rocks or in tree bark.
Lady beetles are just one good example of insects that overwinter in leaf mulch, ready to emerge at the first signs of spring to keep our gardens free of aphids.
Without good habitat to overwinter, insects will not survive and, as a result, migrating birds will not be able to find enough insects to survive or to feed their young. Spring is a critical time for birds. A huge amount of energy is needed just to return to their breeding grounds from more southern areas, let alone find and build a nest and raise their young. To face a dwindling supply of insects and the vital protein they provide at this critical time could be a death sentence for many fledglings.
Bird feeders are not a solution to this problem. Granted feeders can certainly help migrating birds who use a high percentage of seeds to fuel their diets, but many of these birds still depend on insects and spiders to feed their young. Warblers and other insect eaters, rarely seen at feeders, especially need an abundance of insects.
All they are asking us to do is to relax. I think we can afford to do that for them.
Leave the leaves on the ground in the garden. Don’t worry what your neighbours think. If you need to pick up some leaves, move them to an area of the garden where they can slowly decompose. Even a large pile will be cut down to a fraction of its size by spring. Just do it.
• This page contains Amazon affiliate links. This blog would not be possible without your continued support.

Fallen leaves are woodland gardeners’ gold
Fall is a golden time for Woodland gardeners. While neighbours line the curb with bags of leaves, gardeners have to restrain themselves from filling their trunks with the bags to compost them and create leaf mold, otherwise known as gardeners’ gold. The best idea is just to leave them where they fall, the next best idea is to gather them and create an open compost in a corner of your yard.
Leave the leaves where they fall
It’s that time of year when bags and bags of leaves are put out to the curbside as if they were some kind trash.
One might think these leaves are of no value whatsoever.
But gardeners know that one person’s garbage, is a another person’s gold.
Woodland gardeners know the value of a bag of leaves better than most. While others are lining their curbs with compostable bags of leaves, many of us are debating whether they should load up their trunks with their neighbours’ leaves.
Known as black gold, there is nothing better for your garden than leaf mold – the results of simply composting the leaves that fall from our trees. A resource freely available to us every Fall.
While leaf mold is a tremendous addition to our gardens, it’s always best for local wildlife to just leave the leaves where they fall. Or, just rake the leaves on to our gardens where they will eventually break down.
But if that’s not an option for you, rake the leaves into piles in a corner of your garden and leave them for a year or two before spreading them over your garden beds.

Leaves from a Japanese Maple form a carpet over pachysandra. If you can, leave them where they fall, if not move them to a corner in the yard where they can be composted to form leaf mold.
What makes leaf mold so good for our gardens?
One needs only to go to a forest to see the benefits of leaf mold in action. Just push pack the top layer of dried leaves and you’ll likely come across that rich layer of leaf mold. You will find a crumbly, brown, moist layer of decomposing matter with a lovely earthy scent.
I remember that earthy smell best from early spring photo expeditions in the woodlands around our home. A group of us photographers would go out into our local woodlands in the Carolinian zone looking for Hepatica, Blood Root, Trilliums, Dog-Tooth violets you name it. When we kneeled among them, even if the ground seemed bone dry, the spongy soil would leave our pants’ knees wet, and the aroma of fresh earth would fill the air.
It’s those early memories out in the woods that make me realize now just how fertile that forest soil was.
Leaf mold, that “stuff” that left the knees of our pants all wet and earthy smelling, was nothing more than several seasons of partially decomposed leaves that are somewhere between shredded leaves and pure woodland humus.
Here is the golden part: Leaf mold can hold up to 500 per cent of its own weight in water. You know all that snow that melts in early spring and the rains that follow, well leaf mold traps most of that water and both feeds and protects the young emerging plants. It also helps feed the roots of the established perennials that are also beginning to emerge.
Do everything you can to treat your woodland garden as if it is a natural forest.
Like a forest floor, yearly applications of leaves falling on your garden will significantly improve the quality of your soil by, among other things, having a moderating effect on the pH levels in your soils.
Over time, soil will have a better water-holding capacity, a more friable texture, and an increase in beneficial soil life.
In many Woodlands, leaves are simply left on the ground to slowly decompose. In this approach, it could likely take several years for the process to be complete.
In our fern glen, for example, leaves are left where they fall and more leaves are added to the area from other parts of the garden. The leaves not only improve the soil, but provide a blanket for the ferns over the winter.
Leaving the leaves on the ground throughout the winter is definitely the best approach.
Many insects, larvae, birds, reptiles and small mammals depend on leaf cover to survive cold winters.
Wherever you can, leave the leaves where they fall until spring cleanup. And don’t be in too much of a hurry in the spring to begin cleanup. Leaving them until later in spring will give many of the overwintering insects, larvae and eggs an opportunity to complete their cycle. Not only will it help wildlife, the leaves also provide a blanket for our plants, shrubs and tree roots. Yes it looks a little messy. Your neighbours will probably be freaking out, but once the leaves are covered with a blanket of snow, it’s all forgotten.
Unfortunately, for many of us leaving the fallen leaves in place may not be possible. In a smaller yard, a corner of the garden could be set aside for leaf collection either in an open-pit style of composter, or contained inside steel mesh or a more traditional composter.
Can I create leaf mold in one year?
It’s possible to create finished leaf mold in a single year but several steps need to be followed to create the right conditions to speed up the process.’
Unlike traditional compost, leaf mold is created using a cold composting process and decomposition is the result of fungi rather than bacteria.
To speed up the process follow these recommendations: use a variety of leaf types Oak, Maple, Linden, Birch…; keep them moist (not wet); try to shred as many as possible so they are smaller; build a large pile (six feet wide by five feet high or about 20-30 bag fulls). Please note that shredding the leaves actually threatens the lives of the insects, larvae and eggs of butterflies, moths and insects that live in and on the leaves.
If this seems like too much work, you can simply put the leaves into large plastic bags with holes cut into them, add some water, some garden soil, compost or manure and a leave them in a corner of the yard for a year or two. It won’t take long for the leaves to break down under these conditions.
The leaf mold is ready to use when it’s soft and crumbly. Spread it around your perennials or incorporate it right into your soil.
Repeat every Fall.
(For years, my wife and I have used the plastic leaf claws (see Amazon ads above) to pick up leaves that fall on our driveway and pile up against large boulders along the edge of the driveway. We then put them into a collapsible bag and drag them into the back yard where they are either dumped in areas of the garden or piled in a corner. I highly recommend this approach to picking up your leaves. It’s handy and a lot easier on your back)
• This page contains Amazon affiliate links. This blog would not be possible without your continued support.

Naturally Native: Creating a Woodland Garden for the Birds
Exploring native plants and the importance they play in our gardens to attract birds is a primary focus of Ferns & Feathers’ first Naturally Native newsletter. Our primary feature is a three-part unveiling of a backyard woodland landscape plan created by a professional designer. It’s not too late to fill out the form at the bottom of the homepage to sign up for your free newsletter.
Newsletter explores the importance of using native trees, shrubs and plants to attract birds
Subscribers will soon be introduced to the first Ferns & Feathers newsletter designed for Woodland Gardeners looking to attract, feed and photograph backyard birds.
The name, Naturally Native, evolved after much thought. In just the first six months of writing this blog, I’ve come to realize the importance of using native plants in our gardens. It’s not just the latest trend in gardening inspired by environmentalists in the age of climate change. It is a matter of life and death. Maybe not for us humans in the immediate future, but certainly for the wildlife that shares our world.
It’s just a matter of time before the absence of native plants in our gardens begins to have a detrimental effect on all of us. It has actually already begun to play a role in our lives but we may not have realized it quite yet. Insects that depend on particular native plants as a food source are being threatened as those plants slowly disappear from our landscapes. The birds that depend on that particular insect to feed their nestlings are being threatened as it becomes more and more difficult to find enough insects to keep their babies alive.
A recent report shows that the North American bird population has decreased by 2.9 billion breeding adults, a net loss of 29 per cent over the last half-century. Scientists have identified habitat loss as the biggest reason for the decline. Habitat loss can mean many things. The loss of habitat is directly related to the loss of our native plants.

The first Naturally Native newsletter coming out later this month. It’s still not too late to sign up for your free digital copy
Now, throw in the ever increasing number of suburban eco-terrorists. You know that neighbour down the street who fogs his yard to ensure every mosquito within a mile of his property is killed so he can go out with his buddies and have a beer without being bitten. Every spider, every creepy crawly has to be eliminated … every snake destroyed. Massive expanses of perfect lawn – a monoculture that supports few if any living things – have taken over where forests or prairie grassland once existed.
The landscaping companies who move in with their gas-powered, noisy machines disrupting the peace of the neighbourhood. Those weed-free companies that care for lawns the homeowners can’t be bothered to take responsibility for themselves, spraying trees in the spring, routine spraying throughout the summer and a fall cleanup to ensure that any chance of insects who use them to overwinter will not survive.
In many areas, even flowers are no longer wanted. To many homeowners, a low-maintenance landscape means fake grass, a massive deck, a concrete walkway, a few grasses and maybe a sterile tree in the corner of the yard that never gets bigger than 10 -15 feet and is not bothered by any “pests.”
That’s not what this newsletter is going to be about.
The focus will always be on using native plants because these are the drivers to attract the greatest variety of birds to your backyard and keep them there maybe to set up a nest.
Backyard bird feeding is not all about setting up a feeder, although feeders are certainly an important way to attract a variety of birds. We will discuss the best feed to attract various birds, how to provide water to birds in winter and some of the best nesting boxes to create safe homes for the birds, butterflies and bees.
For those who like to document their yards, the newsletter will offer tips on how to best photograph your garden and the wildlife that lives there. Maybe you are just looking to improve your pictures for social media, or maybe you are looking for ideas to take your hobby to a higher level; either way, the newsletter will offer tips to help you reach your goals.
I’m extremely proud of the first newsletter. The highlight is the first of a three-part woodland landscaping plan to help readers envision a typical, new, suburban woodland backyard aimed at attracting birds.
We have a feature on two Toronto architects from France who have designed the ultimate bird feeder and they are offering our readers a special discounted price. Just in time for the perfect Christmas gift.
We have features on getting closer to backyard birds for photography and the importance of using native plants in the garden. We also put a focus on two popular backyard birds and how to attract them to the yard with both native plants and backyard feeders.
I hope that readers who have not signed up for the free newsletter will take the time to join our group. For anyone who prefers not to sign up, the newsletters will soon be available on the Ferns & Feathers’ website on-line store for a reasonable charge.
• This page contains affiliate links. If you purchase a product through one of them, I will receive a commission (at no additional cost to you) I try to only endorse products I have either used, have complete confidence in, or have experience with the manufacturer. Thank you for your support. This blog would not be possible without your continued support.
Garden photography: Tragopan blinds help get you up close to backyard birds
It’s not always about getting photos, but nothing is better than nailing the photograph you’ve been trying to get for weeks. A Tragopan photographic blind just may be the best tool to get up close and personal with your favourite birds and woodland creatures. Not only will it improve your photography, it may also provide some memorable moments as you experience your backyard wildlife in a whole new way.

The Tragopan blind allowed a close approach to this young fox who regularly visits the garden.
Memorable moments and favourite photographs
It’s not always about the photos, but when you nail the shot you’ve been trying to get for weeks, it’s always a good day.
And just about every day has been good since I landed a Tragopan V6 photographic blind.
Like I said, though, it’s not always about getting a good shot. One of the greatest joys I’ve experienced in the first full week of using the blind is getting the opportunity to experience our backyard birds and squirrels up close and personal. Observing the wildlife has been almost as much fun as photographing them.

White-breasted Nuthatch, taken from inside the Tragopan photographic blind.
I’ve even come to know a couple of the squirrels on a more personal basis. There’s the very timid little baby red squirrel who likes to hang out under the bird feeder but scampers up the pole and hides under the squirrel baffle at the least sign of danger. Then there’s the small female black squirrel who obviously has given birth recently and likes to hang out close to the blind.
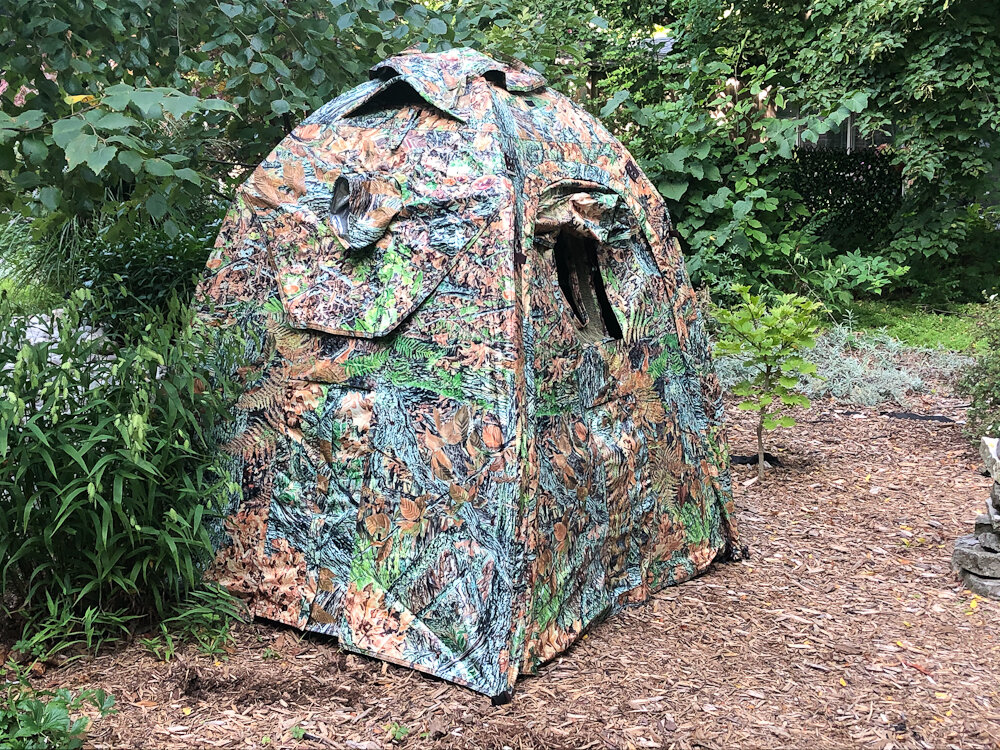
The Tragopan V6 photography blind set up in the woodland garden.
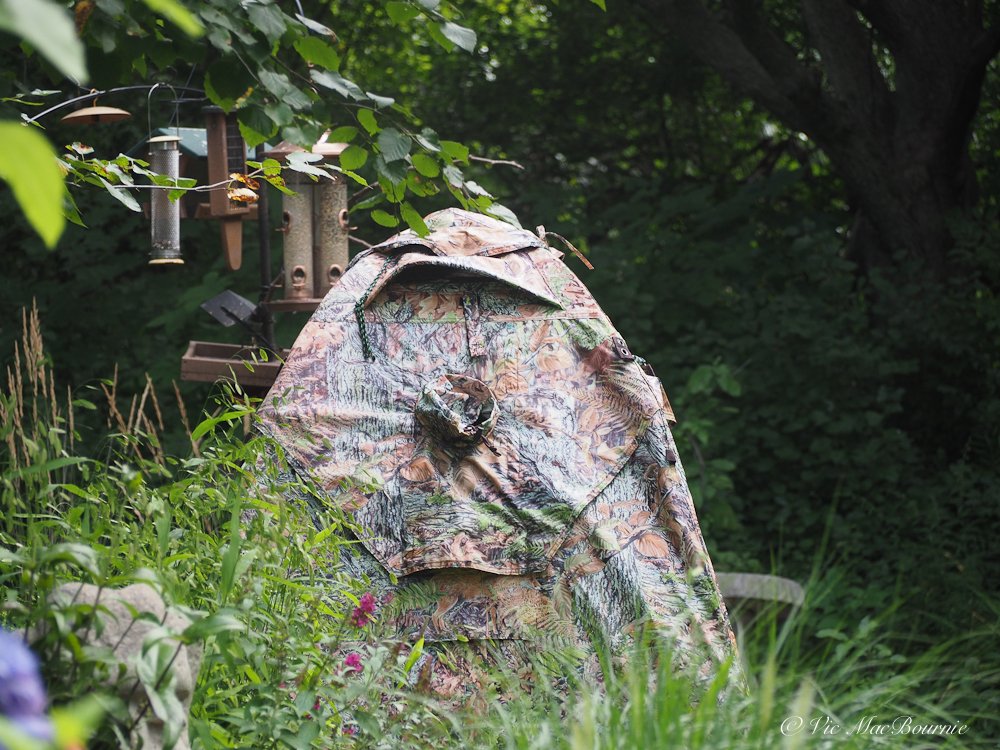
This blind has given me new insights into the goings on in the backyard. At one point, a hawk flew over the yard and the birds and animals scattered in all directions. The yard grew completely silent and I noticed that all but one small Downy woodpecker found refuge. The little Downy clung motionless to the hanging feeder for at least 10 minutes until it felt the danger was completely gone. It was fascinating to watch from a mere 6-8 feet away.
It was just one of a host of memorable moments that I experienced since UPS delivered the one-person blind made specifically for photographers.

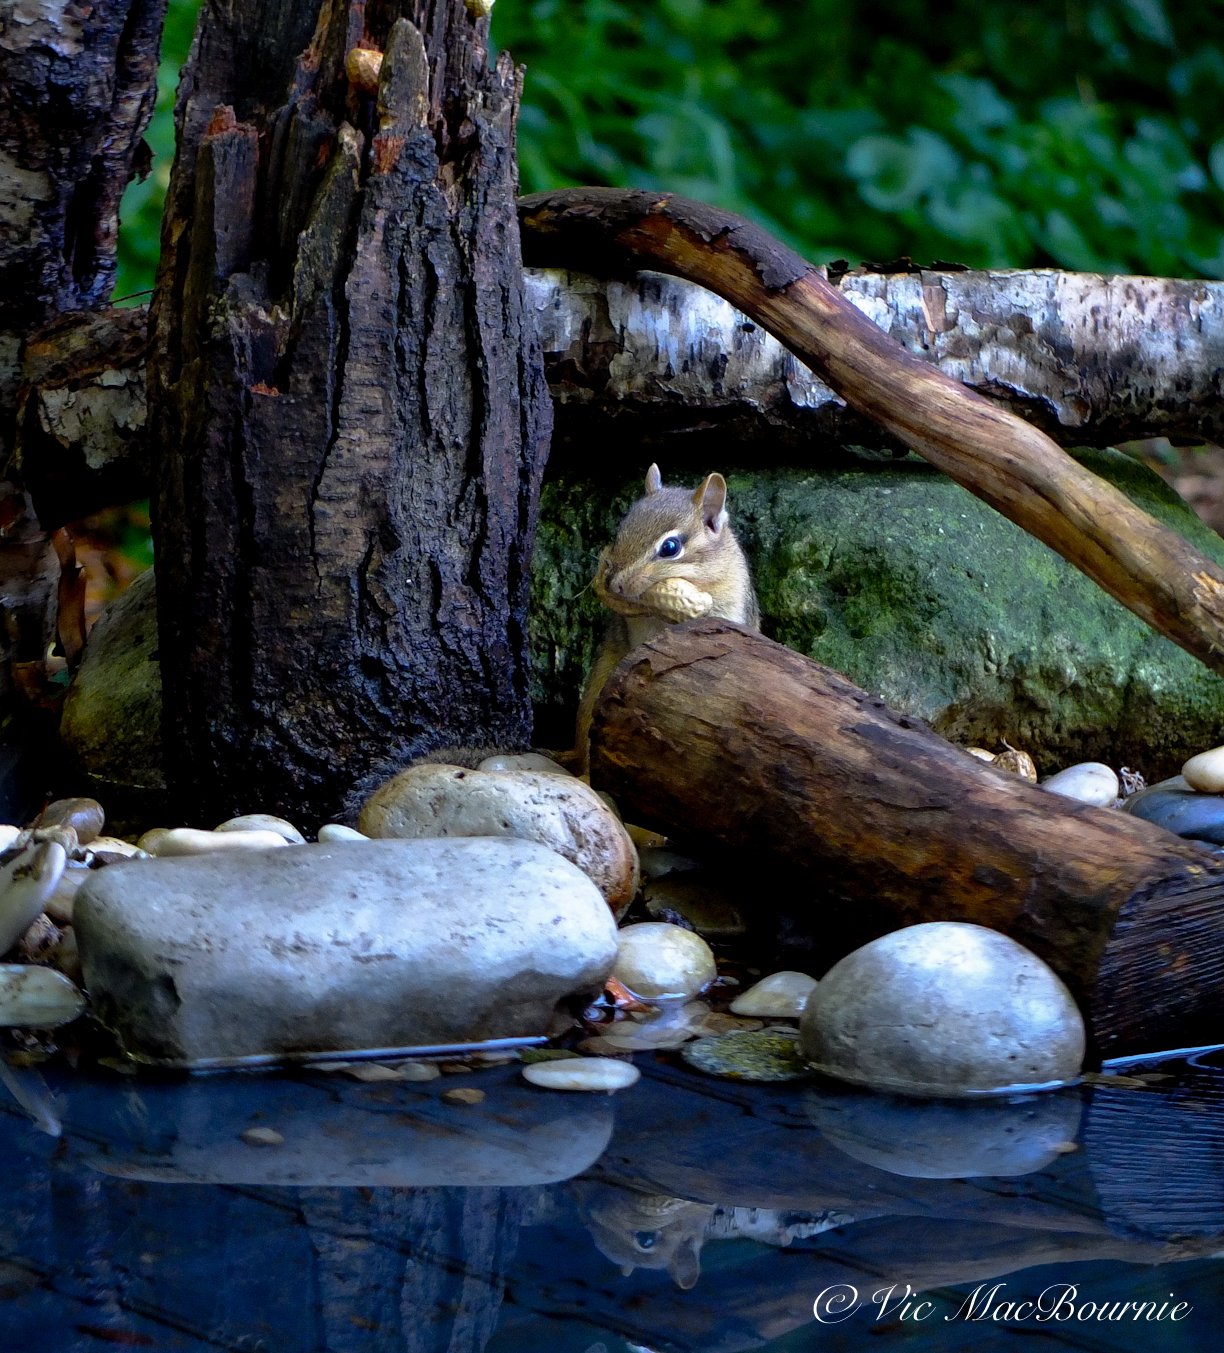
This image of a chipmunk was photographed with a compact camera equipped with a 112mm lens in the Tragopan blind.
How close can you get with a Tragopan blind?
I decided to put the Tragopan photo blind to a real test. How close could I get to wildlife using my Fujifilm X10 compact camera equipped with a mere 28-112mm lens. Of course, in the garden where many of the backyard wildlife are more accepting of me, it can be easier to get close. However, most wildlife photographers invest a lot of money in cameras and lenses that enable them to get up close.
Good planning is critical to successful wildlife photography and be combining the Tragopan blind and my outdoor nature reflection pond, I was able to capture the above image of the chipmunk. In the same photo session, a bluejay also paid me a visit.
So, even if you can’t afford an expensive lens, a Tragopan photo blind might just be all you need to get in close to backyard wildlife.
Many memorable moments in the blind
The other memorable moments have been digitized on photo cards and now sit proudly in Lightroom’s digital database on my computer’s hard drive. There are the woodpeckers, the blue jays, the white-breasted nuthatch, red-breasted nuthatch, the many squirrel shots and chipmunks. In exactly one week in the blind, my success ratio of good shots is through the roof.
I’ve never owned a blind. The closest I’ve come to using one was the purchase of a camo throw that I used to try to photograph deer at a local conservation authority years ago. I tucked it away in tall grass under a tree thinking it was a safe hiding place only to come back the next day to find it gone.
So, this is a new experience for me.
My Tragopan blind set up near the bird feeders in a corner of the yard. The Tragopan blind is an essential photographic accessory that works as well in the garden as it does in the field.
(If you are interested in exploring garden photography at a higher level, be sure to check out my comprehensive post on the Best camera and lens for Garden Photography.)
I could write about the high build quality of the blind. The fact that everything is double stitched, and that the inside has a silver thermal lining that keeps out the heat of the sun, holds in the warmth in fall and winter and blocks any movement in the blind especially when it is backlit. I could write about all the small things that, unlike a blind made for hunting, makes this blind perfect for photographers.
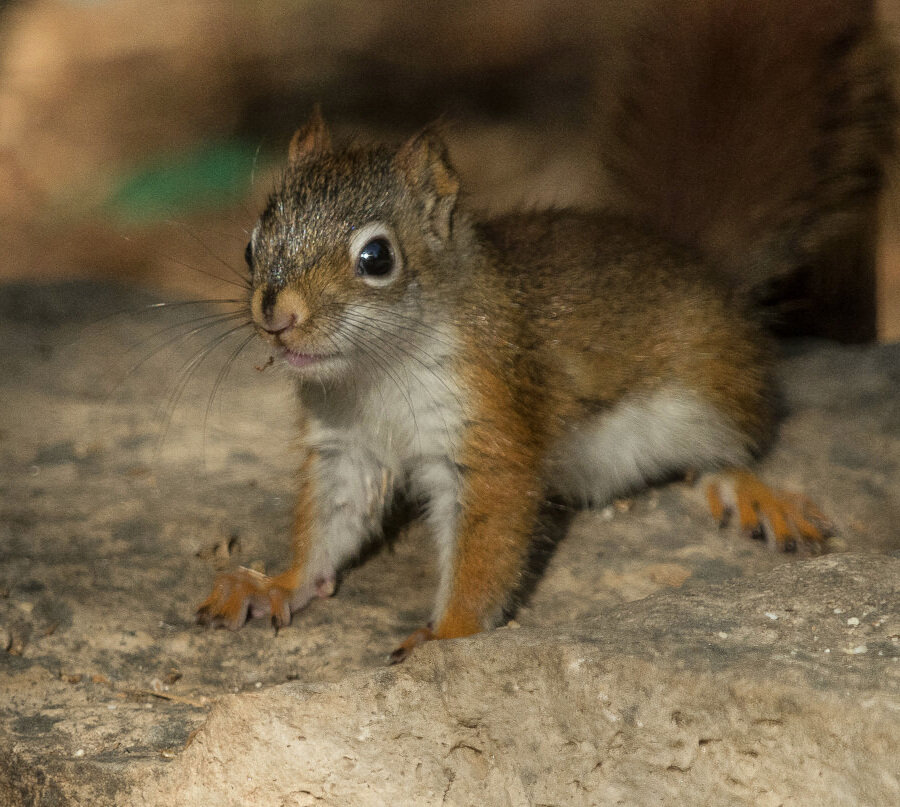
One of our baby red squirrels looking as cute as ever. The photo blind makes getting pictures like this much easier without the need for extremely long lenses.
And did I say that the blind is built specifically for photographers. It is NOT a hunting blind converted for photographers. Ethically, that makes me feel a whole lot better.
“Designed for photographers by photographers” is how Tragopan describes their line-up of blinds. “We’ve tried to think of everything you’ll need to stay concealed and keep yourself and your subject comfortable. Our goal is to make your job of creating great images easier.”
It’s no surprise that one of the company’s goals is to make our job of creating great images easier. What I love, is that one of their goals is also to keep your subjects “comfortable.” I can’t imagine a hunting blind that would make that claim.
I could go on about what makes this blind better for photographers than even the best “hunting” blinds, but I’m not sure readers of this blog need all those details in this post. (There will be other more detailed reviews later.)
The real question for readers here is: who needs this blind and why?
You might think that only dedicated wildlife photographers would go to the trouble of buying a photo blind. In this age of social media, however, many of us are looking for simple, inexpensive ways to improve our Instagram and Facebook posts. Many of us just want to document our gardens and the birds and animals that either call it home or visit it on a regular basis.
Let me say that there might not be a better photographic tool than a blind to improve your backyard bird and wildlife photography, especially if your photography equipment is limited to a few kit lenses and your longest telephoto is a 70-200mm zoom.
There are basically two ways to get closer to your subject. Either buy a longer lens in the realm of 300-400mm for several thousand dollars, or figure out a way to get closer to your subject.
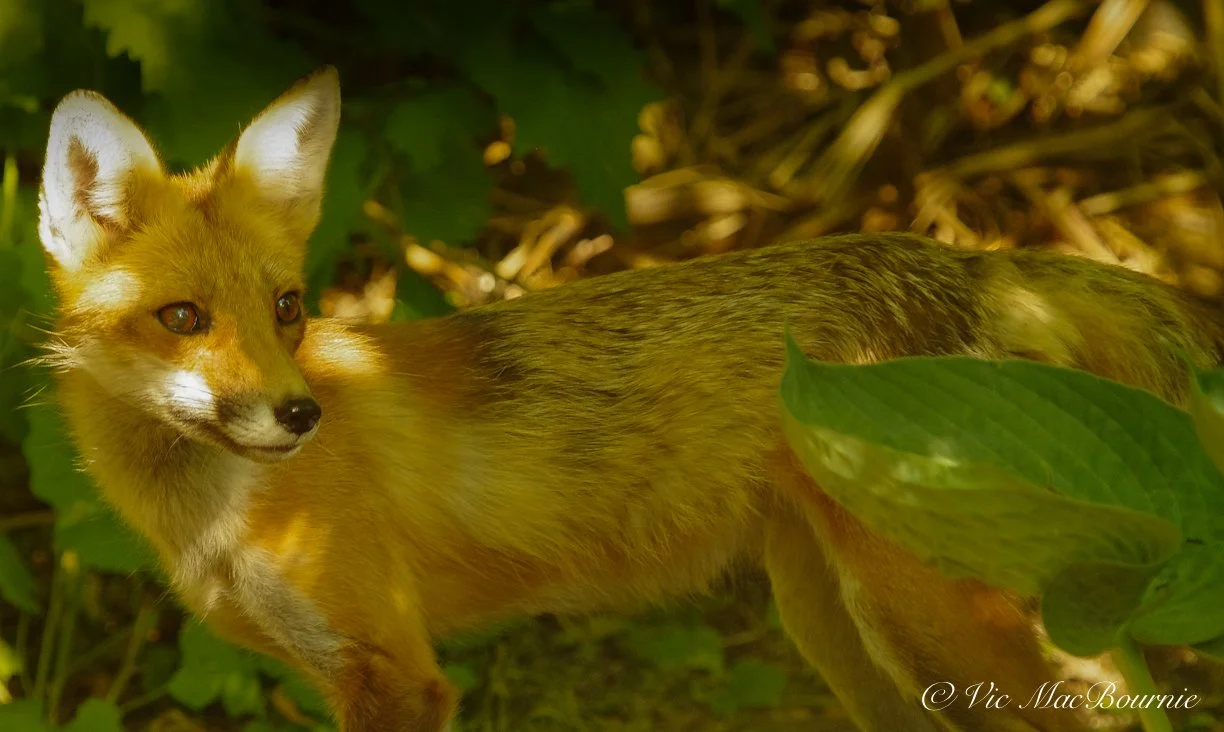
The Tragopan blind made getting this image of a young fox possible.
The blind gets you a whole lot closer for under $300. And because it’s small and light, (sets up in less than a minute or two) it can be easily moved anywhere in the yard or taken out into the field to photograph or observe a host of other subjects.
One of the benefits of photographing in our yard is that many of the birds and wildlife are already accustomed to our movements and accept a closer approach than they would in the wild. But there are many birds and backyard wildlife that do not allow a close approach. The blind not only allows your subjects to become more comfortable, it also allows a close approach to more skittish birds and wildlife. You might be able to get a shot of a bold little chickadee without a blind, but what you really want is a closeup of the sparrow hawk that visits every afternoon looking for dinner.
And, because the blind is mostly used in your yard, you can leave it up for days, even weeks without worrying about someone walking off with it. Set up and tear down is is so easy that I simply store my blind in the shed overnight and pop it up in the morning or evening when I want to use it.
A photographic blind may not be for everyone, but for anyone interested in improving their photography, whether it’s to take their hobby to a higher level, or just to document the wildlife in the yard for their social media accounts, a photographic blind might be the ideal investment.
I hope to use the blind to get photographs of fox, deer, wild turkeys and more. Stay tuned for future posts on how the Tragopan performs under different conditions throughout the fall into winter and finally into the spring months.
For more information on Tragopan Photographic blinds, go to www.photographicblinds.com. or just click on to one of these links.
* I want to disclose that Tragopan Photographic Blinds have provided me with a blind to use for a period of time to test and review. I was required to pay delivery costs of the blind and GST. In no way have they required me to write positive reviews of the product.
• This page contains affiliate links. If you purchase a product through one of them, I will receive a commission (at no additional cost to you) I try to only endorse products I have either used, have complete confidence in, or have experience with the manufacturer. Thank you for your support. This blog would not be possible without your continued support.

Toronto couple behind Q&A Design create the ultimate Bird Feeder
The Ultimate Bird Feeder has its roots in France but it’s definitely a made-in-Canada masterpiece. With its copper roof and western red cedar body, the exquisite feeder is the work of French architects and designers Coraline Allard and Pierre Quesnel from QnA Design. The couple are offering a special discount to readers who sign up for the Ferns and Feathers Woodland Garden newsletter.
Q&A design combines copper and cedar to create unique feeder
The Ultimate Bird Feeder’s roots may be in France, but it was born in Canada.
And, Toronto-based architects Coraline Allard and Pierre Quesnel wouldn’t have it any other way. The couple, who met at architecture school in Rouen France, came to Canada as part of an adventure, to improve their english, and to experience architecture in a big North American city.
Then, they fell in love with Toronto and never left.

Coraline and Pierre go over designs in their Toronto workshop.
The couple didn’t come here to design and build bird feeders, but the exquisitely designed feeders featuring a natural copper roof teamed with western red cedar, have certainly played a key role in pointing them in a new direction that has led them to where they are today.
“In the end, life showed us another path that we are delighted we’ve taken,” explains Coraline.
The couple’s journey actually started with jobs at the prestigious Bowlus Road Chief trailers.
“Yes, we worked for two and a half years designing and building the first prototypes of this amazing travelling trailer, before we decided to start our own business designing and building custom projects for people.” says Coraline.
Their change in focus came after they designed a custom mailbox made out of copper and cedar for a client. That’s when they decided to show their wares at Toronto’s prestigious One of a Kind Show. They created Q and A Designs back in September of 2014, and began brainstorming on what they could focus on as their first creation.
The Ultimate Bird Feeder with its verdigras copper roof and natural cedar.
“We knew we loved the combination of cedar with copper, we just had to find the right object to create,” says Pierre.
After much thought and a vacation in France, they decided to combine their love of nature with their dream of creating a product of the highest quality and design.
Some sketches on a napkin, and the Ultimate Bird Feeder was born.
It’s not hard to see how their work on the all-aluminum travel trailer might have influenced their work.
“Sometimes people say, especially about the round-shape-feeder version, that it looks like an old trailer. So I guess it is not a long way from the design of trailers,” adds Coraline.
Exhibit at Toronto’s One of a Kind Show
While they were showing the feeders at the One of a Kind Show, many shoppers asked them where they could buy the feeders outside of the show. Artisan friends from Toronto told them about the sales potential of Etsy, and their on-line store was born.
Q&A are offering a 15 per cent discount to all Ferns & Feathers readers who make a purchase on their Etsy website by using this special FERNSFEATHERS link.
The feeders are a far cry from cheap plastic feeders or even more expensive store bought models.
“A majority of our buyers are design lovers,” says Coraline, adding that “they are also nature enthusiasts, and most love to watch birds.” She adds that: “usually people buy our feeders for a special occasion gift, housewarming gifts, cottage host gifts, anniversary gifts, retirement gifts, and it’s always a success! Our customers are usually looking for a unique, well crafted product that will be loved at first sight. And as nature admirers, we associated copper with cedar to design a minimalist, yet elegant shape, and created the perfect durable outdoor bird feeder.”
Our QandA feeder didn’t take long to attract the local Chickadees. The copper roof is beginning to patina after arriving with a gorgeous shiny copper roof.
Although Canadians are the biggest buyers of the bird feeder, they also have clients in the United States, Europe and Australia. All of the units are entirely handmade by Coraline and Pierre in their Toronto studio. The price reflects the extremely high quality, the dedication to design and the use of only the finest natural materials that will only get better with age.
Unique bird feeders
“On a design point of view, our feeders are very unique. Let me explain to you how they work. The cork at the top is where you load the seeds. It fills a reservoir that keeps the stock dry and clean, and drops a small amount down at the bottom of the feeder. That is where the opening is, and the birds come to eat. As the bird eats the displayed food, more comes down from the reservoir, self served, it is fed by gravity,” explains Coraline.
The couple get a lot of inspiration for their natural designs from their own environment.
They agree that they love Canada first for its “Nature and the great outdoors. Although people we met here are a big part of the reason why we stayed here as well. So I guess what we like most about living in Canada is going with friends to enjoy some time in the wilderness.”
Closer to home: “Toronto is a great city with lots of green spaces where you can see a wide range of bird species. We love to go to Tommy Thompson Park, and watch wild life for hours there with our binoculars,” says Pierre.
Since their first One of a Kind Show in 2014, the couple have launched several more products.
“After our big success with the bird feeders at the One Of A Kind show the first year, we had to (design more products.) So we came up with different ideas, and some of them are still on the drawing board. But the Beer Boxes, is one of our other most popular collections of objects. They are made of Aluminum, and are riveted with solid rivets which creates a light weight object but still very strong.”
What does the future hold for the couple?
“In the near future, we'll adapt to the new situation and tweak our website to directly accept sales as no shows will happen for the Christmas season this year. We are working on different ideas for a new product, some are mailboxes, and bike rack boxes. I guess we must have something with boxes. On another hand, we also work on big commissions, and are in the process of designing and building a big urban furniture art piece that will be installed next summer in the Toronto cityscape. Keep an eye open @qnadesign (Instagram or Facebook) to see the work in progress.”

Engineering a naturally native wildlife garden
Angela den Hoed of Soil&ink has taken a passion and turned it into her life’s career. One that has taken her down an unusual path, but a path she just loves to go down. Along the way she has discovered her love for the outdoors, for gardening and using natives in the garden. Angela is in the process of designing a Woodland garden for our upcoming fall newsletter.
Soil&Ink: Putting pen to paper in a digital world
Angela den Hoed has not always had an attraction to the great outdoors.
Growing up in Dodge City, Kansas, the dry windswept plains didn’t really inspire outdoor activities. Since then, however, she’s come to appreciate those wide open, windy prairies and big blue Kansas sky.

Her love for the outdoors took root after college when she landed a job with The Coleman Co., the prestigious and well-respected outdoor camping gear manufacturer.
Here, Angela used her mechanical engineering skills obtained at Wichita State University to create many of the camping necessities we’ve come to depend on over the years.
I remember designing flashlights and lanterns, particularly a flashing LED light for kids and a tent light that attaches to the tent wall using magnets,” she recalls. “I learned a lot about the interactions between engineering, marketing, and manufacturing. It was great being able to see something I designed go from idea to being on the shelf at a local retail store.”
So how did an engineer go from designing high-end camping gear, to creating exquisite gardens for her world-wide clients?
Like a good garden path, her journey certainly didn’t evolve as a straight line.
While working at The Coleman Co. her husband’s job provided the family with a chance to live in Annecy, France.

It’s been an interesting path from being an engineer at The Coleman Co to creating beautiful backyard gardens. It’s a path, however, Angela den Hoed is happy to take and one that is providing her with new discoveries at every turn with her company Soil&ink.
Angela has created an impressive meadow garden. For more on how she created the meadow go here.
Angela took the opportunity to become a stay-at-home mom to her two children, Kaitlynn and Emma and take in the incredible culture France had to offer.
Included in the culture change was a fresh view of gardening that Angela admits may have cultivated new roots in her eventual career choice.
Since returning from France, the family called Western North Carolina home, as well as a brief stint back to Wichita, and finally to Carlisle, Pennsylvania, where she now operates Soil + Ink, her on-line landscape design and garden coaching business.
Angela is quick to point out that everywhere she has lived has been in growing zone 6. But, she adds, “the native plants in each location have been different.”
At home in Carlisle, she spent much of her time working on her own garden. “I’ve been a gardener and DIYer for more than 20 years,” she says.
Her hard work did not go unnoticed
Her work at home did not go unnoticed. Before long, neighbours recognized her gardening skills and attention to detail and began asking for gardening advice. The next step was creating garden plans for friends and family.
“One day a local landscaper approached me while I was working in my own garden and asked me to help some of his clients. That started me on the path to owning my own landscape design and garden coaching business, Soil + Ink,” she explains.
“Most people think landscape design is a long leap to make from mechanical engineering, but to me, they are very similar,” she adds.
“The process of designing a product to be sold in a store is very similar to designing a garden. In both cases you must keep the end user in mind, the design must be functional as well as beautiful, and you must take into account environmental factors (sunlight, temperature, etc.) on your materials.”
There is one big difference, however, between working at The Coleman Co. and as a landscape designer that suits her just fine.
“The difference is I get to design with living plants rather than plastic and metal as my materials,” she says.
Since starting her business in 2018, Angela has created more than 20 gardens and coached countless rookie and experienced gardeners on how best to tackle their gardening problems.
One of her favourite designs is one she just finished. “I love working with young homeowners and getting to teach them about using native plants and ecologically sound practices. They often have small children, and I like to include a small path for a child to run through the perennials and get up close and personal with them. Interacting with native plants helps children and adults create a connection and ‘sense of place’ with where they live. I’m so glad more and more home gardeners are asking for native plant designs.”
Backyard bird and wildlife Newsletter and free download
We are extremely excited about our backyard bird and native plants newsletter.
By joining our woodland garden community newsletter, you will receive a downloadable ebook with the complete design plan. To sign up for the newsletter, go to our home page here, scroll to the bottom and complete the newsletter form.

Five tips to attract hummingbirds to our woodland gardens
Here are five tips to attract hummingbirds to your gardens and keep them coming back for more. Going native and eliminating insecticides in your garden will go a long way to attract these wonderful, entertaining little birds.
Going native and eliminating insecticides are key to success
Just as our hummingbirds prepare to make their arduous journey south to Central America and Mexico for the winter, I thought it was a good time to look at ways we can attract more of these favourite little entertainers back to our yards next year.
For those unable to attract hummingbirds, these tips will go a long way to bring success next year.
Depending on where you live, it can take time to get our local hummingbirds to find our yards and put it on their daily rounds for the entire summer.
Here are five ways we can attract and keep hummingbirds coming back:
Have feeders ready in early spring
1) Have your feeders cleaned and ready to go early in the spring and get them out in the garden before not after you see your first hummingbird. It’s a good idea to track the hummingbird migration on line so you can be prepared for the day they fly through your area. Hummingbirds migrate during the day when nectar sources from flowers are available. Flying low, using tail winds to help them move quickly allows hummingbirds to travel as much as 23 miles in a single day. Tracking the fast-moving band can be challenging and to some degree dependant on local circumstances such as food sources and wind direction.

A native Cardinal flower provides the perfect feeding spot for this female hummingbird.
There are many good websites that will help. Facebook groups can prove to be excellent local sources of information, but there are specific websites that make it their business to track the bands on a more global level. Hummingbirdcentral.com is one that does an excellent job tracking not just the Ruby-throated hummingbird popular in both the U.S., and most of Canada, but also the Black-chinned, Rufous, Broad-tailed, Calliope, Anna’s and Allen’s hummingbirds.
Get your feeders out early in areas of your yard that make them easy for the migrating hummingbirds to see. Rather than filling them completely with your homemade food source at 4 parts of water to one part sugar, maybe fill the feeders halfway until you begin seeing them at your feeders. Then you can fill them fully and keep them filled and cleaned regularly all summer. If you are in a colder climate, try putting a hanging basket of brightly-coloured flowers near the feeders to catch their eye. We have had hummingbirds at our front door checking out fake spring flowers on our wreath long before I realized they were back in town.
Plant both annual and perennial native flowers
2) Ensure you have plenty of annual and perennial flowers in your gardens to provide natural sources of nectar for the hummingbirds and try to have at least some in bloom as early in the spring as possible. Hummingbirds take advantage of everything from flowering shrubs, vines and understory trees to provide them with everything from food, shelter, shade and security. They rely on brightly coloured flowers to find food and are particularly attracted to red tubular flowers like the native Cardinal flower, but any brightly-coloured flower that are tubular will hold nectar. Consider planting native columbines for early spring blooms as well as bee balms, daylilies, lupines foxgloves and hollyhocks. Don’t forget to add lots of annuals that may be available in bloom in early spring if they are greenhouse grown.
Here is a short list of important flowers you should consider for your garden:
Beard tongue (Penstemon), Bee balm (Monarda), Butterfly bush (Buddleia), Catmint (Nepaeta) Clove pink (Dianthus), Columbine (Aquilegia), Corla bells (Heuchera), Daylily (Hemerocallis), Larkspur (Delphinium), Deseert candle (Yucca), Iris (Iris), Flowering tobacco (Nicotiana Alata), Foxglowve (Digitalis), Lily (Lilium), Pentas (Pentas), Petunia (Petunia), Pincushion flower (Scabiosa), Red-hot poker (kniphofia), Scarlet sage (Salvia splenens), Scarlet trumpet honeysuckle Lonicera sempervirens), Summer phlox (Phlox paniculata), Verbena (Verbena), Weigela (Weigela).

Create a shallow, reliable water source
3) Prepare a small water source early in spring to get them accustomed to using it throughout the summer. Although hummingbirds get most of their water from nectar sources both naturally and from our feeders, they do enjoy bathing in either very shallow water or, even better, in a fine mist. A gentle continuous spray from a nozzle or a sprinkler hose will get the job done. There are also commercial misters that are available. In nature, hummingbirds will use water falling from leaves during spring and summer rains to keep their feathers in top condition. A mister or gentle sprinkler spraying on leaves will create a similar situation for the birds. For more, check out my earlier post on providing water for the birds in your garden.
Give hummingbirds a place to rest
4) Provide your Hummingbirds with perches either natural ones in the form of small branches from trees and shrubs or commercially available ones designed specifically for them. Hummingbirds use perches as a base to defend their food sources, hunt insects or just as a resting spot. Males will often use the perches as a spot to vocalize in the spring to attract a mate. These branches are often very thin to accommodate the birds very small feet. If your garden lacks good landing spots, you could use thin wires, like the ones on hanging baskets. For more information on perches, check out my earlier post on hummingbird perches.
Stay away from insecticides
5) Do not use insecticides in your garden. This is probably at least as important as providing the birds with artificial feeders. Nectar provides Hummingbirds with quick energy to sustain their high energy needs, but many people might not realize that Hummingbirds depend on insects to provide them with much-needed protein and various minerals in their diets. They prey on very small flying insects, such as mosquitoes, aphids, mites, gnats, leafhoppers, flying ants and parasitic wasps.
Ultimately though, their favourite food source are spiders, specifically the daddy long legs spiders. Some estimates even have spiders representing between 60 and 80 per cent of their diet. Hummingbirds are known to use their exceptional vision to find prey, and their hovering ability and agility to capture them. Not only to they prey on spiders and other insects that get caught in their webs, Hummingbirds use spider silk that form the web to provide the foundation and glue to make nests in the breeding season.
Hummers catch insects while in flight. If you take the time to really watch your Hummers in the garden, you will notice them dashing into vegetation or flitting back and forth, flying quickly and snatching tiny insects where they swallow them whole.
if your garden is devoid of insects because you or your neighbour regularly spray it with insecticides, don’t expect to be able to maintain a healthy group of hummingbirds. In fact, if you want to encourage hummingbirds, it is important to focus on using as many native plants trees and shrubs as your garden can accommodate. For more on the importance of using natives in the garden, please check out my recent post (here) on the importance of using native plants in our garden.
• This page contains affiliate links. If you purchase a product through one of them, I will receive a commission (at no additional cost to you) I try to only endorse products I have either used, have complete confidence in, or have experience with the manufacturer. Thank you for your support. This blog would not be possible without your continued support.

Going Native: Saving nature one backyard at a time
Bringing Nature Home is a book every gardener needs to read. The book is a rich resource for woodland gardeners looking to better understand the importance of native plants in our environment and the dangers of using exotics. It is a comprehensive blueprint for how gardeners can use native plants to sustain wildlife
Bringing Nature Home: Sustaining wildlife with Native Plants
There is plenty to be optimistic about in Douglas Tallamy’s book, Bringing Nature Home and it all begins with the importance of planting native plants, trees and shrubs in our gardens.
But finding this optimism is not easy.
For my extensive article on why using native plants in your garden is important, go here.
Tallamy tells the truth and it’s a truth that will make most gardeners very uncomfortable about what we’ve planted in the past and what is now happily growing in our gardens right now.
The must-have ornamentals, the pest-resistant perennials and the trees and shrubs we probably never suspected were problematic in the landscape are creating the conditions for the slow but steady decline not only of native plants but the entire ecosystem that depend on them for survival.
Scary stuff for sure, but critical reading for anyone who cares about the environment and what awaits future generations.
Remember, I said there’s lots to be optimistic about in the book. It’s important to note that the its full title is “Bringing Nature Home. How You Can Sustain Wildlife with Native Plants.” The book proves to be a rich resource for combating the incredible damage we have inflicted on our land and the wilder places that surround us.
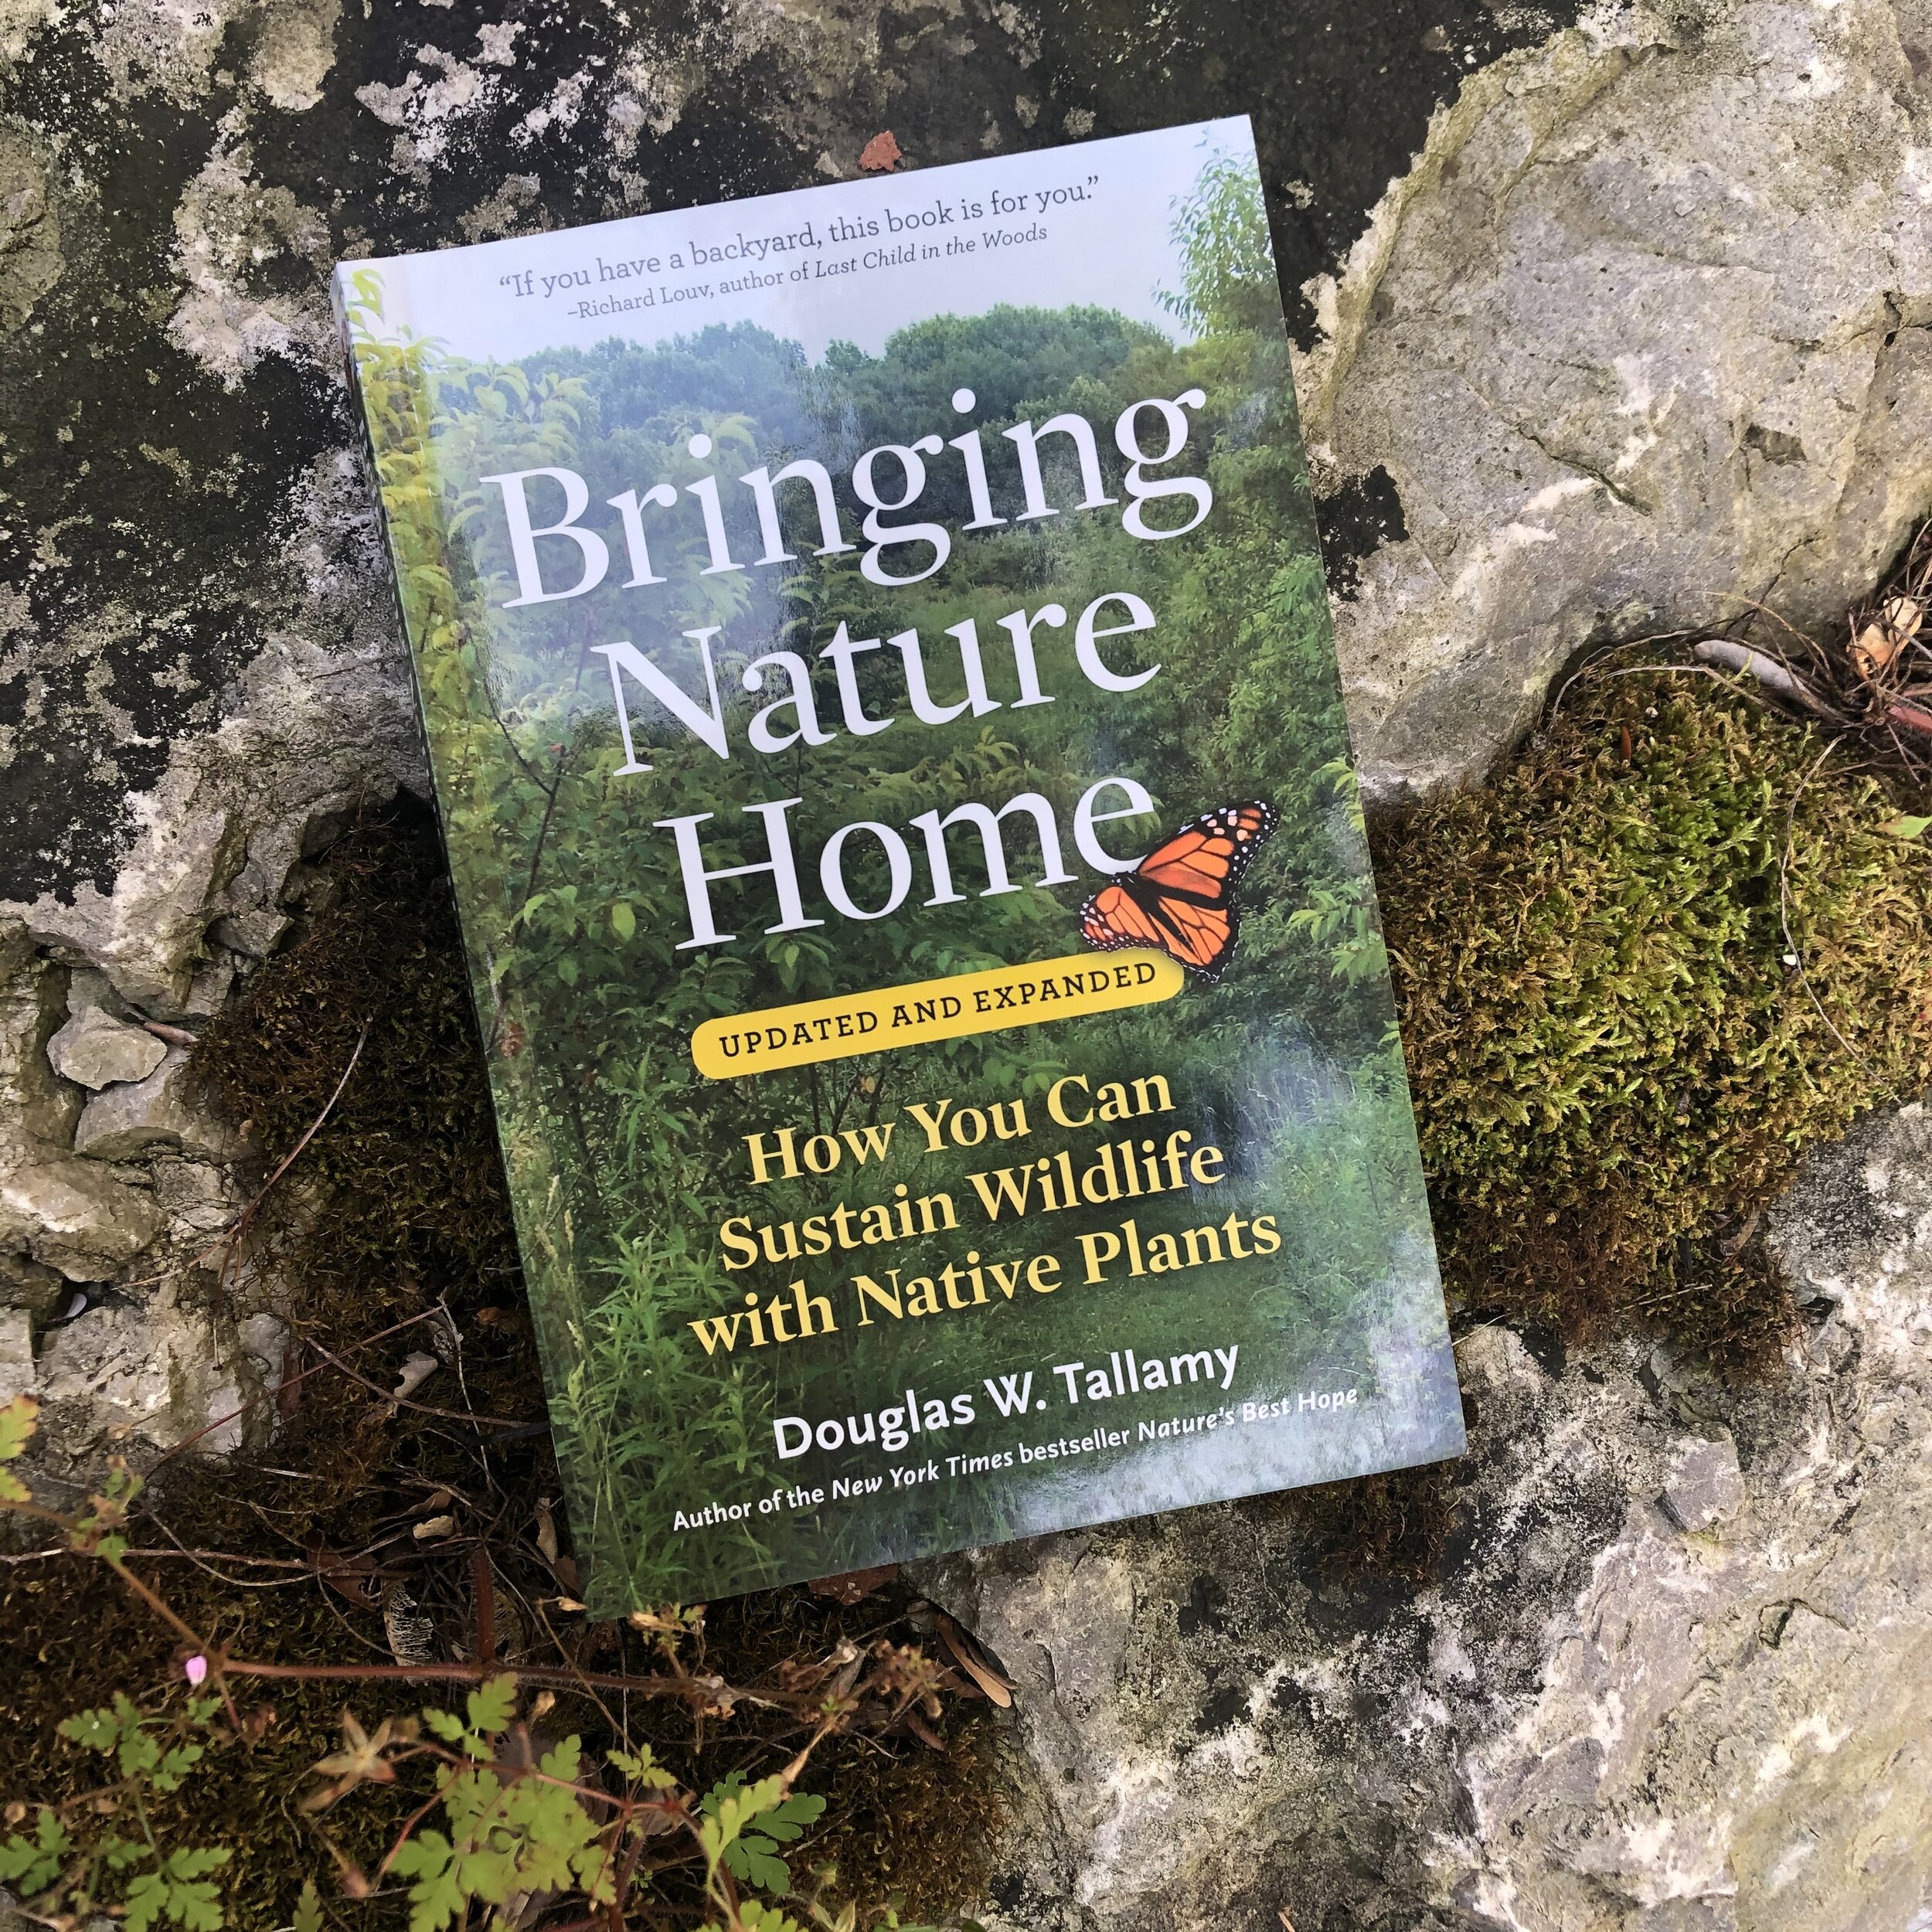
Douglas Tallamy strikes the perfect compromise between fear and optimism in “Bringing Nature Home: How You Can Sustain Wildlife with Native Plants. It’s a must read for anyone who cares about the future of our environment at both a global and local level.
For more on the importance of oak trees in our garden and natural landscapes take a few moments to check out my other posts on Oak trees:
This recent book release is an updated and expanded version of the same book that was first published in 2007.
Tallamy goes to great lengths in the opening chapters to explain the enormous problems we face following the slow and steady introductions of exotic, alien plants, pests and disease brought to North America – sometimes by mistake but often through the nursery trade. The problem these exotic ornamentals bring are twofold: One, they fail to deliver the same nutritional benefits to our insects as native plants, and; Two: many of these alien plants have displaced once dominant native plants in our gardens and in the wild.
The result is devastating to a host of native insects, reptiles, animals and birds.
How we can restore native habitats
Tallamy concludes that all the points in his book converge in a common theme: “we humans have disrupted natural habitats in so many ways that the future of our nation’s biodiversity is dim unless we start to share the places in which we live – our cities and, to an even greater extent, our suburbs – with the plants and animals that evolved there. Because life is fuelled by the energy captured by the sun by plants, it will be the plants that we use in our gardens that determine what nature will be like 10, 20, and 50 years from now.”
He goes on to explain that if gardeners continue to “landscape predominantly with alien plants that are toxic to insects…. We may witness extinction on a scale that exceeds” anything ever experienced on this earth.
Tallamy recognizes that it is probably too late to turn back time and completely eliminate the alien plants either from our gardens or from wild places, but it’s not too late to use our gardens – big or small – to create islands of native-plant sanctuaries to give native fauna a chance to recover. One small island in suburbia will not solve the problem, so Tallamy encourages readers to recruit neighbours, maybe even entire neighbourhoods to transition from exotic to native plantings.
He goes into great detail to help readers recognize the benefits of using natives over exotics, even listing the best native trees and plants to use in the garden (broken down by zones). Not only does he list the trees and plants, but he includes scientific numbers on how many Lepidoptera species benefit from individual trees. For example, Oak trees rank first supporting 534 species, willows are second supporting 456, followed by Cherry/plum at 456 and birch at 413.
Tallamy speaks with great authority. He is a professor in the Department of Entomology and Wildlife Ecology at the University of Delaware, where he has authored 97 research publications and has taught insect related courses for more than 40 years. Using this knowledge, he provides valuable information on every insect and spider you might come across in the garden.
It would be easy to think this is a book for environmentalists, but it really is a book for gardeners. There are even sketches on how to use native plants in the garden to benefit our native wildlife.
For woodland gardeners, many of whom already recognize the importance of using native trees, shrubs and plants, the book helps to validate what you are already doing. For those who have not given a lot of thought to the potential damage exotics create in the environment, the book will get you to question many of your existing beliefs and garden aesthetics.
No matter where you stand, this book – not unlike Mary Reynolds’ book “The Garden Awakening: Designs to Nurture Our Land and Ourselves – will force you to rethink how you garden. Together, they form a powerful voice calling for major changes to suburban gardens away from landscapes dominated by large swaths of non-native grass and exotics, to mass planting of native trees, shrubs, plants and grasses.
It’s a voice gardeners and garden designers need to listen to, need to act on and need to convince others to act on.
Our children deserve a chance to enjoy the birds, butterflies and insects as much as we did growing up.
In addition to Mary Reynold’s book, The Garden Awakening” mentioned above, I have written a number of posts that relate to the subject of native plants. Here are just a few readers may want to explore further. Woodland Nurseries gardeners need to know about . So You Got Perfect Grass: That Don’t Impress me much.
This beautiful, 358-page soft-cover book was provided to me by the good folks at Timber Press for review. It is an outstanding resource for any gardener intent on creating a healthy backyard habitat for birds, butterflies, insects and mammals. The New York Times best seller has been praised by all who take the time to explore it. Writes The New York Tmes: “Tallamy’s message is loud and clear: gardeners could slow the rate of extinction by planting natives in their yards.”
William Cullinar, Director of Horticultural Research for the New England Wild Flower Society, writes “We all hear that insects and animals depend on plants, but in Bringing Nature Home, Douglas Tallamy presents a powerful and compelling illustration of how the choices we make as gardeners can profoundly impact the diversity of life in our yards, towns and on our planet. This important work should be required reading for anyone who ever put shovel to earth.
• If you are considering creating a meadow in your front or backyard, be sure to check out The Making of a Meadow post for a landscape designer’s take on making a meadow in her own front yard.
More links to my articles on native plants
Why picking native wildflowers is wrong
Serviceberry the perfect native tree for the garden
The Mayapple: Native plant worth exploring
Three spring native wildflowers for the garden
A western source for native plants
Native plants source in Ontario
The Eastern columbine native plant for spring
Three native understory trees for Carolinian zone gardeners
Ecological gardening and native plants
Eastern White Pine is for the birds
Native viburnums are ideal to attract birds
The Carolinian Zone in Canada and the United States
Dogwoods for the woodland wildlife garden
Bringing Nature Home by Douglas Tellamy
A little Love for the Black-Eyed Susan
Native moss in our gardens

Three of the best ornamental grasses for sun and shade
Nothing says Fall quite like the gentle swaying of late-summer grasses blowing in the gentle breezes. Gardeners looking for a more natural environment are turning to grasses to give them the architectural interest they are looking for, especially in smaller urban gardens. Here are three of my favourite, including one each for full-sun, part sun and full shade.
Japanese Forest Grass All Gold is a real winner
Nothing welcomes Fall like a beautiful late summer grass, its blooms gently blowing in the wind.
The popularity of grasses probably first set root in Wolfang Oehme and James van Sweden’s revolutionary landscape designs in the New American Garden, some 40-plus years ago. The landscape architects’ style very much celebrated the inherent textures and beauty in the tapestry of a North American meadow. At the same time, the landscape design recognized the inherent ecological, sustainable, aesthetic, and ornamental value of using grasses interlaced with a couple of strong flowering four-season performers. It was not enough for their garden designs to look good in the traditional gardening seasons, they had to be interesting in all four seasons.
Grasses, of course, play a key role in this four-season approach looking as good, if not better, in the fall and winter after the stalks dry and turn a lovely golden colour. An added bonus is the grass heads often catching the falling snow in the dead of winter.
The landscape designers’ approach focused on expansive gardens where huge swaths of ornamental grass was mass planted alongside swaths of Black-eyed Susans or Sedum Autumn Joy.
The success of the New American Garden design began to inspire more urban gardeners to consider ornamental grasses as an architectural element in their smaller, city front and back gardens. Today, it’s hard to walk through a typical neighbourhood without seeing several examples of ornamental grasses being used.
• Looking for some ideas for low-growing ornamental grasses? Be sure to check out my post on Five low-growing ornamental grasses.
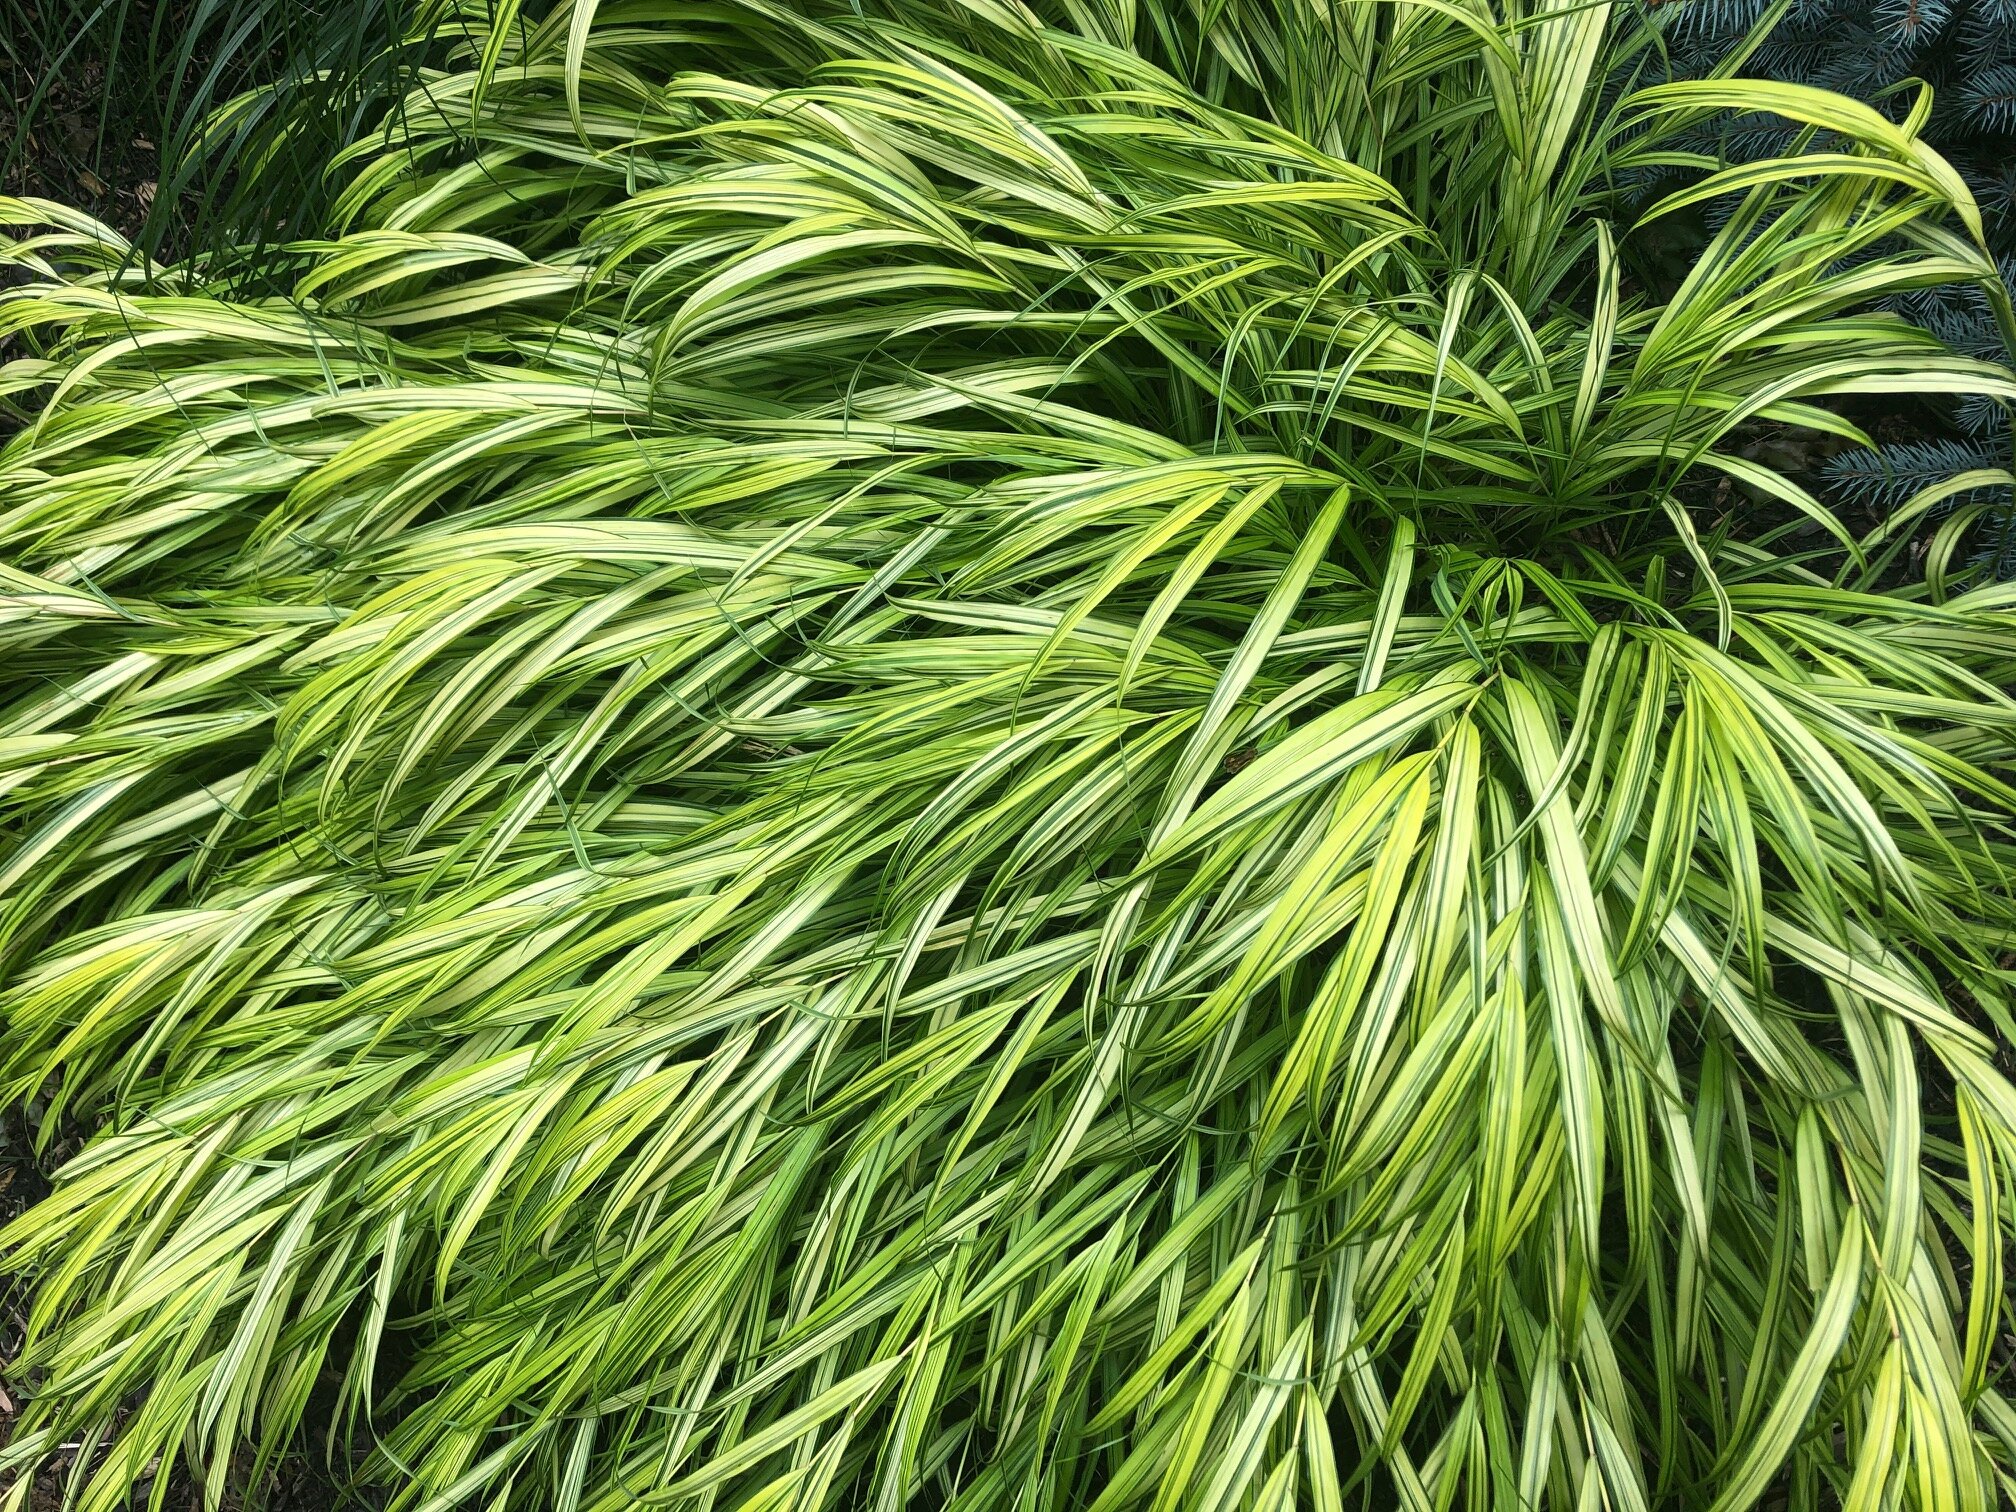
Hakonechloa aurelia (Japanese Forest Grass) is an outstanding warm-summer grass that is one of the few grasses that thrives in full shade, making it perfect for the woodland garden.
If you are a little late getting in on the ornamental grass revolution, here are three very different examples I use that might be of interest to you.

Miscanthus Sinensis forms an elegant clump in our front garden.
Miscanthus Sinensis Gracillimus or Maiden Grass is certainly one of the most popular choices of this graceful upright mounding grass that stands about 4 feet high with a flowering height of an additional two feet. I use it both in the front and back gardens. In the front it acts as the perfect border to create a soft, elegant privacy screen between us and our neighbour’s driveway. Just enough to soften the hardscape, but not to much that we block one another out from a friendly conversation. In the back, two specimens stand guard on each side of a dry river bed helping to soften the edges and add some mystery to the dry-river bed.
Also known as Japanese Silver Grass, this long-lived plant (approximately 20 years) certainly stands the four-season test remaining attractive from summer through winter as it slowly changes to its light tan winter coat. The grass is native to China, Japan, South Korea and Taiwan.
The grass’s dainty plumes of pink flowers rising above the foliage from late summer into early fall, give way to violet-coloured seed heads.
Like most grasses, it’s best to leave it until spring before cutting it down. The tan grasses are too important in the winter landscape. Birds will also use the strong stalks during the winter as perching spots. The dried grasses also help to gather snow around the plant’s base providing shelter for small rodents and insects to help them overwinter in the garden.
The plant does best in full sun to partial shade and prefers moist conditions. It does well in most soil types and is highly tolerant of urban pollution making it an ideal addition to an urban environment.
Because it is not native to North America, it may be subject to certain restrictions or prohibitions on propagation.
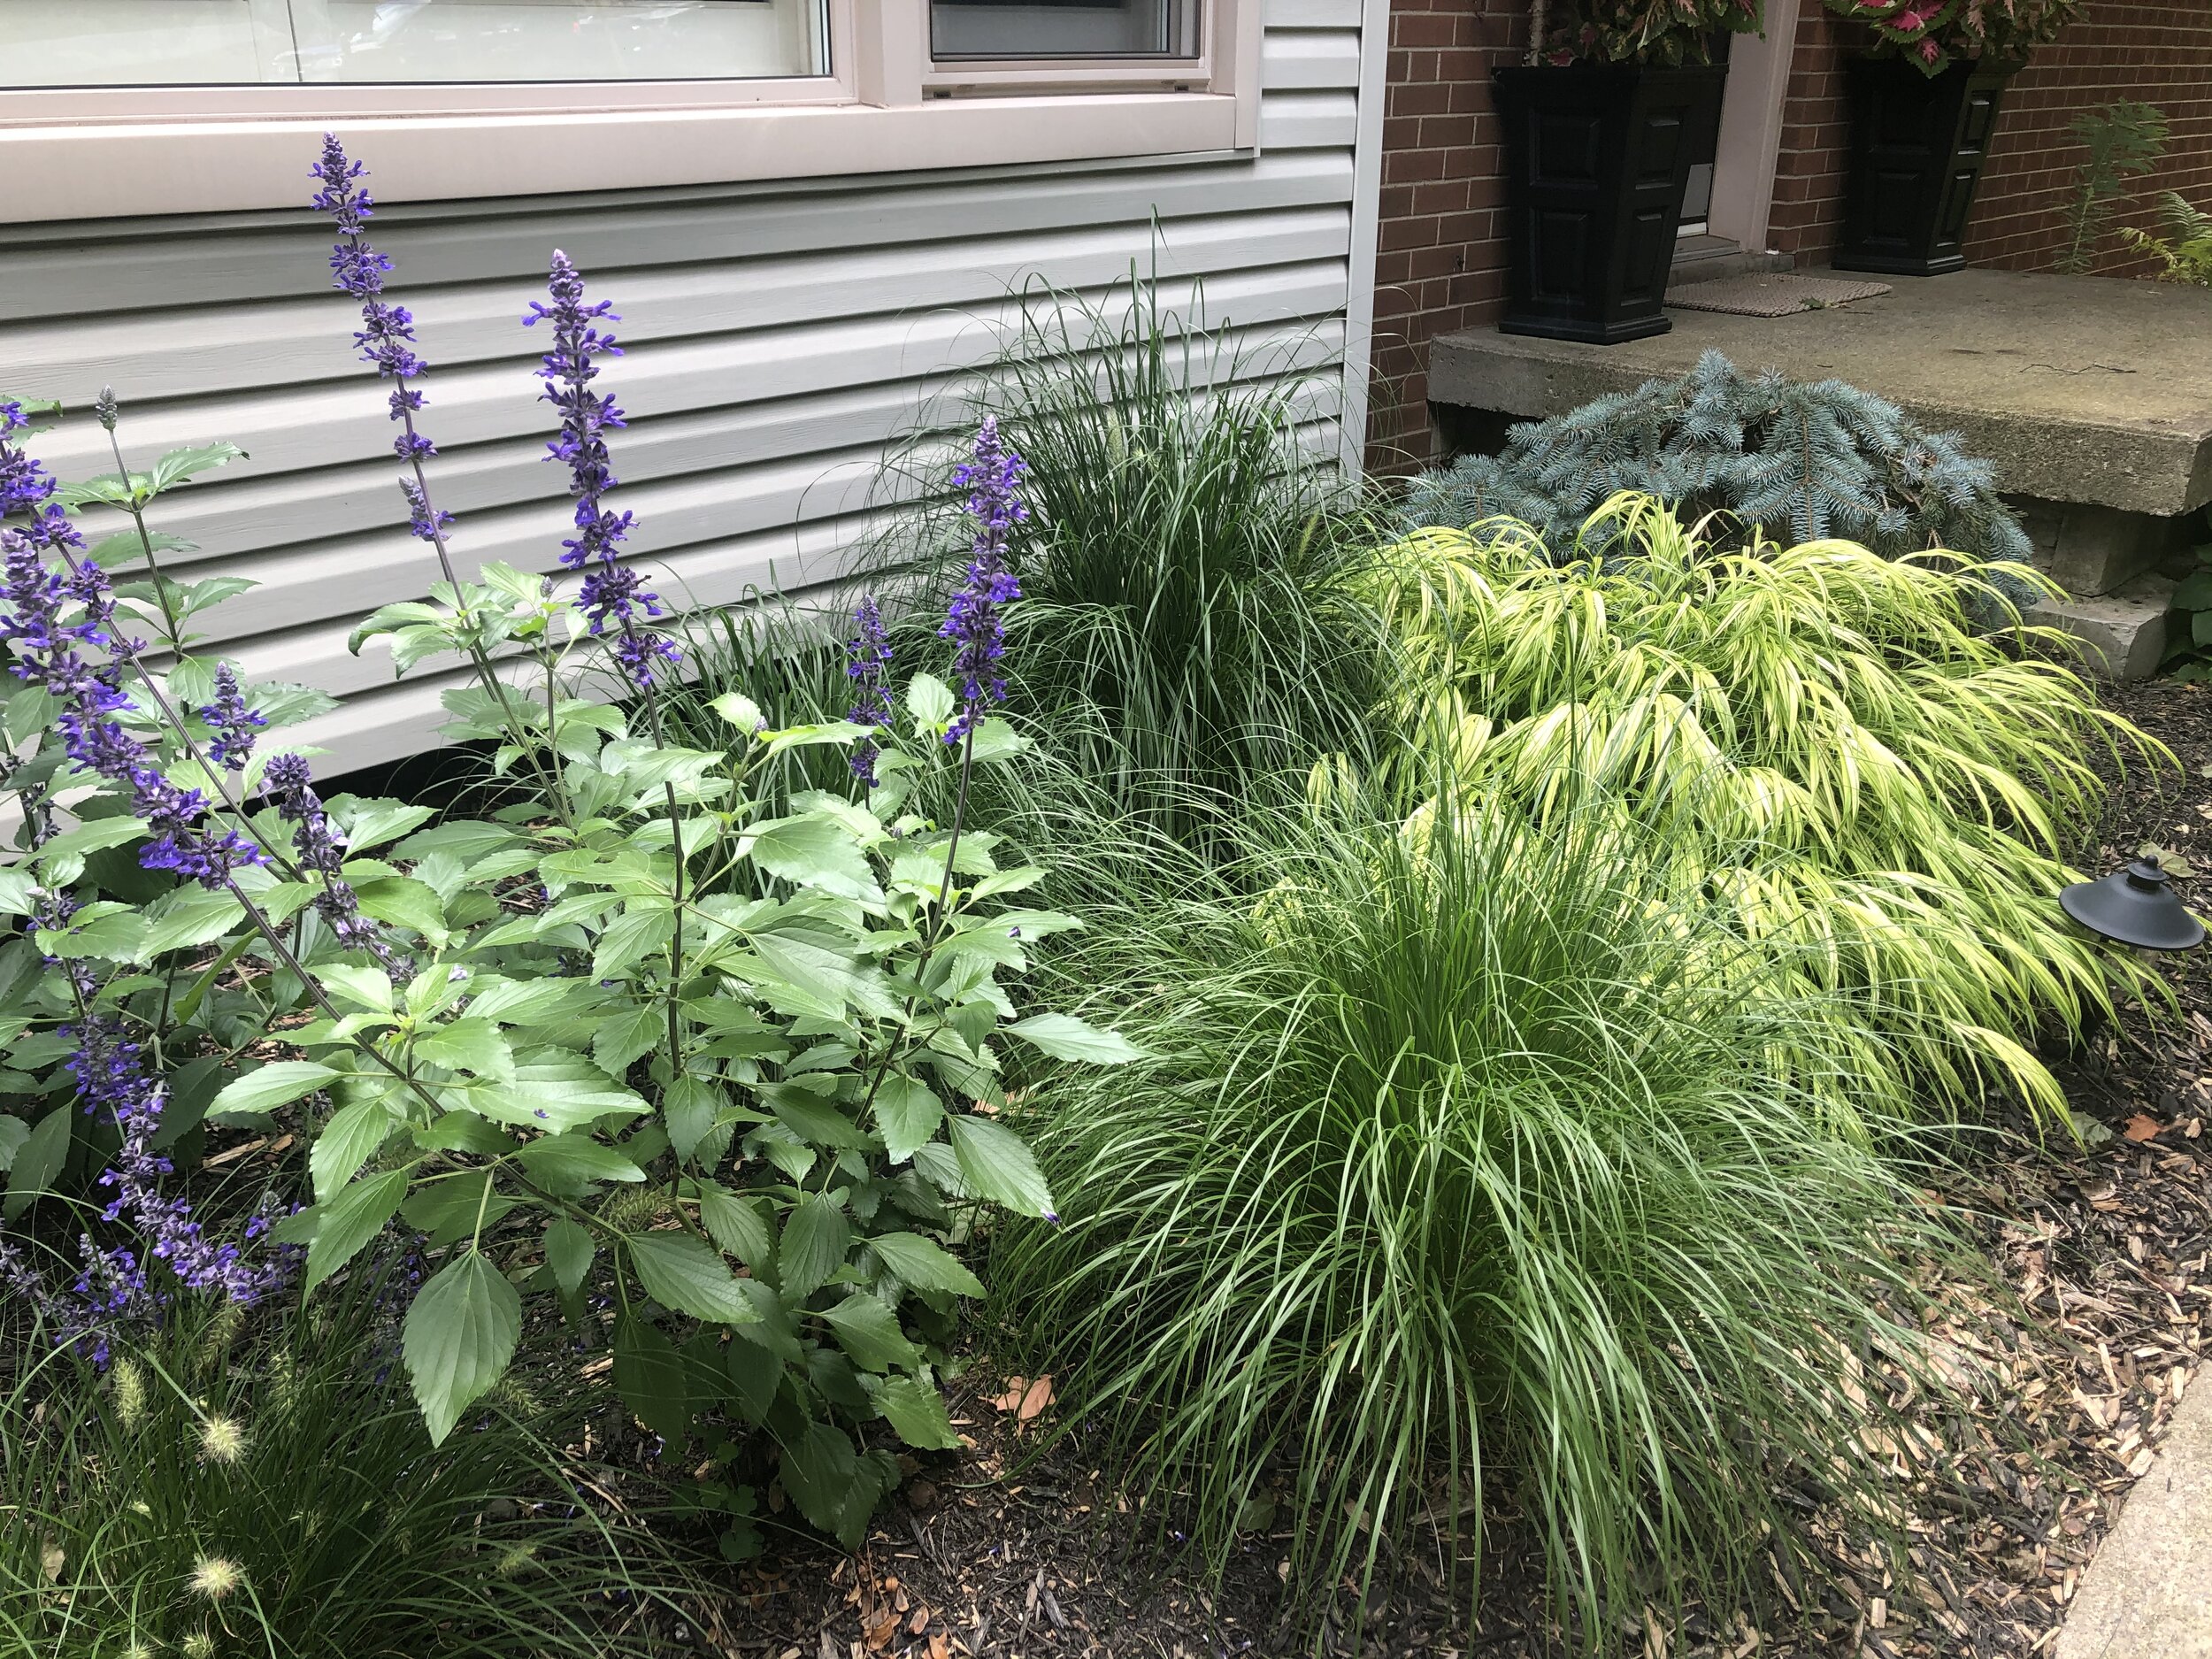
Japanese Forest grass sits in our front border alongside a prostrate blue spruce, fountain grass and blue salvia.
Hakonechloa (Japanese Forest Grass) is an outstanding, warm season grass that adds a hit of glorious colour to shady areas of the garden.
All Gold Japanese Forest Grass is a great choice
Of particular interest is the All Gold Japanese Forest Grass (zones 5-9) that is an outstanding performer in the landscape especially when it comes into its own in late summer into early fall.
Grow it in rich, loamy soil because these grasses do not toleratepoorly drained soils that often come along with clay soils. Japanese Forest Grass All Gold also does not tolerate very dry soils. In colder climates such as zones 5-6, it’s a good idea to mulch the area with fall leaves which can be removed in spring when you cut back the foliage.
All gold like an acidic to neutral soil. Consider using Hakonechloa “All Gold” as a border plant, in containers as a spiller, or as an edging plant, in a mass planting or as a specimen plant.
Unlike the previous grass, Hakonechloa enjoys full shade where its graceful arching form lends a softness and elegance to the landscape and its yellow and green leaves are given the opportunity to really shine. It can handle part shade but will struggle to show its best colours in full sun. It’s one of the few grasses that prefers full shade and that’s reason enough to love the plant.
It never gets too high so it also works well in the front or middle of a large border. It’s also completely at home as a specimen plant all on it’s own. It is native to eastern Asia.
In our garden, Japanese Forest Grass is used primarily in the front Japanese-inspired garden where clumps of it are working to surround the front of a large Japanese Maple. Another large clump is used to soften the front porch foundation and yet more is being grown to eventually surround a small birdbath.
Japanese Forest grass, either the variegated form or the even more beautiful all-gold variety, are at home as a focal point in the woodland or tucked away in a corner to lighten up a dark area of the garden. I have seen outstanding examples of mass plantings around Japanese maples in front gardens that literally take your breath away.
These grasses are well behaved. Their dense mounds of short wide variegated blades emerge from stems in the centre of the mound and slowly spread out into large mounds that can be split to create new plants. The yellow and green leaves turn red and purple shades in the fall before turning to the familiar winter tan colour where they continue to provide interest throughout the winter.
If you are new to these grasses, don’t be surprised in the spring if you don’t see a lot of early growth. They are warm season grassed and don’t begin throwing new growth until the ground heats up in early to midsummer. Keep them well watered for best performance but they can tolerate heat and drought once they are well established.
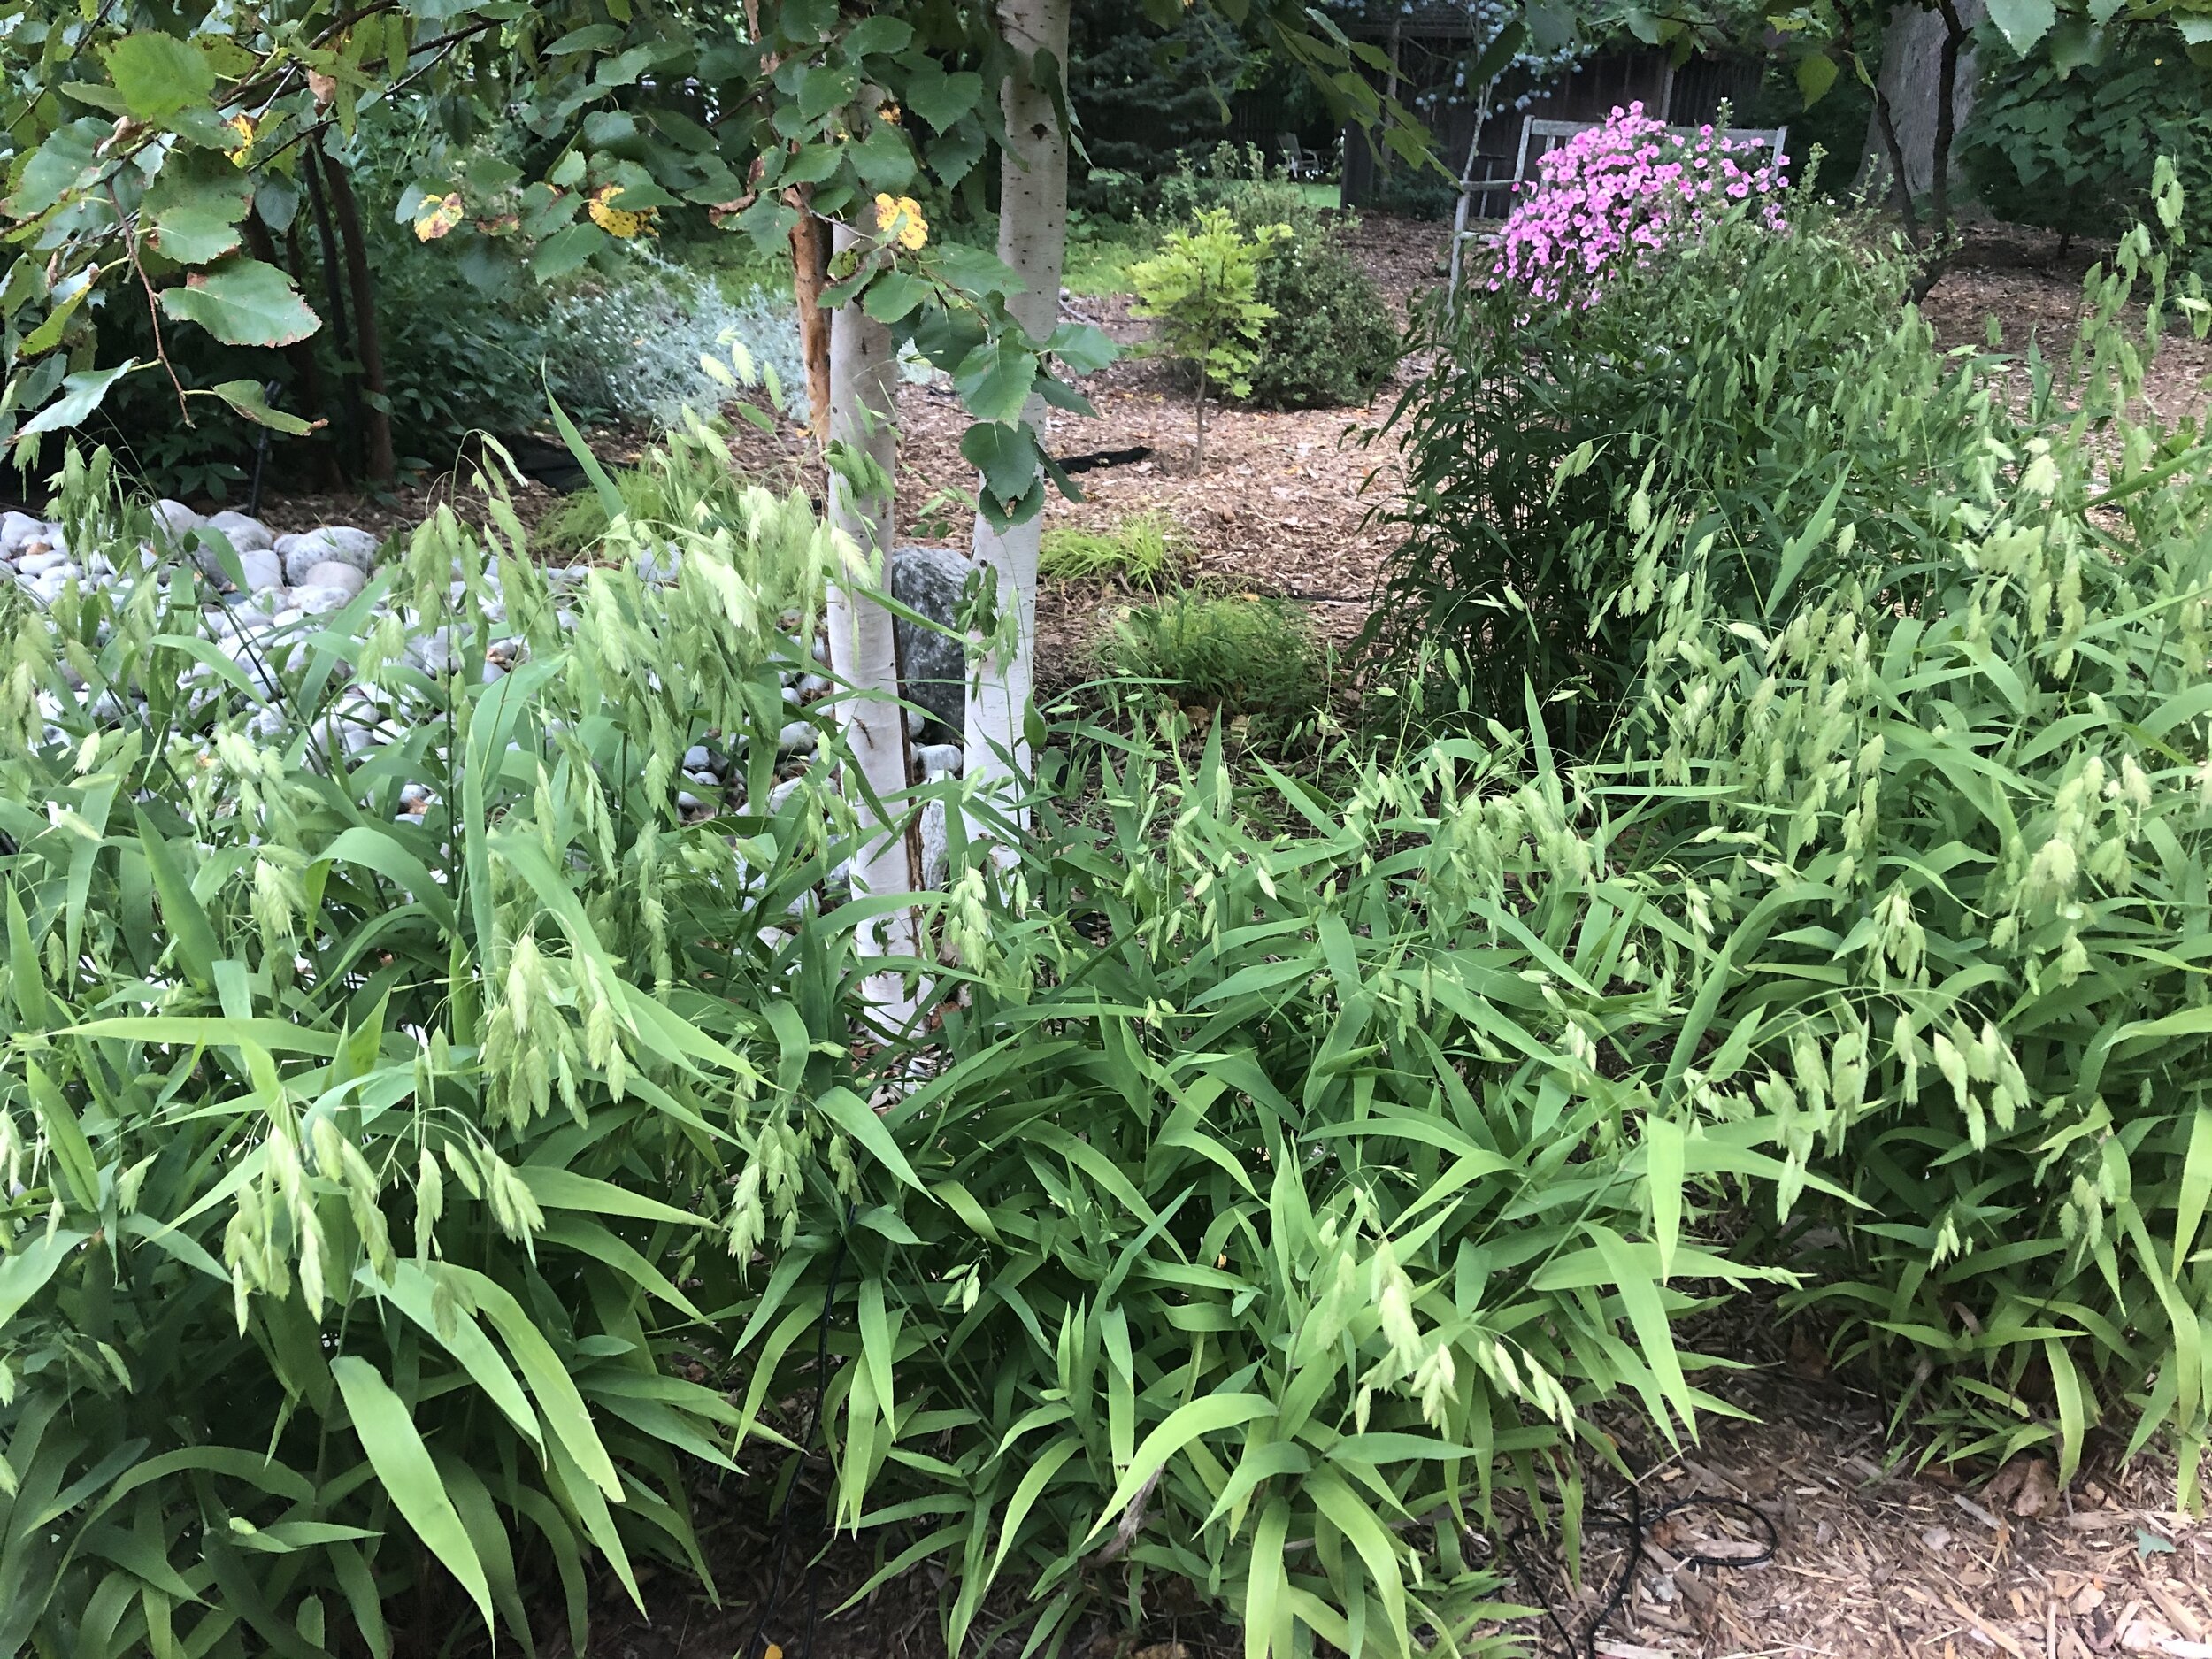
An example of a clump of Northern Sea Oats surrounding our three birch clumps. The North American native, grown primarily for its seed heads, can easily spread if left unchecked.
Northern Sea Oats (Chasmanthium latifolium) is grown not for it’s grasses but its lovely drooping hop-like seed heads that emerge in late summer and remain on the plant through the winter. The seed heads delicately cling to the grasses and flutter in the wind adding lovely movement to the landscape.
Unfortunately, what makes this plant so sought after is also its downfall. These beautiful seed heads are known to fall to the ground and happily emerge in the spring as new plants. Now, this is great if want more and more of this North American native grass (Central and northeast United States) in your garden, but be aware before you plant it that it does have a tendency to spread. I grow ours in a heavily mulched area, so keeping it under control is not a huge task.
It’s grassy leaves are light green but turn a gorgeous coppery-bronze in the fall. This is another grass that is best cleaned up in the spring, but if you want to keep the seeds in check, feel free to gather as many of them in fall before they drop to the ground.
Northern Sea Oats grows to about 4 feet tall with a spread of about 30 inches. Its foliage extends to the base of the plant allowing it to stand alone in the landscape and you can expect a good ten years out of the plant. It’s deer resistant, makes an excellent cut flower for a fall arrangement, and it makes a good container plant that can even work as an effective thriller in a container or window box.
This tough grass prefers full sun but does well in part sun.
• This page contains affiliate links. If you purchase a product through one of them, I will receive a commission (at no additional cost to you) I try to only endorse products I have either used, have complete confidence in, or have experience with the manufacturer. Thank you for your support.

A little love for the Black-eyed Susan
As late summer approaches the Black-eyed Susans begin to come into their own with their bright cheery yellow flowers standing strong in our gardens and in our meadows. Let’s give a little love to these tough, hard-working native plants.
Black-eyed Susans are the perfect low-maintenance garden plant
You gotta love the Black-eyed Susan.
That cheery yellow with its definitive brown or black centre can bring a smile to even the non-gardener’s face, just as other plants in the garden fall victim to the dog-days of summer.
This tough, late summer native plant is as comfortable in our gardens as it is naturalized in grassy meadows.
(The importance of using native plants in our gardens is explored in great detail in my article here.)
In our garden, the hard-working Rudbeckia Hirta takes prominance in both the front, back and side gardens where I have let them naturalize and self-seed. They are just too easy and fun not to grow in our gardens.
Goldfinches depend on them for their late autumn/winter seed heads, and deer, well they pretty much leave them alone once they get past their spring tender young growth and develop their hairy leaves and stems. Butterflies and bees are attracted to Rudbeckia Hirta and the plant is a larval host to three butterflies including the gorgone and silvery checkerspot species.
What’s not to love?
Rudbeckia hirta, commonly called black-eyed Susan, is native to Eastern and Central North America. Its wide range is evident after having been found in all 10 Canadian provinces and 48 states. It’s a member of the sunflower family and a workhorse in the New American Garden along with sedum Autumn Joy and natural grasses. Although most of the plants in our gardens are likely of the perennial variety, there are biennial and annual varieties.
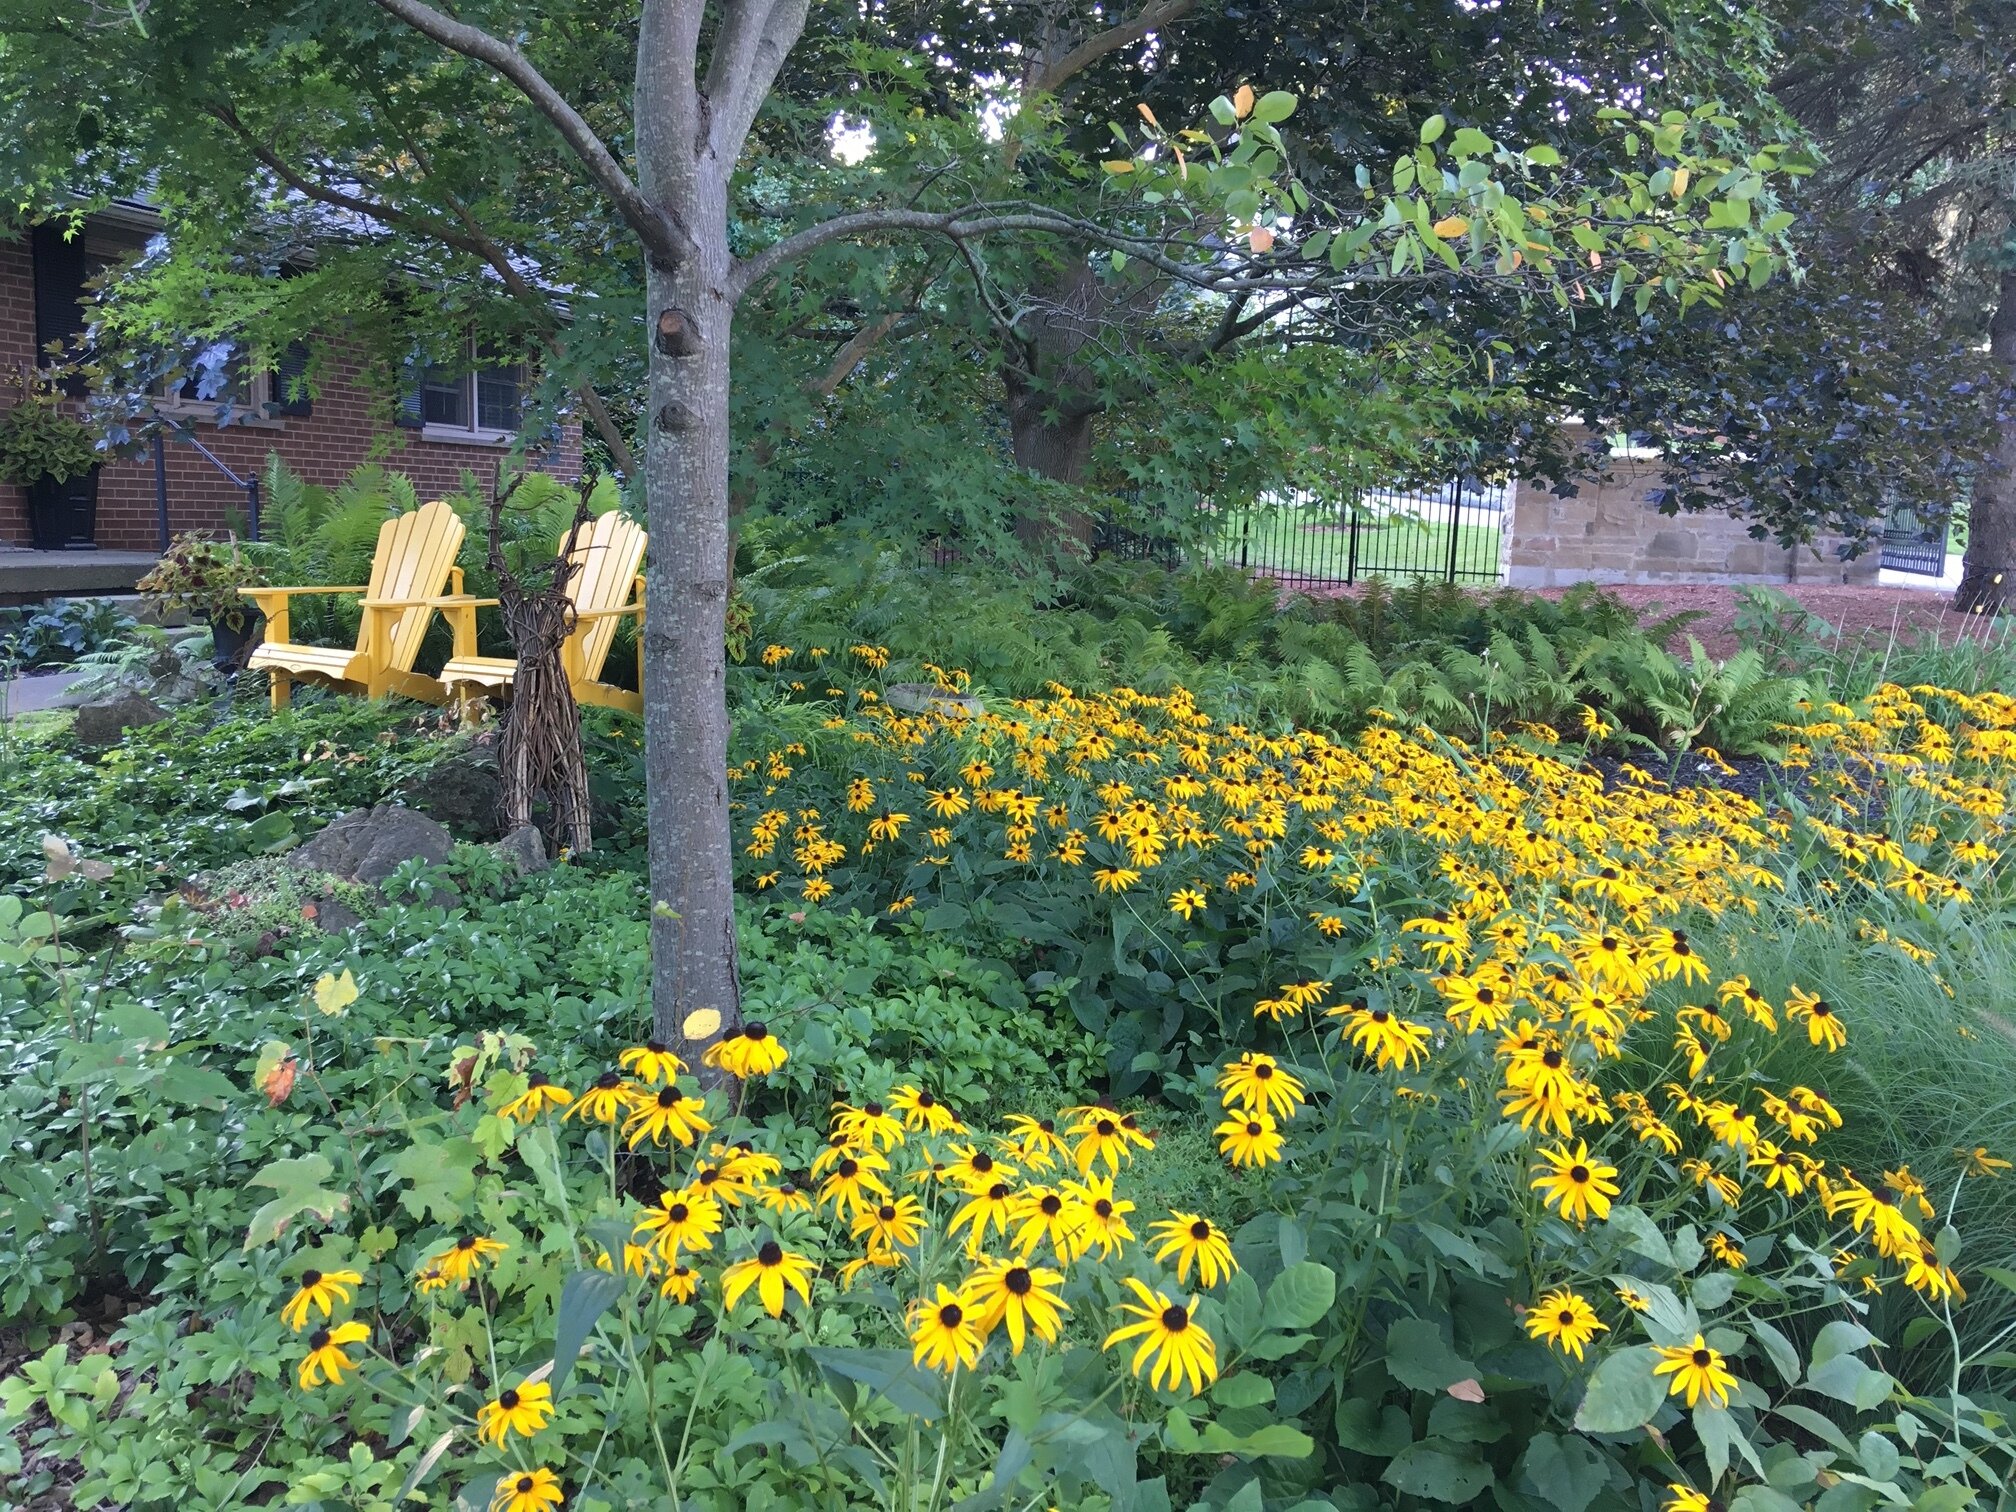
These are heat and drought tolerant native plant
If you are looking for a low-maintenance plant, Rudbeckia hirta is both heat and drought tolerant. It self-seeds and is able to grow in a variety of soils, but prefers a neutral soil pH and a full sun to light shade location. Deadheading, though unnecessary, will encourage more blooms and a stronger, less leggy plant.
The daisy-like flowers can be single semi-double, and fully-double. All, however, sport coarse-textured, scratchy, hairy leaves. Black-eyed Susans work well with Sedum Autumn Joy, purple coneflower and New England asters as well as many of the grasses that have become so popular in our gardens.
An important part of the New American Garden is using plants that perform in summer, fall and winter. Black-eyed Susans certainly meet that criteria. The plants have a strong winter presence in the garden, if the seed heads are left on the plants. Their dark stems give the plant architectural interest all winter and the seed heads covered in snow add a whimsical note to the winter garden.
• If you are considering creating a meadow in your front or backyard, be sure to check out The Making of a Meadow post for a landscape designer’s take on making a meadow in her own front yard.

A few rudbeckia varieties
Here are a few varieties of rudbeckia you might be interested in for your garden:
Rudbeckia fulgida var. sullivantii “Goldsturm” is the standard for Rudbeckia. It is long-blooming and virtually pest free. It grows to about 2-feet tall.
Rudbeckia “Toto Rustic” is a dwarf plant with warm fall colors. Also available is a golden “Toto” and paler “Toto Lemon.” (1 foot tall)
Rudbeckia hirta “Cherokee Sunset” has double and semi-double flowers in shades of yellow, orange, red, bronze and mahogany. It is short-lived but reseeds itself. (2 feet tall)
Rudbeckia hirta “Indian Summer” is daisy-like, with large yellow flowers. It’s short-lived, reseeds itself or it can be grown as an annual. This fella can grow to between 3 to 4 feet tall. Its perfect for the back of the border or for a real statement in the garden.
More links to my articles on native plants
Why picking native wildflowers is wrong
Serviceberry the perfect native tree for the garden
The Mayapple: Native plant worth exploring
Three spring native wildflowers for the garden
A western source for native plants
Native plants source in Ontario
The Eastern columbine native plant for spring
Three native understory trees for Carolinian zone gardeners
Ecological gardening and native plants
Eastern White Pine is for the birds
Native viburnums are ideal to attract birds
The Carolinian Zone in Canada and the United States
Dogwoods for the woodland wildlife garden
This page contains affiliate links. If you purchase a product through one of them, I will receive a commission (at no additional cost to you) I try to only endorse products I have either used, have complete confidence in, or have experience with the manufacturer. Thank you for your support. This blog would not be possible without your continued support.
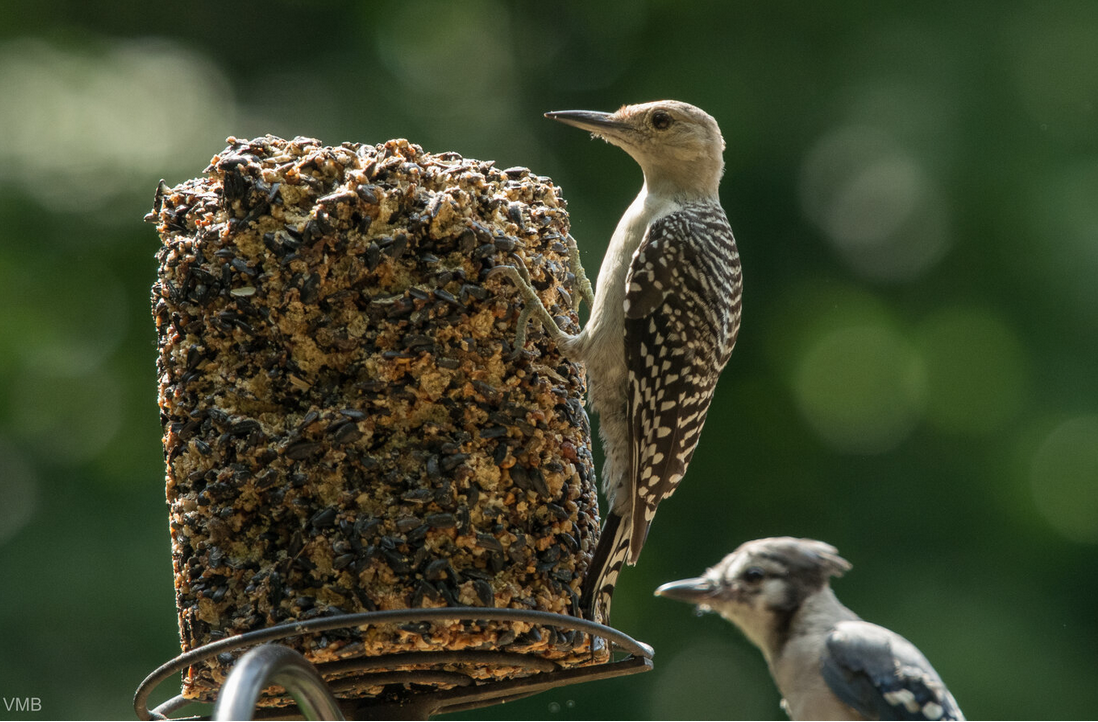
Six best buys to attract birds (A few of my favourites)
When it comes to attracting backyard birds, you can never have enough feeders, birdbaths and bird houses but here are five best-buy items for backyard birders.
How to attract backyard birds with feeders, fountains and birdbaths
Backyard birders are always looking for the next best thing to attract more birds to their backyard.
A fancy new bird feeder, a ground bird bath and a few new bird houses are always welcome additions.
Here are six favourite accessories backyard bird lovers should consider: a bird feeding pole system; a seed cylinder spike; a hummingbird swing; bird bath algae remover or a good cleaning brush, a solar fountain; and high quality bird feed.
The joy birds bring and the life they add to our gardens makes buying these accessories all worthwhile.
Over the years, I’ve discovered more than a few items that have helped attract birds to the backyard and I thought I’d share some of them here with you. I’ve left out my trusty hummingbird swing that you can read about in a separate post here.
While I get great enjoyment from my bird feeding stations, providing natural food sources to our feathered friends is always the goal we should aspire to in our gardens. I have written a comprehensive post on feeding birds naturally. You can read about it here.
For more suggestions and some of my favourite garden things, be sure to check out my Favourite Things post.
1) Bird Feeding Pole System
Without a doubt my most important purchase some 20-plus years ago was a bird feeding pole system that allowed me to build a comprehensive bird feeding station over several years. It was purchased at Wild Birds Unlimited and has truly stood the test of time. Start with a simple pole, stabilizing system and squirrel baffle and add to that one element at a time depending on both the type of birds in your area and the species you want to attract. A simple pole can start as low as $22-$23 such as this one from Perky-Pet. A few dollars more will get you the Pennington Premium Feeder Pole Plus Bird Feeder System with a more heavy-duty, powder coated finish steel pole with hangers for feeders. This is a great starter kit that would allow you to put up at least three different feeders and provide feed for a wide variety of backyard birds.

A young woodpecker takes a turn at the cylinder seed feeder that sits atop our birdfeeding pole system as a blue jay waits its turn.
Moving up from there, is the Premium Bird Feeding Station Kit from yosager for under $160.00 Cdn that includes a metal suet feeder, bird bath, feeding bowl for fruits or meal worms, as well as twin top hooks to hang large bird feeders. The station also includes 5 prongs that go into the ground to stabilize the feeding station. The stabilizing bars can be important to hold the units especially if you have sandy soil. I use two large rocks on my stabilizing bars to keep the unit super stabilized.
2) The Seed Cylinder and spike accessory
Keeping with the pole system, my best accessory without a doubt has been a spike topper that has played a key roll in bringing a huge variety of birds to my feeder. Not only have the seed cylinders that fit over the spike helped to bring a variety of birds to the feeder, but the birds who do visit stay at the feeder longer working to get the seeds from the compressed feed cylinder.

Best Nest, an Ohio-based family-owned business offers a range of bird feeders including the Heath Mfg. Co. cylinder-type feeders and seed cylinders in the image above. The on-line store also offers a great assortment of seed cylinders. Check them out here, or the link above.
The Heath Mfg. Co. Stack’Ms Seed Cake Feeder has a roof to protect the pucks from rain and snow. It can hold up to 4 stack’Ms pucks allowing you to offer a wider variety of seeds. The perch at the bottom of the unit is great for smaller birds.
My seed-cylinder feeder is a simple spike that sits on top of my pole system.
3) Bird bath algae remover or a good cleaning brush
Bird baths can get gross real fast. Algae tends to get a hold of them quickly during the summer months and even if you change the water regularly, and give them a good scrubbing, it’s difficult to eliminate the algae.
That’s when you turn to one of the Algae remover microbe clarifiers that seem to work well in keeping the water clear.
A few drops once a week is usually all it takes to keep the bird baths clear. Add a few drops after cleaning the bath and then just top up the water adding the cleaner once a week or as needed.
There are several available. I have had a bottle for a number of years that continues to work despite being left outside in the shed all winter. The label is long worn off, so I can’t tell you what type it is but here are a couple that should work for you. Sanco Bird Bath & Fountain Maintenance, 100% safe for birds and wildlife and uses natural enzymes to keep the water and birdbath clean. Aquascape Clean Water Treatment used primarily for fountains, waterfalls container water gardens.
The Microbe Lift 32-Ounce Pond Bird Bath and Statuary Cleaner says it combines biodegradable resources and technology along with micro emulsion technology to safely remover organic debris and mineral deposits. It’s safe for use around birds, animals and humans and gets top ratings from users experienced with the product.
Of course a solid cleaning brush and a weekly scrubbing and daily water refresh gets the job done as well but requires us to stay on top of the situation. If you have several bird baths they can be difficult to keep clean.
4) Solar fountains
I have mentioned these before in other blogs and have to recommend them again here for their multiple uses in the garden. These small, inexpensive solar pumps can be used anywhere in the garden where you can get some sun. I use two of the smaller pumps – one as a recirculating pump in a bird bath tied to a dripper, and another in my container water garden pond to circulate the water and create a gentle fountain stream for hummingbirds to enjoy. I use a larger, more expensive unit in a bubbling rock. This unit came complete with a battery to allow me to run a small led light and the pump during the evening or on an overcast day. Both the large and small units have worked perfectly for several years.
5) Quality bird seed
Feeding the birds, squirrels, chipmunks and racoons can get expensive. Keeping squirrels and racoons off the feeder is the first step to solving the problem. The second is using a high quality feed that ensures the birds eat all the food rather than digging through it and throwing most of it on the ground. When too much food accumulates on the ground it can create a real mess and lead to unwanted rodents like mice and rats. This often leads to people new to birdfeeding deciding not to continue feeding the birds, when all they had to do was move to one of the no-mess feeds that are usually made up of high-value seeds that have already been shelled. The seed is expensive but there is no filler. The bag of seed, providing squirrels don’t have access to your feeders, will last much longer than a regular bag of assorted bird feed.
This page contains Amazon affiliate links. If you purchase a product through one of them, I will receive a commission (at no additional cost to you) I try to only endorse products I have either used, have complete confidence in, or have experience with the manufacturer. Thank you for your support. This blog would not be possible without your continued support.
One of my favourite things: A small blue-tooth speaker
These mini blue tooth speakers are the perfect way to add a little music to your garden patio whether to drown out noisy neighbours or just to enjoy your favourite tunes with a glass of wine.

The House of Marley No Bounds Blue tooth speaker is an ideal choice for a gardener to bring their favourite tunes into the yard.
Every gardener needs one of these small, waterproof blue-tooth speakers
I am passionate about two things: one is obviously gardening, the other is music.
So whenever the two can come together, I’m game.
Remember the days of running speaker wire to the backyard patio and maybe tucking a couple of old speakers under your home’s rafters. Then there was the indoor/outdoor speakers you could wire up under a pergola or some other outdoor structure. More recently we got those fancy plastic waterproof speakers that look like rocks that we can spread around the garden.

Closeup of the Marley No Bounds blue tooth speaker.
Not the best sound quality but you do what you have to do to drown out the neighbours’ annoying gas-powered leaf blower or lawnmower.
Music, like a garden fountain or some other form of moving water, can do wonders to drown out neighbourly noise in the garden. Just be sure that you are not the one creating all the noise. Just because you think Bob Dylan is the greatest, doesn’t mean your neighbours want to listen to yet another version of Blowin’ in the Wind.
One of the problems with music in the garden is that you need it loud enough to hear, but not so loud that it annoys your neighbours. Ideally, you set the volume to a level they don’t even hear.
If I’m alone in the garden, my trusty ipod with headphones or a good pair of earbuds allows me to play it as loud as I want. The Boss can be cranked and Bob Dylan can sing his heart out without annoying anyone including my wife who is, shall we say, not a big fan.
But when you don’t want to use headphones or earbuds, or you want to share your music with garden visitors, it’s hard to beat one of the many blue tooth mini-speakers that are now available at Amazon and most electronic stores.
Up until recently, I didn’t give these tiny speakers much thought. Being a little old school where bigger is always better, it was hard to take these mini wireless speakers seriously.
I mean, how good could they be?
Well, I learned quickly, they can sound pretty darn good. But it’s not just the high-quality sound that makes them so great for the garden or patio. It’s their size, portablility and the fact that you can set one down right beside you and enjoy the music while your neighbours will likely not hear a thing.
If you subscribe to one of the many music streaming services, you can go anywhere in the garden with your phone streaming to your wireless speaker. If you are streaming from a computer in the home, the limited blue-tooth range will keep you close to the source.
These small speakers act more like headphones than traditional speakers in the sense that you can place one right beside you on a table or on the arm of an adirondack chair beside the wine glass and the music is isolated to that small area. Although it may sound loud to you because the speaker is literally right beside you, the sound really does not carry very far.
I recently experimented with two of these small bluetooth speakers. Both were purchased for just a little over $50 Canadian and both delivered excellent streaming sound from my indoor computer playing itunes.
My first purchase was the Sony SRS-XB12 Extra Bass Portable speaker. This thing is small but packs quite the punch for its size. It comes in five colours: black, red, silver, blue and green, is waterproof and has up to 16 hours of battery life. Another nice feature is that you can add a second speaker that syncs up with the first for stereo sound.
The rubberized speaker is waterproof so it will survive if left out in the rain or in the path of the sprinkler. It also feels almost indestructible. The extra bass gives it a solid sound, not the least bit tinny. I spent an entire Saturday afternoon with it, listening to a variety of music and not once was I fatigued by the sound of the music.
It’s now in my daughter’s possession. She loves it for use on her Toronto Condo’s balcony and for the hotel when she travels.
The second speaker I tested is from the House of Marley (yes, that is Bob Marley’s family’s business). The No Bounds outdoor speaker is slightly larger than the Sony product and looks more like a hockey puck than the cyclindrical shape of the Sony. The Marley has a 10-hour battery, is water and dust proof, is buoyant if dropped into water and comes with a nice carabiner to clip it onto your clothing or hook it from a branch in the garden.
For environmental conscious gardeners, there are a lot of good reasons to purchase the House of Marley speaker. All of this company’s products are elegantly designed and have a very high-quality feel and look to them. For example, the speaker is:
Crafted from Marley’s exclusive Rewind Fabric, Regrind Silicone, Regrind Cork and Recyclable Aluminum.
able to wirelessly team up with another speaker to boost the listening experience and create an element of surround sound
In addition – and gardeners will appreciate this – for every speaker sold, the company says it will plant a tree.
Add to all this, a high-quality sound that captures both the highs and lows with excellent fidelity.
I have used the company’s ear buds for years with my ipod and love the sound and build quality.
In the end, I can recommend both products with great confidence. I like the House of Marley speaker’s elegant design, use of recycled material and their environmental approach to the business. The Sony is perfect for someone who is looking for a tiny speaker that packs a lot of punch for its size.
This page contains affiliate links. If you purchase a product through one of them, I will receive a commission (at no additional cost to you) I try to only endorse products I have either used, have complete confidence in, or have experience with the manufacturer. Thank you for your support. This blog would not be possible without your continued support.
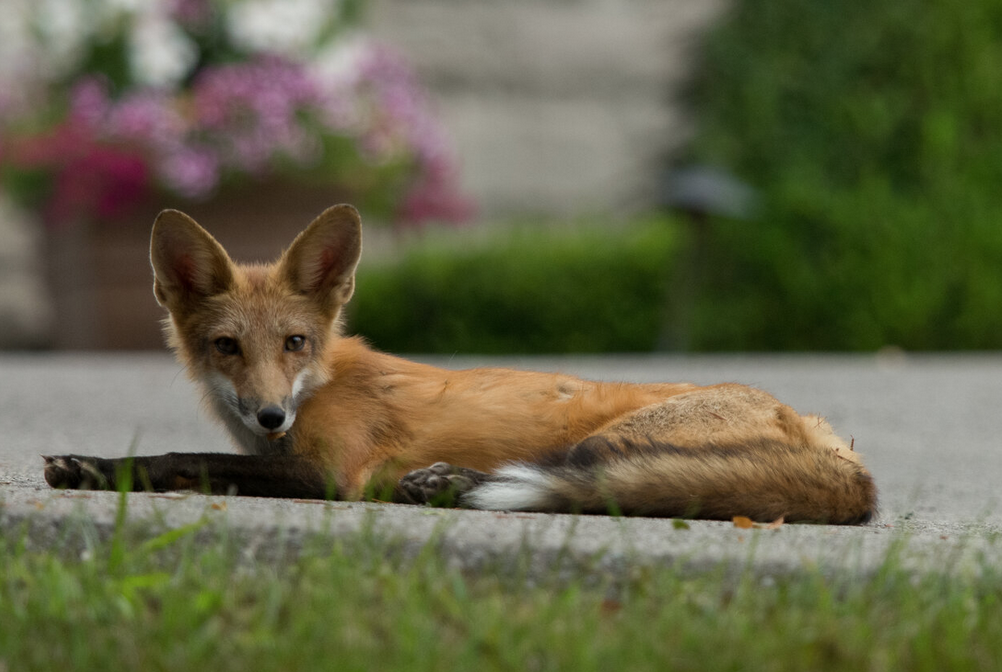
Welcome the urban fox: The ultimate rodent controller
Urban foxes are common throughout North America and are important predators in the control of rodents in our woodland gardens. Here are tips to help gardeners encourage them and help them survive and prosper in our gardens.
Do fox control mice and rats?
Our first fox sighting came on Day 2 after moving to our new, old home some 22 years ago.
My daughter and I were out for a stroll in the woods surrounding our home when a fox appeared on the path right in front of us, looked at us and went on its way without a care in the world.
Not long after, a fox visited the backyard bird feeder where it scored a black squirrel pretty much on a daily basis for several weeks. Every morning at breakfast, my daughter and I would see the fox appear out of nowhere, chase down a squirrel across the yard, catch it, and with a hard shake immobilize it, before carrying it back to its den no doubt for its kits.
Needless to say our squirrel population was kept nicely in check with the Red Fox around.
While squirrel is certainly on their list of preferred food, there is no question that mice and other rodents make up a high percentage of a fox’s diets throughout the year, especially in urban areas. Studies show that urban fox feed predominantly on small mammals, particularly rodents like rats, mice and voles. Rabbits are also among their preferred food choice. Together, these can make up about 50 per cent of their diet.

Our cute little neighbourhood fox taking a rest on a driveway before an evening of hunting. July is a difficult time for fox, and it shows here in the fox’s skinny body .
Ever heard a fox scream. It’s terrifying but fascinating. For more on why foxes scream, check out my post here.
But then they pretty much disappeared for years. Foxes became rare around these parts, apparently decimated by mange.
But they’re back and I couldn’t be happier.
Not sure our local rodent population is as excited about their return as I am, however. Urban foxes help control small mammals, particularly rodents including rats, mice and voles. Squirrels and rabbits are also on the menu to a lesser degree.
This alone is reason enough for gardeners to love these little canines.
Check out my earlier articles on Why do Foxes Scream and Why Foxes steal from our gardens
We have been noticing foxes in the area again for the past two years. This winter I noticed a fox at a neighbour’s property in mid winter. It greeted my dog and I after we returned for a walk. It was in January, about the time of peak mating period. This is about the time these usually quiet little fellas become quite vocal often screaming and barking as the males roam the neighbourhood looking for partners.
When do fox begin breeding?
By February the females are pregnant and begin clearing out den sites in and around our gardens (under decks, sheds and large tree stumps).
Cubs are usually born mid-march, totally deaf, blind and in need of their mother’s constant warmth. By April the cubs emerge from their dens and start eating solid food. By May the den is an active place, especially at dawn and dusk when the parents are busy bringing the growing kits food.

This photo shows on of our neighbourhood foxes killing its prey after pouncing on it in the garden. It’s not a pretty site to watch but our gardens can be good sources of food for neighbourhood foxes.
What do foxes eat?
Foxes are actually extremely opportunistic, omnivorous predators. Besides rodents, Fox will happily feed on invertebrates, particularly various beetles, butterflies and moths as well as earthworms, grasshoppers and crickets. And those pesky garden snails and slugs are also on their menus. Spiders too, are on their list of good eats.
To a lesser degree, Fox will eat frogs and small snakes.
Birds also make up a large part of a fox’s diet, especially in the spring and early summer when foxes are feeding their hungry cubs.
Some foxes have even been known to climb trees in search of prey or fruits and nuts.

Fox kits hanging out a their roadside den.
In an urban garden, there is no doubt that bird feeders provide the perfect opportunity for a fox to easily satisfy most if its nutritional needs. Everything from rats and mice to squirrels, chipmunks and a host of birds gather around the feeder, often letting their guard down just enough to become dinner for the fox.
Being the ultimate opportunist, Fox will feed on whatever is abundant in your area. Whether that’s bugs or rats, the fox will play an important role in keeping populations in check.
Do fox eat worms?
A 1980 study showed that worms played a major role in a cub’s diet during August and September as the cubs, born in March, begin using their own hunting skills to catch worms. The study found that during some months, earthworms may account for more than 60 per cent of a fox’s calorific intake. The study estimated that it would take approximately 120 worms in a night to meet a fox’s caloric needs.
Do fox eat larger animals than mice and rats?
In other areas, hedgehogs, deer, otter, European badger, opossum, raccoon, porcupine, and even wild boar are on the menu. Fox remains have also turned up in their diets as have domestic cat, but many of these animals are expected to be the result of scavenging.
Do fox eat plants and berries?
It’s not all about meat, however. Fox will happily eat a range of plant material, especially fruits, both wild and cultivated. ( I have noticed that my blueberries are disappearing just as they begin to ripen.) Blackberries, raspberries, cherries, apples plums, grapes and even nuts are important foods for the fox as winter approaches. Studies show that fruit accounts for about 10 to 30 per cent of the diet.
And not unlike our domestic canines, grasses, sedges and various tubers find their way into the diet of most foxes.
For a more detailed look at the fox diet, go to Wildlife Online.
The main picture that accompanies this blog was taken at the end of July and it shows. At this time adult fox are often showing the strains of three months of having to provide for their growing cubs. It’s during this time that the fox begin to slow the feeding of their cubs and actually start competing for food with them. This is a dangerous time for the young foxes that are often forced to go out on their own to explore and fend for themselves.
If they survive, they begin to put on their winter coats in September and October in preparation for a long, hard winter. Male cubs leave the den area in late fall, early winter to look for their own territories.
And it all begins again.
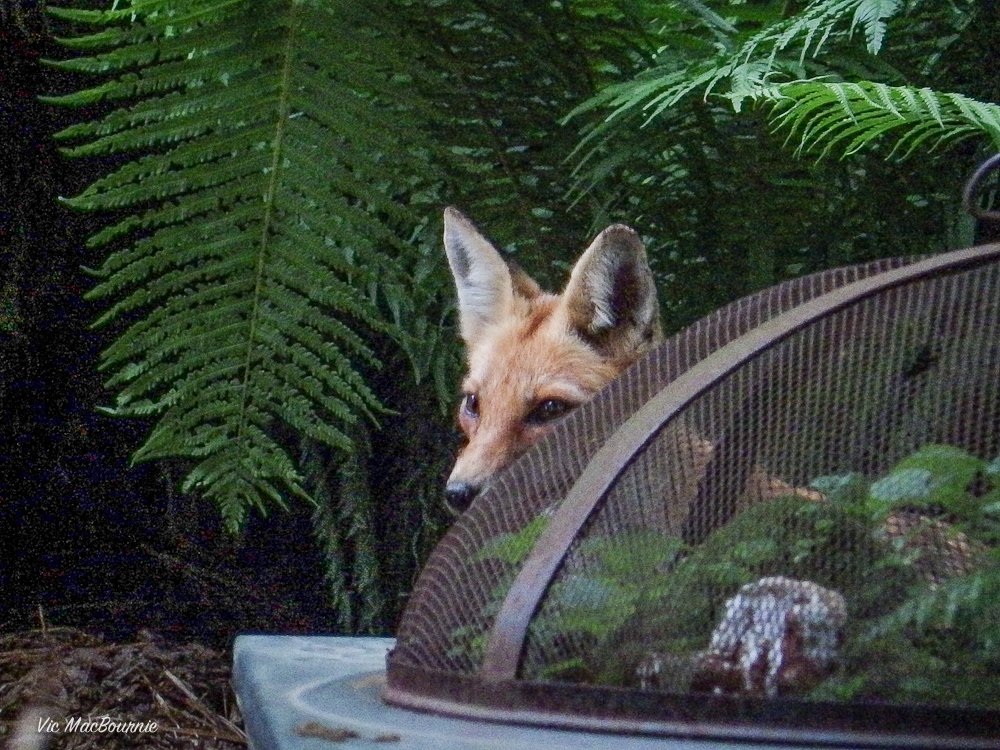
A young fox hides in the urban garden on the watch for easy prey.
How can the Woodland gardener help foxes?
It’s clear that providing a natural area, free of insecticides, that provides a combination of food sources including small rodents, fruit and nuts, while also providing water sources and potential den sites, is a goal all woodland gardeners should strive for. The brush pile we talked about in an earlier post becomes a hunting ground and a potential denning site for fox.
On-ground water bowls become a life-saving source of fresh water during a heat spell. Our humus-rich soil provides homes to insects and a source for earthworms. Leaving debris around the garden like branches and leaves give rodents like mice a place to live and, in return, a source of food for predators such as fox, owls and even snakes.
And, if our properties can only provide a few of these resources, we can provide a green island in a neighbourhood of green islands where a predator like the fox can exist.
We can be the ark (Acts of Restorative Kindness) that Irish landscape designer Mary Reynolds urges in her book The Garden Awakening and on her website, even if our gardens are small islands in a sea of islands.
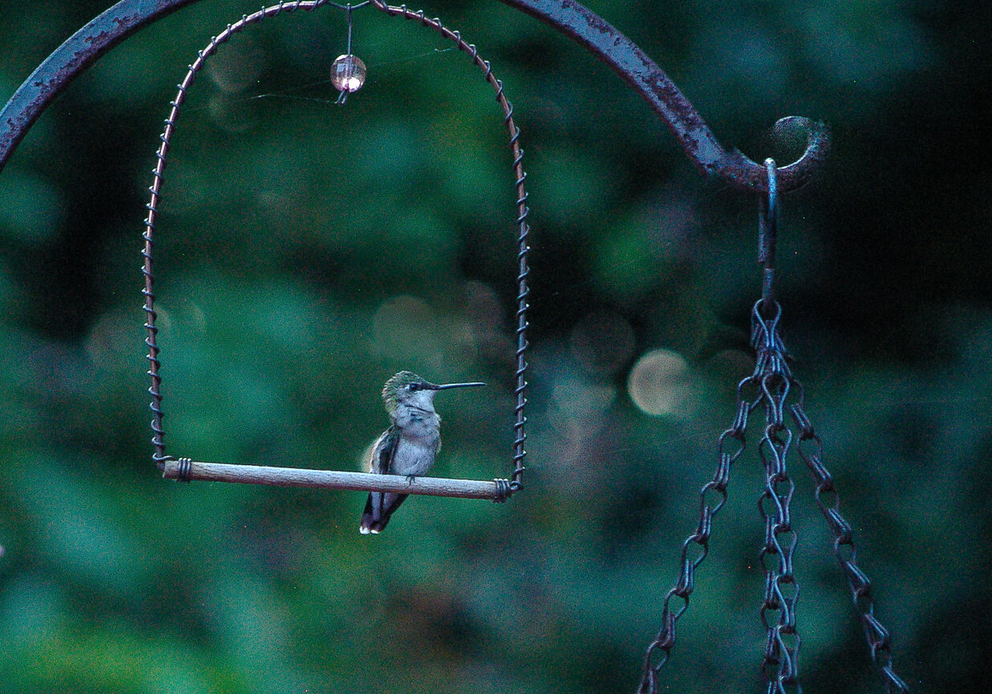
Are hummingbird swings worth buying?
Adding a hummingbird perch close to a favourite feeder or nectar-rich plant provides the perfect resting place for hummingbirds and an ideal place to photograph the little guys when they are not flitting about.

This Hummingbird is happy on its perch showing off its tail feathers.
Perch is ideal for great garden wildlife photography
I don’t know who has more fun the hummingbirds or me, but every morning it’s a swinging good time.
Me with my coffee, Holly resting on her table, and the hummers taking turns on the swing as they make their way to one of the many feeders or native plant groupings in the garden.
Do hummingbirds use store bought swings or perches?
We’ve had the swing for about three years. At first, the hummingbirds didn’t know what to think of it and pretty much left it alone. But it wasn’t long before they took to it and made it one of their favourite landing spots in the garden.
If you are only used to seeing hummingbirds hovering at flowers or a feeder with their little wings buzzing away at more than 50 beats per second, the perch will give you the opportunity to observe them up close preening their feathers and keeping a watchful eye out for competitors.
If you look closely, you might get a good look at their long tongues that they use to lick up the nectar from tubular flowers.
Perches are available at many specialty bird stores and online sources. I purchased ours from Wild Birds Unlimited, but they are also available at Veseys and Walmart as well as Amazon.
The perch is also an excellent spot to set up a camera to photograph them at rest.
Once the hummingbirds start using the perch on a regular basis, you can set a camera up on a tripod and capture some stunning images of the little guys.
Garden wildlife photography can be very rewarding, especially when you can guide the wildlife to where you want to photograph them. You don’t need specialized camera equipment once you get them comfortable landing on the swing in your vicinity.
A good compact camera with a built-in telephoto lens is all you really need. If you are interested in getting more information, check out my post on the Best camera and lens for garden wildlife photography.

Hummingbird at feeder with swing in background. Placing the two close together is a great way to give the hummers a place to rest and keep a watch over the feeder.
Don’t be surprised if they decide the camera is a good landing spot.
For more on hummingbirds in the garden, check out the following posts:
• How to help Hummingbirds during migration
• Five tips to attract hummingbirds
• How long do hummingbirds live
• Where do hummingbirds go in winter
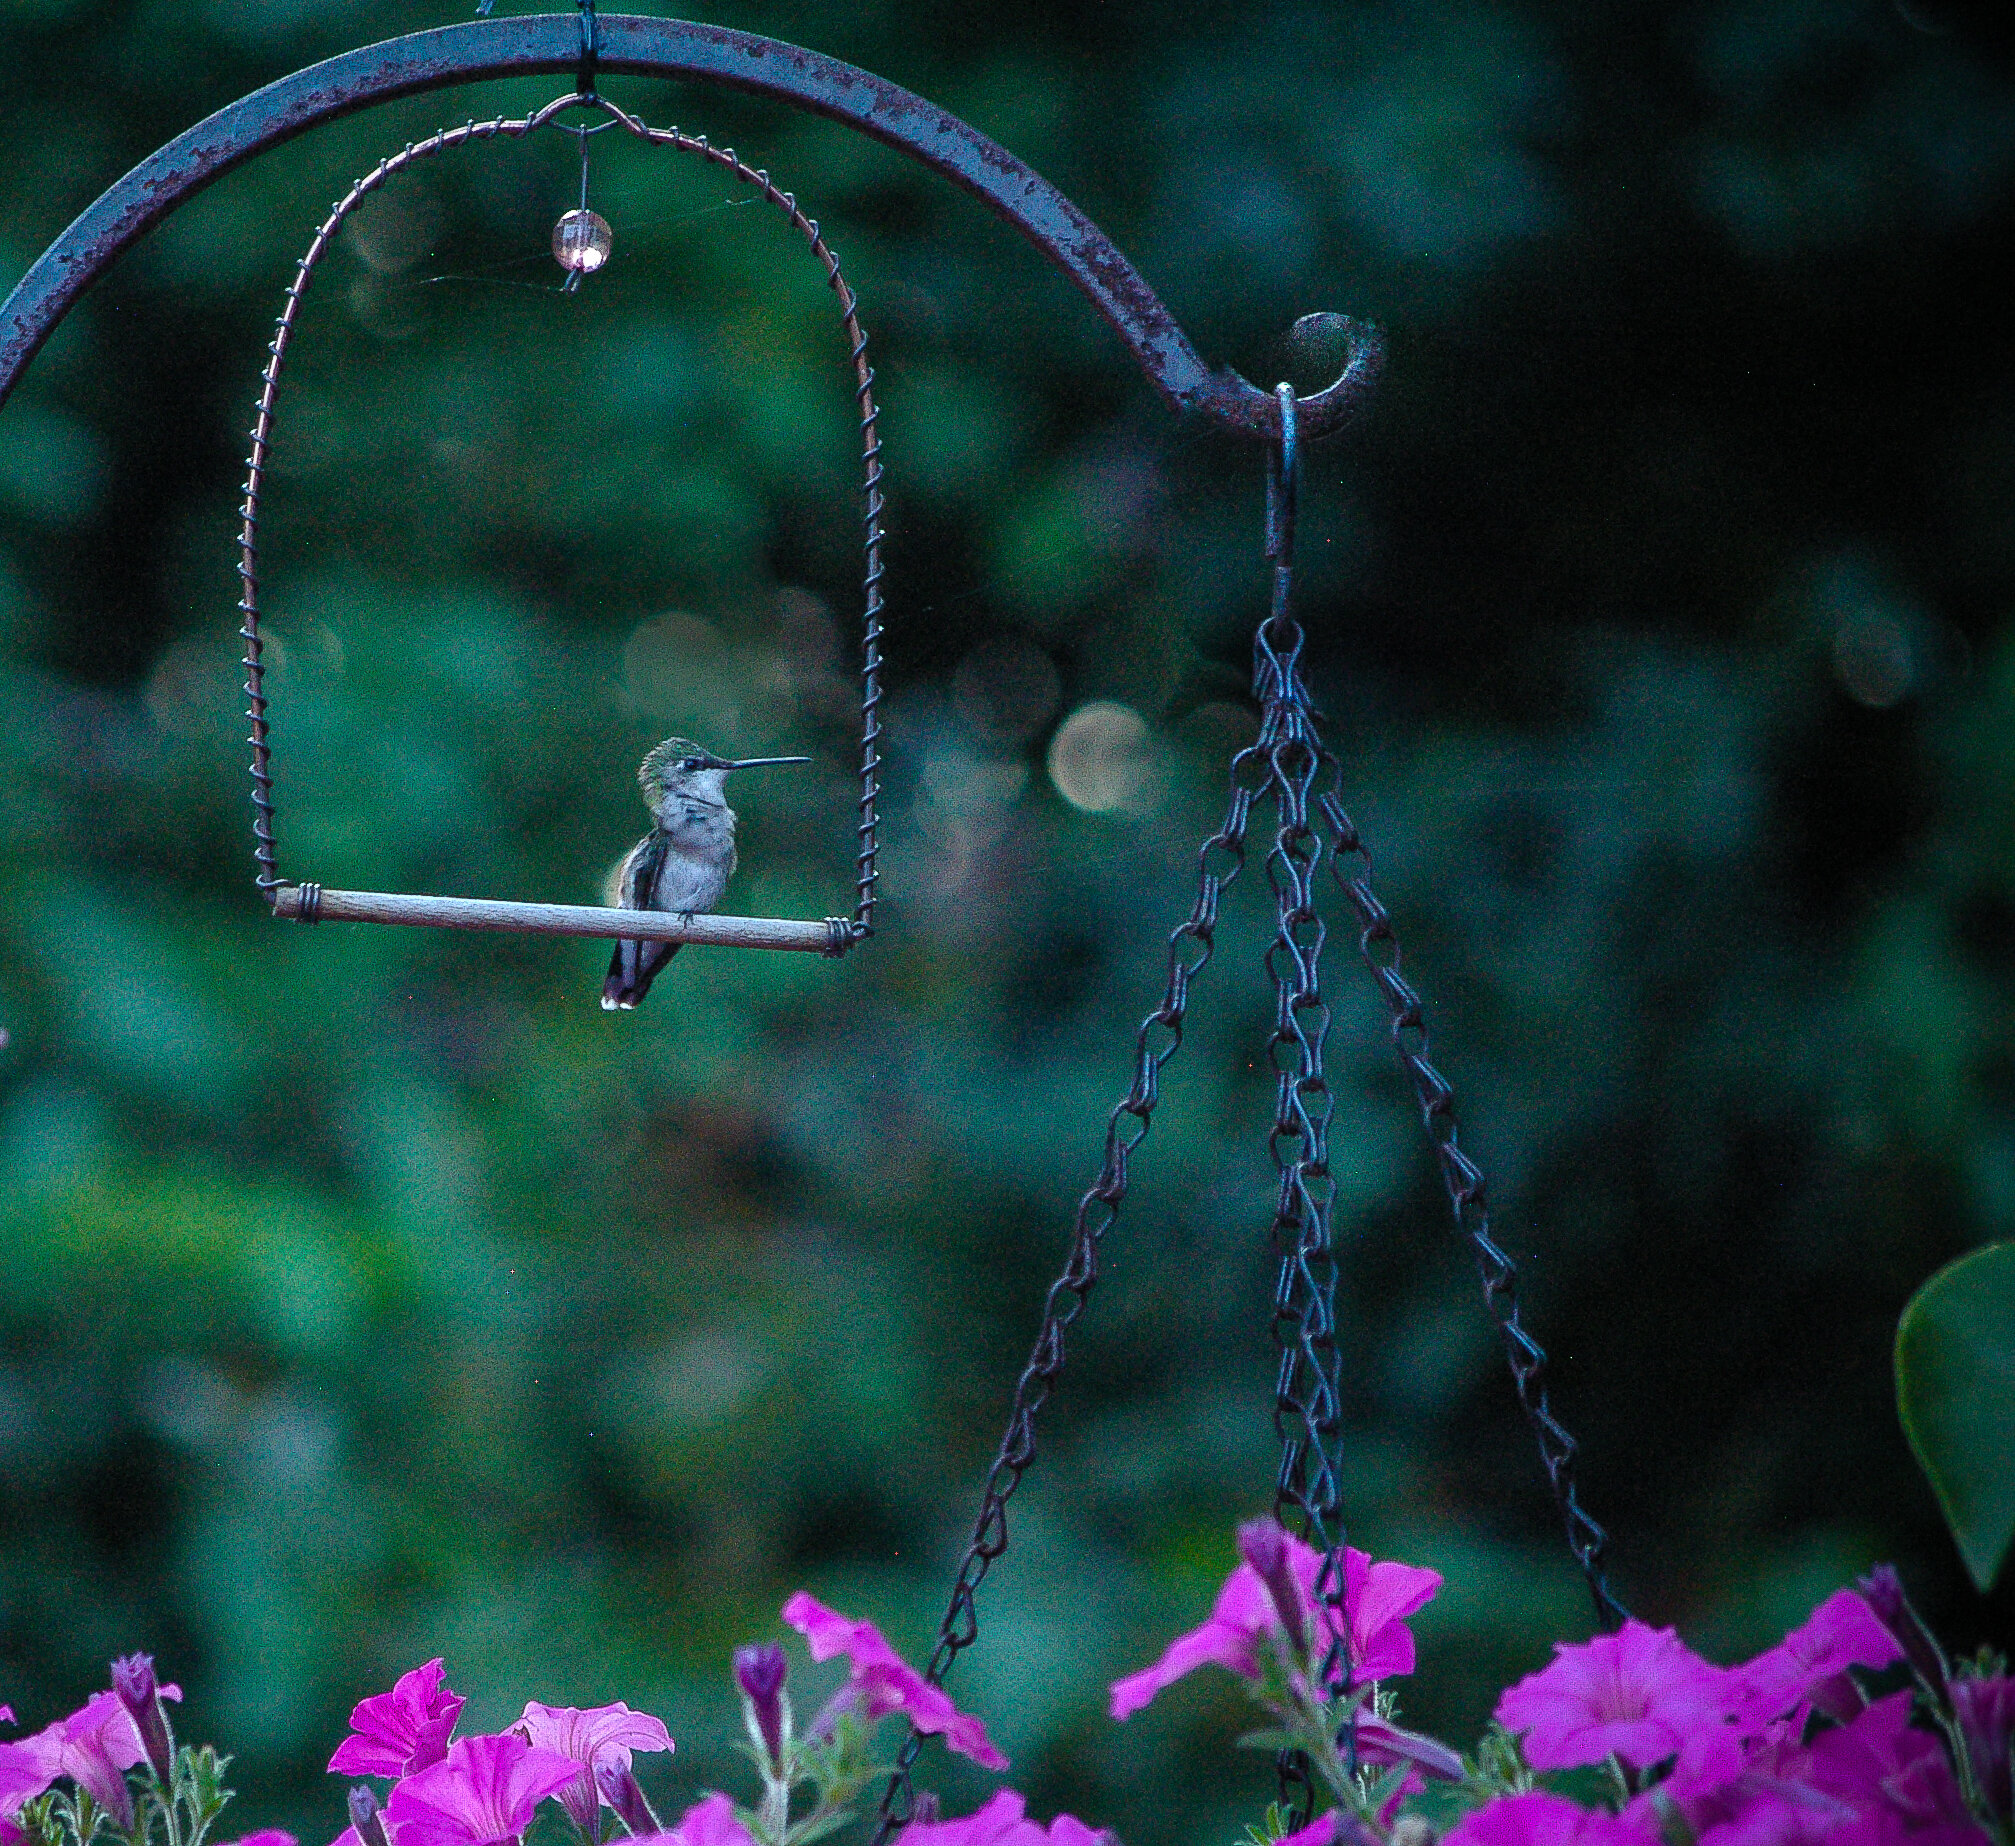
The swing is attached to one of our large, iron plant hooks just above a hanging container filled with Proven Winners Supertunia Vista Bubblegum and just to the right of a hummingbird feeder.
Certainly a lovely spot to go for a swing at any time of day. And if you are looking for an elegant feeder to complement the copper swing, you could do worse than this piece of garden art.
The swings can be purchased commercially or, if you are handy and up for a challenge, can be put together in an afternoon DIY project with some copper wire, beads and either a small branch or a dowel purchased from a hobby store.
Ours is made of a thick copper wire forming the main structure of the swing with a thinner copper band of wire wrapping all around the main wire. The smaller wire helps to hold the small dowel in place for the hummingbirds to sit on and twists up to the top where it holds a lovely red glass bead. I’m not sure if the bead is just for decoration or meant to attract the birds to the swing, but it’s a nice touch.
In case you didn’t know it, hummingbirds are real swingers. Researchers say that hummers spend about 80 per cent of their time perching. So a good perch that swings, is a real find for these little guys.
Now if you know anything about hummingbirds, you know they can be very territorial. Especially when there is a fresh supply of nectar.
The swing is the perfect spot to sit and rest from the enormous task of guarding the food supply, whether that is a batch of homemade nectar (4 parts boiled water to 1 part granulated sugar) or a nectar-rich flowering plant.

Don’t forget to use native flowers in your garden to attract hummingbirds. The plants offer another opportunity to photograph the birds once they begin including the native plants on their feeding routes.
We have located our swing right next to the patio where we can watch the birds on a regular basis. The more they get comfortable with you, the longer they will sit on the swing and pose for photographs.
I can’t imagine going out in the morning and not having the perch for the hummingbirds. Sure they can use a twig from a nearby tree, but providing the perfect spot for them brings them close and allows me to share my coffee time with our little garden friends.
And isn’t that why we have our gardens?
This page contains affiliate links. If you purchase a product through one of them, I will receive a commission (at no additional cost to you) I try to only endorse products I have either used, have complete confidence in, or have experience with the manufacturer. Thank you for your support.
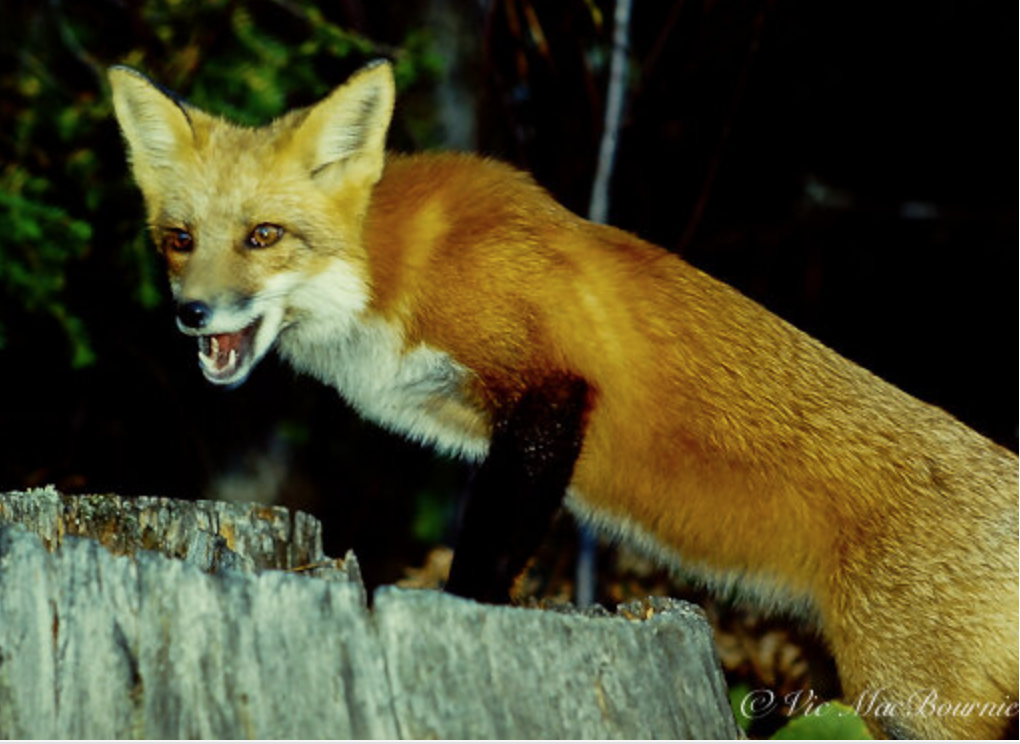
Why do foxes steal from our garden? Fox got my Croc
Somewhere in my neighbourhood is a lost and lonely Croc. It disappeared during an overnight crime spree carried out with great stealth. Our dog saved one by her barking. I am worried about the other.
Closing in on the crime
Somewhere in my neighbourhood a lost Croc is scared, lonely and likely getting chewed on.
I rescued its sibling on a patch of parched earth in the middle of our lawn.
The saga began when I woke up, looked out back to ensure it was safe to put Holly out for the morning. Just two days earlier, she got skunked and I wasn’t going to let that happen again.
(You might want to check out my other articles on foxes: Why Foxes Scream and The urban fox and how it controls rodents like mice and rats.
In the middle of the lawn, what looked like a dead squirrel lay motionless.
Earlier, Holly had been barking at the window. I imagined the barking scared the fox who dropped the squirrel. I went outside to move the dead animal.

Young foxes like to use “toys” such as shoes and gloves to learn life skills including catching prey.
When I stepped out the back door I noticed my old Crocs were nowhere in site. I remember leaving them just outside the door after watering the garden the night before.
Barefoot, I walked out to the middle of the grass. There it sat, motionless. My old Croc, all alone in the parched grass. No doubt, left there in haste by our friendly neighbourhood fox on its regular morning visit.
This wouldn’t be the first time a fox decided to take something that was not theirs. Foxes have been known to make a habit out of stealing people’s shoes. In fact, some have even become famous for their shoe fetishes.
Take the shoe-loving foxes from a neighbourhood in Japan that pilfered 40 pairs of sandals before being nabbed in the act of the crime after a six-hour police stakeout.
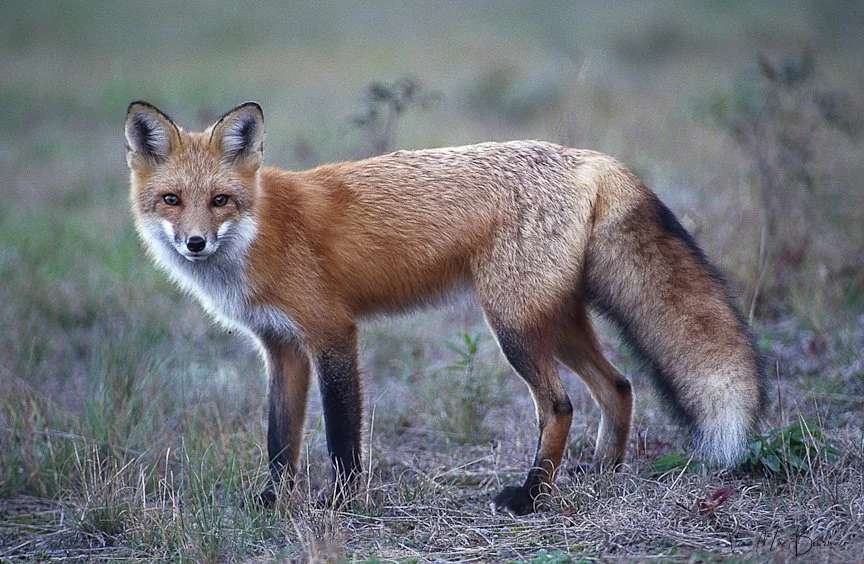
This fox is hunting for mice in a grassy area of the garden.
The pair of sly foxes were discovered after police received reports of footwear mysteriously disappearing from eight households in Nagaokakyo, about 235 miles (380km) west of Tokyo.
Five police officers were involved in the stakeout that ended with the discovery of two foxes who had made their home in the garden of an empty house, with 40 pairs of shoes scattered around a burrow.
In a German town, a fox was responsible for stealing more than 100 shoes.
In England, 50 shoes were found along a path near a fox den – runners and work boots seemed to be the favourites.
So I am not alone. My Croc joins a long list of missing shoes stolen from yards while their owners slept soundly in their beds, totally unaware of the crimes happening all around them.
What makes them want to take our shoes?
From a website on foxes: “A wide range of objects can be found close by a breeding den – besides pieces of paper, plastic and bone there is an array of leathergoods like chewed shoes, gardening gloves or balls. Fox cubs have used them to play with. These “toys” are apparently presented to the young cubs by adult foxes. Later, older cubs bring them back from their own adventure tours.”

Young urban fox hides behind a garden moss garden.
The same site describes how fox cubs use the “toys” to play with their siblings and use various “objects to train their hunting skills such as how to catch and handle their prey.”
So, some advice to my fellow gardeners: Don’t leave shoes, including your favourite Crocs or gardening gloves (especially leather ones) outside overnight. Consider putting away any other articles that you think might be a score for the neighbourhood fox.
We don’t need any more orphaned Crocs.
Be sure to check out my other articles on foxes: Why Foxes Scream and The urban fox and how it controls rodents like mice and rats.

Tips and ideas on how to de-skunk your dog
It all happened so fast. And it can happen to you and your dog if you are not careful. Here are some tips to deal with a skunking and ideas to help stop if from happening again.
Taking the stink out after getting skunked
It all happened so fast.
Holly and I go out every night at around 11 for her final pee. She loves it because she knows there’s a treat at the end. Maybe even two. Well, usually at least two.
It’s a quick in and out, no problem.
Not knowing what awaits us as we step outside, Holly is always on a leash and usually just a few steps in front of me until I’m sure the coast is cleared. The main back light is turned on to supplement the many solar lights and anything that is out there is given ample warning that we are coming out.
I guess no one told Pepe Le Pew the routine. The skunk was hiding behind a large rock on the edge of the patio probably busy digging for grubs. He was just steps from the back door. I think Holly was as surprised to see him as he was to see Holly. All I saw was Holly standing over the little guy before a flash of a black and white tail prompted me to yank the leash back and get her inside.
Then it hit me.

A skunk looking for food in the early evening.
Skunk spray is a form of sulfur. that is released in an oily form. The oil can stick to many surfaces and permeates everything it touches. Once released, the skunk smell fills the air and seeps into everything. It’s a good idea to close all exterior doors and open windows to keep the smell outdoors. The smell can even permeate skin and it’s not unusual to have the odour in your mouth and nose for a period of time. Is it any wonder that, if not treated properly, a dog can carry the smell for up to two years? Especially when its fur gets wet. Just ask a dog groomer. Most will not even take a dog that has been sprayed recently for fear of contaminating their grooming facility.
Holly’s smell was ripe and spreading through our small back landing. I called out for help. Paper towels please and plenty of them.
Be aware that skunks are particularly active in mid Feb. when you might not expect to come across them. This is their mating time and they are often seen during the evening but also during daylight hours roaming around even when there is significant snow on the ground. For more on their Valentine adventures, check out my post here.
Probably not a good idea to bring her inside immediately after getting skunked but I wanted to check her eyes. It’s important to check their eyes; if they're irritated or red, immediately flush them with cool water.
Her eyes seemed fine.
You know that skunk smell you get when you pass one that has been hit on the road, It was nothing like that…
Pungent. Not nice at all.
It wasn’t Holly’s first encounter with a skunk and it surely won’t be her last. After wiping her down as best as I could, we put her and her friend Monet (the cat) in the basement for the night. I felt sorry for both of them, but that’s all we could do at that time.
I would deal with her in the morning.
At first light I was up to take the little stinker outside. I expected the worst when I opened the door to the basement. I was greeted by the cat and dog together at the foot of the stairs. Not sure if Monet felt sorry for Holly or the smell wasn’t bad enough to keep these two buddies apart.
Turns out Holly was able to dodge a bullet. Either she sidestepped the worst the skunk had to offer or the skunk was still a baby and didn’t pack enough punch to make it stick.
Either way, the back entrance seemed to get the worst of it all. A complete cleaning with a Lysol cleaner and then swiffer wet, some scented candles and a diffuser running Refresh from Sage, and it’s liveable again.
Commercial de-skunking products such as Natures Miracle Skunk Odor Remover should probably be your first step to deal with the problem quickly.
Other highly rated products include: Van Den Heuvel’s R86 Industrial Odor Eliminator which is non-toxic and biodegradable. Not only does it eliminate just skunk odors, its combination of more than 30 different essential oils and natural ingredients, can eliminate several odours and is safe to use around children; Bodhi Dog Pet Deskunk Spray Odor Eliminator advertised as containing a combination of essential oils and useful on flat areas both in the home and outdoors; Skunk-off Liquid Soaker, a fast acting solution also useful on hard surfaces around the home; De-Skunk Odor Destroying Shampoo.
But being ill-prepared, I had to make a quick trip to the pet store for some de-skunking shampoo. After a good bath in her bottle cap pool, she’s almost as good as new.

This skunk was wandering through the garden one evening showing off its beautiful tail.
Lessons learned from dog getting skunked
First lesson: Be extremely careful when taking your dog out at night. A combination of solar lights and the back light is good, but it’s not enough in a garden where skunks can be hiding behind plants, rocks or containers. Skunks don’t run fast, so give them time to clear the area. Maybe include a powerful flashlight at the back door for a pre-surveillance before going outdoors with the dog.
Second lesson: Be prepared. There’s not much you can do at 11 pm to deal with the situation if your cupboards are bare of the essentials to de-skunk your dog, or yourself, for that matter. Get some supplies (commercial de-skunkers, old towels, distilled water, rubber gloves, a face mask), put them in a box and have them ready for the big night so the skunking repercussions can, at least, be minimized.
Third lesson: Keep the area around the back door relatively open to lessen the chance of surprising the stinky ones. Always take your dog out on a leash. Despite the leash, she still got skunked. I can’t imagine letting her out on her own. Maybe yanking her back when I saw what was happening was enough to keep the damage to a minimum.
There are several commercial de-skunking remedies available that are simple to use and provide some immediate relief from the odour.
A common DIY concoction comes highly recommended by the humane society
Mix together:
1 quart of 3-per cent hydrogen peroxide (available at most pharmacies)
1/4 cup baking soda
1 teaspoon liquid dishwashing soap preferably Dawn ( highly recommended by wildlife rescues.)
The hydrogen peroxide strips the skunk’s oil from your pet’s coat, and the baking soda helps to neutralizes the smell. Keep the formula away from your pet’s eyes, mouth, ears and nose and do not let your dog swallow any (it will cause immediately vomiting.)
Pop on some rubber gloves and wash your dog with this solution as soon as possible after they’ve been sprayed.
This DIY mixture CANNOT be stored for later use. The components in this mixture could explode if left in the bottle.
Clean and Rinse: Rub the mixture through the dog’s fur, but don’t leave it on too long (peroxide can bleach fur). Rinse thoroughly.
Shampoo: Next, wash your dog with pet shampoo preferably a de-skunk shampoo and rinse thoroughly. Towel-dry the dog and leave it in a warm dry area. Now is not the time to leave it out in the cold or in a cold garage unless there is a bed and a heater nearby. By now, the smell will be either completely gone or, at best, just slightly stinky.
Wash towels and human clothing separately in a normal wash cycle.
This page contains affiliate links. If you purchase a product through one of them, I will receive a commission (at no additional cost to you) I try to only endorse products I have either used, have complete confidence in, or have experience with the manufacturer. Thank you for your support. This blog would not be possible without your continued support.
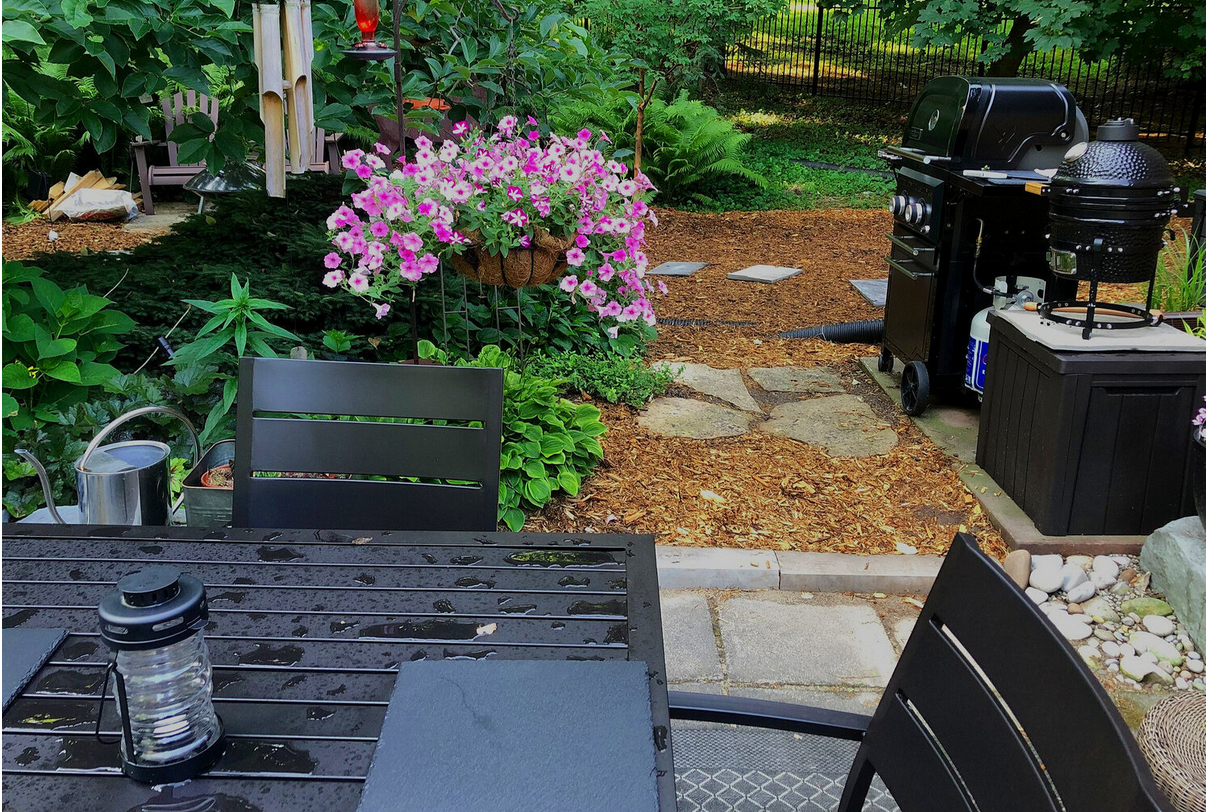
Backyard or Garden: Putting it all together
Creating outdoor living and entertaining with a backyard woodland garden begins with proper planning, but the results can be a truly enjoyable, private space that encourages outdoor living and a truly enjoyable experience.
Open Garden Tours are an opportunity to experience beautiful gardens
I love Open Garden Tours.
They provide us with an opportunity to peek behind the back gates of some of the finest gardens in our area.
They inspire us to make our gardens better, to explore new approaches and to contemplate what we think makes a garden exceptional.
Over the years, garden tours have provided me with endless inspiration. I particularly enjoy touring gardens designed and created by homeowners rather than landscape professionals, but some of the most remarkable gardens I have experienced were created by professional landscapers.
During a tour a few years ago, I remember visiting many exceptional gardens of multi-million dollar homes. Most were created and maintained by high-end professional landscape companies.
One in particular stood out – not because of what it was, but what it could have been.
Everyone who walked through the home’s swanky front gates were excited to see what awaited us as we strolled into the back of the magnificent property.
Garden tours offer the perfect excuse to go exploring in other people’s gardens.
No-one expected the disappointment that greeted us - a sea of concrete, a large pool and a small cantilevered deck overlooking a woodland. That was it. I don’t recall even a single container planted up on the stairs leading to the pool.
The owners were obviously proud of their yard. They stood outside greeting visitors who offered polite praise of the back yard pool before scampering out as quickly as possible. It didn’t help that, for comparison, most of us had just toured some of the finest gardens in the area, but it was impossible to overlook the fact that this could hardly be described as a “garden.”
I’m sure there were visitors who were impressed with the yard.
The “gardeners,” however, were aghast.
And so, the question remains: What makes a garden exceptional?
To many – these homeowners included – a backyard is a place to entertain friends and family. To others, a garden is a quiet retreat under a canopy of magnificent trees.
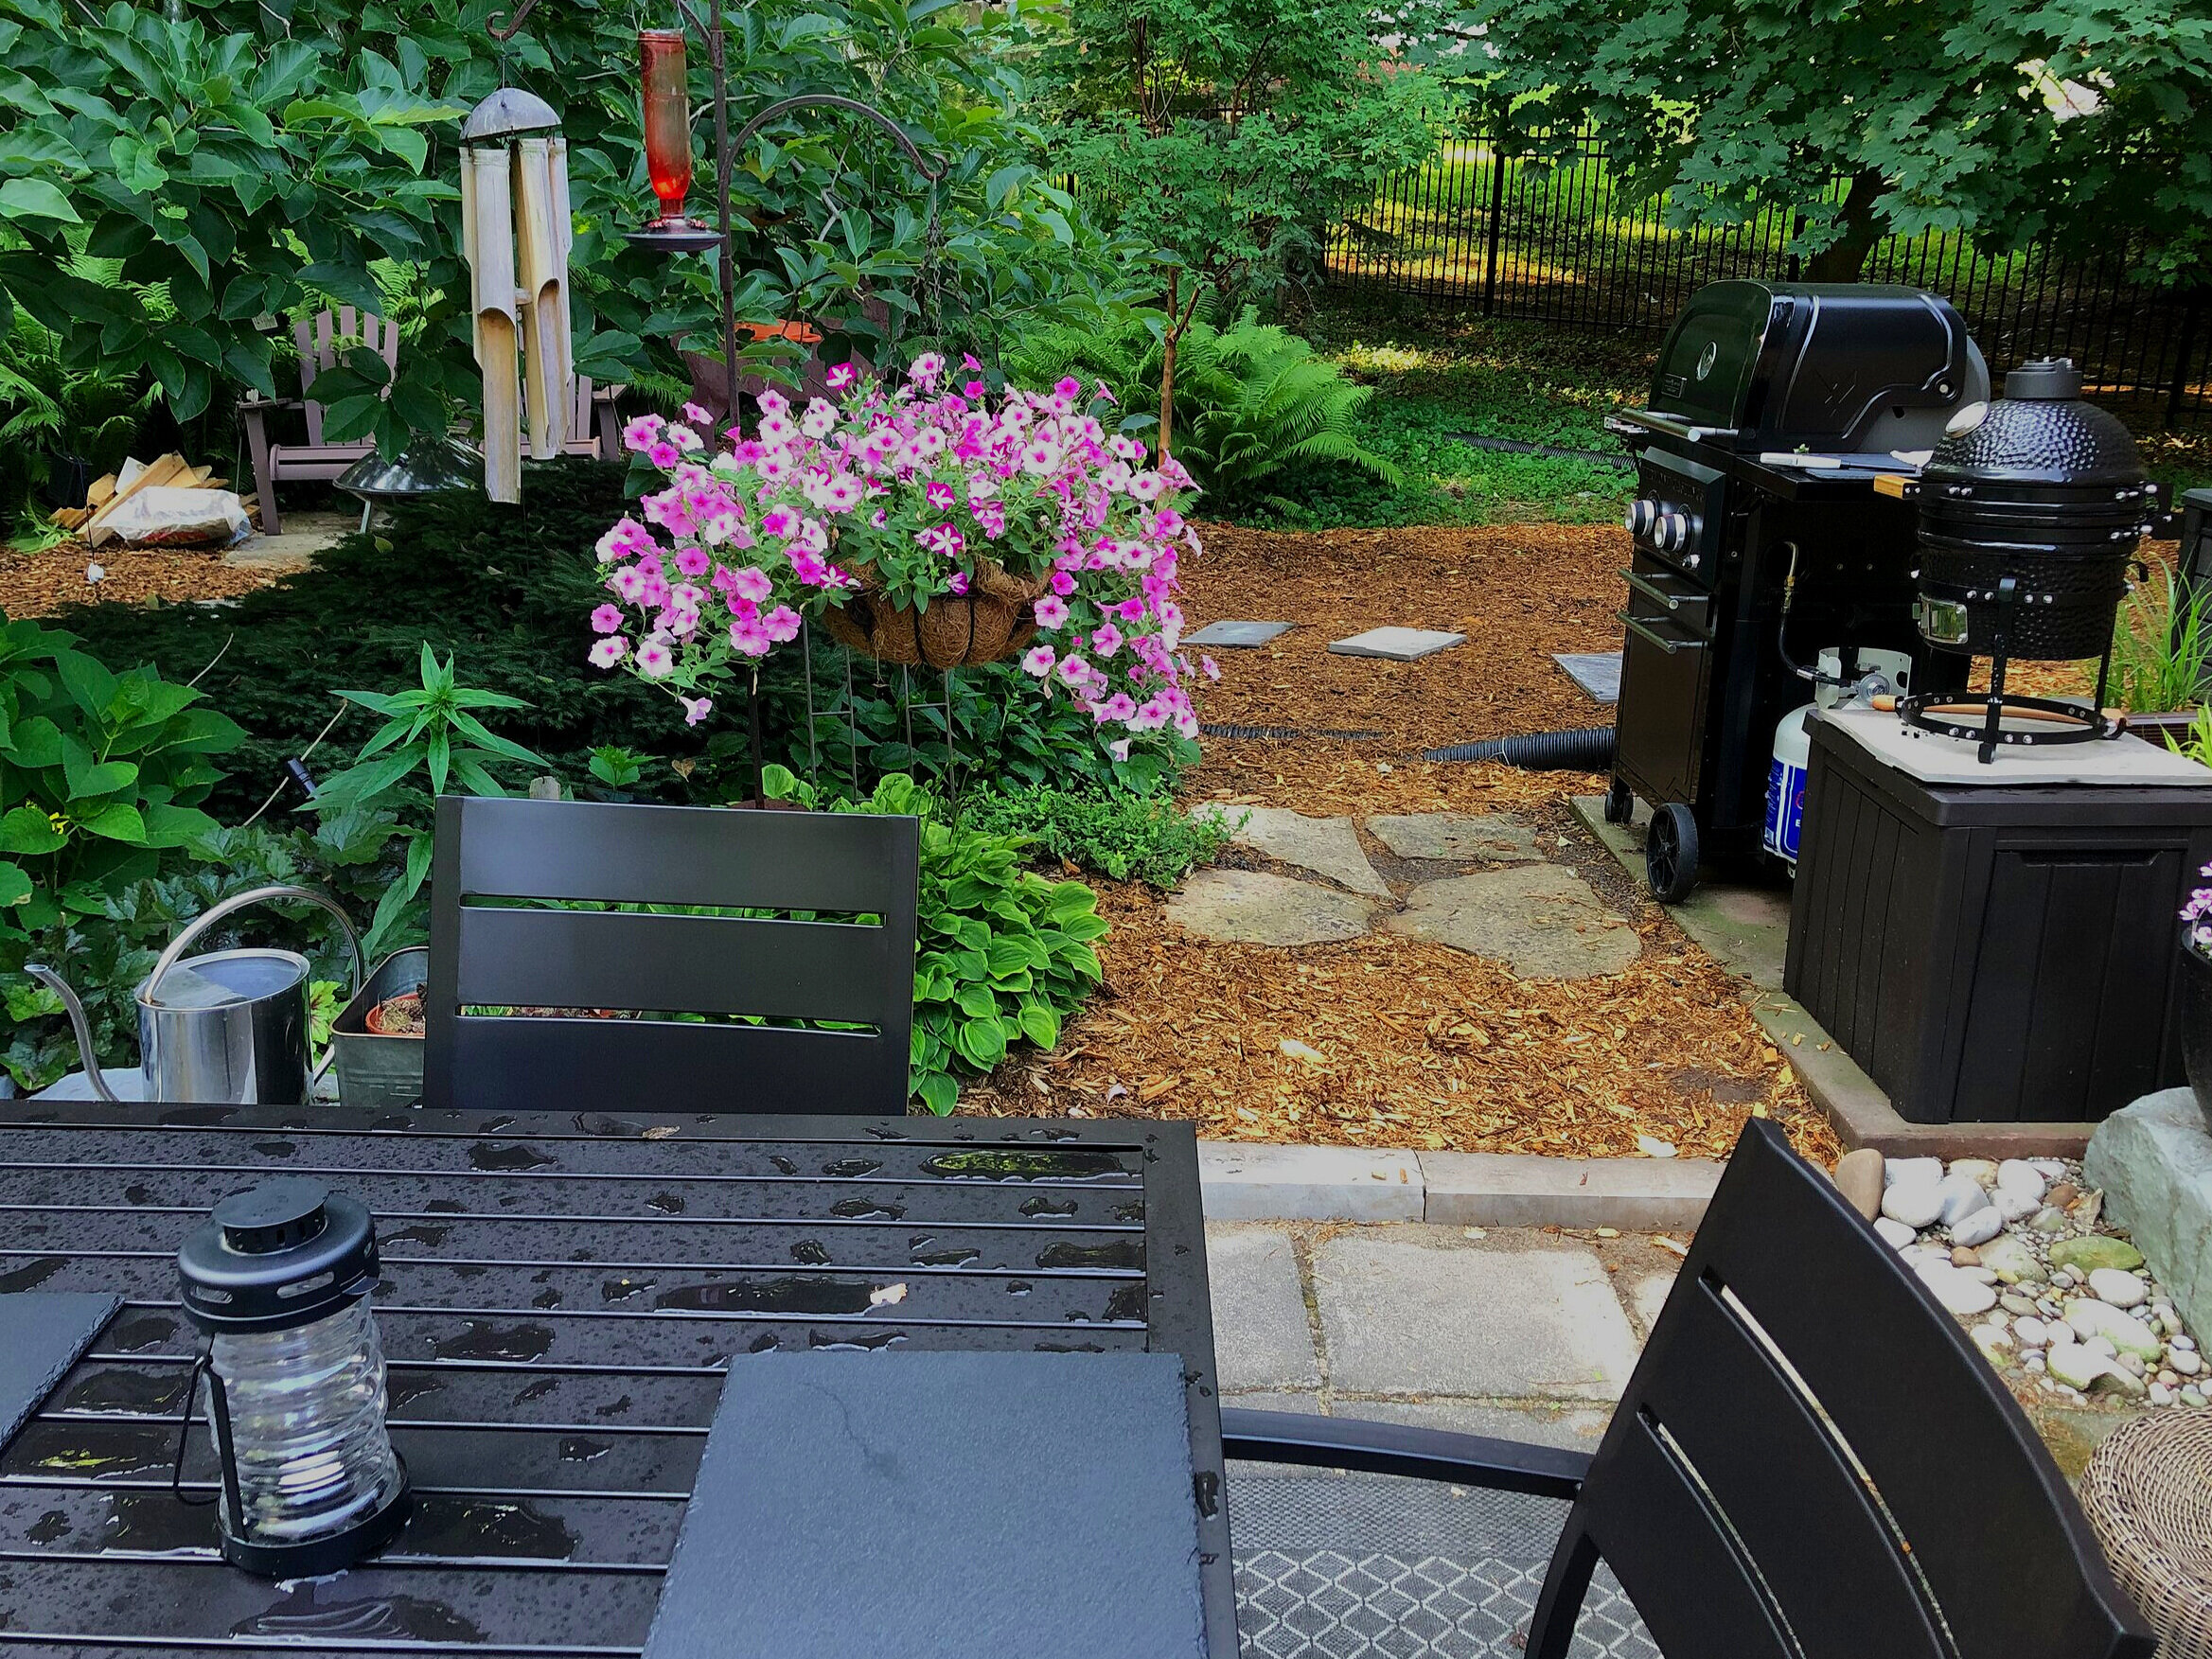
Creating entertaining areas in the garden is the perfect way to encourage everyone to spend more time enjoying the fruits of your labour.
You may have noticed that I referred to one as a “backyard” and the other as a “garden.”
Today, as urban backyards become increasingly smaller, gardens are being replaced by yards. Large decks, patios, massive outdoor kitchens, television screens and hot tubs are competing with perennial gardens, flowering trees and shrub borders for our attention.
In most cases, the plants are losing out.
Gardens are being forced out by backyard entertainment areas in many urban neighbourhoods. Obviously, this is not a good thing. Natural corridors through neighbourhoods, so vital to mammals, birds and reptiles, are shrinking. In many new neighbourhoods we are left with mini-islands of green space not large enough to sustain any meaningful life for native fauna.
It doesn’t have to be that way. With proper planning we can have it all – a place to entertain family and friends as well as natural areas in the garden for wildlife.
Let me be bold enough to make a suggestion to new homeowners: Begin with trees, not the latest high-end BBQ.
The greatest investment you can make in your yard is a small tree that will grow into a magnificent specimen, providing privacy, shade and beauty year round. For the price of a high-end BBQ, you could purchase enough young trees, shrubs and plants to set the foundation for a lovely garden that will increase your property value ten-fold in a few short years – just about the time when you’ll have to replace that BBQ with a new model.
Unlike consumer products, trees get better with age.
I’m not saying don’t buy a BBQ, build a deck, add an overhead structure or lay a new patio. I’m just suggesting you start with a garden plan whether you draw it up yourself or sit down with a professional landscaper.
Once the bones of your garden are in place, then it’s time to look at possible entertainment areas in your yard.
Surrounding these entertainment areas with gardens provides the privacy that is so sought after in many of today’s modern subdivisions. One tree may be all you will need.
Creating the garden and privacy first will surely entice you to want to spend more time outside. Even if you think a garden is not your thing, I guarantee you the experience of eating under the limbs of a tree, it’s branches festooned with outdoor lights, will go a long way to change your mind about the need for a garden.
My wife and I recently bought into this idea big time. Given the stay-at-home world that Covid brought with it, we decided it was a good idea to invest in a little outdoor luxury. We purchased not one, but two barbecues – a small, charcoal unit and a two-burner propane unit. We also added an outdoor dining table and chairs with the expectation of staying home all summer and enjoying our garden in the midst of the pandemic.
It’s already proven to be a great investment. Dining outside couldn’t be more enjoyable. French toast for breakfast on the griddle of our new Vermont Castings propane barbecue, and outstanding chicken wings from the grill of our mini Louisiana Kamado-style grill has made restaurants and take-out a thing of the past. We have a summer of new recipes ahead just waiting to sample.
Spending time outdoors couldn’t be more enjoyable. There is something very relaxing about watching nestlings take their first flights while chipmunks chase one another around your table during morning coffee.
The yard and garden coming together as one. That’s a goal we need to work toward. That just may be the recipe for happiness.